
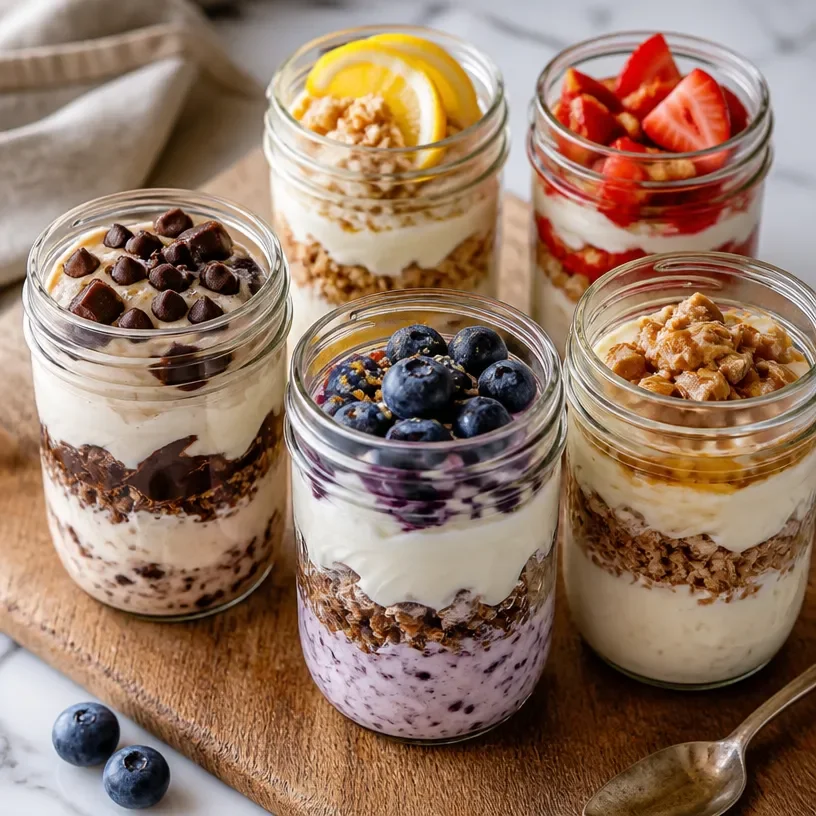
Five-Flavor Protein Dessert Jar Set for Quick Prep Snacks
Indulge in Guilt-Free Deliciousness: Protein Dessert Sampler Jar Set
Welcome to my kitchen! Today, I’m bubbling with excitement as I share a delightful recipe that’s not only scrumptious but also packs a protein punch—our Protein Dessert Sampler Jar Set! This treat is perfect for anyone looking to satisfy their sweet tooth while keeping health goals in sight. Plus, who doesn’t love a charming jar filled with layered goodness? You’ll feel like a gourmet chef as you create these colorful, plated masterpieces that will impress friends and family alike.
There’s something magical about having a variety of desserts at your fingertips—no need to choose just one! This sampler set gives you a taste of everything: creamy, crunchy, fruity, and chocolaty, all in one beautiful package. Imagine treating yourself to a delightful indulgence guilt-free, savoring each spoonful, and knowing you’re fueling your body with high-quality ingredients.
So grab your apron, roll up your sleeves, and let’s dive into this fun culinary adventure. Get ready to whip up a feast for the senses that is as enjoyable to make as it is to eat!
A Taste of Nostalgia
Let me take you back to my childhood for a moment. I remember sitting in my grandmother’s kitchen, the warm aroma of freshly baked goods enveloping the air as she stirred her famous chocolate mousse. It was one of those recipes that seemed so magical—a dessert that felt light as air yet was rich with flavor. As we layered the mousse into glass jars, my siblings and I would sneak spoonfuls when we thought she wasn’t looking. That joy of creating something beautiful and delicious together is what inspired me to develop this protein dessert sampler jar set.
Fast forward to today! My passion for healthy living grew, and so did my guilt about dessert. But what if we could have the best of both worlds? With these protein-rich ingredients and vibrant flavors, I’m here to share a modern twist on that nostalgic layering experience—a treat you can feel good about indulging in. Whether you want a post-workout reward, a sweet treat for your family, or a convenient snack to grab on the go, these protein dessert jars will reignite that spark of joy I felt in my grandmother’s kitchen.
Ingredients
Here’s a rundown of delicious ingredients that will bring your protein dessert sampler jar set to life:
-
Greek Yogurt (2 cups)
- A lean source of protein, Greek yogurt gives your dessert a creamy base. No plain yogurt in the fridge? No worries! You can use regular yogurt, just aim for the thicker varieties for a similar texture.
-
Protein Powder (1 cup)
- Choose a flavor you love, like vanilla or chocolate, for added richness. If you’re dairy-free, plant-based protein powders work great too!
-
Almond Butter (½ cup)
- This nutty spread adds healthy fats and extra protein. If you have a nut allergy, sunflower seed butter is a fantastic substitute!
-
Honey or Maple Syrup (¼ cup)
- Natural sweeteners like honey or maple syrup add a lovely sweetness. For a sugar-free option, try using stevia or a sugar-free syrup.
-
Fresh Berries (1 cup)
- Strawberries, blueberries, or raspberries add a burst of freshness and color. You can use frozen berries in a pinch or even purée them for a smooth layer.
-
Granola (1 cup)
- A crunchy layer that brings texture to your jars. Opt for a low-sugar granola, or make your own for a customized touch!
-
Dark Chocolate Chips (½ cup)
- A sprinkle of chocolate chips elevates these jars into dessert heaven! For a healthier version, choose dark chocolate with a high cocoa content.
Chef Insight
When choosing protein powder, think about your flavor preference and dietary needs. An unflavored or vanilla protein powder allows the other flavors to shine, while chocolate lends itself to more indulgent experiences. Remember, the protein powder you choose can significantly alter the taste, so don’t hesitate to experiment until you find your perfect match!
Step-by-Step Instructions
Now, let’s get into the fun part: assembling your protein dessert sampler jars!
-
Prepare Your Bases
- In a medium mixing bowl, combine the Greek yogurt and protein powder. Use a whisk to beat them together until smooth and creamy. (Tip: If you find the mixture too thick, add a splash of milk or almond milk to reach your desired consistency. This creates the perfect base for your jars!)
-
Make the Almond Butter Mixture
- In another bowl, mix the almond butter with honey or maple syrup until smooth. If the almond butter is too hard, you can microwave it for a few seconds to loosen it up. (Chef hack: Stir in a pinch of sea salt for enhanced flavor!)
-
Layering Your Jars
- Start with a layer of the Greek yogurt mixture at the bottom of your jar, filling it about one-third full. Use the back of a spoon to pack it down gently so it creates a solid base.
- Next, add a layer of the almond butter mixture, smoothing it out evenly over the yogurt layer. (Having a clean offset spatula or a spoon will help you achieve a polished look!)
-
Add the Fresh Berries
- Gently place a handful of fresh berries on top of the almond butter layer. Mixing different types of berries provides beautiful color and flavor diversity.
-
Repeat the Layers
- Continue layering until you reach the top of your jar. Alternate between the yogurt and almond butter layers. Aim for three layers each. You’ll want your last layer to be a yogurt layer topped with granola for a delightful crunch.
-
Garnish with Chocolate Chips
- Finish off your layers with a sprinkle of chocolate chips and any remaining berries on top for a gorgeous presentation.
-
Chill and Enjoy!
- Cover the jars with lids or plastic wrap and refrigerate for at least an hour before serving. This allows the flavors to meld together beautifully.
Chef Tips
- Play with the order of your layers! Want a surprise chocolate burst in the middle? Add chocolate chips between your yogurt and almond butter layers!
- These jars make for beautiful make-ahead desserts. Prepare them over the weekend for a week’s worth of sweet treats!
Serving Suggestions
When it comes to serving your protein dessert sampler jars, presentation is key! Remove the lids and place them on a beautiful platter for a vibrant display. You can even add a sprig of mint or a dusting of cocoa on top of the jars for a pop of color.
For a more interactive experience, provide additional toppings like shredded coconut, nuts, or more fresh fruit for guests to personalize their jar. Trust me, this will bring your dessert game to another level!
Recipe Variations
Feel free to get creative! Here are a few fun variations to make these jars uniquely yours:
- Peanut Butter Swirl: Substitute almond butter with creamy peanut butter for a nutty twist that will make your heart soar.
- Coconut Dreams: Add flaked coconut as a layer or topping for a tropical vibe that transports you straight to the beach.
- Coffee Dessert Jars: Mix in a tablespoon of instant coffee granules with your Greek yogurt for a mocha-inspired dessert. Perfect for coffee lovers!
- Chia Seed Layer: Mix chia seeds into your yogurt for added fiber and a nutritional boost. A great way to sneak in more nutrients!
Chef’s Notes
Each time I whip up these protein dessert sampler jars, I’m reminded of that time in my grandma’s kitchen. I’ve evolved this recipe over the years, always embracing new techniques and ingredients, but it never loses that essence of warmth and joy. I fondly recall trying various toppings based on what we had in the pantry, making every jar a surprise.
Every bite of these jars not only satisfies a sweet craving but also evokes love, nostalgia, and the essence of family cooking.
FAQs and Troubleshooting
Here are some common questions and troubleshooting tips if you encounter bumps along the way:
1. My yogurt mixture is too thick; what should I do?
- Add a splash of milk or almond milk and whisk again until smooth. This will help achieve a creamier texture!
2. Can I use non-dairy yogurt?
- Absolutely! There are many fantastic coconut or almond-based yogurts available; just ensure they’re unsweetened for the best results.
3. How long do these jars last in the fridge?
- They can last up to four days in the fridge if properly sealed. Just remember to add your granola right before serving to ensure it stays crunchy!
4. My almond butter is too runny. What can I do?
- If you find your almond butter too runny, consider chilling it in the fridge for a bit to thicken before layering.
Nutritional Info
Each jar contains:
- Approximately 350 calories
- 25g protein
- 15g healthy fats
- 30g carbohydrates
This protein dessert sampler jar set not only brings delight but also nourishes your body with wholesome ingredients!
As you embark on this delightful culinary adventure, remember each jar is an opportunity to express your creativity. Mix and match flavors, share stories, and turn such simple ingredients into something unforgettable. I can’t wait to hear how yours turn out—happy cooking, friends!
Print
Protein Dessert Sampler Jar Set
- Total Time: 60 minutes
- Yield: 4 servings 1x
- Diet: Protein-rich
Description
A delightful, protein-packed dessert sampler jar set with layers of Greek yogurt, almond butter, fresh berries, and granola.
Ingredients
- 2 cups Greek Yogurt
- 1 cup Protein Powder
- ½ cup Almond Butter
- ¼ cup Honey or Maple Syrup
- 1 cup Fresh Berries
- 1 cup Granola
- ½ cup Dark Chocolate Chips
Instructions
- Combine Greek yogurt and protein powder in a bowl until smooth.
- Mix almond butter with honey or maple syrup until smooth.
- Start layering with Greek yogurt mixture in the bottom of the jar.
- Add a layer of the almond butter mixture over the yogurt.
- Place fresh berries on top of the almond butter layer.
- Repeat the layers until the jar is filled, finishing with yogurt and granola.
- Garnish with chocolate chips and any remaining berries on top.
- Cover and refrigerate for at least 1 hour before serving.
Notes
Experiment with flavors and layer combinations. These jars can be prepped ahead for convenience.
- Prep Time: 15 minutes
- Cook Time: 0 minutes
- Category: Dessert
- Method: No cooking required
- Cuisine: Healthy
Nutrition
- Serving Size: 1 jar
- Calories: 350
- Sugar: 15g
- Sodium: 150mg
- Fat: 15g
- Saturated Fat: 2g
- Unsaturated Fat: 10g
- Trans Fat: 0g
- Carbohydrates: 30g
- Fiber: 5g
- Protein: 25g
- Cholesterol: 10mg
Keywords: protein dessert, healthy dessert, protein jars, guilt-free dessert, layered desserts
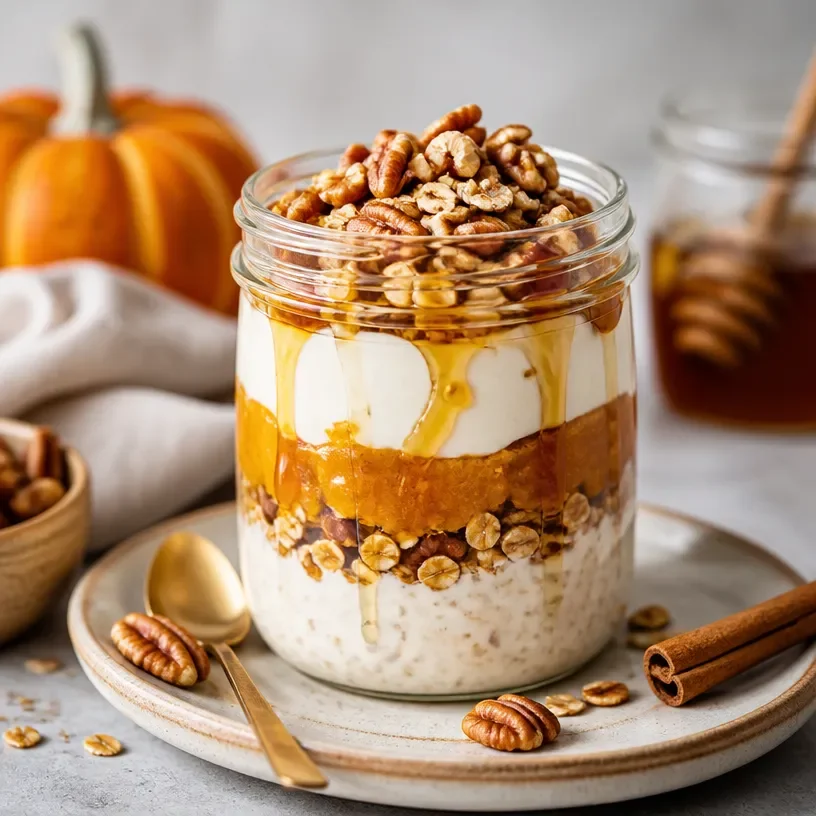
Fall Harvest Protein Jar: Easy High-Protein Snack Prep
Welcome to the Fall Harvest!
Hey there, fellow foodies! It’s Olivia Bennett here, and I’m thrilled to dive into this cozy season with you. When I think of fall, I envision vibrant foliage, warm spices wafting through the air, and most importantly, hearty, nourishing meals that make you feel all warm and fuzzy inside. Today, we’re whipping up something special — a Protein Fall Harvest Jar! This dish is perfect for those crisp autumn days, bringing together the best seasonal ingredients while packing a punch of protein.
As the leaves turn and sweater weather beckons, it’s time to gather around the table (or kitchen counter) with friends and family, sharing stories and savoring every bite. Whether you’re prepping for a relaxing night in or meal prepping for a busy week ahead, this harvest jar will serve you well. Get ready to feel inspired and a little creative as we blend flavors and nutrients into one delightful dish!
A Slice of Nostalgia
Growing up, my family had a tradition of visiting the local pumpkin patch and apple orchard each fall. The crisp air filled with the sweet scent of apples and spices always gets me reminiscing. I remember the long hayrides, the laughter echoing through the fields, and most importantly, the evenings spent in our cozy kitchen after a day of foraging for the best fall produce. My mom would whip up hearty meals, showcasing the bounty of our harvest. One of my favorites was her “mixed harvest bowl,” a colorful collection of proteins and veggies that allowed us to savor the tastes of the season in a single dish.
Fast forward to today, and I’ve taken inspiration from those wonderful memories to create the Protein Fall Harvest Jar. This jar is not merely about filling your belly; it tells a story of togetherness, gratitude, and the warmth of home-cooked meals. Each ingredient has its own personality, just like the family members who gathered around our table, and I can’t wait to share that story with you!
Ingredients
Gather your ingredients, and let’s get started! Here’s what you’ll need for your Protein Fall Harvest Jar:
-
Quinoa (1 cup)
- A fantastic protein-packed base! Quinoa is gluten-free and offers a nutty flavor. Substitute it with couscous or farro for a different texture.
-
Chicken Breast (2 grilled)
- A lean protein that adds great texture. You can easily swap it out for tofu for a plant-based option or use rotisserie chicken for shortcut perfection.
-
Roasted Sweet Potatoes (1 large)
- These provide a subtle sweetness and comforting starch. If sweet potatoes aren’t your thing, butternut squash makes a perfect substitute.
-
Brussels Sprouts (2 cups, halved and roasted)
- Packed with nutrients and a slightly nutty flavor when roasted! Alternatively, try using asparagus or green beans if you want something different.
-
Cranberries (½ cup, dried)
- A burst of sweetness and seasonal cheer! Fresh cranberries can be used, but they’re quite tart; try them when cooked with a bit of sugar for a sweeter option.
-
Spinach (2 cups)
- A power-packed leafy green that adds freshness! Feel free to swap with kale or arugula for a different flavor profile.
-
Apple (1, diced)
- Adding a crispy crunch and natural sweetness! You can substitute it with pears or grapes for a twist.
-
Feta Cheese (½ cup, crumbled)
- Just the right amount of creaminess to elevate the dish! Swap it out for goat cheese or leave it out for a dairy-free option.
-
Balsamic Dressing (½ cup)
- Ties everything together with its tangy sweetness! Make your own with balsamic vinegar, olive oil, and a touch of honey, or grab a bottled version.
These ingredients are not just staples; they’re the building blocks of a delicious and comforting harvest jar. With the right combinations and swaps, you can play around with this dish to make it your very own!
Step-by-Step Instructions
Now that we’ve gathered our ingredients, let’s get to cooking! Here’s how to assemble your Protein Fall Harvest Jar step by step:
-
Prepare the Quinoa:
- Start by rinsing 1 cup of quinoa under cold water in a fine-mesh sieve, which helps remove any bitter coating. In a medium saucepan, combine quinoa with 2 cups of water and a pinch of salt. Bring it to a boil, then reduce the heat to low and cover the pan. Let it simmer for about 15 minutes until all water is absorbed. Fluff it with a fork and set it aside.
- Chef’s Tip: If you want deeper flavor, consider cooking the quinoa in vegetable or chicken broth instead of water!
-
Cook the Chicken:
- While the quinoa cooks, grill or pan-sear your chicken breast seasoned with salt, pepper, and your favorite herbs (rosemary or thyme work beautifully!). Cook for about 6-8 minutes on each side until golden and cooked through. Let it rest for a few minutes before slicing it.
- Chef’s Note: Using a meat thermometer can ensure perfectly cooked chicken — aim for 165°F!
-
Roast the Sweet Potatoes and Brussels Sprouts:
- Preheat your oven to 400°F (200°C). Dice your sweet potato into 1-inch cubes, toss them in olive oil, salt, and pepper, and spread them out on a baking sheet. Next, halve the Brussels sprouts and do the same. Roast both for about 25-30 minutes, flipping halfway through, until tender and caramelized.
- Little Hack: Add a sprinkle of cinnamon or a drizzle of maple syrup to the sweet potatoes for added fall flavor!
-
Assemble the Jar:
- Here’s where the fun begins! Start layering your Protein Fall Harvest Jar. Begin with a scoop of quinoa at the bottom, followed by a layer of spinach. This prevents the spinach from wilting too much from the heat of the other ingredients.
- Next, add your sliced chicken, roasted sweet potatoes, and Brussels sprouts, making sure each layer is visible for a stunning presentation.
-
Top it Off:
- Sprinkle dried cranberries, diced apple, and crumbled feta cheese generously on the top. Just before serving, drizzle with your balsamic dressing.
- Serving Note: You could easily swap the balsamic dressing for a lemon-tahini dressing for a vibrant twist!
With these easy steps, you’ve beautifully constructed your Protein Fall Harvest Jar, making it both a feast for the eyes and a delight for the palate!
Serving Suggestions
When it comes to serving, you can enjoy your Protein Fall Harvest Jar either as an individual meal or family-style. If you’re serving it in a jar, consider placing a festive cloth napkin around the base for extra coziness. You can also serve it in bowls, topped with extra dressing for a splash of brightness. Enjoy it solo or pair it with fresh crusty bread for a heartier meal!
Recipe Variations
The beauty of a dish like this is its versatility! Here are a few fun variations you might explore:
-
Vegan Version: Swap out chicken for chickpeas or lentils, use avocado in place of feta, and make sure your dressing is vegan-friendly.
-
Spicy Kick: Add sliced jalapeños or a sprinkle of chili flakes for a bit of heat.
-
Grain Swap: Try swapping the quinoa for brown rice or cauliflower rice for a lower-carb option.
-
Roasted Beet Twist: Add roasted beets for a sweet, earthy flavor and vibrant color.
-
Nutty Crunch: Toss in a handful of toasted nuts (walnuts or pecans) for added texture and healthy fats.
Chef’s Notes
Cooking is all about creativity and making the dish your own. Over the years, I’ve tweaked this recipe based on what’s in season and what I have on hand. One time, I added roasted butternut squash, and it took the jar to another level of deliciousness! Don’t be afraid to experiment. Cooking is an art, and every twist you put on a recipe tells a unique story.
Oh, and speaking of stories, I once had a friend get overly excited and forget about the sweet potatoes in the oven. Let’s just say we learned what “caramelized” really means! Always set a timer, friends!
FAQs and Troubleshooting
-
What can I do if my quinoa turns out mushy?
- Mushy quinoa usually means there was too much liquid. For next time, make sure to follow the ratio and let it sit covered to absorb the remaining steam after cooking.
-
Can I prepare this jar in advance?
- Absolutely! You can prep the ingredients ahead of time and assemble the jar the day you plan to eat it. It’s best enjoyed fresh but can last in the fridge for about two days.
-
How do I make it gluten-free?
- The ingredients listed are naturally gluten-free! Just ensure that the dressing you use is also gluten-free.
-
What can I replace feta cheese with if I’m lactose intolerant?
- Try using a dairy-free cheese or just omit it altogether. You won’t miss out on flavor!
Nutritional Info
While nutritional content can vary based on ingredient selection, here’s a general breakdown per serving (about 1 jar):
- Calories: 450
- Protein: 30g
- Carbohydrates: 55g
- Fat: 15g
- Fiber: 10g
Enjoy your journey into the comforting world of fall flavors with this Protein Fall Harvest Jar! I hope this dish finds a special place in your kitchen and creates lasting memories just as it has for me. Happy cooking, and remember to savor every moment — both in and out of the kitchen!
Print
Protein Fall Harvest Jar
- Total Time: 45 minutes
- Yield: 4 servings 1x
- Diet: Gluten-Free, High Protein
Description
A nourishing and hearty meal combining seasonal ingredients with a punch of protein, perfect for fall.
Ingredients
- 1 cup Quinoa
- 2 grilled Chicken Breasts
- 1 large Roasted Sweet Potato
- 2 cups Brussels Sprouts, halved and roasted
- ½ cup dried Cranberries
- 2 cups Spinach
- 1 Apple, diced
- ½ cup crumbled Feta Cheese
- ½ cup Balsamic Dressing
Instructions
- Prepare the quinoa by rinsing it under cold water and cooking it with water and salt.
- Cook the chicken breast after seasoning it with salt, pepper, and herbs.
- Roast the sweet potatoes and Brussels sprouts in the oven until tender.
- Assemble the jar starting with quinoa, followed by layers of spinach, chicken, sweet potatoes, and Brussels sprouts.
- Top with cranberries, apple, feta cheese, and a drizzle of balsamic dressing.
Notes
Feel free to swap ingredients and dressings to customize your harvest jar. Consider using lemon-tahini dressing for a vibrant twist.
- Prep Time: 15 minutes
- Cook Time: 30 minutes
- Category: Main Course
- Method: Customization and Assembly
- Cuisine: American
Nutrition
- Serving Size: 1 jar
- Calories: 450
- Sugar: 8g
- Sodium: 500mg
- Fat: 15g
- Saturated Fat: 4g
- Unsaturated Fat: 7g
- Trans Fat: 0g
- Carbohydrates: 55g
- Fiber: 10g
- Protein: 30g
- Cholesterol: 80mg
Keywords: fall recipe, protein jar, healthy meal prep, quinoa, seasonal ingredients
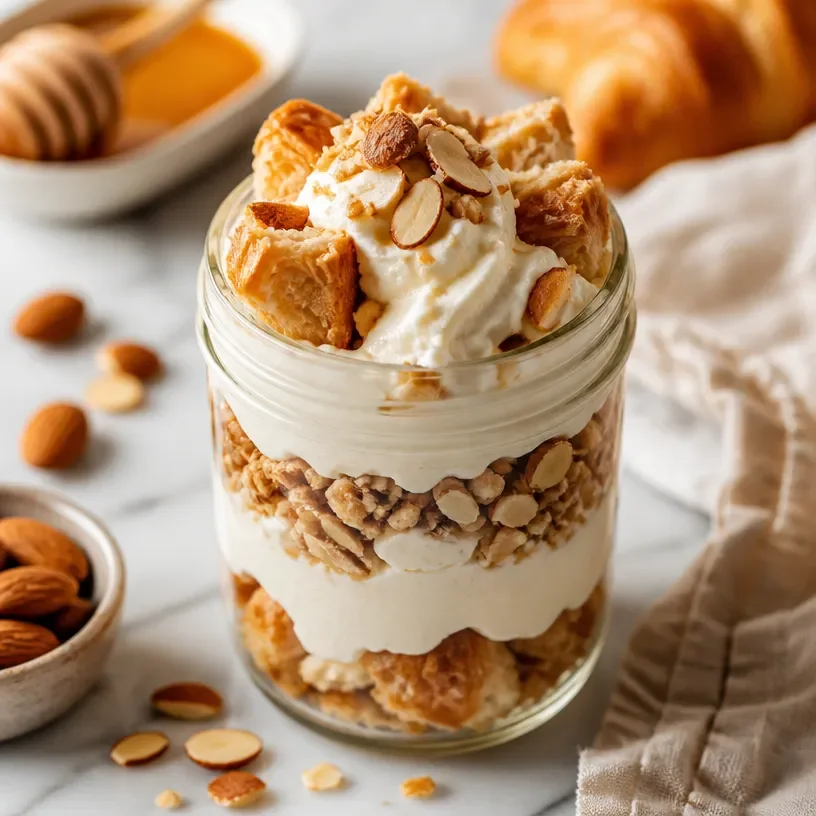
Min Protein Almond Croissant Jar Meal-Prep Snack
Protein Almond Croissant Jar: A Tasty Twist on a Classic Treat
Welcome to my kitchen, where deliciousness is always on the menu! Today, we’re diving into the world of indulgent flavors with a healthful twist—say hello to the Protein Almond Croissant Jar! This delightful recipe takes the classic French almond croissant and transforms it into a portable, nutritious snack that is perfect for breakfast, a quick lunch, or a delectable dessert. And when I say "delectable," I mean melt-in-your-mouth, cozy, and oh-so-satisfying.
Imagine sitting in your kitchen on a Sunday morning, the sun filtering through the windows, filling the space with a warm glow. You’re sipping on a steaming cup of coffee, and the aroma of freshly baked goods wafts through the air. That’s the essence of what we’re recreating here, but we’re giving it a bit of a healthy kick! This Protein Almond Croissant Jar is not only delicious but also packed with protein to keep you feeling energized throughout the day.
Let me take you back to my childhood days, where family gatherings were filled with laughter, stories, and, of course, food. My grandmother would whip up her famous almond croissants every holiday season, each flaky layer lovingly crafted, filled with sweet almond paste, and topped with slivered almonds. Those warm pastries were a breakfast staple that brought all of us together, seated around the table, chatting and munching happily. Although the traditional version is irresistible, it wasn’t always the healthiest option for my busy lifestyle. So, I decided to turn that cherished memory into a nourishing recipe that everyone can enjoy—one that fits into our modern lives while still delivering on flavor and nostalgia.
Let’s whip up a batch of these scrumptious Protein Almond Croissant Jars so you can experience a piece of that sweet memory too!
Ingredients
-
Almond Flour
A key ingredient that brings that nutty flavor and flaky texture. It’s gluten-free and perfect for boosting protein content! You can use regular flour if you prefer or need a gluten-free alternative, just keep in mind the texture will vary. -
Vanilla Protein Powder
This ingredient not only adds extra protein but infuses a delicious sweet vanilla flavor. If you don’t have protein powder on hand, consider using ground oats or even a scoop of nut butter for added creaminess. -
Almond Butter
Adds richness and healthy fats. Smooth or crunchy, pick your favorite! If you’re allergic to nuts, sunflower seed butter works beautifully as a substitute. -
Unsweetened Almond Milk
Provides the perfect moisture without the added sugar. You can swap for any milk you love, just adjust the quantity based on the thickness. -
Maple Syrup
This will sweeten things up naturally! Honey or agave nectar are great alternatives, so choose whatever sweetener fits your lifestyle. -
Sliced Almonds
For that classic topping crunch! You can also use pecans or walnuts if you prefer, or even leave them off if you’re not a fan of additional textures. -
Coconut Yogurt
To add creaminess that echoes the sweet filling of the original croissant. You can substitute it with any yogurt you enjoy, dairy or non-dairy, just look for unsweetened varieties if you want to maintain control over sugar. -
Fresh Berries
A fresh touch! They add a pop of color and brightness. Any seasonal fruit would work – think what you have on hand!
Step-by-Step Instructions
-
Prepare the Base
In a mixing bowl, incorporate the almond flour, vanilla protein powder, and a pinch of salt. I love using a whisk here! It helps to break up any lumps in the almond flour, ensuring a smoother final mix. If you’re using sweetener, mix it in at this stage. -
Make It Creamy
Next, pour in the almond milk and almond butter. You want the mixture to be smooth and thick, similar to pancake batter! I suggest using a spatula to fold rather than whisk to avoid over-mixing. This gives your jar that delightful layered look when it’s time to serve! -
Layer in the Sweetness
Now, let’s add the maple syrup. This will add a bit of moisture too. If you like it sweeter, taste as you go and adjust accordingly. Once everything is combined, set this mixture aside for a moment. -
Prep Your Jars
Grab your favorite jars—you know, the ones that make everything feel special. Start layering! Spoon a layer of your almond mixture into the bottom of one jar, followed by a swirl of coconut yogurt. Top with sliced almonds and a handful of fresh berries. Repeat the layering until you fill the jar, finishing with a garnish of sliced almonds and berries on top. -
Chill and Serve
Finally, let your Protein Almond Croissant Jars chill in the fridge for at least 30 minutes, or for optimal flavor, a couple of hours. This allows the flavors to meld beautifully, making each bite a scrumptious delight!
Serving Suggestions
Serve these jars as a captivating centerpiece for a brunch table! They look stunning stacked on a wooden board, surrounded by fresh fruit or flowers. Alternatively, keep them simple and cozy—perfect for a quick breakfast or an afternoon snack on the go. You can grab a jar and a spoon, and you’re all set!
Recipe Variations
-
Add Cocoa Powder
For a chocolatey twist, add a tablespoon of cocoa powder to the base mixture. This gives a delightful chocolate almond filling! -
Fruit Swaps
Don’t have fresh berries? Use diced apples or bananas for a different burst of sweetness. Dried fruit like cranberries or apricots can also work well! -
Greek Yogurt Option
For a slight tang and more protein, substitute coconut yogurt with Greek yogurt. It changes the flavor profile but keeps it delicious! -
Mix Up the Nuts
Feel free to use different nuts! Chopped hazelnuts can elevate the flavor even further and add unique texture. -
Sweetener Alternatives
Try using stevia or monk fruit sweetener for a low-calorie option while keeping the sweetness!
Chef’s Notes
As with all recipes, this one has evolved over time. My first attempt was a classic almond croissant and, while it was delicious, it was quite the project! I wanted to capture that same warmth and flavor without spending hours in the kitchen. Each iteration led to the Protein Almond Croissant Jar, and now it’s my go-to indulgent yet guilt-free treat. A friendly rivalry with my sister always ensued around breakfast time, debating whose version of the almond treat reigned supreme. Spoiler: we both agreed that sharing was the way to go!
FAQs and Troubleshooting
1. Can I make these jars in advance?
Absolutely! These jars actually taste better when allowed to chill, so feel free to prepare them a day ahead for a quick breakfast or snack on those busy mornings.
2. What if my mixture is too thick?
If your mixture is too thick, simply add a bit more almond milk to achieve your desired consistency. Remember, it’s all about finding that right balance that works for you.
3. Can I freeze this recipe?
Yes, you can freeze the base mixture. However, it’s best to wait to add the yogurt and fresh toppings until you’re ready to eat, as fresh ingredients don’t hold up as well once frozen.
4. How do I make it vegan?
All the ingredients listed are vegan-friendly, but just ensure your protein powder and sweeteners are also vegan to keep this option entirely plant-based.
Nutritional Info
While I won’t get too deep into the numbers for my fellow home cooks (as we’re here for the joy of cooking, right?), these Protein Almond Croissant Jars pack a nutritious punch with protein, healthy fats, and fiber to keep you feeling satisfied and energized throughout your day.
So there you have it! A recipe that merges nostalgia with modernization—a deliciously creamy and textured Protein Almond Croissant Jar that will have you feeling like a culinary rockstar in your own home. Give this recipe a try, and let me know how your jars turn out! Don’t forget to share a snapshot on your favorite social media (tag me, will ya?), because we love to connect with fellow food lovers! Happy cooking!
Print
Protein Almond Croissant Jar
- Total Time: 45 minutes
- Yield: 4 servings 1x
- Diet: Vegan
Description
A nutritious twist on the classic almond croissant, perfect for breakfast, lunch, or dessert.
Ingredients
- 1 cup Almond Flour
- 1/2 cup Vanilla Protein Powder
- 1/4 cup Almond Butter
- 1 cup Unsweetened Almond Milk
- 2 tablespoons Maple Syrup
- 1/4 cup Sliced Almonds
- 1/2 cup Coconut Yogurt
- 1 cup Fresh Berries
Instructions
- Prepare the base: In a mixing bowl, incorporate the almond flour, vanilla protein powder, and a pinch of salt. Mix in sweetener if using.
- Make it creamy: Pour in the almond milk and almond butter, mix until smooth and thick.
- Layer in the sweetness: Add maple syrup and mix. Set aside.
- Prep your jars: Start layering the almond mixture, coconut yogurt, sliced almonds, and berries until jars are filled.
- Chill and serve: Let the jars chill in the fridge for at least 30 minutes for the best flavor.
Notes
These jars make for a beautiful brunch centerpiece or a quick snack. Feel free to customize with different fruits or nuts!
- Prep Time: 15 minutes
- Cook Time: 30 minutes
- Category: Dessert
- Method: No-cook
- Cuisine: French
Nutrition
- Serving Size: 1 jar
- Calories: 350
- Sugar: 10g
- Sodium: 100mg
- Fat: 18g
- Saturated Fat: 1.5g
- Unsaturated Fat: 15g
- Trans Fat: 0g
- Carbohydrates: 42g
- Fiber: 6g
- Protein: 15g
- Cholesterol: 0mg
Keywords: protein, almond, croissant, jar, vegan, breakfast, dessert, healthy snack
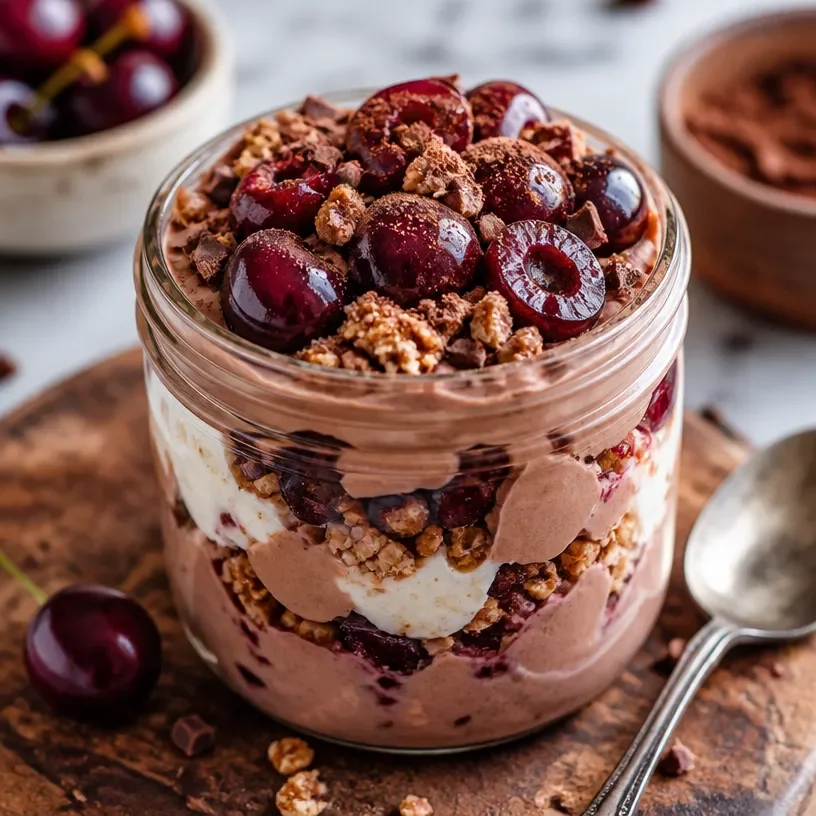
Min No-Bake High-Protein Chocolate Cherry Jar Snack
Indulge in Health: The Protein Chocolate Cherry Jar
Welcome to my kitchen! I’m Olivia Bennett, and I’m thrilled to have you join me today on this culinary adventure. If you’re anything like me, you love the aroma of something delicious wafting through your home, and you savor every moment spent sharing meals with loved ones. Today, we’re diving into a delectable dessert that’s not just a treat for your taste buds but also packs a nutritional punch — the Protein Chocolate Cherry Jar.
This recipe is a beautiful blend of flavors, textures, and health benefits, making it one of my absolute favorites to whip up! Imagine layers of creamy Greek yogurt, rich dark chocolate, juicy cherries, and a kick of protein that keeps you feeling satisfied and energized. It’s the kind of dessert that doesn’t just please your palate but fuels your body too! Whether you’re prepping a sweet pick-me-up for a busy afternoon or an indulgent yet guilt-free dessert to wow your guests, this Protein Chocolate Cherry Jar is a winner all around.
Now, I know what you might be thinking: A healthy dessert? How is that even possible? Trust me; you won’t believe how simple it is to capture the essence of guilt-free indulgence. So roll up your sleeves, grab your apron (prepare for a bit of mess, but that’s where the fun is!), and let’s embark on this flavorful journey together!
A Sweet Memory
As a child, I spent countless weekends in my grandmother’s sunny kitchen, the heart of her home. She had a magical way of turning simple ingredients into culinary treasures. One of my fondest memories is baking cherry chocolate chip cookies with her — every time we mixed the dough, giggles turned into bursts of laughter as we snuck chocolate chips when we thought she wasn’t looking. Oh, the joy of licking the spoon!
Fast forward to today, those cherry-filled treats represent comfort and family. This recipe for the Protein Chocolate Cherry Jar is inspired by those beloved cookies but presents an innovative twist. This jar allows me to enjoy that same nostalgic flavor but in a healthier, protein-packed way! You see, cooking doesn’t just feed the body; it nourishes the soul.
Ingredients
Let’s gather our ingredients! Here’s what you’ll need to create your very own Protein Chocolate Cherry Jar:
-
Greek Yogurt: This creamy base is rich in protein and probiotics. If you’re looking for a dairy-free option, consider using plant-based yogurt made from coconut or almond milk.
-
Cocoa Powder: Unsweetened cocoa powder provides a rich chocolate flavor without added sugars. For a sweeter option, you can use cacao powder, which is slightly less bitter.
-
Protein Powder: Choose a flavor you love (vanilla works great!). If you prefer, you can opt for a plant-based protein powder or even skip it and add a bit of nut butter for creaminess.
-
Cherries: Fresh or frozen, cherries are filled with antioxidants and have a sweet-tart flavor. If cherries aren’t in season, feel free to substitute with raspberries or blueberries!
-
Honey or Maple Syrup: A touch of natural sweetness will elevate your jar. Agave nectar is also a good alternative for a vegan option.
-
Cinnamon: A sprinkle of ground cinnamon adds warmth and flavor. If you’re feeling adventurous, a dash of nutmeg works wonders too.
-
Vanilla Extract: For an added depth of flavor, pure vanilla extract is a must! If you don’t have it, almond extract can lend a unique twist.
-
Dark Chocolate Chips or Cacao Nibs: These chocolatey add-ins bring richness and texture. You can swap them for white chocolate chips or even a sprinkle of crushed nuts for a different spin.
These ingredients not only make for a delightful dessert but also ensure you’re getting a healthy dose of nutrients with each spoonful.
Step-by-Step Instructions
Ready to assemble your delicious Protein Chocolate Cherry Jar? Let’s get cooking!
Step 1: Prepare the Cherries
- If you’re using fresh cherries, rinse them thoroughly and cut them in half, removing the pits. If using frozen cherries, let them thaw for about 30 minutes at room temperature or use the microwave for a quick thaw.
- Chef’s Tip: For an extra burst of flavor, consider tossing the cherries in a bit of cinnamon and a splash of vanilla while they thaw.
Step 2: Make the Base
- In a mixing bowl, combine the Greek yogurt, cocoa powder, protein powder, honey (or maple syrup), and vanilla extract. Stir until smooth and creamy.
- Chef’s Hack: To avoid clumps of cocoa or protein powder, sift them into the yogurt before mixing. This will give you a fluffier base!
Step 3: Layer It Up
-
Grab your jars (they can be any glass or plastic container) and start layering! Begin with a spoonful of the creamy yogurt mixture at the bottom.
- Pro Tip: Use a piping bag or a zip-top bag with a corner cut off to create fancier layers!
-
Next, add a layer of your prepared cherries, followed by a drizzle of honey or maple syrup. Repeat the layers until your jars are filled, finishing with a layer of yogurt on top.
- Fun Fact: You can create as many layers as your heart desires — the more, the merrier!
Step 4: Top It Off
- Finish your jars with a sprinkle of dark chocolate chips or cacao nibs, and a light dusting of cinnamon for that extra touch of love!
- Presentation Idea: Garnish each jar with a whole cherry on top for that cherry-on-top effect!
Step 5: Chill and Enjoy
- Cover your jars with lids or plastic wrap and let them chill in the refrigerator for at least 30 minutes before serving. This allows the flavors to meld together beautifully.
- Chef’s Insight: These jars can be made ahead of time; they’ll last in the fridge for up to three days! Perfect for meal prep!
Serving Suggestions
When it’s time to serve the Protein Chocolate Cherry Jars, place them on a beautiful platter adorned with fresh mint leaves for an extra pop of color. A dollop of whipped cream or coconut cream on the side can elevate the presentation even further. And of course, don’t forget to provide some cute spoons for scooping!
Recipe Variations
Here are a few fun variations to keep things exciting:
-
Nutty Delight: Add a handful of chopped nuts (almonds, walnuts, or pecans) in between the layers for a delightful crunch.
-
Tropical Twist: Swap out the cherries for diced pineapple and add a sprinkle of shredded coconut for a tropical vibe!
-
Spiced Chocolate: Mix in a pinch of cayenne or chili powder for a little heat alongside the sweetness.
-
Cherry Almond Bliss: Use almond extract instead of vanilla for a unique flavor profile that pairs beautifully with cherries.
-
Vegan Version: Use coconut yogurt and a plant-based protein powder to keep it totally vegan while still being incredibly delicious.
Chef’s Notes
I’ve made this Protein Chocolate Cherry Jar countless times, and it never fails to impress! The versatility of this recipe means I can adjust it to fit whatever I have on hand. Plus, it’s perfect for any occasion, whether it’s a casual weeknight treat or a stylish brunch centerpiece.
One time, I whipped this up for a gathering, and watching my friends dive into their jars with delight was a joy. They couldn’t believe it was healthy! It’s those moments that remind me of why I love cooking so much.
FAQs and Troubleshooting
Q: Can I use other fruits instead of cherries?
Absolutely! You can substitute with strawberries, blueberries, or even mixed berries. Just be mindful of their sweetness and adjust the honey accordingly.
Q: My yogurt mixture is too thick. What should I do?
If it’s too thick, gently stir in a little milk (dairy or non-dairy) until you reach your desired consistency. Just remember, you want it creamy and spreadable.
Q: How can I make this recipe lower in sugar?
You can reduce the amount of honey or maple syrup and opt for unsweetened yogurt. The natural sweetness of the fruit should still provide a lovely flavor!
Q: How can I make this recipe gluten-free?
This recipe is naturally gluten-free, so you’re good to go! Just ensure any protein powder you use is also gluten-free if that’s a concern.
Nutritional Info
Each jar is approximately filled with:
- Calories: 250
- Protein: 24g
- Fiber: 3g
- Sugar: 10g (naturally from fruits and yogurt)
Making your own Protein Chocolate Cherry Jars not only brings together a symphony of flavors and textures but also serves as an exciting way to nourish your body without sacrificing taste. This dessert is proof that healthy eating can still be indulgent and fun. So gather those ingredients, get cooking, and most importantly, enjoy every moment in the kitchen! Happy cooking, my friends!
Print
Protein Chocolate Cherry Jar
- Total Time: 30 minutes
- Yield: 4 servings 1x
- Diet: Vegetarian
Description
A delicious and healthy dessert featuring layers of Greek yogurt, dark chocolate, and cherries, providing a protein-packed indulgence.
Ingredients
- 1 cup Greek yogurt
- 2 tablespoons cocoa powder
- 1 scoop protein powder (vanilla)
- 1 cup cherries (fresh or frozen)
- 2 tablespoons honey or maple syrup
- 1/2 teaspoon cinnamon
- 1 teaspoon vanilla extract
- 2 tablespoons dark chocolate chips or cacao nibs
Instructions
- Prepare the cherries by rinsing fresh ones and cutting them in half, or thaw frozen cherries.
- Make the base by combining Greek yogurt, cocoa powder, protein powder, honey (or maple syrup), and vanilla extract in a bowl and stirring until smooth.
- Layer the yogurt mixture and cherries in jars, repeating layers until filled.
- Top with dark chocolate chips or cacao nibs and a dusting of cinnamon.
- Chill in the refrigerator for at least 30 minutes before serving.
Notes
Jars can be made ahead of time and last in the fridge for up to three days. Optional garnishes include fresh mint leaves and whipped cream.
- Prep Time: 15 minutes
- Cook Time: 0 minutes
- Category: Dessert
- Method: No-Cook
- Cuisine: American
Nutrition
- Serving Size: 1 serving
- Calories: 250
- Sugar: 10g
- Sodium: 80mg
- Fat: 7g
- Saturated Fat: 3g
- Unsaturated Fat: 4g
- Trans Fat: 0g
- Carbohydrates: 35g
- Fiber: 3g
- Protein: 24g
- Cholesterol: 10mg
Keywords: healthy dessert, protein dessert, chocolate cherry
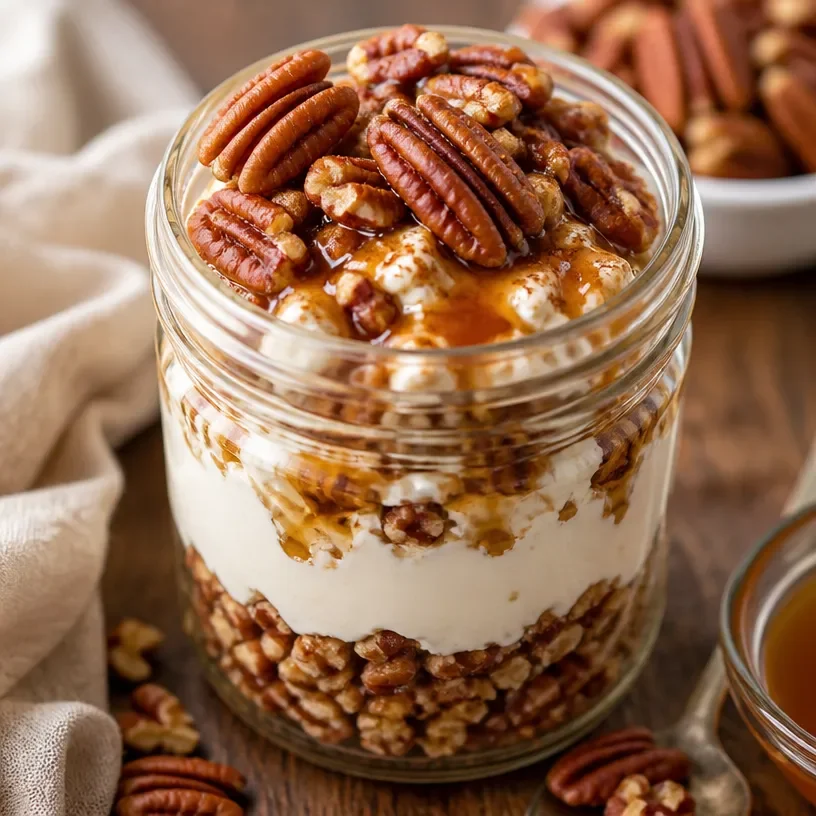
Protein Pecan Pie Jar
Indulge in Cozy Deliciousness: Protein Pecan Pie Jars
Welcome to my kitchen! I’m Olivia Bennett, and today I’m thrilled to share a recipe that brings a twist to the classic dessert we all adore: Pecan Pie. Imagine cozying up with a spoonful of sweet, nutty goodness layered perfectly in a jar, all while knowing that it’s packed with protein to keep you satisfied. These Protein Pecan Pie Jars are not only delicious but also bring a dash of nostalgia and a sprinkle of fun to your dessert game.
There’s something about pecan pie that invokes warm memories of family gatherings, especially around the holidays. I remember as a kid, my grandma would take me to the kitchen as soon as the fall air made its debut. The sweet aroma of toasted pecans mixed with buttery crust filled the room, and I knew we were in for a treat. I would sit on the counter, eagerly mixing ingredients, feeling like the star of our little cooking show. Those moments forged my love for baking and cooking, igniting a passion for creating dishes that bring joy to the table.
Fast forward to today, and I’m here with a protein-packed twist on that cherished pecan pie! These jars are perfect for an individual dessert or a delightful bonus at a family meal. They’re an easy grab-and-go treat, holding everything that made the classic recipe an all-time favorite, but crafted with a health-conscious spin. Ready to get started? Let’s dive into what we’ll need!
Ingredients for Protein Pecan Pie Jars
Here’s a list of what you’ll need for this delightful treat. Each ingredient brings its unique touch, and I’ve included some tips for substitutions and insights to help you ace your dessert-making game:
-
Pecans
Toasted pecans provide a rich, buttery flavor. Tip: You can substitute with other nuts like walnuts or almonds if you’re looking for a different flavor profile. -
Protein Powder
This will give your pie the protein boost! Use any flavor you like. Tip: Vanilla or unflavored works best to keep the pie sweet without overpowering it. -
Maple Syrup
The star of sugars! It adds natural sweetness and that classic pecan pie flavor. Tip: Replace it with agave syrup or honey if you prefer, but adjust sweetness to taste. -
Coconut Milk
This provides creaminess to your pie. Tip: Use almond milk or any other nut milk if you have a coconut allergy or want a lighter version. -
Eggs
Essential for binding and creating that custardy texture. Tip: For vegan versions, you can use flax eggs or chia seeds mixed with water (1 tbsp of seeds with 2.5 tbsp of water per egg). -
Vanilla Extract
For an aromatic boost that ties all flavors together. Tip: Use pure vanilla extract for the best flavor; imitation can taste artificial. -
Brown Sugar
Adds a depth of sweetness and that iconic caramel flavor. Tip: Coconut sugar can be a great alternative for a more wholesome option. -
Salt
A little salt enhances the sweetness! Tip: Opt for sea salt for a more complex taste. -
Crust Ingredients (optional)
You can use crushed graham crackers or gluten-free cookie crumbs for a crust layer at the bottom of your jars.
Step-by-Step Instructions
Now that we have our ingredients lined up, it’s time to bring these jars to life. Follow these steps, and don’t forget to add your chef touch along the way!
-
Preheat the Oven
Preheat your oven to 350°F (175°C). This is where the magic begins, so let’s get things warmed up! -
Toast the Pecans
Spread your pecans on a baking sheet and toast them for about 8-10 minutes or until they are fragrant. Keep an eye on them; burnt pecans can ruin your day! Chef tip: Let them cool and chop them roughly if you prefer smaller bits throughout your pie. -
Mix the Wet Ingredients
In a large bowl, combine 1 cup of coconut milk, ½ cup of maple syrup, 2 eggs, and 1 tsp of vanilla extract. Whisk together until well blended. This is crucial for getting that delightful custard consistency! -
Add the Dry Ingredients
Now, sift in 1 cup of protein powder, ½ cup of brown sugar, and a pinch of salt. Mix until just combined. Be gentle here; we don’t want to overwork the protein powder. Pro tip: If your mixture seems a bit thick, add a bit more coconut milk. -
Incorporate the Pecans
Fold in the toasted pecans, reserving a handful for topping. Get ready for that nutty goodness to shine through! -
Prepare Your Jars
If you’re using crusts, layer 2 tablespoons of crushed graham crackers at the bottom of each jar for an added crunch. This is optional, but I highly recommend it for those buttery bites! -
Fill the Jars
Carefully pour the pecan mixture into each jar until about three-quarters full. Chef hack: Use a funnel for a neater pour! -
Bake
Place the jars on a baking tray and carefully bake in the preheated oven for about 25-30 minutes. You’re looking for a slight jiggle in the middle, like a perfectly set custard. -
Cool Down
Let the jars cool at room temperature and then chill them in the fridge for at least an hour. This will help the flavors meld and give that delicious texture you crave! -
Top and Enjoy
When you’re ready to serve, sprinkle the reserved toasted pecans on top for a beautiful presentation. Now you’re ready to dig in!
Serving Suggestions
Serve these jars warm or chilled, as you prefer. They can be enjoyed on their own or paired with a dollop of whipped cream or a scoop of vanilla ice cream for a truly decadent experience. Chef’s secret: Drizzle a bit more maple syrup on top right before serving for that extra touch of sweetness and elegance!
Recipe Variations
Here are a few fun twists and variations to inspire your creativity:
- Chocolate-Chip Pecan Pie Jars: Add a handful of dark chocolate chips to the mixture for a delightful chocolatey surprise!
- Vegan Pecan Pie Jars: Use flax eggs and maple syrup as a sweetener, and a nut milk alternative to make this dish vegan-friendly.
- Spiced Pecan Pie: Toss in a touch of cinnamon and nutmeg for a spiced-up version that smells as good as it tastes.
- Nut-Free Option: Substitute with sunflower seeds or pumpkin seeds if you need to avoid nuts altogether.
- S’mores Pecan Pies: Top your jars with mini marshmallows before serving and toast them slightly for that campfire vibe.
Chef’s Notes
These Protein Pecan Pie Jars have certainly evolved over time in my kitchen. What started as a classic family recipe often turned into a huge plate of messy goodness has transformed into this sleek, portion-controlled delight. I love how portable they are; I mean, how else can you justify bringing dessert to picnics without lugging around an entire pie? Plus, it’s incredibly satisfying to see friends and family’s faces light up when they dig into their own personal jar of joy. Remember that cooking should be comfortable, playful, and full of love—so don’t hesitate to throw in your own unique twists!
FAQs and Troubleshooting
1. How can I store the leftover jars?
Store them in an airtight container in the fridge for up to 3-4 days. I like to keep it cozy by enjoying them as a snack throughout the week!
2. What if my mixture is too runny?
If your mixture seems too runny, make sure you’ve measured your protein powder correctly. You might want to add just a pinch more! Ensure your eggs are well incorporated as well.
3. Can I freeze these jars?
Absolutely! Just ensure they are cooled completely before freezing them. They can last in the freezer for up to 3 months. Thaw in the fridge before serving.
4. What can I do if my jars overflow while baking?
Okay, so if you’ve overfilled your jars, don’t fret! Place a baking sheet under your jars while they bake to catch any drips. Learn from my clumsy kitchen adventures!
Nutritional Info
While I love indulging in desserts, it’s always great to know what’s inside. Each jar contains a good amount of protein thanks to the protein powder and pecans while still offering that satisfying sweet flavor we all crave. Plus, they’re great for feeding your soul and nourishing your body!
Now that you have all the tips, tricks, and deliciousness near you, it’s your turn to create! Whether you’re making these for yourself or sharing them with loved ones, I assure you that these Protein Pecan Pie Jars are sure to become a crowd favorite — just like they have in my kitchen. Happy cooking!
Print
Protein Pecan Pie Jars
- Total Time: 45 minutes
- Yield: 4 servings 1x
- Diet: Vegetarian
Description
A delicious twist on classic pecan pie, these Protein Pecan Pie Jars are packed with protein and perfect for individual servings.
Ingredients
- 1 cup toasted pecans
- 1 cup protein powder
- ½ cup maple syrup
- 1 cup coconut milk
- 2 eggs
- 1 tsp vanilla extract
- ½ cup brown sugar
- pinch of salt
- 2 tablespoons crushed graham crackers (optional)
Instructions
- Preheat your oven to 350°F (175°C).
- Toast the pecans on a baking sheet for about 8-10 minutes.
- Mix the wet ingredients in a bowl: coconut milk, maple syrup, eggs, and vanilla extract.
- Add the dry ingredients: sift in protein powder, brown sugar, and salt.
- Incorporate the toasted pecans, reserving some for topping.
- Prepare your jars with crushed graham crackers at the bottom, if using.
- Fill each jar with the pecan mixture until about three-quarters full.
- Bake for about 25-30 minutes until slightly jiggly.
- Cool at room temperature, then chill in the fridge for at least an hour.
- Top with reserved pecans before serving.
Notes
These jars can be stored in an airtight container in the fridge for up to 3-4 days. They can also be frozen for up to 3 months.
- Prep Time: 15 minutes
- Cook Time: 30 minutes
- Category: Dessert
- Method: Baking
- Cuisine: American
Nutrition
- Serving Size: 1 jar
- Calories: 350
- Sugar: 15g
- Sodium: 200mg
- Fat: 20g
- Saturated Fat: 6g
- Unsaturated Fat: 10g
- Trans Fat: 0g
- Carbohydrates: 35g
- Fiber: 4g
- Protein: 10g
- Cholesterol: 50mg
Keywords: pecan pie, protein dessert, cozy dessert, individual treats
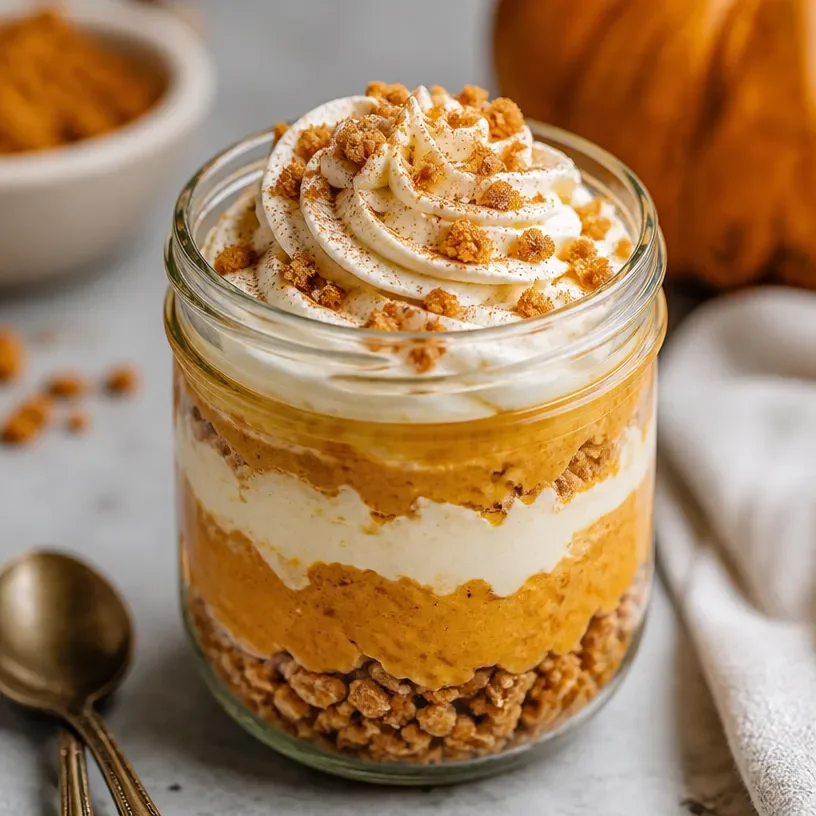
Protein-Packed Sweet Potato Pie Jar for Busy Weeknights
Sweet and Savory Protein Sweet Potato Pie Jar: A Cozy Comfort Dish
Welcome to my kitchen, dear food friends! Today, we’re diving into a delightful treat that’s bound to make your taste buds dance with joy: Protein Sweet Potato Pie Jars. If you’ve ever found comfort in a classic sweet potato pie and wished it could be a wholesome, protein-packed snack, you’re in for a real culinary surprise! This recipe is a beautiful blend of nostalgia and nutrition, perfect for anyone looking to indulge without compromising on health.
Now, let’s make this dish together and create some kitchen magic! Picture your cozy kitchen, the enticing aroma of sweet potatoes wafting through the air, and the bright colors of warm spices ready to brighten your day. Grab your favorite jar (or mason jar for the more rustic vibe) and let’s layer up some deliciousness!
A Slice of My Sweet Potato Memory
You know, every dish tells a story, and the story of sweet potato pie in my life is one I cherish dearly. It all began in my grandmother’s sunlit kitchen back in the day. I vividly remember helping her peel and mash sweet potatoes while dancing around to her favorite oldies playlist. She had this magical ability to turn simple ingredients into pure comfort.
For her, sweet potato pie wasn’t just dessert; it was an experience. I recall landing my sticky hands in the flour as I tried my best to help make the crust, often more spill than dough. But that’s where the “pie” magic happened! The luscious filling of sweet potatoes, warm spices, and a secret touch of love would remind us all why we gathered around her table more than anything else.
Today, as I whip up these sweet potato pie jars, it takes me back to those cherished moments filled with laughter, stories, and, of course, delicious food. So, let’s recreate that joy together!
The Ingredients: What You’ll Need
Here’s a list of everything you’ll need to bring our Protein Sweet Potato Pie Jars to life:
-
Sweet Potatoes (2 medium)
These creamy beauties are the star of the show! Sweet potatoes provide natural sweetness and a velvety texture. You can swap them for puréed pumpkin if you want to switch things up. -
Vanilla Protein Powder (1 scoop)
A fantastic way to pump up the protein and support your healthy lifestyle. Go for a plant-based or whey option depending on your dietary preference. -
Cinnamon (1 tsp)
This warm spice brings that cozy aroma and flavor. Feel free to use nutmeg or pumpkin spice if you want a little twist! -
Maple Syrup (2 tbsp)
A natural sweetener that enhances the sweet potato flavor. You can substitute with agave syrup or honey if desired. -
Almond Milk (1 cup)
To achieve that creamy consistency. If you’re feeling adventurous, try coconut milk for an exotic flair! -
Greek Yogurt (½ cup)
Adds creaminess and a beautiful protein boost. You can swap in dairy-free yogurt for a vegan option. -
Graham Cracker Crumbs (½ cup)
For that signature crust flavor without baking a pie! You could use crushed oats or nuts for a gluten-free alternative. -
Chopped Nuts (optional)
Add walnuts or pecans on top for some crunch and healthy fats.
Step-by-Step Instructions: Let’s Get Cooking!
-
Prepare Your Sweet Potatoes
Start by preheating your oven to 400°F (200°C). While it’s warming, wash your sweet potatoes and prick them all over with a fork. This helps steam escape and makes for super tender insides. Bake for about 45-60 minutes until they are soft. We want that sweet, buttery filling! -
Making the Sweet Potato Filling
Once the sweet potatoes are done, let them cool for a bit, then peel away the skins. Mash the flesh in a bowl until smooth (an easy clean-up tip: I love using a potato masher!). -
Mixing It Up
In a larger mixing bowl, combine your mashed sweet potatoes, vanilla protein powder, cinnamon, maple syrup, almond milk, and Greek yogurt. Stir it well until everything is evenly incorporated. It should be creamy and luscious, just like a pie filling! -
Time to Layer!
Grab your jars and start layering! Begin with a layer of sweet potato filling followed by a sprinkle of graham cracker crumbs, then do a second layer of sweet potato filling. Keep adding layers until you reach the top of your jars. Finish with a sprinkle of nuts if you like some added crunch! -
Chill and Set
Cover your jars and pop them into the refrigerator for at least one hour, allowing the flavors to meld beautifully. That’s right, during this time, grab a book and kick back!
Serving Suggestions: A Feast for the Eyes
When you’re ready to indulge, take your jars out of the fridge and give them a gentle stir. You might want to add a dollop of extra Greek yogurt on top, a drizzle of maple syrup, or even a sprinkle of cinnamon for that final touch.
Imagine presenting these charming little jars at your next gathering — they’re not only delicious but absolutely gorgeous too. Serve them up with spoons ready to scoop up those layers of flavor!
Recipe Variations: Get Creative!
Now that we’ve got the basic recipe down, let’s sprinkle in some excitement. Here are a few variations you can play around with:
-
Chocolate Decadence: Add a tablespoon of unsweetened cocoa powder to the sweet potato filling for a chocolate twist!
-
Nutty Boost: Incorporate almond butter or peanut butter for a richer flavor and creamier texture.
-
Vegan Switch: Use coconut yogurt and agave instead of Greek yogurt and maple syrup for a completely dairy-free version.
-
Spiced Up: Mix in a pinch of cayenne or ginger for an unexpected kick that balances the sweetness!
-
Layer It Up: Introduce layers with fruits like bananas or berries in between the sweet potato filling — a burst of freshness!
Chef’s Notes: A Slice of Wisdom
As we’ve chatted about this recipe, I have to admit that it has definitely evolved along the way. I initially started with an entire sweet potato pie, but with time constraints and my love for jars, it morphed into this quick and easy recipe. Plus, can we talk about portion control? Having it in jars is just so much fun!
Oh, and I remember one time experimenting with different spice combinations and accidentally dropping too much cayenne. Let’s just say, there were some fire-breathing moments, but I learned that cooking is all about experimentation — a little spice goes a long way!
FAQs and Troubleshooting: Let’s Clear It Up
-
How can I make this gluten-free?
Use gluten-free graham crackers or swap for ground oats or almond flour to create a crumb base! -
Can I use canned sweet potatoes?
Absolutely! Just ensure they’re well-drained, and you may need to adjust the amount of almond milk to maintain the right consistency. -
What if my mixture is too thick?
No problem! Simply add a little more almond milk until you reach your desired consistency. -
How long will these keep in the fridge?
Stored in an airtight container, they should last about 4-5 days in the fridge, perfect for meal prep!
Nutritional Info
While exact nutritional breakdown depends on specific brands and portion sizes, a typical Protein Sweet Potato Pie Jar could contain around:
- Calories: 300
- Protein: 15g
- Carbohydrates: 45g
- Fats: 10g
So there you have it! I hope you love making these Protein Sweet Potato Pie Jars as much as I love sharing them with you. Remember, cooking is a journey filled with laughter, love, and a sprinkle of spice. Let me know how yours turn out, and happy cooking!
Print
Protein Sweet Potato Pie Jars
- Total Time: 75 minutes
- Yield: 4 servings
- Diet: Vegetarian
Description
A wholesome and protein-packed take on classic sweet potato pie, served in charming jars.
Ingredients
- Sweet Potatoes (2 medium)
- Vanilla Protein Powder (1 scoop)
- Cinnamon (1 tsp)
- Maple Syrup (2 tbsp)
- Almond Milk (1 cup)
- Greek Yogurt (½ cup)
- Graham Cracker Crumbs (½ cup)
- Chopped Nuts (optional)
Instructions
- Preheat your oven to 400°F (200°C). Wash your sweet potatoes and prick them all over with a fork. Bake for about 45-60 minutes until soft.
- Once the sweet potatoes are done, let them cool, then peel away the skins and mash the flesh until smooth.
- In a larger bowl, combine mashed sweet potatoes, vanilla protein powder, cinnamon, maple syrup, almond milk, and Greek yogurt. Stir until incorporated.
- Grab your jars and start layering by adding sweet potato filling followed by graham cracker crumbs. Continue layering until jars are full.
- Cover the jars and refrigerate for at least one hour to allow flavors to meld.
- When ready to serve, stir gently and add a dollop of Greek yogurt, maple syrup, or cinnamon on top as desired.
Notes
Experiment with different toppings and variations, including chocolate, nut butters, or fruits.
- Prep Time: 15 minutes
- Cook Time: 60 minutes
- Category: Dessert
- Method: Baking
- Cuisine: American
Nutrition
- Serving Size: 1 jar
- Calories: 350
- Sugar: 10g
- Sodium: 200mg
- Fat: 10g
- Saturated Fat: 2g
- Unsaturated Fat: 7g
- Trans Fat: 0g
- Carbohydrates: 45g
- Fiber: 5g
- Protein: 15g
- Cholesterol: 5mg
Keywords: sweet potato pie, protein dessert, healthy snack, cozy dish, meal prep
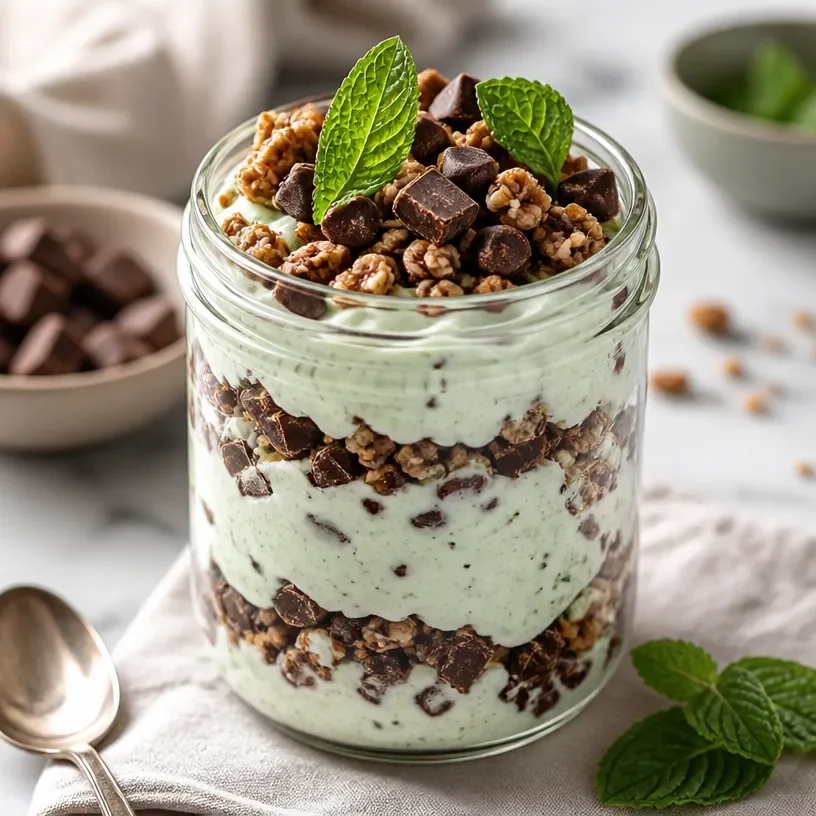
Protein Mint Chocolate Jar
Protein Mint Chocolate Jar: A Delectable Delight for Any Time of Day
Welcome back to my cozy corner of the internet! Today, I’m thrilled to share with you a recipe that combines two of my favorite things: indulgence and nourishment. Picture this: a Protein Mint Chocolate Jar that’s not only a sweet treat but also packs a nutritional punch. Perfect for breakfast, a snack, or even a guilt-free dessert, this jar is sure to brighten your day and satisfy your sweet cravings!
Why mint chocolate? Oh, let me tell you — the fresh, invigorating kick of mint paired with the smooth, lusciousness of chocolate creates a flavor explosion that dances on your taste buds. It’s like a frosty breeze on a hot summer day or snuggling into a warm blanket on a chilly night. Each spoonful carries a memory, and I’m excited to guide you through creating your own delicious moments.
This recipe is inspired by many nights spent in my kitchen experimenting with flavors, textures, and textures. You know those evenings when you just want to whip up something quick, nourishing, and delightful? That’s where this recipe shines. It’s super simple, customizable, and perfect for meal prep. So, roll up your sleeves, grab your favorite mixing bowl, and let’s bring this delightful jar to life!
A Slice of Nostalgia: My Mint Chocolate Journey
Let me take you back in time to one particular summer when I was a teenager. My parents had just declared that our kitchen was open for “special creations,” and I decided to take it upon myself to impress them with a mint chocolate dessert. Armed with a box of instant pudding, crushed mint candies, and a sprinkle of creativity, I concocted a layered dessert that had us all buzzing with excitement.
The anticipation built as we waited for it to chill, and when the moment finally arrived, we dug in with eager spoons. That first bite was pure ecstasy! The cool minty flavor blended perfectly with the smooth chocolate, and I remember thinking, “I’ve created a masterpiece!” That joyful moment fueled my passion for cooking and sparked my obsession with mint chocolate combinations. It became a summer tradition, and now, I’ve brought the essence of those cherished memories into this Protein Mint Chocolate Jar.
Ingredients You’ll Need
Here’s a quick rundown of what you’ll need to bring this delicious jar to life:
-
Plain Greek Yogurt (2 cups): Creamy and protein-packed, Greek yogurt serves as the base. If you prefer dairy-free, opt for coconut yogurt for a tropical twist.
-
Protein Powder (1 scoop): Chocolate or vanilla protein works best. This adds the protein punch! You can substitute it for a plant-based alternative or leave it out for a lighter version.
-
Fresh Mint Leaves (1/4 cup, finely chopped): Think of these as the star of the show! Fresh mint brings brightness. If you’re in a pinch, a few drops of peppermint extract will do, but use sparingly!
-
Cocoa Powder (2 tablespoons): Unsweetened cocoa powder enhances the chocolate flavor. For a sweeter touch, you could use a dash of carob powder.
-
Maple Syrup or Honey (to taste): Sweetener of choice! Maple syrup adds a lovely maple flavor. If you’re vegan, stick with the maple syrup.
-
Chopped Dark Chocolate or Chocolate Chips (1/2 cup): Because who doesn’t love a bit of chocolate? Dark chocolate gives depth, but milk chocolate delivers comfort. Or skip it entirely for a guilt-free treat.
-
Sea Salt (a pinch): A pinch of salt boosts the flavors beautifully! If you prefer, you can leave it out.
Step-by-Step Instructions
Let’s get cooking! Follow these steps to whip up your Protein Mint Chocolate Jar:
-
Prepare Your Workspace: Clear a spot on your kitchen counter and gather all the ingredients. Having everything at hand makes the process so much smoother!
-
Mix the Base: In a large mixing bowl, combine 2 cups of Greek yogurt with 1 scoop of your chosen protein powder. The yogurt creates a creamy texture deliciously complimented by the protein. Use a whisk or spatula to blend until smooth. You want no lumps, just a light, fluffy mixture!
-
Add Cocoa and Flavor: Sprinkle in 2 tablespoons of cocoa powder and a pinch of sea salt. If you’re mad for chocolate (who isn’t?), this is where the magic starts. Mix well until the cocoa is well incorporated into the yogurt.
-
Sweeten the Deal: Drizzle in maple syrup or honey to taste. Start with a tablespoon, taste, and adjust as needed. I love the hint of sweetness balancing the flavors — it’s like a hug in a jar!
-
Mint Magic: Gently fold in the finely chopped fresh mint leaves. This is where your kitchen starts to smell divine! The fresh mint gives an aromatic freshness that brightens the whole dish.
-
Layer it Up: Grab your jars — make sure they’re clean and ready to go! Start layering: spoon a generous amount of the mint chocolate mixture into the jar, followed by a layer of chopped dark chocolate. Repeat until you reach the top. Don’t skimp on those layers!
-
Garnish and Chill: Top off your jars with extra mint leaves and a dollop of yogurt if you like. Cover tightly with lids or plastic wrap and refrigerate for at least an hour. This allows the flavors to meld together beautifully!
-
Dig In!: After letting it chill, it’s time for the best part — digging in! Grab a spoon, get cozy, and enjoy.
Serving Suggestions
Serve your Protein Mint Chocolate Jar chilled, straight from the fridge. You can enjoy it on its own, or pair it with some fresh berries or a sprinkle of granola for added texture. It can also make a delightful breakfast option when you’re short on time!
Recipe Variations
Want to add your personal twist? Here are some fun variations to try:
-
Nutty Addition: Fold in some chopped nuts like almonds or walnuts for extra crunch and healthy fats.
-
Fruit Fusion: Layer some banana slices or strawberries between the chocolate layers for a refreshing fruit burst!
-
Coffee Kick: A tablespoon of instant coffee or espresso powder adds a mocha flavor that’s simply irresistible!
-
Dairy-Free Delight: Use dairy-free yogurt and plant-based protein powder for a plant-based version that still satisfies.
Chef’s Notes
This recipe has been in my repertoire for years, constantly evolving as I’ve experimented with different flavors and ingredients. I remember once I accidentally added too much peppermint extract — yikes! It turned into an overpowering mint experience. Lesson learned: sometimes less is more! But those little kitchen mishaps add to the charm and stories behind my cooking adventures. Now, this Protein Mint Chocolate Jar is one of my go-to recipes because it combines convenience and flavor beautifully.
FAQs and Troubleshooting
1. Can I make this jar ahead of time?
Absolutely! These jars are perfect for meal prep. You can make them up to two days in advance. Just keep them tightly sealed in the fridge.
2. What if I don’t have Greek yogurt?
No worries! You can easily substitute with regular yogurt, silken tofu, or even cottage cheese blended until smooth.
3. How do I adjust the sweetness?
Taste as you go — that’s the best way! If it’s too sweet, add a bit more cocoa powder or yogurt to balance the flavors.
4. My mixture is too thick. What can I do?
Add a splash of milk (dairy or non-dairy) to thin it out. Whisk it well until you reach your desired consistency.
Nutritional Info
This Protein Mint Chocolate Jar is loaded with protein, vitamins, and minerals. Each serving contains approximately:
- Calories: 250
- Protein: 25g
- Carbohydrates: 30g
- Fats: 8g
Feel free to adjust the ingredients to fit your dietary needs!
And there you go! Your very own Protein Mint Chocolate Jar, both scrumptious and nutritious. I hope you enjoy every bite as much as I do. It’s a recipe perfect for any occasion — from lazy weekends to busy weekdays. Happy cooking, friends! Can’t wait to see your creations!
Print
Protein Mint Chocolate Jar
- Total Time: 15 minutes
- Yield: 4 servings 1x
- Diet: Vegetarian
Description
A delicious and nutritious Protein Mint Chocolate Jar perfect for breakfast, a snack, or a guilt-free dessert.
Ingredients
- 2 cups Plain Greek Yogurt
- 1 scoop Protein Powder (Chocolate or Vanilla)
- 1/4 cup Fresh Mint Leaves (finely chopped)
- 2 tablespoons Cocoa Powder
- Maple Syrup or Honey (to taste)
- 1/2 cup Chopped Dark Chocolate or Chocolate Chips
- a pinch Sea Salt
Instructions
- Prepare Your Workspace: Clear a spot on your kitchen counter and gather all the ingredients.
- Mix the Base: In a large mixing bowl, combine the Greek yogurt with the protein powder. Blend until smooth.
- Add Cocoa and Flavor: Sprinkle in the cocoa powder and a pinch of salt. Mix well.
- Sweeten the Deal: Drizzle in maple syrup or honey to taste.
- Mint Magic: Gently fold in the finely chopped fresh mint leaves.
- Layer it Up: Start layering the mint chocolate mixture and chopped dark chocolate in jars.
- Garnish and Chill: Top with mint leaves and refrigerate for at least an hour.
- Dig In!: After chilling, enjoy your delicious treat!
Notes
Perfect for meal prep, can be made up to two days in advance.
- Prep Time: 15 minutes
- Cook Time: 0 minutes
- Category: Dessert
- Method: No Cook
- Cuisine: American
Nutrition
- Serving Size: 1 jar
- Calories: 250
- Sugar: 10g
- Sodium: 100mg
- Fat: 8g
- Saturated Fat: 2g
- Unsaturated Fat: 6g
- Trans Fat: 0g
- Carbohydrates: 30g
- Fiber: 3g
- Protein: 25g
- Cholesterol: 10mg
Keywords: mint, chocolate, protein, dessert, healthy, snacks
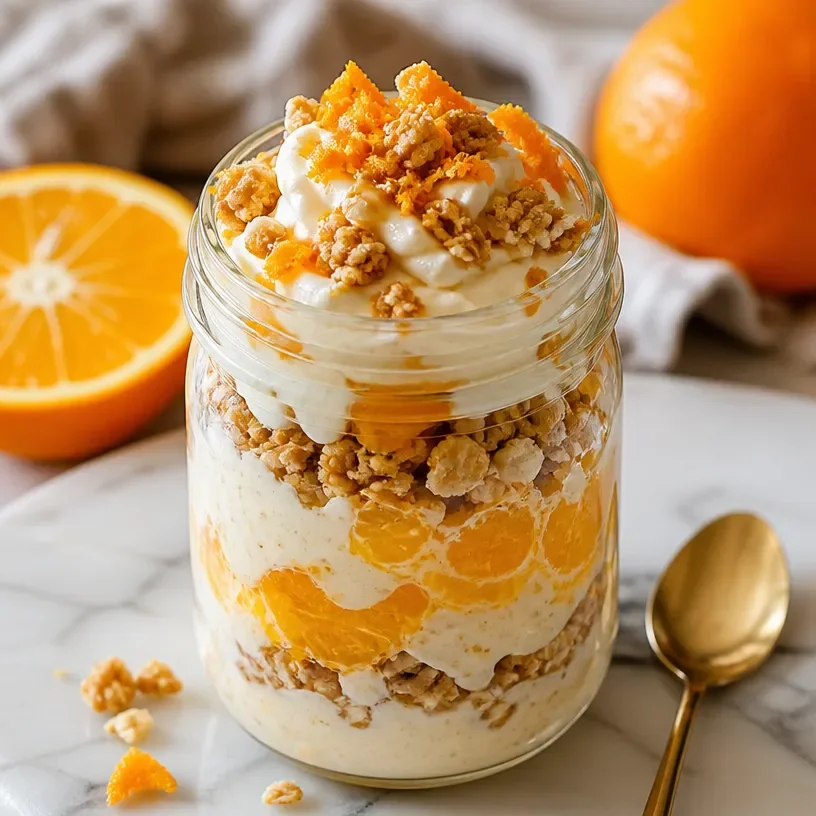
Ingredient High-Protein Orange Creamsicle Jar Snack
Dive into Delight: Protein Orange Creamsicle Jars
Welcome to my kitchen! Today, I’m thrilled to share a recipe that wraps memories of sun-soaked summers, ice cream trucks, and endless laughter into a delightful little jar: the Protein Orange Creamsicle Jar! This vibrant treat is not just a nostalgic nod to our beloved childhood ice creams but also a wholesome option for those of us living busy lives yet looking for something that feels like a treat.
Picture this: it’s a warm afternoon, and the sun is shining bright. The scent of citrus fills the air as you prepare these jars, each layer reminiscent of a creamsicle, but with a protein-packed twist. I created this recipe to blend nostalgia with nutrition, ideal for breakfast, a midday snack, or even dessert. And the best part? It’s incredibly easy to make! If you’re grinning already, grab your apron—we’re diving into a world of flavor and joy together.
Now, I can practically hear the ice cream truck’s jingle ringing in my ears. Growing up, nothing excited me more than rushing to the street with a crumpled dollar bill, racing my friends for the first pick. If I was lucky (and my mom remembered to refill my piggy bank), I’d get my hands on that creamsicle—cold, sweet, and dripping down my fingers. But as I grew older, I started to crave that flavor in a more nutritious way. This Protein Orange Creamsicle Jar was born from that nostalgia and a desire for healthy eating. Who says you can’t enjoy a childhood favorite while fueling your body?
So, let’s roll up our sleeves and create this mouthwatering treat together!
Ingredients
-
1 cup Greek yogurt
- A protein powerhouse! Choose plain yogurt for a balanced flavor or a flavored version for a sweet twist. Dairy-free alternatives like coconut yogurt also work well.
-
1 orange, juiced and zested
- Freshly squeezed juice gives a zesty kick! If you can’t find fresh oranges, no worries—use store-bought orange juice (preferably pulp-free). The zest? Totally optional but adds fabulous flavor!
-
1 scoop vanilla protein powder
- A game-changer for adding creaminess and muscle power! Shake it up by using flavored protein powder like vanilla or even an orange-flavored one.
-
2 tablespoons honey or maple syrup
- Sweetness alert! Adjust the amount based on your taste, or use stevia for a sugar-free alternative.
-
1 teaspoon vanilla extract
- A must for enhancing flavors. If you’re feeling adventurous, consider adding almond extract for a unique touch.
-
1/2 cup granola
- Crunchy, delicious, and satisfying! Need a gluten-free option? Use your favorite gluten-free granola.
-
Fresh fruit for topping (like blueberries or raspberries)
- Elevate your jar’s beauty! You can use frozen fruits too; just let them thaw a bit before adding them for visual appeal and extra flavor.
Step-by-Step Instructions
-
Prepare the Base Layer:
In a medium bowl, combine the Greek yogurt, orange juice, orange zest, protein powder, honey (or maple syrup), and vanilla extract. Whisk vigorously until well blended and creamy. This is where the magic happens! The mixture should be thick and luscious—just imagine spreading it on toast. -
Taste Test Time:
Can’t resist? Go ahead and take a tiny taste! Adjust sweetness with more honey or syrup if needed. Remember, everyone has different preferences! -
Assemble the Jars:
Grab your favorite jars (or bowls if you’re feeling casual). Start by layering the creamy yogurt mixture at the bottom—about half of the jar should be filled with this dreamy concoction. Use a spoon and level it off for a beautiful presentation. -
Granola Crunch:
Next, sprinkle in an even layer of granola. It’s the perfect contrast to the smooth filling. Don’t be shy; you’ll want a nice balance between the creamsicle and the crunch! -
Repeat the Layers:
Top off the granola with another generous layer of the orange yogurt mixture, making the jars eye-catching. Finish with a final layer of granola on top, and if you’re up for it, add your fresh fruit for that Instagram-worthy flair! -
Chill and Serve:
Pop the jars into the fridge for a bit to set—you’ll want them nice and cold. They can also sit in the refrigerator for up to a few hours or overnight, making them perfect for meal prep! -
Enjoy and Delight!
When it’s time to dig in, grab a spoon, stir everything up, and let the flavors come together. Enjoy each bite as you reflect on those sunny memories of ice cream joy.
Serving Suggestions
Serve these Protein Orange Creamsicle Jars chilled, garnished with a sprinkle of additional orange zest and a vibrant slice of orange resting on the rim for a pop of color. Feel free to get creative with your serving dishes—sometimes, a cute mason jar can elevate the experience! If you’re sharing, consider making mini versions in shot glasses for a fun party treat.
Recipe Variations
-
Berry Blast: Swap out orange juice for berry juice and add mixed berries for a totally different flavor while still keeping that creamsicle vibe!
-
Chocolate Dream: Add a tablespoon of cocoa powder to the yogurt mix for a Chocolate Orange Creamsicle Jar. Sweet, zesty, and oh-so-chocolaty!
-
Nutty Delight: Mix in a tablespoon of almond or cashew butter for a nutty twist. This will add creaminess and healthy fats!
-
Tropical Vibes: Mmm! Swap in coconut yogurt and tropical fruit like mango for a piña colada feel.
-
Lazy Night Dessert: Add a scoop of your favorite ice cream instead of yogurt for a richer treat that still reminds you of the classic creamsicle!
Chef’s Notes
I’ve been perfecting this recipe over the years, and it started as a simple yogurt parfait. The more I experimented, the more I thought, “Hey, why not make something reminiscent of those carefree summer days?” Each tweak has brought me back to the moments spent with friends and family, and that zest for life translates directly to this delicious jar. Plus, I definitely had a few ‘oops’ moments in the kitchen, like when I accidentally grabbed an expired bag of granola. The best part? I laugh it off, dust it aside, and come back even more inspired!
FAQs and Troubleshooting
Q: Can I make this without protein powder?
Absolutely! Just increase the Greek yogurt slightly. You may want to add more sweetener for balance, too.
Q: My yogurt mixture is too runny. What can I do?
Try adding a bit more yogurt or protein powder to thicken it up. A pinch of cornstarch can also work wonders if you’re in a pinch!
Q: Can I make this ahead of time?
For sure! These jars can be meal-prepped and stored in the fridge for 2-3 days. Just skip adding the granola until you’re ready to eat, so it stays crunchy!
Q: What if I don’t have jars?
No problem! Use bowls, containers, or even fancy wine glasses if you’re feeling fancy and want to impress.
Nutritional Info
(Per Serving: Based on 1 jar serving)
- Calories: Approx. 250
- Protein: 20g
- Carbohydrates: 30g
- Fat: 5g
This Protein Orange Creamsicle Jar not only brings back cherished memories but also provides a deliciously nutritious way to fuel your day. Now that you have this recipe at your fingertips, you can offer yourself and your loved ones a twist on a classic that satisfies both nostalgia and modern dietary needs.
So, what are you waiting for? Let’s get mixing, layering, and enjoying this fabulous treat together! Remember, cooking is about sharing love and flavor, so don’t forget to share your creations with me—I’d love to hear your stories! Happy cooking, foodie friends!
Print
Protein Orange Creamsicle Jars
- Total Time: 15 minutes
- Yield: 2 servings 1x
- Diet: High Protein
Description
A delightful and nutritious twist on the classic creamsicle, perfect for breakfast, snacks, or dessert.
Ingredients
- 1 cup Greek yogurt
- 1 orange, juiced and zested
- 1 scoop vanilla protein powder
- 2 tablespoons honey or maple syrup
- 1 teaspoon vanilla extract
- 1/2 cup granola
- Fresh fruit for topping (like blueberries or raspberries)
Instructions
- Prepare the Base Layer: In a medium bowl, combine the Greek yogurt, orange juice, orange zest, protein powder, honey (or maple syrup), and vanilla extract. Whisk vigorously until well blended and creamy.
- Taste Test Time: Take a tiny taste and adjust sweetness with more honey or syrup if needed.
- Assemble the Jars: Layer the creamy yogurt mixture at the bottom—about half of the jar should be filled with this mixture.
- Granola Crunch: Sprinkle in an even layer of granola.
- Repeat the Layers: Add another generous layer of the orange yogurt mixture, followed by a final layer of granola and fresh fruit on top if desired.
- Chill and Serve: Pop the jars into the fridge for a bit to set.
- Enjoy and Delight: Stir everything up and enjoy each bite!
Notes
These jars can be meal-prepped and stored in the fridge for 2-3 days. Skip the granola until ready to eat for crunchiness.
- Prep Time: 15 minutes
- Cook Time: 0 minutes
- Category: Dessert
- Method: No-Cook
- Cuisine: American
Nutrition
- Serving Size: 1 serving
- Calories: 250
- Sugar: 15g
- Sodium: 100mg
- Fat: 5g
- Saturated Fat: 2g
- Unsaturated Fat: 3g
- Trans Fat: 0g
- Carbohydrates: 30g
- Fiber: 2g
- Protein: 20g
- Cholesterol: 10mg
Keywords: creamsicle, high protein, dessert, healthy snack, yogurt parfait
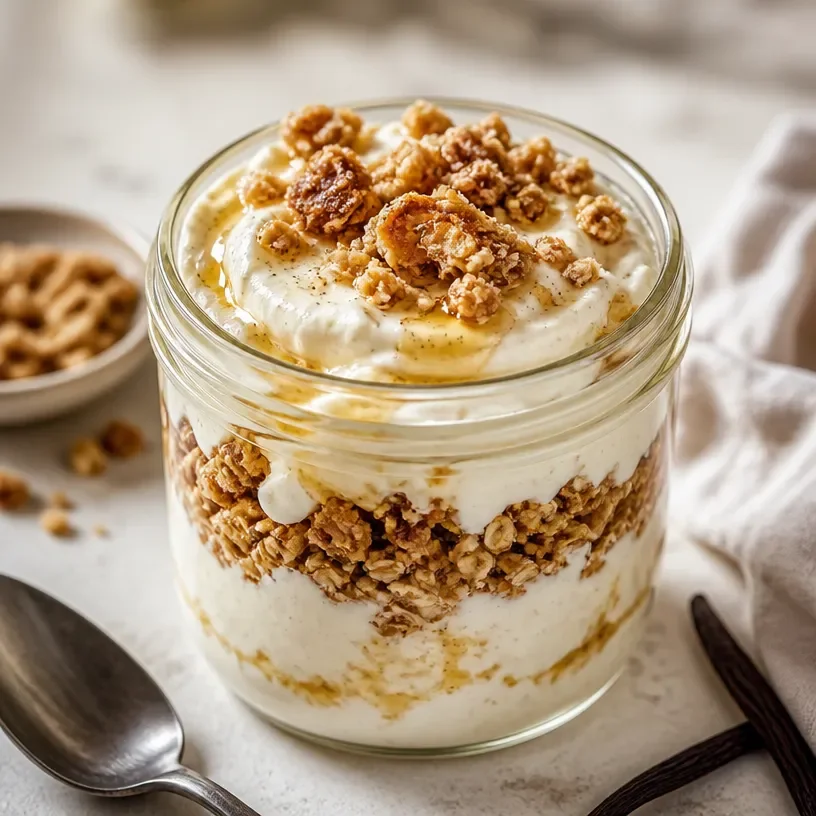
Protein Vanilla Bean Cheesecake Jar
Protein Vanilla Bean Cheesecake Jar: A Cozy, Delicious Delight
Welcome back to my cozy corner of the kitchen, friends! Today, I have a treat that combines creamy indulgence with protein-packed goodness—Protein Vanilla Bean Cheesecake Jars! If you adore the smooth, velvety texture of cheesecake but also crave a healthy twist, you’ve stumbled upon the perfect recipe. Picture this: a delightful blend of cream cheese, Greek yogurt, vanilla bean, and a touch of sweetness, all layered beautifully in a jar for an elegant presentation. Whether you’re treating yourself after a long day or impressing guests at a gathering, these little jars of joy are sure to be a hit!
Personal Story: A Cheesecake Dream
Let me take you back to a special family gathering a few years ago, where I first realized the power of cheesecake to bring people together. My grandmother, who was a wizard in the kitchen, had always made traditional cheesecakes for our family celebrations. I still remember the way the rich aroma of vanilla and baked cream cheese would fill the air, wrapping us in warmth as we gathered around the table.
That day, she decided it was time to shake things up. Instead of her classic recipe, she introduced us to a no-bake version, but with a twist. She added Greek yogurt to the mix and came up with a delightful, lighter cheesecake treat. The first bite was heavenly, and from then on, it became a family favorite. Years later, I find myself recreating that memory in my own kitchen and giving it my special touch with protein powder. So, let’s dive into this recipe together, and I’ll share the magic!
Ingredients
To whip up these delightful Protein Vanilla Bean Cheesecake Jars, you’ll need the following ingredients:
-
Cream Cheese: Use full-fat for a rich, creamy base, or low-fat for a lighter option. Make sure it’s softened to room temperature for easy mixing!
-
Greek Yogurt: This ingredient adds creaminess and a boost of protein! You can substitute it with sour cream or coconut yogurt if you’re looking for a dairy-free option.
-
Protein Powder: A vanilla-flavored protein powder works best to maintain the cheesecake essence. Try plant-based or whey protein, depending on your dietary needs.
-
Vanilla Bean Paste or Extract: Using the real thing brings enchanting notes of vanilla to this recipe. If you can’t find vanilla bean paste, pure vanilla extract will do just fine!
-
Sweetener: Honey, maple syrup, or your favorite sugar substitute will sweeten the deal. Adjust the amount according to your taste preferences.
-
Graham Cracker Crumbs: For the base, use crushed graham crackers, or swap in oat flour for a gluten-free option.
-
Butter: Unsalted butter binds the crust together. Coconut oil is a wonderful vegan substitute.
-
Fresh Berries (optional): These are gorgeous on top and add a pop of color, plus a bit of tartness to balance the sweetness.
Step-by-Step Instructions
Now that we have our ingredients, let’s get to work on these delightful jars! Follow these steps, and watch the magic happen in your kitchen.
-
Prepare the Crust:
- In a medium bowl, combine 1 cup of graham cracker crumbs with 4 tablespoons of melted butter. Mix until the crumbs resemble wet sand.
- Chef’s Tip: If you like a crunchier crust, toast the crumbs in a pan for a few minutes to enhance the flavor before mixing in the butter.
-
Set the Base:
- Scoop about 2 tablespoons of the crumb mixture into the bottom of each jar. Press down firmly to create a solid base.
- Pro Tip: Use the bottom of a shot glass or a small measuring cup to pack it tightly. This step is key for a sturdy structure!
-
Mix the Filling:
- In a large bowl, beat together 8 ounces of softened cream cheese and 1 cup of Greek yogurt until smooth and fluffy. A hand mixer comes in handy here!
- Add 1 scoop of protein powder, 1 tablespoon of vanilla bean paste, and sweetener to taste. Mix until fully combined.
- Chefs Hack: For a smoother texture, sift the protein powder before mixing it in to avoid clumps.
-
Layer It Up:
- Spoon the cheesecake filling over the crust layer in each jar, filling them about ¾ of the way full. Smooth the top with a spatula.
- Tip: Don’t worry if it’s not perfect—these are homemade treats, and a little rustic charm makes them even more endearing!
-
Chill Out:
- Place the jars in the refrigerator and let them chill for at least 2 hours before serving. This helps the flavors meld beautifully.
- Bonus Chef Insight: If you want to make them ahead of time, they can chill up to 24 hours in advance!
-
Serve with Flair:
- Just before serving, top your cheesecake jars with fresh berries or a drizzle of honey for a little extra sweetness and visual appeal.
- Plating Tip: A sprig of mint on top adds a refreshing essence and a pop of color!
Serving Suggestions
These Protein Vanilla Bean Cheesecake Jars are not just delicious; they also look stunning when served! Layered in clear jars, they make for a beautiful dessert presentation. If you’re hosting, consider serving them on a wooden board alongside some fresh fruit, or arrange them on a dessert table with candles for a cozy evening vibe. They also work wonderfully as portioned snacks for meal prep—just grab one from the fridge whenever you need a protein-packed treat on the go!
Recipe Variations
Feeling adventurous? Here are some fun variations to switch things up:
-
Chocolate Swirl: Fold in some cocoa powder or melted dark chocolate into the cheesecake filling for a rich, chocolatey experience.
-
Citrus Zest: Add some lemon or orange zest to the filling for a refreshing twist that complements the vanilla beautifully.
-
Nutty Delight: Swirl in almond or hazelnut butter for a nutty flavor that packs an extra protein punch.
-
Spiced Up: Add a pinch of cinnamon or nutmeg to give it a warm, cozy flavor that’s perfect for fall.
-
Fruit-Infused: Puree berries or mango and layer it between the crust and cheesecake filling for a fruity surprise!
Chef’s Notes
It’s funny how one recipe can evolve over the years. I started making cheesecake jars as a simple way to enjoy my grandma’s classic dessert without the hassle of baking. Over the years, I’ve added my own spin with protein powder and a Greek yogurt twist. I love how versatile this recipe is—it’s deep-rooted in family tradition yet customized to fit modern healthy lifestyles. And let me tell you, getting creative with toppings is always a fun kitchen adventure!
FAQs and Troubleshooting
-
Can I use a different sweetener?
- Absolutely! Feel free to swap in your favorite sweetener, like agave or a sugar alternative like Stevia or erythritol. Just adjust to taste!
-
Why is my cheesecake filling lumpy?
- This usually happens if the cream cheese wasn’t softened enough. Make sure it’s at room temperature before mixing! If this occurs, you can blend it longer to smooth it out.
-
How long do these last in the fridge?
- These jars can last up to 5 days in the fridge, so they’re great for meal prep! Just keep the lids on tight to maintain freshness.
-
Can I freeze these jars?
- Yes, you can freeze the filling (without the crust) in airtight containers for up to a month. When you’re ready to enjoy, thaw in the fridge overnight and then layer with freshly made crust.
With this Protein Vanilla Bean Cheesecake Jar recipe, you’ll enjoy a delicious and healthy treat that speaks of cozy memories and warm gatherings. I can’t wait to hear how you put your own spin on it, so be sure to tag me in your creations or share your kitchen stories! Happy cooking!
Print
Protein Vanilla Bean Cheesecake Jar
- Total Time: 120 minutes
- Yield: 4 servings 1x
- Diet: Healthy
Description
A delightful and healthy twist on classic cheesecake, layered beautifully in jars with creamy indulgence and protein-packed goodness.
Ingredients
- 1 cup graham cracker crumbs
- 4 tablespoons unsalted butter, melted
- 8 ounces cream cheese, softened
- 1 cup Greek yogurt
- 1 scoop vanilla-flavored protein powder
- 1 tablespoon vanilla bean paste or extract
- Sweetener to taste (honey, maple syrup, or sugar substitute)
- Fresh berries (optional)
Instructions
- Combine graham cracker crumbs and melted butter in a medium bowl until they resemble wet sand.
- Scoop about 2 tablespoons of the mixture into the bottom of each jar, pressing down firmly.
- Beat together cream cheese and Greek yogurt in a large bowl until smooth.
- Add protein powder, vanilla bean paste, and sweetener, mixing until fully combined.
- Spoon the cheesecake filling over the crust in each jar, filling about ¾ full.
- Chill in the refrigerator for at least 2 hours before serving.
- Top with fresh berries or a drizzle of honey just before serving.
Notes
These jars can last up to 5 days in the fridge and can be frozen (without crust) for up to a month.
- Prep Time: 15 minutes
- Cook Time: 0 minutes
- Category: Dessert
- Method: No-Bake
- Cuisine: American
Nutrition
- Serving Size: 1 jar
- Calories: 280
- Sugar: 10g
- Sodium: 200mg
- Fat: 14g
- Saturated Fat: 8g
- Unsaturated Fat: 6g
- Trans Fat: 0g
- Carbohydrates: 30g
- Fiber: 1g
- Protein: 12g
- Cholesterol: 30mg
Keywords: cheesecake, dessert, protein, healthy, no-bake
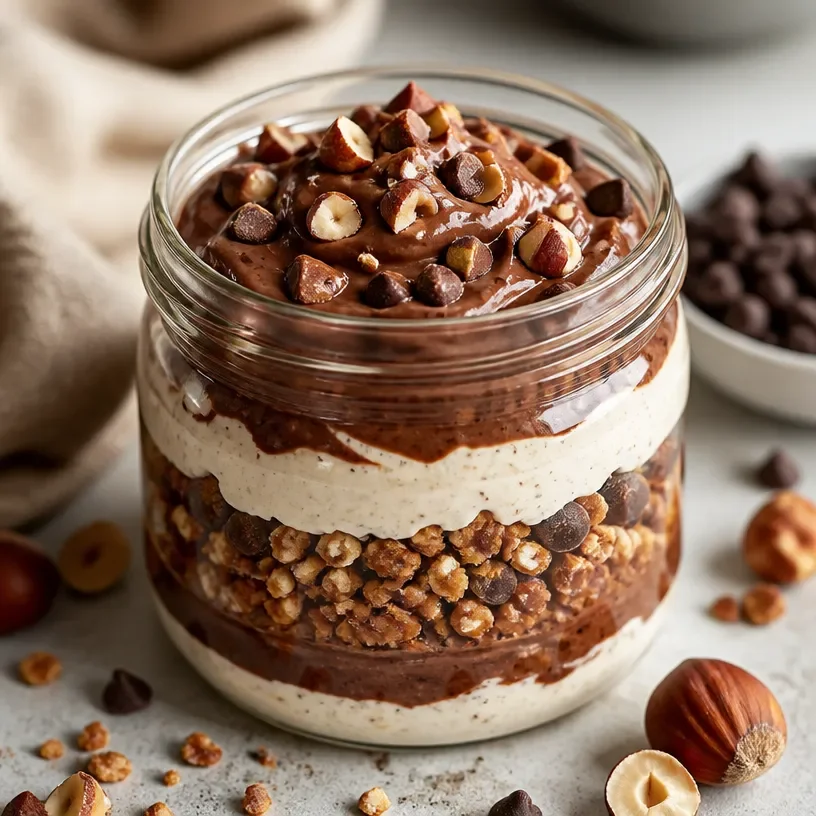
Protein Hazelnut Chocolate Jar: 5-Min No-Bake Snack
The Ultimate Protein Chocolate Hazelnut Jar: A Decadent Delight!
Welcome to my kitchen, fellow food lovers! Today, we’re diving into the world of indulgence with a nutritious twist. If the mere mention of "chocolate" makes your heart race and your taste buds tingle, you’re in just the right spot. I’m Olivia Bennett, and I’m on a mission to unwrap the magic of homemade delights — the ones that bring warmth, comfort, and joy to every bite.
What’s even better? This fabulous recipe is not just a tasty treat; it’s a guilt-free pleasure that packs a protein punch! We’re putting a delightful spin on your favorite spreads with my Protein Chocolate Hazelnut Jar. Imagine the creaminess of hazelnuts merging with chocolatey goodness — all while fueling your day with nutritious ingredients. Whether you’re dolloping it on toast, stirring it into your morning oatmeal, or just grabbing a spoon and indulging straight from the jar, this recipe is about to become your new best friend in the kitchen.
A Bite of Nostalgia
Let me take you back to my childhood for a moment. I remember my grandma’s kitchen on a rainy Saturday afternoon. The sweet scent of vanilla wafted through the air as I would anxiously wait for her daily treat. One of our staples? A homemade chocolate hazelnut spread that was just heavenly! It was rich, creamy, and I could never resist sneaking spoonfuls when Grandma wasn’t looking. Those afternoons were filled with laughter, love, and of course, the sweetest moments shared over a jar of goodness.
As I grew older and began my own culinary journey, the memory of that spread inspired me to create something similar but with a modern twist. Enter my Protein Chocolate Hazelnut Jar: a childhood favorite reimagined with a nutritious twist that fits into today’s health-conscious lifestyle. It brings back that warmth and all those cozy memories while keeping up with our modern food philosophies.
Let’s jump in and create some deliciousness together!
Ingredients
Here’s what you’ll need to whip up your very own Protein Chocolate Hazelnut Jar. Each ingredient plays an essential role in creating that dreamy texture and flavor you crave.
-
Roasted Hazelnuts (1 cup)
These nuts offer a nutty flavor and a creamy base for our spread. If you don’t have hazelnuts, feel free to swap with macadamias or almonds — just adjust the flavor profile accordingly! -
Cocoa Powder (1/4 cup)
This is where the chocolatey magic happens! Look for unsweetened cocoa powder for the best result. If you prefer a sweeter mix, incorporate some dark chocolate chips in place of a bit of cocoa powder. -
Maple Syrup (1/3 cup)
This natural sweetener adds depth and a hint of caramel flavor. If you want to keep it sugar-free, consider using agave nectar or a sugar-free substitute like stevia. -
Protein Powder (1/2 cup)
Choose your favorite flavor — chocolate or vanilla both work like a charm. If you’re vegan or lactose intolerant, look for plant-based protein powder. -
Vanilla Extract (1 tsp)
A dash of pure vanilla extract enhances all the flavors and gives it that homemade touch. If you’re in a pinch, you can use vanilla essence. -
Nut Milk (1/4 cup)
This helps blend everything together smoothly. Almond milk or oat milk are great options, but you can use any nut milk you have at home! -
Pinch of Salt
A little salt enhances the sweetness and balances flavors beautifully. Don’t skip it!
Step-by-Step Instructions
Let’s get those hands busy! We’re about to transform these simple ingredients into a heavenly spread in just a few easy steps.
-
Preheat Your Oven (if necessary)
If your hazelnuts aren’t roasted and you have raw ones, preheat your oven to 350°F (175°C). Spread the hazelnuts in a single layer on a baking sheet and roast for about 10-12 minutes, or until they’re golden and fragrant. Keep an eye on them; you want them perfectly roasted, not burnt! -
Blend the Hazelnuts
Once cooled, transfer the hazelnuts to a high-speed blender or food processor. Blend on high until they begin to break down and turn into a nut butter, scraping down the sides as needed. This process takes about 3-5 minutes. Don’t rush; the creaminess comes with patience! -
Add the Cocoa Powder and Protein Powder
Now it’s time to add the cocoa powder and protein powder! Blend again until well combined. If the mixture looks a bit dry, don’t worry — we’ll add moisture soon! -
Sweeten it Up
Pour in the maple syrup and vanilla extract. Then, add your nut milk one tablespoon at a time. Blend until the mixture reaches your desired consistency. If it’s too thick, add another splash of milk! I always find the consistency is just right when it’s thick yet spreadable — perfect for dolloping on toast. -
Season to Perfection
Sprinkle in a pinch of salt and blend one last time to combine all the elements. Taste it — yes, it’s okay to sample! Adjust sweetener or cocoa to your liking. -
Jar it Up
Transfer your blissful spread into a clean jar. Store it in the fridge for up to two weeks (if it lasts that long!). Enjoy the rich, nutty, chocolatey goodness every day!
Serving Suggestions
Serving your Protein Chocolate Hazelnut Jar is just as delightful as making it. Slather it on whole grain toast for a satisfying breakfast, stir it into your morning smoothie for a protein boost, or top off a bowl of oatmeal for a genuinely luxurious start to your day. For a more indulgent dessert, use it as a dip for fresh fruits like strawberries or apple slices. The options are endless, and each one is a cozy celebration of flavor!
Recipe Variations
Don’t be afraid to get creative! Here are a few fun variations to give your Protein Chocolate Hazelnut Jar an exciting twist:
- Mocha Delight: Mix in a teaspoon of instant coffee for a coffee-infused flavor.
- Spiced Treat: Add a pinch of cinnamon or nutmeg for a warm spiced kick.
- Nutty Crunch: Fold in chopped nuts or cacao nibs after blending for added texture.
- Fruit Fusion: Stir in a tablespoon of pureed fruit like banana or raspberry for a fruity version.
Chef’s Notes
This recipe has come a long way since I first started experimenting in the kitchen! At first, I simply blended hazelnuts with cocoa and sugar, but it wasn’t until I added protein powder and natural sweeteners that I found the right balance. Fun fact: one time, I added too much cocoa and ended up with a chocolate brick — quite the lesson in moderation!
As I continue to refine this recipe over time, I’ve discovered that each batch has its unique personality. So, don’t hesitate! Make this your own and enjoy the journey!
FAQs and Troubleshooting
-
Why is my spread too thick?
If your spread is too thick, simply add more nut milk, one tablespoon at a time, until you reach your desired consistency. -
Can I use other nuts?
Absolutely! While hazelnuts are classic, feel free to experiment with almonds, walnuts, or even cashews. Each nut will yield a slightly different flavor profile. -
Is it okay to sweeten with something else?
Yes! If maple syrup isn’t your thing, you can opt for honey, agave, or your preferred sweetener. Just remember to adjust the liquid content accordingly! -
How long will it stay fresh?
This spread will stay delicious in the fridge for up to two weeks — but I doubt it will last that long in your house!
Nutritional Info
This Protein Chocolate Hazelnut Jar can be packed with nutrients, providing you with healthy fats, protein, and a bit of sweetness. Depending on the exact ingredients and proportions you use, a standard serving (2 tablespoons) contains approximately:
- Calories: 180
- Protein: 7g
- Fat: 13g
- Carbohydrates: 12g
- Fiber: 2g
Wrap-Up
And there you have it — your very own Protein Chocolate Hazelnut Jar, full of cozy flavors and bursting with nutrients. It’s the perfect blend of indulgence and health, bringing the best of both worlds into your kitchen and onto your table. Whether you’re treating yourself or sharing with loved ones, every spoonful is a reminder that delicious homemade food brings us together.
Now, gather your ingredients and let the magic unfold! Remember that cooking is all about having fun. Feel free to make this recipe uniquely yours, and don’t forget to share your creations with me. Happy cooking, friends! 🍫💚
Print
Protein Chocolate Hazelnut Jar
- Total Time: 22 minutes
- Yield: 12 servings 1x
- Diet: Vegetarian
Description
A nutritious twist on your favorite chocolate hazelnut spread, packed with protein and creamy goodness.
Ingredients
- 1 cup Roasted Hazelnuts
- 1/4 cup Cocoa Powder
- 1/3 cup Maple Syrup
- 1/2 cup Protein Powder
- 1 tsp Vanilla Extract
- 1/4 cup Nut Milk
- Pinch of Salt
Instructions
- Preheat your oven to 350°F (175°C) if using raw hazelnuts. Roast for about 10-12 minutes.
- Blend the cooled hazelnuts in a high-speed blender until nut butter forms, about 3-5 minutes.
- Add cocoa powder and protein powder; blend until combined.
- Pour in maple syrup and vanilla extract, then add nut milk a tablespoon at a time until desired consistency is reached.
- Season with a pinch of salt and blend one last time.
- Transfer the mixture into a clean jar and store in the fridge for up to two weeks.
Notes
Feel free to substitute hazelnuts with other nuts or adjust the sweetener to your preference.
- Prep Time: 10 minutes
- Cook Time: 12 minutes
- Category: Spread
- Method: Blending
- Cuisine: American
Nutrition
- Serving Size: 2 tablespoons
- Calories: 180
- Sugar: 8g
- Sodium: 0mg
- Fat: 13g
- Saturated Fat: 1g
- Unsaturated Fat: 12g
- Trans Fat: 0g
- Carbohydrates: 12g
- Fiber: 2g
- Protein: 7g
- Cholesterol: 0mg
Keywords: protein spread, chocolate hazelnut, healthy snacks, homemade spread, nut-based spread




