
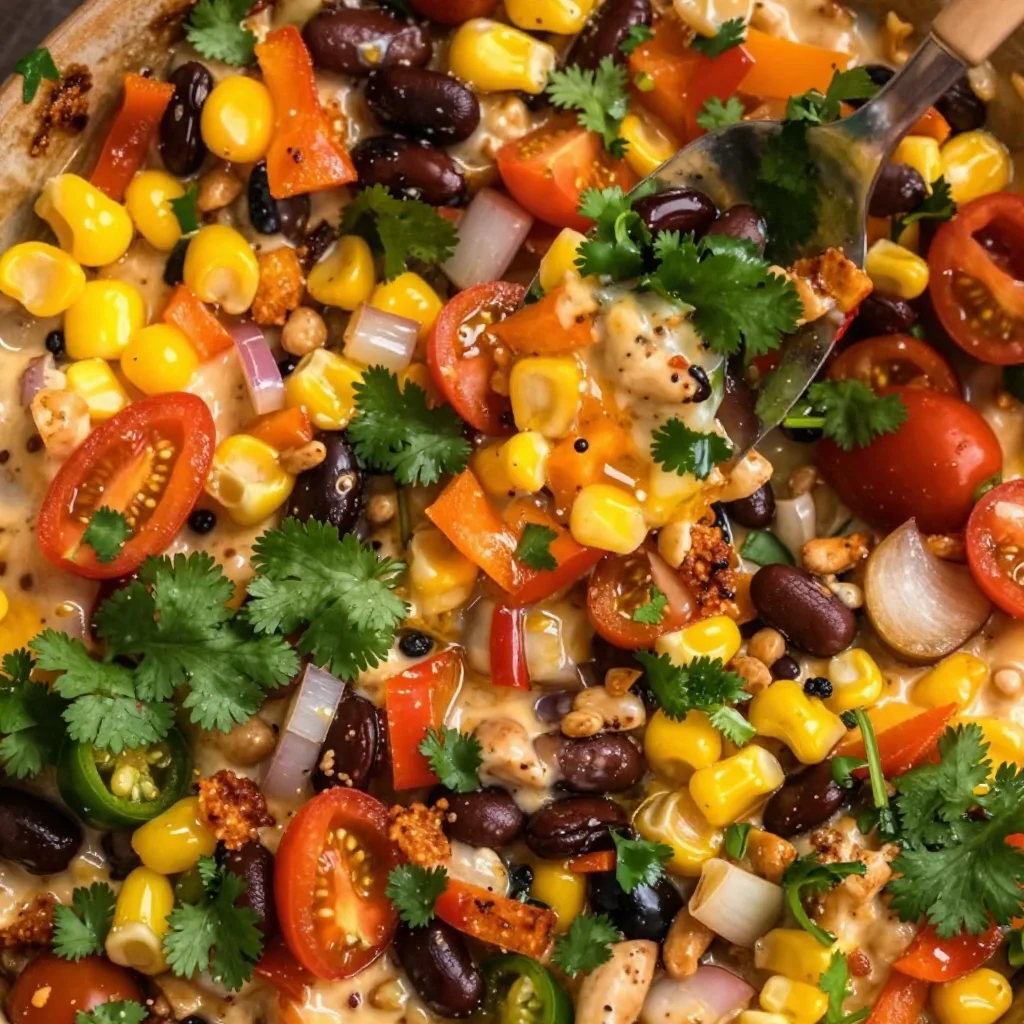
Minute Cowboy Caviar: Fresh, Tangy Bean Dip for Summer
Easy Cowboy Caviar: A Flavorful Fiesta in a Bowl!
Welcome to my kitchen! I’m Olivia Bennett, and today I’m excited to share a scrumptious dish that will make your taste buds dance: Easy Cowboy Caviar! If you’re anything like me, you find pure joy in colorful, fresh ingredients coming together to create something fabulous. This dish is not just a regular salsa; it’s a vibrant party in a bowl, bursting with flavor and perfect for any occasion.
Cowboy Caviar is like a Texan roots-inspired guacamole, often served as a dip but versatile enough to be enjoyed as a salad or side dish. Picture this: a colorful mix of black beans, corn, peppers, tomatoes, and a zesty dressing that tantalizes your palate. It’s a crowd-pleaser that’s quick to whip up, making it ideal for everything from game day snacking to backyard barbecues to casual dinners at home. Plus, it’s a fantastic option if you want something healthy yet hearty. Trust me; once you’ve had a taste, you’ll be coming back for seconds (or thirds).
But before we dive into the recipe, let me set the scene for you. Picture me in my cozy kitchen, with sunlight streaming through the window, fresh produce spread out on the counter, and the anticipation of good food filling the air. This isn’t just cooking; it’s an experience filled with laughter, stories, and moments to cherish. Are you ready to join the fun? Let’s get started on making your new favorite appetizer!
A Slice of Nostalgia
Let me take you back to one of my fondest culinary memories. Growing up, my family had a tradition of hosting summer barbecues. My aunt Clara was the ultimate entertainer, and her Cowboy Caviar was the star of the show. She’d set out a giant bowl of it on the picnic table, and we’d all gather around, plates in hand, ready to dive in. The vibrant colors of the black beans, tomatoes, and bell peppers were not only a feast for the eyes but also for the taste buds.
I remember the mouthwatering smell of the lime and cilantro dressing as I helped her toss it all together. Aunt Clara always encouraged me to add my own twist, and together we experimented with different ingredients, like adding diced avocado or a sprinkle of feta cheese. Those delicious bites were accompanied by hours of laughter, games, and the sweet sound of our family coming together. Every scoop of that Cowboy Caviar brought us closer, creating memories that still warm my heart today.
And so, as I share this recipe with you, my hope is that it becomes a cherished addition to your kitchen, bringing your loved ones together, just like it did for me and my family.
Ingredients
Here’s what you need to whip up this delightful Cowboy Caviar:
-
1 can black beans, drained and rinsed
Black beans are a fantastic source of protein and fiber. If you’re looking for a different flavor, feel free to substitute with chickpeas or pinto beans. -
1 can sweet corn, drained
The sweetness of corn balances the dish beautifully. You can also use fresh corn on the cob if it’s in season—just grill or boil it first! -
1 cup cherry tomatoes, halved
Cherry tomatoes add bursty sweetness. If you don’t have them, any diced tomatoes will work, but fresh is best! -
1 red bell pepper, diced
This adds crunch and a sweet flavor. You could swap in yellow or orange bell peppers for a different twist! -
1 green bell pepper, diced
The green bell pepper adds freshness. You could also use jalapeños if you want a spicy kick. -
1/2 red onion, finely chopped
Onions provide depth of flavor. If you’re sensitive to raw onions, soak them in cold water for 10 minutes before adding them to reduce their bite. -
1/4 cup fresh cilantro, chopped
Cilantro adds a fresh, herbal note. If you’re not a fan, try substituting with parsley or omitting it altogether. -
Juice of 2 limes
Lime juice brightens everything up. You can use lemon juice in a pinch, but it will change the flavor slightly. -
1 tablespoon olive oil
This adds richness and helps meld the flavors. You can swap for avocado oil if you prefer a neutral taste. -
1 teaspoon ground cumin
Cumin gives this dish an earthy depth. If you’re looking to switch things up, smoked paprika can bring a lovely smoky flavor. -
Salt and pepper to taste
Essential for enhancing the dish’s flavor! Use sea salt and freshly cracked black pepper for the best taste.
Step-by-Step Instructions
Now that we’ve gathered our ingredients, let’s get cooking! Here’s how to make your Cowboy Caviar step by step.
-
Prep the Veggies
Start by washing your fresh produce. It’s essential to have clean veggies! Drain and rinse the black beans and corn. I like to use a colander for this step — it’s an easy clean-up! -
Chop and Dice
Dice the bell peppers, cherry tomatoes, and red onion. Aim for uniform pieces so they’re visually appealing and easy to scoop up. If you’re feeling artistic, try cutting the vegetables in fun shapes (kids love this!). -
Combine Everything
In a large mixing bowl, toss together the black beans, corn, cherry tomatoes, red bell pepper, green bell pepper, red onion, and cilantro. Take a moment to enjoy the vibrant colors! -
Make the Dressing
In a small bowl, whisk together the lime juice, olive oil, ground cumin, salt, and pepper. This is where the magic happens! The tanginess of the lime and the warmth of the cumin will elevate all those fresh ingredients. -
Mix it All Together
Pour the dressing over the vegetable mixture and gently stir until everything is coated. I like to use a rubber spatula for this — it’s gentle but effective. -
Taste and Adjust
Here’s where you can put on your chef hat! Give it a taste and adjust seasoning if necessary. Sometimes, a little extra lime juice can make all the difference. -
Chill and Marinate
Cover the bowl with plastic wrap or a lid and let it chill in the fridge for at least 30 minutes. This allows the flavors to meld. If you can let it sit longer, even better! -
Serve and Enjoy
When you’re ready to serve, stir the Cowboy Caviar one last time and transfer it to a beautiful serving dish. Don’t forget the tort tortilla chips for dipping!
Serving Suggestions
To make your Cowboy Caviar stand out, consider serving it in a vibrant bowl that complements the colors of the dish. Use colorful tortilla chips, pita chips, or even fresh veggie sticks for dipping. Another delightful way to present it is over mixed greens for a refreshing salad. Drizzle some extra lime juice on top for an added zing!
Recipe Variations
Cowboy Caviar is incredibly versatile! Here are some creative twists you can try:
- Spicy Kick: Add diced jalapeños or a splash of hot sauce for heat.
- Creamy Avocado: Mash in some ripe avocado for a creamy texture.
- Zesty Citrus: Swap half of the lime juice for orange juice for a unique sweetness.
- Protein Boost: Toss in some diced grilled chicken or shrimp for a heartier meal.
- Herbal Remix: Experiment with different herbs like dill or basil for exciting flavor profiles.
Chef’s Notes
I love experimenting with this recipe! There have been times when I’ve found leftover ingredients from my fridge that I’ve tossed in, from black olives to diced mango. Never be afraid to get creative! One of the best parts of cooking is adapting and making a dish your own. Remember, my Cowboy Caviar recipe was inspired by Aunt Clara’s amazing version, and I’ve added my twists along the way. I encourage you to do the same!
Don’t forget to share your Cowboy Caviar stories with me! I love hearing how my recipes fit into your life and bring joy to your gatherings.
FAQs and Troubleshooting
Q1: Can I make Cowboy Caviar ahead of time?
Absolutely! It tastes even better after marinating overnight. Just be sure to store it in an airtight container in the fridge.
Q2: How long will it last in the fridge?
If stored properly, it should last for 3-5 days. Just make sure to give it a good stir before you serve it again.
Q3: Is it okay to use frozen corn and beans?
Yes, frozen corn works wonderfully! Just thaw it first. If using frozen beans, make sure they’re fully cooked.
Q4: What can I serve with Cowboy Caviar?
It pairs beautifully with grilled meats, on nachos, or in a burrito bowl. You can even elevate it by placing a scoop on top of tacos for an added crunch!
Nutritional Info
Here’s a rough breakdown of each serving (based on eight servings):
- Calories: 120
- Protein: 5g
- Carbohydrates: 24g
- Fat: 2g
- Fiber: 6g
- Sugar: 3g
Cowboy Caviar is not only delicious but packed with fiber and nutrients, making it a great addition to any meal!
And there you have it! A fabulous, vibrant dish that’s so easy to make and even easier to share. Now, roll up your sleeves, put on your favorite apron, and let’s get cooking! I can’t wait to hear how your Cowboy Caviar turns out, so don’t forget to share your creations with me. Happy cooking, friends!
Print
Easy Cowboy Caviar
- Total Time: 45 minutes
- Yield: 8 servings 1x
- Diet: Vegan
Description
A vibrant mix of black beans, corn, and fresh vegetables in a zesty dressing, perfect as a dip or a salad.
Ingredients
- 1 can black beans, drained and rinsed
- 1 can sweet corn, drained
- 1 cup cherry tomatoes, halved
- 1 red bell pepper, diced
- 1 green bell pepper, diced
- 1/2 red onion, finely chopped
- 1/4 cup fresh cilantro, chopped
- Juice of 2 limes
- 1 tablespoon olive oil
- 1 teaspoon ground cumin
- Salt and pepper to taste
Instructions
- Prep the Veggies: Start by washing your fresh produce. It’s essential to have clean veggies! Drain and rinse the black beans and corn.
- Chop and Dice: Dice the bell peppers, cherry tomatoes, and red onion into uniform pieces.
- Combine Everything: In a large mixing bowl, toss together the black beans, corn, cherry tomatoes, red bell pepper, green bell pepper, red onion, and cilantro.
- Make the Dressing: In a small bowl, whisk together the lime juice, olive oil, ground cumin, salt, and pepper.
- Mix it All Together: Pour the dressing over the vegetable mixture and gently stir until everything is coated.
- Taste and Adjust: Give it a taste and adjust seasoning if necessary.
- Chill and Marinate: Cover the bowl and let it chill in the fridge for at least 30 minutes.
- Serve and Enjoy: Stir the Cowboy Caviar and transfer it to a serving dish with tortilla chips.
Notes
Cowboy Caviar can be made ahead of time and tastes even better after marinating overnight.
- Prep Time: 15 minutes
- Cook Time: 0 minutes
- Category: Appetizer
- Method: Mixing
- Cuisine: Tex-Mex
Nutrition
- Serving Size: 1 serving
- Calories: 120
- Sugar: 3g
- Sodium: 200mg
- Fat: 2g
- Saturated Fat: 0g
- Unsaturated Fat: 2g
- Trans Fat: 0g
- Carbohydrates: 24g
- Fiber: 6g
- Protein: 5g
- Cholesterol: 0mg
Keywords: cowboy caviar, dip, salad, Tex-Mex, fresh vegetables, party food
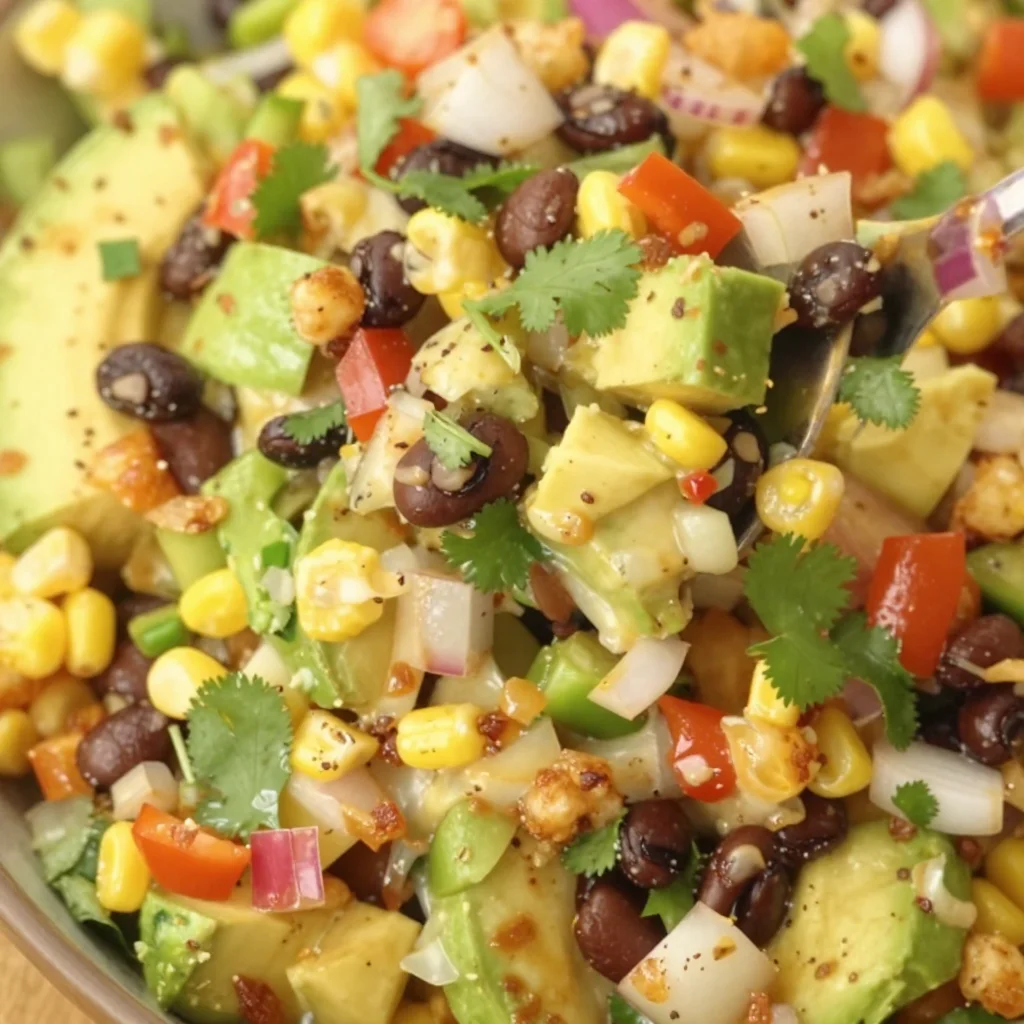
Cowboy Caviar
Whipping Up a Fiesta: Cowboy Caviar Recipe
Welcome to my cozy corner of the culinary world! I’m so thrilled you’re here. Today, we’re diving into a dish that brings a burst of color, flavor, and a whole lot of love into any gathering: Cowboy Caviar. This dish is a delightful salsa-like appetizer that captures the spirit of togetherness—perfect for summer barbecues, game day gatherings, or any casual get-together where laughter is shared over good food.
Picture this: it’s a warm summer evening, and the sun is setting, casting a golden hue across the party as people mingle. You’re standing near the snack table, a bowl of Cowboy Caviar in hand, scooping it with crispy tortilla chips. The vibrant colors of the tomatoes, bell peppers, and black beans mirror the happy faces around you. Everyone is laughing and chatting, enjoying the refreshing zing of lime and cilantro in the air. That’s the magic of Cowboy Caviar; it’s not just food; it’s a catalyst for connections, memories, and stories shared over a meal.
What I love about Cowboy Caviar is how versatile it is. You can tweak the ingredients based on what’s fresh or what tickles your taste buds. Plus, it’s not just a pretty face; it’s packed with protein and loads of vibrant veggies. It’s an easy, approachable dish that even the most novice cook can whip up without breaking a sweat. So grab your apron and let’s get cooking!
A Fond Memory with Cowboy Caviar
Let me take you back to a summer a few years ago when my friends and I decided to host a potluck picnic at the park. It was one of those magical days—sunshine, laughter, and the intoxicating smell of grass on hot pavement. Everyone was tasked with bringing something delicious. I had a plan: I was going to wow them with my version of Cowboy Caviar.
As I chopped fresh veggies, I was reminded of summers spent with my grandma in her kitchen, where we would prepare meals using whatever was in season. She always said, “Cooking is all about balance and love.” So, I made sure to add a little extra love and a zesty twist to my recipe that day.
When I arrived at the picnic, the vibrant bowl of Cowboy Caviar was a total showstopper—and it vanished within minutes! Friends were asking for the recipe, and I felt my heart swell with joy. That is the beauty of this dish; it’s simple, yet it holds the capacity to evoke such warm memories and spark connection. It’s not just food; it’s a celebration of life, friendship, and the joy of gathering around a table.
Ingredients
Here’s what you’ll need to create this colorful delight:
-
1 can black-eyed peas (drained and rinsed)
- These little legumes are the star of the dish! If you can’t find black-eyed peas, feel free to substitute with black beans or chickpeas.
-
1 can black beans (drained and rinsed)
- Rich in protein and fiber, black beans add a great texture. Super versatile: you can swap them out for kidney beans if you like.
-
1 can corn (drained)
- Sweet and crunchy, corn adds a refreshing pop. If you’re feeling adventurous, use fresh corn cut off the cob in peak season for even better flavor.
-
1 cup cherry tomatoes (halved)
- Juicy and flavorful, tomatoes are essential here. You can mix it up with heirloom tomatoes for a colorful twist!
-
1 bell pepper (any color, diced)
- Pick your favorite. Red, yellow, or green all bring their own vibe. They add a crispness and sweetness that complements the dish beautifully.
-
1 small red onion (finely chopped)
- This onion brings a bite that elevates the flavor profile. For a milder taste, consider using green onions.
-
1 avocado (diced)
- Creamy and rich, avocado adds a decadent twist. If you need a substitute, consider some diced mango for sweetness!
-
1-2 jalapeños (finely chopped)
- For a spicy kick! Make sure you adjust this based on your spice tolerance, and consider removing the seeds if you want to tone it down.
-
1/4 cup fresh cilantro (chopped)
- Fresh cilantro adds brightness. If you’re not a fan, parsley or basil can be a delightful alternative.
-
Juice of 2 limes
- Zesty and tangy, lime juice brings everything together. You can also use lemon juice in a pinch.
-
Salt and pepper (to taste)
- Always season to your liking! Remember, you can adjust the salt after everything is mixed.
Step-by-Step Instructions
Now that we have our colorful cast of ingredients, let’s get down to the nitty-gritty of making this Cowboy Caviar!
-
Prep Your Ingredients:
- Gather your fresh produce and start by washing everything thoroughly. A clean kitchen is a happy kitchen! Chop your cherry tomatoes in half, finely dice the red onion, and chop the bell pepper.
-
Can-Do Approach:
- Open your cans of black-eyed peas, black beans, and corn, then drain and rinse them well under cold water. This helps get rid of any excess sodium and preserves their freshness.
-
Mixing Bowl Time:
- Grab a large mixing bowl because it’s time for a colorful explosion! Toss in the black-eyed peas, black beans, corn, halved cherry tomatoes, diced bell pepper, and chopped red onion. My tip? Use a clear bowl to showcase all those gorgeous colors!
-
Adding Freshness:
- Now, let’s fold in the diced avocado and finely chopped jalapeños. Be gentle with the avocado so it doesn’t turn mushy—it should bring creaminess to the dish without becoming guacamole!
-
Cilantro and Lime Love:
- Add the chopped cilantro and squeeze the fresh lime juice over everything. This is where the magic happens! The lime not only brings brightness but also helps preserve the beautiful green color of the avocado.
-
Season to Perfection:
- Sprinkle in salt and pepper. Here’s a little chef hack: start with less and adjust according to your taste. Remember, you can always add more, but you can’t take it away!
-
Give It a Good Toss:
- With clean hands or a gentle spatula, give all those ingredients a good toss. You want everything to be evenly coated in that fresh lime juice and mixed well.
-
Chill Time:
- For best results, let your Cowboy Caviar chill in the fridge for at least 30 minutes, allowing all the flavors to meld together. Trust me; patience is key!
Serving Suggestions
When it comes time to serve, I love placing the Cowboy Caviar in a large, vibrant bowl to showcase its stunning colors. Set it in the center of the table with a platter of crispy tortilla chips surrounding it. If you’re feeling fancy, garnish with a few whole cilantro leaves or some extra lime wedges. Dive in and watch your guests swoon with delight!
Recipe Variations
Feeling adventurous? Here are some creative twists you can try:
- Tropical Twist: Add diced pineapple for a sweet, tangy flair.
- Tex-Mex Inferno: Amp up the heat with some diced habanero or a dash of hot sauce.
- Creamy Dreamy: Mix in some crumbled feta cheese for a savory bite.
- Chickpea Delight: Swap out black beans for chickpeas for a different texture.
- Herby Freshness: Add a sprinkle of fresh mint for an unexpected herbal note.
Chef’s Notes
This Cowboy Caviar recipe has a special place in my heart. Evolving over the years, I’ve played around with various ingredients and flavors. I once even threw in some roasted corn and bacon bits for a smoky twist, which was an undeniable hit at a family BBQ! One time, I forgot the lime and ended up rushing to the grocery store, only to discover that sometimes a bit of spontaneity leads to a breakthrough dish. Food is about experimentation and evolving—so don’t be afraid to make it your own!
FAQs and Troubleshooting
1. My Cowboy Caviar is too bland. What did I do wrong?
Not to worry! Cowboy Caviar loves seasonings. Try adding more lime juice, salt, or even a pinch of cumin for extra flavor. Don’t shy away from tasting as you go!
2. My avocado turned brown. How can I prevent this?
To keep your avocado vibrant, make sure to coat it in lime juice right after cutting. The acid helps slow down the browning process.
3. What if I can’t find fresh ingredients?
No problem at all! Canned veggies work great. Just be aware of excess sodium; always rinse them well.
4. Can I make this ahead of time?
Absolutely! Cowboy Caviar actually tastes better after a day in the fridge as the flavors meld together. Just leave the avocado out until you’re ready to serve it for best freshness.
Nutritional Info
While Cowboy Caviar brings joy and connection, it also packs a nutritional punch! Each serving is loaded with healthy proteins, fiber from the beans, and vitamins from the fresh veggies. It’s a guilt-free, feel-good dish that you can indulge in without hesitation.
I hope you find this Cowboy Caviar recipe as enjoyable to make as it is to eat! Gather your loved ones, whip up a batch, and watch as it becomes the star of your next gathering. Cooking is not just about the food; it’s about creating moments that linger long after you’ve finished your meal. Happy cooking! 🍽️✨
Print
Cowboy Caviar
- Total Time: 45
- Yield: 4 servings 1x
- Diet: Vegetarian
Description
A vibrant and flavorful salsa-like appetizer perfect for gatherings, packed with protein and fresh veggies.
Ingredients
- 1 can black-eyed peas (drained and rinsed)
- 1 can black beans (drained and rinsed)
- 1 can corn (drained)
- 1 cup cherry tomatoes (halved)
- 1 bell pepper (diced)
- 1 small red onion (finely chopped)
- 1 avocado (diced)
- 1–2 jalapeños (finely chopped)
- 1/4 cup fresh cilantro (chopped)
- Juice of 2 limes
- Salt and pepper (to taste)
Instructions
- Prep your ingredients: Wash thoroughly, chop tomatoes, finely dice onion, and chop the bell pepper.
- Open cans of black-eyed peas, black beans, and corn; drain and rinse well.
- Toss in a large mixing bowl the black-eyed peas, black beans, corn, cherry tomatoes, bell pepper, and red onion.
- Fold in diced avocado and jalapeños gently.
- Add chopped cilantro and squeeze lime juice over everything.
- Sprinkle with salt and pepper, adjusting to taste.
- Toss gently to combine all ingredients.
- Chill in the fridge for at least 30 minutes before serving.
Notes
For best flavor, let the Cowboy Caviar chill and the flavors meld together before serving.
- Prep Time: 15
- Category: Appetizer
- Method: Mixing
- Cuisine: Tex-Mex
Nutrition
- Serving Size: 1 serving
- Calories: 210
- Sugar: 5g
- Sodium: 230mg
- Fat: 9g
- Saturated Fat: 1.5g
- Unsaturated Fat: 7g
- Trans Fat: 0g
- Carbohydrates: 38g
- Fiber: 10g
- Protein: 8g
- Cholesterol: 0mg
Keywords: Cowboy Caviar, appetizer, healthy salsa, summer recipe, party food
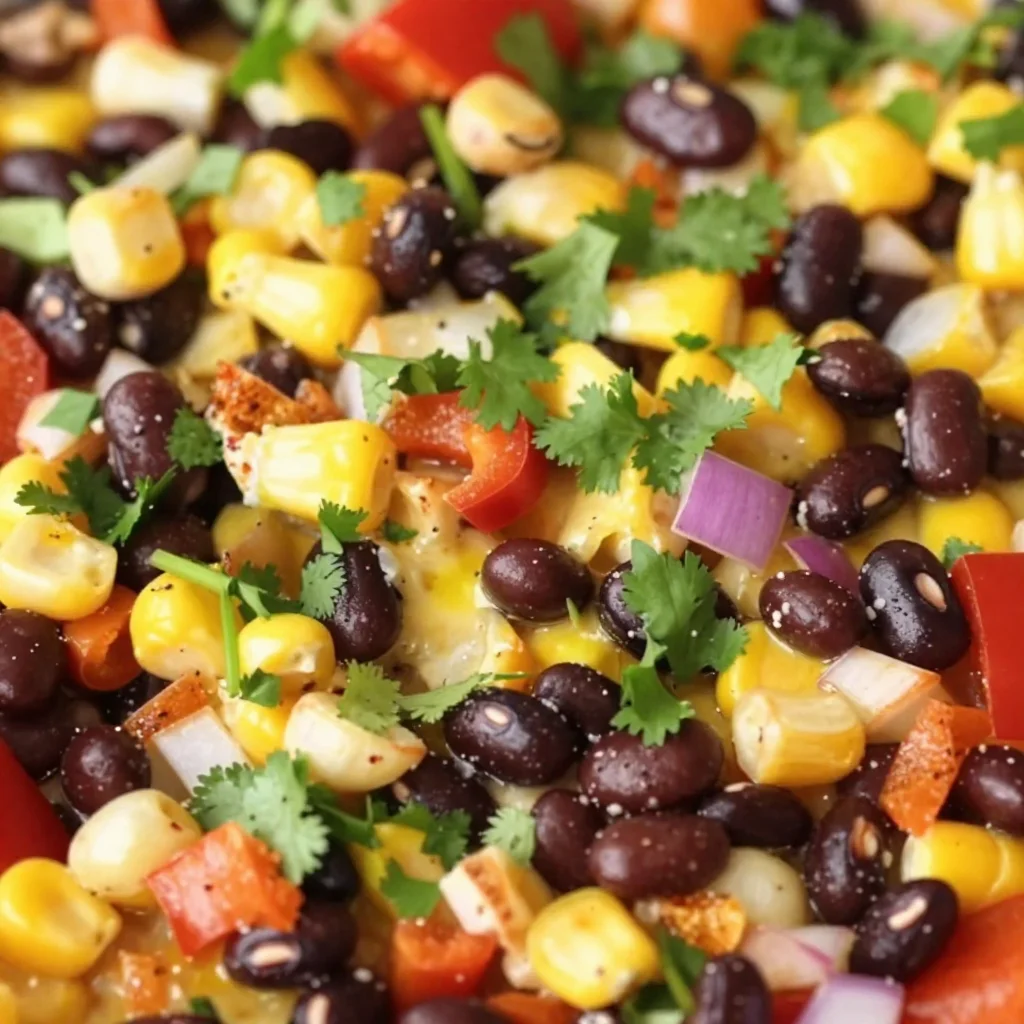
Minute Cowboy Caviar Dip: Fresh, Healthy, Budget-Friendly
Delicious Cowboy Caviar Recipe for a Fresh and Healthy Dip
Welcome to my kitchen! I’m so glad you’re here with me today. If you haven’t experienced Cowboy Caviar yet, you’re in for a treat! This vibrant, colorful dish is not just a dip; it’s an explosion of flavors, textures, and pure joy. Perfect for everything from casual family gatherings to lively dinner parties, Cowboy Caviar brings a splash of excitement to your table and your taste buds. With fresh veggies, hearty beans, and zesty dressing, it’s the perfect balance of healthiness and deliciousness.
In my home, Cowboy Caviar is more than just an appetizer; it’s a hearty tradition. As a kid, I remember my family gathering around the kitchen counter, everyone excitedly reaching for chips and grabbing this delightful dip. It was a ritual, a way to bring us together and kick off any celebration. We would laugh, swap stories, and savor each crunchy bite, making memories that would last a lifetime. Now, I create this dish not just to nourish bodies, but to nourish the soul, connecting friends and family through the love of good food.
Personal Story
When I first made Cowboy Caviar, I was experimenting in the kitchen one summer afternoon, trying to find a dish that my picky little brother would enjoy. I rummaged through the garden, gathering fresh vegetables like sweet bell peppers, juicy tomatoes, and vibrant corn, and then I stumbled upon a can of black beans in the pantry. A lightbulb moment! I tossed everything together with a zesty dressing I whipped up with a bit of lime juice and olive oil, and to my surprise, my brother couldn’t get enough of it.
We spent that afternoon munching on tortilla chips and chatting while the sun dipped low in the sky. Cowboy Caviar quickly became a family favorite at our weekend gatherings, and I learned early on that food is magic—it can bring people together, spark laughter, and create wonderful moments. Now, every time I make it, I’m reminded of those sun-soaked summer days, the happiness of simple pleasures, and how a bowl of colorful goodness can brighten any day.
Ingredients
Here’s what you’ll need for this delightful Cowboy Caviar. Get ready for a fresh and vibrant mix!
- 1 can of black beans: Rinsed and drained. They add protein and a creamy texture. If you’re avoiding canned goods, feel free to use cooked black beans from dried ones.
- 1 can of sweet corn: Rinsed and drained. This adds natural sweetness and crunch! Fresh corn off the cob in peak season makes it even better!
- 1 cup of cherry tomatoes: Halved or diced. They bring a burst of juiciness and color. If cherry tomatoes aren’t available, you can substitute with greenhouse-grown or any ripe tomatoes.
- 1 small red onion: Finely diced. It adds sharpness and depth of flavor. If red onion is too pungent for you, try using green onions instead!
- 1 bell pepper (any color): Diced. Sweet and crunchy, it adds a delightful snap. Feel free to use yellow, green, or orange if red isn’t your thing.
- 1 jalapeño pepper: Seeds removed and diced (optional, for heat). This adds a spicy kick! If you’re looking to keep it mild, leave it out or use a dash of hot sauce instead.
- 1/2 cup of fresh cilantro: Chopped. It adds herbaceous brightness. If you’re not a cilantro fan, try fresh parsley or omit it altogether.
- Juice of 2 limes: Freshly squeezed. This adds acidity and brightness. In a pinch, lemon juice can substitute if limes are unavailable.
- 1/4 cup of extra virgin olive oil: For richness. A light drizzle of avocado oil can also work beautifully here!
- Salt and pepper: To taste. Essential for enhancing all of those vibrant flavors!
Step-by-Step Instructions
Ready to dive in? Here’s how to put this Cowboy Caviar together and make your kitchen sing with flavor!
-
Prep Your Ingredients: Start by gathering all your ingredients. This makes the cooking process a breeze! Rinse your black beans, drain the sweet corn, and chop the veggies as indicated. A well-stocked, organized kitchen sets the stage for success!
-
Mix the Veggies: In a large mixing bowl, combine the black beans, sweet corn, cherry tomatoes, diced red onion, bell pepper, and jalapeño. This colorful medley is not only visually appealing but also brings a wide array of flavors and textures to your dish.
-
Add Fresh Herbs: Toss in the freshly chopped cilantro (or your chosen substitute). The aroma of fresh herbs will transport you to a sunny garden. Stir everything gently to combine so you don’t mash those beautiful ingredients!
-
Make the Dressing: In a separate bowl (or mason jar, my favorite for easy cleanup!), whisk together the lime juice, olive oil, salt, and pepper. This zesty dressing is the magic that brings everything together! If you want an extra layer of flavor, try adding a pinch of cumin or a dash of hot sauce.
-
Combine and Marinate: Pour the dressing over the veggie mix, then gently fold everything together with a spatula. Here’s the fun part: for optimum flavor, let your Cowboy Caviar rest for at least 30 minutes in the fridge! This allows all the flavors to mingle and create that quintessential taste we all love.
-
Taste and Adjust: Once it’s had a chance to marinate, give your dip a taste! You might want to add an extra pinch of salt, a splash more lime juice, or a touch more olive oil, depending on your preferences. Adjusting flavors is key to personalizing your dish.
-
Time to Serve: Once you’re happy with the flavors, serve it up! You can put your Cowboy Caviar in a beautiful bowl and top it off with an extra sprinkle of chopped cilantro or diced tomatoes for a pop of color. Get those tortilla chips ready!
Serving Suggestions
The beauty of Cowboy Caviar is that it’s as versatile as it is delicious. Serve it as a dip with crispy corn tortilla chips for a classic choice, or pair it with pita bread for a twist. It also makes a fantastic topping for grilled chicken or fish, a filling for tacos, or even a salad addition. The possibilities are endless, and each bite is a celebration of freshness.
Recipe Variations
Here are some fun twists you can try with your Cowboy Caviar:
- Southwestern Twist: Add in diced avocado for a creamy texture that pairs perfectly with the zest of lime.
- Tropical Delight: Toss in diced mango or pineapple for a tropical flair.
- Spicy Kick: Add more jalapeños or a splash of your favorite hot sauce if you’re craving heat.
- Cheesy Goodness: Stir in some crumbled feta or cotija cheese for a salty component that elevates the dip.
- Vegan Protein Power: Swap black beans for chickpeas or lentils for a completely different take on this classic dish.
Chef’s Notes
Cowboy Caviar is known for its adaptability, which is one of my favorite aspects! Over the years, I’ve tailored the recipe to accommodate the seasons and what I have on hand. From fresh summer produce to hearty fall vegetables, the base recipe holds strong while welcoming changes with open arms.
And oh, let me tell you about the time I brought Cowboy Caviar to a potluck. It was devoured before I had a chance to grab a bite, and my friends were raving about it all night long. It was such a compliment to see everyone enjoying something I created with love. This dish has a magical quality; it never fails to leave people smiling!
FAQs and Troubleshooting
-
Can I make Cowboy Caviar ahead of time?
Absolutely! It’s actually best when it’s allowed to marinate for a few hours or even overnight. Just hold off on adding avocado until serving to prevent browning. -
What can I substitute for black beans?
You can easily switch black beans for pinto beans, chickpeas, or even white beans for a unique taste. -
How long will Cowboy Caviar last in the fridge?
Generally, it can stay fresh for up to 4 to 5 days in an airtight container. If you notice any ingredients wilting, simply scoop them out, and enjoy the remaining dip! -
Is Cowboy Caviar spicy?
The heat level depends on how much jalapeño you use. You can adjust this to taste, or completely omit it for a milder dip. There’s no wrong way to enjoy Cowboy Caviar!
Nutritional Info
While specific nutritional information may vary, here’s a rough estimate per serving (about 1/2 cup):
- Calories: 120
- Protein: 6g
- Fat: 6g
- Carbohydrates: 14g
- Fiber: 5g
- Sugar: 2g
Ready to whip up your own Cowboy Caviar? Gather your ingredients, let the flavors mingle, and get ready to share this delicious dip with your loved ones. It’s simple, fresh, and absolutely delightful—just the way food should be! Happy cooking!
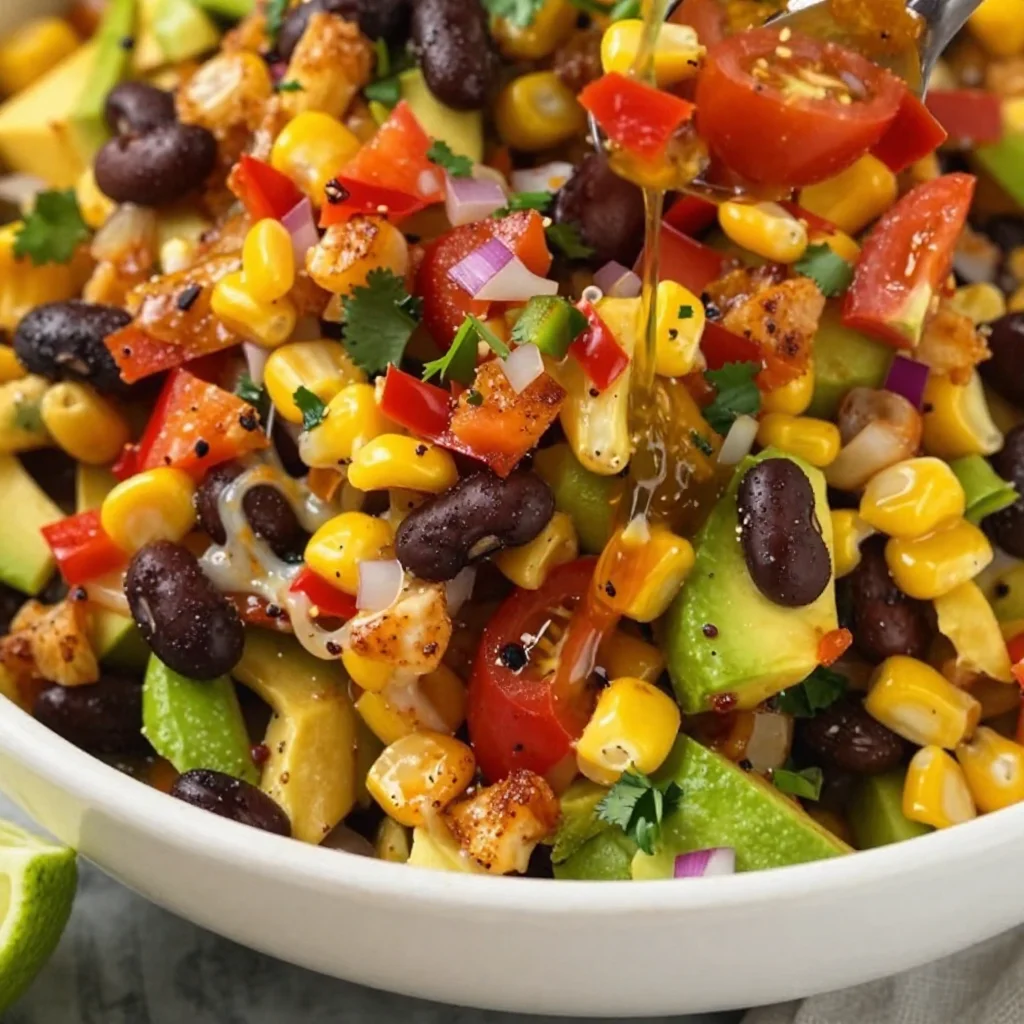
Print
Cowboy Caviar
- Total Time: 30 minutes
- Yield: 4 servings 1x
- Diet: Vegan
Description
A vibrant and healthy dip made with black beans, corn, and fresh veggies, perfect for gatherings and celebrations.
Ingredients
- 1 can of black beans, rinsed and drained
- 1 can of sweet corn, rinsed and drained
- 1 cup of cherry tomatoes, halved or diced
- 1 small red onion, finely diced
- 1 bell pepper, diced
- 1 jalapeño pepper, seeds removed and diced (optional)
- 1/2 cup of fresh cilantro, chopped
- Juice of 2 limes, freshly squeezed
- 1/4 cup of extra virgin olive oil
- Salt and pepper, to taste
Instructions
- Prep your ingredients: Gather and prepare all the ingredients as instructed.
- Mix the veggies: In a large mixing bowl, combine the black beans, sweet corn, cherry tomatoes, diced red onion, bell pepper, and jalapeño.
- Add fresh herbs: Toss in the chopped cilantro and stir gently to combine.
- Make the dressing: Whisk together the lime juice, olive oil, salt, and pepper in a separate bowl.
- Combine and marinate: Pour the dressing over the veggie mix and fold gently. Let it rest in the fridge for at least 30 minutes.
- Taste and adjust: Sample the dip and adjust seasonings as desired.
- Serve: Enjoy the Cowboy Caviar with tortilla chips or as a side with your favorite dishes.
Notes
Best when allowed to marinate. Can be made ahead of time; hold off on adding avocado until serving to prevent browning.
- Prep Time: 15 minutes
- Cook Time: 0 minutes
- Category: Appetizer
- Method: Mixing
- Cuisine: Mexican
Nutrition
- Serving Size: 1/2 cup
- Calories: 120
- Sugar: 2g
- Sodium: 200mg
- Fat: 6g
- Saturated Fat: 1g
- Unsaturated Fat: 5g
- Trans Fat: 0g
- Carbohydrates: 14g
- Fiber: 5g
- Protein: 6g
- Cholesterol: 0mg
Keywords: Cowboy Caviar, dip, healthy appetizer, black beans, corn, salsa, fresh vegetables
Cowboy Caviar
Cowboy Caviar: A Flavorful Dish that Brings Everyone Together
Welcome to my kitchen, friends! Today, I’m thrilled to share a dish that’s as vibrant and delightful as a sunny afternoon in the great outdoors—Cowboy Caviar. This colorful, flavorful dip not only pops with freshness, but it also boasts the ability to bring people together, which is what cooking is all about, right? If you’ve never experienced Cowboy Caviar, prepare for your taste buds to do a happy dance!
Cowboy Caviar has its roots in Tex-Mex cuisine, traditionally served as a dip or salad, making it the perfect companion for gatherings, game days, or simply as a bright addition to your weeknight meals. Its ingredients are fresh, bold, and full of character—just like its namesake, the cowboy! Trust me, there’s something incredibly satisfying about tossing a bunch of colorful ingredients in a bowl and ending up with a dish that looks so good you almost don’t want to eat it. Almost!
But before we dive into the recipe, let’s take a little stroll down memory lane…
A Personal Story: Memories of Summer Parties
One of my fondest memories involving Cowboy Caviar goes back to my childhood summers spent at my grandparent’s farm in Texas. Each Saturday afternoon, my family would gather in the backyard for a potluck feast, celebrating the weekend. My grandma would whip out her big, old mixing bowl and proceed to create what she dubbed "Texas Salad," which was really Cowboy Caviar before it was even a trend.
The sight of those vibrant, diced ingredients being piled high sent my little heart racing. We would sprinkle tortilla chips around the serving dish and scoop up the colorful mixture, laughter filling the air as we reminisced over family stories. The combination of flavors—crunchy, zesty, and utterly refreshing—left everyone craving more. It was during those sunny days that I learned the true joy of sharing food, and that’s what I aim to evoke whenever I make Cowboy Caviar.
Now, let’s get cooking!
Ingredients
Here’s what you’ll need to make your own Cowboy Caviar:
-
1 can black beans
A pantry staple, black beans add protein and heartiness. You can substitute with pinto beans for a different flavor profile. -
1 can corn
Sweet, crisp corn brings a pop of sunshine. If you prefer fresh, use about 1.5 cups of grilled or boiled corn. -
1 red bell pepper
For sweetness and crunch. Feel free to use yellow or orange peppers for a sweeter twist! -
1 green bell pepper
Adds a fresh, herbaceous note. If you want to amp up the flavor, use jalapeños for a spicy kick instead. -
1/2 red onion
Provides a sharp bite. Soaking it in cold water for 10 minutes can tone down some of the pungency if you prefer a milder taste. -
1 avocado
Creaminess meets freshness here. If you’re looking for a lower-fat option, you can skip it, but I wouldn’t recommend it! -
1 cup cherry tomatoes
Juicy bursts of flavor! If they’re out of season, use canned diced tomatoes (drained) instead. -
1/4 cup fresh cilantro
This herb brings brightness and freshness. If you’re not a fan of cilantro, parsley is a great substitute! -
Juice of 2 limes
The acidity cuts through and ties all the flavors together. Lemon juice works in a pinch, but lime is ideal! -
1 teaspoon chili powder
This adds warmth without overwhelming heat. Adjust the seasoning to your liking—smoked paprika can also be an exciting alternative! -
Salt and pepper, to taste
Essential for rounding out flavors. Don’t skimp on the seasoning—it makes all the difference!
Step-by-Step Instructions
Step 1: Prep Your Ingredients
Start by rinsing and draining the black beans and corn to remove excess sodium. Peek in the pantry while you’re at it; this is a great way to get rid of canned goods nearing their expiry!
Chef Tip: If you’re using fresh corn, steam it for about 5-7 minutes until tender, then cool it down before adding.
Step 2: Dice and Chop
Chop your red and green bell peppers, red onion, and cherry tomatoes into similarly-sized pieces—this ensures visual appeal and an even flavor distribution.
Chef Hack: To easily dice an onion, cut it in half, peel the skin off, then slice it vertically and horizontally before chopping into small pieces. Just be careful not to cry too much!
Step 3: The Avocado Affair
Slice the avocado in half, remove the pit (carefully!), and scoop the flesh into the bowl. Gently chop it into chunks, but not too small; we want those creamy bits to stand out.
Tip: Squeeze a little lime juice on the avocado immediately after cutting to keep it from browning.
Step 4: Toss It All Together
In a big mixing bowl, combine your beans, corn, bell peppers, tomatoes, onions, and cilantro. Pour the lime juice over everything, followed by the chili powder, salt, and pepper.
Insider Tip: Always taste as you go. If it needs more lime or seasoning, add it before serving!
Step 5: Let It Marinate
Give your Cowboy Caviar a gentle toss until everything is combined, and let it sit for at least 15-20 minutes in the fridge. This gives the flavors time to meld together and really shine.
Quick Note: If you’re in a hurry, you can serve it immediately, but trust me—allowing it to marinate enhances the flavor.
Serving Suggestions
Serving Cowboy Caviar is party-ready! Use a large serving bowl and scoop the dip into smaller bowls surrounded by crisp tortilla chips. It’s visually stunning and will have your guests clamoring for the recipe! For a sharp contrast, you could also layer it in a mason jar for a delightful picnic or lunch-on-the-go option.
Recipe Variations
Looking to switch things up? Here are some creative twists:
-
Spicy Cowboy Caviar: Add diced jalapeños or a sprinkle of red pepper flakes for extra heat.
-
Tropical Twist: Incorporate diced mango or pineapple for a sweet and tangy finish.
-
Creamy Version: Mix in a dollop of Greek yogurt or sour cream for a richer texture.
-
Protein-Packed: Add grilled chicken or shrimp for a more substantial dish.
-
Vegan Delight: For a fully plant-based take, include hemp seeds or diced nuts for crunch and protein.
Chef’s Notes
Cowboy Caviar has become a staple in my kitchen. Over the years, I’ve taken liberties with ingredients, sometimes swapping the beans or adding seasonal veggies. One particularly funny experience was attempting to impress friends by adding a bit of garlic. Let’s just say, it turned out to be too garlicky—definitely a “less is more” moment!
Regardless of how we tweak it, the essence of Cowboy Caviar remains the same: it’s about bringing people together to enjoy good food and good company.
FAQs and Troubleshooting
1. How long can I store Cowboy Caviar?
Cowboy Caviar can be stored in an airtight container in the fridge for up to 3 days. However, the avocado may brown, so it’s best to add it fresh.
2. My Cowboy Caviar is too sour—what can I do?
If it’s too tart from the lime, try adding a small pinch of sugar or a drizzle of honey; this will balance out the acidity.
3. Can I make this ahead of time?
Absolutely! Just prepare everything except the avocado and add it the day you serve for best freshness.
4. What if I don’t like beans?
No problem! Skip the beans and increase the veggies or add grains like quinoa or couscous for a hearty texture.
Nutritional Info
While exact values can vary, a serving of Cowboy Caviar (about 1/2 cup) is generally low in calories, rich in fiber, and packed with vitamins. Each serving offers a boost of nutrients from the beans, veggies, and healthy fats from the avocado, making it a guilt-free choice for any gathering!
So there you have it, my delightful friends! Cowboy Caviar—colorful, fresh, and bursting with flavor. I can’t wait for you to make this dish and share your own kitchen stories. Until next time, happy cooking!
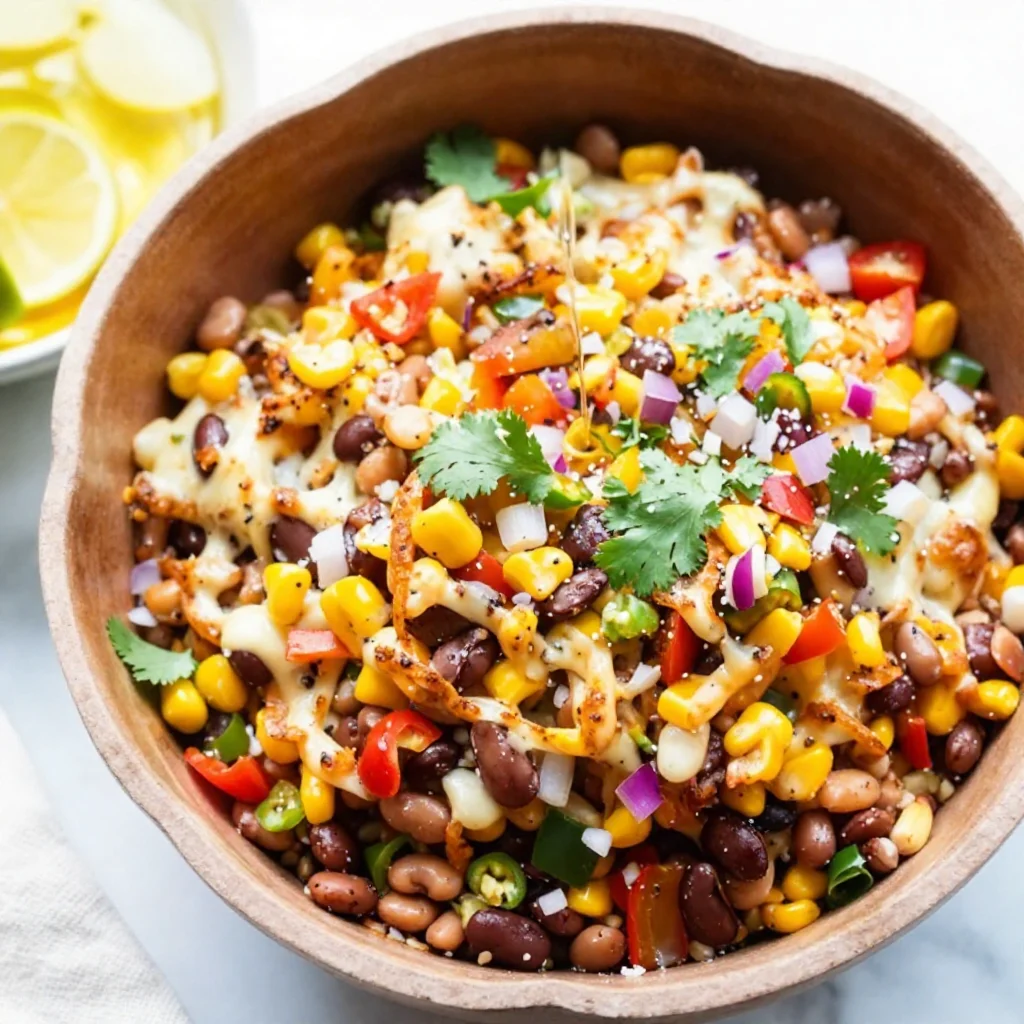
Print
Cowboy Caviar
- Total Time: 20 minutes
- Yield: 4 servings 1x
- Diet: Vegetarian
Description
A colorful and vibrant dip that combines black beans, corn, tomatoes, and peppers, perfect for gatherings and celebrations.
Ingredients
- 1 can black beans
- 1 can corn
- 1 red bell pepper
- 1 green bell pepper
- 1/2 red onion
- 1 avocado
- 1 cup cherry tomatoes
- 1/4 cup fresh cilantro
- Juice of 2 limes
- 1 teaspoon chili powder
- Salt and pepper, to taste
Instructions
- Prep your ingredients by rinsing and draining the black beans and corn.
- Dice and chop the red and green bell peppers, red onion, and cherry tomatoes into similarly-sized pieces.
- The avocado affair—slice the avocado, remove the pit, and chop it into chunks while squeezing lime juice on it.
- Toss everything together in a mixing bowl with lime juice, chili powder, salt, and pepper.
- Let it marinate for at least 15-20 minutes in the fridge.
Notes
Serve with tortilla chips or layer in a mason jar for a picnic-friendly option. Add fresh avocado right before serving for best flavor.
- Prep Time: 15 minutes
- Cook Time: 5 minutes
- Category: Appetizer
- Method: Mixing
- Cuisine: Tex-Mex
Nutrition
- Serving Size: 1/2 cup
- Calories: 180
- Sugar: 3g
- Sodium: 300mg
- Fat: 8g
- Saturated Fat: 1g
- Unsaturated Fat: 7g
- Trans Fat: 0g
- Carbohydrates: 22g
- Fiber: 6g
- Protein: 6g
- Cholesterol: 0mg
Keywords: Cowboy Caviar, Tex-Mex, dip, appetizer, vegetarian, party food
Cowboy Caviar
Cowboy Caviar: A Deliciously Fun Recipe to Impress Your Friends
Welcome to my kitchen! Today, we’re diving into a dish that’s as vibrant and exciting as a summer rodeo: Cowboy Caviar. If you haven’t tried this lively, flavor-packed dip, you’re in for a treat! Cowboy Caviar is not your ordinary bean dip; it’s a colorful medley of fresh ingredients that will make your taste buds dance with joy. Perfect for gatherings, picnics, or as a delightful snack while binge-watching your favorite show, this dish transforms everyday ingredients into something extraordinary.
You might be wondering—what is Cowboy Caviar? Picture this: black beans, corn, colorful peppers, tomatoes, and a zesty dressing that ties it all together. Whether served with tortilla chips or used as a salad topping, it’s a dish that embodies fun, flavor, and friendship. In my home, Cowboy Caviar is a staple. It’s my go-to recipe whenever friends swing by or when I need a vibrant addition to a potluck.
Join me as we journey through the simple steps of creating this crowd-pleaser. I promise it’ll be a delightful experience filled with laughter, great stories, and some culinary magic. Grab your ingredients, put on your apron (or not—I won’t judge!), and let’s get started!
A Nostalgic Memory: The First Time I Made Cowboy Caviar
I remember the first time I stumbled upon Cowboy Caviar like it was yesterday. It was a warm summer evening, and my best friend Sarah and I were trying to impress our college friends for a casual get-together. We wanted something that was easy to prepare but would make a big splash. After extensive Pinterest scrolling and a sprinkle of inspiration from a family cookbook, we landed on this luscious dip.
We spent the afternoon in my tiny kitchen, chopping vegetables, laughing, and devouring leftover tortilla chips while we worked. With each ingredient we added, the colors brightened, and the anticipation grew. When we finally tasted it, our eyes lit up! It was a burst of freshness, heat, and zest all in one bite. That evening was filled with laughter, great conversations, and of course, an empty bowl of Cowboy Caviar. Little did we know, this dish would become a tradition for many gatherings to come!
Ingredients
Here’s what you need to make your very own Cowboy Caviar:
-
1 can black beans: Rinsed and drained. These legumes pack a punch of protein and fiber. You can substitute with pinto or kidney beans if you prefer!
-
1 can corn: Kernel corn gives a lovely sweetness. You can use frozen corn—just thaw it first, or fresh corn off the cob for a juicy crunch.
-
1 cup cherry tomatoes: Halved. They’re sweet and juicy, perfect for this dip. You can swap them out for a cup of diced larger tomatoes, but cherry tomatoes add a fun pop of color!
-
1 bell pepper: Diced. Use your favorite color—red, yellow, or green! They all bring their own sweetness, and red provides a beautiful contrast in color.
-
1 small red onion: Finely chopped. For a milder flavor, you can substitute with green onions or shallots if you prefer less bite.
-
1 jalapeño: Seeds removed and finely chopped. It adds a glorious kick! If you’re sensitive to heat, feel free to skip it or substitute with a mild pepper.
-
½ cup fresh cilantro: Chopped. This herb brings brightness to the dish! If you’re not a fan, parsley works as a lovely alternative.
-
The Juice of 2 limes: Freshly squeezed. Lime juice adds a tangy flavor that pulls all the ingredients together. Bottled lime juice works, but fresh is always the way to go!
-
1 tablespoon olive oil: For a touch of richness. You can also use avocado oil or even skip it altogether if you’d like it lighter.
-
Salt and pepper: To taste. Seasoning can make or break your dish. Always start with a small pinch, and adjust to your preference!
Remember, this recipe is quite forgiving; you can modify it based on what you have in your pantry or what you enjoy!
Step-by-Step Instructions
Ready to bring all those vibrant ingredients together? Let’s get cookin’!
-
Prep Your Ingredients: Start by washing your vegetables. Rinse the black beans and corn under cold water. Halve the cherry tomatoes, chop the bell pepper, red onion, jalapeño, and cilantro. The more colorful your ingredients are, the better your Cowboy Caviar will look!
-
Mix the Base: In a large mixing bowl, combine the black beans, corn, cherry tomatoes, bell pepper, red onion, and jalapeño. Use a spatula and fold everything gently, preserving the shape of the tomatoes and beans.
-
Add the Flavor: Squeeze the juice of the limes over the mixture (don’t be shy; the lime juice is key here!). Drizzle on the olive oil and sprinkle with salt and pepper. The acidity from the lime will help meld all those great flavors.
-
Toss to Combine: Using that spatula again, toss everything together gently until combined. You want all the ingredients to bathe in the zesty dressing!
-
A Quick Taste Test: Here’s the best part! Take a small spoonful and taste. Does it need more lime? A pinch more salt? Adjust to your liking!
-
Chill (If You Can Wait): For the best flavor, let your Cowboy Caviar sit for at least 30 minutes to allow everything to marry. However, if you’re impatient like me, you can dive right in!
-
Serve and Enjoy: Scoop into a bowl and serve with your favorite tortilla chips. Enjoy the happy faces around the room as everyone dig in!
Serving Suggestions
Presentation can elevate your dish from good to spectacular! For a rustic vibe, serve the Cowboy Caviar in a colorful bowl and place it on a large wooden board with an assortment of tortilla chips around it. You could also garnish with extra cilantro or lime wedges for that extra pop of color. Not hosting? Portion it into individual cups for a fun grab-and-go snack!
Recipe Variations
Once you’ve mastered the classic Cowboy Caviar, feel free to shake things up:
- Mexican Street Corn Style: Add crumbled feta or cotija cheese and a sprinkle of chili powder.
- Guacamole Lover: Cube avocado and gently fold it in for a creamy texture—bonus flavor and nutrition!
- Sweet & Spicy: Mix in diced mango or pineapple for a tropical twist.
- Protein Boost: Throw in cooked, shredded chicken or shrimp for a heartier salad.
Chef’s Notes
So, here’s a little secret: Cowboy Caviar wasn’t always this vibrant in my kitchen. I originally made it with store-bought salsa! Over time, I discovered the joy of incorporating fresh ingredients and have adapted it into this lively and colorful dip. I once accidentally added too much jalapeño and ended up with a spicy disaster. But you know what? We laughed it off, made some tasty guacamole on the side to balance out the heat, and it turned into a great flavor combination after all. Cooking is about experimenting, learning, and most importantly, having fun!
FAQs and Troubleshooting
-
Can I make Cowboy Caviar ahead of time?
Absolutely! It gets better as it sits, so feel free to make it a few hours (or even a day) in advance. Just give it a good stir before serving. -
What if I don’t like black beans?
No problem! Use white beans, chickpeas, or even omit beans altogether for a lighter version. -
My dip is too spicy; how do I tone it down?
Mix in a bit of sour cream or yogurt for creaminess, or add more beans and corn to dilute the heat! -
Can I freeze it?
While you technically could, the texture of the beans and fresh veggies won’t fare well after freezing. It’s best enjoyed fresh!
Nutritional Info (Optional)
If you’re interested in the nutrition breakdown, here’s a quick overview (per serving):
- Calories: 120
- Protein: 8g
- Fat: 3g
- Carbs: 18g
- Fiber: 5g
Cowboy Caviar is not only delicious but also packed with vitamins and nutrients!
And there you have it! Cowboy Caviar—a dish that’s not only a feast for the eyes but also a wonderful celebration of flavors. I can’t wait for you to try it, share it with friends, and create your own memories in the kitchen. Remember, cooking should never be stressful but rather a joyous and flavorful adventure! Happy cooking, my friends!
Print
Cowboy Caviar
- Total Time: 45 minutes
- Yield: 4 servings 1x
- Diet: Vegetarian
Description
A colorful medley of black beans, corn, and peppers, served as a vibrant dip perfect for gatherings.
Ingredients
- 1 can black beans, rinsed and drained
- 1 can corn
- 1 cup cherry tomatoes, halved
- 1 bell pepper, diced
- 1 small red onion, finely chopped
- 1 jalapeño, seeds removed and finely chopped
- ½ cup fresh cilantro, chopped
- The juice of 2 limes, freshly squeezed
- 1 tablespoon olive oil
- Salt and pepper to taste
Instructions
- Prep your ingredients: Start by washing your vegetables. Rinse the black beans and corn under cold water. Halve the cherry tomatoes, chop the bell pepper, red onion, jalapeño, and cilantro.
- Mix the base: In a large mixing bowl, combine the black beans, corn, cherry tomatoes, bell pepper, red onion, and jalapeño. Use a spatula and fold everything gently.
- Add the flavor: Squeeze the juice of the limes over the mixture and drizzle on the olive oil. Sprinkle with salt and pepper.
- Toss to combine: Using a spatula, toss everything together gently until combined.
- Chill (if you can wait): For the best flavor, let your Cowboy Caviar sit for at least 30 minutes.
- Serve and enjoy: Scoop into a bowl and serve with tortilla chips.
Notes
Feel free to make it ahead of time, it gets better as it sits. Customize with your favorite ingredients!
- Prep Time: 15 minutes
- Cook Time: 0 minutes
- Category: Appetizer
- Method: Mixing
- Cuisine: Mexican
Nutrition
- Serving Size: 1 serving
- Calories: 120
- Sugar: 2g
- Sodium: 200mg
- Fat: 3g
- Saturated Fat: 0g
- Unsaturated Fat: 2g
- Trans Fat: 0g
- Carbohydrates: 18g
- Fiber: 5g
- Protein: 8g
- Cholesterol: 0mg
Keywords: Cowboy Caviar, dip recipe, vegetarian dip, appetizer, summer recipe
Minute Cowboy Caviar Dip: Fresh, Crowd-Pleasing Recipe
Best Fresh Cowboy Caviar Dip Recipe: 5-Star Crowd Pleaser
Welcome to my kitchen! I’m so glad you’ve joined me here today because we are about to embark on a flavor-packed journey. If you’re looking for a dish that truly embodies the spirit of togetherness, let me introduce you to my all-time favorite — Cowboy Caviar Dip! This vibrant and colorful dip is not just a feast for the eyes; it’s an explosion of textures and tastes that will have your friends and family coming back for seconds (or even thirds!).
Cowboy Caviar is a delightful medley of beans, fresh vegetables, and zesty dressing, making it an ideal appetizer or a party starter. Whether you’re hosting game night, a summer barbecue, or a cozy gathering, this crowd-pleaser elevates any occasion. The best part? It’s super easy to whip up, requires minimal cooking skills, and can be made ahead of time for those busy days when you need something ready to go!
As we dive into this recipe, I’ll be breaking it down step by step, sharing little stories about what makes this dish special, and revealing some of my favorite kitchen hacks. So grab your apron, roll up those sleeves, and let’s get cooking!
A Personal Story
The first time I ever tasted Cowboy Caviar was during a family reunion in Texas. Our relatives gathered in a cozy backyard adorned with string lights, laughter, and the aroma of grilled meats wafting through the air. As kids, my cousins and I would run wild, playing tag while the adults set up a feast fit for a king!
One dish that caught my eye was a vibrant bowl of Cowboy Caviar mixed with all sorts of colorful veggies and beans. I remember dipping my tortilla chip into the mix for the first time. The crunch, the brightness, and the zing of the dressing sent me straight to flavor heaven! I knew right then and there that this would be a staple in my cooking repertoire.
Fast forward a few years, and Cowboy Caviar became a cherished part of my gatherings. I’ve modified the recipe over time, adding my own twist and ensuring every bite tells a story. Each time I make it, I’m taken back to that summer day, surrounded by love and the warmth of family.
Ingredients
Here’s what you’ll need to create this incredible Cowboy Caviar Dip:
-
Black Beans (1 can, drained and rinsed)
These hearty beans are packed with protein and add a satisfying element to the dip. If black beans aren’t your thing, feel free to swap in kidney or pinto beans! -
Corn (1 cup, fresh or canned)
Sweet corn brings in a wonderful crunchy texture. Fresh corn is best, but frozen or canned corn works too! Just be sure to drain any liquid before tossing it in. -
Diced Tomatoes (1 cup, fresh)
Use vine-ripened tomatoes for a burst of juicy flavor. If tomatoes aren’t in season, cherry tomatoes work beautifully as a substitution! -
Red Onion (1/2 cup, finely chopped)
For a zesty kick! If you’re worried about the intensity of raw onion, soak the chopped pieces in cold water for 10 minutes before adding them to your mix. This simple trick takes the edge off. -
Bell Peppers (1 cup, finely diced — mix of colors)
I love using a blend of red, yellow, and green bell peppers for color and flavor. You can also use jalapeño for a spicy kick. -
Avocado (1 ripe, diced)
Avocado adds creaminess to the dip and balances the tang of the dressing. Make sure it’s perfectly ripe for that melt-in-your-mouth texture. -
Fresh Cilantro (1/4 cup, chopped)
If you’re a cilantro lover like I am, this herb adds freshness and brightness! If not, you can easily swap it for parsley. -
Lime Juice (from 1 lime)
The acidity from the lime juice brightens up the flavors! You can substitute with lemon juice, but lime is quintessential for that zesty cowboy essence. -
Olive Oil (2 tablespoons)
This helps to bring all the ingredients together. Use extra virgin olive oil for the best flavor, or experiment with flavored oils! -
Salt and Pepper (to taste)
Essential for enhancing all those delicious flavors. Don’t be shy; seasoning is key for a dip that wows!
Step-by-Step Instructions
Alright, my fellow food lovers, let’s get to the fun part! Here’s how to create your Cowboy Caviar Dip, step by step:
-
Prep Your Ingredients
Start by gathering all your ingredients and giving them a good rinse if needed. This ensures that your veggies and beans are clean and ready to shine. -
Chop and Dice
Dice your tomatoes, bell peppers, and onions into small pieces. When chopping, aim for uniform sizes so they blend well together in the dip. Remember, the prettier your dip looks, the more appetizing it will be! -
Combine Beans and Corn
In a large mixing bowl, combine the drained black beans and corn. Give them a gentle stir to mix them together. -
Add Fresh Veggies
Toss in your chopped tomatoes, bell peppers, and onions. Don’t be afraid to mix colors! This is where the “caviar” of Cowboy Caviar really shines, making your dip super visually appealing. -
Avocado Time
Next, carefully add in your diced avocado. Use a spatula or a large spoon to fold the avocado gently into the mix. You want to keep those lovely chunks intact while ensuring that they are well incorporated. -
Cilantro and Lime
Pour in the freshly chopped cilantro and squeeze in the lime juice. The lime juice not only gives flavor but also helps prevent the avocado from browning. Give everything a gentle toss to coat. -
Drizzle the Oil
Drizzle the olive oil over your dip and season with salt and pepper to taste. A little tip: start with a pinch of salt and a sprinkle of pepper, then add more as needed. Mix well to ensure all the flavors meld together beautifully. -
Rest and Meld
For the best flavor, let your Cowboy Caviar sit in the fridge for at least 30 minutes before serving. Cover it with plastic wrap to keep it fresh! -
Serve with Joy
Once it’s time to serve, give it another light stir and transfer it to a beautiful serving bowl. Nothing says “dig in” quite like a vibrant centerpiece!
Serving Suggestions
When it comes to serving Cowboy Caviar, presentation is key! A rustic wooden board or a vibrant ceramic bowl will make your dish pop. I love serving it with sturdy tortilla chips, but you could also offer veggie sticks like carrots and celery for a healthier crunch. Try layering it on top of a fresh salad for an elevated meal, or scoop it onto tacos for an added zest. Let your creativity shine and remember—it’s all about sharing the love with friends and family!
Recipe Variations
Want to switch things up? Here are some fun Cowboy Caviar variations to try:
-
Spicy Cowboy Caviar: Add diced jalapeños for a spicy kick. Adjust the heat to your preference!
-
Southwestern Twist: Incorporate diced avocado, corn, and a sprinkle of smoked paprika for a smoky flavor boost.
-
Tropical Vibes: Swap in fresh mango for the avocado for a unique, fruity take on this classic dip.
-
Quinoa Boost: Add cooked quinoa for extra protein and a heartier dip that can double as a salad.
-
Cheesy Option: Sprinkle crumbled feta or shredded cheese over the top for a creamy addition!
Chef’s Notes
This Cowboy Caviar recipe is very close to my heart! Over the years, I have experimented with different ingredients, and it never disappoints. One funny memory that comes to mind is when I decided to add some extra spice—thinking I could handle the heat—only to realize I had accidentally grabbed a can of Habaneros instead of my usual chipotle peppers. Let’s just say, that batch sent my friends running for water!
The best part about this recipe is how forgiving it is. You can mix and match based on what you have on hand or what’s in season, making it ever-evolving. I always encourage my fellow cooks to put their own spin on things — the kitchen is yours to play in!
FAQs and Troubleshooting
-
What if my dip is too salty?
If you find your dip comes out too salty, add additional diced tomatoes or a splash of lime juice to balance the flavors. -
Can I make this ahead of time?
Absolutely! Cowboy Caviar actually gets better as it sits, allowing the flavors to meld beautifully. Just remember to add the avocado right before serving to keep it fresh. -
What’s the best way to store leftovers?
Store any leftovers in an airtight container in the fridge for up to 3 days. Just be aware that the avocado may brown slightly, but it’ll still taste delicious! -
What if I don’t like cilantro?
If cilantro isn’t your favorite herb, feel free to swap it for parsley or simply omit it altogether. The dip will still taste fantastic!
Nutritional Info
This Cowboy Caviar is a nutritious choice packed with fiber from the beans and freshness from the veggies. Each serving is low in calories, high in flavor, and loaded with the good stuff. Perfect for a satisfying snack or as part of a healthy meal!
I hope you’re as excited to dive into this Cowboy Caviar as I am to share it! Whether you’re creating it for a party or just because, know that every bite is filled with love and joy. Let’s keep those kitchens bustling with flavors and stories. Happy cooking from my kitchen to yours!
Print
Cowboy Caviar Dip
- Total Time: 45 minutes
- Yield: 4 servings 1x
- Diet: Vegetarian
Description
A vibrant and colorful dip featuring black beans, fresh vegetables, and zesty dressing, perfect for any gathering.
Ingredients
- 1 can Black Beans, drained and rinsed
- 1 cup Corn, fresh or canned
- 1 cup Diced Tomatoes, fresh
- 1/2 cup Red Onion, finely chopped
- 1 cup Bell Peppers, finely diced
- 1 ripe Avocado, diced
- 1/4 cup Fresh Cilantro, chopped
- Juice of 1 Lime
- 2 tablespoons Olive Oil
- Salt and Pepper, to taste
Instructions
- Prep your ingredients by gathering and rinsing them if needed.
- Chop and dice your tomatoes, bell peppers, and onions into small pieces.
- Combine the drained black beans and corn in a large mixing bowl.
- Add the chopped tomatoes, bell peppers, and onions to the bowl.
- Fold the diced avocado gently into the mix.
- Pour in the freshly chopped cilantro and squeeze in the lime juice.
- Drizzle the olive oil over the dip and season with salt and pepper.
- Rest the dip in the fridge for at least 30 minutes before serving.
- Serve in a beautiful bowl with tortilla chips or veggie sticks.
Notes
Can be made ahead of time for best flavor. Store leftovers in an airtight container for up to 3 days.
- Prep Time: 15 minutes
- Cook Time: 0 minutes
- Category: Appetizer
- Method: Mixing
- Cuisine: American
Nutrition
- Serving Size: 1 serving
- Calories: 200
- Sugar: 4g
- Sodium: 200mg
- Fat: 10g
- Saturated Fat: 1g
- Unsaturated Fat: 8g
- Trans Fat: 0g
- Carbohydrates: 28g
- Fiber: 7g
- Protein: 6g
- Cholesterol: 0mg
Keywords: Cowboy Caviar, Dip, Appetizer, Healthy Snack, Party Food
Cowboy Caviar
Kickin’ It with Cowboy Caviar: A Flavor-Loaded Dip for Any Occasion
Welcome to my kitchen! I’m so glad you stopped by. Today, we’re diving into something that’s as fun to make as it is to eat — Cowboy Caviar! This vibrant, colorful dish is not just a dip; it’s a celebration of flavor, texture, and all the joy that comes with sharing food with family and friends. Picture this: warm summer evenings, laughter echoing across the yard, your loved ones gathered around a table, and a bowl of Cowboy Caviar taking center stage. It’s the kind of recipe that transforms any gathering into a fiesta, and I can’t wait to show you how to make it.
Cowboy Caviar is a zesty black bean salad that emerged from the Southwest, combining elements of traditional salsa with the richness of beans and the freshness of vegetables. You can scoop it up with your favorite tortilla chips, pile it into tacos, or add it to grilled meats for an explosion of flavor. What I love most about this dish is its versatility; you can adapt it to suit your cravings or whatever ingredients you have on hand. Plus, it’s packed with nutrition, making it not just delicious but also a great addition to any meal.
In the spirit of community and connection, I want to share a little story about how this dish found its way into my kitchen. One sunny afternoon, I was hosting a BBQ for my family, and after stirring up a few traditional favorites, I needed a refreshing side that would complement the grilled meats sizzling on the barbecue. I remembered a friend from college raving about Cowboy Caviar — he described it as the perfect balance of creamy, crunchy, and zesty flavors. That very moment sparked a culinary adventure, and I jumped onto my laptop to research recipes. The result? Not just a hit at that BBQ but a staple in my cooking rotation that’s since spread like wildfire through family gatherings, potlucks, and even quiet evenings at home.
So, roll up those sleeves, grab your favorite cutting board, and let’s get cooking!
Ingredients: What You’ll Need
Let’s gather our ingredients! Here’s what you’ll need to whip up a fantastic bowl of Cowboy Caviar:
-
Black Beans (1 can, drained and rinsed): A great source of protein and fiber. If you don’t have black beans, feel free to substitute them with pinto or kidney beans for a taste twist.
-
Corn (1 cup, fresh, frozen, or canned): Corn adds a sweet crunch that complements the beans. If using fresh corn, try grilling it for a smoky flavor!
-
Red Bell Pepper (1, diced): This adds sweetness and color; plus, it’s packed with vitamins. You can swap for yellow or orange bell pepper for a different taste and aesthetic.
-
Red Onion (1/2, finely chopped): The sharp bite of red onion balances the sweetness. If you prefer a milder onion flavor, try using green onions or even a shallot.
-
Avocado (1, diced): Creamy avocado gives the dip a rich texture. For a twist, you can use mango or peach for a sweet surprise!
-
Cherry Tomatoes (1 cup, halved): Juicy and sweet, they add freshness. If you can’t find cherry tomatoes, diced Roma tomatoes work just as well.
-
Cilantro (1/4 cup, chopped): This herb elevates the whole dish with its fresh and lively flavor. If you’re not a cilantro fan, parsley is a great alternative.
-
Lime Juice (from 1 lime): Fresh lime juice brightens up the entire dish. Lemon juice can work too if limes aren’t available, though it will alter the flavor slightly.
-
Olive Oil (2 tablespoons): This adds richness and helps meld the flavors together. Feel free to use avocado oil for a similar effect.
-
Cumin (1 teaspoon): A pinch of cumin adds depth and earthiness. If you’re up for it, smoked paprika makes a great substitution for a smoky kick!
-
Salt and Pepper (to taste): Basic seasonings that enhance everything. Always season to your preference!
Step-by-Step Instructions
Ready to assemble this beauty? Let’s get to the fun part! Follow these steps closely, and feel free to embrace your inner chef as you go.
-
Prep Your Ingredients: Start by dicing the red bell pepper, red onion, and avocado. Halve the cherry tomatoes and chop the cilantro. It’s essential to have everything chopped and ready to go to make mixing quick and easy!
Chef Tip: Use a sharp knife to cut the ingredients; it makes the job easier and more enjoyable!
-
Rinse the Beans: Open that can of black beans and pour them into a colander to rinse under cold water. This step helps remove excess sodium and improves the flavor.
-
Combine the Base Ingredients: In a large bowl, combine the black beans, corn, diced red bell pepper, halved cherry tomatoes, and chopped red onion. Use a spatula or large wooden spoon to gently mix everything together until evenly distributed.
-
Add the Creamy Avocado: Gently fold in the diced avocado. Be careful not to mash it — we want those creamy chunks to remain intact for texture!
-
Make the Dressing: In a small bowl, whisk together the lime juice, olive oil, cumin, and a generous pinch of salt and pepper. Drizzle this dressing over your salad mixture and toss gently to combine.
Chef Hack: If you want an extra kick, feel free to add a pinch of cayenne pepper to the dressing!
-
Taste and Adjust: This is the fun part — taste your Cowboy Caviar! Adjust seasoning if necessary by adding more salt, pepper, or lime juice to get the flavor just right.
-
Chill Before Serving: For best results, let your Cowboy Caviar chill in the fridge for at least 30 minutes. This allows the flavors to meld beautifully, creating a taste sensation that’s hard to resist!
Serving Suggestions
When it’s time to serve, grab a beautiful bowl and scoop the Cowboy Caviar into it. I love to garnish it with additional cilantro or a squeeze of lime for visual appeal. Serve alongside a generous bowl of tortilla chips, or create a spread with fresh veggies for dipping. This vibrant dip also works magic atop grilled fish tacos or served alongside barbecued meats. Whatever the occasion, it’s sure to impress anyone who indulges.
Recipe Variations
The beauty of Cowboy Caviar is its flexibility! Here are some fun twists you can try:
-
Spicy Version: Add diced jalapeños for some heat! Just remember to adjust the quantity based on your spice tolerance.
-
Creamy Avocado Dressing: Blend avocado with lime juice and olive oil for a creamy dressing. Mix it into your Cowboy Caviar for a richer texture.
-
Make it a Meal: Serve Cowboy Caviar over a bed of greens and top it with grilled chicken or shrimp for a hearty salad.
-
Seasonal Additions: During the fall, try adding diced sweet potatoes or roasted butternut squash for a seasonal twist.
-
Stay Plant-Based: Replace the corn with quinoa, and you’ve got a grain-packed, hearty option for those on a plant-based diet!
Chef’s Notes
Ah, Cowboy Caviar — where should I begin? Over the years, this recipe has morphed and evolved in my kitchen depending on what I have on hand. I remember bringing it to a neighborhood block party, and it was devoured in minutes! One sunny evening, I made it for a picnic, and my friends couldn’t stop raving about the flavors. In fact, I’ve had requests to teach cooking classes focusing specifically on this dish!
Every time I make it, I try to include a new twist just for fun. It’s a reminder that food brings people together and creativity thrives in the kitchen. Plus, no dish is ever the same, which keeps the excitement alive!
FAQs and Troubleshooting
1. What if I don’t like black beans?
No problem at all! Swap in any beans you prefer – chickpeas or pinto beans work wonderfully.
2. Can I make this ahead?
Absolutely! Cowboy Caviar can be made a day in advance. Just keep the avocado separate until you’re ready to serve to avoid browning.
3. How do I prevent the avocado from browning?
Lime juice is your best friend! Coat the avocado in lime juice before mixing it in, and store any leftovers in an airtight container. You can also cover the surface with plastic wrap, pressing it down to limit air exposure.
4. What can I serve it with besides chips?
This dish is incredibly versatile. Serve it with grilled chicken, use it as a topping for nachos, or even add it to a taco bar for an easy assembly.
Nutritional Info (if applicable)
While specific values will vary depending on ingredient brands and quantities, Cowboy Caviar is generally a low-calorie, nutrient-rich option packed with fiber, healthy fats from avocado, and plenty of vitamins from fresh veggies. It could easily serve as a healthy side dish or even a main meal when paired with protein-rich options.
Now that you’re armed with the inside scoop on making Cowboy Caviar, I hope you’ll give it a try! Whether it’s for an epic summer cookout or just a cozy night in, this dish will definitely bring a smile to your loved ones’ faces. Happy cooking, and remember — the kitchen is where the heart is!
Print
Kickin’ It with Cowboy Caviar
- Total Time: 30 minutes
- Yield: 4 servings 1x
- Diet: Vegan
Description
A vibrant, flavorful dip that combines black beans, corn, and fresh vegetables, perfect for any gathering or meal.
Ingredients
- 1 can Black Beans, drained and rinsed
- 1 cup Corn (fresh, frozen, or canned)
- 1 Red Bell Pepper, diced
- 1/2 Red Onion, finely chopped
- 1 Avocado, diced
- 1 cup Cherry Tomatoes, halved
- 1/4 cup Cilantro, chopped
- Juice from 1 Lime
- 2 tablespoons Olive Oil
- 1 teaspoon Cumin
- Salt and Pepper, to taste
Instructions
- Prep your ingredients: Start by dicing the red bell pepper, red onion, and avocado. Halve the cherry tomatoes and chop the cilantro.
- Rinse the beans: Open that can of black beans and pour them into a colander to rinse under cold water.
- Combine the base ingredients: In a large bowl, combine the black beans, corn, diced red bell pepper, halved cherry tomatoes, and chopped red onion. Mix everything together.
- Add the creamy avocado: Gently fold in the diced avocado, being careful not to mash it.
- Make the dressing: In a small bowl, whisk together the lime juice, olive oil, cumin, and salt and pepper. Drizzle this dressing over your salad mixture and toss gently.
- Taste and adjust the seasoning if necessary.
- Chill before serving: Let your Cowboy Caviar chill in the fridge for at least 30 minutes.
Notes
For a spicy version, add diced jalapeños. For a creamier dip, consider blending avocado with the olive oil and lime juice.
- Prep Time: 15 minutes
- Cook Time: 0 minutes
- Category: Appetizer
- Method: No-Cook
- Cuisine: Mexican
Nutrition
- Serving Size: 1 serving
- Calories: 250
- Sugar: 5g
- Sodium: 300mg
- Fat: 10g
- Saturated Fat: 1.5g
- Unsaturated Fat: 8g
- Trans Fat: 0g
- Carbohydrates: 35g
- Fiber: 10g
- Protein: 8g
- Cholesterol: 0mg
Keywords: cowboy caviar, dip, appetizer, vegan, black beans, corn, salsa
Cowboy Caviar
Cowboy Caviar: A Colorful Fiesta in a Bowl
Welcome to my kitchen, foodie friends! Today, we’re diving into a dish that’s as vibrant as a summer festival and as comforting as a cozy night in—Cowboy Caviar! This delightful dip is not only bursting with flavor but is also wonderfully versatile, making it perfect for gatherings, potlucks, or simply snacking at home. If you’ve never had the pleasure of enjoying Cowboy Caviar, get ready to be thrilled by its exciting combination of fresh vegetables, zesty seasonings, and hearty black beans.
Now, I know what you might be thinking: “Caviar? Isn’t that fancy?” Fear not! This caviar is actually a dip that hails from the Southwestern United States, filled with fresh ingredients that bring the essence of the cowboy spirit to your table. Whether you’re watching the game, hosting a backyard barbecue, or just looking for a colorful snack, this dish is sure to impress.
One of my favorite things about Cowboy Caviar is how adaptable it is. You can serve it as a dip with tortilla chips, pile it on tacos, or even toss it with greens for a refreshing salad. Plus, it’s easy to whip up, making it the perfect option for both beginner cooks and seasoned chefs alike. So grab your apron, and let’s get started on this delicious journey together!
Personal Story
Let me take you back to a summer evening a few years ago, one of those magical nights where the sunset paints the sky in hues of orange and pink. I was at a country-themed potluck, eagerly receiving the scent of barbecue wafting through the air. As I arrived, I saw tables laden with dishes, and right in the middle sat a colorful bowl of Cowboy Caviar. Its cheerful colors caught my eye, and I was drawn in like a moth to a flame.
I remember scooping a generous portion onto my plate, not knowing I was about to embark on a flavor adventure. The first bite was a burst of freshness—the crunchiness of the veggies, the creaminess of the avocado, and that perfect kick of lime. It was love at first taste! From that day on, I made it a tradition to recreate that Cowboy Caviar for every gathering. It became a symbol of summer, friendship, and the joy of sharing delicious food with those we love.
Ingredients
Here’s what you’ll need to create this masterpiece:
-
Black Beans (1 can, drained and rinsed)
A hearty base to this dish, black beans add protein and fiber. You can substitute them with pinto beans or chickpeas for a different texture. -
Corn (1 cup, fresh or canned)
Sweet and crunchy goodness! If using fresh corn, you can grill it first for an added smoky flavor. Frozen corn works well too; just thaw before use. -
Red Bell Pepper (1, diced)
Adds a pop of color and sweetness. Feel free to swap it with yellow or orange peppers for a different look and taste. -
Red Onion (1 small, finely chopped)
This ingredient brings pungency and depth to the dip. If you prefer milder flavors, soak the chopped onion in water for a few minutes before adding it. -
Tomatoes (2 medium, diced)
Juicy and vibrant, tomatoes complete the fresh medley. Cherry tomatoes are a great substitute and don’t require chopping! -
Avocado (1 large, diced)
Creamy goodness! For a twist, you can use mango or pineapple for a fruity sweetness. Just make sure to enjoy it right away to prevent browning. -
Jalapeño (1 small, finely chopped)
For those who like a kick! Remove the seeds for a milder flavor or add more if you’re feeling adventurous. -
Cilantro (1/4 cup, chopped)
This herb adds freshness and a slightly citrusy flavor. If you’re not a fan, parsley makes an excellent substitute. -
Lime Juice (from 1 lime)
Zesty and bright, lime juice brings the whole dish to life. You can also use lemon juice for a different tang. -
Olive Oil (2 tablespoons)
Adds richness and helps meld the flavors together. Avocado oil is a great alternative if you want something lighter. -
Salt and Pepper (to taste)
Essential for bringing out all the flavors. Feel free to experiment with other spices, like cumin or smoked paprika.
Step-by-Step Instructions
Step 1: Prepare Your Ingredients
Start by gathering all your wonderful ingredients. A sharp knife and a good cutting board will make your prep work that much easier. Dice the red onion and jalapeño, chop the cilantro, and dice the tomatoes and bell pepper. If you’re using fresh corn, now is the time to cook it! You can grill or steam it for a few minutes to enhance the flavor.
Step 2: Combine the Base Ingredients
In a large mixing bowl, add the black beans, corn, diced red bell pepper, and the chopped tomatoes. Make sure the ingredients are well-drained to keep the salad from getting soggy. Give everything a gentle stir to combine.
Step 3: Add Freshness and Flavor
Next comes the exciting part! Throw in the jalapeño, red onion, and cilantro. Toss everything together so that the flavors start mingling. There’s something so satisfying about this step—watching all those colors blend together is like creating a culinary masterpiece!
Step 4: Dress It Up
Now it’s time for the dressing! In a separate small bowl, whisk together lime juice, olive oil, salt, and pepper. Drizzle this over your mixed ingredients and toss gently yet thoroughly. This is where the magic happens—the house will start smelling delightful as the dressing permeates each ingredient.
Step 5: Add Avocado Last
Finally, add the diced avocado. Gently fold it into the mixture to keep those lovely pieces intact. Remember, avocado can brown quickly, so if you plan to serve it later, add it right before serving.
Step 6: Let It Chill
Cover your bowl with plastic wrap and let the Cowboy Caviar chill in the fridge for at least 30 minutes. This allows the flavors to deepen and gives you some time to relax (or prep the rest of your meal!).
Serving Suggestions
Serve your Cowboy Caviar in a beautiful bowl alongside a platter of crispy tortilla chips. You can also present it in individual cups for a fun appetizer at parties. Pair it with your favorite salsa or guacamole to create a festive appetizer spread. If you want to add some volume, use it as a topping for grilled chicken or fish—or pour it over a bed of mixed greens for a refreshing salad.
Recipe Variations
- Spicy Kick: Add diced serrano peppers in place of jalapeños for extra heat.
- Cheesy Delight: Incorporate crumbled feta or queso fresco for a creamy, tangy twist.
- Pasta Caviar: Mix with cooked pasta for a hearty, noodle-inspired twist on Cowboy Caviar.
- Mediterranean Vibes: Swap black beans for chickpeas and add olives for a Mediterranean flair.
- Grain Bowl: Turn it into a grain bowl by pairing it with quinoa or brown rice for a filling meal.
Chef’s Notes
This Cowboy Caviar recipe has evolved over time. I remember the first time I made it, I used whatever was in my pantry. Since then, I’ve discovered how much fun it is to customize the ingredients based on what’s in season or what my friends love. I once served it at a gathering, and someone suggested adding pineapple for extra sweetness. It was a huge hit! Don’t be afraid to experiment with flavors and textures—every batch can be a new adventure.
FAQs and Troubleshooting
1. Can I make Cowboy Caviar ahead of time?
Yes! You can prepare it a few hours in advance. Just be cautious about adding the avocado; it’s best to add that right before serving to prevent browning.
2. How long does Cowboy Caviar last in the fridge?
In an airtight container, Cowboy Caviar stays fresh for 3-5 days. The flavors will intensify over time, but the avocado may brown.
3. What can I do if it’s too spicy?
If your Cowboy Caviar turned out spicier than expected, try adding more diced tomatoes or a dollop of sour cream to balance the heat.
4. Is Cowboy Caviar gluten-free?
Absolutely! Cowboy Caviar is inherently gluten-free, making it a great option for those with dietary restrictions.
Nutritional Info
While the nutritional information can vary based on specific ingredients used, this dish is generally low in calories, rich in fiber, and packed with essential vitamins and minerals. Each serving offers a healthy dose of protein, making it a fantastic snack option.
So there you have it! Cowboy Caviar is not just a dip; it’s a celebration of flavors and a dish that brings people together. I hope this recipe brightens your kitchen and inspires you to share the love with friends and family. Until next time, keep cooking with joy and passion!
Print
Cowboy Caviar
- Total Time: 30 minutes
- Yield: 4 servings 1x
- Diet: Vegetarian
Description
A vibrant dip bursting with fresh vegetables, zesty seasonings, and hearty black beans, perfect for gatherings or snacking.
Ingredients
- 1 can Black Beans, drained and rinsed
- 1 cup Corn, fresh or canned
- 1 Red Bell Pepper, diced
- 1 small Red Onion, finely chopped
- 2 medium Tomatoes, diced
- 1 large Avocado, diced
- 1 small Jalapeño, finely chopped
- 1/4 cup Cilantro, chopped
- Juice of 1 Lime
- 2 tablespoons Olive Oil
- Salt and Pepper, to taste
Instructions
- Prepare Your Ingredients by gathering and chopping them as needed.
- Combine the black beans, corn, red bell pepper, and tomatoes in a large mixing bowl.
- Add the jalapeño, red onion, and cilantro; toss to combine.
- Dress the salad with lime juice, olive oil, salt, and pepper. Toss gently.
- Add the diced avocado last, folding it into the mixture.
- Let the Cowboy Caviar chill in the fridge for at least 30 minutes before serving.
Notes
Best served with tortilla chips or as a topping for grilled chicken or fish. Add avocado right before serving to prevent browning.
- Prep Time: 15 minutes
- Cook Time: 0 minutes
- Category: Appetizer
- Method: No Cook
- Cuisine: Southwestern
Nutrition
- Serving Size: 1 serving
- Calories: 250
- Sugar: 4g
- Sodium: 300mg
- Fat: 10g
- Saturated Fat: 1.5g
- Unsaturated Fat: 8g
- Trans Fat: 0g
- Carbohydrates: 35g
- Fiber: 10g
- Protein: 8g
- Cholesterol: 0mg
Keywords: Cowboy Caviar, dip, vegetarian, summer recipe, easy appetizer
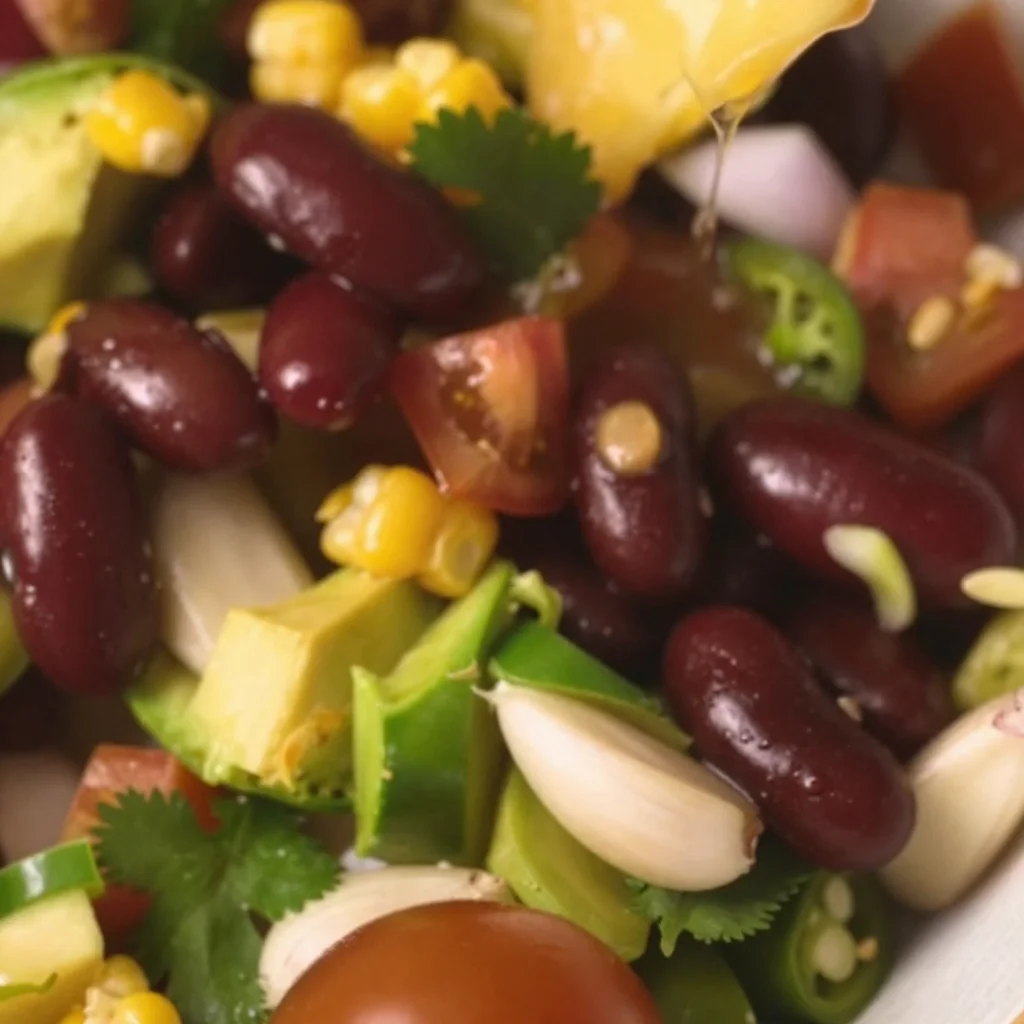
Pioneer Woman’s Cowboy Caviar: 5-Ingredient Party Snack
Cowboy Caviar: A Flavor-Packed Pioneer Woman Inspired Recipe
Welcome to my kitchen, my lovely food enthusiasts! Today, we’re diving into a vibrant, hearty dish that’s sure to elevate your gatherings and put that big smile on your loved ones’ faces. We’re whipping up Cowboy Caviar, a culinary creation that’s as colorful as it is delicious. This fresh, zesty dip is perfect for parties, casual get-togethers, or simply for those days when you want something joyful to snack on. So grab your apron, and let’s get started!
Personal Story
Cowboy Caviar holds a special place in my heart, and I’m excited to share its story with you! Growing up in a tight-knit family, my parents loved throwing summer barbecues in our backyard. As the sun began to set and the fire crackled, my mom would always whip out her big glass mixing bowl filled with Cowboy Caviar, and it was pure magic. We’d all gather around, chips in hand, eager to scoop up that colorful mix.
There was something incredibly special about the way flavors mingled; the sweetness of the corn, the crunch of bell peppers, and the kick from jalapeños created a symphony that made every bite exceptional. Every spoonful would spark laughter and reconnect us, especially when my uncle would try to outdo my mom on the heat level, and the competition turned into a comedic event. That blend of family, food, and joy is what Cowboy Caviar is all about for me.
Now, every time I make it, I’m transported to those backyard barbecues, surrounded by laughter, delicious snacks, and the warmth of family. And today, I want to share that same feeling with you!
Ingredients
Here’s what you’ll need to create this colorful dip:
-
1 can black beans: Rich in protein, these beans provide a hearty base. (Tip: Rinse and drain them to remove excess sodium!)
-
1 can sweet corn: Adds sweetness and a delightful crunch. (Substitution: Fresh corn works if you have it in season—just grill it for a smoky flavor!)
-
1 red bell pepper: Provides sweetness and vibrant color. (Chef Insight: You can swap it with yellow or orange peppers for a different sweetness profile!)
-
1 green bell pepper: Adds crunch and freshness. (Tip: Remove the seeds for a milder taste.)
-
1 jalapeño: Brings that spicy kick! (Substitution: Leave out the seeds for a milder flavor or swap for a milder pepper like poblano.)
-
1 red onion: For a zesty bite. (Tip: Soak the diced onion in cold water for 10 minutes to mellow the flavor!)
-
1 avocado: Adds creaminess and richness. (Chef Insight: To keep it fresh, add it last just before serving.)
-
1/4 cup cilantro: Fresh herbiness to brighten the dish. (Substitution: If you’re not a fan of cilantro, try parsley for a nice twist!)
-
Juice of 2 limes: Zingy and refreshing. (Tip: Roll the limes on the counter before cutting for maximum juice.)
-
1/4 cup olive oil: Lends richness and helps the flavors meld. (Substitution: Avocado oil or another light oil works beautifully too!)
-
Salt and pepper to taste: Enhances all the flavors we’ve got going.
Step-by-Step Instructions
-
Prep Your Vegetables: Begin by gathering all your fresh veggies. Dice the red and green bell peppers, jalapeño, red onion, and avocado into small, uniform pieces. This not only looks beautiful but also ensures that each bite delivers a burst of all the flavors. (Remember, the skills you’re honing are invaluable; it’s all about practice!)
-
Rinse the Beans and Corn: Take your can of black beans and corn, the champions of this dish! Make sure to drain and rinse them under cold water, washing away any excess sodium or liquid that may interfere with the flavor profile. This simple step makes a big difference!
-
Mix the Base: In a large mixing bowl, toss together the black beans, sweet corn, diced red and green bell peppers, jalapeño, and red onion. Use a spatula to gently fold them together — be careful not to mush the beans!
-
Add the Good Stuff: Now, squeeze in the fresh lime juice over your veggie mix. Drizzle with olive oil and sprinkle in some salt and pepper. This is where the magic happens! Give everything a good fold to combine, making sure all the veggies get kissed by that zesty lime and that luscious oil.
-
Integrate the Avocado and Cilantro: Gently fold in the diced avocado and chopped cilantro just before serving to keep them fresh and vibrant. Be careful here, as you want to mix without smashing the avocado! (If you get nervous, try adding a little lime juice to the avocado directly—it helps keep that gorgeous green!)
-
Taste and Adjust: Take a moment to taste your Cowboy Caviar. Feel free to adjust the salt, lime juice, or pepper as needed. This dish is all about personal preference, so make it your own!
-
Let It Chill: If you have time, let your Cowboy Caviar sit in the fridge for at least 30 minutes. This allows all the flavors to intermingle and develop into something divine.
Serving Suggestions
When it’s time to serve, present this colorful dip in a large bowl surrounded by your favorite tortilla chips. For a fresh and fun twist, consider scooping it into individual mason jars for a grab-and-go option at gatherings! Add some lime wedges on the side for extra zing — believe me, everyone will be coming back for seconds.
Recipe Variations
-
Tropical Twist: Add diced mango or pineapple for a sweet and fruity version of Cowboy Caviar. Tropical flavors complement the beans beautifully!
-
Bean Mix-Up: Replace black beans with pinto or kidney beans for different textures and flavors.
-
Extra Heat: If you’re feeling adventurous, toss in some diced serrano or habanero peppers for a spicier kick.
-
Zesty Dressing: Instead of using olive oil, pour in a tangy vinaigrette made from apple cider vinegar or red wine vinegar.
-
Zucchini Addition: Grate some fresh zucchini into the mix for added nutrition and a subtle sweetness.
Chef’s Notes
Over the years, my Cowboy Caviar recipe has evolved into something I adore making. I remember one day I was throwing a friend’s surprise party, and just as I was about to serve the dish, I found myself in a battle with a stubborn avocado. I ended up adding too much lime juice to counteract it, but guess what? It turned out to be a hit! My “mistake” created a refreshing twist that everyone loved. So don’t be afraid to experiment; cooking is about discovering what works for you!
FAQs and Troubleshooting
-
Can I make this in advance?
Absolutely! You can prep all the ingredients and mix them, but wait to add the avocado until just before serving. This prevents browning and keeps it fresh! -
What if it’s too spicy?
If it’s too spicy for your tastes, consider adding more corn or even a dollop of sour cream or Greek yogurt to mellow the heat! -
How can I store leftovers?
Keep it in an airtight container in the fridge for up to 2-3 days. Just remember the longer it sits, the more the flavors marry, but the avocado may brown a bit. -
Can I grill some of the ingredients?
Absolutely! Grilling the corn and peppers adds a tasty smoky flavor to the dish. Just remember to dice them after grilling!
Nutritional Info (if applicable)
Cowboy Caviar is packed with nutrients! It’s high in fiber thanks to the beans and veggies, and low in calories, making it a guilt-free snack. Plus, the healthy fats from avocado and olive oil provide essential nutrients that will keep you satisfied.
There you have it—a delightful Cowboy Caviar recipe inspired by the Pioneer Woman herself! I invite you to bring this dish into your home, share stories around the table, and create new memories with every delicious bite. Happy cooking, and enjoy every colorful scoop!
Print
Cowboy Caviar
- Total Time: 30 minutes
- Yield: 4 servings 1x
- Diet: Vegan
Description
A vibrant, hearty dip perfect for parties and gatherings, featuring a colorful mix of beans, corn, peppers, and avocado.
Ingredients
- 1 can black beans, drained and rinsed
- 1 can sweet corn, drained
- 1 red bell pepper, diced
- 1 green bell pepper, diced
- 1 jalapeño, diced
- 1 red onion, diced
- 1 avocado, diced
- 1/4 cup cilantro, chopped
- Juice of 2 limes
- 1/4 cup olive oil
- Salt and pepper to taste
Instructions
- Prep Your Vegetables: Gather and dice the bell peppers, jalapeño, red onion, and avocado.
- Rinse the Beans and Corn: Drain and rinse the black beans and corn under cold water.
- Mix the Base: In a large mixing bowl, combine the black beans, corn, diced peppers, jalapeño, and onion.
- Add the Good Stuff: Squeeze in lime juice and drizzle with olive oil; mix gently.
- Integrate the Avocado and Cilantro: Fold in diced avocado and chopped cilantro carefully.
- Taste and Adjust: Adjust lime juice, salt, and pepper to your taste.
- Let It Chill: Refrigerate for at least 30 minutes to let flavors meld.
Notes
Serve with tortilla chips and lime wedges for extra zing. Can be made in advance, but add avocado just before serving to prevent browning.
- Prep Time: 15 minutes
- Cook Time: 0 minutes
- Category: Appetizer
- Method: Mixing
- Cuisine: American
Nutrition
- Serving Size: 1 serving
- Calories: 200
- Sugar: 3g
- Sodium: 250mg
- Fat: 10g
- Saturated Fat: 1.5g
- Unsaturated Fat: 8g
- Trans Fat: 0g
- Carbohydrates: 27g
- Fiber: 7g
- Protein: 6g
- Cholesterol: 0mg
Keywords: Cowboy Caviar, dip, healthy snack, party food, vegan recipe
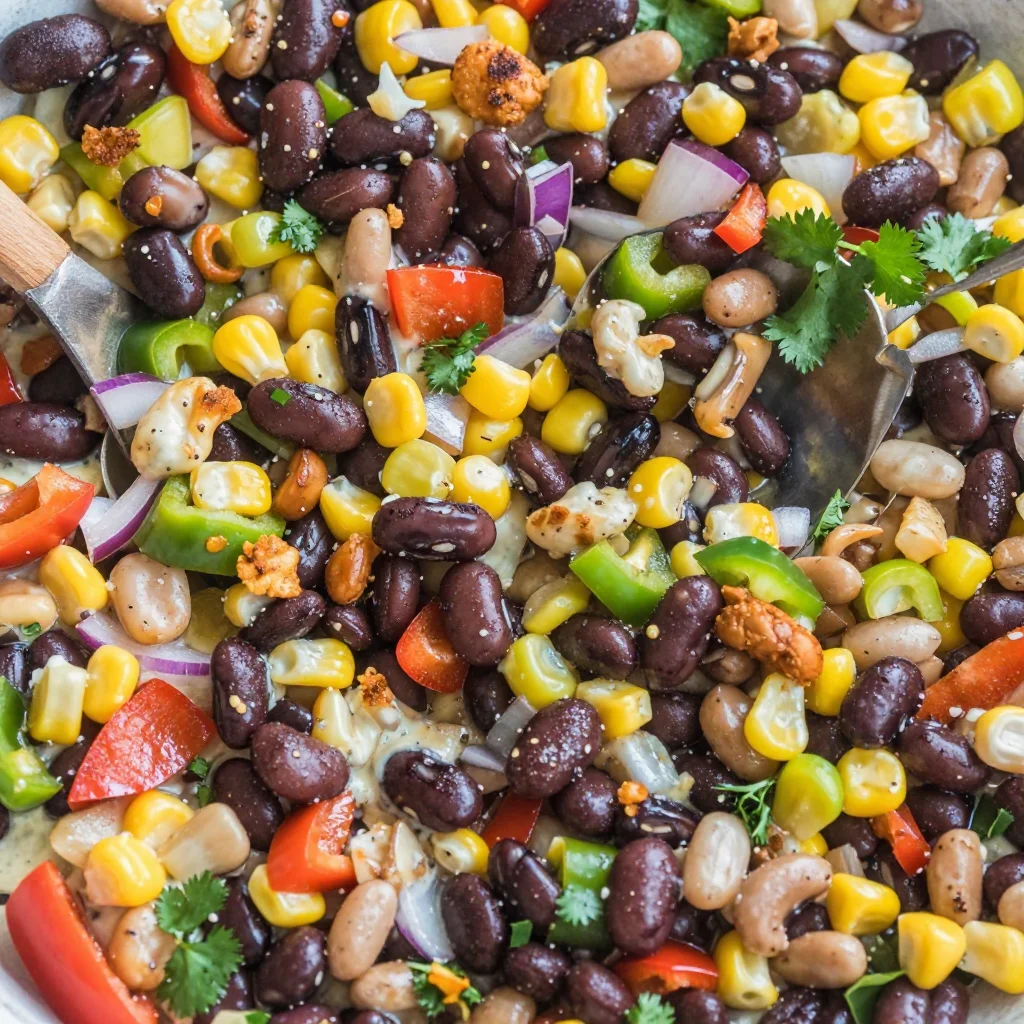
Minute Cowboy Caviar Dip: Tangy, Creamy Crowd-Pleaser
Cowboy Caviar Dip: A Flavorful Fiesta in Every Bite!
Welcome to my kitchen, friends! Today, we’re diving into a vibrant and delicious dish that will not only brighten your snack table but also make you the star of your next gathering! If you’ve never heard of Cowboy Caviar, you’re in for a treat — and if you’ve enjoyed it before, I promise my take on it will rekindle all those tasty memories.
Cowboy Caviar, also known as Texas Caviar, is a zesty and colorful dip influenced by the flavors of the South. It’s rich in texture, filled with beans, fresh veggies, and a tangy dressing that dances on your taste buds. Best of all? It comes together in a flash, making it perfect for impromptu get-togethers or cozy nights at home. This dip is a delicious marriage of flavors that celebrates the simplicity of home cooking — just what I love!
As I reminisce about my culinary journey, I can’t help but think about the first time I made this dip. It was a sunny Saturday, and my best friend was hosting a backyard BBQ. I was on snack duty, and with a head full of ideas and a pantry stocked with fresh produce, Cowboy Caviar quickly became the star of the show. With each scoop of that colorful goodness, laughter and stories flowed around the table, reminding me of how food creates connections. You could see the sparkle in everyone’s eyes as they dove into the dip with crispy tortilla chips, and that moment solidified my love for sharing meals with those I adore.
Ready to make some delicious memories of your own? Let’s gather our ingredients and start cooking!
Ingredients
Here’s what you need to whip up my delightful Cowboy Caviar Dip:
-
1 can black beans – A great source of protein and fiber, black beans add a hearty base to our dip. If you’re looking for a different flavor profile, you can swap them for pinto or kidney beans.
-
1 can sweet corn – Sweet and crunchy, corn adds a delightful texture. You can also use fresh corn off the cob or frozen corn — just make sure to thaw it first!
-
1 red bell pepper – This sweet and crunchy vegetable adds a pop of color and flavor. Feel free to replace it with yellow or green bell pepper for a different taste.
-
1 green bell pepper – Adding another layer of crunch. If you’d like a spicier version, throw in a jalapeño, seeds removed!
-
1/2 red onion – For that zing! Red onions are slightly milder. If they’re too strong for your taste, use green onions or shallots instead.
-
1 cup cherry tomatoes – Sweet and juicy, these tomatoes bring freshness. Look for a variety of colors for more visual appeal! Substitute with diced regular tomatoes if that’s what you have.
-
1 avocado – Creamy and nourishing; avocado balances the dip beautifully. If you want to keep it lower in fat, you can leave it out completely or replace it with diced cucumbers.
-
Juice of 2 limes – The zesty citrus note brings the dip to life! If you’re out of limes, lemon juice works just as well.
-
1/4 cup fresh cilantro – This herb adds an earthy freshness. Not a cilantro fan? Parsley can be a great substitute, or skip it altogether!
-
Salt and pepper – Simply season to taste.
-
Optional: 1 teaspoon chili powder – For a little extra kick, feel free to add this! Smoked paprika is another yummy alternative for a deeper flavor.
Step-by-Step Instructions
Now that we have everything ready, let’s make this Cowboy Caviar Dip come to life!
-
Rinse and Drain the Beans: Start by rinsing your black beans under cold water. This helps to remove any extra sodium and makes them less mushy. Drain them thoroughly, then plop them into a large mixing bowl.
-
Prepare the Corn: If you’re using canned corn, just drain it as well and add it to the bowl. If you’re using fresh corn, stand the ear upright and carefully slice down to release the kernels as you go. It’s a fun way to get messy in the kitchen!
-
Chop the Veggies: Dice your red bell pepper, green bell pepper, and cherry tomatoes. For the onion, I recommend chopping it finely so its flavor mingles throughout the dip without overpowering it. If chopping onions makes you tear up, try refrigerating the onion for a few minutes or using a sharp knife to minimize the sulfuric compounds that cause tears!
-
Slice the Avocado: Cut your avocado in half, remove the pit, and scoop the flesh into the bowl. Gently fold it in with the other ingredients to avoid mashing it too much. Avocado adds that creamy goodness which we love!
-
Add Lime Juice and Seasoning: Squeeze in the freshly squeezed lime juice. Not only does it enhance the flavors, but it also helps prevent the avocado from browning — a little kitchen magic! Season with salt, pepper, and if you’re feeling adventurous, sprinkle in that chili powder or smoked paprika.
-
Toss with Cilantro: Chop up your fresh cilantro and mix it in. Don’t be shy; this adds countless flavor and vibrance. For those who want to punch it up a notch, consider adding minced garlic or diced jalapeños at this stage for an extra kick.
-
Chill and Serve: Cover your bowl with plastic wrap and let it chill in the refrigerator for at least 30 minutes. This allows the flavors to meld together beautifully. When you’re ready to serve, give it a gentle stir, taste, and adjust the seasoning if needed.
Serving Suggestions
This Cowboy Caviar Dip is best served with crispy tortilla chips, but don’t stop there! You can spoon it over tacos, use it as a topping for grilled chicken, or even throw it into a salad. A pretty serving bowl garnished with extra cilantro and lime wedges can make your presentation pop!
Recipe Variations
Feel free to get creative with Cowboy Caviar! Here are a few twists you might enjoy:
-
Spicy Twist: Add diced jalapeños or even a splash of hot sauce for those who like it fiery.
-
Mediterranean Fusion: Substitute black beans with chickpeas and mix in some diced cucumbers and feta cheese. Serve with pita chips.
-
Tropical Style: Incorporate diced mango or pineapple for a sweet and fruity version that’s perfect for summertime gatherings.
-
Vegan/Gluten-Free Delight: This dip is naturally vegan and gluten-free, but for an extra protein boost, consider mixing in some quinoa!
-
Herb Variations: Experiment with other fresh herbs like dill or basil for new flavor profiles.
Chef’s Notes
Cowboy Caviar has had a special place in my heart (and on my table) for years. It’s a dish that seems to evolve with each occasion, reminding me just how versatile cooking can be! I remember once experimenting with adding a splash of balsamic vinegar — a mistake that quickly turned into an “oh wow” moment. Cooking is all about trial and error, and sometimes the best ideas come from those little mishaps!
Every time I make Cowboy Caviar, it’s like a little culture fest in my kitchen. The colors, the crunch, and the smiles that come with it — honestly, it’s everything comforting about food, wrapped up in one bowl. I encourage you to make it your own and share it with those you love!
FAQs and Troubleshooting
-
Why is my Cowboy Caviar watery?
If you find your dip too soupy, try draining the beans and corn more thoroughly next time. You can also balance it with more solid ingredients like chopped peppers or onions. -
How long will it last in the fridge?
Cowboy Caviar can last about 3-5 days in the fridge. But be warned — it tends to disappear quickly when served! -
Can I make this ahead of time?
Absolutely! You can make it a day ahead. Just be sure to give it a good stir before serving, and you may need to add a bit more lime juice to refresh the flavors. -
What can I use instead of avocado?
If avocado isn’t your thing, consider using diced cucumber for a fresh crunch or just leave it out altogether. The dip will still be delicious!
Nutritional Info
(Optional but helpful for those who are health-conscious)
- Serving Size: 1/2 cup
- Calories: ~120 kcal
- Protein: 5g
- Carbs: 22g
- Fat: 4g
- Fiber: 6g
And there you have it! A vibrant and delicious Cowboy Caviar Dip that’s easy to make and even easier to enjoy. So roll up those sleeves, let your creativity shine, and get ready to share some joy in your kitchen! Happy cooking, friends!
Print
Cowboy Caviar Dip
- Total Time: 45 minutes
- Yield: 4 servings 1x
- Diet: Vegan
Description
A vibrant and delicious dip filled with beans, fresh veggies, and a tangy dressing, perfect for gatherings and snack tables.
Ingredients
- 1 can black beans
- 1 can sweet corn
- 1 red bell pepper
- 1 green bell pepper
- 1/2 red onion
- 1 cup cherry tomatoes
- 1 avocado
- Juice of 2 limes
- 1/4 cup fresh cilantro
- Salt and pepper to taste
- 1 teaspoon chili powder (optional)
Instructions
- Rinse and drain the beans, then add to a large mixing bowl.
- Prepare the corn by draining canned corn or slicing kernels off fresh corn.
- Chop the red bell pepper, green bell pepper, and cherry tomatoes; finely chop the red onion.
- Slice the avocado and gently fold it into the bowl.
- Add lime juice, seasoning, and optional chili powder.
- Toss in the chopped cilantro and mix well.
- Chill in the refrigerator for at least 30 minutes before serving.
Notes
Best served with crispy tortilla chips, but can also be used as a taco topping or salad addition.
- Prep Time: 15 minutes
- Cook Time: 0 minutes
- Category: Appetizer
- Method: Mixing
- Cuisine: Mexican
Nutrition
- Serving Size: 1/2 cup
- Calories: 120
- Sugar: 3g
- Sodium: 200mg
- Fat: 4g
- Saturated Fat: 1g
- Unsaturated Fat: 3g
- Trans Fat: 0g
- Carbohydrates: 22g
- Fiber: 6g
- Protein: 5g
- Cholesterol: 0mg
Keywords: Cowboy Caviar, dip, healthy snacks, party food, vegetarian recipes




