

Sugar Free Orange Julius
Sugar-Free Orange Julius: A Refreshing Twist on a Classic
Welcome to my kitchen, dear food lover! Today, I’m beyond excited to share a recipe that’ll tickle your taste buds and bring a sunny burst of citrus to your day—my Sugar-Free Orange Julius. Before we dive into the recipe, let’s talk about why this drink deserves a special spot in your kitchen.
Picture this: it’s a warm summer day, and you’re lounging by the pool, feeling the sun on your skin. You hear the blender whirring, and a moment later, that classic Orange Julius makes an entrance—thick, frothy, and perfectly sweet. Sounds dreamy, doesn’t it? But let’s be honest—sometimes we want a refreshment that won’t wreak havoc on our health goals. This is where my sugar-free take on this iconic drink comes into play!
Making a sugar-free version allows me to savor that nostalgic sweetness without the guilty conscience! Not only does it taste incredible, but it’s also easy to whip up so you can enjoy it anytime. Everyone can gather around and indulge in this delicious treat knowing it’s made with wholesome ingredients. So, roll up those sleeves and let’s get blending!
A Sweet Memory: Discovering Orange Julius
Ah, let me take you on a little journey back to my childhood! Growing up, my family had this incredible tradition of weekend outings to the local mall. You know the kind—shopping, skating, and just soaking in the lively atmosphere. At the end of the day, my reward was always an Orange Julius from that bright yellow kiosk in the food court.
I vividly remember the first time I took a sip. It was love at first taste! That creamy, citrusy flavor was unlike anything I’d ever had. Then my mom would remind me to savor it slowly—as if that was even possible! As I grew older and learned more about nutrition, I realized that the sugary versions of my favorite treats didn’t quite align with my health goals. And so began my mission to recreate that magical Orange Julius with a twist—using natural sweeteners and wholesome ingredients.
And now, dear friend, I’m thrilled to share this revamped, guilt-free version that keeps all the nostalgia but leaves out the sugar!
Ingredients
Let’s gather our ingredients! Here’s what you’ll need for this vibrant beverage:
-
Fresh Oranges (about 4-5)
Nothing beats fresh! Oranges provide the bright citrus flavor we’re after. If you’re in a pinch, you can use store-bought orange juice, just ensure it’s 100% pure juice without added sugars! -
Vanilla Extract (1 tablespoon)
This adds a warm, rich note to the drink, perfectly harmonizing with the citrus. For a twist, try almond extract—it gives a lovely nutty aroma. -
Unsweetened Almond Milk (1.5 cups)
This keeps the drink creamy without adding sugar. You can swap it for coconut milk or oat milk for a different flavor profile! -
Ice (2 cups)
This is the secret to that signature frothy texture. Feel free to adjust the ice for a thicker or thinner drink, depending on your preference. -
Stevia or Monk Fruit Sweetener (to taste)
Opt for whatever you prefer! Both natural sweeteners give the perfect touch of sweetness without the carbs. Start with a little—taste and adjust as you go! -
Optional: Greek Yogurt (½ cup)
For an extra creamy texture and protein boost, this is a great addition! You can also use dairy-free yogurt for a vegan alternative.
Step-by-Step Instructions
Alright, let’s make some magic happen! Follow these easy steps for your Sugar-Free Orange Julius:
-
Prep the Oranges: Start by peeling the fresh oranges. Remove as much of the white pith as you can—it can be bitter. Then, break them into sections. If you have time, you could even juice them, but I find the sections work perfectly in the blender.
Chef Tip: If you want to make this ahead of time, zest a little bit of the orange peel to add to your drink later! It gives a fresh, aromatic kick.
-
Blend It Up: In your trusty blender, toss in the orange sections, vanilla extract, almond milk, and ice. If you’re adding Greek yogurt, go ahead and toss that in too!
Commentary: I absolutely love my high-speed blender for this; it gives a lovely, smooth consistency. If using a regular blender, ensure your ice is crushed a bit for easier blending.
-
Sweeten to Taste: Now, gradually add your choice of sweetener—start with a little and blend. Taste the mix and add more if needed.
-
Blend Again: Blend everything together until smooth and frothy! The goal here is a creamy texture with that signature frothiness.
-
Serve It Up: Once blended, pour this zesty delight into tall glasses. You might want to give it a little taste test first—yummm!
Chef Hack: Serve with colorful straws or garnish with a slice of orange on the rim for a festive touch.
Serving Suggestions
Here’s how I love to serve my Sugar-Free Orange Julius: pour it into tall, chilled glasses and add a playful paper straw or even sprinkle a bit of cinnamon on top for a warming twist! Feeling fancy? Top it off with a dollop of whipped coconut cream or yogurt for that deliciously creamy indulgence.
This drink is perfect for brunch gatherings or as a refreshing afternoon pick-me-up. Pair it with a light salad or some homemade scones, and you’ve got yourself a delightful meal!
Recipe Variations
While the classic is always a win, why not get creative? Here are some delightful twists to try with your Sugar-Free Orange Julius:
- Berry Burst: Toss in a cup of frozen mixed berries before blending for a fruity explosion.
- Mango Madness: Swap half of the oranges with fresh mango for a tropical delight.
- Minty Fresh: Add a few fresh mint leaves while blending for an invigorating twist.
- Protein Power: Add a scoop of vanilla protein powder for a filling, nutritious boost.
Chef’s Notes
Over the years, I’ve played around with this recipe, learning what works best and what doesn’t. I’ve seen it evolve into a favorite amongst friends and family. One funny moment stands out; once, I accidentally added too much orange zest and ended up with a drink that tasted like a citrus explosion! Lesson learned—balance is key!
Cooking is all about experimentation, and I love how this particular recipe has allowed me to modify it while maintaining that nostalgic flavor. I can’t wait for you to try it and hopefully create your own memory around this delicious drink!
FAQs and Troubleshooting
Q: My Orange Julius turned out too runny. What did I do wrong?
A: If your drink is too thin, it might be that you used too much almond milk or not enough ice. Just add a bit more ice and blend until you achieve the desired consistency.
Q: Can I make this ahead of time?
A: While it’s best fresh for that frothy texture, you can prepare the ingredients in advance. Just blend them right before serving for the best results!
Q: Is this recipe vegan?
A: Yes! As long as you use dairy-free yogurt and almond milk, it’s entirely plant-based and suitable for vegan diets.
Q: How long does it last in the fridge?
A: It’s best consumed fresh, but you can store it in the refrigerator for up to 24 hours. Just give it a good stir or shake before enjoying!
Nutritional Info (Approximate per Serving)
- Calories: 120
- Protein: 5g
- Fat: 2g
- Carbs: 16g
- Sugar: 1g (natural sugars from oranges)
- Fiber: 2g
Alright, my lovely foodies! Now you have everything you need to whip up your very own Sugar-Free Orange Julius. I hope this drink brings back memories of sunny days while also aligning with your health goals. Happy cooking, and don’t forget to share the love—this recipe is meant to be enjoyed and shared! 🌞
Print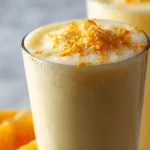
Sugar-Free Orange Julius
- Total Time: 10 minutes
- Yield: 4 servings
- Diet: Vegan
Description
A refreshing, sugar-free twist on the classic Orange Julius, perfect for hot summer days.
Ingredients
- Fresh Oranges (about 4-5)
- Vanilla Extract (1 tablespoon)
- Unsweetened Almond Milk (1.5 cups)
- Ice (2 cups)
- Stevia or Monk Fruit Sweetener (to taste)
- Optional: Greek Yogurt (½ cup)
Instructions
- Prep the Oranges: Start by peeling the fresh oranges. Remove as much of the white pith as you can, break them into sections.
- Blend It Up: In your trusty blender, toss in the orange sections, vanilla extract, almond milk, and ice. If you’re adding Greek yogurt, go ahead and toss that in too!
- Sweeten to Taste: Gradually add your choice of sweetener—start with a little and blend.
- Blend Again: Blend everything together until smooth and frothy.
- Serve It Up: Pour this zesty delight into tall glasses and enjoy!
Notes
Add a splash of cinnamon on top or a dollop of whipped coconut cream for indulgence.
- Prep Time: 10 minutes
- Cook Time: 0 minutes
- Category: Beverage
- Method: Blending
- Cuisine: American
Nutrition
- Serving Size: 1 serving
- Calories: 120
- Sugar: 1g
- Sodium: 50mg
- Fat: 2g
- Saturated Fat: 0g
- Unsaturated Fat: 2g
- Trans Fat: 0g
- Carbohydrates: 16g
- Fiber: 2g
- Protein: 5g
- Cholesterol: 0mg
Keywords: sugar-free, orange, drink, healthy, refreshing, summer
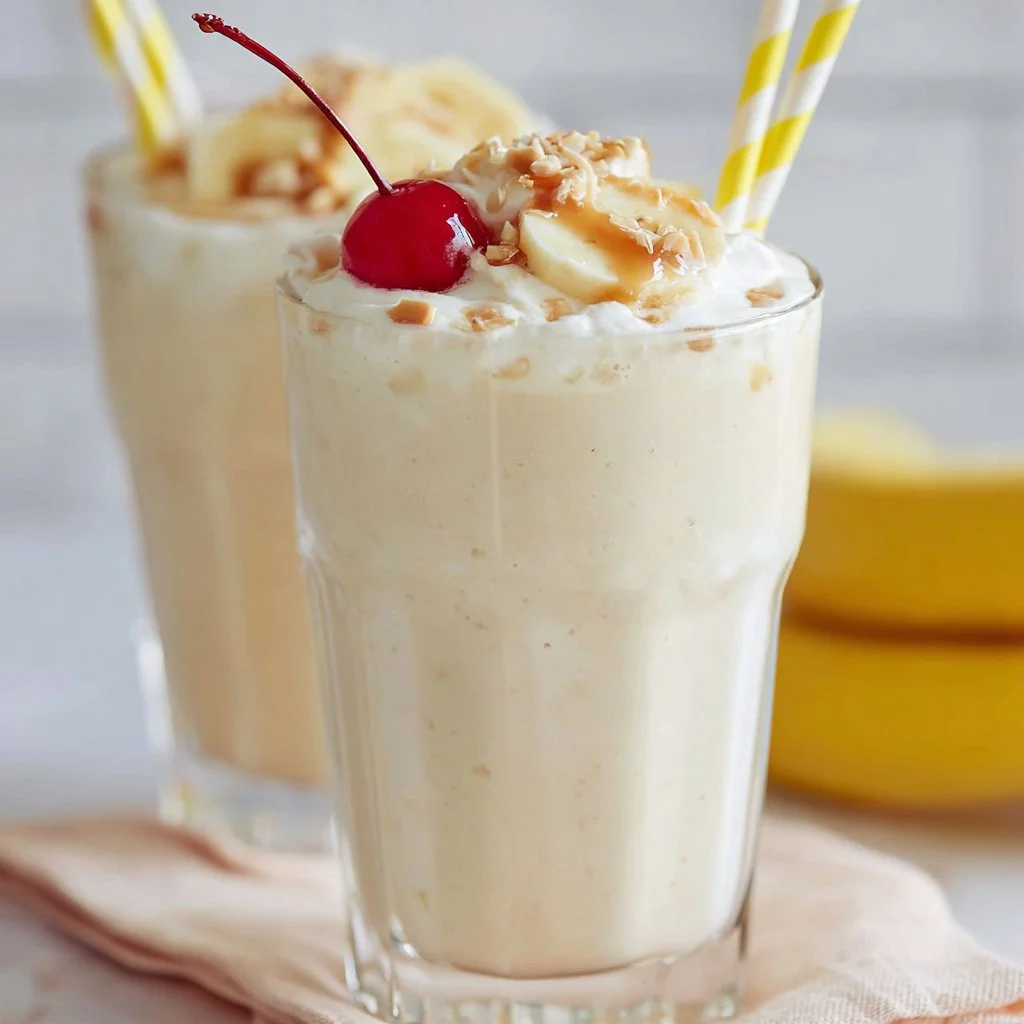
Creamy Banana Milkshake
Creamy Banana Milkshake: A Tribute to Comfort in a Glass
Hey there, friends! Welcome back to my kitchen! Today, I’m thrilled to share one of my all-time favorite drinks that takes me back to sunny afternoons with my childhood friends — the Creamy Banana Milkshake. You know, the kind that feels like a warm hug in a glass! Picture this: It’s a hot summer day, the sun is shining, and all you crave is something cold and delicious. That’s where this banana milkshake swoops in like a superhero!
This milkshake is not just any ordinary treat; it’s creamy, dreamy, and bursting with the natural sweetness of ripe bananas. It’s an easy-to-make, nostalgic drink that can brighten any day and is perfect for all ages. Whether you’ve had a long day and need a pick-me-up or are simply looking to indulge a little, this creamy delight will do the trick!
Plus, the best part? It requires hardly any prep time and just a handful of ingredients that you likely have in your pantry right now. So, grab your blender, and let’s dive into the delicious world of banana milkshakes! Trust me, your taste buds are in for a treat!
Personal Story
Growing up, my mom had a special recipe for banana milkshakes that we all adored. Every Saturday, without fail, she’d pull out the blender, and the kitchen would fill with the sweet aroma of ripe bananas. She’d let us choose the toppings — sometimes it was whipped cream, other times sprinkles — and we’d stand by the counter, eagerly awaiting our frosty glasses filled with pure joy.
I can still remember the thrill of the first sip. The milkshake was icy cold and so creamy that it felt like a dessert and a drink all in one. It was more than just a treat; it was a moment that brought my family together. We’d sit on the porch, laughing and chatting, soaking up the sun while sipping our banana milkshakes. Those Saturdays sparked my love for cooking and sharing food with others, which ultimately led me to create this blog! Every time I whip up a banana milkshake, it’s like stepping back in time to those carefree summer days.
Ingredients
Here’s what you’ll need to create this luscious Creamy Banana Milkshake:
- Ripe Bananas (2): The star of the show! Look for bananas with a few brown spots to get that deep, sweet flavor. If you have overripe bananas, they’re perfect for this recipe!
- Whole Milk (1 cup): For a richer, creamier texture. You can substitute with almond milk, oat milk, or any other milk of your choice if you prefer a non-dairy option.
- Vanilla Ice Cream (1 cup): The secret ingredient for that extra creaminess! Don’t have vanilla? Feel free to swap it for any other flavor that excites you! Chocolate or caramel ice cream would be great too!
- Honey or Maple Syrup (1-2 tablespoons): Just a hint of sweetness to elevate the banana flavor. Adjust the amount based on your sweetness preference, or omit it altogether if your bananas are sweet enough.
- Vanilla Extract (1 teaspoon): Adds depth to the flavor. If you don’t have vanilla extract, a dash of almond extract can also bring an exciting twist!
- Whipped Cream (optional for serving): Because everything is better with whipped cream! You can also use coconut whipped cream for a delightful non-dairy twist.
Step-by-Step Instructions
And now, let’s get to the fun part—making your creamy banana milkshake! Follow these easy steps, and I’ll sprinkle in some handy tips along the way.
-
Prep Your Ingredients: Start by gathering all your ingredients. Peel the bananas and break them into chunks for easier blending. Remember, the riper the banana, the sweeter and creamier your milkshake will be!
-
Blend the Bananas: Add the banana chunks into your blender first. Blend them on low until they start to break down. This helps create a smooth base and reduces the likelihood of banana chunks in your milkshake.
Tip: If you forget to freeze your bananas, you can throw in a few ice cubes at this stage for that chilly texture!
-
Add the Milk and Ice Cream: Pour in the whole milk followed by the vanilla ice cream. This is where the magic happens; the ice cream will add that luscious creaminess!
Chef Hack: If you want an extra thick shake, use less milk or add more ice cream!
-
Sweeten the Shake: Drizzle in honey or maple syrup and add the vanilla extract. Blend everything on high speed until you achieve a smooth and creamy texture. Not too thick, not too runny—just right!
-
Taste Test: This is my favorite part! Give your milkshake a quick taste. If it needs a bit more sweetness, feel free to add more honey or syrup and blend once more.
-
Serve It Up: Once blended to perfection, pour the banana milkshake into your favorite glasses. If you want to channel your inner barista, you can even drizzle a bit of chocolate syrup or caramel on the inside of the glasses before pouring!
Serving Suggestions
To elevate your milkshake experience, top it off with a fluffy cloud of whipped cream. You can sprinkle crushed nuts, chocolate shavings, or even a few banana slices on top to make it visually appealing. Serve alongside a simple but delicious cookie for a delightful treat!
Recipe Variations
-
Peanut Butter Banana Milkshake: Add 1-2 tablespoons of peanut butter for an extra creamy, nutty twist.
-
Chocolate Banana Milkshake: Toss in a couple of tablespoons of chocolate syrup for a chocolatey delight.
-
Vegan Option: Swap the ice cream for a banana-based coconut ice cream and the milk for almond or oat milk for a fully vegan treat.
-
Coffee Banana Milkshake: Add a shot of espresso or cold brew for a morning pick-me-up with a hint of banana flavor.
-
Spicy Kick: Sprinkle in a pinch of cinnamon or nutmeg for a warm, spicy element that complements the sweetness of the bananas.
Chef’s Notes
When I first started making this milkshake, I experimented with different flavor combinations — sometimes adding strawberries or even a dollop of Greek yogurt for extra protein! This recipe has evolved into the ultimate banana milkshake that always hits the spot. It’s simple yet satisfying, proving that sometimes the best recipes are the ones made with love.
A funny story: I once made a batch for my friends and forgot to put the lid on properly. Let’s just say, our kitchen looked like a banana ice cream explosion! But we all laughed and ended up making the mess part of the fun. Cooking is all about enjoying the moment, right?
FAQs and Troubleshooting
-
What if my milkshake is too thin?
- If your milkshake turns out too thin, simply add more ice cream and blend until it’s the desired consistency.
-
Can I make this ahead of time?
- I recommend enjoying this milkshake freshly made, but if you must prepare it ahead, keep it in a sealed container in the freezer. Let it soften a bit before drinking.
-
What if my bananas aren’t very sweet?
- If your bananas aren’t sweet enough for your taste, add a little more honey or maple syrup to enhance the flavor.
-
Can I substitute other fruits in this recipe?
- Absolutely! You can experiment with other fruits like strawberries, blueberries, or even mango to create your own fruity milkshake variations.
Nutritional Info (Optional)
While I love indulging in this delicious treat, it’s always good to know what you’re putting into your body! One serving of this creamy banana milkshake (approx. 1 cup) has around:
- Calories: 350 (varies based on ice cream used)
- Fat: 12g (depends on milk and ice cream type)
- Carbohydrates: 60g
- Protein: 6g
Conclusion
And there you have it, folks! A wonderful recipe for a creamy banana milkshake that not only tastes amazing but also brings back those joyful memories. I hope you try this recipe and share it with your loved ones. Don’t forget to make it your own with fun toppings or add-ins! Keep cooking with passion, and feel free to share your adventures with me! Happy blending! 🍌🥛
Print
Creamy Banana Milkshake
- Total Time: 5 minutes
- Yield: 2 servings 1x
- Diet: Vegetarian
Description
A deliciously creamy banana milkshake that feels like a warm hug in a glass. Perfect for hot summer days or as a nostalgic treat!
Ingredients
- 2 Ripe Bananas
- 1 cup Whole Milk
- 1 cup Vanilla Ice Cream
- 1–2 tablespoons Honey or Maple Syrup
- 1 teaspoon Vanilla Extract
- Whipped Cream (optional for serving)
Instructions
- Prep your ingredients: Gather and peel the bananas, then break them into chunks.
- Blend the bananas: Place banana chunks in the blender and blend on low until broken down.
- Add the milk and ice cream: Pour in the whole milk and add vanilla ice cream, then blend.
- Sweeten the shake: Drizzle in honey or maple syrup, add vanilla extract, and blend on high until smooth.
- Taste test: Sample the milkshake and adjust sweetness if needed, then blend again.
- Serve it up: Pour the milkshake into glasses, using toppings like whipped cream as desired.
Notes
Try adding various toppings like chocolate shavings or nuts for extra flavor and texture. For variations, consider adding peanut butter or chocolate syrup.
- Prep Time: 5 minutes
- Cook Time: 0 minutes
- Category: Dessert
- Method: Blending
- Cuisine: American
Nutrition
- Serving Size: 1 serving
- Calories: 350
- Sugar: 40g
- Sodium: 100mg
- Fat: 12g
- Saturated Fat: 7g
- Unsaturated Fat: 5g
- Trans Fat: 0g
- Carbohydrates: 60g
- Fiber: 3g
- Protein: 6g
- Cholesterol: 30mg
Keywords: banana, milkshake, dessert, creamy, summer drink, nostalgic


