
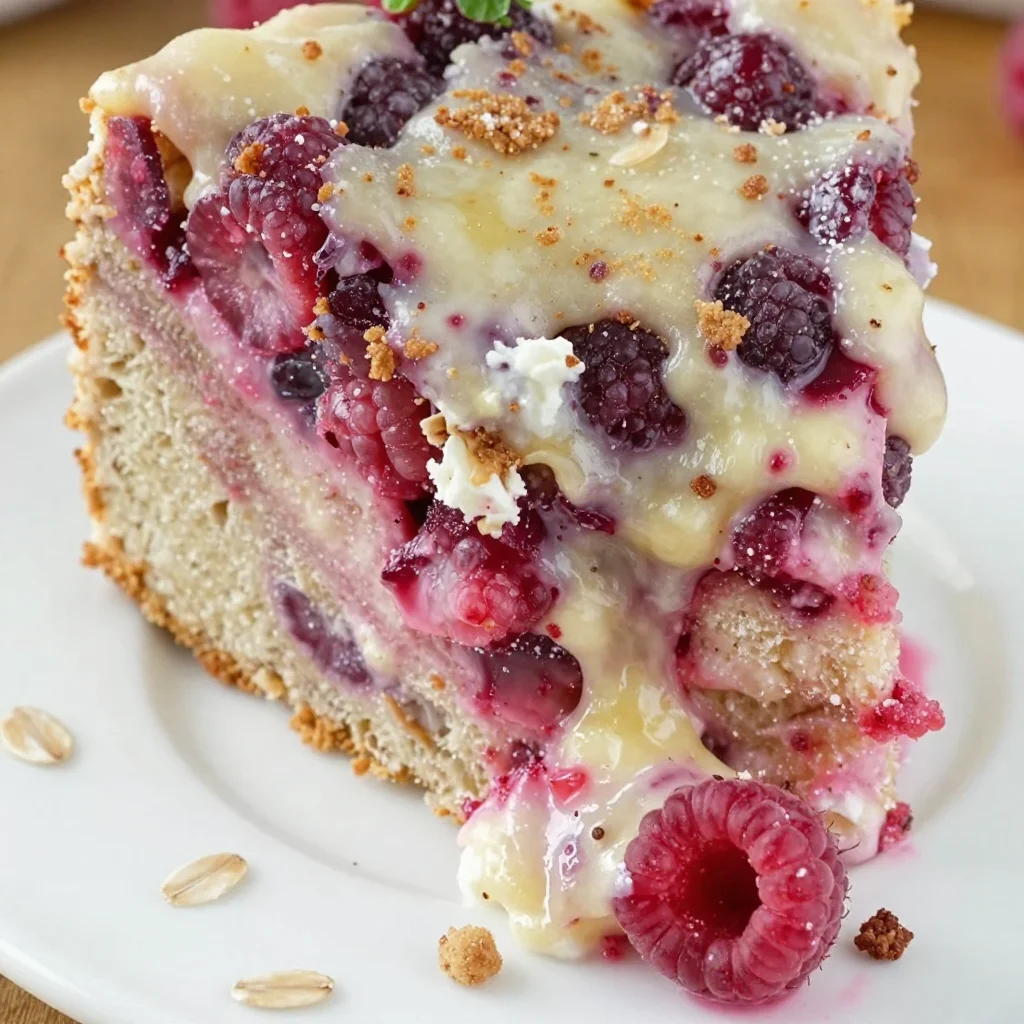
Weeknight-Ready Raspberry Cream Cheese Coffee Cake
Raspberry Cream Cheese Coffee Cake: A Sweet Slice of Nostalgia
Welcome, friends! I’m so excited you’re here in my cozy kitchen today because we’re about to whip up something that’s not just a treat for your taste buds but also a delightful trip down memory lane. It’s my Raspberry Cream Cheese Coffee Cake! 🍰
This cake is the perfect combination of sweet and tangy, with a luscious cream cheese filling that makes it unbelievably rich. Imagine biting into that moist, fluffy cake, with pockets of hearty raspberries bursting with flavor. And the best part? It’s marked with a delicious crumb topping that makes it simply irresistible. Whether for breakfast, an afternoon snack, or a dessert treat, this coffee cake hits all the right spots.
Each time I bake this cake, it reminds me of lazy Sunday mornings spent in my grandmother’s kitchen, the air heavy with the smell of fresh coffee and sweet baked goods. It was a time when family gathered around the table, exchanging stories and laughter, all while savoring the warm, buttery goodness of her creations. Those moments were filled with love, and as I grew older, I made it my mission to carry on that tradition in my own kitchen.
So, roll up your sleeves, grab your apron (you’ll need it!), and let’s dive into this delightful recipe that brings people together. After all, what’s better than bonding over a slice of homemade cake?
A Slice of My Childhood
I’ll never forget the first time I baked this Raspberry Cream Cheese Coffee Cake. I was a curious little munchkin, eager to learn the secrets of my grandmother’s kitchen. One sunny afternoon, she decided it was time to pass down the family recipe, and I remember the thrill of standing on a stool, peering over the counter as she measured out the ingredients.
The raspberries were vibrant, glistening like jewels, and the cream cheese filling intrigued me. As we mixed and mingled the ingredients, my grandmother shared snippets of her culinary adventures, revealing stories that sparked my love for cooking. It was a beautiful bonding experience, and we giggled as the batter splattered everywhere—my curious hands wanted to do it all!
After what felt like an eternity of waiting, a heavenly aroma filled the kitchen as the cake baked to golden perfection. When we finally pulled it from the oven, it looked like a masterpiece—despite the chaos! We let it cool, and when I took that first bite, it wasn’t just delicious; it was love, nostalgia, and happiness all rolled into one.
Now, every time I bake this cake, I’m reminded of those childhood moments brimming with laughter and incredible flavors, and I hope to recreate that magic in your kitchen too!
Ingredients
Here’s what you’ll need to create this dreamy Raspberry Cream Cheese Coffee Cake:
For the Cake:
-
2 cups all-purpose flour
- A staple in most baking. For a gluten-free option, substitute with a 1:1 gluten-free baking mix.
-
1 tablespoon baking powder
- This helps provide aeration and lift. Ensure it’s fresh for maximum fluffiness!
-
½ teaspoon baking soda
- Adds the perfect rise and is especially handy when paired with acidic ingredients like the cream cheese.
-
½ teaspoon salt
- Just a pinch enhances all the flavors.
-
1 cup granulated sugar
- Sweetens the cake! You can substitute it with coconut sugar for a bit of a caramel note.
-
½ cup unsalted butter, softened
- Gives the cake moisture and flavor. If you’re looking for a dairy-free version, coconut oil does wonders!
-
2 large eggs
- Helps bind everything together. For a vegan swap, try ½ cup unsweetened applesauce.
-
1 teaspoon vanilla extract
- Adds depth and warms up the flavor. Fresh vanilla bean or vanilla bean paste are delightful alternatives.
-
1 cup milk
- Whole milk is perfect for richness, but almond or oat milk work just as well!
For the Cream Cheese Filling:
-
8 oz cream cheese, softened
- Provides that luscious, tangy filling we crave! Softened means easy mixing, trust me.
-
1/3 cup granulated sugar
-
1 large egg
-
1 teaspoon vanilla extract
For the Raspberry Topping:
- 2 cups fresh raspberries
- The star of our show! You can swap for blueberries or blackberries if you prefer. Frozen berries work but may create a wetter batter.
For the Crumb Topping:
-
½ cup all-purpose flour
-
½ cup brown sugar
- For that lovely caramel-like flavor!
-
½ teaspoon cinnamon
- Just a pinch adds warmth and spice.
-
¼ cup cold unsalted butter
- Cube it to help create those beautiful crumbs!
Step-by-Step Instructions
Let’s get our hands dirty, shall we? Here’s how to create this delightful Raspberry Cream Cheese Coffee Cake:
Step 1: Preheat and Prep
Begin by preheating your oven to 350°F (175°C). Grease a 9-inch square baking pan or use parchment paper for easy removal later. The goal is to make sure our cake doesn’t stick!
Step 2: Mix Your Dry Ingredients
In a large bowl, whisk together your flour, baking powder, baking soda, and salt. This is important as it evenly distributes the leavening agents ensuring a lovely rise. Set it aside for now.
Step 3: Cream the Butter and Sugar
In another bowl, cream together the softened butter and granulated sugar until light and fluffy. This should take about 3-5 minutes. The air you’re incorporating here is vital for that fluffy texture—it’s like magic! Add in the eggs, one at a time, beating well after each addition. Toss in that vanilla extract too.
Step 4: Combine Wet and Dry
Now, alternate adding the dry ingredients and milk into your butter mixture. Start with a third of the dry mix, then half the milk, and repeat until everything is just combined. Don’t overmix—lumps are perfectly fine!
Step 5: Craft Your Cream Cheese Filling
In a separate bowl, beat the softened cream cheese, sugar, egg, and vanilla until smooth and creamy. This filling will add that dreamy texture and tang that we love.
Step 6: Assemble the Cake
Pour half of the cake batter into your greased pan. Spread it evenly; it’s going to be the foundation! Now, carefully pour the cream cheese mixture over the batter. Dollop the remaining cake batter on top and smooth it out gently.
Step 7: Add Those Raspberries
Scatter the fresh raspberries over the top; the more, the merrier! They’ll sink slightly while baking, creating that beautiful hidden surprise.
Step 8: Time for Crumb Topping
In a small bowl, mix together the flour, brown sugar, cinnamon, and cold butter using your fingers or a pastry cutter until it resembles coarse crumbs. Sprinkle this glorious mixture generously over the cake.
Step 9: Bake
Pop your cake into the preheated oven and bake for 45-55 minutes, or until a toothpick inserted into the center comes out clean. A little bit of melted cream cheese on the toothpick is fine!
Step 10: Cool and Enjoy
Let it cool in the pan for at least 15 minutes before transferring it to a wire rack to cool completely. This cake is divine warm, but giving it time to cool allows the flavors to meld beautifully.
Serving Suggestions
This Raspberry Cream Cheese Coffee Cake looks delightful when plated in thick slices, generous enough to share with family and friends. Dust a light sprinkle of powdered sugar on top for that lovely finishing touch, and serve it with a dollop of whipped cream or a scoop of vanilla ice cream on the side. Coffee or tea pairs perfectly with this treat, making it an ideal afternoon indulgence or a fancy brunch centerpiece!
Recipe Variations
Feel free to get creative with these variations:
-
Mixed Berry Bake: Swap out the raspberries for a mix of your favorite berries such as strawberries, blueberries, or blackberries. Each will bring a unique flavor twist!
-
Citrus Zest: Add lemon or orange zest to the cream cheese filling for a refreshing zing.
-
Nutty Crunch: Fold in some chopped walnuts or pecans into the cake batter for added texture and crunch.
-
Chocolate Dreams: Include chocolate chips in the batter for those who can’t resist a bit of chocolate!
-
Gluten-Free Goodness: Use a gluten-free 1:1 substitute flour for those mindful of gluten.
Chef’s Notes
This Raspberry Cream Cheese Coffee Cake is one of those recipes that has evolved over time. I initially made it with strawberries, but as a lover of diverse flavors, I started experimenting with different fruits. I discovered that the tartness of raspberries pairs beautifully with the sweetness of the cream cheese—truly a match made in flavor heaven!
Remember, it’s completely okay to make a mess while cooking—it just means you’re creating! I always try to keep a camera handy for those messy moments that later become funny cooking stories. Just last week while making this cake, I ended up with flour all over my face and a sprinkle of powdered sugar on my dog from a hopping mishap!
FAQs and Troubleshooting
1. My cake didn’t rise. What went wrong?
Make sure your baking powder and baking soda are fresh. A common mistake is using old leaveners, which can result in a dense cake.
2. How do I store leftovers?
Wrap slices in plastic wrap or store them in an airtight container. They can be left at room temperature for a day or two but refrigerate for longer freshness.
3. Can I freeze this coffee cake?
Absolutely! Once fully cooled, wrap it tightly in plastic wrap and foil, and store it in the freezer. To enjoy, simply thaw it in the fridge overnight and reheat before serving.
4. Can I make the cream cheese filling ahead of time?
Yes! Prepare the filling the night before and keep it in the fridge. Just give it a quick stir before using.
Nutritional Info
While I always encourage balance in eating, here’s a quick nutritional breakdown per serving (slice):
- Calories: 300
- Total Fat: 15g
- Saturated Fat: 8g
- Carbohydrates: 38g
- Sugars: 16g
- Protein: 5g
It’s a sweet treat, but like all things lovely, enjoy it with love and moderation!
And that’s it, friends! I hope this Raspberry Cream Cheese Coffee Cake fills your kitchen with warm memories and delightful aromas, just as it does mine. Don’t forget to share your baking adventures with me—I’d love to hear all about your kitchen stories! Happy baking! 🍰✨
Print
Raspberry Cream Cheese Coffee Cake
- Total Time: 75 minutes
- Yield: 12 servings 1x
- Diet: Vegetarian
Description
A sweet and tangy coffee cake filled with luscious cream cheese and fresh raspberries, topped with a delightful crumb topping.
Ingredients
- 2 cups all-purpose flour
- 1 tablespoon baking powder
- ½ teaspoon baking soda
- ½ teaspoon salt
- 1 cup granulated sugar
- ½ cup unsalted butter, softened
- 2 large eggs
- 1 teaspoon vanilla extract
- 1 cup milk
- 8 oz cream cheese, softened
- 1/3 cup granulated sugar (for filling)
- 1 large egg (for filling)
- 1 teaspoon vanilla extract (for filling)
- 2 cups fresh raspberries
- ½ cup all-purpose flour (for crumb topping)
- ½ cup brown sugar
- ½ teaspoon cinnamon
- ¼ cup cold unsalted butter
Instructions
- Preheat your oven to 350°F (175°C) and grease a 9-inch square baking pan.
- Whisk together the flour, baking powder, baking soda, and salt in a large bowl.
- Cream the softened butter and granulated sugar until light and fluffy; then add eggs and vanilla.
- Alternate adding the dry ingredients and milk into the butter mixture until just combined.
- Beat the cream cheese, sugar, egg, and vanilla until smooth for the filling.
- Pour half of the batter into the pan, then add cream cheese filling, followed by the remaining batter.
- Scatter raspberries over the top.
- Mix flour, brown sugar, cinnamon, and cold butter until crumbs form, then sprinkle over the cake.
- Bake for 45-55 minutes until a toothpick comes out clean.
- Cool for 15 minutes before transferring to a wire rack to cool completely.
Notes
For a gluten-free option, substitute all-purpose flour with a 1:1 gluten-free baking mix.
- Prep Time: 20 minutes
- Cook Time: 55 minutes
- Category: Dessert
- Method: Baking
- Cuisine: American
Nutrition
- Serving Size: 1 slice
- Calories: 300
- Sugar: 16g
- Sodium: 200mg
- Fat: 15g
- Saturated Fat: 8g
- Unsaturated Fat: 6g
- Trans Fat: 0g
- Carbohydrates: 38g
- Fiber: 1g
- Protein: 5g
- Cholesterol: 70mg
Keywords: coffee cake, raspberry cake, dessert, baking
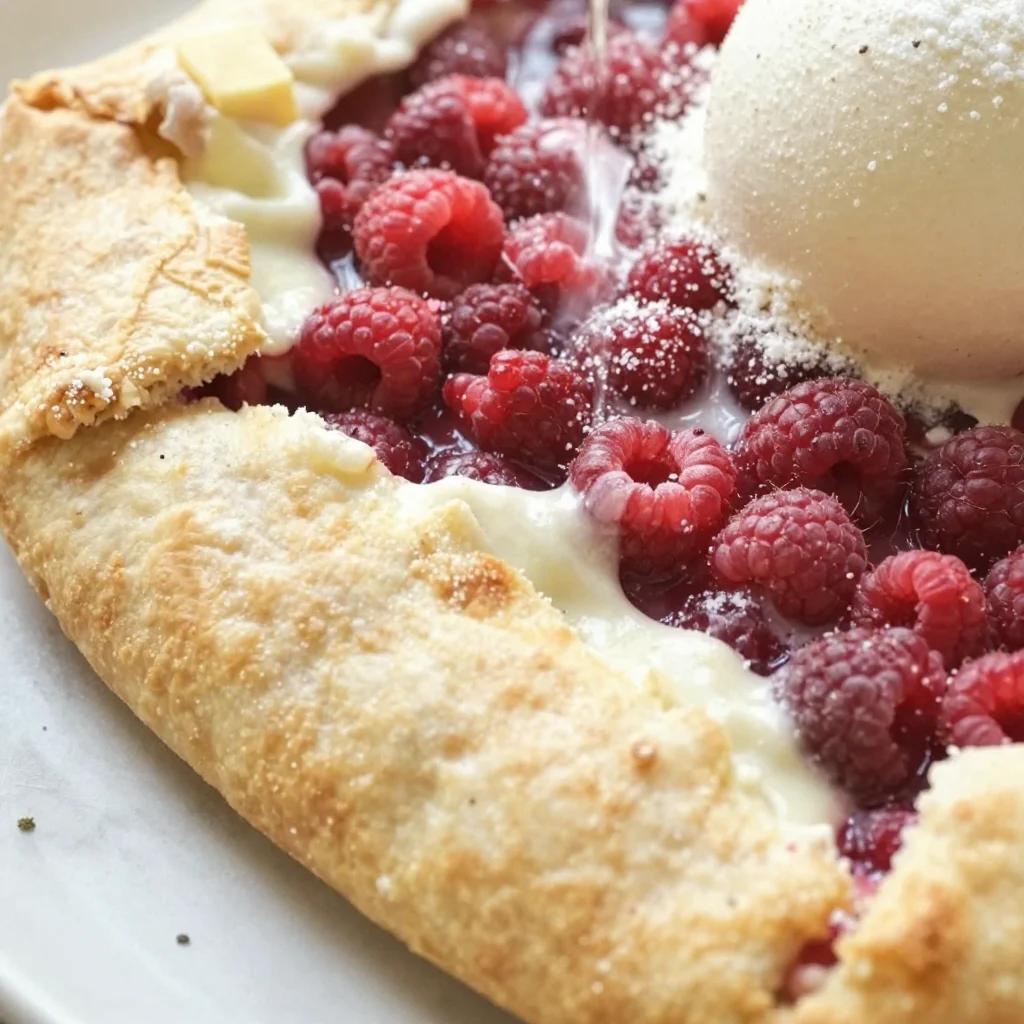
Minute Raspberry Galette for Beginners (No-Fuss Crust)
Easy Raspberry Galette: A Simple Yet Stunning Dessert!
Welcome to my kitchen, dear friends! Today, I’m thrilled to share a delightful recipe that not only brings a splash of vibrant flavor but also a touch of rustic charm to your dessert table: the Easy Raspberry Galette. When I think of galettes, I envision sunny afternoons spent savoring the sweet-tart notes of fresh fruits, mixed with a buttery crust, all while enjoying good company. The beauty of this dish lies in its simplicity—you don’t need to be a pastry chef to impress your friends and family with this stunning dessert.
There’s something magical about the way a galette allows the fruit to take center stage, enveloped in a flaky, tender crust that seems to sing of home. Whether it’s fresh raspberries reminding you of warm summer days or a cozy gathering with loved ones, every bite tells a story. And guess what? This rustic dessert is incredibly forgiving; it doesn’t need to be perfect. The charm is in its imperfect shape, the golden edges, and the bubbling fruit that peeks through. So, let’s roll up those sleeves and dive into this joyfully messy kitchen adventure!
To make an Easy Raspberry Galette, you’ll be working with a handful of wholesome ingredients. I promise, you’ll find it therapeutic to create something so beautiful with your own two hands. And not only will your kitchen smell divine, but you’ll also fill the hearts of those around you with a little love and sweetness. Whether you’re enjoying it on a Sunday brunch, a family gathering, or just a self-care treat, this galette is sure to create memories and smiles.
A Sweet Memory: My First Galette
Let me take you back to a warm summer evening a few years ago. My grandma, the queen of all things baked and buttery, invited me over for what she called a “fancy dessert night.” I remember walking into her cozy kitchen, the delicious aroma of fresh baked goods wafting through the air, making my stomach growl in anticipation.
That evening, she introduced me to the galette. As she rolled out the dough—flour clouds gently dancing around us—she explained, “It’s just a free-form pie, darling.” With a wink and a wink of her flour-dusted nose, she showed me how to fold the edges, leaving a beautiful rustic border. We chose plump, ripe raspberries from her garden that day, and watching those bright jewels come alive in the oven was pure magic.
Sitting together at her kitchen table, we savored every slice, the tart raspberries beautifully balancing the sweet, buttery crust. I learned that day that cooking is not just about flavors—it’s about connections. Now, every time I whip up a galette, I am reminded of those special moments shared in that cozy kitchen and the sense of warmth that good food brings to the table.
Ingredients
Before we jump into the cooking, let’s gather our ingredients! Here’s what you’ll need to create this delightful Easy Raspberry Galette:
-
All-purpose flour (1 1/4 cups): The foundation of our buttery crust. You can substitute with whole wheat flour for a nuttier flavor or gluten-free flour for a gluten-free version.
-
Unsalted butter (1/2 cup, chilled, chopped): Butter brings a rich flavor and flaky texture to the crust. If you’re in a pinch, you can use cold coconut oil or margarine, although the taste will vary.
-
Granulated sugar (1/4 cup, plus more for sprinkling): This sweetness helps balance the tartness of the raspberries. Feel free to swap in brown sugar for a more caramel-like flavor or to use honey or maple syrup in moderation.
-
Salt (1/4 tsp): A pinch of salt enhances and balances the flavors beautifully.
-
Ice water (3-4 tbsp): This helps bring the dough together without melting the butter. You can use club soda for a bubbly crust!
-
Fresh raspberries (2 cups): The star of the show! Use fresh for the best flavor and texture; if you’re using frozen, thaw them first and drain excess liquid.
-
Cornstarch (1 tbsp): This helps absorb moisture from the raspberries, keeping the crust from getting soggy.
-
Vanilla extract (1 tsp): This adds a lovely layer of flavor. Feel free to substitute with almond extract for something a bit different!
-
Egg wash (1 egg beaten with a splash of water): This gives the galette a beautiful, shiny glaze. If you’re going vegan, a plant-based milk works too.
With all these wonderful ingredients, you’ll be ready to create something deliciously rustic and totally Instagram-worthy!
Step-by-Step Instructions
Let’s get into the fun part! Here’s a detailed guide to making your own Easy Raspberry Galette, along with some little chef hacks to make the process easier and even more enjoyable.
Step 1: Prepare the Dough
-
Mix the Flour and Butter: In a mixing bowl, combine the all-purpose flour and salt. Add the chilled, chopped unsalted butter. Using a pastry cutter or your fingers, work the butter into the flour until it resembles coarse crumbs. You want little bits of butter to remain—this is what makes the crust flaky!
-
Add the Sugar and Water: Stir in the granulated sugar. Then, slowly add the ice water, one tablespoon at a time, mixing until the dough comes together. It should be moist but not sticky. If it feels too dry, add a tiny bit more water.
-
Chill the Dough: Form the dough into a disk, wrap it in plastic wrap, and chill for at least 30 minutes. This step is crucial for the butter to firm up and will make rolling out easier.
Step 2: Prepare the Filling
- Mix the Berries: In a medium bowl, gently toss the fresh raspberries with cornstarch, sugar, and vanilla extract. Let the mixture sit for about 10-15 minutes for the juices to meld together. During this time, you can preheat your oven to 400°F (200°C).
Step 3: Roll Out the Dough
-
Flour Your Surface: Once the dough has chilled, remove it from the refrigerator. On a lightly floured surface, roll out the dough into a rough 12-inch circle. Don’t stress about it being perfectly round—remember, rustic is the name of the game!
-
Transfer It: Carefully transfer the dough to a lined baking sheet. You can use parchment paper for easy cleanup and to prevent sticking.
Step 4: Assemble the Galette
-
Add the Filling: Spoon the raspberry filling into the center of the dough, leaving about a 2-inch border.
-
Fold the Edges: Gently fold the edges of the dough over the filling, creating a pleasing border. It doesn’t have to be perfect. The goal is to contain the berries while allowing the top to be exposed.
-
Egg Wash Time: Brush the crust with the egg wash (or plant-based milk), and sprinkle a bit of sugar over the crust for a sparkling finish.
Step 5: Bake
-
Bake to Perfection: Bake the galette in your preheated oven for about 25-30 minutes or until the crust is golden brown and the berries are bubbling.
-
Cool and Enjoy: Allow the galette to cool for at least 10 minutes before slicing. This gives the juices time to settle, making for a cleaner cut.
Serving Suggestions
When serving the Easy Raspberry Galette, presentation is key! Slice it into wedges and serve warm, perhaps with a generous dollop of whipped cream or a scoop of vanilla ice cream on the side. A sprinkle of powdered sugar on top can elevate its beauty even more. Enjoy this delightful treat with a cup of tea or coffee for a perfect afternoon pick-me-up!
Recipe Variations
- Berry Galette: Swap out raspberries for strawberries, blueberries, or even a mix of berries for a colorful twist.
- Peach Raspberry Galette: Combine sweet peaches with raspberries for a delightful summer flavor.
- Nutty Crust: Add ground almonds to the crust for a nutty flavor that pairs beautifully with the fruit.
- Herb-Infused: Add a touch of fresh thyme or basil to the raspberry filling for a unique and aromatic flavor.
- Vegan Option: Use coconut oil instead of butter and a flax egg in place of the egg wash!
Chef’s Notes
This Easy Raspberry Galette has been a staple in my kitchen for years, and it evolves with the seasons, just like life itself. I remember one summer trying out different fillings, and oh boy, the combinations were endless! My favorite deviation was adding a splash of balsamic vinegar to the filling for a lovely depth of flavor.
Don’t be afraid to experiment and use whatever fruits are in season—this recipe is all about creativity, joy, and a bit of delicious messiness! Every time I make it, I’m reminded of those lovely afternoons with my grandma.
FAQs and Troubleshooting
-
My dough is too sticky! What should I do?
If your dough feels overly sticky when rolling it out, don’t panic! Simply add a light sprinkle of flour to your work surface and your rolling pin. Alternatively, chill the dough for another 15 minutes to firm it up. -
Why is my galette soggy?
Soggy galette can happen if the filling is too wet. Make sure to drain any excess liquid from thawed frozen berries, and don’t skip the cornstarch—it helps absorb moisture during baking. -
How do I store leftovers?
Store any leftover galette covered in an airtight container in the fridge for up to 2 days. For the best texture when reheating, place it in the oven to warm up rather than the microwave. -
Can I make the dough ahead of time?
Absolutely! You can make the dough up to 2 days ahead. Just make sure it’s wrapped well and chilled in the fridge. You can also freeze it for up to a month.
Nutritional Info
Note: Nutritional values are estimates and may vary depending on specific brands and preparation methods.
- Serving Size: 1 slice (based on 8 servings)
- Calories: ~210
- Protein: 2g
- Fat: 10g
- Carbohydrates: 29g
- Sugar: 8g
And there you have it! A charming and incredibly easy Raspberry Galette recipe that’s as enjoyable to make as it is to eat. So, gather your loved ones, don that apron, and bake up a storm! I can’t wait to hear about your creations and the sweet moments they inspire. Happy baking, friends!
Print
Easy Raspberry Galette
- Total Time: 45 minutes
- Yield: 8 servings 1x
- Diet: Vegetarian
Description
A delightful and simple dessert featuring a flaky crust and fresh raspberries, perfect for any gathering.
Ingredients
- 1 1/4 cups All-purpose flour
- 1/2 cup Unsalted butter, chilled, chopped
- 1/4 cup Granulated sugar, plus more for sprinkling
- 1/4 tsp Salt
- 3–4 tbsp Ice water
- 2 cups Fresh raspberries
- 1 tbsp Cornstarch
- 1 tsp Vanilla extract
- 1 Egg wash (1 egg beaten with a splash of water)
Instructions
- Mix the flour and butter: Combine flour and salt in a bowl. Add the chopped butter and work it into the flour until it resembles coarse crumbs.
- Add the sugar and water: Stir in sugar and slowly mix in ice water until the dough comes together.
- Chill the dough: Form the dough into a disk, wrap in plastic, and chill for at least 30 minutes.
- Mix the berries: Gently toss raspberries with cornstarch, sugar, and vanilla in a bowl and let sit for 10-15 minutes.
- Flour your surface: Roll out chilled dough into a rough 12-inch circle on a floured surface.
- Transfer it: Move the dough to a lined baking sheet.
- Add the filling: Place raspberry filling in the center of the dough, leaving a 2-inch border.
- Fold the edges: Fold the dough edges over the filling to create a border.
- Brush with egg wash: Apply egg wash and sprinkle sugar over the crust.
- Bake to perfection: Bake in a preheated oven at 400°F for 25-30 minutes until golden brown and bubbling.
- Cool and enjoy: Let cool for 10 minutes before slicing.
Notes
Serve warm with whipped cream or vanilla ice cream. You can substitute with different berries or make it vegan.
- Prep Time: 15 minutes
- Cook Time: 30 minutes
- Category: Dessert
- Method: Baking
- Cuisine: French
Nutrition
- Serving Size: 1 slice
- Calories: 210
- Sugar: 8g
- Sodium: 100mg
- Fat: 10g
- Saturated Fat: 6g
- Unsaturated Fat: 4g
- Trans Fat: 0g
- Carbohydrates: 29g
- Fiber: 2g
- Protein: 2g
- Cholesterol: 70mg
Keywords: galette, raspberry dessert, easy dessert, rustic pie
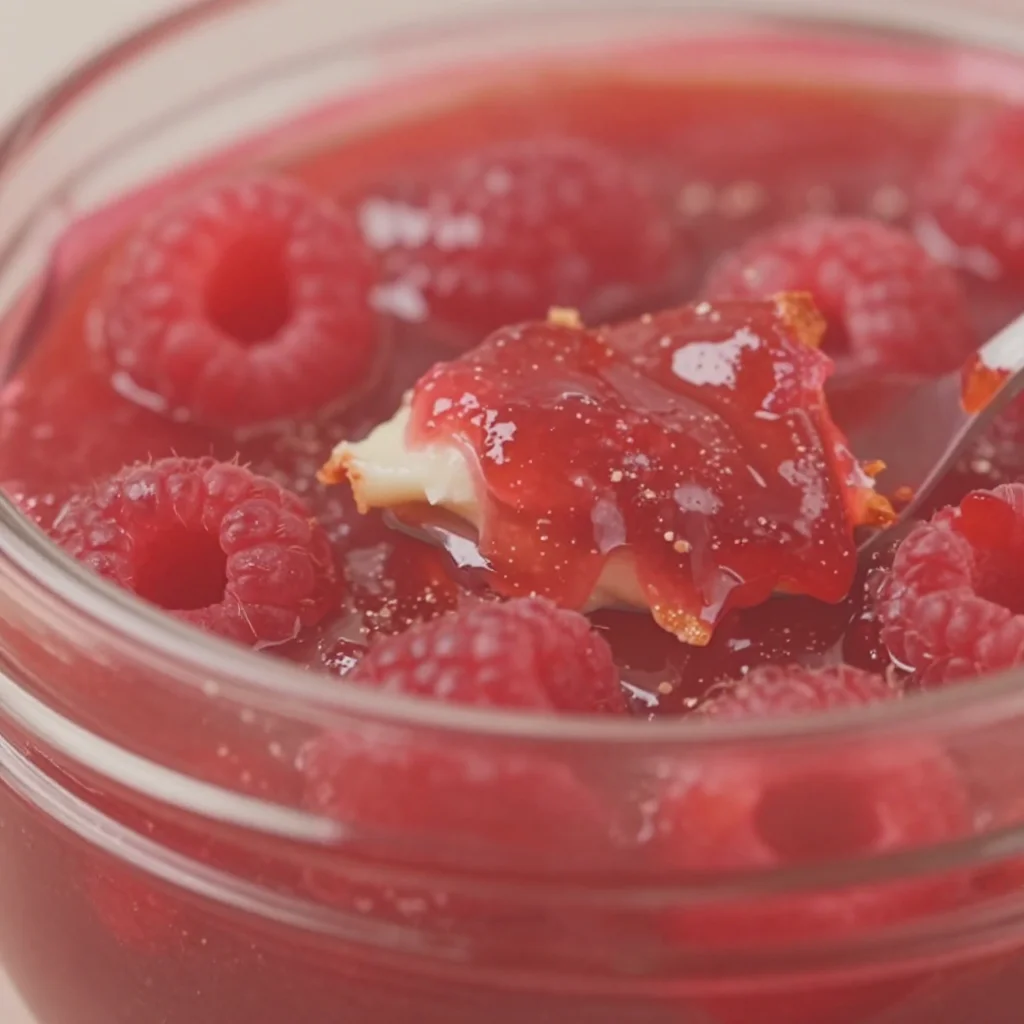
Easy 10 Minute Raspberry Jam
The Sweet Simplicity of Homemade Raspberry Jam in Just 10 Minutes
Welcome to another delightful adventure in my kitchen! Today, we’re diving into a treat that feels like summer in a jar: homemade raspberry jam. You might be thinking, "Making jam sounds complicated!" but trust me—I’m here to show you how easy it can be, especially when you’ve got just 10 minutes to spare. Picture this: a sunny morning, warm toast on the table, and the vibrant, tangy flavor of raspberry jam brightening every bite. Could anything be better?
Jams and preserves have a beautiful history, often wrapping us in nostalgia and warmth with every spoonful. I remember as a child, visiting my grandmother’s farmhouse in the countryside where she would walk me through her garden, collecting fresh fruit. Her raspberry bushes sprawled like a wild canvas, full of plump, juicy berries just begging to be picked. The sweet smell of berries merging with her laughter and stories felt like magic in the air. Once we returned to the kitchen with our colorful haul, we spent hours cooking, chatting, and creating a delicious mess. The aroma of bubbling fruit on the stove filled the air as she poured her heart into each jar, transforming simple ingredients into something extraordinary.
Raspberry jam is the perfect way to recreate those cherished memories and share them with your loved ones. Whether you’re slathering it on warm buttered toast, dolloping it on your morning yogurt, or using it as a filling for a delightful pastry, this jam is sure to become an essential in your kitchen. Plus, it’s a sensational way to preserve that burst of summer sweetness for cooler months ahead. Ready to create some kitchen magic? Let’s get started!
Ingredients for Easy 10-Minute Raspberry Jam
-
Fresh Raspberries (2 cups): The star of our jam! You can use fresh or frozen raspberries, but fresh always gives a vibrant flavor. If you don’t have raspberries on hand, feel free to substitute them with strawberries or blackberries for a delicious twist.
-
Granulated Sugar (1 cup): Sugar not only enhances the sweetness but also helps with the preservation of the jam. If you’re looking to cut down on sugar, coconut sugar or honey can be used, but be aware they might alter the taste slightly.
-
Fresh Lemon Juice (2 tablespoons): This brightens up the flavor and acts as a natural preservative. If you don’t have fresh lemons, bottled lemon juice works too, but I always prefer the taste of fresh whenever possible.
-
Pectin (1 tablespoon): A natural thickening agent that helps achieve that perfect jam texture. If you prefer a more rustic jam, you can skip this ingredient and simply mash the raspberries to retain a chunkier feel.
-
Pinch of Salt: Just a tiny touch to balance the sweetness and elevate the overall flavor of the jam!
Step-by-Step Instructions to Make Your Raspberry Jam
-
Prep Your Ingredients: Wash those beautiful raspberries gently under cold water, then pat them dry with a kitchen towel. This ensures they retain their lovely texture. If you’re using frozen ones, let them defrost and drain any excess water.
-
Mashing the Raspberries: In a mixing bowl, take your fresh raspberries and use a potato masher or the back of a fork to mash them slightly. Leave some chunks for texture! This is also the perfect time to taste a little bit—just remember that the sugar will make it sweeter soon!
-
Cook the Jam Mixture: Transfer those delightful mashed berries into a saucepan over medium heat. Stir in the sugar and lemon juice, making sure it all combines beautifully. Heat this mixture, stirring occasionally. You want to keep an eye on it so the sugar dissolves fully—this takes about 3-4 minutes. That lovely smell is about to waft through your kitchen!
-
Add the Pectin and Salt: Once the mixture is bubbling gently, stir in the pectin and a pinch of salt. This combo is what helps our jam thicken and creates that wonderful glossy finish. Allow the jam to simmer for another 2-3 minutes, stirring frequently.
-
Check the Consistency: To test if your jam is ready, drop a spoonful onto a plate that you’ve chilled in the freezer for a minute. Let it sit for 30 seconds, then run your finger through the middle. If the line holds, you’re good to go! If it’s still too runny, simmer for another minute or so.
-
Cool and Store: Remove the pan from heat and let the jam cool for about 10-15 minutes in the saucepan. Then, pour the jam into sterilized jars (this is crucial for preserving!). Make sure to leave a little space at the top of the jars. Allow the jars to cool completely before sealing them with lids.
And there you have it! In less than 10 minutes, you’ve created a fantastic homemade raspberry jam that captures all the magic of summer.
Serving Suggestions
Serving your homemade raspberry jam is a delightful experience! Spread it generously on warm toast or buttery croissants for breakfast. It pairs wonderfully with creamy cheeses for a savory-sweet snack. You can also swirl it into your morning yogurt or use it as a filling for cakes, tarts, or pastries. For a special touch, consider presenting it in a cute jar as a thoughtful gift for friends or family. Trust me; they’ll love you for it!
Recipe Variations
- Spicy Raspberry Jam: Add a pinch of crushed red pepper flakes or a splash of jalapeño juice for a sweet and spicy twist!
- Vanilla Raspberry Jam: Stir in a splash of vanilla extract along with the lemon juice for a delightful aromatic experience.
- Herbal Infusion: Toss in a few sprigs of fresh mint or thyme while simmering for a fragrant, herby version.
- Citrus Medley Jam: Mix in some zest from an orange or lime for a refreshing citrus vibe that brightens up the flavor.
- Chia Seed Jam: For a healthier alternative, replace the pectin with 2 tablespoons of chia seeds. They add fiber and create a beautiful texture!
Chef’s Notes
Every time I make this raspberry jam, I’m transported back to those sunny afternoons with my grandmother. It’s fascinating how something as simple as fruit, sugar, and a little love can become a cherished memory. Over the years, I’ve refined this recipe, always making little adjustments to evoke that familiar flavor of childhood. Cooking is about evolution and creativity—don’t be afraid to make it your own!
One time, I even tried to make peach jam with leftover raspberries; oh, what a lovely disaster that was! The kitchen was a complete mess, but the taste? An unexpected hit! Remember, cooking might get messy, but it’s the best kind of fun—embrace it!
FAQs and Troubleshooting
1. My jam is too runny! What did I do wrong?
It’s likely that it either didn’t cook for long enough or there wasn’t enough pectin. Just simmer it a bit longer and test it like we discussed!
2. Can I use frozen raspberries?
Absolutely! Just thaw them and drain any excess liquid, as they can be a bit more watery than fresh.
3. How long can I store my jam?
In a sealed jar, this jam should last up to a month in the fridge. For longer preservation, consider water-bath canning techniques!
4. Can I double the recipe?
Yes, but be mindful of cooking it in batches. Doubling the quantities might require you to extend the cooking time to get the right consistency.
Nutritional Info (per tablespoon)
- Calories: 36
- Total Fat: 0g
- Saturated Fat: 0g
- Sugars: 9g
- Protein: 0g
- Carbohydrates: 9g
So, there you have it—a delightful journey into the world of homemade raspberry jam! I hope this recipe inspires you to create your own kitchen magic. Remember, the best flavor comes from sharing with friends and family. Happy cooking, and enjoy every sweet moment!
Print
Easy 10-Minute Raspberry Jam
- Total Time: 10 minutes
- Yield: 1 jar 1x
- Diet: Vegetarian
Description
A quick and delightful recipe for homemade raspberry jam that’s perfect for preserving summer sweetness in just 10 minutes.
Ingredients
- 2 cups Fresh Raspberries
- 1 cup Granulated Sugar
- 2 tablespoons Fresh Lemon Juice
- 1 tablespoon Pectin
- Pinch of Salt
Instructions
- Prep Your Ingredients: Wash those beautiful raspberries gently under cold water, then pat them dry with a kitchen towel.
- Mashing the Raspberries: In a mixing bowl, take your fresh raspberries and use a potato masher or the back of a fork to mash them slightly.
- Cook the Jam Mixture: Transfer those delightful mashed berries into a saucepan over medium heat, stir in the sugar and lemon juice.
- Add the Pectin and Salt: Once the mixture is bubbling gently, stir in the pectin and a pinch of salt.
- Check the Consistency: Drop a spoonful onto a plate that you’ve chilled in the freezer for a minute.
- Cool and Store: Remove the pan from heat and let the jam cool for about 10-15 minutes in the saucepan.
Notes
This jam can last up to a month in the fridge. For longer preservation, consider water-bath canning techniques.
- Prep Time: 5 minutes
- Cook Time: 5 minutes
- Category: Condiments
- Method: Cooking
- Cuisine: American
Nutrition
- Serving Size: 1 tablespoon
- Calories: 36
- Sugar: 9g
- Sodium: 0mg
- Fat: 0g
- Saturated Fat: 0g
- Unsaturated Fat: 0g
- Trans Fat: 0g
- Carbohydrates: 9g
- Fiber: 0g
- Protein: 0g
- Cholesterol: 0mg
Keywords: raspberry jam, homemade jam, summer recipe
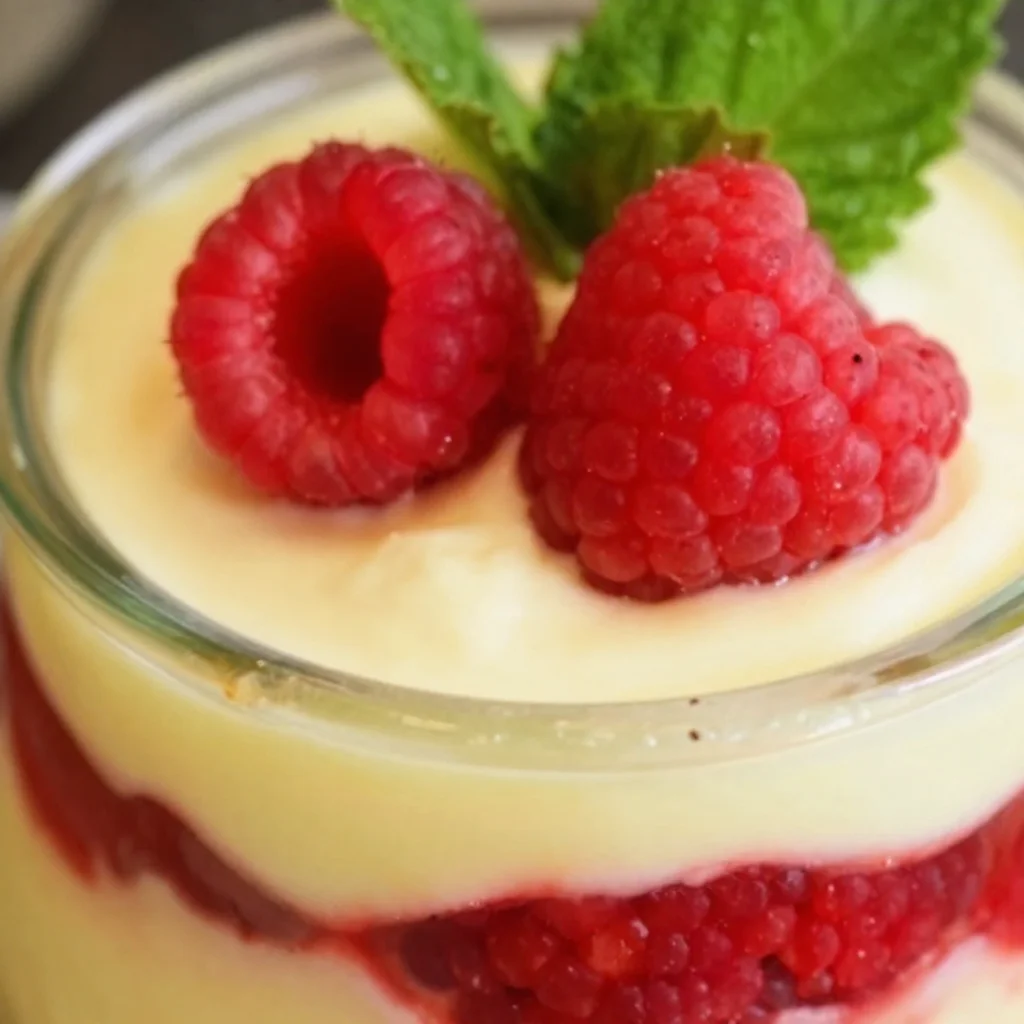
No-Bake Lemon Raspberry Fluff: Quick Summer Dessert
Lemon Raspberry Fluff: A Light and Luscious Dessert That Delights
Hello, fellow food lovers! Welcome back to my kitchen! Today, we’re diving into a recipe that sings of sunshine and sweetness: Lemon Raspberry Fluff. It’s a delightful, airy dessert that brings together the zesty brightness of lemons and the sweet-tartness of fresh raspberries. Imagine sitting on your porch, digging into a fluffy bowl of this light dessert, with the smell of lemon wafting through the air and the vibrant colors dancing in front of your eyes. Doesn’t that sound divine?
Fluff is one of those magical desserts that can elevate any meal or occasion. It’s perfect for summer picnics or lazy Sunday brunches. What I love most about it is how ridiculously simple it is to make! You won’t need to be a pastry chef or have a culinary degree to impress your friends and family. All you need are a few fresh ingredients, a touch of creativity, and of course, a little love (which I believe is the secret ingredient in all great home cooking!).
One of my favorite things about this recipe is its versatility. Serve it straight up or sprinkle on some graham cracker crumbs for an extra crunch. You can even layer it in parfait glasses for a stunning presentation. Trust me, your guests will think you’re a kitchen superstar!
So, grab your apron (maybe a messy one because we all know how that goes), and let’s whip up a Lemon Raspberry Fluff that’s guaranteed to evoke some joy in your kitchen!
A Slice of Nostalgia
I’ll never forget the summer I spent with my grandmother at her lakeside cottage. She had this magical way of conjuring dessert flavors that would dance on your palate. One afternoon, she offered me a simple bowl of fluffy lemon mousse topped with fresh raspberries. The first bite was a revelation! The tartness of the lemon combined with the vibrant sweetness of the raspberries was pure bliss.
Every spoonful felt like sunshine on my taste buds, and from that moment on, I was hooked. Grandma and I would whip it up together, and as the kitchen filled with laughter and joy, I learned that cooking was about more than just the food—it was about connection, memories, and love. That memory has steered my passion for cooking ever since, and it inspires me to create flavorful dishes that foster joy and togetherness in every bite.
I’ve taken that nostalgia and put my own spin on it to bring you this Lemon Raspberry Fluff recipe that will surely transport you back to sun-drenched days filled with sweetness and smiles.
Ingredients
Let’s talk about what you’ll need to create this delicious fluff! Here’s your shopping list:
-
1 cup fresh raspberries
Raspberries bring that sweet-tart punch to the dish. Look for plump, ripe berries; frozen ones can work too, but fresh is always better. -
1 lemon, zested and juiced
Fresh lemon juice adds acidity and brightness. Make sure to zest before juicing! You can also use bottled juice in a pinch, but fresh is always recommended. -
3 tablespoons sugar
For sweetening up the fluff. You can replace this with honey or a sugar substitute if you’re watching your sugar intake. -
2 cups heavy cream
This is what gives the fluff its rich, creamy texture. Whipping cream can be used as a lighter alternative. -
1 teaspoon vanilla extract
Adds a warm layer of flavor to balance the acidity of the lemon. Pure vanilla extract is best! -
Optional: graham cracker crumbs for garnish
Crunchy goodness to sprinkle on top for added texture! If you want a gluten-free option, use crushed nuts or gluten-free crumbs.
Step-by-Step Instructions
Now, let’s get our hands a little messy and whip up this dreamy Lemon Raspberry Fluff! Follow these simple steps, and you’ll be on your way to dessert nirvana.
-
Prep Your Ingredients: Start by rinsing your fresh raspberries gently under cold water. Pat them dry with a paper towel to avoid any excess moisture. Set aside a few to decorate the top later. Zest your lemon and then juice it, making sure it’s fresh.
-
Whip the Cream: In a large mixing bowl, pour in your heavy cream. Using an electric mixer, whip the cream on medium-high speed until soft peaks form. This means the cream should hold its shape but still look fluffy. Be careful not to over-whip or you’ll end up with butter instead!
-
Mix the Lemon Base: In another bowl, combine the lemon juice, lemon zest, sugar, and vanilla extract. Stir until the sugar is dissolved. This mixture is zesty magic; you’re going to love it!
-
Combine the Mixtures: Gently fold the lemon mixture into the whipped cream using a spatula. Use a folding motion to keep the fluffiness intact. This process is crucial; we don’t want to deflate our lovely whipped cream!
-
Add the Raspberries: Now, it’s time to gently fold in the fresh raspberries. You want to break some of them up slightly to release their juices but keep others whole for lovely bursts of flavor.
-
Chill: Spoon the fluff into individual serving bowls or a large dish. Cover with plastic wrap and refrigerate for at least 2 hours, or until chilled and set. This is when the flavors meld together beautifully!
-
Serve and Garnish: When you’re ready to serve, take it out of the fridge. Optionally, sprinkle the top with graham cracker crumbs and add those reserved raspberries for a beautiful, fresh touch!
Serving Suggestions
To plate this fluffy delight, consider serving it in individual glass bowls or parfait glasses. The layers will make for a visually appealing dessert! A sprinkle of graham cracker crumbs or crushed nuts on top will give it a charming crunch. Pair with mint leaves for a pop of color and extra freshness. It’s all about creating that wow factor!
Recipe Variations
Feeling adventurous? Here are some fun twists you can try out:
-
Berry Bliss: Mix it up by adding strawberries or blueberries along with or instead of raspberries. Great for a mixed berry fluff!
-
Coconut Cream: Substitute half of the heavy cream with coconut cream for a tropical flair. Just imagine that creamy, coconut flavor mingling with lemon!
-
Lemon-Lavender Fluff: Add a teaspoon of dried culinary lavender to the lemon mixture for a floral twist that is oh-so-refreshing!
-
Ginger Snap Crunch: For a little zing, add crushed ginger snaps instead of graham cracker crumbs for a spicy sweetness that complements the lemon.
Chef’s Notes
As with any recipe in my kitchen, I always encourage you to make it your own! This Lemon Raspberry Fluff has evolved over the years, initially starting with a simple basic lemon mousse. Each time I’ve made it, I’ve tweaked the proportions and added new flavors. I’ve discovered that sometimes the simplest desserts hold the most memories and joy.
A funny kitchen story: the last time I made this fluff, I accidentally swapped the sugar with salt while in a rush. Let’s just say, surprise and laughter erupted when I offered my family ‘dessert’! Now we have a running joke whenever I make this recipe, “Make sure to check the sugar!”.
FAQs and Troubleshooting
-
What if my fluff is too runny?
If your Lemon Raspberry Fluff is too runny, it could be due to under-whipped cream. Ensure you’re whipping the cream until soft peaks form, and try chilling it longer in the fridge. -
Can I use frozen raspberries?
Yes, but be mindful that they may release more juice, which can make the fluff runnier. If using frozen, let them thaw and drain excess liquid. -
How long will it keep in the fridge?
Your Lemon Raspberry Fluff should stay fresh for about 3 days in the refrigerator. Just be sure it’s covered tightly! -
Can I make it a day ahead?
Absolutely! Making it the day before allows the flavors to meld beautifully and saves you time on the day of your gathering. Just ensure it’s kept covered to maintain its fluffiness.
Nutritional Info
Note: Nutritional values may vary based on portion sizes and specific ingredients used. Always a good idea to calculate if you’re following a strict diet!
That’s it, my dear foodie friends! I hope you enjoy creating and sharing this Lemon Raspberry Fluff as much as I do. Gather your loved ones around the table, share some stories, and celebrate the joy of home cooking. Happy cooking! 🍋🍓
Print
Lemon Raspberry Fluff
- Total Time: 120 minutes
- Yield: 4 servings 1x
- Diet: Vegetarian
Description
A delightful, airy dessert that combines the zesty brightness of lemons with the sweet-tartness of fresh raspberries.
Ingredients
- 1 cup fresh raspberries
- 1 lemon, zested and juiced
- 3 tablespoons sugar
- 2 cups heavy cream
- 1 teaspoon vanilla extract
- Optional: graham cracker crumbs for garnish
Instructions
- Prep Your Ingredients: Rinse raspberries under cold water, pat dry, and set aside a few for decoration. Zest and juice the lemon.
- Whip the Cream: Whip heavy cream in a bowl until soft peaks form.
- Mix the Lemon Base: Combine lemon juice, lemon zest, sugar, and vanilla in another bowl, stirring until sugar is dissolved.
- Combine the Mixtures: Gently fold the lemon mixture into the whipped cream.
- Add the Raspberries: Gently fold in the raspberries, breaking some up slightly.
- Chill: Spoon into serving bowls and refrigerate for at least 2 hours.
- Serve and Garnish: Optionally sprinkle with graham cracker crumbs and add reserved raspberries before serving.
Notes
Feel free to customize with different berries or flavors, such as coconut cream or lavender!
- Prep Time: 15 minutes
- Cook Time: 0 minutes
- Category: Dessert
- Method: Chilling
- Cuisine: American
Nutrition
- Serving Size: 1 serving
- Calories: 250
- Sugar: 12g
- Sodium: 50mg
- Fat: 22g
- Saturated Fat: 13g
- Unsaturated Fat: 9g
- Trans Fat: 0g
- Carbohydrates: 20g
- Fiber: 2g
- Protein: 3g
- Cholesterol: 80mg
Keywords: Lemon Raspberry, Desserts, Fluff Dessert
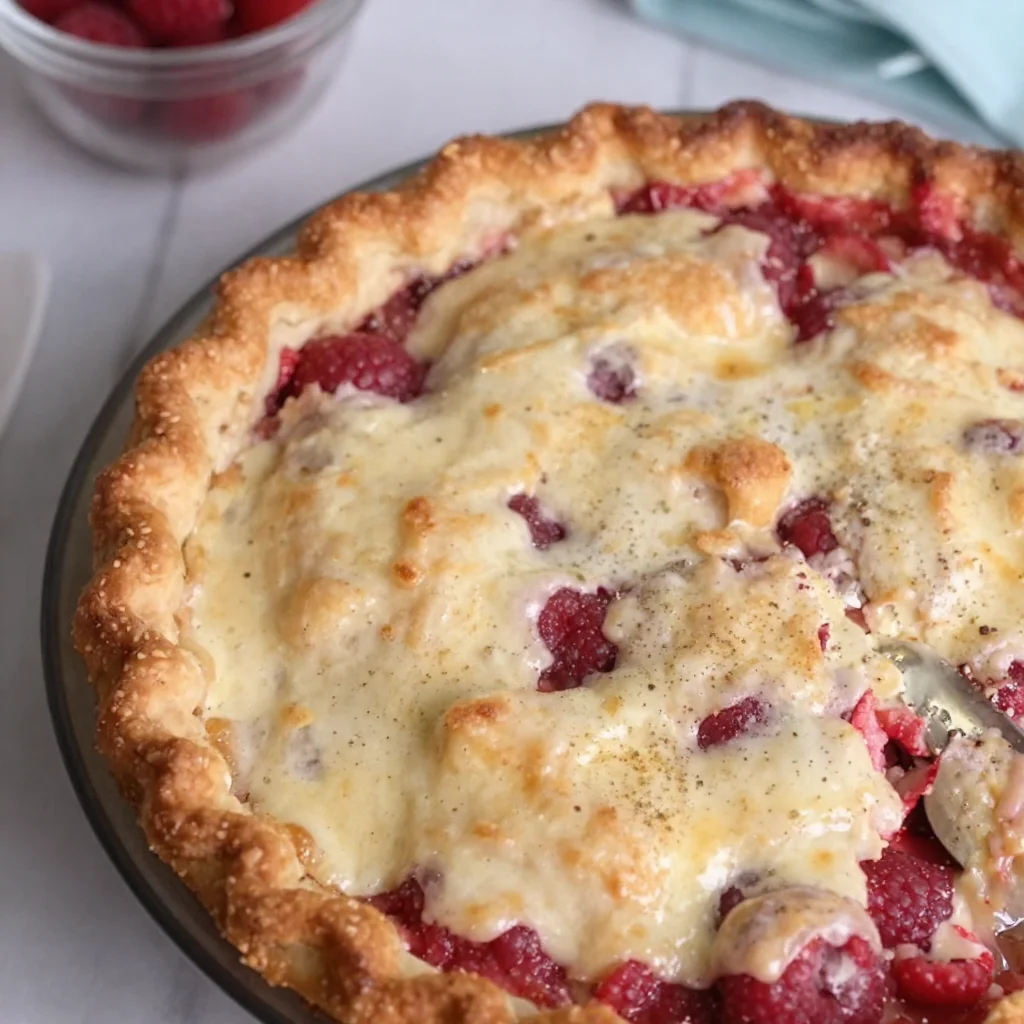
Raspberry Pie
The Joy of Baking: Raspberry Pie Love
Welcome to my kitchen, dear friends! Today, we’re diving into a dish that embodies summer, sweetness, and nostalgia: Raspberry Pie. Oh, how this pie takes me back! The delightful aroma of raspberries filling the air has always brought a smile to my face and a warmth to my heart. Whether enjoyed after a family meal or served during a backyard gathering, Raspberry Pie has a way of turning ordinary moments into cherished memories.
Picture this: a sunlit kitchen, laughter bouncing off the walls, and my grandmother expertly rolling out dough as we prepare for our favorite summer tradition—pie making! Every summer, we’d gather the juiciest raspberries from her garden, the plump little gems bursting with flavor. I can still hear her voice, mixing up the sweet filling, telling stories of pies she made as a child. The magic of those moments is what drives my passion for cooking today.
Making Raspberry Pie is not just about creating a dessert; it’s about celebrating life’s sweetest moments with those you love. Each bite is filled with memories of time spent together, and if you close your eyes, the taste takes you back to simpler times—an experience I want to share with all of you! So, let’s roll up our sleeves, grab our ingredients, and create something extraordinary. Trust me, your family and friends will thank you for it!
A Slice of Nostalgia
One summer, I was around ten years old, and my grandmother decided it was time for me to take on the sacred responsibility of pie-making. Armed with a rolling pin almost as tall as me and a heart full of enthusiasm, I was ready to dive into the world of baking. Grandma showed me how to coax the delicate dough into submission while ensuring our raspberry filling shimmered like jewels.
We scooped those ripe, tart raspberries lovingly plucked from her garden, and I learned the balance of sweetness and tartness—skills that I carry with me to this day. Little did I know then that these hours spent in the kitchen would shape my life and my passion for flavorful, homemade dishes. It was more than making a pie; it was about storytelling, connection, and the love of beautiful food. And those moments created a symphony of flavors, laughter, and memories that will forever be dear to my heart.
Ingredients for the Perfect Raspberry Pie
Now that we’re warmed up with nostalgia, let’s gather our ingredients! Here’s what you’ll need for this delightful Raspberry Pie, along with some tips to make your life easier:
-
Fresh Raspberries (6 cups)
Sweet, juicy raspberries are the star of our show! If you don’t have fresh ones on hand, you can use frozen raspberries (just don’t forget to thaw and drain them first). -
Granulated Sugar (1 cup)
This balances the tartness of the raspberries. Feel free to swap with coconut sugar or honey for a different flavor profile. -
Cornstarch (2 tablespoons)
This thickens the filling. Don’t have cornstarch? You can use tapioca starch as a one-to-one replacement. -
Lemon Juice (2 tablespoons)
Adds brightness and brings out the raspberry flavor. Stay away from bottled lemon juice—fresh is always best! -
Vanilla Extract (1 teaspoon)
A splash of vanilla enhances the raspberry flavor. If you’re in a pinch, you can substitute it with almond extract for a unique twist. -
Pie Crust (store-bought or homemade)
Use your favorite crust recipe or a pre-made one for convenience. If you’re going homemade, I recommend using a buttery pie crust for that perfect flaky texture. -
Egg Wash (1 egg, beaten)
For that golden, glossy finish that makes your pie shine! You can also use milk or cream if you prefer.
Step-by-Step Instructions
Let’s get down to business! Here’s how to turn those ingredients into a masterpiece.
-
Preheat Your Oven
Preheat your oven to 425°F (220°C). This step is crucial for achieving a beautifully baked pie. The high heat helps the crust get that lovely golden color while the filling bubbles away. -
Prepare the Filling
In a large bowl, gently toss the raspberries, sugar, cornstarch, lemon juice, and vanilla extract. Be careful not to mash the berries too much— we want them intact to provide that delightful burst of flavor in every bite. Let this mixture rest for 10-15 minutes. This helps the sugar draw out the juices, creating a delicious filling. -
Roll Out the Dough
If you’re making homemade dough, roll it out on a floured surface to about 1/8-inch thickness. For store-bought, let it sit at room temperature for a few minutes before unrolling. This allows it to be more pliable and easier to work with. -
Assemble the Pie
Lay half of the pie crust in a 9-inch pie pan. Pour the raspberry filling into the crust, spreading it evenly. Top it off with the remaining crust. You can make a full top crust or lattice for a more beautiful presentation—just be sure to cut slits for steam to escape! -
Brush the Crust
Brush the top crust with the beaten egg wash. This is where that golden color comes from! You can also sprinkle a little sugar on top for added crunch and sweetness. -
Bake
Place the pie in the oven and bake for 15 minutes at 425°F. After that, reduce the temperature to 350°F (175°C) and continue baking for 20-25 minutes until the filling is bubbly, and the crust is golden brown. The smell wafting through your kitchen will be pure bliss! -
Cool Down
Let your pie cool for at least 30 minutes before slicing. This step allows the filling to set, making it easier to serve those perfect slices. Patience is key here!
Serving Suggestions
When it comes to serving Raspberry Pie, simplicity is key! I love to serve it warm with a scoop of vanilla ice cream or a dollop of freshly whipped cream. The creamy contrast against the tart raspberries is simply divine. For an elegant touch, sprinkle powdered sugar on top or garnish with a few fresh raspberries and a mint leaf. Voila! You’ve got a showstopper!
Recipe Variations
Fancy switching things up? Here are a few ideas to make this Raspberry Pie your own:
-
Mixed Berry Pie: Swap out some of the raspberries for blueberries or blackberries for a delightful berry medley.
-
Almond Raspberry Pie: Add a teaspoon of almond extract in addition to vanilla for a nutty flavor twist that complements the raspberries beautifully.
-
Gluten-Free Option: Use a gluten-free pie crust to accommodate dietary needs, and don’t worry—the flavor will still shine!
-
Chocolate Raspberry Pie: Mix in a handful of chocolate chips to the filling for an indulgent chocolate twist.
-
Spiced Raspberry Pie: Sprinkle in some cinnamon and nutmeg to the filling for a warm, aromatic touch.
Chef’s Notes
It’s amazing how recipes evolve over time. This Raspberry Pie wasn’t always a summer staple in my kitchen. I’ve adapted and tweaked it to align with what’s freshest and in season, and every time I make it, I find new ways to explore flavors. Plus, there’s a certain joy that comes from getting a little messy in the kitchen! If you’re ever feeling down, I suggest rolling out dough or tossing some berries around—it’s therapeutic, I promise!
I once had a mishap where I forgot to add sugar to the filling. Let’s just say, it was a tart surprise for my family! But life in the kitchen—like life itself—sometimes you just have to roll with it and learn. That’s what makes cooking so fun!
FAQs and Troubleshooting
-
Why did my filling bubble over?
If your pie filling isn’t thick enough, it can bubble over. Make sure to add enough cornstarch and let the mixture sit before filling the pie. -
What if my crust is too dry?
If your dough feels crumbly, it may be too dry. Add a teaspoon of cold water at a time until the dough comes together nicely. -
How do I know when my pie is done?
Your pie is ready when the crust is golden, and you can see the filling bubbling through the top. If you’re unsure, use a thermometer; the filling should reach about 200°F. -
Can I make this ahead of time?
Absolutely! You can prepare the pie and refrigerate it before baking or freeze it before it goes in the oven. Just make sure to adjust baking time as needed!
Nutritional Info (Optional)
(Nutritional information can vary based on specific brands and portion sizes)
- Serving Size: 1 slice (1/8 of pie)
- Calories: Approximately 250
- Total Fat: 10g
- Saturated Fat: 5g
- Carbohydrates: 38g
- Fiber: 3g
- Sugars: 15g
- Protein: 3g
I hope you find joy in making this Raspberry Pie as much as I do. Whether you’re creating it alone or bringing friends and family into the kitchen, remember that every moment spent cooking is a moment invested in love and connection. So, go ahead, put on that messy apron, and let’s bake some magic!
Print
Raspberry Pie
- Total Time: 60 minutes
- Yield: 8 servings
- Diet: Vegetarian
Description
A delightful Raspberry Pie that embodies summer, sweetness, and nostalgia, perfect for family gatherings.
Ingredients
- Fresh Raspberries (6 cups)
- Granulated Sugar (1 cup)
- Cornstarch (2 tablespoons)
- Lemon Juice (2 tablespoons)
- Vanilla Extract (1 teaspoon)
- Pie Crust (store-bought or homemade)
- Egg Wash (1 egg, beaten)
Instructions
- Preheat your oven to 425°F (220°C).
- Prepare the filling in a large bowl by tossing raspberries, sugar, cornstarch, lemon juice, and vanilla extract gently.
- Roll out the dough on a floured surface to about 1/8-inch thickness.
- Assemble the pie by placing half the crust in a 9-inch pie pan, pouring in the filling, and topping with the remaining crust.
- Brush the top crust with the beaten egg wash.
- Bake for 15 minutes at 425°F, then reduce to 350°F (175°C) for 20-25 minutes.
- Cool down for at least 30 minutes before slicing.
Notes
Serve warmed with vanilla ice cream or whipped cream for a delightful treat. Experiment with different berries for variations.
- Prep Time: 20 minutes
- Cook Time: 40 minutes
- Category: Dessert
- Method: Baking
- Cuisine: American
Nutrition
- Serving Size: 1 slice
- Calories: 250
- Sugar: 15g
- Sodium: 100mg
- Fat: 10g
- Saturated Fat: 5g
- Unsaturated Fat: 3g
- Trans Fat: 0g
- Carbohydrates: 38g
- Fiber: 3g
- Protein: 3g
- Cholesterol: 0mg
Keywords: raspberry pie, summer dessert, pie recipe, baking, homemade pie
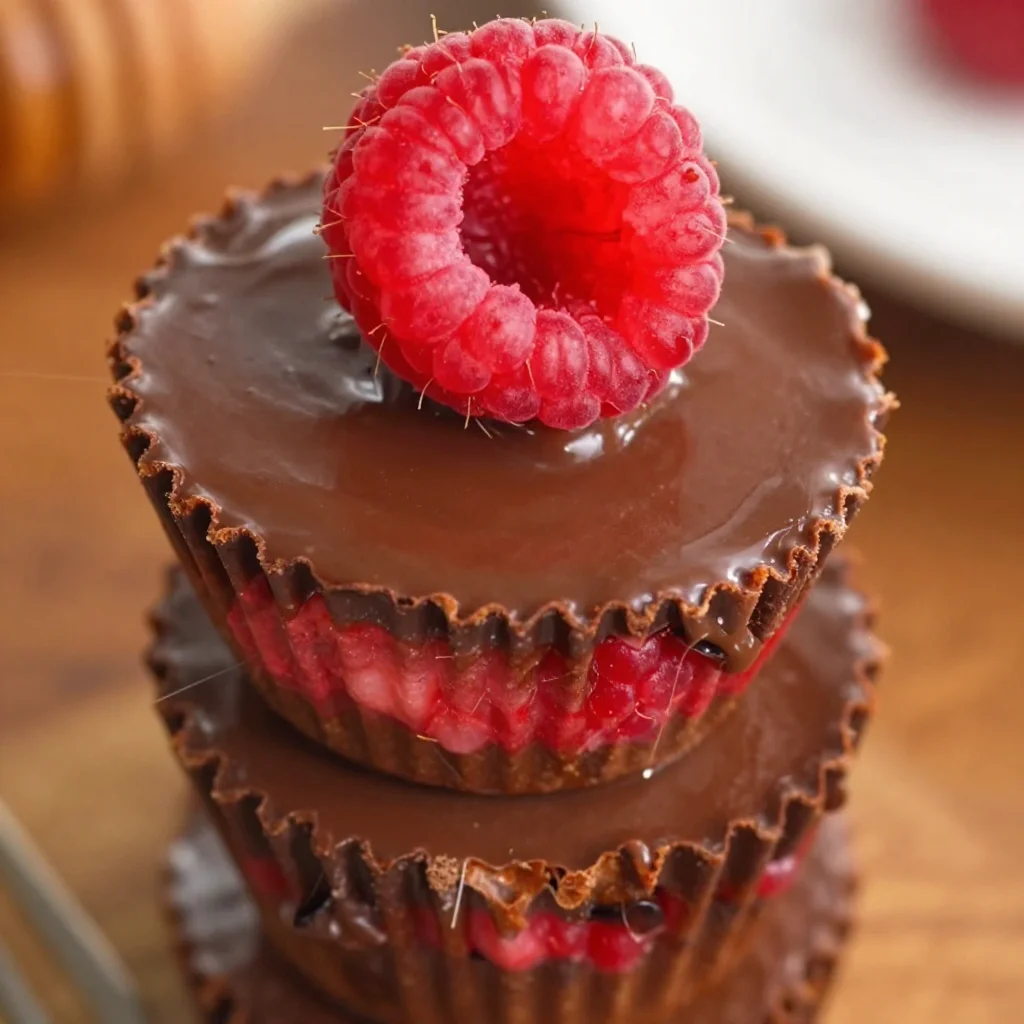
Healthy Chocolate Raspberry Cups: 15-Minute No-Bake Dessert
Indulge Guilt-Free: Healthy Chocolate Raspberry Cups Dessert
Welcome to my cozy kitchen, where the aroma of baking wafts through the air like a warm hug! I’m Olivia Bennett, your friendly culinary companion, and today I’ve got a treat that’s bound to make your taste buds dance. Imagine sinking your teeth into rich, velvety chocolate combined with the bright, tart flavor of fresh raspberries. Sounds heavenly, right? Well, I’m thrilled to share with you my recipe for Healthy Chocolate Raspberry Cups—a delightful dessert that’s not just delicious but also packed with wholesome goodness!
With the hustle and bustle of everyday life, it’s easy to feel overwhelmed when it comes to dessert. We often think of indulgent sweets as being heavy on sugar and calories. But what if I told you that you could satisfy your chocolate cravings without the guilt? These delightful cups bring the best of both worlds together—decadence and health!
Whether you’re hosting a dinner party, celebrating a special occasion, or just craving something sweet at the end of the day, these Healthy Chocolate Raspberry Cups are exactly what you need. They’re simple to make and even easier to enjoy, and I can’t wait for you to dive into this delicious recipe with me.
So, roll up those sleeves, put on your aprons, and let’s get ready to create a delectable dessert that will have everyone talking (and asking for seconds!).
A Sweet Memory
I’ll never forget the summer evenings spent at my grandmother’s house, where the whole family would gather for dinner. There was always laughter, stories, and at the end of every meal, a delicious dessert that brought us together. One of the highlights was when Grandma would whip up her famous chocolate treats—each bite was an explosion of flavor that transported us to a world of sweetness and joy.
I remember one particular evening when she made a raspberry-chocolate mousse. The combination was simply divine! As I savored each spoonful, I realized how powerful food can be; it connects us, evokes memories, and warms our hearts. Inspired by those cherished moments, I wanted to create a dessert that embodies that same joy but with a healthier twist. And thus, the Healthy Chocolate Raspberry Cups were born! With a nod to my grandma’s legacy, these cups are not only delicious but also bring a bit of nostalgia to every bite.
Ingredients
Here’s what you’ll need to whip up these delightful Healthy Chocolate Raspberry Cups:
-
Dark Chocolate (1 cup)
- Look for chocolate that’s at least 70% cocoa for a rich flavor. You can also use dairy-free or vegan chocolate if you prefer. If you’re out of chocolate chips, you can chop a chocolate bar as a great substitute!
-
Coconut Oil (2 tablespoons)
- This adds a nice gloss to your chocolate and enhances the texture. You can use unsalted butter or any neutral oil if you don’t have coconut oil on hand.
-
Greek Yogurt (½ cup)
- Creamy and packed with protein, Greek yogurt gives these treats a delightful texture. For a dairy-free option, try using coconut yogurt!
-
Fresh Raspberries (1 cup)
- These juicy gems bring a burst of flavor and vibrant color. If they aren’t in season, feel free to use frozen raspberries—just thaw and drain excess moisture.
-
Honey or Maple Syrup (2-3 tablespoons)
- For sweetness, these natural sweeteners are simply the best! Adjust according to your taste. You can also use agave nectar or a sugar substitute if you’re looking to cut down on sugar.
-
Vanilla Extract (1 teaspoon)
- This adds depth to the flavor profile. Feel free to use almond extract for a different twist!
-
Pinch of Sea Salt
- This enhances all the flavors, balancing the sweetness.
Chef’s Tip:
Preparation is key! Measure and prep your ingredients before you begin, which will make your cooking process smoother and more enjoyable.
Step-by-Step Instructions
Now, let’s get to the exciting part—preparing these delightful little cups step-by-step.
-
Melt the Chocolate:
Place a heatproof bowl over a pot filled with a couple of inches of simmering water (this is called a double boiler). Add the dark chocolate and coconut oil. Stir slowly until melted and smooth. Remove from heat and let it cool slightly.- Chef’s Hack: If you’re in a hurry, you can also melt the chocolate in the microwave. Just heat it in 20-second bursts, stirring in between to avoid overheating!
-
Prepare the Cups:
Line a muffin tin with cupcake liners (silicone liners work great for easy peeling later). Spoon a tablespoon of the melted chocolate mixture into the bottom of each liner and spread it evenly to form a base.- Tip: Use the back of a spoon to press it flat and create a nice layer!
-
Chill the Base:
Place the muffin tin in the fridge for about 15-20 minutes, or until the chocolate hardens. This ensures a sturdy base for your creamy filling. -
Make the Raspberry Filling:
In a mixing bowl, combine Greek yogurt, honey (or maple syrup), vanilla extract, and a pinch of sea salt. Mix until smooth. Gently fold in the fresh raspberries.- Chef’s Insight: If you want a smoother texture, mash the raspberries a bit before folding them into the yogurt mixture!
-
Fill the Cups:
Once the chocolate base is set, remove the muffin tin from the fridge. Spoon the raspberry yogurt mixture over the hardened chocolate base in each cupcake liner, smoothing out the tops.- Tip: Don’t be afraid to be generous — these cups will be even more delightful with a good amount of filling!
-
Top with More Chocolate:
Drizzle the remaining melted chocolate over the raspberry filling. You’ll want to ensure the filling is covered so everything stays together when you serve!- Pro Tip: If you’d like, sprinkle some crushed nuts or a few whole raspberries on top before the chocolate hardens for some extra flair.
-
Final Chill:
Return the muffin tin to the refrigerator for another 30 minutes to an hour, or until the chocolate is completely firm and set. -
Enjoy:
Carefully peel away the cupcake liners, and voila! You’ve created the most delicious and healthy dessert that’s sure to impress!
Serving Suggestions
For serving, arrange these beautiful Healthy Chocolate Raspberry Cups on a decorative platter or a rustic wooden board. A sprinkle of cocoa powder or a few fresh mint leaves can add a lovely presentation touch. Pair them with a scoop of vanilla ice cream or a dollop of whipped cream (dairy or coconut-based) for an extra treat.
Recipe Variations
-
Nutty Delight: Add chopped nuts (like almonds or hazelnuts) into the chocolate mixture before forming the base for a crunchy texture.
-
Mint Chocolate: Incorporate a few drops of peppermint extract into the chocolate mixture for a refreshing minty twist.
-
Different Berries: If raspberries aren’t your thing, try substituting with blueberries, strawberries, or blackberries for a different flavor!
-
Spicy Kick: Add a pinch of cayenne pepper to the chocolate for a surprising kick that balances the sweetness.
Chef’s Notes
This recipe has evolved over the years, from my grandmother’s chocolate mousse to these delightful cups that fit my healthier lifestyle. I love experimenting with flavors and textures, but I always come back to chocolate and berries as a classic combo. A funny little story: One time I was in a rush and forgot to chill the chocolate base before filling it with yogurt—let’s just say it turned into a bit of a delicious disaster! Even messes can lead to delightful creations in the kitchen!
FAQs and Troubleshooting
1. Why are my cups not setting properly?
Make sure that your chocolate is fully melted and has cooled slightly before adding it to the muffin cups. Also, chilling the cups long enough will ensure they set perfectly.
2. Can I use another type of yogurt?
Absolutely! If you’re not a fan of Greek yogurt, any plain yogurt will work, including non-dairy alternatives like almond or soy yogurt.
3. My chocolate mixture is too thick—what should I do?
If your chocolate is too thick, try adding a small amount of coconut oil or a splash of almond milk to loosen it up before using it in the cups.
4. How long do these healthy cups last?
They should be stored in the refrigerator and will keep well for about a week. However, I doubt they’ll last that long—they’re too delicious!
Nutritional Info (optional)
Each Healthy Chocolate Raspberry Cup contains approximately:
- Calories: 150
- Protein: 4g
- Carbohydrates: 12g
- Fats: 10g
- Fiber: 2g
(Note: Nutritional information may vary based on specific brands and ingredients used.)
And there you have it—my cherished Healthy Chocolate Raspberry Cups Recipe! I hope you enjoy making and indulging in this delightful dessert as much as I do. Each bite is a reminder of love, laughter, and the joy of creating something beautiful in the kitchen. Happy cooking!
Print
Healthy Chocolate Raspberry Cups
- Total Time: 35 minutes
- Yield: 12 servings
- Diet: Vegetarian
Description
A delightful dessert that combines rich chocolate and fresh raspberries in a guilt-free treat.
Ingredients
- Dark Chocolate (1 cup)
- Coconut Oil (2 tablespoons)
- Greek Yogurt (½ cup)
- Fresh Raspberries (1 cup)
- Honey or Maple Syrup (2-3 tablespoons)
- Vanilla Extract (1 teaspoon)
- Pinch of Sea Salt
Instructions
- Melt the chocolate and coconut oil using a double boiler or microwave.
- Prepare the muffin tin with cupcake liners and spoon melted chocolate to form a base.
- Chill the base in the fridge for about 15-20 minutes.
- Make the raspberry filling by combining Greek yogurt, honey, vanilla, and sea salt, then fold in raspberries.
- Fill the cups with the raspberry yogurt mixture over the hardened chocolate base.
- Top with more melted chocolate and optional toppings like crushed nuts.
- Final chill the cups in the refrigerator for 30 minutes to 1 hour.
- Enjoy them once set by peeling away the liners.
Notes
Measure and prep your ingredients beforehand for a smoother cooking process.
- Prep Time: 20 minutes
- Cook Time: 15 minutes
- Category: Dessert
- Method: Chilling
- Cuisine: American
Nutrition
- Serving Size: 1 cup
- Calories: 150
- Sugar: 8g
- Sodium: 50mg
- Fat: 10g
- Saturated Fat: 6g
- Unsaturated Fat: 4g
- Trans Fat: 0g
- Carbohydrates: 12g
- Fiber: 2g
- Protein: 4g
- Cholesterol: 5mg
Keywords: healthy dessert, chocolate raspberry cups, guilt-free treats, summer dessert, easy dessert
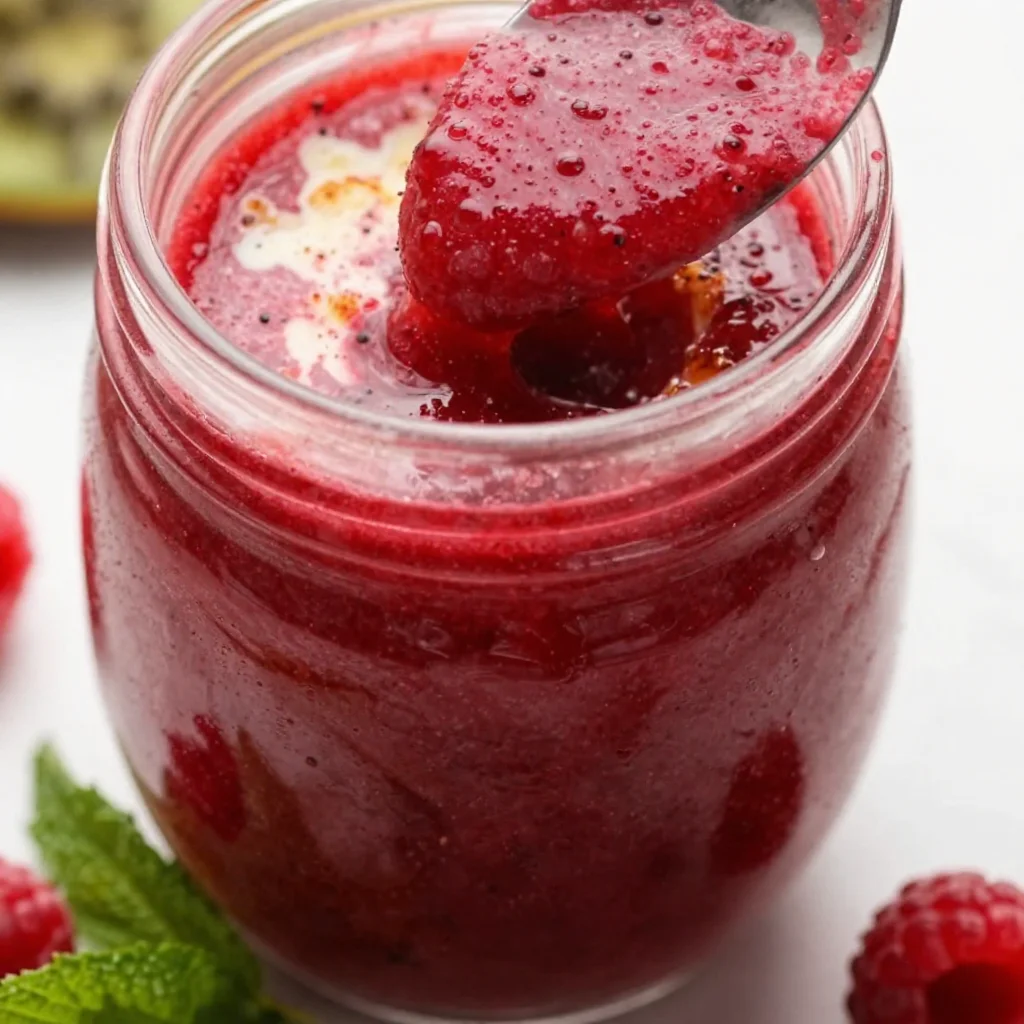
Easy Raspberry Sauce
The Easiest Raspberry Sauce: A Sweet Kitchen Delight
Welcome to my kitchen, dear friends! I’m so thrilled to have you here. Today, we’re diving into one of my absolute favorite recipes: a super simple, utterly delicious Raspberry Sauce. If you’ve ever found yourself with a pint of fresh raspberries and wanted to create something magical, you’re in for a treat. This juicy, vibrant sauce is not only straightforward but also incredibly versatile — perfect for drizzling over pancakes, swirling into yogurt, or even adding a touch of elegance to a baked dessert.
But before we jump into the details, let’s take a moment to appreciate raspberries. These little gems are like nature’s candy — bright, tangy, and bursting with flavor! I remember the first time I tasted a freshly picked raspberry right off the bush. It was like a burst of summer in my mouth, and I’ve been in love ever since. There’s something so nostalgic and delightful about the process of making this sauce; it takes me back to spending lazy afternoons in the kitchen with my grandmother, who would whip up her own version to accompany her famous cheesecake. The sweet and tangy notes of the raspberries paired perfectly with the creamy vanilla.
So, put on your favorite apron (or make a new mess like I do), and let’s create a delightful Raspberry Sauce that will have your friends and family asking for seconds!
A Sweet Memory in Every Bite
Growing up, my grandmother was a culinary wizard; her raspberry sauce was legendary within our family. Every summer, she would gather buckets of fresh raspberries from her garden, and I’d perch beside her, eagerly awaiting the sweet transformations that would unfold. The smell of those bubbling raspberries on the stove was intoxicating, and I can still hear her soft laughter as she tried to keep my sticky little hands from “sampling” too much of the sugary goodness.
Those moments in the kitchen were more than just about cooking; they were filled with stories, laughter, and love. I remember asking her, “Nana, why are raspberries red?” and her playful response was always about them holding the secret to happiness. Little did I know then that each scoop of her raspberry sauce would carry on those cherished memories and brighten future gatherings.
Now, every time I make this sauce, I’m transported back to my grandmother’s cozy kitchen. It serves as a reminder that food isn’t just about taste; it’s about creating connections and weaving memories to share with others. So pull up a chair, and let’s make some more beautiful memories together!
Ingredients
Here’s what you’ll need to whip up this delicious Raspberry Sauce:
-
Fresh raspberries (2 cups)
A star ingredient! Fresh raspberries provide vibrant flavor and color. If you can’t find fresh ones, frozen raspberries work just as well. Just be sure to thaw them first and drain any excess liquid. -
Granulated sugar (3/4 cup)
Sugar is the magic that sweetens the sauce. You can adjust the amount to your taste, or substitute with honey, maple syrup, or a sugar alternative if you’re looking for a lower-sugar option. -
Lemon juice (1 tablespoon)
A splash of lemon juice brightens the flavor and balances the sweetness of the raspberries. Freshly squeezed is best, but bottled lemon juice can work in a pinch. -
Cornstarch (1 tablespoon)
This ingredient helps thicken the sauce, giving it that luscious, syrupy consistency. You can substitute with arrowroot powder if you’re looking for a grain-free option. -
Water (1/4 cup)
This will help dissolve the sugar and create a fluid base for your sauce. If you want more flavor, use raspberry juice if available!
Step-by-Step Instructions
Let’s get cooking, shall we? Follow these simple steps to create your Raspberry Sauce.
-
Prepare the Raspberries
Start by rinsing your fresh raspberries gently under cold water. Place them in a colander and allow them to drain and dry for a few minutes. Make sure to pick out any mushy or discolored berries — we want only the best for our sauce! -
Combine Ingredients
In a medium saucepan, mix together your fresh raspberries, granulated sugar, lemon juice, cornstarch, and water. Swirl it all together gently until the raspberries are mostly intact, as we want some texture in the final product. -
Cook the Mixture
Place the saucepan on medium heat. As the mixture starts to heat up, the raspberries will begin to break down. Stir it occasionally to prevent sticking (and to get that beautiful aroma wafting through your kitchen!). We want to cook it for about 10-15 minutes, or until it starts to bubble vigorously. -
Thickening the Sauce
Once you’ve reached a bubbling stage, reduce the heat to low and let it simmer for an extra 5 minutes. If you prefer a thicker sauce, you can create a slurry by mixing a bit of cornstarch with water before adding it to the sauce, stirring continuously until thickened. -
Strain (if desired)
If you want a smooth sauce, you can strain the mixture through a fine-mesh sieve to remove the seeds. Just push it through with a spoon or spatula for maximum yield. I sometimes choose to keep it chunky for that rustic feel! -
Cool and Store
After cooking, remove the sauce from heat. Let it cool in the saucepan for a bit before transferring it to a jar or airtight container. This sauce can be stored in the refrigerator for up to two weeks — if it lasts that long!
Serving Suggestions
Now that you’ve got your luscious Raspberry Sauce ready, the world is your oyster! Drizzle it over pancakes or waffles for a perfectly sweet breakfast treat. Swirl it into Greek yogurt for a refreshing snack, or use it as a topping for vanilla ice cream to elevate your dessert game. Try it over a slice of cheesecake for a stunning presentation that tastes as good as it looks.
For a fun party idea, serve the sauce alongside a charcuterie board featuring cream cheese, soft cheeses, and crackers. Your guests will be impressed, and it adds a beautiful pop of color!
Recipe Variations
Feel free to get creative! Here are a few variations you can try:
- Minty Raspberry Sauce: Toss in finely chopped mint leaves just as the sauce finishes cooking for a refreshing twist.
- Spicy Raspberry Sauce: Add a pinch of cayenne pepper or crushed red pepper flakes to the mix while cooking for a subtle heat.
- Balsamic Raspberry Sauce: Substitute a tablespoon of balsamic vinegar for the lemon juice to give your sauce a richer, deeper flavor.
- Rum-Infused Raspberry Sauce: Stir in a tablespoons of dark rum once you remove the sauce from the heat for a delightful boozy kick.
- Low-Sugar Option: Replace sugar with a low-calorie sweetener for a guilt-free treat without sacrificing flavor.
Chef’s Notes
As I reflect on this recipe, it’s amazing how something so simple can transform into something truly special. I’ve experimented with this sauce over the years, tweaking the sugar, the tang level, and incorporating different spices. Once, during a summer dinner party, I decided to add some freshly cracked black pepper, and oh my goodness — it took everyone by surprise! They were in awe of the flavor profile and the contrast between the sweet and peppery notes. It’s fun to see how a humble raspberry sauce can evolve and adapt!
And here’s a little secret: the more you make it, the more intuitive you’ll become about your personal preferences. So, don’t be shy; let your kitchen creativity shine!
FAQs and Troubleshooting
Q: Can I use frozen raspberries for this sauce?
A: Absolutely! Frozen raspberries are convenient and work just as well. Just be sure to thaw and drain them first to avoid excess liquid in your sauce.
Q: My sauce turned out too watery. What should I do?
A: If your sauce is too watery, it’s likely that it didn’t simmer long enough. Simply return it to heat and allow it to reduce further until it’s at your desired consistency.
Q: How can I store leftover sauce?
A: Store your Raspberry Sauce in an airtight container in the refrigerator for up to two weeks. You can also freeze it in small portions for up to six months — just thaw in the fridge when you’re ready to use it!
Q: Can I use other berries for this sauce?
A: Yes! Strawberries, blueberries, or blackberries can be swapped in or combined for a mixed berry sauce. Adjust the sweetness according to the berries’ natural flavors.
Nutritional Info
While I won’t go into specific numbers, this Raspberry Sauce is relatively low in calories and can be made even more nutritious by opting for natural sweeteners and reducing sugar.
That’s it, folks! You’ve now mastered a delicious, easy Raspberry Sauce that can elevate a multitude of dishes. I hope my stories and tips inspire you to embrace the joy of cooking and create your unique kitchen memories. Happy cooking, and enjoy every sweet drop of that raspberry goodness!
Print
The Easiest Raspberry Sauce: A Sweet Kitchen Delight
- Total Time: 25 minutes
- Yield: 1 cup of sauce
- Diet: Vegan
Description
A super simple and delicious Raspberry Sauce perfect for drizzling over pancakes, yogurt, or desserts.
Ingredients
- Fresh raspberries (2 cups)
- Granulated sugar (3/4 cup)
- Lemon juice (1 tablespoon)
- Cornstarch (1 tablespoon)
- Water (1/4 cup)
Instructions
- Prepare the raspberries by rinsing them gently under cold water and draining them in a colander.
- Combine ingredients: In a medium saucepan, mix together the raspberries, sugar, lemon juice, cornstarch, and water gently.
- Cook the mixture on medium heat until it starts to break down, stirring occasionally for about 10-15 minutes.
- Thicken the sauce by reducing the heat to low and simmering for an extra 5 minutes.
- Strain if desired, using a fine-mesh sieve to remove seeds for a smooth sauce.
- Cool and store the sauce in an airtight container for up to two weeks.
Notes
Enjoy the sauce over pancakes, yogurt, or desserts. Consider using frozen raspberries if fresh ones are unavailable.
- Prep Time: 10 minutes
- Cook Time: 15 minutes
- Category: Sauce
- Method: Cooking
- Cuisine: American
Nutrition
- Serving Size: 2 tablespoons
- Calories: 50
- Sugar: 10g
- Sodium: 0mg
- Fat: 0g
- Saturated Fat: 0g
- Unsaturated Fat: 0g
- Trans Fat: 0g
- Carbohydrates: 13g
- Fiber: 2g
- Protein: 1g
- Cholesterol: 0mg
Keywords: raspberry sauce, dessert sauce, easy raspberry sauce, fruit sauce, topping
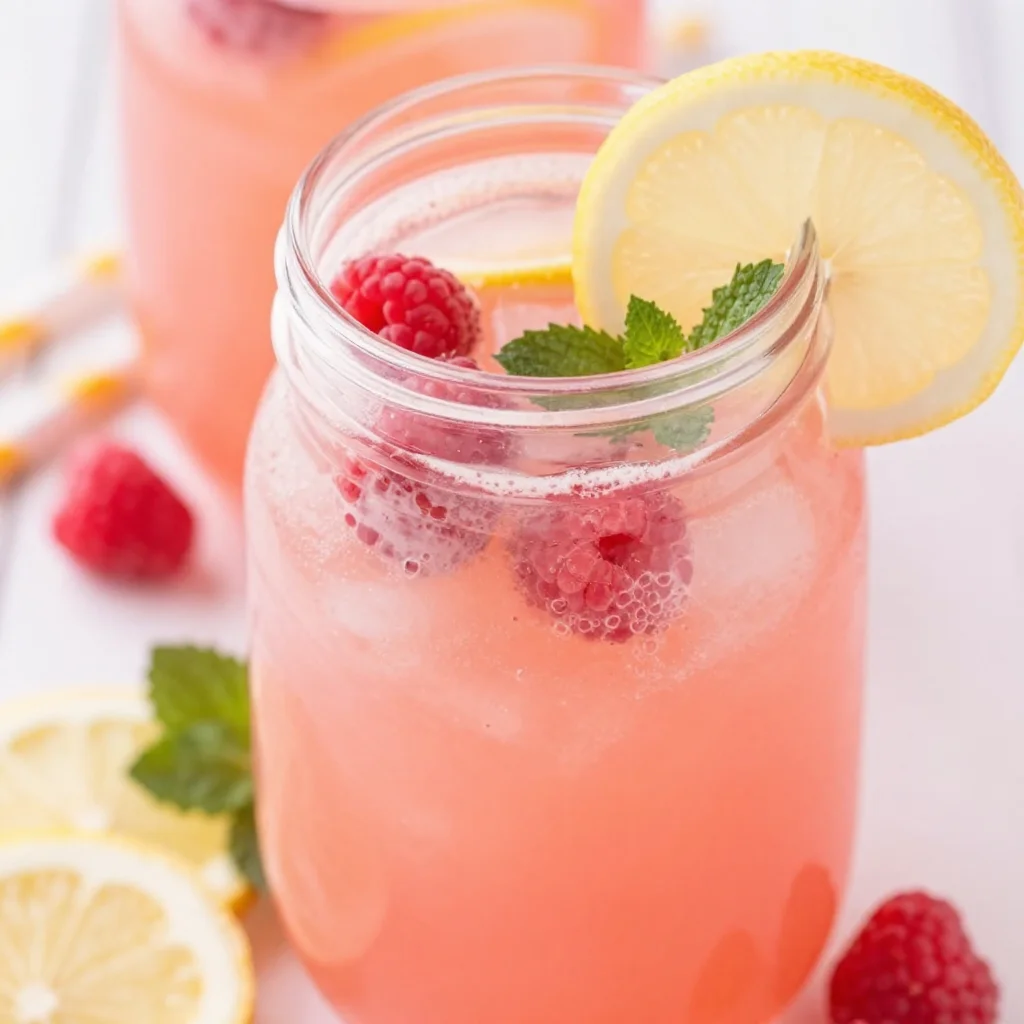
Minute Homemade Raspberry Lemonade (Fresh Summer Sip)
Refreshing Homemade Raspberry Lemonade: A Summer Classic
Welcome to my kitchen, friends! Today, we’re diving into a delightful summertime favorite that is as vibrant and refreshing as a sunny day at the park: homemade raspberry lemonade. Now, if you’re like me, summertime isn’t just about soaking up the sun; it’s also about savoring the delicious, tart, and sweet flavors that fresh fruits have to offer. And there’s really nothing quite like the kick of homemade lemonade, especially when you marry it with the luscious taste of ripe raspberries.
Imagine it: a big glass of ruby-red raspberry lemonade, the ice-cold drink shimmering in the sunlight as you take a sip, and the explosion of flavors dances across your taste buds. It’s the quintessential thirst-quencher and a superb way to impress your friends and family—whether you’re hosting a barbecue, picnicking in the park, or just enjoying a lazy afternoon on your porch.
You don’t need to be a master mixologist to whip this up in your kitchen, and I promise you; it’s simpler than it sounds. In this post, we’ll not only make this vibrant drink together, but I’ll also share some heartwarming stories, helpful tips, and a few creative spins on this classic recipe to keep your summer fun and refreshing! So grab your apron, and let’s get started!
A Little Nostalgia
Before we get into the nitty-gritty of the recipe, let me take you back to my childhood summers. Growing up, my family had a lovely tradition of gathering in our backyard every weekend for a big cookout. The air was filled with laughter, the smell of grilled burgers, and, of course, the occasional splash of water from kids playing in the garden hose. But what stands out most in my memory is my grandmother’s famous lemonade.
She would set up her old wooden table, blending lemons and sugar like a pro while we kids helped her mash fresh fruits from the garden. One summer, we discovered a patch of wild raspberries, and my grandmother had the brilliant idea of adding them into her beloved lemonade recipe. The result? A gloriously sweet and tart drink that quickly became our summer signature!
That buzzy, care-free feeling of sipping on homemade raspberry lemonade while basking in the sun is something I want to share with you today. It’s not just a drink; it’s a memory in a glass!
Ingredients
Let’s gather our ingredients! Here’s what you’ll need to concoct this refreshing homemade raspberry lemonade:
-
Fresh Raspberries (2 cups): Raspberries bring a bright flavor and vibrant color. They’re juicy and sweet with a hint of tartness. If fresh raspberries aren’t available, you can substitute them with frozen ones—just make sure to thaw them before blending.
-
Fresh Lemons (1 cup juice, about 4-6 lemons): The hallmark of any good lemonade is the zesty kick from fresh lemons. If you want to mix it up, try using limes or even some blood oranges for a unique twist!
-
Granulated Sugar (1 cup): This sweetness balances the tartness of the lemons and raspberries. Feel free to adjust the amount depending on your taste. You could also use honey or agave syrup for a natural touch.
-
Water (4 cups): Both for diluting the concentrated lemonade and as a base. You can use sparkling water to add a fun fizz!
-
Ice Cubes: Not exactly an ingredient, but essential for serving cold! You can also freeze some raspberry puree in ice cube trays for a fun twist.
Chef Insight:
Always taste as you go! Every batch of raspberries and lemons may vary in sweetness and acidity, so adjust the sugar according to your preference!
Step-by-Step Instructions
Now, let’s get into the fun part: actually making our luscious raspberry lemonade! Here’s your step-by-step guide:
-
Prepare the Raspberries:
Start by rinsing the fresh raspberries gently under cool water. Place them in a medium saucepan and mash them with the back of a fork or a potato masher until they release their juices. This part is super fun—don’t be shy to get your hands involved! -
Create the Raspberry Syrup:
Add half a cup of water and half a cup of sugar to the saucepan and place it over medium heat. Stir the mixture until the sugar dissolves, allowing the raspberries to steep for about 5-7 minutes. Remove from heat and let it cool. -
Juicing the Lemons:
While your raspberry syrup is cooling, get your lemons juiced! Roll them on the countertop to help release the juice before cutting them in half. Use a citrus juicer to get a full cup of fresh lemon juice. Straining it will help remove seeds and pulp—unless you like the extra texture! -
Mixing Together:
Once your raspberry syrup has cooled down, strain it through a fine-mesh sieve to remove the seeds and pulp, pressing with a spoon to extract as much juice as possible. In a large pitcher, combine the strained raspberry syrup, fresh lemon juice, and the remaining 3.5 cups of cold water. Stir until well mixed. -
Taste Test:
This is a crucial step! Taste the lemonade and adjust the sugar and water according to your preference. Need it sweeter? Add a little more sugar; like it tart? Add more water or lemon juice. -
Chill and Serve:
Add ice cubes to your glass, and pour the raspberry lemonade over to enjoy! You can garnish with fresh raspberries or lemon slices for that Pinterest-ready touch.
Chef Hack:
For an extra burst of flavor, try adding a few mint leaves while you’re mixing up your drink. Not only does it add a refreshing note, but it gives a lovely fragrance to the lemonade too!
Serving Suggestions
When it comes to serving your homemade raspberry lemonade, presentation can make all the difference! I love to pour it into tall, clear glasses filled with ice, garnished with a few whole raspberries, lemon slices, and a sprig of fresh mint. Serve it on a sunny patio table with colorful paper straws, or you can even create a “lemonade stand” vibe for kids’ gatherings. It’s all about the experience of sharing good times with good drinks!
Recipe Variations
Now that you know the classic way to make raspberry lemonade, let’s get creative with some variations!
-
Raspberry-Lemon Basil Refresher: Add fresh basil leaves to your lemonade for a hint of herbal freshness. Muddle them in with the raspberries!
-
Sparkling Raspberry Lemonade: Swap out still water for sparkling water for a fizzy refreshment! Perfect for summer gatherings!
-
Berry Medley Lemonade: Use a mix of berries—strawberries, blueberries, or blackberries—along with raspberries for a colorful twist.
-
Frozen Raspberry Lemonade: Blend the mixture with ice to create a slushy version that’s perfect for keeping cool.
-
Adult Twist: Consider adding a splash of vodka or gin for a delightful adult beverage at your next gathering!
Chef’s Notes
This homemade raspberry lemonade is truly a reflection of summer joy, and I could go on and on about the little tweaks you can make to personalize it! Over the years, I’ve experimented with different fruits and herbs, and every twist adds an unforgettable spin. I once tried a spicy jalapeño version for a friend’s cookout, which brought a surprising kick! If you have stories or experiments of your own, I’d love to hear them—creating in the kitchen is all about fun and community!
FAQs and Troubleshooting
-
Q: My lemonade is too tart; what can I do?
A: It’s all about balance! If your lemonade is too sour, gradually add more sugar until you reach your preferred sweetness. You can also dilute it with more water! -
Q: How long will raspberry lemonade keep in the fridge?
A: Fresh raspberry lemonade is best enjoyed within 3-5 days. Just be sure to give it a good stir before serving, as ingredients may settle. -
Q: Can I use bottled lemon juice?
A: While fresh lemon juice is always preferred for its bright flavor, bottled lemon juice can certainly work in a pinch. Just be aware that the taste might not be as vibrant! -
Q: What can I do with leftover raspberry pulp?
A: Don’t toss it! Use it in yogurt, smoothies, or even as a topping for pancakes or oatmeal. It’s packed with flavor!
Nutritional Info
(Optional section if applicable)
This refreshing homemade raspberry lemonade is a healthier option compared to bottled versions! Here’s a quick idea of the nutrition per serving (based on an 8 oz glass with the above recipe and 1 cup of sugar divided):
- Calories: About 130
- Sugar: 30g
- Carbohydrates: 33g
- Vitamin C: Rich source!
I hope this homemade raspberry lemonade brings sunny vibes and joy into your kitchen this summer! With every sip, remember to share the love and stories that come with your creations. Happy cooking!
Print
Refreshing Homemade Raspberry Lemonade
- Total Time: 25 minutes
- Yield: 4 servings
- Diet: Vegetarian
Description
A vibrant and refreshing summer drink made with fresh raspberries and lemons.
Ingredients
- Fresh Raspberries (2 cups)
- Fresh Lemons (1 cup juice, about 4-6 lemons)
- Granulated Sugar (1 cup)
- Water (4 cups)
- Ice Cubes
Instructions
- Prepare the raspberries: Rinse gently and mash in a saucepan.
- Create the raspberry syrup: Add water and sugar, stirring over medium heat until dissolved.
- Juicing the lemons: Roll, cut, and juice lemons to make a full cup of juice.
- Mixing together: Strain raspberry syrup and combine with lemon juice and remaining cold water.
- Taste test: Adjust sugar and water according to preference.
- Chill and serve: Pour over ice and garnish as desired.
Notes
For an extra twist, add a few mint leaves or try different berry combinations. Serve in tall glasses with colorful straws for a festive touch.
- Prep Time: 15 minutes
- Cook Time: 10 minutes
- Category: Beverage
- Method: Mixing
- Cuisine: American
Nutrition
- Serving Size: 1 serving
- Calories: 130
- Sugar: 30g
- Sodium: 0mg
- Fat: 0g
- Saturated Fat: 0g
- Unsaturated Fat: 0g
- Trans Fat: 0g
- Carbohydrates: 33g
- Fiber: 1g
- Protein: 1g
- Cholesterol: 0mg
Keywords: raspberry lemonade, summer drink, refreshing beverage, homemade lemonade
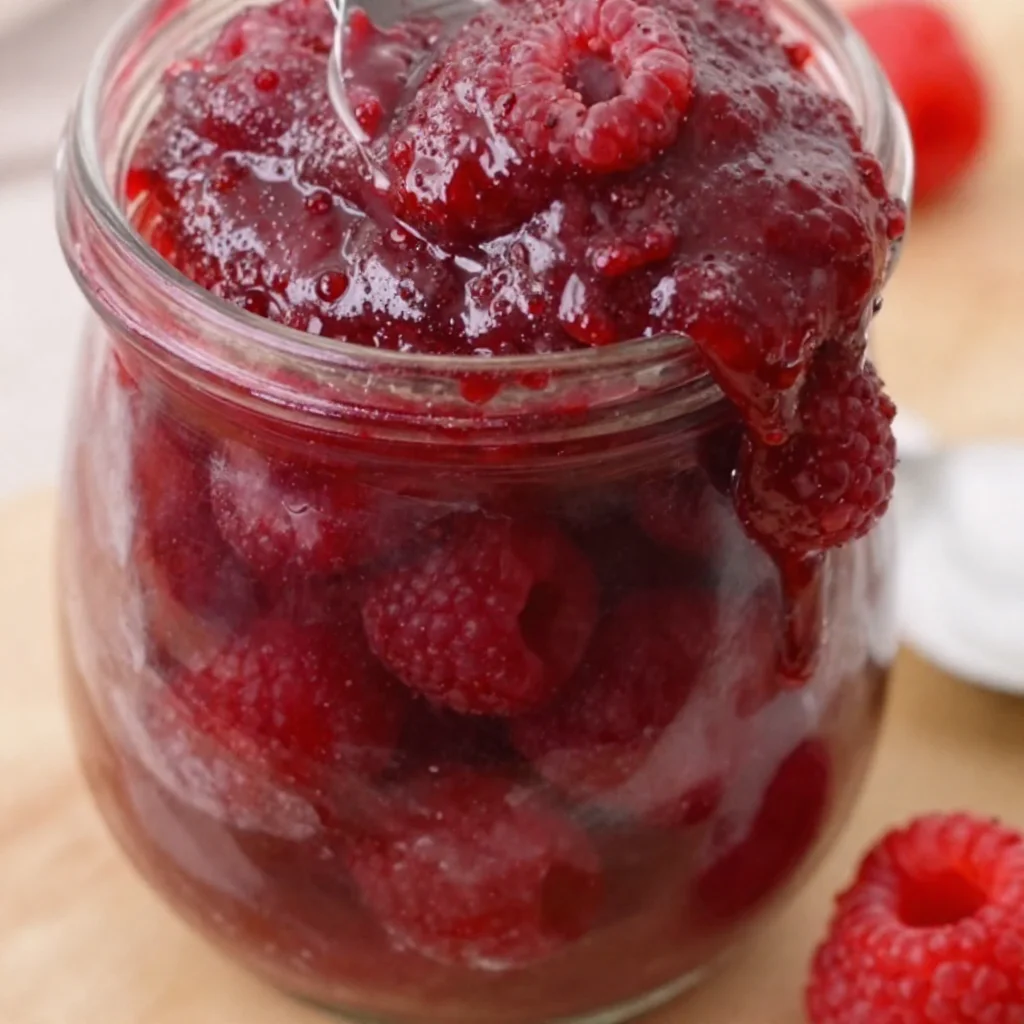
Minute Raspberry Filling for Pies and Desserts (Easy)
The Ultimate Raspberry Filling: A Sweet Sensation
Welcome to my cozy corner of the culinary world! I’m thrilled to share one of my absolute favorite recipes with you today that’s perfect for bringing a bit of sweetness to your kitchen: raspberry filling. This vibrant, tangy filling is a superstar in so many desserts, from danishes and pies to cakes and tarts. If you’ve ever stood in front of a bakery display, mesmerized by the colors and textures of pastries, you know that a good filling can make all the difference. So, let’s dive in and whip up something delicious together!
A Slice of Nostalgia
When I think of raspberry filling, I can’t help but remember the summers spent at my grandmother’s house. She had a little garden bursting with raspberry bushes that seemed to go on forever. Every late afternoon, we would venture out with tiny buckets, and, of course, a few handfuls would always end up in our mouths before making it into the bucket. There’s something truly magical about eating fruits straight from the garden — the flavor just hits differently.
One summer, as my grandma guided me through her time-tested recipe, I remember the excitement of waiting for the thick, glossy filling to cool. We used it to fill her famous pastries, which were flaky, buttery, and simply divine! The house was always filled with laughter and delightful aromas that wrapped around you like a warm hug. That memory has stuck with me through the years, and it inspires me to recreate that same warmth whenever I whip up a batch of raspberry filling. Trust me; once you make this filling, you’ll understand the joy that comes with sharing the fruits of your labor with the people you love.
Ingredients
To create the perfect raspberry filling, you’ll need just a few simple ingredients. Let’s take a closer look!
-
Fresh or Frozen Raspberries (2 cups): The star of our show! Fresh raspberries are flavorful but can be pricey and seasonal. Frozen raspberries are a great substitute and often just as tasty. Just be sure to thaw them and drain any excess liquid.
-
Granulated Sugar (1/2 cup): This sweetener balances the tartness of the raspberries. You can adjust this amount based on your personal taste or substitute with honey or maple syrup for a natural sweetness.
-
Cornstarch (2 tablespoons): This thickening agent helps to give the filling a lovely, spreadable consistency. If you’re looking for a gluten-free option, you can use arrowroot powder instead!
-
Lemon Juice (1 tablespoon): The acidity of lemon juice enhances the flavor of the raspberries and helps to balance the sweetness. You can use bottled lemon juice in a pinch, but fresh is always better!
-
Water (1/4 cup): This is used to help dissolve the sugar and cornstarch. If you’d like a richer taste, you can use fruit juice like apple or white grape juice.
Feel free to experiment with different flavors by infusing the filling with herbs like mint for a refreshing twist!
Step-by-Step Instructions
Ready to get cooking? Here’s a simple and straightforward guide to making your raspberry filling with little chef hacks sprinkled in!
-
Prepare Your Ingredients: Start by gathering all your ingredients. This ensures you won’t find yourself frantically searching for something halfway through the process. It’s also a great time to pre-measure your ingredients for efficiency.
-
Combine the Raspberries and Sugar: In a medium saucepan, combine the raspberries and granulated sugar over medium heat. Stir gently to coat the berries in sugar, then let them sit for a couple of minutes until they start to release their juices. This step helps to create that delicious syrupy base for your filling.
-
Makе the Cornstarch Slurry: While the raspberries are settling, mix the cornstarch with the water in a small bowl. This slurry will help thicken our filling later. For a smooth texture, ensure that there are no lumps!
-
Heat Until Bubbly: Place the saucepan over medium-high heat and bring the mixture to a gentle boil. Stir it occasionally to prevent sticking. The raspberries will break down as they simmer—this is what you want!
-
Add the Cornstarch Mixture: Once the raspberry mixture is bubbling, reduce the heat to medium and pour in the cornstarch slurry. Stir continuously until the mixture thickens, which should take about 2-3 minutes. If it seems too thick, you can always add a splash more water.
-
Add Lemon Juice: Just as the filling begins to thicken, remove it from the heat and stir in the lemon juice. The citrus will brighten the flavor and give your filling that zesty kick!
-
Cool and Store: Allow the filling to cool completely in the saucepan. If you’re not using it right away, transfer it to airtight containers. This filling can be kept in the fridge for about one week or in the freezer for up to three months. I love making a big batch, so I always have some on hand for impromptu desserts!
Serving Suggestions
Now that you have your luscious raspberry filling, it’s time to dream up some serving ideas! Spread this filling between two layers of sponge cake for a gorgeous layer cake, or fill puff pastry shells and dust them with powdered sugar for a delightful treat. You could even dollop it onto a bowl of vanilla ice cream or yogurt for a refreshing dessert. The opportunities are endless, and your friends will swoon!
Recipe Variations
-
Mixed Berry Filling: Combine raspberries with blueberries or strawberries for a delightful berry medley.
-
Lemon-Raspberry Twist: Add extra lemon zest to the filling for an invigorating twist that will brighten up any dessert.
-
Chia Raspberry Jam: Replace some of the sugar with chia seeds for a healthy, jam-like filling that’s packed full of fiber.
-
Raspberry-Lavender Fusion: Infuse the cooking mixture with dried lavender flowers for a floral flavor that pairs beautifully with raspberry.
-
Vegan Swap: Use agave nectar instead of sugar and arrowroot powder instead of cornstarch to make a completely plant-based version of this filling!
Chef’s Notes
Making raspberry filling has become a bit of a ritual for me. It’s a time to slow down and appreciate the beauty in cooking—especially when the vibrant colors of the fresh fruit remind me of all those summer days in my grandmother’s garden. I often find myself experimenting with different flavors and tweaking the recipe as needed, discovering new dimensions to an old beloved favorite! Quick tip: if using frozen raspberries, remember they will release more juice than fresh, so you might need to adjust the amount of cornstarch to achieve your desired consistency.
FAQs and Troubleshooting
Q: Why is my filling too runny?
A: If it’s too runny, it likely needs more cornstarch or a longer cooking time. Try returning it to the heat and cooking it for a few minutes longer, allowing it to thicken up properly.
Q: Can this filling be made ahead of time?
A: Absolutely! In fact, I recommend making it ahead of time for maximum flavor. Just store it in the fridge or freezer as described above.
Q: Can I use other fruits for filling?
A: Yes, feel free to experiment! Other berries or even fruits like peaches or apples can work beautifully with similar ratios, but you may need to adjust sugar levels depending on the fruit’s sweetness.
Q: What’s the best way to use this filling?
A: The best way? All of them! Use it to fill pastries, layer it into cakes, or simply enjoy it on its own—just let your creativity run wild!
Nutritional Info
This raspberry filling is naturally low in calories while being bursting with flavor! Here’s a quick breakdown per serving (1 tablespoon):
- Calories: 25
- Total Fat: 0g
- Sodium: 0mg
- Carbohydrates: 6g
- Sugars: 5g
- Fiber: 1g
- Protein: 0g
Creating your own raspberry filling has never been easier or more satisfying. I can’t wait to hear your thoughts and see what delicious treats you create with it! Whip out your apron, and let’s get cooking—your kitchen adventure awaits!
Print
The Ultimate Raspberry Filling
- Total Time: 25 minutes
- Yield: 3 cups
- Diet: Vegetarian
Description
A vibrant, tangy raspberry filling that enhances various desserts from pastries to cakes.
Ingredients
- Fresh or Frozen Raspberries (2 cups)
- Granulated Sugar (1/2 cup)
- Cornstarch (2 tablespoons)
- Lemon Juice (1 tablespoon)
- Water (1/4 cup)
Instructions
- Prepare your ingredients by gathering and pre-measuring them.
- Combine the raspberries and sugar in a medium saucepan over medium heat.
- Make the cornstarch slurry by mixing cornstarch with water in a small bowl.
- Heat the mixture over medium-high heat until bubbly, stirring occasionally.
- Add the cornstarch mixture once bubbling and stir until thickened.
- Stir in the lemon juice to enhance flavor just as it thickens.
- Cool completely before storing in airtight containers.
Notes
This filling can be kept in the fridge for about one week or in the freezer for up to three months. Adjust cornstarch if using frozen raspberries.
- Prep Time: 10 minutes
- Cook Time: 15 minutes
- Category: Dessert
- Method: Cooking
- Cuisine: American
Nutrition
- Serving Size: 1 tablespoon
- Calories: 25
- Sugar: 5g
- Sodium: 0mg
- Fat: 0g
- Saturated Fat: 0g
- Unsaturated Fat: 0g
- Trans Fat: 0g
- Carbohydrates: 6g
- Fiber: 1g
- Protein: 0g
- Cholesterol: 0mg
Keywords: raspberry, filling, dessert, pastries, jam
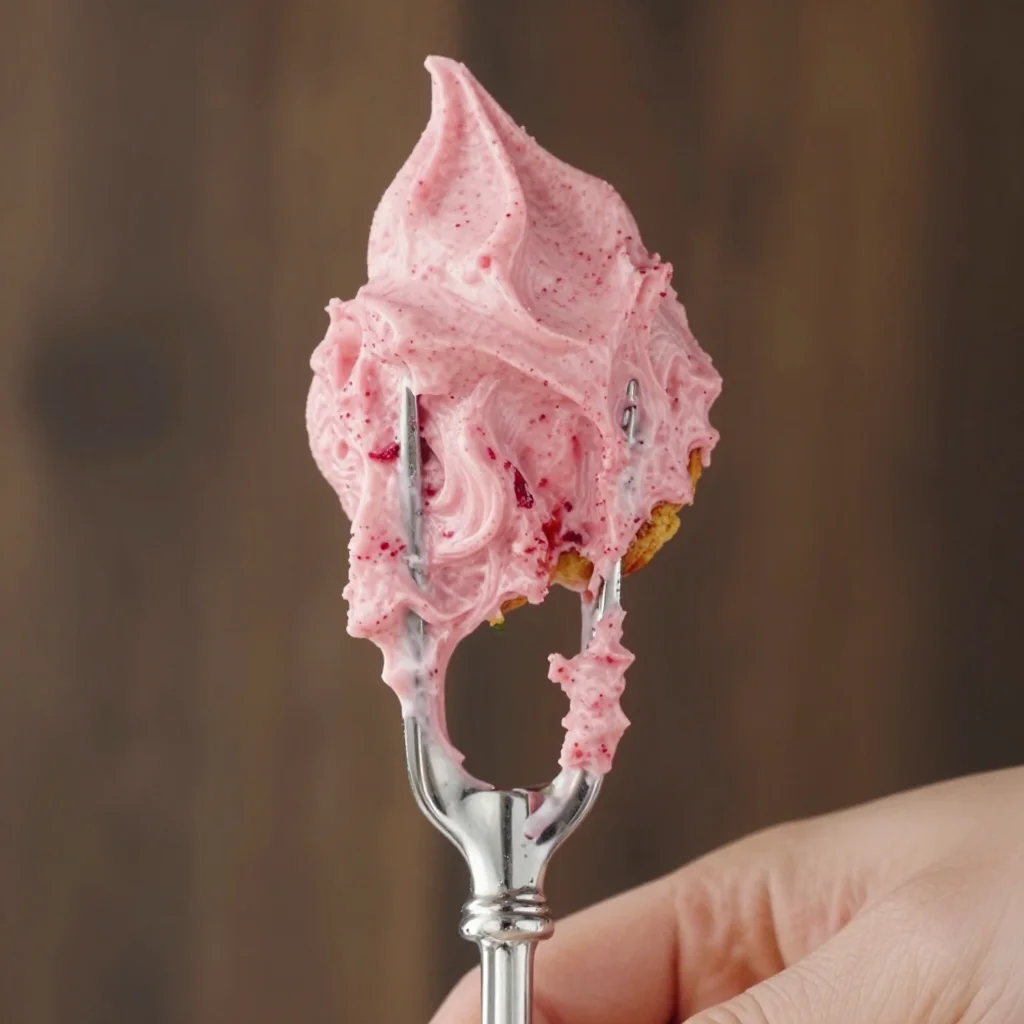
Raspberry Buttercream Frosting
Raspberry Buttercream Frosting: A Sweet Addition to Your Baking Adventures
Welcome to my kitchen! I’m Olivia Bennett, your go-to home cook, flavor enthusiast, and all-around lover of cozy culinary creations. Today, I’m inviting you to join me on a sweet journey as we whip up a delightful Raspberry Buttercream Frosting that will elevate your cakes, cupcakes, and cookies to a whole new level. If the mere thought of frosting draping over a baked treat makes your heart skip a beat, you’re in the right place!
There’s something truly magical about combining fresh fruit with fluffy buttercream, and raspberry is one of my all-time favorites. Its sweet-tart flavor provides a delightful contrast to rich cakes and buttery cookies. The vibrant pink hue of this frosting brings an inviting pop of color to your desserts, making them not just delectable, but also a feast for the eyes!
This frosting recipe is easy to follow, requiring just a handful of ingredients you likely already have on hand. Whether you’re a baking novice or a seasoned pro, you’ll find that crafting your own frosting is a rewarding experience that doesn’t demand fancy skills—just a touch of love and a dollop of creativity. So, roll up your sleeves, grab your mixing bowl, and let’s dive into the world of raspberry buttercream!
A Slice of Nostalgia
Let me take you back to one of my most cherished childhood memories—my grandmother’s kitchen during summer. The air was always thick with the sweet, mouthwatering aroma of fresh berries, and it was a joyous ritual for us to spend Saturday mornings picking raspberries from her garden.
One particular weekend stands out vividly in my mind. After our basket was brimming with bright, juicy raspberries, we headed back to the kitchen, where Grandma began to transform our haul into delicious raspberry preserves. As the berries bubbled away on the stove, she introduced me to the magic of frosting, and we whipped up a batch of her signature raspberry buttercream. I vividly remember how her laughter echoed off the walls as we sampled spoonfuls straight from the bowl, giggling as raspberry juice splattered our aprons.
That memory ignited my lifelong passion for baking and has forever linked the sweet-tart flavor of raspberries with warm moments spent in the kitchen. Now, every time I make my raspberry buttercream frosting, I’m whisked back to those carefree summer days, and my heart swells with love and nostalgia.
What You’ll Need
Here’s what you’ll need to create this scrumptious Raspberry Buttercream Frosting:
-
1 cup unsalted butter (softened): Make sure your butter is at room temperature for the smoothest consistency. If you don’t have unsalted, you can use salted butter—just reduce the added salt in the recipe a bit.
-
4 cups powdered sugar: A must for sweetness and texture! You can substitute some of this with alternative sweeteners like erythritol if you’re aiming for a lower-sugar version.
-
1/4 cup fresh raspberries: Fresh raspberries yield the best flavor! If you can’t find fresh ones, thawed frozen raspberries work, but make sure to drain excess liquid.
-
2 tablespoons heavy cream (or milk): This adds creaminess to the frosting. Almond milk or coconut milk can be used for a dairy-free option!
-
1 teaspoon vanilla extract: This enhances the flavor profile beautifully. Feel free to swap it with almond extract for a different twist!
-
A pinch of salt: It balances the sweetness and enhances the flavors. Just a small amount goes a long way!
These ingredients are relatively simple and can usually be found in most households. Just like in life, cooking is all about flexibility—feel free to mix and match based on what you have on hand!
Step-By-Step Instructions
Now that we have our ingredients ready, let’s transform them into a bowl of delicious Raspberry Buttercream Frosting!
-
Prepare the ingredients: Start by measuring all your ingredients and setting them out. This is a game-changer for efficiency and ensures you won’t forget anything during the mixing process!
-
Cream the butter: In a large mixing bowl, add the softened unsalted butter. Using an electric mixer or a sturdy whisk, cream the butter on medium speed until it’s light and fluffy—about 2-3 minutes. This step is crucial! Properly creamed butter will ensure a light, airy frosting.
-
Sift the powdered sugar: In a separate bowl (or directly into the butter if you’re feeling adventurous), sift the powdered sugar to eliminate any lumps. Gradually add this to your creamed butter, a cup at a time, mixing on low speed to start. This helps to avoid a sugary cloud explosion—trust me, I’ve been there!
-
Incorporate the raspberries: Next, mash your fresh raspberries with a fork until you have a chunky puree. You can reserve a couple for garnishing if you’re feeling fancy later! Add the raspberry mash to the mixing bowl and mix on medium speed until well combined, about 2-3 minutes. The beautiful pink hue will start to appear!
-
Add cream and flavorings: Pour in the heavy cream and vanilla extract (remember that pinch of salt?). Mix on medium-high speed for another minute or two until everything is beautifully combined and fluffy. If the frosting seems too thick, just add a little extra cream until you reach your desired consistency.
-
Taste and adjust: Give your frosting a little taste! This is the fun part. If you want more sweetness, add a bit more powdered sugar; for a tangy kick, throw in a few more mashed raspberries.
-
Get decorative: Now comes the fun! Use a spatula to lift the frosting into a piping bag or use an offset spatula to spread it across cakes and cupcakes.
Serving Suggestions
Once you’ve perfected your Raspberry Buttercream Frosting, it’s time to get creative with your serving options! This luscious frosting is a versatile companion to so many baked goodies. Think fluffy vanilla cupcakes, rich chocolate cakes, or even light and airy sponge cakes. You can pipe it into swirls on top of cupcakes, layer it between sheets of cake, or simply spread it generously on cookies for a quick treat!
To garnish, consider adding fresh raspberries on top or a sprinkle of edible glitter for a touch of sparkle. The presentation is just as important as the taste, and a bright, floral dessert will surely wow your guests!
Recipe Variations
Looking to jazz up your frosting or cater to dietary preferences? Here are some creative twists to try:
-
Lemon Raspberry Buttercream: Substitute a few tablespoons of raspberry with freshly squeezed lemon juice for a citrusy zing.
-
Vegan Raspberry Buttercream: Use coconut oil in place of butter, and swap heavy cream with coconut cream.
-
Chocolate Raspberry Buttercream: Mix in some unsweetened cocoa powder for a decadent chocolate-berry combo.
-
Raspberry Almond Buttercream: Replace vanilla with almond extract for a nutty addition that pairs perfectly with raspberry.
-
Spicy Raspberry Buttercream: Add a pinch of cayenne or chili powder for a surprising heat that contrasts beautifully with the sweetness.
Chef’s Notes
Every recipe evolves over time, and this Raspberry Buttercream Frosting is no exception! Originally, I used to make it with just raspberries and buttercream, but over the years, I’ve played around with incorporating different flavors and textures.
One time, I made a huge batch for a family reunion, but I miscalculated the raspberry-to-butter ratio and ended up with a rather liquidy frosting. Instead of panicking, I turned it into a berry drizzle! I simply heated it gently on the stove, adjusted the sweetness, and poured it over my cake—a delicious mishap indeed!
Cooking is all about finding joy in the journey, and I hope you find just as much joy in this recipe as I have over the years.
FAQs and Troubleshooting
-
My frosting is too runny; what do I do?
- No worries! You can thicken it by gradually adding more powdered sugar. If you’ve added too much liquid, a little extra sugar will usually do the trick.
-
My frosting tastes too sweet; how can I tone it down?
- Try mixing in a pinch of salt or a squeeze of lemon juice to balance the sweetness—this can help bring out the raspberry flavor and give you a more rounded taste.
-
Can I make this frosting ahead of time?
- Absolutely! You can store the frosting in an airtight container in the fridge for up to a week. Just give it a quick stir or re-whip it to fluff it up again before using.
-
What cakes work best with raspberry buttercream?
- This frosting pairs wonderfully with vanilla, chocolate, lemon, and almond cakes. The versatility of raspberry complements various flavors beautifully!
Nutritional Info
(You might want to provide this information based on your ingredients so that readers can make informed dietary decisions!)
Enjoy your culinary adventure with this Raspberry Buttercream Frosting! I hope it brings as much joy to your kitchen as it has to mine over the years. Nothing beats the joy of creating and sharing delicious food, and with this recipe, you can bring the taste of summer into your home—all year round. Happy baking, and don’t forget to keep those aprons messy!
Print
Raspberry Buttercream Frosting
- Total Time: 15 minutes
- Yield: 2 cups 1x
- Diet: Vegetarian
Description
A delightful Raspberry Buttercream Frosting that elevates cakes, cupcakes, and cookies with its sweet-tart flavor and vibrant color.
Ingredients
- 1 cup unsalted butter (softened)
- 4 cups powdered sugar
- 1/4 cup fresh raspberries
- 2 tablespoons heavy cream (or milk)
- 1 teaspoon vanilla extract
- A pinch of salt
Instructions
- Prepare the ingredients: Start by measuring all your ingredients and setting them out.
- Cream the butter: In a large mixing bowl, add the softened unsalted butter and cream until light and fluffy.
- Sift the powdered sugar: Sift the powdered sugar to eliminate lumps, then gradually add it to the creamed butter.
- Incorporate the raspberries: Mash the fresh raspberries and add them to the mixing bowl, mixing until well combined.
- Add cream and flavorings: Pour in the heavy cream and vanilla extract, mix until fluffy.
- Taste and adjust: Taste the frosting and adjust sweetness or tanginess as desired.
- Get decorative: Use a spatula or piping bag to frost your baked goods.
Notes
Consider adding fresh raspberries on top or edible glitter for decoration. This frosting pairs wonderfully with vanilla, chocolate, lemon, and almond cakes.
- Prep Time: 15 minutes
- Cook Time: 0 minutes
- Category: Dessert
- Method: Mixing
- Cuisine: American
Nutrition
- Serving Size: 1 serving
- Calories: 200
- Sugar: 25g
- Sodium: 100mg
- Fat: 9g
- Saturated Fat: 5g
- Unsaturated Fat: 4g
- Trans Fat: 0g
- Carbohydrates: 30g
- Fiber: 1g
- Protein: 1g
- Cholesterol: 30mg
Keywords: frosting, raspberry, buttercream, dessert, baking




