
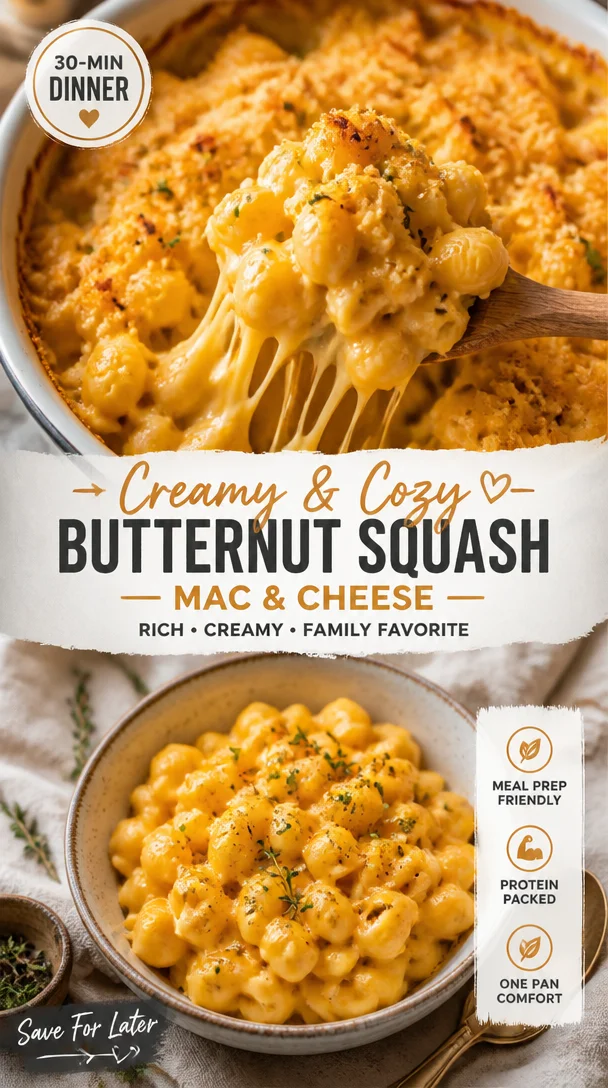
Delicious and Healthy Butternut Squash Mac and Cheese | Mac and cheese with butternut squash, Butternut squash recipes mac and cheese, Creamy butternut squash
Delicious and Healthy Butternut Squash Mac and Cheese
Welcome to my kitchen, fellow food lovers! Today, we’re diving into a creamy, dreamy dish that’s as comforting as a hug and exciting enough to keep your taste buds dancing: Butternut Squash Mac and Cheese! It’s the ultimate comfort food that combines the classic flavors we know and love with the nutritional goodness of butternut squash. Yes, you heard that right! We’re going to take that iconic mac and cheese that brings back fond memories of childhood and give it a healthy twist.
I can still vividly remember those chilly autumn evenings when my mom would whip up a big pot of mac and cheese. The aroma would waft through our home, inviting my siblings and me to gather around the dinner table, our bellies rumbling with anticipation. We’d race to see who could grab the biggest spoonful before it was all gone. Fast forward to today, and I’m thrilled to pass down that same joyous experience in a healthier, vibrant version.
Butternut squash is such a wonderful ingredient to work with; it’s mildly sweet, wonderfully creamy when pureed, and packed with vitamins A, C, and E. Integrating it into your mac and cheese adds depth, color, and nutrition that truly elevates this beloved classic. Plus, the beautiful golden hue of the squash is sure to catch the eyes of even the pickiest eaters. So, whether you’re cooking for your family or hosting a cozy gathering, this dish will surely impress!
This recipe is not just about the food, it’s about the memories and the connections we create around the table. I can’t wait to share all my tips and tricks with you, so let’s roll up our sleeves, put on our aprons, and let’s get cooking!
Personal Story
Let me take you back to my first experience with butternut squash. I was in my early twenties, exploring seasonal produce at a local farmer’s market. The vibrant orange hue of the squashes caught my eye, and something about them just felt warm and inviting. I brought one home, excited to experiment in the kitchen.
As I roasted it, the sweet aroma filled the air, reminding me of my mom’s kitchen – cozy, comforting, and packed with love. I decided to create a macaroni dish that I could share with friends over a cozy dinner party. I vividly remember the laughter, the clinking of glasses, and the joy of everyone digging into my attempt at healthy comfort food. Turns out, my gamble paid off—the creamy butternut squash mac and cheese became a staple at those gatherings. It was an unexpected hit!
That experience taught me the power of using simple, wholesome ingredients to elevate a classic dish. It’s not just mac and cheese; it’s a celebration of flavors and memories. So, grab your butternut squash, and let’s recreate that magic together!
Ingredients
Here’s what you’ll need to make this delicious butternut squash mac and cheese:
-
1 medium butternut squash
The star of the show! Rich in nutrients and flavor, this squash will give our mac a creamy base. If you can’t find butternut squash, sweet potatoes work beautifully as a substitute, too! -
8 oz elbow macaroni
A classic option, but feel free to use whole grain or gluten-free pasta to suit your dietary preferences. Shapes like shells or fusilli hold the cheesy goodness perfectly! -
1 cup sharp cheddar cheese, shredded
Cheddar adds that classic mac and cheese flavor. Mixing in some Gruyère or fontina can create a more gourmet touch if you’re feeling adventurous! -
1/2 cup Parmesan cheese, grated
Parmesan gives a lovely salty kick. If you’re looking for a dairy-free option, nutritional yeast is an excellent substitute for the cheesy flavor! -
1 cup milk (or plant-based milk)
Whole milk helps make the sauce extra creamy, but almond or oat milk are great plant-based alternatives. -
2 tablespoons butter (or olive oil)
For cooking our sauce and adding richness. Feel free to use vegan butter if you’d like a dairy-free version! -
1 teaspoon garlic powder
For a lovely depth of flavor. You can also use fresh minced garlic—about 2 cloves will do the trick! -
Salt and pepper to taste
Essential for enhancing all the flavors in our dish. Always taste as you go! -
1/4 teaspoon nutmeg
It may sound unconventional in mac and cheese, but nutmeg adds a subtle warmth that pairs beautifully with the butternut squash. A little goes a long way!
Step-by-Step Instructions
Ready to get your hands dirty? Here’s how we’ll make the most velvety Butternut Squash Mac and Cheese!
1. Prep the Butternut Squash
First things first, we need to prepare our star ingredient. Preheat your oven to 400°F (200°C). While it heats up, slice your butternut squash in half lengthwise and scoop out the seeds. If you’re worried about cutting it, you can microwave it for a couple of minutes to soften the skin before slicing.
Drizzle a bit of olive oil on the squash halves, sprinkle with salt and pepper, and place them cut-side down on a baking sheet lined with parchment paper. Roast for about 30-40 minutes, or until the squash is fork-tender. The roasting process caramelizes the natural sugars, enhancing its flavor.
Chef Tip: If you have leftover butternut squash, you can easily puree it and freeze it for future recipes. It’s perfect for soups, smoothies, or even baked goods!
2. Cook the Pasta
While your squash is roasting, bring a large pot of salted water to a boil. Add the elbow macaroni and cook according to package instructions until al dente. Remember not to overcook it, as it will continue cooking in the oven later!
Once cooked, drain the pasta and set it aside. You can toss it with a tiny bit of olive oil to prevent sticking while the sauce is being prepared.
3. Make the Sauce
Now let’s make it creamy! In a medium saucepan, melt the butter over medium heat. Stir in the garlic powder, and let it cook for about 30 seconds until fragrant. Slowly whisk in the milk, and bring it to a gentle simmer.
Once it’s steaming, reduce the heat to low and add the roasted butternut squash. Carefully mash it with a fork or use an immersion blender for a smoother texture. Stir in the sharp cheddar and Parmesan cheese until melted and well combined. If the sauce is too thick, add a splash more milk to reach your desired consistency.
Chef Hack: For an extra creamy sauce, stir in a dollop of cream cheese or Greek yogurt!
4. Combine and Bake
Now it’s time to bring everything together! In a large mixing bowl (or the pot you used for pasta), combine the cooked macaroni and the cheese sauce. Stir well until every piece of pasta is coated.
At this point, sprinkle in the nutmeg and add additional salt and pepper to taste. If you want to make it extra decadent, transfer the mac and cheese to a baking dish, top with extra shredded cheese (hello, cheesy goodness), and pop it under the broiler for 2-3 minutes until bubbly and golden brown!
Pro Tip: For a crispy topping, mix some breadcrumbs with melted butter and sprinkle it on top before broiling!
5. Serve and Enjoy!
Once baked, let it cool for a minute before serving. Ladle generous portions into bowls or on plates, garnishing with fresh herbs like parsley or chives for that pop of color and flavor.
Serving Suggestions
This Butternut Squash Mac and Cheese is perfect for cozy family dinners, movie nights, or even as a side dish at holiday gatherings. You can serve it with a crisp green salad, roasted veggies, or even a side of garlic bread to complete the meal.
For an upscale feel, try plating it in individual ramekins or cast-iron skillets for a rustic presentation. You might also consider pairing it with a nice bottle of white wine, like a lightly oaked Chardonnay—trust me, your taste buds will thank you!
Recipe Variations
Now that you have the base recipe down, here are a few fun variations to keep your mac and cheese game exciting!
- Spicy Mac: Add diced jalapeños or a pinch of cayenne pepper for a kick.
- Veggie Boost: Toss in sautéed spinach, kale, or broccoli for extra nutrients.
- Protein Punch: Stir in cooked chicken, turkey, or even crumbled bacon for added flavor and heartiness.
- Herby Twist: Swap in fresh herbs like thyme or sage instead of nutmeg for a different aromatic experience.
- Gourmet Option: Try adding truffle oil or a dollop of pesto to your cheese sauce!
Chef’s Notes
One of the reasons I love this recipe so much is its adaptability. The butternut squash not only gives it that beautiful color but also allows for flexibility in flavors and textures. I’ve been known to experiment by adding different cheeses for unique taste profiles. My favorite combo lately is sharp white cheddar and a sprinkle of gorgonzola—it’s a game-changer!
And let me share a funny moment with you: Once, in my excitement, I added an entire head of garlic into the sauce. Let’s just say, while it was not the typical cheesy mac I envisioned, it sure made an interesting conversation starter at dinner!
FAQs and Troubleshooting
Q: My mac and cheese turned out too dry, what happened?
A: This can occur if the sauce was cooked too long, or if the pasta was overcooked and absorbed too much liquid. Just add a splash of milk when reheating to bring back that creamy texture!
Q: How can I store leftovers?
A: Store leftover mac and cheese in an airtight container in the refrigerator for up to 3 days. For longer storage, consider freezing portions in freezer-safe containers. Just remember, the sauce may thicken after freezing, so adding a bit of milk while reheating helps!
Q: Can I use frozen butternut squash?
A: Absolutely! Just make sure to thaw and drain off any excess moisture before adding it to your sauce.
Q: What if I don’t like butternut squash?
A: No problem! You can replace it with other winter squashes like acorn squash or even roasted pumpkin.
Nutritional Info
This dish not only satisfies your cravings but also packs a nutritional punch! Each serving provides essential vitamins and minerals while keeping calories and unhealthy fats in check compared to conventional mac and cheese recipes.
And there you have it! A deliciously creamy and cozy Butternut Squash Mac and Cheese that’s perfect for any occasion. I hope you enjoy making this dish as much as I enjoyed sharing my kitchen stories with you. Remember, cooking is all about experimenting and finding joy in the process. So get in there, have fun, and don’t forget to share your creations with the ones you love! Happy cooking!
Print
Butternut Squash Mac and Cheese
- Total Time: 55 minutes
- Yield: 4 servings 1x
- Diet: Vegetarian
Description
A creamy and nutritious twist on classic mac and cheese featuring the wholesome goodness of butternut squash.
Ingredients
- 1 medium butternut squash
- 8 oz elbow macaroni
- 1 cup sharp cheddar cheese, shredded
- 1/2 cup Parmesan cheese, grated
- 1 cup milk (or plant-based milk)
- 2 tablespoons butter (or olive oil)
- 1 teaspoon garlic powder
- Salt and pepper to taste
- 1/4 teaspoon nutmeg
Instructions
- Prep the Butternut Squash: Preheat your oven to 400°F (200°C), slice the squash, scoop out seeds, drizzle with oil, and roast for 30-40 minutes until tender.
- Cook the Pasta: Boil salted water and cook elbow macaroni until al dente, then drain.
- Make the Sauce: Melt butter, add garlic powder, whisk in milk, then mix in roasted butternut squash and cheeses until smooth.
- Combine and Bake: Mix the cooked macaroni with the cheese sauce, season, and optionally broil for a crispy topping.
- Serve and Enjoy: Cool slightly, plate, and garnish with fresh herbs.
Notes
Can add diced jalapeños for a spicy kick or mix in veggies like spinach or broccoli for a nutritional boost.
- Prep Time: 15 minutes
- Cook Time: 40 minutes
- Category: Main Course
- Method: Baking
- Cuisine: American
Nutrition
- Serving Size: 1 serving
- Calories: 350
- Sugar: 5g
- Sodium: 400mg
- Fat: 12g
- Saturated Fat: 4g
- Unsaturated Fat: 6g
- Trans Fat: 0g
- Carbohydrates: 45g
- Fiber: 3g
- Protein: 15g
- Cholesterol: 30mg
Keywords: mac and cheese, butternut squash, comfort food, healthy recipes, vegetarian

Crispy 5-Ingredient Butternut Squash Fritters for Weeknights
5-Ingredient Butternut Squash Fritters: A Cozy Kitchen Adventure
Introduction
Hey there, kitchen warriors! I’m Olivia Bennett, your friendly neighborhood cooking enthusiast, and today, we’re diving into a dish that is not only simple to make but will also leave your taste buds dancing with delight: 5-Ingredient Butternut Squash Fritters! These little gems are crispy on the outside, tender on the inside, and absolutely bursting with flavor. If you haven’t yet discovered the joy of cooking with butternut squash, let me tell you — you’re in for a treat.
Butternut squash has been my favorite fall vegetable for years. Its natural sweetness and buttery texture make it a versatile ingredient that can be used in everything from soups to salads. But when I discovered the magic of fritters, it was like a light bulb went off in my kitchen. This recipe is all about highlighting the squash while keeping things easy and approachable — perfect for busy weeknights or a cozy weekend gathering!
Imagine yourself at home, the smell of fritters sizzling away in the skillet, perhaps a podcast playing in the background, or your favorite playlist setting the mood. Fritters are communal by nature — great finger food for sharing and perfect for dipping. Whether you pair them with a spicy yogurt sauce, a vibrant salsa, or keep it classic with some sour cream, these Butternut Squash Fritters are destined to become a staple in your kitchen.
So grab that apron and get ready to unleash your inner chef! Let me walk you through this delightful recipe filled with personal anecdotes, handy tips, and, of course, some good old-fashioned kitchen fun.
Personal Story
I remember the first time I made fritters; it was during my college years, just before a big family gathering. With my family notoriously known for their culinary critiques, I was determined to impress everyone with my newfound cooking skills. I decided to create something special using butternut squash, which was abundant at the farmer’s market that week.
After some trial and error, I landed on these fritters. The first bite was met with silence around the table — the kind of silence that only happens when you’ve hit the jackpot in flavor! My cousin, with a small fry in hand, leaned over and exclaimed, “These taste like fall!” Suddenly, everyone was grabbing seconds, and I felt like a kitchen rock star! It was in that moment that I knew I had a hit on my hands. Ever since, these butternut squash fritters have been a beloved recipe in our family, and I’m excited to share them with you!
Ingredients
Here’s what you’ll need to make these delicious 5-Ingredient Butternut Squash Fritters, along with some nifty tips for each ingredient:
-
1 medium butternut squash (about 2 cups, grated)
- The star of the show! When picking one, look for a squash that feels heavy for its size and has a smooth, tan skin. If you can’t find butternut squash, you can use sweet potatoes or zucchini — just remember to squeeze out any extra moisture from the zucchini!
-
1/2 cup all-purpose flour
- This helps bind the fritters together. If you’re looking for a gluten-free option, quinoa flour or chickpea flour works beautifully as alternatives!
-
1 large egg
- The egg is crucial for binding. If you’re egg-free, try substituting it with a flax egg (1 tablespoon ground flaxseed mixed with 2.5 tablespoons water) or applesauce (1/4 cup works)!
-
1/4 teaspoon salt
- Don’t underestimate salt! It enhances the flavors, making each bite pop. Feel free to adjust the amount to suit your taste.
-
1/4 teaspoon pepper (optional; adjust to taste)
- A little kick adds depth! If you’re feeling adventurous, try adding some smoked paprika or chili powder for an extra flavor boost.
Step-by-Step Instructions
Alright, friends, it’s time to get cooking! Follow these simple steps to whip up your fritters, and remember, cooking is all about having fun and experimenting. Let’s go!
-
Prep the Squash:
- Start by peeling the butternut squash. This can be a bit tough, so make sure to use a sharp vegetable peeler or a sturdy knife. Once peeled, slice it in half lengthwise and scoop out the seeds. Grate the squash using a box grater or the grating attachment of a food processor. You’ll want about 2 cups of grated squash.
Chef Hack: If you have a busy schedule, you can bake the squash whole for about 45-60 minutes at 400°F (204°C) until soft, cool, peel, and then grate. This makes the process a breeze!
-
Mix the Ingredients:
- In a bowl, combine the grated butternut squash, all-purpose flour, egg, salt, and pepper. Stir until well incorporated. You should have a thick batter that holds together nicely.
Tip: Don’t be afraid to get your hands in there! Mixing with your hands can help better combine the ingredients and ensure everything is evenly distributed.
-
Heat the Skillet:
- Heat a medium skillet over medium heat and add a tablespoon of oil (olive oil or vegetable oil works well). You want enough oil to coat the bottom of the pan for frying.
Chef Insight: If you prefer baking, preheat your oven to 375°F (190°C) and line a baking sheet with parchment paper. You can scoop out the fritter mixture and flatten them a bit before popping them in the oven.
-
Form and Fry the Fritters:
- Once the oil is hot, take about 2 tablespoons of the fritter mixture and form them into small patties with your hands. Place them in the skillet, making sure to leave enough space between each fritter. Cook for about 3-4 minutes on one side or until golden brown and crispy. Flip them over carefully and cook for another 3-4 minutes on the other side.
Chef Hack: If you find the fritters falling apart, try adding a touch more flour until the consistency holds together better.
-
Drain and Cool:
- Once cooked, transfer the fritters to a paper towel-lined plate to absorb any excess oil. Let them cool slightly before digging in — they’re perfect while still warm!
Serving Suggestions
Served up hot and delicious, these Butternut Squash Fritters can be plated simply for an elegant touch. Stack fritters high and drizzle with your favorite dipping sauce, possibly a zesty yogurt mix with lemon and herbs, or even serve them with a side of tangy apple chutney. They also pair beautifully with fresh salad greens and a splash of vinaigrette!
Recipe Variations
- Herbed Versions: Add chopped fresh herbs like parsley, cilantro, or chives for an extra burst of freshness.
- Spiced Fritters: Consider folding in some feta cheese and spice it up with cumin or coriander for a Mediterranean twist.
- Vegan Delight: Swap the egg for a flax egg and use chickpea flour instead of all-purpose flour for a vegan take.
- Cheesy Goodness: Add a handful of grated cheese like cheddar or parmesan for an extra savory flavor.
- Baked Not Fried: Prefer a lighter option? Bake them at 375°F (190°C) for about 20-25 minutes, flipping halfway through until golden brown.
Chef’s Notes
These Butternut Squash Fritters hold a special place in my heart as they always remind me of that gathering years ago. As I’ve shared them with friends and family, I’ve witnessed how they can bring people together. The recipe has evolved over time, adapting to the flavors and spices I’ve fallen in love with throughout my cooking journey. There’s something magical about cooking that transcends beyond just feeding people — it creates memories, laughter, and bonds.
FAQs and Troubleshooting
-
Why are my fritters falling apart?
- Ensure you have enough binding agents like flour and eggs. If they’re too wet, adding a bit more flour can help!
-
Can I make these in advance?
- Absolutely! You can prep and form the fritters in advance, just pop them in the fridge until you’re ready to fry. They can also be frozen — fry right from frozen, but increase cooking time.
-
How can I tell when the fritters are done?
- They should be golden brown and crispy on the outside. A quick poke with a fork should show they are tender on the inside without any raw spots.
-
Can I air-fry these fritters?
- Yes! Preheat your air fryer and cook the fritters at 375°F (190°C) for about 15 minutes, flipping halfway through for evenly crisp perfection!
Nutritional Info
(Per fritter, based on the recipe yielding 8 fritters)
- Calories: 120
- Fat: 5g
- Carbohydrates: 15g
- Protein: 2g
And there you have it, friends! Your guide to creating delightful 5-Ingredient Butternut Squash Fritters that are sure to delight your family and friends. Get ready to enjoy the coziness of cooking, the joy of sharing, and the satisfaction of creating something delicious from scratch. Happy cooking!
Print
5-Ingredient Butternut Squash Fritters
- Total Time: 30 minutes
- Yield: 4 servings 1x
- Diet: Vegetarian
Description
Crispy on the outside and tender on the inside, these Butternut Squash Fritters are easy to make and bursting with flavor. Perfect for sharing!
Ingredients
- 1 medium butternut squash (about 2 cups, grated)
- 1/2 cup all-purpose flour
- 1 large egg
- 1/4 teaspoon salt
- 1/4 teaspoon pepper (optional; adjust to taste)
Instructions
- Prep the squash: Peel, halve, seed, and grate the butternut squash to yield about 2 cups.
- Mix the ingredients: Combine grated squash, flour, egg, salt, and pepper in a bowl until well incorporated.
- Heat the skillet: Heat a medium skillet over medium heat with a tablespoon of oil.
- Form and fry the fritters: Shape 2-tablespoon amounts of the mixture into patties and fry until golden brown, about 3-4 minutes per side.
- Drain and cool: Transfer cooked fritters to a paper towel-lined plate to absorb excess oil before serving.
Notes
These fritters can be baked at 375°F (190°C) for a lighter option. You can also make them in advance and freeze for later use.
- Prep Time: 15 minutes
- Cook Time: 15 minutes
- Category: Appetizer
- Method: Frying
- Cuisine: American
Nutrition
- Serving Size: 2 fritters
- Calories: 120
- Sugar: 2g
- Sodium: 200mg
- Fat: 5g
- Saturated Fat: 1g
- Unsaturated Fat: 3g
- Trans Fat: 0g
- Carbohydrates: 15g
- Fiber: 2g
- Protein: 2g
- Cholesterol: 25mg
Keywords: butternut squash, fritters, vegetarian appetizer, fall recipe, easy cooking
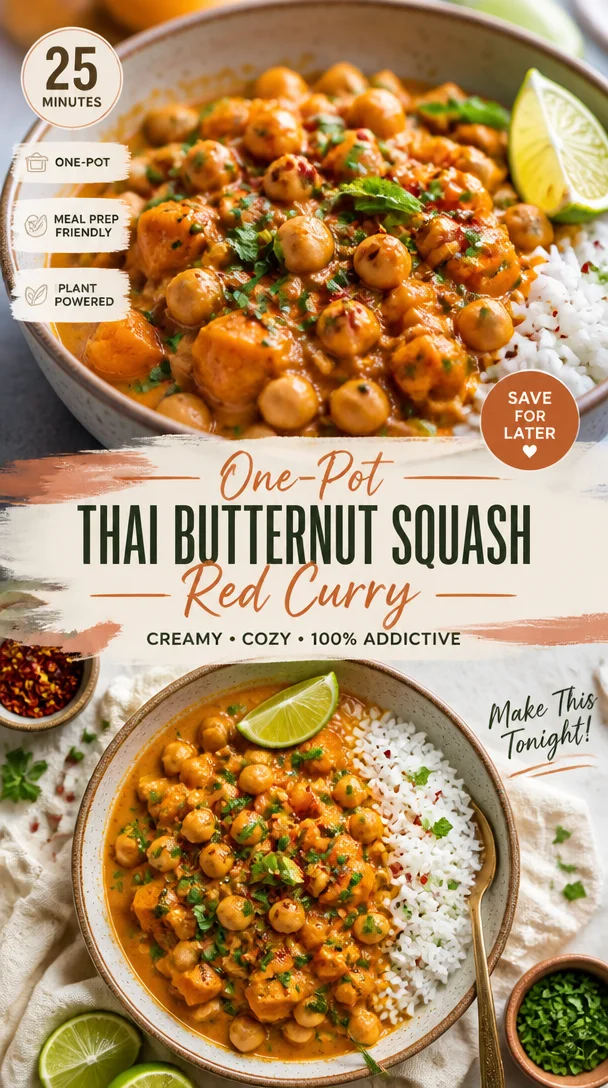
One-Pot Thai Butternut Squash Red Curry in 25 Minutes
Whip Up a Warm Embrace: Thai Butternut Squash Red Curry Recipe
Welcome to my kitchen! I’m beyond excited to share one of my absolute favorite recipes with you today — Thai Butternut Squash Red Curry. This dish is like a warm hug on a chilly evening, bursting with flavor, color, and a little bit of spice, making it perfect for cozy nights or when you want to impress your family or friends!
Whenever I breathe in the aroma of coconut milk blending with red curry paste and fresh herbs, I’m instantly transported to those vibrant street stalls in Thailand, filled with laughter and the tantalizing scent of sizzling ingredients wafting through the air. Cooking this curry is more than just a recipe; it’s an experience that invites you to get a little messy and have fun in the kitchen!
This dish is a true testament to how simple ingredients can evolve into something magical when combined with a pinch of love and a sprinkle of creativity. The creamy texture of the butternut squash perfectly complements the rich, spicy flavor of the curry, resulting in a meal that’s guaranteed to warm your heart and soul. So grab your apron and let’s dive into this delightful culinary adventure together!
A Little Kitchen Story: The First Bowl of Curry
Let me take you back to the first time I made Thai Butternut Squash Red Curry. It was one of those rainy days where the world outside felt dreary, and I craved comfort food. I had a butternut squash sitting on my kitchen counter, begging to be transformed into something delicious.
I went to my go-to Thai cookbook, and there it was — a stunning recipe that promised a burst of flavor with every spoonful. Following the recipe felt almost magical as I watched the squash transform from a hard gourd into a silky, fragrant delight. I remember tasting it for the first time, and my heart practically sang! I couldn’t help but invite a few close friends over to share this newfound treasure, and as we sat around the table, spoons clinking and laughter flowing, I realized that food isn’t just about nourishment; it’s about connection.
That night was filled with stories, smiles, and a second round of curry that left us all blissfully stuffed. From then on, this recipe has wrestled its way into being a beloved staple in my kitchen — a dish that brings joy, warmth, and a dose of nostalgia every time I make it.
Key Ingredients for Your Curry Creation
Here’s what you’ll need to whip up this delightful Thai Butternut Squash Red Curry:
-
Butternut Squash:
- The star of the show! It’s sweet, nutty, and softens beautifully when cooked. If you can’t find it, you can also use pumpkin or acorn squash as a substitute.
-
Coconut Milk:
- This provides the creamy base for your curry. Full-fat coconut milk works best for richness, but you can also opt for light coconut milk if you prefer a lighter version (though it may be less creamy).
-
Red Curry Paste:
- This spice blend adds depth and that signature kick! If you’d like to dial down the heat, start with a small amount and add more as you go. You can also use yellow or green curry paste for a different flavor profile.
-
Vegetable Broth:
- Essential for adding extra flavor. Homemade is great, but store-bought works perfectly fine! Just ensure it’s low-sodium.
-
Garlic and Ginger:
- These aromatic ingredients bring a warming, zesty quality. Grate your garlic and ginger for better integration into the dish, or use pre-minced for convenience!
-
Basil:
- Fresh Thai basil adds a fragrant finish to the curry. If unavailable, regular basil or even cilantro can work as a substitute, though the flavor will differ a bit.
-
Lime Juice:
- Always a must! It brightens the dish and adds needed acidity. If you don’t have fresh limes, bottled lime juice can suffice, though fresh gives a better zing.
-
Optional Proteins (Tofu, Chicken, or Shrimp):
- Customize your curry by adding proteins of your choice. If using tofu, make sure to press it to remove excess moisture for better texture. Chicken or shrimp add a nice protein boost too — just adjust the cooking times accordingly!
Step-by-Step Instructions
Now that we have our ingredients ready, let’s create some culinary magic! Here’s how to make this Thai Butternut Squash Red Curry step by step:
-
Prep Your Veggies:
- Start by peeling and dicing your butternut squash into 1-inch cubes. This will ensure they cook evenly. Pro tip: microwave the squash for a couple of minutes to soften it slightly, making it easier to cut!
-
Sauté the Aromatics:
- Heat a tablespoon of oil in a large pot over medium heat. Add minced garlic and grated ginger, stirring for about 1-2 minutes until fragrant but not burnt. This step builds your flavor foundation!
-
Add the Curry Paste:
- Stir in the red curry paste, letting it cook for another minute. This step is crucial as it helps release the flavors from the spices locked in the curry paste. You want to see it bubble up a little!
-
Incorporate the Squash and Liquids:
- Toss in the diced butternut squash, coating it with the paste. Then, pour in the coconut milk and vegetable broth, and give it a good stir. The squash should be mostly submerged in the liquid.
-
Simmer Away:
- Bring the mixture to a gentle boil, then reduce the heat, cover the pot, and let it simmer for 20-25 minutes. This gives the squash enough time to soften and take in all that delicious flavor. Check occasionally to ensure it’s not sticking to the bottom.
-
Texture Check:
- After 20 minutes, check the squash with a fork. It should be tender but still hold its shape. If you’re adding protein, this is the time to stir in cooked chicken, shrimp, or tofu. Let it simmer for another 5-10 minutes to heat everything through.
-
Finish with Freshness:
- Stir in a handful of fresh basil and a squeeze of lime juice right before serving. This step brightens the dish and takes it to the next level!
-
Season to Taste:
- Take a moment to taste your curry. You may want to adjust the salt or add a bit more lime juice for zing!
-
Serve It Up:
- Ladle the warm, comforting curry into bowls, topping each with extra basil if desired!
Plating and Serving Suggestions
Serving this Thai Butternut Squash Red Curry is just as important as cooking it! Here’s how to plate it beautifully:
- Bowls are Best: Serve your curry in deep bowls to showcase its vibrant orange hue.
- Toppings: Add a sprinkle of fresh herbs like cilantro or extra basil leaves for a pop of color. You can also add a slice of lime for guests to add that zing themselves.
- Accompaniments: Serve with warm jasmine rice or quinoa to soak up all the scrumptious sauce. Optionally, you could include crispy coconut chips or crushed peanuts for texture.
Recipe Variations
Feel free to get creative with your Thai Butternut Squash Red Curry! Here are some fun variations to try:
-
Veggie Delight: Add in other vegetables like spinach, kale, or bell peppers for extra nutrition and color.
-
Spicy Twist: For those who love heat, add sliced fresh Thai chilies or a dash of chili flakes to the mix.
-
Sweet & Spicy: Toss in some pineapple chunks for a sweet contrast to the spicy curry, making it a real tropical delight!
-
Creamy Spin: Switch up the base by incorporating a touch of peanut butter or almond butter for a creamier texture with a nutty flavor.
Chef’s Notes
Cooking has always been a journey for me, with each dish telling a story and each scent evoking a memory. This Thai Butternut Squash Red Curry has certainly found its place in my heart! I love the fact that it’s adaptable; I’ve made it countless times, tweaking it here and there based on seasonal ingredients or mood.
Funny enough, one time I got so caught up in creating this dish that I forgot to buy basil. I stole the neighbor’s permission to forage in their herb garden! They laughed when I revealed it was all for curry. That’s the beauty of cooking — it opens doors to creativity and connection.
FAQs and Troubleshooting
Q: Why is my curry not thickening?
A: If your curry is too watery, simply let it simmer uncovered for a few more minutes. The extra heat will evaporate some liquid, thickening it. Alternatively, you can mash a few butternut squash pieces to help create a creamier texture.
Q: Can I freeze leftovers?
A: Absolutely! This curry freezes well. Allow it to cool, then transfer it to an airtight container before freezing. When ready to eat, thaw in the fridge overnight and reheat on the stove or microwave.
Q: How can I make this dish vegan?
A: This recipe is already vegetarian and can easily be made vegan by sticking with vegetables and tofu and ensuring your vegetable broth is plant-based!
Q: What should I do if I find it too spicy?
A: If your curry turns out spicier than desired, you can add a little more coconut milk to mellow the heat or even a tablespoon of sugar to balance the flavors.
Nutritional Info
While I can’t provide exact nutritional values without knowing serving sizes, this dish is generally packed with:
- Vitamins: Loaded with vitamins A and C from the butternut squash.
- Healthy Fats: Coconut milk offers healthy fats, making this dish filling and satisfying.
- Vegetarian Protein: If you add tofu or shrimp, you’ll also boost the protein content!
And there you have it, my friends! A beautiful, heartwarming Thai Butternut Squash Red Curry that will make you feel like a culinary rockstar! Share it with your loved ones, and watch the smiles light up around the table. Happy cooking! 🥣✨
Print
Thai Butternut Squash Red Curry
- Total Time: 45 minutes
- Yield: 4 servings 1x
- Diet: Vegetarian
Description
A warm and comforting Thai butternut squash red curry that is bursting with flavor and perfect for cozy nights.
Ingredients
- 1 large butternut squash, peeled and diced into 1-inch cubes
- 1 can full-fat coconut milk
- 3 tablespoons red curry paste
- 2 cups vegetable broth (low-sodium)
- 4 cloves garlic, minced
- 1 tablespoon ginger, grated
- 1/2 cup fresh Thai basil (plus more for serving)
- 2 tablespoons lime juice
- Optional: Tofu, chicken, or shrimp for protein
Instructions
- Prep your veggies: Start by peeling and dicing your butternut squash into 1-inch cubes.
- Sauté the aromatics: Heat oil in a large pot, add garlic and ginger, stirring for 1-2 minutes.
- Add the curry paste: Stir in red curry paste, cooking for another minute.
- Incorporate the squash and liquids: Toss in the butternut squash, coconut milk, and vegetable broth.
- Simmer away: Bring to a boil, reduce heat, cover, and simmer for 20-25 minutes.
- Texture check: After 20 minutes, ensure the squash is tender; add your protein now.
- Finish with freshness: Stir in basil and lime juice before serving.
- Season to taste: Adjust salt or lime juice as needed.
- Serve it up: Ladle into bowls and top with extra basil.
Notes
Serve with jasmine rice or quinoa for a complete meal. Adjust the spice level of the curry to your taste.
- Prep Time: 15 minutes
- Cook Time: 30 minutes
- Category: Main Course
- Method: Stovetop
- Cuisine: Thai
Nutrition
- Serving Size: 1 serving
- Calories: 350
- Sugar: 8g
- Sodium: 400mg
- Fat: 20g
- Saturated Fat: 14g
- Unsaturated Fat: 4g
- Trans Fat: 0g
- Carbohydrates: 42g
- Fiber: 5g
- Protein: 6g
- Cholesterol: 0mg
Keywords: Thai curry, butternut squash, vegetarian recipe, comfort food, curry recipe, easy recipes

Easy Stuffed Butternut Squash with Bacon & Goat Cheese
Butternut Squash Stuffed with Bacon and Goat Cheese | Easy Recipe
Welcome to my cozy corner of the kitchen! Today, I’m here to share a delightful recipe that perfectly balances warm, comforting flavors with a touch of sophistication — Butternut Squash Stuffed with Bacon and Goat Cheese. If you’ve ever been enchanted by the rich aroma of roasted squash mingling with crispy bacon, you’re in for a treat. This dish not only warms your heart but also serves as a beautiful centerpiece for any meal, making it perfect for family gatherings or an intimate dinner for two. Let’s dive into the world of cooking with warmth, flavor, and a sprinkle of nostalgia!
Introduction
Ah, butternut squash! This beautiful, pear-shaped gem is a staple in my autumn kitchen; its sweet, nutty flavor and velvety texture just scream comfort. Every time I slice into one, I can’t help but feel transported back to my childhood, where hearty meals made with love brought my family together around the dinner table. There’s something magical about turning simple ingredients into a scrumptious dish that evokes such warm feelings.
In today’s recipe, I’ve combined creamy goat cheese, savory bacon, and the natural sweetness of butternut squash for a dish that encapsulates all the best aspects of home cooking. But don’t worry; you don’t need to be a gourmet chef to create this masterpiece! This recipe is straightforward and packed with tips and tricks to help you recreate that cozy, homemade feeling in your own kitchen.
Whether you’re hosting friends for a cozy dinner party or just looking to warm up on a chilly night, this Butternut Squash Stuffed with Bacon and Goat Cheese will impress everyone at the table. So whip out your apron, let’s roll up our sleeves, and create a meal that not only tastes amazing but also fills your home with irresistible scents. Ready, set, cook!
Personal Story
I still remember the first time I made this dish. It was fall, and the world outside was draped in shades of gold and crimson. I had just returned home from the local farmer’s market, arms heavy with freshly harvested vegetables, when I spotted the perfect butternut squash. Instinctively, I grabbed it—knowing it would become the star of my dinner party that evening.
I remember sitting on the kitchen floor, peeling and cubing the squash, knowing that my friends would soon arrive. The smell of sautéing bacon wafted through the air, accompanied by laughter and chatter as my friends helped set the table. As we gathered around the table, the stuffed butternut squash turned heads and brought smiles. It was a moment filled with joy and connection, and every bite told the story of our shared evening. That’s the magic of food, isn’t it? It fosters love, friendship, and memories — and I can’t wait for you to create your own!
Ingredients
To make this scrumptious Butternut Squash Stuffed with Bacon and Goat Cheese, you’ll need the following ingredients:
-
1 large butternut squash
The star of the show! Choose a squash that feels heavy for its size, with a smooth skin. You can substitute with acorn squash for a different flavor and texture. -
4-6 slices of bacon
The savory goodness that adds a satisfying crunch! If you want a vegetarian option, feel free to swap it out for smoked or sundried tomatoes for a different but equally delightful flavor. -
1 cup goat cheese
Creamy and tangy, goat cheese complements the sweetness of the squash beautifully. If you’re not a fan, try feta or ricotta as alternatives depending on the flavor profile you desire. -
1 small onion, diced
For added sweetness and depth of flavor. Shallots can be a lovely substitute if you prefer a milder taste. -
2 cloves garlic, minced
A must-have for that aromatic punch! If you’re in a pinch, garlic powder works—just remember that one clove of garlic equals about 1/8 teaspoon of garlic powder. -
1/4 cup fresh parsley, chopped
For freshness and color! You can also use thyme or sage for an herbal twist. -
Salt and black pepper to taste
Always essential for enhancing the flavors of your dish. Just remember, you can always add more, but you can’t take it out—season gradually! -
Olive oil
A drizzle for roasting that helps bring all the flavors together. If you’re out, melted butter is a good substitute for a richer flavor.
Step-by-Step Instructions
Now that we have our ingredients, let’s get to the fun part — cooking! Follow these easy steps to make your butternut squash stuffed with bacon and goat cheese:
-
Preheat Your Oven:
Preheat your oven to 400°F (200°C). This ensures that your squash gets that perfect caramelization that brings out its natural sweetness. -
Prepare the Butternut Squash:
Carefully slice the butternut squash in half lengthwise. Scoop out the seeds using a spoon — try to get as much out without losing too much flesh. Drizzle a bit of olive oil, and season with salt and pepper. Place the halves, cut side up, on a baking sheet lined with parchment paper for easy cleanup!Chef’s Tip: Keeping the skin on while cooking can help the squash hold its shape and flavor better, so don’t be too eager to peel it!
-
Roast the Squash:
Pop those squash halves in the oven and roast for about 35-40 minutes, or until they are tender. You can test by poking a fork through the flesh; if it goes in easily, you’re good to go! -
Cook the Bacon:
While the squash roasts, chop the bacon into small pieces and cook in a skillet over medium heat until crispy. Transfer to a paper towel-lined plate to drain and set aside.Chef’s Hack: Reserve a tablespoon of the bacon grease if you’d like to sauté the onions in it for added flavor!
-
Sauté the Onion and Garlic:
In the same skillet (with or without the bacon grease), add the diced onion and sauté until soft and translucent, about 5-7 minutes. Add the minced garlic and cook for an additional minute, just until fragrant — you don’t want it to burn. -
Mix the Filling:
In a large mixing bowl, combine the sautéed onions, crispy bacon, goat cheese, and chopped parsley. Mix until evenly blended. Depending on your preference, you can crumble the cheese for a creamier texture or leave it chunkier for bites of gooeyness!Chef’s Insight: Mixing the filling while the squash is roasting makes your life easier and keeps everything warm!
-
Stuff the Squash:
Once the squash halves are roasted and tender, take them out of the oven and let them cool for a few minutes. Using a fork, fluff up the inside of the squash slightly to create room for the filling. Spoon the bacon and cheese mixture into each half generously. -
Final Roast:
Return the stuffed squash to the oven and bake for another 10-15 minutes, until the cheese is melted and slightly golden.Chef’s Tip: If you like a crispy cheese topping, turn on the broiler for the last couple of minutes—just keep a close eye on it to prevent burning!
-
Serve and Enjoy:
Serve warm, and watch as your family or friends’ eyes light up with delight when they see this beauty!
Serving Suggestions
When it comes to plating, simplicity is key. Place each stuffed squash half on a larger plate or serving platter. A sprinkle of fresh parsley or a drizzle of balsamic glaze on top can add a lovely final touch, elevating the dish with color and flavor. Pair it with a light salad or a warm crusty bread, and you’ve got an unforgettable meal perfect for any occasion!
Recipe Variations
Ready to shake things up? Here are a few creative twists on this classic dish:
- Quinoa Version: Substitute the bacon with cooked quinoa, toasted nuts, or seeds for a nutritious, vegetarian option.
- Cheese Variety: Swap goat cheese for sharp cheddar or a creamy blue cheese for a bold flavor kick!
- Herbal Twist: Add in a pinch of nutmeg for a warm, aromatic note, or try sage for a more robust earthiness.
- Spice It Up: Include a sprinkle of smoked paprika or some crushed red pepper flakes in your filling for a touch of heat!
- Sweet and Savory: Incorporate dried cranberries or sliced apples into the mixture for a sweet touch that pairs beautifully with the savory flavors.
Chef’s Notes
Over the years, this stuffed butternut squash has been a go-to recipe in my kitchen. I’ve made it for everything from cozy family dinners to festive celebrations. Each time, I find new ways to play with flavors and ingredients, and it never disappoints! One amusing kitchen anecdote involves my cat, Biscuit, who miraculously leaped onto the counter one Thanksgiving, targeting a platter of these beautiful squash halves. Needless to say, it was a source of laughter as I chased her around ensuring she didn’t make a mess of my hard work!
FAQs and Troubleshooting
-
What if my butternut squash is too hard to cut?
If you’re struggling with cutting your squash, try microwaving it for 2-3 minutes to soften it slightly. Just be careful when handling it! -
Can I make this ahead of time?
Absolutely! You can prepare the stuffed squash in advance, store it in the fridge, and then bake it just before serving. It’s great for meal prep! -
Why is my stuffing too dry?
This can happen if the cheese is too crumbly or if it’s overcooked. Ensure your cheese is creamy, and consider adding a splash of cream or olive oil to enrich the filling. -
Can I freeze the leftovers?
Yes, but I recommend freezing them before baking. You can keep unbaked stuffed squash in the freezer for up to 2 months. Just bake from frozen, adding a few extra minutes to the cooking time.
Nutritional Info
Each serving of Butternut Squash Stuffed with Bacon and Goat Cheese is packed with vitamins and minerals, including Vitamin A and potassium from the squash, as well as protein and healthy fats from the bacon and goat cheese. While this dish is comforting and hearty, it can also be part of a balanced diet when enjoyed in moderation.
So there you have it! A flavorful, nostalgic recipe to warm your heart and nourish your body—all while creating lovely memories in the kitchen. Enjoy the process of cooking, the joy of sharing, and most importantly, those amazing flavors in every bite! Happy cooking!
Print
Butternut Squash Stuffed with Bacon and Goat Cheese
- Total Time: 55 minutes
- Yield: 4 servings 1x
- Diet: Omnivore
Description
A delightful recipe that combines creamy goat cheese, savory bacon, and the natural sweetness of butternut squash for a warm and comforting dish.
Ingredients
- 1 large butternut squash
- 4–6 slices of bacon
- 1 cup goat cheese
- 1 small onion, diced
- 2 cloves garlic, minced
- 1/4 cup fresh parsley, chopped
- Salt and black pepper to taste
- Olive oil
Instructions
- Preheat your oven to 400°F (200°C).
- Prepare the butternut squash by slicing it in half lengthwise and scooping out the seeds. Drizzle with olive oil and season with salt and pepper.
- Roast the squash halves for about 35-40 minutes until tender.
- Cook the bacon in a skillet over medium heat until crispy.
- Sauté the onion until soft, then add the minced garlic and cook briefly.
- Mix the sautéed mixture with bacon, goat cheese, and parsley in a bowl.
- Stuff the roasted squash halves with the mixture.
- Final roast for another 10-15 minutes until the cheese is melted and slightly golden.
- Serve warm and enjoy!
Notes
You can prepare the stuffed squash in advance and bake it just before serving. Add a sprinkle of fresh parsley or balsamic glaze for extra flavor.
- Prep Time: 15 minutes
- Cook Time: 40 minutes
- Category: Main Course
- Method: Baking
- Cuisine: American
Nutrition
- Serving Size: 1 half of squash
- Calories: 350
- Sugar: 5g
- Sodium: 600mg
- Fat: 24g
- Saturated Fat: 8g
- Unsaturated Fat: 10g
- Trans Fat: 0g
- Carbohydrates: 30g
- Fiber: 6g
- Protein: 12g
- Cholesterol: 30mg
Keywords: butternut squash, stuffed squash, bacon, goat cheese, autumn recipe, comfort food

Minute DIY Ghost Strawberries for Halloween Parties
Spooky Ghost Strawberries: A Delightfully Boo-tiful Treat!
Welcome to my kitchen, friend! As the leaves change and we’re gradually swept into the whirlwind of fall festivities, there’s something absolutely magical about this time of year. The air gets crisp, the pumpkins come out, and I start dreaming up delicious ways to celebrate Halloween! This year, I’m thrilled to share a treat that’s both adorable and super easy to whip up: Spooky Ghost Strawberries! These little ghostly delights are perfect for parties, school events, or just an afternoon snack with a twist.
Imagine stepping into your home and being greeted by the sweet, earthy aroma of fresh strawberries mixed with rich chocolate. It instantly transports you to a nostalgic place where you’re snuggled under a blanket with a good book, and a cozy spirit fills your heart. That’s exactly the vibe we want to create with these spooky treats. They’re not just fun to make but also a delight to see and taste!
In my own kitchen, these ghostly wonders have become a staple. I remember the first time I surprised my family with them a few Halloweens ago. My niece, who was around five at the time, squealed with joy at the sight of these little strawberries transformed into ghosts. We spent the afternoon giggling as we decorated them together, creating unique and adorable faces out of melting chocolate. Since then, they’ve become a family tradition and a fun way to bring everyone together for some delicious creativity.
So, grab your apron and let’s dive into creating a treat that’s sure to bring smiles in the spirit of Halloween!
Ingredients
Here’s what you’ll need to create these Spooky Ghost Strawberries:
-
Fresh Strawberries (12-15)
- Look for plump, ripe berries with bright green leaves. They’re the stars of this dish! Choose organic if possible to keep them pesticide-free.
-
White Chocolate Chips (1 cup)
- White chocolate adds a sweet and creamy finish that beautifully contrasts with the fresh strawberries. If you prefer a different flavor profile, feel free to use almond bark or even white chocolate melts!
-
Chocolate Chips (1/4 cup)
- These will be used for decorating the ghost faces. You can use mini chocolate chips for a more cartoon-like expression, or go for regular-sized ones for a bit more drama!
-
Coconut Oil (1 teaspoon)
- This helps the white chocolate melt smoothly and stay glossy. If you’re in a pinch, vegetable oil can work too, but coconut oil adds the perfect touch of flavor.
-
Sprinkles (optional)
- Halloween-themed sprinkles can add a fun flair to your spooky strawberries and make them extra festive! Go wild with colors and shapes that fit the haunt!
Step-by-Step Instructions
-
Prep the Strawberries:
- Rinse the strawberries gently under cold water. Pat them dry carefully with paper towels.
Chef Tip: Make sure the strawberries are completely dry to ensure the chocolate adheres well.
-
Melt the White Chocolate:
- In a microwave-safe bowl, combine the white chocolate chips and coconut oil. Heat in 30-second intervals, stirring in between, until completely melted and smooth.
Hack: If the mixture is too thick, add a little more coconut oil to thin it out until it’s the right consistency for dipping.
-
Dip the Strawberries:
- Holding the green top of each strawberry, dip it into the melted white chocolate to coat it thoroughly.
Tip: Shake off any excess chocolate gently and place the dipped strawberry on a parchment-lined baking sheet.
-
Chill the Coated Strawberries:
- Place the dipped strawberries in the fridge for about 15-20 minutes or until the chocolate hardens.
Little Note: This is a great time to clean up the kitchen or maybe sip on some hot cocoa while you wait!
-
Create Ghost Faces:
- While the white chocolate coating sets, melt the chocolate chips in a microwave-safe bowl. Use the same melting method, heating in intervals until smooth.
Fun Tip: You can pour the melted chocolate into a ziplock bag, snip the tip, and pipe on little eyes and mouths for a fun ghostly expression!
-
Decorate the Ghosts:
- Once the white chocolate is set, take the melted chocolate and add eyes and mouths to your ghosts. Get creative with expressions!
Chef Hack: To achieve different looks, try making some ghosts with exaggerated eyes and grinning mouths, while others can be sweet and simple!
-
Serve and Enjoy:
- Once decorated, allow the chocolate faces to harden. Then, serve them on a spooky platter and watch the smiles appear!
Serving Suggestions
To truly embrace the Halloween spirit, serve your Spooky Ghost Strawberries on a spooky-themed platter or tray. You could scatter some Halloween candies around them, like candy corn or gummy worms, for a festive touch. If you want an interactive element, consider presenting them alongside some homemade pumpkin spice dip for added flavor. A nice touch is to garnish the plate with some fresh mint leaves for a pop of color!
Recipe Variations
-
Chocolate-Dipped Ghosts: Use dark or milk chocolate instead of white chocolate for a different flavor twist; they’ll still look adorable with the ghostly decor!
-
Fruit Variations: Try dipping other fruits like bananas or pretzels for a fun combo play that suits everyone at the table.
-
Flavor Amplification: Mix in some flavor extracts to the white chocolate, like orange or almond, for a festive twist!
-
Vegan Version: Substitute the white chocolate with dairy-free chocolate chips, and use a plant-based coconut oil for a ghostly treat that anyone can enjoy!
-
Nutty Ghosts: Add finely chopped nuts to the coconut oil mixture for texture, offering a yummy crunch that contrasts beautifully with the smooth chocolate.
Chef’s Notes
Making Spooky Ghost Strawberries is about more than just cooking; it’s about creating lasting memories. The first time I made these, my niece used a heaping amount of chocolate for eyes, leading to some really funny expressions! In the end, we affectionately named one of our ghosts “Uncle Fester” because of his odd appearance! The beauty of this recipe is that it’s a blank canvas for your creativity. As you invite friends or family to help decorate, you’ll create more than just delicious snacks—you’ll craft moments that will stay with you long after the Halloween season is over.
FAQs and Troubleshooting
-
What if my white chocolate won’t melt smoothly?
- If your chocolate clumps, try adding just a tiny bit more coconut oil and stirring continuously over low heat. Be sure not to overheat!
-
Can I store leftovers?
- Absolutely! Keep the strawberries in an airtight container in the fridge for up to two days, but I warn you—they’re usually devoured quickly!
-
The chocolate decorations keep breaking; what do I do?
- If your chocolate has cooled too much and solidified, simply melt it down again. Make sure it’s still pourable, and use a steady hand to pipe delicate features.
-
Can I make Spooky Ghost Strawberries ahead of time?
- You sure can! Just wait to decorate them until you’re ready to serve. The fresh strawberries are best when they’re made within a day of serving for optimal freshness!
Nutritional Info
While these treats are all about the fun and spirit of Halloween, it’s worth noting that they’re not just tasty but can also be a healthier dessert choice! Strawberries are packed with vitamins and antioxidants, while white chocolate offers a little indulgence without the guilt. Just keep in mind moderation is key with treats like these!
There you have it! A friendly guide to creating the most delicious Spooky Ghost Strawberries that bring warmth and laughter to your fall festivities! I hope you enjoy making these special delights and creating wonderful memories with your loved ones in the kitchen. Happy Haunting!
Print
Spooky Ghost Strawberries
- Total Time: 25 minutes
- Yield: 4 servings
- Diet: Vegetarian
Description
A delightful Halloween treat featuring fresh strawberries coated in white chocolate and decorated to resemble spooky ghosts.
Ingredients
- Fresh Strawberries (12-15)
- White Chocolate Chips (1 cup)
- Chocolate Chips (1/4 cup)
- Coconut Oil (1 teaspoon)
- Sprinkles (optional)
Instructions
- Prep the strawberries: Rinse gently under cold water and pat dry with paper towels.
- Melt the white chocolate: Combine white chocolate chips and coconut oil in a microwave-safe bowl and heat in 30-second intervals until smooth.
- Dip the strawberries: Holding the green top, dip each strawberry into the melted white chocolate.
- Chill the coated strawberries: Place them in the fridge for about 15-20 minutes until the chocolate hardens.
- Create ghost faces: Melt chocolate chips and pipe on eyes and mouths for expressions.
- Decorate the ghosts: Add chocolate faces to set white chocolate-coated strawberries.
- Serve and enjoy: Present on a spooky platter and watch the smiles appear!
Notes
Making these strawberries is about more than just cooking; it’s about creating memories. Feel free to get creative with decorations and enjoy the process!
- Prep Time: 15 minutes
- Cook Time: 10 minutes
- Category: Dessert
- Method: No-Cook
- Cuisine: American
Nutrition
- Serving Size: 1 serving
- Calories: 180
- Sugar: 25g
- Sodium: 30mg
- Fat: 8g
- Saturated Fat: 5g
- Unsaturated Fat: 3g
- Trans Fat: 0g
- Carbohydrates: 30g
- Fiber: 2g
- Protein: 2g
- Cholesterol: 0mg
Keywords: Halloween, Strawberries, Desserts, Spooky Treats, Chocolate Recipes
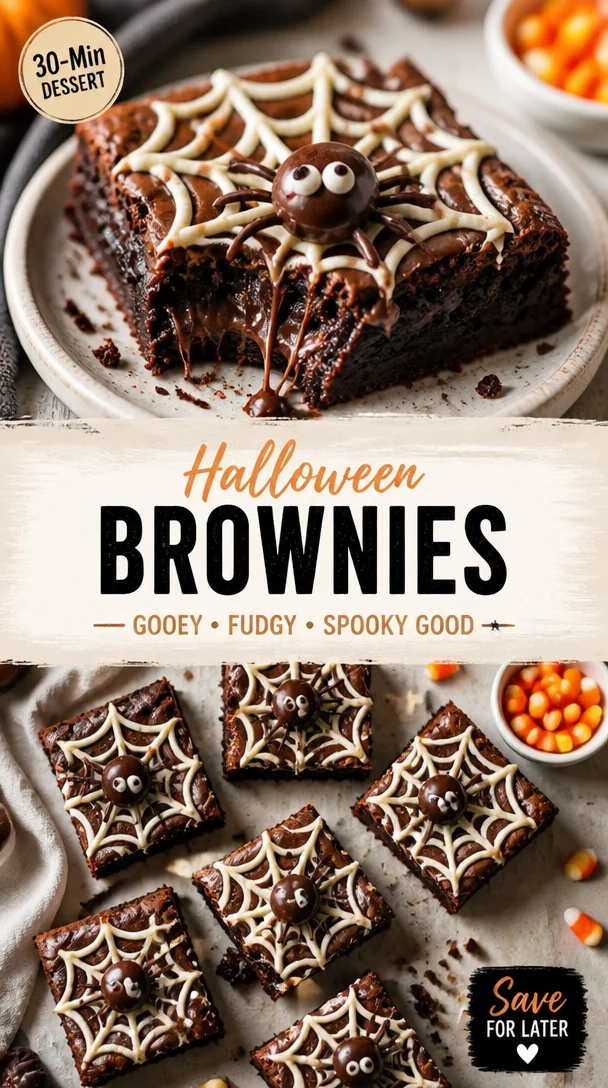
Halloween Brownies Recipe: Gooey Spider Web Swirls
Halloween Brownies: A Spooktacular Delight
Welcome, fellow foodies! It’s that enchanting time of year when the air gets cool, the leaves change colors, and spooky decorations adorn our homes. Yes, it’s Halloween season! 🎃 While candy corn and ghost-shaped gummies are sure to charm any trick-or-treater, I believe that the highlight of any Halloween gathering deserves to be something decadent, gooey, and rich—my Halloween brownies! These aren’t just any brownies; they’re delightfully chocolatey and topped with festive sprinkles that can make even the spookiest night feel warm and inviting.
Imagine it: the intoxicating aroma of warm chocolate wafts through your kitchen as you prepare these brownies, and the anticipation builds as friends and family gather around, eager to dig in. Today, I’m excited to share not just the recipe, but also little tidbits and stories that’ll help you create the most memorable Halloween treat. So grab your favorite apron (and maybe a little pumpkin spice latte), and let’s get baking!
A Nostalgic Halloween Memory
Growing up, Halloween was one of my favorite holidays—not just for the candy, but for the family traditions we created around it. Every year, my mom would set up a "haunted kitchen" where the sweet smell of baking filled the air, and I’d help her whip up a batch of brownies. I remember one year, we decided to add a spooky twist: we dropped candy eyes into the batter before baking. When they came out of the oven, those little eyes peeking up at us transformed ordinary brownies into an eerie treat that had us giggling.
That night, we invited our neighborhood friends for a spooky movie marathon, and those brownies were the main event. We devoured them while watching classic Halloween flicks, and each bite was a reminder—sweet treats can create unforgettable memories. It’s this same magic I hope to bring to your kitchen with this recipe.
Ingredients
To make these Halloween brownies truly special, we’ll need the following ingredients:
-
1 cup unsalted butter
Tip: Using unsalted butter gives you control over the salt in your recipe. If you only have salted butter, reduce the added salt in the recipe. -
2 cups granulated sugar
This adds the sweetness that offsets the rich cocoa flavor. You can substitute half with brown sugar for a richer taste! -
4 large eggs
Eggs help bind everything together and give your brownies that chewy texture we love. An egg substitute for vegans would be 1/4 cup applesauce per egg. -
1 teaspoon vanilla extract
Vanilla is key to enhancing the chocolate flavor. Choose pure vanilla extract for the best taste! -
1 cup all-purpose flour
It’s important to measure your flour correctly to avoid dry brownies. Scoop and level with a knife! -
1 cup cocoa powder
Go for unsweetened cocoa powder to really let the chocolate shine through! A dark cocoa powder can elevate the richness. -
1/2 teaspoon baking powder
This ensures our brownies rise just enough to create a fluffy center. -
1/2 teaspoon salt
Salt enhances the sweetness and balances the flavors beautifully. -
1 cup chocolate chips (optional)
For extra gooeyness, mix in semi-sweet or dark chocolate chips! White chocolate chips can be a fun variation. -
Halloween-themed sprinkles
These are the crowning glory! Use any mix of spooky sprinkles like bats, ghosts, or pumpkin shapes to make it festive.
Step-by-Step Instructions
Now that we’ve got our spooky ingredients ready, let’s dive into making these Halloween brownies! Here’s how to whip them up, step by step.
-
Preheat Your Oven:
Start by preheating your oven to 350°F (175°C). This allows for even baking and ensures our brownies have that delicious crust on top! -
Prepare Your Baking Dish:
Grease a 9×13 inch baking pan and line it with parchment paper. This will make it much easier to lift the brownies out later for cutting. Plus, who doesn’t love a clean release? -
Melt the Butter:
In a medium saucepan, melt the unsalted butter over low heat. As it’s melting, stir it a bit to help it along. You can also do this in the microwave. Just melt in 30-second bursts and stir in between to avoid splattering! -
Mix Sugar and Butter:
Remove the melted butter from heat and whisk in the granulated sugar until well combined. This process helps dissolve the sugar, which leads to beautifully fudgy brownies. -
Add in Eggs and Vanilla:
Quickly whisk in the eggs, one at a time, followed by the vanilla extract. Mixing these in thoroughly gives your brownies that luscious texture. Don’t be afraid to give it a good whisk here! -
Combine Dry Ingredients:
In a separate bowl, whisk together the flour, cocoa powder, baking powder, and salt. Gradually add this dry mix to the wet ingredients, stirring gently until just combined. Be careful not to overmix—lumps are okay! -
Incorporate Chocolate Chips:
If you’re using chocolate chips or other add-ins, fold them into the batter now. This is where your brownies get that delightful melt-in-your-mouth texture! -
Bake the Brownies:
Pour the brownie batter into your prepared baking dish, using a spatula to spread it evenly. Bake for 20-25 minutes or until a toothpick inserted into the center comes out with a few moist crumbs. -
Cool and Decorate:
After baking, let your brownies cool in the pan for a few minutes before lifting them out using the parchment paper. Once they’re completely cool, it’s time to decorate with your favorite Halloween sprinkles! -
Cut and Enjoy:
Use a sharp knife to cut into squares (or spooky shapes if you’re feeling extra). Serve them up and watch the smiles light up!
Serving Suggestions
To make your Halloween brownies extra festive, consider serving them on a platter adorned with mini pumpkins or spider decorations. You could even pair them with a scoop of vanilla ice cream—with a drizzle of warm caramel sauce for a haunt-worthy dessert. For a true spooky effect, you might want to dust some powdered sugar on top, creating a ghostly appearance!
Recipe Variations
Feel free to have fun with this brownie recipe! Here are a few variations to consider:
-
Peppermint Bark Swirl: Fold in crushed peppermint candies and swirl some melted white chocolate into the brownie batter before baking for a festive minty kick.
-
Nutty Surprise: Add a cup of chopped nuts like walnuts or pecans for an extra layer of texture. Toast them beforehand for a deeper flavor!
-
Vegan Version: Substitute with vegan butter and replace eggs with flaxseed meal mixed with water (1 tablespoon flaxseed mixed with 3 tablespoons water = 1 egg).
-
Gluten-Free Brownies: Use a 1:1 gluten-free baking flour in place of all-purpose flour for a gluten-free treat that everyone can enjoy.
-
Caramel Drizzle: Drizzle melted caramel over the top before serving for a gooey upgrade that’s to die for!
Chef’s Notes
As I reflect on my kitchen adventures, I can assure you that experimentation is the name of the game. The first time I made these Halloween brownies, I forgot to add the baking powder. They ended up like a deliciously dense chocolate fudge rather than brownies! Instead of being upset, I leaned in and started calling them "fudge brownies." Sometimes the best moments in the kitchen come from mistakes—the key is to have fun and not take yourself too seriously. So, even if your brownies don’t turn out as planned, they’ll still end up tasting amazing!
FAQs and Troubleshooting
-
Why are my brownies dry?
Overbaking could be the culprit! Keep an eye on them, and try to remove them once a toothpick comes out with a few moist crumbs, not dry. -
My brownies didn’t rise! What went wrong?
Ensure your baking powder is fresh. If it’s expired, your brownies won’t rise properly. Also, check that you mixed your wet and dry ingredients just enough—overmixing can lead to tough brownies! -
Can I freeze brownies?
Absolutely! Cut your brownies into squares, wrap them individually in plastic wrap, and place them in an airtight container. They’ll last for a few months in the freezer! -
How do I get clean cuts on brownies?
Run your knife under hot water, wipe it dry, and then cut. The heat will help make cleaner cuts through the fudgy brownies!
Nutritional Info
While we focus on flavors and fun, here’s a quick overview of some nutritional information per serving (based on a 2-inch square cut):
- Calories: 250
- Total Fat: 12g
- Saturated Fat: 7g
- Cholesterol: 70mg
- Sodium: 80mg
- Total Carbohydrates: 35g
- Dietary Fiber: 2g
- Sugars: 20g
- Protein: 3g
Making these Halloween brownies is more than just whipping up a treat; it’s about creating memories filled with joy and laughter with friends and family. I hope these brownies spark joy in your kitchen as they have in mine. So roll up those sleeves, get messy, and embrace the spirit of Halloween! Happy baking!
Print
Halloween Brownies: A Spooktacular Delight
- Total Time: 40 minutes
- Yield: 16 servings 1x
- Diet: Vegetarian
Description
Delightfully chocolatey brownies topped with festive sprinkles, perfect for Halloween gatherings.
Ingredients
- 1 cup unsalted butter
- 2 cups granulated sugar
- 4 large eggs
- 1 teaspoon vanilla extract
- 1 cup all-purpose flour
- 1 cup cocoa powder
- 1/2 teaspoon baking powder
- 1/2 teaspoon salt
- 1 cup chocolate chips (optional)
- Halloween-themed sprinkles
Instructions
- Preheat your oven to 350°F (175°C).
- Prepare a 9×13 inch baking pan by greasing and lining it with parchment paper.
- Melt the unsalted butter in a medium saucepan over low heat.
- Mix the melted butter with the granulated sugar until well combined.
- Add in the eggs, one at a time, followed by the vanilla extract.
- Combine the dry ingredients: flour, cocoa powder, baking powder, and salt in a separate bowl.
- Incorporate the dry ingredients into the wet mixture, stirring gently until just combined.
- Fold in the chocolate chips, if using.
- Pour the batter into the prepared baking dish and spread it evenly.
- Bake for 20-25 minutes, until a toothpick comes out with a few moist crumbs.
- Cool and decorate with Halloween sprinkles.
- Cut into squares and enjoy!
Notes
These brownies can also be topped with mini pumpkins or served with vanilla ice cream and caramel sauce for extra festivity.
- Prep Time: 15 minutes
- Cook Time: 25 minutes
- Category: Dessert
- Method: Baking
- Cuisine: American
Nutrition
- Serving Size: 1 square
- Calories: 250
- Sugar: 20g
- Sodium: 80mg
- Fat: 12g
- Saturated Fat: 7g
- Unsaturated Fat: 3g
- Trans Fat: 0g
- Carbohydrates: 35g
- Fiber: 2g
- Protein: 3g
- Cholesterol: 70mg
Keywords: Halloween, brownies, dessert, baking, festive treats

Crispy Butternut Squash Fritters (30-Minute Weeknight)
Butternut Squash Fritters: A Cozy Kitchen Adventure
Welcome to my kitchen! I’m so excited to share this amazing recipe for butternut squash fritters with you. These delightful little bites are not only packed with flavor, but they also embody everything I love about cooking: warmth, creativity, and the joy of sharing with loved ones. Imagine your kitchen filled with the sweet, nutty aroma of roasting butternut squash as you whip up these fritters—sounds wonderful, doesn’t it?
Butternut squash fritters are perfect for any occasion—whether it’s a cozy weeknight dinner, a fun brunch with friends, or a tasty appetizer for your next gathering. They’re crispy on the outside, tender on the inside, and oh-so-satisfying. And the best part? They’re easy to make and require simple, wholesome ingredients.
I’ve had a special place in my heart for fritters ever since my grandmother introduced me to her beloved zucchini fritters back when I was a kid. She’d make them whenever we visited, and I remember the excitement in the kitchen as the batter sizzled in the skillet. Fast forward to today, and my version incorporates the vibrant flavors of butternut squash, making them comforting yet fresh. Let’s dive into this recipe together and create a dish that will surely inspire many joyful bites and cherished memories!
Personal Story: A Taste of Home
Cooking has always been a family affair for me. Growing up, I spent countless hours in the kitchen, learning from my grandmother and sharing laughter over the stove. One of my most vivid memories is of her cooking up a storm, using seasonal veggies from her garden. Whenever autumn rolled around, butternut squash became the star of the show. My grandmother would roast them to sweetness and incorporate them into everything from soups to casseroles.
One chilly October afternoon, we decided to experiment and create fritters. I can still hear her humming softly as we mixed the ingredients and marveled at how easy it was to transform a humble squash into something so special. With every crunchy bite, I felt loved, nourished, and connected to my roots. Those fritters became a family favorite, and I’ve carried that warmth into my own kitchen. Now, I’m thrilled to pass on this recipe to you, hoping it will become a cherished dish in your home, too!
Ingredients
Let’s gather our ingredients! This part is crucial because using the right ingredients makes all the difference. Here’s what you’ll need:
-
Butternut Squash (about 2 cups, peeled and grated)
The star of the dish! Butternut squash is naturally sweet and adds a lovely creaminess to the fritters. If you can’t find butternut squash, any winter squash will work as a substitute—like acorn or even pumpkin. -
All-purpose Flour (½ cup)
This helps bind the fritters together. For a gluten-free option, you can swap this for a blend of almond flour or a gluten-free all-purpose flour mix. -
Eggs (2 large)
The eggs are essential for binding the mixture and giving it a nice fluffy texture. You can replace them with flax eggs (1 tablespoon ground flaxseed mixed with 3 tablespoons of water per egg) for a vegan option. -
Green Onions (4, chopped)
These add a mild onion flavor to the fritters. If you don’t have green onions, feel free to use shallots or regular onions instead—just adjust the amount to avoid overpowering flavors. -
Garlic (2 cloves, minced)
Fresh garlic adds a savory depth. If you’re in a pinch, garlic powder can take its place, though fresh is always the best option! -
Ground Cumin (1 teaspoon)
This warming spice complements the sweetness of the squash beautifully. Want to switch it up? Smoked paprika or chili powder can bring a nice kick instead! -
Salt (½ teaspoon)
Essential for enhancing the flavors. Adjust to taste if you’re watching your sodium intake. -
Pepper (½ teaspoon)
Freshly cracked pepper adds a lovely mild kick. Feel free to amp it up if you enjoy a bit more heat! -
Olive Oil (for frying)
This is key for achieving those crispy edges. You can substitute with avocado oil if desired, which has a higher smoke point.
Now that we’ve got everything lined up, let’s get cooking!
Step-by-Step Instructions
-
Prep the Butternut Squash
Start with peeling the butternut squash carefully (watch those fingers!). Cut it in half lengthwise and scoop out the seeds. Then, grate the flesh using the large holes of a box grater—you’re looking for about 2 cups. If you have a food processor, feel free to use the grater attachment—it’ll save you some time! -
Squeeze Out the Moisture
Place the grated squash in a clean kitchen towel and give it a good twist to squeeze out excess moisture. This helps your fritters achieve that crispy texture! (Trust me; it’s worth the extra effort). -
Mix It All Together
In a large bowl, combine the drained butternut squash, flour, eggs, chopped green onions, minced garlic, ground cumin, salt, and pepper. Stir until everything is well incorporated. The mixture should be thick but hold together; if it feels too wet, you can add a bit more flour. -
Heat the Pan
In a non-stick skillet, heat a tablespoon of olive oil over medium heat. You want the oil hot enough to sizzle when you drop the batter in, but not so hot that it smokes. -
Form the Fritters
Using a tablespoon, scoop the batter and carefully drop it into the skillet, pressing down gently to flatten. Avoid overcrowding the pan—give each fritter some space to breathe! -
Cook Until Golden Brown
Let the fritters cook for about 3-4 minutes on one side until they turn golden brown. Flip them over with a spatula and cook the other side for another 3-4 minutes. You’ll know they’re ready when they’re crispy and beautifully browned. -
Drain and Repeat
Remove the fritters from the skillet and place them on a plate lined with paper towels to absorb excess oil. Add more oil to the pan as needed and repeat the process until all the batter is cooked. -
Serve Warm
As soon as they come off the stovetop, serve them warm with your favorite dipping sauce or a dollop of yogurt for extra creaminess.
Serving Suggestions
These fritters are wonderfully versatile! Plate them on a colorful serving dish and sprinkle with fresh herbs like parsley or cilantro for a pop of color. Consider serving them alongside a zesty dipping sauce—like a lemon garlic aioli—or plain Greek yogurt drizzled with olive oil and a splash of lemon juice. They make a stunning centerpiece for brunch or a tasty side at dinner.
Recipe Variations
-
Cheesy Twist
Add shredded cheese (like feta or cheddar) to the batter for a gooey, indulgent twist! -
Herb Infusion
Fresh herbs like thyme or rosemary can elevate the flavors. Chop them finely and mix them into the batter for an aromatic touch. -
Sweet Heat
Add a pinch of crushed red pepper flakes to the batter if you like a touch of heat. -
Vegan Version
Use flax eggs instead of regular eggs, and try chickpea flour instead of all-purpose flour for a hearty vegan fritter. -
Baked Option
Instead of frying, you can bake them! Preheat your oven to 400°F (200°C), place the fritters on a parchment-lined baking sheet, and lightly spray with cooking oil. Bake for about 20 minutes, flipping halfway through until they’re golden and crispy!
Chef’s Notes
As with any recipe, don’t be afraid to make it your own! This dish has evolved for me over the years, and I love experimenting with new flavors and techniques each time I make it. One day, I might incorporate some diced bell peppers for added color. Another time, I may swap in sweet potatoes instead of butternut squash for a fun twist. Remember, cooking is all about creativity and having fun. If something doesn’t go as planned (trust me, it happens to the best of us!), just laugh it off and try again. That’s the beauty of cooking!
FAQs and Troubleshooting
1. My fritters fell apart while cooking. What did I do wrong?
This could be due to excess moisture in the squash. Make sure to squeeze out as much liquid as possible. If they still seem too wet, add a bit more flour to bind the mixture.
2. Can I make the mixture ahead of time?
Absolutely! You can prepare the batter ahead and store it in the fridge for a few hours. Just give it a good stir before cooking.
3. How do I store leftovers?
You can keep leftover fritters in an airtight container in the fridge for up to three days. To reheat, place them in a skillet over medium heat with a touch of olive oil to crisp them up again.
4. Can I freeze these fritters?
Yes! Once cooked, let them cool completely before placing them in a freezer-safe container. They should last up to three months. To reheat, bake them from frozen in a preheated oven until heated through.
Nutritional Info (if applicable)
While I won’t dive into too many details about calories and macros—because cooking should be a joyful experience, not a stressful one—it’s worth noting that these fritters, packed with nutritious butternut squash, offer plenty of vitamins, fiber, and a taste of the season.
So, there you have it! A cozy recipe for butternut squash fritters that’s sure to bring smiles and warmth to your kitchen. Whether you’re enjoying them during a quiet family dinner or serving them at a lively gathering, I hope this dish fills your home with love and deliciousness. Happy cooking!
Print
Butternut Squash Fritters
- Total Time: 35 minutes
- Yield: 4 servings
- Diet: Vegetarian
Description
Delicious and crispy butternut squash fritters, perfect for any occasion.
Ingredients
- Butternut Squash (about 2 cups, peeled and grated)
- All-purpose Flour (½ cup)
- Eggs (2 large)
- Green Onions (4, chopped)
- Garlic (2 cloves, minced)
- Ground Cumin (1 teaspoon)
- Salt (½ teaspoon)
- Pepper (½ teaspoon)
- Olive Oil (for frying)
Instructions
- Prep the butternut squash by peeling, halving, and grating it.
- Squeeze out the moisture using a kitchen towel.
- Mix together the grated squash, flour, eggs, green onions, garlic, cumin, salt, and pepper in a bowl.
- Heat olive oil in a skillet over medium heat.
- Form fritters by scooping the batter into the skillet and flattening gently.
- Cook until golden brown, about 3-4 minutes on each side.
- Drain on paper towels and repeat cooking with the remaining batter.
- Serve warm with your favorite dipping sauce or yogurt.
Notes
Adjust seasoning and enjoy these fritters warm. For a baked option, preheat to 400°F (200°C) and bake for 20 minutes.
- Prep Time: 15 minutes
- Cook Time: 20 minutes
- Category: Appetizer
- Method: Frying
- Cuisine: American
Nutrition
- Serving Size: 1 fritter
- Calories: 250
- Sugar: 3g
- Sodium: 300mg
- Fat: 10g
- Saturated Fat: 1g
- Unsaturated Fat: 8g
- Trans Fat: 0g
- Carbohydrates: 34g
- Fiber: 4g
- Protein: 6g
- Cholesterol: 70mg
Keywords: butternut squash, fritters, vegetarian recipe, cozy cooking, easy appetizers
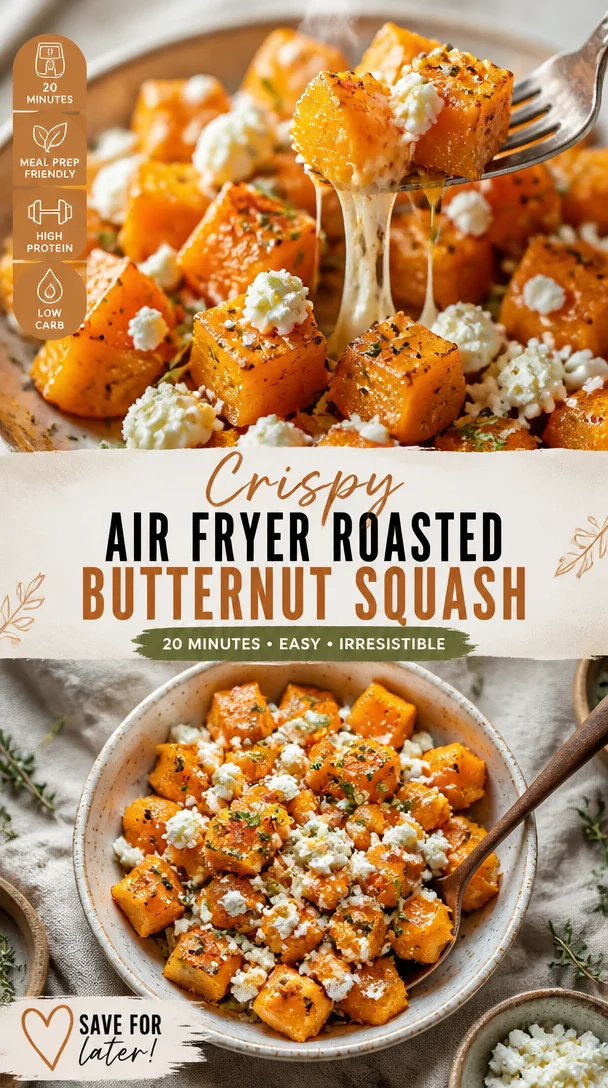
Crispy Air Fryer Roasted Butternut Squash in 20 Minutes
Air Fryer Roasted Butternut Squash: A Cozy Delight
Welcome back to my kitchen, my dear reader! Today, we’re diving into a dish that perfectly captures the essence of cozy cooking: Air Fryer Roasted Butternut Squash. If you’ve ever had a moment in the kitchen where the aroma of something warm and sweet fills the air, you know just how comforting it can be. The sweet, nutty flavor and buttery texture of roasted butternut squash warm not just your belly but your heart too.
Now, I know what some of you might be thinking: “But Olivia, I can just toss squash in the oven. Why the air fryer?” Let me tell you, my friends, this kitchen gadget is a game-changer! With the air fryer, you’ll get that golden, caramelized crunch on the outside while keeping the tender goodness inside. Plus, it’s faster and uses less oil than traditional frying or roasting methods, making it a perfect option for weeknight dinners or last-minute gatherings.
Before we jump into the recipe, let me set the scene for you. Picture this: it’s a chilly autumn afternoon, leaves are swirling in the wind, and the smell of something delicious fills your home. You pull out a beautiful butternut squash, a vibrant orange canvas waiting to be transformed. As you peel and chop it, you’re hit with a flashback — your grandmother’s kitchen, where she would whip up comforting autumn dishes that made everyone feel at home. It’s a food memory, simple yet profound, and it reminds us of why we cook: to create connections, to savor flavors, and to bring warmth to our lives.
So, let’s embrace that nostalgia and turn our butternut squash into something truly unforgettable! Grab your apron (don’t worry, messy hands are the hallmark of a good cook), and let’s get started on this delicious journey together.
Personal Story
Ah, butternut squash! Whenever I think about it, my mind wanders back to family gatherings during the holidays. My grandmother, the undisputed queen of the kitchen, would always feature this delightful squash in her seasonal repertoire. I can almost hear her chuckling as she’d ask for my help in peeling and slicing; she insisted it was her secret weapon for impressing guests.
I remember one year when I decided to surprise her by making my very own butternut squash dish. I borrowed her recipe, attempting to put my spin on it with spices I had learned about. Let’s just say my enthusiasm got the better of me, and I may have gone a bit overboard with the cinnamon! My grandmother adored the effort, though; we both ended up in stitches as we tasted my concoction. It wasn’t perfect — but it was ours. That experience taught me a valuable lesson: it’s not just about the food; it’s about the love, the laughter, and the stories that unfold in the kitchen.
Ingredients
Here’s everything you’ll need to roast your butternut squash to perfection in the air fryer:
-
Butternut Squash: The star of the show! Make sure to choose a firm squash without blemishes. If you’re short on time, pre-cut squash can work too, but fresh is always best!
-
Olive Oil: A light drizzle will help the squash caramelize. Avocado oil can be a great substitute for a high smoke point and buttery flavor.
-
Salt: Just a pinch enhances the natural flavors. Feel free to use sea salt or kosher salt based on your preference.
-
Black Pepper: Freshly cracked produces the best flavor. For a little kick, consider swapping in red pepper flakes.
-
Garlic Powder: This adds a savory depth. You can use fresh minced garlic, but I love the instant flavor boost that powder gives.
-
Paprika: For a hint of smokiness! Try smoked paprika for an extra punch.
-
Maple Syrup (optional): If you want to amplify that sweetness, a touch of pure maple syrup is heavenly.
-
Fresh Herbs (optional): Rosemary or thyme can elevate your dish. Just toss some in at the end for vibrant flavor.
With these ingredients, you’ll create a delightful dish that’s not only healthy but packed with flavor. And remember, cooking is about personal flair! If you have herbs or spices you love, sprinkle them in and make it your own.
Step-by-Step Instructions
Ready to transform that squash into something magical? Let’s break this down step-by-step:
-
Prep Your Squash: Start by washing your butternut squash. Once clean, carefully cut off both ends — this gives it stability when slicing. With a sharp vegetable peeler, peel off the skin in long strokes. You might feel like a master chef at this point!
-
Cut it Up: Next, slice the squash in half lengthwise, scoop out the seeds with a spoon (you can roast those later for a crunchy snack), and chop it into bite-sized cubes. Aim for uniform pieces so they cook evenly.
-
Season it Right: In a large mixing bowl, toss the cubed squash with olive oil, salt, black pepper, garlic powder, and paprika. If you’re adding maple syrup, drizzle it in now. Use your hands to ensure each piece is thoroughly coated — this is the fun part!
-
Preheat Your Air Fryer: While you’re mixing, preheat your air fryer to 375°F (190°C). This will help your squash start crisping up right away.
-
Air Fry to Perfection: Place the seasoned squash in the air fryer basket in a single layer, making sure there’s some space between the cubes for that all-important air circulation. (If your air fryer is small, you might need to do this in batches.)
-
Cooking Time: Air fry for about 15-20 minutes, shaking the basket halfway through the cooking time. This helps to get every side golden and slightly crispy. Keep an eye on it during the last few minutes — you want that perfect caramelization!
-
Finishing Touches: Once the squash is tender and golden brown, remove it from the air fryer. Toss it with fresh herbs if desired or a final drizzle of maple syrup for that sweet touch.
And just like that, you’ve created something extraordinary! It’s so satisfying to pull out beautifully roasted butternut squash.
Serving Suggestions
Let’s talk plating! For a cozy night in, serve your air-fried butternut squash on a rustic wooden board alongside a warm grain salad or simply with a bowl of your favorite soup. If you’re feeling fancy, sprinkle some feta or goat cheese on top, along with extra herbs for a gourmet touch.
For gatherings, arrange the squash on a beautiful serving platter and accompany it with dips like tahini or yogurt sauce. Trust me; your guests will be raving about it long after the last piece is snatched up!
Recipe Variations
Now, let’s shake things up! Here are a few creative twists you can try with this air fryer roasted butternut squash:
-
Spicy Maple: Add a pinch of cayenne alongside the maple syrup for a sweet and spicy kick!
-
Curry Flavor: Swap out the paprika for curry powder for an exotic twist. A touch of coconut oil can also add a nice flavor!
-
Sweet & Savory: Toss in some dried cranberries or raisins halfway through cooking for a burst of sweetness that pairs beautifully with the squash.
-
Mediterranean Style: Use olive oil, lemon zest, and some za’atar seasoning for a vibrant, herbaceous flavor profile.
-
Nutty Crunch: After cooking, sprinkle chopped pecans or walnuts over the top for added texture and flavor.
Chef’s Notes
Oh my goodness, let me share a funny story from my kitchen adventures! The first time I attempted this dish was, let’s just say, a learning experience. I was so excited and distracted by the enticing smell of roasting squash that I forgot a key step — the seasoning! It wasn’t until I took that first bite that I realized I’d forgotten to add the salt and pepper. The flavor was like a blank canvas! Lesson learned: always read the recipe twice before starting! Now, I keep my spices within arm’s reach, just a little reminder as I cook.
This recipe has evolved over the years. Initially, it started as a winter dish, but now I find myself roasting butternut squash all year round. It’s a versatile secret weapon for adding flavor and color to any meal.
FAQs and Troubleshooting
-
Why isn’t my squash getting crispy?
- If your squash is soggy instead of crispy, it might be due to overcrowding the air fryer basket. Make sure the pieces are in a single layer and not stacked on top of each other.
-
Can I use frozen butternut squash?
- Absolutely! Just be aware that the cooking time might vary. Start at a lower temperature and adjust accordingly until tender.
-
How do I know when the squash is done?
- You want the squash to be fork-tender and caramelized on the edges. A good rule of thumb is to test a piece with a fork after about 15 minutes.
-
Can I prepare this in advance?
- Certainly! Roasted butternut squash can be stored in the fridge for up to 3 days. Just reheat in the air fryer for a few minutes before serving to regain that lovely texture!
Nutritional Info
While this recipe isn’t labeled as “healthy” or “indulgent,” butternut squash is indeed a nutritional powerhouse. It’s low in calories yet rich in vitamins A and C, and it’s packed with fiber. If you’re curious about exact nutritional info, feel free to use a calorie-counting app based on the quantities you use — but honestly, it’s more about enjoying the deliciousness and the memories created along the way!
So there you have it, my friends! A simple, cozy dish that embraces the essence of home cooking. May your air fryer be an extension of your love for flavor, and may every bite remind you of warmth, laughter, and cherished moments in the kitchen. I hope you’ll give this roasted butternut squash a try, and if you do, let me know your thoughts! Happy cooking! 🍂💛
Print
Air Fryer Roasted Butternut Squash
- Total Time: 35 minutes
- Yield: 4 servings 1x
- Diet: Vegetarian
Description
A cozy dish that features sweet, nutty butternut squash roasted to perfection in an air fryer.
Ingredients
- 1 Butternut Squash
- 2 tablespoons Olive Oil
- 1/2 teaspoon Salt
- 1/4 teaspoon Black Pepper
- 1 teaspoon Garlic Powder
- 1 teaspoon Paprika
- 1 tablespoon Maple Syrup (optional)
- Fresh Herbs (optional)
Instructions
- Prep your squash: Start by washing your butternut squash. Cut off both ends, then peel off the skin.
- Cut it up: Slice the squash in half lengthwise, scoop out the seeds, and chop it into bite-sized cubes.
- Season it right: Toss the cubed squash with olive oil, salt, black pepper, garlic powder, and paprika. Add maple syrup if desired.
- Preheat your air fryer to 375°F (190°C).
- Air fry the squash: Place the seasoned squash in the air fryer basket in a single layer.
- Cook for about 15-20 minutes, shaking the basket halfway through.
- Finishing touches: Once tender and golden brown, remove from the air fryer and toss with fresh herbs if desired.
Notes
For a cozy night, serve with a warm grain salad or soup. Sprinkling feta or goat cheese adds a gourmet touch.
- Prep Time: 15 minutes
- Cook Time: 20 minutes
- Category: Side Dish
- Method: Air Frying
- Cuisine: American
Nutrition
- Serving Size: 1 serving
- Calories: 150
- Sugar: 7g
- Sodium: 200mg
- Fat: 7g
- Saturated Fat: 1g
- Unsaturated Fat: 5g
- Trans Fat: 0g
- Carbohydrates: 22g
- Fiber: 3g
- Protein: 2g
- Cholesterol: 0mg
Keywords: butternut squash, air fryer, roasted vegetables, healthy recipes, fall recipes

Halloween 🎃 #viral [Video] | Edible candy decorations for halloween, Frankenstein themed snacks, Halloween bake off
Spooktacular Candy-Covered Delights: Your Guide to Halloween Treats 🎃
Welcome to my kitchen, my fellow food enthusiasts! Halloween is just around the corner, and the excitement in the air is almost palpable. As I whip up my favorite spooky delights, I can’t help but reminisce about the joy that this festive season brings. The smell of pumpkins being carved, the vibrant colors of candy corns mingling with black and orange decorations, and, of course, the delightful anticipation of sweets galore!
This time of year is not just about costumes and haunted houses; it’s about gathering with family and friends, creating sweet memories, and sharing delicious treats that light up faces and spark conversations. That’s precisely why today, I’m going to share enticing recipes that will have you baking, decorating, and celebrating Halloween like a pro. Trust me, there’s nothing like a kitchen filled with laughter and the aroma of baked goodies to make the holiday truly special!
Whether you’re planning a whimsical Halloween party, a spooky bake-off with friends, or just some fun activities with the kiddos, these edible candy decorations and Frankenstein-themed snacks are bound to bring joy and smiles to everyone around. So, grab your aprons and let’s dive into the world of Halloween baking!
A Sweet Walk Down Memory Lane
Let me take you on a little journey back to my childhood. I remember the crisp autumn evenings spent at my grandma’s house, where she would always prepare her famous Halloween treats with the kind of enthusiasm that only a true foodie possesses. With her trusty apron tied around her waist, she brought out the candy, sprinkles, and, our absolute favorite—chocolate!
One year, she introduced us to the idea of decorating cookies with edible eyes to create the most delightfully creepy creatures. We laughed and squealed as we transformed simple cookies into zombies and ghosts. Those memories of vibrant colors, sticky fingers, and laughter echoing throughout her kitchen are forever etched in my heart. Through the years, our cozy Halloween baking tradition only grew stronger, leading to epic kitchen experiments every October. That’s the magic I strive for in every recipe I create and share—a way to connect, celebrate, and make memories over something delicious!
Ingredients You’ll Need for Spooktacular Treats
To create these Halloween delights, you’ll need a delightful array of ingredients. Here’s your shopping list, along with some handy tips:
-
All-Purpose Flour: The cornerstone of any baking recipe. If you’re looking to go gluten-free, you can substitute it with almond or coconut flour, but keep in mind that may alter the texture a bit.
-
Granulated Sugar: For that sweet touch! If you want a healthier alternative, consider coconut sugar or even maple syrup (though it might affect the dough consistency).
-
Butter: Use unsalted butter for a controlled flavor, but if you’re vegan or dairy-free, try coconut oil or a plant-based butter substitute.
-
Eggs: They bind everything together. For an egg-free option, you can use a flax or chia seed egg (1 tablespoon ground flaxseed or chia seeds mixed with 2.5 tablespoons of water), which is particularly nice for a vegetarian twist.
-
Vanilla Extract: Adds a beautiful depth and warmth to the flavor. Extract is ideal, but you can use vanilla powder too if that’s what you’ve got on hand.
-
Baking Soda & Baking Powder: These leavening agents are essential for fluffiness. Don’t mix them up—baking soda is for spreading, while baking powder gives height!
-
Edible Candy Decorations: Think eyes, sprinkles, and spooky shapes! You can find a variety at local stores or online, and they’re perfect for letting your creativity shine!
-
Chocolate (dark or white): For coating and decorating, you can substitute chocolate chips with carob chips for a different flavor profile.
-
Food Coloring: Vital for bringing your spooky creations to life! Gel coloring works best for vibrant hues without watering down the batter.
For a little chef insight, always check your pantry before heading out to shop—you might be surprised how many of these essentials you already have!
Step-by-Step Instructions for Spooky Treats
Now that we’ve got our ingredients prepped, it’s time to get to the best part: baking! Here’s how to whip up your magical Halloween treats step-by-step:
-
Preheat the Oven: Start by preheating your oven to 350°F (175°C). This is key to ensuring our goodies bake perfectly.
-
Mix the Dry Ingredients: In a large mixing bowl, combine 3 cups of all-purpose flour with 1 teaspoon of baking soda and 1 teaspoon of baking powder. Whisk them together until well combined. This step helps avoid clumps of baking agents in your final mix. The mixing helps even out the flavors and ensures every bite has that perfect blend.
-
Cream the Butter and Sugar: In another bowl, cream together 1 cup of softened unsalted butter and 1 ¾ cups of granulated sugar until light and fluffy. Use an electric mixer on medium speed, and don’t rush through it—this airing gives your treats a light texture!
-
Add the Eggs and Vanilla: Beat in two eggs, one at a time, mixing well after each addition. Then, add 1 tablespoon of vanilla extract. The mixture should look shiny and fluffy, really bringing out that sweet scent.
-
Combine Dry Ingredients with Wet Ingredients: Gradually add your flour mixture to the butter mixture, stirring until just combined. Avoid overmixing here! We want tender cookies, not tough ones.
-
Add in Your Chocolaty Magic: Fold in 1 cup of chocolate chips (or more, if you’re feeling indulgent). This is where you have the freedom to throw in any extras you love—nuts, dried fruits, or even crushed Halloween candies!
-
Scoop and Shape: Using a tablespoon or scoop, drop dollops of dough onto a lined baking sheet, leaving enough space for them to spread out. For a fun twist, roll some of the balls in colorful sprinkles before placing them down on the sheet.
-
Bake and Watch Them Rise: Pop them into your preheated oven and let them bake for 10-12 minutes. Keep an eye on them! You want the edges to be golden while the center remains soft and slightly underbaked. They’ll firm up as they cool.
-
Decorate with Style: As the cookies cool, melt some chocolate in the microwave or a double boiler. Dip the cookies halfway in the melted chocolate, and then get creative! Use edible eyes, sprinkles, or drizzled chocolate to transform them into spooky creatures. Let them set on wax paper.
-
Serve and Enjoy!: Once set, arrange your creations on a festive platter, and get ready for the oohs and aahs!
Serving Suggestions
To add a cozy vibe to your Halloween spread, consider placing your treats on a rustic wooden platter or a decorative tray. Set the scene with dark-colored napkins, sprigs of rosemary for a witchy touch, or even some faux cobwebs sprinkled around. Don’t forget a cute label or fun sign declaring your treats as “Witch’s Bites” or “Zombie Cookies” to pique interest!
Recipe Variations
Get creative with these variations to make your Halloween treats unique:
- Pumpkin Spice Twist: Incorporate 1 tablespoon of pumpkin pie spice into your dry ingredients and use pumpkin puree instead of half a cup of the butter for a seasonal flavor.
- Creepy-Crawly Cookies: Add edible gummy worms or bugs atop your cookies before baking for a fun, shocking surprise!
- Vegan Adaptation: Swap butter for coconut oil, use plant-based milk, and substitute eggs with your preferred egg replacer. Perfect for all your plant-loving friends!
- Chocolate-Covered Marshmallow Pops: Use large marshmallows, dip them in melted chocolate, and decorate with sprinkles and edible eyes. Easy and fun for the kids!
Chef’s Notes
While creating these treats, I remembered the time I mistakenly grabbed salt instead of sugar when measuring for my cookies! The kitchen turned into a hub of flavors as I had to whip up another batch to fix my mistake. It taught me to always double-check and embrace the chaos of cooking—the messes often lead to the best stories.
This Halloween treat recipe has evolved over time, influenced by trial and error, family traditions, and of course, my unwavering love for creativity. As I put on my messy apron, I remind myself that it’s the joy and love poured into cooking that ultimately makes every creation special.
FAQs and Troubleshooting
Q: My cookies came out too flat. What did I do wrong?
A: Flat cookies are often a result of not enough flour or overmixing the butter and sugar. Try chilling your dough for at least 30 minutes before baking so they don’t spread too much.
Q: Can I freeze the cookie dough?
A: Absolutely! You can freeze the cookie dough in individual balls or as a whole. Just wrap them tightly in plastic wrap and store them in an airtight bag. When you’re ready to bake, let them thaw slightly before popping them in the oven.
Q: What can I use if I don’t have baking soda?
A: You can use baking powder instead! However, remember that you’ll need to use about three times as much baking powder as you would baking soda.
Q: Can I make these in advance? How long do they stay fresh?
A: Yes, you can make them a few days in advance and store them in an airtight container. They’ll stay fresh for about a week. For long-term storage, freezing is best!
Nutritional Info (Optional)
For a rough idea, one cookie has approximately 150 calories with 6g of fat, 22g of carbohydrates, and 2g of protein. Nutritional values may vary based on the specific ingredients used.
So there you have it, my delightful friends! This spooky season, don’t hesitate to embrace the spirit of baking with these fun, easy treats that are sure to delight anyone who crosses your doorstep. Remember, it’s not just about the end product, but the journey of creating with love and laughter. Now, let your Halloween baking adventures begin! 🎃✨
Print
Spooktacular Candy-Covered Delights
- Total Time: 42 minutes
- Yield: 24 servings 1x
- Diet: Vegetarian
Description
A delightful collection of Halloween treats that combines baking and creativity to create spooky and fun edible decorations.
Ingredients
- 3 cups All-Purpose Flour
- 1 teaspoon Baking Soda
- 1 teaspoon Baking Powder
- 1 cup Unsalted Butter, softened
- 1 ¾ cups Granulated Sugar
- 2 Eggs
- 1 tablespoon Vanilla Extract
- 1 cup Chocolate Chips
- Edible Candy Decorations
- Food Coloring
Instructions
- Preheat the oven to 350°F (175°C).
- Mix the dry ingredients: combine flour, baking soda, and baking powder in a large bowl.
- Cream together butter and sugar in another bowl until light and fluffy.
- Add eggs, one at a time, mixing well after each addition, then stir in vanilla.
- Combine the flour mixture with the butter mixture until just combined.
- Add in chocolate chips and any desired extras.
- Scoop dough onto a lined baking sheet, spacing them out.
- Bake for 10-12 minutes until edges are golden and center is slightly underbaked.
- Decorate cooled cookies with melted chocolate and candy decorations.
- Serve and enjoy!
Notes
Make sure to check your pantry before shopping for the ingredients. Feel free to get creative with the decorations!
- Prep Time: 30 minutes
- Cook Time: 12 minutes
- Category: Dessert
- Method: Baking
- Cuisine: American
Nutrition
- Serving Size: 1 cookie
- Calories: 150
- Sugar: 12g
- Sodium: 150mg
- Fat: 6g
- Saturated Fat: 4g
- Unsaturated Fat: 2g
- Trans Fat: 0g
- Carbohydrates: 22g
- Fiber: 1g
- Protein: 2g
- Cholesterol: 30mg
Keywords: Halloween treats, spooky cookies, candy decorations, baking, family recipes
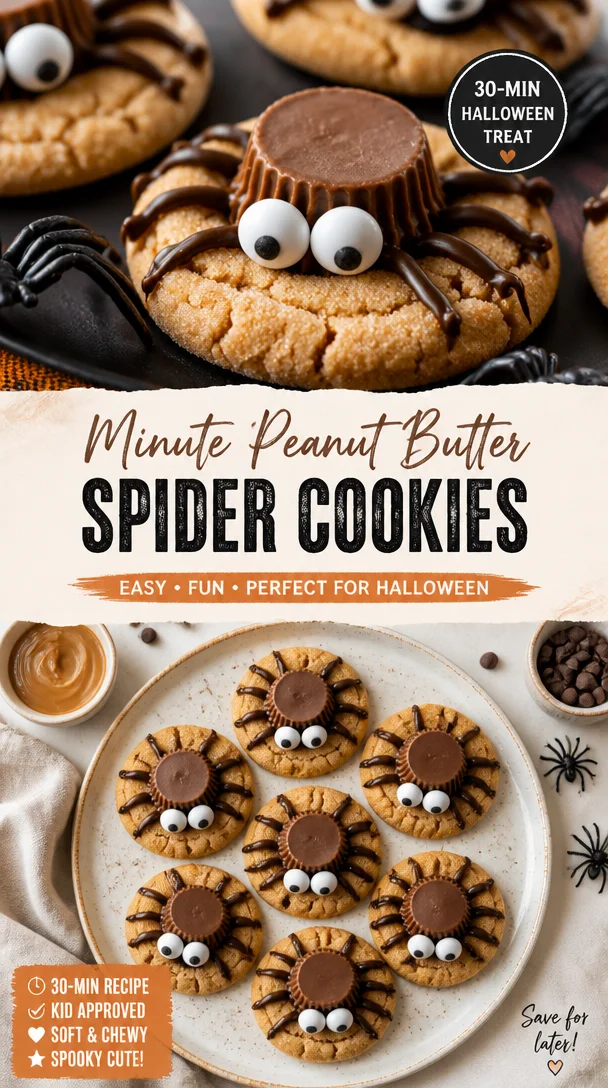
Minute Peanut Butter Spider Cookies for Halloween Treats
Peanut Butter Spider Cookies: A Spooktacular Delight
Welcome back to my kitchen, friends! Today, we’re diving into a recipe that’s perfect for Halloween gatherings or anytime you want to add a touch of whimsy to your baking. Picture this: soft, chewy peanut butter cookies adorned with chocolate “spiders” that are as cute as they are delicious. These Peanut Butter Spider Cookies are sure to bring a smile to your face—whether you’re a kid, or just a kid at heart!
What I love about these cookies is their nostalgia. Growing up, Halloween was a big deal in our household. My family’s kitchen transformed into a bakery of sorts, filled with the delicious aromas of spices, sugar, and, of course, peanut butter! We would whip up all sorts of treats to share with friends and neighbors. One of my fondest memories is of my mom and me spending the afternoon shaping dough and crafting the cutest little spider cookies, complete with chocolate legs sticking out. It was an activity filled with laughter, a bit of mess, and a lot of love.
Baking these cookies is not just about satisfying your sweet tooth; it’s about sharing joy and creativity. So roll your sleeves up and grab that apron—it’s time to create something wonderful!
Personal Story
One Halloween afternoon, my mom and I set out to create the most epic dessert for our neighborhood party. We had the typical classics lined up: pumpkin pies, caramel apples, and of course, peanut butter cookies, because, well, they were my favorite! While we were making our plans, I caught a glimpse of a quirky recipe in an old magazine featuring spider cookies. My mom’s eyes lit up, and just like that, we decided to transform our usual peanut butter cookies into something special.
I remember us laughing as we formed the cookies into spider shapes, adding eight chocolate legs made from chocolate-covered pretzels. As they cooled, we giggled about how they might scare some little goblins at the party! The moment of delight on our neighbors’ faces when they saw our "creepy" creations made all the chaos of the kitchen worthwhile. That year, our spooky cookies became a neighborhood hit, and I’ve been making them every Halloween since.
Ingredients
Here’s what you’ll need to whip up these Peanut Butter Spider Cookies:
-
1 cup creamy peanut butter: The star of the show! Creamy peanut butter gives a smooth texture and rich flavor. If you’re feeling adventurous, swap it for crunchy peanut butter for a bit of extra texture.
-
1 cup granulated sugar: Sweetness is essential to balance the saltiness of the peanut butter. You can also use coconut sugar for a deeper flavor if you’re looking for a healthier twist!
-
1 egg: This binds everything together. In case of an egg allergy, you can use a flaxseed egg (1 tablespoon ground flaxseed mixed with 2.5 tablespoons water) as a substitute.
-
1 teaspoon vanilla extract: This lovely ingredient enhances the flavor of our cookies. Choose pure vanilla extract for a more authentic taste.
-
1 teaspoon baking powder: This little agent is what makes our cookies puff up beautifully in the oven. Baking soda can be used instead, but you may need to adjust the amounts slightly.
-
Chocolate-covered pretzels: These are our "spider legs," combining a delightful crunch with chocolatey sweetness. You can use chocolate malt balls or even cookie dough bites if you want to mix it up!
-
Chocolate chips or M&M’s for the spiders’ bodies: Feel free to get creative! Dark chocolate chips add a rich flavor, while M&Ms come in all those vibrant colors—perfect for Halloween fun!
Step-by-Step Instructions
Let’s dive into the delicious process of creating these fantastic cookies.
Step 1: Preheat the Oven
Preheat your oven to 350°F (175°C). Preheating properly helps the cookies cook evenly. Set a timer for a quick ten minutes once you start mixing things up!
Step 2: Mix the Peanut Butter and Sugar
In a large mixing bowl, combine the peanut butter and granulated sugar. Use a hand mixer or a sturdy wooden spoon to blend them until smooth and fluffy. This step is crucial; the more air you incorporate, the softer and tender the cookies will be!
Step 3: Add the Egg and Vanilla
Crack in the egg and pour in the vanilla extract. Mix until everything is well combined. At this point, take a moment to smell that divine peanut buttery goodness—it’s one of the highlights of cooking, wouldn’t you agree?
Step 4: In with the Dry Ingredients
Now, gently fold in the baking powder. If you’re using any optional ingredients, this is the time to introduce them, like a sprinkle of cinnamon or nutmeg for an extra flavor kick!
Step 5: Scoop the Dough
Using a cookie scoop or a tablespoon, scoop out equal portions of dough onto a lined baking sheet. Make sure they’re spaced about 2 inches apart, as they will spread while baking.
Step 6: Bake
Pop your tray in the preheated oven and bake for about 8-10 minutes. Watch closely! You want them to be slightly underbaked as they will continue to firm up as they cool. Once done, remove them from the oven and let them sit on the tray for 5 minutes before transferring them onto a cooling rack.
Step 7: Create the Spiders
Once the cookies have cooled, it’s time for the fun part! Place two chocolate-covered pretzels on each cookie for legs. Then, top each spider with a chocolate chip or M&M for its body. Get creative with their positioning—they can be whimsical or a bit spooky!
Step 8: Enjoy!
Gather your family or friends around and share these delicious treats! You might want to snap a few pictures first; these little creatures are Instagram-ready!
Serving Suggestions
To serve these delightful cookies, place them on a festive platter lined with parchment paper for a charming touch. For an extra whimsical effect, use a Halloween-themed tablecloth and serve them alongside pumpkin spice lattes or a warm glass of apple cider. Your friends will be talking about these cookies long after the last bite is gone!
Recipe Variations
Here are some creative twists you can try with your Peanut Butter Spider Cookies:
- Pumpkin Spice Variation: Add a teaspoon of pumpkin pie spice to the cookie dough for a fall-inspired flavor.
- Nut Allergies: Swap out the peanut butter for sun butter (made from sunflower seeds) for a nut-free version.
- Vegan Version: Use a flaxseed egg in place of the egg, and for a vegan-friendly chocolate option, search for dairy-free chocolate chips.
- Add-Ins: Toss in some chopped nuts or shredded coconut to the dough before baking for added elements of surprise.
Chef’s Notes
These Peanut Butter Spider Cookies have a special place in my heart. Over the years, I’ve experimented with flavors, occasionally swapping out ingredients based on what I had in my pantry. I once added crushed Oreos to the mix—it created a deliciously unique texture that everyone loved! Ultimately, these cookies became a tradition that sparked creativity and brought joy to our table.
And, oh! Speaking of chaos, let me tell you about the time I accidentally grabbed the salt instead of the sugar. Let’s just say that batch did not make it to the neighborhood party! Now I triple-check everything.
FAQs and Troubleshooting
1. My cookies turned out too flat! How can I prevent that?
This can happen if your dough is too warm or if you didn’t add enough flour. Ensure your butter and peanut butter are at room temperature, and chill the dough for 30 minutes before baking.
2. How should I store my peanut butter spider cookies?
Keep them in an airtight container at room temperature for up to a week. If you want to freeze them, layer them between parchment in a container and freeze for up to three months.
3. Can I use natural peanut butter?
Yes, but be cautious! Natural peanut butter is often less sweet and can affect the texture of the cookies. You might need to adjust the sugar or add a bit more flour to get the desired consistency.
4. How do I make these cookies gluten-free?
Simply replace all-purpose flour with a gluten-free flour mix that has a binding agent, like almond or coconut flour!
With these tips, you’re all set for a successful batch of Peanut Butter Spider Cookies!
Now that you have all the details, invite your friends over and create some unforgettable kitchen magic! Happy baking!
Print
Peanut Butter Spider Cookies
- Total Time: 25 minutes
- Yield: 24 cookies 1x
- Diet: Vegetarian
Description
Soft, chewy peanut butter cookies adorned with chocolate “spiders” that add a whimsical touch to your Halloween gatherings.
Ingredients
- 1 cup creamy peanut butter
- 1 cup granulated sugar
- 1 egg
- 1 teaspoon vanilla extract
- 1 teaspoon baking powder
- Chocolate-covered pretzels
- Chocolate chips or M&Ms
Instructions
- Preheat your oven to 350°F (175°C).
- Mix the peanut butter and granulated sugar in a large mixing bowl until smooth and fluffy.
- Add the egg and vanilla extract, mixing until well combined.
- Fold in the baking powder and any optional ingredients like cinnamon or nutmeg.
- Scoop equal portions of dough onto a lined baking sheet, spaced about 2 inches apart.
- Bake for 8-10 minutes until slightly underbaked, then let cool for 5 minutes on the tray before transferring to a cooling rack.
- Create spiders by placing two chocolate-covered pretzels on each cookie and topping with a chocolate chip or M&M.
- Enjoy! Share these delightful treats with family and friends!
Notes
For variations, try adding pumpkin pie spice for fall flavor, or swap peanut butter for sun butter for nut-free cookies.
- Prep Time: 15 minutes
- Cook Time: 10 minutes
- Category: Dessert
- Method: Baking
- Cuisine: American
Nutrition
- Serving Size: 1 cookie
- Calories: 180
- Sugar: 10g
- Sodium: 50mg
- Fat: 8g
- Saturated Fat: 1g
- Unsaturated Fat: 5g
- Trans Fat: 0g
- Carbohydrates: 24g
- Fiber: 1g
- Protein: 3g
- Cholesterol: 20mg
Keywords: Halloween cookies, peanut butter cookies, spider cookies, festive baking




