
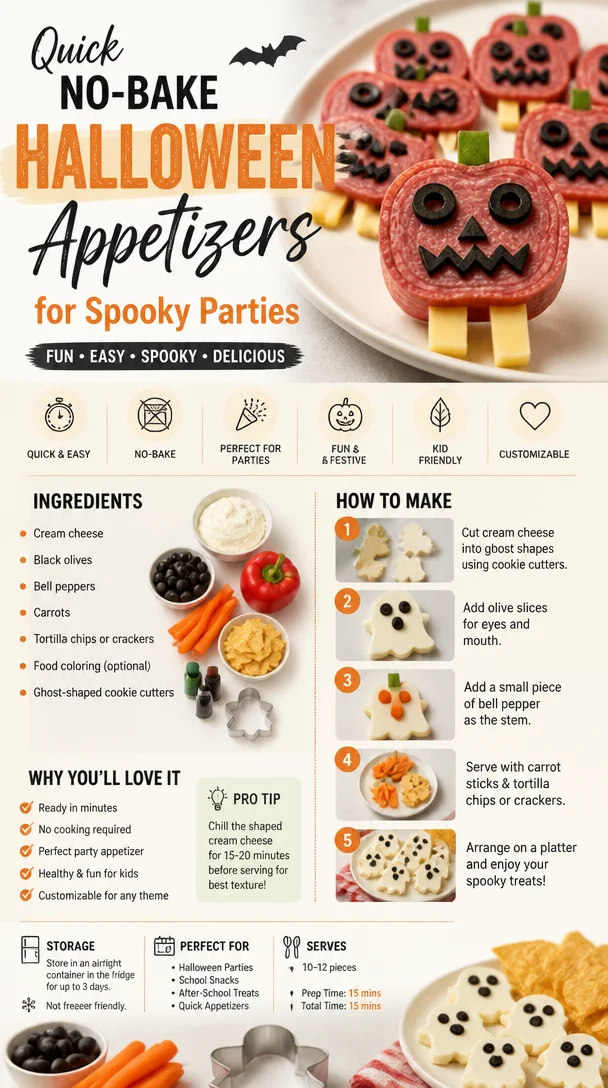
Quick No-Bake Halloween Appetizers for Spooky Parties
No-Bake Halloween Appetizers: Spook-tacular Treats for Your Festivities!
Welcome, fellow foodies, to my cozy little kitchen, where the air is filled with delightful aromas and the spirit of everything homemade! With Halloween creeping around the corner, it’s time to get prepped for a night of spooky fun, laughter, and of course, delicious food. Today, I’m super excited to share with you some absolutely fang-tastic no-bake Halloween appetizers that will not only tickle your taste buds but also impress your guests.
Having hosted countless Halloween get-togethers, I’ve learned that sometimes the most memorable dishes are the ones you whip up without even turning on the oven. Whether you’re throwing a festive party, a casual get-together, or simply looking for ways to celebrate the season, these no-bake appetizers are sure to be a hit. So grab your favorite Halloween playlist, don your most fun apron (and maybe a witch hat!), and let’s conjure up some culinary magic!
Imagine your guests mingling, sharing spooky stories, and laughing over delightful bites that look just as good as they taste. From creepy critter-themed cheese balls to eyeball-inspired deviled eggs, the options are endless when it comes to getting a little creative in the kitchen. Plus, the beauty of no-bake recipes is that they leave you plenty of time to focus on those hauntingly good conversations with your favorite people.
No bake means simple, fun, and oh-so-delicious! I’m all about creating recipes that bridge connections, and this collection of spooky appetizers is guaranteed to get your gathering off to a ghoulishly great start. So let’s dive right in!
A Nostalgic Kitchen Memory: Halloween Flea Market Fun
Before I share my favorite no-bake Halloween appetizers, let me take you on a quick trip down memory lane. Growing up, my family was all about hosting the most spirited Halloween parties ever! I fondly remember the time when my mom decided to turn our garage into a haunted house, complete with cobwebs, rubber bats, and sounds of ghostly moans.
One of my favorite moments was when she kicked off the festivities with a make-your-own appetizer table. She laid out an array of colorful ingredients and encouraged us to get creative. I remember giggling as we tried to build the most bizarre, spooky-looking snacks, like gummy worm layered dips or spider webs made of whipped cream. My best friend and I ended up crafting these crazy cheese balls covered in crumbled olives that we dubbed “The Haunted Cheese Mounds.” They were a total hit, and the spirit of creativity and laughter filled the air.
This experience not only fueled my love for cooking but also reminded me of how food can weave deeper connections among friends and family. Now, as an adult, I strive to recreate that magic in my own kitchen and make Halloween just as memorable for the next generation. Armed with that warmth and nostalgia, let’s get into the specifics of these no-bake bites!
Ingredients for No-Bake Halloween Appetizers
Let’s gather our ingredients! Here’s what you’ll need to create these spooky no-bake Halloween treats.
-
Cream Cheese: The creamy base for many of our appetizers. It adds richness and pairs well with various flavors. If you’re dairy-free, you can use a nut-based cream cheese for similar texture.
-
Shredded Cheese: I love using sharp cheddar, but feel free to mix in your favorites. For a twist, try pepper jack for a little kick!
-
Olives: Black olives create the perfect ‘eyeball’ effect for our spooky appetizers, but green olives can work too! If olives aren’t your thing, try cherry tomatoes for a pop of color.
-
Fresh Herbs: Parsley or chives add freshness to balance out the creamy ingredients. You can easily swap these for dried herbs; just remember to adjust the quantity!
-
Veggies: Bell peppers, cucumbers, or baby carrots can add crunch to your bites. Choose colorful varieties to make your platter visually appealing!
-
Graham Crackers: Great for some sweet no-bake treats! You could use gluten-free crackers or even crushed nuts for a grain-free option.
-
Chocolate or Candy Eyes: These are a fun way to add creepy features to your appetizers. If you can’t find them, you could use regular chocolate chips too (though they won’t be quite as spooky!).
-
Worm Gummy Candy: A must-have for Halloween-themed snacks! These can be switched out for any other candy you might have on hand, like gummy bears or jelly beans.
Step-by-Step Instructions for No-Bake Halloween Appetizers
Now the fun part! Here, I’ll guide you through assembling three spooktacular no-bake appetizers.
Creepy Cheese Ball Eyeballs
-
Prep the Ingredients: Start by softening 8 oz of cream cheese in a mixing bowl. Let it sit at room temperature for 15 minutes. This helps the cheese mix smoothly.
-
Mix the Cheese: Add in 1 cup of shredded cheddar cheese to the softened cream cheese. Use a spatula or a mixer to blend them together until smooth. This will be your monstrous eyeball base!
-
Shape the Balls: Using your hands, scoop out portions of the cheese mixture and roll them into balls, roughly the size of ping pong balls. This can get a bit messy, but who doesn’t love a little culinary chaos?
-
Chill: Place the cheese balls on a plate or baking sheet and pop them in the fridge for about 30 minutes. This helps them firm up, making them easier to handle later.
-
Decorate: After they set, take them out and press one chocolate or candy eye into the top of each cheese ball. For a fun twist, surround each eyeball with sliced olives to create a “screaming” face.
Monster Veggie Platter
-
Prepare the Base: Start with a flat platter and layer your choice of dips at the center. Consider using hummus or ranch for the ‘monster’ body.
-
Add the Veggies: Arrange colorful veggies around the dip to serve as ‘hair’ (think curly cucumbers and carrots), creating a fun visual presentation.
-
Create Faces: Cut small veggies like cherry tomatoes horizontally, using half for the eyes, and black olives for pupils. Carrots and bell pepper slices work great for mouths. Get creative with the monster features!
-
Serve with a Smile: This allows guests to dip and create their own monster faces on their plates, providing a fun interactive touch that makes the platter come alive!
Halloween Graham Cracker Ghosts
-
Prepare the Crackers: Begin by breaking graham cracker sheets in half to create your ghost ‘bodies’.
-
Make the Ghosts: Spread a generous layer of whipped cream (or any white frosting) over the top of each half cracker. You’ll want to create a nice, ghostly layer. Resist the urge to eat them—just for a few minutes longer!
-
Add Eyes: Place chocolate eyes on top while the cream is still soft. You can use two on each ghost for big spooky eyes.
-
Chill: If time allows, chill them in the fridge for about 15 minutes before serving so they’re slightly firmer, and get ready for some smiles!
Serving Suggestions
When it comes to serving these no-bake Halloween appetizers, presentation is key! For the cheese ball eyeballs, arrange them on a spooky-themed platter surrounded by fresh parsley or edible flowers for that eerie effect. The monster veggie platter should take center stage, standing out with its colorful veggies and funny faces. As for the ghostly graham cracker treats, stack them creatively on a haunted dish, complete with little decorations like fake spiders or mini tombstones.
Recipe Variations
-
Spicy Variation: Mix in some jalapeños or hot sauce into your cheese ball mix for a spicy surprise!
-
Fruit Halloween Treats: Swap out the savory snacks for spooky fruit kabobs using strawberries, bananas, and mini marshmallows for ghostly accents.
-
Nut-Free Option: Use seeds instead of nuts for texture in any of the dips or cheese balls to cater to guests with nut allergies.
-
Vegan Version: Swap cream cheese with tofu-based alternatives and use plant-based cheese and sour creams for a killer vegan option!
Chef’s Notes
These no-bake appetizers have really evolved for me over the years. I used to spend hours in the kitchen, but now I know that the simplest dishes can bring the greatest joy. It’s also amazing to see how many twists these recipes can take depending on seasonal ingredients or personal preferences! My friend once snuck pickled jalapeños into the cheese balls for an unexpected kick – they were a huge hit!
Each year, I discover new ways to reinvent these spooky treats and get everyone involved in the kitchen. Sharing those moments with friends and family while creating a delicious spread is what truly brings the holiday to life!
FAQs and Troubleshooting
-
Can I make these appetizers ahead of time?
Absolutely! You can prepare the cheese balls and ghosts a day in advance. Just keep them refrigerated until serving time for optimal freshness. -
What if my cheese mixture is too runny?
If your cream cheese mixture isn’t thick, try adding a bit more shredded cheese or a handful of crushed crackers. This will help firm it up. -
How do I make these snacks gluten-free?
Use gluten-free crackers and ensure that any other packaged ingredients (like dips) are labeled gluten-free. -
Can I omit certain ingredients?
Yes! Feel free to get creative and swap any ingredients based on personal taste and dietary restrictions. Cooking is all about improvisation, after all!
With these no-bake Halloween appetizers up your sleeve, you’re ready to charm and delight your guests. Remember, the best part is sharing the joy that comes from cooking and gathering together. Happy Halloween, and may your kitchen always be filled with warmth and laughter!
Print
No-Bake Halloween Appetizers
- Total Time: 45 minutes
- Yield: 8 servings 1x
- Diet: Vegetarian
Description
Delicious and fun no-bake appetizers perfect for your Halloween festivities!
Ingredients
- 8 oz Cream Cheese
- 1 cup Shredded Cheese (sharp cheddar or pepper jack)
- Olives (black or green)
- Fresh Herbs (parsley or chives)
- Veggies (bell peppers, cucumbers, baby carrots)
- Graham Crackers
- Chocolate or Candy Eyes
- Worm Gummy Candy
Instructions
- Prep the Ingredients: Start by softening the cream cheese in a mixing bowl for 15 minutes.
- Mix the Cheese: Add shredded cheese to the cream cheese and blend until smooth.
- Shape the Balls: Scoop mixture and roll into balls, about the size of ping pong balls.
- Chill: Place cheese balls in the fridge for about 30 minutes.
- Decorate: Press a chocolate eye into each cheese ball and surround with sliced olives.
- Prepare the Base: Layer your choice of dips on a flat platter.
- Add the Veggies: Arrange colorful veggies around the dip for visual appeal.
- Create Faces: Use small veggies for monster features like eyes and mouths.
- Serve with a Smile: Allow guests to create their own monster faces.
- Prepare the Crackers: Break graham cracker sheets in half.
- Make the Ghosts: Spread whipped cream on each half cracker.
- Add Eyes: Place chocolate eyes on each ghost.
- Chill: Refrigerate for 15 minutes before serving.
Notes
These appetizers can be made a day in advance. Keep refrigerated until serving.
- Prep Time: 15 minutes
- Cook Time: 0 minutes
- Category: Appetizer
- Method: No-Bake
- Cuisine: American
Nutrition
- Serving Size: 2-3 pieces
- Calories: 200
- Sugar: 5g
- Sodium: 300mg
- Fat: 15g
- Saturated Fat: 6g
- Unsaturated Fat: 5g
- Trans Fat: 0g
- Carbohydrates: 20g
- Fiber: 1g
- Protein: 5g
- Cholesterol: 30mg
Keywords: Halloween, appetizers, no-bake, spooky snacks, party food
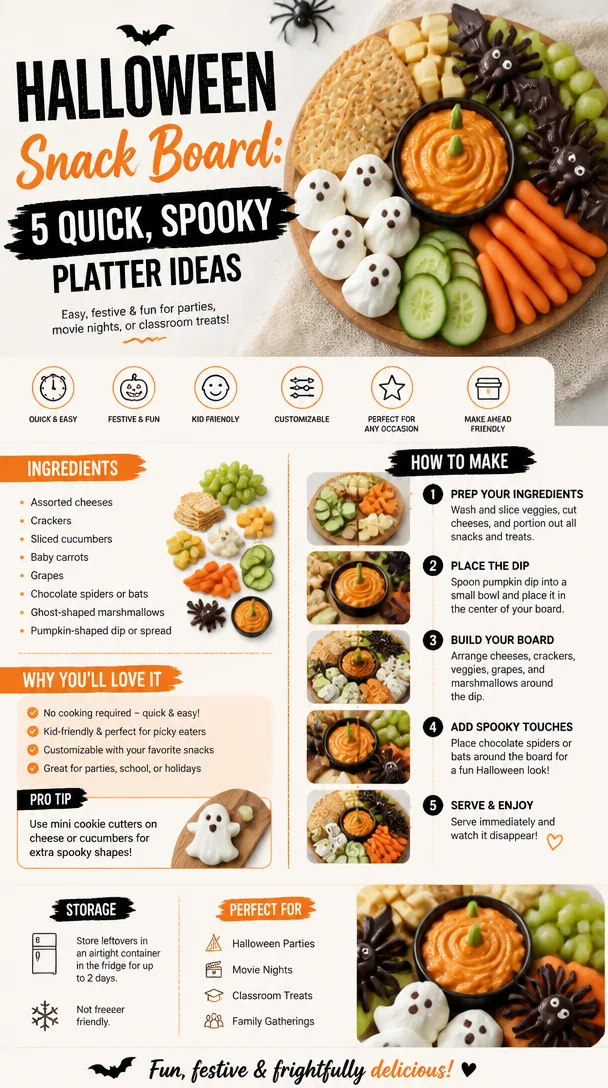
Halloween Snack Board: 5 Quick, Spooky Platter Ideas
Creepy-Cool Halloween Snack Board: A Spooktacular Feast for the Eyes and Taste Buds
Welcome to my kitchen! As the leaves start to tumble and the air turns crisp, you can bet that I’m brewing up something festive and fun to celebrate the season. Halloween is just around the corner, and what better way to celebrate than with a Halloween Snack Board that’s not only delicious but also downright delightful to look at? Whether you’re hosting a haunted gathering or simply looking for a way to enjoy October’s eerie charm, this snack board is the perfect centerpiece.
Imagine this: You’ve invited a few friends over for a spooky movie marathon, or perhaps the kids are gearing up for trick-or-treating. The excitement fills the air, and your kitchen is alive with laughter and chatter. Suddenly, you unveil a beautifully crafted Halloween Snack Board adorned with vibrant colors, playful shapes, and a mix of flavors that make everyone’s taste buds tingle with anticipation. It’s all about creating a delightful experience that gathers people together — and that’s what this festive board does so perfectly!
The joy of a snack board lies in its endless possibilities. You can use your favorite flavors, add seasonal touches, and of course, make it as spooky (or as sweet) as your heart desires. I’ll guide you through the ins and outs of assembling a Halloween Snack Board that will impress your guests and put you at the center of the fun. Let’s unleash your creativity and embrace the flavors of fall together, shall we?
A Bite of Nostalgia
When I think of Halloween, I can’t help but reminisce about my childhood. It was always such an enchanting time of the year. Dress-up costumes, bobbing for apples, and, of course, being surrounded by a mountain of candy were highlights. But it was the Halloween parties that stood out the most. My mom would whip up a monstrous spread of spooky snacks that looked as good as they tasted. I remember one year, she created a “witch’s brew” punch and shaped her famous cheese ball into a pumpkin, complete with pretzel stems.
That pumpkin cheese ball has always stuck with me, a reminder of the joy and laughter that fills the kitchen during this festive season. Years later, I found myself hosting my own Halloween parties, inspired by those cherished memories. Now, I take all of those fond flavors and whimsical designs to create snack boards — gatherings that bridge my past with my present. Each board is a canvas of horror and fun, sparking joy and nostalgia in every bite. So, let’s take a trip down memory lane and create a Halloween Snack Board that will enchant everyone who sees it!
Ingredients
To create this spooky Halloween Snack Board, you’ll need a variety of ingredients that not only provide a burst of flavors but also allow for creativity in presentation. Here’s a list of key components you’ll want to gather:
-
Cheddar Cheese (or “Pumpkin Cheese Ball”): The star of any snack board! You can use classic sharp cheddar for its bite or swap in a creamier cheese like gouda for smoothness. If you want to make it festive, mold your cheese into a pumpkin shape using a cheese ball recipe and decorate it with pretzels.
-
Salami (or any cured meats): A savory element is essential! Go for sliced salami or prosciutto. For a spicy kick, consider adding some spicy chorizo. These add a nice contrast to the cheeses.
-
Veggies (carrot sticks, cucumber slices, bell pepper ghosts): Fresh veggies provide crunch and color. You can cut cucumbers into spooky shapes with cookie cutters, and carrot sticks add a pop of color! Bell peppers can be carved like little ghosts too.
-
Fruit (grapes, figs, or apple slices): Gingerly sweet additions like grapes or figs bring balance to your snack board. You can even apple slices dotted with peanut butter to add charm!
-
Nuts (almonds, walnuts, pumpkin seeds): Nuts add a satisfying crunch and are great for nibbling. Pumpkin seeds are especially fitting for Halloween!
-
Dips (hummus, guacamole, or pumpkin dip): Dips are a must! Choose something herby and delicious like pesto hummus or create a festive pumpkin dip with cream cheese for a sweet twist.
-
Crackers and breadsticks: For serving with dips and cheese. Get creative with spooky-shaped crackers or even offer breadsticks dressed up as broomsticks!
-
Sweets (candy corn, chocolate spiders, or gummy worms): You can’t forget the sweets! They add whimsy and a touch of fun. Get creative with gummy worms trailing down like little monsters or chocolate spiders hiding among the cheese!
Creating an invitation with these ingredients allows you to mix and match according to your preferences and audience. Feel free to substitute any items you think might be more suited to the taste of your guests!
Step-by-Step Instructions
Now that you’ve got your ingredients gathered, let’s get down to the exciting part: assembling your Halloween Snack Board! Follow these steps for a frightfully fun display:
-
Choose a Board: A large wooden cutting board or a slate platter works beautifully as your base. You want something that can showcase your delicious spread, while still allowing for creativity in arrangement. If you don’t have a dedicated board, a large platter will also do!
-
Start with Cheese and Meats: Begin by placing your cheese on the board. If you’ve shaped your cheese into a pumpkin, place it front and center! For sliced cheese, arrange the slices in a corner or fan them out for an appealing display. Next, rustic fold your salami or prosciutto and add it nearby. Balance is key—try to have it on opposite sides to let the eye travel across the board.
-
Add Veggies: Next, fill in the spaces with your colorful veggies. Place carrot sticks standing up like spooky trees, and scatter cucumber rounds nearby. Don’t forget to include those bell pepper ghosts! Their varying colors will brighten up the board beautifully.
-
Create Clusters with Fruits and Nuts: Time to add sweet and salty! Let’s create little clusters of fruits and nuts to fill those gaps. Arrange grapes in a little pile near the veggies and sprinkle nuts in a couple of spots. This gives the board more texture and keeps everything from looking too organized.
-
Dips and Crackers: Set bowls of dips on the board, spacing them out for easy access. Now it’s time to add your crackers and breadsticks. Arrange them around your dips and cheese to invite people in to munch away!
-
Finish with Sweets: Last but not least, finish your board with those delightful sweets. Scatter candy corn and creepy gummy worms across the board, tucking them into the nooks and crannies. Maybe even dot some chocolate spiders around for an extra fright!
-
Add Decorative Touches: If you want to make it even more festive, add little decorative elements like pumpkin spice shakers or a tiny spooky scarecrow. These little touches help elevate your board from merely delicious to truly thematic!
And voila! You have yourself a visually stunning and delicious Halloween Snack Board. Don’t forget to step back and admire your artwork before your guests dig in!
Serving Suggestions
When it’s time to serve your Halloween Snack Board, make it all about the experience! Encourage your guests to gather around the board, inviting them to mix and match their own bites. You could even provide small plates or napkins and some festive toothpicks for easy snacking. I like to let everyone get creative, layering their favorite ingredients into delicious bites that represent the flavors they crave.
Remember, this board is a show-stopper. Keep it at the center of your dining room table or coffee table while the laughter and chatter flow, creating an inviting atmosphere. It’s the perfect way to keep your guests munching throughout the night!
Recipe Variations
While the classic Halloween Snack Board has its charm, you can switch things up with these variations:
-
Spooky Charcuterie: Amp up your meats with different charcuterie options and complement with gourmet cheeses and preserves. Add figs and olives for an extra gourmet touch.
-
Healthy Harvest Board: Swap the sweets for things like apple slices with almond butter, popcorn drizzled in white chocolate, and a few seasonal veggies with a light dip—perfect for health-conscious guests!
-
Chocolate Lovers’ Board: Create an all-sweets version filled with chocolates, cookies, dried fruits, and marshmallows. Include nut butter for dipping and chocolate snacks such as chocolate-covered pretzels!
-
Mexican Fiesta Board: Incorporate nacho chips, guacamole, salsa, spicy sausage, and jalapeños for a southwest-inspired snack board.
-
Kid-Friendly Fun Board: Make it more wholesome by including slices of cheese shaped like bats, mini sandwiches cut into spooky shapes, and lots of fruit pieces for the little trick-or-treaters!
Chef’s Notes
Over the years, I’ve watched this Halloween Snack Board evolve beautifully. What started with just candy and cheese transformed into a delightful cluster of flavors and experiences, just like the seasons themselves. I remember one Halloween where my only goal was to create a snack board that my nephews would love. I decided to involve them in the process! We baked pumpkin-spice cookies together and decorated them, and suddenly, that Halloween became a cherished memory.
Each year, as I craft my board, I allow myself a bit of whimsy. I like to keep the mood light, encouraging friends and family to get their hands into this creation. The joy is in the collaboration, all of us together, sharing flavors that remind us of simpler times. So, don’t take a snack board too seriously—have some fun with it. The more laughter shared, the better the flavors!
FAQs and Troubleshooting
-
How do I keep the fruits and veggies from browning? To prevent your apple slices from browning, soak them in a solution of water and lemon juice for about 5-10 minutes. This keeps them fresh and crunchy for serving!
-
What if I have dietary restrictions to consider? No problem! Be mindful of your guests’ dietary needs by incorporating gluten-free crackers, nut-free dips, or vegan cheeses. You can customize the board to accommodate everyone.
-
How can I make a larger board for a big gathering? Scale up by adding more of each component — consider a wider variety of cheese and meats, larger bowls for dips, and plenty of colors to keep things inviting and exciting!
-
What if I have leftovers? Snack boards are infinitely flexible. Leftovers can be repurposed into wraps, salads, or even a filling for quesadillas. Store any extra independently in airtight containers to keep them fresh.
Final Thoughts
Creating a Halloween Snack Board is a joyful adventure filled with flavors, creativity, and togetherness. It’s a way to celebrate not only the season but also the people we share it with. I hope you find as much joy in crafting your own version as I do in sharing mine. Don’t forget to embrace the laughter, the memories, and a bit of Halloween magic along the way. Happy snacking! 🎃
I hope you enjoy making your own Halloween Snack Board! It’s a celebration of flavors, togetherness, and the warmth of the season. Happy cooking, and let your creativity run wild!
Print
Creepy-Cool Halloween Snack Board
- Total Time: 20 minutes
- Yield: 8 servings
- Diet: Vegetarian
Description
A festive and delicious Halloween Snack Board perfect for gatherings, featuring a mix of cheeses, meats, veggies, fruits, and delightful sweets.
Ingredients
- Cheddar Cheese (or Pumpkin Cheese Ball)
- Salami (or any cured meats)
- Veggies (carrot sticks, cucumber slices, bell pepper ghosts)
- Fruit (grapes, figs, or apple slices)
- Nuts (almonds, walnuts, pumpkin seeds)
- Dips (hummus, guacamole, or pumpkin dip)
- Crackers and breadsticks
- Sweets (candy corn, chocolate spiders, or gummy worms)
Instructions
- Choose a board: A large wooden cutting board or a slate platter works beautifully.
- Start with cheese and meats: Place your cheese on the board, and add salami or prosciutto nearby.
- Add veggies: Fill the spaces with colorful veggies like carrot sticks and bell pepper ghosts.
- Create clusters with fruits and nuts: Arrange grapes and sprinkle nuts in spots for texture.
- Dips and crackers: Set bowls of dips on the board and arrange crackers around them.
- Finish with sweets: Scatter candy corn and gummy worms for a festive touch.
- Add decorative touches: Enhance the board with seasonal decor for extra flair.
Notes
Encourage guests to mix and match their own bites for a fun experience. Customize ingredients to suit dietary preferences.
- Prep Time: 20 minutes
- Cook Time: 0 minutes
- Category: Appetizer
- Method: No Cooking Required
- Cuisine: American
Nutrition
- Serving Size: 1 plate
- Calories: 400
- Sugar: 15g
- Sodium: 600mg
- Fat: 25g
- Saturated Fat: 10g
- Unsaturated Fat: 12g
- Trans Fat: 0g
- Carbohydrates: 35g
- Fiber: 4g
- Protein: 15g
- Cholesterol: 30mg
Keywords: Halloween, Snack Board, Party Food, Appetizer, Festive Snacks
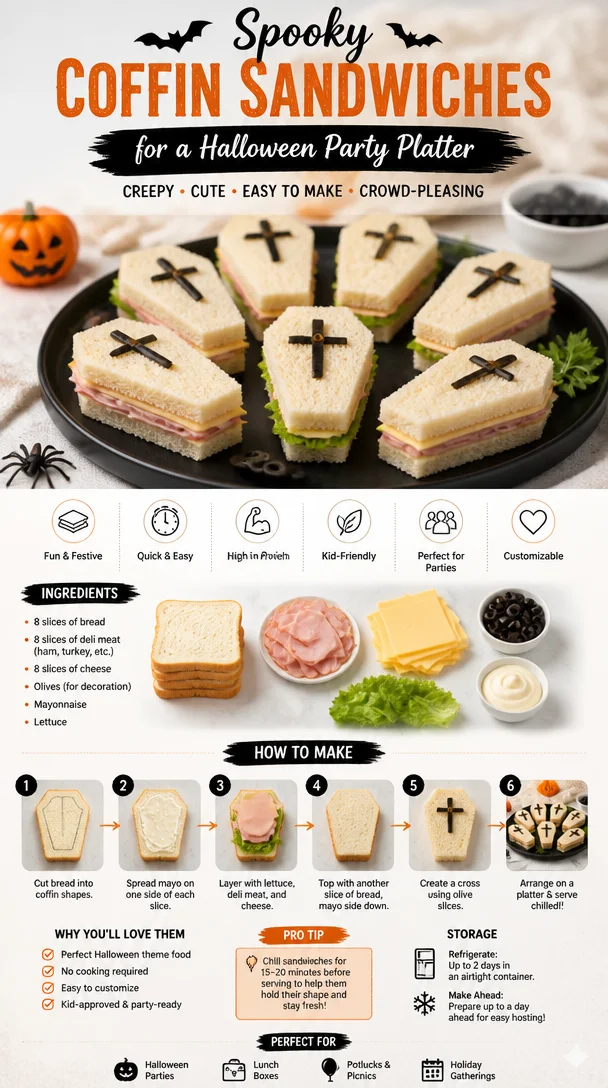
Spooky Coffin Sandwiches for a Halloween Party Platter
Coffin Sandwiches: A Comforting Culinary Hug from the Past
Welcome to my cozy kitchen, dear foodie friends! Today, I’m excited to share with you a recipe that’s not just a sandwich but a nostalgic culinary experience wrapped in layers of flavor and warmth: Coffin Sandwiches. I know, you might be scratching your head and wondering, “What on earth are Coffin Sandwiches?” Well, let me tell you, they’re a delightful creation that’s sure to bring both comfort and curiosity to your meal table.
You see, Coffin Sandwiches have a history that intertwines with family gatherings, festive celebrations, and comfort food traditions. Think of a sandwich that elevates the classic to something special. These sandwiches are often filled generously and baked to a crispy, golden perfection, turning a simple lunch into a memorable feast. Just envision layers of smoked meats, creamy cheeses, and tangy spreads all nestled between slices of bread that have undergone a glorious transformation in the oven.
My own journey with Coffin Sandwiches began years ago at a family reunion. My great-aunt Martha—an absolutely fabulous cook with a zest for life—always made these sandwiches when we gathered, and I can still recall the aroma wafting through the air as the family laughed and reminisced. The sandwiches were always the highlight, and there was a delicious competition about who would take the last bite!
So, grab your apron, and let’s create some Coffin Sandwiches that could rival those from my family gatherings. Whether you’re prepping for a casual family dinner or hosting a weekend get-together, these sandwiches are here to satisfy everyone’s cravings.
Personal Story: A Childhood Memory
I’ll never forget the summer family reunion at my great-aunt Martha’s house when I was about ten years old. The sun was shining, and the scent of freshly cut grass mixed with something absolutely mouthwatering wafting from the kitchen. Aunt Martha had promised her famed Coffin Sandwiches would make an appearance, and my heart raced with excitement.
When I finally caught a glimpse of those glorious sandwiches lined up on the picnic table, they were warm from the oven, the cheese bubbling enticingly at the edges, and each bite promising a flavor explosion that lingered long after. I remember gripping my sandwich in eager hands, the crusty exterior giving way to gooey cheese and smokey ham. Each bite was filled with laughter and chatter around the table, creating memories I cherish to this day.
As I grew older, Aunt Martha entrusted me with her secret recipe, and I’ve cherished making these sandwiches for my friends and family ever since. Each time I whip them up, I’m reminded of those joyful gatherings—the laughter, the love, and the ultimate comfort that good food brings. Now, it’s my turn to pass on this cherished recipe to you. Let’s dive into making some unforgettable Coffin Sandwiches!
Ingredients
To make Coffin Sandwiches that are sure to impress, you’ll need:
- Bread (1 loaf, preferably white or whole wheat): The base of your sandwich! You can substitute with gluten-free bread or a hearty sourdough if you’re feeling fancy.
- Meats (1 pound, thinly sliced; ham, turkey, or roast beef): Choose your favorite or mix and match! For a vegetarian option, consider using roasted vegetables or marinated tofu.
- Cheese (8 ounces; Swiss or cheddar): Cheese is essential for that melty goodness! Feel free to use your favorite cheese, such as provolone or even pepper jack for a spicy kick.
- Butter (1/2 cup, melted): This will give the sandwich that golden crispy exterior. For a lighter option, use olive oil or a dairy-free substitute.
- Dijon mustard (1/4 cup): This adds a lovely tangy flavor. You can swap it for honey mustard or even a spicy mustard for an extra zing!
- Garlic powder (1 teaspoon): A sprinkle to create depth of flavor. Fresh minced garlic can be a great alternative if you want a stronger garlic kick!
- Optional extras (pickles, spinach, or olives): These bits can elevate your sandwich to a whole new level. Feel free to get creative!
Step-by-Step Instructions
Let’s create these delightful Coffin Sandwiches together! Follow these steps and sprinkle in your own personal touches along the way.
-
Preheat Your Oven: Start by preheating your oven to 350°F (175°C). This will ensure that your sandwiches come out perfectly golden and crispy.
-
Prepare Your Bread: Take your loaf of bread and slice it in half horizontally. This forms the top and bottom of your sandwich. If you’re feeling adventurous, consider using a mix of different breads for added flavor and texture!
-
Create the Base: Spread a generous layer of Dijon mustard on the bottom half of the bread. Remember, this is where the flavor begins, so don’t skimp on it!
-
Layer Your Meats: Begin layering your choice of meats evenly over the mustard-slathered bread. Get creative here! Try adding a few slices of each type of meat for a flavor party.
-
Cheese, Please: Sprinkle an even layer of cheese on top of the meat. It’s the glue that will hold your glorious sandwich together.
-
Seasoning Magic: If you’re adding any optional extras (like pickles or spinach), now is the time! Feel free to get creative with the ingredients and add your personal twist.
-
Top It Off: Place the top half of the bread on the assembled sandwich. Now, you can press down a bit to help everything meld together beautifully.
-
Brush with Butter: Melt your butter and mix in the garlic powder, then brush it generously over the top of the sandwich. Ah, the aroma already starts to waft in the air!
-
Wrap It Up: Wrap your sandwich in aluminum foil, leaving it a bit loose to allow airflow. This ensures even cooking.
-
Bake Away: Place the wrapped sandwich in your preheated oven and let it bake for about 20-25 minutes. You want it to be heated through and golden brown.
-
The Golden Reveal: Remove it from the oven, and carefully unwrap the foil. Be cautious of the steam! Let it cool for a minute, and you’ll see that melty cheese and crispy exterior that’s simply irresistible.
Serving Suggestions
When it comes to serving Coffin Sandwiches, you can keep it simple or jazz it up! Slice the sandwiches into generous squares or rectangles and serve them on a rustic wooden board for a comfy, homey vibe. Pair them with a side of crunchy pickles or a fresh green salad for a light addition. You could even serve them at room temperature during gatherings for that effortless charm.
Recipe Variations
There’s always room for creativity in the kitchen! Here are some fun variations to try:
-
Italian Twist: Use Italian meats like salami, capicola, and provolone, and layer in some roasted red peppers for that Italian flair.
-
Mediterranean Delight: Swap the meats for grilled vegetables, add feta cheese, and top with tzatziki sauce for a refreshing twist.
-
BBQ Bliss: For a barbeque-inspired version, swap out the mustard for BBQ sauce and add pulled pork along with coleslaw, giving your sandwich a smoky flavor.
-
Veggie Heaven: Load up on grilled zucchini, mushrooms, and bell peppers, replacing cheese with a cashew cream for a vegan option.
-
Sweet and Savory: Add caramelized onions and apple slices for a sweet twist alongside your regular fillings for a delicious contrast.
Chef’s Notes
As with any family recipe, this Coffin Sandwich has seen its fair share of tweaks over the years! I remember the first time I tried to make them on my own—let’s just say it didn’t go as planned. My family still jokes about the time I accidentally used powdered sugar instead of garlic powder! Who knew that could turn a savory sandwich into a sweet disaster?
Now, I cherish every bite I take, remembering the laughter and love that came with those family gatherings. Each new batch I create is a tribute to Aunt Martha, and I hope you enjoy making and sharing them as much as I do!
FAQs and Troubleshooting
1. Can I make Coffin Sandwiches ahead of time?
Absolutely! You can assemble the sandwiches, wrap them tightly, and store them in the fridge for a day. Just be sure to reheat them in the oven to maintain that crispy texture.
2. What if my sandwiches are soggy?
To avoid soggy sandwiches, ensure your ingredients, especially any spreads or veggies, are well-drained. You can also toast the bread lightly before assembling!
3. I don’t like mustard. What can I use instead?
No problem! You can simply omit the mustard and use creamy mayonnaise or a flavorful pesto as a substitute to keep it delicious.
4. How do I know when my sandwich is done?
The sandwich is perfect when it’s golden brown and the cheese is fully melted. If you’re unsure, a quick peek inside will do!
Nutritional Info
While Coffin Sandwiches are a delightful indulgence, it’s always best to enjoy them as part of a balanced meal. Each serving can vary, but generally, you’re looking at approximately 400-500 calories per serving, depending on your fillings and portions.
Now that you’ve got all the tools you need to embark on your Coffin Sandwich adventure, I can’t wait to hear about your experiences! Share your creations with friends and family, and know that every bite is filled with warmth, love, and joyful memories. Happy cooking!
Print
Coffin Sandwiches
- Total Time: 40 minutes
- Yield: 4 servings 1x
- Diet: Omnivore
Description
Coffin Sandwiches are a nostalgic culinary experience wrapped in layers of flavor, combining smoked meats, creamy cheeses, and tangy spreads, all baked to a crispy perfection.
Ingredients
- 1 loaf of bread (preferably white or whole wheat)
- 1 pound of thinly sliced meats (ham, turkey, or roast beef)
- 8 ounces of cheese (Swiss or cheddar)
- 1/2 cup of melted butter
- 1/4 cup of Dijon mustard
- 1 teaspoon of garlic powder
- Optional extras (pickles, spinach, or olives)
Instructions
- Preheat your oven to 350°F (175°C).
- Prepare the bread by slicing it in half horizontally.
- Spread a generous layer of Dijon mustard on the bottom half of the bread.
- Layer your choice of meats evenly over the mustard-slathered bread.
- Sprinkle an even layer of cheese on top of the meat.
- Add any optional extras as desired.
- Place the top half of the bread on the sandwich and press down gently.
- Brush the top with melted butter mixed with garlic powder.
- Wrap the sandwich in aluminum foil, leaving it a bit loose.
- Bake in the preheated oven for about 20-25 minutes.
- Remove from the oven and unwrap, letting cool for a minute before serving.
Notes
Feel free to get creative with the ingredients and add your personal twist. You can also make these sandwiches ahead of time and store them in the fridge.
- Prep Time: 15 minutes
- Cook Time: 25 minutes
- Category: Main Course
- Method: Baking
- Cuisine: American
Nutrition
- Serving Size: 1 sandwich
- Calories: 450
- Sugar: 2g
- Sodium: 600mg
- Fat: 25g
- Saturated Fat: 10g
- Unsaturated Fat: 10g
- Trans Fat: 0g
- Carbohydrates: 40g
- Fiber: 3g
- Protein: 25g
- Cholesterol: 70mg
Keywords: Coffin Sandwiches, comfort food, baked sandwiches, family recipe
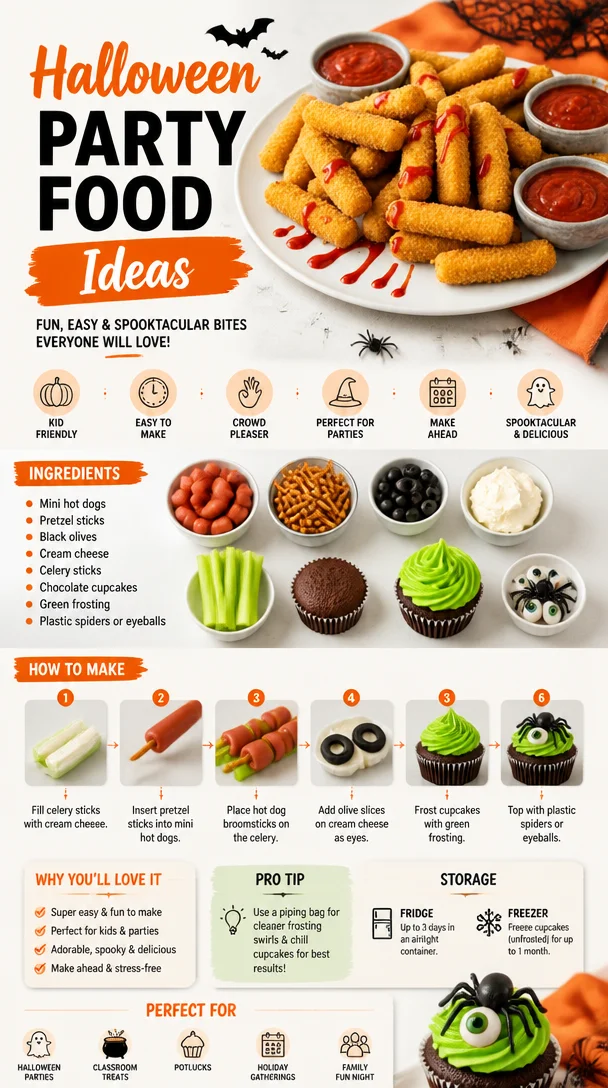
Halloween Party Food Ideas
Spook-tacular Halloween Party Food Ideas to Thrill Your Guests!
As the days grow shorter and the nights turn crisp, it’s time to embrace the cozy vibes of fall and prepare for one of the most delightful nights of the year: Halloween! This isn’t just any holiday; it’s a carnival of creativity, whimsy, and unapologetic fun — especially when it comes to food. Whether you’re hosting a frightful feast for family or a spirited soirée for friends, the key ingredient to a memorable Halloween gathering is the food.
Imagine dimmed lights, jack-o’-lanterns glowing on the table, and plates filled with creepy yet delicious delights. Picture your loved ones indulging in dishes that ignite a sense of nostalgia and spark laughter. In today’s post, I’m sharing an array of Halloween party food ideas that are not only spooky but also utterly delicious—perfect for satisfying your guests’ cravings and creating a festive atmosphere. So grab your cauldron (or just a big pot) because we’re diving into the world of ghoulishly good eats!
A Bite of Nostalgia: My Halloween Memories
Every Halloween brings back a wave of nostalgia for me. I can still recall the thrill of trick-or-treating as a child, my pillowcase growing heavier with each step a little more exciting than the last. But perhaps my most cherished memories revolve around gathering in the kitchen with my family to create an array of Halloween treats. My mom had her own twist on classic recipes—like transforming regular cupcakes into frightful monsters with colorful frosting and candy eyes.
One year, we decided to feature “witch’s fingers” made of almond-flavored cookies that truly had everyone buzzing. They were creepy, cute, and a big hit! As I grew older, my passion for cooking evolved into a love for creating fun, festive dishes that brought people together. Today, I’m excited to share some of those playful inspirations that can easily become the highlight of your Halloween party. Ready to unleash your inner kitchen magician? Let’s go!
Ingredients You’ll Need
Here’s a helpful list of ingredients that will make your Halloween party menus a hit. Each ingredient comes with tips and swaps to keep your cooking flexible and fun!
-
Crescent Roll Dough: This versatile dough makes for an excellent base for a variety of Halloween treats! Substitute with puff pastry for a flakier result, or use phyllo dough for a lighter option.
-
Hot Dogs: They’re a favorite among party-goers of all ages! You can swap in veggie dogs for a plant-based option, or even sausages for a more flavorful punch.
-
Cheese: A must for elevating your dishes! You can use cheddar (for a classic), mozzarella (for melting), or even vegan cheeses for dairy-free guests.
-
Mustard and Ketchup: Not just for dipping! These can be your ghoulish “blood” sauces for the pretzel bites. Experiment with spicy mustard for a kick, or use beet juice for an all-natural dye.
-
Mini Marshmallows: These fluffy delights make quirky additions to desserts. If you prefer less sugar, try using yogurt-covered raisins as a sweet alternative.
-
Chocolate: Perfect for coating and creating spooky treats! White chocolate can be dyed to create creepy colors, while dark chocolate adds sophistication.
Remember, cooking should be fun and free of stress, so feel free to play around with these ingredients based on what you have on hand!
Step-by-Step Instructions
Alright, let’s get cooking! Here’s a simple yet fantastically fun recipe you can incorporate into your Halloween festivities—Mummy Hot Dogs!
-
Preheat Your Oven: Set the temperature to 375°F (190°C). This ensures that your mummies get all nice and crispy!
-
Unroll the Crescent Dough: Carefully unroll the crescent roll dough and separate the triangles. You can use a roller or your hands to gently stretch each triangle into a longer strip. The length will help create those elegant mummy wrappings!
-
Cut Strips: Using a pizza cutter or sharp knife, cut the dough into long strips—about 1/2 inch wide. These will be your mummy bandages. It’s okay if they’re a bit uneven; the rustic look adds to the charm!
-
Wrap Those Hot Dogs: Take a hot dog, and start wrapping those dough strips around it, leaving a little gap for the “face.” Be sure to overlap the strips slightly for that authentic mummy look. The more chaotic the wrap, the more fun they’ll appear!
-
Bake Until Golden: Place the wrapped hot dogs on a baking sheet lined with parchment paper, and pop them in the oven for about 12-15 minutes—or until they’re golden brown and your kitchen is filled with mouthwatering aromas.
-
Dress Them Up: Let them cool slightly. Now’s your time to get creative! Use mustard to dot on “eyes” and ketchup as blood.
Tip: Smile as you hand them out; your guests will love the spooky surprise!
Serving Suggestions
These Mummy Hot Dogs are best served warm and fresh from the oven. Arrange them on a platter with mini bowls of mustard and ketchup for dipping. Add some fun garnishes like fresh parsley or chives for a pop of color. For a festive touch, create a spooky backdrop using cobwebs or Halloween-themed plates.
Recipe Variations
If you want to mix it up, here are a few creative variations to try:
- Veggie Mummies: Use veggie dogs for a plant-based version. They hold up beautifully and are just as fun!
- Cheesy Mummies: Insert a small stick of cheese into the hot dog before wrapping it in dough for an extra gooey surprise.
- Jalapeño Popper Mummies: Add jalapeños to the hot dog mix for a spicy kick!
- Sweet Mummy Twists: Swap hot dogs for cream cheese-filled crescent rolls wrapped into mummy shapes—perfect for dessert!
Chef’s Notes
I must confess: the first time I made Mummy Hot Dogs, I attempted to make them look picture-perfect, but they ended up looking more like abstract art than mummies! Over time, I learned that the more whimsical, the better. Halloween is all about fun—so don’t stress about presentation! Embrace the chaos of the kitchen. Also, one of my favorite Halloween gatherings featured these mummies, and we shared laughs as guests tried to guess what I’d used for the eyes. It’s these little moments that make cooking so special.
FAQs and Troubleshooting
-
Can I make these ahead of time?
Yes! You can prepare the mummies ahead of time, wrap them in plastic wrap, and refrigerate. Bake them just before serving for the best texture. -
What if I don’t have crescent dough?
No worries! You can use any type of dough you have, such as pizza dough or even phyllo. Just be mindful of the baking time, as it may vary. -
How do I store leftovers?
Store any leftovers in an airtight container in the fridge. Simply reheat in the oven before serving for the best results. -
Can I make these gluten-free?
Absolutely! Look for gluten-free crescent rolls or dough alternatives, as many brands offer delicious options these days.
Nutritional Info
While I love indulging during Halloween, keep in mind that balance is key. Mummy Hot Dogs can be enjoyed in moderation, and it’s always lovely to complement them with some fresh fruits or veggies!
So there you have it—an exciting, spook-tacular set of Halloween party food ideas that will leave your guests raving! Remember, cooking is about sparking joy and creativity. Roll up those sleeves and let’s prepare to make some magical memories together around the table! Happy Halloween! 🎃
Print
Mummy Hot Dogs
- Total Time: 25 minutes
- Yield: 8 servings
- Diet: Omnivore
Description
Delicious and spooky Mummy Hot Dogs perfect for your Halloween festivities!
Ingredients
- Crescent Roll Dough
- Hot Dogs
- Cheese
- Mustard
- Ketchup
- Mini Marshmallows
- Chocolate
Instructions
- Preheat your oven to 375°F (190°C).
- Unroll the crescent dough and separate the triangles.
- Cut the dough into long strips, about 1/2 inch wide.
- Wrap the hot dogs with the dough strips, leaving a gap for the face.
- Bake for about 12-15 minutes until golden brown.
- Dress them up with mustard and ketchup for eyes and blood.
Notes
These are best served warm. Feel free to personalize them with your own creative twists!
- Prep Time: 10 minutes
- Cook Time: 15 minutes
- Category: Appetizer
- Method: Baking
- Cuisine: American
Nutrition
- Serving Size: 1 hot dog
- Calories: 250
- Sugar: 4g
- Sodium: 650mg
- Fat: 16g
- Saturated Fat: 6g
- Unsaturated Fat: 8g
- Trans Fat: 0g
- Carbohydrates: 20g
- Fiber: 1g
- Protein: 7g
- Cholesterol: 30mg
Keywords: Halloween, party food, mummy hot dogs, spooky recipes, festive food
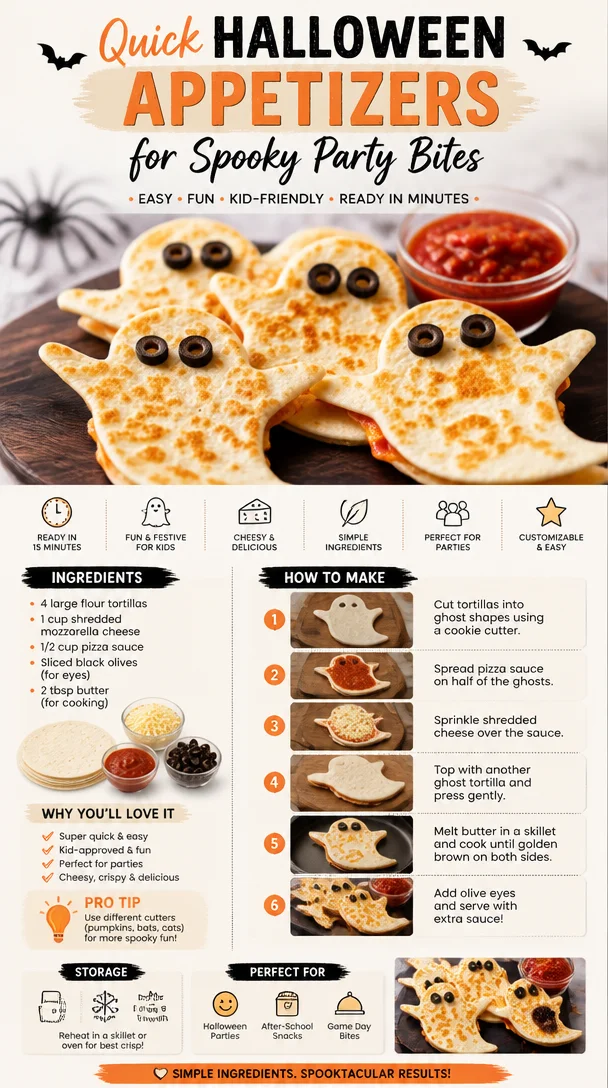
Quick Halloween Appetizers for Spooky Party Bites
25 Best Halloween Appetizer Ideas to Wow Your Guests
Ah, Halloween! A time when the nights get longer, the air feels a little crisper, and the little ones (and big ones) get to indulge in all things spooky and sweet. But let’s not forget about one of my favorite parts of this ghoulish holiday: the food! Halloween calls for more than just candy; it’s the perfect opportunity to create some spine-tingling appetizers that will leave your guests both delighted and a little creeped out.
Imagine hosting a cozy gathering, the flicker of candles casting shadows on the walls as laughter fills the air. Your table is adorned with fantastically fun appetizers that will have everyone buzzing with excitement. From pumpkin-shaped cheese balls to mummy wraps, these creative bites will be the centerpiece of your Halloween festivities.
In this post, I’m thrilled to share 25 of the best Halloween appetizer ideas that are not only easy to make but also packed full of flavor. Whether you’re throwing a big Halloween bash or enjoying a cozy evening with family, these recipes will ensure your appetizers are on theme, mouthwatering, and a hit with everyone around the table.
So grab that broomstick and let’s get cooking in your haunted kitchen!
A Whimsical Halloween Memory
One of my fondest Halloween memories was the year my mom decided to throw a spooky-themed party for our neighborhood. I remember being tasked with helping her prepare the appetizers while my little brother dressed up as Dracula. The kitchen was chaotic —think flour everywhere, the smell of herbs filling the air, and my not-so-subtle attempts to sneak in candy corn while my mom wasn’t looking.
The highlight was our signature dish, “Witch’s Brew Meatballs.” They were surprisingly delicious, simmering in a deep green sauce that looked creepily like swamp muck but tasted heavenly. My friends couldn’t get enough! That party taught me that festive food doesn’t have to be traditional; it can be playful, creative, and most importantly — fun. Since then, I’ve always aimed to replicate that magical atmosphere with my Halloween appetizers, bringing joy and deliciousness to parties, just like my mom did.
Ingredients
Here’s a quick rundown of the ingredients you might use for some of these delightful appetizers. Each ingredient brings its unique flair, and I’ve included some handy substitution tips to make your life easier!
-
Cream Cheese: Rich and creamy, this is a staple in many Halloween appetizers. If you want to lighten it up, you can use Greek yogurt, which will also add a tangy flavor.
-
Mozzarella Sticks: Perfect for creating ooey-gooey “bones” in mummified appetizers. If you prefer a dairy-free option, try using plant-based cheese or alternative breadsticks.
-
Olives: They add a briny touch and are great for creating “eyeballs.” If olives aren’t your thing, consider using grapes or cherry tomatoes as a sweet twist.
-
Tortillas: These are versatile and can be used to make wraps or cut out shapes for mini monsters. Whole wheat or spinach tortillas can be fun alternatives.
-
Pumpkin Puree: The star of many fall dishes, this ingredient adds natural sweetness and a festive orange hue. Canned sweet potato puree works well in a pinch too.
-
Spices (Garlic Powder, Paprika, etc.): The right spices can elevate your appetizers. Don’t skimp — fresh herbs like chives or parsley can brighten things up if dried herbs are not on hand.
-
Chopped Vegetables (Bell Peppers, Carrots): They add crunch and color, enhancing the appeal of your platters. Try cucumbers for a refreshing twist!
These ingredients are just a starting point, but I promise you’ll discover a world of flavor when you start mixing and matching!
Step-by-Step Instructions
Now that we have our ingredients sorted, let’s dive into some of these delightful Halloween appetizer recipes. I’ll give you a detailed recipe for a classic favorite: Mummy Wrapped Hot Dogs. Don’t worry; I’ll sprinkle in some tips along the way!
Mummy Wrapped Hot Dogs
What You Need:
- 8 Hot Dogs
- 1 can of crescent roll dough
- Mustard or ketchup (for the eyes)
Instructions:
-
Preheat the Oven: Start by preheating your oven to 375°F (190°C). This will ensure that your mummies bake up nice and crispy.
-
Prepare the Crescent Rolls: Open the can of crescent roll dough and unroll it onto a clean surface. You can use a rolling pin to flatten it slightly, making cutting easier.
-
Cut Strips: Using a sharp knife (be careful, chef!), cut the crescent dough into thin strips about ½ inch wide. You don’t need to be perfect here, as the unevenness will give the mummies a charming, rustic look!
-
Wrap the Hot Dogs: Take your hot dog and start wrapping it with the crescent dough strips, leaving a small gap for the “face.” Don’t stress about keeping it too neat — a little entanglement adds to the spooky effect!
-
Arrange on a Baking Sheet: Place your wrapped hot dogs on a baking sheet lined with parchment paper. Give them space so they can expand while baking.
-
Bake Away: Pop the tray into the oven and bake for about 12-15 minutes or until the dough is golden brown. Keep an eye on them; every oven is different!
-
Create the Faces: Once baked, let your mummies cool slightly before using a toothpick to dab mustard or ketchup for eyes. It’s the final touch that brings them to life!
-
Serve Them Up: Plate your mummies on a festive tray and watch them disappear! You might want to serve them with a side of ketchup or spicy mustard for dipping.
Tips & Tricks:
- Get Creative: Consider using different types of sausages or even veggie dogs for a healthier option!
- Try Different Dough: For something a little different, you can use puff pastry instead of crescent roll dough — it elevates the flaky factor!
- Make Them in Advance: Prep the hot dogs in advance and refrigerate them, only baking when your guests arrive.
Serving Suggestions
These Mummy Wrapped Hot Dogs are best served warm, so make sure to pop them in the oven just before your guests arrive. You can serve them on a spooky black platter with cobwebs (made from cotton candy or cheese strings) for an added dramatic effect. Pair them with themed napkins featuring ghosts or pumpkins, and don’t forget a colorful display of dipping sauces!
Recipe Variations
- Veggie Mummies: Swap out hot dogs for zucchini or carrots for a fresh, crunchy option.
- Spicy Mummies: Use spicy sausages to give your mummies a kick, and drizzle with sriracha for added flair.
- Sweet Mummies: Instead of hot dogs, use banana slices wrapped in crescent dough for a fun dessert twist, adorned with chocolate chips for eyes!
Chef’s Notes
Halloween appetizers are all about creativity, and this dish is a testament to how a simple ingredient can transform delightfully spooky. I started making mummy dogs because I loved how they brought back fun memories from my own childhood. As time went on, I added different spices and discovered how to make them healthier, while always keeping the playful element that makes them so fun.
FAQs and Troubleshooting
Q: What if my dough won’t stick?
A: Make sure you’re wrapping tightly, and a quick brush of water can help seal the edges.
Q: Can I make these ahead of time?
A: Absolutely! Wrap them and refrigerate, then bake just before serving.
Q: What if I don’t have crescent roll dough?
A: You can use puff pastry or even biscuit dough if you’re in a pinch. Just keep an eye on baking times!
Q: How can I make this vegetarian-friendly?
A: There are numerous meatless sausage options on the market today, or you can substitute with veggies as mentioned above.
Nutritional Info
(Nutritional information will vary based on the ingredients used. Here’s a rough estimate per serving):
- Calories: 150
- Protein: 5g
- Carbs: 15g
- Fat: 8g
And there you have it! This Halloween, create a spread of deliciously spooky appetizers that will have your guests laughing, talking, and coming back for more. I hope these recipes inspire you to let your creativity shine in the kitchen as you celebrate the most chilling night of the year! Happy cooking, and enjoy the haunting festivities!
Print
Mummy Wrapped Hot Dogs
- Total Time: 25 minutes
- Yield: 4 servings 1x
- Diet: Vegetarian
Description
Delightfully spooky Mummy Wrapped Hot Dogs that are a perfect appetizer for your Halloween gathering.
Ingredients
- 8 Hot Dogs
- 1 can of crescent roll dough
- Mustard or ketchup (for the eyes)
Instructions
- Preheat the oven to 375°F (190°C).
- Prepare the crescent rolls by unrolling the dough onto a clean surface.
- Cut the dough into thin strips about ½ inch wide.
- Wrap each hot dog with the crescent dough strips, leaving space for the ‘face’.
- Arrange on a baking sheet lined with parchment paper.
- Bake for 12-15 minutes until golden brown.
- Create faces by using a toothpick to dab mustard or ketchup for eyes.
- Serve warm on a festive tray with dipping sauces.
Notes
Consider using different sausage types or veggie dogs, or swap crescent roll dough for puff pastry for a different texture.
- Prep Time: 10 minutes
- Cook Time: 15 minutes
- Category: Appetizer
- Method: Baking
- Cuisine: American
Nutrition
- Serving Size: 1 serving
- Calories: 150
- Sugar: 1g
- Sodium: 500mg
- Fat: 8g
- Saturated Fat: 2g
- Unsaturated Fat: 6g
- Trans Fat: 0g
- Carbohydrates: 15g
- Fiber: 0g
- Protein: 5g
- Cholesterol: 20mg
Keywords: Halloween, Appetizer, Mummy Wrapped Hot Dogs, Spooky Food, Party Food
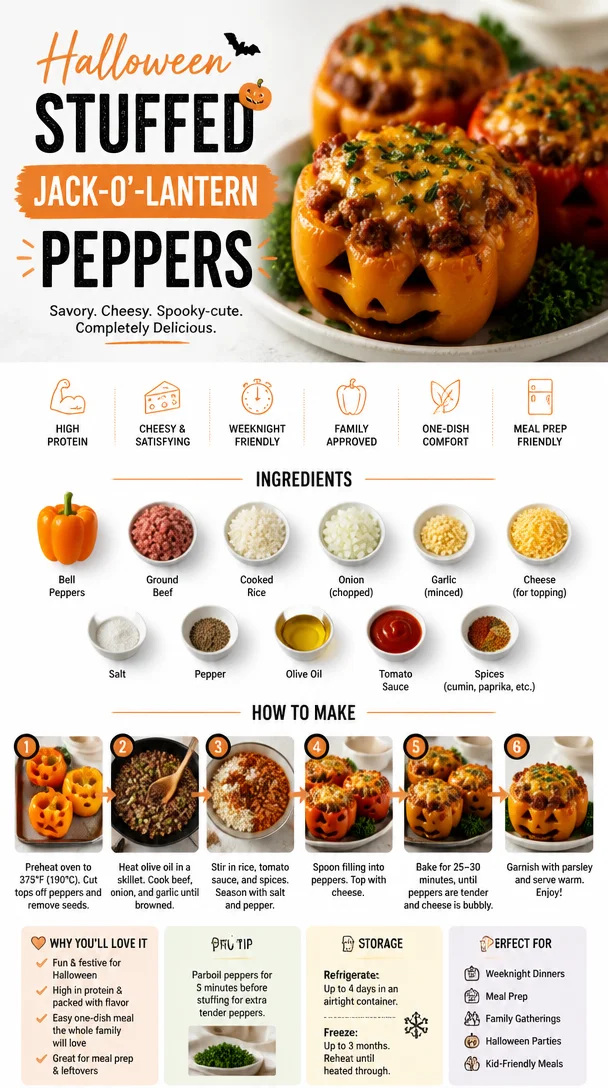
Halloween Stuffed Jack-O’-Lantern Peppers
Halloween Stuffed Jack-O’-Lantern Peppers: A Spooktacular Recipe for Fall Festivities
Welcome to my cozy kitchen, my dear foodies! As the leaves turn golden and the air becomes crisp, there’s a certain magic that fills the air—it’s that time of year when we dust off our baking pans, carve pumpkins, and get ready for Halloween! Now, while carving pumpkins is a beloved tradition, I thought, "Why not take it a step further and create something absolutely delicious?" Enter my Halloween Stuffed Jack-O’-Lantern Peppers—a fun, festive dish that not only brings the Halloween vibes but also fills your kitchen with the warm, inviting aromas of fall.
These vibrant, orange bell peppers are not just adorable little jack-o’-lanterns that will steal the spotlight at any Halloween gathering; they also deliver on flavor, making them the perfect crowd-pleaser. Stuffed with a savory mixture of spiced rice, black beans, and a medley of veggies, these peppers are wholesome, healthy, and wholly delightful. Whether you’re cooking for friends, family, or just treating yourself after an evening of pumpkin-spiced everything, these stuffed peppers have got you covered!
A Dash of Nostalgia: My Pumpkin Picking Tradition
As we dive into this delicious recipe, I can’t help but reminisce about my childhood Halloweens. Every October, my family and I ventured out to a nearby pumpkin patch, armed with nothing but excitement and an insatiable appetite for autumn fun. I remember walking through rows of plump pumpkins, each one more perfect than the last, while my mom brainstormed creative ideas for our Halloween costumes.
But the highlight, without a doubt, was the night we carved those pumpkins. We would sit around the dining table, scooping out the insides (always a messy task!), and crafting silly faces. After we finished, we’d roast the pumpkin seeds for a crunchy snack and decorate the porch with our spooky creations.
Now, as an adult, I find joy in continuing these traditions with my own twist. Instead of simply carving pumpkins this year, I decided to take it up a notch and create these adorable stuffed jack-o’-lantern peppers. They capture the spirit of Halloween while combining the nostalgia of my childhood with my passion for cooking!
Ingredients You’ll Need
Before we jump into the cooking, here’s a handy list of ingredients you’ll need for your Halloween Stuffed Jack-O’-Lantern Peppers, along with some tips and tricks to make your cooking experience a breeze!
-
Orange Bell Peppers (4 medium-sized): The stars of this dish! Choose peppers that feel firm and heavy for their size. If orange isn’t available, yellow or even green peppers can work in a pinch.
-
Cooked Rice (1 cup): Any kind will do—white, brown, or even cauliflower rice for a low-carb version. Cooking rice ahead of time makes this dish quick and easy!
-
Black Beans (1 can, drained and rinsed): Packed with protein and fiber, they make the filling hearty. Don’t have black beans? You can substitute them with pinto beans or even quinoa for a different texture.
-
Corn (1 cup): Frozen or canned, corn adds a touch of sweetness. If you’re feeling adventurous, throw in some diced jalapeños for a spicy kick!
-
Onion (1 small, diced): This gives flavor and depth to the filling. Red onions or shallots can also be good alternatives.
-
Chili Powder (1 teaspoon): A perfect spice to give that warm autumn flavor. Smoked paprika can add an exciting twist!
-
Oregano (1 teaspoon): Dried is fine, but if you have fresh oregano, use it for a fresher taste.
-
Cheddar Cheese (1 cup, shredded): Optional but oh-so-delicious! Feel free to swap with mozzarella or a dairy-free cheese for a vegan version.
-
Garlic (2 cloves, minced): Adds a lovely aroma and enhances the overall taste. If you’re short on fresh garlic, garlic powder works just as well.
-
Salt and Pepper (to taste): Always essential to bring your flavors to life!
Step-by-Step Instructions
Ready to bring these festive peppers to life? Let’s get cooking! Follow these steps closely, and don’t forget to add your personal touch along the way.
-
Prep the Peppers: Start by preheating your oven to 375°F (190°C). While that’s heating up, wash the orange bell peppers and slice the tops off like a lid. Remove the seeds and membranes carefully with a small knife, trying to keep the peppers intact. Don’t toss those lids; you’ll keep them for later!
-
Sauté the Aromatics: In a large skillet over medium heat, drizzle a bit of olive oil and add the diced onions. Sauté for about 2-3 minutes until they become translucent, stirring occasionally—this step builds a lovely aromatic foundation for your filling! Add the minced garlic, and sauté for an additional minute until fragrant—whew, so good!
-
Mix In the Filling: Next, add the cooked rice, black beans, corn, chili powder, oregano, salt, and pepper to the skillet. Mix everything well, allowing the flavors to meld together. You may want to adjust seasoning at this stage to suit your palate.
-
Stir in the Cheese: If you’re using cheddar cheese, fold that into your mixture, letting it melt slightly. This not only binds the filling but also adds that delicious creamy texture when baked!
-
Stuff the Peppers: Now for the fun part! Carefully spoon the mixture into each pepper, packing it down a bit to fit all that goodness inside. You want to fill them up generously but avoid overstuffing, as they may spill over while cooking. Place the stuffed peppers upright in a baking dish.
-
Cover and Bake: If you saved the tops of the peppers, you can place them back on (just for cute effect) or leave them off for a better cheese melt. Cover the baking dish with aluminum foil and bake in the preheated oven for about 25-30 minutes. This helps the peppers soften.
-
Uncover and Finish Baking: After half an hour, remove the foil and bake for an additional 10-15 minutes until the tops are golden brown and the peppers are tender. Your kitchen will smell wonderful by now—brace yourself for the compliments!
Serving Suggestions
Once your Halloween Stuffed Jack-O’-Lantern Peppers are beautifully baked and golden brown, it’s time to serve them up! For a fun and festive presentation, place them on a platter with the tops slightly askew. Serve alongside a fresh green salad or some pumpkin-flavored soup for a full autumn feast!
Recipe Variations
Get creative and customize this delicious dish to suit your taste! Here are a few variations you can try:
-
Meat Lover’s Delight: Add ground turkey or beef to the filling for extra protein and heartiness.
-
Vegetarian Twist: Swap the cheese for nutritional yeast to create a cheesy flavor without dairy.
-
Spicy Surprise: Mix in diced jalapeños or a dash of hot sauce for a kick!
-
Herb Lovers: Enhance the flavor profile by adding fresh herbs like cilantro or parsley to the filling.
-
Curry Love: Combine curry powder with coconut milk instead of chili powder for a unique sweet and savory twist.
Chef’s Notes
These adorable stuffed peppers have become one of my go-to dishes for fall gatherings. I love how they beautifully combine delicious flavors with the whimsy of Halloween. The best part? You can prep them in advance! Just stuff the peppers and refrigerate them until you’re ready to bake.
Also, be ready for the countless “oohs” and “ahhhs” when you serve them! They bring a smile to every face, and it ends up being the kind of cozy meal that makes everyone feel right at home.
FAQs and Troubleshooting
Q: Can I make these stuffed peppers ahead of time?
Absolutely! You can prep the filling and stuff the peppers a day in advance. Just store them in the fridge until you’re ready to bake.
Q: How do I prevent my peppers from being too soggy?
To avoid sogginess, don’t overcook the peppers before baking. Also, be sure to allow any excess liquid from the filling to evaporate before stuffing them.
Q: What can I do if my peppers are very thick?
If your peppers seem a bit tougher, you can blanch them beforehand. Simply boil them for 2-3 minutes and then start stuffing them!
Q: How can I make these peppers vegetarian or vegan?
Skip the cheese or substitute it with a plant-based alternative. You can also replace the rice with quinoa or lentils to boost the fiber content.
Nutritional Info
While I typically focus on flavors rather than numbers, these stuffed peppers are nutritious! Each portion is packed with vitamins and minerals thanks to the peppers, beans, and veggies.
There you have it, my fellow food lovers—a scrumptious recipe for Halloween Stuffed Jack-O’-Lantern Peppers that’s as delightful to eat as it is to create. So roll up your sleeves, light up those ovens, and let’s make this spooky season memorable with a dish that will bring everyone together. Happy cooking! 🕷️🎃
Print
Halloween Stuffed Jack-O’-Lantern Peppers
- Total Time: 55 minutes
- Yield: 4 servings 1x
- Diet: Vegetarian
Description
A festive and delicious recipe featuring orange bell peppers stuffed with spiced rice, black beans, and veggies, perfect for Halloween gatherings.
Ingredients
- 4 medium-sized Orange Bell Peppers
- 1 cup Cooked Rice
- 1 can Black Beans, drained and rinsed
- 1 cup Corn
- 1 small Onion, diced
- 1 teaspoon Chili Powder
- 1 teaspoon Oregano
- 1 cup Cheddar Cheese, shredded (optional)
- 2 cloves Garlic, minced
- Salt and Pepper, to taste
Instructions
- Prep the Peppers: Preheat your oven to 375°F (190°C). Wash the orange bell peppers and slice the tops off. Remove seeds and membranes.
- Sauté the Aromatics: In a skillet over medium heat, add olive oil and diced onions. Sauté for 2-3 minutes. Add minced garlic and sauté for another minute.
- Mix In the Filling: Add cooked rice, black beans, corn, chili powder, oregano, salt, and pepper. Mix well.
- Stir in the Cheese: If using cheddar cheese, fold it into the mixture until it melts slightly.
- Stuff the Peppers: Spoon the filling into each pepper, packing lightly. Place them in a baking dish.
- Cover and Bake: Place the tops back on (optional) and cover with foil. Bake for 25-30 minutes.
- Uncover and Finish Baking: Remove the foil and bake for an additional 10-15 minutes until the tops are golden brown.
Notes
These stuffed peppers can be prepped in advance. Just stuff them and refrigerate until baking. Customize with different proteins or spices to suit your taste!
- Prep Time: 15 minutes
- Cook Time: 40 minutes
- Category: Main Course
- Method: Baking
- Cuisine: American
Nutrition
- Serving Size: 1 pepper
- Calories: 280
- Sugar: 3g
- Sodium: 350mg
- Fat: 8g
- Saturated Fat: 4g
- Unsaturated Fat: 2g
- Trans Fat: 0g
- Carbohydrates: 45g
- Fiber: 8g
- Protein: 10g
- Cholesterol: 20mg
Keywords: Halloween, stuffed peppers, fall recipes, vegetarian, festive
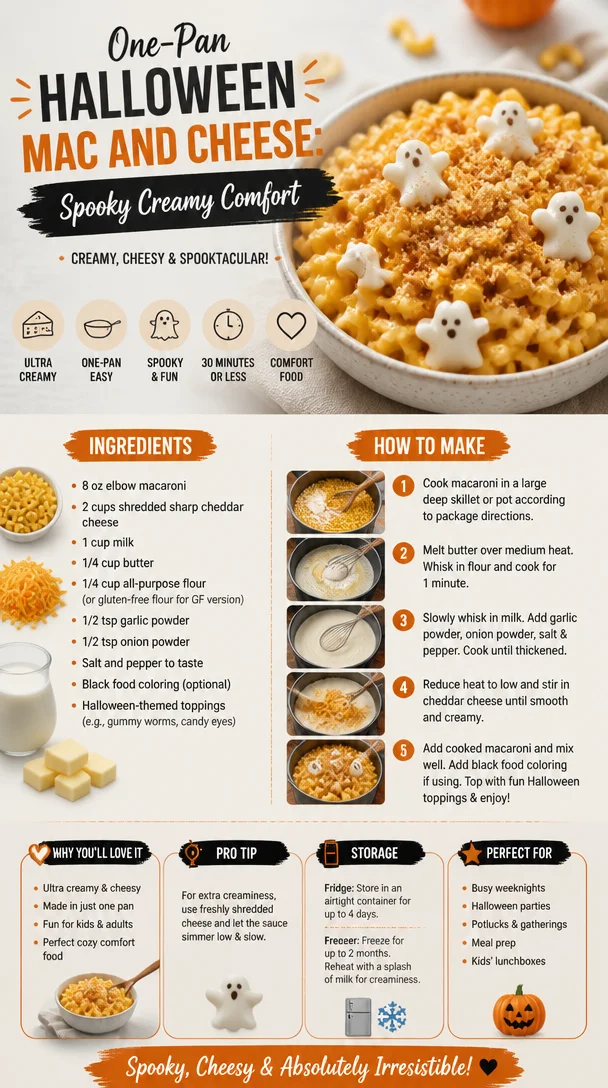
One-Pan Halloween Mac and Cheese: Spooky Creamy Comfort
Halloween Mac and Cheese: A Spooky, Delicious Twist!
Welcome back to my cozy kitchen, food friends! As the leaves change and the nights grow longer, there’s something magical about the air — crisp and fragrant with the promise of Halloween. It marks a time of gathering with friends and family, indulging in treats, and, of course, conjuring up culinary delights that fit the spooky season. Today, I’m thrilled to share a playful twist on an all-time favorite — Halloween Mac and Cheese!
Picture this: you’re at a festive gathering, laughter fills the air, and the sweet smell of pumpkin spice lingers. Just as you think you’ve tasted it all, someone brings out a bubbling dish of Halloween Mac and Cheese. With its hauntingly creamy cheese, ghosts made from mozzarella, and vibrant orange pumpkin puree, this dish is not only delicious but also a fun way to capture the spirit of Halloween. So grab your favorite mixing bowl, roll up those sleeves, and let’s dive headfirst into this magical recipe!
Personal Story
This recipe holds a special place in my heart, and it all goes back to my childhood. Every Halloween, my family would host a gathering for our closest friends. The highlight, of course, was always the food. My mom, a wizard in the kitchen, would make her classic mac and cheese, bubbling with rich cheese and buttery breadcrumbs. But on Halloween, she would spice things up — literally. She’d mix in some pumpkin puree and top it with cheese “ghosts,” and we would all giggle at her spooky creations while gobbling them down.
I fondly remember my little cousins adorning their costumes, laughing and plotting the night’s trick-or-treat scheme, while my mom worked her magic in the kitchen. Watching the joy on their faces as they dug into that hauntingly delicious dish was priceless. Fast forward a few decades, and I’ve proudly carried on this Halloween tradition — adding my own flair, but keeping that spirit of fun alive. I can’t wait for you to create your own magical memories with this Halloween Mac and Cheese recipe!
Ingredients
-
Pasta:
- Any shape will do! Elbow macaroni is classic, but if you want to be extra spooky, try using mini pumpkin-shaped pasta pieces. They’re adorable and fun!
-
Cheddar Cheese:
- Sharp or mild — your choice! Sharp will give you a bolder flavor, while mild will keep it creamy. A mix also works beautifully.
-
Mozzarella Cheese:
- For the ghostly toppings! Use fresh mozzarella for a gooey finish or shredded mozzarella for an easy melt. Want a little kick? Try pepper jack!
-
Pumpkin Puree:
- A delightful secret ingredient. Aside from being festive, it adds creaminess. Canned pumpkin is perfect, but fresh pumpkin puree is a lovely alternative. Just roast, scoop out, and blend!
-
Milk:
- Whole milk is best to keep it rich, but any milk works! Have a dairy-free household? Use almond milk or cashew milk; you’ll just need to watch the flavor balance.
-
Butter:
- To start our roux. Unsalted butter gives you control over the salt. Vegan butter works just as well if you prefer a plant-based option.
-
Flour:
- This helps thicken our cheese sauce. All-purpose flour is standard, but for a gluten-free option, reach for almond flour or a gluten-free blend.
-
Garlic Powder and Onion Powder:
- For flavor magic! If you love fresh garlic and onions, feel free to sauté some diced onions and minced garlic before mixing in the flour.
-
Salt and Pepper:
- Staples in any dish! Adjust based on your taste, and don’t be afraid to add a little pinch of nutmeg for warmth and depth.
-
Food Coloring (optional):
- For extra spooky vibes. Orange dye can brighten your mac and cheese to match the Halloween theme.
Step-by-Step Instructions
-
Cook the Pasta:
- Bring a large pot of salted water to a boil. Add the pasta and cook until al dente, following package instructions. Tip: Save a cup of pasta water before draining — you might need it later to adjust the sauce’s consistency!
-
Make the Cheese Sauce:
- In a large saucepan over medium heat, melt the butter. Once melted, whisk in the flour, stirring constantly for about 2-3 minutes until it’s a nice golden color. This roux is the base of your cheese sauce — if it’s too dark, start over!
-
Add the Milk:
- Slowly whisk in the milk, ensuring there are no lumps. Keep stirring until the mixture thickens and starts to bubble, approximately 4-5 minutes. Chef hack: to make it extra creamy, consider using half-and-half instead!
-
Incorporate the Pumpkin:
- Stir in the pumpkin puree. This step not only adds flavor but gives a lovely, subtle sweetness. Whisk it! Feel free to add some of that optional food coloring here to amp up the autumnal hue!
-
Melt in the Cheese:
- Gradually add the shredded cheddar and mozzarella, stirring until melted and smooth. Don’t be shy; taste and adjust the salt and pepper as it comes together!
-
Combine with Pasta:
- Add the cooked pasta to the cheese sauce, stirring well to coat every delicious piece. If it seems too thick, add some reserved pasta water!
-
Prepare the Dish:
- Transfer the cheesy mixture into a greased baking dish. Sprinkle with additional cheese and breadcrumbs on top for that crispy finish!
-
Bake Your Creation:
- Preheat your oven to 350°F (175°C) and bake uncovered for about 20 minutes until golden and bubbling. Chef’s tip: for an extra spooky touch, consider using pumpkin-shaped cookie cutters to make little cheese ghosts on top!
-
Add Your Ghosts:
- While it’s still hot, use bits of fresh mozzarella to create ghost shapes on top. Add mini black olive “eyes” for a fun and spooky effect!
Serving Suggestions
When it comes to serving your Halloween Mac and Cheese, the presentation can elevate your dish from tasty to truly spectacular. Serve it straight from the oven in the baking dish for a rustic feel or use hollowed-out mini pumpkins as individual servings! Garnish with a sprinkle of parsley or some crunchy, spooky-shaped crackers on the side for some crunch. And for a fun addition? Set out a platter of assorted Halloween cookies to complement your cheesy creation!
Recipe Variations
-
Veggie Boost: Add steamed broccoli or cooked pumpkin or butternut squash for added nutrition. It’s a great way to sneak in some veggies while keeping it festive!
-
Spicy Mac & Cheese: Mix in diced jalapeños or a dash of cayenne pepper for a bit of heat.
-
Meaty Twist: Brown some ground turkey or sausage to mix in before baking for some protein enhancement.
-
Cheese Lovers’ Dream: Use a mix of Gouda, Havarti, and Gruyere cheeses in addition to cheddar for a gourmet twist!
-
Gluten-Free Version: Substitute regular pasta for gluten-free pasta and use gluten-free flour for the roux.
Chef’s Notes
This Halloween Mac and Cheese recipe is a testament to how cooking can be both delicious and playful! I’ve taken my mom’s traditional dish and given it a spooky upgrade, but the heart remains the same. Each bite is a delightful blend of nostalgia and new adventures. Over the years, I’ve played around with different ingredients — sometimes adding caramelized onions or throwing in a handful of spinach — it’s all about what makes your taste buds dance!
Remember, cooking is an art! Don’t hesitate to make this recipe yours; it’s part of the joy of being in the kitchen. And trust me, nothing says “Halloween” like a heartwarming bowl of mac and cheese that brings everyone together.
FAQs and Troubleshooting
Q: My mac and cheese turned out too dry. What happened?
A: It’s likely due to cooking the pasta too long or not adding enough liquid to the sauce. Always reserve that pasta water for adjustments, and ensure your sauce is nice and creamy before mixing!
Q: Can I prepare this ahead of time?
A: Absolutely! Assemble everything, cover, and refrigerate it before baking. When you’re ready to serve, just pop it in the oven for about 25-30 minutes until heated through.
Q: My cheese sauce is lumpy. What can I do?
A: If your cheese sauce is lumpy, it might be because the cheese was added too quickly or at too high a temp. For a lump-free experience, stir in the cheese gradually while keeping the heat low.
Q: Can I use non-dairy cheese?
A: Yes, you can! There are plenty of excellent vegan cheese options. Just keep in mind that they might behave differently in terms of melting and flavor, but the end result can still be delicious!
Nutritional Info
(If applicable, include per serving):
- Calories: 450
- Protein: 20g
- Carbohydrates: 58g
- Fat: 20g
- Fiber: 3g
So there you have it, food lovers! A spooky yet scrumptious Halloween Mac and Cheese that is sure to steal the show this season. It’s a comforting dish that not only celebrates flavor but also fills your home with warmth and love. Gather your loved ones, grab your spoons, and let’s turn this Halloween into something truly unforgettable! Happy cooking and Happy Halloween!
Print
Halloween Mac and Cheese
- Total Time: 45 minutes
- Yield: 4 servings
- Diet: Vegetarian
Description
A spooky twist on traditional mac and cheese with creamy cheese, pumpkin puree, and mozzarella ghosts.
Ingredients
- Elbow macaroni or mini pumpkin-shaped pasta
- Cheddar cheese (sharp or mild)
- Mozzarella cheese (fresh or shredded)
- Pumpkin puree (canned or fresh)
- Whole milk (or dairy-free alternative)
- Unsalted butter
- All-purpose flour (or gluten-free blend)
- Garlic powder
- Onion powder
- Salt and pepper
- Food coloring (optional)
Instructions
- Cook the pasta: Bring a large pot of salted water to a boil. Add the pasta and cook until al dente, saving a cup of pasta water before draining.
- Make the cheese sauce: In a large saucepan over medium heat, melt the butter and whisk in the flour, stirring for 2-3 minutes until golden.
- Add the milk: Slowly whisk in the milk until the mixture thickens and bubbles, about 4-5 minutes.
- Incorporate the pumpkin: Stir in the pumpkin puree and optional food coloring.
- Melt in the cheese: Gradually add shredded cheddar and mozzarella, stirring until smooth.
- Combine with pasta: Mix the cooked pasta into the cheese sauce, adding reserved pasta water if needed.
- Prepare the dish: Transfer to a greased baking dish, sprinkle with cheese and breadcrumbs.
- Bake your creation: Preheat oven to 350°F (175°C) and bake for about 20 minutes until golden.
- Add your ghosts: Use bits of mozzarella to create ghost shapes on top with olive “eyes.”
Notes
For extra flavor, add diced jalapeños or caramelized onions. Can be prepared ahead and baked later.
- Prep Time: 15 minutes
- Cook Time: 30 minutes
- Category: Main Course
- Method: Baking
- Cuisine: American
Nutrition
- Serving Size: 1 serving
- Calories: 450
- Sugar: 5g
- Sodium: 400mg
- Fat: 20g
- Saturated Fat: 10g
- Unsaturated Fat: 8g
- Trans Fat: 0g
- Carbohydrates: 58g
- Fiber: 3g
- Protein: 20g
- Cholesterol: 30mg
Keywords: Halloween, Mac and Cheese, Comfort Food, Vegetarian, Pumpkin
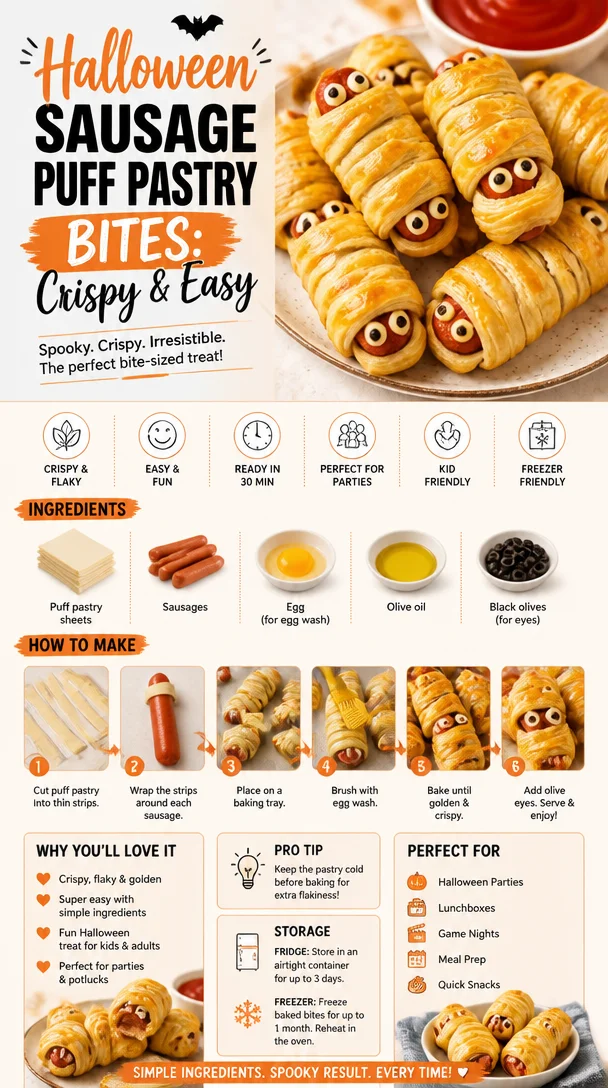
Halloween Sausage Puff Pastry Bites: Crispy & Easy
Feuilletés Saucisse: A Spooky Culinary Delight for Halloween
Welcome to my kitchen, friends! With the leaves turning crimson and pumpkin patches popping up everywhere, Halloween is upon us — a time not just for costumes and candy, but for fun, festive cooking! Today, I’m thrilled to share a recipe that’s close to my heart and perfect for your Halloween gatherings: Feuilletés Saucisse. These little savory pastries, filled with delicious sausage and wrapped in flaky pastry, are sure to be a hit at any spooky soirée.
Picture this: it’s Halloween night, and the air is filled with the scent of crisp autumn leaves. You’re gathered with friends and family, enjoying laughter and stories, the flickering candlelight casting playful shadows. You’ve just pulled a tray of Feuilletés Saucisse from the oven, their golden-brown tops gleaming. As you take that first bite, the delightful crunch of the pastry gives way to a juicy, flavorful filling, and suddenly, it feels like a scene straight out of a cozy movie.
I created this recipe with joy and a touch of nostalgia. Growing up, my family had a tradition of making these crispy pastries, especially during fall celebrations. My grandmother would whip them up for every Halloween party, and I’d help her roll out the dough. Standing on a stool, flour dusting the air, I felt like a little chef, eagerly anticipating the moment we’d take them out of the oven and feast together. Now, I’m thrilled to pass that tradition on to you!
Feuilletés Saucisse are not just easy to make; they are incredibly versatile and can be customized to cater to your taste buds. Whether you’re hosting a Halloween bash or creating a cozy night in, these savory delights will bring warmth and nostalgia to your table. Now, let’s dive into this easy-peasy, crowd-pleasing recipe!
Ingredients
To make these delightful feuilletés, you’ll need the following ingredients:
-
Puff Pastry
- This is the magical ingredient that gives these pastries their flaky texture. You can find it in the frozen section of most grocery stores. If you prefer a homemade touch, you can make your own puff pastry, but store-bought is perfectly delightful!
-
Sausages
- Choose your favorite type — pork, chicken, or even a vegan alternative work beautifully. For a twist, try spiced or herb-infused sausages to add an exciting flavor.
-
Mustard
- A classic choice for dipping, mustard adds a lovely zing! Use Dijon for a slight kick or whole grain for extra texture. You could even mix in a hint of honey for a sweet twist.
-
Egg (for egg wash)
- This is what gives your pastries that beautiful golden color. If you’re in a pinch, you can substitute a sprinkle of milk for an equally nice finish.
-
Herbs and Spices (optional)
- Fresh herbs like parsley or thyme can elevate your filling. Feel free to experiment with spices like paprika or black pepper for added depth!
Step-by-Step Instructions
Ready to get cooking? Let’s make some Feuilletés Saucisse that will inspire gasps of delight!
-
Preheat Your Oven:
- Preheat your oven to 400°F (200°C). This will ensure a perfectly crispy pastry. You’ll want your oven to be nice and hot, so those pastries puff up beautifully!
-
Prepare the Puff Pastry:
- If you’re using frozen puff pastry, remove it from the freezer and let it thaw on the counter for about 30 minutes. Once thawed, gently roll it out on a floured surface to prevent sticking. This step isn’t crucial, but it allows for a little extra flakiness!
-
Sausage Filling:
- While the pastry is thawing, let’s prep the filling. Remove the sausage casings and crumble the meat into a mixing bowl. You can also use pre-cooked sausage; just chop it into small pieces. Add your herbs and spices if you’re using them for added flavor!
-
Cut the Pastry:
- Cut the puff pastry into rectangles, about 4×6 inches. This size allows for a nice portion without being overwhelming.
-
Fill with Sausage:
- Place a small spoonful of your sausage mixture in the center of each pastry rectangle. Be careful not to overfill; a little goes a long way!
-
Fold and Seal:
- Fold the pastry over the filling to create a pocket. Press the edges with a fork to seal them nice and tight! You want to keep all that juicy goodness inside.
-
Egg Wash:
- In a small bowl, beat the egg, then brush it over the top of each filled pastry. This step ensures a beautiful golden glow when they bake.
-
Bake:
- Pop those beauties onto a baking sheet lined with parchment paper and bake for about 20-25 minutes, or until they’re golden brown and flaky. Your kitchen will start to smell irresistible!
-
Cool and Serve:
- Once they’re out of the oven, let them cool for a few minutes — if you can resist! You can serve them warm or at room temperature.
Serving Suggestions
To plate your Feuilletés Saucisse beautifully, arrange them on a festive platter. You can garnish with fresh herbs or serve with a side of dipping sauces like mustard or ketchup. For a Halloween twist, use a creepy cloth or a cutting board decorated with mini pumpkins and faux cobwebs for a spooky look. They’ll be the centerpiece of your Halloween spread!
Recipe Variations
Here are a few creative twists you can consider:
- Cheesy Delight: Add grated cheese into the sausage mixture for a gooey, savory treat.
- Veggie Medley: Mix in sautéed onions, peppers, or mushrooms into your filling for an extra boost of flavor.
- Spicy Kick: Add jalapeños or a pinch of cayenne pepper to the sausage for a spicy version.
- Herbed Up: Experiment with different herbs! Fennel or rosemary can give a fresh twist.
- Sweet and Savory: Blend in some caramelized apples or fig jam into the filling for a sweet contrast to the savory sausage.
Chef’s Notes
Feuilletés Saucisse has traveled through time in my kitchen. I first learned the art of making them with my grandmother, and over the years, I’ve adapted the recipe to suit my tastes and, of course, those of my friends. Sometimes, I toss in whatever veggies I have lying around — there’s never a bad time to be resourceful in the kitchen! I even remember one Halloween where we made them themed to look like little mummies, wrapping the sausage filling with strips of pastry and drawing eyes with mustard! The laughter and delight those little creations brought were unforgettable!
FAQs and Troubleshooting
1. My pastry isn’t puffing up — what went wrong?
- Make sure your oven is preheated and that your pastry is cold before it goes in. Puff pastry thrives on high heat!
2. Can I make these ahead of time?
- Absolutely! You can prepare them up to the baking stage, cover them, and refrigerate. Bake them just before your guests arrive for that fresh-out-of-the-oven experience.
3. Can I freeze them?
- Yes! Freeze the unbaked Feuilletés on a baking sheet, and once frozen solid, place them in a freezer bag. Bake directly from frozen, adding a few minutes to the cooking time.
4. What’s the best way to reheat them?
- The oven is your best bet for reheating. Place them in a preheated oven at 350°F (175°C) for about 10–15 minutes until warmed through.
Nutritional Info (Optional)
While I’m not a nutritionist, I like to remind everyone to enjoy these delicious treats in moderation, especially during the festive season! They’re a wonderful treat filled with flavor, and sharing them with others is what truly makes them special.
So there you have it—your ultimate guide to making Feuilletés Saucisse this Halloween! I hope these savory delights sprinkle some warmth and joy into your celebrations. Remember, cooking is all about fun, experimentation, and savoring the company of those you love. So roll up those sleeves, get that kitchen messy, and enjoy every delicious bite! Happy cooking!
Print
Feuilletés Saucisse
- Total Time: 55 minutes
- Yield: 12 servings 1x
- Diet: Omnivore
Description
Delicious savory pastries filled with sausage, perfect for Halloween gatherings.
Ingredients
- Puff Pastry
- Sausages (pork, chicken, or vegan)
- Mustard (Dijon or whole grain)
- 1 Egg (for egg wash)
- Herbs and Spices (optional)
Instructions
- Preheat your oven to 400°F (200°C).
- Prepare the puff pastry by thawing and rolling it out.
- Remove sausage casings and crumble meat into a bowl.
- Cut puff pastry into 4×6 inch rectangles.
- Place a spoonful of the sausage mixture in the center of each pastry.
- Fold the pastry over the filling and seal edges with a fork.
- Beat the egg and brush it over the top of each pastry.
- Bake for 20-25 minutes, or until golden brown.
- Cool for a few minutes before serving.
Notes
Serve with mustard or ketchup for dipping. These can be customized with various fillings or toppings.
- Prep Time: 30 minutes
- Cook Time: 25 minutes
- Category: Appetizer
- Method: Baking
- Cuisine: French
Nutrition
- Serving Size: 1 serving
- Calories: 280
- Sugar: 1g
- Sodium: 450mg
- Fat: 16g
- Saturated Fat: 6g
- Unsaturated Fat: 8g
- Trans Fat: 0g
- Carbohydrates: 26g
- Fiber: 1g
- Protein: 9g
- Cholesterol: 40mg
Keywords: Feuilletés Saucisse, Halloween recipes, savory pastries, puff pastry, sausage snacks
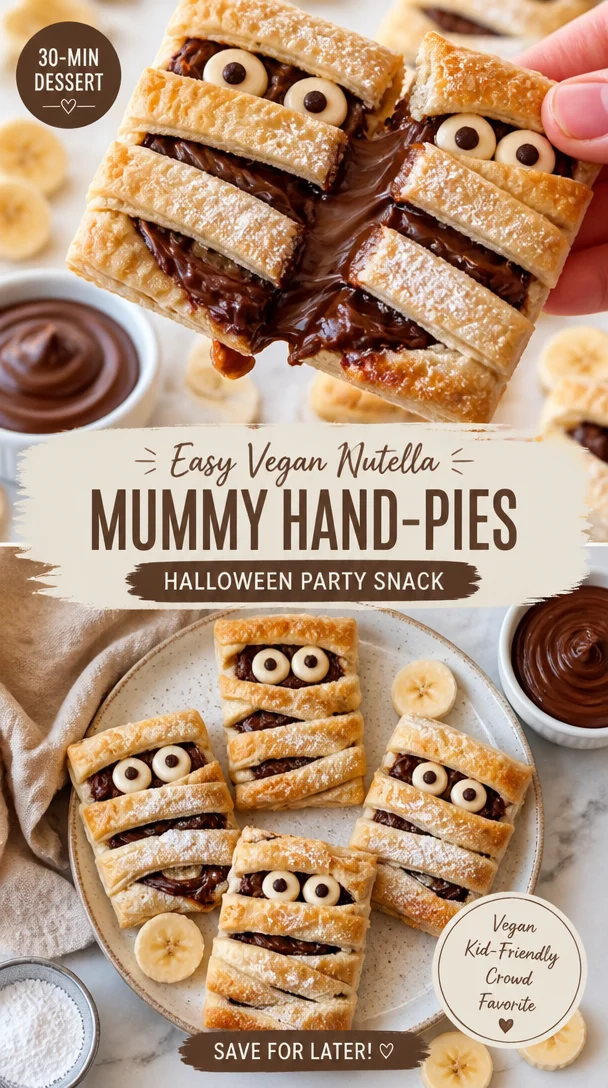
Easy Vegan Nutella Mummy Hand-Pies: Halloween Party Snack
Vegan Nutella Halloween Mummy Hand-Pies: Spooktacular Treats for Your Autumn Celebrations
Welcome to a magical corner of my kitchen, where the air is filled with the enchanting scents of chocolate and spice. If you’re anything like me, the joy of cooking isn’t just about making food; it’s about creating memories, sharing laughter, and bringing a bit of cozy warmth into the hearts of those we love. With Halloween right around the corner, what better way to celebrate than by whipping up a batch of Vegan Nutella Halloween Mummy Hand-Pies? Trust me, these delightful little pastries are sure to become a tradition that will fill your kitchen with giggles and sweet aromas!
Picture this: a crisp autumn afternoon, the leaves danced in the wind, and the sweet smell of baking wafted through my mom’s kitchen. Every year, as Halloween approached, we would set aside a weekend to create spooky treats. One of my absolute favorites was this super simple Nutella dessert pies! Except back then, we didn’t have a reliable store-bought vegan option, and we certainly didn’t know what “vegan” meant. Yet somehow, we always ended up with gooey chocolate filling enveloped in flaky, buttery pastry. Fast forward to today, and while my mom may not be in the kitchen with me, her spirit lives on in every recipe I craft. Today, I’m excited to share a plant-based twist on our childhood favorite that’s just as delicious and perfect for a Halloween gathering.
These hand-pies are not only adorable but also incredibly easy to make! Plus, they are filled with a rich, vegan Nutella equivalent – yep, it’s that luscious chocolate-hazelnut spread you’ve always loved – but made without any animal products. The flaky crust resembles the fun, ghostly bandages of a mummy, making them a wonderfully festive choice for your Halloween soirée. So grab your apron, and let’s dive into making these scrumptious treats that awaken your inner child while satisfying your sweet tooth!
A Whimsical Memory that Sparks Joy
One of my most cherished Halloween memories revolves around these hand-pies. I can still recall the gleeful chaos that unfolded in our kitchen. My siblings and I had concocted a plan to surprise our parents with a batch of spooky treats to celebrate the season. We donned our best Halloween costumes (because what’s Halloween without a little dress-up, right?), wielding spatulas and cookie cutters like our culinary swords.
There we were, flour dusting our faces, laughing uncontrollably as we tried to form little mummies from pieces of pie crust. Everything turned into a delightful mess of dough and Nutella – and the more mess we made, the more we laughed! Once they were baked, our “mummies” came to life, delightfully golden and flaky, and that first bite, revealed gooey chocolate heaven. Each hand-pie was a nostalgic nod to the magic and joy of family—just the kind of warmth you can always spread through food. It’s those kinds of memories that inspired me to recreate and share this vegan version. After all, food not only nourishes our bodies but also feeds our soul!
Ingredients
Now, let’s gather our ingredients! This recipe is straightforward and calls for items you may already have on hand. Here’s what you need to create these bewitching hand-pies:
-
Vegan Pie Crust
- What it is: This forms the flaky exterior of your hand-pies.
- Substitution tips: You can use store-bought vegan pie crust for quicker preparation. Just make sure to check the label!
-
Nutella (or Vegan Hazelnut Spread)
- What it is: The gooey, rich filling that makes these hand-pies irresistible.
- Substitution tips: If Nutella is not available, any other vegan hazelnut spread works beautifully or try making your own!
-
All-Purpose Flour
- What it is: A classic choice for the crust, lending structure and tenderness.
- Substitution tips: If you’re looking for a gluten-free option, you can substitute with a gluten-free all-purpose flour blend.
-
Confectioners’ Sugar
- What it is: This sweetens the pastry and creates a nice drizzle for the mummies.
- Substitution tips: If you’re avoiding sugar, you could use powdered monk fruit or coconut sugar.
-
Unsweetened Almond Milk (or any plant milk)
- What it is: This helps bind the pie crust and adds moisture.
- Substitution tips: Any non-dairy milk (like soy, oat, or coconut milk) works well here.
-
Salt
- What it is: A crucial flavor enhancer that brings all the elements together.
- Chef insight: Just a pinch can make all the difference!
-
Vanilla Extract
- What it is: Adds a lovely aroma and depth of flavor to both the crust and filling.
- Substitution tips: If you don’t have vanilla extract, almond extract is a great alternative.
Now that we have our ingredients ready, let’s get to the fun part: cooking!
Step-by-Step Instructions
-
Make the Dough:
In a large bowl, combine 2 cups of all-purpose flour, ½ teaspoon of salt, and 1 tablespoon of confectioners’ sugar. To bring the dough to life, add ½ cup of vegan butter (chilled and cubed) and use your fingers or a pastry cutter to mash the butter into the flour until it resembles coarse crumbs. This step is essential—it’s what gives your hand-pies that buttery, flaky texture we love! -
Add the Liquid:
Gradually pour in 4 to 6 tablespoons of almond milk and 1 teaspoon of vanilla extract, mixing until the dough just comes together. Don’t overmix—I promise, your hand-pies will thank you later! Once combined, wrap the dough in plastic wrap and refrigerate it for at least 30 minutes. This will allow the butter to firm up, ensuring a flakier crust. -
Preheat the Oven:
While the dough chills, preheat your oven to 375°F (190°C). This way, it’s ready to bake as soon as your hand-pies are assembled. -
Roll Out the Dough:
On a floured surface, roll out the dough to about ⅛ inch thick. Use a round cookie cutter (or any circular object) to cut out circles about 4 inches in diameter. Transfer them to a parchment-lined baking sheet. -
Fill the Mummies:
Place about a tablespoon of Nutella (or your favorite hazelnut spread) in the center of each round. Be sure to leave some space around the edges to seal the pies later. -
Seal the Pies:
To form the mummies, take a smaller circle of dough and cut it into thin strips (about ½ inch wide). Place a few strips across the filling to resemble a mummy’s wrappings. Press the edges of the bottom dough circle with a fork or pinch them to seal, ensuring nothing leaks out while baking. -
Brush with Almond Milk:
To help achieve that golden, mouthwatering finish, brush the top of your mummies with a little almond milk. This little chef hack makes a significant difference in creating that bakery-style sheen. -
Bake the Hand-Pies:
Pop those beauties into the preheated oven for 20-25 minutes, or until they are golden brown and puffed. Keep a close eye on them—they bake quickly and you want them to be perfectly golden! -
Cool and Decorate:
Once baked, allow the hand-pies to cool for at least 10 minutes. When you’re ready, create a quick glaze by mixing a couple of tablespoons of almond milk with confectioners’ sugar until you reach a drizzling consistency. Drizzle it over the cooled hand-pies to give them some adorable mummy eyes (you can use mini chocolate chips if you want them to look especially spooky!).
Serving Suggestions
These Vegan Nutella Halloween Mummy Hand-Pies are perfect for serving at a Halloween party, Halloween-themed brunch, or even as a fun after-school treat. Arrange them on a festive platter and add some spooky decorations, like small plastic spiders or Halloween-themed napkins. They also pair wonderfully with a cup of tea or coffee for those chilly fall evenings!
Recipe Variations
If you’re looking to switch things up and add a personal flair, here are a few fun twists to your mummies:
- Berry Mummies: Swap out the Nutella for your favorite berry jam or preserves for a delightful fruity surprise!
- Pumpkin Spice Fill: Try filling your hand-pies with a mix of pumpkin puree, vegan cream cheese, and pumpkin spice for an autumnal taste explosion.
- Peanut Butter Surprise: Change it up by using a vegan peanut butter spread for a nutty twist on the classic!
- Chocolate Chip Spillover: Add a handful of dairy-free chocolate chips to the Nutella for extra chocolaty goodness!
- Cinnamon Sugar Dust: Dust the hand-pies with cinnamon sugar post-baking for a sweet crunch.
Chef’s Notes
As with any recipe, feel free to have fun with it! Get creative with the filling, play with shapes (who says mummies can’t be ghosts on Halloween?), and don’t be afraid to let your personality shine through the kitchen chaos! I’ll often throw in whatever leftover candies or nuts I have lying around. The recipe has beautifully evolved from my childhood kitchen memories into a recipe that adapts to the seasons and my ever-changing cravings. Remember, the magic of cooking lies not in perfection but in the joyful experience of making something delicious!
FAQs and Troubleshooting
1. My dough is too crumbly; what did I do wrong?
A crumbly dough could be a sign that there wasn’t enough liquid added during mixing or the butter got too warm. Make sure your butter is chilled, and add a bit more almond milk if it feels too dry.
2. Why did my hand-pies leak filling while baking?
If the filling leaks, it might be that the pies weren’t sealed securely. Ensure that you press down firmly around the edges and check for any punctures in the crust.
3. Can I freeze the hand-pies?
Absolutely! Just bake them, then allow them to cool completely. Place them in airtight containers or freezer bags, and they’ll last up to three months in the freezer. Reheat them in the oven straight from frozen—you may need to add a few extra minutes to the baking time.
4. How do I store leftovers?
These are best eaten fresh, but you can store them in an airtight container at room temperature for 1-2 days. If you’ve made a large batch (because who could resist?), consider putting some in the fridge for a longer shelf life.
Nutritional Info
Calories: Approx. 150 per hand-pie
Fat: 7g
Carbohydrates: 20g
Protein: 2g
Vegan and nut-free options available based on ingredient choices.
So there you have it! A playful and heartfelt recipe to bring those warm Halloween vibes right into your kitchen. These Vegan Nutella Halloween Mummy Hand-Pies are more than just a delightful treat; they’re a celebration of memories, creativity, and, most importantly, good food! Happy baking!
Print
Vegan Nutella Halloween Mummy Hand-Pies
- Total Time: 40 minutes
- Yield: 12 hand-pies 1x
- Diet: Vegan
Description
Delightful vegan hand-pies filled with rich hazelnut spread, perfect for Halloween celebrations.
Ingredients
- 2 cups all-purpose flour
- ½ teaspoon salt
- 1 tablespoon confectioners’ sugar
- ½ cup vegan butter, chilled and cubed
- 4 to 6 tablespoons unsweetened almond milk (or any plant milk)
- 1 teaspoon vanilla extract
- Nutella (or vegan hazelnut spread)
- Mini chocolate chips (optional, for decoration)
Instructions
- Combine the flour, salt, and confectioners’ sugar in a large bowl.
- Add the vegan butter and mix until you get coarse crumbs.
- Pour in the almond milk and vanilla extract, mixing until the dough comes together.
- Wrap the dough in plastic wrap and refrigerate for at least 30 minutes.
- Preheat your oven to 375°F (190°C).
- Roll out the dough to about ⅛ inch thick and cut into 4-inch circles.
- Place one tablespoon of Nutella in the center of each round.
- Cut smaller circles into strips to form the mummy wrappings and seal the edges.
- Brush the top with almond milk for a golden finish.
- Bake for 20-25 minutes until golden brown.
- Allow to cool, then drizzle with a glaze made from almond milk and confectioners’ sugar.
Notes
These hand-pies can be customized with different fillings like berry jam or pumpkin puree. Perfect for any Halloween party!
- Prep Time: 15 minutes
- Cook Time: 25 minutes
- Category: Dessert
- Method: Baking
- Cuisine: Vegan
Nutrition
- Serving Size: 1 hand-pie
- Calories: 150
- Sugar: 5g
- Sodium: 200mg
- Fat: 7g
- Saturated Fat: 1g
- Unsaturated Fat: 5g
- Trans Fat: 0g
- Carbohydrates: 20g
- Fiber: 1g
- Protein: 2g
- Cholesterol: 0mg
Keywords: Vegan Halloween dessert, Nutella hand-pies, spooky treats, Halloween recipes
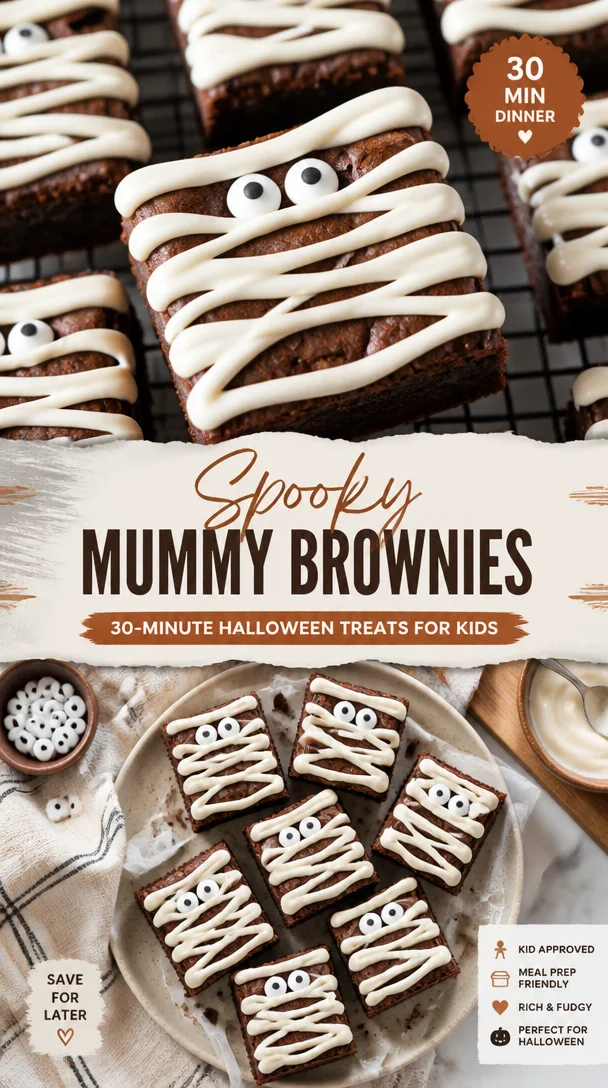
Spooky Mummy Brownies: 30-Minute Halloween Treats for Kids
Spooky Mummy Brownies: A Halloween Treat to Delight
Welcome to my kitchen, food friends! I’m so thrilled to have you here today. As we approach Halloween, the air becomes crisp, leaves crunch underfoot, and the scent of baked goods wafts through homes everywhere. There’s something truly magical about this time of year — it’s all about treats, spooky vibes, and the joy of creating something delightful to share with friends and family. Today, I’m sharing a recipe that’s near and dear to my heart: Spooky Mummy Brownies.
These brownies are not just fudgy and decadent; they’re irresistibly cute with their mummy-like appearance. Perfect for both kids and adults, these treats may just become your new Halloween tradition. Imagine this: a cozy kitchen filled with laughter and the warm aroma of chocolate as you whip up a batch of these spooky brownies. It’s a recipe that combines the fun of crafting with the joy of cooking — and who could say no to that?
When I think of Halloween, I can’t help but remember the excitement shared with my family as we prepped for the spooky season. We’d gather together, donned in our costumes, with bowls of candy and stacks of decorations piled high. One year, we decided to throw a Halloween-themed dinner party, complete with ghoulish decorations and a dessert table that had everyone buzzing. That’s when I first served these Mummy Brownies, and their popularity skyrocketed. They became the highlight of the evening, and the kids couldn’t get enough of them. The best part? The scaredy-cats among us loved that they were surprisingly satisfying and indulgent, despite their eerie look.
So, ready to dive into the creation of these delightful mummies? Let’s get baking!
Ingredients
For your Spooky Mummy Brownies, you will need the following ingredients:
-
1 cup (2 sticks) unsalted butter: Butter adds richness to your brownies; feel free to use a dairy-free alternative if you’re looking for a vegan option.
-
2 cups granulated sugar: This sweetens your brownies wonderfully. For a less sweet version, try using coconut sugar.
-
4 large eggs: Eggs provide moisture and help bind everything together. If you’re vegan, you can substitute ground flaxseed (1 tablespoon of flaxseed with 3 tablespoons of water for one egg).
-
1 teaspoon vanilla extract: Vanilla enhances the flavors. Use pure vanilla for the best taste, or sub with almond extract for a different twist!
-
1 cup all-purpose flour: This gives structure to your brownies. For gluten-free options, a 1:1 gluten-free flour blend works great.
-
1 cup unsweetened cocoa powder: Cocoa is key for that rich chocolate flavor. Dutch-process cocoa can be used for a deeper taste.
-
1 teaspoon baking powder: This helps the brownies rise slightly during baking. If you’re out, baking soda works in a pinch—just use half the amount.
-
½ teaspoon salt: A little salt balances the sweetness. You can reduce it slightly if you are watching your sodium intake.
-
Candy eyes: These bring the mummies to life! Use small chocolate chips if you can’t find candy eyes.
-
White chocolate melts or candy coating: For wrapping your brownies like mummies. If you want to keep it dairy-free, look for vegan white chocolate.
Step-by-Step Instructions
Let’s jump right into making these spooky delights! Follow these steps for brownie perfection:
-
Preheat the oven to 350°F (175°C). This is essential, as it allows for even cooking right from the start. While it heats, prepare your baking pan.
-
Prepare your baking pan: Grease a 9×13 inch baking dish or line it with parchment paper. This will prevent sticking and make it easier to remove the brownies after baking. I always recommend parchment paper for ease of lifting out the brownies.
-
Melt the butter: In a medium saucepan over low heat, melt the butter. Stir it gently until it has fully melted, making sure it doesn’t brown. If you do overheat and brown it, don’t worry — just let it cool a bit before proceeding.
-
Combine sugar and eggs: In a large mixing bowl, whisk together the melted butter and sugar until well blended. Then, add the eggs one at a time, mixing thoroughly after each. The mixture should be creamy and smooth.
-
Add the vanilla: Stir in the vanilla extract. This is where the magic happens, as the aroma fills your kitchen, making it feel cozier.
-
Incorporate dry ingredients: Now, sift together the flour, cocoa powder, baking powder, and salt in another bowl. This step is key to ensuring there are no lumps in your brownies and the flavors mix well. Gradually add this dry mixture to the wet ingredients and stir until just combined. Be careful not to overmix. We want fudgy brownies, not cake-like ones!
-
Pour into the pan: Transfer the brownie batter into the prepared baking dish and spread it evenly. A spatula works great for this step.
-
Bake for 25-30 minutes: You know your brownies are done when a toothpick inserted into the center comes out with a few moist crumbs. No batter, but a little gooey is exactly what we’re aiming for.
-
Cool completely: Once baked, let the brownies cool in the pan on a wire rack. This allows them to firm up before cutting.
-
Cut into pieces: Once cooled, cut the brownies into rectangles or squares, depending on your preference.
-
Mummify them up!: Melt your white chocolate melts according to the package instructions. Use a piping bag or a zip-top bag with the corner snipped off to drizzle the melted chocolate over the brownies, creating mummy bandages. Place two candy eyes on each brownie while the chocolate is still soft.
Serving Suggestions
Serve your Spooky Mummy Brownies on a rustic wooden board or a vibrant Halloween-themed platter. They look fantastic with miniature pumpkins or autumn leaves scattered around for decor. These brownies are perfect for Halloween parties, school events, or simply to enjoy with your family on a cozy movie night. Pair them with a scoop of vanilla ice cream or a drizzle of caramel for an added treat!
Recipe Variations
Want to mix things up? Here are a few creative twists you can try:
-
Peanut Butter Swirl: Before baking, drop spoonfuls of peanut butter into the brownie batter and swirl it lightly for a delicious twist.
-
Fruity Add-ins: Add chopped cherries or raspberries for a tart surprise within the brownies.
-
Spicy Kick: A pinch of cinnamon or cayenne pepper can give your brownies a unique flavor profile with a little warmth.
-
Nutty Crunch: Toss in some chopped nuts like walnuts or pecans to add texture—just make sure your guests are nut-friendly!
-
Oreo Surprise: Crush some Oreo cookies and fold them into the batter. The cookies will create delightful pockets of flavor.
Chef’s Notes
As with any beloved recipe, mine has seen many iterations over the years. The chocolate drizzle was born from my love for decoration, and every Halloween party I host somehow ends with these brownies being the star! I remember an autumn night when I forgot to buy candy eyes, and we ended up using mini chocolate chips instead. The kids loved them just as much and even named them “Choco-Mummies!”
Every time I make these brownies, I reminisce about those cozy family gatherings and how the simple act of cooking can bring everyone together. These brownies aren’t just a treat; they’re a medium for laughter and connection!
FAQs and Troubleshooting
Here are some common questions I’ve received, along with answers:
1. Why are my brownies cakey?
- Ensure you’re not overmixing the batter. Also, be cautious with your baking time; check your brownies a few minutes early. Fudgy brownie perfection lies just under the “done” threshold.
2. What’s the best way to store leftover brownies?
- Store them in an airtight container at room temperature for up to three days. They also freeze beautifully for up to three months!
3. Can I make these brownies ahead of time?
- Absolutely! You can make them a day or two before your event. Just keep them covered to maintain freshness.
4. What if I want vegan brownies?
- You can easily substitute the eggs with ground flaxseed and use plant-based butter and chocolate. Just check that your chocolate and candy eyes are dairy-free!
Nutritional Info
While I usually focus on enjoyment over nutrition when it comes to indulging, I believe it’s helpful to know what you’re eating! Each brownie (out of about 24 servings) contains approximately:
- Calories: 200-250
- Total Fat: 10g
- Carbohydrates: 30g
- Protein: 2g
Feel free to adjust portions based on your serving size and dietary needs!
Conclusion
There you have it! Spooky Mummy Brownies that are not only scrumptious but also add a playful twist to your Halloween festivities. I hope this recipe fills your kitchen with warmth and laughter, making memories with every bite. So, gather your loved ones, crank up your favorite Halloween tunes, and have a blast while baking!
Happy Halloween, and may your kitchen always smell like something delicious! If you make these brownies, I’d love to hear how they turn out. Share your spooky creations with me!
Print
Spooky Mummy Brownies
- Total Time: 45 minutes
- Yield: 24 brownies 1x
- Diet: Vegetarian
Description
These fudgy and decadent Spooky Mummy Brownies are irresistibly cute and perfect for Halloween celebrations.
Ingredients
- 1 cup (2 sticks) unsalted butter
- 2 cups granulated sugar
- 4 large eggs
- 1 teaspoon vanilla extract
- 1 cup all-purpose flour
- 1 cup unsweetened cocoa powder
- 1 teaspoon baking powder
- ½ teaspoon salt
- Candy eyes
- White chocolate melts or candy coating
Instructions
- Preheat the oven to 350°F (175°C).
- Prepare your baking pan: Grease a 9×13 inch baking dish or line it with parchment paper.
- Melt the butter in a medium saucepan over low heat.
- Combine the melted butter and sugar in a large mixing bowl until well blended.
- Add the eggs one at a time, mixing thoroughly after each.
- Stir in the vanilla extract.
- Incorporate dry ingredients: sift flour, cocoa powder, baking powder, and salt in another bowl.
- Gradually add the dry mixture to the wet ingredients and stir until just combined.
- Pour the brownie batter into the prepared baking dish and spread it evenly.
- Bake for 25-30 minutes until a toothpick comes out with a few moist crumbs.
- Cool completely in the pan on a wire rack.
- Cut into rectangles or squares.
- Mummify the brownies with melted white chocolate and place candy eyes on top.
Notes
Store leftover brownies in an airtight container at room temperature for up to three days or freeze for up to three months.
- Prep Time: 15 minutes
- Cook Time: 30 minutes
- Category: Dessert
- Method: Baking
- Cuisine: American
Nutrition
- Serving Size: 1 brownie
- Calories: 225
- Sugar: 25g
- Sodium: 85mg
- Fat: 10g
- Saturated Fat: 6g
- Unsaturated Fat: 4g
- Trans Fat: 0g
- Carbohydrates: 30g
- Fiber: 2g
- Protein: 3g
- Cholesterol: 30mg
Keywords: Halloween, brownies, dessert, spooky, treats




