
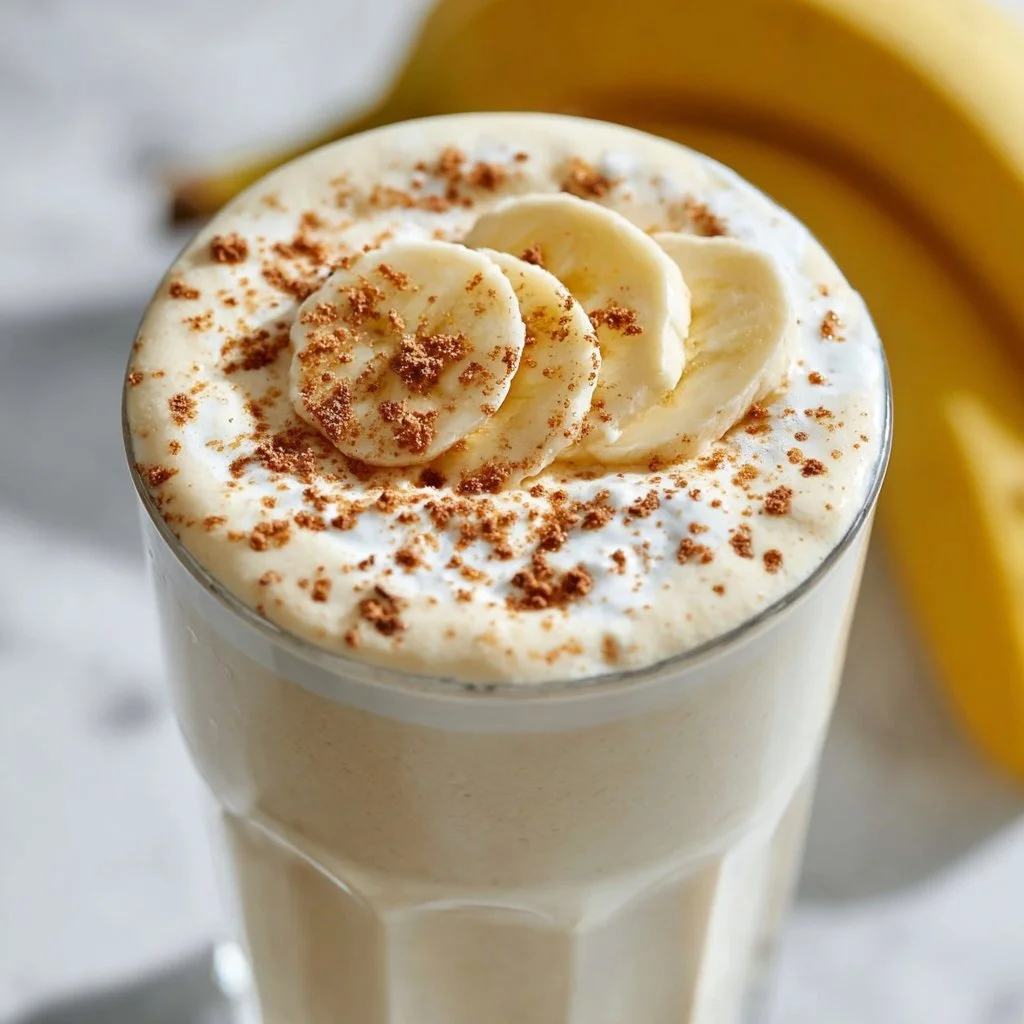
Banana Milkshake
The Creamiest, Dreamiest Banana Milkshake: A Comforting Classic
Welcome to my kitchen, my dear foodies! Today, we’re diving into one of the simplest yet most delightful beverages that has been making taste buds dance for generations: the classic banana milkshake. There’s just something about that creamy blend of fresh bananas, milk, and ice cream that sends me straight back to my childhood, indulging in lazy summer afternoons or celebrating little victories with a sweet treat.
When I think of banana milkshakes, I’m reminded of the first warm sunny day each spring when my family would whip them up in our cramped kitchen, laughter filling the air as we all tried to outshine one another in the craft of milkshake making. Trust me, there’s an art to it! So, whether you’re gracing this blog to relive a childhood memory or to find a refreshing drink for your weekend brunch, stick around because we’re about to blend some magic too!
What I love most about banana milkshakes is how adaptable they are. They take only a few simple ingredients and, with just a bit of creativity, can be transformed into your unique concoction. They are the epitome of versatility—you can whip them up for breakfast, as a post-workout snack, or just because you’re craving something creamy and sweet! So let’s grab our blenders and get to work! You’re going to love how easy and rewarding making a banana milkshake can be.
Personal Story
Now, let me take you back to one of my fondest kitchen memories: It was a sun-drenched afternoon, and the aroma of freshly baked cookies lingered in the air. My mom had just pulled a tray of chocolate chip cookies out of the oven, and I was tasked with blending bananas for our classic milkshakes. In my 10-year-old mind, I imagined myself as a tall, famous chef, thrilled to serve my family this sweet beverage alongside those glorious cookies.
I remember turning the blender on, a bit too hastily, resulting in banana splatters dancing around the kitchen! My little sister burst into giggles as she pointed at the walls where banana bits stuck like modern art. No worries, we cleaned it up together (a wonderful bonding experience), and eventually, we enjoyed our well-deserved banana milkshakes, paired with warm cookies, as we watched our favorite movie. It was moments like these that instilled in me the joy of cooking and the importance of sharing good food with loved ones.
So here I am, years later, inspired by those messy but joyful days to bring banana milkshake magic to your home!
Ingredients
Here’s what you’ll need to whip up the most luxurious banana milkshake you’ll ever taste:
-
Ripe Bananas
Opt for bananas that are speckled with brown spots for optimal sweetness and flavor. Green bananas can be substituted, but they won’t provide that creamy texture and sweetness we want. -
Whole Milk (or Milk of Choice)
Whole milk gives the milkshake a rich, creamy texture, but any milk—almond, soy, oat, or skim—works beautifully! -
Vanilla Ice Cream
Classic vanilla ice cream adds a comforting sweetness. You can replace it with dairy-free ice cream for a vegan option or even Greek yogurt for a healthier twist! -
Vanilla Extract
Just a splash of vanilla extract elevates the flavor profile, adding depth. Feel free to use almond extract if you want a completely different flavor kick. -
Honey or Sugar (optional)
If your bananas aren’t sweet enough for your taste, a drizzle of honey or a tablespoon of sugar can enhance the sweetness. Medjool date syrup can also work well for a natural sweetener! -
Ice Cubes
Ice makes your milkshake refreshing and thick. You can adjust the number based on your preferred texture and chilliness.
The beauty of these ingredients is that they’re easily adaptable based on what you have at home!
Step-by-Step Instructions
Let’s get started with making this banana milkshake that’ll make you feel like a master chef in your own kitchen!
Step 1: Prepare the Bananas
Peel two ripe bananas and slice them into small rounds. This helps them blend easier and makes the milkshake super smooth. Pro tip? If you find yourself with overripe bananas, don’t throw them away! They can be sliced and frozen for these crafty milkshakes.
Step 2: Gather Your Ingredients
In a blender, combine your sliced bananas, 1 cup of whole milk, 2 cups of vanilla ice cream, and 1 teaspoon of vanilla extract. If you’re feeling adventurous and want that extra indulgence, drizzle in honey or sugar—your choice!
Step 3: Blend It Up
Put the lid on your blender and blend your ingredients on high until smooth, about 30-45 seconds. Stop to scrape down the sides with a spatula as needed. If you want a thicker shake, throw in a handful of ice cubes and blend again!
Step 4: Taste-Test and Adjust
This is the fun part! After blending, take a quick taste. Trust me—this is a non-negotiable step! If you want it sweeter, now’s the time to add a touch more honey or sugar. Maybe you want a richer flavor? Splash in a bit more vanilla extract. Blend again for a few seconds after any adjustments.
Step 5: Serve with Flair
Pour your magnificent banana milkshake into tall glasses. You can garnish with whipped cream, a sprinkle of cinnamon, or even some crushed graham crackers or chocolate sprinkles if you’re feeling fancy. Add a straw, and voila—you’re ready to serve!
Step 6: Enjoy!
Sip, savor, and share it with your loved ones! There’s a certain joy that comes with watching someone take their first sip and their eyes widen in delight. Just make sure to save a little for yourself!
Serving Suggestions
Serve your banana milkshake with a side of freshly baked cookies, a stack of pancakes, or a bowl of granola for an indulgent brunch. You could even turn it into a fun milkshake bar, allowing your guests to customize their shakes with add-ins like chocolate chips, peanut butter, or fresh berries!
Recipe Variations
Feeling creative? Here are some exciting twists on the classic banana milkshake you can try:
-
Chocolate Banana Milkshake: Add 2 tablespoons of chocolate syrup or a handful of cocoa powder for that indulgent chocolate flavor.
-
Peanut Butter Banana Milkshake: Toss in 2 tablespoons of creamy peanut butter for a nutty, protein-packed version.
-
Berry Banana Milkshake: Add a handful of fresh or frozen strawberries or blueberries for a fruity burst!
-
Green Banana Milkshake: Blend in a handful of spinach or kale for a nutrient boost—don’t worry, the bananas will still carry the flavor!
-
Coffee Banana Milkshake: Add a shot of espresso or 1 teaspoon of instant coffee for that delightful caffeinated kick!
Chef’s Notes
I have evolved this banana milkshake recipe over the years, experimenting with different creaminess levels and flavors. There was a time when I would just toss everything in without measurements—but now, I have the joy of creating the perfect balance each time. Also, a funny memory comes to mind: I once tried adding in fluffy marshmallows thinking they’d blend well—you can imagine my surprise when they just sat at the bottom! A little trial and error taught me that not everything works—definitely a lesson worth sharing.
Today, this milkshake is a go-to when I need a quick pick-me-up or a delightful dessert to share with friends and family. It’s simple, pure, and oh-so-comforting!
FAQs and Troubleshooting
Why isn’t my milkshake creamy?
If your milkshake isn’t coming out as creamy as expected, it may be due to over-blending or not enough ice cream. For a perfect texture, balance your bananas and ice cream well.
How do I prevent my bananas from browning?
If you’re using fresh bananas, try to make your milkshake right after slicing. If you must store them, a squeeze of lemon juice can help keep them fresh.
Can I make this ahead of time?
While banana milkshakes are best enjoyed fresh, you can freeze the blended mixture in a sealed container. When you’re ready, just let it sit out for a few minutes until it softens, and then blend it again!
What if it’s too thick?
Simply add a splash of extra milk and blend it again until you reach your desired consistency!
Nutritional Info
This information can vary based on your specific ingredients, but a basic estimate per serving (1 shake) using whole milk and vanilla ice cream is approximately:
- Calories: 350
- Total Fat: 14g
- Saturated Fat: 8g
- Cholesterol: 60mg
- Sodium: 150mg
- Total Carbohydrates: 54g
- Dietary Fiber: 2g
- Sugars: 41g
- Protein: 7g
And there you have it, folks! Your guide to the perfect homemade banana milkshake, straight from my cozy kitchen to yours! I hope this recipe fills your heart with joy and your belly with sweetness. Happy shaking! 🍌🥛✨
Print
The Creamiest, Dreamiest Banana Milkshake
- Total Time: 10 minutes
- Yield: 2 servings 1x
- Diet: Vegetarian
Description
A delightful and comforting banana milkshake that’s perfect for any occasion.
Ingredients
- 2 ripe bananas
- 1 cup whole milk (or milk of choice)
- 2 cups vanilla ice cream
- 1 teaspoon vanilla extract
- Honey or sugar (optional)
- Ice cubes
Instructions
- Prepare the bananas by peeling and slicing them into small rounds.
- Gather your ingredients in a blender: bananas, milk, ice cream, and vanilla extract.
- Blend the ingredients on high until smooth, about 30-45 seconds.
- Taste-test the mixture and adjust sweetness or vanilla to your liking.
- Pour the milkshake into glasses and garnish as desired.
- Enjoy your creamy banana milkshake with loved ones!
Notes
Serve with freshly baked cookies or pancakes for an indulgent brunch.
- Prep Time: 10 minutes
- Cook Time: 0 minutes
- Category: Beverage
- Method: Blending
- Cuisine: American
Nutrition
- Serving Size: 1 shake
- Calories: 350
- Sugar: 41g
- Sodium: 150mg
- Fat: 14g
- Saturated Fat: 8g
- Unsaturated Fat: 4g
- Trans Fat: 0g
- Carbohydrates: 54g
- Fiber: 2g
- Protein: 7g
- Cholesterol: 60mg
Keywords: banana, milkshake, dessert, beverage, creamy, summer treat
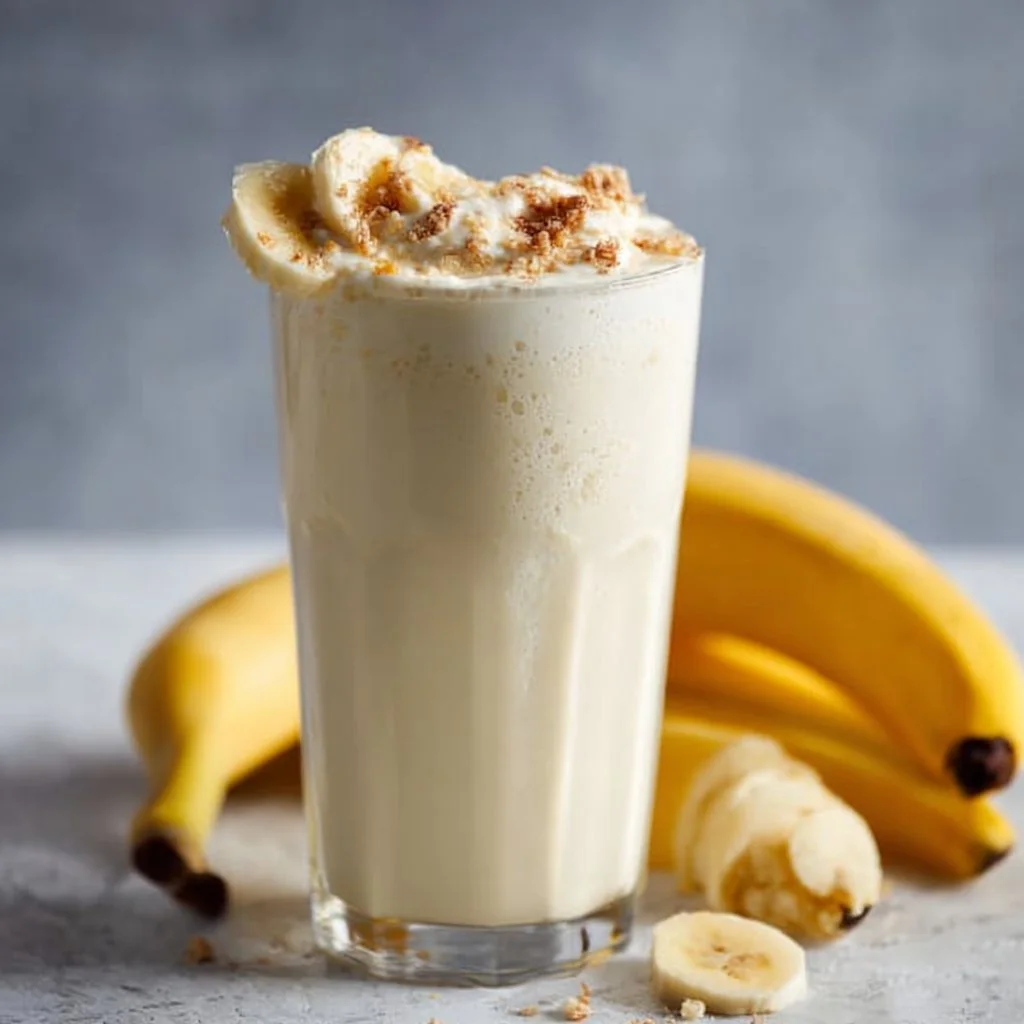
Banana Milkshake Recipe
# The Ultimate Banana Milkshake Recipe: A Creamy, Dreamy Treat

## Introduction

Welcome to my little corner of the kitchen! I’m Olivia Bennett, your friendly neighborhood foodie, and today, we’re diving into something that makes my heart sing—the classic banana milkshake. Whether you’re reminiscing about lazy summer afternoons or just looking for a quick and delicious treat to whip up, this banana milkshake is sure to bring a smile to your face.

Banana milkshakes aren’t just a nostalgic sip from childhood; they’re a delightful blend of creaminess and fruity goodness that brings joy with every slurp. You don’t need a fancy blender or ingredients that can only be found in high-end grocery stores. Instead, you’ll just need a few simple staples, making this a perfect recipe for anyone from a culinary novice to a seasoned home chef.

Now, let’s talk about what makes this milkshake special. It’s all about the ripe bananas—nature’s candy! The key is to use bananas that are perfectly spotty; they’re sweeter and blend beautifully into a creamy concoction. And if you’re anything like me, you might have a few overripe bananas sitting on your countertop, just begging to be transformed into something that's not only tasty but also wonderfully indulgent.

So grab your aprons, folks! We’re about to embark on a banana-flavored adventure that’s not just delicious but also sure to ignite warm memories and create new ones with every sip. Are you ready to blend up some love? Let’s get started with our banana milkshake recipe!

## Personal Story

Whenever I think of banana milkshakes, I’m instantly transported back to my childhood kitchen, where the walls were always warm with the smell of baked goodies. My mom would make these luscious banana milkshakes for me and my siblings every Saturday as a special treat after our weekend family breakfast. That sound of the blender whirring combined with the bright chatter of my family created the perfect weekend symphony.

I still remember one particular Saturday when my little brother, excited to blend the bananas himself, “accidentally” added a whole bunch of chocolate chips into the blender along with the bananas and milk. What we ended up with was a slightly chunky, but absolutely delectable, banana-chocolate milkshake that became an instant family favorite. From that day forward, our banana shakes were never the same again—there was always room for a little chocolate!

So, whether you’re sipping this delectable treat solo after a long day or sharing it with loved ones, remember that this milkshake is more than just a drink – it’s a wonderful memory waiting to happen. Let’s recreate this joy together!

## Ingredients

Here’s what you’ll need to create the perfect banana milkshake:

- **2 ripe bananas**
  - Look for bananas that are well-spotted; their sweetness will elevate your milkshake to new heights. If you don’t have ripe bananas, you can speed up the process by baking unripe ones at 350°F (175°C) for about 15-20 minutes until they soften a bit.

- **2 cups vanilla ice cream**
  - Classic vanilla ice cream is the secret to a rich, creamy texture. For a lighter version, you can substitute with frozen yogurt or even a non-dairy ice cream if you prefer.

- **1 cup milk (dairy or non-dairy)**
  - Whole milk gives the shake a rich taste, but any milk will work. Almond milk, oat milk, or coconut milk can add unique flavors—you might even discover a new favorite!

- **1 tablespoon honey or maple syrup (optional)**
  - This is a personal twist! If you prefer a sweeter milkshake, a drizzle of honey or maple syrup does the trick. For vegan options, choose maple syrup.

- **1 teaspoon vanilla extract**
  - This adds a delightful depth of flavor. If you’re feeling adventurous, a dash of cinnamon can elevate your shake to another level.

- **Ice (optional)**
  - Adding ice can make your milkshake extra frosty, but it’s totally optional; the ice cream will already give it a lovely chill.

Remember, this recipe is flexible! Feel free to adjust based on your preference or dietary needs—after all, cooking is all about creativity!

## Step-by-Step Instructions

Ready to create your milkshake masterpiece? Let’s blend up some magic!

1. **Prepare Your Ingredients**
   - Begin by peeling the ripe bananas and slicing them into smaller rounds. This step makes it easier on your blender and ensures a smooth blend. Plus, you can sneak a taste!

2. **Blend the Bananas**
   - Add the banana slices into your blender, and pulse them for a few seconds until they become a smooth paste. This helps them integrate better with the other ingredients.

3. **Add the Ice Cream**
   - Now, it’s time for the star of the show! Toss in the two cups of vanilla ice cream. The creaminess of good ice cream will turn your banana paste into a silky shake.

4. **Pour in Milk**
   - Pour in your milk of choice. If you prefer a thicker shake, feel free to start with half a cup and gradually add more until you reach your desired consistency. Here’s a little chef hack: blend half the milk first and then gradually add the rest to avoid making too thin a shake.

5. **Sweeten It Up**
   - If you’re including honey or maple syrup, add it now along with the teaspoon of vanilla extract. These lovely additions will enhance the overall flavor of your banana milkshake.

6. **Blend, Blend, Blend!**
   - Secure the lid tightly and blend on high until smooth and creamy. You might have to stop and scrape down the sides to ensure everything mixes thoroughly. If the mixture is too thick for your blender, a splash of milk can help.

7. **Taste Test Time!**
   - Give your milkshake a quick taste. If you find it isn’t sweet enough, feel free to stir in a little more honey or syrup. Blend again for a few seconds more after adding.

8. **Adjust Consistency**
   - If you like it colder or thicker, toss in a handful of ice and pulse a few more times until you achieve the desired texture.

9. **Serve It Up**
   - Pour your banana milkshake into tall glasses, leaving space for whipped cream if you like. You can also garnish with banana slices or drizzle with a bit of chocolate sauce for an extra sweet touch!

## Serving Suggestions

Presentation matters, right? For a fun serving suggestion, try topping your milkshake with a generous dollop of whipped cream and sprinkle some crushed graham crackers or chocolate shavings on top. This little touch makes your milkshake not only a treat for the taste buds but also a visual feast. Serve it with colorful straws and maybe a maraschino cherry on top, and you have a sweet treat that feels like a special occasion!

## Recipe Variations

- **Chocolate Banana Milkshake**: Add a few tablespoons of chocolate syrup or cocoa powder to the mix for the ultimate chocolate-banana combo!

- **Nutty Banana Milkshake**: Toss in a couple of tablespoons of peanut butter or almond butter for a delicious nutty flavor packed with protein.

- **Berry Banana Milkshake**: Want a twist of fruitiness? Add in some frozen strawberries or blueberries to your banana milkshake for a refreshing berry burst.

- **Tropical Banana Milkshake**: Try blending in some fresh pineapple or coconut cream for a tropical vibe that transports you straight to the beach!

- **Protein-Packed Milkshake**: Mix in a scoop of your favorite protein powder for a healthy post-workout treat!

## Chef’s Notes

As a home chef, I truly believe recipes evolve over time, often inspired by the ingredients you have on hand or the stories you create around them. This banana milkshake has certainly become a staple in my kitchen, and I love seeing how others customize it! Sometimes I add a sprinkle of chia seeds for a bit of crunch or even blend in some spinach for greening things up—trust me, you won’t taste it!

Also, I can’t begin to tell you how many times I’ve made this milkshake with my kids, doubling the recipe just to see who can gulp it down faster—spills everywhere, but laughter is the best ingredient.

## FAQs and Troubleshooting

**1. Why is my banana milkshake thin?**
If your milkshake turns out thinner than you'd like, try adding more ice cream or a banana to thicken it up.

**2. Can I use frozen bananas?**
Absolutely! Frozen bananas will give your milkshake a thicker consistency and be super creamy; just make sure to let them sit at room temperature for a few minutes for easier blending.

**3. My milkshake is too sweet. What can I do?**
If your shake is overly sweet, add more milk, ice cream, or even a pinch of salt to balance the sweetness out.

**4. How do I store leftover milkshake?**
Not that you’d want leftovers, but if you do, store your banana milkshake in an airtight container in the freezer. Just know that it may need a little re-blending before serving!

## Nutritional Info

(Per Serving – approx. 1 cup)
- Calories: 300
- Protein: 5g
- Carbohydrates: 53g
- Fat: 10g
- Sugars: 34g

Cooking is all about joy and making connections—whether it's with the food you create or the people you share it with. So, grab those bananas, fire up that blender, and let this banana milkshake become a part of your kitchen memories. Enjoy your cozy moments, and happy blending!
The Ultimate Banana Milkshake Recipe
- Total Time: 10 minutes
- Yield: 2 servings 1x
- Diet: Vegetarian
Description
A classic banana milkshake recipe that’s creamy, dreamy, and perfect for any occasion.
Ingredients
- 2 ripe bananas
- 2 cups vanilla ice cream
- 1 cup milk (dairy or non-dairy)
- 1 tablespoon honey or maple syrup (optional)
- 1 teaspoon vanilla extract
- Ice (optional)
Instructions
- Prepare your ingredients by peeling the ripe bananas and slicing them into smaller rounds.
- Blend the banana slices in your blender until they become a smooth paste.
- Add the ice cream and blend until fully combined.
- Pour in your milk of choice, adjusting for thickness as desired.
- Sweeten with honey or maple syrup and stir in vanilla extract.
- Blend on high until smooth and creamy, scraping down the sides as necessary.
- Taste your milkshake and adjust sweetness or consistency as needed.
- Serve in tall glasses, garnishing as desired.
Notes
Customize your milkshake by adding ingredients like chocolate syrup or peanut butter for different flavors.
- Prep Time: 10 minutes
- Cook Time: 0 minutes
- Category: Dessert
- Method: Blending
- Cuisine: American
Nutrition
- Serving Size: 1 cup
- Calories: 300
- Sugar: 34g
- Sodium: 100mg
- Fat: 10g
- Saturated Fat: 5g
- Unsaturated Fat: 5g
- Trans Fat: 0g
- Carbohydrates: 53g
- Fiber: 3g
- Protein: 5g
- Cholesterol: 30mg
Keywords: banana milkshake, dessert, beverage, creamy treat, easy recipe
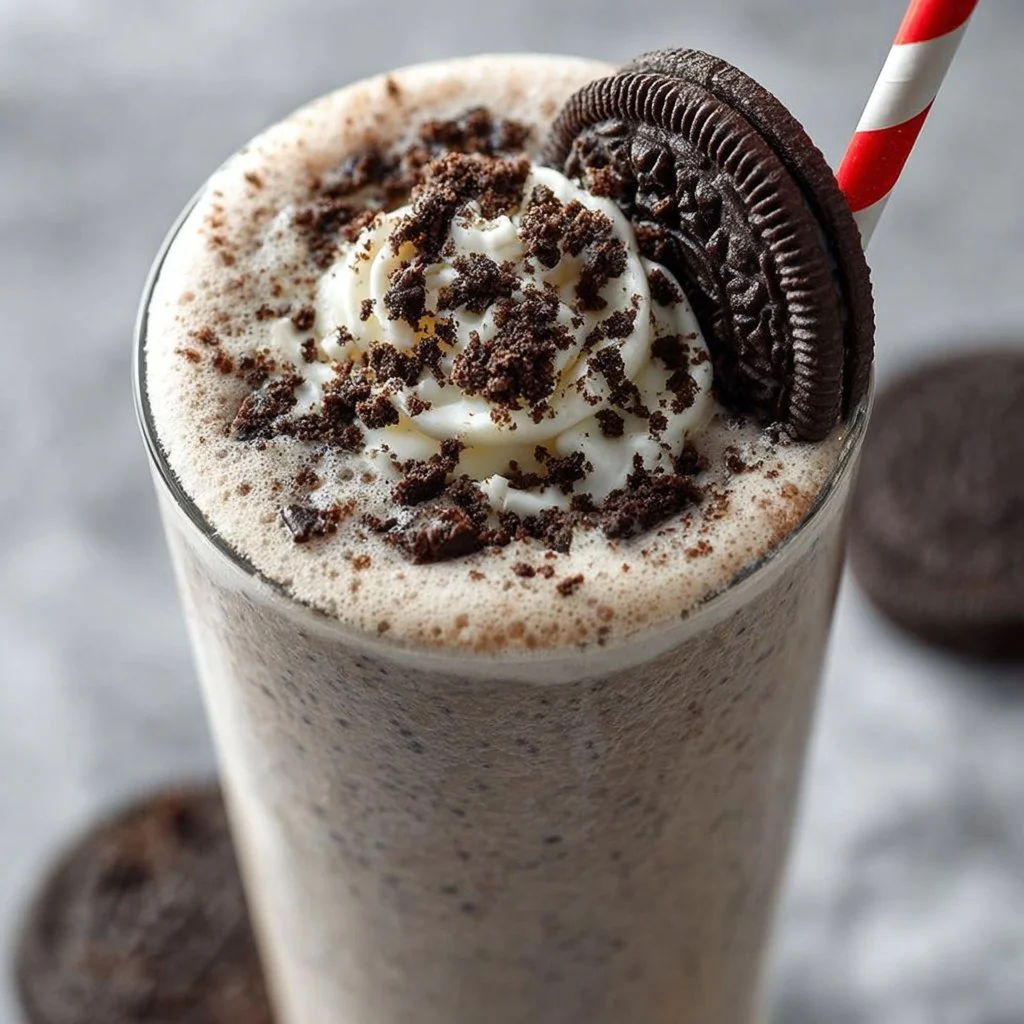
Oreo Milkshake
Creamy Dreamy Oreo Milkshake Recipe
Welcome to my cozy corner of the kitchen! Today, I’m excited to share a recipe that’s not just a treat, but a nostalgic trip down memory lane: the delicious Oreo milkshake. There’s something undeniably magical about this simple combination of ice cream, milk, and those iconic black-and-white cookies. With every sip, we’re transported back to carefree summer days and the joyful hugs of family gatherings.
As a passionate home cook, I truly believe that food is more than just fuel; it’s an experience meant to be shared. Whether you’re enjoying it alone on a quiet evening or whipping up a batch for a gathering of friends, an Oreo milkshake never fails to put a smile on my face (and I’m sure it’ll do the same for you!).
Today’s recipe is about more than just a tasty indulgence — it’s about creating memories with the people you cherish most. Let’s dive into the delightful world of Oreo milkshakes, where the only requirement is a love for delicious flavors and a willingness to sprinkle a little happiness into your day.
Personal Story
I remember the first time I made an Oreo milkshake. I was about ten years old, standing on a stool in my mom’s kitchen while trying to reach the blender on the countertop. The kitchen was filled with warm scents of baking cookies, and in the background, my siblings were busy with their own fun kitchen experiments. We had just come back from our favorite ice cream parlor, where we were dessert-testing for the family.
Eager to recreate that magical shake, I took a little trip to the pantry and grabbed a bag of Oreos. I carefully opened them, but the cookies crumbled under the weight of my excitement, and chocolate crumbs flew everywhere! Instead of worrying about the mess, my mom joined in the fun, helping me toss the cookies into the blender along with scoops of cool vanilla ice cream.
The milkshake was a little lumpy, twinkling with bits of Oreos floating around like stars in a chocolate galaxy. Once it was done, we each grabbed a straw and took that first sip together. It was a moment that sparked laughter, joy, and the pure bliss of homemade treats. That creamy, sweet concoction taught me that cooking is more than technique; it’s about having fun and making memories.
Ingredients
Now, let’s gather our ingredients! Here’s what you’ll need for this fantastic Oreo milkshake:
-
Oreo Cookies: The stars of the show! Famous for their creamy filling and cookie crunch, these iconic treats provide the base flavor. You can experiment with different Oreo varieties, like double-stuffed or mint, for a unique twist.
-
Vanilla Ice Cream: This creamy delight gives the milkshake its luscious texture. Feel free to swap with any ice cream you love — chocolate or cookies and cream work beautifully too.
-
Whole Milk: This adds the right amount of creaminess and helps blend everything smoothly together. If you want to cut down on calories, opt for 2% milk or your favorite milk alternative like almond or oat milk.
-
Whipped Cream: While optional, it’s a glorious topping that adds extra fluff and sweetness. You can either whip your own or grab a can from the store.
-
Chocolate Syrup: Drizzled on top or blended in, it amps up the chocolatey goodness! Use store-bought or homemade syrup for a personal touch.
-
Chocolate Shavings or Crushed Oreos for Garnish: These are perfect for that finishing touch. Don’t skip out on garnishing; it makes the treat feel extra special!
Chef Insight:
For a richer flavor, consider adding a splash of vanilla extract to the milkshake mixture. It enhances the taste just like a scoop of love!
Step-by-Step Instructions
Now that we’ve got our ingredients lined up, let’s get to the fun part – making your Oreo milkshake!
-
Crush the Oreos: Start by crushing about 4-5 Oreo cookies. You can use a food processor or pop them into a zip-lock bag and give them a hearty whack with a rolling pin. This will create a delightful crumb texture in your shake! Reserve some crumbs for garnish later.
-
Blend the Ingredients: In a blender, combine 3-4 scoops of vanilla ice cream, about 1 cup of whole milk, and the crushed cookies. The amount of milk can be adjusted based on how thick you want your shake. For a thicker shake, start with less milk and add gradually.
- Tip: Always add ice cream before the milk to prevent a messy blender situation. Trust me, I’ve been there!
-
Add Chocolate Syrup: For an extra indulgent flavor, next drizzle in 2 tablespoons of chocolate syrup. If you’re like me and love a good chocolate taste, don’t hold back!
-
Blend Again: Put the lid on and blend until combined and smooth — about 30 seconds to a minute. You want to see a beautiful, thick milkshake with cookie bits peppered throughout.
-
Taste Test: Here comes the most fun part! Pour a little bit into a glass to taste. If it’s perfect, wonderful! If not, tweak it — maybe a little more syrup or ice cream, depending on your taste.
-
Serve it Up: Pour the milkshake into tall glasses. You can go fancy if you want by drizzling chocolate syrup on the insides of the glass before pouring in the shake.
-
Top with Whipped Cream & Oreos: Now, the pièce de résistance! Add whipped cream to the top, and sprinkle those reserved Oreo crumbs and/or chocolate shavings to make it visually appealing and extra delicious!
Chef Hack:
If you want to get fancy, you can add a dollop of whipped cream followed by a whole Oreo cookie standing proud on top! It makes for a show-stopper treat.
Serving Suggestions
Presentation is key! Serve your Oreo milkshake in tall, clear glasses so that those layers of rich chocolate and creamy white ice cream are showing off. You can even accompany your milkshake with a few extra Oreos on the side for some dipping fun (and another way to experience that creamy goodness)!
Recipe Variations
Feeling adventurous? Let’s shake things up! Here are a few tasty twists to try with your Oreo milkshake:
-
Mint Oreo Shake: Swap regular Oreos for Mint Oreos and add a drop of peppermint extract for a refreshingly cool flavor.
-
Peanut Butter Oreo Shake: Toss in a tablespoon of creamy peanut butter before blending for a deliciously nutty twist.
-
Coffee Oreo Shake: If you love your caffeine fix, add a shot of espresso or strong brewed coffee to give it a delightful kick!
-
Cookies and Cream Oreo Shake: For an ultra-creamy treat, use cookies and cream ice cream as the base, combining both flavors in every sip.
-
Vegan Version: Use dairy-free ice cream and plant-based milk for a version that everyone can enjoy, regardless of dietary restrictions!
Chef’s Notes
This recipe has transformed over time, reflecting the various delights of my own kitchen experiments. I once discovered that tossing in a sprinkle of cinnamon elevated the chocolatey experience further! I urge you to think outside the box and personalize your shake; it’s all about making memories and having fun! And hey, if you find yourself making a bit of a mess — embrace it! Every splash and spill is a story waiting to be told.
FAQs and Troubleshooting
-
Why is my milkshake too thick?
- If it’s too thick, just add a bit more milk until you get the desired consistency. Blend again to ensure everything mixes nicely.
-
Can I make this milkshake ahead of time?
- Milkshakes are best enjoyed fresh, but you can prepare the base ahead. Just blend the ice cream and milk, then add the Oreos just before serving.
-
What’s the best way to store leftovers?
- If you have any leftover milkshake (rare, but it happens!), store it in an airtight container in the freezer. Let it sit at room temperature for a few minutes before trying to blend again.
-
How do I adjust the sweetness?
- If it’s too sweet for your liking, add a pinch of sea salt or a dash of unsweetened cocoa powder to balance flavors.
Nutritional Info
While I don’t often dwell on numbers in my kitchen adventures, a typical serving of this Oreo milkshake contains around 540 calories, with varying amounts depending on specific brands of ingredients used. Don’t forget — it’s all about balance and treating ourselves now and then!
So there you have it! Your very own Oreo milkshake recipe, filled with love and kitchen tales that spark joy. I hope you enjoy making this rich and creamy drink as much as I do. Cheers to sweet indulgences and even sweeter memories! Happy cooking!
Print
Creamy Dreamy Oreo Milkshake
- Total Time: 10 minutes
- Yield: 2 servings 1x
- Diet: Vegetarian
Description
A rich and creamy Oreo milkshake that captures the joy of childhood memories with every sip.
Ingredients
- 4–5 Oreo Cookies
- 3–4 scoops Vanilla Ice Cream
- 1 cup Whole Milk
- 2 tablespoons Chocolate Syrup
- Whipped Cream (optional)
- Chocolate Shavings or Crushed Oreos for garnish
Instructions
- Crush the Oreos: Start by crushing about 4-5 Oreo cookies in a food processor or zip-lock bag.
- Blend the Ingredients: In a blender, combine 3-4 scoops of vanilla ice cream, 1 cup of whole milk, and the crushed cookies.
- Add Chocolate Syrup: Drizzle in 2 tablespoons of chocolate syrup.
- Blend Again: Blend until combined and smooth, about 30 seconds to a minute.
- Taste Test: Pour a little into a glass to taste. Adjust sweetness or thickness as needed.
- Serve it Up: Pour the milkshake into tall glasses, drizzling chocolate syrup inside the glass if desired.
- Top with Whipped Cream & Oreos: Add whipped cream, and garnish with reserved Oreo crumbs and/or chocolate shavings.
Notes
For a richer flavor, consider adding a splash of vanilla extract. Serve with extra Oreos for dipping!
- Prep Time: 10 minutes
- Cook Time: 0 minutes
- Category: Dessert
- Method: Blending
- Cuisine: American
Nutrition
- Serving Size: 1 serving
- Calories: 540
- Sugar: 45g
- Sodium: 170mg
- Fat: 25g
- Saturated Fat: 14g
- Unsaturated Fat: 6g
- Trans Fat: 0g
- Carbohydrates: 53g
- Fiber: 2g
- Protein: 8g
- Cholesterol: 70mg
Keywords: Oreo Milkshake, Dessert, Ice Cream, Summer Treat
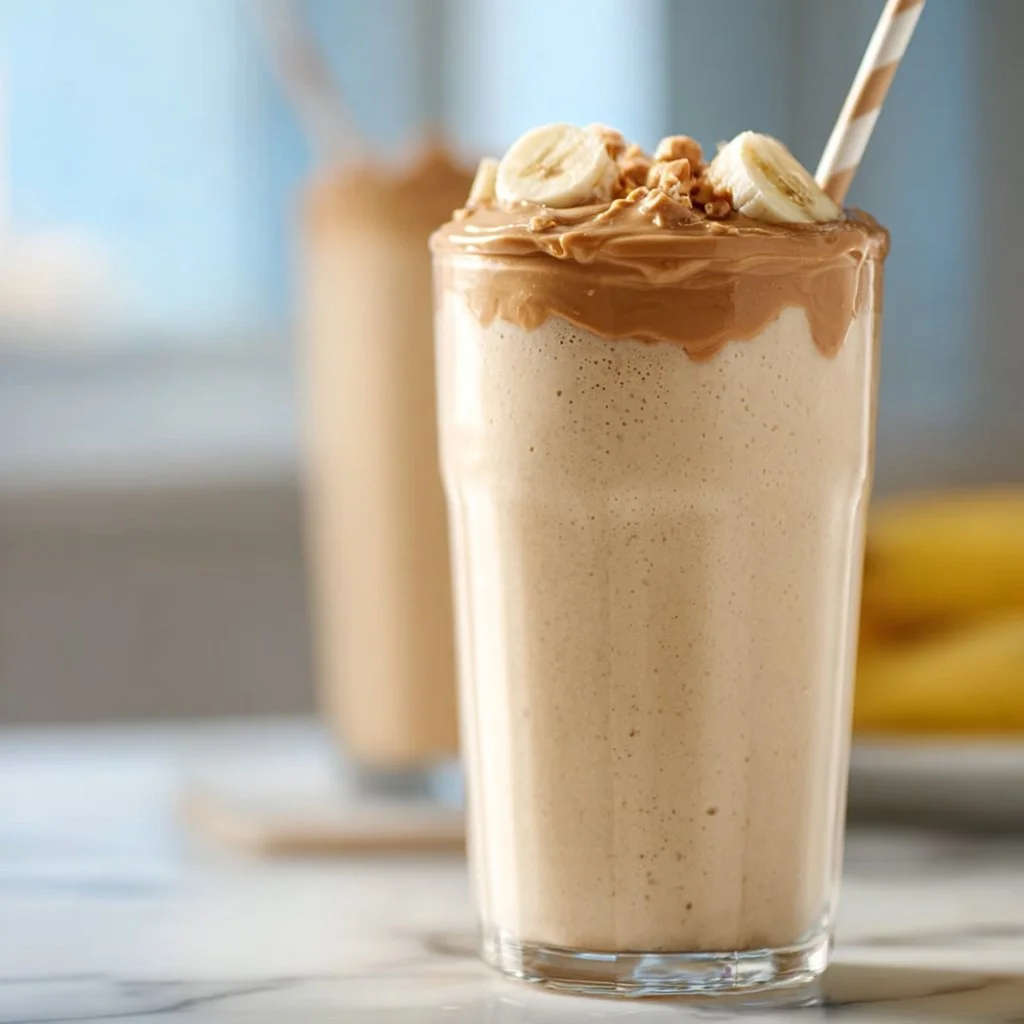
Peanut Butter Power Shake
Peanut Butter Power Shake Recipe: Energize Your Day!
Welcome to my kitchen, my fellow flavor enthusiasts! Today I’m excited to share one of my absolute favorite recipes: the Peanut Butter Power Shake. It’s creamy, dreamy, and filled to the brim with energy-boosting goodness that packs a punch. Whether you’re heading out the door for an early morning or just looking for a mid-afternoon treat, this shake is perfect for fueling your day!
I’ve always believed that food connects us; it fuels our bodies and ignites our passions. This shake, in particular, has been a staple in my home for as long as I can remember. After a long day of classes in college, I would whip it up in the blender as a delicious way to recharge. Back then, I had no idea how “adulting” would bring unexpected energy plateaus — but I always knew I could rely on this shake. The irresistibly rich flavor of peanut butter alongside the smoothness of bananas and creaminess of yogurt keeps my spirits up and my energy soaring. Let’s dive into this recipe that’s as easy to make as it is to enjoy!
A Sweet Memory
While I often whip up this shake solo, there’s a magical moment in my brain that sweetly tugs at my heartstrings. I remember a Saturday morning when I invited my best friend Casey over for brunch. Lazy mornings should ideally start with something decadent yet wholesome, right? We hit the kitchen together, blasting our favorite tunes, and the smell of peanut butter wafting through the air was enough to get us giggling like kids again.
As we poured the shake into our favorite oversized mugs, we couldn’t help but fawn over its velvety texture and enticing aroma. It felt like the perfect way to kick off an impromptu girls’ day! We chatted about everything under the sun while savoring every sip of our creation. To this day, we call this shake “Memory Maker Shake.” Because honestly, is there anything a good shake can’t solve?
Ingredients
Let’s go ahead and gather our ingredients! Here’s what you’ll need for this delightful shake, along with some special notes about each:
-
2 tablespoons of natural peanut butter
A creamy, delicious source of protein! Go for the unsweetened kind if you want to control the sugar. Almond butter or sunflower seed butter are great alternatives if allergies are a concern! -
1 ripe banana
Bananas add natural sweetness and a smooth consistency. If you don’t have one on hand, avocado can provide similar creaminess without the strong banana taste. -
1 cup of milk (dairy or plant-based)
Choose your favorite! Almond milk, oat milk, or coconut milk are all delightful substitutes. Just watch for added sweeteners if you’re looking to keep it light! -
½ cup of plain yogurt
Greek yogurt is ideal for added protein and thickness! For a lactose-free option, use coconut yogurt. -
1 tablespoon of honey or maple syrup
A little added sweetness can make all the difference, but feel free to skip it if your banana is sweet enough! -
1 tablespoon of chia seeds (optional)
These tiny seeds are powerhouses of nutrients! They also help to thicken the shake. If you don’t have any, flaxseeds make a fantastic alternative! -
A pinch of cinnamon
Cinnamon enhances flavor and has wonderful health benefits. Nutmeg is a delicious alternative if you want a warm twist! -
Ice cubes (optional)
If you prefer a thicker, frostier shake, add a few ice cubes. Just remember that it will make it more slushy!
Step-by-Step Instructions
Ready to blend? Here’s how to create that delectable Peanut Butter Power Shake!
-
Prep Your Ingredients
Start by gathering all your ingredients on the counter. If you’re like me, having everything in front of you prevents those frantic kitchen moments where you realize you forgot something crucial! -
Layer It Up
In your blender, add the peanut butter first. This will help with blending smoothly — we don’t want any clumps here! Follow that with the banana, milk, yogurt, and sweetener. Pro tip: if your banana is frozen, it will make the shake extra creamy and cold. Just give it a little thaw time for easier blending! -
Toss in the Extras
If you’re going for some added health benefits, throw in the chia seeds and a sprinkle of cinnamon. Just be sure to stir the chia seeds into the liquid a bit; they’ll blend better! -
Blend It!
Pop the lid on that blender and give it a whirl! Blend on high for about 30 seconds or until you see a smooth, luscious consistency. If you want it thinner, add a bit more milk. For thicker, toss in some ice cubes and blend again until everything’s deliciously combined. -
Taste Test
This is the best part! Grab a spoon and taste your shake. Need more sweetness? Add an extra drizzle of honey and blend. Make sure to adjust based on your preferences — this shake is all about you! -
Serve It Up
Pour your shake into your favorite glass or mug and take a second to admire your handiwork. You can top it with a sprinkle of extra chia seeds or a few banana slices for a pretty finish!
Serving Suggestions
I love serving my Peanut Butter Power Shake with a sprig of fresh mint on top or a handful of granola to add a bit of crunch. If you happen to be hosting friends, create a mini shake bar with various toppings like nuts, seeds, and fruits — let everyone customize their own shakes! It’s a fun, interactive way to enjoy a meal while fostering connection.
Recipe Variations
If you’re feeling adventurous, here are a few creative twists to elevate your Peanut Butter Power Shake:
- Chocolate Lover’s Delight: Add in a tablespoon of cocoa powder or a scoop of chocolate protein powder for a rich chocolatey flavor.
- Berry Bliss: Blend in a handful of berries like strawberries, blueberries, or raspberries for a fruity twist that packs an antioxidant punch!
- Green Power: Add a handful of spinach or kale to sneak in some greens without sacrificing the delicious peanut butter flavor!
- Coffee Boost: For a morning wake-up call, blend in a shot of espresso or brewed coffee.
- Nutty Banana Swirl: Mix in a tablespoon of almond or cashew butter for a different nutty flavor profile.
Chef’s Notes
One of the best parts about cooking is that it’s always evolving! I remember when I first started making this shake, I relied on pre-packaged peanut butter. Now, I’m all about natural options, which have so much more flavor! And let me tell you — the joy of tasting a perfectly blended shake and realizing you’ve nailed the proportions never gets old.
Every time I make this shake, I can’t help but reminisce about those carefree days in my college kitchen, laughing and blending with friends. The heart of cooking is rooted in togetherness, and I think that’s what makes this shake feel special — it’s not just about the ingredients; it’s about the memories we create!
FAQs and Troubleshooting
Q: What can I do if my shake is too thick?
A: Simply add a splash more milk or water and blend again until the desired consistency is reached!
Q: Can I make this ahead of time?
A: Yes, feel free to prepare everything in advance and store it in the fridge. Just give it a quick blend before serving as the ingredients might settle.
Q: Why isn’t my peanut butter blending smoothly?
A: If using natural peanut butter, sometimes it separates. Make sure to stir it well before measuring out! If all else fails, add a small amount of the milk to aid in blending.
Q: How can I make this shake vegan?
A: Simply substitute the yogurt for coconut yogurt, use a plant-based milk, and swap honey for maple syrup.
Nutritional Info (Optional)
For those curious about the numbers, here’s a rough breakdown of your delicious shake (based on basic ingredients):
- Calories: ~350
- Protein: ~15g
- Carbs: ~45g
- Fat: ~15g
Now that you’ve got the scoop on making a perfect Peanut Butter Power Shake, it’s time to blend one up! This shake is a canvas for creativity, so let your taste buds guide you in making it your own. Remember, every time you whip up this drink, you’re not just satisfying your hunger — you’re creating memories! Cheers to health, happiness, and deliciousness, my kitchen friends!
Print
Peanut Butter Power Shake
- Total Time: 5 minutes
- Yield: 1 serving 1x
- Diet: Vegetarian
Description
A creamy and energizing shake filled with the rich flavor of peanut butter, bananas, and yogurt, perfect for a morning boost or mid-afternoon treat.
Ingredients
- 2 tablespoons of natural peanut butter
- 1 ripe banana
- 1 cup of milk (dairy or plant-based)
- ½ cup of plain yogurt
- 1 tablespoon of honey or maple syrup
- 1 tablespoon of chia seeds (optional)
- A pinch of cinnamon
- Ice cubes (optional)
Instructions
- Prep your ingredients by gathering everything on the counter.
- Layer it up by adding peanut butter, banana, milk, yogurt, and sweetener to your blender.
- Toss in the extras, like chia seeds and cinnamon.
- Blend on high for about 30 seconds until smooth.
- Taste your shake and adjust sweetness as needed.
- Serve in your favorite glass and enjoy!
Notes
Feel free to customize your shake with toppings or variations like cocoa powder or spinach for added nutrition.
- Prep Time: 5 minutes
- Cook Time: 0 minutes
- Category: Smoothie
- Method: Blending
- Cuisine: American
Nutrition
- Serving Size: 1 shake
- Calories: 350
- Sugar: 15g
- Sodium: 120mg
- Fat: 15g
- Saturated Fat: 3g
- Unsaturated Fat: 10g
- Trans Fat: 0g
- Carbohydrates: 45g
- Fiber: 5g
- Protein: 15g
- Cholesterol: 10mg
Keywords: peanut butter shake, smoothie, healthy breakfast, energy booster, quick recipe
Oreo Milkshake
Oreo Milkshake Recipe: A Decadent Delight for Everyone
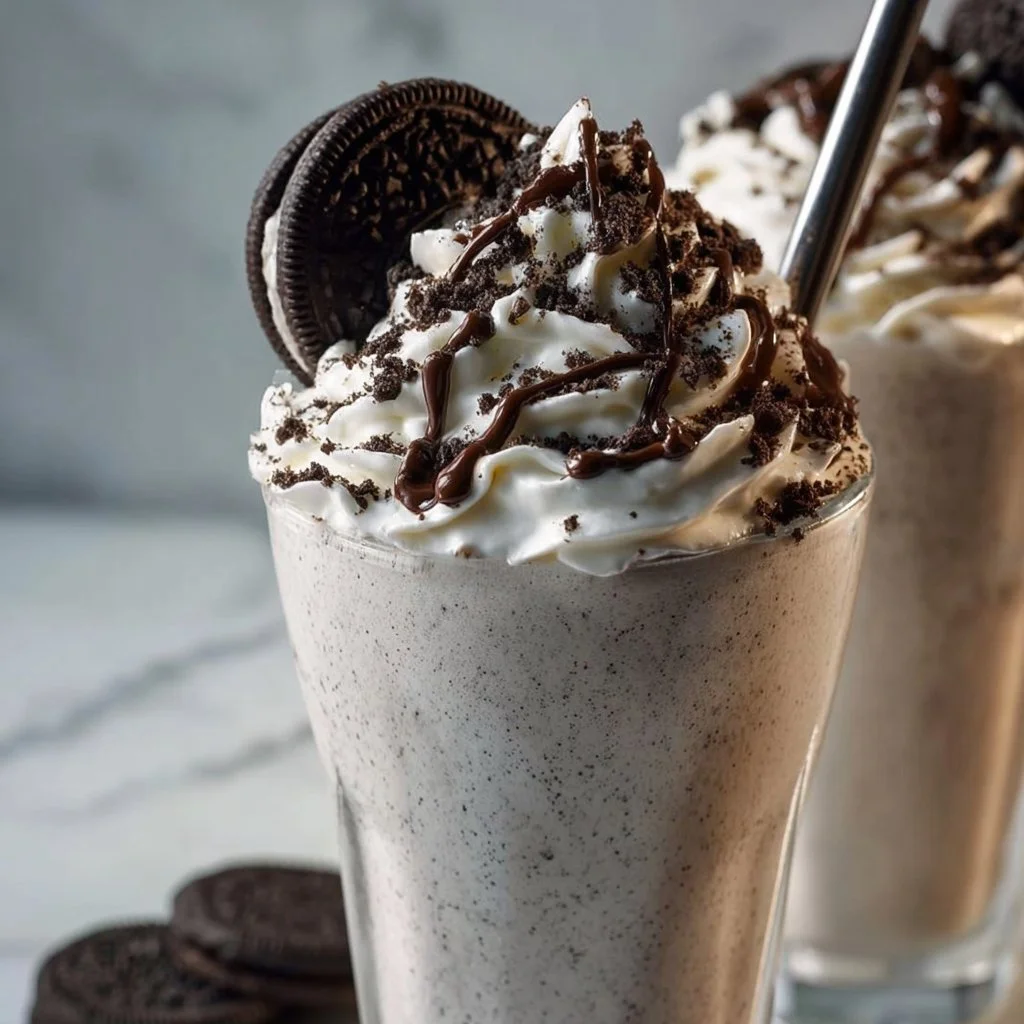
Welcome to my kitchen! I’m so excited to share one of my absolute favorite sweet treats with you today: the Oreo milkshake. If you’re anything like me, you know there’s something incredibly special about the combination of creamy ice cream and crunchy cookies. Picture this: a frosty glass filled with a luscious, thick, and creamy milkshake that perfectly balances chocolatey and vanilla flavors, topped with whipped cream and maybe even a drizzle of chocolate syrup. It’s the indulgence we didn’t know we needed!
Oreo milkshakes remind me of those carefree summer afternoons when my siblings and I would race to the kitchen after dinner, eager to whip up a batch while we still had daylight. We’d rummage through the pantry for our favorite ingredients, our giggles filling the room. My parents could always hear us stirring up mischief! But the best part? As we blended those cookies into ice-cold milk, the anticipation built until we could finally savor that first sip. Each sip was a sweet memory, a moment that transported us to a blissful, cookie-laden paradise.
Today, I want to channel that pure joy of childhood into your kitchen. Whether you’re treating yourself during a cozy night in, celebrating a special occasion, or just trying to impress friends, an Oreo milkshake never fails to delight. Plus, it’s super easy—it only takes a few minutes, and you probably already have the ingredients hanging out in your pantry and fridge! So, grab your blender and let’s get started on creating a mouthwatering Oreo milkshake that’s bound to be a hit.
Personal Story
I still fondly remember the summer my family transformed our small kitchen into a makeshift ice cream parlor. One evening, after a particularly long day of swimming in the pool, we decided to recreate our favorite movie scene where the characters enjoyed huge milkshakes at an old diner. We quickly gathered hand-churned vanilla ice cream, stacks of Oreos, and the creamiest milk we could find.
As we whipped everything up, my older brother decided to go wild with the toppings, adding everything from sprinkles to chocolate syrup (yes, we were a little overzealous!). I can still hear our laughter as we tried to take our first sips—those straws were working overtime! But the real victory of that evening? The moment we sat on the back porch, milkshakes in hand, stars twinkling overhead, as we shared the best of stories and dreams. It was one of those moments that makes you appreciate the simple joys in life.
Now, whenever I blend up an Oreo milkshake, it’s like catching a nostalgic whiff of childhood—a reminder that good food and laughter are the ultimate experiences to savor, especially when shared with loved ones.
Ingredients
Before we dive into the deliciousness that is the Oreo milkshake, let’s briefly review the ingredients you’ll need. Each one adds its unique touch to the shake, making it a delightful treat!
-
Oreo Cookies (6–8):
- Why it’s essential: The classic base for our milkshake. Their crunchy chocolate cookies and creamy filling create the ultimate flavor.
- Substitution tips: If you’re feeling adventurous, try chocolate sandwich cookies or even gluten-free versions!
-
Vanilla Ice Cream (2 cups):
- Why it’s essential: Creaminess is key! Vanilla ice cream provides a smooth texture and the perfect neutral backdrop for those Oreos.
- Substitution tips: Try using plant-based ice creams or frozen yogurt for a lighter version.
-
Milk (1 cup):
- Why it’s essential: Milk helps blend everything into that luxuriously thick consistency we all crave.
- Substitution tips: Almond milk, oat milk, or even chocolate milk can add exciting flavors!
-
Whipped Cream (for topping):
- Why it’s essential: A fluffy crown for your milkshake! It’s a glorious finish that elevates every sip.
- Substitution tips: Try coconut whipped cream for a dairy-free treat!
-
Chocolate Syrup (optional):
- Why it’s essential: You can drizzle it on top for an extra sweet moment or swirl it throughout the shake!
- Substitution tips: Experiment with caramel or strawberry sauce for a fruity twist.
-
Extra Oreo Crumbles (for garnish):
- Why it’s essential: More Oreos? Yes, please! It adds crunch and that wow factor when serving.
- Substitution tips: Crushed nuts or cereal can offer a different texture!
Step-by-Step Instructions
Now, let’s get into the fun part—making your Oreo milkshake! Grab your blender, and let’s whip up a monster of a shake!
Step 1: Prepare Your Ingredients
Before blending, we want to have everything ready. Measure out your ice cream, milk, and Oreos. You want to use a sturdy blender for this recipe; it’ll make everything so much easier!
Step 2: Blend in the Goodness
Add all your ingredients into the blender: the ice cream, milk, and Oreos. Start with 6 Oreos, and you can always add more if you want a stronger flavor. Trust me; it’s hard to go wrong!
Blend on high until everything is smooth and creamy. Don’t be concerned if the Oreos break up unevenly—they should give that perfect speckled look. It’s like each sip is a surprise!
Step 3: Check the Consistency
After blending, take a moment to taste-test! If it’s a bit too thick for your liking, add a splash more of milk and give it another quick blend. If you want a thicker shake, add a bit more ice cream.
Step 4: Pour and Plate
Grab your favorite tall glass and pour the milkshake in. You’ll want to let it fill all the way to the top; nobody likes a half-filled milkshake! At this point, you can drizzle chocolate syrup inside the glass before pouring for an extra-special touch.
Step 5: Top It Off
Here comes the magic! Add a generous swirl of whipped cream on top, then sprinkle extra crumbled Oreos for that fancy finishing touch. Drizzle more chocolate syrup if you’re feeling adventurous.
Step 6: Serve Immediately
Grab a straw (or a spoon if you’re like me and just can’t wait!), and find a cozy spot to enjoy your creation. Trust me, you’re going to want to savor that first sip!
Serving Suggestions
For the ultimate presentation, serve your Oreo milkshake with a side of extra cookies or snack-sized treats, like chocolate bars or brownies. You can also pair it with fresh fruit—strawberries or bananas make excellent companions. And if you want to turn it into a full-fledged dessert experience, pair it with a slice of chocolate cake or gooey brownies to complete the party!
Recipe Variations
Looking to switch it up? Here are a few fun variations you can try:
- Mint Oreo Milkshake: Swap regular Oreos for mint-flavored ones for a refreshing twist.
- Peanut Butter Oreo: Add a couple of tablespoons of peanut butter to the blender for a nutty, delicious flavor combo.
- Mocha Oreo Shake: Use coffee ice cream and add a shot of espresso or cold brew for an energizing twist.
- Cookie Dough Delight: Toss in some edible cookie dough chunks for an extra treat in your shake.
- Vegan Oreo Shake: Use dairy-free ice cream, almond milk, and vegan Oreo cookies to cater to vegan friends!
Chef’s Notes
This recipe is one that’s evolved over the years in my kitchen. I initially started with just milk and Oreos, but like any avid cook knows, discovering new flavors is where the fun happens! I’ve experimented with different ice creams—mint chocolate chip is a favorite (and so good for summer!)—and have learned to embrace toppings.
I’ll never forget the time I tried to create an “Oreo milkshake bar” for a get-together with friends, allowing everyone to customize their shakes. Let’s just say we had a few too many “experiments,” including a strange peanut butter-bacon combination (which was hilariously a disaster). Sometimes, the best kitchen memories come from the fails!
FAQs and Troubleshooting
-
Q: My milkshake is too thick! What can I do?
- A: Just add a splash of milk and blend again. Start with small amounts until you reach the desired consistency!
-
Q: Can I make this ahead of time?
- A: I recommend enjoying these fresh, but if you must make it ahead, blend and store it in the freezer. Just remember to re-blend right before serving for the best texture.
-
Q: How can I make this into a non-dairy version?
- A: Simply use dairy-free ice cream and almond or oat milk. Most store-bought Oreos are also dairy-free!
-
Q: Can I customize the level of sweetness?
- A: Absolutely! Adjust the amount of milk and ice cream depending on your preference. If you love it sweeter, drizzle some extra syrup into the blender.
Nutritional Info
While a delicious indulgence, an Oreo milkshake isn’t exactly low-calorie. Here’s a quick nutritional breakdown per serving (approximately):
- Calories: 800-900 calories
- Fat: 30-40g
- Carbohydrates: 100-110g
- Sugars: 70-75g
- Protein: 10g
Note: Nutritional values will vary based on specific ingredient choices.
I hope you’re now feeling inspired to create your very own Oreo milkshake! Armed with this recipe, you’re all set to sweeten up your day and make some delightful memories. So, gather your loved ones, blend up those ingredients, and let the happiness flow—one delicious sip at a time! Enjoy, and happy cooking!
Print
Oreo Milkshake
- Total Time: 5 minutes
- Yield: 2 servings
- Diet: Vegetarian
Description
A decadent Oreo milkshake with a perfect balance of chocolatey and vanilla flavors, topped with whipped cream and drizzled with chocolate syrup.
Ingredients
- Oreo Cookies (6–8)
- Vanilla Ice Cream (2 cups)
- Milk (1 cup)
- Whipped Cream (for topping)
- Chocolate Syrup (optional)
- Extra Oreo Crumbles (for garnish)
Instructions
- Prepare your ingredients by measuring out the ice cream, milk, and Oreos.
- Blend all ingredients into the blender: ice cream, milk, and Oreos. Start with 6 Oreos for a nice flavor.
- Check the consistency after blending. Add more milk for a thinner shake or more ice cream for a thicker shake.
- Pour the milkshake into a tall glass, filling it to the top.
- Top it off with whipped cream and extra Oreo crumbles.
- Serve immediately with a straw or spoon!
Notes
For variations, try using mint Oreos or adding peanut butter for a nutty twist. Enjoy with extra cookies or brownies on the side.
- Prep Time: 5 minutes
- Cook Time: 0 minutes
- Category: Dessert
- Method: Blending
- Cuisine: American
Nutrition
- Serving Size: 1 serving
- Calories: 800
- Sugar: 75g
- Sodium: 300mg
- Fat: 35g
- Saturated Fat: 20g
- Unsaturated Fat: 10g
- Trans Fat: 0g
- Carbohydrates: 110g
- Fiber: 3g
- Protein: 10g
- Cholesterol: 60mg
Keywords: Oreo, milkshake, dessert, sweet treat, ice cream
Ninja Slushie Caramel Milkshake Recipe
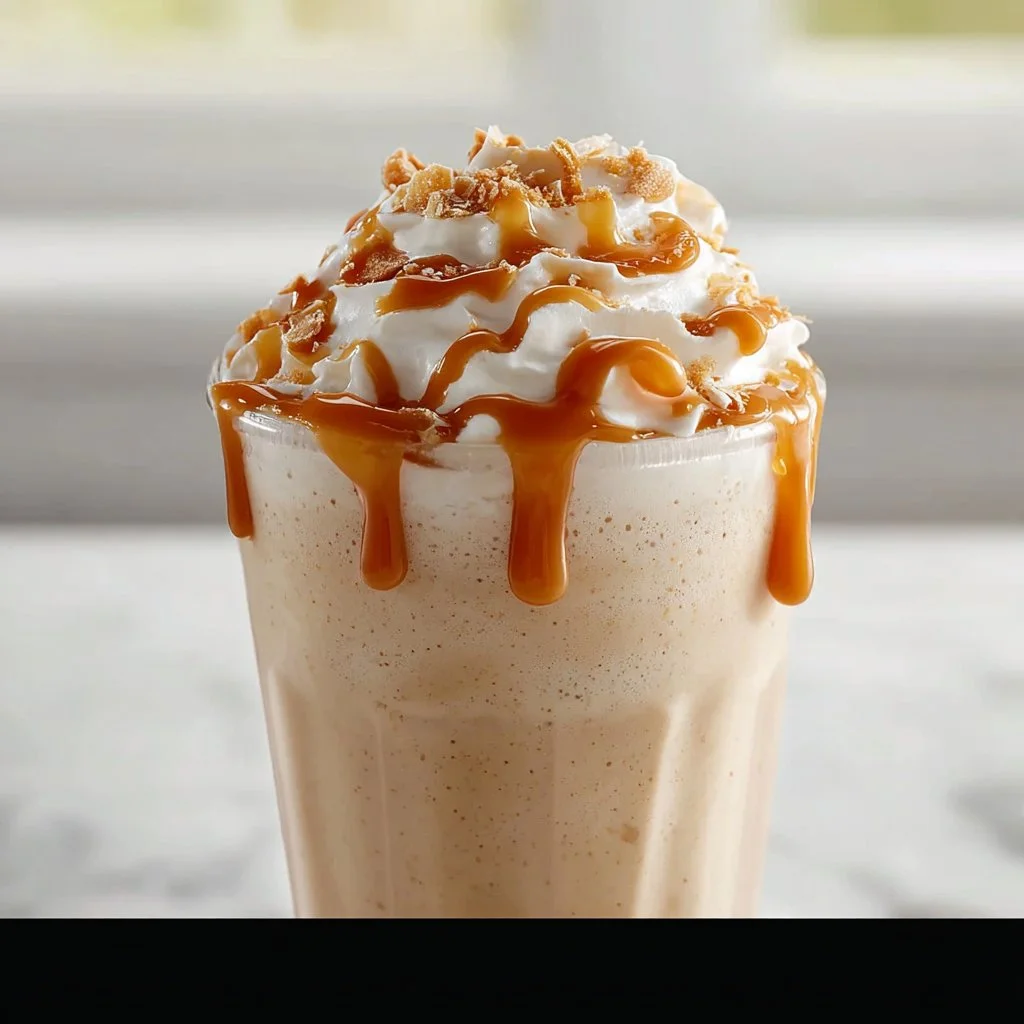
Ninja Slushie Caramel Milkshake Recipe
Welcome to my kitchen! If you’ve ever been on a hot summer day, yearning for a refreshingly sweet treat that perfectly balances indulgence and nostalgia, you’re in for a real treat today. I’m Olivia Bennett, and today we’re diving into the world of delightful milkshakes—not just any milkshakes, but the fabulously fun Ninja Slushie Caramel Milkshake! Think of it as a cool breeze on a hot day, a comforting hug in a cup, and an adventure in flavor all mixed together.
Picture this: it’s a sunny Saturday afternoon, and the kids are running around the yard while the grill sizzles with delicious barbecue. You’re seeking something to cool off with—maybe to share or indulge in solo. That’s when the Ninja Slushie Caramel Milkshake comes into play, transforming simple ingredients into something magical. With the swoosh of a Ninja blender (or any trusty blender), you can create a delightful concoction that mesmerizes taste buds and fills your home with the sweet aroma of caramel.
This isn’t just any milkshake; it’s a fun twist on the classic, enhanced with yummy caramel swirls and frosty goodness that blend together to create an experience you’ll want to revisit over and over again. So, whether it’s a sunny day or an enjoyable night in, let’s whip up something that not only tastes absolutely yummy but also takes us back to warm, fuzzy memories of childhood ice cream trucks and lazy weekends.
Personal Story
Let me tell you about my very first milkshake experience. I was a little girl, and every summer, my family would take a day trip to the beach. Before hitting the sandy shores, we’d always stop at this charming little diner known for its milkshakes. I remember the excitement in my tummy as I gazed at the menu with all its whimsical flavors, but my heart was set on one thing: the creamy caramel milkshake.
The waitress would bring it to our table in this tall, frosty glass, topped with whipped cream and an extra drizzle of caramel that glistened like sunshine. That moment was more than just a drink; it was about the smiles, laughter, and family moments we shared around that table. I can’t help but giggle now thinking about my dad trying to keep the whipped cream from reaching his nose. It’s those simple pleasures and cherished memories that inspire this colorful Ninja Slushie Caramel Milkshake recipe today!
Ingredients
-
Ice Cream:
- Vanilla or Caramel Flavor: A rich vanilla makes a great base, while caramel-flavored ice cream adds an extra punch. Feel free to swap with dairy-free options if you’re looking for a vegan treat—coconut or almond milk ice creams work wonders!
-
Milk:
- Whole or Almond Milk: About 1 cup of whole milk for creaminess, or almond milk for a lighter version. You can adjust the quantity based on your desired thickness.
-
Caramel Sauce:
- Store-bought or Homemade: Look for quality caramel sauce that will delight your taste buds. If you’re feeling adventurous, try your hand at making it from scratch using butter, sugar, and cream for a fun kitchen project!
-
Ice:
- Crushed or Cubed Ice: Use more or less depending on your desired slushie texture. Crushed ice is fantastic for achieving that refreshing slush consistency!
-
Whipped Cream:
- A Must-Have Topping: You can make it fresh or use pre-made. Don’t forget to add an extra drizzle of caramel on top. It’s all about the presentation!
-
Optional Toppings:
- Chocolate Shavings, Nuts, or Sprinkles: Get creative! You can customize your milkshake with these fun toppings for added crunch and flair.
Step-by-Step Instructions
Alright, let’s get our hands a bit messy, shall we? Grab your apron and let’s blend up some magic!
Step 1: Gather Your Ingredients
Start by gathering all your ingredients on your countertop. This will ensure you have everything you need at your fingertips. Nobody enjoys running around the kitchen mid-blend, right?
Step 2: Blend the Base
In your mighty Ninja blender, add about 2 cups of vanilla ice cream, followed by the milk. Start with 1 cup; you can always add more later for thickness. Secure the top and blend until smooth. Pro tip: If your milkshake feels too thick, gradually add a splash of milk until you achieve your desired consistency.
Step 3: Add the Caramel
Now comes the fun part—drizzle about ¼ cup of caramel sauce into the mix while the blender runs. The caramel swirls will infuse a delightful flavor into your milkshake. Note: you may wish to adjust the caramel based on how sweet you prefer your shake.
Step 4: Ice, Ice, Baby!
Toss in about 1-2 cups of ice (depending on how slushy you want it), and blend again for about 30 seconds until crushed and well-combined. This is where the Ninja’s power shines! You should see a luscious, creamy mix taking shape.
Step 5: Taste Test
This is my favorite step! Give your milkshake a taste. If you think it needs a little more caramel or is too thick, go ahead and adjust. It’s all about personal preference here!
Step 6: Serve It Up!
Grab your fanciest glasses (or the fun ones your kids picked out), and pour your Ninja Slushie Caramel Milkshake right in. Make sure you see those delightful layers!
Step 7: Toppings Galore!
Dollop on a whirlwind of whipped cream and drizzle with an extra swirl of caramel. You could even sprinkle chocolate shavings, nuts, or rainbow sprinkles on top for a festive touch. Ta-da!
Serving Suggestions
Present your beautiful milkshake topped with a bright maraschino cherry for an extra pop of color. Hand out colorful straws or even set up a mini milkshake bar with various toppings so everyone can customize their creations. It makes for great conversation and a wonderful way to connect over something sweet!
Recipe Variations
- Nutty Caramel Chocolate: Blend in some chocolate ice cream, and sprinkle chopped nuts on top for that satisfying crunch.
- Salted Caramel: A touch of sea salt can elevate your milkshake game to a whole new level by balancing the sweetness of caramel beautifully.
- Banana-Fudge Delight: Toss in half a ripe banana to add natural sweetness and creaminess, then finish off with a drizzle of fudge.
- Coconut Bliss: Use coconut milk ice cream and top with toasted coconut flakes for a tropical twist.
- Cookie Lover’s Dream: Add crushed cookies to the mix and as topping for a delicious cookie-and-cream-inspired shake.
Chef’s Notes
This Ninja Slushie Caramel Milkshake recipe has come a long way since I first tried making it years ago! I’ve fiddled with different ice cream flavors, caramel types and even experimented with adding seasonal spices like cinnamon or nutmeg to see what fits best. Every time I whip this up, it brings back memories of family trips, friends gathered in my kitchen, and lots of giggles over who can make the tallest whipped cream mountain!
Don’t ever let kitchen messes discourage you—some of the best culinary creations come from those spontaneous moments. Remember to take a look back at your “oops” moments—they often lead to the best stories and smiles!
FAQs and Troubleshooting
-
What if my milkshake is too thin?
Don’t fret! Just add more ice or ice cream and blend it again until you get that creamy thickness you crave. -
Can I make it ahead of time?
While it’s best enjoyed fresh, you can store it in the freezer for a short time. Just remember to let it sit for a bit before serving again to soften it up! -
Can I use a different flavor of ice cream?
Absolutely! The beauty of a milkshake is its versatility. Try experimenting with mint chocolate chip, cookies and cream, or even some fruity flavors for a summer twist. -
What if I don’t have a blender?
No blender? No problem! Consider using a milkshake maker if you have one. Alternatively, mix your ice cream and milk in a large jar with a tight-fitting lid and shake, shake, shake until blended!
Nutritional Info (Optional)
- Serving Size: 1 medium milkshake
- Calories: Approximately 500 calories (depending on ingredients used)
- Total Fat: 25g
- Carbohydrates: 65g
- Sugars: 45g
- Protein: 10g
So there you have it, my fabulous Ninja Slushie Caramel Milkshake recipe! I hope you enjoy making it as much as I do. Embrace the joy of creating something delicious from the heart. Let’s keep cooking, sharing stories, and making cherished memories together. Happy blending! 🍦💕
Print
Ninja Slushie Caramel Milkshake
- Total Time: 10 minutes
- Yield: 2 servings 1x
- Diet: Vegetarian
Description
A delightfully refreshing and indulgent milkshake, enhanced with caramel swirls for a nostalgic treat on hot summer days.
Ingredients
- 2 cups Vanilla or Caramel Ice Cream
- 1 cup Whole or Almond Milk
- ¼ cup Caramel Sauce (store-bought or homemade)
- 1–2 cups Crushed or Cubed Ice
- Whipped Cream (for topping)
- Optional Toppings: Chocolate Shavings, Nuts, Sprinkles
Instructions
- Gather your ingredients on your countertop.
- Blend the base by adding ice cream and milk in the blender.
- Add the caramel sauce while blending.
- Toss in the ice and blend until well-combined.
- Taste your milkshake and adjust flavors as desired.
- Serve the milkshake in glasses, showcasing delightful layers.
- Dollop whipped cream and add toppings on top.
Notes
For added flavor, try variations like Nutty Caramel Chocolate or Salted Caramel. Perfect for customizing with your favorite toppings!
- Prep Time: 10 minutes
- Cook Time: 0 minutes
- Category: Dessert
- Method: Blending
- Cuisine: American
Nutrition
- Serving Size: 1 milkshake
- Calories: 500
- Sugar: 45g
- Sodium: 150mg
- Fat: 25g
- Saturated Fat: 15g
- Unsaturated Fat: 7g
- Trans Fat: 0g
- Carbohydrates: 65g
- Fiber: 1g
- Protein: 10g
- Cholesterol: 80mg
Keywords: milkshake, caramel, dessert, summer treat, sweet
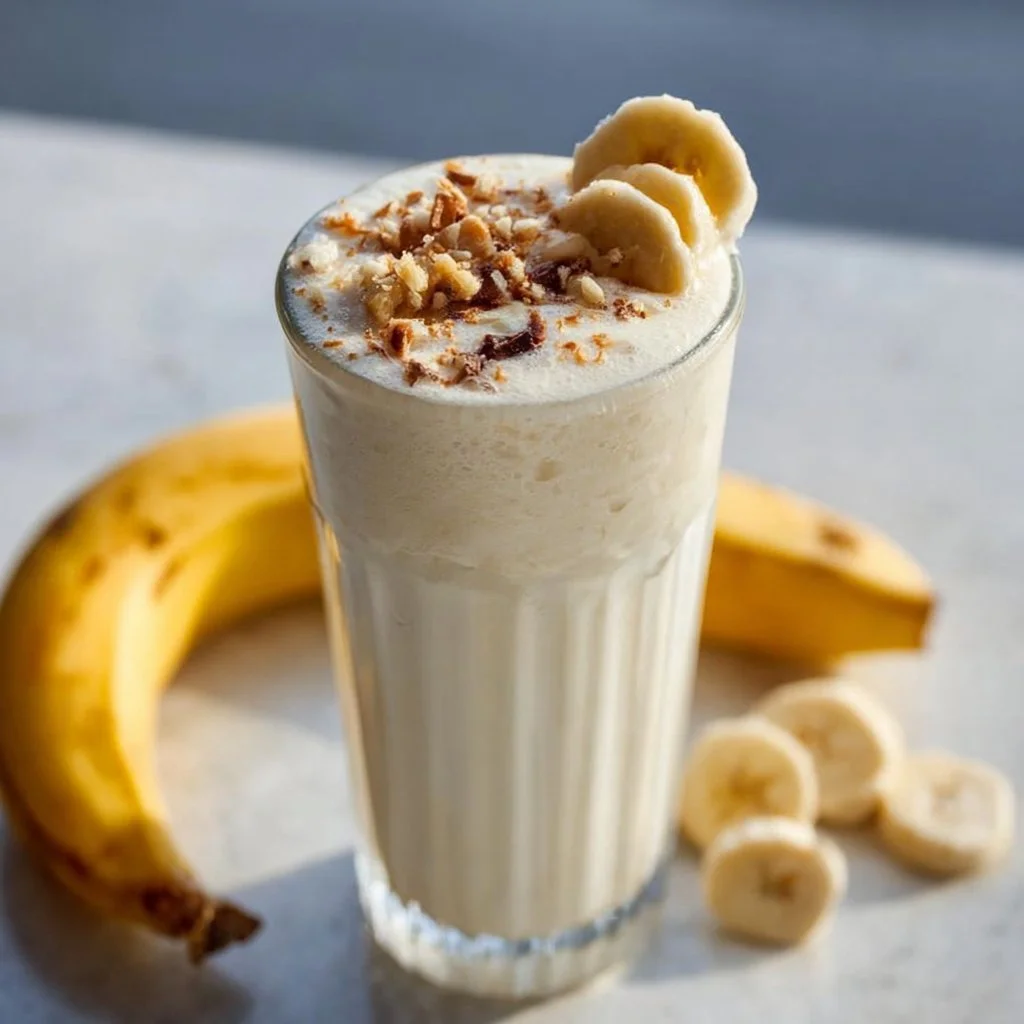
Banana Milkshake Recipe
# Whip Up Cozy Memories with the Perfect Banana Milkshake

## Introduction: A Sweet Start to Your Day
Ah, the banana milkshake! If there’s one drink that can transport me back to my childhood, it’s this nostalgic treat. The creamy sweetness of ripe bananas perfectly blended with rich, velvety milk creates a symphony of flavors that’s undeniably enticing. This isn’t just a simple drink; for me, it’s a cozy hug in a glass, bringing memories of lazy summer afternoons and laughter-filled family gatherings. Whether you're looking for a quick breakfast treat or a satisfying snack, a banana milkshake is a versatile delight that can brighten any day.

Banana milkshakes are not just about the bananas, either! With a handful of additional ingredients, you can transform them into a creamy dream that’s rich in flavor, texture, and nostalgia. Flipping through an old family recipe book, you might come across various versions chock-full of surprises—chocolate syrup swirls, a dash of vanilla extract, or even a sprinkle of nutmeg. Inspired by these memories, I created a recipe that balances the smooth, sweet goodness of banana with the exciting hints of creativity that can be added along the way.

Let’s dive together into the banana milkshake recipe that will make your taste buds dance and your heart sing! Get ready to put on your apron and embrace the magic of this simple yet fabulous creation. The best part? You’ll be able to whip it up in no time—no fancy equipment required. So grab those bananas, and let’s make some banana magic happen in your kitchen!

## Personal Story: A Banana-Scented Memory
Growing up, weekends were always special. My mom was a master in the kitchen, passionately whipping up all sorts of delicious goodies. But there was one thing that stood out the most: her banana milkshakes. On lazy Saturday mornings, she’d peel those perfectly ripe bananas with a smile, the sweet aroma filling the air. I would bounce around the kitchen, eagerly waiting for my turn to mix—I loved being her little sidekick.

One Saturday, we decided to shake things up and added a scoop of chocolate ice cream to the mix. The result was nothing short of magical! That first sip sent me to a new level of deliciousness—so creamy, so divine! From that moment on, our banana milkshake tradition transformed from being just a simple drink to a delightful family affair filled with laughter, experiments, and all kinds of flavors. Today, each banana milkshake I make brings back those warm memories and the sweet sounds of laughter in our kitchen—a warm reminder of comfort and togetherness.

## Ingredients
### Here’s what you’ll need to create the most delicious banana milkshake:

- **Ripe Bananas (2 large)**: The star of the show! Look for bananas with brown spots for maximum sweetness. If you don't have ripe ones, you can work with yellow bananas, but they may not be as sweet.

- **Whole Milk (1 cup)**: For a creamy, rich shake. You can substitute with almond milk, oat milk, or any milk of your choice for a lighter version.

- **Vanilla Ice Cream (2 scoops)**: This adds a delightful creaminess and a hint of vanilla. For a dairy-free option, choose a plant-based ice cream, which still delivers a similar texture.

- **Honey or Maple Syrup (1-2 tablespoons)**: Depending on your sweetness preference, this natural sweetener can enhance the flavor beautifully. Feel free to skip it if your bananas are perfectly ripe.

- **Vanilla Extract (½ teaspoon)**: A splash of vanilla helps to elevate the flavor. If you prefer, you could use a drop of almond extract for a different twist.

- **Nutmeg or Cinnamon (a pinch)**: A little sprinkle enhances the warmth of the shake, though it's optional. These spices work great to add depth if you're feeling adventurous!

Each ingredient plays a significant role, and the simple swaps mentioned can turn this basic recipe into a custom creation!

## Step-by-Step Instructions
### Are you ready to shake things up in the kitchen? Let's get blending!

1. **Prep Your Ingredients**: Start by gathering all your ingredients. Peel those ripe bananas and chop them into chunks—it allows them to blend more easily. Make sure your ice cream is slightly softened if it’s been stored in the freezer for a while.

2. **Gather Your Blender**: Place the banana chunks at the bottom of your blender. This helps everything blend smoothly without getting stuck!

3. **Add the Liquid**: Pour in the cup of whole milk. If you're going for a thicker shake, add less milk or even a splash of cream. For a thinner consistency, add a bit more.

4. **Ice Cream Time!**: Scoop in those two generous scoops of vanilla ice cream. This is where the shake gets that decadent creaminess—don’t be shy here!

5. **Sweeten Up**: Drizzle in the honey or maple syrup, then toss in the vanilla extract and pinch of nutmeg or cinnamon. These last touches bring the whole shake together, infusing it with warmth and complexity.

6. **Blend Away**: Secure the lid tightly on your blender and blend on high until everything is smooth and creamy. I usually do this for about 30 seconds, but feel free to adjust based on your blender’s strength.

7. **Taste Test**: Take a quick taste before serving—adjust sweetness if needed! If it’s too thick, add a splash of milk; if it’s too thin, throw in a few more banana chunks or ice cream.

8. **Serve Immediately**: Pour your shake into tall glasses. You can top it with whipped cream, chocolate shavings, or a cherry for some extra flair if desired.

And voila! You've made a dreamy banana milkshake that could easily bring the sunshine indoors, perfect for any time of day!

## Serving Suggestions
Presentation is key! If you want to elevate your banana milkshake experience, consider serving it in chilled glassware or mason jars. Top your milkshake with whipped cream and sprinkle a dash of cinnamon or even crushed nuts for an added texture. Serve with a colorful straw and watch as your loved ones dive into this creamy delight!

## Recipe Variations
Want to put your spin on this classic milkshake? Here are some fun variations:

1. **Peanut Butter Banana Milkshake**: Add 2 tablespoons of peanut butter for that nutty flavor kick!

2. **Chocolate Banana Milkshake**: Mix in 1-2 tablespoons of chocolate syrup or a scoop of chocolate ice cream for an indulgent treat.

3. **Strawberry Banana Combo**: Toss in some fresh strawberries along with the bananas for a refreshing fruit blend.

4. **Minty Fresh Banana Shake**: Add a few fresh mint leaves for a refreshing twist, perfect for summer!

5. **Protein-Packed Shake**: Blend in a scoop of protein powder for a post-workout boost that tastes great and keeps you fuller longer!

## Chef’s Notes
This banana milkshake recipe has evolved throughout the years. I used to make it flawlessly with sugar, but I’ve learned to keep it simple and let those ripe bananas do the talking. The key to the perfect milkshake lies in the quality of your bananas—overripe and spotty will always yield a sweeter flavor.

The memories of my mom and our Saturday morning shake tradition are never far from my mind. Every time I make this shake for family or friends, I recount those silly moments in the kitchen, laughing, experimenting, and definitely making a mess! Embrace the messiness of cooking; it’s all part of the fun!

## FAQs and Troubleshooting
### 1. **Why is my milkshake too thick?**
If your milkshake is thicker than you'd like, simply add some more milk in small increments until you reach your desired consistency. Blending it a bit longer can also help!

### 2. **What if I don’t have ripe bananas?**
If you only have yellow bananas, you can use them, but the milkshake might not be as sweet. A quick hack is to microwave them for about 20 seconds to soften them up a bit!

### 3. **Can I make this ahead of time?**
While it’s best enjoyed fresh, you can prepare the banana and milk mixture and store it in the fridge. Just give it a quick re-blend before serving.

### 4. **What can I do with leftover banana milkshake?**
If you have leftovers, pour the shake into popsicle molds for a tasty frozen treat. Banana milkshake pops are sure to be a hit with the kids!

## Nutritional Info
(If you’re tracking your nutrition, here’s a rough estimate per serving):
- **Calories**: 340
- **Total Fat**: 10g
- **Total Carbohydrates**: 63g
- **Protein**: 6g

Now that you have the ultimate banana milkshake recipe, it’s time to make some delicious memories in your kitchen! Share your creations, and remember—cooking is all about joy and connection. Cheers to cozy flavors and delightful sips!
Cozy Banana Milkshake
- Total Time: 10 minutes
- Yield: 2 servings 1x
- Diet: Vegetarian
Description
A creamy and sweet banana milkshake that brings childhood memories to life.
Ingredients
- 2 large Ripe Bananas
- 1 cup Whole Milk
- 2 scoops Vanilla Ice Cream
- 1–2 tablespoons Honey or Maple Syrup
- ½ teaspoon Vanilla Extract
- a pinch of Nutmeg or Cinnamon
Instructions
- Prep Your Ingredients: Start by gathering all your ingredients. Peel those ripe bananas and chop them into chunks.
- Gather Your Blender: Place the banana chunks at the bottom of your blender.
- Add the Liquid: Pour in the cup of whole milk.
- Ice Cream Time!: Scoop in those two generous scoops of vanilla ice cream.
- Sweeten Up: Drizzle in the honey or maple syrup, then toss in the vanilla extract and pinch of nutmeg or cinnamon.
- Blend Away: Secure the lid tightly on your blender and blend on high until everything is smooth and creamy.
- Taste Test: Take a quick taste before serving—adjust sweetness if needed!
- Serve Immediately: Pour your shake into tall glasses.
Notes
For a thicker shake, adjust the milk amount accordingly. Serve in chilled glasses with toppings like whipped cream or chocolate shavings.
- Prep Time: 10 minutes
- Cook Time: 0 minutes
- Category: beverage
- Method: Blending
- Cuisine: American
Nutrition
- Serving Size: 1 serving
- Calories: 340
- Sugar: 30g
- Sodium: 100mg
- Fat: 10g
- Saturated Fat: 6g
- Unsaturated Fat: 4g
- Trans Fat: 0g
- Carbohydrates: 63g
- Fiber: 3g
- Protein: 6g
- Cholesterol: 30mg
Keywords: banana milkshake, easy dessert, childhood memories, creamy drink, summer treat
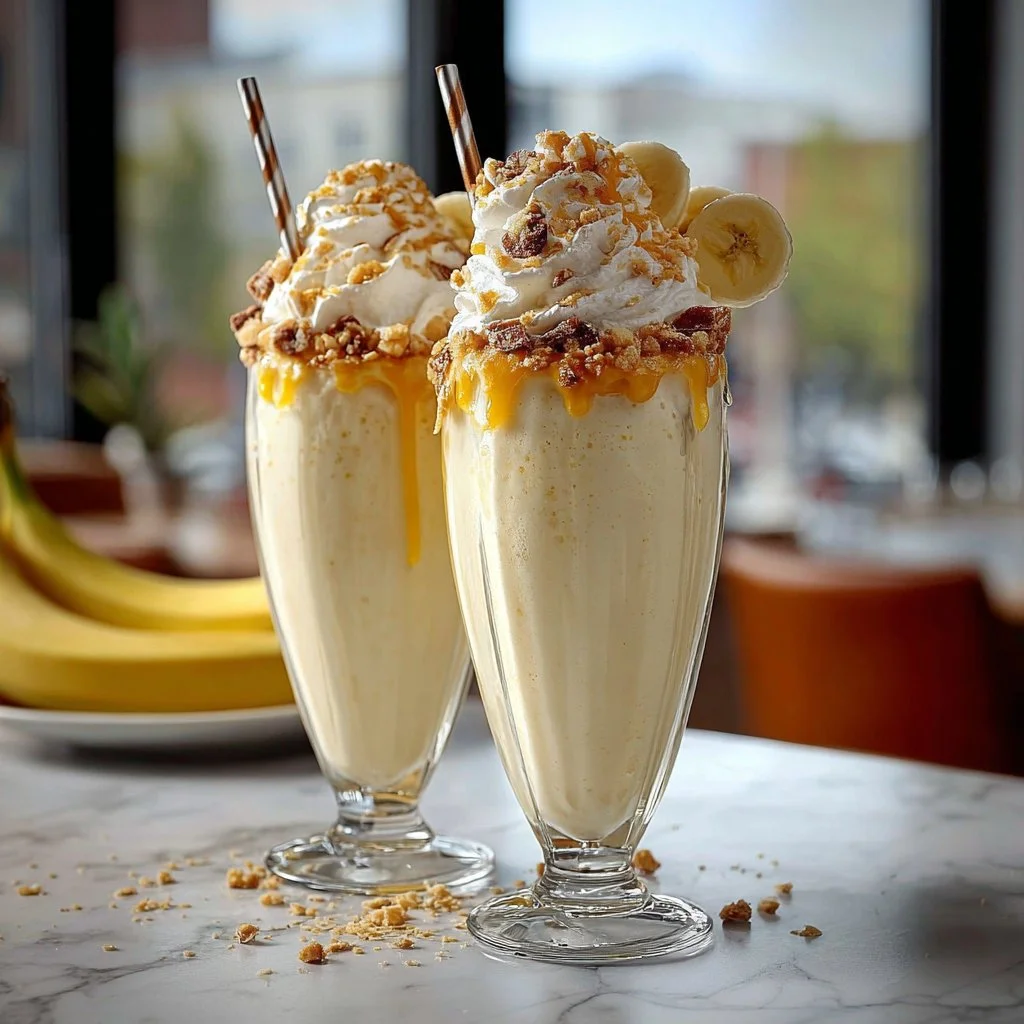
Banana Pudding Milkshakes: The Best Creamy Dessert You’ll Ever Sip
Banana Pudding Milkshakes: The Best Creamy Dessert You’ll Ever Sip
Welcome back to my cozy kitchen, my dear food enthusiasts! Today, we’re going to dive into one of my all-time favorite desserts that’s perfect for any occasion—Banana Pudding Milkshakes! Imagine this: a creamy, luscious shake that combines the comforting essence of banana pudding with the fun of a milkshake. It’s the kind of treat that makes every day feel like a celebration, or better yet, like a flashback to those carefree childhood summers. You know, when the sun was shining, the days felt endless, and every scoop of sweetness brought a smile to your face.
Now, let’s take a moment to appreciate how well this delightful dessert can bring people together. Whether you’re serving it at a casual get-together, a fun-filled BBQ, or simply treating yourself on a cozy evening at home, Banana Pudding Milkshakes are sure to steal the show. They are rich and creamy, with all the nostalgic flavors you adore, while being easy enough for even the busiest of chefs to whip up on a whim.
But wait! Before we jump into the recipe, I want to share a little background about what inspired this delicious creation. After all, every great recipe has a story behind it, right? So sit tight, mix your favorite ingredients, gather your loved ones, and let’s shuffle into a memory lane that will sweeten your day!
Personal Story
Growing up, my family had this tradition of gathering around the table every Sunday for a potluck-style meal. Each week, one family member would take the lead in preparing the main course while everyone else brought their favorite sides. My aunt Clara was famous for her homemade banana pudding, which never failed to steal the spotlight. I still remember the way the warm kitchen would fill with the aroma of vanilla and sweet bananas, drawing everyone in like a moth to a flame. There was always a race to see who could snag the first serving.
One summer, I decided to sneak a taste when no one was looking. Well, let’s just say I never regretted that bold move! I ended up devouring an entire cup of that velvety pudding before even making it to the table. The pure joy of that moment, feeling the balance of soft, creaminess and bites of crunchy Nilla wafers, inspired me to create this Banana Pudding Milkshake. It’s a way for me to honor those cherished memories while also making something whimsical and fun for everyone to enjoy. So gather ’round, my friends! Let’s channel those sunny childhood days with this delightful shake that’s sure to enchant your taste buds and warm your heart.
Ingredients
Here’s what you’ll need to make the ultimate Banana Pudding Milkshake:
-
Bananas
- Ripe, medium bananas work best for sweetness and flavor. If you’re short on ripe bananas, you can opt for frozen pieces for a super creamy consistency.
-
Vanilla Ice Cream
- The base of our shake! You can substitute with a dairy-free alternative or yogurt for a lighter option. Aim for quality ice cream; it truly makes a difference.
-
Milk
- Whole milk adds richness, but feel free to use almond, oat, or any other milk of your choice! Just remember, the consistency you aim for might vary.
-
Instant Vanilla Pudding Mix
- This is the secret ingredient for that classic banana pudding flavor. If you prefer, you could try making your own pudding from scratch.
-
Whipped Cream
- To top it off! Homemade whipped cream is easy to whip up, or go for store-bought for a quicker option.
-
Nilla Wafers
- The signature cookie! If you’re looking for a gluten-free option, check for gluten-free vanilla wafers or even crush up some graham crackers.
-
Salt
- A pinch of salt helps balance the sweetness and enhance all the flavors!
With these ingredients on hand, you’re already halfway to creamy, dreamy bliss!
Step-by-Step Instructions
Now that we have our ingredients ready, it’s time to bring the magic to life. Let’s get shaking!
-
Prep Your Bananas
Start by peeling the bananas and slicing them into smaller chunks. The riper the bananas, the sweeter your shake! If you’re using frozen bananas, skip this step and toss them directly into the blender. -
Blending the Base
Add the sliced bananas into your blender, followed by a generous scoop of vanilla ice cream. You can start with about 2 cups for a thick shake. Now it’s time for the instant vanilla pudding mix—about ½ cup will do. It’s the key to that luscious pudding flavor! -
Adding Milk
Pour in about 1 cup of milk. Depending on how thick or thin you like your shakes, feel free to adjust this amount. Blend the mixture on high until it’s primarily smooth, and please do not forget the taste test at this stage. You might need to add a bit more banana or ice cream—no judgment here! -
Add Texture with Nilla Wafers
Toss in a handful of Nilla Wafers (think about 6-8) and pulse the blender just a couple of times. This will break up the cookies while still leaving some chunks for that classic banana pudding experience. -
Taste and Adjust!
Give it a taste. Do you need a little more sweetness? Maybe a touch of whipped cream or another cookie for pzazz? Adjust according to your like, and blend again briefly if needed. -
Serve It Up!
Grab your favorite tall glasses and pour in the milkshake. Opt for a fun straw or fancy spoon for instant happiness. If you want to, you can even drizzle a little extra whipped cream on top before adding a few crushed Nilla Wafers for decoration—after all, we eat with our eyes first!
Serving Suggestions
These Banana Pudding Milkshakes are phenomenal on their own, but why not serve them with a little flair? You can pair them with homemade cookies, mini banana muffins, or even a scoop of fresh fruit for a refreshing contrast. If you’re hosting a party, consider setting up a shake bar where guests can add their own toppings, like chopped nuts or chocolate shavings, to make it even more personal and fun!
Recipe Variations
-
Chocolate Lover’s Twist
Add 2 tablespoons of chocolate syrup to transform this into a chocolate banana pudding shake. You could even use chocolate ice cream for a rich and indulgent treat! -
Nutty Delight
Introducing a handful of crushed peanuts or almond butter can add a delightful nutty flavor that complements the bananas perfectly. -
Berry Banana Bliss
Toss in a handful of fresh strawberries or blueberries for a vibrant twist full of extra fruity goodness. -
Vegan Version
Swap your regular ice cream for coconut or almond milk ice cream and use a dairy-free milk option. Replace the instant pudding mix with a vegan version or homemade. -
Frozen Banana Surprise
Replace fresh bananas with frozen ones, which will create a wonderfully thick and creamy shake that’s perfect for hot summer days.
Chef’s Notes
Every time I whip up these milkshakes, I’m reminded of those family potluck Sundays. This recipe has evolved over time, inspired by my cravings for nostalgia and comfort. I can’t help but chuckle at how many times I’ve found myself standing by the blender, doing the “just one more scoop” dance! Plus, the joy of sharing a glass with friends is unmatched. Remember, making desserts doesn’t need to be serious—get your kiddos involved, make a mess, and most importantly, have fun!
FAQs and Troubleshooting
1. Why is my milkshake too thick?
If your shake ends up too thick, simply add a bit more milk, blending again until it reaches your desired consistency. It’s always easier to thicken than thin, so add gradually!
2. Can I make this ahead of time?
While I recommend consuming it fresh for the best flavor, you can prepare individual cups and store them in the freezer for short bursts of sweetness. Just be aware that they may take on a slushy texture!
3. What if I don’t have vanilla pudding mix?
You can create your own with cornstarch, sugar, and a dash of vanilla extract or even skip it entirely for a more straight banana flavor! The nostalgia might slightly shift, but it will still be delicious.
4. How long will these last in the fridge?
I generally advise consuming your milkshake right away, but if any leftovers remain, seal them in an airtight container and refrigerate them for a couple of hours. Just give them a quick blend before serving again.
Nutritional Info
- Calories: Approximately 450 (varies based on toppings and substitutions)
- Fat: 18g
- Carbohydrates: 65g
- Protein: 6g
And there you have it! Untangle your mixing bowls and embrace all the creamy goodness that is a Banana Pudding Milkshake. I can’t wait for you to enjoy this batch of nostalgia in a glass, creating sweet memories of your own along the way. Happy shaking!
Print
Banana Pudding Milkshakes
- Total Time: 10 minutes
- Yield: 2 servings 1x
- Diet: Vegetarian
Description
A creamy and nostalgic milkshake that combines the flavors of banana pudding with the fun of a refreshing shake.
Ingredients
- 2 ripe medium bananas
- 2 cups vanilla ice cream
- 1 cup whole milk (or dairy-free alternative)
- ½ cup instant vanilla pudding mix
- Whipped cream for topping
- 6–8 Nilla Wafers
- A pinch of salt
Instructions
- Prep your bananas by peeling and slicing them into smaller chunks.
- Add the bananas into your blender along with 2 cups of vanilla ice cream.
- Pour in ½ cup of instant vanilla pudding mix.
- Pour in 1 cup of milk and blend on high until smooth.
- Toss in a handful of Nilla Wafers and pulse a couple of times to add texture.
- Give it a taste and adjust sweetness as needed.
- Grab glasses and pour in the milkshake, topping with whipped cream and crushed Nilla Wafers.
Notes
For a variation, try adding chocolate syrup or fresh berries for an exciting twist!
- Prep Time: 10 minutes
- Cook Time: 0 minutes
- Category: Dessert
- Method: Blending
- Cuisine: American
Nutrition
- Serving Size: 1 glass
- Calories: 450
- Sugar: 35g
- Sodium: 150mg
- Fat: 18g
- Saturated Fat: 11g
- Unsaturated Fat: 7g
- Trans Fat: 0g
- Carbohydrates: 65g
- Fiber: 3g
- Protein: 6g
- Cholesterol: 60mg
Keywords: banana pudding, milkshake, dessert, creamy, nostalgic
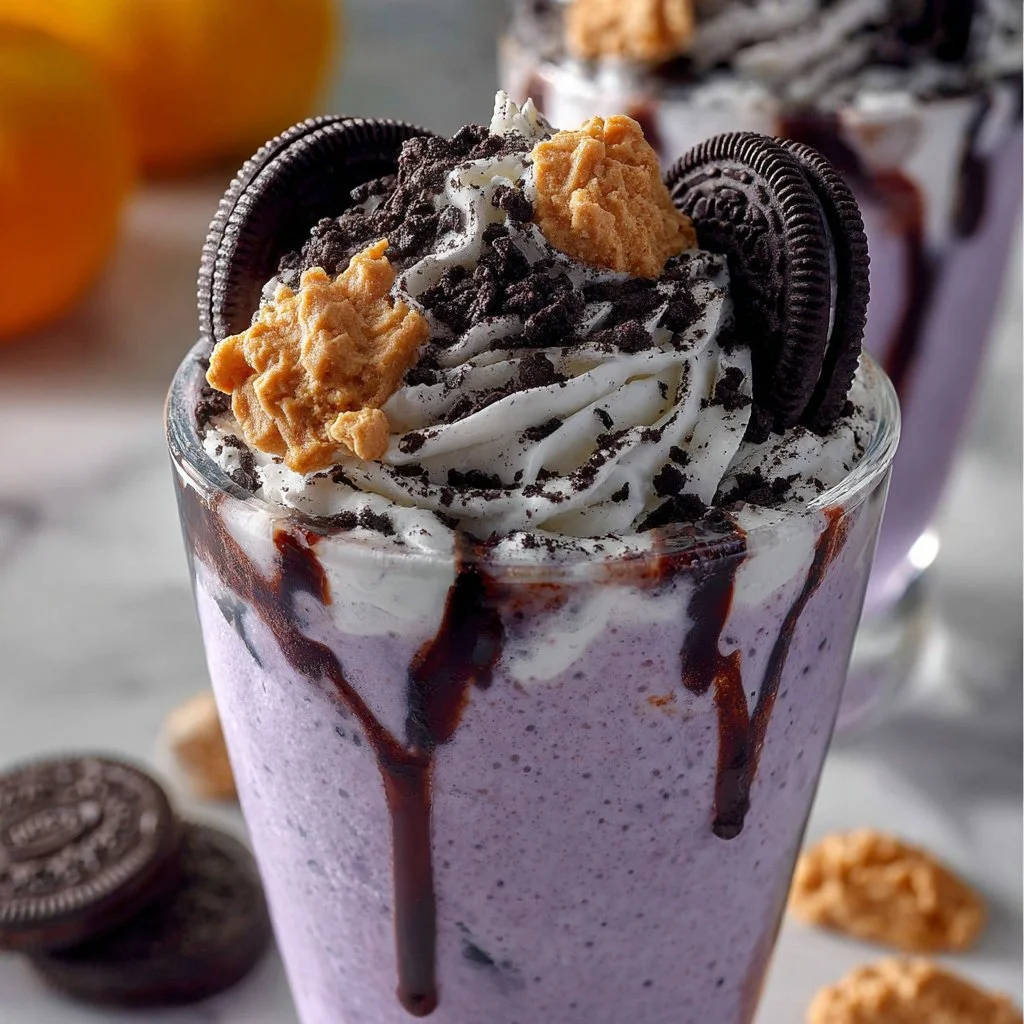
Witches Brew Oreo Milkshake
Witches Brew Oreo Milkshake: Spooktacularly Delicious
Hello, fellow food adventures! 🌟 As the leaves start to change and the air turns crisper, there’s one thing on my mind: Halloween treats! I can’t help but get excited about the magic of the season, especially when it comes to food. One of my absolute favorite creations to whip up during this time is the Witches Brew Oreo Milkshake. It’s not just a drink; it’s a delightful experience that brings a little extra charm and a sprinkle of fun to your Halloween festivities.
Imagine this: you gather around with friends and family, laughter fills the room, and suddenly that first sip of creamy, chocolatey goodness hits your taste buds. It’s like diving into a cauldron of sweet nostalgia, with just the right amount of spooky vibes to get everyone in the Halloween spirit. Honestly, what could be better than a milkshake that not only tastes divine but also looks like something straight out of a fun Halloween movie?
In this post, we’re going to blend up this delightful milkshake together. It’s packed with that hauntingly delicious flavor of Oreos, creamy vanilla ice cream, and some surprising ingredients that add flair without breaking the bank or your spirit! So grab your blender, and let’s make your Halloween party unforgettable with this quick and easy recipe.
Personal Story
Ah, memories of Halloween back in the day! As a kid, I was always that one who took Halloween way too seriously—costumes, decorations, and of course, treats galore. One year, my mom decided to host a Halloween party, which meant a lot for an eight-year-old Olivia filled with excitement. She whipped up a delightful mix of snacks, but what stole the show was her special spooky milkshake.
She called it the “Witches Brew,” and it was simply magical! I remember sitting on the couch, clad in my fluffy witch costume, straw in hand, and instantly falling in love with the delicious blend of chocolate, cookies, and creamy goodness. That milkshake quickly turned into the highlight of our celebration, its rich, chocolately essence sparking spontaneous dance parties in our living room as we raised our cups to the air and cheered each time someone took a sip.
Now, every Halloween, I like to carry on that tradition in my own kitchen. I’ve added my twists to the recipe over the years, and now I’m excited to share my version—the Witches Brew Oreo Milkshake! It’s guaranteed to bring the same joy and laughter to your celebrations as it did back then. Let’s dive right into the magical ingredients!
Ingredients
Here’s what you’ll need to create this enchanting concoction:
-
Oreos (1 package)
- Chef Insight: Oreos are the classic cookie choice here, but you can switch it up with any flavored Oreo (like mint or pumpkin spice) for a fun twist!
-
Vanilla Ice Cream (3 cups)
- Substitution Tip: Need a dairy-free option? Use a plant-based vanilla ice cream made from coconut or almond milk!
-
Milk (1 cup)
- Quick Insight: Whole milk gives you that creamy texture, but you can use almond milk or oat milk for a lighter version.
-
Chocolate Syrup (1/4 cup)
- Chef Hack: Consider using a homemade chocolate syrup for that extra special touch—just combine equal parts cocoa powder, sugar, and water and simmer until thick!
-
Whipped Cream (for topping)
- Substitution Tip: For a fun Halloween presentation, consider using green-tinted whipped cream or even flavored whipped cream like marshmallow!
-
Green Food Coloring (optional, for spooky vibes)
- Chef Insight: This is optional, but a few drops can really elevate the witchy aesthetic!
-
Sprinkles or Edible Glitter (for garnish)
- Chef Hack: Go wild with the sprinkles—think Halloween colors like orange and purple for extra flair!
Step-by-Step Instructions
Ready to get blending? Let’s make this Witches Brew Oreo Milkshake step by step!
-
Gather Your Ingredients:
Make sure you have all your ingredients ready to go. Nothing worse than realizing halfway through you’re out of Oreos! -
Crush the Oreos:
In a large zip-top bag, crush your Oreos into smaller pieces. You want chunks, not powder—so swing by with a rolling pin, or just use your hands! This will add that delightful texture to your milkshake.Tip: Save a few cookie pieces for garnishing later—they’ll add that extra yum factor on top!
-
Blend it All Together:
In a blender, combine the vanilla ice cream, milk, chocolate syrup, and about two-thirds of your crushed Oreos.Chef Hack: From experience, it’s often easier to start with the milk and ice cream first, as they create a smooth base. Blend on medium speed until everything is well combined and creamy. Adjust the thickness by adding more milk if it’s too thick or more ice cream for a richer flavor.
-
Add Green Food Coloring (Optional):
If you’re going for that spooky look, this is the time to add your green food coloring. Just a couple of drops will do. Blend again until the color is evenly distributed. -
Pour & Garnish:
Now comes the fun part! Pour the luscious milkshake into tall glasses. Top with a generous dollop of whipped cream, sprinkle on those saved Oreo chunks, and add your Halloween sprinkles or glitter for a dramatic flair.Serving Tip: To make it even more festive, serve with colorful straws or spooky-themed drink stirrers.
-
Enjoy!
Gather your family and friends around, and toast to a delicious Halloween treat! Take a moment to appreciate the delightful blend of flavors before diving in.
Serving Suggestions
This milkshake is fabulous on its own, but feel free to make it a full-on dessert experience! Pair it with Halloween cookies, ghost-shaped cupcakes, or even a platter of chocolate-dipped fruit for a little balance. Each sip will feel like a cozy hug on a chilly October evening!
Recipe Variations
Want to mix things up? Here are some creative twists:
- Minty Witch’s Brew: Use mint-flavored Oreos and a splash of peppermint extract for a fresh mint chocolate taste!
- Peanut Butter Swirl: Add a couple of tablespoons of creamy peanut butter in the blend for a deliciously nutty flavor.
- Pumpkin Spice Surprise: Swap out some vanilla ice cream with pumpkin ice cream or add a few tablespoons of pumpkin puree and pumpkin spice.
- Chocolate Overload: Toss in some chocolate chips for extra chocolate chunks and a rich texture.
- Vegan-Friendly: Make it vegan by choosing plant-based ice cream and almond milk—so everyone can enjoy.
Chef’s Notes
This recipe has been a staple in my kitchen since I can remember! Each time I make it, I find myself reminiscing about that precious Halloween night spent with family and friends. Over the years, I’ve definitely rambled on about my favorite ingredients, trying to perfect that blend of creamy, crunchy, and sugary goodness. One funny episode was when I accidentally dumped in way too much food coloring and ended up with a glowing green concoction that made for great Instagram material—just slightly less appealing for my guests!
It’s all about experimenting, so don’t shy away from putting your spin on this milkshake. After all, cooking should be as fun and whimsical as the holiday itself!
FAQs and Troubleshooting
-
Why is my milkshake too thick?
- No worries! Simply add a little more milk and blend again until you reach your desired consistency.
-
What if I don’t have a blender?
- You can use a milkshake maker or even a whisk to combine the ingredients. It’ll take more elbow grease, but homemade always has a touch of love!
-
Can I make this ahead of time?
- Yes! You can prepare the milkshake mix (minus the whipped cream and garnishes) and store it in the freezer until you’re ready to serve. Just give it a quick blend before pouring!
-
My whipped cream isn’t holding its shape—what did I do wrong?
- Often, this is because the whipped cream wasn’t beaten enough or the cream wasn’t cold enough. Make sure the cream is chilled and whip until stiff peaks form!
Nutritional Info
(Per serving, approximate values):
- Calories: 450
- Protein: 8g
- Carbohydrates: 64g
- Fat: 22g
There you have it—a Halloween treat that’s sure to conjure up nostalgia and delight in every scoop. I hope you find as much joy making and sharing this Witches Brew Oreo Milkshake as I do! So gather those ghouls and goblins, and let the festive fun begin. Happy sipping! 🍬🧙♀️
Print
Witches Brew Oreo Milkshake
- Total Time: 15 minutes
- Yield: 4 servings 1x
- Diet: Vegetarian
Description
A spooktacular Oreo milkshake that’s perfect for Halloween gatherings, combining chocolatey creaminess with festive flair.
Ingredients
- 1 package Oreos
- 3 cups vanilla ice cream
- 1 cup milk
- 1/4 cup chocolate syrup
- Whipped cream (for topping)
- Green food coloring (optional)
- Sprinkles or edible glitter (for garnish)
Instructions
- Gather your ingredients.
- Crush the Oreos in a zip-top bag.
- Blend the vanilla ice cream, milk, chocolate syrup, and two-thirds of the crushed Oreos.
- Add green food coloring if desired and blend again.
- Pour into tall glasses and top with whipped cream, saved Oreo chunks, and sprinkles.
- Enjoy with family and friends!
Notes
Feel free to mix and match ingredients for creative variations like mint or pumpkin flavors.
- Prep Time: 15 minutes
- Cook Time: 0 minutes
- Category: Dessert
- Method: Blending
- Cuisine: American
Nutrition
- Serving Size: 1 serving
- Calories: 450
- Sugar: 40g
- Sodium: 150mg
- Fat: 22g
- Saturated Fat: 12g
- Unsaturated Fat: 8g
- Trans Fat: 0g
- Carbohydrates: 64g
- Fiber: 2g
- Protein: 8g
- Cholesterol: 30mg
Keywords: Halloween, milkshake, dessert, Oreo, festive
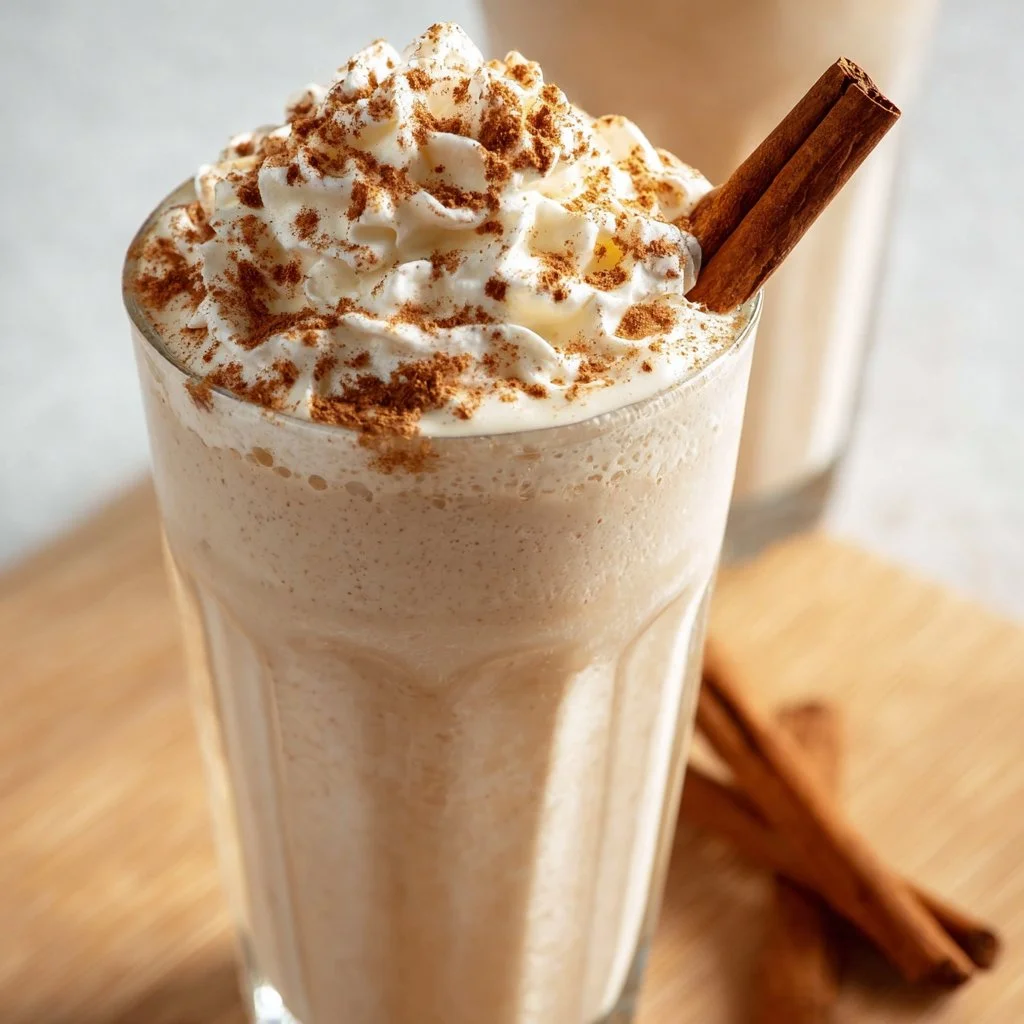
Cinnamon Vanilla Milkshake
Cinnamon Vanilla Milkshake: A Cozy Delight to Savor
Welcome back to my kitchen, my lovely foodies! Today, I’m thrilled to share one of my favorite treats that takes me right back to those lazy afternoons spent with my family — the Cinnamon Vanilla Milkshake. Picture this: it’s a hot summer day, and the sun is shining just right. The smell of cinnamon wafts through the air, reminding me of the cozy evenings spent gathered around the kitchen table, laughing and creating sweet memories. You know that feeling when you take that first sip of something utterly delightful? Well, this milkshake is the embodiment of that happiness!
This isn’t just any ordinary milkshake; it’s a rich and creamy blend that combines the warmth of cinnamon with the sweet allure of vanilla. The flavor is so comforting that it feels like a hug in a glass! And let’s be honest — who doesn’t need a little bit of that cozy love in their lives? Whether you’re indulging after a long day or treating yourself on a weekend brunch, this milkshake will surely brighten your spirits.
Now, the beauty of this recipe is that it’s wonderfully easy to whip up. With simple ingredients and minimal kitchen fuss, you can bring a little magic to your day. As you blend everything together, you’ll feel like a rockstar in your own kitchen, creating a delightful drink that’s sure to impress — even if it’s just for yourself! So, let me guide you through this delicious journey. Trust me; you’ll be sipping on this fabulous shake in no time!
Personal Story
Let me take you back to about ten summers ago when my little sister, Emma, would come over to visit during her break. I vividly remember one day, the sun pouring in through the windows, and the scent of cinnamon tipped into the air when I decided to surprise her with a decadent milkshake. It was one of those spontaneous kitchen adventures that turned into a cherished memory!
We rummaged through the pantry, pulling out every possible ingredient we could find, but it was the combination of vanilla ice cream, milk, and that sweet-smoky cinnamon that made our taste buds dance. We blended our concoction in a vintage blender — the kind that wobbled just a bit while we curiously waited for it to whirr up our treat. The moment we poured it into those tall glasses, topped with a dusting of cinnamon and a cherry, we were in heaven!
Emma’s eyes lit up at that first sip, and I knew we had created something special. This milkshake became our secret summer ritual, reminding us to embrace simplicity and joy in cooking. As you make this recipe, I hope it brings you as much happiness and warmth as it did for us. Now, let’s dive into the ingredients for this delightful goodness!
Ingredients
Here’s what you’ll need to create your Cinnamon Vanilla Milkshake:
-
Vanilla Ice Cream (4 cups)
The star of the show! Use your favorite brand, but make sure it’s a rich, creamy vanilla to get that deliciously smooth texture. If you prefer a lighter version, try frozen yogurt or a dairy-free alternative! -
Whole Milk (1 cup)
Whole milk adds richness, but you can swap it with skim milk or unsweetened almond milk for a lighter version. Keep an eye on the thickness; thinner milk will give you a more liquid shake! -
Ground Cinnamon (1 teaspoon)
This warming spice is what brings the magic! If you’re feeling adventurous, you could use a cinnamon stick for a stronger flavor — just blend it in and strain it out later. -
Vanilla Extract (1 teaspoon)
A splash of vanilla enhances the ice cream’s flavor. Pure vanilla extract is best, but if you’re out, feel free to use imitation vanilla in a pinch. -
Whipped Cream (optional)
For that extra indulgent topping! You can make homemade whipped cream in seconds or grab a can from the store. -
Maraschino Cherry (optional)
A cute cherry on top makes everything more delightful! Feel free to skip this step if you’re avoiding added sugar.
Step-by-Step Instructions
Get ready for some smooth blending action! Follow these steps, and you’ll be sipping bliss in no time:
-
Gather Your Ingredients
Before you start, gather all your ingredients. Trust me; it makes the process smoother! Plus, it’s fun to see all the yummy components laid out. -
Add Ice Cream to Blender
Scoop 4 cups of vanilla ice cream into your blender. You can let it sit for a few minutes to soften slightly — this makes blending easier and ensures you won’t need to wrestle with a stubborn ice cream block! -
Pour in the Milk
Next, add 1 cup of whole milk to the blender. If you want a thicker shake, hold back a splash of milk until you find the consistency you like. You can always add more — but it’s tricky to thicken up! -
Blend Until Smooth
Lock the lid on your blender and blend on medium speed until everything is creamy and smooth, about 20-30 seconds. Make sure to glance at the sides of the blender; you might want to scrape down any ice cream clinging onto the walls! -
Add Cinnamon and Vanilla
Now, sprinkle in the ground cinnamon and pour in the vanilla extract. Give it another quick blend for about 5-10 seconds to distribute that warm cinnamon aroma evenly throughout. -
Taste Test
Here comes the fun part! Carefully taste your shake. Is it sweet enough? If you want a little extra sweetness, consider adding a tablespoon of sugar or honey at this stage. Just blend it one last time! -
Serve Immediately
Pour your delightful shake into tall glasses. For a little flair, you can drizzle some chocolate or caramel sauce inside the glass before pouring in the shake. Can you say extravagant? -
Top with Whipped Cream and Cherry
If you’re feeling fancy, top with a dollop of whipped cream and plop a maraschino cherry right on top! Grab a straw, take a moment to admire your masterpiece, and dive in.
Serving Suggestions
To plate this delicious Cinnamon Vanilla Milkshake, I recommend using tall, clear glasses to showcase its creamy texture. If you’re feeling extra fancy, add a sprinkle of cinnamon on top of the whipped cream and perhaps a little extra swirl of chocolate or caramel sauce. Serve with wide straws, napkins galore, and that infectious smile of yours!
Recipe Variations
-
Chocolate Cinnamon Milkshake
Blend in 2 tablespoons of chocolate syrup for a chocolatey twist on this classic shake. -
Nutty Delight
Add a tablespoon of almond butter or peanut butter to your shake before blending for a creamy, nutty flavor. -
Spiced Twist
Experiment by adding a dash of nutmeg or allspice along with the cinnamon for a more complex flavor profile. -
Fruit-Fusion Milkshake
Toss in half a banana before blending for a fruity, creamy variation that’s equally delightful. -
Dairy-Free Option
Use dairy-free ice cream and nut or oat milk for an equally scrumptious shake, perfect for those with dietary restrictions!
Chef’s Notes
I’ve made this milkshake countless times, and every batch brings back those sweet summer memories with my sister. Once, I even hosted a "Shake-Off" party with friends, where we each brought our unique twist on the milkshake. It became a fun competition filled with laughter, spills, and, yes, too many milkshakes to count!
Over the years, this recipe has evolved, but the core remains the same — a love for cozy flavors and shared moments. Think of this as more than just a drink; it’s an opportunity to connect with loved ones, whether you’re sitting around the kitchen or catching up on the back porch.
FAQs and Troubleshooting
-
Can I use low-fat or almond milk instead of whole milk?
Yes, you absolutely can! Low-fat milk will work perfectly fine, but be ready for a slightly less creamy texture. Almond milk is a great dairy-free alternative, but the milkshake will be thinner — so adjust the quantity as needed! -
What if my milkshake is too thick?
No worries! Simply add a splash more milk and blend again; that should loosen it right up! -
Can I store leftovers?
While it’s tempting, milkshakes are best enjoyed fresh. If you do have leftovers, store them in an airtight container in the freezer. Let them sit out for a bit to soften before relishing again, but ice crystals may form. -
How can I make my milkshake sweeter?
For sweetness, try adding a tablespoon of vanilla syrup, honey, or sugar right before blending! Just be careful; a little goes a long way.
Nutritional Info
(This section is optional and can be customized according to dietary preferences.)
Serving: 1 milkshake
Calories: ~350
Fat: 17g
Carbohydrates: 50g
Fiber: 1g
Sugar: 35g
Protein: 9g
And there you have it, my sweet friends! Your very own cozy Cinnamon Vanilla Milkshake to enjoy on any occasion. I hope this recipe fills your kitchen with warmth and laughter just the way it has in mine! Now go ahead and treat yourself to a refreshing sip of nostalgia. Cheers to you and your kitchen adventures! 🌟🥤
Print
Cinnamon Vanilla Milkshake
- Total Time: 10 minutes
- Yield: 1 serving 1x
- Diet: Vegetarian
Description
A rich and creamy blend of vanilla ice cream and cinnamon, perfect for a hot summer day.
Ingredients
- 4 cups Vanilla Ice Cream
- 1 cup Whole Milk
- 1 teaspoon Ground Cinnamon
- 1 teaspoon Vanilla Extract
- Whipped Cream (optional)
- Maraschino Cherry (optional)
Instructions
- Gather your ingredients.
- Add ice cream to the blender.
- Pour in the milk.
- Blend until smooth.
- Add cinnamon and vanilla.
- Taste test for sweetness.
- Serve immediately.
- Top with whipped cream and cherry.
Notes
For a thicker shake, adjust the milk. Optional variations include chocolate syrup or nut butter.
- Prep Time: 10 minutes
- Cook Time: 0 minutes
- Category: Dessert
- Method: Blending
- Cuisine: American
Nutrition
- Serving Size: 1 milkshake
- Calories: 350
- Sugar: 35g
- Sodium: 100mg
- Fat: 17g
- Saturated Fat: 10g
- Unsaturated Fat: 5g
- Trans Fat: 0g
- Carbohydrates: 50g
- Fiber: 1g
- Protein: 9g
- Cholesterol: 60mg
Keywords: milkshake, cinnamon, vanilla, dessert, summer treat




