
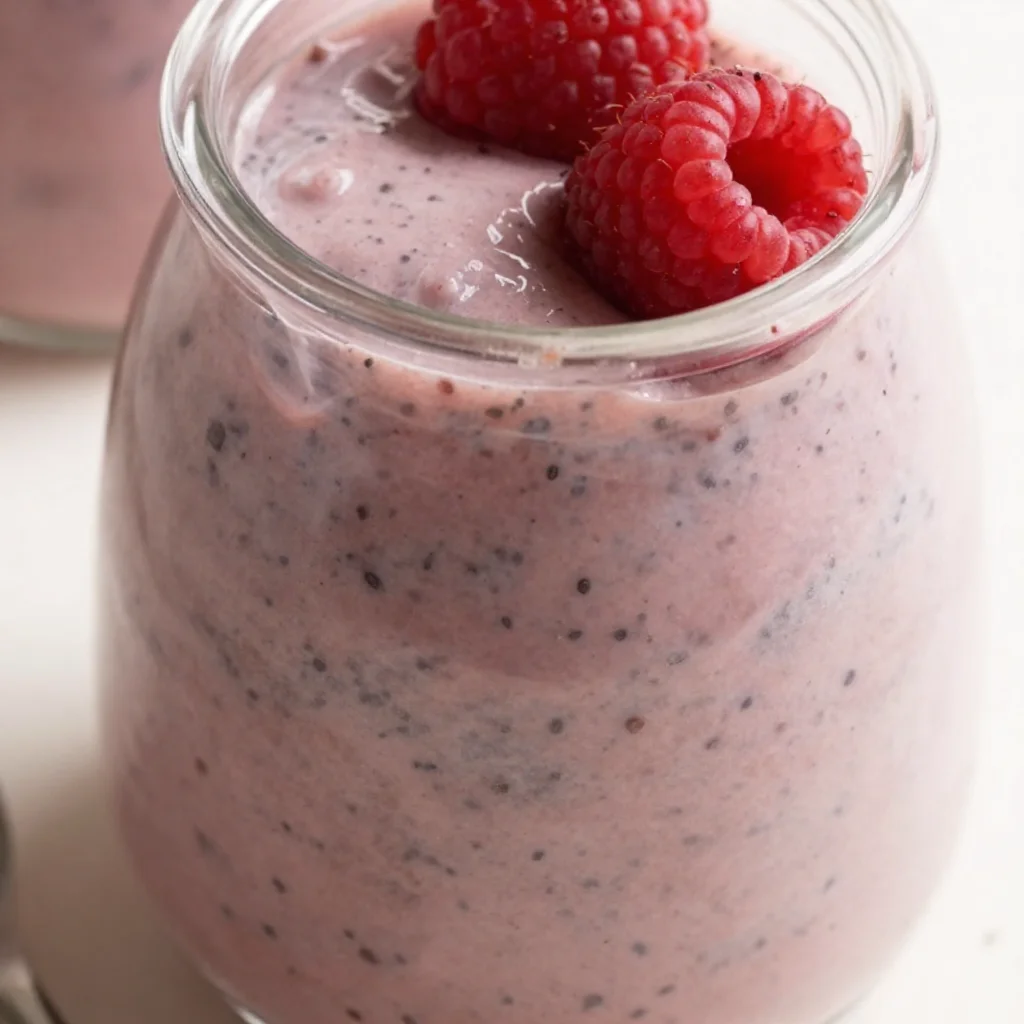
Ingredient Raspberry Chia Pudding: Quick, Creamy Breakfast
5 Ingredient Raspberry Chia Pudding: A Delightful, Fruity Adventure!
Welcome to my kitchen once again, fellow food lovers! Today, I’m thrilled to share with you one of my absolute favorite recipes that fits snugly into the realm of quick, healthy, and oh-so-delicious — Raspberry Chia Pudding! This vibrant treat is not only luscious and decadent but also incredibly easy to whip up. Perfect for breakfast, an afternoon snack, or even dessert, this pudding shines with its fruity freshness and creamy texture.
Now, I know what you might be thinking — “Chia pudding? Does it really taste good?” Oh yes, my friend! This dish is like a little sweet hug in a bowl. It’s bursting with the tartness of ripe raspberries, the nuttiness of chia seeds, and a lovely creaminess that makes it feel indulgent, even though it’s made with whole foods. Plus, with just five ingredients, you’ll be amazed at how simple it is to put together.
As a home cook, I love recipes that let me get creative while still being approachable. This chia pudding is all about experimenting with flavors while keeping the base super simple. So grab your apron, and let’s dive into this delightful and healthful recipe!
A Walk Down Memory Lane
Growing up, I spent countless weekends at my grandmother’s house, and every Saturday morning was special. The kitchen would fill with laughter and the aroma of a pot of tea boiling on the stove. Grandma’s kitchen was a treasure trove of memories, filled with whimsical jars full of dried fruits, nuts, and, yes — chia seeds! Though they weren’t as trendy back then, she used them in a variety of unique dishes.
One particular Saturday stands out in my mind: Grandma decided to put her spin on pudding, which wasn’t the traditional creamy version. I walked into the kitchen to find her mixing something in a bowl, and I could see tiny seeds dancing around in her mixture. “I’m making a special pudding, dear,” she said with a wink. The memory of that fluffy, fruity dessert inspired many of my kitchen adventures today. Every time I prepare chia pudding, I can’t help but feel her spirit guiding my hands. It’s a reminder that cooking isn’t just about food; it’s about family, tradition, and the love we share through our meals.
Ingredients
To make this 5 Ingredient Raspberry Chia Pudding, you will need:
-
Chia Seeds: These tiny powerhouses are rich in omega-3s, fiber, and protein. If you don’t have chia seeds on hand, you can replace them with flaxseeds, but the texture will differ, so keep that in mind.
-
Ripe Raspberries: Fresh or frozen, raspberries bring a tart, juicy brightness to the pudding. If raspberries aren’t available, feel free to swap them for strawberries, blueberries, or mangoes for a different fruity twist.
-
Milk (Dairy or Non-Dairy): Whether you opt for almond milk, coconut milk, or good old cow’s milk, this will help soak the chia seeds, creating that lovely pudding-like texture. Choose your favorite milk for a flavor that you love!
-
Honey or Maple Syrup: Striking the perfect balance of sweetness, the natural sugars in honey or maple syrup elevate the flavors. For a vegan option, stick with maple syrup. Feel free to adjust the sweetness to your taste!
-
Vanilla Extract: Just a splash adds a warm, aromatic depth to your pudding. If you want something more exotic, try a hint of almond extract for a nutty essence.
These five simple ingredients will transform into something that not only looks stunning but tastes even better. Trust me!
Step-by-Step Instructions
-
Combine the Base: In a mixing bowl, add 1 cup of your chosen milk and 1/4 cup of chia seeds. Stir well to ensure the seeds are evenly distributed. This is where the magic begins as it’s crucial to prevent clumping!
-
Add Sweetness and Flavor: Pour in 2 tablespoons of honey (or maple syrup) and 1 teaspoon of vanilla extract. Give it a good stir until everything is well blended. Sweeten to your liking—after all, no one likes a bland pudding!
-
Get Fruity: Now, fold in 1 cup of raspberries. If you’re using frozen raspberries, there’s no need to thaw them, but do gently crush them a bit to release their juices. This way, you’ll get those lovely raspberry swirls throughout the pudding!
-
Whisk It Up: Let’s channel some energy here! Use a whisk or fork to mix everything together thoroughly. You want to break up any clumps of chia seeds while also getting the raspberries and sweetener distributed throughout.
-
Chill Time: Cover your bowl with plastic wrap or transfer it to individual serving containers. Pop it in the fridge for at least 2-3 hours, or even better, overnight! This allows the chia seeds to absorb the liquid and swell, creating that wonderful pudding texture you’re dreaming of.
-
Serve and Enjoy: When you’re ready to dig in, give it a good stir, and if you like, top your chia pudding with extra fresh raspberries, a sprinkle of coconut, or a handful of granola for added texture.
A little chef hack: If you don’t have time to wait, you can enjoy this pudding after only an hour, but it will be thinner in consistency.
Serving Suggestions
To serve, grab your favorite bowls or mason jars to showcase the vibrant colors of the chia pudding! Layer the pudding in the glass and top with a few fresh raspberries, a drizzle of honey, or a sprinkle of nuts for some crunch. This not only makes it look gorgeous but also adds different textures. Invite your family to the kitchen table and serve it with a warm cup of tea or coffee for a delightful breakfast treat!
Recipe Variations
Here are a few fun variations to keep things exciting:
-
Tropical Twist: Swap out the raspberries for mango or pineapple. Add a pinch of coconut flakes on top for a beachy vibe!
-
Chocolate Lovers Unite: Mix in a tablespoon of cocoa powder to the milk before adding the chia seeds for a rich, chocolatey pudding. Top with fresh strawberries for added sweetness.
-
Nutty Delight: Stir in a tablespoon of almond or peanut butter for a creamy, nutty flavor. This adds healthy fats and protein!
-
Berry Medley: Mix it up with whatever berries you have—blueberries, strawberries, or blackberries give you a boost of antioxidants!
-
Cinnamon Spice: Add a sprinkle of cinnamon before serving for a warm, comforting flavor that pairs beautifully with the sweetness of the pudding.
Chef’s Notes
This recipe for Raspberry Chia Pudding has evolved quite a bit since I first started making it. I’ll never forget the first time I served it at a brunch with friends — it was a hit! Now, I like to jazz it up depending on the season. Summer calls for fresh stone fruits, while in the winter, I’ll bring in spices and maybe some roasted nuts. The flexibility of chia pudding makes it my secret weapon for quick, wholesome meals, and I hope it becomes one of your go-to recipes, too!
Oh! And here’s a funny kitchen story: One time, I mistakenly used salt instead of sugar while making my chia pudding. Let’s just say, that was a memorable moment, but hey, we all make mistakes! The important thing is to keep laughing and tasting, and you will always find a way to make things work.
FAQs and Troubleshooting
-
Why did my chia pudding turn out runny?
If your pudding didn’t thicken up, it might be that you didn’t use enough chia seeds or that it needs more time in the fridge. Let it set longer to reach that pudding-like consistency! -
How long can I store chia pudding?
You can keep your chia pudding in the fridge for up to 5 days, so it can be a great meal prep option! Just remember to give it a stir before serving. -
What if I can’t find raspberries?
No worries! You can substitute with any fruit you prefer. Frozen berries work perfectly, and even a fruit purée will do wonders — just remember to adjust the sweetness! -
Can I make the pudding vegan?
Absolutely! Just use plant-based milk and sweeten with maple syrup instead of honey. It’s delicious, and no one will notice the difference!
Nutritional Info
If you’re curious about the nutrition in this yummy pudding:
- Calories: Approximately 150 calories per serving
- Protein: 5g
- Fiber: 10g
- Fat: 4g
So there you have it — a wholesome, satisfying treat that’s as easy as it is delicious! Enjoy every spoonful, and don’t forget to get a little creative in your kitchen. Happy cooking, and until next time, stay cozy!
Print
5 Ingredient Raspberry Chia Pudding
- Total Time: 180 minutes
- Yield: 4 servings 1x
- Diet: Vegan
Description
A quick, healthy, and delightful chia pudding bursting with the fresh tartness of raspberries and the creaminess of chia seeds.
Ingredients
- 1 cup Milk (Dairy or Non-Dairy)
- 1/4 cup Chia Seeds
- 1 cup Ripe Raspberries
- 2 tablespoons Honey or Maple Syrup
- 1 teaspoon Vanilla Extract
Instructions
- Combine the Base: In a mixing bowl, add 1 cup of your chosen milk and 1/4 cup of chia seeds. Stir well to ensure the seeds are evenly distributed.
- Add Sweetness and Flavor: Pour in 2 tablespoons of honey (or maple syrup) and 1 teaspoon of vanilla extract. Stir until well blended.
- Get Fruity: Fold in 1 cup of raspberries, gently crushing them if using frozen.
- Whisk It Up: Mix thoroughly to break up clumps of chia seeds and distribute the raspberries.
- Chill Time: Cover and refrigerate for at least 2-3 hours, or overnight.
- Serve and Enjoy: Stir before serving and top with extra raspberries, coconut, or granola if desired.
Notes
For a quicker serving, allow to chill for at least one hour, though the consistency will be thinner.
- Prep Time: 10 minutes
- Cook Time: 0 minutes
- Category: Dessert
- Method: Refrigeration
- Cuisine: Healthy
Nutrition
- Serving Size: 1 serving
- Calories: 150
- Sugar: 8g
- Sodium: 30mg
- Fat: 4g
- Saturated Fat: 1g
- Unsaturated Fat: 3g
- Trans Fat: 0g
- Carbohydrates: 28g
- Fiber: 10g
- Protein: 5g
- Cholesterol: 0mg
Keywords: chia pudding, raspberry, healthy dessert, vegan, easy recipe

White Chocolate Raspberry Scones
The Sweet Symphony of White Chocolate Raspberry Scones
Welcome to my kitchen, friends! Today, we’re diving into something truly delightful: White Chocolate Raspberry Scones. These little treats are more than just baked goods; they’re bites of joy that can turn any day into a special occasion. Whether you’re enjoying a cozy morning at home or hosting a charming tea party, these scones bring a burst of flavor and a sprinkle of sweetness to your life.
I remember the first time I tasted a raspberry scone — it was during a lazy Sunday brunch with my best friend Lucy. The cafe, with its mismatched furniture and floral wallpaper, radiated warmth. We’d ordered a pot of Earl Grey tea and a couple of those heavenly scones, which were golden and crusty on the outside, yet tender and bursting with juicy raspberries on the inside. The moment I took my first bite, I could feel the sweet and tart flavors dancing in harmony, with the smoothness of white chocolate elevating it all to another level. It was pure bliss! From that day on, I became determined to recreate that experience in my kitchen, and I’m excited to share what I’ve learned.
Let’s roll up our sleeves and get baking because these White Chocolate Raspberry Scones are going to steal your heart — and your taste buds. Trust me, you’ll want to whip these up again and again!
A Nostalgic Memory: The Birth of My Scone Addiction
Picture this: a sun-drenched kitchen, a gentle breeze wafting through the window, and the sweet scent of raspberries blended with a hint of white chocolate. That was the scene when I first tried my hand at baking scones at home. After my memorable brunch outing, I was inspired and slightly obsessed! I spent countless weekends experimenting, flour dusting my apron, and my dog, Oliver, eagerly waiting for any crumbs to fall.
I remember the first batch I made. It was a sunny Saturday morning, and I was determined to impress my family. The scones were a bit overcooked (okay, maybe more than a bit), but even those crispy edges couldn’t hide the delight of the rich raspberry flavor with morsels of melted white chocolate. We sat around the breakfast table, sharing laughs, and with each bite, my confidence as a baker blossomed. Those scones became a Saturday tradition in our home, a ritual that celebrated the joy of family and flavor.
And now, I want to inspire you with this simple yet elegant recipe that will just become a staple in your kitchen too. Let’s bring the warmth of that sunny kitchen into your home!
Ingredients
-
2 cups all-purpose flour
All-purpose flour forms the base of your scones, providing the right texture. If you want a slightly healthier twist, feel free to substitute half of it with whole wheat flour! -
1/4 cup granulated sugar
Sugar adds sweetness and enhances the flavor of the baked good. If you prefer a less sweet version, you can reduce the sugar slightly while still keeping the integrity of our scones. -
1 tablespoon baking powder
This helps the scones rise and become fluffy. Ensure it’s fresh; old baking powder can lead to dense scones. -
1/2 teaspoon salt
Salt enhances the overall flavor and balances the sweetness. It’s an essential ingredient! -
1/2 cup cold unsalted butter
Cold butter is crucial! It creates a flaky texture. If you’re in a pinch, you can substitute it with margarine or even coconut oil for a different flavor profile. -
1/2 cup heavy cream (plus extra for brushing)
Cream brings richness and moisture. For a lighter option, try whole milk or buttermilk. -
1 teaspoon vanilla extract
Add this for a warm, inviting flavor. Feel free to experiment with almond extract for a different twist! -
1 cup fresh raspberries
The star of the show! Fresh raspberries add vibrant color and tartness. If fresh ones aren’t available, you can use frozen, but make sure to gently fold them in while still frozen. -
1/2 cup white chocolate chips
For that sweet, creamy contrast to the tart raspberries. You can also try dark chocolate chips if you prefer a richer flavor.
Step-by-Step Instructions
Preheat and Prep
-
Preheat your oven to 400°F (200°C)
Preheating is essential for scones, as it helps achieve that beautiful golden crust. It’ll take a few minutes, so let’s just revel in the anticipation! -
Prepare your baking sheet
Line a baking sheet with parchment paper. This will prevent your scones from sticking and make clean-up a breeze!
Mix Dry Ingredients
- In a large bowl, whisk together the flour, sugar, baking powder, and salt
This ensures everything is well combined, which is key to uniform scones. Take a moment to appreciate the beauty of these simple ingredients!
Cut in the Butter
- Add the cold butter
Using a pastry cutter or your fingertips, work the butter into the flour mixture until it resembles coarse crumbs. You want small pea-sized pieces of butter left—that’s where the magic happens! This process creates those lovely flaky layers.
Combine Wet Ingredients
- In a separate bowl, whisk together the cream and vanilla extract
This will not only bring added flavor but also help ease the dry ingredients together. Whisk it until it’s nice and smooth — you want it to be a bit frothy.
Bring It Together
- Pour the wet ingredients into the dry mixture
Stir gently with a spatula until just combined. Be careful not to overmix — we want tender scones, not tough ones!
Fold in the Goodies
- Gently fold in the raspberries and white chocolate chips
Use a light hand here. This is where you’ll see those gorgeous specks of fruit and chocolate come to life in your dough!
Shape the Scones
-
Turn the dough onto a lightly floured surface
With your hands, gently shape the dough into a round disc about one inch thick. -
Cut the dough into wedges
Use a sharp knife or a pizza cutter — my secret weapon! — to slice the dough into 8 triangles.
Bake Time!
-
Transfer the scones to the prepared baking sheet
Leave a little space between them since they’ll puff up during baking. Brush the tops with a bit of cream for that golden finish. -
Bake in the preheated oven for 15-20 minutes or until golden brown
Sit back and enjoy the heavenly aroma wafting through your kitchen. It’s the best part!
Serving Suggestions
Once out of the oven, let the scones cool slightly on a wire rack. To serve, stack a few scones on a beautiful platter, dust with powdered sugar for a touch of elegance, and consider pairing them with whipped cream or clotted cream for an indulgent treat. These scones are perfect with a cup of tea or coffee, making them ideal for brunch or an afternoon snack!
Recipe Variations
-
Lemon Zest Addition
Add a teaspoon of lemon zest to the dough for a bright, citrusy twist that pairs wonderfully with the raspberries. -
Nutty Touch
Incorporate chopped nuts like almonds or hazelnuts for an added crunch. This gives a delightful texture contrast! -
Different Berries
Swap out raspberries for blueberries or strawberries. You can mix and match based on your seasonal favorites! -
Flavored Chocolate
Experiment with flavored chocolate chips — white chocolate peppermint for winter, or dark chocolate rosemary for a more sophisticated touch. -
Gluten-Free Version
Substitute the all-purpose flour with a 1:1 gluten-free baking flour blend. Just watch your baking time closely!
Chef’s Notes
When I first developed this recipe, I played around with various substitutions, trying to strike the perfect balance between sweetness and tartness. One afternoon, I accidentally dropped a whole cup of raspberries into the dough — while I thought I had ruined it, the end result was astounding! The scones were bursting with color and flavor, which inspired me to embrace imperfections in the kitchen. After all, cooking is all about experimenting and making mistakes.
I’ve had the joy of making these scones for countless brunches, family gatherings, and casual afternoons with friends. Each time, they turn out a little differently depending on the berries I use or what I have on hand, and that’s the beauty of cooking!
FAQs and Troubleshooting
Why are my scones too dry?
If your scones are dry, you might be overmixing the dough or using too much flour. Always measure your flour correctly and mix until just combined.
Can I make the dough ahead of time?
Absolutely! You can prepare the dough, shape it into a disc, and wrap it tightly in plastic wrap. Refrigerate for up to 24 hours. Just bake them directly from the fridge, but you may need to add a couple of extra minutes to the baking time.
How should I store leftover scones?
Store them in an airtight container at room temperature for up to three days. To reheat, pop them in the oven for a few minutes to restore their delightful texture.
Can I freeze these scones?
Yes! Scones freeze beautifully. Freeze them after baking and let them thaw on the counter for a few hours before enjoying. Alternatively, you can freeze unbaked scones on a baking sheet and transfer them to a bag. Bake straight from the freezer; just add a couple of extra minutes to the baking time.
Nutritional Info
(For reference; this can be adjusted based on actual ingredients used)
- Calories: 250 kcal per scone
- Total Fat: 12g
- Saturated Fat: 7g
- Carbohydrates: 35g
- Sugar: 10g
- Fiber: 1g
- Protein: 3g
And there you have it! These White Chocolate Raspberry Scones are perfect for any occasion, whether a quiet Sunday morning or a bustling brunch gathering with friends. So, roll up those sleeves, gather your ingredients, and let’s create some mouthwatering memories in the kitchen! Happy baking! 🍽️❤️
Print
White Chocolate Raspberry Scones
- Total Time: 30 minutes
- Yield: 8 servings 1x
- Diet: Vegetarian
Description
Delightful scones bursting with fresh raspberries and white chocolate, perfect for brunch or a cozy afternoon tea.
Ingredients
- 2 cups all-purpose flour
- 1/4 cup granulated sugar
- 1 tablespoon baking powder
- 1/2 teaspoon salt
- 1/2 cup cold unsalted butter
- 1/2 cup heavy cream (plus extra for brushing)
- 1 teaspoon vanilla extract
- 1 cup fresh raspberries
- 1/2 cup white chocolate chips
Instructions
- Preheat your oven to 400°F (200°C).
- Prepare a baking sheet by lining it with parchment paper.
- Whisk together the flour, sugar, baking powder, and salt in a large bowl.
- Add the cold butter, working it into the flour mixture until it resembles coarse crumbs.
- Whisk together the cream and vanilla extract in a separate bowl until smooth.
- Pour the wet ingredients into the dry mixture and stir gently until just combined.
- Fold in the raspberries and white chocolate chips carefully.
- Turn the dough onto a lightly floured surface and shape it into a round disc about one inch thick.
- Cut the dough into 8 triangles using a sharp knife.
- Transfer the scones to the prepared baking sheet, brushing the tops with cream.
- Bake for 15-20 minutes or until golden brown.
Notes
Consider serving with whipped cream or clotted cream for an indulgent treat.
- Prep Time: 10 minutes
- Cook Time: 20 minutes
- Category: Bakery
- Method: Baking
- Cuisine: American
Nutrition
- Serving Size: 1 scone
- Calories: 250
- Sugar: 10g
- Sodium: 150mg
- Fat: 12g
- Saturated Fat: 7g
- Unsaturated Fat: 5g
- Trans Fat: 0g
- Carbohydrates: 35g
- Fiber: 1g
- Protein: 3g
- Cholesterol: 30mg
Keywords: scones, white chocolate, raspberry, brunch, dessert
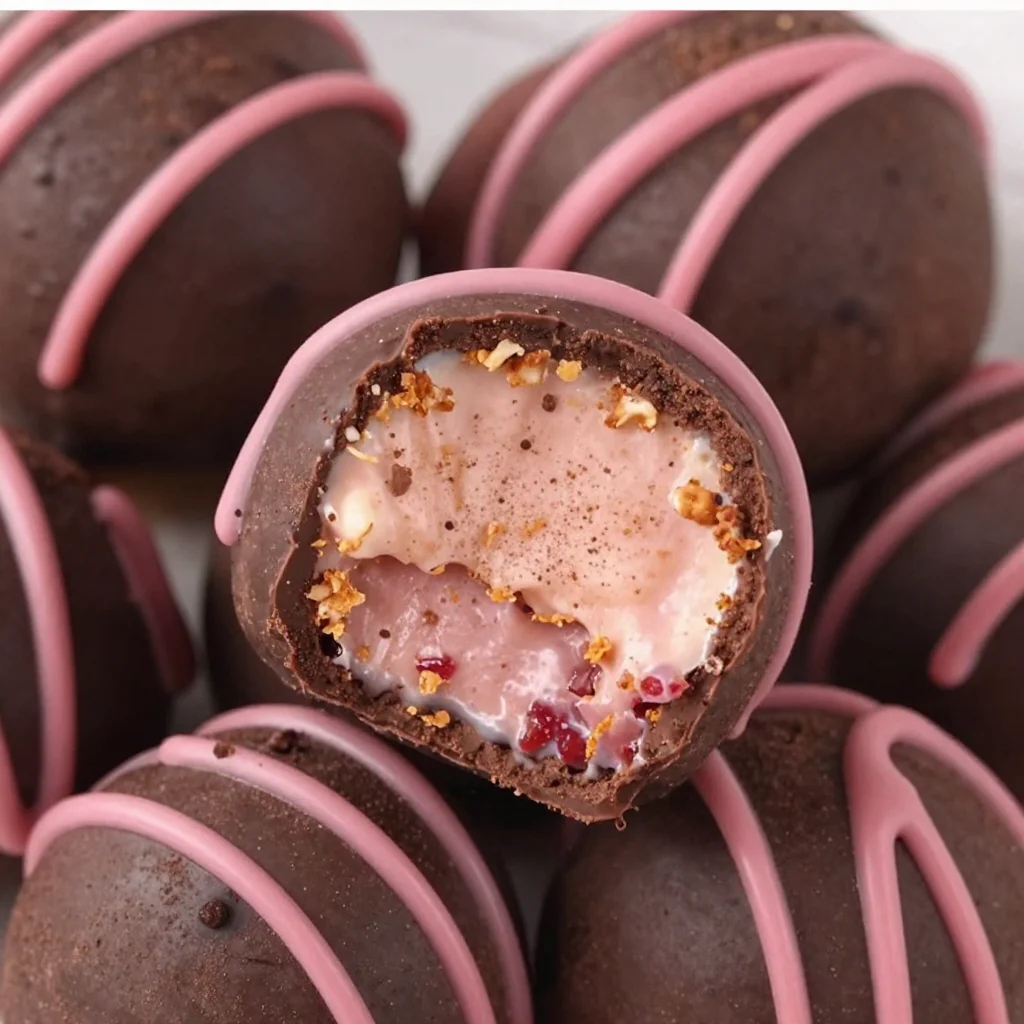
Chocolate Raspberry Truffles
Indulge in Bliss: Homemade Chocolate Raspberry Truffles
Welcome to my kitchen, my fellow flavor enthusiasts! Today, we’re going to dive into the world of decadence with my all-time favorite dessert—Chocolate Raspberry Truffles. You know those magical little bites of joy that can turn even the most ordinary days into special occasions? Yep, those are the ones I’m talking about! The combination of rich, velvety chocolate and the tart sweetness of raspberries is like a hug for your taste buds. Whether you’re whipping them up for a cozy night in, a fancy dinner party, or a sweet gift that says, "I care", these truffles are sure to hit the spot.
For me, nothing brings people together quite like chocolate. I can vividly recall rainy afternoons in my childhood kitchen, the enticing aroma of melting chocolate wafting through the air as my mom and I stirred together a pot of ganache. It was during those moments, surrounded by laughter and a sprinkling of flour on our noses, that I learned the true magic of cooking. Now, as an adult, I realize that food is so much more than just sustenance—it’s about creating memories and sharing joy. And nothing embodies that spirit more than homemade Chocolate Raspberry Truffles.
So grab your apron and let’s embark on this delicious journey! I promise you’ll cherish every minute spent crafting these delightful treats, just as much as you’ll enjoy devouring them.
A Sweet Trip Down Memory Lane
As I reflect on my love for chocolate, one memory stands out brightly—a baking marathon my mother and I embarked on when I was about ten years old. It was a stormy weekend, and we were stuck indoors. Instead of succumbing to restlessness, we decided to embark on a grand truffle-making adventure! Armed with an array of ingredients, including chocolate, cream, and a bevy of toppings, we transformed our kitchen into a mini chocolate factory.
With every melted chocolate chip that dripped on the counter, laughter filled the air. We made a delightful mess as we tossed cocoa powder and toasted coconut around while trying to roll the ganache into perfect little balls. Each truffle was a masterpiece in its own right. But what truly made the day magical was sharing our creations with the neighbors and witnessing the smiles as they indulged in our handmade sweets. From that day forward, truffle-making became a special tradition.
This recipe captures that same spirit of joy and nostalgia. These Chocolate Raspberry Truffles are not only delicious but also a reflection of love, laughter, and memories that last a lifetime.
Ingredients
Gathering the right ingredients is key to making the best Chocolate Raspberry Truffles. Here’s what you’ll need:
-
High-Quality Dark Chocolate (8 oz) – Look for chocolate that has at least 60% cocoa. The better the quality, the richer the flavor! If dark chocolate isn’t your thing, feel free to substitute semi-sweet chocolate for a milder sweetness.
-
Heavy Cream (1/2 cup) – This adds that luscious, creamy texture to the ganache. If you’re looking for a lighter version, you could use coconut cream instead. It adds an exotic twist, too!
-
Fresh Raspberries (1/2 cup) – These sweet-tart gems balance out the chocolate beautifully. If raspberries aren’t in season, you can also use frozen raspberries; just make sure to thaw and drain them well beforehand.
-
Unsweetened Cocoa Powder (for dusting) – This gives your truffles that classic look and a slight bitterness that complements the sweet center perfectly. If you want a more festive touch, try using crushed pistachios or shredded coconut instead!
-
Vanilla Extract (1 teaspoon) – A splash of this magic elixir enhances the overall flavor. Feel free to experiment with almond extract for a nutty twist.
-
Sea Salt (a pinch) – Just a touch brings out the flavors even more. It’s amazing how a little salt can elevate a sweet treat!
Step-by-Step Instructions
Now that you have your ingredients gathered, let’s make some truffles! Here’s how:
-
Chop the Chocolate: Start by finely chopping the dark chocolate and placing it in a medium-sized mixing bowl. The smaller the pieces, the easier they’ll melt. Quality chocolate is key here—don’t skip it!
-
Heat the Cream: In a small saucepan, heat the heavy cream over medium heat until it just starts to simmer. You don’t want it to boil; we’re looking for a gentle simmer here! Once it starts to bubble around the edges, remove it from heat immediately.
-
Make the Ganache: Pour the hot cream over the chopped chocolate, ensuring that all the chocolate is covered. Let it sit for about 2-3 minutes without stirring. This waiting will allow the chocolate to melt perfectly.
-
Mix It Up: After a few minutes, grab a whisk or spatula and gently stir the mixture until it’s smooth and shiny. Don’t rush this part! If there are still some lumps, it might need a tiny bit more heat. Just pop it back on the stove for a few seconds, then stir again.
-
Add the Raspberries: Fold in the fresh raspberries gently, ensuring they’re evenly distributed. The mixture will be a bit chunky, but that’s the beauty of it! If you want smoother truffles, you can mash the raspberries with a fork before mixing them in.
-
Cool Down: Cover the bowl with plastic wrap and refrigerate the ganache for about 2 hours or until it’s firm enough to handle. Patience is key here!
-
Shape Your Truffles: Once the ganache is firm, use a small cookie scoop or melon baller to portion out the mixture. With slightly damp hands (this helps prevent sticking), roll them into balls about one inch in diameter. Don’t worry about making them perfect—each truffle has its own character!
-
Dust and Chill: Roll the truffles in cocoa powder or your chosen coating to give them that marvelous finish. Place them back in the refrigerator for about 30 minutes to firm up even more.
-
Serve and Enjoy: Present your beautifully rolled truffles on a decorative plate, or package them in a cute box to share with friends and family. Watch their faces light up with delight!
Serving Suggestions
When it comes to serving, presentation is everything! Arrange your truffles on a lovely platter, and don’t forget to add a sprinkle of fresh raspberries or mint leaves for color. They look divine served alongside a steaming cup of coffee or a glass of dessert wine. You could even pair them with a scoop of vanilla ice cream for an indulgent treat.
For an added touch, consider placing your truffles in decorative cupcake liners or small glass jars tied with a ribbon if you’re gifting them. They’ll look as delightful as they taste!
Recipe Variations
The beauty of truffles is their versatility! Here are a few creative twists and variations to try:
-
Nutty Delight: Incorporate chopped nuts like hazelnuts or almonds into the ganache or roll the truffles in finely crushed nuts for extra crunch.
-
Flavor Infusion: Add a splash of flavored liqueur (like raspberry or mint) to your ganache for an adult twist.
-
Coconut Bliss: Use coconut cream instead of heavy cream, and roll your truffles in shredded coconut for a tropical vibe.
-
Seasonal Spices: For fall flavors, add a pinch of pumpkin spice or cinnamon to the ganache to create a warm autumn treat.
-
Berry Blast: Mix in crushed strawberries or blueberries with the ganache for a fruity version!
Chef’s Notes
Ah, the evolution of a recipe! I’ve been tweaking and perfecting my truffle recipe for years. I remember a blender mishap while experimenting with flavored oils, which resulted in a chocolate volcano of gooey goodness all over my kitchen counter. It was a hilarious disaster (and a real mess), but it taught me the importance of patience and precision in the kitchen!
Truffles are such a forgiving treat, allowing for so many creative expressions. Don’t stress about them being perfect; the joy lies in the process and the love you pour into them. With each batch, I’m reminded that cooking is all about experimenting and having fun!
FAQs and Troubleshooting
1. My ganache is too thin! What did I do wrong?
No worries! If your ganache is too thin, it might simply need more chilling time. Place it back in the refrigerator for a bit longer. If you find that it’s still too runny after cooling, you can add more chopped chocolate to firm it up.
2. How do I keep the truffles from sticking to my hands?
Damp hands work wonders here! Simply moisten your palms with a bit of water before rolling the ganache into balls. This way, they’ll easily come together without stickiness.
3. Can I use a different type of chocolate?
Absolutely! Feel free to experiment with milk chocolate or even white chocolate for a different flavor profile. Just adjust the sweetness accordingly, as milk chocolate is usually sweeter than dark.
4. How long do the truffles last?
When stored in an airtight container in the fridge, these beauties can last about one week. If you manage to have any leftovers, they also freeze beautifully, allowing you to enjoy them for up to a month!
Nutritional Info (optional)
While I encourage indulgence in moderation, here’s a rough idea of the nutritional info per truffle:
- Calories: 70-80
- Fat: 5g
- Carbohydrates: 8g
- Protein: 1g
Time to indulge, friends! Gather your ingredients and create your own little piece of chocolate bliss. These Chocolate Raspberry Truffles promise joy, deliciousness, and sweet memories that you’ll cherish forever. Happy cooking!
Print
Homemade Chocolate Raspberry Truffles
- Total Time: 145 minutes
- Yield: 24 truffles
- Diet: Vegetarian
Description
Decadent chocolate raspberry truffles that combine rich chocolate and tart raspberries for a magical dessert experience.
Ingredients
- High-Quality Dark Chocolate (8 oz)
- Heavy Cream (1/2 cup)
- Fresh Raspberries (1/2 cup)
- Unsweetened Cocoa Powder (for dusting)
- Vanilla Extract (1 teaspoon)
- Sea Salt (a pinch)
Instructions
- Chop the Chocolate: Start by finely chopping the dark chocolate and placing it in a medium-sized mixing bowl.
- Heat the Cream: In a small saucepan, heat the heavy cream over medium heat until it just starts to simmer.
- Make the Ganache: Pour the hot cream over the chopped chocolate and let it sit for about 2-3 minutes.
- Mix It Up: Gently stir the mixture until it’s smooth and shiny.
- Add the Raspberries: Fold in the fresh raspberries gently, ensuring they’re evenly distributed.
- Cool Down: Cover the bowl with plastic wrap and refrigerate the ganache for about 120 minutes.
- Shape Your Truffles: Use a small cookie scoop or melon baller to portion out the mixture and roll them into balls.
- Dust and Chill: Roll the truffles in cocoa powder and place them back in the refrigerator for about 30 minutes.
- Serve and Enjoy: Present your beautifully rolled truffles on a decorative plate.
Notes
For variations, consider adding nuts or flavored liqueurs to the ganache for a creative twist.
- Prep Time: 15 minutes
- Cook Time: 30 minutes
- Category: Dessert
- Method: Chilling
- Cuisine: American
Nutrition
- Serving Size: 1 truffle
- Calories: 75
- Sugar: 5g
- Sodium: 5mg
- Fat: 5g
- Saturated Fat: 3g
- Unsaturated Fat: 2g
- Trans Fat: 0g
- Carbohydrates: 8g
- Fiber: 1g
- Protein: 1g
- Cholesterol: 0mg
Keywords: chocolate truffles, raspberry dessert, homemade sweets
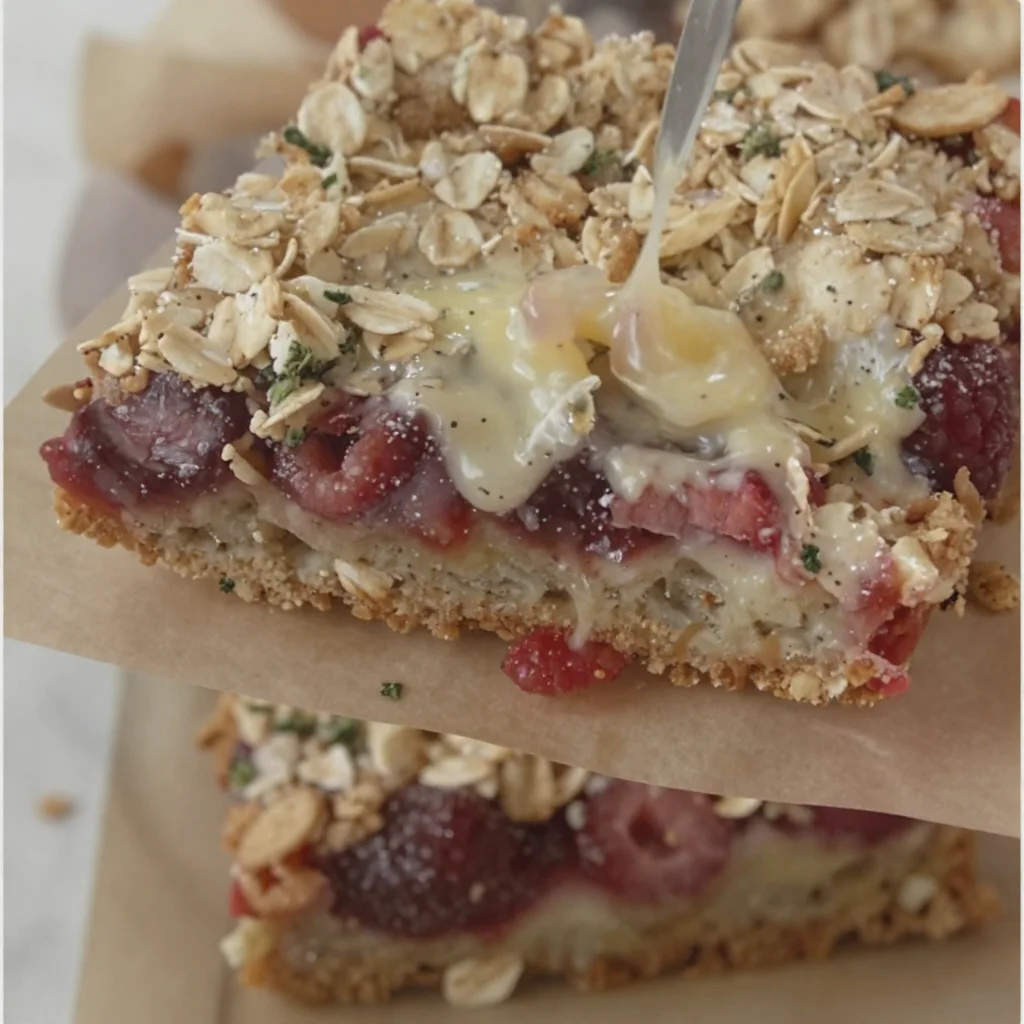
Ingredient Raspberry Oatmeal Crumble Bars (Summer Snack)
Raspberry Oatmeal Crumble Bars: A Cozy Kitchen Delight
Welcome to my cozy corner of the culinary world! Today, I’m excited to share with you one of my favorite recipes that embodies all the warmth and comfort of homemade goodness: Raspberry Oatmeal Crumble Bars. These delightful treats are perfect for breakfast, snacks, or a sweet afternoon pick-me-up. With layers of tangy raspberry and a buttery, crumbly oat topping, these bars are a crowd-pleaser that will have everyone asking for seconds.
The beauty of these Raspberry Oatmeal Crumble Bars lies not only in their delicious flavor but also in their heartwarming backstory. I remember the first time I made them; it was during a rainy Saturday afternoon. I had just returned from the local farmers’ market with a pint of fresh raspberries that were bursting with flavor. The rain pattered against the window as I whisked together the mixture, filled the kitchen with the smell of melting butter, and transformed those vibrant berries into a sweet filling. The sight of my family munching on the bars, their faces lighting up with delight, is a memory I’ll cherish forever.
So, let’s step into the kitchen together and create a batch of these irresistible bars that will fill your home with fragrant joy!
Personal Story
One of my fondest memories with Raspberry Oatmeal Crumble Bars dates back to a summer family reunion at my grandmother’s house. The afternoon sun poured through the kitchen windows, illuminating her old wooden table where she used to knead dough and prepare sweet treats. She pulled out her secret stash of frozen raspberries, a treasure trove from her garden. As she expertly layered the oats and berries in a baking dish, I marveled at her effortless grace in the kitchen. She handed me a spoon and encouraged me to help sprinkle the oat topping—her legacy of cooking was palpable in that moment. Those bars vanished quickly that day, devoured by a bunch of happy faces, and ever since, they’ve held a special place in my heart.
Ingredients
To whip up these delectable Raspberry Oatmeal Crumble Bars, you’ll need the following ingredients:
-
Fresh Raspberries (2 cups)
Fresh raspberries bring a tartness and vibrant color to these bars. If you can’t find fresh ones, feel free to use frozen raspberries—just make sure to thaw and drain them beforehand to avoid excess moisture. -
Rolled Oats (2 cups)
Rolled oats provide the chewy texture and heartiness. Quick oats can be used in a pinch, but avoid instant oats, as they won’t yield the same structure. -
All-Purpose Flour (1 cup)
This gives the crumble its base. For a gluten-free version, substitute with almond flour or a gluten-free flour blend. -
Brown Sugar (1 cup)
Brown sugar adds that lovely caramel flavor. You can use coconut sugar for a healthier substitute, but it will alter the color of the crumble slightly. -
Butter (½ cup, unsalted)
Butter binds it all together and adds richness. For a vegan version, substitute with coconut oil or dairy-free butter. -
Baking Powder (1 tsp)
This helps to give the oatmeal a little lift and lightness. -
Salt (½ tsp)
Just a pinch to enhance the flavors; it balances the sweetness of the sugar and brings out the raspberry’s bright notes. -
Vanilla Extract (1 tsp)
This infuses the mixture with a warm aroma and depth of flavor.
Step-by-Step Instructions
-
Preheat the Oven
Begin by preheating your oven to 350°F (175°C). This is the perfect time to gather your ingredients and prepare your baking dish. Grease a 9×9-inch baking pan with a little butter or line it with parchment paper for easy removal later. -
Mix the Dry Ingredients
In a large mixing bowl, whisk together the rolled oats, flour, brown sugar, baking powder, and salt until well combined. Trust me, this step is key for ensuring an even distribution of flavors. -
Incorporate the Butter
Melt the butter in a small saucepan over low heat or in the microwave. Allow it to cool slightly, then pour it into the dry mixture. Using your fingers (my favorite method!) or a fork, blend it together until the mixture resembles coarse crumbs. You want some larger clumps, as they’ll create a lovely texture on top! -
Reserve Oats for Topping
Take about 1½ cups of this mixture and set it aside—this will be your crumble topping. -
Create the Raspberry Filling
In another bowl, toss the fresh (or thawed) raspberries with a tablespoon of flour to help absorb excess liquid. Gently fold in the vanilla extract. You want those luscious little berries to shine, without drowning in moisture. -
Layer It Up
Spread the remaining oat mixture evenly into the prepared baking pan, pressing it firmly to form the crust. Spoon the raspberry mixture over the crust, spreading it evenly. Finally, sprinkle the reserved crumble topping over the raspberries. Don’t be shy; this is where the magic happens! -
Bake to Perfection
Slide the pan into the preheated oven and bake for about 30–35 minutes, or until the topping is golden brown and the raspberries are bubbly. The delicious aroma wafting through your kitchen will be intoxicating, I promise! -
Cooling Time
Once out of the oven, let the bars cool in the pan for at least 15 minutes before transferring them to a wire rack to cool completely. This step will help them set up for easy slicing. -
Slice and Enjoy
Use a sharp knife to cut the bars into squares or rectangles. Serve them warm for a gooey treat or at room temperature for a delightful snack.
Serving Suggestions
For an extra touch of coziness, serve these Raspberry Oatmeal Crumble Bars with a dollop of whipped cream or a scoop of vanilla ice cream on top. They also pair beautifully with a steaming cup of tea or coffee for a delightful afternoon treat.
Recipe Variations
- Nutty Version: Fold in some chopped nuts like almonds or walnuts into the crumble mixture for added crunch and depth.
- Different Berries: Swap out the raspberries for strawberries, blueberries, or blackberries, depending on the season and your preference.
- Spiced Up: Add a teaspoon of cinnamon or a pinch of nutmeg to the dry ingredients for a warm, spiced flavor.
- Zesty Twist: Incorporate a bit of lemon zest into the raspberry filling for a refreshing citrusy kick.
Chef’s Notes
This recipe is particularly adaptable! I’ve made these bars countless times, experimenting with what I have on hand. One memorable attempt was using a mix of frozen berries leftover from summer and a bit of almond extract instead of vanilla. The flavors melded surprisingly well! Sometimes my kids even get involved in the process, adding their own spin—chocolate chips sneaked in here and there. It’s a lovely way to bond over something delicious!
FAQs and Troubleshooting
-
Why are my crumble bars falling apart?
If your bars aren’t holding together, they may not have cooled long enough before slicing. Give them ample time to set completely—patience is key! -
Can I use other fruits besides raspberries?
Absolutely! Feel free to experiment with your fruit of choice. Just make sure the fruit isn’t overly watery, which could make the filling too soggy. -
How do I store the leftover bars?
Store any leftovers in an airtight container at room temperature for 2–3 days. For longer storage, you can refrigerate them for about a week or freeze them for up to 3 months—perfect for a quick snack! -
Can I make these vegan?
Yes! Simply substitute the butter with a plant-based alternative, and for the egg (if you choose to include it), use a flax or chia seed egg.
Nutritional Info (Optional)
This recipe yields approximately 16 bars. Each bar can be expected to have around 180 calories, with 8g of fat, 24g of carbohydrates, and 2g of protein. For a more precise analysis, consider using a nutritional calculator.
I hope you enjoy making these Raspberry Oatmeal Crumble Bars as much as I do. They’re a hug in dessert form and a fantastic way to celebrate the simple joys of cooking and sharing with loved ones. Happy baking!
Print
Raspberry Oatmeal Crumble Bars
- Total Time: 50 minutes
- Yield: 16 servings 1x
- Diet: Vegetarian
Description
Delightful Raspberry Oatmeal Crumble Bars with layers of tangy raspberry and buttery, crumbly oat topping, perfect for breakfast or snacks.
Ingredients
- 2 cups Fresh Raspberries
- 2 cups Rolled Oats
- 1 cup All-Purpose Flour
- 1 cup Brown Sugar
- ½ cup Unsalted Butter
- 1 tsp Baking Powder
- ½ tsp Salt
- 1 tsp Vanilla Extract
Instructions
- Preheat the oven to 350°F (175°C) and prepare a 9×9-inch baking pan.
- Mix the rolled oats, flour, brown sugar, baking powder, and salt in a large bowl.
- Incorporate the melted butter into the dry mixture until coarse crumbs form.
- Reserve about 1½ cups of the mixture for the topping.
- Create the raspberry filling by tossing fresh raspberries with a tablespoon of flour and folding in vanilla.
- Layer the remaining oat mixture in the baking pan, add the raspberry filling, and top with reserved crumble.
- Bake for 30-35 minutes until golden brown and bubbly.
- Cool in the pan for 15 minutes before transferring to a wire rack.
- Slice into bars and enjoy!
Notes
Serve with whipped cream or ice cream. Store leftovers in an airtight container for up to 3 days.
- Prep Time: 15 minutes
- Cook Time: 35 minutes
- Category: Dessert
- Method: Baking
- Cuisine: American
Nutrition
- Serving Size: 1 bar
- Calories: 180
- Sugar: 10g
- Sodium: 100mg
- Fat: 8g
- Saturated Fat: 4g
- Unsaturated Fat: 4g
- Trans Fat: 0g
- Carbohydrates: 24g
- Fiber: 2g
- Protein: 2g
- Cholesterol: 15mg
Keywords: raspberry, oatmeal, crumble, bars, dessert, baking, cozy
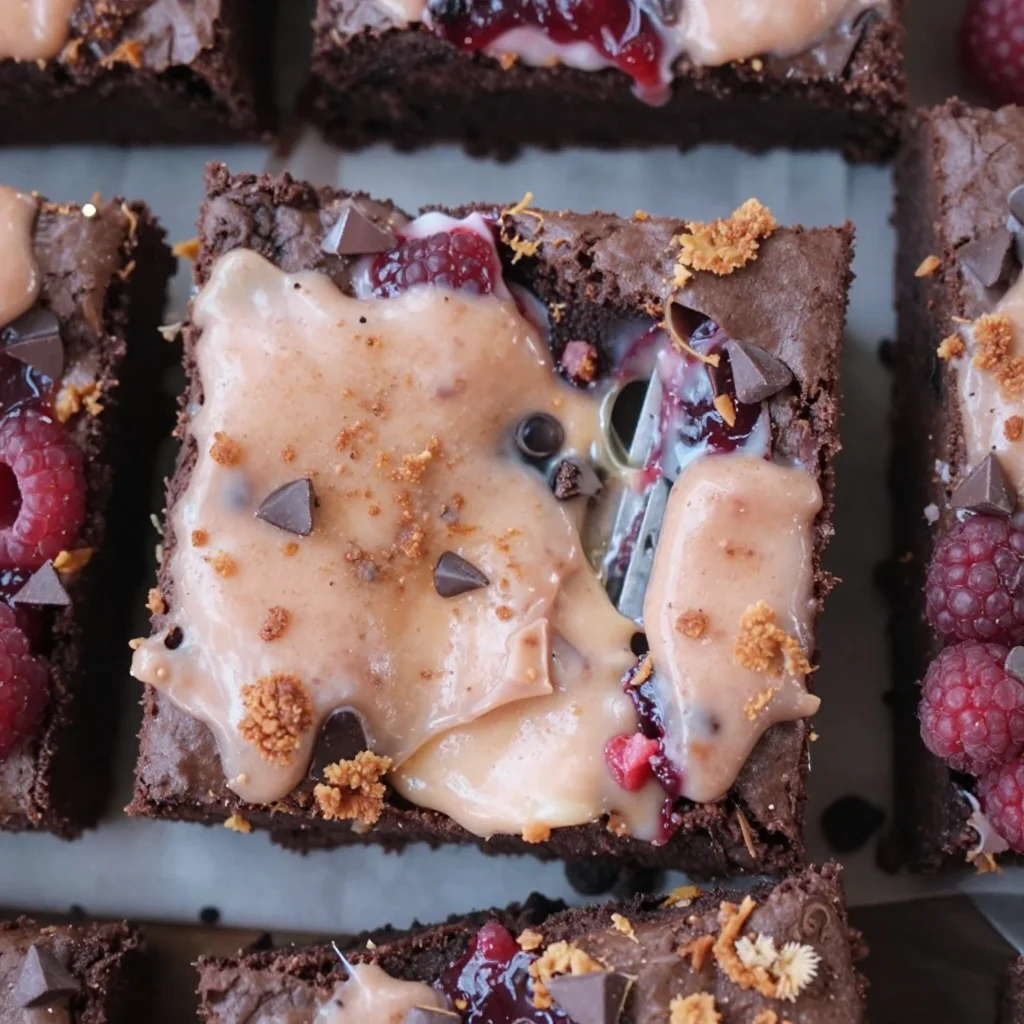
Beginner-Friendly Raspberry Brownies (One-Bowl Recipe)
Indulge in Raspberry Brownies: A Sweet Journey to Flavor Paradise
Welcome to my cozy corner of the kitchen! Today, we’re diving into luscious Raspberry Brownies that are bound to tickle your taste buds and steal your heart. The scent of warm, gooey chocolate dancing with tart raspberries creates a vibe that’s perfect for sharing (or not—no judgment here!). Just imagine, a plate of these beauties on your table, their rich dark chocolate complimented by vibrant red raspberries. It’s a symphony of flavors that’s hard to resist.
Every time I bake these brownies, I’m flooded with nostalgia from my childhood when my mom would whip up a batch for our family gatherings. I can still hear the laughter ringing in our kitchen as my siblings and I eagerly awaited the moment the brownies would make their grand debut. It became a sweet tradition, one that would draw us all into the heart of the home. These brownies not only won our hearts; they became the ultimate treat to impress everyone.
But don’t worry! You don’t need a culinary degree to make these scrumptious Raspberry Brownies. It’s all about combining simple ingredients and a little love. So, grab your mixing bowl, channel that inner chef, and let’s bake something special!
A Fond Kitchen Memory
Let me take you back to the summer I turned 10. It was a sunny afternoon, and I decided to bake my very first batch of brownies all by myself. I couldn’t wait to surprise my family with my newfound culinary skills. As I carefully measured the flour, the chocolate melted, and the raspberries burst with juicy goodness, I could hardly contain my excitement. I remember the smell wafting through the house, pulling everyone in like a siren’s call.
With my little apron tied too loosely around my waist, I proudly took the warm brownies out of the oven. With a sprinkle of powdered sugar, they looked heavenly! But that’s not all—a few sneaky bites had led to a chocolate explosion and raspberry chaos all over my face! I couldn’t stop laughing, and neither could my family when they saw my little "chocolate monster" look. That day, I learned that baking is not just about following a recipe; it’s about the joy of creation and the taste of those delightful moments spent together.
Ingredients
Let’s gather our ingredients for these decadent Raspberry Brownies. Here’s what you’ll need, along with some tips:
-
Unsalted Butter (1/2 cup)
Unsalted butter allows you to control the saltiness in your brownies. If you’re out of butter, try using coconut oil for a cute twist! -
Semi-Sweet Chocolate (4 oz. or about 1 cup of chips)
The chocolate is the heart of these brownies! Feel free to use dark chocolate for a richer flavor or milk chocolate if you prefer something sweeter. -
Granulated Sugar (1 cup)
This adds sweetness and helps create that delightful crust on top. You can substitute half the sugar with brown sugar for extra moisture and a hint of caramel flavor. -
Large Eggs (2)
Eggs are essential for binding the ingredients together. If you’re vegan, you can use flaxseed meal as a substitute. Just mix 1 tablespoon of flax with 2.5 tablespoons of water and let it sit until it thickens. -
All-Purpose Flour (1/2 cup)
Flour provides structure. For gluten-free options, you can use a 1:1 gluten-free flour blend—it works wonders! -
Cocoa Powder (1/4 cup)
Good quality unsweetened cocoa powder gives the brownies their rich chocolatey flavor. If you’re feeling adventurous, you can use Dutch-processed cocoa for a smoother taste. -
Fresh Raspberries (1 cup)
The star of our show! Fresh raspberries add a zesty contrast. If you can’t find fresh ones, frozen raspberries work in a pinch—just don’t thaw them until you’re ready to use them, or it might get messy. -
Vanilla Extract (1 teaspoon)
This enhances the flavors beautifully. You can use almond extract for a unique flavor twist! -
Salt (1/4 teaspoon)
A little salt balances the sweetness and intensifies the chocolate flavor.
Step-By-Step Instructions
Now, let’s bring these ingredients together magically! Here’s how to create your Raspberry Brownies, step by step:
-
Preheat Your Oven:
Preheat your oven to 350°F (175°C). This is key for even baking. Nobody wants a gooey middle that’s not cooked! -
Prepare Your Baking Dish:
Grease an 8×8 inch baking pan with cooking spray or butter. You can also line it with parchment paper for easier removal. This little hack ensures you’ll have no casualties when cutting those brownies! -
Melt the Chocolate and Butter:
In a saucepan over low heat, melt the unsalted butter and semi-sweet chocolate together. Stir continuously to avoid burning. This will create a smooth, glossy mixture—just like magic! -
Mix in Sugar:
Once melted, remove the saucepan from the heat and stir in the granulated sugar. Mixing it while it’s warm helps to dissolve the sugar better for a fudgier texture. -
Add Eggs and Vanilla:
Let the mixture cool for a few minutes. Then, whisk in the eggs, one at a time, and add the vanilla extract. Your mixture should now be thick and glossy. If you want to feel like a superstar chef, use a whisk for this step! -
Combine the Dry Ingredients:
In a separate bowl, whisk together the flour, cocoa powder, and salt. Gradually fold this dry mixture into the chocolate mixture using a spatula. Be careful not to over-mix—just combine until you don’t see any flour streaks. -
Add the Raspberries:
Gently fold in the fresh raspberries. This step adds juicy pockets of tartness that perfectly balance the richness of the brownies. If you prefer even distribution, sprinkle some raspberries on top after pouring the batter in the pan—you’ll have a delightful topping! -
Pour into the Pan:
Pour the brownie batter into your prepared baking dish, spreading it evenly. Use a spatula to smooth the top for that professional touch! -
Bake to Perfection:
Bake in the preheated oven for 25-30 minutes. You’ll know they’re done when a toothpick inserted into the center comes out with a few moist crumbs. Remember, they will continue to cook while cooling! -
Cool and Cut:
Let the brownies cool in the pan for at least 15 minutes. If you can resist the temptation, cool them completely before slicing into squares. They’ll hold their shape better that way!
Serving Suggestions
Ready to impress your family and friends? Plate your raspberry brownies on a beautiful serving dish. Dust them lightly with powdered sugar for that charming touch. Serve them warm with a scoop of vanilla ice cream on the side and a drizzle of chocolate sauce for an extra indulgent dessert! Add fresh mint leaves for a pop of color, and watch the jaws drop!
Recipe Variations
Here are a few fun twists you can try with your Raspberry Brownies:
-
Nutty Addition:
Add 1/2 cup of chopped walnuts or pecans for a delightful crunch. -
Minty Fresh:
Include a few drops of peppermint extract in the batter for a refreshing twist. -
Chocolate overload:
Top the brownies with chocolate chips or drizzle melted chocolate for a rich finish. -
Swirl with Cream Cheese:
Create a cream cheese swirl by mixing 4 oz. softened cream cheese with 1/4 cup sugar and a dash of vanilla. Drop spoonfuls into the batter and swirl with a knife before baking! -
Berry Medley:
Swap out raspberries for a mix of berries—think strawberries or blueberries for a fruity explosion!
Chef’s Notes
Oh, the stories I could tell about these brownies! They’ve been my go-to treat for birthdays, anniversaries, and even bake sales. Over the years, I’ve experimented with adding different spices like cinnamon or chai, and I’ve discovered that a pinch of espresso powder really elevates the chocolate flavor. I’ve had my fair share of epic kitchen fails while trying to perfect this recipe, but each mishap only brought me closer to the fabulous delights I serve today. Just remember, each brownie has its own personality, and every bake tells a story!
FAQs and Troubleshooting
-
Why are my brownies too cakey?
If your brownies are too cakey, it might be due to overmixing or too much flour. Be sure to fold the ingredients gently and measure accurately. -
My brownies sunk in the middle! What happened?
This can occur if they were underbaked or if too much air got incorporated during mixing. The trick is to pull them out when they’re just done—don’t wait for the toothpick to come out completely clean! -
Can I use frozen raspberries?
Absolutely! Just add them directly to the batter frozen; this will help them keep their shape and prevent the brownies from turning into a mushy mess. -
How do I store leftover brownies?
Store them in an airtight container at room temperature for 3-4 days, or refrigerate for up to a week. Trust me, they’ll be gone before you know it!
Nutritional Info
- Serving Size: 1 brownie
- Calories: 210
- Total Fat: 12g
- Saturated Fat: 7g
- Cholesterol: 45mg
- Sodium: 50mg
- Total Carbohydrates: 24g
- Dietary Fiber: 2g
- Sugars: 15g
- Protein: 2g
So there you have it! My delicious Raspberry Brownies that will leave your loved ones craving more. Get ready to savor the delight of baking and the joy of sharing these little squares of happiness! Happy baking, my fellow foodies!
Print
Raspberry Brownies
- Total Time: 45 minutes
- Yield: 16 servings 1x
- Diet: Vegetarian
Description
Luscious Raspberry Brownies that combine rich chocolate with tart raspberries, perfect for sharing or indulging alone.
Ingredients
- 1/2 cup Unsalted Butter
- 4 oz. Semi-Sweet Chocolate (about 1 cup of chips)
- 1 cup Granulated Sugar
- 2 Large Eggs
- 1/2 cup All-Purpose Flour
- 1/4 cup Cocoa Powder
- 1 cup Fresh Raspberries
- 1 teaspoon Vanilla Extract
- 1/4 teaspoon Salt
Instructions
- Preheat your oven to 350°F (175°C).
- Grease an 8×8 inch baking pan with cooking spray or butter.
- Melt the unsalted butter and semi-sweet chocolate together over low heat.
- Mix in the granulated sugar until dissolved.
- Add the eggs and vanilla, whisking until smooth.
- Combine the flour, cocoa powder, and salt in a separate bowl.
- Fold the dry ingredients into the chocolate mixture.
- Add in the fresh raspberries gently.
- Pour the batter into the prepared baking dish.
- Bake for 25-30 minutes.
- Cool in the pan for at least 15 minutes before cutting.
Notes
For best results, let the brownies cool completely before slicing. Serve with powdered sugar and vanilla ice cream for an indulgent treat!
- Prep Time: 15 minutes
- Cook Time: 30 minutes
- Category: Dessert
- Method: Baking
- Cuisine: American
Nutrition
- Serving Size: 1 brownie
- Calories: 210
- Sugar: 15g
- Sodium: 50mg
- Fat: 12g
- Saturated Fat: 7g
- Unsaturated Fat: 4g
- Trans Fat: 0g
- Carbohydrates: 24g
- Fiber: 2g
- Protein: 2g
- Cholesterol: 45mg
Keywords: brownies, dessert, raspberry, chocolate, baking
One-Bowl Chocolate Raspberry Cupcakes (Ready in 30 Minutes)
Indulge in Chocolate Raspberry Cupcakes: A Sweet Journey Awaits!
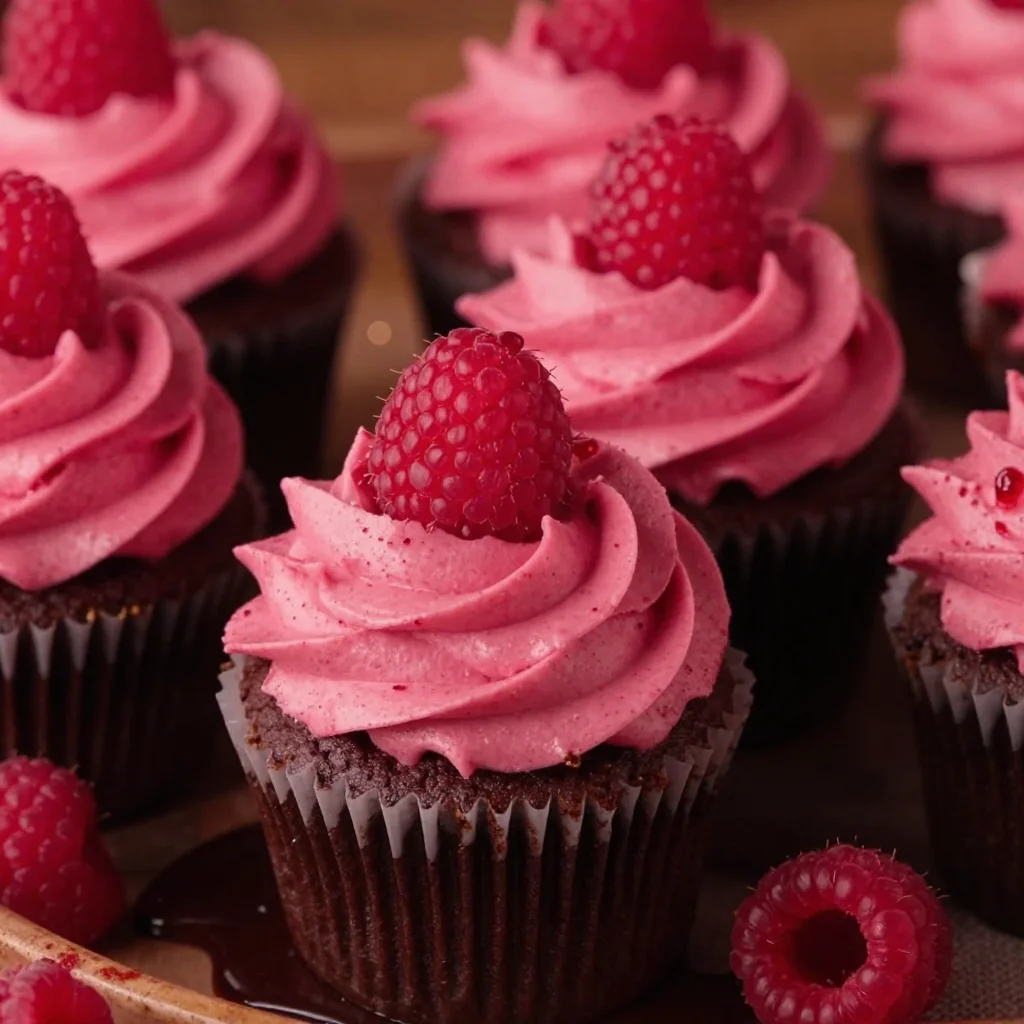
Welcome to the delicious world of baking where the air is filled with the sweet aroma of chocolate and berries! Today, we’re diving into a treat that combines two of life’s greatest pleasures: rich, decadent chocolate and vibrant, tart raspberries. These chocolate raspberry cupcakes are not just dessert; they’re a celebration of flavor that can turn an ordinary day into something extraordinary. So, grab your mixing bowl and let’s get started!
In my kitchen, cupcakes are a staple. They’re the perfect canvas for creativity, and each batch tells a unique story. Whether it’s a special occasion or just a Tuesday craving, these chocolate raspberry cupcakes will add a dash of joy to your life. I remember the first time I made these beauties for a group of friends. It was a rainy Saturday afternoon, and I was trying to lift spirits with some baking therapy. The sound of the mixer, the smell of melting chocolate, and the vibrant splash of raspberries felt like magic happening right in my kitchen. When my friends took their first bite, their eyes lit up! It was an unforgettable moment — laughter, compliments, and an empty platter in no time. That’s the power of good food, folks!
So, let’s create your own memory with these delightful cupcakes. Don’t worry if you’re a beginner; I’m here to guide you through each step. You’ll be surprised at how easy these elegant treats are to make, and they’re sure to impress. Ready, set, let’s get baking!
A Sweet Childhood Memory
Growing up, my mom had a knack for making baking feel like a comforting hug. She often whipped up chocolate treats for our family gatherings, but there was one dessert that always stood out: her raspberry chocolate cake. I remember sneaking bites of the batter when I thought she wasn’t looking and the thrill of seeing her frost it with the perfect swirl. Each slice was luscious, and the tart raspberries cut through the rich chocolate perfectly.
Fast forward to my own kitchen, and I realized that the spirit of that cake could easily transform into cupcakes. I still make these for family gatherings, and the nostalgia it brings is simply irreplaceable. They remind me that food isn’t just about nourishment—it’s about connection, love, and creating delightful memories with those we cherish.
Ingredients List
Here’s what you’ll need to create these decadent chocolate raspberry cupcakes. Take your time to gather all the ingredients—each one plays a crucial role in this delightful recipe!
-
1 cup all-purpose flour
The foundation of our cupcakes. You can substitute with gluten-free flour or whole wheat flour for a healthier twist. -
1 cup granulated sugar
For sweetness! Brown sugar is a great alternative if you want a deeper flavor. -
½ cup unsweetened cocoa powder
The star of our show! If you prefer a rich chocolate taste, opt for Dutch-processed cocoa powder. -
1 tsp baking powder
This little helper ensures our cupcakes rise beautifully. If you don’t have baking powder, you can substitute it with 1 tsp baking soda (plus an acid like yogurt or vinegar). -
½ tsp baking soda
For a touch of extra fluffiness. Just don’t skip it! -
¼ tsp salt
Enhances all the flavors. You can use kosher salt for a finer texture. -
2 large eggs
They add moisture and richness. Flax seeds mixed with water can work as a vegan substitute. -
½ cup vegetable oil
Keeps our cupcakes moist. You can use melted coconut oil or applesauce for a lighter option. -
½ cup buttermilk
Adds tang and tenderness. If you don’t have buttermilk, mix regular milk with a splash of lemon juice or vinegar for a similar effect. -
1 tsp vanilla extract
A must for enhancing flavor! If in a pinch, try almond extract for a different but delightful twist. -
1 cup fresh raspberries (plus more for garnish)
The fruity burst! If you can’t find fresh, frozen raspberries can work too—just thaw and drain excess liquid before adding.
Step-by-Step Instructions
Ready to bake? Let’s get to the fun part! Here’s how to whip up these chocolate raspberry cupcakes step-by-step:
Step 1: Preheat Your Oven
Preheat your oven to 350°F (175°C). This step is super important because it ensures your cupcakes get that perfect rise. While you wait, line a muffin tin with cupcake liners to keep things neat and tidy!
Step 2: Combine Dry Ingredients
In a large mixing bowl, whisk together your flour, sugar, cocoa powder, baking powder, baking soda, and salt. Make sure there are no lumps; this is the base of our batter. Pro tip: Sifting your cocoa powder can help avoid clumps and make for a smoother cupcake!
Step 3: Mix Wet Ingredients
In a separate bowl, combine the eggs, oil, buttermilk, and vanilla extract. Whisk until well blended. This is where the magic happens! The combination of oil and buttermilk will keep our cupcakes moist.
Step 4: Combine and Fold
Pour the wet ingredients into the dry ingredients. Mix gently with a spatula until just combined. Don’t overmix; a few lumps are okay! The goal is to create a soft batter without activating the gluten too much, which can lead to tough cupcakes.
Step 5: Add Raspberries
Gently fold in the fresh raspberries. This is my favorite part! The vibrant pink pops of color throughout the dark batter are not just beautiful but add a burst of flavor in each bite. Just be careful when folding to keep the berries whole!
Step 6: Bake
Scoop the batter into the prepared cupcake liners, filling them about ¾ full to give them room to rise. Pop them in the oven and bake for about 18-20 minutes, or until a toothpick inserted into the center comes out clean. The smell will be intoxicating!
Step 7: Cool
Once baked, remove the cupcakes from the oven and allow them to cool in the tin for 5 minutes. Afterward, transfer them to a wire rack to cool completely. Trust me; the waiting will be worth it!
Step 8: Frosting Time
While your cupcakes cool, it’s the perfect time to whip up your frosting. I recommend a simple chocolate ganache or cream cheese frosting, but feel free to use your favorite. To make chocolate ganache, heat ½ cup of heavy cream until it’s just about to boil. Pour it over 1 cup of chocolate chips, let it sit for a few minutes, and then stir until smooth. Let it cool slightly before frosting your cupcakes.
Step 9: Decorate
Once your cupcakes are completely cool, frost them generously with your ganache. Top each cupcake with a few extra raspberries for a pop of color and freshness.
Serving Suggestions
For a beautiful presentation, arrange the frosted cupcakes on a decorative cake stand or platter. You can create a cute centerpiece by adding fresh mint leaves around the base for added color. Feel free to sprinkle some cocoa powder on top or drizzle some melted chocolate over the cupcakes for an extra touch of elegance—perfect for a brunch, celebration, or a simple dessert!
Recipe Variations
Here are a few fun twists you can try to put your unique stamp on these cupcakes:
- Lemon Zest Infusion: Add a teaspoon of lemon zest to the batter for a citrusy note that pairs beautifully with the raspberries.
- Nutty Addition: Toss in some chopped walnuts or almonds for a delightful crunch.
- Vegan Option: Substitute eggs with flaxseed meal mixed with water, and use a plant-based milk and yogurt for an equally scrumptious vegan version.
- Mint Chocolate Raspberry: Add a drop of peppermint extract to your batter for a refreshing twist.
- Chocolate Chip Delight: Swirl in some mini chocolate chips for an extra chocolatey cupcake!
Chef’s Notes
One of my favorite things about baking is the evolution of recipes. This chocolate raspberry cupcake recipe has been a work in progress over the years. I started with a basic chocolate cupcake recipe but found it lacked the zing I was looking for. After experimenting with different fruits and flavors, I finally stumbled upon the perfect balance with raspberries. Sharing these cupcakes with friends and watching them disappear in moments has become one of my cherished kitchen anecdotes.
And let’s not forget about the inevitable mess! You might find flour dust on your apron or chocolate smudges on your cheek while baking—embrace it! Cooking is all about joyful chaos.
FAQs and Troubleshooting
1. My cupcakes came out flat. What went wrong?
Flat cupcakes can be a result of a few things. Did you make sure your baking powder and baking soda are fresh? Old leavening agents can lose effectiveness. Also, double-check your oven temperature—ovens can run hot or cold, which can impact your bake.
2. Can I use frozen raspberries?
Absolutely! Just thaw and drain them first to prevent excess moisture in the batter, which can affect the texture of your cupcakes.
3. How can I make these cupcakes ahead of time?
You can bake the cupcakes a day in advance. Just store them in an airtight container at room temperature. Frost them just before serving for the best taste and texture!
4. What if I don’t have a hand mixer?
No problem! A whisk and some elbow grease will do just fine. Just be sure to mix gently to keep the batter light and fluffy.
Nutritional Info
Each chocolate raspberry cupcake contains approximately:
- Calories: 220
- Protein: 3g
- Carbohydrates: 30g
- Fat: 10g
- Fiber: 2g
- Sugar: 18g
Please note that nutritional values may vary based on ingredient substitutions and portion sizes.
And there you have it! A delightful journey through the kitchen creating chocolate raspberry cupcakes that are bound to bring smiles and happy bellies. Enjoy the process, don’t take it too seriously, and remember—the first bite of your creation is the sweetest reward. Happy baking!
Print
Chocolate Raspberry Cupcakes
- Total Time: 35 minutes
- Yield: 12 servings 1x
- Diet: Vegetarian
Description
Delicious chocolate raspberry cupcakes that combine rich chocolate and vibrant raspberries for an unforgettable treat.
Ingredients
- 1 cup all-purpose flour
- 1 cup granulated sugar
- ½ cup unsweetened cocoa powder
- 1 tsp baking powder
- ½ tsp baking soda
- ¼ tsp salt
- 2 large eggs
- ½ cup vegetable oil
- ½ cup buttermilk
- 1 tsp vanilla extract
- 1 cup fresh raspberries (plus more for garnish)
Instructions
- Preheat your oven to 350°F (175°C) and line a muffin tin with cupcake liners.
- Combine the flour, sugar, cocoa powder, baking powder, baking soda, and salt in a large mixing bowl.
- Mix the eggs, oil, buttermilk, and vanilla extract in a separate bowl until well blended.
- Pour the wet ingredients into the dry ingredients and mix gently with a spatula until just combined.
- Gently fold in the fresh raspberries.
- Scoop the batter into the cupcake liners, filling them about ¾ full.
- Bake for 18-20 minutes or until a toothpick inserted into the center comes out clean.
- Cool the cupcakes in the tin for 5 minutes, then transfer to a wire rack to cool completely.
- Prepare your frosting (chocolate ganache or cream cheese frosting).
- Frost the cooled cupcakes and top with fresh raspberries.
Notes
These cupcakes can be made ahead of time. Store in an airtight container and frost just before serving.
- Prep Time: 15 minutes
- Cook Time: 20 minutes
- Category: Dessert
- Method: Baking
- Cuisine: American
Nutrition
- Serving Size: 1 cupcake
- Calories: 220
- Sugar: 18g
- Sodium: 200mg
- Fat: 10g
- Saturated Fat: 2g
- Unsaturated Fat: 6g
- Trans Fat: 0g
- Carbohydrates: 30g
- Fiber: 2g
- Protein: 3g
- Cholesterol: 30mg
Keywords: cupcakes, chocolate, raspberry, dessert, baking
White Chocolate Raspberry Muffins Recipe | Homemade raspberry muffins, Chocolate baked goods, Cafe baked goods
White Chocolate Raspberry Muffins Recipe
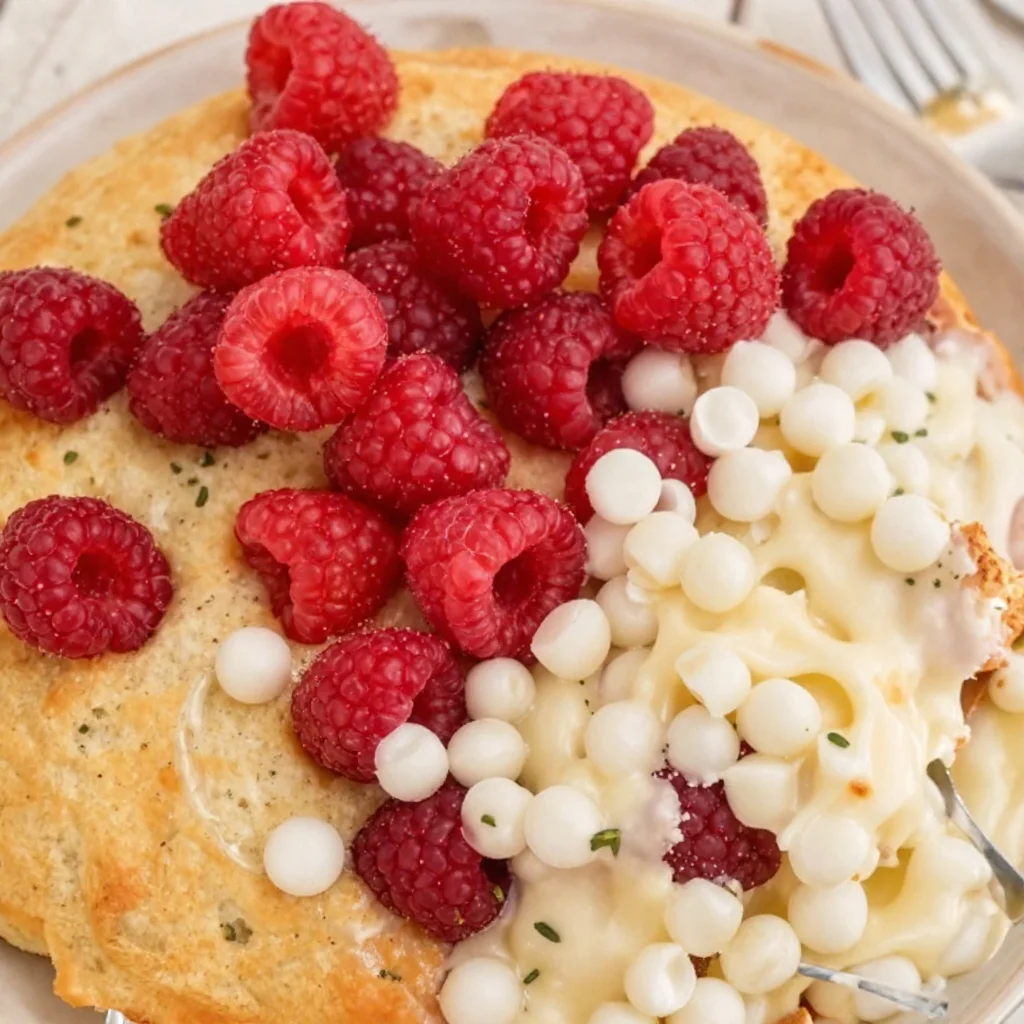
Welcome to my cozy corner of the kitchen! I’m thrilled you’re here, and I can’t wait to share one of my absolute favorite recipes: White Chocolate Raspberry Muffins. If you’re someone who finds solace in the kitchen, enjoys the sweet aroma of muffins baking, and loves the joyful delight of sharing delicious treats with family and friends, then you’re in for a real treat today. These muffins are a celebration of flavor, sweetness, and a sprinkle of joy in every bite.
A Little Background
Growing up, my kitchen was a bustling place. I fondly remember spending weekend afternoons with my grandma, surrounded by flour-covered countertops, laughing as we whipped up everything from cookies to cakes. One particular day stands out in my memory: the sweet, tangy burst of raspberries mingling with the rich creaminess of white chocolate. It was a heavenly combination I’d never forget. As we pulled the muffins out of the oven, the entire house filled with that mouthwatering aroma, and I couldn’t wait to sink my teeth into one. The texture was divine—light and fluffy with a hint of crunch from the sugar on top. It was pure magic.
Fast forward to today, and I find myself recreating that same magical moment in my kitchen — only this time, with my own twist! These White Chocolate Raspberry Muffins not only taste incredible, but they also evoke a sense of nostalgia and warmth that transforms even the most ordinary day into something extraordinary. So let’s roll up our sleeves, put on those aprons, and bring a little sweetness into our lives!
Ingredients
To make these heavenly muffins, you’ll need the following ingredients:
- All-purpose flour: This is the foundation of your muffins. For a lighter texture, you can swap out 1/4 cup of the all-purpose flour for whole wheat flour.
- Granulated sugar: The sweetness of our muffins comes from sugar. If you’re looking for a healthier option, coconut sugar has a lovely caramel flavor.
- Baking powder: This is our leavening agent, giving our muffins that necessary rise. Make sure it’s fresh for the best results!
- Salt: Just a pinch enhances all the flavors and balances the sweetness.
- Butter: Use unsalted butter, melted. If you want to cut calories, you can replace half of it with applesauce!
- Egg: This binds our ingredients together. For a vegan option, you can use a flaxseed meal egg (1 tablespoon of flaxseed mixed with 2.5 tablespoons of water).
- Milk: Any milk will do, but I love using almond milk for a slightly nutty flavor. You can also use buttermilk for a richer taste.
- Vanilla extract: Essential for flavor! If you have almond extract, it adds a wonderful twist.
- White chocolate chips: This is where the magic happens! If you want a darker flavor profile, try dark chocolate chips instead.
- Fresh raspberries: The star of the show! You can substitute them with frozen raspberries, but make sure to thaw and drain them first.
Step-by-Step Instructions
-
Preheat Your Oven: Start by preheating your oven to 375°F (190°C). This will ensure that your muffins bake evenly and rise beautifully!
-
Prepare Your Muffin Tin: Line a standard muffin tin with paper liners or grease it lightly with cooking spray. If you want to add a little extra flair, sprinkle a bit of flour in the greased tin to prevent sticking.
-
Mix Dry Ingredients: In a large mixing bowl, whisk together 2 cups of all-purpose flour, 1 cup of granulated sugar, 2 teaspoons of baking powder, and a pinch of salt. Whisking combines the ingredients, helping to distribute the baking powder evenly throughout so you get a lovely rise on all muffins!
-
Combine Wet Ingredients: In a separate bowl, combine 1/2 cup of melted butter, 1 large egg, 1 cup of milk, and 1 teaspoon of vanilla extract. Stir until well-combined. It’s important to let the melted butter cool slightly before mixing everything together—no one wants scrambled eggs in their muffins!
-
Mix Together: Pour the wet ingredients into the dry ingredients and gently stir until just combined. It’s okay if the batter is a little lumpy; overmixing can lead to tough muffins. This is your cue to put your spatula down and stop. Trust me!
-
Fold in Chocolate and Raspberries: Gently fold in 1 cup of white chocolate chips and 1 cup of fresh raspberries. This is where the magical burst of flavor happens, so be gentle if you’re using fresh raspberries to avoid bruising them.
-
Fill Muffin Cups: Spoon the batter into the prepared muffin tin, filling each cup about 3/4 full. For an adorable finishing touch, sprinkle a little extra sugar on top of each muffin for that sweet, crispy crust.
-
Bake: Place the muffin tin in the preheated oven and bake for 18-20 minutes or until golden brown. You can do the toothpick test by inserting a toothpick in the center of a muffin; it should come out clean or with a few moist crumbs, not wet batter.
-
Cool: Once baked, remove the muffins from the oven and allow them to cool in the pan for about 5 minutes before transferring them to a wire rack. This helps to keep the bottoms from getting soggy.
-
Enjoy: These muffins are best enjoyed fresh out of the oven, but they’ll keep for a couple of days in an airtight container. Trust me; they won’t last long!
Serving Suggestions
These White Chocolate Raspberry Muffins are perfect for a cozy brunch or a delightful afternoon snack! Serve them warm with a pat of butter or a dollop of homemade raspberry jam. For a more indulgent treat, pair them with a steaming cup of coffee or a refreshing glass of iced tea. You could even plate them up on a rustic wooden board, garnished with a few fresh mint leaves and dusted with powdered sugar for that extra wow factor!
Recipe Variations
Feel like getting creative? Here are a few delightful twists for your White Chocolate Raspberry Muffins:
- Lemon Zest: Add a teaspoon of lemon zest to the batter for a refreshing citrus flavor that brightens up the muffins.
- Nutty Delight: Include 1/2 cup of chopped walnuts or pecans for added texture and a nutty taste that pairs perfectly with the sweetness of the chocolate and berries.
- Choco-berry Burst: Swap white chocolate chips for semi-sweet chocolate chips or even a mix of white and dark for an exciting flavor combo.
- Banana Substitute: You can substitute half the butter with ripe mashed bananas for a healthier, moist version that tastes heavenly!
- Berry Medley: Feel free to substitute raspberries with other berries like blueberries, strawberries, or even a mix for a beautiful berry muffin!
Chef’s Notes
I’ll let you in on a little secret—I always keep a stash of these muffins in my freezer. They freeze beautifully, and when you pop one in the microwave for a few seconds, it’s like a mini celebration at any time of the day! Each time I bake them, I’m reminded of the joy that comes from sharing good food and creating cherished memories. Plus, there’s nothing quite like the taste of homemade muffins, fresh from the oven, filled with love and happiness.
FAQs and Troubleshooting
Q: My muffins turned out dry. What did I do wrong?
A: Don’t fret! Overmixing or baking for too long can lead to dryness. Be gentle when mixing the batter, and check for doneness a minute or two before the suggested baking time.
Q: Can I use frozen raspberries?
A: Absolutely! Just remember to thaw and drain them to avoid excess moisture in your batter, which could lead to soggy muffins.
Q: How do I store my muffins?
A: Keep them in an airtight container at room temperature for up to 3 days or freeze them for up to a month. Just pop them in the microwave when you’re ready for a snack!
Q: Why do my muffins have a flat top?
A: This could be due to underbaking or not enough leavening agent. Ensure your baking powder is fresh and consider baking a little longer if needed.
Nutritional Info
While I believe in enjoying anything in moderation, if you’d like to know what’s packed into each muffin, here’s a rough estimate (per muffin):
- Calories: 210
- Protein: 3g
- Fat: 9g
- Carbohydrates: 30g
- Fiber: 1g
- Sugar: 12g
So there you have it, my dear friends! A delightful journey into the world of White Chocolate Raspberry Muffins that’s sure to bring joy into your kitchen. Get ready to savor the sweet moments and create wonderful memories with every bite. Happy baking!
Print
White Chocolate Raspberry Muffins
- Total Time: 35 minutes
- Yield: 12 servings 1x
- Diet: Vegetarian
Description
These delightful White Chocolate Raspberry Muffins combine the sweetness of white chocolate with the tangy burst of fresh raspberries, creating a light and fluffy treat that’s perfect for any occasion.
Ingredients
- 2 cups all-purpose flour
- 1 cup granulated sugar
- 2 teaspoons baking powder
- Pinch of salt
- 1/2 cup unsalted butter, melted
- 1 large egg
- 1 cup milk (almond milk recommended)
- 1 teaspoon vanilla extract
- 1 cup white chocolate chips
- 1 cup fresh raspberries
Instructions
- Preheat your oven to 375°F (190°C).
- Prepare a standard muffin tin with paper liners or grease it lightly.
- Mix together the flour, sugar, baking powder, and salt in a large mixing bowl.
- Combine the melted butter, egg, milk, and vanilla extract in a separate bowl, stirring until well combined.
- Pour the wet ingredients into the dry ingredients and gently stir until just combined.
- Fold in the white chocolate chips and raspberries carefully.
- Fill each muffin cup about 3/4 full and sprinkle a little extra sugar on top.
- Bake for 18-20 minutes or until golden brown.
- Cool the muffins in the pan for about 5 minutes before transferring to a wire rack.
- Enjoy fresh or store in an airtight container for a couple of days.
Notes
These muffins freeze beautifully; just pop one in the microwave for a treat anytime!
- Prep Time: 15 minutes
- Cook Time: 20 minutes
- Category: Dessert
- Method: Baking
- Cuisine: American
Nutrition
- Serving Size: 1 muffin
- Calories: 210
- Sugar: 12g
- Sodium: 200mg
- Fat: 9g
- Saturated Fat: 5g
- Unsaturated Fat: 4g
- Trans Fat: 0g
- Carbohydrates: 30g
- Fiber: 1g
- Protein: 3g
- Cholesterol: 30mg
Keywords: muffins, white chocolate, raspberries, baking, dessert
One-Bowl Chocolate Zucchini Cake: Easy Weeknight Dessert
Chocolate Zucchini Cake: A Deliciously Moist Treat
Welcome to my kitchen, dear friends! If there’s one thing that brings me an overwhelming sense of joy, it’s baking something delicious that becomes an instant hit with family and friends. There’s a special magic that happens when you combine simple ingredients to create something extraordinarily delightful. Today, I’m excited to share with you my go-to recipe for Chocolate Zucchini Cake. This lush cake is not only a chocolate lover’s dream, but it also sneaks in some veggies—shh, don’t tell the kids!
This cake is the perfect example of how we can take what seems like a simple ingredient (like zucchini) and transform it into something that feels indulgent and special. So, if you’re ready to experience the rich and moist flavors of this fabulous dessert, grab your apron, and let’s get baking!
A Memory Wrapped in Chocolate
Growing up, I spent countless hours in my grandmother’s kitchen. She had an incredible ability to turn the most mundane ingredients into fantastic desserts. One summer afternoon, I remember walking into her house, greeted by the sweet, chocolatey aroma wafting through the air. She was experimenting with a new recipe—a chocolate cake with zucchini! At first, I was hesitant. Zucchini in a cake? But as I took my first bite, all my doubts vanished. The cake was rich, moist, and oh-so-delicious!
From that day forward, chocolate zucchini cake became a staple at our family gatherings. We shared stories, laughter, and, of course, second servings of this magical cake. Creating this recipe today isn’t just about baking; it’s about cherishing those memories and passing them on through food.
Ingredients: What You’ll Need
To whip up this delightful Chocolate Zucchini Cake, gather the following ingredients:
-
Zucchini (2 cups, grated)
- Moisture is key! Zucchini keeps the cake tender, so don’t skimp on it. You can substitute with carrots for a different flavor profile.
-
All-purpose flour (1 ¾ cups)
- This is the backbone of your cake. If you’re feeling adventurous, try whole wheat flour for added fiber or gluten-free flour for a gluten-free version.
-
Unsweetened cocoa powder (¾ cup)
- Cocoa adds deep chocolate flavor. Make sure it’s unsweetened so you can control the sweetness of your cake!
-
Granulated sugar (1 ½ cups)
- Sweetness is essential, but if you’re looking to cut sugar, honey or maple syrup can be excellent natural sweeteners.
-
Brown sugar (½ cup)
- This adds moisture and a hint of caramel flavor. Light or dark will work; the darker will give you a richer taste.
-
Baking soda (1 tsp)
- This is your leavening agent. Make sure it’s fresh for the best rise.
-
Baking powder (1 tsp)
- A backup leavener to ensure a fluffy cake. Always check the expiration date!
-
Salt (½ tsp)
- Enhances all the flavors. Don’t leave it out—you’ll be surprised how much it contributes!
-
Eggs (2 large)
- They bind the ingredients and add richness. If you need an egg substitute, consider using flaxseed meal or applesauce (1/4 cup per egg).
-
Vanilla extract (1 tsp)
- A simple yet essential flavor booster. You can use almond extract for a different twist.
-
Vegetable oil (¾ cup)
- Keeps the cake moist. If you prefer a lighter option, try using unsweetened applesauce!
-
Chocolate chips (1 cup, optional)
- Add these to bring an extra chocolate punch! You can swap them for nuts or dried fruit for added texture.
Step-by-Step Instructions: How to Create Your Masterpiece
-
Preheat Your Oven:
Preheat your oven to 350°F (175°C). This ensures your cake bakes evenly from the get-go! While the oven warms up, take a moment to gather your ingredients and enjoy the delightful aroma of the cocoa. -
Prepare Your Baking Pan:
Grease and flour a 9×13 inch baking pan. This prevents the cake from sticking. You can also line it with parchment paper for easy removal and cleanup. Trust me, you want to get this cake out in one piece! -
Grate the Zucchini:
Grate the zucchini using a box grater or food processor. No need to peel it; the skin adds color! Once grated, place it in a clean kitchen towel, twist it, and squeeze out excess moisture. This step is crucial for avoiding a soggy cake. -
Mix Dry Ingredients:
In a large bowl, whisk together the flour, cocoa powder, baking soda, baking powder, and salt. This step helps to evenly distribute the dry ingredients, ensuring every bite is just as delicious as the last! -
Combine Wet Ingredients:
In another bowl, whisk the granulated sugar, brown sugar, eggs, vanilla extract, and vegetable oil until smooth. You should see a lovely, glossy mixture. This is where the magic starts! If you can sneak a taste at this point, go for it—just remember, we’re saving room for cake! -
Mix Everything Together:
Gradually add the dry ingredients into the wet ingredients, stirring until just combined. Don’t overmix—lumps are okay! Then, gently fold in the grated zucchini and chocolate chips if you’re using them. You want to keep that wonderful texture! -
Pour Into the Pan:
Pour the batter into the prepared baking pan, spreading it evenly. Take a moment to admire the deep, dark color of the batter. It’ll rise beautifully in the oven! -
Bake:
Bake in your preheated oven for 30–35 minutes, or until a toothpick inserted into the center comes out clean. Keep an eye on it; ovens can vary. The cake should spring back when lightly touched. -
Cool Down:
Let the cake cool in the pan for about 15 minutes before transferring it to a wire rack to cool completely. This cool-down is the hardest part, but trust me; it’s worth the wait!
Serving Suggestions: Treat Your Guests!
Once your cake is cool, it’s time to slice and serve! For a delightful presentation, dust the top with powdered sugar or top with a scoop of vanilla ice cream. If you’re feeling extra indulgent, drizzle a warm chocolate ganache over it! Serve it on a cozy plate, maybe with a sprig of mint for that pop of color.
Recipe Variations: Creative Twists to Try
- Spicy Chocolate: Add a pinch of cayenne pepper or cinnamon to the batter for a warm, spicy kick.
- Nuts & Zucchini: Fold in chopped walnuts or pecans for added crunch.
- Fruity Delight: Mix in some shredded coconut or even crushed pineapple for an exotic twist.
- Gluten-Free: Use a gluten-free flour blend to make it suitable for gluten-free eaters.
- Sugar-Free Version: Substitute granulated sugar with a sugar substitute like erythritol or stevia for a low-calorie treat!
Chef’s Notes: A Cake Journey
This Chocolate Zucchini Cake recipe has been tirelessly refined over the years. I’ve experimented with countless variations, but I always return to this classic! I remember one time I decided to swap zucchini for beet puree. While the taste was phenomenal, my cake came out a vibrant shade of pink. My friends called it “Rosy Chocolate Cake” affectionately; it was definitely a hit in terms of flavor!
Don’t hesitate to play around with the ingredients—it’s how you find your perfect version.
FAQs and Troubleshooting: Common Questions
1. My cake turned out too dense. What did I do wrong?
It’s likely because of overmixing. Be gentle when combining wet and dry ingredients, and avoid overbaking—this will also dry it out!
2. Can I make this cake ahead of time?
Absolutely! This cake keeps well in an airtight container for 3-4 days at room temperature. You can also freeze it—just wrap slices in plastic wrap and place them in a freezer bag.
3. How do I know when my cake is done?
A toothpick inserted into the center should come out clean, or with just a few moist crumbs attached. If it comes out wet, give it a few more minutes in the oven.
4. What if I don’t have eggs?
No problem! Use 1/4 cup applesauce or a flax egg (1 tablespoon ground flaxseed mixed with 3 tablespoons water). Let it sit for a few minutes to thicken.
Nutritional Info (Optional)
For those counting calories: one slice of this delightful Chocolate Zucchini Cake typically has around 250 calories. Packed with fiber from the zucchini, it can be a guilt-free indulgence when enjoyed in moderation!
In the end, whether you’re baking this treat for yourself or to share with others, remember that food is about community, about connection. Each bite of this Chocolate Zucchini Cake brings a reminder of those warm, loving moments in the kitchen. So, let’s celebrate cooking together—happy baking!
Print
Chocolate Zucchini Cake
- Total Time: 50 minutes
- Yield: 12 servings 1x
- Diet: Vegetarian
Description
A deliciously moist chocolate cake that sneakily incorporates zucchini for added tenderness and nutrition.
Ingredients
- 2 cups Zucchini, grated
- 1 ¾ cups All-purpose flour
- ¾ cup Unsweetened cocoa powder
- 1 ½ cups Granulated sugar
- ½ cup Brown sugar
- 1 tsp Baking soda
- 1 tsp Baking powder
- ½ tsp Salt
- 2 large Eggs
- 1 tsp Vanilla extract
- ¾ cup Vegetable oil
- 1 cup Chocolate chips (optional)
Instructions
- Preheat your oven to 350°F (175°C).
- Prepare a 9×13 inch baking pan by greasing and flouring it.
- Grate the zucchini and squeeze out excess moisture using a kitchen towel.
- Mix dry ingredients: whisk together flour, cocoa powder, baking soda, baking powder, and salt in a large bowl.
- Combine wet ingredients: whisk granulated sugar, brown sugar, eggs, vanilla extract, and vegetable oil until smooth.
- Mix everything together by gradually adding dry ingredients to wet ingredients, stirring until just combined. Fold in zucchini and chocolate chips if using.
- Pour the batter into the prepared baking pan, spreading it evenly.
- Bake for 30–35 minutes, or until a toothpick inserted comes out clean.
- Cool in the pan for 15 minutes, then transfer to a wire rack to cool completely.
Notes
For extra indulgence, dust with powdered sugar or top with vanilla ice cream. This cake can be kept in an airtight container for 3-4 days or frozen for longer storage.
- Prep Time: 15 minutes
- Cook Time: 35 minutes
- Category: Dessert
- Method: Baking
- Cuisine: American
Nutrition
- Serving Size: 1 slice
- Calories: 250
- Sugar: 22g
- Sodium: 360mg
- Fat: 10g
- Saturated Fat: 1.5g
- Unsaturated Fat: 8g
- Trans Fat: 0g
- Carbohydrates: 37g
- Fiber: 2g
- Protein: 4g
- Cholesterol: 40mg
Keywords: chocolate zucchini cake, dessert, baking, chocolate cake, vegetable cake
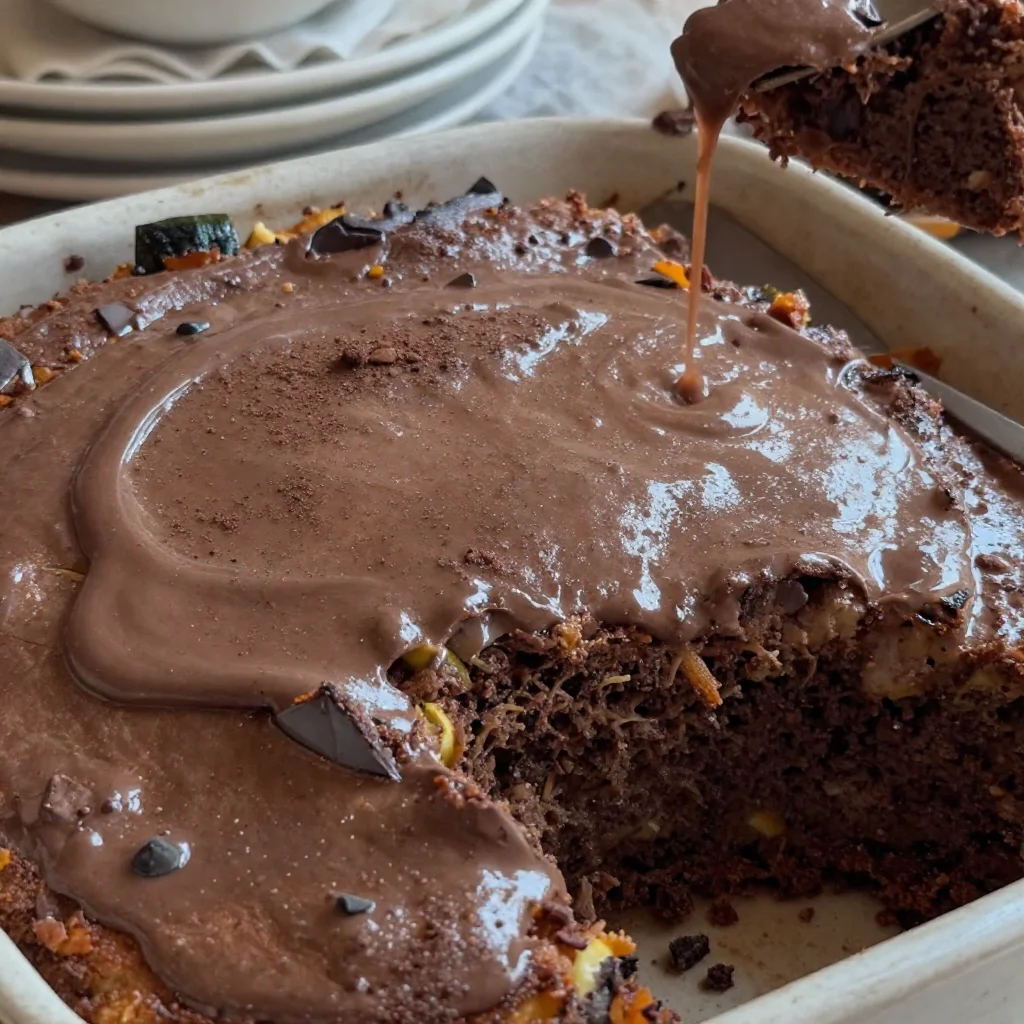
One-Bowl Chocolate Zucchini Cake: Easy Weeknight Treat
The Best Chocolate Zucchini Cake: A Delightful Surprise!
Welcome to my kitchen, fellow foodies! Today, I’m super excited to share a recipe that combines two surprisingly harmonious elements: rich, decadent chocolate and moist, nutrient-packed zucchini. This Chocolate Zucchini Cake is not just an ordinary dessert; it’s an enchanting twist that’ll have everyone wondering about your magic touch. With the summer garden bursting with zucchini, it’s the perfect time to whisk up this delightful cake that is sure to charm your friends and family.
Now, you may be thinking, “Zucchini in a cake? Really?” Trust me—you’re in for a treat! This cake is wonderfully moist, decadent, and brimming with chocolatey goodness, making it a delightful disguise for the often-overlooked zucchini. Not only does it add moisture, but it also blends seamlessly into the rich chocolate flavor. Plus, it’s a sneaky way to add a bit of nutrition to your dessert!
A bit about my journey into the wonderful world of chocolate zucchini cake: A few summers ago, while on a quest to use up an overflowing basket of fresh zucchini from my garden, I stumbled upon this recipe in my late grandmother’s old cookbook. The memories came rushing back—summers spent in her sunlit kitchen, enveloped in the aromas of chocolate and baking bread. Cooking always felt like a gathering of love, and piecing together the ingredients for this cake was like rekindling those fond memories. After some trial and error (thank you, messy kitchen apron!), I finally created my own version, a cake that not only tastes fabulous but also tells a story.
Join me on this delightful adventure. Let’s make some memorable moments, shall we?
Personal Story
I’ll never forget the first time I made this Chocolate Zucchini Cake for a summer potluck at my friend Sarah’s house. I had just learned the recipe from my grandmother’s dusty cookbook and was eager to impress everyone with my culinary skills. Armed with a fresh batch of zucchini and bags of chocolate chips, I dove into the mixing, the kitchen filling up with the sweet scent of cocoa powder and vanilla.
Before long, I pulled the cake out of the oven, its surface glistening with a glossy sheen. I couldn’t wait to get it to the potluck, where I was sure it would steal the show. When it was finally time to taste it, I hesitated. What if they could taste the zucchini? Would they even like it?
Much to my surprise, as soon as the cake was served, the compliments poured in. “What’s your secret ingredient?” one of my friends asked, eyes wide with delight. I smiled, “A little zucchini magic!” That night, as my friends devoured slice after slice, I realized how special it was to share something homemade—something imbued with love and memories. Every bite was nostalgic for me, a reminder of summers spent baking with my grandmother. From then on, this cake has become a staple in my baking repertoire, a comforting delight that always brings smiles and joy.
Ingredients
To make this delicious Chocolate Zucchini Cake, you’ll need the following ingredients:
For the Cake:
-
2 cups all-purpose flour
The base of your cake! If you’re gluten-free, you can substitute with a 1:1 gluten-free flour blend. -
2 cups granulated sugar
This sweetens your cake beautifully—you could use coconut sugar for a lower glycemic option. -
½ cup unsweetened cocoa powder
This brings the rich chocolate flavor. Look for a high-quality cocoa for the best results. -
1 tsp baking soda
Helps the cake rise and become fluffy. Always check the expiration date for the best effect! -
1 tsp baking powder
Works in tandem with baking soda, providing that perfect lift. -
1 tsp salt
Enhances the flavors of the cake. Feel free to cut down on this for a lower sodium version. -
1 cup vegetable oil
Adds moisture to the cake. You could use melted coconut oil for a hint of sweetness or even apple sauce for a lower-calorie version! -
3 large eggs
Binds the ingredients together, giving structure to the cake. Consider using flaxseed meal mixed with water for a vegan swap. -
2 cups grated zucchini
The star of the show! No need to peel—just wash and grate (you can easily swap in carrots if you’re feeling adventurous!). -
1 tsp vanilla extract
Adds a warm, inviting flavor to the cake. Use pure vanilla extract for the best taste. -
1 cup chocolate chips
For that ooey-gooey melt-in-your-mouth decadence! You can use dark, semi-sweet, or even dairy-free chips depending on your preference.
Step-by-Step Instructions
Now that we have our ingredients ready, it’s time to get cooking! Here’s how to make this beautiful Chocolate Zucchini Cake.
Step 1: Preheat the Oven
Preheat your oven to 350°F (175°C). This step is crucial because a properly heated oven allows the cake to rise perfectly without sinking in the middle—trust me, nobody likes a flat cake!
Step 2: Prepare Your Pan
Grease and flour a 9×13-inch baking pan or line it with parchment paper. This not only helps in the easy release of the cake but also ensures a nice presentation (hello, clean edges!).
Step 3: Grate the Zucchini
Grate your zucchini using a box grater or a food processor. There’s no need to peel the zucchini first; the skin adds color and nutrients! After grating, place it in a clean dish towel and squeeze out excess moisture. This keeps the cake from becoming too soggy—no one wants a wet cake!
Step 4: Mix the Dry Ingredients
In a medium-sized bowl, whisk together the flour, cocoa powder, baking soda, baking powder, and salt. This step distributes the leavening agents evenly and ensures your cake rises without any pesky lumps.
Step 5: Mix the Wet Ingredients
In a large mixing bowl, combine the sugar and oil. Whisk until well blended. Next, add the eggs and vanilla extract, mixing until fully incorporated. Pro tip: if you want your eggs to blend more smoothly, make sure they’re at room temperature before mixing.
Step 6: Combine Zucchini with Wet Ingredients
Add the grated zucchini to your wet mixture, folding it gently with a spatula. The zucchini will release some moisture, making the batter even more luscious.
Step 7: Combine Wet and Dry Mixtures
Gradually add the dry ingredients to the wet mixture, folding gently until just combined. Be careful not to overmix—this keeps your cake tender and fluffy!
Step 8: Add Chocolate Chips
Stir in the chocolate chips, allowing them to distribute evenly throughout the batter. I like to save a handful to sprinkle on top before baking for an added touch of chocolate goodness!
Step 9: Bake
Pour the batter into your prepared baking pan and spread it evenly. Bake in your preheated oven for 30-35 minutes, or until a toothpick inserted in the center comes out clean. Keep an eye on it—I’ve had cakes bake faster than expected, especially if your oven runs hot.
Step 10: Cool
Once baked, remove the cake from the oven and leave it in the pan for about 10 minutes. Then, transfer it to a wire rack to cool completely. This step allows the structure to firm up, making it easier to cut later.
Serving Suggestions
This Chocolate Zucchini Cake is scrumptious on its own, but you can elevate it even further! Serve a warm slice with a scoop of vanilla ice cream or a dollop of whipped cream for a perfect dessert. Drizzle a little chocolate ganache or dust with powdered sugar for an elegant touch. Wouldn’t it be fun to serve it along with a fresh berry compote for some tartness?
Recipe Variations
Feel free to get creative! Here are some fun variations to try:
- Spicy Kick: Add a dash of cayenne pepper or cinnamon for a spiced chocolate zucchini cake.
- Nutty Addition: Fold in some chopped walnuts or pecans for added crunch.
- Fruit Fusion: Add in a cup of chopped strawberries or raspberries for a fruity twist.
- Vegan Variations: Substitute eggs with flaxseed meal and oil with applesauce for a vegan-friendly version.
- Frosting Fun: Top it with a tangy cream cheese frosting for a decadent dessert!
Chef’s Notes
When I first attempted this recipe, I accidentally overlooked the zucchini squeezing step. Let’s just say the cake turned out more of a chocolate pudding than anything else! Thus, I learned the invaluable lesson of managing moisture. Now, every time I make this cake, I think back to that not-so-perfect attempt and smile. It reminds me that cooking is all about experimenting, learning, and most importantly, having fun in the kitchen!
Over the years, this Chocolate Zucchini Cake has evolved in my kitchen. I’ve played around with various additions and toppings, and I love how versatile it can be!
FAQs and Troubleshooting
1. My cake sunk in the middle. What went wrong?
A sunken cake is often due to overmixing or having the oven temperature too low. Be gentle when combining ingredients and ensure your oven is properly preheated!
2. What if my cake is too dry?
It could be overbaked or there wasn’t enough moisture in the batter. Make sure you’re accurately measuring and don’t exceed the baking time.
3. Can I make this cake ahead of time?
Absolutely! It can be made a day in advance and stored in an airtight container. If you want it warm when serving, just pop it in the oven for a few minutes before serving.
4. Is it possible to freeze the cake?
Yes! Wrap the cooled cake tightly in plastic wrap and place it in a freezer-safe container. It can last for up to three months. Just let it thaw in the refrigerator or at room temperature!
Nutritional Info (Optional)
While I believe in the magic of desserts, I also want you to enjoy treats mindfully. Here’s a general breakdown per slice (based on 12 slices):
- Calories: 280
- Total Fat: 12g
- Saturated Fat: 4g
- Carbohydrates: 42g
- Dietary Fiber: 2g
- Sugars: 24g
- Protein: 3g
This Chocolate Zucchini Cake is a delightful way to satisfy your sweet tooth while sneaking in some extra veggies!
Thank you for joining me in my kitchen today and for letting me share this cherished recipe with you. I hope you find as much joy in baking this Chocolate Zucchini Cake as I have. Happy baking!
Print
Chocolate Zucchini Cake
- Total Time: 55 minutes
- Yield: 12 servings 1x
- Diet: Vegetarian
Description
A moist and decadent chocolate cake that cleverly incorporates grated zucchini for added nutrition and flavor.
Ingredients
- 2 cups all-purpose flour
- 2 cups granulated sugar
- ½ cup unsweetened cocoa powder
- 1 tsp baking soda
- 1 tsp baking powder
- 1 tsp salt
- 1 cup vegetable oil
- 3 large eggs
- 2 cups grated zucchini
- 1 tsp vanilla extract
- 1 cup chocolate chips
Instructions
- Preheat your oven to 350°F (175°C).
- Grease and flour a 9×13-inch baking pan or line it with parchment paper.
- Grate your zucchini and squeeze out excess moisture.
- Mix the dry ingredients in a bowl: flour, cocoa powder, baking soda, baking powder, and salt.
- Combine the sugar and oil in a large bowl, then whisk in the eggs and vanilla.
- Add the grated zucchini and mix gently.
- Fold the dry ingredients into the wet ingredients until just combined.
- Stir in the chocolate chips.
- Pour the batter into the prepared pan and spread it evenly.
- Bake for 30-35 minutes, or until a toothpick comes out clean.
- Cool in the pan for 10 minutes, then transfer to a wire rack.
Notes
Store in an airtight container. Can be made a day in advance. This cake can also be frozen for up to three months.
- Prep Time: 20 minutes
- Cook Time: 35 minutes
- Category: Dessert
- Method: Baking
- Cuisine: American
Nutrition
- Serving Size: 1 serving
- Calories: 280
- Sugar: 24g
- Sodium: 400mg
- Fat: 12g
- Saturated Fat: 4g
- Unsaturated Fat: 6g
- Trans Fat: 0g
- Carbohydrates: 42g
- Fiber: 2g
- Protein: 3g
- Cholesterol: 30mg
Keywords: chocolate cake, zucchini cake, dessert, baking
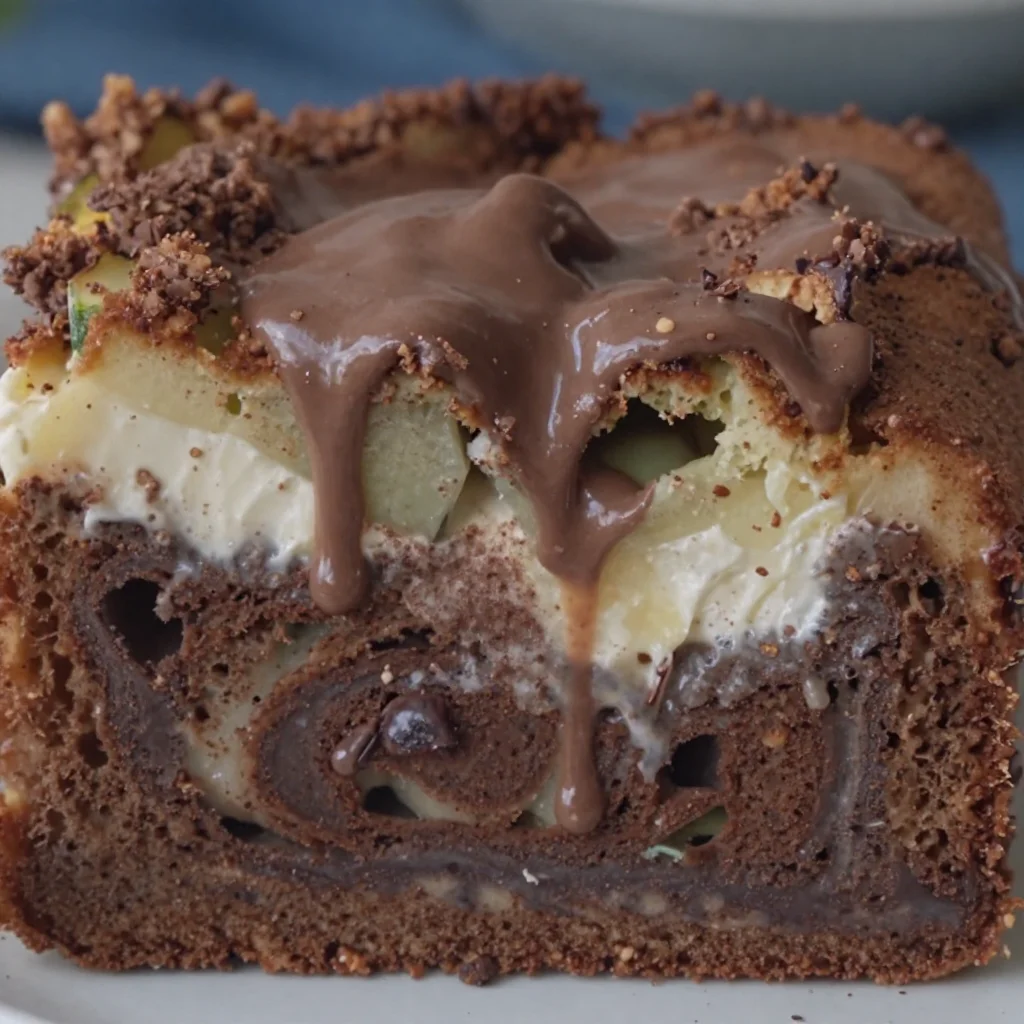
One-Pan Zucchini Chocolate Swirl Sheet Cake (Easy Weeknight)
Indulge in a Slice of Heaven: Chocolate Swirl Zucchini Sheet Cake
Welcome to my cozy kitchen, where the aroma of sweet bakes and savory dishes fills the air! I’m Olivia Bennett, and I’m thrilled to share one of my all-time favorite recipes with you today: Chocolate Swirl Zucchini Sheet Cake. This delightful dessert is all about taking simple, humble ingredients and transforming them into something spectacular that not only pleases the taste buds but also warms the heart.
You might wonder, "Zucchini in a cake?" But trust me, this moist and decadent creation will make you fall in love with vegetables in a way you’ve never imagined. Perfectly spiced with cinnamon and complemented by rich chocolate, this cake is a burst of joy in every bite. Whether you’re whipping it up for a family gathering, a potluck, or just a cozy night in, this recipe is sure to impress. Plus, it’s a fantastic way to sneak in a little extra veggie goodness while satisfying your sweet tooth!
So roll up those sleeves and preheat your oven to 350°F (175°C); let’s dive into the delicious world of baking!
A Slice of Nostalgia
Growing up, my family had a tradition of baking together on rainy Sundays. One particular memory stands out: my grandma’s famous zucchini bread. The smell of fresh bread rising in the oven was nothing short of magic. One day, with a generous pile of zucchini from the garden, I suggested we mix things up with chocolate. My grandma raised an eyebrow but agreed. The result? A decadent chocolate zucchini cake that left us all in awe! This recipe is a tribute to those precious moments spent in the kitchen with loved ones, transforming ordinary ingredients into extraordinary bites of joy.
Ingredients
Here’s what you’ll need to create this irresistible Chocolate Swirl Zucchini Sheet Cake:
-
2 cups grated zucchini
(Don’t worry about peeling it—most of the nutrients are in the skin! If you don’t have zucchini, try using shredded carrots as a fun twist.) -
1 ½ cups all-purpose flour
(This is your base! For gluten-free options, a 1:1 gluten-free flour blend works great.) -
1 cup granulated sugar
(You can substitute with coconut sugar for a more caramel-like flavor, or use a sugar substitute if watching your sugar intake.) -
½ cup unsweetened cocoa powder
(This adds the chocolatey goodness! Dutch-processed cocoa lends a smoother texture, while regular cocoa gives a deeper chocolate flavor.) -
1 teaspoon baking soda
(Essential for fluffiness! Ensure it’s fresh. If you run out, you can use baking powder (just double the amount).) -
½ teaspoon baking powder
(This helps the cake rise perfectly! Similar to baking soda, make sure it’s not expired.) -
½ teaspoon salt
(Enhances flavor and balances the sweetness!) -
1 teaspoon ground cinnamon
(Warm spices elevate the chocolate flavor. Feel free to add a pinch of nutmeg for a cozy twist.) -
½ cup vegetable oil
(This keeps the cake moist. For a lighter option, you can substitute with applesauce or Greek yogurt—just add a touch more flour.) -
3 large eggs
(These are the glue! For an egg-free version, try flax eggs: mix 1 tablespoon of ground flaxseed with 2.5 tablespoons water; let sit for 5 minutes.) -
1 teaspoon vanilla extract
(A must for flavor! Use pure vanilla for the best taste; artificial extract just doesn’t cut it.) -
1 cup chocolate chips
(Semi-sweet is classic, but dark chocolate or even white chocolate would make for a fun variation!)
Step-by-Step Instructions
Step 1: Prepping the Zucchini
First, let’s give that zucchini a gentle wash. Grate it using a box grater or food processor. You want about 2 cups. Too watery? Squeeze the grated zucchini in a clean kitchen towel to remove any excess moisture—it’ll help keep your cake from getting soggy.
Step 2: Mix the Dry Ingredients
In a large mixing bowl, whisk together the flour, sugar, cocoa powder, baking soda, baking powder, salt, and cinnamon. Stop for a moment and inhale that chocolatey aroma! It’s the best kind of therapy, I swear.
Step 3: Combine the Wet Ingredients
In a separate bowl, beat the eggs, then add in the vegetable oil and vanilla extract. Give it a good whisk until combined—the more air you incorporate, the fluffier your cake will be!
Step 4: Join Wet and Dry
Now it’s time to make magic happen! Pour the wet mixture into the dry ingredients. Gently fold until just combined. Be cautious not to overmix; we want a tender cake, not a bread-like loaf!
Step 5: Add the Zucchini and Chocolate Chips
Fold in the grated zucchini and half of the chocolate chips. This is where the fun begins! The zucchini adds an incredible texture and moisture to the cake. Plus, those chocolate chips are about to melt into gooey perfection!
Step 6: Pour and Swirl
Pour the batter into a greased or lined sheet pan (16×12 inches works beautifully). Now, use a spatula to smooth it out evenly. Use the remaining chocolate chips and sprinkle them on top. If you’re feeling adventurous (and I always encourage that!), take a butter knife and create swirls in the batter—this adds a stunning visual!
Step 7: Bake to Perfection
Pop your cake in the oven and bake for about 25-30 minutes, or until a toothpick comes out clean. The aroma will fill your home, making it feel like a warm hug.
Step 8: Cool and Serve
Let the cake cool in the pan for about 10 minutes, then transfer to a wire rack to cool completely. This is the hardest part—waiting for it to cool! But believe me, a warm slice fresh out of the oven is magical.
Serving Suggestions
To serve, cut your Chocolate Swirl Zucchini Sheet Cake into squares. You can dust them with powdered sugar for a touch of elegance, or add a scoop of vanilla ice cream for those indulgent moments. Pair with a cup of coffee or tea, and you’ve got yourself a delightful afternoon treat!
Recipe Variations
- Nutty Crunch: Add chopped walnuts or pecans to the batter for extra texture and flavor.
- Spiced Up: Stir in a teaspoon of pumpkin spice or cardamom for a seasonal twist.
- Double Chocolate: Instead of just chocolate chips, swirl in some Nutella for an ultra-chocolatey delight!
- Fruity Bonus: Mix in some blueberries or raspberries for a fruity surprise amidst the chocolate.
- Gluten-Free: As mentioned earlier, opt for a gluten-free flour to cater to dietary needs.
Chef’s Notes
This recipe is a product of my kitchen experiments, evolving over the years. I started with zucchini bread, and after many successful (and not-so-successful) iterations, I landed on this chocolatey delight! Sometimes, I add a pinch of espresso powder to enhance the chocolate flavor further. And, oh boy, it is mouthwatering! Cooking and baking have a charm that keeps us connected, and I love that this cake feels like a warm embrace from the inside out.
FAQs and Troubleshooting
Can I freeze this cake?
Absolutely! Once cooled, wrap it tightly in plastic wrap and then in foil. You can freeze it for up to 3 months. Thaw it in the fridge overnight before enjoying!
My cake came out dry; what went wrong?
Overbaking is the culprit! Keep an eye on it as it gets closer to the baking time mentioned. Every oven is different, so checking with a toothpick can save the day.
Can I use other vegetables?
Definitely! While zucchini is the star here, shredded carrots or even finely grated beetroot could bring delightful variations.
Why should I use unsweetened cocoa powder?
Unsweetened cocoa powder allows you to control the sweetness of the cake while providing the rich chocolate flavor it craves. Sweetened cocoa can make your cake overly sweet.
Nutritional Info (Optional)
- Serving Size: 1 square (serves approximately 16)
- Calories: 230
- Fat: 10g
- Carbohydrates: 32g
- Protein: 3g
So, there you have it—my cherished Chocolate Swirl Zucchini Sheet Cake. With its tender crumb, rich chocolate flavor, and hidden veggie goodness, it’s a dessert that embodies love and warmth. I hope you try this recipe and make it your own—maybe even create some new cherished kitchen memories along the way. Happy baking!
Print
Chocolate Swirl Zucchini Sheet Cake
- Total Time: 45 minutes
- Yield: 16 servings 1x
- Diet: Vegetarian
Description
A moist and decadent chocolate cake incorporating grated zucchini for a unique twist, perfect for family gatherings or a cozy night in.
Ingredients
- 2 cups grated zucchini
- 1 ½ cups all-purpose flour
- 1 cup granulated sugar
- ½ cup unsweetened cocoa powder
- 1 teaspoon baking soda
- ½ teaspoon baking powder
- ½ teaspoon salt
- 1 teaspoon ground cinnamon
- ½ cup vegetable oil
- 3 large eggs
- 1 teaspoon vanilla extract
- 1 cup chocolate chips
Instructions
- Prepping the Zucchini: Wash and grate zucchini, then squeeze out excess moisture if needed.
- Mix the Dry Ingredients: Whisk flour, sugar, cocoa powder, baking soda, baking powder, salt, and cinnamon in a bowl.
- Combine the Wet Ingredients: Beat eggs, then mix in vegetable oil and vanilla extract.
- Join Wet and Dry: Pour the wet mixture into the dry ingredients and fold gently until just combined.
- Add the Zucchini and Chocolate Chips: Fold in grated zucchini and half the chocolate chips.
- Pour and Swirl: Transfer batter to a greased sheet pan, sprinkle remaining chocolate chips, and create swirls.
- Bake to Perfection: Bake in a preheated oven at 350°F for 25-30 minutes or until a toothpick comes out clean.
- Cool and Serve: Let the cake cool before transferring to a wire rack.
Notes
Dust with powdered sugar or serve with ice cream for an extra treat. Can freeze for up to 3 months.
- Prep Time: 15 minutes
- Cook Time: 30 minutes
- Category: Dessert
- Method: Baking
- Cuisine: American
Nutrition
- Serving Size: 1 square
- Calories: 230
- Sugar: 15g
- Sodium: 200mg
- Fat: 10g
- Saturated Fat: 2g
- Unsaturated Fat: 8g
- Trans Fat: 0g
- Carbohydrates: 32g
- Fiber: 2g
- Protein: 3g
- Cholesterol: 50mg
Keywords: Chocolate Cake, Zucchini Cake, Dessert, Baking




