

One-Pan Vegan Potimarron Lentil Parmentier (Autumn Comfort)
Parmentier Vegan Potimarron Lentilles: A Warm Embrace of Autumn Flavors
Welcome back to my cozy kitchen, foods lovers! Today, we’re diving into a dish that not only warms the belly but also wraps you up in a hug of seasonal flavors — Parmentier Vegan Potimarron Lentilles. This dish is like a love letter to autumn; it’s rich, hearty, and bursting with the comforting essence of fall. In this lovely recipe, you’ll find creamy potimarron squash paired with protein-packed lentils, seasoned to perfection. Trust me, when you take that first bite, you might just find yourself transported to a cozy cabin in the woods, proudly enjoying the fruits of your labor.
A Taste of Nostalgia: My First Encounter With Potimarron
Let me take you back a few years to my very first encounter with potimarron squash. I was visiting a local farmers’ market, a vibrant landscape filled with colorful produce and the enticing aromas of freshly baked goods. As I wandered through the stalls, my eyes landed on this beautiful orange squash, perfectly shaped and glowing under the warm fall sun.
Intrigued, I picked it up and was instantly captivated by its sweet, nutty aroma. A friendly vendor encouraged me to try it, and before long, I was hooked. That weekend, I tried out my Grandma’s cherished recipes, blending her rich flavors with my playful twists. That evening, as I sat down to share my creation with friends, laughter and joy filled the air, and I realized this was more than just food; it was about connection.
As I serve up Parmentier Vegan Potimarron Lentilles today, I find joy in knowing that I’m sharing more than a recipe — I’m sharing a piece of my culinary journey. This dish encapsulates warmth, love, and the delightful experience of gathering around the table with those we hold dear.
Ingredients
For this delightful Parmentier Vegan Potimarron Lentilles, gather the following ingredients:
- 400g Potimarron Squash: This vibrant squash has a sweet, nutty flavor and creamy texture when cooked. If you can’t find potimarron, butternut squash or pumpkin can be good substitutes, providing similar results.
- 250g Cooked Lentils: I love using green or brown lentils for their firm texture. If you’re in a hurry, canned lentils are a great shortcut — just rinse and toss them in!
- 1 Medium Onion, diced: Onions add a lovely depth of flavor. You can swap them with shallots for a milder sweetness or use garlic for an extra kick.
- 2-3 Garlic Cloves, minced: Garlic makes everything better! If you’re a garlic lover, don’t hold back — feel free to add more.
- 400ml Vegetable Broth: Homemade is ideal, but store-bought works just fine. Look for low-sodium options to control the saltiness in your dish.
- 2 tbsp Olive Oil: This adds richness and flavor. For a different spin, you can use coconut oil for a subtly sweet addition.
- 1 tsp Thyme (dried or fresh): Thyme adds an earthy note to the dish. If you’re looking for something different, rosemary or sage could also work beautifully.
- Salt and Pepper, to taste: Always essential! Adjust according to your preference.
- Fresh parsley or chives for garnish: A pop of color and freshness at the end makes all the difference.
Step-by-Step Instructions
Now, let’s get cooking! Follow these easy steps, and you’ll have a beautiful dish ready to share in no time.
-
Prepare the Potimarron: Start by washing your potimarron squash thoroughly. Cut it in half and scoop out the seeds. This part can be a bit messy, but it’s all part of the fun! Aim for 1-inch cubes for even cooking. After you’ve chopped it, drizzle it with a bit of olive oil, salt, and pepper, then place it on a baking sheet lined with parchment paper.
-
Roast the Squash: Preheat your oven to 200°C (400°F). Roast the potimarron cubes for about 25-30 minutes or until tender and caramelizing. You’ll love the sweet aroma that fills your kitchen as it roasts.
-
Sauté the Base: While the potimarron is roasting, grab a large skillet and add the remaining olive oil over medium heat. Toss in the diced onion and sauté until it becomes translucent — about 4-5 minutes — before adding the minced garlic. Stir frequently so the garlic doesn’t burn; it should smell divine!
-
Combine the Lentils and Broth: Add the cooked lentils to the skillet and pour in the vegetable broth. Stir in the thyme and season with salt and pepper to your liking. Let this simmer on low for about 10 minutes. The flavors meld beautifully, making it a real comfort dish.
-
Blend the Squash: Once the squash is ready, check its tenderness. If it’s fork-tender, remove it from the oven. Allow it to cool slightly before blending or mashing until you achieve a smooth consistency. You can do this with a fork, potato masher, or an immersion blender.
-
Assemble the Dish: In a large baking dish, spread the lentil base evenly across the bottom. Top it off with the creamy potimarron mixture, smoothing it with a spatula. Feel free to create a swirling design for that artistic touch!
-
Final Bake: Return the assembled dish to the oven and bake for an additional 20 minutes at 200°C (400°F) until the top is slightly golden and bubbly.
-
Serve and Enjoy: Let it cool for a few moments before diving in! Garnish with freshly chopped parsley or chives for that beautiful finishing touch.
Serving Suggestions
This Parmentier Vegan Potimarron Lentilles looks gorgeous served straight from the oven in a rustic baking dish. I recommend pairing it with a side of crusty whole-grain bread for a cozy meal or perhaps a crisp autumn salad with apple slices and walnuts. It’s perfect for dinner gatherings or simply cozy evenings at home!
Recipe Variations
Feeling adventurous? Here are a few creative twists you can make to this recipe:
- Spicy Kick: Add a pinch of cayenne pepper or smoked paprika for a spicy twist that will awaken your taste buds!
- Cheesy Vibes: Sprinkle nutritional yeast over the squash mixture before baking for that comforting cheese-like flavor without the dairy.
- Herb Infusion: Switch up the herbs! Try fresh rosemary or sage for a different aroma that still captures the essence of cozy fall cooking.
- Nut Topping: For added texture, sprinkle some toasted pine nuts or almonds on top of the dish before serving.
Chef’s Notes
I must admit, this recipe has evolved since my first creation of it. What started as a riff on a traditional shepherd’s pie has morphed into this delightful vegan version inspired by seasonal ingredients. Over the years, I’ve experimented with flavors, initially sticking to standard herbs and spices. But as I tasted new combinations, I learned that adding a dash of creativity completely transforms a dish! The joy is in the experimentation — don’t be afraid to make it your own!
FAQs and Troubleshooting
1. What type of lentils should I use?
- Green or brown lentils are ideal due to their firm texture. Avoid red lentils as they tend to break down and become mushy.
2. Can I prepare this in advance?
- Absolutely! You can assemble the dish a day in advance. Just cover it with foil and keep it in the fridge. All you need to do is pop it in the oven when you’re ready to eat!
3. What if my squash isn’t tender after baking?
- If your squash isn’t tender, you might need to leave it in the oven for an additional 10-15 minutes. Cooking times can vary based on the size of your cubes.
4. Can I freeze leftovers?
- Yes, this dish freezes beautifully! Just allow it to cool completely and then store it in an airtight container. When you’re ready to enjoy it, simply thaw it in the fridge overnight and reheat in the oven.
Nutritional Info (if applicable)
This Parmentier Vegan Potimarron Lentilles is not only delicious but also packed with nutrition! Depending on the exact ingredients used, one serving would generally provide a good source of fiber, proteins, and essential vitamins, primarily from the squash and lentils. It’s a wholesome, comfort-filled meal that you can feel good about!
And there you have it! This cozy, hearty dish isn’t just a recipe; it’s an experience. I hope you feel inspired to gather your loved ones and whip up this delightful Parmentier Vegan Potimarron Lentilles. Remember, cooking is about joy, creativity, and connection. Until next time, happy cooking, and keep those aprons messy!
Print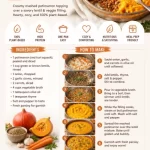
Parmentier Vegan Potimarron Lentilles
- Total Time: 1 hour 10 minutes
- Yield: 4 servings 1x
- Diet: Vegan
Description
A warm and hearty dish featuring creamy potimarron squash and protein-packed lentils, perfect for autumn gatherings.
Ingredients
- 400g Potimarron Squash
- 250g Cooked Lentils
- 1 Medium Onion, diced
- 2–3 Garlic Cloves, minced
- 400ml Vegetable Broth
- 2 tbsp Olive Oil
- 1 tsp Thyme (dried or fresh)
- Salt and Pepper, to taste
- Fresh parsley or chives for garnish
Instructions
- Prepare the Potimarron: Wash and cut the squash in half, scoop out the seeds, and cube it.
- Roast the Squash: Preheat your oven to 200°C (400°F) and roast the cubes for 25-30 minutes until tender.
- Sauté the Base: In a large skillet, heat olive oil and sauté the diced onion until translucent. Add minced garlic and stir.
- Combine the Lentils and Broth: Add cooked lentils and vegetable broth, then stir in thyme, salt, and pepper. Let simmer for 10 minutes.
- Blend the Squash: Once roasted, blend or mash the potimarron until smooth.
- Assemble the Dish: Spread the lentil base in a baking dish and top with the potimarron mixture.
- Final Bake: Return to the oven and bake for an additional 20 minutes until golden.
- Serve and Enjoy: Cool slightly, garnish, and serve.
Notes
Pair with crusty bread or a crisp autumn salad.
- Prep Time: 15 minutes
- Cook Time: 55 minutes
- Category: Main Course
- Method: Baking
- Cuisine: Vegan
Nutrition
- Serving Size: 1 serving
- Calories: 350
- Sugar: 6g
- Sodium: 300mg
- Fat: 12g
- Saturated Fat: 2g
- Unsaturated Fat: 10g
- Trans Fat: 0g
- Carbohydrates: 45g
- Fiber: 10g
- Protein: 15g
- Cholesterol: 0mg
Keywords: vegan, potimarron, lentils, autumn recipes, comfort food
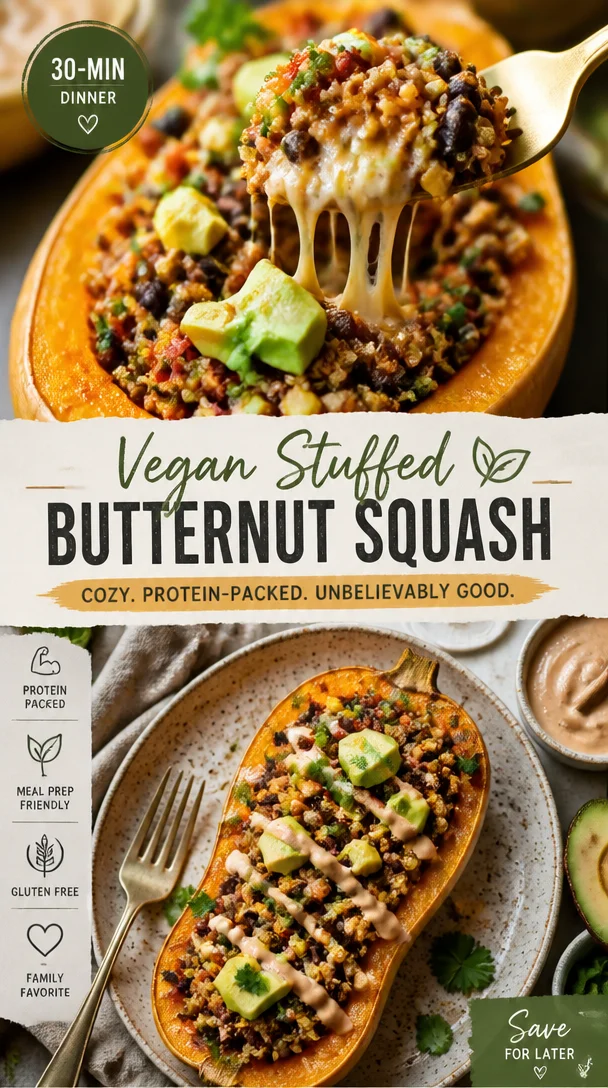
Vegan Stuffed Butternut Squash
Warm Up to Vegan Stuffed Butternut Squash
Welcome to my cozy corner of the kitchen, friends! I’m Olivia Bennett, your guide on this culinary adventure. Today, we’re diving into one of my absolute favorite dishes: Vegan Stuffed Butternut Squash. This recipe is a celebration of comfort, warmth, and vibrant flavors that are sure to make your kitchen feel like a welcoming haven. Perfect for a festive holiday gathering or even a family weeknight dinner, this dish proves that plant-based cooking can be both delicious and satisfying.
There’s just something magical about the smell of butternut squash baking in the oven. The sweet, nutty aroma fills the air, promising warmth and delightful flavors. Every time I make this dish, I’m transported back to those crisp autumn days as a child, where our family would gather around the table, sharing stories over a steaming bowl of something hearty. Cooking filled my home with love and joy, and I want to pass that legacy on to you.
As I carefully scoop out the sweet flesh of the roasted squash and mix it with spices, grains, and veggies, I can’t help but feel giddy. It’s like creating a cozy, edible hug! This dish is not only a treat for the taste buds but also a delightful centerpiece that brings everyone together. So, grab your apron and let’s get cooking!
A Journey to Flavor Town
Let me whisk you away to a memory that sparked my love for stuffed vegetables. I remember one chilly Thanksgiving afternoon, my grandmother, bless her heart, introduced me to the wonders of cooking with squashes. She pulled out her favorite old-fashioned cookbook, the pages worn and stained, and guided me through the process of stuffing acorn squashes with wild rice, cranberries, and pecans. As I stirred the fragrant mixture, I felt a sense of belonging, of tradition. The satisfaction of creating something from scratch and sharing it with family seeped into my soul.
As I grew older and ventured into the world of vegan cuisine, I found myself dreaming up my own version of that nostalgic dish. Enter the Vegan Stuffed Butternut Squash, with a hearty filling full of flavor and personality! It reminds me of those sweet family gatherings while allowing me to experiment with seasonal ingredients. Trust me; it makes people smile!
Ingredients That Sing
Let’s gather our ingredients and lay them out like the stars they are. Here’s what you’ll need for your Vegan Stuffed Butternut Squash:
-
1 large butternut squash
Sweet and nutty, butternut squash forms the perfect vessel for our stuffing. If you can’t find butternut squash, acorn squash can also work beautifully. -
1 cup quinoa (or rice)
This fluffy grain will serve as the base of the stuffing. Quinoa packs a protein punch and can be replaced with brown rice or even cauliflower rice for a low-carb option. -
1 can black beans (15 oz), drained and rinsed
Full of fiber and protein, black beans add substance to our dish. You can swap them with kidney beans or chickpeas, depending on your preference. -
1 cup corn (fresh or frozen)
Corn brings a sweet, crunchy texture to the filling. Feel free to substitute with diced bell peppers for a different flavor profile. -
1 medium onion, diced
Onions add depth and flavor. Yellow or red onions work best, but shallots can enhance the dish’s sweetness as well. -
2-3 cloves garlic, minced
Garlic is a flavor powerhouse! If you’re not a garlic fan, you can simply omit it or use garlic powder in a pinch. -
1 tsp ground cumin
A warm spice that brings out the earthiness of the squash. If you’re feeling adventurous, try smoked paprika for a smoky touch. -
1 tsp ground cinnamon
The aromatic flavor of cinnamon enhances the sweetness of the squash. If you’re not keen on cinnamon, nutmeg offers a nice alternative. -
Salt and pepper to taste
Essential for enhancing all the beautiful flavors in our dish! -
1 tablespoon olive oil
A drizzle of olive oil keeps the stuffing moist and adds healthy fats. Avocado oil works just as well. -
Fresh herbs for garnish (like cilantro or parsley)
These will brighten up the dish! Fresh basil or chives can add freshness too.
Step-By-Step Instructions
Alright, let’s get cooking! Follow these simple steps, and you’ll be well on your way to creating your own masterpiece.
-
Preheat Your Oven
Start by preheating your oven to 400°F (200°C) while you prep your squash. This allows for uniform cooking and that lovely caramelization you crave! -
Prepare the Butternut Squash
Slice the butternut squash in half lengthwise. Scoop out the seeds using a spoon or ice cream scoop—don’t forget to save those seeds for roasting later! Drizzle the cut surfaces with olive oil, and sprinkle with salt and pepper. Place the halves cut-side down on a baking dish lined with parchment paper. Bake for about 30-40 minutes until fork-tender. -
Cook the Quinoa
While the squash is baking, rinse your quinoa under cold water. Combine the rinsed quinoa with 2 cups of water in a saucepan. Bring it to a boil, reduce to a simmer, cover, and cook for about 15 minutes until the water is absorbed and the quinoa is fluffy. Fluff it with a fork and set aside. -
Sauté the Vegetables
In a skillet over medium heat, heat the remaining olive oil. Add the diced onion and sauté until translucent, about 5-6 minutes. Toss in the minced garlic, cumin, and cinnamon, cooking until fragrant, about 1 minute. Stir in the black beans and corn, allowing them to warm through. Finally, fold in the cooked quinoa and mix well. Season with salt and pepper to taste. -
Stuff the Squash
Once the butternut squash is out of the oven, flip the halves over so the cut side faces up. Carefully spoon the quinoa mixture into each half, pressing it down gently to pack it in. Feel free to overflow a little—who doesn’t love a heaping helping? -
Final Bake
Return the stuffed squash to the oven for an additional 10-15 minutes. This final bake allows all those delicious flavors to meld together beautifully. -
Serve and Enjoy!
Once done, remove from the oven and let it cool for a few minutes. Garnish with your favorite fresh herbs, cut into wedges, and serve warm. Enjoy every delicious bite, preferably with your favorite people around the table!
Serving Suggestions
To serve, I love to place the stuffed halves on a beautiful platter, garnished with fresh herbs. You could even drizzle a tangy tahini sauce or a squeeze of lime over the top for extra zest! Pair this dish with a simple mixed green salad drizzled with a balsamic vinaigrette, and voila! You’ve got yourself a dinner that looks and tastes like a cozy embrace.
Recipe Variations
Now, let’s have a little fun with this recipe! Here are some creative twists you can try with your vegan stuffed butternut squash:
- Spicy Southwest Flavors: Add diced jalapeños and a sprinkle of chili powder for a kick!
- Italian Style: Incorporate sun-dried tomatoes, pine nuts, and a sprinkle of nutritional yeast for a cheesy flavor. Toss in fresh basil for a fragrant touch.
- Mediterranean Touch: Mix in Kalamata olives, artichokes, and feta-style vegan cheese for a delightful twist.
- Savory Mushroom Bliss: Swap black beans for finely chopped mushrooms and add some spinach or kale for an earthy flavor.
- Nutty and Fruity: Toss in chopped apples or dried cranberries with almonds or walnuts for a crunchy, sweet surprise.
Chef’s Notes
As with any recipe, this vegan stuffed butternut squash has evolved over time. I remember the first time I made it a little too spicy—I mistakenly used cayenne instead of cumin! The result was a fiery dish, more suited for the bravest of taste buds. But it taught me to embrace experimentation in the kitchen, and now, I encourage you to enjoy the process, too!
Cooking is about joy, creativity, and sometimes, a little chaos in the kitchen. Don’t stress if things don’t go according to plan. Laugh it off, share it with loved ones, and make a memory out of it!
FAQs and Troubleshooting
Q: My quinoa always comes out mushy. What am I doing wrong?
A: Make sure to rinse quinoa under cold water before cooking, and follow the water-to-quinoa ratio on the package. A general rule is 2 cups of water for every 1 cup of quinoa. Fluff with a fork after cooking to avoid clumping.
Q: Can I prepare the stuffing ahead of time?
A: Absolutely! You can prepare the stuffing in advance and store it in the fridge for up to 2-3 days. Just assemble and bake when ready to serve!
Q: What if I have leftover stuffing?
A: Lucky you! The stuffing is fantastic on its own as a salad or even as a filling for wraps. Get creative in using it up!
Q: Can I freeze the stuffed squash?
A: Yes! You can freeze the stuffed squash before baking. Wrap it tightly in foil and freeze for up to a month. When you’re ready to eat, thaw in the refrigerator overnight and bake until heated through.
Nutritional Info
While cooking is about joy and creativity, it doesn’t hurt to know the benefits of what we’re eating! This Vegan Stuffed Butternut Squash is not only delicious but also nourishing. Each serving is rich in fiber, packed with protein from quinoa and black beans, and filled with essential vitamins and minerals from the veggies. It’s a wholesome meal that fuels your body and spirit!
So there you have it—your new favorite cozy dish, Vegan Stuffed Butternut Squash! Whether it’s fall or spring, a party or a quiet dinner at home, this recipe is sure to win hearts. Join me in the kitchen, and remember: every meal is an opportunity to create a connection, share a story, and savor the flavors of life! Happy cooking!
Print
Vegan Stuffed Butternut Squash
- Total Time: 55 minutes
- Yield: 4 servings 1x
- Diet: Vegan
Description
A cozy, plant-based dish featuring roasted butternut squash stuffed with a flavorful mixture of quinoa, black beans, and spices, perfect for any gathering.
Ingredients
- 1 large butternut squash
- 1 cup quinoa (or rice)
- 1 can black beans (15 oz), drained and rinsed
- 1 cup corn (fresh or frozen)
- 1 medium onion, diced
- 2–3 cloves garlic, minced
- 1 tsp ground cumin
- 1 tsp ground cinnamon
- Salt and pepper to taste
- 1 tablespoon olive oil
- Fresh herbs for garnish (like cilantro or parsley)
Instructions
- Preheat your oven to 400°F (200°C) while you prep your squash.
- Slice the butternut squash in half lengthwise and scoop out the seeds.
- Drizzle the cut surfaces with olive oil, sprinkle with salt and pepper, and place cut-side down on a baking dish lined with parchment paper.
- Bake for about 30-40 minutes until fork-tender.
- Rinse your quinoa under cold water and combine with 2 cups of water in a saucepan.
- Bring it to a boil, reduce to a simmer, cover, and cook for about 15 minutes until the water is absorbed.
- Heat the remaining olive oil in a skillet over medium heat and sauté the diced onion until translucent.
- Stir in the minced garlic, cumin, and cinnamon, cooking until fragrant.
- Add the black beans and corn, allowing them to warm through, then fold in the cooked quinoa and mix well.
- Flip the squash halves cut side up and spoon the quinoa mixture into each half.
- Return the stuffed squash to the oven for an additional 10-15 minutes.
- Remove from the oven, garnish with fresh herbs, and serve warm.
Notes
Feel free to experiment with the filling! Add spicy jalapeños or Italian flavors with sun-dried tomatoes.
- Prep Time: 15 minutes
- Cook Time: 40 minutes
- Category: Main Course
- Method: Baking
- Cuisine: Vegan
Nutrition
- Serving Size: 1 serving
- Calories: 350
- Sugar: 6g
- Sodium: 420mg
- Fat: 12g
- Saturated Fat: 2g
- Unsaturated Fat: 8g
- Trans Fat: 0g
- Carbohydrates: 45g
- Fiber: 10g
- Protein: 15g
- Cholesterol: 0mg
Keywords: vegan, stuffed butternut squash, plant-based, comfort food
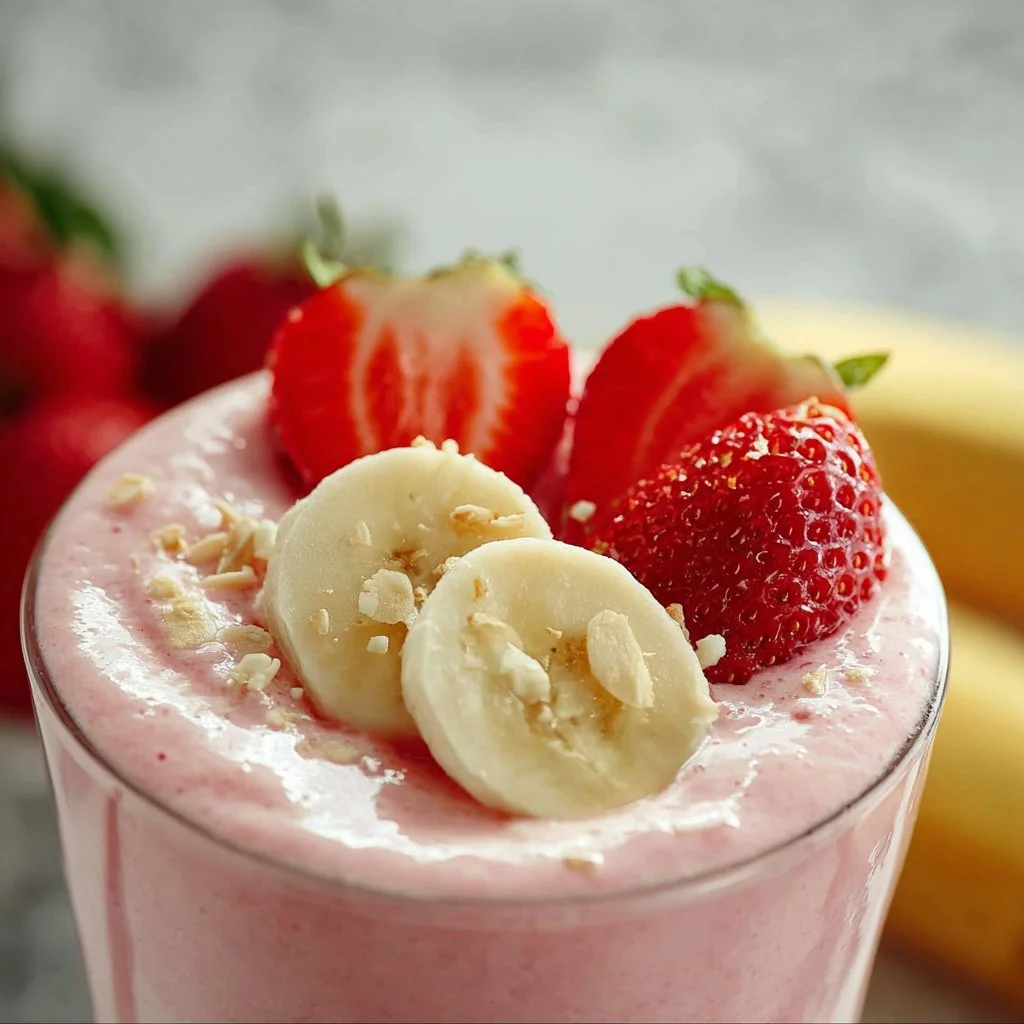
Strawberry Banana Smoothie
Whip Up Some Sunshine: The Ultimate Strawberry Banana Smoothie
Welcome, friends! Today, let’s dive into something that’s not just a treat for your taste buds but also a burst of sunshine in a glass—our delicious Strawberry Banana Smoothie. If you’re like me, you probably can’t resist the sweet, fruity aroma wafting through the air when strawberries and bananas are blended together. It’s like a refreshing hug on a hot summer day or a gentle nudge of nostalgia that might just take you back to simpler times.
Picture this: you wake up on a Saturday morning, sunlight streaming through the kitchen window, the sound of birds chirping outside. As you stretch out in your pajamas, you feel the pull of something sweet and fulfilling. You shuffle over to the blender and pull out some vibrant strawberries and ripe bananas just waiting to be transformed into a creamy, dreamy smoothie. Can you feel the excitement? That’s exactly the kind of joy I want to share with you today.
Smoothies are the ultimate kitchen chameleons, and this Strawberry Banana Smoothie perfectly combines flavor, nutrition, and simplicity. Whether you’re whipping it up as a quick breakfast, a refreshing afternoon snack, or a post-workout pick-me-up, this recipe has got you covered. Plus, it only takes minutes to prepare! So, let’s roll up our sleeves, grab our ingredients, and embark on this fruity adventure together. I promise you’ll have a smile on your face and a satisfied belly in no time!
A Walk Down Memory Lane
Growing up, summer was my favorite season, and a big part of that was the abundance of fresh fruit. Every weekend, my family would head to the local farmer’s market. We’d wander among the colorful stalls lined with ripe strawberries, bananas, and other seasonal delights. It was always a thrill to choose the best-looking produce, and my mom would let us help her pick the juiciest strawberries.
One fateful summer day, we came across a vendor with perfectly ripe strawberries. I still remember the sweet smell that filled the air as we picked out pints. When we got home, my mom decided we would make her famous smoothie recipe. We’d crank up her old blender, giggling as we poured in the ingredients. The sound of the blender whirring, combined with the bright colors of the smoothie, created an atmosphere of pure joy.
As we sipped on our creations, I realized that these simple moments—like enjoying a homemade strawberry banana smoothie—were what made summer special. It wasn’t just about the taste; it was about connections, laughter, and creating memories that would last a lifetime. Now, each time I make this smoothie, I’m reminded of those sweet summer days with my family, and I hope to pass that same joy on to you!
Ingredients
Let’s get to the fun part—gathering our ingredients! Here’s what you’ll need to create this delightful smoothie:
-
Strawberries (2 cups)
Juicy and sweet, strawberries are the star here! Choose fresh, ripe strawberries for the best flavor. If you can’t find any fresh ones, frozen strawberries work perfectly too. -
Banana (1 large)
Bananas add creaminess and natural sweetness to the mix. For a fresher banana flavor, use one that’s slightly underripe. If your bananas are overripe, they work beautifully too—just increase the ice a tad for a cooler smoothie! -
Yogurt (1 cup)
Greek yogurt makes the smoothie thick and adds a dose of protein. You can use regular yogurt if that’s what you have on hand. For a dairy-free option, coconut yogurt or almond yogurt will work wonderfully as substitutes. -
Milk (1 cup)
Whole milk, almond milk, or oat milk—choose your favorite! Each type of milk will slightly change the flavor and texture, so feel free to experiment. If you’re looking to keep it vegan, nut-based milks are fantastic! -
Honey or Maple Syrup (1-2 tablespoons)
Sweeten to your taste! If you prefer a sugar-free option, you can skip this or use a natural sweetener like stevia. -
Ice (1 cup)
Ice is essential for that cold, refreshing texture. You can adjust the amount based on how thick or frosty you like your smoothies!
You might want to grab a few sprigs of fresh mint or some chia seeds for extra flavor and health benefits—but that’s entirely optional!
Step-by-Step Instructions
Ready to blend our fruity concoction? Here’s how to create this Strawberry Banana Smoothie from start to finish:
-
Prepare Your Ingredients
Start by washing your strawberries thoroughly—give them a gentle scrub under running water. Remove the green stems and slice them in half so they blend easier. Peel your banana and break it into smaller chunks. -
Add the Ingredients to the Blender
Toss the strawberries, banana, Greek yogurt, and milk into the blender. Drizzle in honey or maple syrup if you’re using it. Remember this is about your taste, so adjust the sweetness according to your preference! -
Throw in the Ice
Add the ice cubes last. This helps to weigh everything down and keep the blender’s blades moving smoothly. It’s all about creating the perfect vortex! -
Blend, Blend, Blend!
Put the lid on tightly and start blending on a low speed. Gradually increase to high speed for about 30–60 seconds. Keep blending until you reach your desired consistency. If it’s too thick for your liking, you can always add a splash more milk to loosen it up. -
Taste Test
Here’s my favorite part! Take a moment to taste your smoothie before serving. Adjust the sweetness if needed. Add a little more honey or syrup if you like it sweeter! -
Serve it Up
Grab your favorite glass and pour the smoothie in, filling it nearly to the brim. The vibrant pink hue is just begging to be enjoyed. -
Garnish if Desired
For a fancy touch, pop a whole strawberry on the rim of your glass or add a few mint leaves on top. It adds that extra visual appeal, and who doesn’t love a little flair?
Serving Suggestions
Serve your Strawberry Banana Smoothie immediately, as it’s best enjoyed fresh! Whether you’re sipping it alone at home or serving guests, pairing it with a light breakfast, like avocado toast or a veggie omelet, creates a wonderfully balanced meal. You could even serve it in cute mason jars for a picnic vibe!
Recipe Variations
Feeling creative? Here are a few variations to spice up your smoothie:
- Berry Blast: Mix in blueberries or raspberries for an extra fruity kick.
- Nut Butter Swirl: Add a tablespoon of almond or peanut butter for an extra creamy texture and awesome flavor—plus, it’s packed with protein!
- Green Smoothie: Throw in a handful of spinach or kale for a nutrient boost. The fruitiness will mask the greens, making it still delicious!
- Coconut Twist: Use coconut milk and add shredded coconut for a tropical twist.
- Protein Power: Mix in a scoop of your favorite protein powder to enhance the smoothie’s nutrition.
Chef’s Notes
Over the years, I’ve experimented with this recipe so much that it’s become a family staple! Sometimes I even add a scoop of orange juice to introduce a citrusy zing, reminiscent of sunny mornings in my childhood kitchen. And let’s be honest—it’s nearly impossible to make this smoothie without sneaking a lick of the blender—who else is with me on that?
Cooking and creating can be spontaneous, so feel free to adapt this recipe as you like. The kitchen should always be a playground for your creativity!
FAQs and Troubleshooting
Q: My smoothie turned out too thick. What can I do?
A: If your smoothie is thicker than you’d like, just add a splash more milk and blend it again! Adjusting for thickness is part of the fun—every smoothie is unique!
Q: Can I make this smoothie ahead of time?
A: I recommend making it fresh, but if you plan to prepare ahead, you can blend it a few hours in advance and store it in the fridge. Just give it a good shake before enjoying, as some separation may occur.
Q: How can I make this smoothie dairy-free?
A: Easy peasy! Simply swap out the yogurt and milk for their dairy-free alternatives, like almond milk and coconut yogurt.
Q: Can I freeze the smoothie?
A: Absolutely! If you have leftovers, pour them into an ice cube tray or a freezer-safe container. Thaw and blend when you’re ready to enjoy it again.
Nutritional Info
For those of you counting calories or watching your macros, here’s a rough nutritional breakdown per serving of this Strawberry Banana Smoothie:
- Calories: ~250 (depends on specific ingredients used)
- Protein: ~9g
- Fat: ~5g
- Carbohydrates: ~45g
- Fiber: ~4g
(Adjust according to the specific ingredients you choose!)
And that’s a wrap, foodie friends! I’m so excited for you to whip up your own Strawberry Banana Smoothie and savor every sip. Remember, it’s not just about the ingredients; it’s about the love you pour into each blend and the moments you create while sharing it with those you care most about. Enjoy every refreshing mouthful and happy blending!
Print
Ultimate Strawberry Banana Smoothie
- Total Time: 5 minutes
- Yield: 2 servings 1x
- Diet: Vegetarian
Description
A refreshing and nutritious strawberry banana smoothie, perfect for breakfast or a snack.
Ingredients
- 2 cups Strawberries, fresh or frozen
- 1 large Banana, peeled and broken into chunks
- 1 cup Greek Yogurt (or dairy-free alternative)
- 1 cup Milk (whole, almond, or oat)
- 1–2 tablespoons Honey or Maple Syrup
- 1 cup Ice
Instructions
- Prepare your ingredients by washing strawberries and slicing them, and breaking the banana into chunks.
- Add the strawberries, banana, Greek yogurt, and milk to the blender. Drizzle in honey or maple syrup.
- Throw in the ice cubes last to help the blending.
- Blend on low speed, gradually increasing to high for about 30–60 seconds until smooth.
- Taste and adjust sweetness if needed.
- Serve in your favorite glass, garnishing with a strawberry or mint if desired.
Notes
For extra flavor, consider adding chia seeds or mint leaves.
- Prep Time: 5 minutes
- Cook Time: 0 minutes
- Category: Beverage
- Method: Blending
- Cuisine: American
Nutrition
- Serving Size: 1 serving
- Calories: 250
- Sugar: 20g
- Sodium: 100mg
- Fat: 5g
- Saturated Fat: 2g
- Unsaturated Fat: 3g
- Trans Fat: 0g
- Carbohydrates: 45g
- Fiber: 4g
- Protein: 9g
- Cholesterol: 10mg
Keywords: strawberry banana smoothie, healthy smoothie, refreshing drink
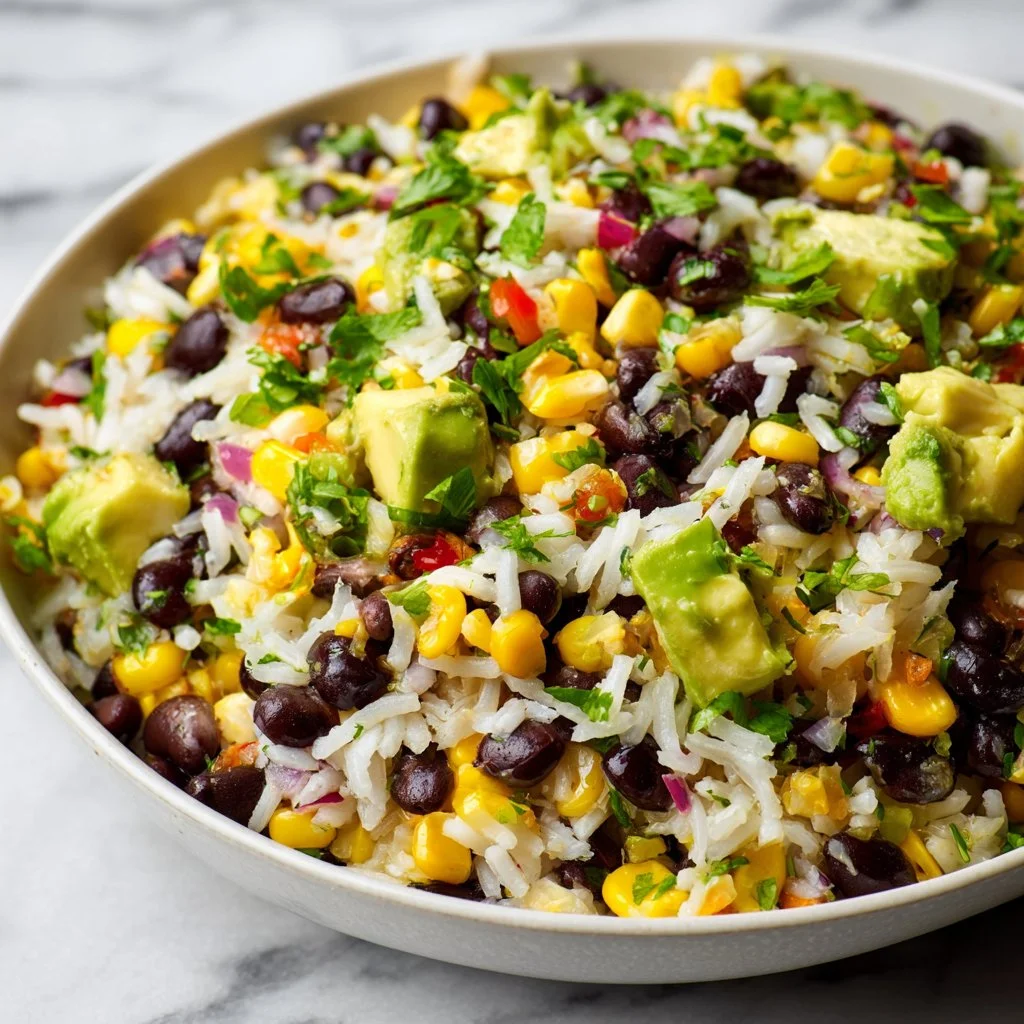
Black Bean Corn Avocado Salad with Rice
Black Bean Corn Avocado Salad with Rice: A Hearty, Flavor-Packed Celebration
Hello, lovely food enthusiasts! Welcome back to my cozy kitchen, where every meal is a chance to create memories, forge friendships, and spread joy. If you’re anything like me, you get giddy at the thought of fresh produce and vibrant flavors coming together in a delightful dish. Today, we’re diving into a recipe that encapsulates everything I love about cooking: the scrumptious Black Bean Corn Avocado Salad with Rice. It’s not just a salad; it’s a celebration of flavors, textures, and colors that will have your taste buds doing a happy dance!
This recipe is perfect for those warm, sunny days when you’re looking for something light yet filling, and it’s equally fantastic for your next gathering or meal prep for the week. With fresh ingredients like crunchy corn, creamy avocado, and hearty black beans, this salad isn’t just about sustaining yourself; it’s about savoring every delightful bite. And let’s not forget the hint of lime that brings it all together—it’s like a summery hug in a bowl!
But let’s take a step back for a moment. How did this salad become a staple in my kitchen? Picture this: A summer day full of laughter, the scent of the BBQ in the air, and friends gathering around the table, sharing stories. My best friend, Jamie, brought over her family’s BBQ spread, and this exact salad was the star of the show. I still remember biting into the rich avocado, pairing it perfectly with the sweetness of the corn and the robust flavors of black beans. It all blended together so well, and I was instantly hooked. That gathering sparked my desire to craft my version of this crowd-pleaser, and I can’t wait to share it with you!
So, grab your aprons, and let’s head into the kitchen to create a mouthwatering Black Bean Corn Avocado Salad with Rice that will leave your guests amazed and your heart full.
Personal Story
The first time I tried a version of this Black Bean Corn Avocado Salad was one of those perfect summer evenings that lingered in my memory. The sun was setting, casting warm golden hues across our backyard, and the air buzzed with laughter and music. My friend Jamie had whipped it up as a side dish for a BBQ, and it was an instant hit.
As I sat around the table with our friends, I could hardly keep my fork off Jamie’s salad, barely leaving enough for anyone else. There was something so magical about the combination of juicy corn kernels, creamy avocado, and the satisfying texture of black beans. As we bantered and reminisced, each bite was a reminder of the simple joys of good food and great company.
Eventually, I asked Jamie for the recipe, and she graciously shared her secrets and tips. With a few tweaks to make it my own, I began crafting this salad for every gathering, potluck, and family dinner. It became my go-to dish that always earned compliments and requests for seconds. Every time I make it, those fond memories come rushing back, coupled with the realization that food truly has the power to connect us.
Ingredients
Let’s gather our ingredients! Here’s what you’ll need for this delectable dish:
-
1 can (15 oz) black beans, drained and rinsed
- These little powerhouses are not just delicious; they’re also packed with protein and fiber. If you’re in a pinch, you could swap them for kidney beans, but I really recommend sticking with black beans for that perfect balance of flavor and texture.
-
1 cup corn (fresh, frozen, or canned)
- Fresh summer corn is the star of this salad, but frozen corn works just as well. If you’re using canned corn, make sure to drain it well. Sweet corn really elevates the dish, giving it that crunchy sweetness we all love.
-
1 cup cooked rice (white, brown, or quinoa)
- Cooking your rice with a bit of lime juice and salt can impart a beautiful flavor. If you want a gluten-free alternative, quinoa makes a fantastic substitute.
-
1 large ripe avocado, diced
- Avocado adds creaminess that complements the other ingredients perfectly. When choosing, look for one that gives a little when you Press gently. If you’re looking to make it lighter, feel free to adjust the amount or even use a diced cucumber for crunch.
-
1 medium red bell pepper, diced
- This adds a sweet crunch to the salad and beautiful color. You can substitute with a yellow or green bell pepper, or even switch to cherry tomatoes for a juicy bite.
-
1 small red onion, diced
- Red onions provide a zesty kick. If you find raw onions too strong, soak diced onion in cold water for a few minutes before adding it to the salad to mellow the flavor.
-
1/4 cup fresh cilantro, chopped
- Fresh herbs can elevate any dish! If cilantro isn’t your favorite, try substituting with parsley for a milder taste.
-
Juice of 2 limes
- Lime juice brings all the flavors together while adding a refreshing zest. Use fresh lime juice if you can for the best flavor—trust me, it makes a difference!
-
Salt and pepper, to taste
- Always a chef’s secret weapon! Adjust to your liking, but remember that seasoning enhances the natural taste of all ingredients.
Once you’ve gathered these wonderful components, we’re one step closer to creating a dish that’s sure to bring smiles all around the table!
Step-by-Step Instructions
Alright, my foodie friend, it’s time to get cooking! Here’s how to whip up your Black Bean Corn Avocado Salad with Rice in just a few simple steps:
Step 1: Prepare Your Rice
Cooking your rice is the first step. Rinse 1 cup of rice under running water to remove excess starch. This will lead to fluffier rice. Then, cook it according to the package instructions. For extra flavor, add 1/2 teaspoon of salt and the juice of half a lime to the water while it cooks. This little trick adds a nice zing to the rice that’s totally worth the extra effort!
Step 2: Combine the Base Ingredients
In a large mixing bowl, add your drained and rinsed black beans, corn, cooked rice, diced red bell pepper, and diced red onion. Gently mix everything together, ensuring not to mush the beans. You want those lovely textures intact for every bite!
Step 3: Prepare the Dressing
Now, let’s make our salad shine even brighter! In a separate bowl, combine the lime juice from the two limes, a generous pinch of salt, and pepper. If you like a little heat, this is an excellent moment to add a pinch of cayenne or chili powder. Whisk this together until well blended.
Step 4: Toss in Avocado and Cilantro
Chop your ripe avocado into bite-sized pieces and sprinkle with some lime juice to prevent browning. Add this to your salad mixture along with the chopped cilantro. Chef Hack: To make the mixing easier without damaging the avocado too much, toss the salad gently from the bottom up instead of stirring aggressively. This helps maintain those beautiful chunks of avocado!
Step 5: Final Toss and Taste
Pour the dressing over the salad mixture and gently fold everything together until every ingredient is nicely coated. Now’s the moment of truth—give it a taste! Adjust salt, pepper, and lime juice as needed. Remember, the dressing should be zesty, so don’t be afraid to add a little more lime juice if it needs a tangy boost.
Step 6: Chill Before Serving
For the best experience, let the salad chill in the refrigerator for at least 30 minutes. This allows the flavors to meld beautifully. It’s like a party in a bowl, and the guests (of flavors) are finally ready to mingle!
Serving Suggestions
To serve your Black Bean Corn Avocado Salad, think colorful and inviting! Present it in a large, beautiful serving bowl and garnish with an extra sprinkle of cilantro on top for a pop of color. Pair it with some tortilla chips for crunch, or serve it alongside grilled chicken or fish for a heartier meal. I also love offering lime wedges on the side for an added fresh squeeze just before serving.
Recipe Variations
-
Seasonal Swaps: In the fall, try incorporating roasted butternut squash for a cozy twist that adds sweetness and warmth!
-
Spicy Kick: Add diced jalapeños for a spicy kick that complements the sweetness of the corn.
-
Cheesy Delight: Toss in some crumbled feta cheese for a tangy creaminess that takes this salad over the top.
-
Veggie Power: Bulk it up with additional veggies like diced cucumber, cherry tomatoes, or shredded carrots for even more color and nutrients.
-
Grain-Free Option: Replace rice with cauliflower rice for a lighter, grain-free variation that’s just as delicious.
Chef’s Notes
This Black Bean Corn Avocado Salad is a recipe that has evolved beautifully over time. Each gathering brings new ideas and upgrades, and it never fails to impress guests. I once made this salad for a potluck, and I completely forgot it in the fridge at home. I panicked but ended up whipping up a quick alternative with whatever I had on hand. Surprisingly, that has sparked a new variation that has salad lovers coming back for more!
Cooking should always leave room for creativity. Feel free to adjust the recipe based on your preferences and available ingredients. Who knows? You might just create the next lovely, nostalgia-filled experience at your table!
FAQs and Troubleshooting
Q1: Why did my avocado turn brown in the salad?
Using fresh lime juice is key! The acidity helps prevent oxidation. If you add the avocado right before serving, it will stay fresher longer.
Q2: Can I make this salad ahead of time?
Absolutely! Preparing it a few hours in advance allows the flavors to meld beautifully. Just remember to add the avocado right before serving to keep it vibrant and green.
Q3: How can I store leftovers?
Store any leftover salad in an airtight container in the fridge for up to 2 days. The avocado may brown slightly, but the flavors will still be delicious.
Q4: Can I substitute the beans for another protein?
Certainly! If you’re looking for a different protein, roasted chickpeas or diced grilled chicken can work beautifully in this salad. You can even add a handful of nuts or seeds for extra crunch!
Nutritional Info
For a serving size of approximately 1 cup, here’s a rough breakdown:
- Calories: 250
- Protein: 10g
- Carbohydrates: 40g
- Fat: 9g
- Fiber: 10g
- Sodium: 200mg
(Nutritional information can vary based on the exact ingredients used.)
And there you have it! A vibrant, flavorful Black Bean Corn Avocado Salad with Rice that’s bound to become a staple in your kitchen. I hope you enjoyed making it as much as I do sharing it. Here’s to good food, cherished moments, and bringing people together—one delicious recipe at a time. Happy cooking!
Print
Black Bean Corn Avocado Salad with Rice
- Total Time: 35 minutes
- Yield: 4 servings 1x
- Diet: Vegetarian
Description
A vibrant and hearty salad packed with black beans, corn, creamy avocado, and rice, perfect for gatherings or meal prep.
Ingredients
- 1 can (15 oz) black beans, drained and rinsed
- 1 cup corn (fresh, frozen, or canned)
- 1 cup cooked rice (white, brown, or quinoa)
- 1 large ripe avocado, diced
- 1 medium red bell pepper, diced
- 1 small red onion, diced
- 1/4 cup fresh cilantro, chopped
- Juice of 2 limes
- Salt and pepper, to taste
Instructions
- Prepare your rice. Rinse 1 cup of rice under running water to remove excess starch. Then, cook it according to package instructions with a bit of salt and lime juice.
- Combine the drained and rinsed black beans, corn, cooked rice, diced red bell pepper, and diced red onion in a large mixing bowl.
- Prepare the dressing by mixing lime juice, salt, and pepper in a separate bowl.
- Toss in the diced avocado and chopped cilantro, mixing gently.
- Pour the dressing over the salad and fold together until coated.
- Chill the salad for at least 30 minutes before serving.
Notes
For a lighter version, you can substitute the avocado with diced cucumber. Adjust salt and lime juice based on taste.
- Prep Time: 15 minutes
- Cook Time: 20 minutes
- Category: Salad
- Method: Mixing
- Cuisine: Mexican
Nutrition
- Serving Size: 1 serving
- Calories: 250
- Sugar: 3g
- Sodium: 200mg
- Fat: 9g
- Saturated Fat: 1g
- Unsaturated Fat: 8g
- Trans Fat: 0g
- Carbohydrates: 40g
- Fiber: 10g
- Protein: 10g
- Cholesterol: 0mg
Keywords: salad, black beans, avocado, corn, healthy recipe, summer dish

Charred Corn Avocado Salad with Roasted Red Onions
Charred Corn Avocado Salad with Roasted Red Onions: A Fresh Fiesta in Your Bowl!
Hello, fellow food lovers! Welcome back to my cozy little corner of the internet. I’m Olivia Bennett, your friendly home cook who’s always on the hunt for flavors that make your heart happy and your taste buds dance. Today, I’m thrilled to share a delightful recipe that celebrates summer produce and bright, satisfying flavors: Charred Corn Avocado Salad with Roasted Red Onions!
We all have those dishes that take us back in time, creating a tapestry of memories steeped in laughter, good company, and perhaps a few kitchen mishaps along the way. This salad is one of those treasures for me. Picture this: sun-kissed afternoons, friends gathering for a backyard barbecue, and the enticing aroma of corn grilling on the barbecue. This dish isn’t just a salad; it’s a symphony of textures and tastes that has the power to bring everyone together.
Imagine the crispy sweetness of charred corn mingling with the creamy richness of ripe avocados, all brought to life with a zesty dressing that sings of summer! It’s a dish so vibrant and fresh, you could easily serve it at a casual picnic or fancy dinner party. Plus, it’s quick to whip up, making it perfect for those busy weekdays when you want to keep things light and refreshing.
So, grab your apron and let’s dive into this colorful bowl of goodness. I promise you’ll want to make this salad over and over again—not just for its deliciousness but also for the wonderful memories you’ll create around it!
Personal Story
Let me take you back to one of my fondest summer memories. I vividly remember the first time I made this charred corn avocado salad; I was hosting a gathering for some of my closest friends. The sun was shining, and there was a slight breeze, perfect for keeping the summer heat at bay.
As I stood by the grill, my heart raced with excitement. I’d had this vision of bright, flavorful food dancing around in my head, and I was determined to bring it to life. Each bite of that grilled corn had magic in it—smoky, sweet, and a touch of nostalgia all rolled into one. Friends were gravitating towards the kitchen, drawn in by the scents that wafted in the air. As they took their first bites, their faces lit up with joy! We laughed, we toasted, and we relished every mouthful.
That day, I learned that food is not just about sustenance; it’s about connection, joy, and those cherished moments that become the fabric of our lives. Ever since, this corn and avocado salad has become a staple at my gatherings, a recipe I’m proud to pass down through my kitchen adventures. So let’s recreate that spirit of togetherness with this vibrant salad that’s sure to bring smiles all around!
Ingredients
To prepare your Charred Corn Avocado Salad, gather the following ingredients:
-
Fresh Corn on the Cob (2-3 cobs): Sweet, juicy corn is what lends this salad its magical flavor. If fresh corn isn’t available, you can use frozen corn. Just sauté it until it’s heated through and slightly charred.
-
Ripe Avocados (2): Choose avocados that feel slightly soft to the touch for the creamiest texture. Alternatively, if you’re avoiding avocados, consider using diced cucumber for crunch.
-
Roasted Red Onions (1 large): Roasting the onions provides a sweet, caramelized flavor. You can substitute with shallots or red bell peppers for a sweeter kick if you’re in a pinch!
-
Cherry Tomatoes (1 cup): These juicy gems add a pop of color and sweetness. Feel free to swap them with diced bell peppers or even fresh mango for a tropical twist.
-
Fresh Cilantro (1/3 cup, chopped): This herb lifts the entire dish with its fresh, zesty flavor. If you’re not a fan, try using parsley or basil instead.
-
Lime Juice (2 limes): Fresh citrus juice adds brightness! If you don’t have limes, lemon juice works well too.
-
Olive Oil (3 tablespoons): A good quality extra virgin olive oil enhances the flavor. For a different profile, you could use avocado oil.
-
Salt and Pepper (to taste): The basic seasoning that elevates all the flavors! Always go for kosher salt for better control when seasoning.
This ingredient lineup may look simple, but together, they create a bowl of magic filled with fresh, vibrant flavors and delightful textures.
Step-by-Step Instructions
Now, let’s get our hands dirty and cook this beauty together!
-
Char the Corn: Start by preheating your grill or skillet over high heat. If you’re using the grill, your grill grates should be clean and oiled to prevent sticking. The corn will take about 8-10 minutes to char. Place the corn on the grill, turning occasionally until you get those beautiful char marks. Pro tip: Use a pair of tongs to turn the corn to ensure even charring. Remove from heat and let it cool a bit before cutting the kernels off the cob.
-
Roast the Red Onions: Cut your red onion into thick slices. Toss them with a drizzle of olive oil, salt, and pepper. Spread them out on a baking sheet and roast in a preheated oven at 400°F (200°C) for 20-25 minutes or until golden brown and caramelized. If roasted onions aren’t your gig, you can quickly sauté them in the skillet with a splash of olive oil until they soften.
-
Prepare the Avocados: While the corn and onions are doing their thing, cut your avocados in half, remove the pit, and scoop the flesh into a bowl. Chop them into bite-sized pieces, and squeeze a bit of lime juice over them to keep them from browning. This simple trick can be a game-changer!
-
Toss It All Together: In a large mixing bowl, combine the charred corn kernels, roasted onions, cherry tomatoes (halved), chopped cilantro, and avocado. Drizzle in the olive oil and lime juice, and season generously with salt and pepper. Give it a gentle toss to combine. Remember, we want to be gentle with the avocado to keep the pieces looking lovely!
-
Taste and Adjust: Here’s where you get to taste test! Give it a little taste and adjust the seasoning if needed. More lime? Go for it! A bit more salt? Absolutely!
-
Plate It Up: Scoop the salad into a beautiful serving bowl. It looks gorgeous when served immediately, but it can also chill in the fridge for about 30 minutes to let the flavors meld together, which is a fantastic option if you’re prepping ahead for a gathering.
Easy peasy, right? This salad is not only a feast for the eyes but also a joy to make and share with loved ones!
Serving Suggestions
To serve this Charred Corn Avocado Salad, plate it in a large, rustic bowl to capture that inviting vibe. A sprinkle of extra cilantro on top gives it a fresh finish. Pair it alongside grilled shrimp or chicken for a hearty meal, or simply enjoy it with tortilla chips or on a bed of greens as a delightful light meal. The colors alone will make your table a masterpiece!
Recipe Variations
- Spicy Kick: Add a diced jalapeño or a sprinkle of your favorite hot sauce to give this salad a delightful kick!
- Cheesy Goodness: Crumble some queso fresco or feta cheese on top for a salty, creamy finish that complements the salad beautifully.
- Grain Boost: Mix in some cooked quinoa or farro for added texture and nutritional value.
- Nutty Crunch: Toss some toasted pumpkin seeds or sliced almonds into the salad for a lovely crunch.
- Vegan Option: To keep it entirely plant-based, ensure that your optional cheese toppings are dairy-free, and you’re golden!
Chef’s Notes
The beauty of this salad is its versatility. Over the years, I’ve twisted and turned this recipe to accommodate different preferences and seasonal ingredients. One time, I had an abundance of mangoes and threw them in for a tropical vibe—oh my goodness, it was like my taste buds were on a vacation!
Cooking is all about experimenting, playing with flavors, and following your cravings. This salad has become a canvas for my culinary adventures, and I truly hope it inspires you to make it your own in the kitchen!
FAQs and Troubleshooting
-
What if my corn doesn’t char well?
Make sure your grill or skillet is hot enough before you add the corn. If it’s not sizzling, you won’t get that lovely char. You can also try using a broiler if your oven has one—just keep an eye on it! -
Can I make this salad ahead of time?
Absolutely! Just keep in mind that the avocado may brown. To delay this, mix all ingredients except for the avocado, and toss it right before serving. -
How do I store leftovers?
Keep any leftover salad in an airtight container in the fridge. It’s best eaten within a day, but if you must store it longer, separate the avocado from the rest to keep it fresh! -
Can I use canned corn?
You can certainly use canned corn in a pinch! Just make sure to drain and rinse it well, then sauté it in a pan for a few minutes to bring out a bit of flavor.
Nutritional Info
If you’d like, I can help you with the nutritional breakdown of this salad, but I always encourage checking your individual ingredients based on the brands you use.
Altogether, this Charred Corn Avocado Salad with Roasted Red Onions is a celebration of fresh ingredients and great company. So next time you gather with loved ones, whip up this wonderful dish and let the flavors and memories unfold. Happy cooking, friends! 🍽️
Print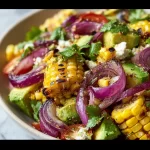
Charred Corn Avocado Salad with Roasted Red Onions
- Total Time: 50 minutes
- Yield: 4 servings
- Diet: Vegetarian
Description
A vibrant salad that combines charred corn, creamy avocado, and roasted red onions, perfect for summer gatherings.
Ingredients
- Fresh Corn on the Cob (2-3 cobs)
- Ripe Avocados (2)
- Roasted Red Onions (1 large)
- Cherry Tomatoes (1 cup)
- Fresh Cilantro (1/3 cup, chopped)
- Lime Juice (2 limes)
- Olive Oil (3 tablespoons)
- Salt and Pepper (to taste)
Instructions
- Char the corn: Preheat your grill or skillet over high heat. Place the corn on the grill, turning occasionally until you get char marks (about 8-10 minutes). Let it cool before cutting off the kernels.
- Roast the red onions: Cut into thick slices, toss with olive oil, salt, and pepper. Roast in a preheated oven at 400°F (200°C) for 20-25 minutes until golden brown.
- Prepare the avocados: Cut them in half, remove the pit, scoop into a bowl, and chop. Squeeze lime juice over them to prevent browning.
- Toss it all together: In a large bowl, combine corn kernels, roasted onions, halved cherry tomatoes, chopped cilantro, and avocado. Add olive oil, lime juice, salt, and pepper, and gently mix.
- Taste and adjust: Sample the salad and adjust seasoning as desired.
- Plate it up: Serve immediately or chill for 30 minutes to meld flavors.
Notes
This salad can be easily customized with additional ingredients like jalapeños for spice or feta cheese for a creamy finish.
- Prep Time: 15 minutes
- Cook Time: 35 minutes
- Category: Salad
- Method: Grilling
- Cuisine: Mexican
Nutrition
- Serving Size: 1 serving
- Calories: 320
- Sugar: 4g
- Sodium: 300mg
- Fat: 22g
- Saturated Fat: 3g
- Unsaturated Fat: 18g
- Trans Fat: 0g
- Carbohydrates: 34g
- Fiber: 7g
- Protein: 5g
- Cholesterol: 0mg
Keywords: salad, corn, avocado, summer, vegetarian
High Protein Vegan Meal Prep with Creamy Tuscan Tofu
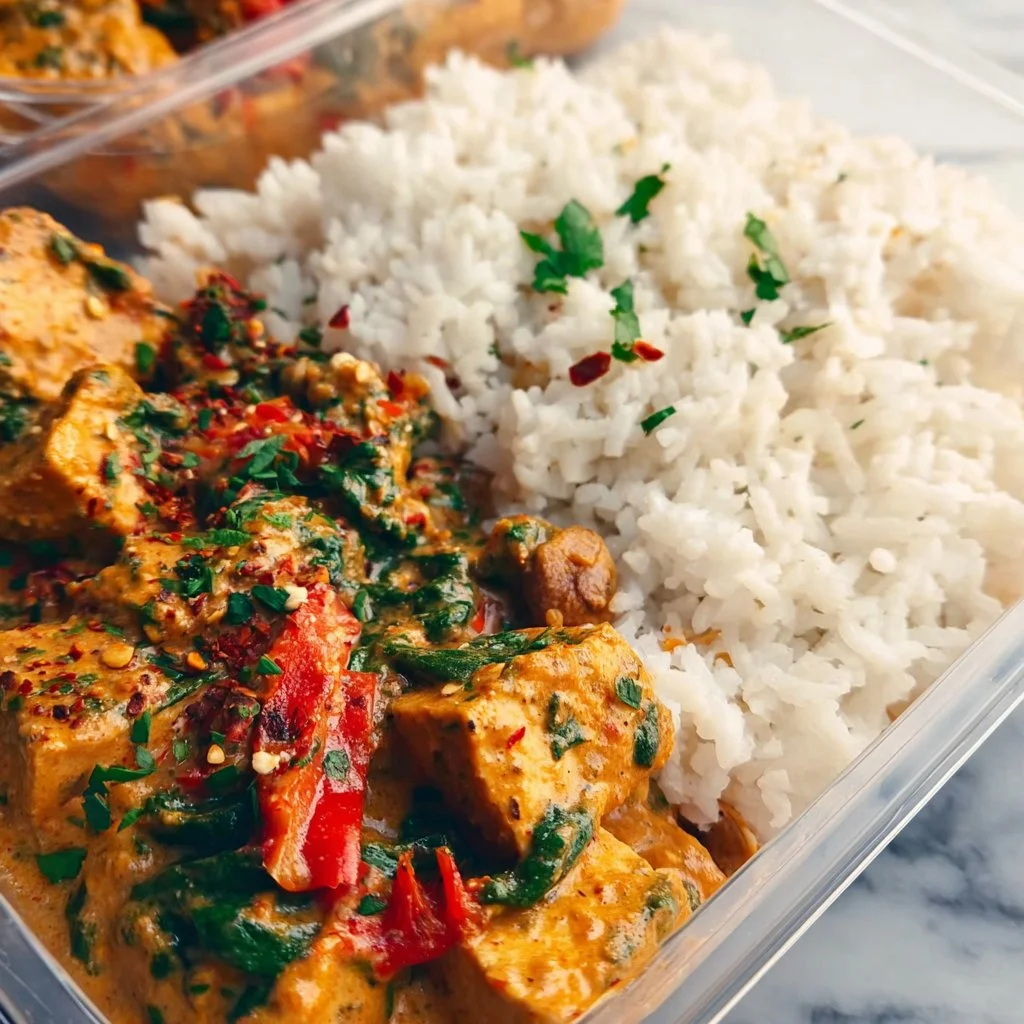
High Protein Vegan Meal Prep with Creamy Tuscan Tofu
Welcome to my cozy corner of the kitchen! Today, we’re diving into a dish that’s bursting with flavor, nutrition, and warmth — my Creamy Tuscan Tofu. If you’re anything like me, the mere thought of a plant-based dish that’s not only delicious but brimming with protein gets your culinary heart racing. Whether you’re a seasoned vegan or just looking to incorporate more plant-based meals into your routine, this recipe is here to inspire you.
Let’s be honest: meal prep can sometimes feel like a chore, but it doesn’t have to be! With a big batch of this Creamy Tuscan Tofu on hand, you’ll be able to enjoy scrumptious lunches or dinners throughout the week with minimal effort. This dish is perfect for those busy weekdays when you want something hearty and satisfying without all the fuss. Plus, the vibrant flavors of sun-dried tomatoes, fresh spinach, and a dreamy creamy sauce will make your taste buds sing!
Why did I choose Tuscan flavors for this recipe? Well, I took a trip to Tuscany a few years back, and the rich food culture left an indelible mark on me. There’s just something magical about the combination of sun-dried tomatoes, creamy sauces, and fresh herbs that brings joy. So, I brought that inspiration back to my kitchen, and voilà! Tuscan-style tofu became a weekly staple in my home, and I can’t wait to share it with you.
In addition to being a delight for your palate, creamy Tuscan tofu is packed with plant-based protein, making it perfect for anyone looking to power up their meals. With the versatility of tofu, you can marinate, bake, or sauté this wonderful protein, and it always absorbs the flavors like a champ. So grab your apron (maybe one that’s slightly messy, like mine!) and let’s get cooking!
Personal Story
Let me take you back to a beautiful summer evening a few years ago. I was hosting a small dinner party with some of my closest friends. I wanted to impress them with a vegan option that wasn’t just some sad salad or store-bought hummus. I rummaged through my pantry, and after a bit of creativity, I stumbled upon a bunch of sun-dried tomatoes, fresh spinach, and a block of tofu just begging to be turned into something magical.
As the aroma of roasting garlic filled the air, everyone gathered in my little kitchen, laughing, sipping wine, and waiting with anticipation. When I finally served my Creamy Tuscan Tofu, the smiles on my friends’ faces were priceless. They were amazed that tofu could taste so good and were blown away by the vibrant flavors. That night, we celebrated not just good food, but friendship, laughter, and the beauty of cooking together. Since then, this dish has become a staple in my meal prep routine, and I love whipping it up for gatherings or just for a nourishing dinner solo. It’s a reminder of how cooking can bring us all together.
Ingredients
Let’s gather our ingredients! Here’s what you’ll need for this delightful and high-protein vegan meal. Each ingredient is carefully selected to bring out the best flavors in our creamy Tuscan tofu.
-
Firm Tofu (14 oz)
- Chef Insight: Firm or extra-firm tofu works best here as it holds its shape and absorbs flavors beautifully. If you’re feeling adventurous, try marinating silken tofu for a unique texture!
-
Sun-Dried Tomatoes (1/2 cup, chopped)
- Substitution Tip: If you can’t find sun-dried tomatoes in oil, dried ones work too — just soak them in warm water or broth for 20 minutes before using.
-
Fresh Spinach (2 cups)
- Quick Insight: Spinach adds a nice pop of color and nutrients, but feel free to swap with kale or Swiss chard for a different twist!
-
Coconut Cream (1/2 cup)
- Substitution Tip: Prefer a lower-fat option? Use cashew cream or unsweetened almond milk for a lighter sauce.
-
Garlic (3 cloves, minced)
- Chef Hack: To intensify the flavor, roast the garlic before mincing — it will be sweeter and milder!
-
Nutritional Yeast (1/4 cup)
- Quick Insight: This adds a cheesy flavor without dairy. If you miss that umami kick, sprinkle in some miso paste for a different savory depth.
-
Italian Seasoning (1 tsp)
- Chef Insight: You can easily make your own blend with dried basil, oregano, thyme, and rosemary — fresh herbs are delightful too!
-
Salt & Pepper (to taste)
- Quick Tip: Always taste as you go! Adjusting salt and pepper levels can bring your dish to life.
-
Olive Oil (2 tbsp)
- Substitution Tip: For a different flavor profile, opt for avocado oil or even sesame oil for an Asian twist!
With these ingredients on hand, you’ll be well on your way to creating a nourishing and delightful dish that’s perfect for meal prep.
Step-by-Step Instructions
Now comes the fun part – the cooking! Here’s how to transform your ingredients into a creamy, dreamy culinary delight that you can enjoy all week long.
-
Prepare the Tofu:
- Begin by pressing your firm tofu to remove excess moisture. Wrap it in a clean kitchen towel and place a heavy pan on top for about 15-20 minutes. This will help it absorb all those luscious flavors later on.
Tip: You can skip this step if you’re short on time, but pressed tofu has a firmer texture that’s simply irresistible!
-
Chop the Ingredients:
- While your tofu is pressing, chop up your sun-dried tomatoes and mince the garlic. This is a great time to turn on your favorite tunes or catch up with a friend while cooking!
-
Sauté the Aromatics:
- Heat 1 tablespoon of olive oil in a large skillet over medium heat. Add the minced garlic and sauté for about 1-2 minutes until fragrant. Be careful not to burn it!
Chef Hack: If you’re a garlic lover, feel free to toss in extra cloves — there’s no such thing as too much garlic in my book!
-
Add Sun-Dried Tomatoes:
- Toss in the chopped sun-dried tomatoes and Italian seasoning. Cook for an additional 2-3 minutes, letting those flavors meld together and create a beautiful aroma.
-
Cook the Tofu:
- Slice your pressed tofu into cubes (or crumble it for a different texture) and add them to the skillet. Gently stir to coat the tofu in the flavorful mixture. Cook for about 5-7 minutes, allowing the edges to crisp up a little.
Tip: If you like a crispy texture, consider browning the tofu on both sides before adding the spinach!
-
Add Coconut Cream:
- Reduce the heat to low and pour in the coconut cream. Stir everything together gently, allowing the creamy sauce to envelop the tofu and sun-dried tomatoes.
-
Incorporate Spinach:
- Lastly, add in the fresh spinach, stirring until it wilts down. This should take about 3-4 minutes. The vibrant green will contrast beautifully with the creamy sauce!
Chef Insight: If you want to add even more flavor and nutrition, consider tossing in some additional veggies, like zucchini or bell peppers!
-
Season to Taste:
- Add salt and pepper to your liking. Stir everything together one last time, and voilà! Your creamy Tuscan tofu is ready to serve.
Serving Suggestions
When it comes to plating, less is sometimes more! Serve your creamy Tuscan tofu over a bed of brown rice, quinoa, or whole grain pasta for a hearty meal. Garnish with fresh herbs, a sprinkle of nutritional yeast, or even a squeeze of lemon juice to elevate those flavors further. This dish not only looks stunning, but it’ll also impress your family and friends every single time!
Recipe Variations
Are you feeling creative? Here are a few variations to keep things fun and fresh:
- Greek-Style Tofu: Swap sun-dried tomatoes for olives and add in fresh cucumbers and a vegan tzatziki drizzle.
- Spicy Kick: Add red pepper flakes or diced jalapeños to the sautéed garlic for some heat.
- Cream-free Option: Use roasted peppers and cashew cream for a lower-fat, unique twist.
- Mediterranean Vibes: Toss in capers and artichoke hearts for additional Mediterranean flair.
- Different Proteins: Replace tofu with chickpeas or tempeh for a different protein source that still packs a punch!
Chef’s Notes
This recipe has had its own little evolution over the years! I started with a basic tofu stir-fry, but as I began exploring new flavors and cuisines, the creamy Tuscan version emerged. Now, it’s not only a weekly staple, but it’s also one of my go-to dishes when I want to impress guests!
Every time I serve it, I’m reminded of that wonderful summer evening with friends. Cooking is not just about feeding the body; it’s about nourishing the soul and creating lasting memories around the table. Don’t be surprised if you find yourself experimenting with this dish — the options are endless!
FAQs and Troubleshooting
1. My tofu didn’t crisp up! What went wrong?
- If your tofu isn’t crisping, it might be due to excess moisture. Remember to press it well, and try cooking over medium-high heat. A non-stick skillet can also help!
2. Can I freeze the leftovers?
- Definitely! Creamy Tuscan tofu freezes beautifully. Just store it in an airtight container, and it will last for up to 3 months. When ready to eat, thaw in the fridge and reheat in a skillet.
3. My sauce seems too thick! How can I fix this?
- If your sauce turns out thicker than you wished, add a splash of vegetable broth or water to loosen it up while reheating.
4. What can I serve with this dish?
- Pair it with a fresh salad, roasted vegetables, or over grains like rice, quinoa, or even stuffed inside a wrap for a wholesome meal.
With these tips in mind, you’re all set for a delicious cooking adventure. Got more questions? Drop them in the comments, and I’ll be happy to help!
Nutritional Info
For those mindful of nutrition, here’s a quick breakdown per serving (based on 4 servings):
- Calories: 230
- Protein: 18g
- Carbohydrates: 12g
- Dietary Fiber: 3g
- Fat: 15g
Enjoy this delightful and nourishing high-protein vegan meal that’s warm, creamy, and oh-so-sharing-worthy! Until next time, happy cooking! 🍳❤️
Print
Creamy Tuscan Tofu
- Total Time: 35 minutes
- Yield: 4 servings
- Diet: Vegan, High-Protein
Description
A high-protein vegan meal featuring tofu in a creamy Tuscan sauce with sun-dried tomatoes and fresh spinach.
Ingredients
- Firm Tofu (14 oz)
- Sun-Dried Tomatoes (1/2 cup, chopped)
- Fresh Spinach (2 cups)
- Coconut Cream (1/2 cup)
- Garlic (3 cloves, minced)
- Nutritional Yeast (1/4 cup)
- Italian Seasoning (1 tsp)
- Salt & Pepper (to taste)
- Olive Oil (2 tbsp)
Instructions
- Prepare the tofu by pressing it to remove excess moisture.
- Chop the sun-dried tomatoes and mince the garlic.
- Sauté the garlic in olive oil in a skillet over medium heat.
- Add the chopped sun-dried tomatoes and Italian seasoning, cooking for 2-3 minutes.
- Cook the pressed tofu cubes in the skillet for 5-7 minutes.
- Incorporate the coconut cream and stir gently.
- Add the fresh spinach and stir until wilted.
- Season with salt and pepper to taste.
Notes
Serve over rice or pasta for a complete meal. This dish can be frozen for up to 3 months.
- Prep Time: 20 minutes
- Cook Time: 15 minutes
- Category: Main Course
- Method: Sautéing
- Cuisine: Italian
Nutrition
- Serving Size: 1 serving
- Calories: 230
- Sugar: 4g
- Sodium: 200mg
- Fat: 15g
- Saturated Fat: 12g
- Unsaturated Fat: 3g
- Trans Fat: 0g
- Carbohydrates: 12g
- Fiber: 3g
- Protein: 18g
- Cholesterol: 0mg
Keywords: vegan, meal prep, high-protein, Tuscan tofu, creamy tofu

Chickpea Feta Avocado Salad
The Ultimate Chickpea Feta Avocado Salad: A Flavor-Packed Journey
Hey there, fellow food lovers! I’m excited you’ve popped into my cozy kitchen today because we’re about to whip up something absolutely delicious — a Chickpea Feta Avocado Salad that will make your taste buds sing, and your heart warm. This salad is not just an appetizer; it’s a celebration of flavor, texture, and the joy that cooking and sharing food can bring.
Imagine this: a bowl brimming with tender chickpeas, creamy avocado, and tantalizing feta cheese, all tossed together in a light and zesty dressing. Whether you’re tossing together a quick lunch, prepping for a summer picnic, or impressing friends at a dinner party, this salad has you covered! Plus, it’s super easy to make and packed full of nutrients, making it the perfect companion for any season. And don’t worry if you’re a kitchen novice; I’ll guide you step by step. So, grab your apron (I know you have a messy one just like mine!) and let’s dive right in!
But wait—it’s not just about the flavors; it’s about the connections we make over our meals. Cooking is like a love language, and with every chop, stir, and sprinkle, we create stories. Now, let me share a little backstory about why this particular dish holds a special place in my heart!
Personal Story
One sunny afternoon a few summers ago, I found myself in the kitchen with my best friend, Clara. We had just finished a long day of gardening, and our newly grown veggies were calling to be transformed into something fabulous. As we brainstormed recipes, Clara’s eyes lit up at the mention of chickpeas. “What about a salad?” she suggested.
Her enthusiasm was infectious, and before I knew it, we were tossing ideas back and forth like seasoned chefs. We chopped, mixed, and laughed, trying not to spill the cornucopia of ingredients we had laid out before us. It was a joyful mess filled with the aroma of fresh herbs and zesty dressing.
As the sun began to set, we laid our salad out on the porch, accompanied by some homemade bread and chilled lemonade. Those moments—enjoying food under the golden hour, wrapped in laughter and nostalgia—are what led me to create this Chickpea Feta Avocado Salad. It’s a dish that brings me back to those blissful summer days, and I hope it can create lovely memories for you too!
Ingredients
Gather your ingredients for this mouthwatering Chickpea Feta Avocado Salad! Here’s what you’ll need:
-
Chickpeas (2 cans, drained and rinsed)
These little legumes are not only rich in protein and fiber, but they’re also a great base for salads. If you prefer, you can use dried chickpeas — just soak and cook them beforehand! -
Fresh Avocado (1 large, diced)
Creamy and rich, avocado adds the perfect texture to this salad. If you’re not a fan of avocados or can’t find ripe ones, try substituting with diced cucumber or even some roasted sweet potatoes for a twist. -
Feta Cheese (½ cup, crumbled)
Tangy feta brings a burst of flavor. If you’re dairy-free, you can substitute with a plant-based feta or even nutritional yeast for a cheesy flavor. -
Cherry Tomatoes (1 cup, halved)
Juicy tomatoes not only add color but a sweet juiciness that complements the nuttiness of chickpeas. You can choose any variety—grape tomatoes work great too! -
Red Bell Pepper (1, diced)
Crunchy and sweet, this pepper adds a delightful crunch. Feel free to swap with any color bell pepper or even diced cucumbers for added freshness. -
Red Onion (¼ cup, finely chopped)
Onions add a fantastic zing! If raw onion is too strong for you, try soaking the chopped pieces in cold water for 10 minutes to mellow out the flavor. -
Fresh Parsley (¼ cup, chopped)
Bright and herby, parsley adds a lovely finish. If you’re not a fan, mint or cilantro can also bring a fresh twist to the dish. -
Olive Oil (3 tablespoons)
A drizzle of good olive oil ties everything together. You can opt for avocado oil or any light oil if you prefer a different flavor. -
Lemon Juice (from 1 large lemon)
Freshly squeezed lemon juice adds brightness and tang. Lime juice works as an excellent substitute if you’re in a pinch! -
Salt and Pepper (to taste)
Always essential for enhancing flavors! Feel free to experiment with your favorite spices too—paprika or chili flakes can add a delightful kick!
Step-by-Step Instructions
-
Prep Your Veggies:
Start by washing all your fresh produce. Cut the cherry tomatoes in half (or quarters if they’re large) and dice the red bell pepper into bite-sized pieces. -
Get Those Chickpeas Ready:
In a large mixing bowl, add the drained and rinsed chickpeas. If you like a creamier salad, you can lightly mash a portion of the chickpeas with a fork before mixing. This will create a lovely texture. -
Toss In Your Veggies:
Add in the avocado, cherry tomatoes, red bell pepper, and red onion. Be gentle with the avocado to keep it intact; we want those lovely chunks that lend creaminess to the salad. -
Crumbled Feta and Parsley:
Now, sprinkle the crumbled feta cheese and chopped parsley over the heap of fresh ingredients. The feta adds a wonderful salty tang that plays so well with the other flavors! -
Whisk the Dressing:
In a small bowl, whisk together the olive oil, lemon juice, salt, and pepper. You can add a pinch of dried herbs like oregano or basil for an extra flavor kick! -
Combine Everything:
Drizzle the dressing over your salad and gently toss everything together until well combined. Make sure every piece is coated nicely to ensure a burst of flavor with every bite! -
Taste and Adjust:
Here’s where you get to play chef! Taste your salad and adjust the seasoning if needed—maybe a little more salt or a splash more lemon juice—whatever your heart desires! -
Let It Chill:
If you have time, let the salad sit for about 20-30 minutes before serving. This allows the flavors to meld beautifully!
Serving Suggestions
When it comes to serving this Chickpea Feta Avocado Salad, keep it simple yet delightful! Present it in a large, vibrant bowl and let the colors shine. For an elegant touch, garnish with an extra sprig of parsley and a drizzle of olive oil right before serving. You can enjoy it as a refreshing standalone dish or as a side to grilled chicken, fish, or even a hearty grain like quinoa.
Recipe Variations
Here are a few creative twists to keep things exciting:
-
Mediterranean Twist: Add some pitted olives and sun-dried tomatoes for a more Mediterranean vibe.
-
Spicy Kick: Toss in some diced jalapeños or sprinkle some red pepper flakes for added heat.
-
Grain Booster: For a more filling option, mix in cooked quinoa or farro for a hearty salad.
-
Herb Garden: Swap the parsley for fresh dill or basil for a completely different flavor profile.
-
Nutty Crunch: Toss in a handful of toasted nuts or seeds for an extra crunch and healthy fats!
Chef’s Notes
This Chickpea Feta Avocado Salad has become one of my go-to recipes for every occasion. I love how versatile it is—you can adjust the ingredients based on what you have on hand or what’s in season. I remember the first time I attempted to make it for a potluck and accidentally added too much lemon juice. Oh boy, did it turn into a zesty disaster! But with a bit of tossing and a sprinkle of sugar, it transformed into a beloved hit!
Cooking is all about learning and experimenting. So don’t be afraid to make your version of this salad, and remember: things don’t always have to be perfect to be delicious!
FAQs and Troubleshooting
1. Why did my avocado turn brown so quickly?
Avocado browning is completely normal due to oxidation. To slow this process, make sure to toss the avocado with lemon juice immediately after dicing it; this will help preserve its vibrant green color for longer!
2. Can I make this salad ahead of time?
Yes! You can prep your veggies and chickpeas ahead of time, but I suggest adding the avocado and dressing just before serving to keep everything fresh and delicious.
3. It’s too salty—help!
If your salad ends up too salty from the feta, you can balance it by adding extra chickpeas or veggies. A small drizzle of honey can also help counteract excessive saltiness!
4. How long can I store leftovers?
The salad will typically last 2-3 days in an airtight container in the fridge. However, if the avocado begins to brown, it may not look as appealing, so try to eat it fresh!
Nutritional Info
(Per serving, makes approximately four servings)
- Calories: 300
- Protein: 10g
- Carbohydrates: 35g
- Fat: 15g
- Fiber: 9g
There you have it! A delightful Chickpea Feta Avocado Salad that’s not only packed with flavor but also a story to tell. I hope you enjoy making and sharing this recipe as much as I do. Happy cooking, and may your kitchen always be filled with warmth and laughter!
Print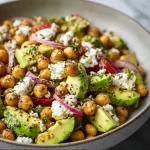
Chickpea Feta Avocado Salad
- Total Time: 15 minutes
- Yield: 4 servings 1x
- Diet: Vegetarian
Description
A flavorful and nutritious Chickpea Feta Avocado Salad packed with fresh ingredients and vibrant tastes, perfect for any occasion.
Ingredients
- 2 cans Chickpeas, drained and rinsed
- 1 large Fresh Avocado, diced
- ½ cup Feta Cheese, crumbled
- 1 cup Cherry Tomatoes, halved
- 1 Red Bell Pepper, diced
- ¼ cup Red Onion, finely chopped
- ¼ cup Fresh Parsley, chopped
- 3 tablespoons Olive Oil
- Juice from 1 large Lemon
- Salt and Pepper, to taste
Instructions
- Prep your veggies: Start by washing all your fresh produce. Cut the cherry tomatoes in half (or quarters if they’re large) and dice the red bell pepper into bite-sized pieces.
- Get those chickpeas ready: In a large mixing bowl, add the drained and rinsed chickpeas. You can lightly mash a portion of the chickpeas with a fork if you like a creamier salad.
- Toss in your veggies: Add in the avocado, cherry tomatoes, red bell pepper, and red onion. Be gentle with the avocado to keep it intact.
- Sprinkle the crumbled feta cheese and chopped parsley over the heap of fresh ingredients.
- Whisk the dressing: In a small bowl, whisk together the olive oil, lemon juice, salt, and pepper.
- Combine everything: Drizzle the dressing over your salad and gently toss until well combined.
- Taste and adjust: Taste your salad and adjust the seasoning if needed.
- Let it chill: If you have time, let the salad sit for about 20-30 minutes before serving.
Notes
Enjoy it as a refreshing standalone dish or as a side to grilled chicken, fish, or hearty grains like quinoa. You can prepare the veggies and chickpeas ahead of time but add the avocado just before serving.
- Prep Time: 15 minutes
- Cook Time: 0 minutes
- Category: Salad
- Method: Mixing
- Cuisine: Mediterranean
Nutrition
- Serving Size: 1 serving
- Calories: 300
- Sugar: 3g
- Sodium: 400mg
- Fat: 15g
- Saturated Fat: 4g
- Unsaturated Fat: 8g
- Trans Fat: 0g
- Carbohydrates: 35g
- Fiber: 9g
- Protein: 10g
- Cholesterol: 20mg
Keywords: chickpea salad, avocado salad, Mediterranean salad, healthy recipe, vegetarian recipe


