
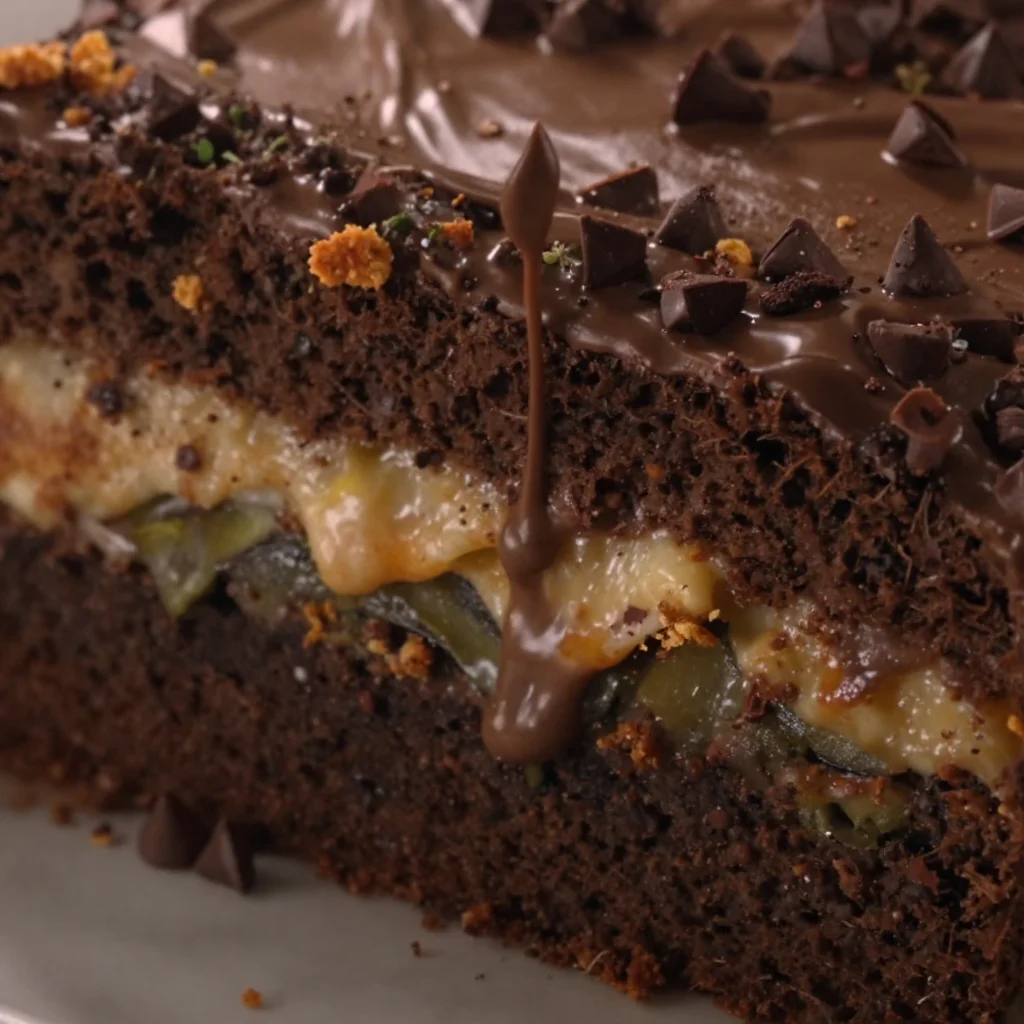
One-Bowl Chocolate Zucchini Cake with Fudgy Frosting
The Ultimate Chocolate Zucchini Cake with Chocolate Frosting
Welcome to my cozy kitchen! I’m so glad you’re here. Today, we’re diving into the rich, fudgy world of chocolate zucchini cake. Now, before you raise an eyebrow at the thought of pairing chocolate with zucchini, let me assure you that this delightful dish is a game-changer. This recipe transforms the humble zucchini into a luscious treat that’s so moist and decadent, you’ll forget it even has veggies in it!
When you take a bite of this cake, you’re not just tasting chocolate—you’re experiencing a symphony of flavors and textures. The zucchini adds moisture without overwhelming the cake with vegetable flavor, creating a lightness that perfectly complements the rich chocolate. And that chocolate frosting? It’s like a cherry on top of an already perfect sundae. Trust me; you’re going to want to make this for every occasion—birthdays, potlucks, or just because it’s Tuesday!
Whether you’re a seasoned baker or a novice looking to impress at your next brunch, this recipe is simple enough to encourage even the most hesitant cooks to dive in. So, grab your apron and let’s stir up some magic together!
A Sweet Slice of Nostalgia
Growing up, my grandmother had a garden filled with the most beautiful zucchinis. Every summer, she would invite our family over for a harvest party where zucchini reigns supreme. The highlight was always her famous chocolate zucchini cake. I remember watching her grate the zucchini, her hands moving deftly as she whispered little tips passed down through generations. The excitement in the air was palpable as we all gathered around the dining table, eager to taste her creation.
It was beyond delicious—a moist, rich cake topped with creamy chocolate frosting. Even as a child, I didn’t care that it had vegetables; I only cared about the blissful chocolatey goodness. With each bite, it was like a hug for my taste buds. Fast forward to today, and I can still feel that joy whenever I bake this cake. It’s more than just a recipe; it’s a vessel of memories, laughter, and love—the kind of cake that brings people together.
Ingredients
Here’s what you’ll need for this luscious Chocolate Zucchini Cake, along with tips for each ingredient!
-
Zucchini (2 cups, grated): This is our star ingredient! The moisture and subtle sweetness of zucchini enhance the cake’s texture without making it taste like vegetables. Use freshly grated zucchini for the best results. No zucchini handy? Shredded carrots work as a great substitute.
-
All-purpose flour (1 ¾ cups): This gives our cake structure. If you’re looking for a gluten-free option, substitute with a blend of almond flour and coconut flour (check ratios on the pack to ensure a good texture).
-
Granulated sugar (1 ½ cups): Sweeten the deal! You can adjust the sugar to your liking or use coconut sugar for a healthier twist.
-
Cocoa powder (¾ cup): For that intense chocolate flavor! Opt for unsweetened cocoa powder, or dark cocoa powder if you want a deeper taste.
-
Baking soda (1 tsp): This is our leavening agent that makes the cake rise beautifully. Make sure your baking soda is fresh for the best results.
-
Salt (½ tsp): A pinch of salt elevates the sweetness, creating a balanced flavor profile.
-
Eggs (2 large): These bind everything together and help with the rise. For a vegan swap, use flax eggs (1 tbsp ground flaxseed + 3 tbsp water = 1 egg).
-
Vegetable oil (½ cup): Adds moisture to our cake. You can use melted coconut oil or applesauce as a lighter alternative.
-
Vanilla extract (2 tsp): For a lovely aromatic flavor, enhancing the chocolate. Use pure vanilla extract for the best taste; imitation vanilla just doesn’t compare!
-
Chocolate chips (½ cup, optional): Because more chocolate is always a good idea! If you want to make it dairy-free, choose vegan chocolate chips.
Step-by-Step Instructions
Let’s get cooking!
-
Preheat your oven: Start by preheating your oven to 350°F (175°C). This ensures that your cake bakes evenly from the get-go.
-
Prepare the pan: Grease and flour a 9×13-inch baking pan. Alternatively, you can line the bottom with parchment paper for easy removal and a perfect presentation.
-
Grate the zucchini: Using a box grater or food processor, grate your zucchini. Squeeze out excess moisture using a clean kitchen towel—this prevents the cake from becoming too soggy!
-
Mix the dry ingredients: In a large mixing bowl, combine your flour, cocoa powder, baking soda, and salt. Whisk it together until well blended—this helps to distribute the baking soda evenly throughout.
-
Combine the wet ingredients: In another bowl, whisk together the eggs, sugar, vegetable oil, and vanilla extract until they’re blended nicely. The mixture should be smooth and creamy.
-
Incorporate the zucchini: Fold the grated zucchini into the wet mixture—it’s a great way to ensure every moist bite includes veggie goodness.
-
Combine wet and dry ingredients: Gradually add the dry mixture to your wet mixture, stirring until just combined. Be careful not to overmix—overworking the batter can lead to a dense cake.
-
Add chocolate chips: If you’re using chocolate chips, fold them into the batter now. This is where the magic happens!
-
Pour the batter: Transfer the batter into your prepared baking pan, smoothing the top with a spatula. This step is crucial for a beautifully baked top.
-
Bake: Pop the pan into the preheated oven and bake for 30-35 minutes, or until a toothpick inserted in the center comes out clean. The kitchen will smell heavenly during this time!
-
Cool the cake: Once baked, remove the pan from the oven and let it cool in the pan for about 10 minutes. Then, gently turn it out onto a wire rack to cool completely.
-
Make the frosting: While your cake cools, whip up your chocolate frosting. Combine softened butter, cocoa powder, powdered sugar, milk, and vanilla extract in a bowl, and mix until smooth and creamy.
-
Frost the cake: Once your cake is completely cool, slather on that chocolate frosting with a generous hand. Don’t worry about being perfect—it’s about the love you put into it!
Serving Suggestions
Slice your delicious chocolate zucchini cake into squares and serve it warm or at room temperature. Pair it with a dollop of whipped cream or a scoop of vanilla ice cream for an indulgent treat. If you’re feeling fancy, garnish with fresh raspberries or a sprinkle of confectioners’ sugar for a delightful presentation. Trust me; it’s a showstopper!
Recipe Variations
Feel free to mix things up! Here are a few creative twists you can try:
- Spiced Zucchini Cake: Add 1 tsp of cinnamon and 1/2 tsp of nutmeg for a fall-inspired flavor.
- Nutty Delight: Toss in 1/2 cup of chopped nuts (walnuts or pecans) for added crunch and flavor.
- Orange Chocolate Fusion: Add 1 tbsp of orange zest to the batter for a refreshing kick.
- Caramel Drizzle: Top your cake with a caramel drizzle for an indulgent sweetness.
- Gluten-Free Option: Substitute all-purpose flour with a 1:1 gluten-free baking blend for a safe treat.
Chef’s Notes
This chocolate zucchini cake is proof that veggies can bring joy to dessert. Over the years, I’ve adapted this recipe, and each time it evolves just a little—sometimes I’ll replace half the oil with applesauce for a lighter version, or I’ll play around with different frostings. The best part? Each version has its own special place in my heart (and stomach!).
Don’t fret if things get a little messy in the kitchen; that’s part of the fun! I once accidentally used baking powder instead of baking soda and ended up with a chocolate soufflé instead of a cake. Still delicious—just a different style!
FAQs and Troubleshooting
1. Why is my cake dense?
This could be because the batter was overmixed or too much flour was added. Make sure to fold gently and measure accuracy. Use a kitchen scale if you’re unsure!
2. Can I use frozen zucchini?
Yes! Just make sure to thaw and drain excess moisture from the frozen zucchini before using it in the recipe.
3. How do I know when my cake is done?
The toothpick test works like a charm! Insert a toothpick in the center, and it should come out clean or with a few moist crumbs attached. If it’s wet, give it a few more minutes.
4. How should I store leftover cake?
Store leftovers in an airtight container at room temperature for up to 3 days. You can refrigerate it for a week, but you might prefer it at room temp for the best texture.
Nutritional Info (optional)
Calories: 300 per slice (may vary based on ingredients and servings). This cake is a delightful blend of wholesome veggies and rich chocolate—perfect for satisfying those sweet cravings without a hint of guilt!
There you have it! Your ultimate guide to baking a deliciously moist Chocolate Zucchini Cake with dreamy chocolate frosting. I hope this recipe ignites your passion for cooking and brings a bit of joy into your kitchen. Happy baking! 🍫✨
Print
The Ultimate Chocolate Zucchini Cake with Chocolate Frosting
- Total Time: 55 minutes
- Yield: 12 servings 1x
- Diet: Vegetarian
Description
A moist, rich chocolate zucchini cake topped with creamy chocolate frosting, perfect for any occasion.
Ingredients
- 2 cups Zucchini, grated
- 1 ¾ cups All-purpose flour
- 1 ½ cups Granulated sugar
- ¾ cup Cocoa powder
- 1 tsp Baking soda
- ½ tsp Salt
- 2 large Eggs
- ½ cup Vegetable oil
- 2 tsp Vanilla extract
- ½ cup Chocolate chips (optional)
Instructions
- Preheat your oven to 350°F (175°C).
- Prepare a 9×13-inch baking pan by greasing and flouring it.
- Grate the zucchini and squeeze out excess moisture using a kitchen towel.
- Mix the flour, cocoa powder, baking soda, and salt in a large bowl.
- Combine eggs, sugar, vegetable oil, and vanilla extract in another bowl and whisk until smooth.
- Incorporate the grated zucchini into the wet mixture.
- Combine the dry ingredients into the wet mixture gradually, stirring until just combined.
- Add chocolate chips, if using.
- Pour the batter into the prepared baking pan and smooth the top with a spatula.
- Bake for 30-35 minutes, or until a toothpick comes out clean.
- Cool the cake in the pan for 10 minutes, then turn it out onto a wire rack to cool completely.
- Make the frosting by combining softened butter, cocoa powder, powdered sugar, milk, and vanilla extract until smooth.
- Frost the cooled cake with chocolate frosting.
Notes
Store leftovers in an airtight container at room temperature for up to 3 days.
- Prep Time: 20 minutes
- Cook Time: 35 minutes
- Category: Dessert
- Method: Baking
- Cuisine: American
Nutrition
- Serving Size: 1 slice
- Calories: 300
- Sugar: 18g
- Sodium: 290mg
- Fat: 15g
- Saturated Fat: 3g
- Unsaturated Fat: 6g
- Trans Fat: 0g
- Carbohydrates: 40g
- Fiber: 3g
- Protein: 5g
- Cholesterol: 70mg
Keywords: chocolate cake, zucchini cake, dessert, baking, chocolate frosting
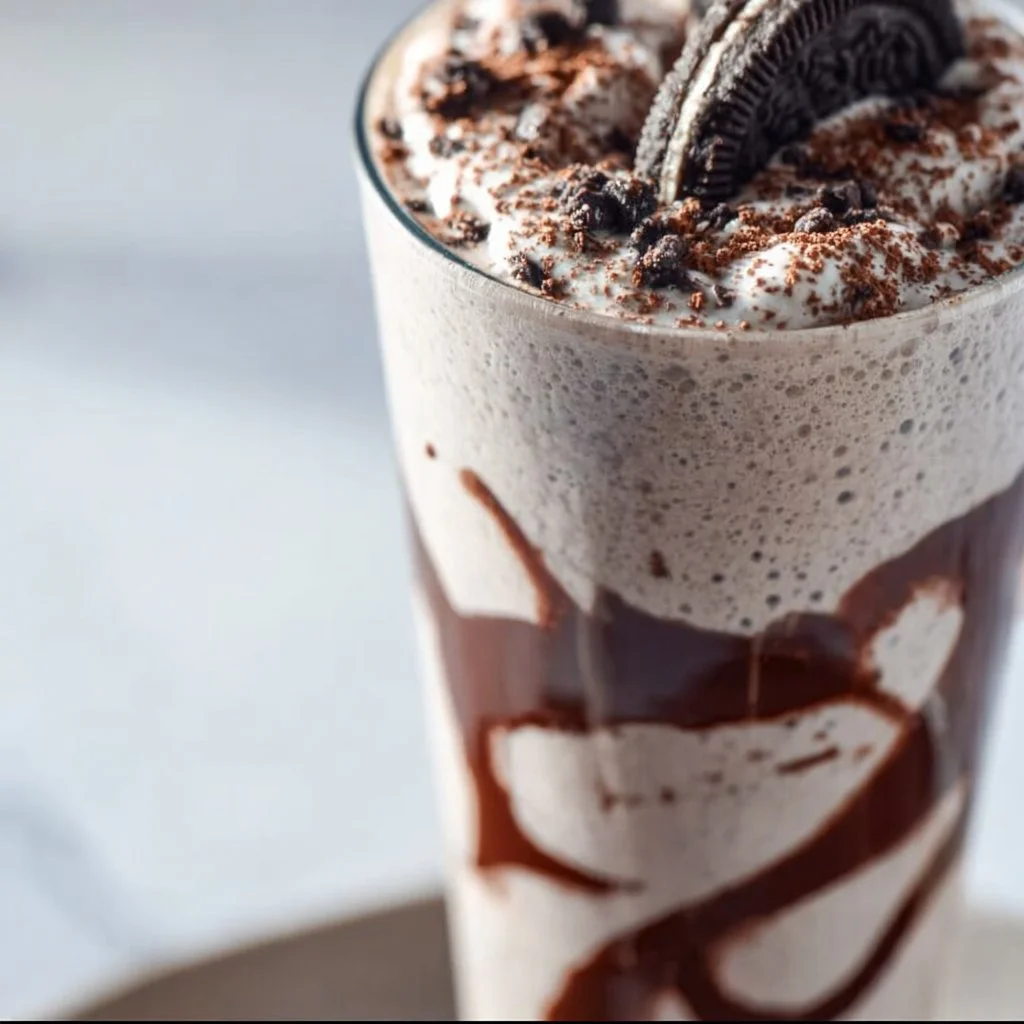
Homemade Oreo Milkshake Recipe
The Ultimate Homemade Oreo Milkshake Recipe
Hey there, fellow food lovers! Welcome back to my cozy little corner of the kitchen. Today, we’re diving into a treat that’s as comforting as a hug and as delightful as a sunny afternoon — the Homemade Oreo Milkshake! If you’ve never tried making this ice cream dream at home, let me tell you, you’re in for a real treat. The rich, creamy texture combined with those iconic chocolatey cookie crumbles is absolute bliss.
I don’t know about you, but I have a bit of a soft spot for milkshakes. They remind me of lazy summer afternoons spent hanging out with friends at the local diner, sharing stories and slurping up ice-cold goodness with those oversized straws. There’s something magical about the way a milkshake can transport you back to those carefree days.
This recipe is not just about creating a delicious milkshake; it’s about bringing back those nostalgic moments while adding your unique flair. Trust me, once you whip up this fabulous homemade Oreo milkshake, you’ll never want to buy one again!
The best part? You don’t need a fancy blender or a kitchen full of gadgets to make this magical concoction. With just a few simple ingredients, you can create a milkshake that’s perfect for any occasion, whether you’re throwing a party, celebrating a special moment, or just treating yourself after a long day. So grab your favorite glass, put on some tunes, and let’s get shaking!
Personal Story
I vividly remember the first time I made an Oreo milkshake. It was a hot summer day, and my sister and I decided we were old enough to tackle the kitchen without any adult supervision (probably not the best idea, but let’s roll with it!). Armed with a pack of Oreo cookies, vanilla ice cream, and a blender my mom swore was "the best thing since sliced bread," we were determined to make the ultimate summer treat.
We tossed the ingredients into the blender, cranked it up too high, and ended up with a chocolate explosion all over the kitchen! It was messy, chaotic, and oh so much fun. After we cleaned up (mostly), we finally poured the milkshake into tall glasses, topped it off with whipped cream and a few extra cookie crumbles for good measure.
That first sip? Pure bliss! The perfect balance of creamy ice cream, rich cookies, and just a hint of milk. Since that day, making Oreo milkshakes has been our little tradition — a way to bond, create memories, and indulge in something truly delicious. So let’s make some new memories together, shall we?
Ingredients
Here’s what you’ll need to create your own Oreo milkshake — simple ingredients that you probably already have at home!
-
Oreo Cookies (10-12 cookies)
The star of the show! These chocolatey sandwich cookies bring that signature flavor to our milkshake. If you’re feeling adventurous, you can swap out traditional Oreos for any flavored varieties — think mint, peanut butter, or even the seasonal pumpkin spice! -
Vanilla Ice Cream (2 cups)
A classic choice for any milkshake, vanilla ice cream provides the creamy base that pairs wonderfully with the cookies. You can substitute this with chocolate ice cream for an even richer treat or a dairy-free option if you prefer a non-dairy milkshake. -
Milk (1 cup)
The secret to achieving that perfect creamy consistency! I typically use whole milk, but feel free to use almond, oat, or soy milk for a lighter version. -
Whipped Cream (for topping)
Now, we don’t ‘have to’ add whipped cream, but trust me, it takes this milkshake over the top! Use store-bought or homemade whipped cream. If you’re dairy-free, coconut whipped cream is a fantastic alternative! -
Additional Oreo Crumbles (for garnish)
A little something extra to make your milkshake look as good as it tastes! You can crush a few Oreos in a zip-top bag or use a food processor to make those delectable shards of chocolate goodness.
Step-by-Step Instructions
Step 1: Gather Your Ingredients
Before you jump into blending, it helps to have all your ingredients within reach. Set everything out on the counter — trust me, it’ll make the process smoother (and less messy!).
Step 2: Crush Your Oreos
Grab a couple of Oreo cookies and throw them into a zip-top bag. Seal it up, and crush them with a rolling pin or even your hands. You want some chunky bits for texture, so don’t overdo it! Keep those cookie crumbles aside for later.
Step 3: Blend It Up
Now, grab your blender and add the vanilla ice cream, milk, and the majority (but not all) of those crushed Oreos. Blend until the mixture is smooth and creamy. Depending on your blender, this may take 30 seconds to a minute. If it’s too thick, add a splash more milk. Too runny? Toss in more ice cream! This is where you can customize the texture to your liking.
Step 4: Taste and Adjust
Once you’ve got your milkshake blended, take a quick taste. Need a little more chocolate flavor? Go ahead and add an extra cookie or two, then blend again. Don’t be shy about making it your own!
Step 5: Serve It Up
Grab your tall glasses or mason jars, and pour in that beautiful milkshake. You want to fill it about three-quarters of the way, leaving room for whipped cream and more Oreo crumbles. If you’re feeling fancy, use a piping bag to dollop the whipped cream on top.
Step 6: Garnish and Enjoy
Now it’s time for the fun part! Sprinkle those crushed Oreos over the whipped cream, and if you really want to impress, you can drizzle some chocolate syrup over the top. Serve with a straw or a spoon — or both! You’re all set to enjoy a delicious homemade Oreo milkshake!
Serving Suggestions
The beauty of milkshakes is the endless creativity! Serve these milkshakes in tall glasses garnished with whipped cream and a sprinkle of crushed Oreos for that perfect indulgent look. You can even add a cherry on top or drizzle some chocolate syrup for an extra touch of sweetness.
For a fun twist, try serving them in mini mason jars for a nostalgic feel. They make adorable individual servings for a party or a cozy afternoon treat. Add a sprinkle of cocoa powder or chocolate shavings for an elevated presentation!
Recipe Variations
If you’re feeling adventurous, here are a few fun variations to mix things up:
-
Mint Oreo Milkshake
Swap regular Oreos for mint-flavored ones for a refreshing twist. You can also add a drop of peppermint extract to enhance that minty flavor. -
Cookies and Cream Milkshake
Use chocolate ice cream instead of vanilla for an extra-rich cookies and cream experience. -
Vegan Oreo Milkshake
For a dairy-free version, use coconut milk and coconut or almond milk ice cream. Throw in some vegan whipped cream on top! -
Peanut Butter Oreo Milkshake
Add a tablespoon of peanut butter to give your milkshake a nutty flavor. It pairs perfectly with the chocolate! -
Chocolate Chip Oreo Milkshake
Toss in some mini chocolate chips for added texture and richness!
Chef’s Notes
I absolutely love creating a fantastic milkshake, and this Oreo version holds a special place in my heart. It’s evolved over the years as I’ve played around with different ice creams and flavors. One time, I accidentally grabbed spicy chai-flavored ice cream. It was an interesting experiment for sure — let’s just say some flavors are better left untouched!
I always keep a stash of Oreos in my pantry because you never know when a milkshake craving will hit! So whenever you feel a bit adventurous, feel free to add your personal touch. Remember, the kitchen is your playground!
FAQs and Troubleshooting
Q: My milkshake is too thick; how do I fix it?
Don’t panic! Just add a little bit of milk at a time and blend again until you’ve achieved your desired consistency.
Q: Can I make this dairy-free?
Absolutely! Just substitute regular ice cream and milk with non-dairy alternatives, like almond milk and coconut ice cream.
Q: What can I use if I don’t have a blender?
No blender? No problem! You can use a whisk to combine the ingredients in a large bowl. Crush the Oreos and mix everything until it’s combined. The texture will be a bit different, but still delicious!
Q: How do I store leftovers?
If you happen to have leftovers (not likely with how yummy these are!), simply cover the glasses with plastic wrap and freeze them. They’ll be a bit firmer once frozen, so allow them to sit out for a few minutes before enjoying again.
Nutritional Info
While milkshakes are a treat best enjoyed in moderation, here’s a rough breakdown of what you can expect per serving (when made with whole ingredients):
- Calories: Approximately 500-600
- Fat: 25g
- Carbohydrates: 65g
- Protein: 10g
And there you have it — the ultimate homemade Oreo milkshake you’ll want to make time and time again! So roll up those sleeves, don your favorite apron, and let’s whip up some joy in the kitchen! Cheers to tasty memories and homemade goodness!
Print
Ultimate Homemade Oreo Milkshake
- Total Time: 10 minutes
- Yield: 2 servings 1x
- Diet: Vegetarian
Description
A rich, creamy homemade Oreo milkshake with chocolatey cookie crumbles that captures the essence of nostalgic summer days.
Ingredients
- 10–12 Oreo Cookies
- 2 cups Vanilla Ice Cream
- 1 cup Milk
- Whipped Cream (for topping)
- Additional Oreo Crumbles (for garnish)
Instructions
- Gather Your Ingredients
- Crush Your Oreos
- Blend It Up
- Taste and Adjust
- Serve It Up
- Garnish and Enjoy
Notes
Feel free to customize the recipe with different ice cream flavors or mix-ins to make it your own.
- Prep Time: 10 minutes
- Cook Time: 0 minutes
- Category: Dessert
- Method: Blending
- Cuisine: American
Nutrition
- Serving Size: 1 serving
- Calories: 550
- Sugar: 40g
- Sodium: 200mg
- Fat: 28g
- Saturated Fat: 16g
- Unsaturated Fat: 10g
- Trans Fat: 0g
- Carbohydrates: 65g
- Fiber: 3g
- Protein: 10g
- Cholesterol: 70mg
Keywords: Oreo milkshake, homemade milkshake, dessert, summer treat
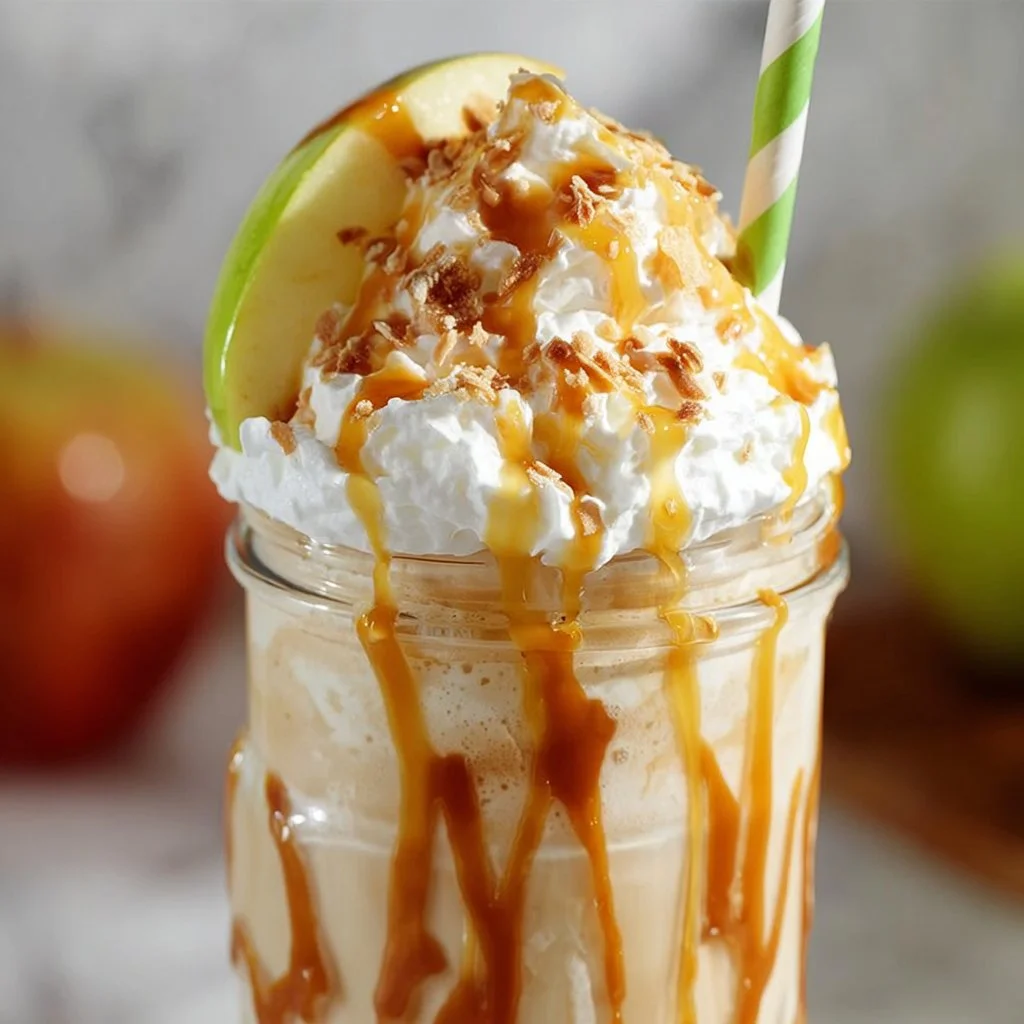
Caramel Apple Milkshake
Caramel Apple Milkshake: A Sweet Taste of Fall
Hello there, fellow food lovers! 🍏🍦 It’s Olivia Bennett here, and today, we’re diving into one of my all-time favorite treats — the Caramel Apple Milkshake! Imagine biting into a crisp, juicy apple drizzled with luscious caramel, but in shake form! This delight takes the essence of autumn and packs it into a glass, making it the perfect beverage to enjoy with friends or family during the cozy fall months, or really any time of the year when that sweet craving hits!
The thing I adore about this milkshake is the nostalgia it brings. Every sip reminds me of those carefree afternoons spent at the county fair, watching apple bobbing contests and enjoying all the caramel-coated goodies the vendors had to offer. This recipe is not only a fun twist on a classic milkshake, but also a fantastic way to make memories in the kitchen. It’s so simple yet delicious, perfect for anyone who wants to whip up something special without spending hours in the kitchen.
Now, whether you’re hunkering down after a long day or hosting a chilled-out movie night, this Caramel Apple Milkshake will surely bring everyone together. Plus, it’s a great opportunity to get creative! You can customize it to fit your tastes or dietary needs while still capturing that sweet caramel apple essence. So, let’s get our ingredients together and create something unforgettable!
Personal Story
Let me take you back to a fall day years ago. I was in high school, bursting with energy and a robust appetite. My friends and I saved up our allowances to hit up the annual apple festival. The sun was shining, leaves were falling, and the tantalizing aroma of baked goods filled the air. We made our first stop at the caramel apple booth, and boy, was it hard to resist! All of us traded bites of caramel apples, laughing and joking as we sweetened the day away.
That festival visit forever left a mark on my heart — not just for the sweets, but for the laughter and love we shared. Fast forward to me in my kitchen, reminiscing about those blissful days, and I decided to take that iconic combination of flavors and turn it into a milkshake! Blending nostalgia with culinary creativity is what it’s all about, isn’t it? Each sip tells a story, and I can’t wait for you to create your own!
Ingredients
Here’s what you’ll need to whip up this delightful treat. Each ingredient is chosen with love to help you create that authentic caramel apple flavor:
-
Vanilla Ice Cream: The base of our milkshake! For a dairy-free option, use coconut or almond milk ice cream instead. The creaminess is the secret to its luxurious texture.
-
Milk: We’re talking about whole milk for extra richness, but feel free to use almond milk, oat milk, or any plant-based milk for a lighter version.
-
Caramel Sauce: A must-have! You can use store-bought or homemade. To make it a bit healthier, try a date-based caramel for a natural sweetener.
-
Apples: Any variety will work, but Granny Smith or Honeycrisp provides the perfect balance of tartness and sweetness. If you want a different flavor profile, try using a flavored apple cider instead for a fruity twist.
-
Cinnamon: Just a pinch enhances the fall flavors! You can also use pumpkin spice if you want to amp up the autumn vibe.
-
Whipped Cream (optional): For that café-style finish, why not? Vegan whipped cream is widely available for a dairy-free version!
Remember, these ingredients can be adjusted based on your taste buds or pantry stock. Let your creativity flow!
Step-by-Step Instructions
Alright, it’s time to get blending! Grab your favorite blender (or immersion blender if you’re fancy), and let’s create something incredible.
-
Gather Your Ingredients: Make sure you have everything prepped and ready. Nothing worse than halfway through and realizing you’re missing a key component!
-
Slice the Apples: Take one or two apples (depending on how apple-y you want your shake) and slice them into small chunks. No need to peel; the skin adds a beautiful texture and nutrients. Bonus chef tip: squeeze a bit of lemon juice on the apple slices to help prevent browning!
-
Blend It Up: In your blender, combine 2 cups of vanilla ice cream, 1 cup of milk, ½ cup of caramel sauce, and the apple chunks. For a boost of flavor, sprinkle in a teaspoon of cinnamon.
-
Start Blending: Set your blender to high speed and blend until the mixture is smooth and creamy. If you prefer a thicker shake, add a bit more ice cream or decrease the milk; if you like it thinner, add more milk.
-
Taste Test Time: Once blended, take a little taste (make sure it’s safe to do so!) and see if you need more caramel or a sprinkle of cinnamon. Adjust according to your taste buds! It’s your masterpiece — make it count!
-
Chill, Baby, Chill: At this point, if you want, throw the milkshake in the freezer for about 10 minutes to thicken it even more. A perfect milkshake is creamy, but there’s something special about getting it extra chilly!
-
Serve: Grab your favorite tall glasses; I recommend a clear glass for that beautiful swirl of colors. Drizzle some caramel along the inside of the glasses before pouring in your milkshake — it’s all about presentation!
-
Top It Off: If you’re feeling fancy, dollop whipped cream generously on top, then drizzle on more caramel sauce, and maybe a sprinkle of cinnamon for good measure. Add some small apple slices for garnish if you want to wow your guests!
And voilà! You’ve made a delicious Caramel Apple Milkshake. How easy was that?
Serving Suggestions
This milkshake is best served immediately while it’s icy and fresh. You can serve it alongside some warm cinnamon donuts for a cozy treat or with a slice of apple pie as a delightful dessert duo! For a fun touch, consider using decorative straws or mixing in mini caramel candies for added texture. Don’t forget to snap a pic before diving in — it’s Instagram-worthy for sure!
Recipe Variations
-
Peanut Butter Lover: Swirl in some creamy peanut butter for a delightful caramel apple peanut butter milkshake!
-
Chocolate Twist: Add a couple of tablespoons of cocoa powder or blend in some chocolate ice cream for a chocolaty caramel apple delight.
-
Nutty Notes: Toss in crushed nuts like pecans or walnuts for a crunchy twist — hello, texture!
-
Spiced-Up Version: Substitute apple pie spice for the cinnamon for a more complex flavor profile, bringing in notes of nutmeg and clove!
-
Healthier Swap: Use Greek yogurt instead of ice cream for a lighter, protein-packed version; just blend in some extra honey to sweeten it up.
Chef’s Notes
This recipe has truly evolved over time! I remember the first time I tried making this milkshake; I ended up with a lumpy, overly sweet disaster — and it was the most fun disaster ever! Through experimentation, I honed in on the perfect balance of flavors and textures. The key is to have fun in the kitchen! Whether you make a mistake or create magic, it’s all part of the process!
Also, if you end up with extra caramel sauce (is there even such a thing?), it’s fantastic drizzled over pancakes, waffles, or even stirred into oatmeal for breakfast! That’s how we sustainably embrace our kitchen adventures with the leftovers!
FAQs and Troubleshooting
How can I make this milkshake vegan?
Simply substitute the milk and ice cream with plant-based alternatives, and ensure your caramel sauce is vegan-friendly!
Can I store leftovers?
While this milkshake is best enjoyed fresh, you can store it in a sealed container in the freezer for a little while. Just give it a good stir or re-blend it if it hardens too much.
My milkshake is too thin; what do I do?
If your shake ends up too runny, simply add a bit more ice cream and re-blend until you reach your desired consistency.
What’s the best apple for a milkshake?
Granny Smith or Honeycrisp apples work best for that perfect balance of sweet and tart! However, feel free to experiment with your favorites!
Nutritional Info
Serving Size: 1 milkshake
Calories: ~500 (depending on ingredients used)
Fat: 22g
Carbohydrates: 58g
Protein: 7g
Sugar: 45g
Note: Nutritional values will vary based on ingredient substitutions.
So, there you have it — a heavenly Caramel Apple Milkshake that’ll make your taste buds dance! I can’t wait for you to try this recipe and make it your own. Remember, cooking (and shake-making!) is all about joy, creativity, and love. Enjoy every sip, and happy cooking! 🍏❤️
Print
Caramel Apple Milkshake
- Total Time: 10 minutes
- Yield: 2 servings 1x
- Diet: Vegetarian
Description
A delightful milkshake capturing the essence of autumn with the flavors of caramel and apple.
Ingredients
- 2 cups vanilla ice cream
- 1 cup whole milk (or plant-based milk)
- ½ cup caramel sauce (store-bought or homemade)
- 1–2 apples (Granny Smith or Honeycrisp)
- 1 teaspoon cinnamon (or pumpkin spice)
- Whipped cream (optional, for topping)
Instructions
- Gather Your Ingredients: Make sure you have everything prepped and ready.
- Slice the Apples: Cut apples into small chunks, keeping the skin on for texture.
- Blend It Up: Combine ice cream, milk, caramel sauce, and apple chunks in the blender.
- Start Blending: Blend until smooth and creamy, adjusting thickness as desired.
- Taste Test Time: Adjust caramel or cinnamon to your preference.
- Chill, Baby, Chill: Optional, chill the milkshake in the freezer for 10 minutes.
- Serve: Pour into glasses and drizzle caramel along the inside before serving.
- Top It Off: Add whipped cream, more caramel, and optional apple slices for garnish.
Notes
This milkshake is best served immediately, but you can store leftovers in the freezer.
- Prep Time: 10 minutes
- Cook Time: 0 minutes
- Category: Beverage
- Method: Blending
- Cuisine: American
Nutrition
- Serving Size: 1 milkshake
- Calories: 500
- Sugar: 45g
- Sodium: 150mg
- Fat: 22g
- Saturated Fat: 14g
- Unsaturated Fat: 8g
- Trans Fat: 0g
- Carbohydrates: 58g
- Fiber: 2g
- Protein: 7g
- Cholesterol: 60mg
Keywords: caramel apple milkshake, fall treat, sweet beverage, dessert, milkshake recipe
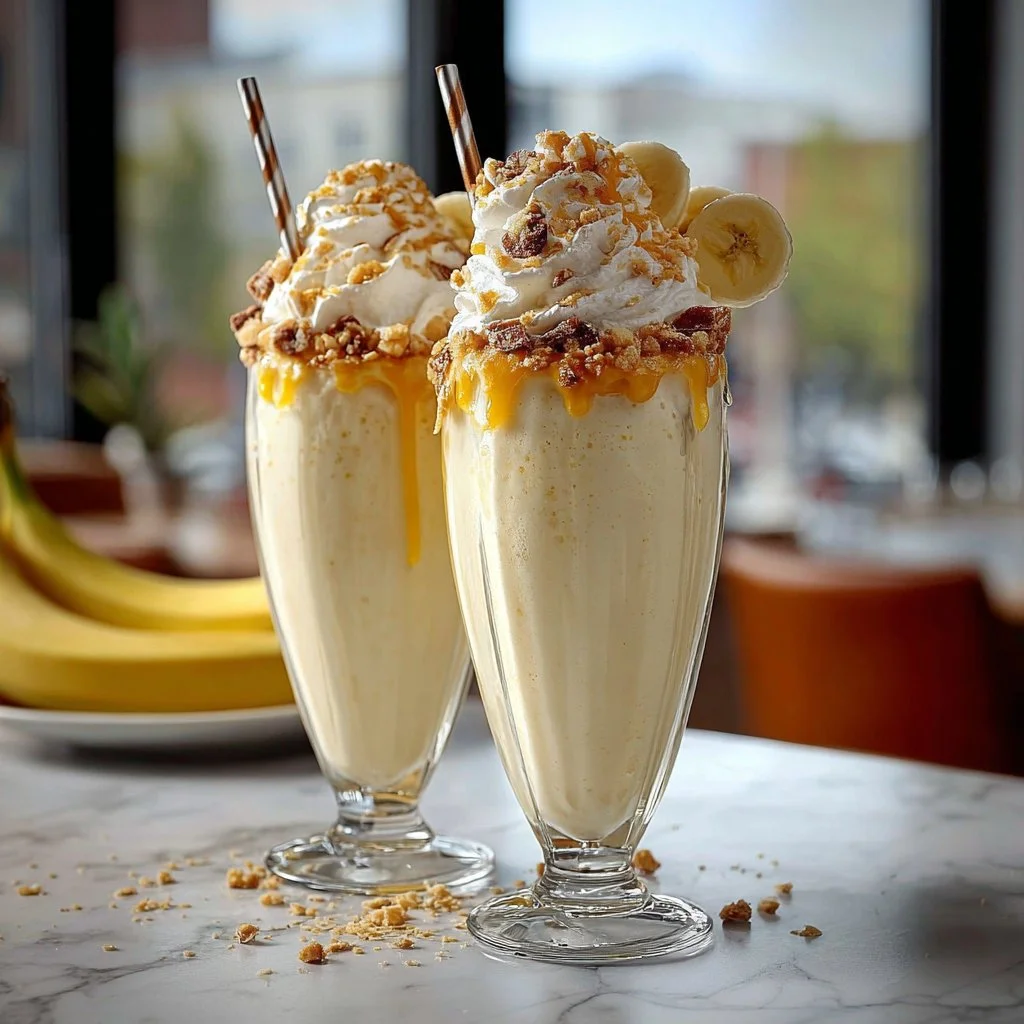
Banana Pudding Milkshakes: The Best Creamy Dessert You’ll Ever Sip
Banana Pudding Milkshakes: The Best Creamy Dessert You’ll Ever Sip
Welcome back to my cozy kitchen, my dear food enthusiasts! Today, we’re going to dive into one of my all-time favorite desserts that’s perfect for any occasion—Banana Pudding Milkshakes! Imagine this: a creamy, luscious shake that combines the comforting essence of banana pudding with the fun of a milkshake. It’s the kind of treat that makes every day feel like a celebration, or better yet, like a flashback to those carefree childhood summers. You know, when the sun was shining, the days felt endless, and every scoop of sweetness brought a smile to your face.
Now, let’s take a moment to appreciate how well this delightful dessert can bring people together. Whether you’re serving it at a casual get-together, a fun-filled BBQ, or simply treating yourself on a cozy evening at home, Banana Pudding Milkshakes are sure to steal the show. They are rich and creamy, with all the nostalgic flavors you adore, while being easy enough for even the busiest of chefs to whip up on a whim.
But wait! Before we jump into the recipe, I want to share a little background about what inspired this delicious creation. After all, every great recipe has a story behind it, right? So sit tight, mix your favorite ingredients, gather your loved ones, and let’s shuffle into a memory lane that will sweeten your day!
Personal Story
Growing up, my family had this tradition of gathering around the table every Sunday for a potluck-style meal. Each week, one family member would take the lead in preparing the main course while everyone else brought their favorite sides. My aunt Clara was famous for her homemade banana pudding, which never failed to steal the spotlight. I still remember the way the warm kitchen would fill with the aroma of vanilla and sweet bananas, drawing everyone in like a moth to a flame. There was always a race to see who could snag the first serving.
One summer, I decided to sneak a taste when no one was looking. Well, let’s just say I never regretted that bold move! I ended up devouring an entire cup of that velvety pudding before even making it to the table. The pure joy of that moment, feeling the balance of soft, creaminess and bites of crunchy Nilla wafers, inspired me to create this Banana Pudding Milkshake. It’s a way for me to honor those cherished memories while also making something whimsical and fun for everyone to enjoy. So gather ’round, my friends! Let’s channel those sunny childhood days with this delightful shake that’s sure to enchant your taste buds and warm your heart.
Ingredients
Here’s what you’ll need to make the ultimate Banana Pudding Milkshake:
-
Bananas
- Ripe, medium bananas work best for sweetness and flavor. If you’re short on ripe bananas, you can opt for frozen pieces for a super creamy consistency.
-
Vanilla Ice Cream
- The base of our shake! You can substitute with a dairy-free alternative or yogurt for a lighter option. Aim for quality ice cream; it truly makes a difference.
-
Milk
- Whole milk adds richness, but feel free to use almond, oat, or any other milk of your choice! Just remember, the consistency you aim for might vary.
-
Instant Vanilla Pudding Mix
- This is the secret ingredient for that classic banana pudding flavor. If you prefer, you could try making your own pudding from scratch.
-
Whipped Cream
- To top it off! Homemade whipped cream is easy to whip up, or go for store-bought for a quicker option.
-
Nilla Wafers
- The signature cookie! If you’re looking for a gluten-free option, check for gluten-free vanilla wafers or even crush up some graham crackers.
-
Salt
- A pinch of salt helps balance the sweetness and enhance all the flavors!
With these ingredients on hand, you’re already halfway to creamy, dreamy bliss!
Step-by-Step Instructions
Now that we have our ingredients ready, it’s time to bring the magic to life. Let’s get shaking!
-
Prep Your Bananas
Start by peeling the bananas and slicing them into smaller chunks. The riper the bananas, the sweeter your shake! If you’re using frozen bananas, skip this step and toss them directly into the blender. -
Blending the Base
Add the sliced bananas into your blender, followed by a generous scoop of vanilla ice cream. You can start with about 2 cups for a thick shake. Now it’s time for the instant vanilla pudding mix—about ½ cup will do. It’s the key to that luscious pudding flavor! -
Adding Milk
Pour in about 1 cup of milk. Depending on how thick or thin you like your shakes, feel free to adjust this amount. Blend the mixture on high until it’s primarily smooth, and please do not forget the taste test at this stage. You might need to add a bit more banana or ice cream—no judgment here! -
Add Texture with Nilla Wafers
Toss in a handful of Nilla Wafers (think about 6-8) and pulse the blender just a couple of times. This will break up the cookies while still leaving some chunks for that classic banana pudding experience. -
Taste and Adjust!
Give it a taste. Do you need a little more sweetness? Maybe a touch of whipped cream or another cookie for pzazz? Adjust according to your like, and blend again briefly if needed. -
Serve It Up!
Grab your favorite tall glasses and pour in the milkshake. Opt for a fun straw or fancy spoon for instant happiness. If you want to, you can even drizzle a little extra whipped cream on top before adding a few crushed Nilla Wafers for decoration—after all, we eat with our eyes first!
Serving Suggestions
These Banana Pudding Milkshakes are phenomenal on their own, but why not serve them with a little flair? You can pair them with homemade cookies, mini banana muffins, or even a scoop of fresh fruit for a refreshing contrast. If you’re hosting a party, consider setting up a shake bar where guests can add their own toppings, like chopped nuts or chocolate shavings, to make it even more personal and fun!
Recipe Variations
-
Chocolate Lover’s Twist
Add 2 tablespoons of chocolate syrup to transform this into a chocolate banana pudding shake. You could even use chocolate ice cream for a rich and indulgent treat! -
Nutty Delight
Introducing a handful of crushed peanuts or almond butter can add a delightful nutty flavor that complements the bananas perfectly. -
Berry Banana Bliss
Toss in a handful of fresh strawberries or blueberries for a vibrant twist full of extra fruity goodness. -
Vegan Version
Swap your regular ice cream for coconut or almond milk ice cream and use a dairy-free milk option. Replace the instant pudding mix with a vegan version or homemade. -
Frozen Banana Surprise
Replace fresh bananas with frozen ones, which will create a wonderfully thick and creamy shake that’s perfect for hot summer days.
Chef’s Notes
Every time I whip up these milkshakes, I’m reminded of those family potluck Sundays. This recipe has evolved over time, inspired by my cravings for nostalgia and comfort. I can’t help but chuckle at how many times I’ve found myself standing by the blender, doing the “just one more scoop” dance! Plus, the joy of sharing a glass with friends is unmatched. Remember, making desserts doesn’t need to be serious—get your kiddos involved, make a mess, and most importantly, have fun!
FAQs and Troubleshooting
1. Why is my milkshake too thick?
If your shake ends up too thick, simply add a bit more milk, blending again until it reaches your desired consistency. It’s always easier to thicken than thin, so add gradually!
2. Can I make this ahead of time?
While I recommend consuming it fresh for the best flavor, you can prepare individual cups and store them in the freezer for short bursts of sweetness. Just be aware that they may take on a slushy texture!
3. What if I don’t have vanilla pudding mix?
You can create your own with cornstarch, sugar, and a dash of vanilla extract or even skip it entirely for a more straight banana flavor! The nostalgia might slightly shift, but it will still be delicious.
4. How long will these last in the fridge?
I generally advise consuming your milkshake right away, but if any leftovers remain, seal them in an airtight container and refrigerate them for a couple of hours. Just give them a quick blend before serving again.
Nutritional Info
- Calories: Approximately 450 (varies based on toppings and substitutions)
- Fat: 18g
- Carbohydrates: 65g
- Protein: 6g
And there you have it! Untangle your mixing bowls and embrace all the creamy goodness that is a Banana Pudding Milkshake. I can’t wait for you to enjoy this batch of nostalgia in a glass, creating sweet memories of your own along the way. Happy shaking!
Print
Banana Pudding Milkshakes
- Total Time: 10 minutes
- Yield: 2 servings 1x
- Diet: Vegetarian
Description
A creamy and nostalgic milkshake that combines the flavors of banana pudding with the fun of a refreshing shake.
Ingredients
- 2 ripe medium bananas
- 2 cups vanilla ice cream
- 1 cup whole milk (or dairy-free alternative)
- ½ cup instant vanilla pudding mix
- Whipped cream for topping
- 6–8 Nilla Wafers
- A pinch of salt
Instructions
- Prep your bananas by peeling and slicing them into smaller chunks.
- Add the bananas into your blender along with 2 cups of vanilla ice cream.
- Pour in ½ cup of instant vanilla pudding mix.
- Pour in 1 cup of milk and blend on high until smooth.
- Toss in a handful of Nilla Wafers and pulse a couple of times to add texture.
- Give it a taste and adjust sweetness as needed.
- Grab glasses and pour in the milkshake, topping with whipped cream and crushed Nilla Wafers.
Notes
For a variation, try adding chocolate syrup or fresh berries for an exciting twist!
- Prep Time: 10 minutes
- Cook Time: 0 minutes
- Category: Dessert
- Method: Blending
- Cuisine: American
Nutrition
- Serving Size: 1 glass
- Calories: 450
- Sugar: 35g
- Sodium: 150mg
- Fat: 18g
- Saturated Fat: 11g
- Unsaturated Fat: 7g
- Trans Fat: 0g
- Carbohydrates: 65g
- Fiber: 3g
- Protein: 6g
- Cholesterol: 60mg
Keywords: banana pudding, milkshake, dessert, creamy, nostalgic
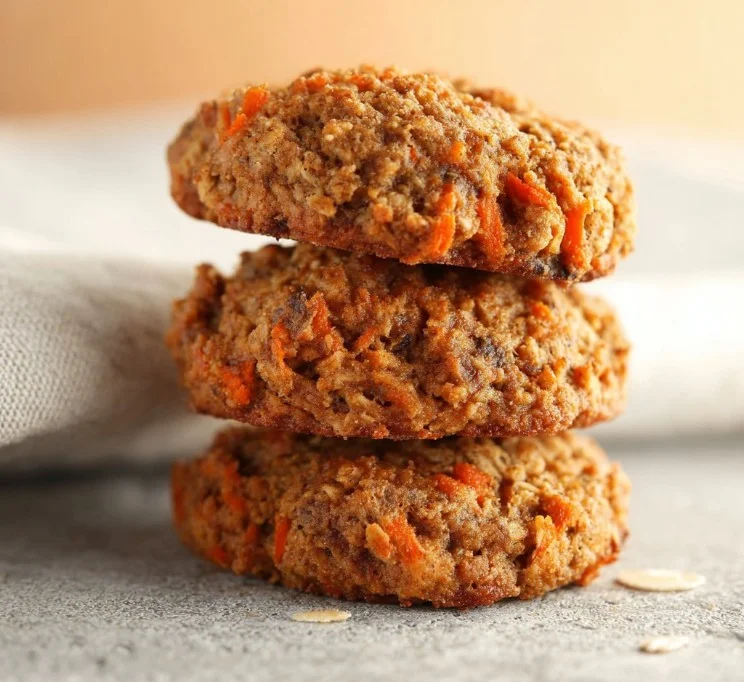
Healthy Carrot Cake Oatmeal Cookies
Healthy Carrot Cake Oatmeal Cookies: The Perfect Blend of Comfort and Wholesome Goodness
Welcome back to my cozy corner of the kitchen! I’m Olivia Bennett, here to whisk you away on a delightful baking adventure. Today, we’re making healthy carrot cake oatmeal cookies—yes, you heard that right! Imagine biting into a soft, chewy cookie infused with the flavors of traditional carrot cake yet packed with wholesome ingredients. These cookies are perfect for breakfast or a sweet snack, and trust me; you won’t be able to stop at just one!
Now, why carrot cake cookies, you might ask? Well, let me take you down memory lane for a moment. Growing up, my grandma had this magical touch in the kitchen. Her carrot cake was a family favorite, gracing every birthday and holiday table. The warm spices mingled beautifully with the sweet, tender carrots, creating a comforting aroma that filled our home. But as much as I adored that classic cake, let’s be real: it isn’t the healthiest treat.
So, I set out to recreate that beloved flavor but in a format that lets me indulge without the guilt. These healthy carrot cake oatmeal cookies are jam-packed with fiber, healthy fats, and naturally sweetened with honey and ripe bananas. They’re not only a healthier alternative, but they also bridge the gap between nostalgic flavors and the need for nutritious food. Whether you’re a health nut or just looking for a delicious treat, this recipe hits all the right notes. Let’s dive in and throw on those aprons—it’s time to bake some magic!
Personal Story
Whenever I think back to my childhood, I can’t help but smile at the memory of those sunny afternoons spent in my grandma’s kitchen. She would often put me in charge of grating carrots while she mixed up the batter for her famous carrot cake. I remember the feel of that wooden box grater, the scent of fresh carrots filling the air, and the gentle laughter we shared over spilled flour and a mischievous cat trying to steal a taste.
Those moments inspired my love for cooking, and the joy of baking with her still warms my heart. It wasn’t just about the cake; it was about the time spent together, the stories we shared, and the sweet sense of accomplishment once we pulled that golden cake from the oven. Recreating her delicious carrot cake in a healthier form is my way of not only honoring those memories but also carrying them into my modern family.
So every time I bake these healthy carrot cake oatmeal cookies, I feel like I’m channeling my grandma’s spirit. I invite you to join me in this delicious tribute to the past while savoring the delightful present. After all, food is best when it brings love and memory to the table!
Ingredients
To whip up these nutritionally charming cookies, gather the following ingredients:
-
Rolled Oats: The star of our cookies! Oats help create a chewy texture and are packed with fiber. For gluten-free options, choose certified gluten-free oats!
-
Whole Wheat Flour: This gives the cookies substance, adding more fiber and nutrients than all-purpose flour. You can substitute with almond flour or oats ground into flour for gluten-free versions.
-
Grated Carrots: Fresh, sweet, and full of vitamins. Grating the carrots ensures they blend well into the dough. If you’re short on time, pre-grated carrots work fine too.
-
Mashed Banana: This acts as a natural sweetener while also providing moisture. You can substitute with unsweetened applesauce if desired.
-
Honey or Maple Syrup: A natural sweetener that enhances the flavor. If you prefer lower sugar, use a sugar alternative like stevia or monk fruit syrup.
-
Cinnamon and Nutmeg: These spices bring warmth and depth, mimicking the flavors found in carrot cake. Feel free to adjust amounts based on your spice preference.
-
Chopped Nuts (like walnuts or pecans): These add a delightful crunch and healthy fats. If you’re nut-free, try using seeds like sunflower or pumpkin.
-
Raisins or Dried Cranberries: For a little sweetness and chewiness, these fruits are optional but highly recommended. You can also use dark chocolate chips, as who wouldn’t want some chocolate with a cookie?
-
Baking Soda & Baking Powder: These leavening agents help your cookies rise and become light and fluffy.
Now that we’ve gathered our ingredients, let’s get those spatulas ready!
Step-by-Step Instructions
1. Preheat the Oven
Start by preheating your oven to 350°F (175°C). This little step ensures an even baking temperature and that your cookies will turn out perfectly golden brown.
2. Prepare Your Baking Sheet
Line a baking sheet with parchment paper. This prevents sticking and makes cleanup a breeze—an essential hack for every home cook!
3. Mix the Dry Ingredients
In a large bowl, combine your rolled oats, whole wheat flour, baking soda, baking powder, cinnamon, nutmeg, and a pinch of salt. Give it a good stir and set aside. This mix is where the magic begins!
4. Mash Those Bananas
In another bowl, mash your ripe bananas until smooth. The riper, the better! Bananas with a few brown spots are perfect for baking as they provide natural sweetness.
5. Combine Wet Ingredients
To the mashed bananas, add honey (or maple syrup) and mix well. Then fold in the grated carrots. You’ll notice how vibrant the mixture becomes; it’s a feast for the eyes!
6. Blend Wet and Dry Ingredients
Create a well in the dry ingredients bowl and pour the banana-carrot mixture right in! Gently stir until just combined. Overmixing can make your cookies tough, so be gentle!
7. Mix in Nuts and Dried Fruits
Now, add in your chopped nuts and raisins/dried cranberries. Feel free to taste test here—nothing like sneaking a few chocolate chips into the batter if that’s your jam!
8. Scoop the Dough
Using a generous tablespoon or cookie scoop, drop heaping mounds of dough onto your prepared baking sheet. Leave some space between each cookie; they will spread slightly while baking.
9. Bake to Perfection
Pop those cookies into the oven and bake for 12-15 minutes, or until they become a light golden brown. Your kitchen will soon be filled with the most delightful aroma!
10. Cool and Enjoy
Once baked, let the cookies cool on the sheet for 5 minutes before transferring them to a wire rack to cool completely. This little wait ensures they firm up nicely without falling apart.
Serving Suggestions
To serve your incredible healthy carrot cake oatmeal cookies, plate them on a colorful dish, maybe with a sprig of mint for a pop of color. Pair them with a warm cup of tea or coffee for a lovely afternoon treat. These cookies are also great for lunchboxes or as a quick breakfast grab-and-go item. Trust me, your friends and family will be begging for more!
Recipe Variations
- Add Coconut Flakes: For a tropical twist, fold in unsweetened shredded coconut.
- Spiced Carrot Cake: Add a dash of ginger or cardamom to amp up the spice profile.
- Vegan Swap: Use flax eggs (1 tablespoon flaxseed meal+ 2.5 tablespoons water) instead of eggs and replace honey with maple syrup to make them vegan-friendly.
- Peanut Butter or Almond Butter: Swapping some of the banana with nut butter can introduce a creamy decadence!
- Chocolate-Dipped Cookies: Drizzle or dip the cooled cookies in melted dark chocolate for a decadent finish.
Chef’s Notes
These healthy carrot cake cookies have evolved significantly since my first attempt. Initially, they were just basic oatmeal cookies. But with all the taste tests and experiments, I finally hit the jackpot with this version!
I recall one baking adventure where I added too much grated carrot—my family was skeptical, but I was determined. I ended up with mini ‘carrot cakes’ that were dense yet delightful! It became a hit after that, proving that sometimes, kitchen mishaps can lead to the best surprises.
FAQs and Troubleshooting
Q: Can I make these cookies gluten-free?
Absolutely! Just substitute the whole wheat flour with a gluten-free flour blend or almond flour. Ensure your oats are certified gluten-free as well.
Q: My cookies turned out dry. What happened?
This could be due to overbaking or too much flour. Make sure you’re measuring your ingredients accurately and adjust the baking time based on your oven, as they can vary.
Q: Can I freeze these cookies?
Yes! These cookies freeze beautifully. Just place them in a single layer on a baking sheet until frozen solid, then transfer to an airtight container separated by parchment paper. Thaw them in the fridge or microwave as needed.
Q: How do I store these cookies?
Store your healthy carrot cake oatmeal cookies in an airtight container at room temperature for 3-4 days or in the fridge for up to a week. They also taste wonderful cold!
Nutritional Info
Each cookie (based on the recipe making 24 cookies) has approximately:
- Calories: 100
- Protein: 2g
- Fat: 2.5g
- Carbohydrates: 17g
- Fiber: 2g
- Sugar: 5g
Now that you have everything you need to whip up these delicious healthy carrot cake oatmeal cookies, it’s time to get back into the kitchen! Let’s celebrate the flavors that bring us joy, indulge in some healthy sweetness, and create lasting memories with those we love. Happy baking, friends! 🍪✨
Print
Healthy Carrot Cake Oatmeal Cookies
- Total Time: 30 minutes
- Yield: 24 cookies 1x
- Diet: Vegetarian
Description
These healthy carrot cake oatmeal cookies are a delicious and nutritious treat, combining the flavors of traditional carrot cake with wholesome ingredients for a guilt-free indulgence.
Ingredients
- 1 cup rolled oats
- 1 cup whole wheat flour
- 1 cup grated carrots
- 2 ripe bananas, mashed
- 1/3 cup honey or maple syrup
- 1 teaspoon cinnamon
- 1/2 teaspoon nutmeg
- 1/2 cup chopped nuts (walnuts or pecans)
- 1/2 cup raisins or dried cranberries
- 1 teaspoon baking soda
- 1 teaspoon baking powder
- Pinch of salt
Instructions
- Preheat the oven to 350°F (175°C).
- Prepare a baking sheet lined with parchment paper.
- Mix the rolled oats, flour, baking soda, baking powder, cinnamon, nutmeg, and salt in a large bowl.
- Mash the ripe bananas until smooth.
- Combine the mashed bananas with honey (or maple syrup) and fold in the grated carrots.
- Blend the banana-carrot mixture with the dry ingredients until just combined.
- Mix in chopped nuts and raisins/dried cranberries.
- Scoop mounds of dough onto the prepared baking sheet, leaving space between each cookie.
- Bake for 12-15 minutes until golden brown.
- Cool on the baking sheet for 5 minutes before transferring to a wire rack.
Notes
These cookies can be made gluten-free by using gluten-free flour and certified gluten-free oats. They can also be frozen for later enjoyment.
- Prep Time: 15 minutes
- Cook Time: 15 minutes
- Category: Snack
- Method: Baking
- Cuisine: American
Nutrition
- Serving Size: 1 cookie
- Calories: 100
- Sugar: 5g
- Sodium: 50mg
- Fat: 2.5g
- Saturated Fat: 0g
- Unsaturated Fat: 2g
- Trans Fat: 0g
- Carbohydrates: 17g
- Fiber: 2g
- Protein: 2g
- Cholesterol: 0mg
Keywords: carrot cake, oatmeal cookies, healthy cookies, vegetarian snacks, wholesome dessert
Strawberry Sago
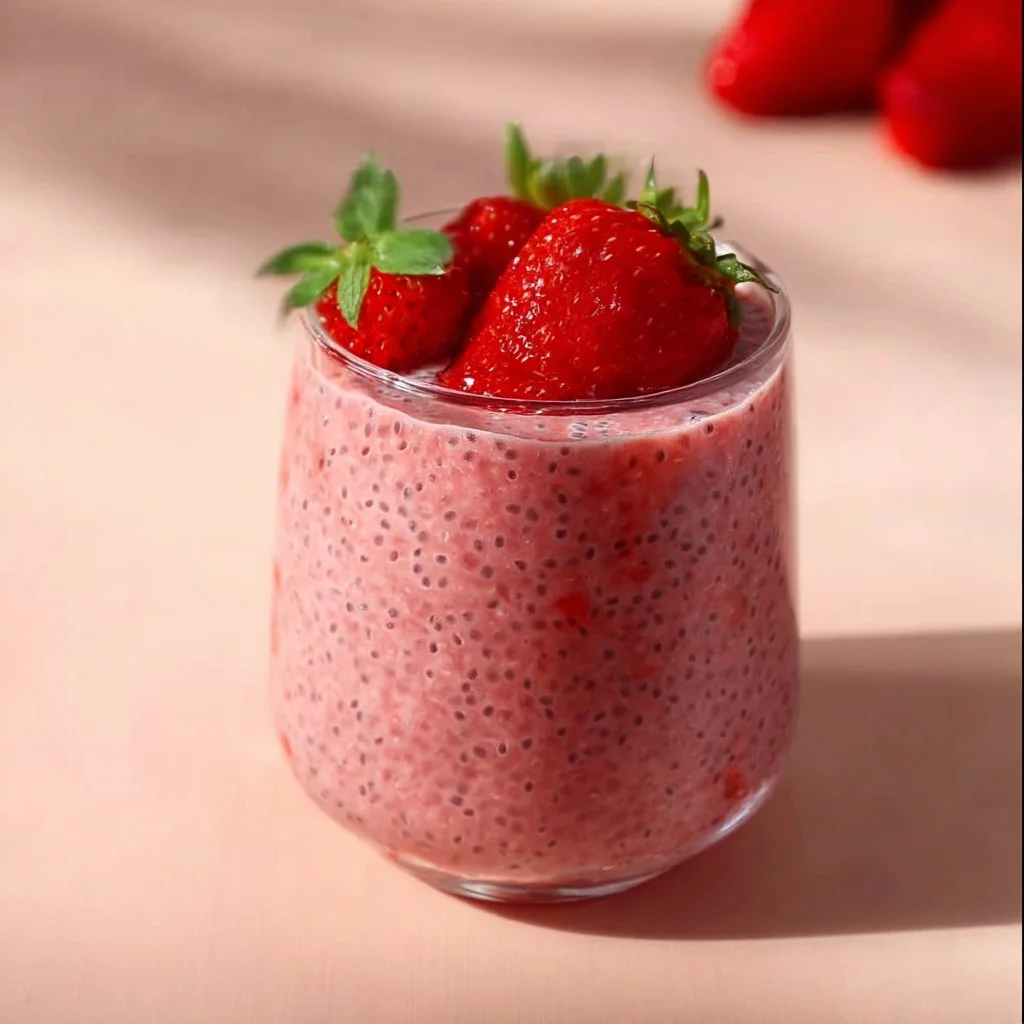
Strawberry Sago: A Sweet, Nostalgic Delight
Hello there, fellow food enthusiasts! It’s Olivia Bennett here, welcoming you back into my cozy kitchen where delicious aromas mingle with laughter, and every recipe has a story to tell. Today, I’m excited to share a recipe that’s not only a hit in the summer but also a delightful embrace of nostalgia—the delightful Strawberry Sago.
Now, if you haven’t had the pleasure of tasting this gem yet, let me fill you in. Imagine a bowl of creamy coconut milk, dotted with soft, chewy sago pearls, and luscious strawberries that burst with sweetness in every spoonful. This dessert is an ode to the warm, sun-kissed days of summer and a tribute to simple, wholesome ingredients that evoke fond memories at the table.
What I love most about this recipe—besides the incredible taste—is how flexible it is! It can easily be adjusted to suit your personal tastes or whatever is hanging out in your pantry. Whether you’re using fresh strawberries from the farmer’s market or some frozen ones you have stashed away, this strawberry sago will make your heart sing. So grab your apron, let’s get started, and I’ll guide you through this sweet, fruity journey step by step!
Personal Story
Ah, strawberry sago—one of those dishes that takes me right back to my childhood summers! I remember sitting on my grandma’s porch, the sun beating down but a light breeze cooling my cheeks. Grandma used to whip up this dessert every time she spotted strawberries on sale at the local market. She’d chat about her gardening exploits while I’d watch the sago pearls bubble away in the pot, mesmerized by their transformation from tiny grains to plump little gems.
One particular afternoon, my little brother and I decided to “help” her in the kitchen. With our tiny hands, we managed to turn her perfect batch of strawberry sago into an adventure of our own—adding in ingredients we thought would be ‘fun,’ like a sprinkle of cinnamon and chocolate chips (what were we thinking?). While Grandma laughed at our creative endeavors, the truth is, that playful kitchen experiment turned into one of our favorite summer memories. Later that summer, with her cozy, warm laugh echoing in my ears, I enjoyed my first-ever bowl of the perfectly uncomplicated strawberry sago. Ever since, I’ve known that sometimes, the best recipes are those that come from a place of love and creativity. And so, this recipe has gained a cherished spot in my heart, and today, I can’t wait to share it with you!
Ingredients
Let’s gather our ingredients! This strawberry sago is simple yet totally scrumptious. Here’s what you need:
-
Sago Pearls (1 cup)
- These little gems are the star of the show. Commonly used in desserts throughout Southeast Asia, sago pearls are made from the starch of the sago palm. If you can’t find sago pearls, you can substitute with tapioca pearls; they have a similar chewy texture!
-
Coconut Milk (2 cups)
- This luscious liquid will add that creamy richness we all love. I recommend using full-fat coconut milk for the best flavor. If you’re looking for a lighter version, feel free to swap with light coconut milk or almond milk for a nutty twist.
-
Fresh Strawberries (2 cups, hulled and sliced)
- As mentioned, fresh is fabulous! But if they are out of season, frozen strawberries work well too. Just let them thaw and slice, and you’ll get the same deliciousness!
-
Sugar (½ cup, adjust to taste)
- This will enhance the sweetness of your strawberries, but you can also use honey or maple syrup for a more natural sweetener.
-
Water (4 cups)
- For cooking the sago. Use filtered water for the best results!
-
Salt (a pinch)
- Just a sprinkle! It elevates the flavors and balances the sweetness.
-
Vanilla Extract (1 teaspoon, optional)
- A touch of vanilla adds warmth and depth. If you don’t have it on hand, you can skip it without missing out.
Step-by-Step Instructions
Step 1: Cook the Sago Pearls
-
Rinse the Sago: Begin by rinsing the sago pearls in cold water. This step helps to wash off any extra starch and ensures that they remain separate while cooking.
-
Boil the Water: In a medium-sized pot, bring 4 cups of water to a gentle boil.
-
Add the Sago: Once bubbling, drop the rinsed sago into the pot. Reduce the heat to low and let them cook for about 15 minutes, stirring occasionally. You’ll see them gradually turning translucent as they cook—this is the magic of transformation!
-
Check for Doneness: After 15 minutes, taste a pearl. It should be chewy but not hard. If needed, cook for a few more minutes. Once ready, remove from heat and drain them in a fine mesh strainer. Rinse under cold water to stop the cooking process. Set aside.
Step 2: Prepare the Sweet Coconut Base
-
Heat the Coconut Milk: In the same pot, pour in the coconut milk. Add the sugar and a pinch of salt. Stir everything together on medium heat until the sugar dissolves but don’t let it boil!
-
Add Vanilla: If you’re using vanilla extract, add it now and stir well. The aroma will fill your kitchen with warmth and sweetness!
Step 3: Combine Everything
-
Mix in Sago: Add the cooked sago pearls to the coconut milk mix and stir gently to combine. Let this simmer for another 5-7 minutes over low heat. This allows the sago to soak up the rich coconut flavor.
-
Fold in Strawberries: Once everything is well mixed, fold in the sliced strawberries, reserving a few for garnish. Let it sit for about 2-3 minutes just to warm the strawberries slightly. I love the way the heat makes them juicy!
Step 4: Serving the Strawberry Sago
- Cool Down: You can serve this warm or chilled. If you prefer a cold dessert, let the mixture cool at room temperature, then transfer it to the refrigerator for at least an hour.
Serving Suggestions
When it’s your time to serve, the presentation can elevate this dish from tasty to truly stunning! Pour the strawberry sago into lovely serving bowls or glasses. Load them up with the vibrant pink-stained sago and strawberries. Top with a drizzle of extra coconut milk and sprinkle some toasted coconut flakes if you feel fancy! Those little touches create a beautiful platter that’s perfect for enjoying with friends and family!
Recipe Variations
Feeling adventurous? Here are a few of my favorite twists on this classic strawberry sago:
-
Tropical Blend: Add diced mango and pineapple along with the strawberries for a tropical paradise in a bowl!
-
Lychee Delight: Substitute fresh lychees for the strawberries—this variation adds a unique floral flavor that’s simply wonderful.
-
Chocolate Sago: Mix in some cocoa powder for an indulgent chocolate twist. Use dark chocolate for a richer experience!
-
Herbal Infusion: Infuse the coconut milk with pandan leaves while heating for a fresh, aromatic flavor that complements the strawberries beautifully.
-
Contrast Crunch: Add nuts like toasted almonds or coconut flakes for an extra texture and crunch!
Chef’s Notes
This recipe has been a staple in my kitchen for as long as I can remember, and each time I make it, I sprinkle in a little nostalgia and love. The beauty of strawberry sago lies in its adaptability; you can play with the flavors and textures according to what ingredients you have on hand or what excites your palate on any given day. I recall experimenting with different fruits as I went along—never once did I make a bad batch! Although, I will admit, there was that one time I accidentally added too much sugar… let’s just say, it was a very sweet night!
FAQs and Troubleshooting
1. My sago pearls are still hard. What did I do wrong?
If your sago pearls are hard after cooking, they may need more time! Allow them to simmer longer in the water before draining. Keep an eye on them, as you don’t want them to turn mushy.
2. Can I make it ahead of time?
Absolutely! Strawberry sago can be made a day in advance and stored in the refrigerator. Just give it a gentle stir before serving. The flavors will meld beautifully overnight!
3. What if I want to make this vegan?
This recipe is already vegan as long as you use plant-based sweeteners like maple syrup instead of regular sugar. Enjoy!
4. Can I use other fruits?
Definitely! While strawberries are delicious, you can swap them for your favorite seasonal fruits. Don’t hesitate to experiment; the world of fruit is your oyster!
Nutritional Info
For those curious about the numbers, a typical serving of strawberry sago contains:
- Calories: Approximately 180-250 (depends on your sweetener and coconut milk)
- Carbohydrates: 25-30g
- Fats: 8-10g
- Protein: 2-3g
Please adjust based on specific ingredients used!
And there you have it! A delightful, nostalgic dessert that you can whip up without breaking a sweat. Strawberry sago is not just a recipe; it’s an experience filled with warmth, family, and sweet memories. I hope you find joy in creating this dish as much as I do. So, gather your ingredients, and let that cooking spirit shine! Happy cooking, my friends! 🍓🥥✨
Print
Strawberry Sago
- Total Time: 30 minutes
- Yield: 4 servings 1x
- Diet: Vegan
Description
A delightful dessert featuring creamy coconut milk and chewy sago pearls, complemented by fresh strawberries for a nostalgic summertime treat.
Ingredients
- 1 cup Sago Pearls
- 2 cups Coconut Milk
- 2 cups Fresh Strawberries, hulled and sliced
- ½ cup Sugar (adjust to taste)
- 4 cups Water
- a pinch Salt
- 1 teaspoon Vanilla Extract (optional)
Instructions
- Rinse the sago pearls in cold water to wash off any extra starch.
- Boil the water in a medium-sized pot.
- Add the rinsed sago to the pot and reduce the heat, cooking for about 15 minutes until translucent.
- Check the sago for doneness and drain in a fine mesh strainer, rinsing with cold water.
- Heat the coconut milk in the pot with sugar and salt until dissolved without boiling.
- Add vanilla extract if using and stir well.
- Mix in the cooked sago into the coconut mix and let it simmer for another 5-7 minutes.
- Fold in the sliced strawberries and let sit to warm slightly.
- Cool the mixture down before serving warm or chilled.
Notes
Can be made a day in advance and stored in the refrigerator. Adjust sugar according to taste. Serve in bowls with optional coconut milk and toasted coconut flakes.
- Prep Time: 10 minutes
- Cook Time: 20 minutes
- Category: Dessert
- Method: Boiling
- Cuisine: Southeast Asian
Nutrition
- Serving Size: 1 serving
- Calories: 220
- Sugar: 12g
- Sodium: 5mg
- Fat: 10g
- Saturated Fat: 8g
- Unsaturated Fat: 2g
- Trans Fat: 0g
- Carbohydrates: 30g
- Fiber: 1g
- Protein: 3g
- Cholesterol: 0mg
Keywords: strawberry dessert, sago recipe, summer dessert, vegan sago, coconut milk dessert
Strawberry Cheesecake Cookies (Pretty & Delicious!)
Strawberry Cheesecake Cookies: Pretty & Delicious!
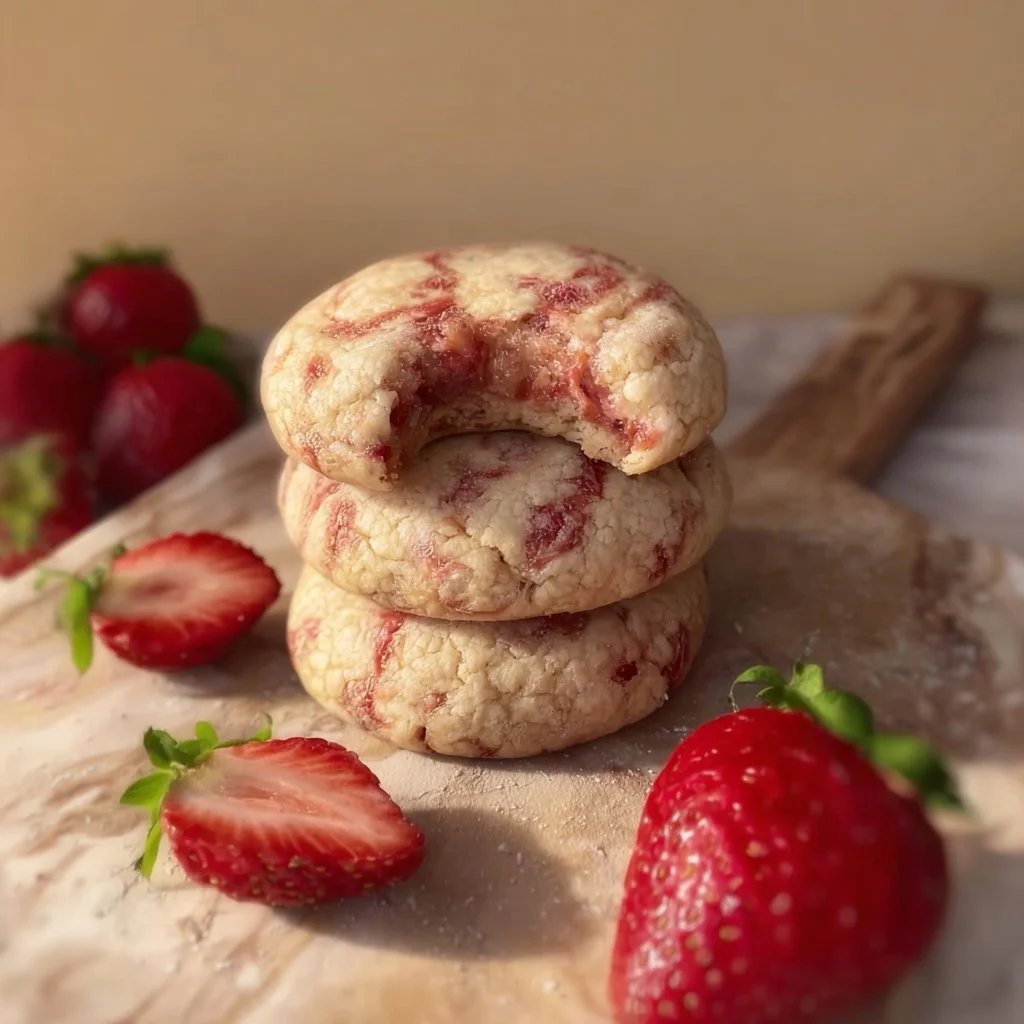
Welcome back to my kitchen, friends! Today, I’m thrilled to share a recipe that’s near and dear to my heart: Strawberry Cheesecake Cookies. Just saying the name brings a smile to my face, and I can almost smell the sweet, creamy aroma wafting through my kitchen. Picture this: tender, chewy cookies infused with rich cream cheese and bursting with the vibrant sweetness of fresh strawberries. They are a little bite of cloud-like bliss that’s not only visually captivating but also perfect for any occasion.
Whether you’re looking for a fun treat to brighten up your week or a fabulous dessert to impress at your next gathering, these cookies deliver that “wow” factor with every bite. What I love most about them is the delightful fusion of textures and flavors. The creaminess of the cheesecake-inspired dough, coupled with the juicy strawberries, creates a cookie experience that transcends your regular baked goods. Plus, they’re a great way to celebrate strawberry season!
The idea of turning a classic cheesecake into a cookie form was inspired by those lovely warm afternoons where the sun shines just right, and the world feels just a little bit more magical. For me, it’s about finding joy in baking and sharing delicious treats with loved ones. So, pull up a chair, put on your apron, and let’s get baking! I promise these cookies will bring a smile to your face and a sweet taste to your day.
Personal Story
Growing up, my family had a beautiful tradition of gathering for Sunday brunch. It was a time when we would savor delightful homemade dishes, engage in lively conversations, and share stories that still make us laugh today. One Sunday, my grandmother surprised us all with her famous cheesecake — a dish that everyone in the family loved. The creamy filling paired with the bright tartness of strawberries was simply irresistible.
As we gathered around the table, I remember watching her whip up the cheesecake with such ease, telling stories as she effortlessly folded in the strawberries. I was captivated. Inspired by that cherished memory, I decided to create a unique version of that classic treat: Strawberry Cheesecake Cookies! Not only do they evoke nostalgia, but they also bring my family together in the same way. Every time I bake them, I can’t help but think of those cozy brunches filled with laughter, love, and lots of cheesecake!
Ingredients
Let’s gather our ingredients! Here’s what you’ll need to create your Strawberry Cheesecake Cookies, along with a few helpful insights:
-
1 cup unsalted butter, softened
Butter adds richness and moisture to the cookies. If you’re in a pinch, feel free to substitute with margarine or coconut oil for a dairy-free option. -
1 cup cream cheese, softened
This is the star of the show! Cream cheese gives that iconic cheesecake flavor. For a lower-fat option, try Neufchâtel cheese, which has less fat but a similar taste! -
1 cup granulated sugar
Sugar adds sweetness and helps with the cookie structure. You can use coconut sugar for a more caramel-like flavor or a sugar substitute for a healthier option. -
1 large egg
Eggs provide moisture and bind the ingredients together. For a vegan option, you can use a flax egg (1 tablespoon of ground flaxseed mixed with 2.5 tablespoons of water) to achieve the binding effect! -
2 cups all-purpose flour
This forms the base of the cookies. For a gluten-free version, substitute with gluten-free all-purpose flour, and add a touch of xanthan gum to help with the texture! -
1 teaspoon vanilla extract
Vanilla enhances the flavor profile, giving it that comforting aroma. Consider using almond extract for a nuttier flavor or leave it out completely if preferred. -
1 teaspoon baking powder
This gives your cookies that lift and fluffiness. Baking soda can also be used if you’re out of baking powder; just adjust the acidity with a touch of vinegar! -
½ teaspoon salt
A pinch of salt balances the sweetness and brings out the flavors. Sea salt or Himalayan salt can be great alternatives for a different flavor. -
1 cup fresh strawberries, diced
Fresh strawberries bring sweetness and a burst of flavor. You can also use freeze-dried strawberries for a more concentrated flavor if fresh ones aren’t available!
Step-by-Step Instructions
Now, let’s dive into the fun part — baking those Strawberry Cheesecake Cookies! Here’s how to make them step-by-step:
Step 1: Preheat the Oven
Start by preheating your oven to 350°F (175°C). This initial heat is crucial for achieving that perfect, chewy texture in your cookies. A hot oven means that the cookies will rise beautifully!
Step 2: Cream the Butter and Cream Cheese
In a large mixing bowl, beat together the softened butter and cream cheese until the mixture is creamy and smooth. This should take about 2-3 minutes of beating. You want that lovely, light texture to form!
Chef’s Tip: Use an electric mixer for this step if you want to save time and energy! You can also mix by hand with a strong spatula, but it may take a bit longer.
Step 3: Add Sugar and Egg
Now, add the granulated sugar and egg to the mixture. Beat again until everything is well combined. This will create a wonderfully fluffy base for your cookie dough.
Little Hack: Don’t just crack the egg directly into the bowl! Crack it into a separate dish first to avoid getting any shell bits in your mixture.
Step 4: Combine Dry Ingredients
In another bowl, mix together the flour, baking powder, and salt. This ensures that the flour is evenly distributed and the cookies have a nice rise. Gradually add this dry mixture to the wet ingredients, mixing until just combined. Over-mixing can lead to tough cookies, so be gentle!
Step 5: Fold in Strawberries
Once your dough is ready, gently fold in the diced fresh strawberries. You should see vibrant bits of red speckle throughout — this makes the cookies extra pretty!
Chef’s Note: If your strawberries are particularly juicy, consider patting them dry with a paper towel before mixing them in. This prevents the dough from becoming overly wet.
Step 6: Scoop and Bake
Line your baking sheet with parchment paper. Using a cookie scoop (or two spoons), drop heaping tablespoons of dough onto the sheet, leaving enough space between each cookie to allow for spreading. Bake in your preheated oven for 12-15 minutes, or until the edges are lightly golden.
Pro Tip: If you want an extra burst of strawberry flavor, reserve a few pieces to sprinkle on top before baking.
Step 7: Cool and Enjoy
Once they’re done, remove the cookies from the oven, and let them cool on the baking sheet for 5 minutes before transferring them to a wire rack to cool completely. The cooling process allows the cookies to set up perfectly — you don’t want to bite into a gooey mess!
Serving Suggestions
Serve these gorgeous Strawberry Cheesecake Cookies on a beautiful platter or in a fun, rustic basket lined with a cloth napkin. They pair perfectly with a cup of coffee, tea, or even a tall glass of milk! For a little added flair, dust the cookies with powdered sugar before serving for a hint of elegance.
Recipe Variations
Feeling adventurous? Here are a few creative twists you can try with your Strawberry Cheesecake Cookies:
-
Chocolate Chips: Add a handful of semi-sweet or white chocolate chips to the dough for a decadent chocolate-strawberry combo.
-
Lemon Zest: Incorporate zest from one lemon into the dough for a zesty kick that complements the strawberries beautifully.
-
Nuts: Fold in some chopped pecans or walnuts for an extra crunch and delightful flavor.
-
Dried Fruits: Swap strawberries for dried cranberries or cherries for a tart flavor twist.
-
Coconut Flakes: Add unsweetened coconut flakes for a tropical flair!
Chef’s Notes
As with all recipes, this one has evolved over time. Originally, I just made a basic cheesecake but quickly realized I wanted something that was a bit more fun and portable. Cookies seemed like the perfect solution! Whenever I bake these, I always think of Grandma, who never shyed away from adding her personal touch. Sometimes, I even leave a few unbaked cookies in the fridge overnight — they taste even better the next day when the flavors have had time to meld!
Oh, and let me share a funny little kitchen blunder! One time, I got so caught up in nostalgia that I accidentally added salt instead of sugar. Let’s just say those batch didn’t make it very far! But hey, the lesson learned? Always double-check the labels!
FAQs and Troubleshooting
1. Why are my cookies flat?
If your cookies spread too much, it could be due to melted butter. Ensure your butter is softened, not melted. Additionally, chilling the dough for about 30 minutes before baking can help them hold their shape better!
2. Can I use frozen strawberries?
Yes, you can use frozen strawberries! Just be sure to thaw them first and pat them dry to remove excess moisture before adding them to the dough.
3. How do I store leftover cookies?
Store your cookies in an airtight container at room temperature for up to 5 days. For longer storage, you can freeze them for up to 3 months. Just make sure to separate layers with parchment paper to prevent sticking!
4. Can I make the dough ahead of time?
Absolutely! You can prepare the dough ahead of time and keep it in the fridge for up to 24 hours. Just scoop and bake when you’re ready!
Nutritional Info (Optional)
Calories per cookie (estimated): 150
Total Fat: 7g
Carbohydrates: 20g
Protein: 2g
(Values may vary based on ingredient brands and amounts used.)
There you have it, my friends — a delightful recipe that will add a pop of color and joy to your baking repertoire! I hope you enjoy making these Strawberry Cheesecake Cookies as much as I do. Remember, baking is all about the love you put into it, so let that heart shine through every cookie you make. Happy baking! 🍓🧁
Print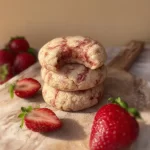
Strawberry Cheesecake Cookies
- Total Time: 30 minutes
- Yield: 24 servings 1x
- Diet: Vegetarian
Description
Delicious and visually captivating cookies infused with rich cream cheese and fresh strawberries.
Ingredients
- 1 cup unsalted butter, softened
- 1 cup cream cheese, softened
- 1 cup granulated sugar
- 1 large egg
- 2 cups all-purpose flour
- 1 teaspoon vanilla extract
- 1 teaspoon baking powder
- ½ teaspoon salt
- 1 cup fresh strawberries, diced
Instructions
- Preheat the oven to 350°F (175°C).
- Cream the butter and cream cheese in a large mixing bowl until smooth.
- Add sugar and egg to the mixture and beat until well combined.
- Combine dry ingredients (flour, baking powder, and salt) in another bowl.
- Gradually add the dry mixture to the wet ingredients, mixing until just combined.
- Fold in the diced strawberries.
- Scoop heaping tablespoons of dough onto a lined baking sheet and bake for 12-15 minutes.
- Cool on a wire rack before serving.
Notes
Chill the dough for about 30 minutes before baking for a better cookie shape.
- Prep Time: 15 minutes
- Cook Time: 15 minutes
- Category: Dessert
- Method: Baking
- Cuisine: American
Nutrition
- Serving Size: 1 cookie
- Calories: 150
- Sugar: 8g
- Sodium: 80mg
- Fat: 7g
- Saturated Fat: 4g
- Unsaturated Fat: 2g
- Trans Fat: 0g
- Carbohydrates: 20g
- Fiber: 1g
- Protein: 2g
- Cholesterol: 30mg
Keywords: cookies, cheesecake, strawberry, dessert, sweet treats
Frozen Yogurt Granola Power Cups
Frozen Yogurt Granola Power Cups: A Joyful Treat to Energize Your Day!
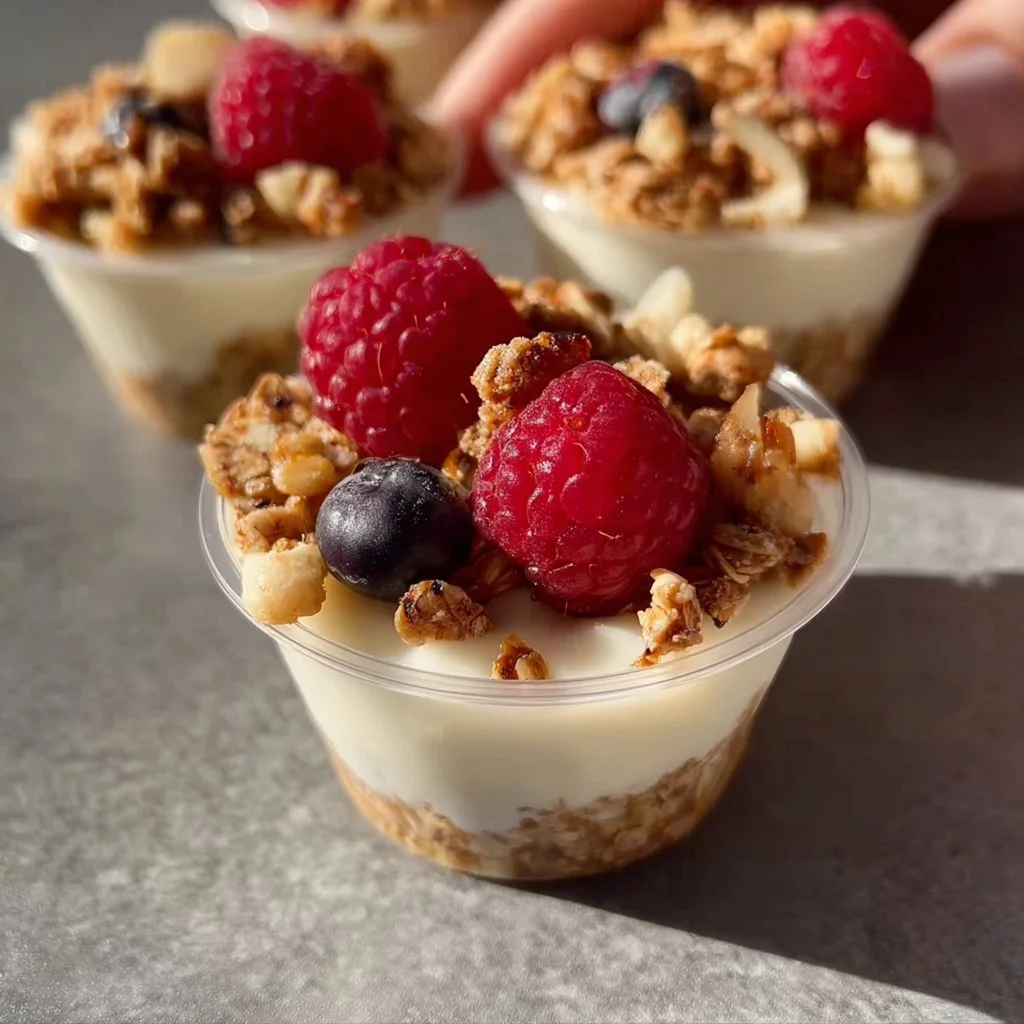
Hey there, fellow food lovers! 🌟 Welcome back to my cozy kitchen! Today, we’re diving into a delightful recipe that’s just as fun to make as it is to devour — Frozen Yogurt Granola Power Cups. Picture this: creamy yogurt paired with crunchy granola, sweet fruits, and a drizzle of honey. They’re bite-sized bundles of joy that will fuel your day and satisfy your craving for something sweet yet wholesome.
Now, I know what you’re thinking. "Frozen yogurt? Granola? This sounds like a fancy café treat!" But let me assure you, these power cups are super easy to whip up at home, and you don’t need any culinary degree to impress with them. Just a love for delicious food and a few ingredients from your pantry. Whether you’re prepping for breakfast, a snack on the go, or a fun dessert to share with friends, these cups come to the rescue!
As we journey through this recipe, I’ll share a little bit of my backstory and highlight some tips and tricks along the way. So grab your favorite apron (mine has flour stains that tell stories of countless baking adventures), and let’s get started on making these flavorful cups that are perfect for any occasion!
Personal Story
I’ll never forget the first time I attempted to create my own frozen yogurt treats. It was a summer afternoon, and the sun was blaring down on our backyard. My cousin and I were looking for a way to beat the heat, so we headed to the kitchen to concoct something refreshing. We didn’t have much in the fridge, but we had plain yogurt, some leftover granola from breakfast, and a few frozen berries hiding in the freezer.
With laughter echoing through the kitchen, we mixed everything together haphazardly, packed the mixture into muffin tins, and shoved them into the freezer without much thought. After a couple of hours, we dove into our newfound creation — it was a glorious mess of creamy, fruity goodness! From that day on, frozen yogurt cups have held a special place in my heart. They remind me of sunny days, giggles, and a happy sense of freedom in the kitchen. Now, I’m passing on that joy to you!
Ingredients
Here’s what you’ll need to create your own Frozen Yogurt Granola Power Cups:
-
Greek Yogurt: The star of this recipe! Greek yogurt is creamy, tangy, and loaded with protein. If you’re looking for a lighter option, you can substitute it with low-fat yogurt or dairy-free yogurt alternatives, like coconut yogurt.
-
Granola: A crunchy topper that adds texture and flavor. Look for a granola that isn’t overly sweet, or make your own! You can easily swap this with puffed rice or crushed nuts for a gluten-free option.
-
Honey or Maple Syrup: A natural sweetener that brings everything together. If you prefer a vegan option, maple syrup works beautifully here. Need it sugar-free? Try using stevia or another natural sweetener.
-
Fresh or Frozen Fruits: Berries, bananas, or even apples — the possibilities are endless! Fresh fruits give a vibrant color and flavor, while frozen fruits can add a refreshing touch. You can also swap them for dried fruits like raisins or cranberries for different textures.
-
Nut Butter (optional): To give your cups an extra boost, consider adding a spoonful of almond or peanut butter. This will not only enhance the flavor but also add more healthy fats to keep you satisfied.
-
Chia Seeds (optional): If you’re looking to up the nutritional profile, add some chia seeds. They’re a fantastic source of omega-3 fatty acids and fiber. No chia? No problem! You can skip this ingredient without compromising the recipe.
Step-by-Step Instructions
Let’s get cooking! Here’s how you create these delicious Frozen Yogurt Granola Power Cups:
-
Prepare Your Molds: Grab a muffin tin or silicone cupcake tray. I love using silicone because it makes removing the cups a breeze! If you’re using a metal muffin tin, consider putting paper liners in for easier serving.
-
Combine the Yogurt and Sweetener: In a mixing bowl, add 2 cups of Greek yogurt and a generous drizzle of honey or maple syrup (about 2-3 tablespoons). Stir well until the mixture is smooth and creamy. The sweetness is all about personal preference, so taste it as you mix and adjust accordingly!
-
Add Nut Butter: If you decided to use nut butter, now’s the time to mix in ¼ cup of your favorite nut butter. This will enrich the flavor and texture. Make sure to fold it in gently so you keep that beautiful, creamy yogurt base.
-
Layer Your Ingredients: Spoon a layer of your yogurt mixture into each muffin tin compartment, filling them about halfway. Then grab your granola — about a tablespoon per cup — and sprinkle it on top of the yogurt. Press it gently so it sticks and creates a nice layer.
-
Top with Fruits: Now it’s time for the fun part! Add your fresh or frozen fruit on top of the granola layer. If you’re using frozen fruit, try to break it into smaller pieces so they fit well in the cups.
-
Complete the Layers: Spoon a little more yogurt on top of the fruits until you reach the top of each cup. Give a little tap on the counter to settle everything down — it ensures the yogurt fills in any gaps.
-
Final Touches: If you’d like, you can sprinkle a few more granola bits on the top for added crunch and garnish. This is also where you can sprinkle chia seeds if you’re using them.
-
Freeze: Cover the muffin tin with plastic wrap or foil and pop it in the freezer for at least 4 hours, or until the power cups are frozen solid.
-
Serve: Once they’re nicely frozen, carefully pop the cups out of the molds. If it’s a bit tricky, run a little warm water over the bottom of the muffin tin to help release them.
-
Enjoy: Serve as a delicious snack or a sweet breakfast treat! They can stay in the freezer for weeks, so feel free to batch-make them and always have some on hand. Enjoy every delightful bite!
Serving Suggestions
For serving, I like to arrange the Frozen Yogurt Granola Power Cups on a lovely platter, garnished with a sprinkle of fresh mint or edible flowers for a pop of color. They’re perfect for summer parties, breakfast on-the-go, or just as a cozy treat in the evening. Pair them with a cup of coffee or a refreshing iced tea, and you’ve got a winning combination that’s sure to impress!
Recipe Variations
Feeling creative? Here are a few fun twists you can try with your Frozen Yogurt Granola Power Cups:
-
Chocolate Lovers: Add a spoonful of cocoa powder to the yogurt mix for a chocolatey trend, or drizzle melted dark chocolate over the top before freezing. Yum!
-
Tropical Escape: Replace the berries with diced mango and pineapple, and use coconut yogurt for a refreshing tropical twist.
-
Peanut Butter & Jelly: Layer your favorite fruit jam or jelly between the yogurt and granola layers for a nostalgic flavor.
-
Autumn Vibes: Mix in some pumpkin puree and pumpkin pie spice into the yogurt for a fall-inspired treat, and top with chopped pecans.
-
Protein Power: Stir a scoop of your favorite protein powder into the yogurt for an extra boost, making these perfect post-workout snacks!
Chef’s Notes
Oh, the memories these cups bring! I often whip them up when I’m having a busy week. They’re fantastic for breakfast on rushed mornings or as a mid-afternoon pick-me-up that keeps my energy levels up while I tackle my to-do list. This recipe has evolved over the years, influenced by friends and family. I still remember hosting a brunch where I served these alongside pancakes, and everyone raved about how refreshing they were. It’s all about sharing delicious memories through food, right?
Every time I make them, I like to change things up a bit, tossing in whatever fruits I have hanging around or whatever nut butter is in the pantry. The only consistent factor is the joy it brings to everyone who bites into them.
FAQs and Troubleshooting
Q: Can I use flavored yogurt instead of plain?
A: Yes, you can absolutely use flavored yogurt! Just keep an eye on the sweetness, as it may be sweeter than plain yogurt. This can add extra flavors to your cups!
Q: How can I prevent the cups from sticking to the molds?
A: Using silicone molds works wonders for easy removal. If you’re using metal, oiling the cups lightly with cooking spray before filling can help.
Q: Can I make these ahead of time?
A: Yes! These power cups freeze beautifully. Just make sure to store them in an airtight container or keep them covered in the muffin tin after they’re frozen. They’ll stay good for up to a month!
Q: My yogurt cups are too hard to bite into! What can I do?
A: Sometimes, they might freeze a little too solid. Let them sit at room temperature for a few minutes before serving, so they soften up a bit.
Nutritional Info (if applicable):
Each Frozen Yogurt Granola Power Cup (made with Greek yogurt, granola, and fruits) is approximately:
- Calories: 120
- Protein: 6g
- Carbohydrates: 15g
- Fats: 4g
- Fiber: 2g
- Sugar: 5g
(Note: Nutritional values will vary based on specific ingredients used.)
And there you have it! A straightforward, delicious, and versatile recipe for Frozen Yogurt Granola Power Cups. I can’t wait for you to try these! Remember to have fun while creating in the kitchen and make sure to share your creations with family and friends. Happy cooking! 🍽️✨
Print
Frozen Yogurt Granola Power Cups
- Total Time: 255 minutes
- Yield: 12 servings 1x
- Diet: Vegetarian
Description
Delightful bite-sized Frozen Yogurt Granola Power Cups filled with creamy yogurt, crunchy granola, and sweet fruits — a perfect energizing treat for any occasion!
Ingredients
- 2 cups Greek yogurt
- 2–3 tablespoons honey or maple syrup
- ¼ cup nut butter (optional)
- Granola, about 1 tablespoon per cup
- Fresh or frozen fruits (berries, bananas, apples, etc.)
- Chia seeds (optional)
Instructions
- Prepare your molds: Grab a muffin tin or silicone cupcake tray.
- Combine the yogurt and sweetener in a mixing bowl until smooth.
- Add nut butter if using, folding in gently.
- Layer yogurt mixture into muffin tin, filling halfway.
- Top with granola, pressing gently to stick.
- Add fruits on top of the granola layer.
- Complete with more yogurt until cups are full.
- Freeze for at least 4 hours until solid.
- Serve by popping the cups out of the molds and enjoy!
Notes
These cups can stay in the freezer for weeks, making them a convenient snack to have on hand. Feel free to customize with different fruits or nut butters.
- Prep Time: 15 minutes
- Cook Time: 240 minutes
- Category: Snack
- Method: Freezing
- Cuisine: American
Nutrition
- Serving Size: 1 cup
- Calories: 120
- Sugar: 5g
- Sodium: 50mg
- Fat: 4g
- Saturated Fat: 1g
- Unsaturated Fat: 3g
- Trans Fat: 0g
- Carbohydrates: 15g
- Fiber: 2g
- Protein: 6g
- Cholesterol: 10mg
Keywords: frozen yogurt, granola cups, healthy snack, meal prep, easy dessert, vegetarian
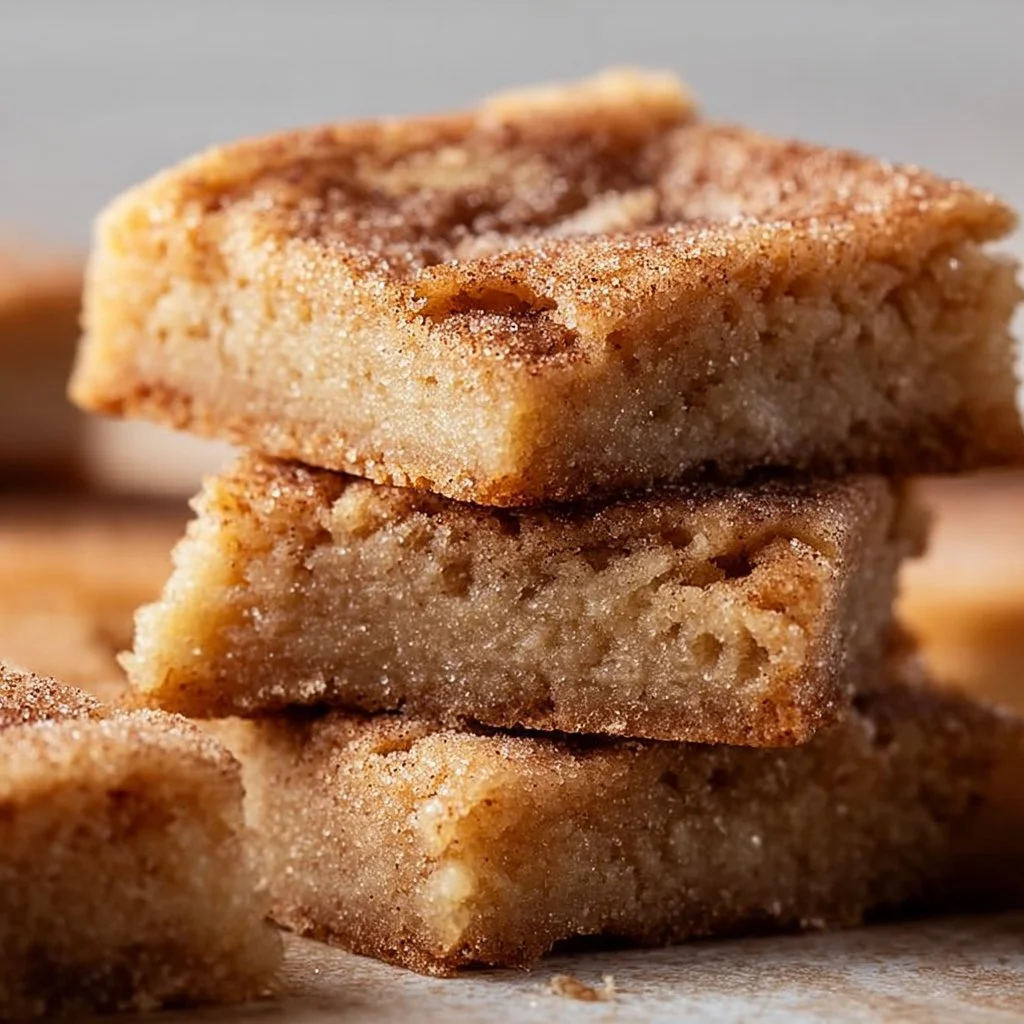
Cinnamon Sugar Blondies
The Sweet Delight of Cinnamon Sugar Blondies
Welcome to my cozy corner of the kitchen! Today, we’re diving into a treat that warms the heart and tickles the taste buds: Cinnamon Sugar Blondies. Picture this: golden bars, soft in the middle yet slightly crisp on the edges, enveloped in a heavenly blanket of cinnamon sugar. There’s something undeniably magic about these blondies – they’re the perfect blend of buttery goodness and spiced sweetness. Whether you’re enjoying a quiet afternoon at home or entertaining friends at a gathering, these blondies will surely steal the show.
Baking has this incredible ability to transform our spaces and moods, doesn’t it? The aroma of something sweet wafting through the air can instantly lift spirits and bring smiles. That’s precisely why I can’t wait to share this recipe with you! It’s so wonderfully simple yet so incredibly satisfying. And the best part? You don’t have to be a master chef to whip these up. With just a handful of pantry staples and a pinch of love, you’ll have everyone asking for seconds! So, grab your apron, and let’s get to it!
A Nostalgic Kitchen Memory
Every time I bake these blondies, I’m transported back to my childhood kitchen. I can still remember the delightful chaos of my family gatherings—everyone bustling about, laughter echoing, and the smell of something sweet wafting from the oven. My grandma, with her flour-dusted apron and twinkling eyes, was the mastermind behind our sweet treats.
One afternoon, as I watched her prepare for a family get-together, she casually tossed ingredients into a bowl, her eyes lighting up as she sprinkled in spices. “It’s all about the love you put in, dear,” she’d say. While I didn’t fully grasp what she meant then, each bite I took of her creations spoke volumes. The cinnamon-sugar blend she used became a staple in our desserts, including this very recipe.
These Cinnamon Sugar Blondies encapsulate not just flavor but also the warmth of those cherished moments spent in the kitchen. I still use her rhythm of mixing, her secret love for cinnamon, and the fun of sharing good food with those I love. Ready to create your own magical moments? Let’s get baking!
Ingredients
-
Unsalted Butter (1 cup, melted)
Butter is the backbone of many desserts. For a richer flavor, you can use brown butter, which adds a nutty taste. If you need a dairy-free option, coconut oil works well too. -
Brown Sugar (1 cup, packed)
Brown sugar gives these blondies their signature chewiness and depth. If you’re out of brown sugar, you can make a substitute by mixing white sugar with a bit of molasses. -
Granulated Sugar (½ cup)
This sugar helps create that slightly crispy edge. If you’re looking to cut back on sugar, you could reduce the granulated sugar by a couple of tablespoons, though the texture may change a bit. -
Eggs (2 large)
Eggs act as a binding agent, giving structure and moisture. If you’re vegan, unsweetened applesauce or flaxseed gel (1 tablespoon of flaxseed meal mixed with 2.5 tablespoons of water) can be great substitutes. -
Vanilla Extract (1 tsp)
Vanilla enhances all the flavors in your blondies. If you want a twist, consider using almond extract instead for a unique flavor profile. -
All-Purpose Flour (2 cups)
The base of your blondies! For gluten-free options, you can substitute with a 1:1 gluten-free flour blend. -
Baking Powder (1 tsp)
This gives the blondies a slight lift. Ensure your baking powder is fresh for the best texture. -
Salt (½ tsp)
A pinch of salt enhances the flavor profile. If you’re using salted butter instead of unsalted, you can cut back a bit on the added salt. -
Ground Cinnamon (2 tsp)
Cinnamon is the star here! You can try different spices, like nutmeg or cardamom, for a twist. -
Cinnamon Sugar Mixture (¼ cup granulated sugar + 1 tbsp ground cinnamon)
This is what you’ll sprinkle on top to create that crunchy, dreamy finish.
Step-by-Step Instructions
1. Preheat the Oven
Start by preheating your oven to 350°F (175°C). This ensures that the blondies bake evenly. Don’t forget to grease and line an 8×8-inch baking pan with parchment paper for easy removal afterward.
2. Mix Your Wet Ingredients
In a large bowl, combine the melted butter, brown sugar, and granulated sugar. Whisk them together until smooth and silky. You’ll want to beat it until it’s lighter in color and creamy in texture. This step is crucial since it incorporates air into the mix, leading to a lovely, chewy blondie.
3. Add Eggs and Vanilla
Once the mixture is creamy, add in the eggs one at a time, beating well after each addition. Next, stir in the vanilla extract. This added step helps bring out the flavors even more. You should notice your batter becoming rich and glossy!
4. Combine Your Dry Ingredients
In another bowl, whisk together the flour, baking powder, ground cinnamon, and salt. Mixing these dry ingredients separately ensures even distribution throughout the blondies.
5. Fold Dry Ingredients into Wet Ingredients
Gently fold the dry ingredients into your wet mixture with a spatula. Be careful not to overmix; we want to keep those blondies tender! Mix just until you see no dry flour left—lumps are totally okay!
6. Pour and Spread in the Pan
Transfer the batter into the prepared baking pan. Use your spatula to spread it out evenly. Feel free to give it a little shake to smooth it out. Now, this is where the magic happens!
7. Create Your Cinnamon Sugar Top
In a small bowl, mix together your granulated sugar and ground cinnamon. Sprinkle this heavenly mixture generously over the top of the blondie batter. The cinnamon sugar will create a deliciously crunchy exterior as they bake.
8. Bake ‘Em Up!
Pop the pan into your preheated oven and bake for 25-30 minutes. Keep an eye on them! You’re looking for a slightly golden top; a toothpick inserted should come out clean with just a few moist crumbs. Once done, let them cool in the pan for about 10 minutes before transferring them to a wire rack.
9. Slice and Enjoy!
After letting them cool a bit, slice your blondies into squares (or rectangles, if you’re feeling adventurous!). These delicious bites are now ready to impress! Serve warm or let them cool completely—either way, they’ll be a hit!
Serving Suggestions
When it comes to serving these blondies, let your creativity soar! They’re delightful on their own, but you can also serve them with a scoop of vanilla ice cream on top for that melty goodness. Drizzle some caramel sauce or a sprinkle of sea salt for an extra flavor punch. Present them on a beautiful platter or stack them high and tie with a ribbon for a sweet gift idea!
Recipe Variations
-
Add-Ins Galore: Try folding in chocolate chips, nuts, or even dried fruits like cranberries for a fun twist!
-
Pumpkin Spice Blondies: Replace some flour with pumpkin puree and add pumpkin spice to create a seasonal delight.
-
Nutty Brown Butter: Use brown butter instead of melted butter to deepen the flavor and aroma.
-
Frosted Delight: Top with a cream cheese frosting or a sweet glaze for an indulgent dessert option.
-
Coconut Dream: Add shredded coconut to the batter for a tropical vibe!
Chef’s Notes
Every time I whip up these blondies, I can’t help but reminisce about those happy kitchen moments with my grandma. They always remind me that cooking is about the joy we create along the way. A few years back, I decided to experiment by adding nutty brown butter to the base, and oh boy! It took these blondies to a whole new level. Don’t be afraid to play around with flavors and textures – this recipe serves as a canvas for your culinary creativity!
FAQs and Troubleshooting
Q: My blondies came out too dense; what did I do wrong?
A: It’s possible you overmixed the batter or added too much flour. Remember, gentle mixing is key!
Q: Can I double this recipe?
A: Absolutely! Just use a larger baking pan and adjust the baking time, checking for doneness.
Q: How do I store leftover blondies?
A: Store them in an airtight container at room temperature for up to three days. For longer storage, freeze them tightly wrapped for up to three months!
Q: What if I don’t have cinnamon?
A: No worries! Try experimenting with other spices like pumpkin spice or even cocoa powder for a chocolaty treat.
Nutritional Info
While I believe dessert is all about balance, if you’re curious, a typical serving of these blondies (assuming 16 servings) contains approximately:
- Calories: 200
- Total Fat: 9g
- Saturated Fat: 5g
- Carbohydrates: 30g
- Sugars: 15g
- Protein: 2g
There you have it! These Cinnamon Sugar Blondies are not just a recipe but a delightful journey back to cherished moments. I hope you find as much joy in making them as I do, and may they become a beloved part of your own kitchen tales! Happy baking, my friend!
Print
Cinnamon Sugar Blondies
- Total Time: 45 minutes
- Yield: 16 servings 1x
- Diet: Vegetarian
Description
Indulge in these soft and slightly crisp cinnamon sugar blondies, a perfect blend of buttery goodness and spiced sweetness.
Ingredients
- 1 cup Unsalted Butter (melted)
- 1 cup Brown Sugar (packed)
- ½ cup Granulated Sugar
- 2 large Eggs
- 1 tsp Vanilla Extract
- 2 cups All-Purpose Flour
- 1 tsp Baking Powder
- ½ tsp Salt
- 2 tsp Ground Cinnamon
- ¼ cup Granulated Sugar + 1 tbsp Ground Cinnamon (for topping)
Instructions
- Preheat the oven to 350°F (175°C) and line an 8×8-inch baking pan with parchment paper.
- Mix the melted butter, brown sugar, and granulated sugar in a large bowl until smooth and creamy.
- Add the eggs one at a time, beating well after each addition, then stir in the vanilla extract.
- Combine the flour, baking powder, ground cinnamon, and salt in a separate bowl.
- Fold the dry ingredients into the wet mixture with a spatula, mixing just until no dry flour remains.
- Pour the batter into the prepared baking pan and spread it evenly.
- Create the topping by mixing granulated sugar and ground cinnamon, and sprinkle it over the batter.
- Bake for 25-30 minutes, or until lightly golden, and a toothpick comes out clean with a few moist crumbs.
- Slice once cooled slightly and enjoy warm or let cool completely.
Notes
Consider adding chocolate chips, nuts, or dried fruits for variations. Store leftovers in an airtight container for up to three days.
- Prep Time: 15 minutes
- Cook Time: 30 minutes
- Category: Dessert
- Method: Baking
- Cuisine: American
Nutrition
- Serving Size: 1 blondie
- Calories: 200
- Sugar: 15g
- Sodium: 100mg
- Fat: 9g
- Saturated Fat: 5g
- Unsaturated Fat: 3g
- Trans Fat: 0g
- Carbohydrates: 30g
- Fiber: 1g
- Protein: 2g
- Cholesterol: 30mg
Keywords: blondies, dessert, baking, cinnamon sugar, sweet treats
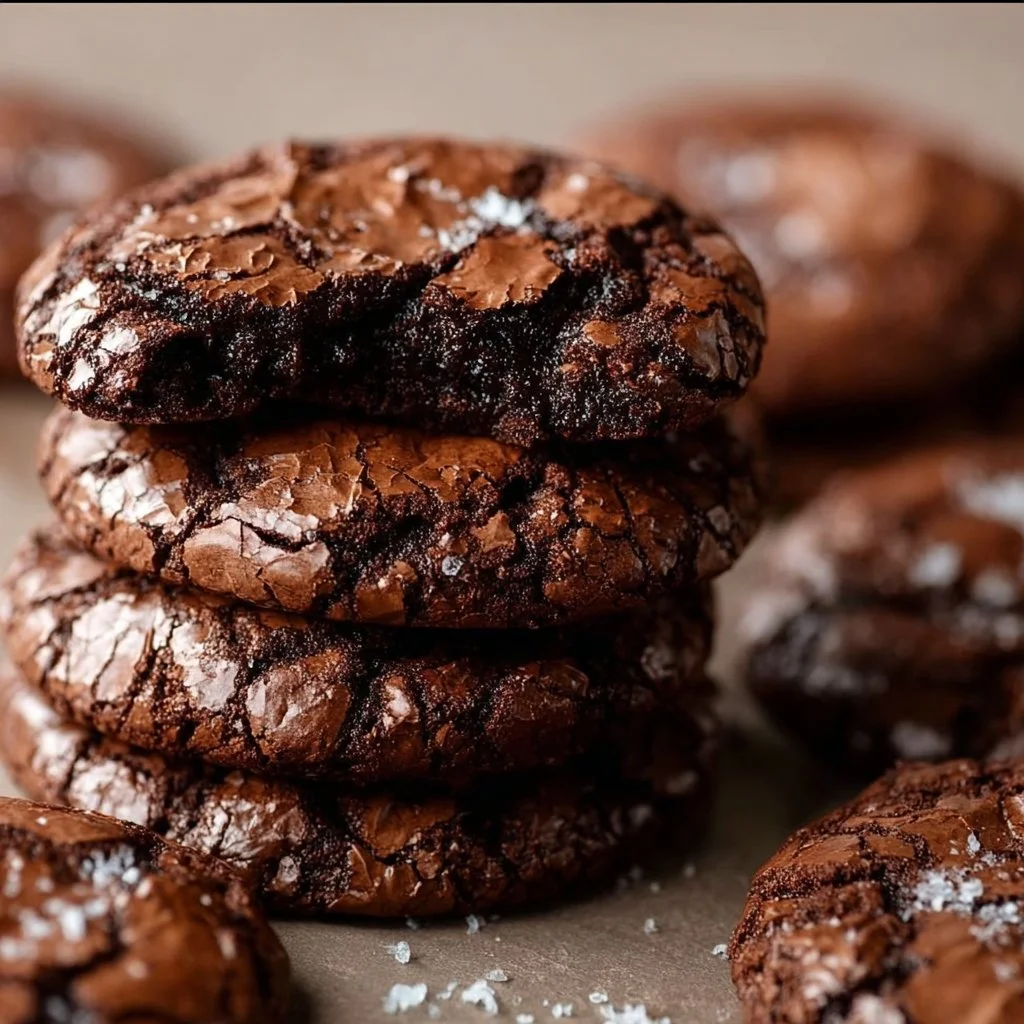
Gourmet Brownie Cookies
Gourmet Brownie Cookies: The Perfect Fusion of Brownies and Cookies!
Welcome back to my cozy kitchen, my fellow food enthusiasts! Today, we’re diving into a recipe that’s sure to steal the show at your next gathering—Gourmet Brownie Cookies! These little delights boast all the rich, fudgy decadence of brownies combined with the delightful chewiness of cookies. Imagine biting into a deeply chocolatey cookie that’s crisp on the edges and gooey in the middle—a slice of heaven right here on Earth!
I’ve always believed that some of the best memories are made in the kitchen, especially when it comes to baking. The aroma of chocolate melting, sugar whisking, and a sprinkle of flour dusting the countertops takes me on a nostalgic trip back to my childhood. I remember my grandma’s kitchen filled with laughter and warmth as she’d gather all of us around her. Making cookies felt like a sacred ritual, and though we often ended up with a flour fight, the joy of baking together was always worth it.
Whether you’re whipping these up for a family gathering or just because it’s a Tuesday, these gourmet brownie cookies are sure to impress. What’s more? They’re surprisingly easy to make! So gather your ingredients and let’s embark on this chocolatey adventure together.
Personal Story
Oh, let me take you back to a sunny Saturday morning at my grandma’s house. The whole family was buzzing with excitement as the smell of something chocolatey wafted through the air. Grandma was making her signature brownie cookie recipe, and you know what that meant—each of us had a specific job. My sister and I would race to measure the flour and cocoa powder, while our cousins fought over who got to crack the eggs. We’d find ourselves peeking into the oven, eyes wide with anticipation, as the cookies baked to a beautiful, glossy finish.
It was during one of those kitchen adventures that I learned the importance of patience—fighting the urge to devour them straight from the oven and waiting just a few minutes for them to cool. Little did I know, this recipe would become a cherished tradition in my life. It holds memories of laughter, love, and, the occasional chocolate-covered disaster. I revisit this recipe from time to time, not just for its rich flavor but for the connection it builds. Now, it’s my turn to share this love with you!
Ingredients
Here’s what you’ll need to create these heavenly treats:
For the Cookies:
-
1 cup (2 sticks) unsalted butter
- Why? The butter adds richness and flavor.
- Substitution: You can use coconut oil or a dairy-free butter alternative for a vegan version.
-
1 ½ cups granulated sugar
- Why? This helps your cookies spread out beautifully while keeping them chewy.
-
1 cup brown sugar, packed
- Why? The molasses in brown sugar adds depth and a chewy texture.
-
2 large eggs
- Why? Eggs help bind the cookies together.
- Tip: If you’re vegan, you can replace each egg with 1/4 cup unsweetened applesauce.
-
2 teaspoons vanilla extract
- Why? Pure vanilla takes the flavor from good to great!
-
1 cup all-purpose flour
- Why? This gives your cookies structure.
- Substitution: For a gluten-free option, substitute with a 1:1 gluten-free flour blend.
-
1 cup unsweetened cocoa powder
- Why? Essential for that brownie taste!
- Tip: Use Dutch-processed cocoa for a deeper flavor.
-
1 teaspoon baking powder
- Why? Helps the cookies rise just a tad without losing that chewy brownie-like texture.
-
1/2 teaspoon salt
- Why? A touch of salt amplifies sweetness and balances flavors.
-
2 cups semi-sweet chocolate chips or chunks
- Why? Melty chocolate bits in each bite—need I say more?
- Variation: Swap for dark chocolate or even white chocolate chips for a unique twist!
Step-by-Step Instructions
Now that we have our ingredients prepped, let’s get rolling on these delicious brownie cookies!
Step 1: Preheat Your Oven
Preheat your oven to 350°F (175°C). This step is crucial because we want those cookies to bake evenly and help them achieve that perfect chewy texture.
Step 2: Cream the Butters and Sugars
In a large mixing bowl, beat the unsalted butter, granulated sugar, and brown sugar together until light and fluffy. This should take about 2-3 minutes. You can use a handheld mixer or a stand mixer. Pro tip: allow your butter to sit at room temperature for about 30 minutes before using it. This will give you that creamy texture we’re after!
Step 3: Incorporate Eggs and Vanilla
Next, add in the eggs (one at a time) and the vanilla extract. Beat until everything is combined. You want that batter to be smooth—trust me, this is going to make it all come together beautifully!
Step 4: Mix the Dry Ingredients
In a separate bowl, whisk together the flour, cocoa powder, baking powder, and salt. Now, this step is important—sifting the cocoa powder before adding it to the mixture ensures there are no lumps and keeps our batter silky smooth. Once combined, gradually add this dry mixture into the wet ingredients. Mix until just combined—overmixing could lead to dry cookies!
Step 5: Fold in the Chocolate Chips
Here comes the fun part! Fold in the chocolate chips or chunks gently into your dough. You might want to save a few to sprinkle on top right before baking for that professional touch!
Step 6: Scoop and Bake
Using a cookie scoop or two tablespoons, drop heaping amounts of dough onto a baking sheet lined with parchment paper, spacing them about 2 inches apart to allow for spreading. Pop them into the preheated oven and bake for 10-12 minutes. Keep an eye on them—the edges should be set while the centers will look slightly underbaked (trust me, they’ll firm up as they cool).
Step 7: Cool
Remove the cookies from the oven and let them rest on the baking sheet for about 5 minutes. This helps them set up before transferring them to a wire rack to cool completely. Don’t skip this step—this is where that gooey center magic happens!
Enjoy Your Cookies
Wait for them to cool a bit before diving in. I know it’s hard, but those few minutes will reward you with a fudgy, melty, chocolate-filled experience!
Serving Suggestions
These gourmet brownie cookies can be served on a beautiful platter, perhaps garnished with a dusting of powdered sugar or a drizzle of chocolate sauce for that eye-catching finish. Pair them with a tall glass of milk or a scoop of vanilla ice cream for an irresistible treat that nobody will be able to resist. ❤️ They also make fantastic gifts in cute cookie tins—just try not to eat them all before you get a chance to give them away!
Recipe Variations
If you’re feeling adventurous or catering to specific dietary preferences, here are a few ideas to switch up this recipe:
- Nutty Addition: Fold in 1 cup of your favorite nuts, such as walnuts or pecans, for a delightful crunch.
- Minty Fresh: Add a few drops of peppermint extract for a chocolate-mint flair that’s perfect during the holidays.
- Spicy Kick: Incorporate a pinch of cayenne pepper into the dry ingredients for a subtle kick that enhances the chocolate flavor.
- Flourless Option: Go for a gluten-free version by omitting the flour entirely and using ground almonds instead, yielding ultra-fudgy cookies.
Chef’s Notes
Over the years, this brownie cookie recipe has become a staple in my home, and I can’t help but tweak it each time I make it! Lately, I’ve been experimenting with adding a hint of espresso powder to the mix, which enhances that chocolate flavor even more! One of my funniest kitchen memories was when I accidentally used salt instead of sugar—I had a room full of disappointed taste testers whose faces were priceless! Remember to check your ingredients before diving in, friends!
FAQs and Troubleshooting
1. My cookies are too cakey! What went wrong?
This could happen if you overmixed the dough or added too much flour. Make sure to measure accurately and mix until just combined to maintain that chewy texture.
2. Why are my cookies spreading too much?
Chilling your dough for at least 30 minutes can help the cookies maintain their shape while baking, as well as keeping your ingredients cool.
3. My cookies didn’t turn out gooey!
If they were left in the oven for too long, they might dry out. Remember, they’ll continue to cook on the baking sheet after being pulled from the oven, so take them out while they still look slightly underbaked.
4. Can I freeze the dough?
Absolutely! You can scoop the dough into balls and freeze them on a baking sheet. Once frozen, transfer them to a zip-top bag and pop them in the freezer. When you’re ready, bake directly from frozen, adding an extra minute or two to the bake time.
Nutritional Information (optional)
Caloric Content: Each cookie is approximately 150 calories.
Health Tip: These cookies are rich in antioxidants from the cocoa but should be consumed in moderation due to their sugar content.
Now, are you ready to transform your kitchen into a chocolatey wonderland? Collect your ingredients, turn on those ovens, and let’s get baking! Share your creations with me—there’s nothing better than the joy of homemade goodies shared with love. Happy baking! 🍪❤️
Print
Gourmet Brownie Cookies
- Total Time: 27 minutes
- Yield: 24 cookies 1x
- Diet: Vegetarian
Description
Delicious gourmet brownie cookies that combine the fudgy richness of brownies with the chewy texture of cookies. Perfect for any gathering!
Ingredients
- 1 cup (2 sticks) unsalted butter
- 1 ½ cups granulated sugar
- 1 cup brown sugar, packed
- 2 large eggs
- 2 teaspoons vanilla extract
- 1 cup all-purpose flour
- 1 cup unsweetened cocoa powder
- 1 teaspoon baking powder
- 1/2 teaspoon salt
- 2 cups semi-sweet chocolate chips or chunks
Instructions
- Preheat your oven to 350°F (175°C).
- Cream the unsalted butter, granulated sugar, and brown sugar in a large mixing bowl until light and fluffy.
- Incorporate the eggs and vanilla extract, beating until combined.
- Mix the flour, cocoa powder, baking powder, and salt in a separate bowl.
- Gradually add the dry mixture into the wet ingredients, mixing until just combined.
- Fold in the chocolate chips or chunks.
- Scoop heaping amounts of dough onto a parchment-lined baking sheet, spacing them 2 inches apart.
- Bake for 10-12 minutes until edges are set and centers are slightly underbaked.
- Cool on the baking sheet for 5 minutes before transferring to a wire rack.
Notes
For variations, consider adding nuts, peppermint extract, or a pinch of cayenne. These cookies can also be frozen in dough form for later baking.
- Prep Time: 15 minutes
- Cook Time: 12 minutes
- Category: Dessert
- Method: Baking
- Cuisine: American
Nutrition
- Serving Size: 1 cookie
- Calories: 150
- Sugar: 15g
- Sodium: 150mg
- Fat: 7g
- Saturated Fat: 4g
- Unsaturated Fat: 3g
- Trans Fat: 0g
- Carbohydrates: 23g
- Fiber: 2g
- Protein: 2g
- Cholesterol: 30mg
Keywords: brownies, cookies, chocolate, dessert, baking




