
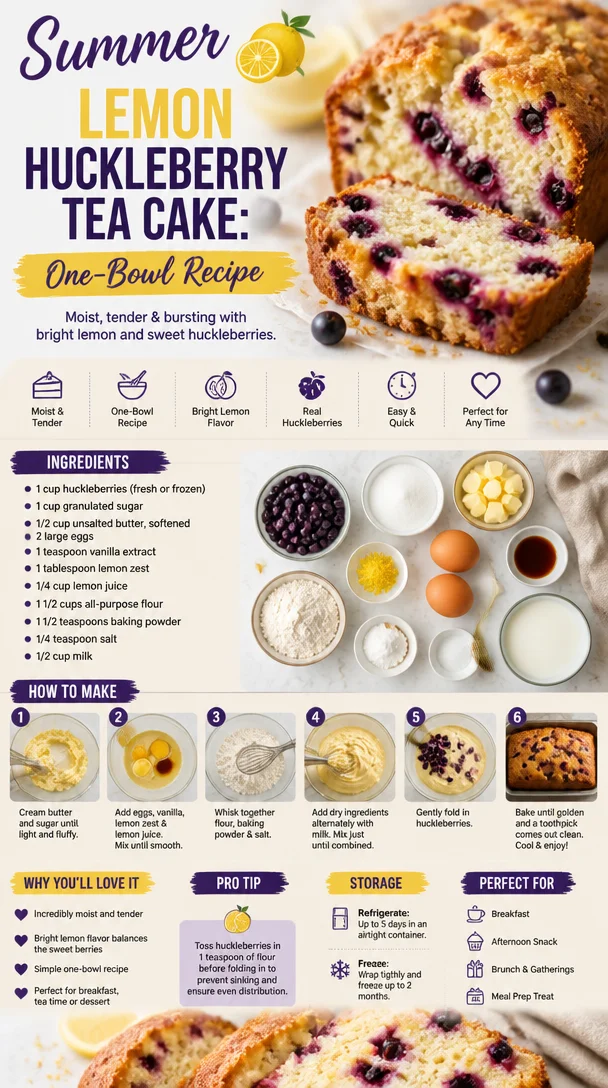
Summer Lemon Huckleberry Tea Cake: One-Bowl Recipe
Lemon Huckleberry Tea Cake: A Slice of Sunshine in Every Bite
Welcome to my kitchen, dear friends! Today, we’re diving into a recipe that feels like the essence of summer captured in a cake: Lemon Huckleberry Tea Cake. Imagine a warm afternoon, the sun dancing through your kitchen window, and the delightful aroma of freshly baked cake surrounding you. It’s a moment that invites laughter, connection, and perhaps a cup of your favorite tea. If huckleberries are in season, you’re in for a real treat, but if you can’t find them, don’t worry—I’ve got you covered with some fantastic substitutions!
Baking this Lemon Huckleberry Tea Cake is not just about following a recipe; it’s about creating a moment—a memory—much like my childhood summers spent at my grandparents’ cabin in the mountains. Those days were filled with picking berries, making lemonade, and, of course, baking with my grandmother, who could whip up a cake in no time flat. Her secret? Love and a zest for life, which I’ve infused into this very recipe.
I still remember the day we baked a cake filled with fresh huckleberries picked right from the lush ravines behind their home. We’d sing off-key as we mixed the batter, and as the cake rose in the oven, it filled the cabin with a sweet, tangy aroma that promised deliciousness. My grandparents would sit with us at the table, their faces lighting up with joy as we shared our creation. That experience inspired this Lemon Huckleberry Tea Cake—a tribute to unconditional love and cherished memories.
Ingredients
Here’s what you’ll need to get started on your Lemon Huckleberry Tea Cake:
-
1 ½ cups all-purpose flour
This is the backbone of your cake. If you want a gluten-free option, feel free to swap in a 1:1 gluten-free baking flour mix. Ensure it’s one with xanthan gum for better structure! -
1 teaspoon baking powder
This helps our cake rise, giving it a light and airy texture. You could use baking soda if you’re out, but remember to adjust the acid in your recipe (a splash of vinegar or lemon juice) to balance it out. -
½ teaspoon baking soda
Just a little extra lift! It works in tandem with the baking powder for that perfectly fluffy cake. -
½ teaspoon salt
Salt enhances all the flavors. Don’t skip it; it’s like the background music to your culinary masterpiece! -
½ cup unsalted butter, softened
Butter gives your cake that rich flavor. If you’re dairy-free, you can swap it with coconut oil, but keep that in mind if you want a hint of coconut in your cake. -
1 cup granulated sugar
Sweetness is essential! You can substitute part of it with honey or maple syrup—reduce the liquid in your recipe slightly if you go this route. -
2 large eggs
These not only add moisture but also bind the ingredients together. For a vegan option, use 1/2 cup of unsweetened applesauce or flax eggs (1 tablespoon ground flaxseed mixed with 2.5 tablespoons of water). -
Zest of one lemon
This is where the magic starts—zest brightens flavors and gives a lovely aroma. If you don’t have lemons, some orange zest could work in a pinch! -
Juice of one lemon (about 2–3 tablespoons)
The tartness balances the sweetness perfectly. If you’ve got limes on hand, feel free to use their juice as a twist! -
1 cup huckleberries (fresh or frozen)
These little gems provide bursts of sweet-tart flavor. If you can’t find huckleberries, blueberries make a delicious substitute! -
1 teaspoon vanilla extract
A must-have for that aromatic depth!
Let’s get mixing!
Step-by-Step Instructions
1. Preheat Your Oven
Begin by preheating your oven to 350°F (175°C). This is super important as it ensures your cake starts cooking as soon as it goes in. Nothing like a perfectly preheated oven to get those baking vibes flowing!
2. Prepare Your Baking Pan
Grease a 9-inch round cake pan or line it with parchment paper to ensure your lovely creation doesn’t stick. I always like to use parchment on the bottom because it makes it so easy to pop the cake out later.
3. Mix the Dry Ingredients
In a medium bowl, whisk together the flour, baking powder, baking soda, and salt. This step ensures that your leavening agents are evenly distributed (no one likes a cake with a random lump of baking powder!).
4. Cream Butter and Sugar
In a large mixing bowl, cream the softened butter and granulated sugar together until you achieve a light and fluffy texture—about 3-4 minutes using an electric mixer. This is where all your hard work pays off, making sure to scrape down the sides of the bowl so everything’s incorporated!
5. Add the Eggs and Flavorings
Next, beat in the eggs one at a time, mixing well after each addition. Then add the lemon zest, lemon juice, and vanilla extract. The batter should now smell divine!
6. Combine the Wet and Dry Ingredients
Gradually add the dry ingredients to the wet mixture, alternating with 1/2 cup of milk (or a dairy-free alternative). Start and end with the dry mix for the best texture. Mix until just combined—overmixing can lead to a dense cake, and nobody wants that!
7. Fold in the Huckleberries
Gently fold in the huckleberries. This is where you introduce those sweet bursts of flavor! If using frozen berries, there’s no need to thaw them—just fold them in gently. The batter may turn a little purple—that’s okay; it’s going to be delicious!
8. Pour and Bake
Pour the batter into your prepared cake pan, smoothing out the top with a spatula. Place in the oven and bake for 25-30 minutes, or until a toothpick inserted into the center comes out clean or with just a few moist crumbs. Keep an eye on it after 25 minutes; ovens can be tricky!
9. Cool and Serve
Once baked, remove the cake from the oven and let it cool in the pan for about 10 minutes before transferring it to a wire rack. Let it cool completely before dusting with powdered sugar or a drizzle of lemon glaze. Oh, that final touch really makes it sing!
Serving Suggestions
Slice your Lemon Huckleberry Tea Cake and serve it with a dollop of freshly whipped cream or a scoop of vanilla ice cream—heavenly! Pair it with a lovely cup of Earl Grey or your favorite herbal tea for an afternoon treat that feels just a bit special. Don’t forget to share with friends; it makes every bite even sweeter!
Recipe Variations
-
Berry Mix: Instead of just huckleberries, combine blueberries, raspberries, and blackberries for a delightful berry medley.
-
Lemon Blueberry: Use blueberries instead of huckleberries; the classic combo is always a crowd-pleaser and beautifully vibrant.
-
Gluten-Free: Substitute all-purpose flour with a gluten-free flour blend and add a pinch of xanthan gum to improve texture.
-
Lemon-Lavender Twist: Add a teaspoon of dried culinary lavender to the batter to create a subtly fragrant cake.
-
Coconut Flavored: Swapping out half of the butter for coconut oil and adding shredded coconut to the batter can elevate the tropical vibes!
Chef’s Notes
Ah, baking—and the countless memories wrapped in those joyful moments! I can’t help but chuckle when I think about those early baking experiments that didn’t go as planned. One time, I accidentally mistook salt for sugar and created a delightfully hilarious kitchen disaster—with some very confused taste testers! But hey, every mishap in the kitchen is a memory in the making!
Over the years, this Lemon Huckleberry Tea Cake has seen many variations. Sometimes I’ve made it with a crumb topping (delicious!), or added a glaze of lemon juice and powdered sugar for an extra sweetness. The beauty of baking is that you can always play—creating something new every time!
FAQs and Troubleshooting
1. Why did my cake sink in the middle?
This can happen if the batter was overmixed or if the oven temperature was too low. Be gentle with your mixing and ensure your oven is properly calibrated!
2. Can I use frozen huckleberries?
Absolutely! Frozen huckleberries work just fine. There’s no need to thaw them, although they may lend a bit more moisture to your batter, which is usually welcome in a cake.
3. How do I know when my cake is done?
Perform the toothpick test—if it comes out clean or with a few moist crumbs clinging, it’s ready!
4. Can I make this ahead of time?
Definitely! The cake keeps well at room temperature for a few days, or you can freeze it wrapped tightly for up to 3 months. Just thaw it in the fridge overnight before serving.
Nutritional Info
The nutrition information for this Lemon Huckleberry Tea Cake varies based on specific ingredients and portion sizes. However, a standard slice (1/12th of the cake) can range from 200-250 calories, with a good source of vitamin C from the lemon. For more exact details, consider using a nutritional calculator with the exact quantities and specific brands of ingredients you use.
I hope you’re as excited to create this delightful cake as I am! Remember, it’s not just about baking; it’s about the joy and warmth you bring into your kitchen. Happy baking, and be sure to share your creations with loved ones—they’ll savor every slice! 🌼
Print
Lemon Huckleberry Tea Cake
- Total Time: 45 minutes
- Yield: 12 servings 1x
- Diet: Vegetarian
Description
A delightful cake capturing the essence of summer with the sweet-tart flavor of huckleberries and a hint of lemon.
Ingredients
- 1 ½ cups all-purpose flour
- 1 teaspoon baking powder
- ½ teaspoon baking soda
- ½ teaspoon salt
- ½ cup unsalted butter, softened
- 1 cup granulated sugar
- 2 large eggs
- Zest of one lemon
- Juice of one lemon (about 2–3 tablespoons)
- 1 cup huckleberries (fresh or frozen)
- 1 teaspoon vanilla extract
Instructions
- Preheat your oven to 350°F (175°C).
- Prepare a 9-inch round cake pan, greasing or lining it with parchment paper.
- Mix the dry ingredients: whisk together the flour, baking powder, baking soda, and salt.
- Cream the butter and sugar together until light and fluffy.
- Add the eggs one at a time, beating well after each addition, then mix in the lemon zest, lemon juice, and vanilla extract.
- Combine the wet and dry ingredients, alternating with milk until just combined.
- Fold in the huckleberries gently.
- Pour the batter into the prepared pan and bake for 25-30 minutes.
- Cool the cake in the pan for 10 minutes, then transfer to a wire rack.
Notes
Tip: Serve the cake with whipped cream or vanilla ice cream. It’s perfect with a cup of tea!
- Prep Time: 15 minutes
- Cook Time: 30 minutes
- Category: Dessert
- Method: Baking
- Cuisine: American
Nutrition
- Serving Size: 1 slice
- Calories: 220
- Sugar: 10g
- Sodium: 300mg
- Fat: 9g
- Saturated Fat: 5g
- Unsaturated Fat: 3g
- Trans Fat: 0g
- Carbohydrates: 30g
- Fiber: 1g
- Protein: 3g
- Cholesterol: 50mg
Keywords: cake, lemon, huckleberry, dessert, summer, baking
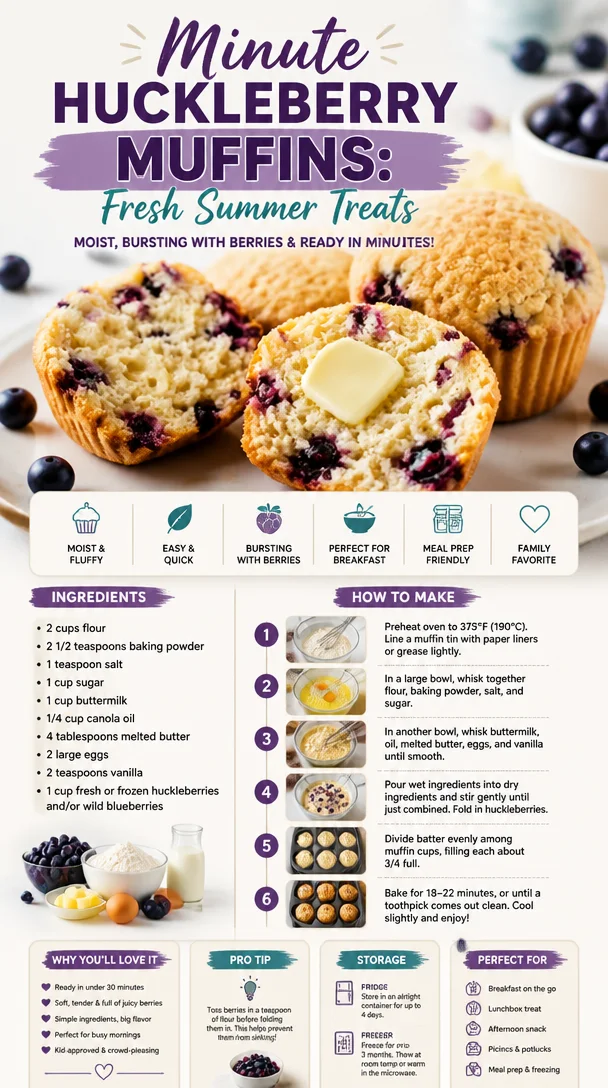
Minute Huckleberry Muffins: Fresh Summer Treats
Huckleberry Muffins: A Sweet Journey Back to Simpler Times
Welcome, fellow food enthusiasts! I’m thrilled that you’ve joined me today in this cozy corner of my culinary universe. Honestly, is there anything more heartwarming than the scent of freshly baked muffins wafting through your kitchen? The mere thought of it sends me into a nostalgic whirl, whisking me back to sun-drenched summer days spent picking huckleberries with my dear grandmother. Today, we’ll dive deep into the world of huckleberry muffins—sweet, tangy, and downright delightful bites that carry with them a piece of my heart and many cherished memories.
Growing up, my grandmother had this ritual every summer. Armed with her trusty basket and a sun hat, we’d venture into the nearby woods, where the bushes bloomed with the small but vibrant huckleberries. There was something magical about those mornings; the thrill of the hunt made it a delightful adventure. Once we returned home, her kitchen would transform into a hub of laughter and warmth as she turned our gathered bounty into delicious treats. Her signature huckleberry muffins were the stars of those afternoons—a fluffy, tender crumb that housed bursts of tangy sweetness.
These muffins aren’t just delectable; they’re a reminder of family bonding and the beauty of simple ingredients. The huckleberries would add this delightful pop of flavor, a tangy sweetness that paired perfectly with the buttery richness of the muffin base. As we sample one right out of the oven, slathered with a bit of butter (or my favorite—honey), you can just taste the love that went into making them.
In this blog post, I’m excited to share my version of these cherished huckleberry muffins with you, along with a sprinkle of my personal anecdotes, cooking tips, and serving suggestions. Let’s step into the kitchen together and create a batch that will not only tantalize your taste buds but also warm your soul.
A Nostalgic Yarn: The Huckleberry Adventure
One summer afternoon, I remember the excitement in the air as my grandmother announced our annual huckleberry picking adventure. We packed a picnic basket—a vibrant quilt to sit on, a thermos of iced tea, and a few homemade goodies for our outing. As we strolled through the wooded trails, my grandmother would share stories about her childhood, her voice blending harmoniously with the rustling leaves.
When we finally reached our favorite patch, the bushes were ripe with plump, indigo berries, glistening under the sun. With each handful we picked, I could feel the anticipation build. Those berries weren’t just food; they were the promised sweetness of the muffins we would soon create together.
Later, back in her warm kitchen, flour dust floated in the air like tiny memories, and the whir of the mixer became the soundtrack to our afternoon. I helped measure, pour, and mix, my little hands covered in flour and berry juice. The best part? Watching those muffins rise in the oven, the sweet aroma wrapping around us like a warm hug. Each bite melted in my mouth, and suddenly, sitting at her farmhouse table, we weren’t just eating; we were celebrating those moments of connection.
Ingredients
Ready to whip up your own batch of huckleberry muffins? Here’s what you’ll need:
-
1 cup huckleberries
These little gems are the star of the show! Fresh or frozen work well. If you can’t find huckleberries, blueberries are a great substitute. -
2 cups all-purpose flour
Provides structure to the muffins. You can use whole wheat flour if you’d like a heartier texture or a gluten-free blend for a gluten-free option. -
1 cup granulated sugar
For sweetness! If you prefer less sugar, consider using maple syrup or coconut sugar instead. -
½ cup unsalted butter, melted
Brings richness and moisture. You can swap it for vegetable oil or almond butter if you’re looking for a dairy-free alternative. -
2 large eggs
These provide binding and structure. For a vegan option, try ½ a mashed banana or ¼ cup unsweetened applesauce for each egg. -
1 cup buttermilk
Adds moisture and a slight tang. You can make a quick substitute with regular milk and a tablespoon of vinegar or lemon juice. -
1 tablespoon baking powder
This is the magic ingredient that helps your muffins rise. Make sure it’s fresh for the best results! -
1 teaspoon vanilla extract
For warm, aromatic flavor! If you want to get creative, almond extract can also add a nice twist. -
½ teaspoon salt
Enhances all the flavors in your muffins. Trust me; don’t skip it!
These ingredients are super straightforward, and I love that they usually hang out in most pantries. It feels good to create something delicious with simple elements!
Step-by-Step Instructions
Let’s get those muffins in the oven, shall we? Follow along with these detailed steps, and I’ll share some tips that will have you baking like a pro.
-
Preheat Your Oven
Preheat your oven to 350°F (175°C). This step is crucial—starting with a hot oven helps your muffins rise beautifully. -
Prepare Your Muffin Pan
Line a 12-cup muffin tin with paper liners or grease it with non-stick spray. This ensures your muffins pop out easily after they cool! If you’re feeling fancy, a sprinkle of flour after greasing can help prevent sticking too. -
Mix Dry Ingredients
In a large mixing bowl, whisk together the flour, sugar, baking powder, and salt. A good whisking here will aerate the flour, ensuring your muffins have that oh-so-fluffy texture. Pro tip: if you see any lumps in your flour, sift it first for the smoothest batter. -
Combine Wet Ingredients
In another bowl, whisk together the melted butter, eggs, buttermilk, and vanilla extract until well combined. This is where the magic happens—the butter adds richness, while the buttermilk makes the muffins tender. -
Combine Wet and Dry Ingredients
Gradually pour the wet ingredients into the dry ingredients, mixing until just combined. Remember, don’t overmix! A few lumps are okay. Overmixing can lead to dense muffins. Fold in those huckleberries gently—you want to keep their shape. -
Scoop & Fill
Using an ice cream scoop or a ¼ cup measuring cup, fill each muffin tin slot about 2/3 full. This allows room for them to rise without overflowing. -
Bake
Pop your muffin tin into the preheated oven and bake for 18-22 minutes, or until a toothpick inserted in the center comes out clean. The aroma that fills your kitchen during this time is simply heavenly—seriously, I could bottle that up! -
Cool & Enjoy
Once baked, let the muffins cool in the pan for about five minutes before transferring them to a wire rack to cool completely. This helps them set without getting soggy. Don’t forget to sneak a warm one while you’re at it!
Serving Suggestions
Huckleberry muffins are delightful on their own, but let’s jazz them up a bit! Serve them warm with a dollop of whipped cream or a drizzle of honey for an extra touch of sweetness. For brunch gatherings, pair them alongside fresh fruit and a cold brew coffee—perfect for a lazy Sunday morning! A side of yogurt or a fruit salad will also complement these muffins beautifully.
Recipe Variations
Feeling adventurous? Here are a few fun twists on the classic huckleberry muffin:
-
Lemon Zest: Add the zest of one lemon to give your muffins a refreshing zing alongside those huckleberries.
-
Nutty Crunch: Fold in ½ cup of chopped walnuts or pecans for added texture and a nutty flavor.
-
Cinnamon Swirl: Mix a teaspoon of ground cinnamon into the dry ingredients for a warm, comforting spice element.
-
Chocoholic Treat: Add chocolate chips to give your muffins a decadent twist. Just toss them in gently with the huckleberries!
-
Vegan Twist: Substitute all animal products with plant-based alternatives, using flaxseed meal mixed with water instead of eggs and dairy-free milk!
Chef’s Notes
These huckleberry muffins have been my go-to comfort food for years, and I’ve loved watching them evolve. Initially, they were a simple way to use up an abundance of huckleberries, but over time, I’ve played around with countless flavors and twists. One time, I tried swirling a cream cheese mixture into the batter—heavenly!
Remember, cooking is about your creativity and love for food. Don’t hesitate to make this recipe your own; that’s where the magic truly happens!
FAQs and Troubleshooting
-
Why are my muffins dense?: Denseness usually comes from overmixing the batter or too much flour. Measure flour accurately by spooning it into your measuring cup, then leveling off, instead of dipping the cup into the flour.
-
My muffins are not rising!: Make sure your baking powder is fresh! An old leavening agent can prevent your muffins from rising properly.
-
Can I freeze these muffins?: Absolutely! Once cooled, wrap them individually in plastic wrap and freeze. When you’re ready to enjoy, simply pop one in the microwave for a few seconds or let it thaw room temperature.
-
What’s the best way to store leftovers?: Keep your muffins in an airtight container at room temperature for 2-3 days. For longer storage, freeze them as mentioned earlier!
Nutritional Info
While I am all about enjoying these delicious treats mindfully, if you’re keen on the numbers, here’s a rough estimate per muffin (without extra toppings):
- Calories: 200
- Total Fat: 9g
- Saturated Fat: 4g
- Carbohydrates: 30g
- Protein: 3g
- Sugar: 10g
I hope you enjoy making these huckleberry muffins as much as I do! They’re not just a treat; they’re a slice of my heart and a taste of beautiful memories. Grab a friend or family member, whip up a batch together, and let the laughter and stories flow. Happy baking! 🌼
Print
Huckleberry Muffins
- Total Time: 37 minutes
- Yield: 12 muffins 1x
- Diet: Vegetarian
Description
Delightful huckleberry muffins that are sweet, tangy, and perfect for any occasion.
Ingredients
- 1 cup huckleberries (fresh or frozen)
- 2 cups all-purpose flour
- 1 cup granulated sugar
- ½ cup unsalted butter, melted
- 2 large eggs
- 1 cup buttermilk
- 1 tablespoon baking powder
- 1 teaspoon vanilla extract
- ½ teaspoon salt
Instructions
- Preheat your oven to 350°F (175°C).
- Prepare a 12-cup muffin tin with paper liners or grease with non-stick spray.
- Mix dry ingredients in a large bowl: flour, sugar, baking powder, and salt.
- Combine wet ingredients in another bowl: whisk melted butter, eggs, buttermilk, and vanilla extract.
- Pour the wet ingredients into the dry ingredients, mixing until just combined.
- Fold in the huckleberries gently.
- Fill each muffin tin slot about 2/3 full with batter.
- Bake for 18-22 minutes, or until a toothpick comes out clean.
- Cool in the pan for 5 minutes, then transfer to a wire rack.
Notes
Serve warm with butter or honey. Try adding lemon zest, nuts, cinnamon, or chocolate chips for variations!
- Prep Time: 15 minutes
- Cook Time: 22 minutes
- Category: Breakfast
- Method: Baking
- Cuisine: American
Nutrition
- Serving Size: 1 muffin
- Calories: 200
- Sugar: 10g
- Sodium: 150mg
- Fat: 9g
- Saturated Fat: 4g
- Unsaturated Fat: 5g
- Trans Fat: 0g
- Carbohydrates: 30g
- Fiber: 1g
- Protein: 3g
- Cholesterol: 30mg
Keywords: huckleberry muffins, baked goods, breakfast, nostalgic recipes, easy muffins
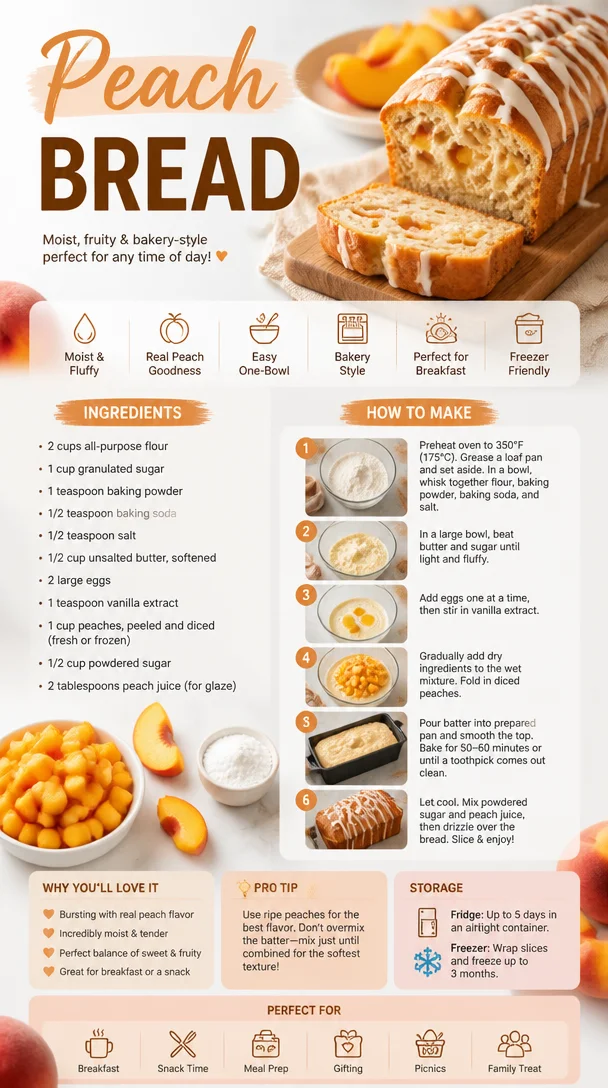
Peach Bread
The Ultimate Peach Bread Recipe: A Slice of Summer in Every Bite
Welcome to my kitchen! Today, I’m excited to share a recipe that brings me back to my childhood summers spent chasing fireflies and devouring fresh fruit straight from the tree — it’s Peach Bread! There’s something utterly magical about the aroma of peaches baking in the oven, wafting through my kitchen and making my heart swell with nostalgia. As much as I adore summer barbecues and sun-soaked afternoons, nothing beats enjoying a slice of this delightful Peach Bread with a drizzle of honey and a dollop of whipped cream.
Peach Bread combines the sweetness of ripe, juicy peaches with a cozy, warm bread base, creating a comforting treat perfect for breakfast, brunch, or even dessert. It’s easy enough to whip up on a lazy weekend morning, yet impressive enough to serve at your next gathering. Trust me, the blend of soft bread and succulent peaches will have your friends asking for the recipe while you bask in the glory of your culinary masterpiece.
In this blog post, I’m going to take you through every step of making Peach Bread, share some personal stories, and give you lots of tips and tricks along the way. Whether you’re an experienced baker or simply trying to impress your family with a delicious homemade treat, you’ll find everything you need right here!
So, roll up those sleeves, don your favorite apron, and let’s get baking some Peach Bread that will make your taste buds dance!
A Sweet and Juicy Memory
Growing up in the sunny countryside, my family had an orchard filled with lush, round peach trees. Each summer, my siblings and I would clamor to help our grandparents harvest ripe peaches, turning the experience into a competitive game. I still remember the feeling of sticky hands and sweet juice dripping down my chin, accompanied by lots of laughter and chatter. At the end of the day, my grandmother would pull together a peach dessert, and one of my favorites was her unforgettable Peach Bread.
Her recipe lacked any fancy techniques, yet it always turned out perfectly moist and fragrant. We would gather around the kitchen table, eager for the first warm slice slathered with butter. That joy of sharing a meal made with love and fresh ingredients is what has inspired me to create my own version of Peach Bread, one that echoes my childhood memories while inviting new ones to be made.
The beauty of this recipe is its simplicity. Whether you’re making it at home for your family or sharing with friends at a gathering, it’s meant to foster connection and joy. Let’s dive deeper into what you’ll need to create this delectable Peach Bread!
Ingredients
To make this delightful Peach Bread, you’ll need the following ingredients:
-
Fresh Peaches (2-3 large, about 2 cups diced)
Look for peaches that are ripe and fragrant. If they’re slightly green, leave them to ripen on your counter for a day or two. If you’re in a pinch, canned peaches can work as a substitute — just be sure to drain and pat them dry to prevent excess moisture. -
All-Purpose Flour (2 cups)
This is your base! If you’re looking to kick up the nutritional content, you can substitute half of it with whole wheat flour. Just be mindful that it may alter the texture slightly. -
Granulated Sugar (1 cup)
This sugar not only sweetens the bread but also keeps it moist. For a healthier option, you can use coconut sugar or even a sugar alternative like stevia, though it may affect the bread’s taste and moisture. -
Baking Powder (2 teaspoons)
The leavening agent is key to giving your bread a nice rise. Make sure it’s fresh — if it’s been sitting around for too long, it might not give you the lift you need! -
Salt (½ teaspoon)
A pinch of salt enhances the flavor of your bread, highlighting the sweetness of the peaches. It’s a small but mighty ingredient! -
Eggs (2 large)
Eggs provide structure and moisture. For an egg-free alternative, you can use a flaxseed meal mixture (1 tablespoon of flaxseed meal mixed with 2.5 tablespoons of water, let it sit until gelatinous). -
Vegetable Oil or Melted Butter (⅓ cup)
Using oil will yield a light and fluffy bread, while melted butter will give an extra rich flavor. Choose based on your mood! -
Vanilla Extract (1 teaspoon)
Ah, vanilla! This flavor enhancer makes everything taste better. If you’re feeling adventurous, try using almond extract instead for a twist. -
Cinnamon (1 teaspoon)
This is optional, but a sprinkle of cinnamon adds warmth and depth, complementing the sweetness of the peaches perfectly.
Now that we have our ingredients, let’s get into the step-by-step process of creating this Peach Bread masterpiece!
Step-by-Step Instructions
Preheat the Oven and Prepare Your Pan
- Preheat your oven to 350°F (175°C). While the oven is heating up, grab a 9×5-inch loaf pan and grease it with either butter or a non-stick cooking spray. This will prevent your beautiful bread from sticking. If you want more assurance against sticking, consider lining the bottom with parchment paper.
Mix the Dry Ingredients
- In a large mixing bowl, whisk together the flour, baking powder, salt, and cinnamon (if using). Mix these dry ingredients thoroughly to ensure even distribution of the leavening agent.
Prepare the Wet Ingredients
- In another bowl, beat the eggs. Once they’re frothy, add the sugar, oil (or melted butter), and vanilla extract. Whisk until everything is well combined. The mixture should be smooth and glossy.
Combine Wet and Dry Ingredients
- Gradually incorporate the dry ingredient mixture into the wet ingredients. Use a rubber spatula or wooden spoon to carefully fold them together. Be cautious not to overmix; some lumps are perfectly fine.
Add the Peaches
- Gently fold in the diced peaches. This is where the magic happens! Feel free to reserve a few peach pieces to sprinkle on top for a pretty presentation. Their juices will meld into the batter, making delicious little pockets of sweetness throughout the bread.
Pour into the Pan
- Transfer the batter into the prepared loaf pan; it should fill about two-thirds of the way to allow room for rising. Spread the top level with a spatula, and sprinkle any remaining peach pieces if you saved some.
Bake to Perfection
- Place the loaf pan in the preheated oven and bake for approximately 50-60 minutes. You’ll want to check for doneness by inserting a toothpick into the center. If it comes out clean or with just a few crumbs clinging to it, your bread is ready! If you notice it browning too quickly, cover it loosely with aluminum foil.
Cool it Down
- Once baked, remove it from the oven and let it cool in the pan for about 10-15 minutes. Afterward, gently turn it out onto a wire rack to cool completely. The aroma in your kitchen will be intoxicating.
Serving Suggestions
Now that your Peach Bread is cool and fragrant, slice it up and serve it warm with a pat of butter or a drizzle of honey. For a brunch treat, pair it with whipped cream or Greek yogurt and a dusting of powdered sugar to wow your guests! You can also enjoy it plain for a quick breakfast on-the-go.
Recipe Variations
While the classic Peach Bread is delicious on its own, here are some creative variations you can experiment with:
- Add Nuts: Throw in some chopped walnuts or pecans for a delightful crunch.
- Make it Tropical: Replace half of the peaches with diced pineapple for a tropical twist.
- Cinnamon Swirl: Swirl a cinnamon-sugar mix into your batter for a sweet surprise in every slice.
- Sourdough Version: Use sourdough starter as a base for a tangy, complex flavor.
- Gluten-Free Option: Substitute the all-purpose flour with a gluten-free baking blend, ensuring you’ve got an even balance of wet to dry for the same consistency!
Chef’s Notes
You know, this recipe has evolved over time as I experimented with different fruits, textures, and flavors. I remember the first time I swapped butter for oil and my family raved about how much they loved the moistness of the bread! I also recall one rather hilarious mishap when I grabbed salt instead of sugar. Let’s just say, the outcome was… not peachy! But every kitchen adventure only made me more determined to perfect my recipes.
Ultimately, this Peach Bread embodies the spirit of summer and family gatherings for me, and I hope it transports you to sunny moments in the kitchen just as it does for me!
FAQs and Troubleshooting
Can I use frozen peaches?
Yes! Just be sure to thaw and drain them well to avoid excess moisture in your bread, which could make it soggy.
What should I do if my bread is too dense?
If your bread turned out dense, it could be due to overmixing or using too much flour. Ensure you’re measuring flour accurately by spooning it into the measuring cup and leveling it off.
How can I tell if my bread is done baking?
Insert a toothpick into the center of the bread; if it comes out clean or with a few moist crumbs, you’re good to go! If it’s wet with batter, give it a few more minutes.
Can I make this recipe ahead of time?
Absolutely! Peach Bread keeps well in an airtight container at room temperature for about 3 days or can be stored in the fridge for up to a week. You can also freeze it; just make sure it’s well-wrapped.
Nutritional Info (if applicable)
For one slice of Peach Bread (about 1/12 of the loaf):
- Calories: ~180
- Total Fat: 7g
- Saturated Fat: 1g
- Carbohydrates: 27g
- Fiber: 1g
- Sugar: 10g
- Protein: 3g
Conclusion
And there you have it — the ultimate Peach Bread recipe, filled with sweet memories and the promise of delicious moments to come. I hope you enjoy baking and sharing this delightful treat as much as I do. Remember, cooking is all about experimentation and love, so don’t be afraid to make it your own!
Happy baking, and may your kitchen be filled with joy, laughter, and the sweet aroma of peaches! 🍑
Print
The Ultimate Peach Bread
- Total Time: 75 minutes
- Yield: 12 servings
- Diet: Vegetarian
Description
A comforting Peach Bread recipe that combines ripe peaches with a warm bread base, perfect for breakfast or dessert.
Ingredients
- Fresh Peaches (2-3 large, about 2 cups diced)
- All-Purpose Flour (2 cups)
- Granulated Sugar (1 cup)
- Baking Powder (2 teaspoons)
- Salt (½ teaspoon)
- Eggs (2 large)
- Vegetable Oil or Melted Butter (⅓ cup)
- Vanilla Extract (1 teaspoon)
- Cinnamon (1 teaspoon, optional)
Instructions
- Preheat your oven to 350°F (175°C) and grease a 9×5-inch loaf pan.
- Mix the flour, baking powder, salt, and cinnamon in a bowl.
- Prepare the eggs by beating them, then add the sugar, oil (or butter), and vanilla extract.
- Combine the dry ingredients with the wet ingredients carefully.
- Add the diced peaches to the batter and fold gently.
- Pour the batter into the prepared loaf pan.
- Bake for approximately 50-60 minutes until done.
- Cool in the pan for about 10-15 minutes, then transfer to a wire rack.
Notes
Serve with butter, honey, or whipped cream. Great for brunch or as a dessert.
- Prep Time: 15 minutes
- Cook Time: 60 minutes
- Category: Dessert
- Method: Baking
- Cuisine: American
Nutrition
- Serving Size: 1 slice
- Calories: 180
- Sugar: 10g
- Sodium: 220mg
- Fat: 7g
- Saturated Fat: 1g
- Unsaturated Fat: 4g
- Trans Fat: 0g
- Carbohydrates: 27g
- Fiber: 1g
- Protein: 3g
- Cholesterol: 60mg
Keywords: peach bread, summer recipes, quick bread, dessert, baking
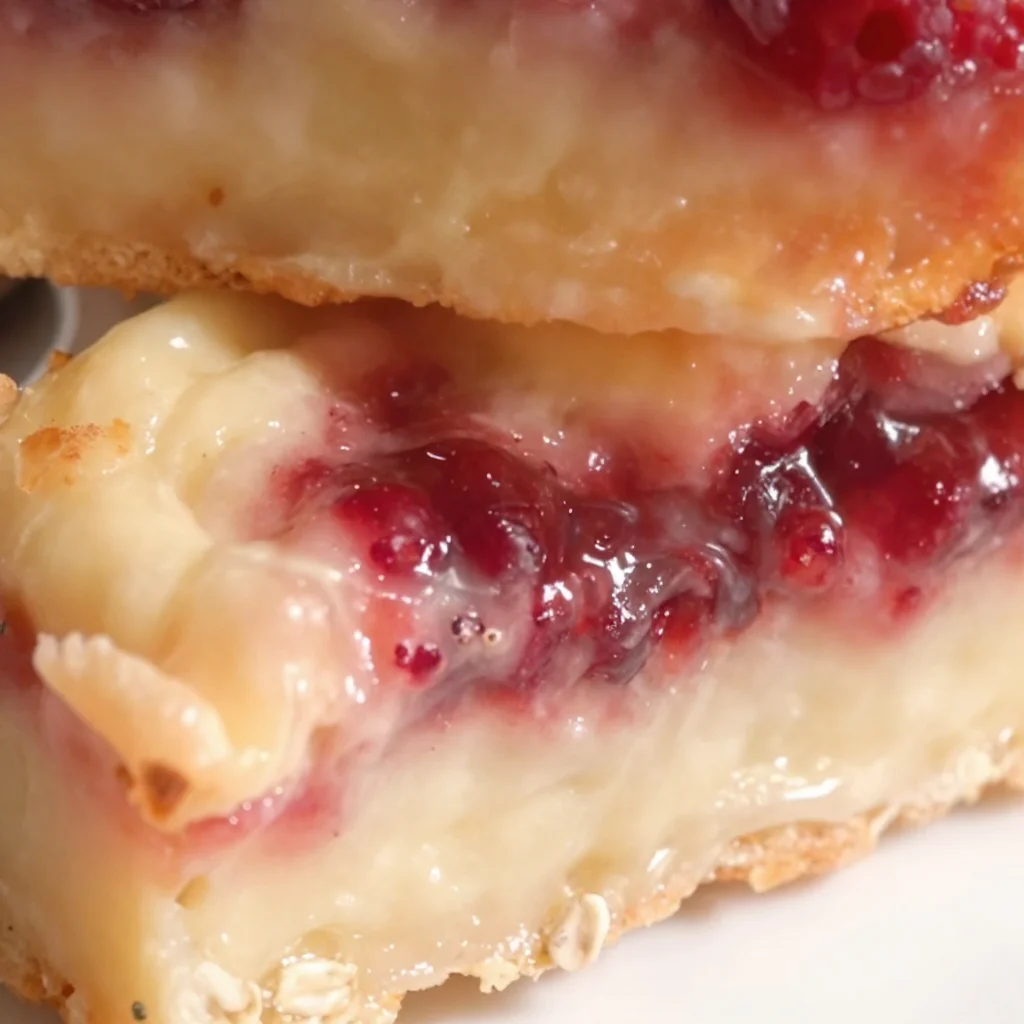
Raspberry Bars
Delightfully Tart Raspberry Bars: A Flavorful Adventure in Baking
Welcome to my cozy kitchen, friends! Today, we’re diving into a delightful baking adventure that will fill your home with the sweet and tangy aroma of fresh raspberries. That’s right—I’m talking about Raspberry Bars! These scrumptious treats are the perfect combination of tart and sweet, with a buttery crumble that melts in your mouth. Whether you’re planning to treat yourself to a little afternoon snack or impress your friends at the next gathering, these Raspberry Bars are sure to be a hit.
Baking has always been a way for me to express love, care, and creativity. You see, every time I pull a tray of goodies out of the oven, I can’t help but feel a rush of excitement. There’s something deeply satisfying about transforming simple ingredients into a treat that brings joy to others. When those golden bars come out, with the beautiful blush of raspberries peeking through the crumbly topping, it feels like magic.
The great thing about these Raspberry Bars is that they’re incredibly easy to whip up. You don’t need to be a master chef to create something truly special. And while it’s always nice to indulge in a slice of chocolate cake or a fancy pastry, there’s something uniquely grounding about a humble yet delightful dessert made with seasonal fruits. Plus, the vibrant color and tangy flavor of raspberries simply scream summer! So, roll up your sleeves, preheat that oven, and let’s make some Raspberry Bars that even your grandma would be proud of!
A Walk Down Memory Lane
I still vividly recall the summer days spent with my grandmother in her kitchen, where the walls were adorned with her handmade aprons and family photos. She had this magical way of turning a simple afternoon into an unforgettable experience. One of my fondest memories was when we would go to the local farmer’s market together, her wicker basket swinging from her arm as we searched for plump, juicy raspberries.
Once home, we would rinse the berries and set to work, her guiding hands teaching me the tender art of baking. We would take turns mixing, measuring, and tasting (my favorite part, of course). As the sweet aroma wafted through the air, we would sit together in a cozy nook, eagerly awaiting the timer to ding. To this day, whenever I make these Raspberry Bars, I can hear her laughter and feel her warmth in every bite. It’s a recipe filled with love and cherished nostalgia, and I can’t wait to share it with you!
Ingredients
Here’s what you’ll need to whip up these delightful Raspberry Bars:
-
Fresh Raspberries (2 cups): The star of the show! Fresh raspberries bring a perfect balance of sweetness and tartness. If fresh isn’t available, frozen raspberries work well too—just make sure to thaw and drain excess moisture.
-
All-Purpose Flour (2 cups): This will create the perfect base for our crust and topping. If you want to make a gluten-free version, swap it out with a 1:1 gluten-free flour blend.
-
Granulated Sugar (1 cup): A little sweetener to balance the tartness. You can reduce the amount for a less sweet treat or substitute with coconut sugar for a deeper flavor.
-
Unsalted Butter (1 cup): The fat that creates a rich and buttery flavor. Important: make sure your butter is softened to room temperature for easy mixing! If you’re dairy-free, coconut oil can be a good substitute.
-
Eggs (1 large): Eggs help bind everything together and provide richness. For vegan options, unsweetened applesauce or a flax egg works well.
-
Vanilla Extract (1 teaspoon): This adds a lovely warmth and depth of flavor. If you’re feeling adventurous, try almond extract for a different twist!
-
Baking Powder (1 teaspoon): This helps the bars rise a little and keeps them fluffy.
-
Salt (1/4 teaspoon): Just a pinch to enhance flavor—always important!
-
Powdered Sugar (for dusting, optional): A little fairy-tale touch to finish off your bars.
Step-by-Step Instructions
Now that we’ve gathered all of our ingredients, it’s time to get cooking! Here’s how to make these delicious Raspberry Bars:
-
Preheat Your Oven: Start by preheating your oven to 350°F (175°C). This ensures that our bars bake evenly and gives them that perfect golden crust.
-
Prepare the Baking Dish: Grease a 9×9-inch square baking dish with a little butter or line it with parchment paper for easy removal later. Just imagine lifting those bars right out, complete with clean edges—that’s the dream!
-
Make the Crust: In a large mixing bowl, combine 1 cup of flour, 1/2 cup of sugar, and the softened butter. Using a pastry cutter or your hands, mix until the mixture resembles coarse crumbs. Don’t be afraid to get your hands in there—it’s half the fun!
-
Add the Egg: Mix in the egg and the vanilla extract until combined. You should have a sticky dough that holds together nicely.
-
Press into the Dish: Take about 2/3 of the dough and press it firmly into the bottom of the greased baking dish to form the crust. Use a spatula to get an even layer.
-
Prepare the Raspberry Filling: In another bowl, combine the raspberries, 1/2 cup of sugar, 2 tablespoons of flour, and baking powder. This will thicken the filling and enhance the berry flavor. Gently toss to coat the raspberries without breaking them apart too much.
-
Spread the Filling: Pour the raspberry mixture evenly over the crust in the baking dish. Holy moly, this looks so vibrant!
-
Crumble the Topping: Now, take the remaining dough and crumble it over the raspberry filling. It doesn’t have to be perfect—some large clumps are okay! This maintains that beautiful texture.
-
Bake to Perfection: Pop the baking dish in the preheated oven and bake for about 35-40 minutes, or until the topping is lightly golden and the raspberries are bubbling. Your house will smell like a dream.
-
Cool and Cut: Once baked, remove the dish from the oven and let it cool completely before cutting into squares. Patience is key—trust me, it’s worth the wait!
Serving Suggestions
When it’s finally time to serve your Raspberry Bars, cut them into squares and plate them up simply. A light dusting of powdered sugar on top adds a beautiful finishing touch. For an extravagant twist, serve with a dollop of whipped cream or a scoop of vanilla ice cream on the side, and watch those plates disappear. You could also pair these with a cup of tea for a special afternoon treat.
Recipe Variations
Here are some creative twists to enjoy your Raspberry Bars even more:
-
Mixed Berry Delight: Swap out some of the raspberries for blueberries or strawberries for a mixed berry medley.
-
Nutty Crunch: Add chopped nuts like almonds or pecans to the topping to give it extra crunch and flavor.
-
Citrusy Zing: Mix in some lemon zest into the raspberry filling for a fresh, zesty twist.
-
Chocolate Lovers: Drizzle melted dark chocolate over the bars before serving for a decadent touch.
-
Vegan Option: Substitute the butter with coconut oil and the egg with applesauce for a delicious vegan variation that everyone can enjoy.
Chef’s Notes
Thinking back, this recipe has evolved over the years. I started off with a simple crust that didn’t hold together well, but with a few adjustments and a lot of taste testing, I’ve landed on this lovely version. I still remember the first time I experimented with adding a bit of almond extract—what a game changer!
And how about that time I tried to impress friends by making a double batch for a potluck? Let’s just say that was the fastest I’ve ever seen a dessert table clear out! If there’s one thing I’ve learned, it’s that Raspberry Bars are always a crowd-pleaser.
FAQs and Troubleshooting
1. My crust is too crumbly. What did I do wrong?
- It sounds like there may not have been enough moisture or the butter wasn’t properly softened. Make sure to cream the butter well and measure accurately. If it’s too crumbly, a splash of milk or an extra egg can help bind it together.
2. Can I use frozen raspberries?
- Absolutely! Just thaw and drain them well to avoid excess moisture. Frozen berries work great and can even be slightly sweeter than fresh ones.
3. Why are my Raspberry Bars too soggy?
- If your filling looks overly wet, you might need to bake them a little longer. Just keep an eye on the topping—if it starts to brown too quickly, you can cover it loosely with foil.
4. How should I store the Raspberry Bars?
- Keep them in an airtight container at room temperature for up to three days. If you want to keep them longer, they freeze beautifully! Just layer them with parchment paper to prevent sticking.
Nutritional Info
While it’s hard to pin down exact nutritional values without specifics on portion size, a typical serving of these Raspberry Bars will have about:
- Calories: 200
- Total Fat: 9g
- Carbohydrates: 29g
- Protein: 2g
- Fiber: 1g
Remember, moderation is key! Enjoy these bars with friends and family, and you’ll savor every bite.
And there you have it—delicious, easy-to-make Raspberry Bars that capture the spirit of summer and home baking like no other. Whether you’re enjoying them solo or sharing them with loved ones, these bars are bound to bring joy and sweetness into your life. Happy baking, and may your kitchen always smell like warm raspberries!
Print
Delightfully Tart Raspberry Bars
- Total Time: 55 minutes
- Yield: 16 servings 1x
- Diet: Vegetarian
Description
A delicious blend of sweet and tart, these Raspberry Bars feature a buttery crumble and vibrant raspberry filling, perfect for any occasion.
Ingredients
- 2 cups Fresh Raspberries
- 2 cups All-Purpose Flour
- 1 cup Granulated Sugar
- 1 cup Unsalted Butter, softened
- 1 large Egg
- 1 teaspoon Vanilla Extract
- 1 teaspoon Baking Powder
- 1/4 teaspoon Salt
- Powdered Sugar, for dusting (optional)
Instructions
- Preheat your oven to 350°F (175°C).
- Prepare a 9×9-inch square baking dish with butter or parchment paper.
- Make the crust by mixing 1 cup flour, 1/2 cup sugar, and softened butter until crumbly.
- Add the egg and vanilla extract and mix until combined.
- Press 2/3 of the dough into the bottom of the dish.
- Prepare the filling by combining raspberries, 1/2 cup sugar, 2 tablespoons flour, and baking powder in a bowl.
- Spread the raspberry mixture over the crust.
- Crumble the remaining dough over the filling.
- Bake for 35-40 minutes until golden.
- Cool completely before cutting into squares.
Notes
Serve with a dusting of powdered sugar, whipped cream, or vanilla ice cream for an extra treat.
- Prep Time: 15 minutes
- Cook Time: 40 minutes
- Category: Dessert
- Method: Baking
- Cuisine: American
Nutrition
- Serving Size: 1 bar
- Calories: 200
- Sugar: 10g
- Sodium: 110mg
- Fat: 9g
- Saturated Fat: 5g
- Unsaturated Fat: 3g
- Trans Fat: 0g
- Carbohydrates: 29g
- Fiber: 1g
- Protein: 2g
- Cholesterol: 30mg
Keywords: Raspberry Bars, Dessert, Easy Baking, Fruit Dessert, Summer Treat

White Chocolate Raspberry Scones
The Sweet Symphony of White Chocolate Raspberry Scones
Welcome to my kitchen, friends! Today, we’re diving into something truly delightful: White Chocolate Raspberry Scones. These little treats are more than just baked goods; they’re bites of joy that can turn any day into a special occasion. Whether you’re enjoying a cozy morning at home or hosting a charming tea party, these scones bring a burst of flavor and a sprinkle of sweetness to your life.
I remember the first time I tasted a raspberry scone — it was during a lazy Sunday brunch with my best friend Lucy. The cafe, with its mismatched furniture and floral wallpaper, radiated warmth. We’d ordered a pot of Earl Grey tea and a couple of those heavenly scones, which were golden and crusty on the outside, yet tender and bursting with juicy raspberries on the inside. The moment I took my first bite, I could feel the sweet and tart flavors dancing in harmony, with the smoothness of white chocolate elevating it all to another level. It was pure bliss! From that day on, I became determined to recreate that experience in my kitchen, and I’m excited to share what I’ve learned.
Let’s roll up our sleeves and get baking because these White Chocolate Raspberry Scones are going to steal your heart — and your taste buds. Trust me, you’ll want to whip these up again and again!
A Nostalgic Memory: The Birth of My Scone Addiction
Picture this: a sun-drenched kitchen, a gentle breeze wafting through the window, and the sweet scent of raspberries blended with a hint of white chocolate. That was the scene when I first tried my hand at baking scones at home. After my memorable brunch outing, I was inspired and slightly obsessed! I spent countless weekends experimenting, flour dusting my apron, and my dog, Oliver, eagerly waiting for any crumbs to fall.
I remember the first batch I made. It was a sunny Saturday morning, and I was determined to impress my family. The scones were a bit overcooked (okay, maybe more than a bit), but even those crispy edges couldn’t hide the delight of the rich raspberry flavor with morsels of melted white chocolate. We sat around the breakfast table, sharing laughs, and with each bite, my confidence as a baker blossomed. Those scones became a Saturday tradition in our home, a ritual that celebrated the joy of family and flavor.
And now, I want to inspire you with this simple yet elegant recipe that will just become a staple in your kitchen too. Let’s bring the warmth of that sunny kitchen into your home!
Ingredients
-
2 cups all-purpose flour
All-purpose flour forms the base of your scones, providing the right texture. If you want a slightly healthier twist, feel free to substitute half of it with whole wheat flour! -
1/4 cup granulated sugar
Sugar adds sweetness and enhances the flavor of the baked good. If you prefer a less sweet version, you can reduce the sugar slightly while still keeping the integrity of our scones. -
1 tablespoon baking powder
This helps the scones rise and become fluffy. Ensure it’s fresh; old baking powder can lead to dense scones. -
1/2 teaspoon salt
Salt enhances the overall flavor and balances the sweetness. It’s an essential ingredient! -
1/2 cup cold unsalted butter
Cold butter is crucial! It creates a flaky texture. If you’re in a pinch, you can substitute it with margarine or even coconut oil for a different flavor profile. -
1/2 cup heavy cream (plus extra for brushing)
Cream brings richness and moisture. For a lighter option, try whole milk or buttermilk. -
1 teaspoon vanilla extract
Add this for a warm, inviting flavor. Feel free to experiment with almond extract for a different twist! -
1 cup fresh raspberries
The star of the show! Fresh raspberries add vibrant color and tartness. If fresh ones aren’t available, you can use frozen, but make sure to gently fold them in while still frozen. -
1/2 cup white chocolate chips
For that sweet, creamy contrast to the tart raspberries. You can also try dark chocolate chips if you prefer a richer flavor.
Step-by-Step Instructions
Preheat and Prep
-
Preheat your oven to 400°F (200°C)
Preheating is essential for scones, as it helps achieve that beautiful golden crust. It’ll take a few minutes, so let’s just revel in the anticipation! -
Prepare your baking sheet
Line a baking sheet with parchment paper. This will prevent your scones from sticking and make clean-up a breeze!
Mix Dry Ingredients
- In a large bowl, whisk together the flour, sugar, baking powder, and salt
This ensures everything is well combined, which is key to uniform scones. Take a moment to appreciate the beauty of these simple ingredients!
Cut in the Butter
- Add the cold butter
Using a pastry cutter or your fingertips, work the butter into the flour mixture until it resembles coarse crumbs. You want small pea-sized pieces of butter left—that’s where the magic happens! This process creates those lovely flaky layers.
Combine Wet Ingredients
- In a separate bowl, whisk together the cream and vanilla extract
This will not only bring added flavor but also help ease the dry ingredients together. Whisk it until it’s nice and smooth — you want it to be a bit frothy.
Bring It Together
- Pour the wet ingredients into the dry mixture
Stir gently with a spatula until just combined. Be careful not to overmix — we want tender scones, not tough ones!
Fold in the Goodies
- Gently fold in the raspberries and white chocolate chips
Use a light hand here. This is where you’ll see those gorgeous specks of fruit and chocolate come to life in your dough!
Shape the Scones
-
Turn the dough onto a lightly floured surface
With your hands, gently shape the dough into a round disc about one inch thick. -
Cut the dough into wedges
Use a sharp knife or a pizza cutter — my secret weapon! — to slice the dough into 8 triangles.
Bake Time!
-
Transfer the scones to the prepared baking sheet
Leave a little space between them since they’ll puff up during baking. Brush the tops with a bit of cream for that golden finish. -
Bake in the preheated oven for 15-20 minutes or until golden brown
Sit back and enjoy the heavenly aroma wafting through your kitchen. It’s the best part!
Serving Suggestions
Once out of the oven, let the scones cool slightly on a wire rack. To serve, stack a few scones on a beautiful platter, dust with powdered sugar for a touch of elegance, and consider pairing them with whipped cream or clotted cream for an indulgent treat. These scones are perfect with a cup of tea or coffee, making them ideal for brunch or an afternoon snack!
Recipe Variations
-
Lemon Zest Addition
Add a teaspoon of lemon zest to the dough for a bright, citrusy twist that pairs wonderfully with the raspberries. -
Nutty Touch
Incorporate chopped nuts like almonds or hazelnuts for an added crunch. This gives a delightful texture contrast! -
Different Berries
Swap out raspberries for blueberries or strawberries. You can mix and match based on your seasonal favorites! -
Flavored Chocolate
Experiment with flavored chocolate chips — white chocolate peppermint for winter, or dark chocolate rosemary for a more sophisticated touch. -
Gluten-Free Version
Substitute the all-purpose flour with a 1:1 gluten-free baking flour blend. Just watch your baking time closely!
Chef’s Notes
When I first developed this recipe, I played around with various substitutions, trying to strike the perfect balance between sweetness and tartness. One afternoon, I accidentally dropped a whole cup of raspberries into the dough — while I thought I had ruined it, the end result was astounding! The scones were bursting with color and flavor, which inspired me to embrace imperfections in the kitchen. After all, cooking is all about experimenting and making mistakes.
I’ve had the joy of making these scones for countless brunches, family gatherings, and casual afternoons with friends. Each time, they turn out a little differently depending on the berries I use or what I have on hand, and that’s the beauty of cooking!
FAQs and Troubleshooting
Why are my scones too dry?
If your scones are dry, you might be overmixing the dough or using too much flour. Always measure your flour correctly and mix until just combined.
Can I make the dough ahead of time?
Absolutely! You can prepare the dough, shape it into a disc, and wrap it tightly in plastic wrap. Refrigerate for up to 24 hours. Just bake them directly from the fridge, but you may need to add a couple of extra minutes to the baking time.
How should I store leftover scones?
Store them in an airtight container at room temperature for up to three days. To reheat, pop them in the oven for a few minutes to restore their delightful texture.
Can I freeze these scones?
Yes! Scones freeze beautifully. Freeze them after baking and let them thaw on the counter for a few hours before enjoying. Alternatively, you can freeze unbaked scones on a baking sheet and transfer them to a bag. Bake straight from the freezer; just add a couple of extra minutes to the baking time.
Nutritional Info
(For reference; this can be adjusted based on actual ingredients used)
- Calories: 250 kcal per scone
- Total Fat: 12g
- Saturated Fat: 7g
- Carbohydrates: 35g
- Sugar: 10g
- Fiber: 1g
- Protein: 3g
And there you have it! These White Chocolate Raspberry Scones are perfect for any occasion, whether a quiet Sunday morning or a bustling brunch gathering with friends. So, roll up those sleeves, gather your ingredients, and let’s create some mouthwatering memories in the kitchen! Happy baking! 🍽️❤️
Print
White Chocolate Raspberry Scones
- Total Time: 30 minutes
- Yield: 8 servings 1x
- Diet: Vegetarian
Description
Delightful scones bursting with fresh raspberries and white chocolate, perfect for brunch or a cozy afternoon tea.
Ingredients
- 2 cups all-purpose flour
- 1/4 cup granulated sugar
- 1 tablespoon baking powder
- 1/2 teaspoon salt
- 1/2 cup cold unsalted butter
- 1/2 cup heavy cream (plus extra for brushing)
- 1 teaspoon vanilla extract
- 1 cup fresh raspberries
- 1/2 cup white chocolate chips
Instructions
- Preheat your oven to 400°F (200°C).
- Prepare a baking sheet by lining it with parchment paper.
- Whisk together the flour, sugar, baking powder, and salt in a large bowl.
- Add the cold butter, working it into the flour mixture until it resembles coarse crumbs.
- Whisk together the cream and vanilla extract in a separate bowl until smooth.
- Pour the wet ingredients into the dry mixture and stir gently until just combined.
- Fold in the raspberries and white chocolate chips carefully.
- Turn the dough onto a lightly floured surface and shape it into a round disc about one inch thick.
- Cut the dough into 8 triangles using a sharp knife.
- Transfer the scones to the prepared baking sheet, brushing the tops with cream.
- Bake for 15-20 minutes or until golden brown.
Notes
Consider serving with whipped cream or clotted cream for an indulgent treat.
- Prep Time: 10 minutes
- Cook Time: 20 minutes
- Category: Bakery
- Method: Baking
- Cuisine: American
Nutrition
- Serving Size: 1 scone
- Calories: 250
- Sugar: 10g
- Sodium: 150mg
- Fat: 12g
- Saturated Fat: 7g
- Unsaturated Fat: 5g
- Trans Fat: 0g
- Carbohydrates: 35g
- Fiber: 1g
- Protein: 3g
- Cholesterol: 30mg
Keywords: scones, white chocolate, raspberry, brunch, dessert
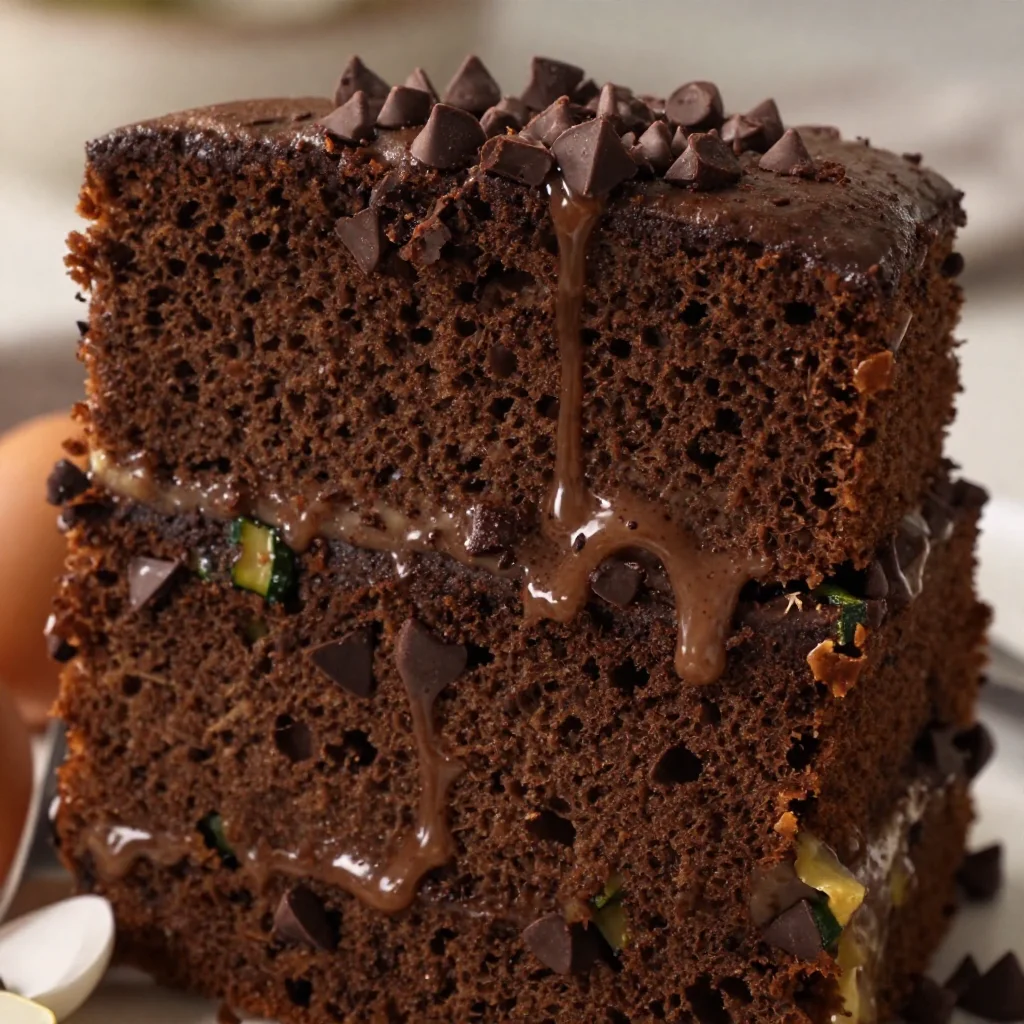
One-Bowl Chocolate Zucchini Cake: Quick, Moist & Easy
Indulge in a Slice of Heaven: Chocolate Zucchini Cake Recipe
Welcome to my cozy kitchen! Today, I’m excited to whisk you away into the delightful world of baking with one of my all-time favorite recipes: Chocolate Zucchini Cake. If you’re a fellow food enthusiast who loves the smell of something sweet wafting through the air, you’re in for a treat. This cake is not only incredibly moist and delicious, but it also sneaks in a good serving of vegetables—yes, you read that right!
Growing up, I always associated baking with warmth and love. I fondly recall afternoons spent in my grandmother’s kitchen, where she transformed the most unsuspecting ingredients into magical desserts. Chocolate Zucchini Cake was one of her signature recipes. I can still picture her dusting cocoa powder on the counter, her laughter filling the room as we prepared to mix the batter. Using zucchini was her clever way of taking advantage of summer harvests. It was our little secret–no one ever guessed there were veggies hiding in our sweet treats!
As we whipped up that rich batter, I remember sneaking tastes and marveling at how the chocolate completely masked the zucchini. Each slice of cake was a celebration at the dinner table, perfect for birthdays, potlucks, or simply as a special afternoon treat. I knew from that moment on that I would have to share this cake with others. It’s not just about feeding your loved ones; it’s about creating memories that linger long after the last bite. So, grab your whisks, and let’s dive into this delightful Chocolate Zucchini Cake together!
The Story Behind the Cake
What makes this recipe extra special for me? It’s not just the rich chocolatey goodness that envelops this cake, but the memories and laughs shared while making it. I remember one summer afternoon when my cousin came over unannounced, and we decided to whip something up. Armed with fresh zucchinis from my garden, we looked at each other and said, “Chocolate Zucchini Cake, it is!”
The kitchen soon filled with laughter, flour, and a few accidental messes—who knew a simple recipe could turn into a cocoa avalanche? We turned on the radio, dancing and singing while mixing ingredients, all the while sneaking spoonfuls of the batter. Finally, once we pulled the cake from the oven, the kitchen filled with a heavenly aroma that drew in my family like moths to a flame.
That day wasn’t just about making cake; it was about creating cherished moments that I still carry with me today. It’s the kind of joy I want to share every time I bake. So, let’s bring that warmth and happiness into your own kitchen together!
Ingredients
Here’s what you’ll need to create this amazing Chocolate Zucchini Cake:
-
1½ cups grated zucchini
A moisture-packed ingredient that adds tenderness, zucchini provides a wonderful texture without overpowering the chocolate flavor. You can substitute with finely grated carrots for a similar moisture effect. -
1½ cups all-purpose flour
The backbone of any cake. If you’re looking for a gluten-free option, you can experiment with almond flour or a 1:1 gluten-free flour blend. -
1 cup granulated sugar
This sweet staple adds to the cake’s fluffiness. You can substitute with coconut sugar for a lower glycemic index, but the cake may alter slightly in color and flavor. -
⅓ cup unsweetened cocoa powder
A key player for that rich chocolate flavor. Opt for Dutch-processed cocoa for a smoother taste, or use carob powder for a caffeine-free alternative. -
½ teaspoon baking powder
This helps the cake rise and ensures a light texture. If you’re out, baking soda works in a pinch, but cut it in half since it’s stronger. -
½ teaspoon baking soda
Another leavening agent that works wonders, especially combined with acid from the zucchinis or cocoa. -
½ teaspoon salt
Balances out the sweetness and enhances flavors. -
½ cup vegetable oil
For moistness and richness. You can substitute with applesauce for a healthier option or melted coconut oil for a delightful twist. -
2 large eggs
Essential for binding the ingredients together. For an egg-free alternative, use ¼ cup unsweetened applesauce per egg. -
1 teaspoon vanilla extract
The aromatic quality of vanilla elevates the entire cake! Feel free to swap with almond extract for a unique flavor. -
½ cup chocolate chips (optional)
Who can resist chocolate chunks in chocolate cake? Dark chocolate or dairy-free chips work perfectly here too!
Step-by-Step Instructions
Now, let’s get to the magic part—making your cake from scratch! Here’s how to do it:
-
Preheat the Oven
Start by preheating your oven to 350°F (175°C). This ensures a perfectly baked cake. While the oven heats up, grab your baking pan—a 9×13-inch pan works wonders—grease it lightly to prevent sticking. -
Prepare the Zucchini
Wash and grate your zucchini. To avoid excess moisture, use a clean kitchen towel to squeeze out any liquid. Trust me; it can make a difference in texture! -
Mix Dry Ingredients
In a large mixing bowl, whisk together the flour, cocoa powder, baking powder, baking soda, and salt until fully combined. This step helps distribute the leavening agents evenly throughout the batter, ensuring a consistent rise. -
Combine Wet Ingredients
In a separate bowl, whisk together the granulated sugar, vegetable oil, eggs, and vanilla extract until smooth and homogenous. That lovely golden color will have you drooling already! -
Combine All Ingredients
Gradually add the wet mixture to the dry ingredients, stirring gently until just combined (be careful not to overmix!). Fold in the grated zucchini until it’s incorporated, followed by the chocolate chips if using. The batter will be thick and luscious—just how we like it! -
Pour and Bake
Pour the batter into your prepared baking pan, smoothing the top with a spatula. Bake for about 35-40 minutes or until a toothpick inserted into the center comes out clean (or with a few moist crumbs). You got this! -
Cool and Serve
Once baked, remove the pan from the oven and let it cool in the pan for about 10 minutes before transferring to a wire rack. This helps prevent sticking. Let it cool completely, and enjoy the heavenly aroma as you wait!
Serving Suggestions
Slice your beautifully baked Chocolate Zucchini Cake and serve with a light dusting of powdered sugar or a dollop of whipped cream for an extra touch of indulgence. You can also pair it with fresh berries for a touch of fruity freshness that balances the richness of the chocolate. It’s perfect for dessert or as a delicious snack with afternoon tea!
Recipe Variations
Feel free to let your creativity shine! Here are some variations to spice things up:
-
Mocha Madness: Mix in a tablespoon of instant coffee granules for a delightful mocha flavor that pairs beautifully with chocolate.
-
Spiced Up: Add a teaspoon of cinnamon or a pinch of nutmeg for a warm, earthy flavor.
-
Nutty Delight: Toss in some chopped walnuts or pecans for an extra crunch that complements the moist cake.
-
Fruity Twist: Add in a half-cup of mashed bananas for a hint of natural sweetness and a different flavor profile.
-
Coconut Flair: Incorporate unsweetened shredded coconut for a tropical feel—just adjust the moisture slightly to maintain the cake’s consistency.
Chef’s Notes
Over the years, I’ve experimented with this Chocolate Zucchini Cake recipe, and it has blossomed into a family favorite that everyone raves about. I vividly remember one time baking it for a friend’s birthday. In my excitement, I grabbed the wrong container and added salt instead of sugar! Let’s just say it was a monumental flop. But as they say, every mistake is a chance to learn. That mishap encouraged me to keep my ingredients organized and labeled!
This cake has become synonymous with celebrations in my home. It’s one of those desserts that never goes left uneaten. In fact, it often gets devoured before I even have time to snap a pic! So, I leave you with a friendly reminder: always have your camera at the ready when you bake this beauty!
FAQs and Troubleshooting
-
Why does my cake turn out dense?
A dense cake can result from overmixing the batter or adding too much zucchini. Remember to mix until just combined, and ensure your grated zucchini is adequately drained. -
How do I store leftovers?
Store in an airtight container at room temperature for up to three days or refrigerate for up to a week. You can also freeze slices for up to three months—perfect for a quick treat! -
Can I make this cake healthier?
Absolutely! Substituting applesauce for oil, using whole wheat flour, or reducing sugar by a third are all great ways to lighten this dessert while keeping the flavor intact. -
Can I make this cake in advance?
Yes! It actually tastes better the next day as the flavors have time to meld. Just ensure it’s stored properly.
With all these tips at your fingertips, you’re all set to bake the perfect Chocolate Zucchini Cake! Embrace the little messes and enjoy the process—we’re all friends in this cozy kitchen of ours. So, gather your loved ones, mix up that batter, and let the memories unfold sweetly and joyfully. Happy baking!
Print
Chocolate Zucchini Cake
- Total Time: 55 minutes
- Yield: 12 servings 1x
- Diet: Vegetarian
Description
A moist and delicious chocolate cake that cleverly incorporates zucchini for added texture and nutrition.
Ingredients
- 1½ cups grated zucchini
- 1½ cups all-purpose flour
- 1 cup granulated sugar
- ⅓ cup unsweetened cocoa powder
- ½ teaspoon baking powder
- ½ teaspoon baking soda
- ½ teaspoon salt
- ½ cup vegetable oil
- 2 large eggs
- 1 teaspoon vanilla extract
- ½ cup chocolate chips (optional)
Instructions
- Preheat the oven to 350°F (175°C) and grease a 9×13-inch baking pan.
- Wash and grate the zucchini, squeezing out excess moisture with a kitchen towel.
- Whisk together flour, cocoa powder, baking powder, baking soda, and salt in a large bowl.
- Combine granulated sugar, vegetable oil, eggs, and vanilla in a separate bowl until smooth.
- Add the wet mixture to dry ingredients, stirring gently until just combined, then fold in zucchini and chocolate chips.
- Pour batter into prepared pan and bake for 35-40 minutes until a toothpick comes out clean.
- Cool in the pan for 10 minutes, then transfer to a wire rack to cool completely.
Notes
Serve with powdered sugar or whipped cream. Variations include adding coffee granules for a mocha flavor or nuts for a crunchy texture.
- Prep Time: 15 minutes
- Cook Time: 40 minutes
- Category: Dessert
- Method: Baking
- Cuisine: American
Nutrition
- Serving Size: 1 slice
- Calories: 350
- Sugar: 20g
- Sodium: 200mg
- Fat: 15g
- Saturated Fat: 2g
- Unsaturated Fat: 10g
- Trans Fat: 0g
- Carbohydrates: 45g
- Fiber: 3g
- Protein: 5g
- Cholesterol: 70mg
Keywords: chocolate cake, zucchini cake, dessert, moist cake, baking
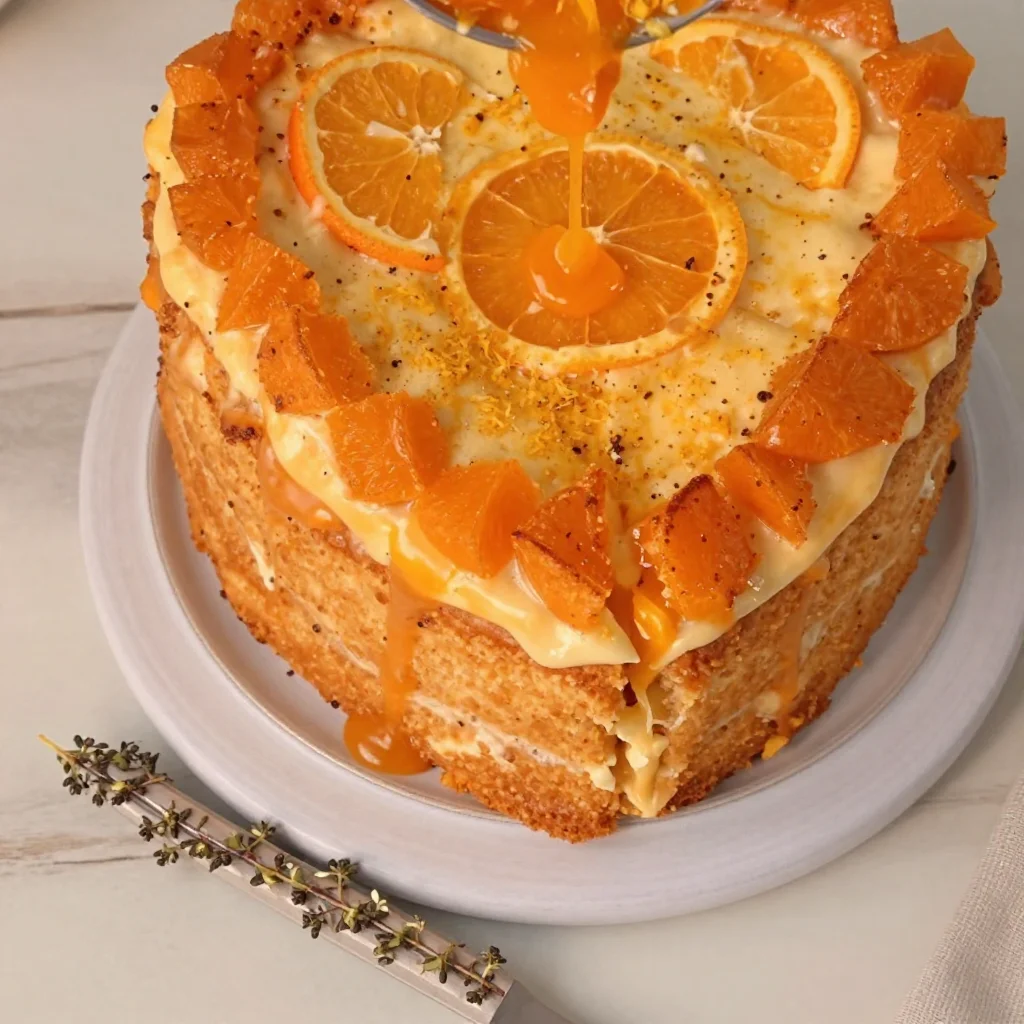
Orange Cake
The Sweet Zest of Orange Cake: A Cozy Culinary Adventure
Welcome to my kitchen, fellow food lovers! Today, we’re diving into a delightful dessert that embodies the warmth and brightness of citrus — Orange Cake! If the mere thought of fresh cake slathered in orange glaze makes your heart flutter, you’re in the right place. This splendid treat is not just a dessert; it’s a celebration of seasonal flavors and a reminder of life’s sweet moments.
There’s something magical about cake. It brings people together and creates a sense of joy that’s hard to replicate. As I whisk together flour and sugar, I’m transported to my grandma’s kitchen, where the aroma of oranges would fill the air on lazy Sunday afternoons. I remember the first time I helped her make this cake; she handed me a zester and said, “Here, my dear, start with this magical ingredient.”
Watching the bright orange zest fall into the mixing bowl felt like sprinkling sunshine into our afternoon. The best part? Grandma’s laughter would echo in the background as we tasted the batter (don’t worry — a little raw batter won’t hurt you!) and shared stories of family gatherings filled with love and laughter.
Today, we’ll recreate that cherished memory together. Not only will I guide you through each step with care and a sprinkle of humor, but I’ll also share tips and tricks that will have you whipping up this Orange Cake with confidence. So, put on your favorite apron, grab your ingredients, and let’s make some magic happen!
Personal Story: A Slice of Nostalgia
When I think of Orange Cake, my thoughts drift back to family get-togethers at Grandma’s house. She had this knack for transforming our ordinary weekends into extraordinary feasts. The centerpiece? Always her mouthwatering Orange Cake.
I remember how she’d meticulously zest fresh oranges, her hands moving quick like a magician — all while weaving in stories of her youth. “You know, sweetie,” she’d say, “the secret to a great cake is in the love you put into it.” I chuckle now, recalling how my young self took her words to heart, believing that if I just stirred vigorously enough, a bit of that love would leap into the pan, creating a masterpiece.
As time went on, I witnessed how this simple cake became a tradition. It graced tables at birthdays, holidays, and even just Wednesday afternoon coffee breaks. When I serve it today, I feel her presence, becoming part of each slice I share with friends and family. So, let’s don our aprons and embrace the spirit of togetherness as we bake this timeless treat!
Ingredients: Gather Your Sunshine
To whip up this delightful Orange Cake, you’ll need the following ingredients:
-
2 cups all-purpose flour
- This forms the base of your cake. For a gluten-free version, substitute with almond flour or a gluten-free blend.
-
1 ½ cups granulated sugar
- Sweetness alert! You can reduce the sugar by a third if you like a less sweet cake or swap in coconut sugar for a hint of caramel flavor.
-
1/2 cup unsalted butter (softened)
- Butter not only adds richness but also helps create that tender crumb. If you’d prefer a dairy-free option, coconut oil works wonders.
-
1 cup fresh orange juice
- Here’s where your cake gets its vibrant flavor! Freshly squeezed is best, but store-bought works in a pinch.
-
2 teaspoons baking powder
- This is your leavening agent! Ensure it’s fresh for that perfect rise. You can use baking soda, but you’ll need to adjust the quantities.
-
1/2 teaspoon salt
- Salt enhances sweetness. Don’t skip it, or your cake may taste flat!
-
3 large eggs
- Eggs provide moisture and richness. For a vegan twist, replace each egg with 1/4 cup unsweetened applesauce.
-
Zest of 2 oranges
- Zest adds concentrated flavor. The fresher, the better! A microplane makes quick work of this.
-
1 teaspoon vanilla extract
- Vanilla rounds out the flavors beautifully. In a pinch, almond extract can substitute if you’re feeling adventurous.
-
Optional: Powdered sugar for dusting
- A light dusting of powdered sugar elevates your cake presentation, making it Instagram-worthy!
Step-by-Step Instructions: Let’s Bake!
Now that we’ve rounded up our ingredients, it’s time to get baking! Here’s how to create a glorious Orange Cake that bursts with flavor:
-
Preheat Your Oven:
Preheat your oven to 350°F (175°C). This ensures a perfectly baked cake. While it’s warming up, grease and flour a 9-inch round cake pan, or line it with parchment paper. -
Cream Butter and Sugar:
In a large mixing bowl, cream the softened butter with the granulated sugar until light and fluffy. This step is crucial for creating air pockets leading to a tender cake. Aim for about 4-5 minutes — patience is key here! -
Add Eggs:
Beat in the eggs, one at a time, ensuring each is well incorporated. It should look creamy and luscious. Toss in that teaspoon of vanilla — ah, the aroma is heavenly! -
Mix in Orange Juice and Zest:
Stir in the fresh orange juice and zest. The bright orange aroma will make you feel sunny inside! Here’s a fun tip: If you have any leftover orange zest, toss it into your morning smoothie for an extra zing. -
Combine Dry Ingredients:
In a separate bowl, whisk together the flour, baking powder, and salt. Gradually fold this mixture into your wet ingredients. Be gentle with this step; over-mixing can lead to a dense cake. -
Pour into the Pan:
Once the batter is just combined, pour it into your prepared cake pan. Use a spatula to level the top. Don’t forget to clean any batter off the sides — no one wants a burnt crust! -
Bake:
Place the pan in the preheated oven and bake for 25 to 30 minutes or until a toothpick inserted into the center comes out clean. Keep an eye on it after the 25-minute mark — we want that gorgeous, golden hue! -
Cool Down:
Once baked, remove the cake from the oven and let it cool in the pan for about 10 minutes. Then, carefully transfer it to a wire rack to cool completely. Patience is key; let it cool down before you dive in! -
Glaze (Optional):
For a citrusy twist, you can make a quick glaze! Simply mix powdered sugar with a bit of orange juice until smooth and drizzle over the cooled cake. You’ll feel like a professional pastry chef in no time!
Serving Suggestions: Let’s Plate It Up!
When it comes to serving, I like to keep it simple yet elegant. A generous slice of your Orange Cake on a beautiful plate is already a treat in itself. Add a few thin slices of fresh orange or a sprig of mint for a pop of color and freshness. For an extra special touch, serve it alongside a dollop of whipped cream or a scoop of vanilla ice cream, letting the creamy sweetness meld with the bright citrus notes.
Recipe Variations: Put Your Twist on It!
This recipe is so versatile! Here are a few fun variations to keep it interesting:
-
Chocolate Orange Cake: Add 1/2 cup of cocoa powder to the flour mixture for a deliciously rich twist.
-
Nutty Delight: Stir in 1/2 cup of finely chopped walnuts or almonds into the batter to add a delightful crunch.
-
Spiced Orange Cake: Incorporate 1 teaspoon of cinnamon or ginger for a warm, spicy note that complements the citrus beautifully.
-
Marmalade Glaze: For an extra layer of flavor, use orange marmalade instead of glaze. Just heat it slightly to thin it out before drizzling!
-
Gluten-Free Orange Cake: Substitute the all-purpose flour with a gluten-free flour blend, ensuring that your baking powder is certified gluten-free for a perfect rise!
Chef’s Notes: A Dash of Love and Laughter
This Orange Cake holds a special place in my heart. As I perfected it over the years, I’ve tested numerous variations, and each time I pull it from the oven, I’m reminded of Grandma’s laughter and wisdom. I’ve learned to embrace the mess of baking; after all, it’s called a “kitchen adventure” for a reason!
I’ve also experienced my fair share of kitchen catastrophes. Like the time I forgot the baking powder and ended up with a sunken sponge. It wasn’t pretty! But through those little hiccups, I learned that cooking is about experimentation and having fun — and sharing the results, good or bad, always sparks laughter.
FAQs and Troubleshooting: Let’s Avoid Those Kitchen Gremlins!
1. Why did my cake sink in the middle?
- This often happens if it was underbaked or the oven temperature was too low. Always trust your toothpick test and keep an eye on that timer!
2. Can I use bottled orange juice instead of fresh?
- Yes, you can! However, fresh juice will give you the best flavor. If using store-bought, look for one that’s pure juice without additives.
3. How do I store leftovers?
- This cake can stay fresh at room temperature for 2-3 days. For extended life, wrap it tightly and refrigerate it for up to a week. Just be sure to bring it back to room temperature before serving — the flavors bloom beautifully!
4. My glaze turned out too thick; what can I do?
- Simply add a few drops of orange juice or water to thin it out. Remember, you want it pourable but still thick enough to coat!
Nutritional Info (Optional, but Helpful)
- Serving Size: 1 slice (1/12 of cake)
- Calories: 250
- Total Fat: 9g
- Saturated Fat: 5g
- Cholesterol: 40mg
- Sodium: 150mg
- Total Carbohydrates: 38g
- Dietary Fiber: 1g
- Sugars: 20g
- Protein: 3g
Now, my friends, you’re ready to create some homemade happiness with this Orange Cake. It’s more than just a recipe; it’s about the memories and connections built around it. Bake it, share it, and most importantly, enjoy every crumb. I hope this cake brightens your days as much as it has brightened mine! Happy baking!
Print
Orange Cake
- Total Time: 45 minutes
- Yield: 12 servings 1x
- Diet: Vegetarian
Description
A delightful Orange Cake that embodies the warmth and brightness of citrus, perfect for any occasion.
Ingredients
- 2 cups all-purpose flour
- 1 ½ cups granulated sugar
- 1/2 cup unsalted butter (softened)
- 1 cup fresh orange juice
- 2 teaspoons baking powder
- 1/2 teaspoon salt
- 3 large eggs
- Zest of 2 oranges
- 1 teaspoon vanilla extract
- Optional: Powdered sugar for dusting
Instructions
- Preheat your oven to 350°F (175°C) and prepare a 9-inch round cake pan.
- Cream the softened butter with the granulated sugar until light and fluffy for about 4-5 minutes.
- Add the eggs one at a time, incorporating each one fully, then mix in the vanilla extract.
- Mix in the fresh orange juice and zest until well combined.
- Combine the flour, baking powder, and salt in a separate bowl, then gradually fold into the wet ingredients.
- Pour the batter into the prepared pan, leveling the top, and clean any batter off the sides.
- Bake for 25 to 30 minutes, or until a toothpick inserted in the center comes out clean.
- Cool in the pan for 10 minutes, then turn out onto a wire rack to cool completely.
- Glaze (Optional): Mix powdered sugar with a little orange juice for a quick glaze and drizzle over the cooled cake.
Notes
Serve with a drizzle of glaze and garnish with fresh orange slices or a sprig of mint for added elegance.
- Prep Time: 15 minutes
- Cook Time: 30 minutes
- Category: Dessert
- Method: Baking
- Cuisine: American
Nutrition
- Serving Size: 1 slice (1/12 of cake)
- Calories: 250
- Sugar: 20g
- Sodium: 150mg
- Fat: 9g
- Saturated Fat: 5g
- Unsaturated Fat: 4g
- Trans Fat: 0g
- Carbohydrates: 38g
- Fiber: 1g
- Protein: 3g
- Cholesterol: 40mg
Keywords: orange cake, citrus dessert, baking recipes, family recipes, nostalgic cake
Blueberry and Oat Crumble Bars
Deliciously Easy Blueberry and Oat Crumble Bars
Hello, my lovely kitchen enthusiasts! Today we’re diving into a recipe that’s as comforting as a hug and as delightful as a sunny afternoon. Whether you’re looking for a sweet surprise for your afternoon tea, a snack to satisfy your mid-day cravings, or a delightful addition to your brunch spread, these Blueberry and Oat Crumble Bars are here to save the day. Trust me; once you sink your teeth into these fabulous treats, you’ll be adding them to your regular baking rotation!
Growing up, my summers were practically synonymous with berry picking. The smell of ripe berries wafting through the air was a signal that heaven was about to unfold in my kitchen. With my trusty apron on and a slight twinkle of mischief in my eye, I would turn our freshly picked blueberries into all sorts of yummy treats, one of which was this incredibly simple yet satisfying blueberry crumble.
What I adore about this recipe is its versatility. It’s perfect for all occasions, whether you’re hosting a garden party or just having a cozy movie night at home—this is what I like to call “comfort food made easy.” So, grab your baking dishes and your favorite mixing bowl, and let’s get ready to whip up some magic with these delightful blueberry and oat crumble bars. You’re going to love them!
Personal Story
Ah, the memories come flooding back as I think about those summer days spent berry picking with my family. We would pile into the car, armed with single-use containers and excitement, ready to scour the nearby farms for the juiciest blueberries. I remember one particular year when I decided to attempt making my own version of a “Blueberry Oat Crumble” after our expedition.
With a basket brimming full of the plumpest blueberries, I dashed into the kitchen like a kid on Christmas morning. My parents were skeptical of my culinary endeavors, but the smell of butter melting and sugar mixing with fresh berries soon drew them in. As I tasted my creation, the divine combination of tart blueberries and buttery oats was a revelation! My family loved it, and it quickly became a summertime ritual in our household.
This simple recipe reminds me of those sunny days and all the love we shared in the kitchen. I can’t wait for you to create your own magical moments with these blueberry and oat crumble bars. Let’s dive right into the ingredients, shall we?
Ingredients
Here’s what you’ll need to create the most scrumptious blueberry and oat crumble bars:
-
2 cups rolled oats
These hearty oats provide the perfect texture for the crumble and are the foundation of the bars. Feel free to swap with quick oats for a softer texture, but avoid steel-cut oats, which will be too chewy. -
1 cup all-purpose flour
Flour holds everything together—some people use whole-wheat flour for a nuttier flavor. You can also try almond flour for a gluten-free option (just adjust the liquid slightly as needed). -
1/2 cup brown sugar
This adds a rich, caramel-like sweetness to the crumble. If you’re out of brown sugar, you can mix white sugar with a dash of molasses for a quick substitute. -
1/2 tsp baking soda
Helps the mixture rise gently, giving the bars a lovely texture. -
1/2 tsp salt
A little pinch of salt enhances the overall flavor of the dish—don’t skip it! -
1/2 cup unsalted butter, melted
Butter adds a rich, creamy flavor to your bars. Sometimes, I even use coconut oil for a lighter taste, which gives a subtle hint of coconut in each bite! -
2 cups fresh blueberries
The star of the show! You can use frozen blueberries, but rinse and dry them well to avoid excess moisture. -
1 tbsp lemon juice
This lifts the flavor of the blueberries and adds a zesty twist. You can adjust this to taste, particularly if your blueberries are extra sweet.
Let’s get cooking!
Step-by-Step Instructions
Step 1: Preheat the oven
Begin by preheating your oven to 350°F (175°C). This step is crucial as it ensures your bars bake evenly. While the oven warms, line an 8×8-inch baking pan with parchment paper, leaving some overhang for easy removal later.
Step 2: Mix Dry Ingredients
In a large bowl, combine your rolled oats, flour, brown sugar, baking soda, and salt. Stir gently with a wooden spoon or spatula until evenly combined. I like to feel the texture of the oats and sugar; it adds a delicious anticipation to the baking process!
Step 3: Add Wet Ingredients
Next, pour in the melted butter, mixing until everything is well-coated and crumbly. At this point, take a moment to appreciate the heavenly aroma wafting up from the mixture—heaven, I tell you! Save about 1 cup of this mixture to sprinkle on top later; it will create a beautiful crumble topping!
Step 4: Prepare the Blueberry Filling
In a separate bowl, gently mix the blueberries with the lemon juice. Be careful not to crush them; we want juicy bursts of fruit in every bite! You can add a tablespoon of sugar if your berries are a bit tart.
Step 5: Assemble the Layers
Now, press half of the oat mixture into the bottom of your prepared baking pan, ensuring it’s compact and even. This forms a sturdy crust that holds everything together.
Step 6: Add Blueberry Filling
Spread the blueberry mixture evenly over the crust. I like to envision how each berry will burst when baked, releasing their juice and mingling with the oats—yum!
Step 7: Top It Off
Now, crumble the reserved oat mixture evenly over the blueberries. It doesn’t need to be perfect; rustic is always better in my kitchen!
Step 8: Bake
Slide the pan into the preheated oven and bake for 25-30 minutes until the top is golden brown and the blueberries are bubbling away cheerfully. You may want to peek occasionally, but resist the urge to keep opening the oven door!
Step 9: Cool and Slice
Once baked, remove the pan from the oven and let it cool for at least 10-15 minutes to set. When cooled slightly, lift the bars using the parchment paper, and slice them into squares or rectangles. Trust me, letting the bars cool a bit before slicing will result in cleaner edges—and no one likes a messy dessert!
Serving Suggestions
Serve these delightful blueberry and oat crumble bars warm, drizzled with a little honey or a dollop of fresh whipped cream if you’re feeling indulgent. They’re also fantastic with a scoop of vanilla ice cream on a hot summer day! For a coffee shop vibe at home, pair it with a cup of coffee or tea, and you’ve got the ultimate cozy treat.
Recipe Variations
Feel free to get creative! Here are some fun variations you might enjoy:
- Swap the Fruit: Use peaches, raspberries, or even chopped strawberries instead of blueberries for a personal twist.
- Nuts and Seeds: Add 1/4 cup of chopped nuts (like almonds or walnuts) in the crumble for extra crunch, or mix in a tablespoon of chia seeds for added nutrition.
- Spices: Add a pinch of cinnamon or nutmeg to the crumble for a warmer flavor profile.
- Sweeteners: Try honey or maple syrup as the sweetener for a different take—just adjust the amount used in the butter mixture slightly.
Chef’s Notes
This recipe has been evolving with me over the years—from simple family gatherings to modern-day brunches with friends. I remember one fateful Fourth of July when I opted to bring these bars to celebrate. After some fierce but friendly competition in the dessert category, it became the star of the potluck!
One tip I always keep in mind is to leave a little room for experimentation. You never know what twist might surprise you, and that’s the beauty of home cooking—it’s all about what feels right to you!
FAQs and Troubleshooting
-
Q: Can I use frozen blueberries?
A: Absolutely! Just be sure to rinse and dry them well to avoid excess moisture in the bars. -
Q: What if my crumble is too dry?
A: Don’t fret! If your crumble mixture seems a bit crumbly, add a splash of water or a little extra melted butter to bind it together. -
Q: How do I store leftovers?
A: Store your crumble bars in an airtight container at room temperature for up to 3 days. You can also freeze them for up to a month—just make sure to wrap them well! -
Q: My bars fell apart when I cut them. Help!
A: This is usually a sign they weren’t cooled enough or that they need a little more time in the oven. Letting them cool properly will help them set!
Nutritional Info
(Approximate per serving, assuming 16 servings)
- Calories: 190
- Protein: 3g
- Carbs: 28g
- Fat: 8g
- Fiber: 3g
- Sugar: 7g
And there you have it, my dearest foodie friends! With just a handful of ingredients and a little love, you can create these scrumptious Blueberry and Oat Crumble Bars that will warm your heart and satisfy your sweet tooth. I hope this recipe inspires you to get creative in your kitchen, just like I did all those years ago. So, what are you waiting for? Gather your ingredients and let’s bake some delicious memories together! Happy cooking!
Print
Deliciously Easy Blueberry and Oat Crumble Bars
- Total Time: 45 minutes
- Yield: 16 servings 1x
- Diet: Vegetarian
Description
These delightful blueberry and oat crumble bars are a comforting treat perfect for any occasion, delivering a burst of juicy blueberries and a rich, buttery oat crumble.
Ingredients
- 2 cups rolled oats
- 1 cup all-purpose flour
- 1/2 cup brown sugar
- 1/2 tsp baking soda
- 1/2 tsp salt
- 1/2 cup unsalted butter, melted
- 2 cups fresh blueberries
- 1 tbsp lemon juice
Instructions
- Preheat the oven to 350°F (175°C) and line an 8×8-inch baking pan with parchment paper.
- Mix the rolled oats, flour, brown sugar, baking soda, and salt in a large bowl until combined.
- Add the melted butter and mix until the mixture is crumbly; reserve 1 cup for topping.
- Prepare the blueberry filling by gently mixing the blueberries with lemon juice.
- Assemble by pressing half of the oat mixture into the bottom of the baking pan.
- Add the blueberry mixture evenly over the crust.
- Top with the reserved oat mixture.
- Bake for 25-30 minutes until golden brown and bubbling.
- Cool for 10-15 minutes before slicing into bars.
Notes
Serve warm with honey or whipped cream, or enjoy with a scoop of vanilla ice cream.
- Prep Time: 15 minutes
- Cook Time: 30 minutes
- Category: Dessert
- Method: Baking
- Cuisine: American
Nutrition
- Serving Size: 1 bar
- Calories: 190
- Sugar: 7g
- Sodium: 200mg
- Fat: 8g
- Saturated Fat: 4g
- Unsaturated Fat: 4g
- Trans Fat: 0g
- Carbohydrates: 28g
- Fiber: 3g
- Protein: 3g
- Cholesterol: 15mg
Keywords: blueberry crumble, oat bars, dessert, healthy snack, baking
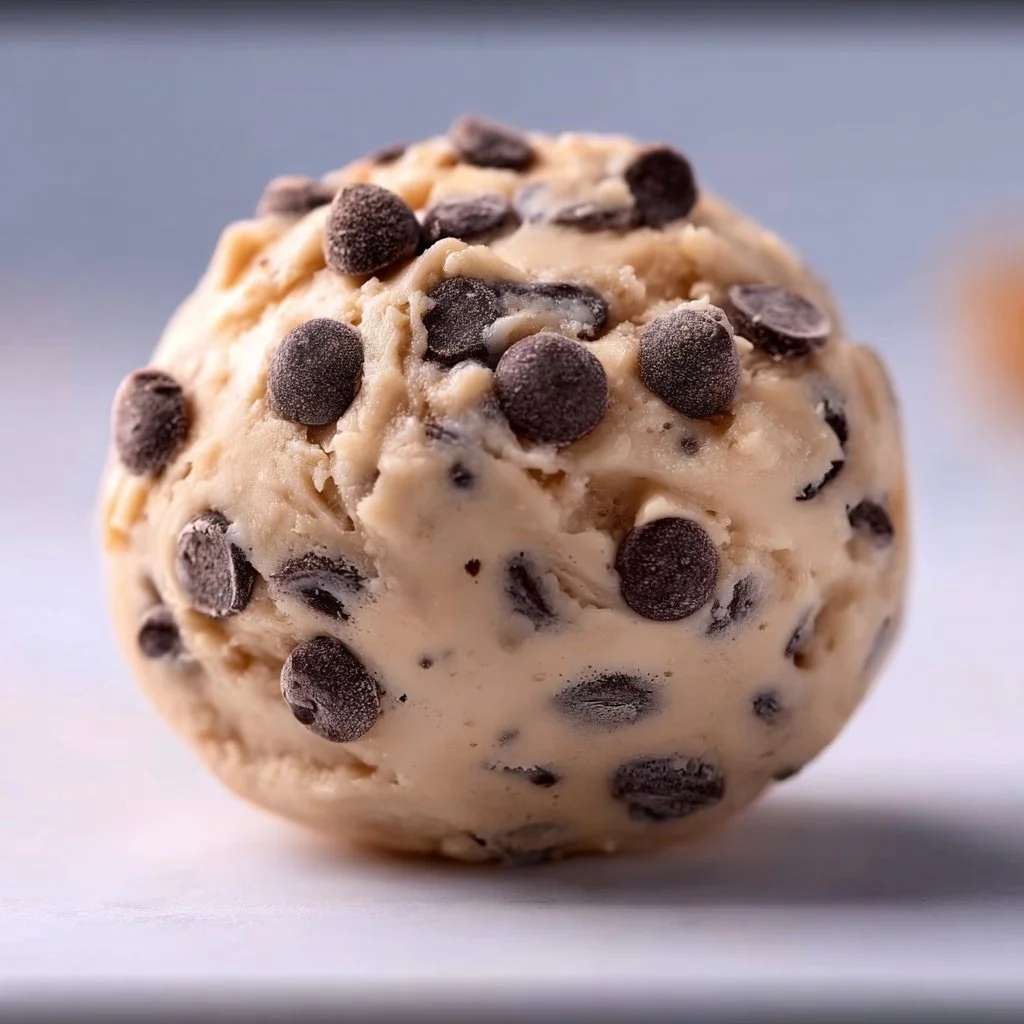
Greek Yogurt Cookie Dough
The Ultimate Greek Yogurt Cookie Dough: It’s Time to Get Cozy in the Kitchen!
Welcome to my kitchen! I’m eager to share a delightful treat that will transform your baking game: Greek Yogurt Cookie Dough! Picture this: the warm aroma of freshly baked cookies filling your home, the blissful anticipation of that first bite, and, oh, the joy of indulging without feeling guilty. These cookies have a healthy twist that will make you want to dive into the dough straight away!
I absolutely adore recipes that bring a nutritious spin to indulgent treats, and this one hits the spot! When I whipped up this Greek Yogurt Cookie Dough for the first time, it brought back fond memories of baking with my grandmother. She always believed that every great recipe shared a story; that the kitchen was a sacred place where love, laughter, and deliciousness rolled in tandem. As I stirred in the creamy yogurt into the fluffy mixture of butter and sugar, it was like she was there with me, teaching me once again that every ingredient adds its own unique character, just like the people we love.
So let’s roll up our sleeves and dive into this easy, scrumptious Greek Yogurt Cookie Dough recipe that’s sure to become a staple in your baking repertoire.
A Taste of Nostalgia: My Baking Journey
One of my fondest memories from childhood was baking cookies with my grandma during the holidays. The kitchen would fill with laughter, the sound of clattering measuring cups, and of course, the divine aroma of melting chocolate. We would whip up batch after batch, and the culinary glow of her well-worn kitchen was more comforting than a warm blanket on a cold winter’s night.
I remember one holiday season distinctly. In a desperate attempt to sneak extra chocolate chips into our classic cookie recipe, I knocked over the sugar canister! It went everywhere—on the floor, all over the counter, and even in our hair! We burst out laughing, and instead of cleaning it up immediately, we decided to roll our hands in the sugar like shimmering fairy dust and turn our messy disaster into a magic show!
This memory forms the heart of my cooking philosophy: it doesn’t have to be perfect to be delicious or fun! You have permission to explore, play, and even mess up a little in the kitchen. So, grab your apron, channel your inner cookie sorcerer, and discover the wonder of creating Greek Yogurt Cookie Dough!
Ingredients
Let’s gather our wonderful ingredients! Here’s what you’ll need:
For the Cookie Dough:
-
1 cup unsalted butter, softened
Creamy and dreamy, butter is the backbone of our cookie dough! You can use margarine in a pinch, but nothing beats that authentic buttery flavor. -
1 cup brown sugar
This lends a beautiful moister texture, richer flavor, and that lovely caramel undertone in your cookies. If you don’t have brown sugar, you can substitute with an equal amount of granulated sugar, but add a tablespoon of molasses for that rich flavor! -
1/2 cup granulated sugar
This balances the sweetness while contributing to the cookies’ scrumptious crunch. Regular sugar is perfect here; it’s a classic! -
2 large eggs
These are your binding agents! If you’re egg-free, use 1/4 cup of unsweetened applesauce or a “flax egg” (1 tablespoon ground flaxseed mixed with 2.5 tablespoons of water). -
1 tablespoon pure vanilla extract
This elevates everything with a warm, aromatic embrace. You can experiment with almond extract or citrus zest for a fun twist! -
2 cups all-purpose flour
Vital for structure, flour takes on the flavors and makes our cookies chewy. Whole wheat flour can add a nutty flavor but cut the amount slightly to avoid drying them out. -
1 teaspoon baking soda
This will give our cookies a gentle lift. If you don’t have baking soda, baking powder can work—just double the amount. -
1/2 teaspoon salt
Trust me, a pinch of salt enhances the sweetness! Kosher or sea salt works wonderfully here; you’re after that subtle edge that makes your flavors pop. -
1 cup Greek yogurt (plain)
The star of our healthy cookie dough! Greek yogurt gives moisture, protein, and a slight tang. If you need a dairy-free alternative, go for coconut or almond yogurt. -
1 cup chocolate chips (dark, milk, or white!)
Chocolate chips are your canvas! Use whatever suits your fancy; sprinkle in nuts or dried fruit for extra fun!
Step-by-Step Instructions
Now that we have everything ready, let’s mix it up! Here’s how we’ll bring these delightful cookies to life:
-
Cream the Butter and Sugars (5-7 minutes)
In a large mixing bowl, combine the softened unsalted butter, brown sugar, and granulated sugar. Using a hand mixer or stand mixer, beat on medium speed until the mixture is light and fluffy. This process traps air, which helps your cookies rise perfectly and ensures they’re delightfully airy. As you mix, let your imagination wander and think about all the incredible flavors that are about to meld together! -
Add the Eggs and Vanilla (2-3 minutes)
Next, crack in your eggs and pour in the pure vanilla extract. Continue beating until thoroughly combined. Don’t worry if it looks a little curdled—that’s just a part of the magic! If you pause for a moment, you might even catch a whiff of that delightful mix of sweetness, pure comfort, and a hint of nostalgia wafting through the kitchen. -
Incorporate the Greek Yogurt (1-2 minutes)
Now for the secret ingredient! Add the Greek yogurt to the mixture. This will create a luscious dough with both creaminess and tanginess that makes every bite divine. Mix until just combined—overmixing can lead to tough cookies, so take your time and enjoy this step! If your kiddo is nearby, allow them to lick the spatula; it’s a rite of passage! -
Combine Dry Ingredients (1-2 minutes)
In a separate bowl, whisk together the all-purpose flour, baking soda, and salt. Gradually add this dry mix to your creamy mixture. Use a spatula or wooden spoon to fold the dry ingredients in until just mixed. You want to see a few flour streaks for the perfect chewy cookie, and your mouth will water just thinking about it! -
Add Chocolate Chips (1-2 minutes)
Gently fold in those glorious chocolate chips. Every “chocolate treasure” you find amid the dough will make the final cookie that much more exciting! The key here is to mix until just combined, then let the dough chill for about 30 minutes in the refrigerator for better flavor and texture. -
Preheat Your Oven (10 minutes)
Preheat your oven to 350°F (180°C). This wait is the perfect time to clean up your workspace and chat with family or friends about your cooking journey; you’re creating something magical here, after all! -
Scoop and Bake (12-15 minutes)
Using a cookie scoop or spoon, drop rounded tablespoons of cookie dough onto a lined baking sheet, leaving some room for spreading. Bake for 12-15 minutes or until the edges are golden brown but the centers are soft. It won’t be long before your friends or family come asking what that mouthwatering aroma is! -
Cool and Indulge
Let the cookies cool on the baking sheet for a few minutes before transferring them to a wire rack to cool completely. The hardest part—waiting until they cool before devouring them—is worth every second!
Serving Suggestions
Once your Greek Yogurt Cookie Dough cookies are perfectly cooled, it’s time to plate them! Arrange the cookies on a beautiful platter or a rustic wooden board, and garnish with a sprinkle of sea salt to enhance the taste. For a fun touch, serve alongside a glass of cold milk or a scoop of vanilla ice cream for an ultimate treat combo. Perhaps even host a cookie bar, where everyone can choose their toppings—because let’s face it, cookies just make life a little sweeter!
Recipe Variations
Feeling adventurous? Here are some creative twists you can make to elevate your Greek Yogurt Cookie Dough cookies:
-
Nutty Chocolate Bliss: Stir in 1/2 cup of finely chopped nuts (like pecans or walnuts) for extra crunch and flavor.
-
Citrus Zing: Add 1 teaspoon of lemon or orange zest for a zesty kick that brightens your cookies.
-
Spiced Up: Mix in a teaspoon of cinnamon or pumpkin spice for those cold, cozy nights.
-
Dried Fruit Delight: Swap out some of the chocolate chips for dried cranberries, cherries, or raisins for a fruity twist!
-
Nut Butter Surprise: Replace half of the butter with nut butter (like almond or peanut butter) for a nutty flavor profile and even more creaminess!
Chef’s Notes
As I look back over the years, I realize how much this recipe has evolved! What started as a simple chocolate chip cookie recipe has morphed into this deliciously healthy version. Each time I tweak it, I reminisce about cozy evenings spent laughing with my family over homemade treats. Remember, cooking is about enjoying moments and creating memories, so allow yourself to experiment and find your favorite way to enjoy these cookies. Embrace the nostalgia and fun that comes from making a mess and sharing sweetness with your loved ones!
FAQs and Troubleshooting
Q: My cookies turned out flat—what happened?
A: This can happen if your butter was too melted or you overmixed the dough. Make sure to use softened butter, and only mix your dough until the ingredients are combined. Also, try chilling the dough more before baking!
Q: Can I freeze the cookie dough?
A: Yes! You can scoop the dough onto a baking sheet and freeze it until solid, then transfer the cookie blobs into a zip-top bag for later baking—amazing for those late-night cravings!
Q: The dough is too sticky; what should I do?
A: If it’s overly sticky, chill the dough for about 30 minutes in the fridge. This makes it easier to handle without compromising that chewy goodness!
Q: Can I substitute the Greek yogurt for something else?
A: Absolutely! You can use sour cream or any plant-based yogurt, but keep an eye on the consistency.
Nutritional Info (per cookie)**
Calories: 150
Protein: 2g
Fat: 7g
Carbohydrates: 20g
Fiber: 1g
Sugar: 9g
There you have it! Your cozy experience awaits you with these delightful Greek Yogurt Cookie Dough cookies. Remember, baking is as much about creating joyful moments as it is about the delicious end result. Get comfortable in your kitchen, find your rhythm, and let love and flavor be your guide! Happy baking, friends!
Print
Greek Yogurt Cookie Dough
- Total Time: 30 minutes
- Yield: 24 cookies 1x
- Diet: Vegetarian
Description
A delicious twist on traditional cookie dough featuring Greek yogurt for added creaminess and nutrition.
Ingredients
- 1 cup unsalted butter, softened
- 1 cup brown sugar
- 1/2 cup granulated sugar
- 2 large eggs
- 1 tablespoon pure vanilla extract
- 2 cups all-purpose flour
- 1 teaspoon baking soda
- 1/2 teaspoon salt
- 1 cup Greek yogurt (plain)
- 1 cup chocolate chips (dark, milk, or white)
Instructions
- Cream the butter and sugars in a large mixing bowl until light and fluffy.
- Add the eggs and vanilla, and beat until combined.
- Incorporate the Greek yogurt until just combined.
- Combine the flour, baking soda, and salt in a separate bowl, then gradually add to the wet mixture.
- Add chocolate chips and mix until just combined.
- Chill the dough in the refrigerator for about 30 minutes.
- Preheat the oven to 350°F (180°C).
- Scoop rounded tablespoons onto a lined baking sheet, leaving room for spreading.
- Bake for 12-15 minutes until edges are golden brown.
- Cool on a wire rack before indulging.
Notes
Add nuts, citrus zest, or spices for a fun twist on the classic cookie.
- Prep Time: 15 minutes
- Cook Time: 15 minutes
- Category: Dessert
- Method: Baking
- Cuisine: American
Nutrition
- Serving Size: 1 cookie
- Calories: 150
- Sugar: 9g
- Sodium: 100mg
- Fat: 7g
- Saturated Fat: 4g
- Unsaturated Fat: 2g
- Trans Fat: 0g
- Carbohydrates: 20g
- Fiber: 1g
- Protein: 2g
- Cholesterol: 30mg
Keywords: cookie dough, Greek yogurt, dessert, baking, healthy treats
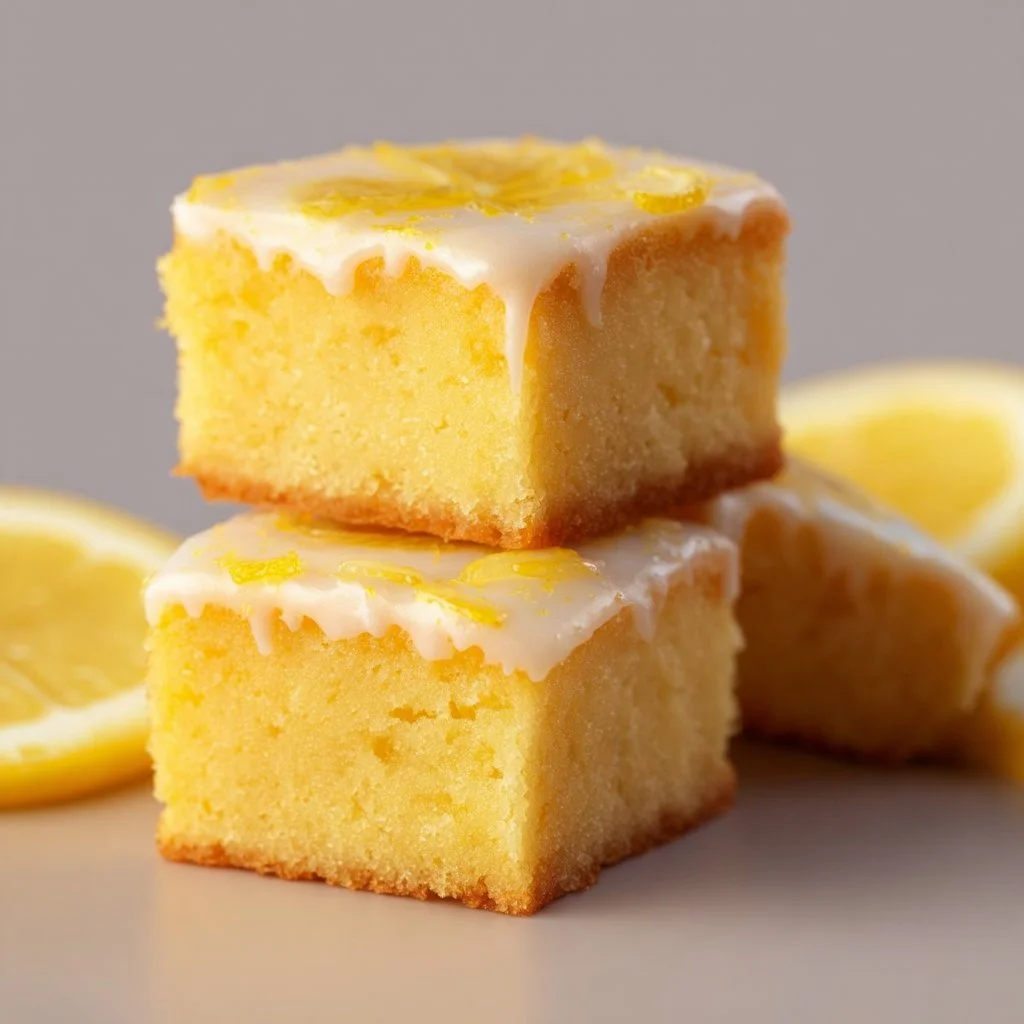
Lemon Brownies
Sweet Sunshine on a Plate: The Ultimate Lemon Brownies Recipe
Welcome to my kitchen! Today, we’re diving into a delightful treat that’s perfect for those times when you’re craving something sweet yet refreshing — Lemon Brownies! You might be wondering, “What on earth are Lemon Brownies?” Well, let me tell you, they are a delightful twist on traditional brownies, infusing zesty lemon flavor into a chewy, rich base that’s simply irresistible.
Imagine biting into a soft, fudgy square with a bright citrus kick that dances across your taste buds. It’s like springtime in your mouth, and it will have you pressing repeat faster than you can say “lemon zest!” These Lemon Brownies are the perfect blend of sweet and tangy, and I promise they’ll make your kitchen smell heavenly.
In this post, I’ll share my cherished Lemon Brownies recipe that combines comfort with a splash of sunshine, along with tips and tricks to make them extra special. Whether you’re baking for a crowd or simply indulging in a treat for yourself, these brownies are sure to bring joy to your day. So, roll up your sleeves, grab your apron (a little messiness is part of the fun), and let’s get baking!
Personal Story
I can never think of Lemon Brownies without recalling a charming afternoon spent in my grandmother’s kitchen. Each spring, as the days grew longer and warmer, she would invite me over to help her bake. The sun would beam through the windows, casting a golden glow on the countertops, and that’s where the magic happened.
One day, we decided to try our hand at something new. Instead of her usual chocolate brownies, she pulled out a tattered cookbook and flipped to a recipe for something called Lemon Brownies. I was skeptical; after all, chocolate was her signature! But as we mixed the ingredients, the bright scent of lemon filled the air, and my doubts began to melt away.
When they came out of the oven, they didn’t look like the brownies I was used to, but the moment we took a bite, I fell in love. Each square was a burst of sunshine, and it felt like a celebration of spring right at home. The best part? Sharing them with family, bringing smiles and laughter around the dining table. That day solidified my passion for baking, and every time I make Lemon Brownies, I’m transported back to that cozy kitchen with my grandmother, laughing and creating something beautiful.
Ingredients
Here’s what you’ll need to whip up these delightful Lemon Brownies:
-
1 cup unsalted butter, melted
This provides a rich, buttery base. You can substitute it with coconut oil for a dairy-free option, but it may alter the flavor slightly. -
2 cups granulated sugar
Sweetness is key! You can reduce the sugar slightly for a less sweet brownie or use a sugar substitute like coconut sugar for a different flavor profile. -
4 large eggs
Eggs add structure and moisture. For an egg-free version, consider using a flax egg (1 tablespoon of ground flaxseed mixed with 3 tablespoons of water per egg). -
1 tablespoon lemon zest
The zest is where the flavor magic happens! Don’t skip it. You can use lime zest for a fun twist. -
1 cup fresh lemon juice (about 4-5 lemons)
Fresh juice gives the best flavor! Bottled juice lacks the vibrant zing, but if you must use it, opt for a quality one. -
2 cups all-purpose flour
This is the backbone of the brownie. For a gluten-free version, use a 1:1 gluten-free baking mix. -
1 teaspoon baking powder
A must to make the brownies rise! If you’re out, you can use baking soda, but adjust the quantity accordingly. -
1/2 teaspoon salt
Balances the sweetness! You can use sea salt or kosher salt. -
Powdered sugar (for dusting)
Adds a lovely finish! If you’re looking for a health-conscious option, try using a sugar-free powdered alternative.
Step-by-Step Instructions
Ready to get baking? Let’s break this down into simple steps. Get your ingredients ready, and let’s embark on this lemony journey!
Step 1: Preheat Your Oven
Preheat your oven to 350°F (175°C). This may seem like a small step, but it’s super important! A properly preheated oven ensures even baking, so don’t skip it.
Step 2: Prepare Your Baking Pan
Grease a 9×13 inch baking pan with a little butter or line it with parchment paper. If you’re using parchment, leave some overhanging for easy removal later. That’ll save you from any brownie warfare during the extraction!
Step 3: Melt the Butter
In a large mixing bowl, melt the butter. You can do this in the microwave or on the stovetop. Just be sure not to overheat it to prevent it from cooking the eggs later!
Step 4: Mix the Sugar and Butter
Add the granulated sugar to the melted butter and whisk until combined. You’re looking for that silky, smooth texture! This mixture should be glossy, and the sugar will start dissolving.
Step 5: Add the Eggs
Crack your eggs into the butter-sugar mixture, one at a time. Whisk well after each addition. The mixture will turn frothy and pale — this is what we want! It’s like magic happening in your bowl.
Step 6: Infuse with Lemon
Now, it’s time to amp up the flavor! Add in the lemon zest and fresh lemon juice, and give it a good stir. Close your eyes as you do it — that bright scent is pure bliss!
Step 7: Add Dry Ingredients
In a separate bowl, mix the flour, baking powder, and salt. Gradually add this to the wet mixture. Gently fold everything together with a spatula until just combined. Be careful not to overmix! You want those chewy brownie bites, not tough cookies.
Step 8: Pour and Bake
Pour the brownie batter into your prepared pan and spread it evenly. Pop it into the oven and bake for about 25-30 minutes. You’ll know they’re done when a toothpick inserted in the center comes out with a few moist crumbs but not raw batter. Those little crumbs are key; they mean you’ve got that perfect brownie texture!
Step 9: Cool
Once baked, remove the brownies from the oven and let them cool in the pan for about 15-20 minutes. If you’re too impatient, you can slide them into the fridge to speed up the cooling process!
Step 10: Dust with Powdered Sugar
Once cooled, remove the brownies from the pan using the parchment (if you used it), and dust the top with powdered sugar for that elegant finish. Slice them into squares, and you’re ready to serve!
Serving Suggestions
These Lemon Brownies are fabulous served as is, but you can elevate the experience by pairing them with a dollop of whipped cream or a scoop of vanilla ice cream for a party on your plate. For those hot summer days, consider serving them with fresh berries on the side — they complement the lemon flavor perfectly and add a pop of color!
Recipe Variations
Feel like getting creative? Here are a few fun variations you can try:
- Lemon Blueberry Brownies: Fold in a cup of fresh or frozen blueberries for an extra fruity twist.
- Lemon Poppy Seed Brownies: Add 2 tablespoons of poppy seeds to the batter for that delightful crunch!
- Lemon Cream Cheese Brownies: Swirl in a cream cheese filling made with softened cream cheese, sugar, and an egg before baking.
- Gluten-Free Option: Swap the all-purpose flour for a gluten-free blend for everyone to enjoy.
- Lemon Coconut Brownies: Add shredded unsweetened coconut to the batter for a tropical flavor.
Chef’s Notes
As I reflect on this recipe, I can’t help but smile thinking of all the times I’ve served these Lemon Brownies at gatherings, picnics, and even just as a simple treat after a long day! Each batch brings back cherished memories and has evolved a little each time I made it. Sometimes I’ll get creative and top them with a lemon glaze or drizzle (mix powdered sugar with lemon juice), adding that extra zesty flair.
And let’s be real, no kitchen adventure is without its hiccups. I once mistook salt for sugar, and let’s say the face of my poor sister when she took a bite of those brownies was one I won’t forget! Just a friendly reminder to always double-check your ingredients!
FAQs and Troubleshooting
Q: What if my brownies come out too dry?
A: Overbaking is often the culprit! Keep an eye on them towards the end and do the toothpick test. If they’re dry, reduce your baking time next time around.
Q: Can I use bottled lemon juice?
A: Absolutely! But fresh lemons will give you a more vibrant flavor. If using bottled, opt for a high-quality brand for the best taste.
Q: How should I store my brownies?
A: Store them in an airtight container at room temperature for 3-4 days. You can also refrigerate them if you prefer a denser brownie texture.
Q: Can I freeze Lemon Brownies?
A: Yes! Wrap them tightly in plastic wrap, then in aluminum foil, and they can be frozen for up to 3 months. Just thaw at room temperature before enjoying.
Nutritional Info
(Note: Nutritional values are estimated and can vary based on ingredients used.)
- Serving Size: 1 Brownie
- Calories: 180
- Total Fat: 8g
- Saturated Fat: 5g
- Cholesterol: 50mg
- Sodium: 100mg
- Total Carbohydrates: 26g
- Dietary Fiber: 1g
- Sugars: 18g
- Protein: 2g
There you have it! A little sunshine on your plate and a delightful way to bring a taste of spring into your kitchen, no matter the season. Enjoy the baking process, and don’t forget to share your creations with those you love! Happy baking! 🍋✨
Print
Sweet Sunshine on a Plate: The Ultimate Lemon Brownies Recipe
- Total Time: 45 minutes
- Yield: 12 servings 1x
- Diet: Vegetarian
Description
Delightful Lemon Brownies combining sweet and tangy flavors in a fudgy, rich base, perfect for any occasion.
Ingredients
- 1 cup unsalted butter, melted
- 2 cups granulated sugar
- 4 large eggs
- 1 tablespoon lemon zest
- 1 cup fresh lemon juice (about 4–5 lemons)
- 2 cups all-purpose flour
- 1 teaspoon baking powder
- 1/2 teaspoon salt
- Powdered sugar (for dusting)
Instructions
- Preheat your oven to 350°F (175°C).
- Prepare a 9×13 inch baking pan by greasing it or lining with parchment paper.
- Melt the butter in a large mixing bowl.
- Add the granulated sugar to the melted butter and whisk until combined.
- Add the eggs into the butter-sugar mixture, whisking well after each addition.
- Infuse with lemon by adding lemon zest and fresh lemon juice, stirring well.
- Mix the flour, baking powder, and salt in a separate bowl, then gradually add to the wet mixture.
- Pour the batter into the prepared pan and spread evenly.
- Bake for about 25-30 minutes or until a toothpick comes out with a few moist crumbs.
- Cool in the pan for about 15-20 minutes before dusting with powdered sugar and slicing into squares.
Notes
Serve with whipped cream or a scoop of vanilla ice cream for an elevated dessert experience.
- Prep Time: 15 minutes
- Cook Time: 30 minutes
- Category: Dessert
- Method: Baking
- Cuisine: American
Nutrition
- Serving Size: 1 brownie
- Calories: 180
- Sugar: 18g
- Sodium: 100mg
- Fat: 8g
- Saturated Fat: 5g
- Unsaturated Fat: 2g
- Trans Fat: 0g
- Carbohydrates: 26g
- Fiber: 1g
- Protein: 2g
- Cholesterol: 50mg
Keywords: Lemon Brownies, Dessert, Spring Dessert, Citrus Desserts, Baking




