Greek Yogurt Cookie Dough
The Ultimate Greek Yogurt Cookie Dough: It’s Time to Get Cozy in the Kitchen!
Welcome to my kitchen! I’m eager to share a delightful treat that will transform your baking game: Greek Yogurt Cookie Dough! Picture this: the warm aroma of freshly baked cookies filling your home, the blissful anticipation of that first bite, and, oh, the joy of indulging without feeling guilty. These cookies have a healthy twist that will make you want to dive into the dough straight away!
I absolutely adore recipes that bring a nutritious spin to indulgent treats, and this one hits the spot! When I whipped up this Greek Yogurt Cookie Dough for the first time, it brought back fond memories of baking with my grandmother. She always believed that every great recipe shared a story; that the kitchen was a sacred place where love, laughter, and deliciousness rolled in tandem. As I stirred in the creamy yogurt into the fluffy mixture of butter and sugar, it was like she was there with me, teaching me once again that every ingredient adds its own unique character, just like the people we love.
So let’s roll up our sleeves and dive into this easy, scrumptious Greek Yogurt Cookie Dough recipe that’s sure to become a staple in your baking repertoire.
A Taste of Nostalgia: My Baking Journey
One of my fondest memories from childhood was baking cookies with my grandma during the holidays. The kitchen would fill with laughter, the sound of clattering measuring cups, and of course, the divine aroma of melting chocolate. We would whip up batch after batch, and the culinary glow of her well-worn kitchen was more comforting than a warm blanket on a cold winter’s night.
I remember one holiday season distinctly. In a desperate attempt to sneak extra chocolate chips into our classic cookie recipe, I knocked over the sugar canister! It went everywhere—on the floor, all over the counter, and even in our hair! We burst out laughing, and instead of cleaning it up immediately, we decided to roll our hands in the sugar like shimmering fairy dust and turn our messy disaster into a magic show!
This memory forms the heart of my cooking philosophy: it doesn’t have to be perfect to be delicious or fun! You have permission to explore, play, and even mess up a little in the kitchen. So, grab your apron, channel your inner cookie sorcerer, and discover the wonder of creating Greek Yogurt Cookie Dough!
Ingredients
Let’s gather our wonderful ingredients! Here’s what you’ll need:
For the Cookie Dough:
-
1 cup unsalted butter, softened
Creamy and dreamy, butter is the backbone of our cookie dough! You can use margarine in a pinch, but nothing beats that authentic buttery flavor. -
1 cup brown sugar
This lends a beautiful moister texture, richer flavor, and that lovely caramel undertone in your cookies. If you don’t have brown sugar, you can substitute with an equal amount of granulated sugar, but add a tablespoon of molasses for that rich flavor! -
1/2 cup granulated sugar
This balances the sweetness while contributing to the cookies’ scrumptious crunch. Regular sugar is perfect here; it’s a classic! -
2 large eggs
These are your binding agents! If you’re egg-free, use 1/4 cup of unsweetened applesauce or a “flax egg” (1 tablespoon ground flaxseed mixed with 2.5 tablespoons of water). -
1 tablespoon pure vanilla extract
This elevates everything with a warm, aromatic embrace. You can experiment with almond extract or citrus zest for a fun twist! -
2 cups all-purpose flour
Vital for structure, flour takes on the flavors and makes our cookies chewy. Whole wheat flour can add a nutty flavor but cut the amount slightly to avoid drying them out. -
1 teaspoon baking soda
This will give our cookies a gentle lift. If you don’t have baking soda, baking powder can work—just double the amount. -
1/2 teaspoon salt
Trust me, a pinch of salt enhances the sweetness! Kosher or sea salt works wonderfully here; you’re after that subtle edge that makes your flavors pop. -
1 cup Greek yogurt (plain)
The star of our healthy cookie dough! Greek yogurt gives moisture, protein, and a slight tang. If you need a dairy-free alternative, go for coconut or almond yogurt. -
1 cup chocolate chips (dark, milk, or white!)
Chocolate chips are your canvas! Use whatever suits your fancy; sprinkle in nuts or dried fruit for extra fun!
Step-by-Step Instructions
Now that we have everything ready, let’s mix it up! Here’s how we’ll bring these delightful cookies to life:
-
Cream the Butter and Sugars (5-7 minutes)
In a large mixing bowl, combine the softened unsalted butter, brown sugar, and granulated sugar. Using a hand mixer or stand mixer, beat on medium speed until the mixture is light and fluffy. This process traps air, which helps your cookies rise perfectly and ensures they’re delightfully airy. As you mix, let your imagination wander and think about all the incredible flavors that are about to meld together! -
Add the Eggs and Vanilla (2-3 minutes)
Next, crack in your eggs and pour in the pure vanilla extract. Continue beating until thoroughly combined. Don’t worry if it looks a little curdled—that’s just a part of the magic! If you pause for a moment, you might even catch a whiff of that delightful mix of sweetness, pure comfort, and a hint of nostalgia wafting through the kitchen. -
Incorporate the Greek Yogurt (1-2 minutes)
Now for the secret ingredient! Add the Greek yogurt to the mixture. This will create a luscious dough with both creaminess and tanginess that makes every bite divine. Mix until just combined—overmixing can lead to tough cookies, so take your time and enjoy this step! If your kiddo is nearby, allow them to lick the spatula; it’s a rite of passage! -
Combine Dry Ingredients (1-2 minutes)
In a separate bowl, whisk together the all-purpose flour, baking soda, and salt. Gradually add this dry mix to your creamy mixture. Use a spatula or wooden spoon to fold the dry ingredients in until just mixed. You want to see a few flour streaks for the perfect chewy cookie, and your mouth will water just thinking about it! -
Add Chocolate Chips (1-2 minutes)
Gently fold in those glorious chocolate chips. Every “chocolate treasure” you find amid the dough will make the final cookie that much more exciting! The key here is to mix until just combined, then let the dough chill for about 30 minutes in the refrigerator for better flavor and texture. -
Preheat Your Oven (10 minutes)
Preheat your oven to 350°F (180°C). This wait is the perfect time to clean up your workspace and chat with family or friends about your cooking journey; you’re creating something magical here, after all! -
Scoop and Bake (12-15 minutes)
Using a cookie scoop or spoon, drop rounded tablespoons of cookie dough onto a lined baking sheet, leaving some room for spreading. Bake for 12-15 minutes or until the edges are golden brown but the centers are soft. It won’t be long before your friends or family come asking what that mouthwatering aroma is! -
Cool and Indulge
Let the cookies cool on the baking sheet for a few minutes before transferring them to a wire rack to cool completely. The hardest part—waiting until they cool before devouring them—is worth every second!
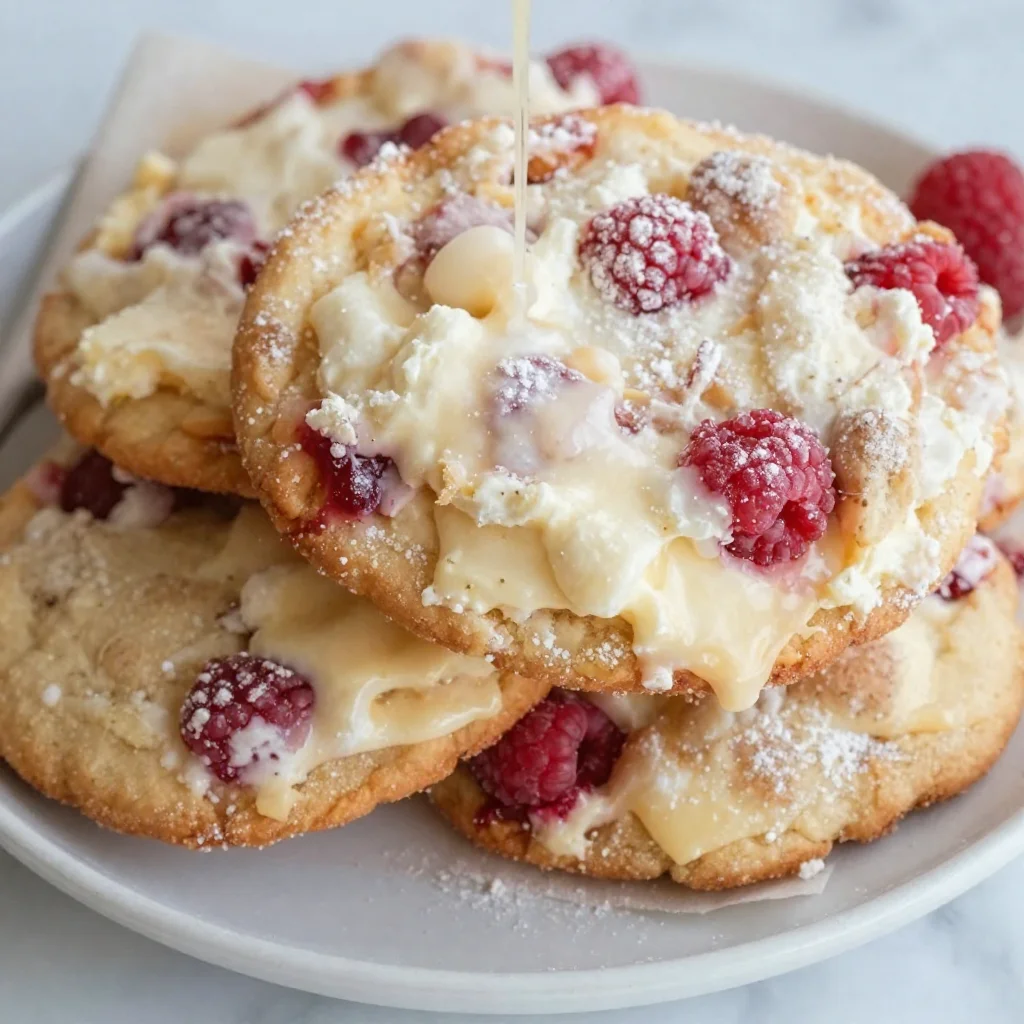
Serving Suggestions
Once your Greek Yogurt Cookie Dough cookies are perfectly cooled, it’s time to plate them! Arrange the cookies on a beautiful platter or a rustic wooden board, and garnish with a sprinkle of sea salt to enhance the taste. For a fun touch, serve alongside a glass of cold milk or a scoop of vanilla ice cream for an ultimate treat combo. Perhaps even host a cookie bar, where everyone can choose their toppings—because let’s face it, cookies just make life a little sweeter!
Recipe Variations
Feeling adventurous? Here are some creative twists you can make to elevate your Greek Yogurt Cookie Dough cookies:
-
Nutty Chocolate Bliss: Stir in 1/2 cup of finely chopped nuts (like pecans or walnuts) for extra crunch and flavor.
-
Citrus Zing: Add 1 teaspoon of lemon or orange zest for a zesty kick that brightens your cookies.
-
Spiced Up: Mix in a teaspoon of cinnamon or pumpkin spice for those cold, cozy nights.
-
Dried Fruit Delight: Swap out some of the chocolate chips for dried cranberries, cherries, or raisins for a fruity twist!
-
Nut Butter Surprise: Replace half of the butter with nut butter (like almond or peanut butter) for a nutty flavor profile and even more creaminess!
Chef’s Notes
As I look back over the years, I realize how much this recipe has evolved! What started as a simple chocolate chip cookie recipe has morphed into this deliciously healthy version. Each time I tweak it, I reminisce about cozy evenings spent laughing with my family over homemade treats. Remember, cooking is about enjoying moments and creating memories, so allow yourself to experiment and find your favorite way to enjoy these cookies. Embrace the nostalgia and fun that comes from making a mess and sharing sweetness with your loved ones!
FAQs and Troubleshooting
Q: My cookies turned out flat—what happened?
A: This can happen if your butter was too melted or you overmixed the dough. Make sure to use softened butter, and only mix your dough until the ingredients are combined. Also, try chilling the dough more before baking!
Q: Can I freeze the cookie dough?
A: Yes! You can scoop the dough onto a baking sheet and freeze it until solid, then transfer the cookie blobs into a zip-top bag for later baking—amazing for those late-night cravings!
Q: The dough is too sticky; what should I do?
A: If it’s overly sticky, chill the dough for about 30 minutes in the fridge. This makes it easier to handle without compromising that chewy goodness!
Q: Can I substitute the Greek yogurt for something else?
A: Absolutely! You can use sour cream or any plant-based yogurt, but keep an eye on the consistency.
Nutritional Info (per cookie)**
Calories: 150
Protein: 2g
Fat: 7g
Carbohydrates: 20g
Fiber: 1g
Sugar: 9g
There you have it! Your cozy experience awaits you with these delightful Greek Yogurt Cookie Dough cookies. Remember, baking is as much about creating joyful moments as it is about the delicious end result. Get comfortable in your kitchen, find your rhythm, and let love and flavor be your guide! Happy baking, friends!
Print
Greek Yogurt Cookie Dough
- Total Time: 30 minutes
- Yield: 24 cookies 1x
- Diet: Vegetarian
Description
A delicious twist on traditional cookie dough featuring Greek yogurt for added creaminess and nutrition.
Ingredients
- 1 cup unsalted butter, softened
- 1 cup brown sugar
- 1/2 cup granulated sugar
- 2 large eggs
- 1 tablespoon pure vanilla extract
- 2 cups all-purpose flour
- 1 teaspoon baking soda
- 1/2 teaspoon salt
- 1 cup Greek yogurt (plain)
- 1 cup chocolate chips (dark, milk, or white)
Instructions
- Cream the butter and sugars in a large mixing bowl until light and fluffy.
- Add the eggs and vanilla, and beat until combined.
- Incorporate the Greek yogurt until just combined.
- Combine the flour, baking soda, and salt in a separate bowl, then gradually add to the wet mixture.
- Add chocolate chips and mix until just combined.
- Chill the dough in the refrigerator for about 30 minutes.
- Preheat the oven to 350°F (180°C).
- Scoop rounded tablespoons onto a lined baking sheet, leaving room for spreading.
- Bake for 12-15 minutes until edges are golden brown.
- Cool on a wire rack before indulging.
Notes
Add nuts, citrus zest, or spices for a fun twist on the classic cookie.
- Prep Time: 15 minutes
- Cook Time: 15 minutes
- Category: Dessert
- Method: Baking
- Cuisine: American
Nutrition
- Serving Size: 1 cookie
- Calories: 150
- Sugar: 9g
- Sodium: 100mg
- Fat: 7g
- Saturated Fat: 4g
- Unsaturated Fat: 2g
- Trans Fat: 0g
- Carbohydrates: 20g
- Fiber: 1g
- Protein: 2g
- Cholesterol: 30mg
Keywords: cookie dough, Greek yogurt, dessert, baking, healthy treats

Greek Yogurt Jello
# The Delightful Transformation of Greek Yogurt Jello: A Treat for All Occasions
## Introduction
Welcome to my cozy corner of the culinary world! I'm Olivia Bennett, your enthusiastic guide to the delightful, adventurous, and often messily beautiful journey that is cooking. Today, we’re diving into a unique recipe that’s perfect for any occasion—Greek Yogurt Jello. Yes, you heard me right. This charming dessert takes everything you love about a classic jello treat and ramps it up with the creamy richness of Greek yogurt. Layered with vibrant fruit and a gentle sweetness, it’s as visually stunning as it is delicious!
Jello has been a staple in many homes, especially during those summer get-togethers when the family gathers for potlucks or picnics. But let’s be honest, sometimes, the standard jello can be a little…uninspiring. That's where Greek yogurt comes in—it's like that delightful friend who enhances every party simply by showing up. Not only does it add creaminess and depth to the flavor, but Greek yogurt also brings a hefty dose of protein and tanginess. It’s like a health-conscious party in your mouth, wrapped in a nostalgic childhood treat!
Whether you’re hosting a bright brunch, refreshing the dessert table for a dinner party, or simply indulging in a sweet afternoon pick-me-up, Greek Yogurt Jello is bound to steal the show. So, grab your apron, tune into your favorite playlist, and let’s whip up something beautiful!
## Personal Story
The first time I made jello as a kid, I was mesmerized by the way it wiggled and jiggled. I can still remember my mom mixing those vibrant, flavored crystals with hot water while I stood on a stool, wide-eyed and curious about the magical transformation before me. We would wait in anticipation as it set in the fridge, hardly able to contain our excitement. After what felt like ages, it was finally time to dive into that wobbly, sweet treat.
As I grew older and my culinary curiosities expanded, I wanted to reimagine that childhood classic. One sunny afternoon, I stumbled upon a container of Greek yogurt in my fridge, longing to give my jello a sophisticated twist. And just like that, Greek Yogurt Jello came to life—a blend of nostalgia wrapped in a healthy, modern twist. It reminds me not just of the fun I had in the kitchen as a child, but also of the memories made around the table with loved ones. That's what food is all about, isn’t it? Creating moments that linger long after the plates are cleared.
## Ingredients
To get started on making Greek Yogurt Jello, you’ll need a handful of simple ingredients that play nicely together:
- **Greek Yogurt:** This star ingredient is creamy, tangy, and packed with protein. You can use full-fat or low-fat yogurt based on your preference. For a dairy-free option, try coconut yogurt!
- **Gelatin Powder:** This helps the jello set. If you're looking for a vegetarian alternative, agar-agar is an excellent substitute, though the texture may vary slightly.
- **Fruit Juice:** This adds flavor and sweetness. Freshly squeezed juices like orange or berry work wonderfully! If you’re in a pinch, 100% juice from a carton will do, too.
- **Honey or Maple Syrup:** A touch of natural sweetness balances the tanginess of the yogurt. You can adjust the sweetness based on your taste, or swap it out for stevia for a lower-calorie option.
- **Fresh Fruits:** Think strawberries, blueberries, or mangoes! They add a burst of color and flavor. Frozen fruits can also work—just thaw them before use.
## Step-by-Step Instructions
Now, let’s dive into the fun part—making our Greek Yogurt Jello step by step! With each step, I’ll sprinkle in some insights to make sure you’re feeling confident and ready to wow your friends and family.
### Step 1: Prepare the Gelatin
Start by measuring out about **2 tablespoons of gelatin powder**. If you’re using agar-agar, follow the package instructions for rehydrating. Sprinkle the gelatin over **1/4 cup of cold water** in a small bowl. Let it sit for about **5 minutes** to bloom. This little waiting game is worth it; it ensures your jello has the perfect consistency!
### Step 2: Heat the Juice
In a small saucepan, take **2 cups of your chosen fruit juice** and warm it over medium heat. Don’t let it boil; we just want it warm enough to dissolve the gelatin. Stir it occasionally and enjoy the sweet aroma wafting through your kitchen!
### Step 3: Combine Gelatin and Juice
Once the juice is warm, add the bloomed gelatin to the pan. Stir vigorously until it's completely dissolved. This step is akin to magic—the transformation of humble powders into a luscious liquid!
### Step 4: Mix in Greek Yogurt
In a mixing bowl, combine **2 cups of Greek yogurt** with the gelatin-juice mixture. Here’s where you can add your **honey or maple syrup**! Stir until you have a smooth and creamy mixture. If you want a hint of zest, consider adding a splash of vanilla extract to enhance the flavors.
### Step 5: Layer the Jello
Now it’s time for the fun layering part! You can choose to layer your jello in individual cups or a large glass dish for a stunning presentation. First, pour a layer of the yogurt mixture into each cup or the base of the dish—about **1/3 full**.
### Step 6: Add Fresh Fruits
Once that layer has been poured, it’s time to add fresh fruits! You can be as creative as you like here—layer in slices of strawberries, blueberries, or even mango chunks. After adding the fruit, carefully pour another layer of the mixture over, filling your cups.
### Step 7: Chill
Pop these beauties into the fridge and let them chill for at least **4 hours**, or until the jello is fully set. Use this time to clean up your kitchen mess—trust me, your future self will appreciate it!
### Step 8: Serve and Enjoy!
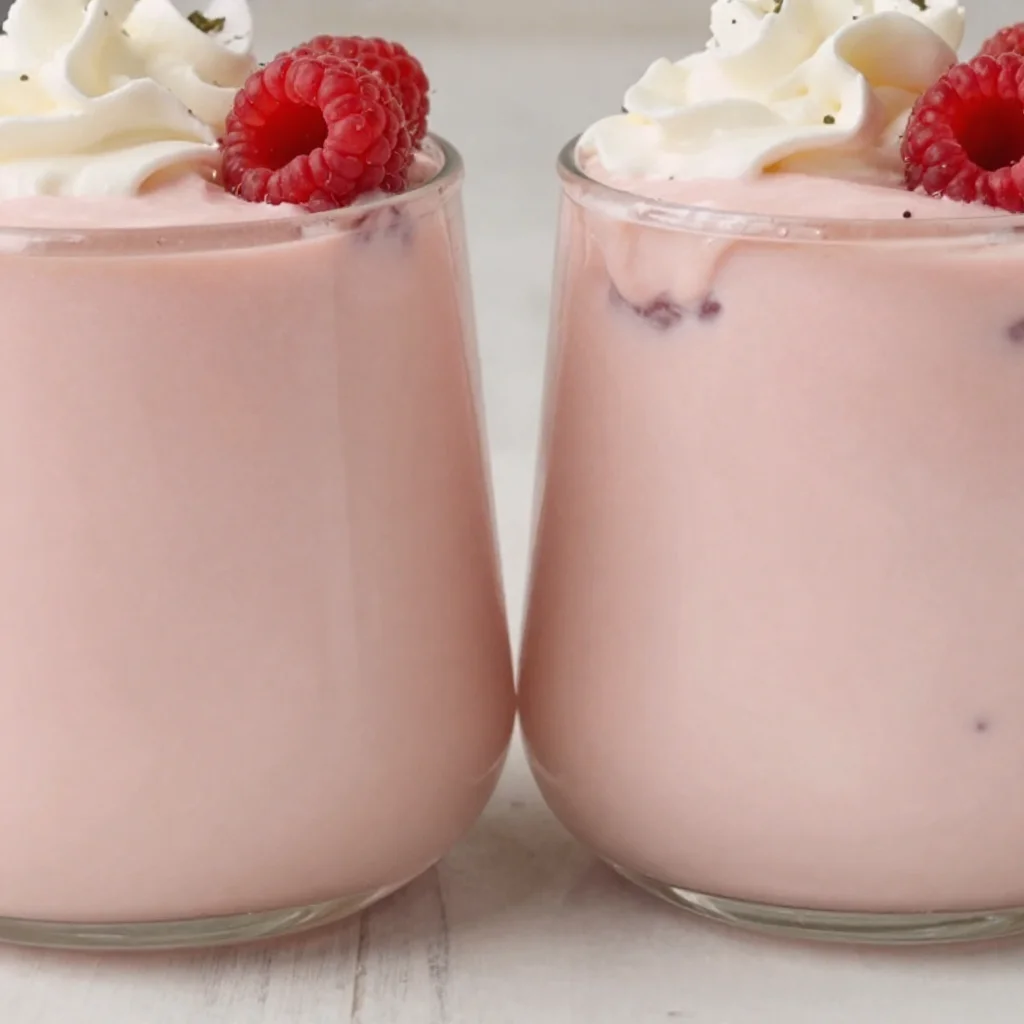
Once set, your Greek Yogurt Jello is ready to impress! Serve it as is or go all out and top it with a drizzle of honey, a dollop of whipped cream, or more fresh fruits. The vibrant colors and delectable flavors are sure to have everyone cheering for seconds!
## Serving Suggestions
When it comes to serving, presentation is key! I love to serve my Greek Yogurt Jello in clear glass cups to showcase those beautiful layers. You can garnish with fresh mint leaves for a pop of color and an added layer of freshness. For a casual gathering, serve it alongside some crunchy graham crackers for a delightful texture contrast. Your guests will be impressed—and they'll definitely want the recipe!
## Recipe Variations
Now, if you’re feeling adventurous, here are a few creative twists you can try with your Greek Yogurt Jello:
1. **Tropical Delight:** Use coconut milk as a base and mix in tropical fruits like pineapple and kiwi for a sunny escape.
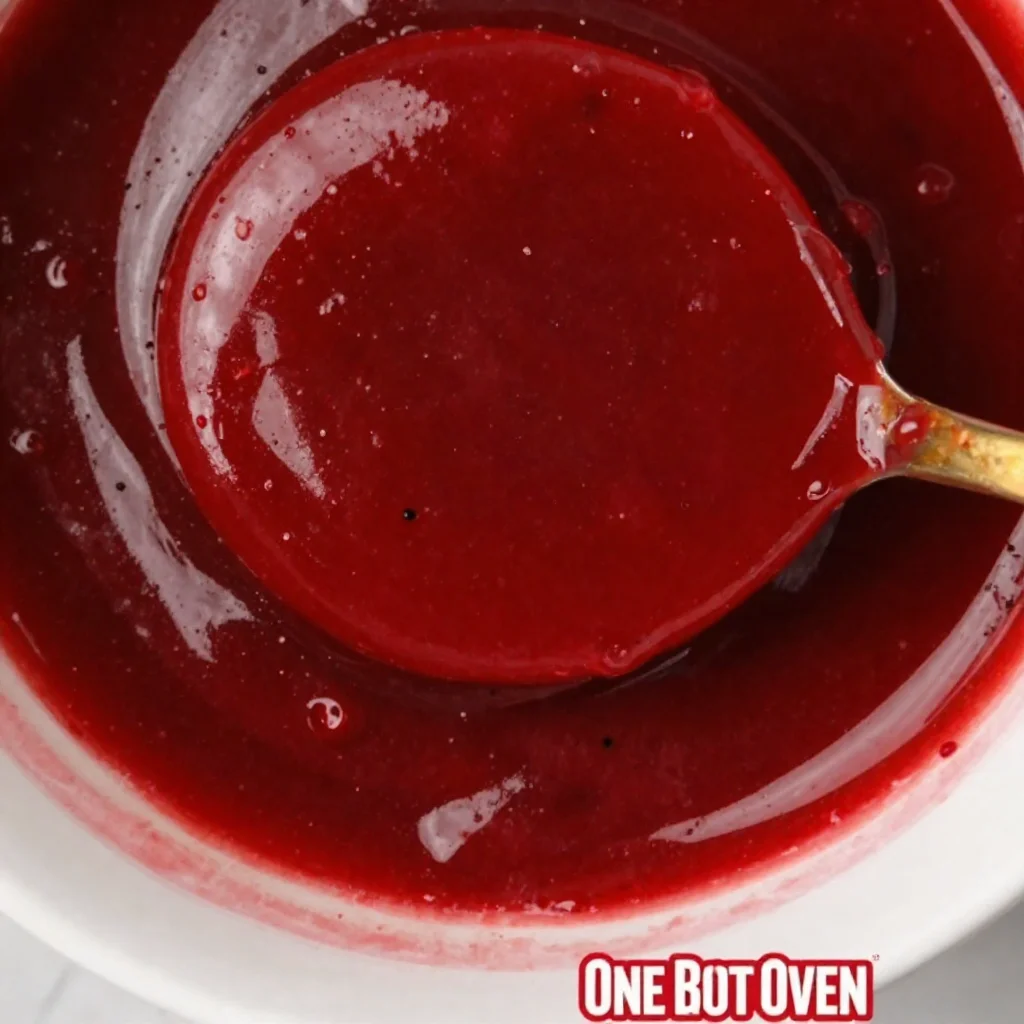
2. **Berry Blast:** Blend mixed berries into the Greek yogurt layer and fold in some whole berries for extra texture.
3. **Chocolate Lover's Jello:** Add a tablespoon of cocoa powder to your yogurt mix for a chocolatey dessert. Top with shaved dark chocolate for a fabulous finish!
4. **Herb Infusion:** Try adding a hint of herb like basil or mint to your fruit juice to elevate the flavor profile.
5. **Zesty Citrus:** Mix lemon or lime zest into your yogurt layer for a refreshing, zesty kick!
## Chef’s Notes
Throughout my cooking journey, this recipe has evolved so beautifully over time! I initially created it on a whim, but over the years, I’ve fine-tuned it based on feedback from friends and family. One time, I experimented by using tea instead of juice, and let me tell you, it added an intricate depth of flavor! Every time I make it, I’m reminded of that delightful afternoon in my mom’s kitchen and how joyful creating something with your own hands can truly be.
## FAQs and Troubleshooting
**1. My Jello isn’t setting properly—what did I do wrong?**
- This can happen if the gelatin didn’t fully dissolve or if the mixture was too warm when combined. Make sure to bloom the gelatin properly and combine all ingredients only when everything is at the right temperature.
**2. Can I make this recipe vegan?**
- Absolutely! Substitute the gelatin for agar-agar and use a dairy-free yogurt alternative. Your result will be just as delicious!
**3. How long will my Jello last in the fridge?**
- Your Greek Yogurt Jello should stay fresh for about **3-5 days** in the fridge, but I doubt it will last that long unless you’re hiding it from your family!
**4. What other flavors can I use?**
- The sky's the limit! Experiment with different fruit juices, flavored yogurts, or even try using herbal infusions for a unique twist!
## Nutritional Info (if applicable)
This delightful Greek Yogurt Jello is not just a feast for the eyes but also a healthier dessert option! Here’s a rough breakdown per serving (based on standard portions):
- Calories: Approximately 100
- Protein: 6g
- Fat: 2g
- Carbohydrates: 15g
- Sugars: 8g
(Note: Nutritional values can vary based on specific ingredients used).
So there you have it—a complete and flavorful journey into making a delightful dish that brings joy to both your kitchen and taste buds. I hope you embrace your culinary creativity through this simple yet appealing Greek Yogurt Jello recipe! Happy cooking, and remember to share your creations with those you love—the heart of cooking is all about connection and togetherness.

Greek Yogurt Jello
- Total Time: 250 minutes
- Yield: 4 servings 1x
- Diet: Vegetarian
Description
A delightful and healthy twist on a classic jello dessert, combining the creaminess of Greek yogurt with vibrant fruits.
Ingredients
- 2 cups Greek Yogurt
- 2 tablespoons Gelatin Powder (or agar-agar for a vegetarian option)
- 2 cups Fruit Juice (freshly squeezed, e.g., orange or berry)
- Honey or Maple Syrup (to taste)
- Fresh Fruits (e.g., strawberries, blueberries, mangoes)
Instructions
- Prepare the gelatin by sprinkling it over 1/4 cup of cold water in a small bowl and letting it bloom for 5 minutes.
- Heat the fruit juice in a small saucepan over medium heat until warm, but do not boil.
- Combine the bloomed gelatin with the warm juice and stir until completely dissolved.
- Mix the gelatin-juice mixture with 2 cups of Greek yogurt in a mixing bowl, adding honey or maple syrup if desired.
- Layer the mixture in individual cups or a large dish, filling about 1/3 full.
- Add fresh fruits to each layer as desired.
- Chill in the fridge for at least 4 hours until set.
- Serve and enjoy, garnished with mint leaves or whipped cream if desired.
Notes
For a dairy-free option, try using coconut yogurt. Allow enough time for chilling to achieve the best texture.
- Prep Time: 15 minutes
- Cook Time: 10 minutes
- Category: Dessert
- Method: Chilling
- Cuisine: Mediterranean
Nutrition
- Serving Size: 1 serving
- Calories: 100
- Sugar: 8g
- Sodium: 50mg
- Fat: 2g
- Saturated Fat: 1g
- Unsaturated Fat: 1g
- Trans Fat: 0g
- Carbohydrates: 15g
- Fiber: 0g
- Protein: 6g
- Cholesterol: 5mg
Keywords: Greek Yogurt, Jello, Dessert, Healthy Treat, Fruit Layered Dessert
Greek Yogurt Orange Fluff
Greek Yogurt Orange Fluff: A Dreamy Citrus Delight
Welcome to my kitchen, my lovely food friends! Today, we’re diving into a recipe that combines lightness and sweetness in the most delightful way—my Greek Yogurt Orange Fluff! This recipe is not just a treat for your taste buds but also a fabulous, wholesome dish that elevates any gathering.
Imagine walking into a cozy kitchen, the sun shining in as you spot a beautiful, fluffy dessert waiting to be shared. The aroma of fresh oranges fills the air, and you can’t help but feel that rush of joy that only good food can bring. This dish is perfect for those moments—be it a casual Sunday brunch, a potluck with friends, or a festive family dinner.
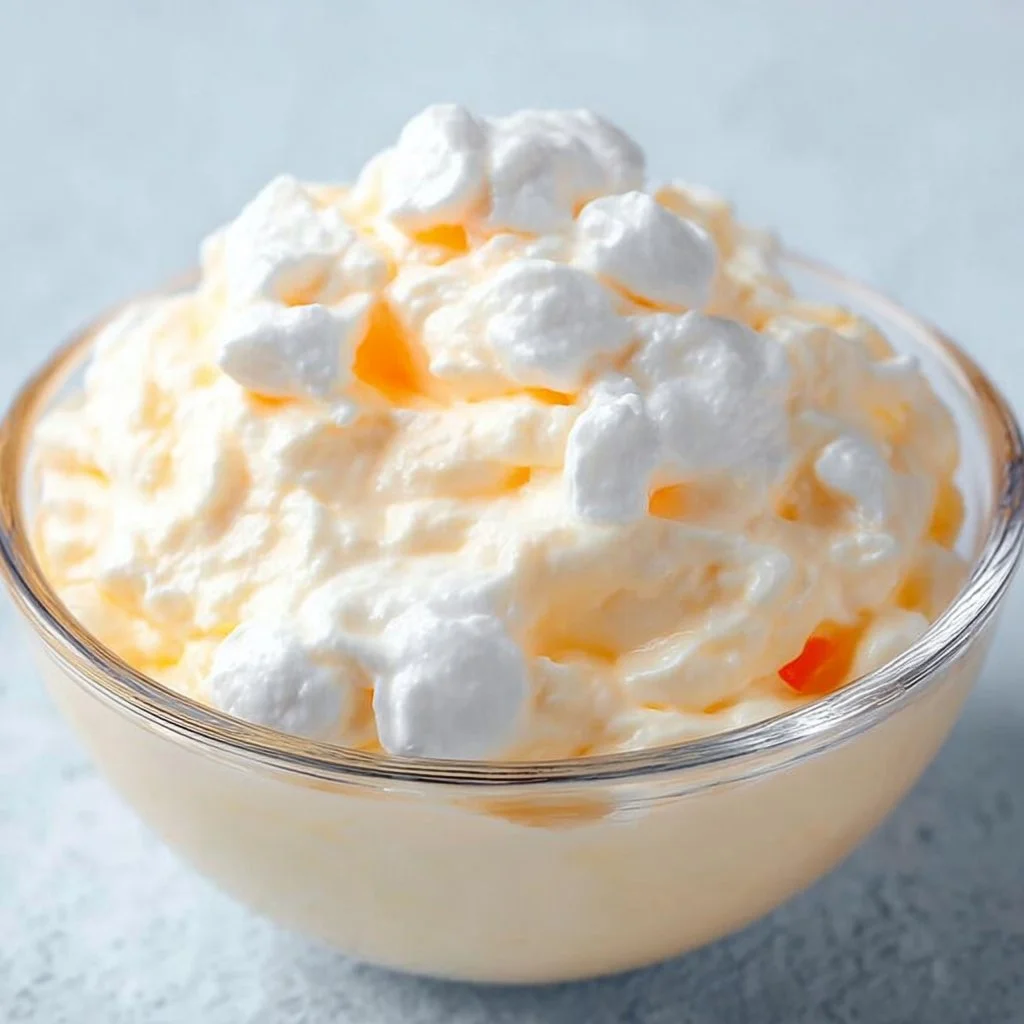
With its creamy texture, refreshing citrus flavor, and a touch of sweetness, Greek Yogurt Orange Fluff is a concoction that captures the spirit of all things cozy and homemade. Plus, it’s incredibly versatile! You can serve it as a dessert, a breakfast treat, or even as a snack during the day. Whichever way you slice it, this fluff is bound to be a hit!
So grab your apron (I know mine is probably a little messy already) and let’s get ready to whip up something special together!
A Taste of My Childhood
My love for fluffy desserts goes way back to my childhood. I remember my grandmother’s kitchen, which was the heart of our home. It was always bustling with activity—dough rising, spices dancing through the air, and laughter echoing off the walls. One of my favorite memories is of her preparing a light, fluffy dessert to brighten our family gatherings, especially during the warmer months.
She used to whip up a similar fluffy creation using whipped cream and citrus fruits, and everyone would eagerly gather around the table, waiting to sample her latest masterpiece. Weeks turned into months, and seasons slipped by, but that dessert continued to hold a special place in my heart.
As I grew up and began to experiment in my own kitchen, I wanted to create something just as light and cheerful but with a modern twist. Enter Greek Yogurt! It added a healthy spin while still allowing for that same delightful fluffiness I adored from my grandma’s creations. This Greek Yogurt Orange Fluff is my homage to those memory-filled afternoons spent in the kitchen, and I can’t wait for you to share it with your loved ones, too!
Ingredients
Here’s what you’ll need to make this dreamy, creamy dessert:
-
1 cup Greek yogurt
Look for plain, unsweetened Greek yogurt for the best results! It provides a rich base, packed with protein and a tangy flavor that balances perfectly with the sweetness of oranges. If you prefer a dairy-free option, coconut yogurt works wonderfully too! -
1 cup heavy whipping cream
This adds that luscious fluffiness we love in desserts! Make sure to whip it until soft peaks form—this gives the fluff a light and airy texture. If you’re looking for a lighter option, you can use whipped coconut cream instead. -
1/2 cup powdered sugar
Powdered sugar dissolves beautifully and sweetens the fluff without adding graininess. If you’re watching your sugar intake, feel free to swap it for a natural sweetener like honey or agave syrup, but adjust to taste! -
Zest of 1 large orange
Zesting the orange adds an aromatic brightness to the dish that’s simply irresistible. If you’re out of oranges, lemon zest can create a zesty variation! -
Juice of 1 large orange
Freshly squeezed juice is key! This will infuse your fluff with just the right amount of citrusy goodness. If you don’t have fresh oranges, bottled juice can be a quick alternative, but be sure to select one that’s 100% juice with no added sugars. -
Optional: 1 teaspoon vanilla extract
A touch of vanilla enhances the flavor and adds warmth—like a comfy hug for your taste buds! Use pure vanilla extract for the best taste. If you’re feeling adventurous, experiment with almond or orange extract!
Step-by-Step Instructions
Let’s dive right into creating our Greek Yogurt Orange Fluff masterpiece!
Step 1: Prepare the Base
In a large mixing bowl, combine the Greek yogurt, powdered sugar, orange zest, and orange juice. Mix it up gently until everything is well combined. Take a moment to breathe in the heavenly aroma of fresh oranges—this is what summer dreams are made of!
Step 2: Whip the Cream
In a separate bowl, start whipping the heavy cream with a hand mixer or stand mixer until soft peaks form. You want it light and fluffy—almost like a cloud! This step is crucial for achieving that airy texture we love, so take your time and don’t rush.
Step 3: Fold Together
Once your cream is whipped, it’s time for the magic! Gently fold the whipped cream into your yogurt mixture using a spatula. Start by adding a small amount of whipped cream into the yogurt to lighten it up (this is called tempering). Then, carefully fold in the rest. You want to maintain that fluffy texture, so be gentle!
Step 4: Chill
Pour the combined mixture into your desired serving bowl or individual cups. Cover and refrigerate for at least 2 hours (or, ideally, overnight for the flavors to meld together).
Step 5: Serve and Enjoy
When you’re ready to eat, scoop out a generous serving of that fluffy goodness. You can garnish it with some additional orange zest or a sprig of mint for a pop of color. Now sit down and prepare to enjoy the delightful blend of tangy yogurt and sweet orange flavors!
Chef’s Tips
- Taste and Adjust: Always taste your fluff mixture before chilling. If you desire a little more sweetness, add more powdered sugar or sweetener.
- Be Patient: Allowing the fluff to chill is essential as it helps the flavors develop and the texture to set—your patience will be rewarded!
- Presentation: For an extra touch, consider adding a crunchy topping like crushed nuts or granola just before serving for added texture!
Serving Suggestions
This Greek Yogurt Orange Fluff can be served in various ways! For an elegant presentation, serve it in beautiful glass cups or mason jars to showcase its fluffy layers. Decorate the top with a sprinkle of your favorite nuts, a dollop of orange marmalade, or even a mint leaf for that extra touch of flair. You can also create a fun dessert bar where guests can top their fluff with various fruits, granola, or chocolate shavings!
Recipe Variations
Feeling a little adventurous? Try these creative twists on the classic recipe:
- Berry Blast: Substitute the orange juice with mixed berry puree for a vibrant berry version!
- Coconut Citrus: Add shredded coconut to the fluff for a tropical flair—perfect for summer!
- Chocolate Orange: Mix in some cocoa powder for a chocolatey twist, creating a decadent treat sure to impress.
- Nutty Delight: Replace the orange zest with lemon, and add crushed pistachios for a nutty variation.
- Honey Lavender: Drizzle some honey and add culinary lavender for a unique flavor profile—perfect for a calming dessert!
Chef’s Notes
I love how this recipe has evolved over the years! Initially, I focused on the traditional sweet fluff, but as I experimented with different ingredients and healthier choices, Greek yogurt became my go-to. It offers the same creamy texture without feeling too heavy while packing a nutritional punch. Plus, it’s been a fantastic way to sneak some additional protein into dessert!
One amusing kitchen story sticks with me—when I first attempted this dessert, I accidentally over-whipped my cream, and let me tell you, it turned into butter! While it was a funny mishap, it taught me a valuable lesson about patience and attention in the kitchen. Cooking is all about learning, and I love sharing those little moments with you!
FAQs and Troubleshooting
Q: Can I make this recipe dairy-free?
A: Absolutely! Substituting regular Greek yogurt with coconut yogurt and using whipped coconut cream makes a delicious, dairy-free version.
Q: My fluff is not setting properly. What went wrong?
A: If your fluff isn’t setting, it may be due to insufficient chilling time. Also, make sure you whipped the heavy cream to soft peaks before folding it in—this is key for maintaining that fluffy texture!
Q: Can I use flavored yogurt?
A: While you can, I recommend using plain Greek yogurt to control the sweetness and flavor profile. However, if you find a delicious orange-flavored yogurt, it could work nicely too!
Q: How long can I store the Greek Yogurt Orange Fluff in the fridge?
A: This dessert can be stored in the fridge for about 3 days. Just remember to cover it well to prevent it from absorbing unwanted odors from your fridge!
Nutritional Info
While I typically let you focus on enjoyment and connection with food rather than its numbers, here’s a rough estimate per serving (if this recipe serves 8):
- Calories: 150
- Protein: 6g
- Fat: 7g
- Carbohydrates: 15g
- Sugar: 10g
(Please note that this is an approximation and can vary based on specific ingredients used.)
And there you have it, my friends—a delightful and fluffy Greek Yogurt Orange Fluff that’s bound to impress! Whether you’re enjoying it solo or sharing it with loved ones, I hope it brings as much joy to your kitchen as it has brought to mine. So, roll up those sleeves, have fun, and let’s celebrate the deliciousness of homemade treats! Happy cooking!
Print
Greek Yogurt Orange Fluff
- Total Time: 135 minutes
- Yield: 8 servings 1x
- Diet: Vegetarian
Description
A light and fluffy dessert combining Greek yogurt with refreshing citrus flavors, perfect for any gathering.
Ingredients
- 1 cup Greek yogurt
- 1 cup heavy whipping cream
- 1/2 cup powdered sugar
- Zest of 1 large orange
- Juice of 1 large orange
- Optional: 1 teaspoon vanilla extract
Instructions
- Prepare the Base: In a large mixing bowl, combine the Greek yogurt, powdered sugar, orange zest, and orange juice. Mix it up gently until everything is well combined.
- Whip the Cream: In a separate bowl, start whipping the heavy cream with a hand mixer or stand mixer until soft peaks form.
- Fold Together: Gently fold the whipped cream into your yogurt mixture using a spatula.
- Chill: Pour the combined mixture into your desired serving bowl or individual cups and cover. Refrigerate for at least 120 minutes.
- Serve and Enjoy: Scoop out a generous serving and garnish with additional orange zest or a sprig of mint.
Notes
Allow the fluff to chill adequately for the best texture and flavor. Consider adding crunchy toppings like crushed nuts before serving.
- Prep Time: 15 minutes
- Cook Time: 0 minutes
- Category: Dessert
- Method: Mixing and Chilling
- Cuisine: Mediterranean
Nutrition
- Serving Size: 1 serving
- Calories: 150
- Sugar: 10g
- Sodium: 30mg
- Fat: 7g
- Saturated Fat: 4g
- Unsaturated Fat: 2g
- Trans Fat: 0g
- Carbohydrates: 15g
- Fiber: 0g
- Protein: 6g
- Cholesterol: 30mg
Keywords: Greek Yogurt, Orange, Dessert, Light, Fluff
Homemade Greek Yogurt
The Ultimate Guide to Homemade Greek Yogurt: Simple, Delicious, and So Rewarding!
Welcome to my kitchen! I’m Olivia Bennett, your friendly guide on this culinary adventure, and today we’re diving into something incredibly simple yet utterly delightful: homemade Greek yogurt. If you’re a foodie like me who loves creamy textures, tangy flavors, and the satisfaction of making something from scratch, you’re in just the right place!
Have you ever tasted fresh yogurt that’s velvety smooth, bursting with flavor, and made with just a few beautiful ingredients? If not, get ready for your taste buds to do a happy dance! Homemade Greek yogurt is a game-changer. It’s vastly different from store-bought versions, often overloaded with additives and preservatives, which can take away from that wholesome natural goodness we all crave.
Picture this: It’s early summer, and the flowers are in full bloom. I’m in my cozy kitchen, sunlight streaming through the windows, the faint aroma of lavender from my herb garden wafting in the air. I’ve just made a fresh batch of Greek yogurt, and the anticipation of tasting that first creamy spoonful sends a flutter through my heart. The nutritional benefits are just the icing on the cake! Packed with probiotics and protein, this yogurt is not just a treat; it’s a powerhouse for your gut health too.
Now, let’s get started! I promise you that making homemade Greek yogurt is one of the most rewarding (and delicious) kitchen projects you’ll ever take on. From setting the yogurt to that magical moment of scooping it out of the strainer, every step is filled with joy. And don’t worry — it’s super easy. Grab your apron, and let’s get creating!
A Little Personal Story
Ah, yogurt! I have fond memories of my grandma — a feisty Italian woman with an unmatched love for food. Every summer, she would set aside a whole day just for yogurt making. I remember standing beside her, eyes wide with fascination, as she carefully poured milk, added the starter, and wrapped the jars in fluffy towels as if they were precious treasures. The whole house smelled divine after a day of waiting, and the first spoonful of her homemade yogurt was always a moment of pure bliss.
What I loved most was that we always topped it with whatever fruit was fresh from the market or whatever was ripe in our garden that day. Whether it was a handful of tart berries or a drizzle of honey, it was personal, it was special, and excitedly messy. My grandmother taught me that cooking is not just about nourishment; it’s about creating memories, sharing flavors, and celebrating the act of togetherness. I carry that tradition with me, and each time I whip up a batch of Greek yogurt, I feel like I’m keeping a little piece of her spirit alive.
Ingredients
Let’s gather everything you’ll need for this lovely homemade Greek yogurt:
-
Whole Milk (1 quart): For the creamiest, richest yogurt, whole milk is the way to go. You can use 2% or skim milk if you prefer a lighter version, but remember, the creamier the milk, the creamier the yogurt!
-
Plain Yogurt (1/4 cup): This will act as your starter culture. Make sure it contains live active cultures, as these little guys are what give your yogurt its signature tang. If you’re dairy-free, you can use a non-dairy yogurt starter.
-
Cheesecloth or Fine Mesh Strainer: This is for straining your yogurt and achieving that thick, luscious Greek yogurt consistency. If you don’t have cheesecloth, you can use a clean dish towel or a coffee filter!
-
A Pot: Any medium-sized pot will do. Just make sure it has enough space to hold the milk without spilling over.
-
A Thermometer: This isn’t absolutely necessary, but a kitchen thermometer makes it easier to ensure your milk is just the right temperature for culturing. If you don’t have one, I’ll guide you through the approximate steps!
-
A Whisk: Perfect for whisking together your yogurt starter with the milk. It helps the cultures blend beautifully.
Step-by-Step Instructions
You ready? Let’s make some magic happen! Here’s how to whip up your Greek yogurt:
Step 1: Heat the Milk
Pour the whole milk into a medium pot and gently heat it over medium-low heat. You want to warm it up to about 180°F (82°C) — this pasteurizes the milk. If you don’t have a thermometer, just keep an eye on it; you’ll see steam forming, and tiny bubbles starting to appear around the edges.
Chef Tip: Stir occasionally to prevent the milk from scorching at the bottom. You want your yogurt to be smooth and silky, not burned!
Step 2: Cool the Milk
Once you’ve reached that magic temperature, remove the pot from heat and let it cool down to around 110°F (43°C). You can whisk it every now and then to speed up the cooling process!
Chef Insight: Patience is key here. Temperature affects how well the yogurt cultures will thrive, which ultimately results in a delicious final product.
Step 3: Mix in the Starter
In a separate bowl, take your plain yogurt and whisk it until smooth. Then, add a couple of tablespoons of the warm milk into the yogurt to temper it. This step is crucial because it helps the cultures gradually adjust to the warmer temperature.
Now, whisk that mixture back into the pot of warm milk until everything is blended evenly.
Step 4: Let It Culture
Transfer the pot to a warm place, like an oven with the light on, or cover it with towels and place it in a cozy spot. Let it sit undisturbed for 6 to 12 hours.
Chef Tip: The longer you let it sit, the tangier it will become! I recommend checking it after 6 hours and deciding if it needs more time.
Step 5: Strain the Yogurt
Once your yogurt has thickened to your liking, it’s time to strain it! Set up a fine mesh strainer over a large bowl, line it with cheesecloth, and pour the yogurt into the strainer.
Cover it with plastic wrap or set it aside to drain for about 2 hours for a creamy Greek texture, or longer if you want it extra thick—up to 8 hours!
Step 6: Transfer and Store
Carefully transfer your strained Greek yogurt into an airtight container, and guess what? You just made yogurt from scratch!
Chef Note: Reserve a couple of tablespoons of your homemade yogurt for the next batch — that’s your starter culture for the next time around!
Serving Suggestions
Homemade Greek yogurt is so versatile! You can enjoy it in a multitude of ways. Serve it in a beautiful bowl topped with fresh berries, a drizzle of honey, and a sprinkle of granola for crunch. Or, mix it into smoothies for an extra protein boost.
You can also use it as a tangy base for savory dishes like tzatziki or as a creamy addition to your favorite salad dressings. The possibilities are endless!
Recipe Variations
-
Flavored Yogurt: Stir in some vanilla extract, cocoa powder, or even fresh herbs for a twisted version.
-
Dairy-Free Option: Substitute whole milk with coconut milk for a tropical twist that’s equally creamy.
-
Honey Vanilla Yogurt: Mix in honey and vanilla extract after straining for a deliciously sweet treat.
-
Fruit-Infused Yogurt: Blend fresh fruits like strawberries or mangoes into your Greek yogurt for a fresh burst of flavor.
-
Savory Yogurt Bowls: Top it with olive oil, fresh herbs, and a sprinkle of sea salt for a savory snack or dip.
Chef’s Notes
Homemade Greek yogurt has been a staple in my kitchen, and every time I make it, I think about those warm summer days spent with my grandma. I’ve experimented over the years, trying different cultures, milk varieties, and even different straining times. Each time, I learn something new. The beauty of making yogurt at home is that you can completely customize it and make it your own.
And let me tell you — the first time I made it and tasted that velvety goodness, it felt like the culinary equivalent of discovering a treasure chest! No more store-bought yogurt for me; you can taste the love in every luscious spoonful.
FAQs and Troubleshooting
1. Why didn’t my yogurt thicken?
If your yogurt didn’t thicken properly, it might be due to the milk not being heated to the right temperature or not enough time to culture it. Patience is key — try letting it sit longer next time!
2. How can I make my yogurt less tangy?
For a milder flavor, simply reduce the culturing time. Check it after about 4 hours for a gentler tang.
3. Can I reuse my homemade yogurt as a starter?
Absolutely! Just save a few tablespoons of your batch for your next round. It’s such a great circle of flavor!
4. My yogurt has separated; is it still good?
No worries! It’s completely normal for whey to separate from the yogurt. You can just stir it back in for a creamier texture or drain it off if you prefer a thicker product.
Nutritional Info
While the nutritional content can vary based on specific ingredients used, typically, one cup of homemade Greek yogurt contains:
- Calories: Approximately 140
- Protein: 12-15g
- Fat: 6-10g
- Carbohydrates: 6-8g
- Calcium: A good source!
Now, what are you waiting for? Dive into this delightful culinary project, and savor the joys of homemade Greek yogurt. It truly is a labor of love that brings happiness to both your taste buds and your kitchen! Happy cooking, my fellow food lover! 💖
Print
Homemade Greek Yogurt
- Total Time: 12 hours 15 minutes
- Yield: 4 servings 1x
- Diet: Vegetarian
Description
A simple and rewarding guide to making creamy homemade Greek yogurt from scratch.
Ingredients
- 1 quart Whole Milk
- 1/4 cup Plain Yogurt (with live active cultures)
- Cheesecloth or Fine Mesh Strainer
- A medium-sized Pot
- A Thermometer
- A Whisk
Instructions
- Pour the whole milk into a medium pot and gently heat it over medium-low heat until it reaches about 180°F (82°C).
- Remove the pot from heat and let it cool down to around 110°F (43°C).
- Whisk the plain yogurt in a separate bowl until smooth, then add a couple of tablespoons of warm milk to temper it.
- Blend the tempered yogurt mixture back into the pot of warm milk until evenly mixed.
- Transfer the pot to a warm place and let it sit undisturbed for 6 to 12 hours to culture.
- Set up a fine mesh strainer over a large bowl, line it with cheesecloth, and pour the yogurt into the strainer to strain for about 2 to 8 hours.
- Carefully transfer the strained yogurt into an airtight container.
Notes
Reserve a couple of tablespoons of your homemade yogurt for the next batch as your starter culture.
- Prep Time: 15 minutes
- Cook Time: 12 hours
- Category: Snack
- Method: Culturing
- Cuisine: Greek
Nutrition
- Serving Size: 1 serving
- Calories: 140
- Sugar: 6g
- Sodium: 100mg
- Fat: 8g
- Saturated Fat: 4g
- Unsaturated Fat: 4g
- Trans Fat: 0g
- Carbohydrates: 8g
- Fiber: 0g
- Protein: 12g
- Cholesterol: 30mg
Keywords: Greek yogurt, homemade yogurt, yogurt recipe, dairy recipes, probiotic food

Greek Yogurt Bagels
The Delight of Homemade Greek Yogurt Bagels
Welcome to my cozy kitchen, friends! Today, I’m utterly thrilled to share with you a recipe that’s not only incredibly simple but also downright delightful—Greek Yogurt Bagels! If you’ve ever been tempted by the idea of freshly baked bagels wafting through your home, but felt intimidated by the process, fear not! These bagels come together in a breeze, using just a handful of ingredients.
Picture this: the aroma of warm bread filling your kitchen, the satisfaction of creating something from scratch, and then indulging in those golden, chewy bagels slathered with cream cheese or your favorite toppings. It’s like having a little bakery right in your home! Plus, these bagels have a unique twist: they’re made with Greek yogurt, which gives them a wonderfully fluffy texture and a subtle tang. They’re perfect for breakfast, brunch, or a cozy snack any time of the day.
Now, you may be wondering, “Why Greek yogurt?” Well, my friends, not only does it enhance the flavor, but it also means you can skip the long proofing times traditionally associated with bagel-making. So tuck in your apron and roll up your sleeves—let’s whip up a batch of these delicious homemade Greek Yogurt Bagels! Trust me; once you get the hang of it, your friends and family will be hounding you for more.
Personal Story
Ah, bagels. When I think back to my childhood, I vividly recall Saturday mornings spent at my grandmother’s house in the bustling heart of our little neighborhood. The delightful smell of freshly baked bagels mingled with the aroma of her secret-recipe coffee, creating a warm, inviting blanket that wrapped around everyone who visited. My grandma was known for her homemade bagels, and she would often have a gathering of family to nibble on her creations while sharing stories and laughter.
One sunny morning, I stood beside her, eager to learn the bagel-making secrets she had perfected over the years. She guided me patiently, measuring flour with a lighthearted approach that filled the kitchen with joy. It was more than just the act of cooking; it was about togetherness and the love that comes from sharing good food. As we shaped dough together, she would tell tales from her childhood, weaving together memories and flavors. Those bagels were more than just food; they represented family stories, connections, and a legacy of love that I carry with me today.
With these Greek Yogurt Bagels, I hope to evoke those same feelings of warmth and connection in your kitchen. So let’s get baking, shall we?
Ingredients
Here’s what you’ll need to whip up your own batch of Greek Yogurt Bagels:
-
2 cups all-purpose flour
For the best results, use a good-quality all-purpose flour. If you’re looking for a healthier option, you can substitute half with whole wheat flour for a nutty flavor. -
1 cup Greek yogurt
Choose plain, unsweetened Greek yogurt. This is the star of our show, giving our bagels a fluffy texture that’s also rich in protein! For a dairy-free alternative, look for coconut or almond-based Greek yogurt. -
1 tablespoon baking powder
This is our leavening agent! Baking powder creates those lovely air pockets that make our bagels light and fluffy. -
1 teaspoon salt
A pinch of salt goes a long way, enhancing the flavors of our bagels. Feel free to experiment with flavored salts for a unique twist! -
Optional toppings (such as sesame seeds, everything bagel seasoning, or poppy seeds)
Add your personal flair by sprinkling these toppings on the bagels before baking. This is where you can really let your creativity shine!
Step-by-Step Instructions
Step 1: Preheat the Oven
First things first, let’s get that oven preheated to 375°F (190°C). This will ensure our bagels bake evenly.
Step 2: Combine Ingredients
In a mixing bowl, combine the flour, baking powder, and salt. Give it a quick whisk to incorporate everything. In another bowl, add the Greek yogurt. Now for the fun part! Gradually add the dry ingredients to the yogurt, mixing until it starts to come together into a shaggy dough.
Step 3: Knead the Dough
Once it’s mixed, dust your countertop with a little flour and transfer the dough onto the surface. Knead it gently for about 2-3 minutes until it’s just smooth. Since this dough is relatively low in gluten, don’t overdo it. You want it to be tender, not tough!
Step 4: Shape the Bagels
Now comes the exciting part—shaping your bagels! Divide the dough into 6-8 equal pieces (depending on how large you want your bagels to be). Roll each piece into a ball, then poke a hole in the center with your finger and gently stretch to form a ring. Remember, the hole will expand a bit while baking, so don’t worry if it looks small initially.
Step 5: Prepare for Baking
Line a baking sheet with parchment paper. If you’re using toppings, now’s your chance! Brush each bagel lightly with water and sprinkle your desired toppings on top.
Step 6: Bake
Pop those beauties into your preheated oven and let them bake for 25-30 minutes or until they’re golden brown. You’ll want to rotate your baking sheet halfway through so they cook evenly—trust me; you won’t want to pull burnt bagels out of the oven!
Step 7: Cool and Enjoy!
Once they’re perfectly baked, remove them from the oven and let them cool on a wire rack. I recommend letting them cool slightly before diving in because the steam will help to develop that chewy texture we all adore.
Serving Suggestions
These Greek Yogurt Bagels are best enjoyed warm! Slice them open and add your favorite spreads—cream cheese, avocado, or even a dollop of homemade jam. For an extra special treat, try making a breakfast sandwich with eggs and your favorite cheese. The toppings are endless, but remember, the best additions are the ones you love most!
Recipe Variations
-
Herb-Infused Bagels: Add herbs like rosemary, thyme, or dill to the dough for a fragrant twist.
-
Sweet Touch: Mix in a tablespoon of honey or maple syrup for a hint of sweetness; perfect for a breakfast bagel.
-
Cheese Lover’s Delight: Incorporate shredded cheese into the dough or sprinkle it on top before baking for a cheesy crust.
-
Spicy Bagels: Add a pinch of cayenne pepper or red pepper flakes to the dough for a kick of heat.
-
Seasonal Favorites: Incorporate seasonal ingredients like pumpkin puree in the fall or blueberries in the summer for a refreshing change.
Chef’s Notes
Making bagels has always been a joyous occasion for me; it’s not just about the food but also the memories. Since my grandmother’s days, I’ve played with this recipe, tweaking it for simplicity while keeping that nostalgic warmth. You can even make a batch ahead of time and freeze them. Seriously! Just thaw them and pop them in the toaster when you’re ready to indulge. I like to make double batches so I always have some on hand—trust, it saves me from those last-minute breakfast dashes!
FAQs and Troubleshooting
Q: My bagels came out too dense. What happened?
A: If your bagels turned out dense, it might be because the dough was over-kneaded or the flour was packed tightly. Remember to knead gently!
Q: Can I make the dough ahead of time?
A: Absolutely! You can prepare the dough, shape the bagels, and store them in the fridge for a few hours or overnight before baking. Just let them come to room temperature for about 30 minutes before popping them in the oven.
Q: What if I don’t have Greek yogurt?
A: No worries! You can substitute with regular yogurt, but the texture might be a little different. Alternatively, you can try sour cream for a similar tanginess.
Q: How do I store leftover bagels?
A: Keep any leftover bagels in an airtight container at room temperature for up to three days, or wrap them in plastic wrap and freeze for up to two months.
Nutritional Info (Optional)
While I usually focus more on flavor than numbers, it’s good to be aware! Each bagel roughly contains:
- Calories: ~180
- Protein: 8g
- Carbohydrates: 32g
- Fat: 1g
Feel free to adjust based on the toppings you choose!
So there you have it, my friend! A delicious, guilt-free recipe for Greek Yogurt Bagels that’s bound to spark joy in your kitchen and tantalize your taste buds. Happy baking, and may your kitchen be forever filled with warmth, love, and deliciousness!
Print
Greek Yogurt Bagels
- Total Time: 40 minutes
- Yield: 6-8 servings 1x
- Diet: Vegetarian
Description
Delightfully fluffy bagels made with Greek yogurt, perfect for breakfast or anytime snacking.
Ingredients
- 2 cups all-purpose flour
- 1 cup Greek yogurt
- 1 tablespoon baking powder
- 1 teaspoon salt
- Optional toppings (such as sesame seeds, everything bagel seasoning, or poppy seeds)
Instructions
- Preheat the oven to 375°F (190°C).
- Combine the flour, baking powder, and salt in one bowl; in another bowl, add the Greek yogurt. Gradually mix dry ingredients into the yogurt until shaggy dough forms.
- Knead the dough on a floured surface for 2-3 minutes until smooth.
- Shape the dough into 6-8 balls, poke holes in the center, and stretch to form bagel shapes.
- Prepare a baking sheet with parchment paper, brush bagels with water, and add toppings if desired.
- Bake for 25-30 minutes until golden brown, rotating the sheet halfway.
- Cool on a wire rack before enjoying!
Notes
These bagels are best enjoyed warm with your favorite spreads. Feel free to add herbs or cheese to the dough for variations.
- Prep Time: 10 minutes
- Cook Time: 30 minutes
- Category: Breakfast
- Method: Baking
- Cuisine: American
Nutrition
- Serving Size: 1 bagel
- Calories: 180
- Sugar: 1g
- Sodium: 250mg
- Fat: 1g
- Saturated Fat: 0g
- Unsaturated Fat: 1g
- Trans Fat: 0g
- Carbohydrates: 32g
- Fiber: 2g
- Protein: 8g
- Cholesterol: 0mg
Keywords: bagels, Greek yogurt, breakfast, homemade, easy recipe