
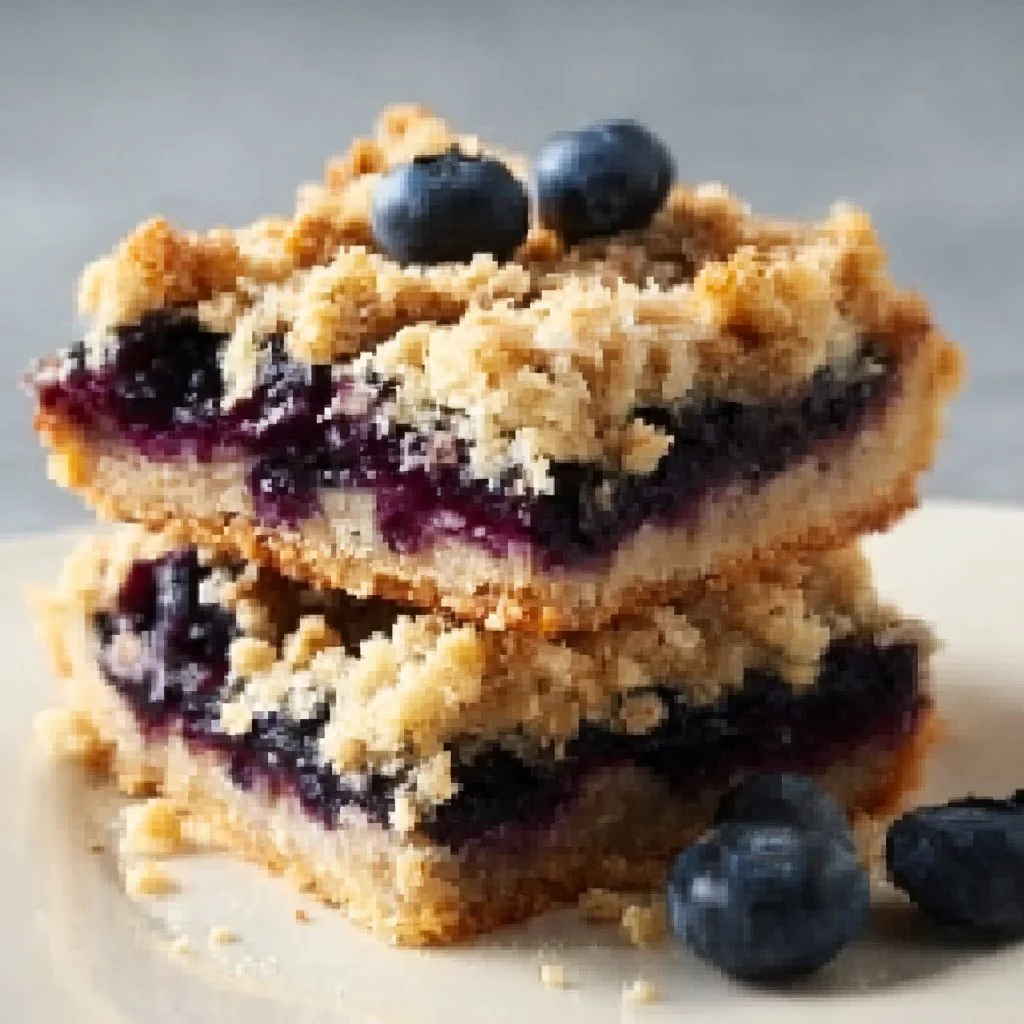
Blueberry and Oat Crumble Bars
Deliciously Easy Blueberry and Oat Crumble Bars
Hello, my lovely kitchen enthusiasts! Today we’re diving into a recipe that’s as comforting as a hug and as delightful as a sunny afternoon. Whether you’re looking for a sweet surprise for your afternoon tea, a snack to satisfy your mid-day cravings, or a delightful addition to your brunch spread, these Blueberry and Oat Crumble Bars are here to save the day. Trust me; once you sink your teeth into these fabulous treats, you’ll be adding them to your regular baking rotation!
Growing up, my summers were practically synonymous with berry picking. The smell of ripe berries wafting through the air was a signal that heaven was about to unfold in my kitchen. With my trusty apron on and a slight twinkle of mischief in my eye, I would turn our freshly picked blueberries into all sorts of yummy treats, one of which was this incredibly simple yet satisfying blueberry crumble.
What I adore about this recipe is its versatility. It’s perfect for all occasions, whether you’re hosting a garden party or just having a cozy movie night at home—this is what I like to call “comfort food made easy.” So, grab your baking dishes and your favorite mixing bowl, and let’s get ready to whip up some magic with these delightful blueberry and oat crumble bars. You’re going to love them!
Personal Story
Ah, the memories come flooding back as I think about those summer days spent berry picking with my family. We would pile into the car, armed with single-use containers and excitement, ready to scour the nearby farms for the juiciest blueberries. I remember one particular year when I decided to attempt making my own version of a “Blueberry Oat Crumble” after our expedition.
With a basket brimming full of the plumpest blueberries, I dashed into the kitchen like a kid on Christmas morning. My parents were skeptical of my culinary endeavors, but the smell of butter melting and sugar mixing with fresh berries soon drew them in. As I tasted my creation, the divine combination of tart blueberries and buttery oats was a revelation! My family loved it, and it quickly became a summertime ritual in our household.
This simple recipe reminds me of those sunny days and all the love we shared in the kitchen. I can’t wait for you to create your own magical moments with these blueberry and oat crumble bars. Let’s dive right into the ingredients, shall we?
Ingredients
Here’s what you’ll need to create the most scrumptious blueberry and oat crumble bars:
-
2 cups rolled oats
These hearty oats provide the perfect texture for the crumble and are the foundation of the bars. Feel free to swap with quick oats for a softer texture, but avoid steel-cut oats, which will be too chewy. -
1 cup all-purpose flour
Flour holds everything together—some people use whole-wheat flour for a nuttier flavor. You can also try almond flour for a gluten-free option (just adjust the liquid slightly as needed). -
1/2 cup brown sugar
This adds a rich, caramel-like sweetness to the crumble. If you’re out of brown sugar, you can mix white sugar with a dash of molasses for a quick substitute. -
1/2 tsp baking soda
Helps the mixture rise gently, giving the bars a lovely texture. -
1/2 tsp salt
A little pinch of salt enhances the overall flavor of the dish—don’t skip it! -
1/2 cup unsalted butter, melted
Butter adds a rich, creamy flavor to your bars. Sometimes, I even use coconut oil for a lighter taste, which gives a subtle hint of coconut in each bite! -
2 cups fresh blueberries
The star of the show! You can use frozen blueberries, but rinse and dry them well to avoid excess moisture. -
1 tbsp lemon juice
This lifts the flavor of the blueberries and adds a zesty twist. You can adjust this to taste, particularly if your blueberries are extra sweet.
Let’s get cooking!
Step-by-Step Instructions
Step 1: Preheat the oven
Begin by preheating your oven to 350°F (175°C). This step is crucial as it ensures your bars bake evenly. While the oven warms, line an 8×8-inch baking pan with parchment paper, leaving some overhang for easy removal later.
Step 2: Mix Dry Ingredients
In a large bowl, combine your rolled oats, flour, brown sugar, baking soda, and salt. Stir gently with a wooden spoon or spatula until evenly combined. I like to feel the texture of the oats and sugar; it adds a delicious anticipation to the baking process!
Step 3: Add Wet Ingredients
Next, pour in the melted butter, mixing until everything is well-coated and crumbly. At this point, take a moment to appreciate the heavenly aroma wafting up from the mixture—heaven, I tell you! Save about 1 cup of this mixture to sprinkle on top later; it will create a beautiful crumble topping!
Step 4: Prepare the Blueberry Filling
In a separate bowl, gently mix the blueberries with the lemon juice. Be careful not to crush them; we want juicy bursts of fruit in every bite! You can add a tablespoon of sugar if your berries are a bit tart.
Step 5: Assemble the Layers
Now, press half of the oat mixture into the bottom of your prepared baking pan, ensuring it’s compact and even. This forms a sturdy crust that holds everything together.
Step 6: Add Blueberry Filling
Spread the blueberry mixture evenly over the crust. I like to envision how each berry will burst when baked, releasing their juice and mingling with the oats—yum!
Step 7: Top It Off
Now, crumble the reserved oat mixture evenly over the blueberries. It doesn’t need to be perfect; rustic is always better in my kitchen!
Step 8: Bake
Slide the pan into the preheated oven and bake for 25-30 minutes until the top is golden brown and the blueberries are bubbling away cheerfully. You may want to peek occasionally, but resist the urge to keep opening the oven door!
Step 9: Cool and Slice
Once baked, remove the pan from the oven and let it cool for at least 10-15 minutes to set. When cooled slightly, lift the bars using the parchment paper, and slice them into squares or rectangles. Trust me, letting the bars cool a bit before slicing will result in cleaner edges—and no one likes a messy dessert!
Serving Suggestions
Serve these delightful blueberry and oat crumble bars warm, drizzled with a little honey or a dollop of fresh whipped cream if you’re feeling indulgent. They’re also fantastic with a scoop of vanilla ice cream on a hot summer day! For a coffee shop vibe at home, pair it with a cup of coffee or tea, and you’ve got the ultimate cozy treat.
Recipe Variations
Feel free to get creative! Here are some fun variations you might enjoy:
- Swap the Fruit: Use peaches, raspberries, or even chopped strawberries instead of blueberries for a personal twist.
- Nuts and Seeds: Add 1/4 cup of chopped nuts (like almonds or walnuts) in the crumble for extra crunch, or mix in a tablespoon of chia seeds for added nutrition.
- Spices: Add a pinch of cinnamon or nutmeg to the crumble for a warmer flavor profile.
- Sweeteners: Try honey or maple syrup as the sweetener for a different take—just adjust the amount used in the butter mixture slightly.
Chef’s Notes
This recipe has been evolving with me over the years—from simple family gatherings to modern-day brunches with friends. I remember one fateful Fourth of July when I opted to bring these bars to celebrate. After some fierce but friendly competition in the dessert category, it became the star of the potluck!
One tip I always keep in mind is to leave a little room for experimentation. You never know what twist might surprise you, and that’s the beauty of home cooking—it’s all about what feels right to you!
FAQs and Troubleshooting
-
Q: Can I use frozen blueberries?
A: Absolutely! Just be sure to rinse and dry them well to avoid excess moisture in the bars. -
Q: What if my crumble is too dry?
A: Don’t fret! If your crumble mixture seems a bit crumbly, add a splash of water or a little extra melted butter to bind it together. -
Q: How do I store leftovers?
A: Store your crumble bars in an airtight container at room temperature for up to 3 days. You can also freeze them for up to a month—just make sure to wrap them well! -
Q: My bars fell apart when I cut them. Help!
A: This is usually a sign they weren’t cooled enough or that they need a little more time in the oven. Letting them cool properly will help them set!
Nutritional Info
(Approximate per serving, assuming 16 servings)
- Calories: 190
- Protein: 3g
- Carbs: 28g
- Fat: 8g
- Fiber: 3g
- Sugar: 7g
And there you have it, my dearest foodie friends! With just a handful of ingredients and a little love, you can create these scrumptious Blueberry and Oat Crumble Bars that will warm your heart and satisfy your sweet tooth. I hope this recipe inspires you to get creative in your kitchen, just like I did all those years ago. So, what are you waiting for? Gather your ingredients and let’s bake some delicious memories together! Happy cooking!
Print
Deliciously Easy Blueberry and Oat Crumble Bars
- Total Time: 45 minutes
- Yield: 16 servings 1x
- Diet: Vegetarian
Description
These delightful blueberry and oat crumble bars are a comforting treat perfect for any occasion, delivering a burst of juicy blueberries and a rich, buttery oat crumble.
Ingredients
- 2 cups rolled oats
- 1 cup all-purpose flour
- 1/2 cup brown sugar
- 1/2 tsp baking soda
- 1/2 tsp salt
- 1/2 cup unsalted butter, melted
- 2 cups fresh blueberries
- 1 tbsp lemon juice
Instructions
- Preheat the oven to 350°F (175°C) and line an 8×8-inch baking pan with parchment paper.
- Mix the rolled oats, flour, brown sugar, baking soda, and salt in a large bowl until combined.
- Add the melted butter and mix until the mixture is crumbly; reserve 1 cup for topping.
- Prepare the blueberry filling by gently mixing the blueberries with lemon juice.
- Assemble by pressing half of the oat mixture into the bottom of the baking pan.
- Add the blueberry mixture evenly over the crust.
- Top with the reserved oat mixture.
- Bake for 25-30 minutes until golden brown and bubbling.
- Cool for 10-15 minutes before slicing into bars.
Notes
Serve warm with honey or whipped cream, or enjoy with a scoop of vanilla ice cream.
- Prep Time: 15 minutes
- Cook Time: 30 minutes
- Category: Dessert
- Method: Baking
- Cuisine: American
Nutrition
- Serving Size: 1 bar
- Calories: 190
- Sugar: 7g
- Sodium: 200mg
- Fat: 8g
- Saturated Fat: 4g
- Unsaturated Fat: 4g
- Trans Fat: 0g
- Carbohydrates: 28g
- Fiber: 3g
- Protein: 3g
- Cholesterol: 15mg
Keywords: blueberry crumble, oat bars, dessert, healthy snack, baking
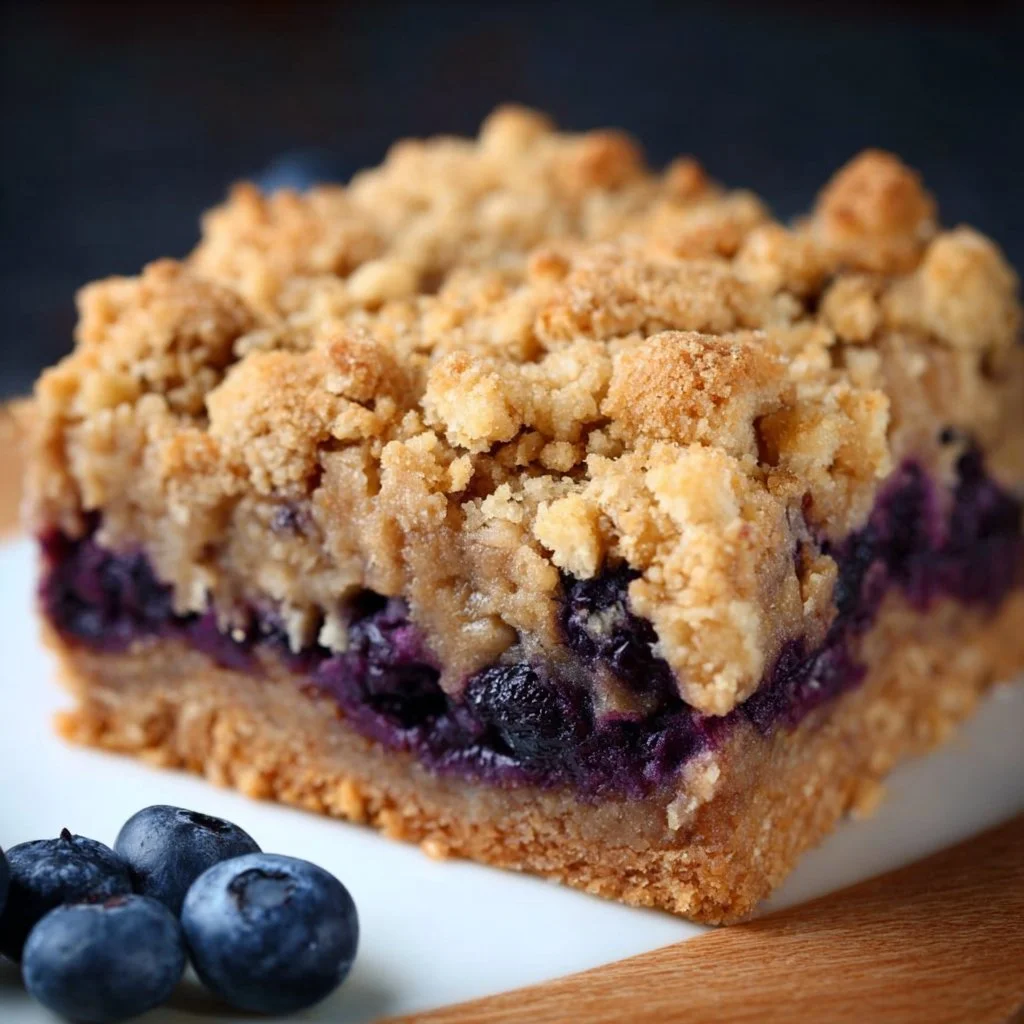
Healthy Blueberry Crumble Cake
A Slice of Sunshine: Healthy Blueberry Crumble Cake
Hey there, friends! Welcome back to my cozy kitchen! Today, I’m beyond excited to share a slice of my heart (and a sprinkle of happiness) with you — we’re diving into the delightful world of Healthy Blueberry Crumble Cake.
Let’s start with a little daydream: Picture yourself on a sunny Saturday morning, the air filled with the sweet scent of fresh blueberries, and the sound of laughter echoing from the dining table as friends or family gather around. That’s the magic I hope to create with this recipe. Whether it’s breakfast, brunch, or a sunny afternoon snack, this cake is a showstopper that’s equally delightful and healthier than your traditional dessert.
Now, let’s be clear — “healthy” doesn’t mean sacrificing flavor. I promise you that this cake maintains that rich, indulgent taste while sneaking in some nutritious ingredients. It’s packed with juicy blueberries that burst with flavor and topped with a crunchy crumble that’s simply irresistible! Plus, this cake is perfect for sharing, so you can spread the joy (and calories) with the ones you love.
Plus, it’s so simple to make — even if you’re a total kitchen novice, you’ll find that whipping this up is a breeze. So grab your apron (and maybe a cup of coffee), and let’s get our hands a bit messy as we bake some delicious memories together!
Personal Story
Whenever I think of blueberry cakes, I’m immediately transported back to my childhood summers spent at my grandparents’ farm. Every July, my family would gather to pick the plumpest blueberries straight from the bushes, which seemed to stretch on forever. I still remember my grandmother’s kitchen, filled with warmth and the comforting aroma of baked goods.
As she would mix the batter, I’d steal a few blueberries, their sweet juices staining my fingers blue — oh, those were the days! It was a simple blueberry cake she made, nothing fancy, but it was always gone within hours. The magic wasn’t just in the cake; it was in the conversations shared around the table and the laughter that filled the air. So, this recipe is my nod to those bright summer days and the joy of sharing simple pleasures with loved ones.
Ingredients
Here’s what you’ll need to whip up this Healthy Blueberry Crumble Cake:
-
Fresh Blueberries (2 cups)
These vibrant beauties are the star of the show! Packed with antioxidants and fiber, blueberries add natural sweetness and flavor. If fresh blueberries aren’t available, feel free to swap in frozen ones; just make sure to thaw and drain excess moisture first. -
Whole Wheat Flour (1 ½ cups)
Whole wheat flour is a wonderful source of nutrients and gives your cake a heartier texture. If you prefer, you can use spelt flour or gluten-free flour blends for those with dietary restrictions. -
Coconut Sugar (¾ cup)
This natural sugar is less processed than white sugar and has a lower glycemic index. If you don’t have coconut sugar, brown sugar or maple syrup works great too, but it’ll change the moisture content, so adjust accordingly. -
Baking Powder (2 teaspoons)
A must-have leavening agent to give your cake a nice, fluffy rise. -
Cinnamon (1 teaspoon)
This aromatic spice adds warmth and depth to the flavor. Feel free to play with nutmeg or cardamom for a unique twist! -
Greek Yogurt (½ cup)
Swap out traditional oil or butter for Greek yogurt to boost protein while keeping the cake moist. In a pinch, you can also use unsweetened applesauce. -
Eggs (2 large)
They act like a binder in this recipe. If you are looking for an egg-free option, try using flax eggs (1 tbsp ground flaxseed + 2.5 tbsp water = 1 egg). -
Vanilla Extract (1 teaspoon)
A splash of this enhances all the flavors and adds a touch of warmth. -
Oats (½ cup)
For the crumble topping! Oats add a lovely texture and health benefits. Quick oats or rolled oats can be used interchangeably. -
Butter (¼ cup, melted)
Just a little butter adds richness to the crumble topping. If you’d like a dairy-free option, melted coconut oil works perfectly!
Step-by-Step Instructions
Step 1: Preheat the Oven
Preheat your oven to 350°F (175°C). This essential step ensures that your cake will bake evenly. If you forget this step, don’t fret! Just pop it in once you’re ready, but it might take a bit longer to set.
Step 2: Prepare Your Baking Pan
Grease a 9-inch round cake pan with cooking spray or a bit of melted butter, then line the bottom with parchment paper for easy removal. Trust me; nobody wants a cake that sticks!
Step 3: Make the Batter
In a large mixing bowl, create a beautiful blend by whisking together the whole wheat flour, coconut sugar, baking powder, and cinnamon. Make a little well in the center and add Greek yogurt, eggs, and vanilla extract. Mix until just combined (don’t over-mix, or your cake may be dense).
Step 4: Fold in Blueberries
Gently fold in the fresh blueberries, taking care not to smush them (a light hand works wonders here). Using frozen blueberries? No problem! Just fold them in directly from the freezer.
Step 5: Pour and Smooth
Transfer the cake batter into your prepared pan, using a spatula to smoothly level the surface. This helps ensure even baking!
Step 6: Prepare the Crumble Topping
In a small bowl, mix oats, melted butter, and a pinch of cinnamon. Just knead it with your fingers until crumbly. It should resemble wet sand. If you want a sweeter crumble, add a tablespoon or two of coconut sugar here.
Step 7: Crumble it On
Evenly sprinkle your crumble topping over the cake batter. Do it generously — we love a chunky crumble!
Step 8: Bake Away!
Transfer the cake into the oven and bake for about 35-40 minutes, or until a toothpick comes out clean from the center. Your kitchen will start to smell heavenly, and that’s your cue that you’re on the right track!
Step 9: Cool and Slice
Once baked, remove the cake from the oven, let it cool in the pan for about 10 minutes, then transfer it to a wire rack. Once cool enough, slice and enjoy warm with a dollop of yogurt or a drizzle of honey.
Serving Suggestions
Serve your Blueberry Crumble Cake warm or at room temperature. It’s delightful alongside a hot cup of tea or coffee. For a special touch, consider garnishing with a sprinkle of powdered sugar, a swirl of cream cheese frosting, or a few extra fresh blueberries on top.
Recipe Variations
-
Zesty Lemon Blueberry Crumble: Add the zest and juice of one lemon to the batter for a bright, citrusy flair.
-
Nutty Boost: Mix in a half cup of chopped nuts (like walnuts or almonds) for a crunchy texture that compliments the blueberries perfectly.
-
Vegan Version: Substitute the eggs with flax eggs and use almond yogurt instead of Greek yogurt for a delicious vegan twist.
-
Spiced Twist: Experiment with a variety of spices such as nutmeg or ginger for an added flavor dimension.
Chef’s Notes
Baking this Blueberry Crumble Cake feels like giving a hug to yourself and those around you! Over the years, I’ve modified this recipe countless times—sometimes adding lemon, other times incorporating nuts —each variation has its story to tell. What remains constant, however, is the joy this cake brings. And oh, don’t be surprised if you find yourself “testing” the crumble topping before it even makes it to the oven. I won’t tell!
FAQs and Troubleshooting
1. Why is my cake dense?
If your cake didn’t rise like you hoped, it could be due to overmixing the batter. Always mix until just combined when adding dry and wet ingredients!
2. Can I freeze the cake?
Absolutely! You can freeze the cake once it’s completely cooled. Just wrap it tightly in plastic wrap and store it in an airtight container. When you’re ready to enjoy it, let it thaw at room temperature.
3. How do I know when the cake is done?
Insert a toothpick in the center of the cake. If it comes out clean (or with a few moist crumbs), you’re all set! If there’s wet batter, pop it back in for a few more minutes.
4. My crumble topping didn’t come out crunchy. Help!
If your crumble is soggy, it might be due to too much butter or not enough oats. Ensure to measure accurately and feel free to add a bit more oats if needed.
Nutritional Info
Calories per slice (based on 12 slices): Approximately 180
Fat: 6g, Carbs: 28g, Protein: 4g
And there you have it, my lovely foodies! Your forever go-to recipe for a scrumptious Healthy Blueberry Crumble Cake. I can’t wait for you to try this at home and savor every bite while sharing it with those you cherish. Happy baking, and as always, I’d love to hear your kitchen stories too — what twist did you add? Until next time, keep that oven warm and your heart even warmer!
Print
Healthy Blueberry Crumble Cake
- Total Time: 55 minutes
- Yield: 12 servings
- Diet: Vegetarian
Description
A delightful and healthier take on the classic blueberry crumble cake, packed with juicy blueberries and topped with a crunchy crumble.
Ingredients
- Fresh Blueberries (2 cups)
- Whole Wheat Flour (1 ½ cups)
- Coconut Sugar (¾ cup)
- Baking Powder (2 teaspoons)
- Cinnamon (1 teaspoon)
- Greek Yogurt (½ cup)
- Eggs (2 large)
- Vanilla Extract (1 teaspoon)
- Oats (½ cup)
- Butter (¼ cup, melted)
Instructions
- Preheat the oven to 350°F (175°C).
- Grease a 9-inch round cake pan with cooking spray or melted butter and line with parchment paper.
- Whisk together the whole wheat flour, coconut sugar, baking powder, and cinnamon in a large bowl.
- Add Greek yogurt, eggs, and vanilla extract to the dry ingredients, mixing until just combined.
- Fold in the fresh blueberries gently.
- Transfer the batter to the prepared pan and level the surface with a spatula.
- Mix oats, melted butter, and a pinch of cinnamon in a bowl for the crumble topping.
- Evenly sprinkle the crumble topping over the cake batter.
- Bake in the oven for about 35-40 minutes, or until a toothpick comes out clean.
- Cool for about 10 minutes in the pan before transferring to a wire rack to cool completely.
Notes
Serve warm or at room temperature, optionally garnished with powdered sugar or fresh blueberries.
- Prep Time: 15 minutes
- Cook Time: 40 minutes
- Category: Dessert
- Method: Baking
- Cuisine: American
Nutrition
- Serving Size: 1 slice
- Calories: 180
- Sugar: 8g
- Sodium: 150mg
- Fat: 6g
- Saturated Fat: 3g
- Unsaturated Fat: 2g
- Trans Fat: 0g
- Carbohydrates: 28g
- Fiber: 3g
- Protein: 4g
- Cholesterol: 50mg
Keywords: blueberry, crumble cake, healthy dessert, brunch recipe, vegetarian baking
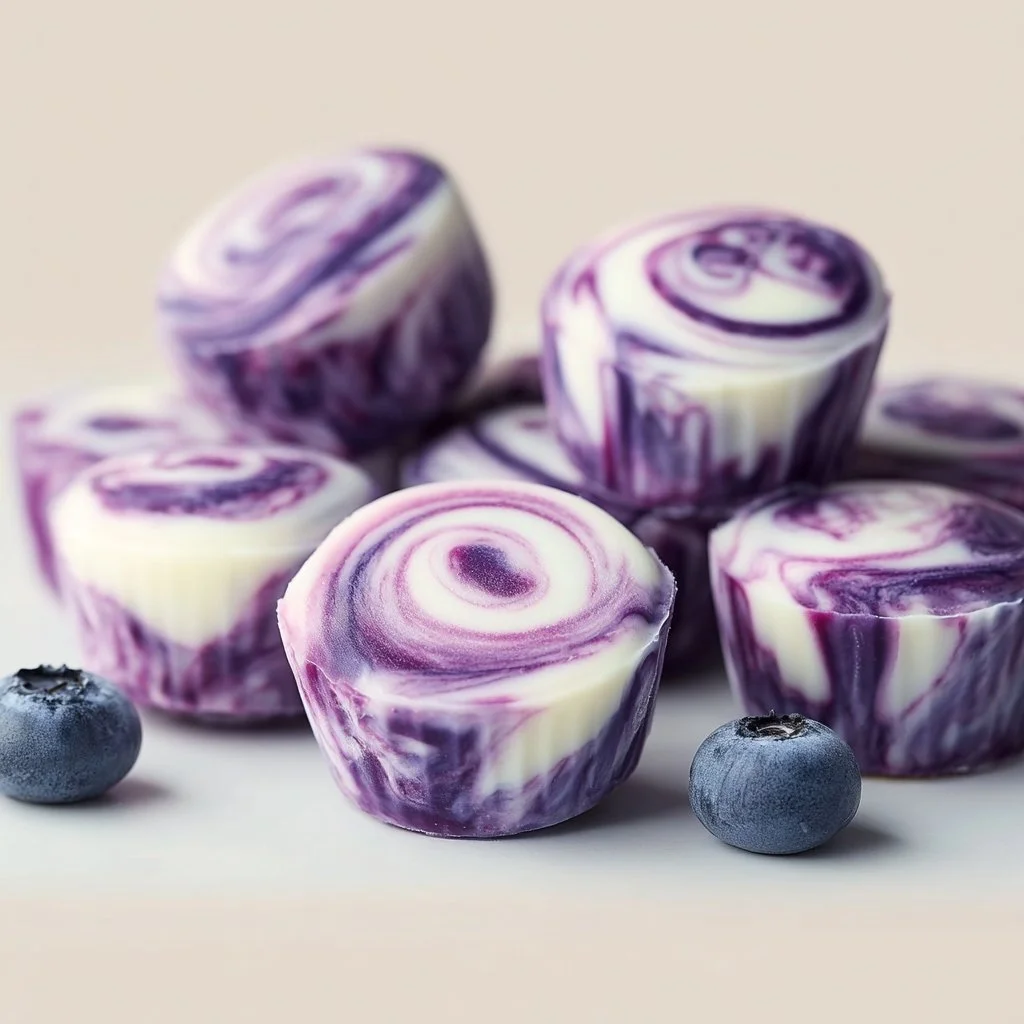
Blueberry Swirl Yogurt Bites
Blueberry Swirl Yogurt Bites: A Delightful Treat for Every Occasion
Hey there, fellow foodies! I’m Olivia, and today we’re diving into a recipe that’s not only delicious but also bursting with nostalgia—Blueberry Swirl Yogurt Bites! If you’re anything like me, there’s nothing better than creating a refreshing, sweet snack that you can enjoy anytime. Whether you’re looking for a midday pick-me-up, an after-school treat for the kids, or an elegant addition to your next brunch, these yogurt bites are the perfect answer.
Just thinking about those juicy blueberries swirled into creamy yogurt makes my taste buds dance! The best part? They’re simple to make and feel like a little gourmet treat that you can whip up in no time. I still remember the first time I experimented with yogurt bites; it was a warm summer afternoon, and my kids were running around the house, asking for something to beat the heat. I wanted something that was both fun and healthy, so I grabbed a tub of yogurt and a basket of fresh blueberries. The result was a hit, and we’ve been making them ever since!
Plus, this recipe is packed with benefits. Greek yogurt gives you that protein punch while blueberries are full of antioxidants and vitamins. So, not only are we indulging our taste buds, but we’re also popping in a bit of goodness. Are you ready to create something that will wow your friends and family? Let’s roll up our sleeves, grab our aprons, and let’s make these irresistible Blueberry Swirl Yogurt Bites together!
Personal Story
Thinking back to my childhood, one of the fondest memories I have is of summer mornings at my grandmother’s house. We’d wake up to the sound of birds chirping and the delightful smell of fresh pancakes wafting through the air. But what really made those mornings shine was my grandma’s famous blueberry pancake recipe. Each plate was piled high with fluffy pancakes topped with sweet, juicy blueberries that she’d always insist we pick together from her backyard.
We’d spend hours together, laughing and savoring the taste of the season while her garden was bursting with vibrant fruits. Inspired by those memories, I wanted to evoke that feeling of happiness and sunshine in these Blueberry Swirl Yogurt Bites. Just like Grandma’s pancakes, these bites bring a special kind of warmth and joy, and they’re a lovely way to include the taste of fresh blueberries in a fun, refreshing snack!
Ingredients
Here’s what you’ll need for these delightful Blueberry Swirl Yogurt Bites:
-
2 cups Greek yogurt: The heart of our bites! Greek yogurt is thick and creamy, giving a luscious texture. You can substitute with regular yogurt, but it will be a tad runnier.
-
1 cup fresh blueberries: Bursting with flavor! Fresh blueberries are best, but if you’re out of season, frozen works, too—just be sure to thaw and drain excess liquid.
-
2-3 tablespoons honey or maple syrup: For sweetness! You can adjust the sweetness based on your preference. Use agave syrup or a sugar substitute if you need to keep it lower-calorie or vegan.
-
1 teaspoon vanilla extract: Adds warmth and depth to the yogurt. Feel free to use almond extract for a different flavor twist!
-
Optional toppings: Granola, coconut flakes, or chopped nuts add crunch if you like some texture.
With this list, you’re all set to create a delicious, no-fuss snack that’s not only simple but also super flexible. Feel free to experiment—there’s no wrong way to make these bites your own!
Step-by-Step Instructions
Step 1: Make the Blueberry Swirl
-
Wash Your Blueberries: Start by rinsing the blueberries under cool water. Pat them dry with a paper towel. If you’re using frozen ones, thaw them until soft.
-
Blend the Berries: In a small blender (or you can use a fork!), blend about half of the blueberries until you form a chunky puree. Chef’s tip: If you want a bit of texture, don’t over-blend—leave some small bits for bursts of flavor!
-
Sweeten the Puree: Taste your blueberry puree. If desired, add a splash of honey or maple syrup to sweeten it. Set aside.
Step 2: Mix the Yogurt Base
-
Combine Yogurt and Add-Ins: In a mixing bowl, combine the Greek yogurt, honey (or maple syrup), and vanilla extract. Stir until everything is smooth and well-combined. Chef’s insight: Use a whisk for a fluffier texture!
-
Taste Test: Give it a quick taste and adjust sweetness if necessary. Remember, the blueberry swirl will add sweetness too!
Step 3: Assemble the Bites
-
Prepare Your Mold: Grab a silicone ice cube tray or muffin tin. If you’re using a metal tray, lightly grease it with non-stick spray.
-
Layer the Yogurt: Spoon some yogurt into each cavity, filling it about halfway. Use a tablespoon to create an even layer.
-
Add the Blueberry Swirl: Drop a small spoonful of your blueberry puree into each yogurt-filled cavity. With a toothpick or skewer, gently swirl the puree into the yogurt to create pretty marbled patterns. Chef’s hack: Don’t overmix! You want those lovely swirls to show.
Step 4: Freeze
- Freeze the Bites: Pop the tray into the freezer for about 3-4 hours until they’re completely solid. Bonus tip: For easier removal, leave them in the freezer overnight!
Step 5: Enjoy!
- Unmold and Serve: Once frozen, gently pop out the yogurt bites. Enjoy them immediately or store them in a glass container for later. They can be kept frozen for up to a month (but trust me, they won’t last that long!).
Serving Suggestions
These Blueberry Swirl Yogurt Bites are not just a snack; they’re a versatile addition to any gathering! Serve them on a cute platter for guests at brunch, pop them in a bowl for a fun treat at your next picnic, or enjoy them straight from the freezer during a hot summer day. Pair them with fresh mint leaves for a lovely pop of color—a feast for the eyes and the taste buds!
Recipe Variations
-
Berry Bliss: Swap the blueberries for other berries like raspberries, strawberries, or blackberries for a colorful twist!
-
Yogurt Flavor Fusion: Use flavored yogurt (like vanilla or berry) for a different depth of flavor.
-
Nutty Delight: Mix in some chopped almonds or walnuts directly into the yogurt for added crunch.
-
Chocolate Drizzle: Drizzle melted dark chocolate over the frozen bites for a decadent finish.
-
Dairy-Free Option: Use coconut yogurt or almond yogurt for a dairy-free alternative!
Chef’s Notes
Oh, how this recipe has evolved over the years! I remember using whatever fruits were on hand—peaches, strawberries, you name it. Each batch taught me something new! When I had my friends over, we’d host a “Yogurt Bite Day,” where we’d experiment with different toppings and flavors. One of my friends once tried adding a sprinkle of cinnamon, and we were hooked! Most importantly, I’ve had so much fun watching my kids get creative with their toppings. The best part is that no matter how they look, they always taste divine! Embrace the messiness; cooking should always be a joyful experience!
FAQs and Troubleshooting
-
Q: What if my yogurt isn’t stiff enough?
- A: If your yogurt isn’t thick enough, try using full-fat Greek yogurt, or let it drain in a cheesecloth for a couple of hours to get that perfect texture.
-
Q: Can I use other fruits besides blueberries?
- A: Absolutely! Experiment with any berries or fruits you love—just be aware that some fruits may require adjustments in sweetness or pairing.
-
Q: How do I store leftovers?
- A: Keep them in an airtight container in the freezer. Just be sure to separate them with parchment paper if you crowd them together, so they don’t freeze into one big lump!
-
Q: Can I make them vegan?
- A: Yes! Substitute Greek yogurt with coconut or almond yogurt and switch out honey for maple syrup.
Nutritional Info
These Blueberry Swirl Yogurt Bites are not only delicious but also nutritious. Here’s an approximate breakdown per serving (assuming the recipe yields 12 bites):
- Calories: 60
- Protein: 4g
- Total Fat: 1.5g
- Carbohydrates: 9g
- Sugar: 3.5g
- Fiber: 1g
(Note: Nutritional info will vary based on specific ingredients used.)
So there you have it, lovely friends—a fierce yet simple recipe for Blueberry Swirl Yogurt Bites that brings a sprinkle of joy to your day! Whether you’re indulging solo or sharing with others, these bites are sure to bring smiles and delicious moments all around. Happy cooking!
Print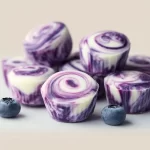
Blueberry Swirl Yogurt Bites
- Total Time: 240 minutes
- Yield: 12 bites 1x
- Diet: Vegetarian
Description
A delightful treat that combines creamy Greek yogurt with fresh blueberries, these yogurt bites are perfect for snacking any time of the day.
Ingredients
- 2 cups Greek yogurt
- 1 cup fresh blueberries
- 2–3 tablespoons honey or maple syrup
- 1 teaspoon vanilla extract
- Optional toppings: Granola, coconut flakes, or chopped nuts
Instructions
- Wash the blueberries under cool water and pat dry.
- Blend half of the blueberries to make a chunky puree.
- Sweeten the puree with honey or maple syrup to taste.
- Combine the Greek yogurt, honey (or maple syrup), and vanilla extract in a mixing bowl.
- Taste the yogurt mixture and adjust sweetness if necessary.
- Prepare your silicone ice cube tray or muffin tin.
- Layer yogurt into each cavity, filling them halfway.
- Add a spoonful of blueberry puree to each yogurt cavity and swirl gently.
- Freeze for 3-4 hours or until solid.
- Unmold the yogurt bites and enjoy immediately or store in a glass container.
Notes
These bites can be stored in the freezer for up to a month. Feel free to experiment with different fruits and toppings.
- Prep Time: 15 minutes
- Cook Time: 0 minutes
- Category: Snack
- Method: Freezing
- Cuisine: American
Nutrition
- Serving Size: 1 serving
- Calories: 60
- Sugar: 3.5g
- Sodium: 50mg
- Fat: 1.5g
- Saturated Fat: 0.5g
- Unsaturated Fat: 1g
- Trans Fat: 0g
- Carbohydrates: 9g
- Fiber: 1g
- Protein: 4g
- Cholesterol: 5mg
Keywords: yogurt bites, blueberry snack, healthy treat, frozen yogurt, kids snacks
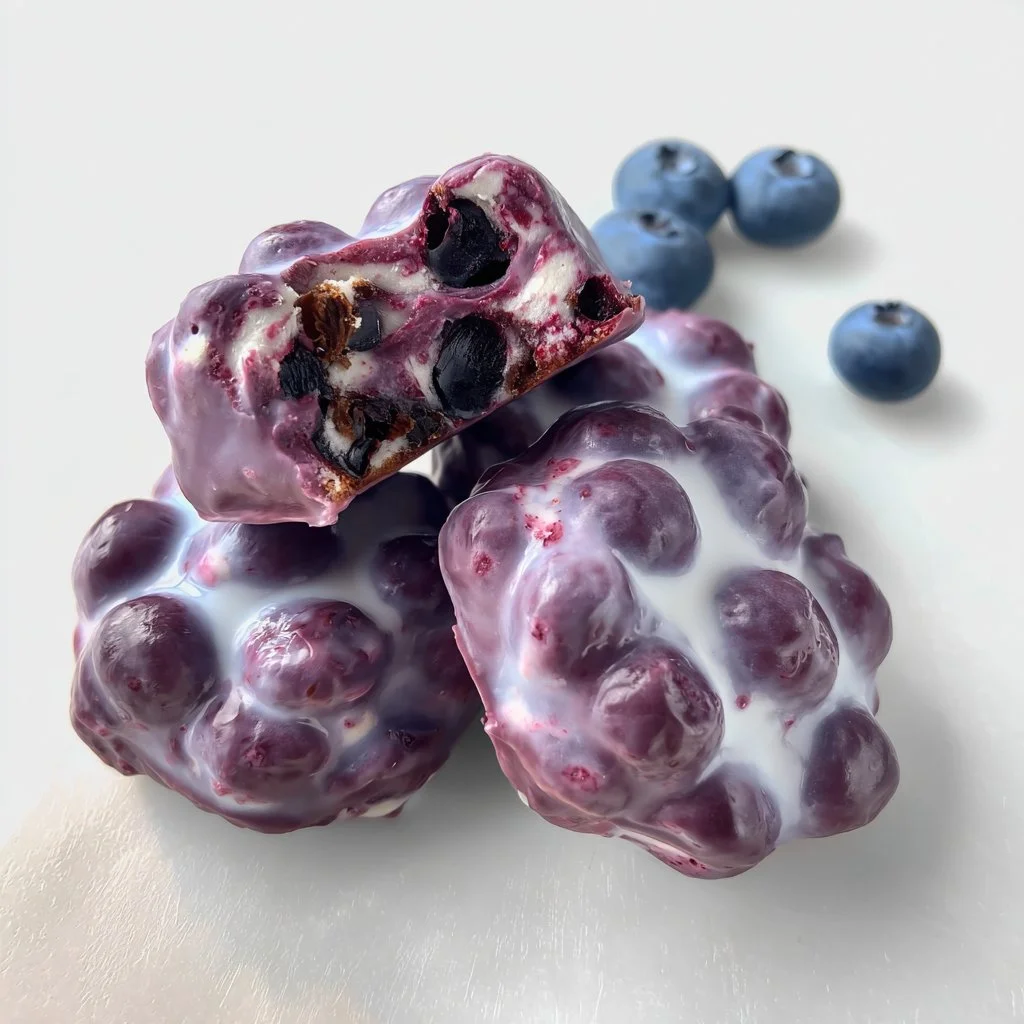
Blueberry Yogurt Clusters
Blueberry Yogurt Clusters: A Wholesome Treat for Every Occasion
Welcome back to my cozy corner of the kitchen, my fellow food lovers! Today, I’m thrilled to take you on a delightful journey as we whip up some Blueberry Yogurt Clusters. If there’s one thing I truly adore, it’s creating something that not only brightens up a room but also packs a nutritious punch! These little gems are perfect for snacking, breakfasting, or just indulging in when that sweet craving hits.
Imagine the delightful combination of luscious blueberries enveloped in creamy yogurt, all frozen into perfectly bite-sized clusters. It’s like nature’s candy, but made even better, because you’re in control of the sweetness! Plus, they’re a fantastic way to use up any fresh blueberries you have on hand, and you know I’m all about celebrating seasons and fresh ingredients.
Now, I understand you might have concerns about what it takes to create these tasty bites. Fear not! These clusters are incredibly easy to make, and I promise you’ll be snacking on them in no time. No fancy kitchen gadgets or skills are required – just your lovely self and a dash of enthusiasm! Perfect for enjoying solo while binge-watching your favorite show, or for impressing guests at your next brunch get-together, these Blueberry Yogurt Clusters will have everyone singing your culinary praises.
So, roll up those sleeves and let’s dive into a recipe that’s not only scrumptious but also a joy to create. From kitchen mishaps to moments of pure culinary magic, I’ll be here to guide you every step of the way. Let’s get started, my friends!
Personal Story
The first time I came across the idea of yogurt clusters was during my summer break in the mountains a few years ago. My aunt, a vibrant, free-spirited woman with an infectious laugh and culinary energy, had brought a bowl of these tasty delights to our family picnic. As we lounged in the shade, she insisted we all try a cluster—or three—before I knew it, a friendly competition sparked to see who could dive into the bowl the fastest!
The taste was divine; the creamy yogurt balanced the tartness of the blueberries perfectly. But what truly made the experience unforgettable were the stories she shared, reminiscing about her childhood summers spent indulging in similar treats with her own grandmother by the lakeside. That day turned into not just a feast for the taste buds but also a heartwarming connection between generations. I left that picnic with a happy belly and a newfound appreciation for simple treats. Ever since then, I’ve been on a mission to create my own versions at home, adding my own twists to craft a recipe that’s packed with nostalgia, love, and of course, flavor!
Ingredients
Here’s what you’ll need to bring these Blueberry Yogurt Clusters to life:
-
Fresh Blueberries (2 cups)
Juicy, plump blueberries are the star of the show here! Their natural sweetness and vibrant color make them irresistible. If fresh blueberries aren’t available, you can use frozen ones, just make sure to thaw and drain excess moisture to avoid a soggy mix. -
Plain Greek Yogurt (2 cups)
The creamy base for our clusters! Greek yogurt adds a great protein boost and a thickness that holds everything together. Feel free to swap with any flavored yogurt for added sweetness, or try plant-based yogurt for a dairy-free option. -
Honey or Maple Syrup (2 tablespoons)
A touch of sweetness to complement the tartness of the berries. You can adjust the sweetness to your preference. For a different flavor, consider agave syrup or even coconut sugar. -
Vanilla Extract (1 teaspoon)
Simply enhances the taste of the yogurt and adds an aromatic flair. If you’re out of vanilla, try almond extract for a nutty twist! -
Pinch of Salt
Just enough to balance the sweetness and enhance all the flavors. -
Chopped Nuts or Granola (optional, for garnish)
Adds a nice crunch to your clusters! Use your favorite type of nuts or granola, or leave it out for a more straightforward berry experience.
Step-by-Step Instructions
-
Prep Your Blueberries
Rinse the fresh blueberries thoroughly under cold water and gently pat them dry with a paper towel or clean cloth. This ensures your clusters aren’t waterlogged. Holding each berry up one by one, you might even hear whispers of “I’m going to be delicious!” -
Mix the Yogurt Base
In a mixing bowl, combine the Greek yogurt, honey or maple syrup, vanilla extract, and a pinch of salt. Use a whisk or spatula to blend until it’s smooth and creamy—think of it as giving the yogurt a cozy, sweet hug! -
Gently Fold in the Blueberries
Carefully add in the blueberries and fold them into the yogurt mixture using a spatula. Go slow here to keep those lovely berries whole and plump; their juicy goodness will burst in your mouth later! -
Create the Clusters
Now it’s time for the fun part! Using a spoon or a small ice cream scoop, scoop out a heaping tablespoon of the blueberry-yogurt mixture and drop it onto a parchment-lined baking sheet. Aim for small mounds that will hold their shape during freezing. If you’re feeling fancy, sprinkle a few chopped nuts or granola on top for added texture and flavor. -
Freeze The Clusters
Once your clusters are formed, pop the baking sheet into the freezer for about 2-3 hours, or until the yogurt is completely firm. You can try sneaking one before they’re fully frozen, but I suggest you let them set for the best result! -
Enjoy or Store
When they’re ready, remove the clusters from the freezer and transfer them to an airtight container, separating layers with parchment paper if you’re making a big batch. You can keep them in the freezer for up to a month, but I doubt they’ll last that long once your friends and family get a taste!
Serving Suggestions
To plate these delightful Blueberry Yogurt Clusters, simply arrange them on a pretty serving platter or in a charming bowl. I love to add a sprig of fresh mint for a pop of color and fresh aroma—perfect for impressing guests at breakfast or brunch! You can also serve them with extra yogurt or a drizzle of honey on the side for dipping. Trust me; they look as good as they taste!
Recipe Variations
-
Choco-Nut Delight: Add mini chocolate chips to your yogurt mixture for a delicious chocolatey twist that kids will adore and adults will secretly love too.
-
Berry Medley: Swap blueberries for other berries like raspberries, strawberries, or blackberries, or mix multiple types of berries for more fun!
-
Yogurt Flavors: Experiment with flavored yogurts like strawberry or vanilla bean to create unique clusters without any added sweeteners.
-
Tropical Twist: Incorporate shredded coconut or chopped pineapple to evoke a sunny beach vibe in every bite!
-
Spice It Up: Add a sprinkle of cinnamon or nutmeg into your yogurt mixture for a warm spice flavor that adds seasonal cheer, especially in the fall!
Chef’s Notes
These Blueberry Yogurt Clusters are one of those beautiful recipes that evolve based on what’s in season and what flavors inspire me at the moment. I often change up the yogurt to reflect the berry I’m using or add whatever nuts I have left from previous baking sessions (no waste in this kitchen!). One time, I even turned them into a smoothie bowl topping, just crumbling a few on top for extra crunch—a fun way to enjoy them!
And remember, the first batch is always a taste-testing opportunity, which usually means extra enthusiasm and a few dirtied spoons along the way!
FAQs and Troubleshooting
Q: Can I use frozen blueberries?
Absolutely! Just let them thaw and drain the excess liquid before mixing them into your yogurt. This way, you won’t end up with soggy clusters.
Q: What if my yogurt mixture is too runny?
If your yogurt is too runny, it may be due to the type of yogurt used. You can add a bit more plain yogurt to thicken it up or even a touch of cornstarch for a quick fix!
Q: Can I make these clusters ahead of time?
Yes! These are perfect for meal prep. Make your clusters ahead of time and store them in an airtight container in the freezer for up to a month. You’ll have snacks ready to go anytime!
Q: A few of my clusters melted and fell apart; what went wrong?
This can happen if they’re stored for too long at a warmer temperature in the freezer or if they’ve been sitting out too long before serving. Keep them frozen until you’re ready to enjoy for the best results!
Nutritional Info
(approximate per serving):
- Calories: 80
- Protein: 4g
- Fat: 1g
- Carbohydrates: 14g
- Fiber: 2g
Thank you for joining me in the kitchen today! I hope you’re feeling inspired to create these Blueberry Yogurt Clusters at home. Share your stories, variations, or anything else you’d like to chat about in the comments below – I can’t wait to hear your culinary adventures! Happy cooking!
Print
Blueberry Yogurt Clusters
- Total Time: 180 minutes
- Yield: 4 servings 1x
- Diet: Vegetarian
Description
Delightful Blueberry Yogurt Clusters, a nutritious and easy treat perfect for snacking or breakfasting.
Ingredients
- 2 cups Fresh Blueberries
- 2 cups Plain Greek Yogurt
- 2 tablespoons Honey or Maple Syrup
- 1 teaspoon Vanilla Extract
- Pinch of Salt
- Chopped Nuts or Granola (optional, for garnish)
Instructions
- Prep your blueberries by rinsing them thoroughly under cold water and patting them dry.
- Mix the Greek yogurt, honey or maple syrup, vanilla extract, and a pinch of salt in a mixing bowl until smooth and creamy.
- Gently fold in the blueberries, being careful to keep them whole.
- Create small mounds on a parchment-lined baking sheet using a spoon or small ice cream scoop.
- Freeze the clusters for about 2-3 hours, or until firm.
- Enjoy or store them in an airtight container in the freezer.
Notes
These yogurt clusters can be customized with other berries, yogurt flavors, or additional toppings.
- Prep Time: 15 minutes
- Cook Time: 0 minutes
- Category: Snack
- Method: Freezing
- Cuisine: American
Nutrition
- Serving Size: 1 serving
- Calories: 80
- Sugar: 7g
- Sodium: 50mg
- Fat: 1g
- Saturated Fat: 0.5g
- Unsaturated Fat: 0.5g
- Trans Fat: 0g
- Carbohydrates: 14g
- Fiber: 2g
- Protein: 4g
- Cholesterol: 5mg
Keywords: blueberry, yogurt, healthy snack, frozen treat, easy recipe


