
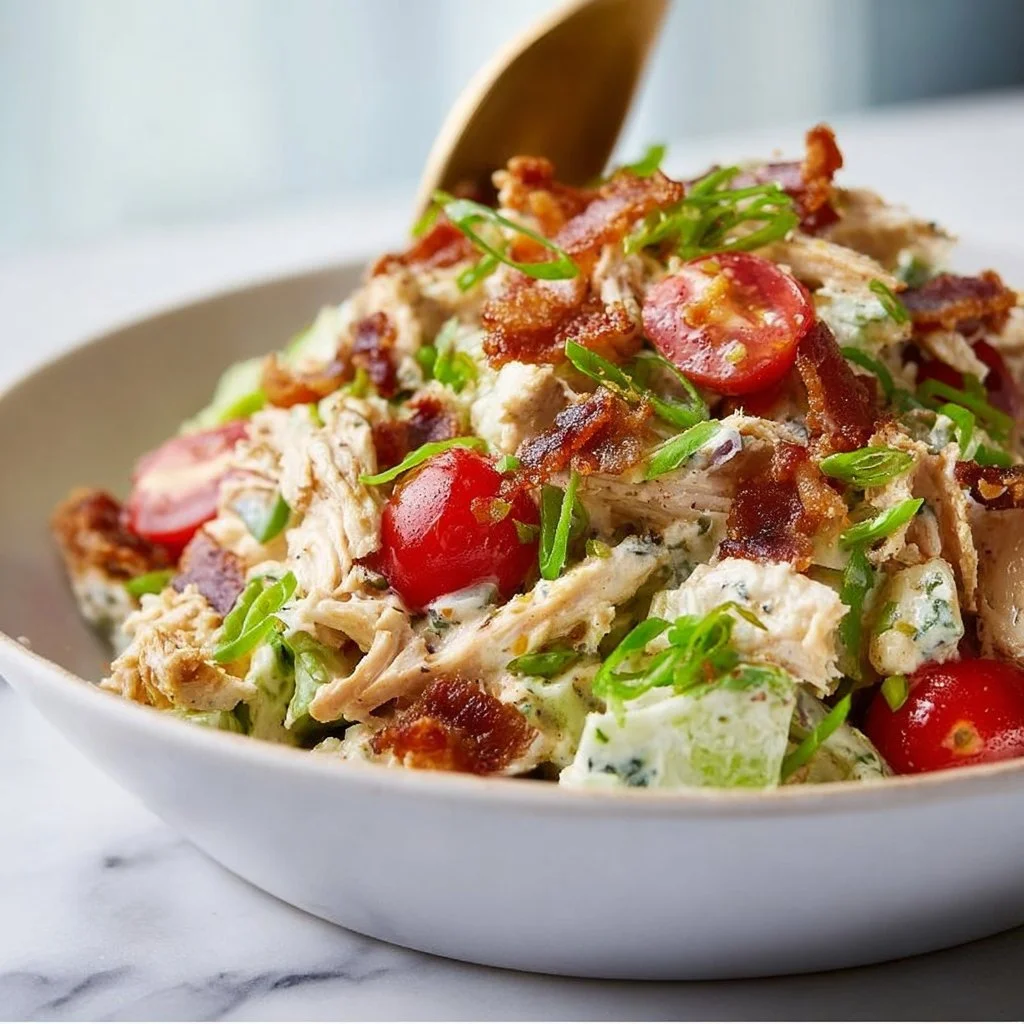
BLT Chicken Salad
# BLT Chicken Salad: A Twist on a Classic

## Introduction

Welcome back to my cozy kitchen, food lovers! Today, we're diving into a delightful creation that combines two of my absolute favorites—a classic BLT sandwich and a hearty chicken salad. That's right; we’re making a mouthwatering **BLT Chicken Salad** that’s as satisfying as it is refreshing. Picture this: a bowl filled with tender chicken, crispy bacon, juicy, ripe tomatoes, and fresh, crunchy lettuce—all blended with a creamy dressing that ties everything together. If that doesn’t get your taste buds tingling, I don’t know what will!

The beauty of this dish lies in its versatility. Whether you’re prepping for a summer picnic, casual lunch, or a quick weeknight dinner, this salad comes together in a snap and feels so much more than a mundane meal. I love recipes that spark joy, and this one is all about celebrating simple, quality ingredients that transform into something magical—and that’s what we’ll achieve today!

Feel free to mix and match the ingredients according to your preferences, and most importantly, have fun with it! Cooking should always be an enjoyable, creative experience. So, grab your apron, roll up your sleeves, and let’s get started on this delicious journey together!

## Personal Story

I still remember the first time I made a version of this BLT Chicken Salad. I was in college, living in a tiny apartment with my best friends. We were hosting a little get-together one summer evening when our fridge was practically empty, minus a few odds and ends. Inspired by a craving for something light yet satisfying, I decided to combine the leftover grilled chicken from the night before with some crispy bacon and a couple of tomatoes from the farmer's market.

As I tossed everything together, I can vividly recall the laughter and chatter around the table. We dug in, and wow—what a hit! People were asking for seconds (and thirds!), and I felt an immense rush of joy knowing I created something that brought everyone together. It wasn’t just a meal; it was a memory of friendship, laughter, and delicious food. And ever since that night, this BLT Chicken Salad has become one of my go-to recipes whenever I want to elevate any gathering (or just treat myself!).

## Ingredients

Here’s what you’ll need to make this scrumptious BLT Chicken Salad, along with tips on each ingredient:

- **Cooked Chicken**: You can shred or dice it. I usually use rotisserie chicken for ease. It’s tender and flavorful. Alternatively, you can grill, bake, or poach chicken breasts.

- **Bacon**: Crispy bacon is essential! You can use turkey bacon or even cook it in the oven for less mess. Feel free to use your favorite smoked or flavored bacon for an extra kick.

- **Ripe Tomatoes**: Fresh, in-season tomatoes are best. I love using heirloom or vine-ripened varieties, but cherry tomatoes work well too! If you’re in a pinch, Sun-dried tomatoes can add a lovely concentrated flavor.

- **Romaine Lettuce**: It brings that satisfying crunch and freshness! Iceberg can be substituted for a similar crunch, or you can even try baby spinach for a change of scenery.

- **Avocado**: Creamy avocado makes this salad extra luxurious. If you're watching your calorie intake, feel free to omit this, or substitute with Greek yogurt for creaminess.

- **Mayonnaise**: A classic binding agent. Add your favorite flavored mayo or swap for Greek yogurt for a lighter version.

- **Dijon Mustard**: Enhances the dressing with a zesty kick! If you want to mellow it out, honey mustard is a great alternative.

- **Salt and Pepper**: Essential seasonings! Always remember: seasoning is key to bringing out the flavors of your ingredients.

- **Lemon Juice**: A splash of acidity brightens the dish. If you don’t have lemons on hand, lime juice works wonderfully too!

## Step-by-Step Instructions

Now that we have our ingredients gathered, let's dive into making this delightful BLT Chicken Salad!

1. **Cook the Bacon**: In a skillet over medium heat, place your bacon strips and cook until super crispy. This usually takes about 7-10 minutes. Remember, crispy bacon adds the perfect texture to our salad! If you enjoy less mess, feel free to bake bacon on a foil-lined tray at 400°F (about 20 minutes). Once it's done, let it cool, then chop it into bite-sized pieces. Don't forget to save some of that delicious bacon grease—it can be used for other recipes!

2. **Prep the Chicken**: If you’re using rotisserie chicken, shred it using two forks in a large bowl. If you’re cooking fresh chicken, season with salt and pepper, then grill or bake until cooked through (165°F internal temperature). Let it cool a bit, then chop it into cubes.

3. **Chop the Veggies**: Dice your tomatoes and chop up the romaine lettuce. No precise sizes are needed here—just aim for a mix of sizes to keep it rustic and inviting. And don’t forget to slice the avocado just before you’re ready to serve to avoid browning.

4. **Make the Dressing**: In a separate bowl, mix together the mayonnaise, Dijon mustard, lemon juice, salt, and pepper. Adjust to taste; if you like it creamier, add more mayo. This dressing is simple but oh-so-delicious.

5. **Combine the Ingredients**: In a large mixing bowl, combine the chicken, bacon, tomatoes, lettuce, and avocado. Pour the dressing over the top and gently toss to coat everything well. This is where all the flavors start singing together! Be gentle with the avocado to keep it intact.

6. **Taste and Adjust**: Now's the time for a little taste test! Adjust seasoning as needed. Want more crunch? Add a few more strips of bacon. A bit more zest? A splash more lemon juice can work wonders!

## Serving Suggestions

To serve this BLT Chicken Salad, you can go classic by plating it in a large bowl for sharing or serve in individual plates or cups for a trendy touch! A sprinkle of fresh herbs on top—like cilantro or parsley—can elevate the appearance. Pair it with some crusty baguette slices, pita chips, or serve it in a wrap for a delightful sandwich twist.

## Recipe Variations

Here are a few fun variations to keep your taste buds excited:

- **Vegan Twist**: Substitute chicken with chickpeas or grilled tempeh, and use a dairy-free mayo for a vegan-friendly option.

- **Spicy Version**: Add diced jalapeños for some heat. You can also incorporate a hot sauce factor in the dressing.

- **Mediterranean Flair**: Use feta cheese, Kalamata olives, and swap tomatoes with roasted red peppers for a Mediterranean vibe.

- **Crunchy Add-ins**: Toss in some pumpkin seeds or sunflower seeds for extra texture.

## Chef’s Notes

Over the years, this recipe has evolved significantly. There was a phase where I would add a heaping tablespoon of relish to the dressing—talk about flavor bomb! And don’t even get me started on the wild ingredient swaps I tried. From adding pomegranate seeds for a pop of sweetness to infusing the dressing with garlic—so good! Every iteration brought a new twist to the flavor profile, keeping things exciting in my kitchen.

One memorable laugh comes from a cooking class I held, when the students mistook "BLT" for "best leftover turkey" and adapted the recipe with Thanksgiving leftovers. We ended up with an unexpected yet delightful creation!

## FAQs and Troubleshooting

1. **What if my salad is too dry?**
   If you find your salad a bit dry, don't hesitate to whip up a little extra dressing. A drizzle of olive oil can also work wonders if you're trying to lighten it up a bit.

2. **How long can I keep the salad?**
   This salad is best enjoyed freshly made but can be stored in an airtight container in the fridge for up to 1-2 days. The greens might wilt a little, but it’ll still taste delicious!

3. **Can I make this salad in advance?**
   You can prepare the chicken, bacon, and dressing a day in advance, but I recommend adding the lettuce and avocado right before serving to keep everything fresh and crunchy.

4. **How do I ensure my bacon is perfectly crispy?**
   Avoid overcrowding the pan, as this will steam the bacon instead of crisping it up. Also, allow some space between each strip to let the hot air circulate.

## Nutritional Info

*Caloric content may vary depending on ingredient choices and portion sizes. Here’s a rough estimate for a serving:*

- Calories: 450
- Protein: 30g
- Fat: 30g
- Carbohydrates: 10g
- Fiber: 2g

There you go! A delightful BLT Chicken Salad that sparks joy both in the kitchen and around the table. Enjoy every bite, friends, and don’t forget to share your creations with me! Happy cooking!
This blog post provides all the necessary details in a friendly tone, inviting readers into the world of culinary creativity and enjoyment while fully engaging with the cooking process. Happy cooking!
Print
BLT Chicken Salad
- Total Time: 25 minutes
- Yield: 4 servings 1x
- Diet: None
Description
A refreshing twist on a classic BLT sandwich combined with hearty chicken salad, featuring crispy bacon, tender chicken, fresh tomatoes, and crunchy lettuce in a creamy dressing.
Ingredients
- 2 cups Cooked Chicken, shredded or diced
- 4 slices Bacon, cooked until crispy
- 2 Ripe Tomatoes, diced
- 2 cups Romaine Lettuce, chopped
- 1 Avocado, sliced
- 1/2 cup Mayonnaise
- 1 tablespoon Dijon Mustard
- 1 tablespoon Lemon Juice
- Salt and Pepper, to taste
Instructions
- Cook the Bacon: In a skillet over medium heat, cook bacon strips until crispy, about 7-10 minutes. Let cool and chop.
- Prep the Chicken: Shred rotisserie chicken or season and cook fresh chicken until done. Let cool, then chop.
- Chop the Veggies: Dice tomatoes and chop romaine lettuce. Slice avocado just before serving.
- Make the Dressing: In a bowl, mix mayonnaise, Dijon mustard, lemon juice, salt, and pepper.
- Combine the Ingredients: In a large bowl, mix chicken, bacon, tomatoes, lettuce, and avocado. Pour dressing over and toss gently.
- Taste and Adjust: Check seasoning and adjust as needed.
Notes
Best served fresh, but can be stored in the fridge for 1-2 days. Add greens right before serving to keep them crunchy.
- Prep Time: 15 minutes
- Cook Time: 10 minutes
- Category: Salad
- Method: Mixing
- Cuisine: American
Nutrition
- Serving Size: 1 serving
- Calories: 450
- Sugar: 2g
- Sodium: 800mg
- Fat: 30g
- Saturated Fat: 8g
- Unsaturated Fat: 18g
- Trans Fat: 0g
- Carbohydrates: 10g
- Fiber: 2g
- Protein: 30g
- Cholesterol: 90mg
Keywords: BLT, chicken salad, easy recipes, summer salad, comfort food
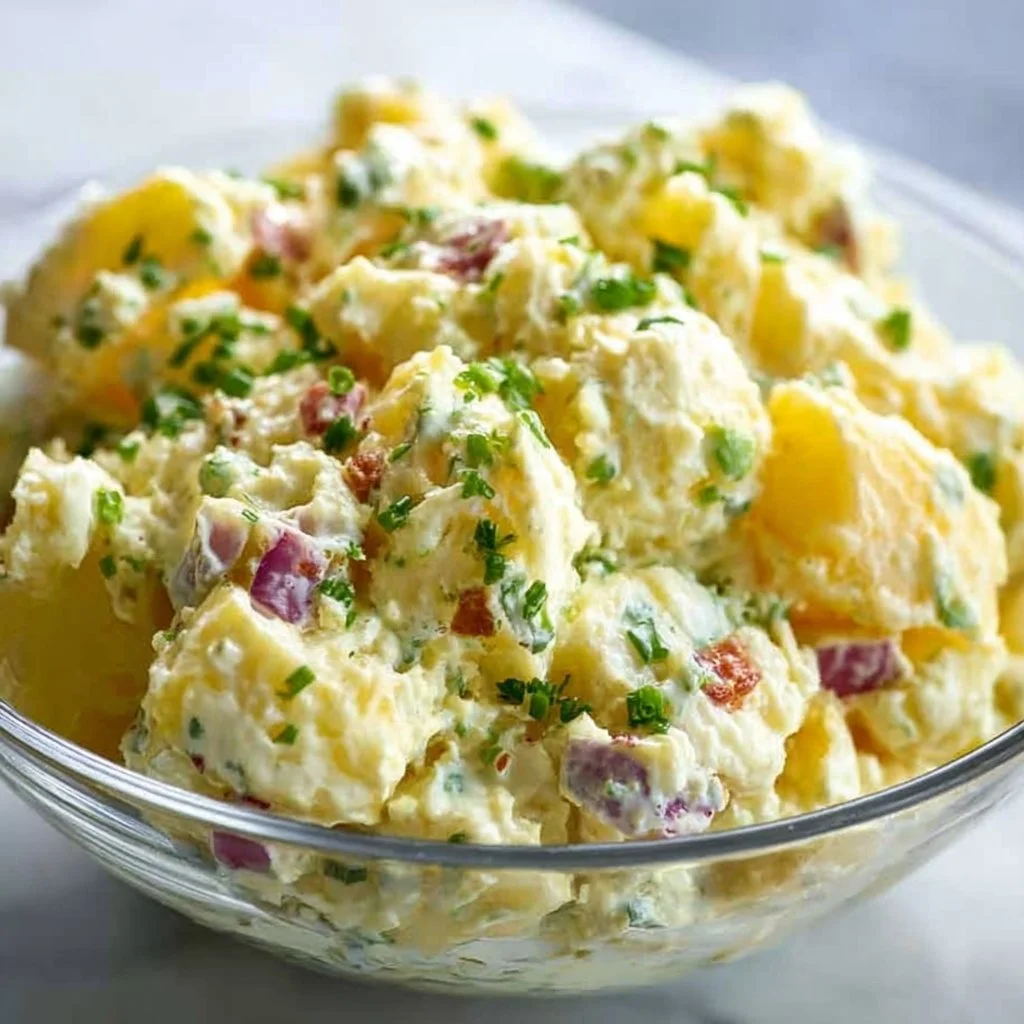
Classic Potato Salad
Classic Potato Salad: A Hearty Hug in a Bowl
Ah, potato salad — the quintessential side dish that’s been the star of every backyard barbecue, family reunion, and picnic in the park. There’s something undeniably comforting about a creamy bowl of potato salad tucked in between the juicy burgers and plump hot dogs. It’s a dish that transcends generations, bringing with it a sense of nostalgia and warmth. Today, I’m thrilled to share my version of classic potato salad, which is not just a recipe but a story—a thread that weaves through the beautiful tapestry of culinary adventures and shared experiences.
When I think about potato salad, I can’t help but remember my childhood summers spent at my grandparents’ house. The sun would be shining, the scent of fresh-cut grass in the air, and there, on the picnic table, sat my grandmother’s famous potato salad. It had the perfect balance of creaminess and tang, and each bite reminded me of lazy afternoons spent playing with my cousins. The secret? A touch of love and a sprinkle of her secret ingredient (which I’ve finally deduced… it’s dill pickles!). I decided to bring that taste of simplicity and joy into my own kitchen.
So, whether you’re whipping this up for a gathering or just to indulge in some comforting nostalgia, I’m right there with you. Let’s roll up our sleeves and create something beautiful—a dish that’s not just about the ingredients but about the moments we share.
Personal Story
Growing up, my family had a tradition—a summer gathering where everyone would bring a dish to share. My dad would always fire up the grill for burgers, while my mom would whip up a big batch of her creamy potato salad, which we lovingly called "Grandma’s Special." What made it special wasn’t just the recipe; it was the laughter and stories shared over plates piled high with food.
I still remember the year I decided I wanted to help, standing beside Mom at the kitchen counter, peeking over the bowl as she mixed mayo, mustard, and those crunchy little hints of dill relish. She handed me the whisk and said, “Just mix till it’s perfect, my little sous-chef.” I was on top of the world! Little did I know, it wasn’t just the mixing that mattered—it was learning to blend flavors, to experiment, and to embrace imperfection.
Years later, I’d be the one carrying that spirit into my own gatherings, teaching my friends and family. A bowl of potato salad brought us together then and continues to do so now, and I can’t wait for you to experience that same joy in your own kitchen!
Ingredients
Here’s what you’ll need to make this classic potato salad truly shine. Each ingredient plays a vital role in building texture and flavor, so let’s dive in!
-
Potatoes (2 pounds, preferably Yukon Gold or Red Potatoes)
These varieties are creamy and hold their shape well. For a lighter option, you can opt for waxy potatoes instead of starchy ones. If you’re feeling adventurous, try sweet potatoes for a unique twist! -
Mayonnaise (1 cup)
This is the base for that creamy texture. If you’re looking for a healthier alternative, Greek yogurt offers a similar creaminess with added protein! -
Dijon Mustard (1 tablespoon)
A touch of Dijon mustard adds a nice tang. If you prefer a different flavor profile, honey mustard or even whole grain mustard can work beautifully. -
Apple Cider Vinegar (2 tablespoons)
This brings a vibrant acidity that cuts through the richness of the mayo. White wine vinegar or even lemon juice can be fantastic substitutes if you don’t have it on hand. -
Celery (2 stalks, diced)
Celery adds a delightful crunch. If you’re not a fan, diced bell peppers or carrots could replace this for a sweet crunch instead. -
Red Onion (1 small, finely chopped)
The sharpness of red onion brings complexity. For a milder flavor, you can go with green onions or chives. -
Dill Pickles (1 cup, chopped)
A true staple in classic potato salad, these add an incredible briny flavor. If you’re in a pinch, relish works too, or you could skip them altogether for a milder taste. -
Fresh Dill (optional, for garnish)
Fresh herbs elevate the salad’s flavor. If you don’t have dill, parsley or basil could also brighten up the dish. -
Salt and Pepper (to taste)
Always a must! Don’t forget to season your dish well; it can really bring everything together.
Step-by-Step Instructions
Time to get cooking! I know you’ll be tempted to just dump everything into a bowl and mix, but trust me; following these steps will level up your potato salad game!
-
Boil the Potatoes
Start by giving your potatoes a good scrub to remove any dirt. Then, cut them into bite-sized cubes—about 1-inch pieces. Fill a large pot with water, add a generous pinch of salt, and bring it to a boil. Once boiling, add the potato cubes and cook for about 10-15 minutes or until they’re fork-tender but not mushy. Overcooking will result in a mushy salad! Trust your instincts and check them frequently. -
Drain and Cool
Once your potatoes are perfectly tender, drain them in a colander and allow them to cool for about 10 minutes. Cooling is essential to prevent the mayo from breaking and absorbing too much moisture. This technique helps ensure your salad is creamy rather than soupy. -
Make the Dressing
While your potatoes cool down, let’s whip up that smack-your-lips dressing! In a large mixing bowl, combine the mayonnaise, Dijon mustard, apple cider vinegar, a pinch of salt, and a few cracks of fresh pepper. Whisk it together until smooth and creamy. Taste it—feel free to adjust the seasoning according to your preference. -
Mix It All Together
Toss the cooled potatoes in the mixing bowl with the dressing. Fold gently to make sure each piece is coated but be careful not to mash them. This is where the love really shines through! -
Add the Crunch
Now, stir in the diced celery, chopped red onions, and dill pickles. These ingredients add that much-needed crunch and burst of flavor. If you’re adding fresh herbs, sprinkle those in too! -
Chill Out
Once mixed, it’s time for the salad to chill in the fridge. Cover the bowl and let it sit for at least an hour. This resting period allows the flavors to meld beautifully. Longer is even better—overnight if you have the patience! -
Serve and Enjoy
Just before serving, give your salad a final taste and adjust seasoning if necessary. If it seems thick, add a dash of water or milk to loosen it up. Now it’s ready for that picnic table or dinner table!
Serving Suggestions
Plating your potato salad can be as simple or as intricate as you’d like. For a casual vibe, a generous scoop in a rustic bowl with a sprinkle of fresh dill on top creates an inviting feel. If you’re aiming for a fancier setup, consider using a large platter and arranging the salad artfully with slices of cherry tomatoes or radishes for a pop of color. Don’t forget some serving spoons nearby for easy access!
Recipe Variations
Feeling creative? Here are some delicious twists you can try to shake things up:
-
Loaded Potato Salad: Add crumbled bacon, cheddar cheese, and green onions for a loaded version that’s sure to impress!
-
Vegan Potato Salad: Swap the mayonnaise for a plant-based creepy dressing or silken tofu blended with a little mustard and vinegar for creaminess.
-
Mediterranean-Style: Toss in diced olives, feta cheese, cherry tomatoes, and a squeeze of lemon for a fresh take.
-
Spicy Kick: Add diced jalapeños or a splash of hot sauce for those who need a heat level!
-
Herbed Potato Salad: Incorporate different fresh herbs like parsley or chives for a brighter flavor profile.
Chef’s Notes
I’ve been perfecting my potato salad recipe for years, and I promise you, even the mishaps turned into delightful surprises! Like the time I accidentally added way too much vinegar — I was doing a taste test and got a little too carried away. To salvage the salad, I mixed in more potatoes, and you would not believe how good it turned out! That’s the beauty of cooking; it’s all about learning and adapting.
This potato salad has evolved along with me, and I now offer various versions depending on who I’m serving. It’s not just about following a recipe; it’s about making it your own and celebrating the moments along the way.
FAQs and Troubleshooting
Here are some common questions I get about potato salad, along with advice to make your experience even smoother:
-
Why is my potato salad too mushy?
If you’ve overcooked your potatoes or didn’t let them cool enough before mixing, they might break down too much. In the future, try to cook them until just tender to maintain that perfect bite. -
Can I make this ahead of time?
Absolutely! Potato salad is an excellent make-ahead dish. Just remember that it tastes best after chilling for a bit, so make it at least a few hours in advance (or overnight!) to allow the flavors to meld. -
What if it tastes too tangy?
If your potato salad is too tangy for your liking, consider adding a touch of sugar or honey to balance the acidity, or simply mix in a little extra mayo. -
Can I leave potato salad out?
For food safety, potato salad should be kept at room temperature no longer than two hours. If it’s a hot day, use ice packs or a chilled bowl to keep it fresh.
Nutritional Info
(Optional section as per your needs)
If you’re curious about the nutritional aspect of this delicious dish, here are approximate values for one serving (assuming 8 servings total):
- Calories: 320
- Protein: 5g
- Carbohydrates: 42g
- Fat: 15g
- Fiber: 3g
There you have it! My signature classic potato salad recipe, full of warmth, memories, and flavor. I hope every scoop brings you joy and that you enjoy sharing it with your loved ones as much as I do. Let’s get cooking!
Print
Classic Potato Salad
- Total Time: 30 minutes
- Yield: 8 servings 1x
- Diet: Vegetarian
Description
A comforting and creamy classic potato salad, perfect for summer gatherings and picnics.
Ingredients
- 2 pounds Potatoes (preferably Yukon Gold or Red)
- 1 cup Mayonnaise
- 1 tablespoon Dijon Mustard
- 2 tablespoons Apple Cider Vinegar
- 2 stalks Celery, diced
- 1 small Red Onion, finely chopped
- 1 cup Dill Pickles, chopped
- Fresh Dill (optional, for garnish)
- Salt and Pepper (to taste)
Instructions
- Boil the Potatoes: Scrub the potatoes, cut them into 1-inch cubes, and boil with a pinch of salt for 10-15 minutes until fork-tender.
- Drain and Cool: Drain the potatoes and let them cool for about 10 minutes.
- Make the Dressing: In a bowl, mix mayonnaise, Dijon mustard, apple cider vinegar, salt, and pepper, whisking until smooth.
- Mix It All Together: Toss the cooled potatoes with the dressing, ensuring everything is coated.
- Add the Crunch: Stir in celery, red onions, and dill pickles.
- Chill Out: Cover the salad and refrigerate for at least an hour before serving.
- Serve and Enjoy: Adjust seasoning if necessary and serve chilled.
Notes
Potato salad tastes best after chilling to allow flavors to meld. Feel free to customize with your favorite ingredients and herbs.
- Prep Time: 15 minutes
- Cook Time: 15 minutes
- Category: Side Dish
- Method: Mixing
- Cuisine: American
Nutrition
- Serving Size: 1 serving
- Calories: 320
- Sugar: 5g
- Sodium: 400mg
- Fat: 15g
- Saturated Fat: 2g
- Unsaturated Fat: 8g
- Trans Fat: 0g
- Carbohydrates: 42g
- Fiber: 3g
- Protein: 5g
- Cholesterol: 10mg
Keywords: potato salad, side dish, summer recipe, barbecue, picnic
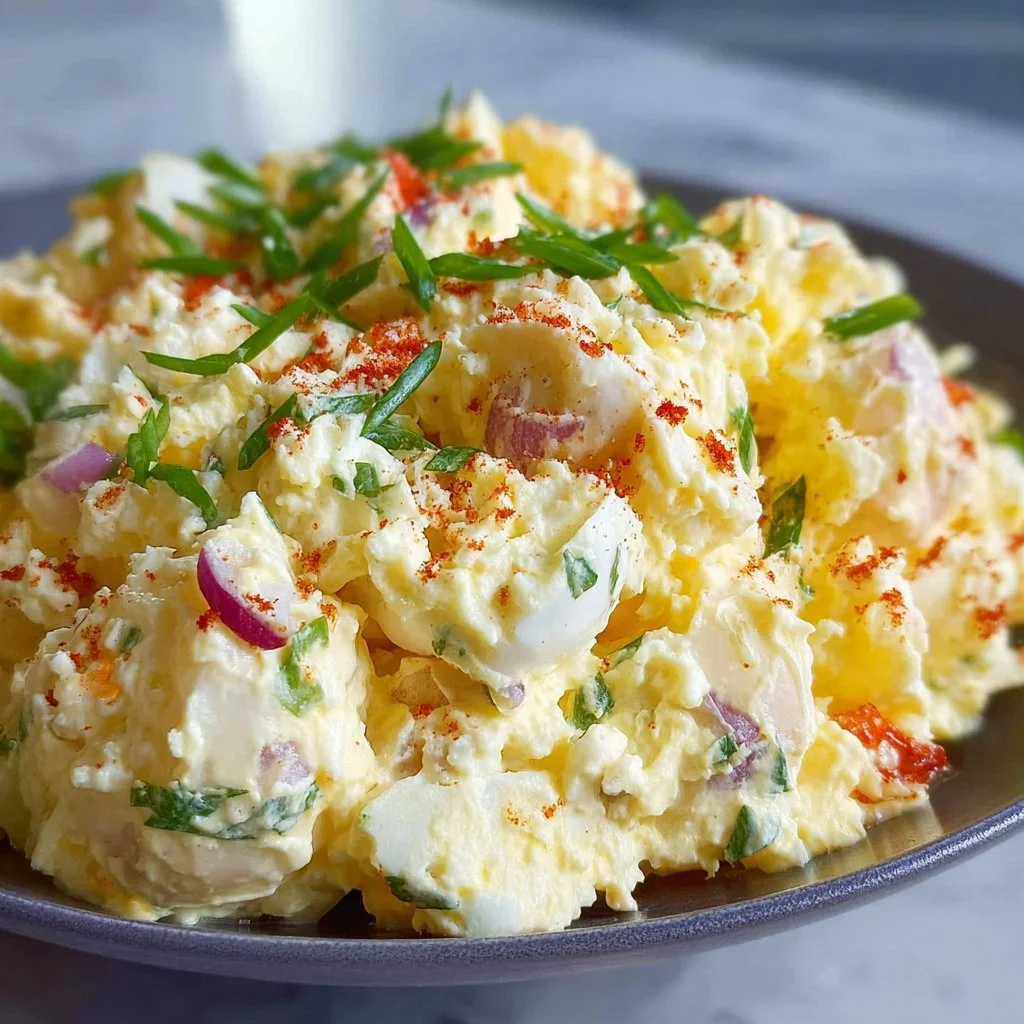
Southern Potato Salad
Southern Potato Salad: A Hearty Classic with a Twist
Welcome back to my cozy kitchen, my fellow food lovers! Today, I’m thrilled to dive into a recipe that warms the heart and brings back a flurry of delightful memories: Southern Potato Salad. If you’ve ever found yourself at a family barbecue, a picnic in the park, or a lively Sunday dinner, you’ve likely encountered this creamy, tangy masterpiece. This dish is a staple in Southern kitchens, and for good reason! Not only is it the perfect side to complement your grilled favorites, but it’s also a conversation starter, full of flavor and nostalgia.
Potato salad is more than just a dish; it’s a canvas for creativity, allowing you to add your twist while holding onto the traditional roots that make it so beloved. In my family, potato salad was the highlight of every summer gathering. It was the dish my grandmother whipped up every Sunday, with an extra dose of love and a handful of secret ingredients that we’d all try to guess but never quite decipher.
The best part? It’s easy to make! You don’t need to be a culinary expert to succeed with this dish; it can be whipped up with a few simple steps and common ingredients. Whether you’re preparing a potluck dish or looking to elevate your weeknight meals, my version of Southern Potato Salad will not disappoint. So, roll up your sleeves and let’s journey into the heart of Southern cooking—you’ll be amazed at how something so simple can bring so much joy!
Personal Story
I have vivid memories from my childhood Saturdays spent at my grandmother’s house. The comforting aroma of freshly baked biscuits filled the air, but the real star of the show was always her potato salad. She made it on the weekends, and my cousins and I would race to the kitchen to snag a taste before it made its way to the dining table. Each spoonful was a buttery, creamy delight, brightened by the crunch of celery and the tang of pickle relish.
One particularly sunny afternoon, we had a family barbecue in the backyard. Grandma’s potato salad was served in a large bowl adorned with a hand-painted design that she had crafted herself. Every bite was accompanied by stories from our loved ones, and Laughter floated through the air like sweet summer sunshine. We stayed so long that day, with second helpings, impromptu games, and the sound of cicadas singing—a perfect blend of simplicity and love.
Even now, whenever I whip up a batch, I’m transported back to those happy days. Let’s recreate that nostalgic dish together, shall we? Just to warn you—this potato salad might just become your new favorite recipe!
Ingredients
Here’s what you’ll need to create this Southern classic:
-
Potatoes (3 lbs, preferably Yukon Gold or red potatoes)
- Chef Insight: Yukon Gold potatoes are creamy and flavorful, which creates the perfect base for your salad. Red potatoes hold their shape well, so feel free to use either or combine both!
-
Mayonnaise (1 cup)
- Substitution Tips: If you’re looking for a lighter option, Greek yogurt works wonderfully and adds a tangy flavor. Vegan mayo is a great substitute for plant-based diets.
-
Dijon mustard (2 tablespoons)
- Chef Insight: A bit of Dijon mustard adds depth and a subtle zing; feel free to increase this if you like a more bold flavor!
-
Vinegar (apple cider or white wine, 2 tablespoons)
- Substitution Tips: You can use fresh lemon juice for a lighter zest.
-
Celery (2 stalks, finely chopped)
- Chef Insight: Celery adds that delightful crunch; you can also swap it for diced bell peppers for a different flavor profile.
-
Red onion (1 small, finely chopped)
- Substitution Tips: For a milder taste, try green onions or shallots instead.
-
Sweet pickle relish (1/4 cup)
- Chef Insight: This provides the sweetness that balances out the creamy mayo. If you prefer a tart flavor, opt for dill relish!
-
Salt and black pepper (to taste)
- Chef Insight: Adjust the seasoning as you mix—taste testing is essential!
-
Fresh dill or parsley (for garnish)
- Chef Insight: Fresh herbs add color and finish. Dill brings a classic touch while parsley is a fresh alternative.
Step-by-Step Instructions
Step 1: Preparing the Potatoes
Start by selecting your potatoes—make sure they’re firm and free of blemishes. Scrub them clean under running water to remove any dirt. For this Southern Potato Salad, I recommend leaving the skin on for added texture and nutrients. Now, chop your potatoes into evenly sized chunks, about 1-inch wide. This will ensure they cook evenly.
Step 2: Boil the Potatoes
Place your chopped potatoes in a large pot and cover them with cold water. Add a generous pinch of salt—this will enhance the flavor while they cook. Bring the pot to a rolling boil over medium-high heat, then reduce the heat to maintain a gentle boil. Cook for about 15-20 minutes or until they’re fork-tender but not falling apart. Remember, we want them to hold their shape!
Step 3: Drain and Cool
Once your potatoes are ready, drain them in a colander and let cool for about 10-15 minutes. This cooling period helps prevent a mushy texture when mixing in your dressing.
Step 4: Mix the Dressing
While your potatoes are cooling, let’s prepare the dressing! In a large mixing bowl, combine the mayonnaise, Dijon mustard, vinegar, salt, and pepper. Whisk until smooth and creamy. Taste it—this is your chance to adjust flavors! If you love a tangier salad, add more mustard or vinegar.
Step 5: Combine Ingredients
Next, once your potatoes have cooled slightly, transfer them into the bowl with your dressing. Gently fold the potatoes into the dressing—be careful not to break them apart! You want those lovely chunks intact.
Now, add in your finely chopped celery, red onion, and sweet pickle relish. Gently combine, ensuring every piece of potato is coated with that creamy goodness!
Step 6: Chill and Serve
Cover the potato salad with plastic wrap and refrigerate for at least an hour before serving. This allows those wonderful flavors to meld together. When you’re ready to serve, give it another gentle fold for good measure and garnish with fresh dill or parsley.
Serving Suggestions
Serve your Southern Potato Salad in a large, vibrant bowl for that rustic feel, or scoop individual portions into mason jars for a fun picnic vibe. Pair it alongside grilled meats, fried chicken, or anything from the BBQ grill. Don’t forget to have some extra herbs on hand for garnish—it’s all in the details!
Recipe Variations
- Bacon Lovers: Crumble cooked bacon on top for a smoky crunch.
- Spicy Twist: Add diced jalapeños or a dash of hot sauce for a kick.
- Herb-Infused: Mix in a variety of fresh herbs like basil or chives for a unique flavor profile.
- Make it Vegan: Substitute with plant-based mayo and skip the egg for a delicious vegan potato salad.
- Colorful Veggies: Toss in diced bell peppers or shredded carrots for a pop of color and additional crunch.
Chef’s Notes
Southern Potato Salad has deep roots filled with creativity and love! Over the years, I’ve tweaked my grandmother’s recipe, making it my own while holding onto the heartfelt memories it brings. I once hosted a barbecue and, feeling adventurous, I used curry powder in my dressing. The family went wild! Now, it’s a staple at every gathering—variations keep the dish exciting.
Sometimes, I get caught forgetting to boil the potatoes long enough. The result? A crunch that’s a bit unexpected! But you know what? If you ever find yourself in a similar situation, just embrace the unexpected. Cooking is about exploration, after all!
FAQs and Troubleshooting
Q1: My potatoes turned mushy. What happened?
It’s easy to overcook potatoes! Next time, keep a close eye on them. They should be fork-tender but still firm. If they feel soft in the boiling stage, they might disintegrate when mixed into the salad.
Q2: Can I prepare potato salad a day in advance?
Absolutely! In fact, making it a day ahead can enhance the flavors, as they have time to meld together beautifully.
Q3: Is there a way to make my potato salad creamier?
If it ever feels too dry, mix in an extra tablespoon or two of mayonnaise right before serving. Adding a splash of pickle juice can also increase creaminess and flavor!
Q4: My salad is too tangy. How can I fix that?
If you find the flavor a bit too sharp, incorporate a teaspoon of sugar to balance the acidic notes—just mix it in slowly and taste test along the way!
Nutritional Info
(While exact nutritional values can vary based on specific ingredients and quantities used, here’s a general estimate per serving for this dish.)
- Calories: 250
- Total Fat: 12g
- Cholesterol: 15mg
- Sodium: 300mg
- Carbohydrates: 32g
- Fiber: 3g
- Protein: 4g
So, there you have it, my beautiful food friends—a magical journey into the world of Southern Potato Salad! I hope this recipe brings the same joy and comfort it brought to my family. Remember, cooking is about love, memories, and bringing people together. Happy cooking, and I can’t wait to hear what you think!
Print
Southern Potato Salad
- Total Time: 35 minutes
- Yield: 8 servings 1x
- Diet: Vegetarian
Description
A creamy and tangy Southern classic potato salad that brings back nostalgic memories and is perfect for gatherings.
Ingredients
- 3 lbs Potatoes (preferably Yukon Gold or red potatoes)
- 1 cup Mayonnaise
- 2 tablespoons Dijon mustard
- 2 tablespoons Vinegar (apple cider or white wine)
- 2 stalks Celery (finely chopped)
- 1 small Red onion (finely chopped)
- 1/4 cup Sweet pickle relish
- Salt and black pepper (to taste)
- Fresh dill or parsley (for garnish)
Instructions
- Select your potatoes—make sure they’re firm and free of blemishes. Scrub them clean under running water. Chop your potatoes into evenly sized chunks, about 1-inch wide.
- Place your chopped potatoes in a large pot and cover them with cold water. Add a generous pinch of salt and bring to a rolling boil. Cook for about 15-20 minutes or until fork-tender.
- Once your potatoes are ready, drain them and let cool for about 10-15 minutes.
- In a large mixing bowl, combine the mayonnaise, Dijon mustard, vinegar, salt, and pepper. Whisk until smooth.
- Transfer the cooled potatoes into the bowl with your dressing. Gently fold the potatoes into the dressing.
- Add in your finely chopped celery, red onion, and sweet pickle relish, and gently combine.
- Cover the potato salad with plastic wrap and refrigerate for at least an hour before serving.
Notes
Serve the potato salad in a vibrant bowl for a rustic feel, and pair it alongside grilled meats or fried chicken.
- Prep Time: 15 minutes
- Cook Time: 20 minutes
- Category: Side Dish
- Method: Boiling and Mixing
- Cuisine: Southern
Nutrition
- Serving Size: 1 serving
- Calories: 250
- Sugar: 3g
- Sodium: 300mg
- Fat: 12g
- Saturated Fat: 2g
- Unsaturated Fat: 8g
- Trans Fat: 0g
- Carbohydrates: 32g
- Fiber: 3g
- Protein: 4g
- Cholesterol: 15mg
Keywords: potato salad, Southern recipe, picnic side dish, creamy salad
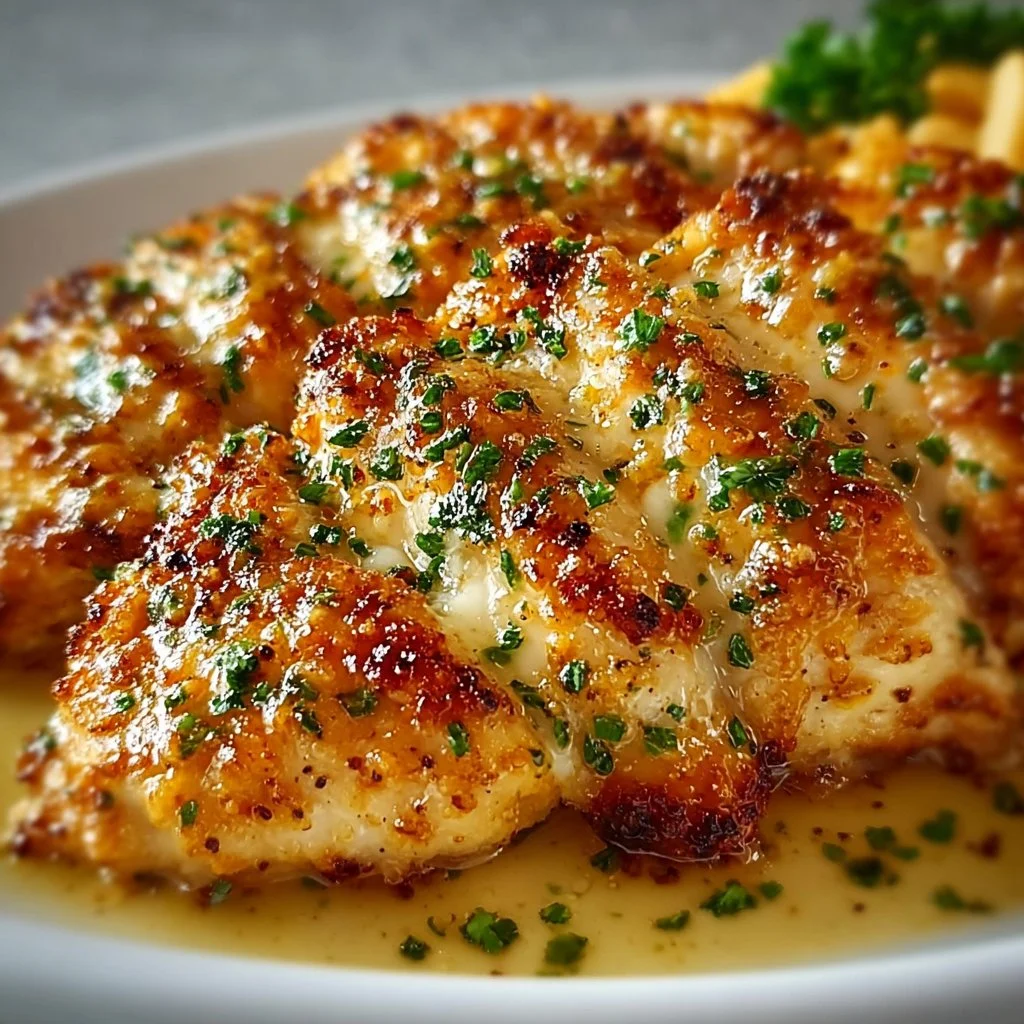
Longhorn Steakhouse Parmesan Chicken Recipe
# Discovering Comfort: Longhorn Steakhouse Parmesan Chicken Recipe

Welcome to my cozy little corner of the kitchen! If you’re anything like me, the aroma of something savory and delightful cooking away is an instant mood booster. Today, we're diving into a special recipe that I like to think of as pure comfort on a plate — **Longhorn Steakhouse Parmesan Chicken**. As we go through this delicious adventure together, let’s unlock the secret behind this restaurant favorite and make it a cherished dish in your home. Whether you’re a busy parent, a romantic at heart, or just eager to impress your friends at the next dinner party, this recipe is for everyone who appreciates good food made with love.

Growing up, my family had its own rituals around mealtimes. Sunday dinners were sacred, filled with laughter, stories, and of course, a whole lot of delicious food. My cousin Marco was the family “chef,” whipping together feasts that had everyone coming back for seconds… and thirds! One evening, he surprised us with a chicken dish that made my heart skip a beat—it was crispy, cheesy, and absolutely divine. Flash forward years later, and I found myself replicating that dish countless times, but with my own personal twist! And here we are, ready to make our very own version of **Parmesan Chicken** that would make Marco proud.

This recipe is not just about the food; it's about creating moments and memories in the kitchen that last a lifetime. Plus, with just a handful of ingredients, you can make this mouthwatering dish that everyone will be talking about long after the table is cleared. Let’s roll up our sleeves and get cooking!

---

## Ingredients

Let’s gather the ingredients that will transform simple chicken into a flavor-packed dish! Here's what you'll need:

- **Boneless, Skinless Chicken Breasts (4 pieces)**
  These are your protein base. Feel free to swap with boneless thighs if you prefer a juicier piece of meat. If you’re looking for a lighter option, turkey cutlets could work wonders here!

- **Parmesan Cheese (1 cup, grated)**
  The star ingredient! Parmesan adds that rich, nutty flavor that makes this dish unforgettable. If you’re in a pinch, Pecorino Romano or even a vegetarian hard cheese can be great substitutes.

- **Italian Breadcrumbs (1 cup)**
  A crunchy coating that brings texture to our chicken. If gluten-free is your vibe, you can use gluten-free breadcrumbs or crushed rice cereal for a similar effect!

- **Eggs (2, beaten)**
  These act as the glue that holds everything together. For a vegan alternative, you can use flaxseed meal mixed with water (1 tablespoon of flaxseed meal with 3 tablespoons of water, let it sit until it thickens).

- **Garlic Powder (1 teaspoon)**
  A classic addition that elevates everything! Fresh minced garlic can also be used, just remember to adjust the quantities to taste.

- **Salt & Pepper (to taste)**
  Seasoning is key to bringing out the natural flavors of our dish. Don’t be shy; a good sprinkle of sea salt can work wonders!

- **Olive Oil (3 tablespoons)**
  A little fat for cooking—perfect for achieving that golden crust. You can substitute it with melted butter or avocado oil if you want a different flavor profile.

- **Fresh Parsley (for garnish)**
  Because everything looks better with herbs! Fresh basil or chives can also add a nice flair.

---

## Step-by-Step Instructions

### 1. Prepping the Chicken

First things first, let’s prepare our chicken! Rinse the chicken breasts under cold water and pat them dry with paper towels. This step helps the breading stick better. If your chicken breasts are uneven in thickness, consider butterflying them or lightly pounding them with a meat mallet to ensure even cooking. This is a chef hack to avoid dry edges and raw centers.

### 2. Set Up Your Breading Station

Now, let's set up the classic three-station breading system: one bowl for the beaten eggs, one for the grated Parmesan combined with breadcrumbs, and a third for the chicken. Lightly season the egg wash with a pinch of salt and pepper.

### 3. Breading the Chicken

Dip each chicken breast first into the egg wash, making sure it’s fully coated. Shake off any excess egg before transferring it to the breadcrumb mixture. Make sure to press the breadcrumbs onto the chicken so it sticks well. This is where the magic happens! You want it to be evenly coated for that golden crunch.

### 4. Cooking the Chicken

In a large skillet, heat the olive oil over medium heat. Once hot, carefully add the chicken breasts. You should hear that satisfying sizzle—don’t crowd the pan! Cook for about 5-7 minutes per side until the chicken is golden brown and cooked through. Use a meat thermometer if you have one—165°F is your goal!

### 5. Baking for Extra Crispiness

To take your Parmesan Chicken to the next level, preheat your oven to 375°F (190°C). Move the browned chicken to a baking dish and sprinkle with a bit more Parmesan. Bake in the oven for an additional 10-15 minutes for that perfect finish.

### 6. Garnishing Your Dish

Once done, let the chicken rest for a few minutes before slicing. This will keep it juicy! Sprinkle with fresh parsley for a pop of color and serve it up hot. Enjoy that beautiful crust and cheesy goodness!

---

## Serving Suggestions

Plate your Parmesan Chicken alongside a fresh garden salad or some roasted veggies. A creamy garlic mashed potato could be the heart of the meal, and don’t forget a drizzle of balsamic glaze for a sophisticated touch! Place a wedge of lemon on the side for a refreshing zest—it's amazing how citrus elevates even the simplest dishes.

---

## Recipe Variations

1. **Parmesan Herb Crust**: Mix in dried herbs like oregano or thyme to the breadcrumb mixture for a flavor boost.

2. **Spicy Kick**: Add a teaspoon of red pepper flakes to the breadcrumb mixture to give the dish a nice heat.

3. **Mushroom Love**: Serve with sautéed mushrooms on top for an earthy twist!

4. **Creamy Spinach**: Top the chicken with a layer of creamy spinach before baking for extra indulgence.

5. **Pasta Feast**: Serve your chicken atop spaghetti tossed with a light olive oil and garlic sauce for a hearty meal.

---

## Chef’s Notes

Oh, where do I begin? This recipe has been a rolling stone in my kitchen and has often been attributed to those last-minute dinners when friends stop by unexpectedly. I still remember the first time I made it—it was a chaotic evening filled with laughter and a few minor kitchen disasters! Let’s just say, I had flour everywhere, but the smiles at the table were totally worth it. This dish is like a warm hug that brings people together, and each time I make it, I tweak it just a bit more!

---

## FAQs and Troubleshooting

1. **Why is my chicken not browning?**
   Ensure that the pan is hot enough before adding the chicken. If it’s too cool, the coating might steam rather than fry.

2. **Can I make this ahead of time?**
   Yes, you can bread the chicken in advance and store it in the fridge for a few hours or overnight. Just remember to let it come to room temperature before cooking.

3. **How do I know when the chicken is done?**
   The best way is to use a meat thermometer! If you don’t have one, look for juices that run clear and a deep golden brown color.

4. **How can I make it healthier?**
   Baking instead of frying would lower the calorie count. Also, ditching the breadcrumbs or substituting with ground almonds can be a nutritious twist!

---

## Nutritional Info

*(Optional section; can be filled based on specific serving sizes and calculations)*

---

And there you have it, my dear fellow foodies! Your very own **Longhorn Steakhouse Parmesan Chicken** recipe, lovingly crafted to bring joy into your home. I hope that as you cook this dish, you find not only a delicious meal waiting for you but also a lovely moment to share with the people you cherish. Happy cooking, and don’t forget to savor every bite—and the memories that come with them!
Longhorn Steakhouse Parmesan Chicken
- Total Time: 45 minutes
- Yield: 4 servings 1x
- Diet: Gluten-Free option available
Description
A comforting and flavorful dish featuring crispy, cheesy chicken breasts served with your choice of sides.
Ingredients
- 4 Boneless, Skinless Chicken Breasts
- 1 cup Parmesan Cheese, grated
- 1 cup Italian Breadcrumbs
- 2 Eggs, beaten
- 1 teaspoon Garlic Powder
- Salt & Pepper, to taste
- 3 tablespoons Olive Oil
- Fresh Parsley, for garnish
Instructions
- Prepare the chicken by rinsing it under cold water and patting dry.
- Set up the breading station with bowls for eggs, breadcrumb mixture, and chicken.
- Dip each chicken breast into the egg wash, coating it fully.
- Transfer the coated chicken to the breadcrumb mixture and press to ensure it sticks.
- Heat olive oil in a skillet over medium heat and add the chicken, cooking until golden brown.
- Bake the browned chicken in the oven at 375°F (190°C) for an additional 10-15 minutes.
- Garnish with fresh parsley and serve while hot.
Notes
For variations, add herbs to the breadcrumbs or top with sautéed mushrooms for an earthy twist.
- Prep Time: 15 minutes
- Cook Time: 30 minutes
- Category: Main Course
- Method: Baking and Pan-frying
- Cuisine: American
Nutrition
- Serving Size: 1 serving
- Calories: 350
- Sugar: 1g
- Sodium: 400mg
- Fat: 12g
- Saturated Fat: 5g
- Unsaturated Fat: 7g
- Trans Fat: 0g
- Carbohydrates: 45g
- Fiber: 3g
- Protein: 30g
- Cholesterol: 160mg
Keywords: Parmesan Chicken, Comfort Food, Dinner Recipe, Chicken Breast, Easy Recipe
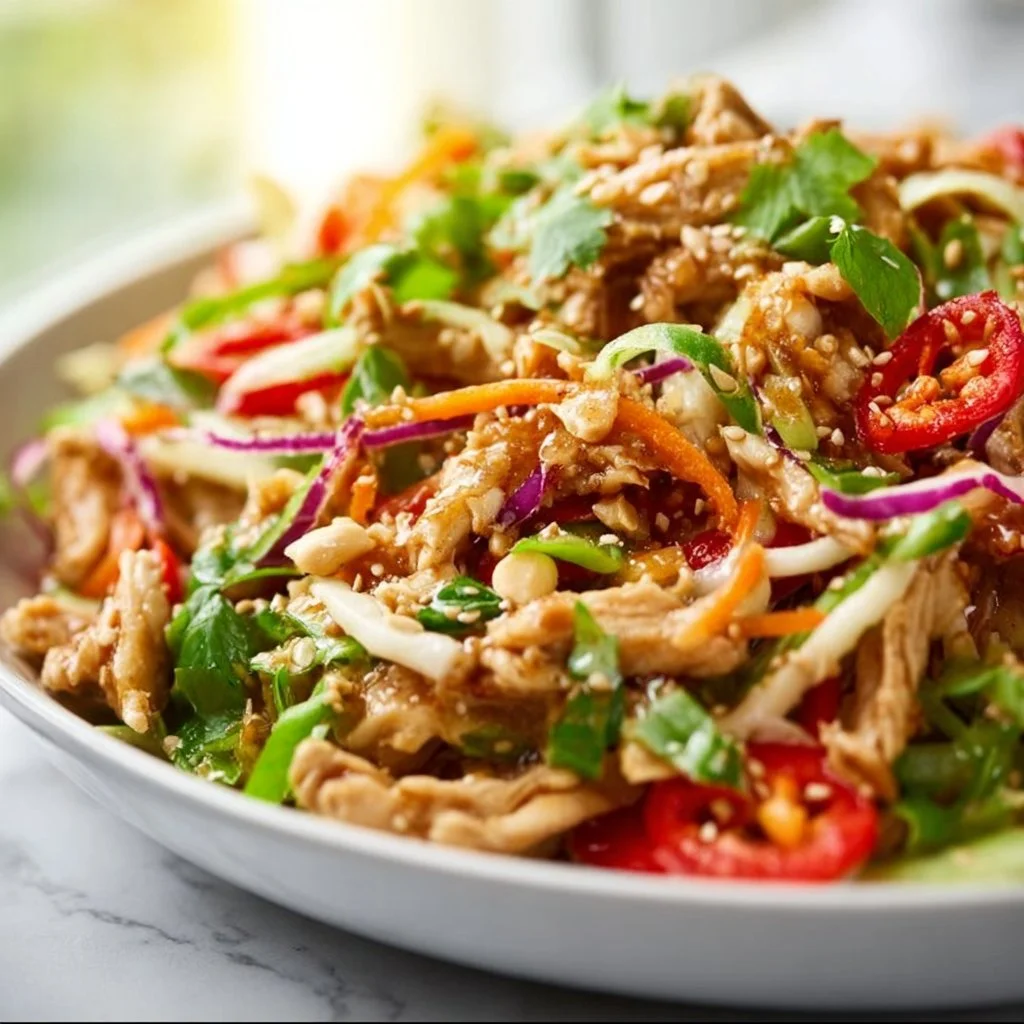
Thai Chicken Salad
Thai Chicken Salad: A Flavor-Packed Journey to Your Dinner Table
Welcome back to my cozy corner of the culinary world! Today, we’re diving headfirst into a vibrant, crunchy, and oh-so-delicious dish that I cannot wait to share with you: Thai Chicken Salad. If you’ve ever taken a bite of a salad that made you feel like you were magically transported to a bustling street market in Thailand, then this dish is for you. It’s not just a salad; it’s a celebration of flavors, textures, and colors that will have you reaching for second servings—trust me!
Thai cuisine is celebrated for its balance of sweet, sour, salty, and spicy notes, and this salad embodies that spirit beautifully. Picture a bright medley of napa cabbage, tender chicken, crunchy peanuts, and a tangy dressing that dances on your taste buds—what’s not to love? Whether you’re looking to impress your friends at a potluck or simply enjoying a healthy meal at home, this salad checks all the right boxes.
Now, let’s embark on this culinary adventure together! I’ll guide you through every step, sprinkling in my kitchen wisdom so you can whip this up with ease, no matter your cooking experience. Ready to stir up some excitement in your kitchen? Grab your apron—it’s about to get delicious!
Personal Story
When I think of Thai Chicken Salad, I am transported back to a sun-soaked afternoon in the heart of Sydney, where my best friend invited me over for lunch. She’s an incredible cook with a penchant for all things Southeast Asian, and that day, she prepared her version of this salad. The aroma of garlic, lime, and fish sauce wafted through her open kitchen window, mingling with the sound of laughter and chatter from her family gathered around the table.
As we dug into the salad, I was struck by how something so simple could evoke such joy and community. Each of us piled our bowls high with colorful ingredients, squeezing fresh lime on top and adding that deliciously spicy dressing. The chorus of “Mmm!” that followed the first bites was music to my ears. That day not only filled my belly but also ignited my passion for cooking and sharing food with loved ones. It became a tradition for us to make this salad together, each time experimenting with new ingredients and flavors. I’m thrilled to share this experience with you, hoping it brings the same joy to your table!
Ingredients
Here’s what you’ll need to create this flavorful Thai Chicken Salad:
-
2 cups cooked chicken breast, shredded
- You can use rotisserie chicken for a time-saving hack, or poach your chicken with some ginger and garlic for extra flavor.
-
4 cups napa cabbage, finely shredded
- Napa cabbage has a mild flavor and crispy texture, but feel free to substitute with regular green cabbage or even kale if that’s what you have on hand.
-
1 cup carrots, grated
- Fresh carrots add a nice crunch. You can also swap in shredded red cabbage for a pop of color and a slightly different texture.
-
1 red bell pepper, thinly sliced
- This adds sweetness; consider using cucumbers instead for a refreshing twist.
-
1/2 cup fresh cilantro, chopped
- Cilantro provides that signature herbaceous taste. If you’re not a fan, use fresh mint for a variation.
-
1/4 cup chopped peanuts (or cashews)
- These add a lovely crunch. If you need this nut-free, sunflower seeds work wonderfully too!
Dressing Ingredients
-
1/4 cup fresh lime juice
- The zing from lime is essential! Bottled lime juice works, but fresh is always best.
-
2 tablespoons fish sauce (or soy sauce for a vegetarian option)
- This brings umami to the dressing—don’t skip it! You can substitute with coconut aminos for a gluten-free option.
-
1 tablespoon honey or maple syrup
- It balances the acidity perfectly. Use agave syrup for a vegan substitute.
-
1 teaspoon chili paste (adjust to taste)
- This is your spicy element! Sriracha or even red pepper flakes are great alternatives.
Step-by-Step Instructions
Now that we’ve gathered our ingredients, let’s get cooking! Here’s how you can whip up this delightful salad:
Step 1: Cook the Chicken
If you’re using raw chicken breast, season it with salt and pepper. In a pot, bring lightly salted water to a boil. Add the chicken and simmer for about 15-20 minutes, or until fully cooked. Once tender, remove from the pot and shred using two forks. Chef’s Hack: You can save time and hassle by shredding the chicken while it’s still slightly warm—it’s much easier that way!
Step 2: Prepare the Vegetables
While your chicken is cooking, it’s the perfect time to prep your vegetables. Take that napa cabbage and slice it thinly; parents love this sawing method! Grate the carrots, and julienne the bell pepper—these vibrant colors will make your salad pop. Tip: For an added crunch, soak the cabbage in ice-cold water for about 10 minutes before using. This will make it extra crispy.
Step 3: Make the Dressing
In a small bowl, whisk together the lime juice, fish sauce, honey, and chili paste until well combined. Little Chef Insight: Taste as you go! You want it to have a perfectly balanced flavor. Adjust the sweetness or heat according to your preference—there’s no wrong way to dress a salad!
Step 4: Assemble the Salad
In a large mixing bowl, combine the shredded chicken, napa cabbage, grated carrots, bell pepper, and chopped cilantro. Drizzle the dressing over the salad and toss gently until every bite is brightly flavored and coated in that zesty goodness. Chef’s Tip: Use tongs for easy mixing—this will keep your ingredients intact!
Step 5: Garnish
Sprinkle the chopped peanuts (or any nuts you’ve chosen) over the top of your salad before serving. This adds an inviting crunch and visual appeal—who doesn’t love a little texture?
Step 6: Serve
Scoop the salad into individual bowls and garnish each one with an extra wedge of lime on the side for those who love a little extra tang. Voilà! You now have a vibrant, colorful dish that’s sure to impress.
Serving Suggestions
This Thai Chicken Salad is stunning on its own, but it can shine even brighter when paired with other dishes. Consider serving alongside some crispy spring rolls or a warm bowl of coconut soup for a beautifully balanced meal. To plate, mound the salad high on a bright plate and sprinkle some additional cilantro for the wow factor!
Recipe Variations
Now that you’ve mastered the classic, here are some creative twists for your Thai Chicken Salad:
- Grilled Chicken Twist: Swap cooked chicken for thinly sliced grilled chicken marinated in lime and garlic for an extra smoky flavor.
- Vegetarian Delight: Replace chicken with chickpeas or baked tofu for a vegetarian powerhouse meal.
- Fruit Fusion: Toss in some fresh mango or diced pineapple for a touch of sweetness that pairs wonderfully with the salad’s tang.
- Spicy Kick: Add sliced jalapeños or a pinch more chili paste to dial up the heat.
- Crunch Factor: Mix in some crispy chow mein noodles for an unexpected crunch!
Chef’s Notes
This salad has evolved over time, mirroring my own culinary journey in the realm of vibrant, flavor-packed dishes. I remember the first time I adapted a traditional recipe—it felt like a block of weight had lifted from my shoulders. Cooking should be fun and free, an expression of your unique tastes!
Sometimes, I brighten it up even more with a few extra herbs or a sprinkling of sesame seeds. It’s gratifying to see how a simple recipe can adapt to various preferences and quickly become a staple in the kitchen. In my house, we love to pull this together as a quick lunch or a light dinner, especially on those warm summer evenings when cooking feels like too much work.
FAQs and Troubleshooting
Q: Can I make this salad ahead of time?
A: Absolutely! Make the dressing and prep the chicken the day before. However, it’s best to mix the salad just before serving to keep everything fresh and crunchy.
Q: My salad turned out too salty. What can I do?
A: If you find it too salty, try adding more shredded cabbage or carrots to balance out the flavors. Adding a touch of honey can also help draw some of that saltiness out.
Q: Can I make it gluten-free?
A: Yes, just ensure to use gluten-free tamari instead of regular soy sauce and double-check the fish sauce ingredient, as some may contain gluten.
Q: What’s the best way to store leftovers?
A: Store any leftovers in an airtight container in the fridge. It should last about 2 days, but the veggies might lose their crispness, so I recommend eating it fresh!
Nutritional Info
(Optional): Here’s a general nutritional breakdown per serving:
- Calories: 350
- Protein: 30g
- Carbohydrates: 20g
- Fat: 18g
- Fiber: 4g
There you have it! Your complete guide to making a vibrant Thai Chicken Salad that’s sure to delight. I hope it brings a touch of Thailand into your home and fills your kitchen with laughter and joy. Remember, cooking is about connection—both to the ingredients and to each other. Enjoy every delicious bite!
Print
Thai Chicken Salad
- Total Time: 35 minutes
- Yield: 4 servings 1x
- Diet: Gluten-free, High-Protein
Description
A vibrant and crunchy Thai Chicken Salad loaded with flavors, textures, and colors that’s perfect for any occasion.
Ingredients
- 2 cups cooked chicken breast, shredded
- 4 cups napa cabbage, finely shredded
- 1 cup carrots, grated
- 1 red bell pepper, thinly sliced
- 1/2 cup fresh cilantro, chopped
- 1/4 cup chopped peanuts (or cashews)
- 1/4 cup fresh lime juice
- 2 tablespoons fish sauce (or soy sauce for a vegetarian option)
- 1 tablespoon honey or maple syrup
- 1 teaspoon chili paste (adjust to taste)
Instructions
- Cook the chicken: If using raw chicken, season and simmer in salted water until fully cooked, then shred.
- Prepare the vegetables: Slice napa cabbage, grate carrots, and julienne bell pepper.
- Make the dressing: Whisk lime juice, fish sauce, honey, and chili paste until combined.
- Assemble the salad: In a bowl, combine chicken, cabbage, carrots, bell pepper, and cilantro, then drizzle with dressing.
- Garnish the salad: Sprinkle chopped peanuts on top before serving.
- Serve: Place salad in bowls with extra lime wedges for garnish.
Notes
Make the dressing and prep the chicken a day before. Mix the salad just before serving to keep it fresh and crunchy.
- Prep Time: 15 minutes
- Cook Time: 20 minutes
- Category: Salad
- Method: No Cooking
- Cuisine: Thai
Nutrition
- Serving Size: 1 serving
- Calories: 350
- Sugar: 5g
- Sodium: 400mg
- Fat: 18g
- Saturated Fat: 3g
- Unsaturated Fat: 5g
- Trans Fat: 0g
- Carbohydrates: 20g
- Fiber: 4g
- Protein: 30g
- Cholesterol: 75mg
Keywords: Thai salad, chicken salad, healthy salad, quick meal, vibrant recipe
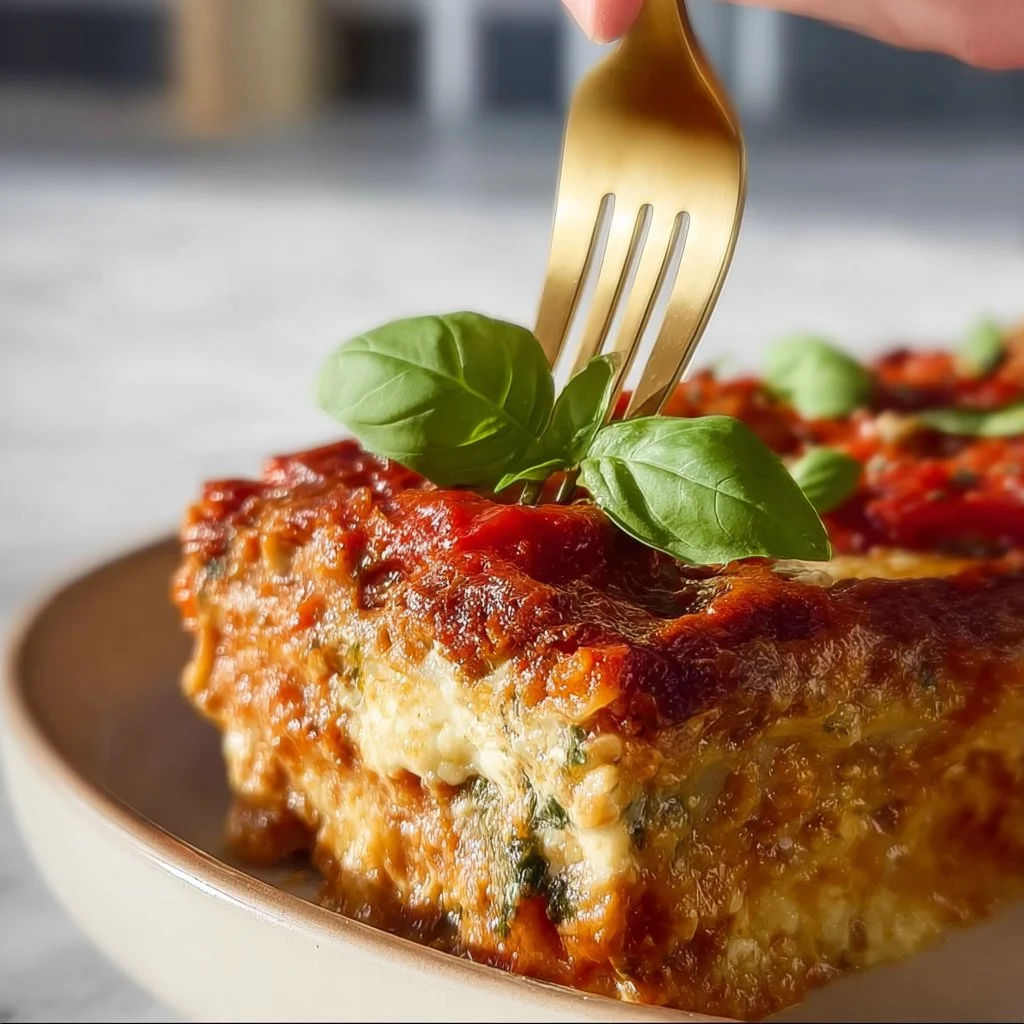
High-Protein Vegan Lasagna
# High-Protein Vegan Lasagna: A Cozy Culinary Adventure

## Introduction

Welcome to my cozy kitchen, friends! Today, we are diving headfirst into a comforting classic that is sure to warm your heart and tickle your taste buds: High-Protein Vegan Lasagna! If you’ve been seeking a dish that perfectly couples nutrition, flavor, and a dash of nostalgia, you’re about to discover a treasure.

Lasagna has always held a special place in my culinary journey. I can vividly recall those Saturday afternoons at my grandmother’s house, where layers of cheesy, saucy goodness were greeted with echoed laughter and the clinking of forks. Every layer told a story, each ingredient was added with love, and I spent countless hours watching the magic unfold. Now, as an avid home cook, I’ve taken that cherished tradition and given it a modern, plant-based twist!

Why high-protein, you ask? Well, life is all about balance, and I believe in fueling our bodies with tasty, nourishing food. Traditional lasagna might leave you in a food coma, but not this one—it’s packed with plant-based protein, making it not only a healthier choice but also a great option for meal prep. Whether you’re a seasoned vegan or just experimenting with plant-based meals, this lasagna is for everyone.

So, roll up your sleeves, and let’s get cooking! Together, we’ll create a heartwarming dish that can effortlessly feed a crowd or serve as delightful leftovers throughout the week.

## Personal Story

This recipe reminds me of a fun cooking competition night I had with my best friends a couple of years ago. It was an impromptu gathering that turned into a full-blown culinary showdown! We were each tasked with creating a dish that was both impressive and plant-based. I had recently adopted a more plant-focused lifestyle, and after a long brainstorming session, I decided to tackle a vegan lasagna.

Standing in my cramped kitchen, amid cut veggies and spilling jars of spices, I felt the excitement surge. I layered my homemade marinara, sautéed veggies, and a protein-packed tofu ricotta. With a big glass of red wine in hand and my friends cheering me on, I realized that food has an incredible way of bringing us together. The minute that lasagna hit the oven, the rich aroma wafted through the room, silencing all banter.

When it was finally time to slice into the bubbling layers, we shared laughter, stories, and a sense of accomplishment. To this day, that spontaneous cook-off and my high-protein vegan lasagna remain etched in my memory as a joyful celebration of friendship over food.

## Ingredients

Let’s gather the ingredients for this High-Protein Vegan Lasagna! Below is what you’ll need, along with some handy tips and insights.

- **Lasagna Noodles**:
  - *Tip*: You can use regular, whole wheat, or gluten-free lasagna noodles. I love the texture of the oven-ready kind because it's quick and easy!

- **Firm Tofu**:
  - *Insight*: Tofu is your friend here! It’s a fantastic source of plant-based protein. Sometimes, I like to use silken tofu for a creamier texture.

- **Spinach/Kale**:
  - *Substitution*: Fresh or even frozen greens work! Just make sure to thaw and squeeze out excess moisture if using frozen.

- **Marinara Sauce**:
  - *Chef Tip*: Look for a low-sugar sauce, or better yet, make homemade marinara for that fresh, vibrant flavor.

- **Nutritional Yeast**:
  - *Why It’s Awesome*: Adds a cheesy flavor without the dairy! Plus, it’s packed with B12, which is great for plant-based eaters.

- **Cashews**:
  - *Swap Suggestion*: If you’re nut-free, sunflower seeds can be a great alternative. Soak them for creamy textures.

- **Garlic and Onion**:
  - *Flavor Booster*: Always sauté these first—they build the foundation of flavor in your dish.

- **Zucchini**:
  - *Pro Tip*: Thinly slices work wonderfully to create layers. You could also use eggplant if you prefer.

- **Basil and Oregano**:
  - *Fresh vs. Dried*: Fresh herbs add a burst of flavor. Dried herbs are great if you don't have fresh on hand.

- **Salt and Pepper**:
  - *Essential*: Always season your layers for maximum flavor.

## Step-by-Step Instructions

Now that we have everything ready, let’s jump into the journey of making our High-Protein Vegan Lasagna! Get your apron on—it's time to get saucy!

1. **Preheat Your Oven**:
   - Preheat your oven to 375°F (190°C). A hot oven ensures that our lasagna bakes evenly and gets those bubbly layers we all love.

2. **Prepare the Tofu Ricotta**:
   - In a food processor, combine drained tofu, a splash of lemon juice, nutritional yeast, a clove of garlic, salt, and a bit of fresh basil. Blend until smooth and creamy.
   - **Chef Tip**: If it’s too thick, add a dash of almond milk to achieve your desired texture.

3. **Sauté the Veggies**:
   - In a skillet, heat a tablespoon of olive oil over medium heat. Add chopped onion and minced garlic, sautéing until fragrant (about 3-4 minutes).
   - Toss in chopped spinach (or kale) and cook until wilted.
   - **Pro Insight**: Feel free to add notes of spice like red pepper flakes for an extra kick!

4. **Layer the Lasagna**:
   - Start by spreading a thin layer of marinara sauce on the base of your baking dish.
   - Lay down a layer of lasagna noodles, followed by a spread of the tofu ricotta, another layer of sautéed veggies, and a drizzle of marinara. Repeat the layers until you reach the top.
   - **Hacks**: Ensuring each layer has enough sauce will keep everything moist while baking!

5. **Top It Off**:
   - Finish with a generous layer of marinara sauce on top. Sprinkle additional nutritional yeast or cashew cheese for a lovely cheesy finish.
   - **Personal Insiders Tip**: You can sprinkle some fresh herbs for that vibrant touch.

6. **Bake**:
   - Cover your lasagna with aluminum foil (to avoid over-browning), then bake it in the preheated oven for about 35-40 minutes.
   - For the last 10 minutes, remove the foil to allow the top to brown beautifully.

7. **Cool and Serve**:
   - Once the lasagna is out of the oven, let it cool for about 10-15 minutes before slicing. This will help the layers hold together when serving.
   - **Chef's Touch**: Garnish with fresh basil for a pop of color!

## Serving Suggestions

When it comes to plating, a simple yet elegant presentation goes a long way! Slice your lasagna into hearty squares and serve on a warm plate. Pair it with a light green salad topped with a lemon vinaigrette, or even a slice of homemade garlic bread to soak up those luscious layers. The goal is to create an inviting display that draws people in—just like a warm hug on a chilly day!

## Recipe Variations

1. **Mushroom Medley**: Add a layer of sautéed mushrooms for an umami-packed twist!
2. **Pesto Spinach**: Mix in some pesto with your greens for a flavor explosion.
3. **Roasted Veggies**: Utilize a mix of roasted zucchini, bell peppers, and carrots to add a sweetness to each bite.
4. **Chickpeas for Extra Protein**: Layer some chickpeas for an additional protein punch and a touch of nuttiness.
5. **Spicy Tomato Sauce**: Add some diced jalapeños or crushed red pepper to the sauce for a delightful kick!

## Chef’s Notes

As I reflect on my journey with this recipe, I remember the countless iterations it underwent before finding the perfect balance. My friends used to tease me about my constant ingredient swapping and taste testing. Over time, I learned to embrace flavor combinations I never considered before!

This lasagna has evolved from a simple family dish to a staple in my home. It’s become a go-to for gatherings, and surprisingly enough, people don’t even realize it’s vegan! It goes to show that the love you put into cooking can transform even the simplest ingredients.

## FAQs and Troubleshooting

**1. My lasagna turned out watery! What happened?**
   - This might happen if you didn’t drain your tofu or vegetables adequately. Sautéing the veggies beforehand helps eliminate excess moisture, so be sure to keep an eye on this step!

**2. Can I make this ahead of time?**
   - Absolutely! Assemble the lasagna a day prior and keep it covered in the fridge. Just remember to extend the baking time if it comes straight from the refrigerator.

**3. How do I store leftovers?**
   - Store any leftovers in an airtight container in the fridge for up to 5 days. For longer storage, freeze slices wrapped in foil, then placed in a freezer-friendly bag. Defrost before reheating.

**4. Can I add more protein?**
   - Definitely! Consider incorporating lentils or tempeh for an incredible protein boost.

## Nutritional Info

While I typically encourage enjoying food without dwelling on nutritional facts, it’s worth mentioning that this High-Protein Vegan Lasagna serves as a complete meal packed with fiber, protein, vitamins, and minerals. It's an excellent way to get your servings of veggies while savoring each bite!

---

So there you have it! My High-Protein Vegan Lasagna is not just a dish; it's a culinary experience meant to be shared and celebrated. I hope you enjoy making (and devouring) this lasagna just as much as I do. Remember, cooking should be fun, friendly, and warming—like a cozy hug from the inside out. Happy cooking, my fellow food lovers!
High-Protein Vegan Lasagna
- Total Time: 55 minutes
- Yield: 6 servings
- Diet: Vegan
Description
A comforting high-protein vegan lasagna packed with flavor and nutrition, perfect for meal prep and gatherings.
Ingredients
- Lasagna Noodles
- Firm Tofu
- Spinach or Kale
- Marinara Sauce
- Nutritional Yeast
- Cashews
- Garlic
- Onion
- Zucchini
- Basil
- Oregano
- Salt
- Pepper
Instructions
- Preheat your oven to 375°F (190°C).
- Prepare the tofu ricotta by blending drained tofu, lemon juice, nutritional yeast, garlic, salt, and basil until smooth.
- Sauté the onion and garlic in olive oil until fragrant, then add spinach and cook until wilted.
- Layer a thin layer of marinara sauce in a baking dish, followed by noodles, tofu ricotta, sautéed veggies, and continue layering.
- Top with marinara sauce and nutritional yeast or cashew cheese.
- Bake covered for 35-40 minutes, removing foil for the last 10 minutes.
- Cool for 10-15 minutes before slicing.
Notes
Add variations by including mushrooms, pesto, or extra protein sources like lentils or chickpeas.
- Prep Time: 15 minutes
- Cook Time: 40 minutes
- Category: Main Course
- Method: Baking
- Cuisine: Italian
Nutrition
- Serving Size: 1 slice
- Calories: 400
- Sugar: 6g
- Sodium: 380mg
- Fat: 15g
- Saturated Fat: 2g
- Unsaturated Fat: 12g
- Trans Fat: 0g
- Carbohydrates: 52g
- Fiber: 6g
- Protein: 22g
- Cholesterol: 0mg
Keywords: vegan lasagna, high-protein recipe, plant-based dinner, healthy lasagna
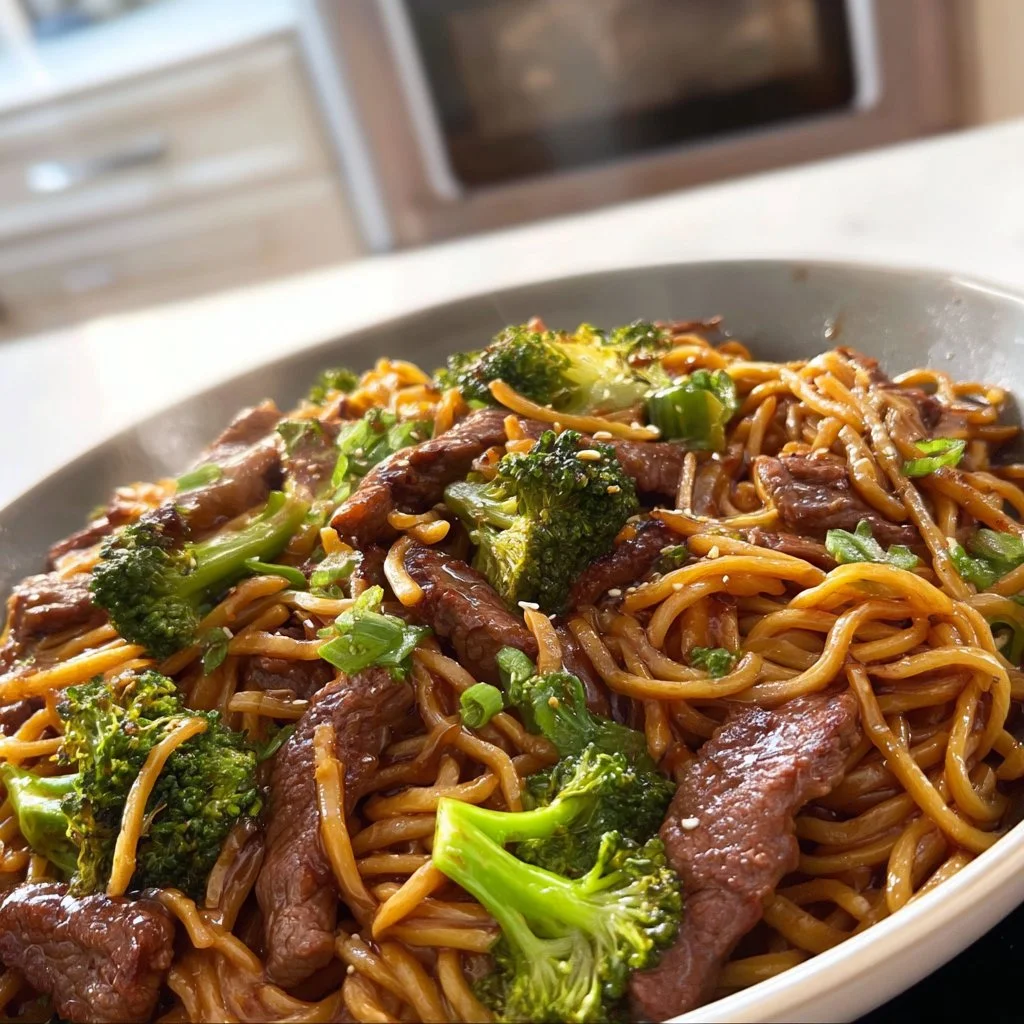
Beef and Broccoli Lo Mein
Beef and Broccoli Lo Mein: A Cozy Kitchen Delight
Hey there, fellow food lovers! Welcome back to my cozy corner of the internet. Today, we’re diving into one of my absolute favorite dishes to whip up—Beef and Broccoli Lo Mein. Perfectly tender beef, vibrant broccoli, and those chewy, comforting noodles all come together in a savory sauce that makes my heart (and taste buds) sing. This dish is like a warm hug on a plate and a sure crowd-pleaser for any time you gather with friends or family.
I remember the first time I had lo mein; I was a kid, and my parents would take me to our favorite Chinese restaurant every Friday night. The moment the plate of noodles hit the table, my excited eyes would sparkle brighter than the overhead lights. I still relish that first bite of tender beef mingling with perfectly cooked noodles—ah, the nostalgia! That warm feeling of being surrounded by the people you love, sharing stories over a delicious meal, is what cooking—and particularly this dish—is all about.
As I’ve grown as a cook (and accumulated countless kitchen mishaps), I’ve perfected this Beef and Broccoli Lo Mein recipe to transport you straight back to your favorite takeout spot—without any of the fuss. Ready to get cooking? Let’s roll up our sleeves and make some magic happen in the kitchen!
Personal Story
Growing up, my mother had a knack for creating a warm and inviting kitchen environment. One weekend, with my little brother running in and out, she decided to have a “make your own lo mein” night. I vividly recall how we set out an array of vibrant ingredients on the kitchen counter—fresh veggies, marinated beef, and, of course, those fabulous lo mein noodles.
We bounced around ideas, each of us claiming our favorite flavors and combinations. My brother went for a wild mix of sesame sauce and broccoli, while I opted for a more traditional approach. The chaotic laughter between us, combined with the delicious aromas wafting throughout the house from the sizzling pan, created one of those unforgettable memories. Even now, every time I make this dish, I’m taken back to that kitchen, the sounds of my family echoing while we clink our chopsticks over bowls of soul-soothing lo mein.
Ingredients
For this delightful dish, here’s what you’ll need:
-
Beef (flank steak or sirloin): Tender cuts work best for stir-fries. If you don’t have beef on hand, you can substitute chicken, shrimp, or even tofu!
-
Broccoli florets: Fresh is best, but frozen will work in a pinch. If you want more color, throw in some colorful bell peppers or snap peas.
-
Lo mein noodles: These egg noodles give a delightful chewiness. If you can’t find them, spaghetti or rice noodles can do the trick.
-
Soy sauce: The backbone of our savory sauce! Low-sodium soy sauce is a great alternative for a lighter option.
-
Oyster sauce: It adds a rich, umami flavor. If you want to keep it vegetarian, opt for a mushroom-based oyster sauce.
-
Sesame oil: A little drizzle gives an aromatic finish. Olive oil or peanut oil can replace it, but you’ll miss out on that nutty flavor.
-
Garlic (3-4 cloves): Minced garlic is fabulous for depth of flavor. Feel free to add ginger for an extra kick!
-
Ginger (fresh or powdered): Just a touch brings the dish alive! Ground ginger is okay if fresh isn’t accessible.
-
Cornstarch: Essential for thickening our sauce. Arrowroot powder is a nice gluten-free alternative.
-
Water or broth: For the sauce consistency. Use a good-quality beef broth for richer flavor, or vegetable broth for a lighter option.
Having a good quality soy sauce and fresh garlic available opens a whole world of flavor in any stir-fry!
Step-by-Step Instructions
Now, let’s get cooking! Follow along, and don’t hesitate to make it your own.
-
Prep Your Ingredients: Start by slicing your beef against the grain into thin strips. This ensures it stays tender. Next, chop the broccoli into bite-sized florets and set them aside. Boil water in a large pot, then add the lo mein noodles according to package instructions—usually, around 4-5 minutes. Once they’re done, drain and toss with a splash of oil to prevent sticking.
-
Marinate the Beef: In a bowl, combine the sliced beef with a tablespoon of soy sauce, a teaspoon of cornstarch, and a dash of sesame oil. This not only adds flavor but also tenderizes the beef. Let it sit for about 15 minutes while the noodles cook—perfect timing!
-
Sauté Garlic and Ginger: In a large skillet or wok, heat a tablespoon of sesame oil over medium-high heat. Add the minced garlic and grated ginger, stirring for about 30 seconds until fragrant. Be careful not to burn the garlic—nobody likes bitter!
-
Cook the Beef: Toss in the marinated beef and stir-fry until it’s browned and nearly cooked through, about 3-4 minutes. You want it beautifully seared but not overcooked. Remove the beef from the skillet and set aside—remember, we’ll return it to heat later!
-
Broccoli Time: In the same pan, add a splash of water (or broth) and stir in the broccoli. Cover and steam it for about 2-3 minutes until vibrant green and tender yet crisp. We love that crunch!
-
Make the Sauce: While the broccoli steams, whisk together ¼ cup soy sauce, 2 tablespoons oyster sauce, a teaspoon of cornstarch, and a little bit of water (about ¼ cup) in a small bowl. This will be our heavenly sauce!
-
Combine Everything: Return the cooked beef to the pan along with the sauce and loosen up everything. Toss in the drained lo mein noodles gently, incorporating all those mouthwatering flavors evenly. Let it all chat in the pan for a minute or two—trust me, the aroma will be intoxicating!
-
Final Touches: Sprinkle with sesame seeds and sliced green onions, giving it a final toss to mix everything together. Now, take a moment and breathe in that delicious scent!
Serving Suggestions
To serve your Beef and Broccoli Lo Mein, plate it warmly in shallow bowls. Garnish with extra sesame seeds and sliced green onion for that beautiful pop of color. Consider serving it with pickled vegetables or a side of steamed dumplings for a full Asian feast! Don’t forget some chopsticks to dig in—because it makes the experience feel all the more authentic.
Recipe Variations
-
Spicy Beef and Broccoli Lo Mein: Add a teaspoon of chili sauce or red pepper flakes in the sauce for a little zing.
-
Vegetable Load-Up: Swap out half of the beef for additional veggies like bell peppers, snap peas, or mushrooms for added crunch and color!
-
Sesame Chicken Lo Mein: Substitute the beef with sliced chicken breast for a lighter twist—or use a mix of chicken and beef for a protein-packed dish.
-
Vegan Tofu Lo Mein: Replace beef with tofu (extra firm works best) and use a vegan oyster sauce or mushroom sauce.
-
Noodle-Free Version: Skip the noodles and serve the beef and broccoli over riced cauliflower for a low-carb option.
Chef’s Notes
As I stirred my Beef and Broccoli Lo Mein today, memories of family gatherings and friends crowded around a table flooded back. What started as a home-cooked meal for two in my kitchen has evolved into a beloved dish I share with anyone and everyone who crosses my threshold. It’s a reminder that food is intimately linked to love, and every recipe evolves with the memories created around it. Whether you are cooking for the first time or are a seasoned chef, enjoy the process and let it bring you joy!
FAQs and Troubleshooting
-
What if my noodles stick together?
- Toss the freshly boiled noodles with a little oil—this helps keep them separate. Also, make sure you’re utilizing enough water when cooking.
-
Can I use other proteins?
- Absolutely! Feel free to swap beef for chicken, shrimp, or even tempeh for a delicious alternative. Just adjust the cooking time based on the protein you opt for.
-
I overcooked my beef, how can I avoid that next time?
- Slicing against the grain and keeping the heat high while cooking for a shorter time will help you achieve that tender texture. Remember, it will continue to cook a little after you remove it from the heat!
-
How can I make this more balanced?
- Increase the vegetable load, or serve it with a simple side salad. A sprinkle of sesame seeds also adds healthy fats!
There’s nothing quite like the comforting embrace of a warm bowl of Beef and Broccoli Lo Mein. Not only do you get a delicious meal that brings friends and family together, but you also create lasting memories with every delicious bite. I hope you enjoy making this dish as much as I do—happy cooking!
Print
Beef and Broccoli Lo Mein
- Total Time: 45 minutes
- Yield: 4 servings 1x
- Diet: None
Description
A cozy dish of tender beef, vibrant broccoli, and chewy lo mein noodles in a savory sauce, perfect for any gathering.
Ingredients
- 1 pound Beef (flank steak or sirloin)
- 2 cups Broccoli florets
- 8 ounces Lo mein noodles
- ¼ cup Soy sauce
- 2 tablespoons Oyster sauce
- 1 tablespoon Sesame oil
- 3–4 cloves Garlic (minced)
- 1 teaspoon Ginger (fresh or powdered)
- 1 tablespoon Cornstarch
- ½ cup Water or broth
Instructions
- Prep Your Ingredients: Slice beef against the grain, chop broccoli into florets, and boil water for the noodles. Cook noodles according to package instructions, then drain and toss with oil.
- Marinate the Beef: In a bowl, mix sliced beef with soy sauce, cornstarch, and sesame oil. Let sit for 15 minutes.
- Sauté Garlic and Ginger: Heat sesame oil in a skillet, add garlic and ginger, and stir for 30 seconds.
- Cook the Beef: Stir-fry marinated beef until browned, about 3-4 minutes. Remove from skillet.
- Broccoli Time: Add water or broth, then stir in broccoli and steam for 2-3 minutes.
- Make the Sauce: Whisk soy sauce, oyster sauce, cornstarch, and water in a bowl.
- Combine Everything: Return beef to pan with the sauce, add noodles, and toss to mix.
- Final Touches: Sprinkle with sesame seeds and green onions before serving.
Notes
Serve garnished with extra sesame seeds and green onions, perfect with pickled vegetables or dumplings.
- Prep Time: 15 minutes
- Cook Time: 30 minutes
- Category: Main Course
- Method: Stir-frying
- Cuisine: Chinese
Nutrition
- Serving Size: 1 serving
- Calories: 450
- Sugar: 4g
- Sodium: 800mg
- Fat: 20g
- Saturated Fat: 4g
- Unsaturated Fat: 14g
- Trans Fat: 0g
- Carbohydrates: 50g
- Fiber: 3g
- Protein: 25g
- Cholesterol: 60mg
Keywords: Beef Lo Mein, Broccoli Lo Mein, Comfort Food
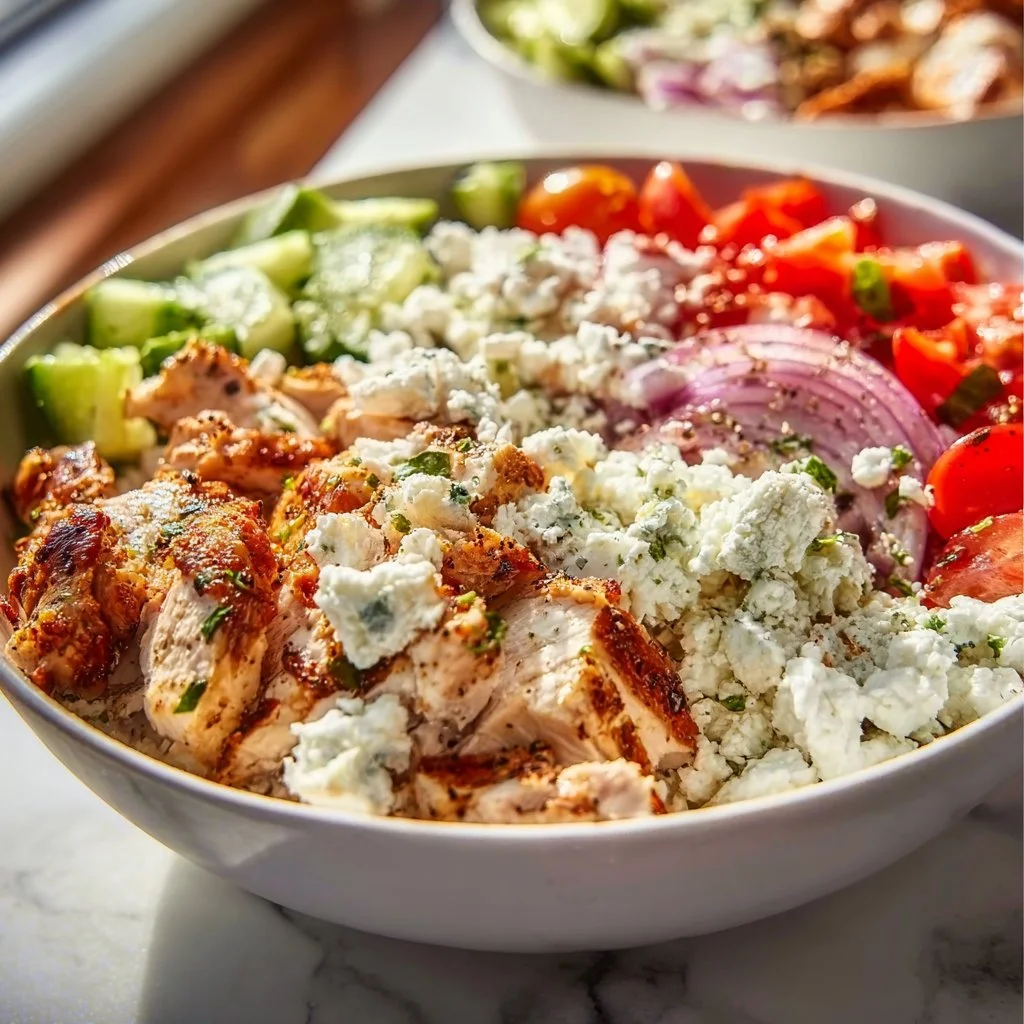
Greek Chicken Bowls
Greek Chicken Bowls: A Flavorful Journey to the Mediterranean
Welcome back to my kitchen, friends! Today, I’m thrilled to whisk you away on a Mediterranean adventure with my delicious Greek Chicken Bowls! If you’re yearning for a dish that bursts with vibrant flavors, freshness, and comfort, then you’ve hit the jackpot. Picture succulent marinated chicken, crisp veggies, creamy tzatziki, and fluffy rice or quinoa — this dish has it all!
Growing up, my family had a special affinity for Greek cuisine. I fondly remember our Sunday dinners, where my mom would magically transform the kitchen with the aromatic scents of oregano, lemon, and garlic. It was the kind of place where the air was filled with laughter and the clinking of plates — a true feast of love, flavors, and cherished memories. Those Sunday gatherings never felt complete without a selection of colorful bowls brimming with goodies, inviting everyone to build their perfect plate.
These Greek Chicken Bowls embody that same spirit. They are versatile, filling, and straightforward to whip up, even on a busy weeknight. Whether you’re meal prepping for the week or serving guests on a sunny afternoon, this dish will impress everyone at your table while keeping your heart happy and satisfied.
So, let’s roll up our sleeves, throw on our aprons, and embark on this flavorful journey together. Not only will you discover how to make my favorite Greek Chicken Bowls, but you’ll also find tips, tricks, and stories from my own culinary escapades. Ready? Let’s dive in!
Personal Story
Ah, the memories tied to food are some of the best, aren’t they? One of my most cherished kitchen tales revolves around the first time I attempted to recreate my mom’s Greek chicken dish. I was in my college dorm, surrounded by textbooks and ramen noodle packets, feeling particularly nostalgic. My heart was longing for that family warmth, so I called her, excitedly asking for her secrets.
With a chuckle, she responded, “Sweetheart, it’s all about love and a few good ingredients.” I remember scribbling down her notes on a napkin, full of joy and determination. That night, I marinated chicken thighs in olive oil, garlic, and lots of lemon. The moment I pulled that first bowl of Greek chicken onto my desk — alongside fuzzy memories of loud family dinners — I knew I had created something special.
Though my first attempt didn’t match my mom’s, it opened a new chapter of cooking for me. That messy night in my tiny dorm, along with plenty of spilled tzatziki and laughter, led me to discover the joy of creating dishes that bring people together. Cooking is about sharing love, memories, and delicious bites. So, yes, every Greek Chicken Bowl holds a small piece of my heart!
Ingredients
Before we jump into the actual cooking, let’s gather our ingredients like a well-prepared chef! For these Greek Chicken Bowls, you’ll need:
For the Chicken Marinade:
-
Chicken Thighs or Breasts (1.5 lbs):
- Juicy chicken thighs are the secret to a tender bite, but chicken breasts can also do the job! For a lighter option, you could substitute them with turkey cutlets.
-
Olive Oil (1/4 cup):
- A staple in Mediterranean cooking! Extra virgin olive oil enhances flavor. If you’re looking for a change, avocado oil is a suitable substitute.
-
Garlic (4 cloves, minced):
- Garlic is the flavor bomb! Feel free to swap it with garlic powder in a pinch — however, fresh is always best!
-
Lemon Juice (1/4 cup):
- Freshly squeezed lemon juice brings brightness to the dish. In a pinch, bottled lemon juice can work, but fresh is highly recommended for maximum flavor!
-
Dried Oregano (2 tablespoons):
- A quintessential herb in Greek cooking with a warm flavor profile. Don’t have oregano? Try dried thyme or Italian seasoning instead!
-
Salt and Pepper (to taste):
- A must-have combo! You can always add more, but start with a pinch. I love using sea salt for its flavor.
For the Bowls:
-
Cooked Rice or Quinoa (2 cups):
- These hearty bases make the perfect canvas! Brown rice or cauliflower rice are fantastic alternatives depending on your dietary preference.
-
Chopped Cherry Tomatoes (1 cup):
- Juicy and sweet! Diced cucumbers work well too if you want something crunchier!
-
Red Onion (1/2, thinly sliced):
- Tart and crunchy! If onion isn’t your thing, feel free to skip or substitute with green onions.
-
Feta Cheese (1/2 cup, crumbled):
- Creamy and tangy, feta ties all the flavors together! Try goat cheese for a different spin, or use dairy-free feta for a vegan option!
-
Tzatziki Sauce (1 cup):
- The soul of Greek cuisine; this cucumber-yogurt sauce is a must! You can buy it ready-made, but making it fresh at home is much more rewarding!
-
Plain Greek Yogurt (for topping, optional):
- Extra creaminess never hurt anyone! You can mix it with a little garlic and dill for an upgraded version.
Step-by-Step Instructions
Now that our ingredients are ready, let’s cook up these delectable Greek Chicken Bowls! Grab your favorite playlist, channel that kitchen energy, and let’s get moving!
Step 1: Marinate the Chicken
-
Combine the Marinade: In a bowl, whisk together olive oil, minced garlic, lemon juice, dried oregano, salt, and pepper.
- Pro Tip: Let the marinade sit for a few minutes! The flavors will meld beautifully, creating a divine taste explosion.
-
Add Chicken: Place the chicken thighs or breasts in a resealable bag or a shallow dish. Pour the marinade over the chicken, ensuring they are well coated.
- Chef Insight: For the most flavor, let your chicken marinate in the fridge for at least 30 minutes or up to 8 hours if you plan ahead! The longer it marinates, the more delicious it becomes.
Step 2: Cook the Chicken
-
Heat the Grill or Skillet: Preheat your grill or a skillet over medium-high heat.
- If grilling, brush the grates with a little oil to prevent sticking! If you’re using a skillet, a splash of olive oil will do the trick!
-
Cook the Chicken: Once hot, place the marinated chicken on the grill or in the skillet. Sear for 5-7 minutes on each side until fully cooked (internal temperature of 165°F).
- Chef Hack: Once you see those beautiful grill marks, resist the urge to flip too early! Let it sear properly for a tasty caramelization!
-
Rest the Chicken: Once cooked, take the chicken off the heat and let it rest on a cutting board for about 10 minutes.
- Resting is key! It allows the juices to redistribute throughout the meat, keeping it tender and moist.
Step 3: Prepare the Accompaniments
-
Cook the Rice or Quinoa: While the chicken is resting, follow the package instructions to cook rice or quinoa.
- Quick Tip: Add a pinch of salt and a squeeze of lemon juice to the water for added flavor.
-
Prep the Veggies: Meanwhile, chop your cherry tomatoes and slice the red onion.
- Sweet tip: If your onions are too pungent, soak them in cold water for about 10-15 minutes before using them! It reduces the bite!
Step 4: Assemble the Bowls
-
Slice the Chicken: After resting, slice the chicken into strips.
- Presentation Matters! Angle your knife at 45 degrees for beautiful, delicious-looking slices!
-
Build Your Bowls: Start with a base of rice or quinoa, then layer your sliced chicken, chopped tomatoes, onions, and sprinkle with crumbled feta. Drizzle tzatziki over top!
- Remember! This is a create-your-own moment; feel free to layer and mix according to your preference!
Serving Suggestions
Time to serve these beauties! I love presenting them in colorful bowls that show all the vibrant ingredients. Add a sprinkle of fresh herbs like parsley or mint on top for a finishing touch, and don’t forget extra tzatziki on the side for those who can’t get enough! The vibrant colors, aromatic scents, and delicious flavors make a delightful combination that’s not just a meal — it’s a feast for the eyes!
Recipe Variations
Want to jazz up your Greek Chicken Bowls? Here are a few fun variations you can try:
-
Mediterranean Grain Bowl: Swap out rice or quinoa for farro or couscous for a trendy hidden gem!
-
Spicy Kick: Add some sliced jalapeños or a drizzle of chili oil for those who like an extra kick!
-
Vegetarian Option: Instead of chicken, use grilled veggies like zucchini, eggplant, or portobello mushrooms for a hearty and satisfying bowl!
-
Pesto Twist: Swap out tzatziki with basil pesto — it’s a deliciously unique spin that brings out the lush flavors of summer.
-
Hummus Base: Use hummus as a base instead of grains for a protein-packed, lower-carb option!
Chef’s Notes
Cooking is not just about following a recipe; it’s about the stories we build in the kitchen. If you saw my kitchen right now, you’d laugh! Tzatziki in the hair, chicken drippings on the floor, and a profusion of chopped veggies scattered around. But you know what? Each bit adds to the fun of creating something delicious.
Over the years, I’ve adapted this recipe countless times! Sometimes I’ll toss in sautéed spinach or layer in roasted chickpeas for extra texture and flavor. Each adjustment has only enriched my love for cooking and reminded me to always bring my creativity into every dish.
FAQs and Troubleshooting
1. What if my chicken is dry?
- Dry chicken usually comes from overcooking. To prevent this, always use a meat thermometer, and let it rest after cooking! Trust me — this will save your meal!
2. Can I make this ahead of time?
- Absolutely! You can marinate the chicken up to a day in advance, and pre-cook rice/quinoa. Alternatively, prep all the veggie toppings and store in the fridge until you’re ready to assemble.
3. How do I make tzatziki from scratch?
- Mix 1 cup of Greek yogurt with half a grated cucumber (squeeze out excess moisture), 2 minced garlic cloves, a tablespoon of olive oil, 1 tablespoon of lemon juice, and season with salt and pepper. It’s easy and absolutely delicious!
4. What should I do with leftovers?
- Leftovers can be stored in an airtight container in the fridge for up to 3 days. Simply reheat the chicken and enjoy another lovely bowl!
Nutritional Info
(Approximate per serving)
- Calories: 450
- Protein: 36g
- Carbohydrates: 45g
- Fat: 18g
- Fiber: 5g
And there you have it! A delightful, tasty journey to the Mediterranean right in your own kitchen. I hope you’re excited to embark on this culinary adventure and create your own Greek Chicken Bowls brimming with flavor and love. Remember, cooking is all about making it your own, so feel free to experiment and share this journey with those you love. Until next time, happy cooking!
Print
Greek Chicken Bowls
- Total Time: 45 minutes
- Yield: 4 servings 1x
- Diet: Paleo
Description
A flavorful journey to the Mediterranean with succulent marinated chicken, crisp veggies, creamy tzatziki, and fluffy rice or quinoa.
Ingredients
- 1.5 lbs Chicken Thighs or Breasts
- 1/4 cup Olive Oil
- 4 cloves Garlic, minced
- 1/4 cup Lemon Juice
- 2 tablespoons Dried Oregano
- Salt and Pepper, to taste
- 2 cups Cooked Rice or Quinoa
- 1 cup Chopped Cherry Tomatoes
- 1/2 Red Onion, thinly sliced
- 1/2 cup Feta Cheese, crumbled
- 1 cup Tzatziki Sauce
- Plain Greek Yogurt, for topping (optional)
Instructions
- Combine the Marinade: In a bowl, whisk together olive oil, minced garlic, lemon juice, dried oregano, salt, and pepper.
- Add Chicken: Place the chicken in a resealable bag or a shallow dish. Pour the marinade over and ensure they are well coated.
- Heat the Grill or Skillet: Preheat your grill or skillet over medium-high heat.
- Cook the Chicken: Once hot, place the marinated chicken on the grill or in the skillet. Sear for 5-7 minutes on each side until fully cooked (internal temperature of 165°F).
- Rest the Chicken: Once cooked, take the chicken off the heat and let it rest on a cutting board for about 10 minutes.
- Cook the Rice or Quinoa: While the chicken is resting, follow the package instructions to cook rice or quinoa.
- Prep the Veggies: Meanwhile, chop your cherry tomatoes and slice the red onion.
- Slice the Chicken: After resting, slice the chicken into strips.
- Build Your Bowls: Start with a base of rice or quinoa, then layer with sliced chicken, tomatoes, onions, and sprinkle with crumbled feta. Drizzle tzatziki over top!
Notes
Feel free to layer the ingredients according to your preference. Explore variations with different grains or toppings.
- Prep Time: 15 minutes
- Cook Time: 30 minutes
- Category: Main Course
- Method: Grilling
- Cuisine: Mediterranean
Nutrition
- Serving Size: 1 serving
- Calories: 450
- Sugar: 4g
- Sodium: 500mg
- Fat: 18g
- Saturated Fat: 4g
- Unsaturated Fat: 12g
- Trans Fat: 0g
- Carbohydrates: 45g
- Fiber: 5g
- Protein: 36g
- Cholesterol: 75mg
Keywords: Greek Chicken, Mediterranean Bowl, Healthy Recipe, Chicken Bowl, Meal Prep
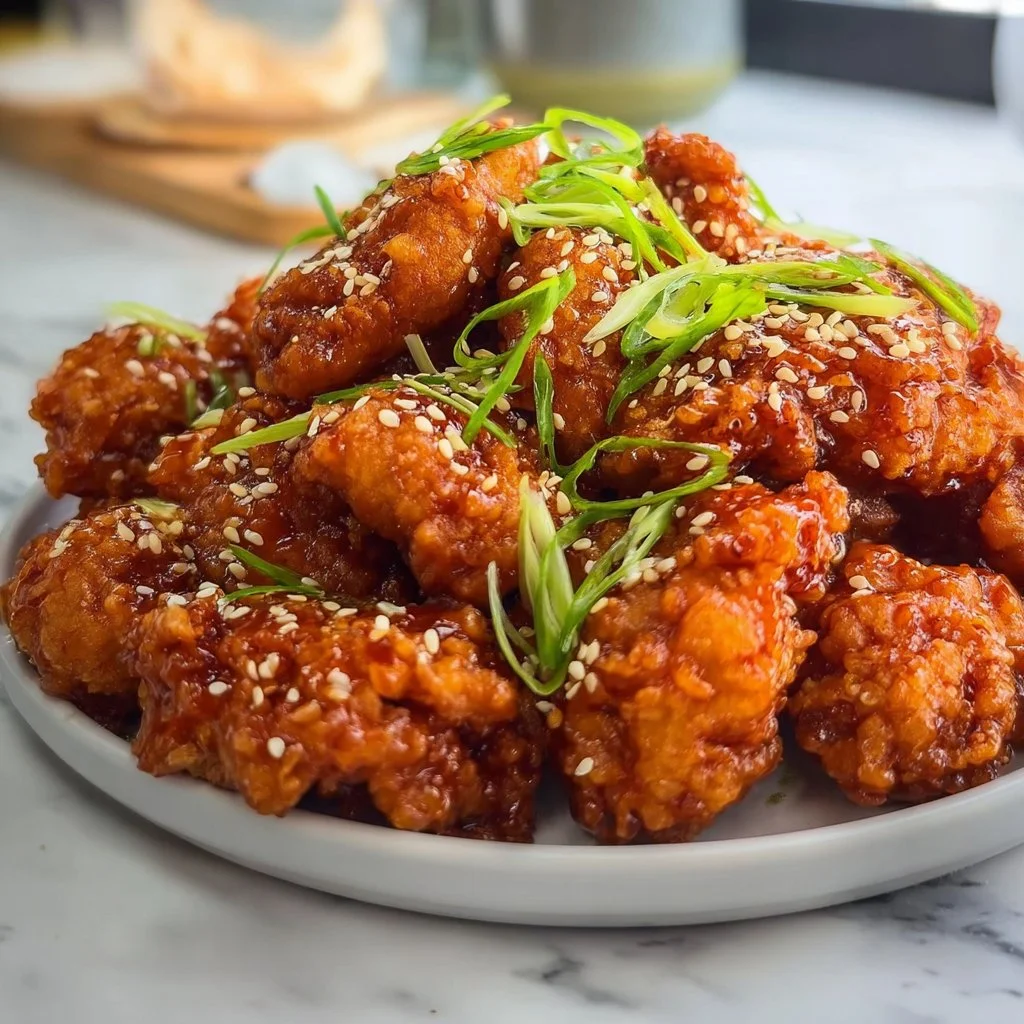
Healthy Korean Fried Chicken
A Crispy, Healthy Twist on Korean Fried Chicken
Welcome back to my cozy kitchen, dear foodies! Today, we’re diving into one of my all-time favorite dishes that brings a zing of flavor and a delightful crunch to the table: Healthy Korean Fried Chicken. Now, before you start imagining heavy batter and deep frying, let me reassure you — this isn’t your typical oil-soaked feast! We’re giving this classic dish a vibrant, health-conscious makeover while keeping that unmistakable umami flavor intact.
Korean Fried Chicken (or KFC for short, but we’ll stick to Korean Fried Chicken to avoid confusion with the other KFC) is beloved for its crispy exterior and juicy meat, often coated in a sticky, spicy sauce that dances on your taste buds. I remember the first time I tried it at a small food truck in the heart of Seoul. The sun was setting, the streets were bustling, and every bite felt like a warm hug on a chilly evening. The crunch was unlike anything I’d ever experienced! Since then, I’ve made it my mission to recreate that nostalgia right here at home, blending authentic traditions with healthier alternatives.
So, roll up those sleeves and let’s get cooking! Whether you’re whipping this up for a cozy night in or impressing guests at your next gathering, this dish is bound to be a showstopper. Get ready for tons of juicy flavor without the heavy guilt — your taste buds and your waistline will thank you!
Personal Story
One of my most cherished food memories is the time I traveled to Seoul with my best friend, Mia. We were on a culinary adventure, determined to taste every dish we could find. After a day of exploring ancient temples and vibrant markets, we stumbled upon a food stall selling Korean Fried Chicken. The aroma wafting through the air was simply irresistible. We ordered a couple of portions — one spicy and one sweet — and found a little corner to dig in.
The moment we took our first bites, it was like fireworks in our mouths! The crunch, the spice, the sweet glaze bursting with flavor—it was everything we had hoped for and more. We laughed, relished every morsel, and made a pact to recreate that magic at home. That journey sparked my love for Korean cuisine and solidified my belief that food isn’t just about nourishment; it’s about connection, memories, and joy.
Now, I’m excited to bring that vibrant experience to you all with a twist — making it healthier without sacrificing any of that finger-licking goodness!
Ingredients
Here’s what you’ll need to make this delectable Healthy Korean Fried Chicken:
For Chicken Marinade:
-
Chicken thighs (boneless, skinless): 1.5 lbs
- Chef’s Tip: Thighs are juicy and forgiving compared to chicken breasts. You can substitute with chicken breasts or wings if you prefer, but make sure to adjust your cooking time!
-
Soy sauce: ¼ cup
- Substitution: Use coconut aminos for a gluten-free or soy-free version.
-
Rice vinegar: 2 tablespoons
- Insight: Adds a subtle tanginess. If you don’t have it, apple cider vinegar works well too!
-
Garlic (minced): 3 cloves
- Quick Hack: Fresh garlic is best, but powdered garlic can be used in a pinch; just halve the amount.
-
Ginger (grated): 1 tablespoon
- Chef’s Insight: Fresh ginger adds warmth and spice, but ground ginger works in this marinade too!
For Breading:
-
Almond flour: 1 cup
- Substitution: For a nut-free option, use oat flour or breadcrumbs.
-
Cornstarch: ½ cup
- Chef’s Tip: This is key for achieving that ultra-crispy texture! You can use tapioca starch if you’re avoiding corn.
-
Egg (beaten): 1 large
- Insight: Acts as a binder for the breading. If egg-free, try a flaxseed egg (1 tbsp flaxseed meal + 2.5 tbsp water)!
For the Sauce:
-
Korean chili paste (Gochujang): 3 tablespoons
- Substitution: If you find it too spicy, use sriracha or reduce the amount.
-
Honey: 2 tablespoons
- Tip: Swap with maple syrup for a vegan option.
-
Sesame oil: 1 tablespoon
- Insight: Provides a nutty flavor. You can replace it with olive oil in moderation.
-
Sesame seeds: For garnish
- Quick Tip: Use toasted sesame seeds to enhance the flavor!
Step-by-Step Instructions
Now that we have our ingredients prepped, let’s dive into the step-by-step journey of making this delightful dish!
Step 1: Marinate the Chicken
- In a large bowl, combine the soy sauce, rice vinegar, minced garlic, and grated ginger. Add in the chicken thighs, ensuring each piece is well-coated. Cover with plastic wrap or put it in a resealable bag and let it marinate in the fridge for at least 30 minutes. The longer, the better; I usually aim for a couple of hours if time allows! This really lets those flavors soak in.
Step 2: Prepare the Breading Station
- In one shallow dish, prepare the almond flour and cornstarch in equal parts. In another dish, beat the egg. This is where the fun begins! Make sure to set up a little assembly line—marinated chicken first, egg wash second, and then into the flour mixture. Pro tip: Keep one hand for wet (egg) and one for dry (flour) to avoid a gooey mess!
Step 3: Coat the Chicken
- Take each piece of marinated chicken, dip it into the beaten egg, letting the excess drip off, and then dredge it into the almond flour mixture, pressing gently to ensure a good coating. Place the coated chicken on a wire rack to let it rest as you preheat your oven!
Step 4: Bake the Chicken
- Preheat your oven to 425°F (220°C). Line a baking sheet with parchment paper and lightly spray it with cooking oil. This helps in achieving that perfect crisp! Arrange the coated chicken in a single layer, making sure they’re not overcrowded (give them room to breathe and crisp up!). Bake for about 25-30 minutes until the internal temperature reaches 165°F and the chicken is golden brown. Halfway through, flip them for an even bake.
Step 5: Make the Sauce
- While the chicken is baking, let’s whip up the sauce! In a small saucepan, combine the Gochujang, honey, and sesame oil over low heat. Stir gently until everything is well mixed and heated through. You can adjust the sweetness or heat by adding more honey or Gochujang based on your preference.
Step 6: Toss and Serve!
- Once your chicken is out of the oven, place it in a large mixing bowl. Pour the sauce over the hot chicken and toss it gently until every piece is beautifully coated. Get excited; you’re almost there!
Serving Suggestions
For a beautiful presentation, serve the Healthy Korean Fried Chicken on a large platter, garnishing with a sprinkle of sesame seeds and some sliced green onions for a pop of color. Pair it with a side of cucumber salad or steamed broccoli for a fresh crunch. It’s perfect for sharing, but trust me, you’ll want to keep it all to yourself!
Recipe Variations
Get creative with your Healthy Korean Fried Chicken! Here are a few fun variations to consider:
- Spicy Garlic Version: Add minced garlic to the sauce for an extra punch; perfect for garlic lovers!
- Sweet and Sour Twist: Mix in a little pineapple juice with the sauce for a sweet, tangy kick.
- Vegetarian Option: Use cauliflower or tofu as a substitute for chicken, following the same marinade and breading methods for a delightful veggie dish.
- Make It a Bowl: Serve the chicken over cooked rice or quinoa, topped with pickled veggies for a complete meal.
Chef’s Notes
As with any recipe, this Healthy Korean Fried Chicken has evolved over time in my kitchen. The first attempt turned out a bit too soggy, but with practice, I learned the importance of letting the chicken rest after breading and ensuring it’s fully dry before baking. I also experimented with different flours and spices until I landed on this winning combination. Honestly, I can’t remember how many batches I made, but every “failed” attempt was a delicious lesson! Cooking should be playful and experimenting is half the fun.
FAQs and Troubleshooting
Q1: Why is my chicken not crispy?
A: Ensure you’ve set your oven to the right temperature and gave the breadcrumbs a chance to stick by not overcrowding the pan. If they seem soggy, try baking for a little longer!
Q2: Can I make this ahead of time?
A: Absolutely! You can marinate the chicken the night before or make the sauce ahead of time. Just reheat the sauce before adding it to your chicken!
Q3: What if I don’t have Gochujang?
A: No worries! You can use sriracha or even a mix of chili powder and a little sugar as an alternative.
Q4: How can I store leftovers?
A: Store any leftover chicken in an airtight container in the fridge for up to three days. Reheat in the oven to maintain that crispy texture!
Nutritional Info (Optional)
Though the precise nutritional breakdown can depend on specific ingredients used, one serving of this Healthy Korean Fried Chicken may include:
- Calories: ~250
- Protein: ~25g
- Carbohydrates: ~15g
- Fat: ~10g
- Fiber: ~3g
So there you have it—a heartwarming adventure into the world of Healthy Korean Fried Chicken that’s just waiting for you to recreate in your kitchen. I can’t wait to hear your stories, so let me know how yours turns out! Happy cooking, friends!
Print
Healthy Korean Fried Chicken
- Total Time: 1 hour
- Yield: 4 servings 1x
- Diet: Gluten-Free, Dairy-Free
Description
A healthy twist on the classic Korean Fried Chicken, offering a crispy exterior and juicy meat without the guilt.
Ingredients
- 1.5 lbs boneless, skinless chicken thighs
- ¼ cup soy sauce
- 2 tablespoons rice vinegar
- 3 cloves garlic, minced
- 1 tablespoon ginger, grated
- 1 cup almond flour
- ½ cup cornstarch
- 1 large egg, beaten
- 3 tablespoons Korean chili paste (Gochujang)
- 2 tablespoons honey
- 1 tablespoon sesame oil
- Sesame seeds for garnish
Instructions
- Marinate the chicken: In a large bowl, combine the soy sauce, rice vinegar, minced garlic, and grated ginger. Add the chicken thighs, ensuring each piece is coated. Cover and let marinate for at least 30 minutes.
- Prepare the breading station: In one dish, mix almond flour and cornstarch. In another, beat the egg. Set up an assembly line.
- Coat the chicken: Dip each piece into the beaten egg, letting excess drip off, then dredge in the almond flour mixture. Place on a wire rack.
- Bake the chicken: Preheat oven to 425°F (220°C). Line a baking sheet with parchment and arrange the chicken in a single layer. Bake for 25-30 minutes until golden brown and cooked through.
- Make the sauce: In a small saucepan, combine Gochujang, honey, and sesame oil over low heat, stirring until mixed. Adjust sweetness or heat as needed.
- Toss and serve: Place the baked chicken in a bowl, pour the sauce over, and toss until coated. Garnish with sesame seeds and serve.
Notes
For added flavor, pair with a side of cucumber salad or steamed broccoli.
- Prep Time: 30 minutes
- Cook Time: 30 minutes
- Category: Main Course
- Method: Baking
- Cuisine: Korean
Nutrition
- Serving Size: 1 serving
- Calories: 250
- Sugar: 8g
- Sodium: 800mg
- Fat: 10g
- Saturated Fat: 1g
- Unsaturated Fat: 4g
- Trans Fat: 0g
- Carbohydrates: 15g
- Fiber: 3g
- Protein: 25g
- Cholesterol: 70mg
Keywords: Korean Fried Chicken, Healthy Recipe, Comfort Food, Chicken Dish, Gluten-Free
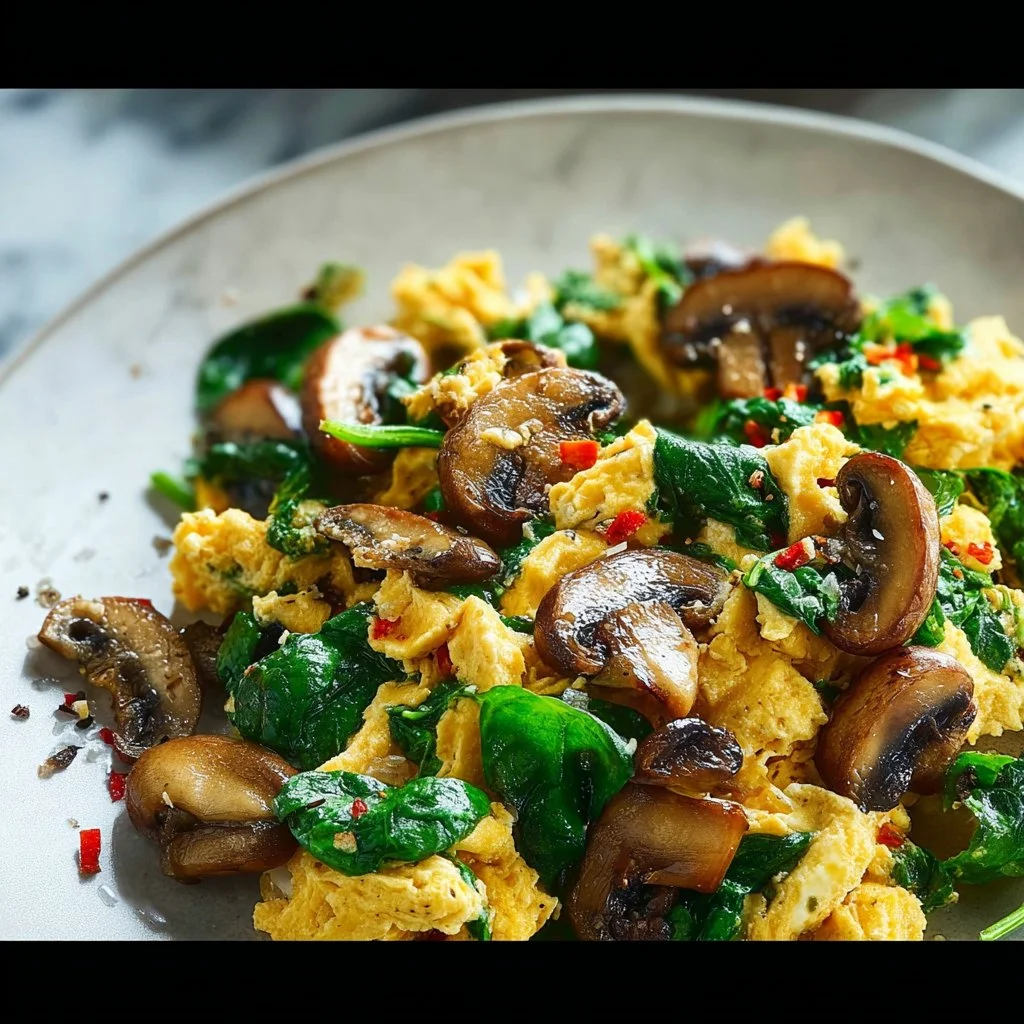
Mushroom Spinach Scrambled Eggs
Deliciously Cozy Mushroom Spinach Scrambled Eggs: A Weekend Breakfast Favorite
Hey there, fellow food enthusiasts! Welcome back to my cozy little corner of the internet where I get to share the heartwarming dishes that I whip up in my kitchen. Today, we’re diving into a breakfast classic — Mushroom Spinach Scrambled Eggs. If you’re anything like me, mornings can often feel rushed, but nothing beats the comfort of a delicious, homemade breakfast that fuels you for the day ahead!
Imagine waking up to the smell of earthy mushrooms sautéing in butter, mixed with vibrant green spinach and fluffy, golden scrambled eggs. Sounds dreamy, right? That’s exactly what I’m talking about! This dish brings together some of the most comforting ingredients, and the best part? It comes together in a matter of minutes, allowing you to savor every last bite and maybe even linger over that cup of coffee a little longer.
What I adore about this recipe is its versatility. Whether you’re cooking for one, throwing together a fancy brunch for friends, or just trying to sneak in some greens, these scrambled eggs have your back! So, let’s not waste any more time — grab your apron, and let’s sprinkle some love and flavor into our morning meal!
Personal Story
Every time I make Mushroom Spinach Scrambled Eggs, I’m transported back to lazy Sunday mornings at my grandmother’s house. The sun would peek through the kitchen window as the aroma of sautéed mushrooms filled the air. Grandma was a culinary wizard, and her love for cooking was infectious. I still remember standing on a little stool, peering over the counter as she expertly cracked eggs into a bowl, whisking them to perfection with a sprinkle of salt and pepper.
Her secret? Always, and I mean always, using fresh ingredients. That meant visiting the local farmer’s market early in the morning to pick up mushrooms so fresh you could still taste the earth in them and vibrant spinach that was practically bursting with nutrients. As she cooked, she’d share little tales from her youth, and those stories mingled with the sizzling sounds in the pan, creating an aromatic symphony.
Now, I carry on that tradition in my kitchen. Whenever I make these scrambled eggs, I’m not just feeding my family; I’m passing on a legacy of love and memories, one delicious bite at a time.
Ingredients
Here’s what you’ll need to whip up these delightful Mushroom Spinach Scrambled Eggs:
-
Fresh Eggs: The star of the show! Opt for high-quality eggs for richer flavor. If you’re looking for a lighter option, feel free to substitute with egg whites or a plant-based egg alternative.
-
Mushrooms: Cremini, button, or shiitake work beautifully. They add a lovely umami depth to the dish. If you find yourself without mushrooms, you could use diced bell peppers or zucchini as a tasty substitute.
-
Fresh Spinach: This leafy green adds color, nutrients, and a hint of earthy flavor. If spinach isn’t your thing, kale or Swiss chard are excellent stand-ins.
-
Butter: For that rich, velvety finish. You can replace it with olive oil or coconut oil if you’re looking for a dairy-free option.
-
Salt and Pepper: Essential for enhancing flavors. Feel free to experiment with other spices like garlic powder or a pinch of chili flakes for some heat.
-
Optional Add-ins: A splash of milk or cream for creamier eggs, grated cheese for an indulgent touch, or herbs like chives or parsley for a fresh finish.
Who knew something so simple could bring so much flavor? The key is using fresh, high-quality ingredients that speak for themselves!
Step-by-Step Instructions
Let’s get started! Here’s how to create the most delicious Mushroom Spinach Scrambled Eggs:
-
Prep Your Ingredients: Start by cleaning your mushrooms and trimming off the stems. Slice them thinly for even cooking. Rinse your spinach under cold water and pat it dry — this will get rid of any grit. Crack 4-6 eggs into a bowl, adding a pinch of salt and pepper, and whisk until the yolks are well combined with the whites.
Chef Tip: If you want the eggs to be super fluffy, add a splash of milk or cream to your whisked eggs — trust me, it makes a difference!
-
Sauté the Mushrooms: In a non-stick skillet, melt 1-2 tablespoons of butter over medium heat. Add the sliced mushrooms and a pinch of salt. Sauté until the mushrooms are golden brown and tender, about 5-7 minutes. This is where the flavor really starts to develop!
Chef Hack: Make sure not to overcrowd the pan with mushrooms; otherwise, they’ll steam instead of sauté. If you have a lot, it’s better to do this in batches.
-
Add Spinach: Toss in your fresh spinach and stir it around until wilted, which should take about 1-2 minutes. The vibrant greens add a fantastic pop of color!
-
Incorporate the Eggs: Pour the whisked eggs directly over the sautéed mushrooms and spinach. Allow them to sit for a few seconds, then gently stir with a wooden spoon or spatula. Keep the motion gentle and slow.
Chef Insight: Cook the eggs over low to medium heat; high temperatures can make them rubbery. Patience is key here for smooth, creamy eggs!
-
Finish Cooking: Continue to stir until the eggs reach your desired doneness. I like mine soft and slightly runny, but feel free to scramble them longer for firmer textures.
-
Add Final Touches: Once done, remove the pan from heat and toss in additional salt and pepper to taste. If you’re using cheese, sprinkle it on while the eggs are still warm so it melts beautifully.
-
Plate and Serve: Transfer the scrambled eggs to plates and garnish with fresh herbs if you like.
And there you have it! A beautiful, hearty breakfast that’s ready to be devoured.
Serving Suggestions
These Mushroom Spinach Scrambled Eggs are delicious on their own but can be elevated in so many ways! Serve them on a slice of crusty, toasted bread or atop a warm, fluffy English muffin for a gourmet feel. Drizzle with a little hot sauce or serve alongside crispy bacon for a hearty breakfast spread. If you want to impress your brunch guests, plate them with sliced avocado and fresh tomato on the side — a feast for the eyes and stomach!
Recipe Variations
-
Cheesy Delight: Stir in some crumbled feta or shredded cheddar for a seriously gooey, indulgent dish.
-
Spicy Twist: Add diced jalapeños or a pinch of cayenne pepper for those of you who like a little heat in the morning!
-
Herb Infusion: Mix in fresh dill, basil, or chives for herbaceous freshness.
-
Meaty Marvel: Brown some crumbled sausage or diced ham before adding the mushrooms for a protein-packed breakfast.
-
Vegan Version: Use plant-based eggs, and sauté with olive oil instead of butter, along with sautéed cherry tomatoes for added flavor!
Chef’s Notes
Oh, the memories tied to breakfast! Over the years, my Mushroom Spinach Scrambled Eggs have evolved from my grandma’s classic recipe. I’ve added my own twist with creamy cheese here, a dash of hot sauce there, and I keep discovering new ingredients from my local farmer’s market that inspire me. I remember one Sunday, aiming for a healthy breakfast for friends, I really went crazy with the toppings — think avocado, feta, and a sprinkle of smoked paprika — we all laughed, but it turned out to be the best breakfast ever!
Cooking is all about experimentation and adapting to what you love. Get creative! You never know what lovely things might come from a little kitchen adventure.
FAQs and Troubleshooting
-
Why are my eggs rubbery?
- Cooking at too high a temperature is usually the culprit. Make sure to keep the heat low and stir gently for a creamy texture.
-
How do I store leftovers?
- If you have any leftover scrambled eggs (though they rarely last in my house!), store them in an airtight container in the fridge for up to 2 days. Reheat low and slow to avoid overcooking.
-
Can I make this dish in advance?
- While scrambled eggs are best fresh, you can prep your mushrooms and spinach in advance. Just store them in separate containers and combine them with the eggs the morning of.
-
What can I do if my spinach is wilted?
- You can still use it! Just give it a rinse and dry it thoroughly before cooking. If it’s too far gone, though, it’s best to toss it. Fresh ingredients make a world of difference!
Nutritional Info (Optional)
Each serving of these Mushroom Spinach Scrambled Eggs is packed with protein and nutrients. They cater to various dietary preferences while being gluten-free, and when made with eggs and spinach, they contain a good amount of vitamins A and D, iron, and essential amino acids. If you’re keeping an eye on calories, using fewer eggs or lightening up with just egg whites can also be a great option.
Thank you for joining me on this delightful journey of culinary comfort! I hope you feel inspired to whip up these Mushroom Spinach Scrambled Eggs and create your own breakfast memories. Happy cooking, friends! 🥚✨
Print
Mushroom Spinach Scrambled Eggs
- Total Time: 15 minutes
- Yield: 2 servings 1x
- Diet: Gluten-Free, Vegetarian
Description
A comforting and delicious breakfast featuring fluffy scrambled eggs with earthy mushrooms and vibrant spinach, perfect for any morning.
Ingredients
- 4–6 Fresh Eggs
- 1 cup Mushrooms, sliced (Cremini, button, or shiitake)
- 2 cups Fresh Spinach, rinsed
- 1–2 tablespoons Butter
- Salt, to taste
- Pepper, to taste
- Optional: Splash of milk or cream
- Optional: Grated cheese
- Optional: Fresh herbs (chives or parsley)
Instructions
- Prep Your Ingredients: Clean mushrooms, slice them, and rinse spinach. Crack eggs into a bowl, add salt and pepper, and whisk.
- Sauté the Mushrooms: Melt butter in a skillet, add sliced mushrooms and salt, and sauté until golden brown, about 5-7 minutes.
- Add Spinach: Toss in spinach and stir until wilted, about 1-2 minutes.
- Incorporate the Eggs: Pour whisked eggs over the mixture and let sit for a few seconds, then gently stir.
- Finish Cooking: Stir until eggs reach desired doneness, keeping the heat low.
- Add Final Touches: Remove from heat and season with additional salt and pepper; add cheese if desired.
- Plate and Serve: Serve eggs on plates and garnish with fresh herbs if desired.
Notes
Feel free to add in your favorite spices or herbs for extra flavor. This dish is versatile for various dietary preferences.
- Prep Time: 5 minutes
- Cook Time: 10 minutes
- Category: Breakfast
- Method: Sautéing
- Cuisine: American
Nutrition
- Serving Size: 1 serving
- Calories: 300
- Sugar: 2g
- Sodium: 400mg
- Fat: 20g
- Saturated Fat: 10g
- Unsaturated Fat: 8g
- Trans Fat: 0g
- Carbohydrates: 5g
- Fiber: 1g
- Protein: 20g
- Cholesterol: 300mg
Keywords: scrambled eggs, breakfast, mushroom, spinach, healthy breakfast, quick meal




