
Quick Dairy-Free Vegan Desserts for Busy Weeknights
Indulge Guilt-Free: The Ultimate Vegan Chocolate Avocado Mousse
Welcome to my kitchen! Today, I am thrilled to share a recipe that perfectly marries indulgence with health: Vegan Chocolate Avocado Mousse. If you’re anything like me, the mere thought of chocolate invokes a wave of happiness. But what if I told you that you could enjoy a rich, creamy dessert without any dairy or guilt? This mousse not only satisfies your chocolate cravings but also sneaks in some healthy fats and nutrients thanks to the superstar ingredient—avocado!
Imagine cozying up with a silky bowl of chocolate goodness after a long day, knowing it’s nourishing your body while delighting your taste buds. Sounds dreamy, right? This recipe combines simple ingredients to create a dessert that’s not just vegan and dairy-free but also an absolute crowd-pleaser. Whether it’s for a special occasion or a quiet night in, this mousse will have you basking in compliments and well-deserved "Wow!" moments from everyone at the table.
Perhaps you’re thinking, “Avocado in dessert? No way!” Trust me; I had my doubts too until I tried it for the first time at a friend’s dinner party. She served it in tiny elegant cups, and I was skeptical as I took my first bite. To my absolute delight, the rich texture and deep chocolate flavor blew my mind! I couldn’t believe I was indulging in something so decadent yet so nutritious. Ever since that delightful evening, I’ve been whipping up this vegan mousse whenever I want to impress friends or treat myself to something sweet, and now it’s time for you to experience this joy too!
So grab your mixing bowl and get ready to dive into a dessert that will redefine your expectations of healthy sweets. Let’s turn those ripe avocados into a luscious treat that you’ll want to make again and again!
A Taste of Nostalgia
My journey with cooking has always been tied to the warmth of family and friends, particularly the joy of dessert-making together. One memory that stands out was the summer my sister and I teamed up to create our own dessert recipes. We rummaged through our family cookbook, coming across a version of chocolate mousse that sparked our curiosity. However, we weren’t just satisfied with following a recipe. We looked to make an indulgent dessert that also catered to our evolving dietary choices in our teenage years.
That’s when we stumbled upon the idea of incorporating avocados into our chocolate creation. At first, my sister raised an eyebrow, but with a little coaxing and a dash of sibling curiosity, we set to work in the kitchen. The feel of the creamy avocado blending with the chocolate was pure magic, and the moment we dipped the spoon in for a taste, we couldn’t stop smiling. It was beyond what we had imagined. That day, we not only created a delicious dish but also built a cherished memory that I carry with me every time I whip up this fantastic mousse.
Now, I love sharing this recipe with my friends and family, hoping to inspire them to explore cooking with newfound ingredients. It’s amazing how a simple dish can evoke powerful emotions and create lasting bonds.
Ingredients
To create this decadent Vegan Chocolate Avocado Mousse, you will need the following ingredients:
-
Ripe Avocados
The base of our mousse! When choosing avocados, look for ones that are dark purple and have a slight give when squeezed gently. If they’re too firm, leave them at room temperature for a couple of days before using. If you don’t have avocados, you could substitute them with silken tofu for a similar creamy texture. -
Cocoa Powder
Unsweetened cocoa powder adds that rich chocolate flavor. Opt for a high-quality brand, as it makes a difference. If you’re looking for something sweeter, you can swap it with carob powder, but the flavor will shift to a more earthy profile. -
Maple Syrup
This natural sweetener balances the bitterness of the cocoa. Maple syrup has a unique flavor that pairs wonderfully with chocolate, but agave nectar or even honey can serve as alternatives (if not vegan). -
Vanilla Extract
A splash of vanilla enhances the overall flavor, bringing a warm richness to the mousse. If you’re out of vanilla extract, try using almond extract for a different but delicious twist. -
Almond Milk (or any plant-based milk)
This will help achieve the creamy consistency we want in our mousse. You can use soy milk, coconut milk, or even oat milk if you prefer! -
A Pinch of Salt
Trust me, a little salt elevates the sweetness and helps bring out the flavors. If you’re on a sodium-restricted diet, feel free to omit it!
Step-by-Step Instructions
Let’s get cooking! Follow these steps for a delicious Vegan Chocolate Avocado Mousse.
-
Prep Your Avocados
Cut open your ripe avocados and carefully remove the pit. Scoop the flesh into your mixing bowl. This is an excellent time to reflect on the delightful memories tied to cooking with friends and family as you feel the texture of the avocado! -
Blend the Ingredients
Add the cocoa powder, maple syrup, vanilla extract, almond milk, and a pinch of salt to the mixing bowl with the avocados. Use a hand mixer or a food processor for this step. A blender can work too, but be careful not to over-blend—taste as you go! You’ll want a smooth and creamy consistency. -
Taste and Adjust
After blending, taste your mousse. Does it need more sweetness? Add a bit more maple syrup! Too thick? Splash in a little more almond milk until you reach your desired consistency. Remember, this is your mousse, so tailor it to your taste! -
Chill It Out
Once you’re satisfied, transfer the mousse into serving bowls or cups. Cover them with plastic wrap and place them in the fridge for at least 30 minutes. Chilling allows the flavors to meld and gives it the perfect texture—like a chocolatey hug! -
Garnish and Serve
When you’re ready to serve, feel free to get creative with your presentation! Top with fresh berries, crushed nuts, or a dollop of coconut whipped cream for an extra touch of sweetness and elegance. And don’t forget a sprig of mint for that pop of color!
Serving Suggestions
When it comes to serving this Vegan Chocolate Avocado Mousse, think presentation! Layer the mousse into elegant glasses or mason jars for a charming touch. You could also serve it in a small bowl topped with your favorite crunch—like granola or cacao nibs—giving it a delightful bite and contrast in texture.
For an extra treat, consider offering a selection of toppings on the side, such as shredded coconut, mini dark chocolate chips, or fresh berries, allowing everyone to customize their dessert just the way they like it!
Recipe Variations
Want to mix things up? Here are a few creative twists you can try:
- Minty Fresh: Add a drop of peppermint extract to your mousse for a refreshing mint chocolate vibe.
- Spiced Mocha: Stir in a teaspoon of instant coffee granules or espresso powder for a fabulous mocha flavor.
- Nutty Delight: Blend in a tablespoon of almond or peanut butter to enhance the richness.
- Citrus Zing: A hint of orange or lemon zest can brighten the flavor profile beautifully.
- Avocado-Free Option: If you’re not keen on avocados, try this with silken tofu to maintain the creamy texture while adding protein!
Chef’s Notes
This recipe has been a staple in my kitchen for years, but it didn’t start with a perfect outcome! I remember the first time I made it, and the texture was a bit grainy because I didn’t blend it enough—welcome to the learning curve of culinary adventures! Now, I’ve mastered the art of achieving that luscious, silky texture, and this mousse always brings joy, laughter, and satisfaction—just like the many cherished memories of cooking with loved ones.
So don’t hesitate to make this your own! Share your kitchen adventures with me—I’d love to hear how your chocolate mousse journey goes!
FAQs and Troubleshooting
Here are a few common questions and issues you might run into while making this Vegan Chocolate Avocado Mousse:
-
My mousse turned out too thick. What can I do?
If your mousse is too thick, a splash of almond milk will help thin it out! Just blend it again until you reach the desired consistency. -
It tastes too avocado-y for my liking. What did I do wrong?
If you can taste the avocado too strongly, try adding more cocoa powder and sweetener to balance the flavor. Blending well helps achieve that creamy chocolate finish too! -
Can I use overripe avocados?
Sure! As long as they’re not brown inside and have no off-smells, overripe avocados can give you an even creamier mousse. -
How long can I store the mousse?
It will last in the fridge for about 2-3 days. Just make sure to cover it well to prevent it from oxidizing and turning brown.
Nutritional Info
Though I’d usually focus on the enjoyment of cooking, it’s good to know that each serving of this delightful Vegan Chocolate Avocado Mousse is packed with heart-healthy fats from avocados, while also remaining free of dairy and refined sugars. This delightful indulgence keeps everything balanced, providing good energy without the guilty aftermath—perfect for both your palate and your body!
Now, get cooking! I can’t wait for you to take a spoonful of this healthy, delightful, and utterly delicious Vegan Chocolate Avocado Mousse. Happy cooking!
Print
Vegan Chocolate Avocado Mousse
- Total Time: 40 minutes
- Yield: 4 servings 1x
- Diet: Vegan
Description
A rich and creamy dessert made from avocados and cocoa powder, perfect for satisfying chocolate cravings guilt-free.
Ingredients
- 2 ripe avocados
- 1/2 cup unsweetened cocoa powder
- 1/4 cup maple syrup (or agave nectar)
- 1 tsp vanilla extract
- 1/2 cup almond milk (or any plant-based milk)
- A pinch of salt
Instructions
- Prep your avocados by cutting them open and removing the pit. Scoop the flesh into a mixing bowl.
- Blend the cocoa powder, maple syrup, vanilla extract, almond milk, and a pinch of salt with the avocados until smooth.
- Taste the mousse and adjust sweetness or thickness as needed.
- Chill in the fridge for at least 30 minutes to allow flavors to meld.
- Garnish with fresh berries, crushed nuts, or coconut whipped cream before serving.
Notes
For an avocado-free option, substitute the avocados with silken tofu. This mousse can last in the fridge for 2-3 days when covered.
- Prep Time: 10 minutes
- Cook Time: 0 minutes
- Category: Dessert
- Method: No Cook
- Cuisine: Vegan
Nutrition
- Serving Size: 1 serving
- Calories: 250
- Sugar: 12g
- Sodium: 50mg
- Fat: 10g
- Saturated Fat: 1.5g
- Unsaturated Fat: 8g
- Trans Fat: 0g
- Carbohydrates: 34g
- Fiber: 6g
- Protein: 3g
- Cholesterol: 0mg
Keywords: vegan dessert, chocolate mousse, healthy chocolate, avocado mousse, guilt-free dessert
No-bake Vegan Coconut Cups
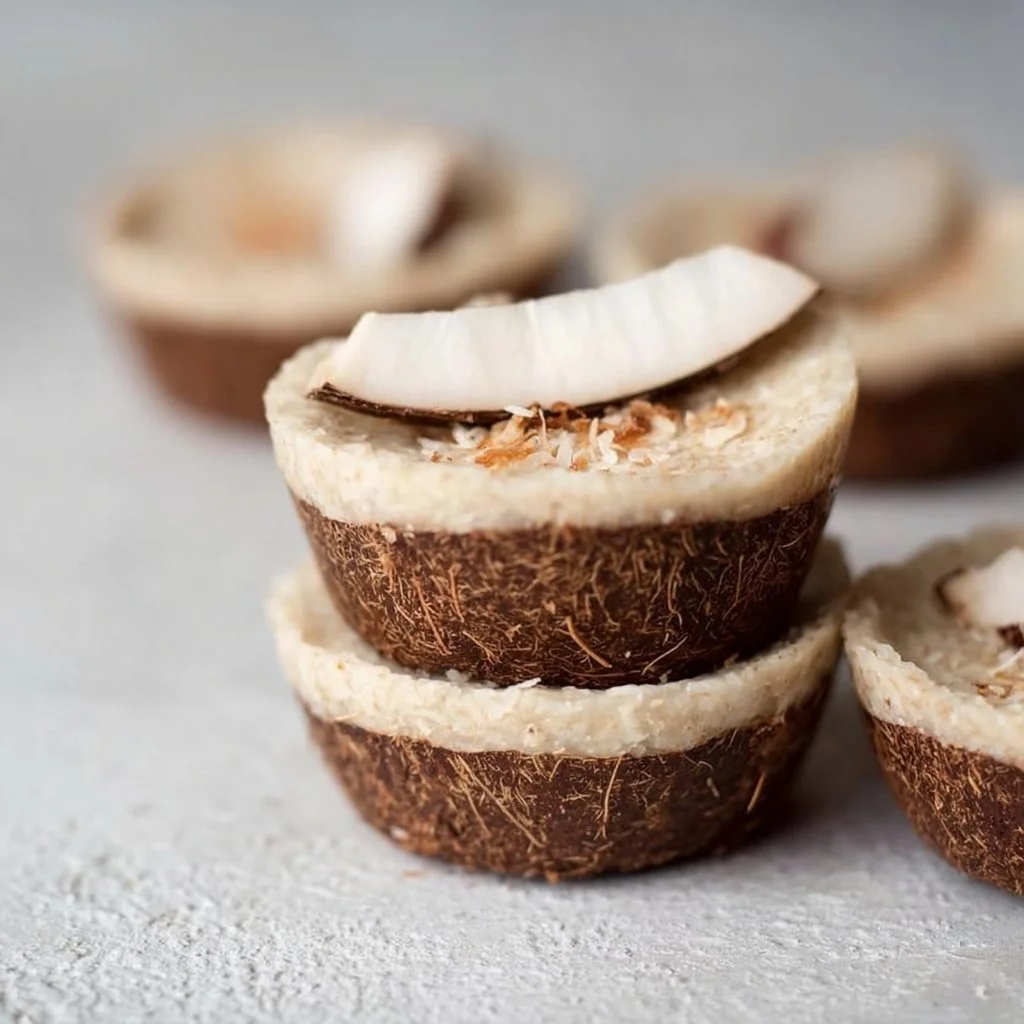
No-Bake Vegan Coconut Cups: A Sweet Escape to Paradise
Welcome back to my cozy corner of the internet, foodies! Today, we’re diving into a scrumptious treat that’s not only easy to whip up but also a delightful taste of tropical paradise: No-Bake Vegan Coconut Cups. I mean, who doesn’t love a dessert that makes you feel like you’re lounging on a sun-soaked beach? These little gems are the perfect blend of creamy coconut, sweet maple syrup, and luscious nuts, bringing together a medley of flavors that is sure to light up your taste buds.
Now, I know we’re all busy, juggling life, work, and everything in between. That’s why I adore no-bake recipes—they give you all the satisfaction of homemade goodness without tethering you to the oven for hours! Just a few simple steps, and you’ll have delightful coconut cups to share (or not, I won’t judge if you want to keep them all to yourself). What I love about these treats is their versatility. They’re fantastic for any occasion—whether it’s a potluck, a cozy night in, or a fun brunch with friends.
But wait, before we get our hands sticky, let’s talk about why these coconut cups are not just delicious but also a more health-conscious option. They’re vegan, naturally sweetened, and can easily be made gluten-free. Plus, coconut is packed with fiber and healthy fats that provide quick energy—perfect for an afternoon pick-me-up!
So grab your mixing bowls, and let’s get ready to create these delightful No-Bake Vegan Coconut Cups that are as fun to make as they are to eat!
Personal Story
As I sit here thinking about coconut, I can’t help but reminisce about my childhood summers spent at my grandma’s small beach house. The air was always rich with the smell of saltwater and sun-kissed coconut palms, and finding a mug of coconut cream pie or coconut cookies waiting for me was the highlight of my day. Grandma would whip up treats that reminded her of her childhood in the Caribbean, and I’d sit on the patio soaking in both the sun and the flavors.
Every bite took me back to those carefree summers, where the only worries were whether to build sandcastles or collect seashells. That nostalgia inspired these No-Bake Vegan Coconut Cups! They are a tribute not only to grandma’s love for coconut but also to those lazy beach days that seemed endless. Each cup is like a little bite of summer, and I hope making these brings you just as much joy as those sunny memories brought me.
Ingredients
Let’s gather all the goodness we need! Below is a list of ingredients you’ll need to create these delectable coconut cups, along with some handy notes and substitution tips.
-
Unsweetened Shredded Coconut (2 cups): The star of the show! This adds incredible flavor and texture. You can opt for sweetened shredded coconut, but keep in mind it will change the sweetness of your cups.
-
Coconut Cream (1 cup): For that luscious, decadent texture. If you can’t find coconut cream, a can of full-fat coconut milk works just fine—just scoop out the cream from the top after it’s been chilled overnight.
-
Maple Syrup (1/3 cup): This natural sweetener adds a warm, rich quality. You can replace it with agave syrup or date syrup for a different flavor profile.
-
Almond Flour (1/2 cup): It provides a nice nutty undertone. If you have nut allergies, feel free to substitute with oat flour or even all-purpose flour.
-
Vanilla Extract (1 teaspoon): This enhances all the flavors. Pure vanilla extract is best, but if you need to, you could use vanilla essence.
-
Pinch of Sea Salt: Don’t skip this! A little salt enhances sweetness and brings everything together.
-
Dark Chocolate (for drizzling, optional): This adds a rich finish. You can use vegan chocolate chips or even melted cacao for a healthier option.
With this lineup, we’re ready to create something that feels indulgent yet is genuinely wholesome.
Step-by-Step Instructions
Alright, it’s time to get our hands moving! Here’s how to make these delightful No-Bake Vegan Coconut Cups.
-
Prepare Your Muffin Tin: Line a standard 12-cup muffin tin with paper liners or lightly grease with coconut oil. This will ensure an easy release once your cups are set.
-
Mix the Coconut Base: In a large mixing bowl, combine shredded coconut, almond flour, and a small pinch of sea salt. Use a spatula or your hands (get ready for a bit of stickiness!) to mix until well combined. This will be the crusty base that holds all that coconut goodness together!
-
Add Creamy Ingredients: Next, pour in the coconut cream and maple syrup into the dry coconut mix. Stir until it becomes a thick, sticky mass. This is where the magic happens! Make sure everything is well coated—the consistency should be moldable, similar to cookie dough. Pro Tip: If you find it too sticky, add a little more almond flour to absorb some moisture.
-
Form Your Cups: Using a cookie scoop or a tablespoon, portion out the mixture into your muffin tin. Press it down firmly to create a well-formed cup shape; the denser, the better! Make sure it’s packed tightly so it doesn’t fall apart later.
-
Chill: Place your muffin tin in the refrigerator for about 30-60 minutes. This helps the cups firm up nicely, ensuring they’ll hold their shape when you take them out.
-
Optional Chocolate Drizzle: While they chill, melt your dark chocolate in a microwave-safe bowl, using 30-second intervals to avoid burning. Once your coconut cups have set, take them out and drizzle the melted chocolate over each one. This is the glamorous finishing touch that’s sure to impress!
-
Serve and Enjoy: Allow the chocolate to set for a few more minutes, then serve straight from the muffin tin or plate them up for your guests.
These no-bake delights will have you feeling like a kitchen guru in no time!
Serving Suggestions
When it comes to serving these coconut cups, the presentation is key! You can serve them straight from the muffin tin with a colorful napkin underneath for a casual vibe. For a more elegant touch, try placing them on a decorative serving platter with a sprinkle of extra shredded coconut or a few fresh mint leaves for a pop of color. They also pair wonderfully with a fresh fruit salad or a scoop of coconut sorbet on the side for a refreshing contrast.
Recipe Variations
The beauty of these No-Bake Vegan Coconut Cups lies in their versatility. Here are a few fun twists you can try:
-
Chocolate Coconut Cups: Incorporate cocoa powder into the coconut mixture for a chocolatey flair. Simply use 1/4 to 1/2 cup of cocoa powder in place of the almond flour.
-
Nutty Twist: Fold in some chopped nuts such as walnuts or pecans for a satisfying crunch.
-
Fruit Infusion: Add a tablespoon of your favorite jam inside the cups before refrigerating for a sweet surprise!
-
Citrus Zing: Grate some orange or lime zest into the coconut mixture to brighten the flavors.
-
Spiced Coconut Cups: Mix in a bit of cinnamon or nutmeg for a warm, cozy vibe, perfect for cooler months!
Chef’s Notes
You know what’s funny? I used to be a bit of a baking snob, thinking everything needed to be baked to be delicious. But the moment I embraced no-bake treats, my world expanded! These coconut cups have become a go-to for last-minute gatherings or when I want to whip up something sweet without the heat. They’re so easy to customize, and every variation seems like a new adventure.
Another funny kitchen story: the first time I made these, I got so excited about the chocolate drizzle that I may have overdone it. My kitchen looked like a chocolate bomb went off, but the results were totally worth it! Each cup was a little work of art, and seeing friends’ faces light up made it all worth the mess.
FAQs and Troubleshooting
1. Why are my coconut cups too crumbly?
If your cups are falling apart, it might be that they aren’t packed tightly enough or didn’t have enough coconut cream. Next time, make sure to really press them down when forming the cups, and add a splash more coconut cream if needed.
2. How long will these coconut cups last?
Stored in an airtight container in the refrigerator, they can last about a week. But trust me, they’ll be gone long before that!
3. Can I freeze them?
Absolutely! These coconut cups freeze beautifully. Just separate layers with parchment paper and store in a freezer-safe bag. When you’re ready to indulge, let them thaw in the fridge overnight.
4. Can I make these chocolate-covered?
Yes! Just dip each coconut cup into melted chocolate instead of drizzling. This gives them an indulgent chocolatey shell that complements the coconut perfectly.
Nutritional Info (Optional)
While the specific nutritional information can vary based on ingredient brands and quantities, here’s a rough idea of what you’re looking at per coconut cup:
- Calories: ~150
- Protein: 2g
- Fat: 10g
- Carbohydrates: 14g
- Fiber: 3g
- Sugar: 5g
These No-Bake Vegan Coconut Cups are not just a sweet treat; they’re a little reminder of the joys of cooking from the heart. So, roll up your sleeves, get creative, and most importantly, have fun! Here’s to many more kitchen adventures together—you’ve got this, and your taste buds will thank you! Happy cooking!
Print
No-Bake Vegan Coconut Cups
- Total Time: 60 minutes
- Yield: 12 servings 1x
- Diet: Vegan
Description
A delightful treat that combines creamy coconut, sweet maple syrup, and luscious nuts, perfect for any occasion.
Ingredients
- 2 cups Unsweetened Shredded Coconut
- 1 cup Coconut Cream
- 1/3 cup Maple Syrup
- 1/2 cup Almond Flour
- 1 teaspoon Vanilla Extract
- Pinch of Sea Salt
- Dark Chocolate (for drizzling, optional)
Instructions
- Prepare Your Muffin Tin: Line a standard 12-cup muffin tin with paper liners or lightly grease with coconut oil.
- Mix the Coconut Base: In a large mixing bowl, combine shredded coconut, almond flour, and salt; mix until well combined.
- Add Creamy Ingredients: Pour in coconut cream and maple syrup; stir until a thick, sticky mass forms.
- Form Your Cups: Portion out the mixture into muffin tin, pressing down firmly to create a cup shape.
- Chill: Place muffin tin in the refrigerator for 30-60 minutes to firm up the cups.
- Optional Chocolate Drizzle: Melt dark chocolate and drizzle over the set coconut cups.
- Serve and Enjoy: Serve straight from the muffin tin or plate them up for guests.
Notes
These coconut cups can be stored in an airtight container in the refrigerator for up to a week. They also freeze beautifully!
- Prep Time: 15 minutes
- Cook Time: 0 minutes
- Category: Dessert
- Method: No-Bake
- Cuisine: Vegan
Nutrition
- Serving Size: 1 cup
- Calories: 150
- Sugar: 5g
- Sodium: 10mg
- Fat: 10g
- Saturated Fat: 9g
- Unsaturated Fat: 1g
- Trans Fat: 0g
- Carbohydrates: 14g
- Fiber: 3g
- Protein: 2g
- Cholesterol: 0mg
Keywords: no-bake, vegan, coconut, dessert, healthy treat
Vegan Berry Crumble Bars
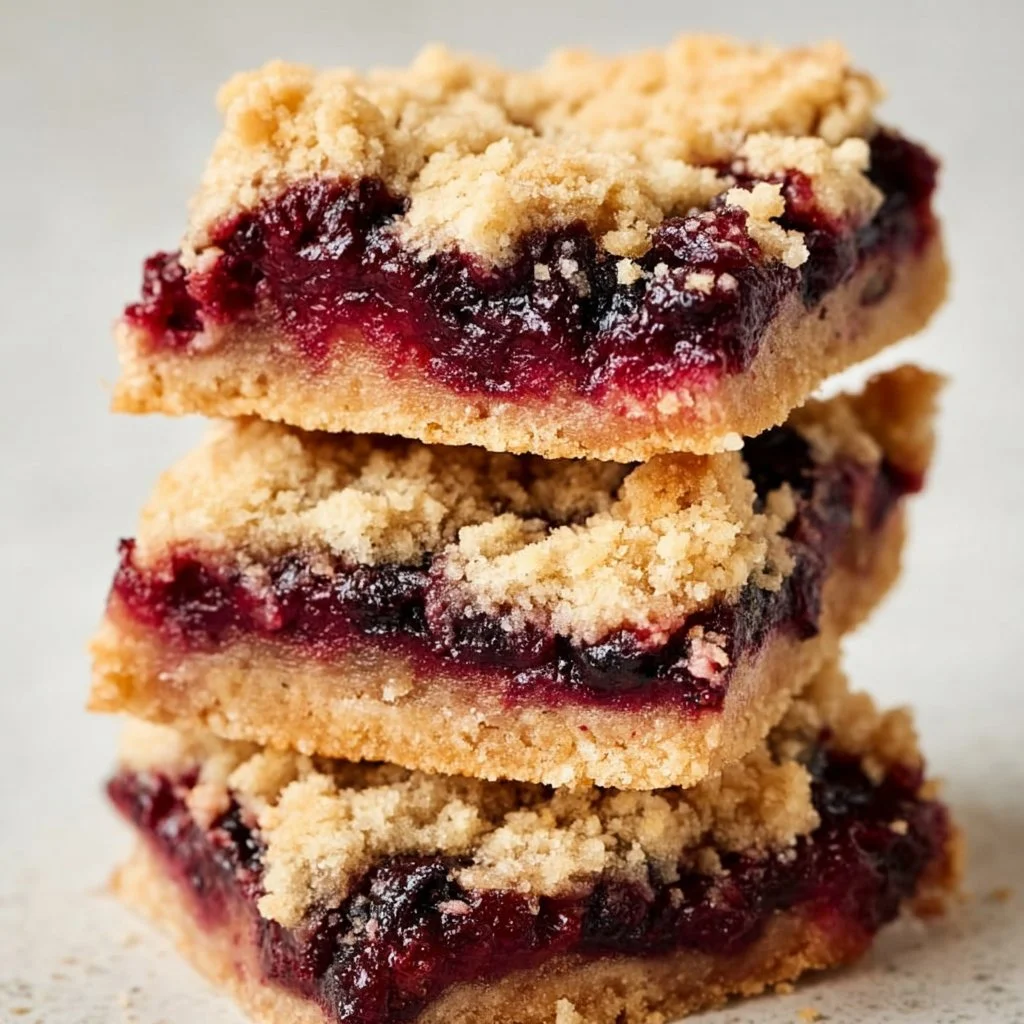
Vegan Berry Crumble Bars: A Sweet Slice of Nostalgia
Hello, fellow food lovers! 🌟 I’m so excited to welcome you back to my cozy kitchen, where the aromas of deliciousness dance through the air like a joyful, chubby little fairy. Today, I’m sharing one of my absolute favorite recipes, one that combines simplicity with a mountain of flavor — Vegan Berry Crumble Bars. These bars are whether you’re savoring a slice with your morning coffee or serving them at your next gathering, these delectable treats are bound to steal the show (and your heart!).
Now, I don’t know about you, but there’s something utterly magical about a dessert that has a crumbly topping. It reminds me of cozy afternoons spent in my grandmother’s kitchen, her laughter spilling out as generously as the flour from the bag that she always managed to spill. Maybe it’s the combination of tart berries and sweet oats, or perhaps it’s the way each bite is warm, inviting, and just a touch rustic. Either way, these Vegan Berry Crumble Bars represent everything I love about cooking: the ability to bring people together, create cherished memories, and delight our taste buds.
The best part? You don’t need to be a master chef to whip up these delightful bars. You can make them with ingredients you likely already have in your kitchen, and I’m here to guide you every step of the way. So, if you’re ready to turn your kitchen into a little bakery, grab your apron, and let’s dive into the joyful world of Vegan Berry Crumble Bars!
Personal Story
Let me take you back to a sun-drenched afternoon in my childhood home. I was no more than 10 years old, on summer break, and I had just gotten my hands on a large basket of fresh-picked berries from our family garden. They were plump, juicy, and bursting with color, and I could hardly wait to turn them into something unique.
My grandma, sensing my excitement, pulled out a well-worn recipe box from the shelf. That’s when I learned about the magic of combining fruit with a crunchy crumble topping. We spent the afternoon fumbling with ingredients, laughter bubbling over, flour dusting our noses, and our hands stained with berry juice. As we pulled the pan out of the oven, the kitchen was filled with a sweet aroma that made my heart smile.
To this day, those cream-colored bars with golden-brown tops evoke so many warm memories. The joy of sharing those bars with family around the table was priceless, and now, I get to recreate that nostalgia with a vegan twist! Each time I make these Vegan Berry Crumble Bars, I’m reminded of love, laughter, and the beauty of simple, delicious cooking.
Ingredients
Here’s what you’ll need to create your own batch of Vegan Berry Crumble Bars:
-
Rolled Oats (2 cups)
- Perfect for the crumbly topping and base, they provide fiber and substance. If you’re looking for a gluten-free option, simply swap them for gluten-free rolled oats!
-
Almond Flour (1 cup)
- Gives a lovely nutty flavor. You can use any nut flour you like or even whole wheat flour for a heartier option!
-
Maple Syrup (½ cup)
- This sweetener is a vegan favorite! It lends a delightful, rich sweetness to your crumble. If you’re out of maple syrup, agave nectar works as a delicious substitute.
-
Coconut Oil (⅓ cup, melted)
- Adds fat and moisture, helping bind the ingredients. You could easily replace this with vegan butter or unsweetened applesauce if you’re after a lower-fat option.
-
Fresh Berries (2 cups)
- Strawberries, blueberries, raspberries, or a berry mix are all fantastic. Feel free to swap in frozen berries if fresh ones aren’t available; just be sure to thaw and drain them first!
-
Cornstarch (2 tablespoons)
- This little power booster helps thicken the berry mixture and keeps it from becoming too runny. If you’re looking for a quick substitute, arrowroot flour can do the trick.
-
Cinnamon (1 teaspoon)
- For a hint of warmth and spice! Adjust the amount to suit your taste. If you’re feeling adventurous, nutmeg can add a lovely twist.
Step-by-Step Instructions
Ready to bring these delightful bars to life? Let’s get started!
-
Preheat Your Oven: Start by preheating your oven to 350°F (175°C). This is crucial, folks! You want your bars to come out warm but not too warm, just like a cozy hug.
-
Prepare Your Baking Dish: Grease a 9×9-inch square baking dish or line it with parchment paper for easy removal. A little oil or cooking spray makes for simple cleanup!
-
Mix the Base & Topping:
- In a large mixing bowl, combine the rolled oats, almond flour, cinnamon, and maple syrup. Drizzle in the melted coconut oil, and with your hands or a spatula, combine until it resembles a crumbly texture. Remember, it’s supposed to be messy—embrace it!
-
Reserve Some Crumbs: Take about 1 cup of this mixture and set it aside. This will be your crunchy topping that makes everyone go, "Yum!"
-
Prepare the Berry Filling:
- In another bowl, toss your fresh (or thawed) berries with cornstarch. This helps soak up any juices for the perfect texture in your bars. Gently mix and let it sit for a few minutes while the flavors meld.
-
Assemble: Spread the remaining oat mixture evenly into the bottom of your prepared dish. Press down firmly, creating a solid base for your berry filling. Pour the berry mixture over the base, spreading it out evenly. Finally, sprinkle the reserved crumb topping on top. Channel your inner artist with this layer!
-
Bake Time: Pop the dish in the preheated oven and let those flavors meld for about 30-35 minutes. Keep an eye out for a golden-brown topping that looks like a sweet masterpiece!
-
Cool It Down: Once out of the oven, allow them to cool in the pan for at least 15-20 minutes. Patience is key here; this step makes for easier slicing, and in the meantime, your kitchen will smell heavenly.
-
Slice and Serve: Once cooled, slice into squares (or rectangles, no judgment here!). Dust with powdered sugar if you’re feeling fancy. Serve these scrumptious bars warm or at room temperature, and watch them disappear!
Serving Suggestions
To elevate your serving game, consider presenting these Vegan Berry Crumble Bars on a rustic wooden board. Add a side of vegan vanilla ice cream or fresh whipped coconut cream for an indulgent touch! A sprinkle of fresh mint leaves can add a pop of color and a hint of freshness!
Recipe Variations
Want to shake things up a bit? Here are some creative variations:
- Cocoa Crumble: Add ¼ cup of cocoa powder to the oat mixture for a chocolatey twist.
- Mixed Fruit Medley: Substitute berries with diced peaches or cherries for a unique flavor.
- Nutty Crunch: Fold in some chopped walnuts or pecans into the crumb topping for extra crunch.
- Spiced Crumble: Experiment with different spices—cardamom or ginger could offer a lovely warm note.
- Oat-Free Option: For a nut-free version, replace oats with quinoa flakes as a base.
Chef’s Notes
This recipe has come a long way! Originally, it was just a simple berry crumble topped with a sugar-heavy crumble. I’ve transformed it into this plant-based delight over time, proving that you can indeed swap out ingredients for healthier ones without losing any flavor or comfort.
Oh, and a fun little kitchen story—one time, I got overly ambitious with my mixing and ended up with berry juice splattered all over the ceiling. Not a proud moment, but a hilarious one! Now I make sure to wear an apron that can handle the mess and slow down a bit when I’m mixing.
FAQs and Troubleshooting
-
Q: Why did my crumble bars turn out too soggy?
- A: Soggy bars often indicate that there were too many juicy berries or not enough cornstarch. Make sure to measure accurately, and remember, if using frozen berries, thaw and drain well!
-
Q: Can I substitute the maple syrup?
- A: Absolutely! You can swap maple syrup with agave nectar, brown sugar, or even a ripe banana for a natural sweetness, but be mindful of adjusting the moisture levels.
-
Q: How do I store my crumble bars?
- A: Once completely cooled, store them in an airtight container in the fridge for up to a week. These bars also freeze well, so feel free to stash away leftovers for a sweet treat later!
-
Q: Can I use different fruits?
- A: Yes, indeed! Apples, peaches, or even mangoes could work beautifully. Just be sure to adjust the cornstarch accordingly based on the moisture content of the fruits you choose.
Nutritional Info
Here’s a quick glance at the nutritional benefits of your Vegan Berry Crumble Bars (per serving, assuming 12 servings):
- Calories: ~150 calories
- Protein: 3g
- Fat: 7g
- Carbohydrates: 21g
- Fiber: 3g
- Sugar: 5g
There you have it, my friends! A delightful journey through the world of Vegan Berry Crumble Bars, filled with warmth, flavor, and lots of love. I hope you feel inspired to head into your kitchen and create your own memories with this recipe. Remember, it’s not just about the food; it’s about bringing people together and sharing joy. Happy cooking! 🍓❤️
Print
Vegan Berry Crumble Bars
- Total Time: 50 minutes
- Yield: 12 servings 1x
- Diet: Vegan
Description
Delight in these Vegan Berry Crumble Bars that combine tart berries with a crunchy crumble topping, creating a nostalgic, warm treat perfect for any occasion.
Ingredients
- 2 cups Rolled Oats
- 1 cup Almond Flour
- ½ cup Maple Syrup
- ⅓ cup Coconut Oil, melted
- 2 cups Fresh Berries (strawberries, blueberries, raspberries)
- 2 tablespoons Cornstarch
- 1 teaspoon Cinnamon
Instructions
- Preheat your oven to 350°F (175°C).
- Prepare a 9×9-inch square baking dish by greasing or lining it with parchment paper.
- Mix the rolled oats, almond flour, cinnamon, and maple syrup in a mixing bowl. Drizzle in the melted coconut oil and combine until crumbly.
- Reserve about 1 cup of the mixture for topping.
- Prepare the berry filling by tossing fresh or thawed berries with cornstarch.
- Assemble by spreading the remaining oat mixture in the baking dish, pressing down firmly. Pour the berry mixture on top and sprinkle reserved crumbs.
- Bake for 30-35 minutes until the topping is golden brown.
- Cool for 15-20 minutes before slicing into squares.
- Serve warm or at room temperature, optionally dusted with powdered sugar.
Notes
For varied flavors, try adding cocoa powder, different fruits, or nuts to the topping. Store in an airtight container for up to a week.
- Prep Time: 15 minutes
- Cook Time: 35 minutes
- Category: Dessert
- Method: Baking
- Cuisine: Vegan
Nutrition
- Serving Size: 1 serving
- Calories: 150
- Sugar: 5g
- Sodium: 12mg
- Fat: 7g
- Saturated Fat: 6g
- Unsaturated Fat: 1g
- Trans Fat: 0g
- Carbohydrates: 21g
- Fiber: 3g
- Protein: 3g
- Cholesterol: 0mg
Keywords: vegan dessert, berry bars, healthy snacks, crumble bars
Healthy Strawberry Peanut Butter Cups
Healthy Strawberry Peanut Butter Cups: A Delightfully Sweet Indulgence
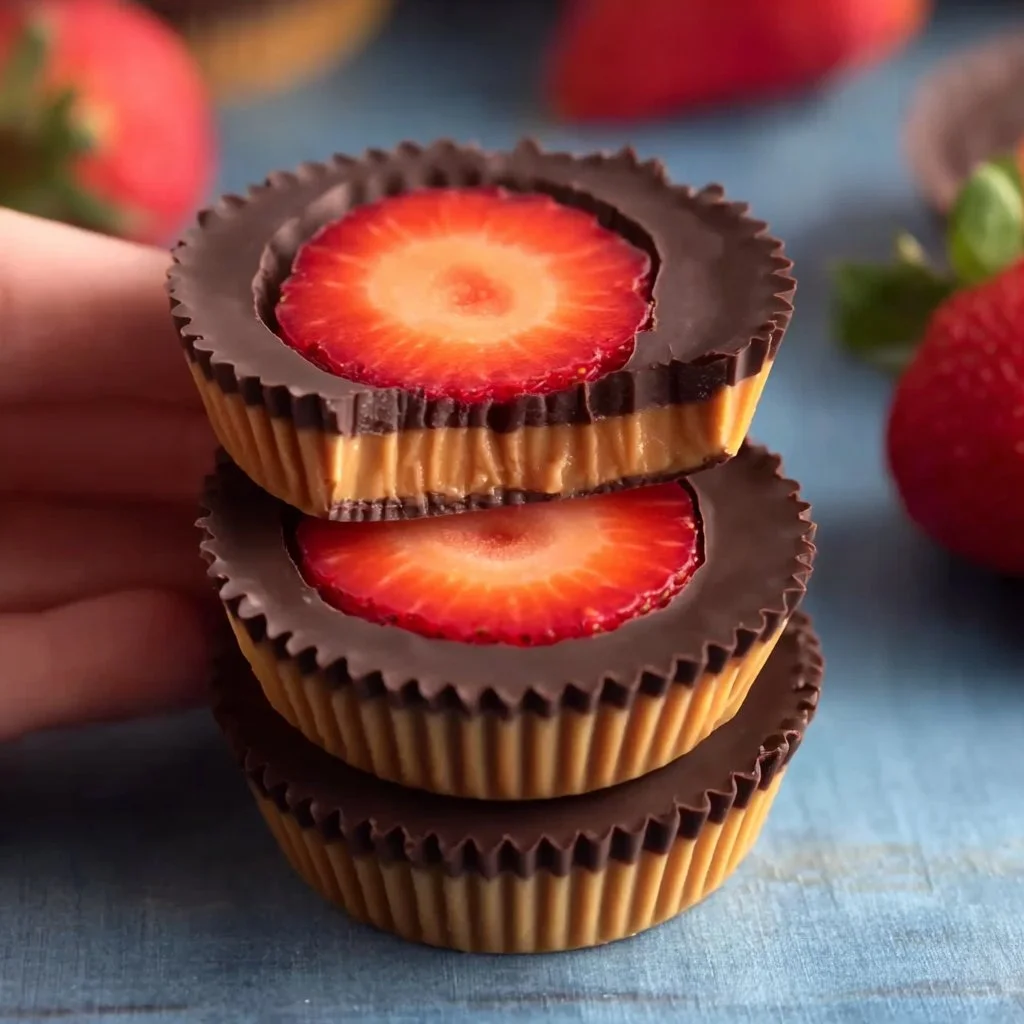
Welcome to my kitchen! This week, I’m thrilled to share a recipe that perfectly marries sweetness with wholesome ingredients: Healthy Strawberry Peanut Butter Cups. Picture this: luscious strawberries sandwiched between creamy peanut butter and a silky chocolate coat. Yes, please! These little gems are not just a treat for your taste buds but also a guilt-free indulgence you can feel great about. Grab your apron and let’s dive into the delicious world of strawberry peanut butter cups — it’s about to get cozy in here!
A Delightful Memory
Let me take you back to a sun-soaked summer afternoon at my grandmother’s house. I was about ten years old, and the kitchen was filled with the aroma of freshly picked strawberries simmering on the stove. My grandmother believed that every fruit deserved a little magic, and her specialty was combining sweet and savory flavors. That day, she decided to make peanut butter and strawberry sandwiches, but not in the traditional way — oh no! She transformed them into delightful little cups, using chocolate that melted my heart (and made my taste buds sing).
We spent the afternoon creating these delicious treats together, carefully layering peanut butter and strawberries in chocolate molds. It was messy, sticky, and absolutely perfect! As we licked our fingers clean, I realized the joyful beauty of cooking and the cherished moments we create in the kitchen. Those blissful peanut butter cups became an emblem of not just a recipe, but a deep, nostalgic love for cooking, family, and a sprinkle of magic in everyday moments.
Ingredients
Now that you’ve got a taste of the story behind this recipe, let’s gather our ingredients. Here’s what you’ll need to whip up your own batch of Healthy Strawberry Peanut Butter Cups:
-
Fresh Strawberries
Fresh strawberries are the star of the show here! Look for bright, red berries with no blemishes. If fresh strawberries aren’t in season, frozen ones can work too; just make sure to thaw them beforehand. -
Natural Peanut Butter
Choose a natural peanut butter without added sugar or oils. It adds rich flavor and creamy texture. If you’re allergic or prefer something different, sunflower seed butter makes an excellent substitute. -
Dark Chocolate Chips (or Cocoa Powder)
For the chocolate coating, go for high-quality dark chocolate chips (70% cocoa or higher). If you want to keep it dairy-free, dark dairy-free chocolate works wonders! Alternatively, you can use cocoa powder mixed with a little coconut oil for a lighter version. -
Honey or Maple Syrup (optional)
A drizzle of honey or maple syrup can add a touch of sweetness. If you’re vegan, maple syrup is the way to go. If you’re looking for a sugar-free option, consider using stevia or monk fruit sweetener. -
Sea Salt
Just a pinch! Sea salt balances the sweetness of the strawberries and chocolate beautifully, elevating the flavors.
Step-by-Step Instructions
Ready to make some magic happen? Here’s how to prepare these heavenly Healthy Strawberry Peanut Butter Cups:
Step 1: Prep Your Strawberries
First things first, wash your fresh strawberries under cool water and gently pat them dry with a clean kitchen towel. Hull the strawberries by removing the green tops and any white parts left behind. If you’re using larger strawberries, you might want to slice them in half for easy layering.
Step 2: Melt the Chocolate
In a microwave-safe bowl, add your dark chocolate chips. Microwave them in 30-second increments, stirring in between until they are fully melted and smooth. If you prefer, you can melt the chocolate using a double boiler — simply fill a pot with water, bring it to a simmer, and place a heatproof bowl on top. Once melted, stir in a sprinkle of sea salt for that chocolatey perfection.
Step 3: Assemble Your Cups
Grab a muffin tin or silicone mold for this part. Spoon a small amount of melted chocolate into each cup, just enough to cover the bottom (about 1 tablespoon). Use a pastry brush or the back of a spoon to spread the chocolate up the sides a bit, creating a little “cup.” Place the muffin tin in the freezer for about 10-15 minutes until the chocolate is set.
Step 4: Layer the Goodness
Once the chocolate has set, it’s time to add your peanut butter. Spoon a generous dollop of peanut butter into each chocolate cup. Add the strawberry slices on top, stacking them if you’d like. Feel free to sprinkle a pinch of salt on top of the strawberries for that sweet-savory balance.
Step 5: Final Chocolate Coating
Now comes the fun part! Pour more melted chocolate on top of the strawberries and peanut butter until they are covered completely. Tap the muffin tin gently on the counter to eliminate any air bubbles and allow the chocolate to settle.
Step 6: Chill and Serve
Pop your cups back into the freezer for another 30 minutes to set the chocolate completely. Once done, carefully peel the chocolate cups out of the muffin tin or mold. They might break apart a bit, but don’t worry — they’ll still be deliciously delightful!
Serving Suggestions
Serve these delectable strawberry peanut butter cups on a beautiful platter. They make a fabulous centerpiece for a brunch spread or a sweet treat at a picnic! Drizzle a bit of melted chocolate or a dusting of cocoa powder on top for a touch of elegance. If you love presentation, feel free to sprinkle some crushed nuts or coconut flakes for added flair!
Recipe Variations
Here are a few fun twists on the classic Healthy Strawberry Peanut Butter Cups:
-
Nuts About It
Mix in some chopped nuts or seeds (like almonds or chia seeds) into the peanut butter for added crunch. -
Extra Fruity
Use diced bananas or raspberries in addition to or instead of strawberries. The flavor combinations are endless! -
Nut-Free Version
Swap out peanut butter for almond butter or tahini for a nut-free alternative. Cream cheese can also be a delightful twist! -
Flavor Infusion
Add a splash of vanilla extract to the peanut butter for extra flavor, or a pinch of cinnamon for warmth. -
Vegan Delight
Make them completely dairy-free by using vegan chocolate and sweetening with maple syrup instead of honey.
Chef’s Notes
These Healthy Strawberry Peanut Butter Cups hold a special place in my heart. They’re not just a nostalgic treat from my childhood; they’ve evolved over time. Initially, I made them for my family, and now they’ve become a go-to recipe for celebrations and special gatherings. My friends often ask me to whip them up for parties, and I always happily oblige — who can resist a little homemade sweetness?
I’ve also found that they’re incredibly forgiving! Want a darker chocolate? No problem! Not a fan of strawberries? Use your favorite fruit instead. This flexibility allows everyone to put their own spin on them while keeping the heart of the recipe intact. Just remember, cooking is about creativity and joy, so feel free to experiment!
FAQs and Troubleshooting
1. What if my chocolate is too thick or chunky?
If your chocolate isn’t melting smoothly, try adding a tiny bit of coconut oil to help it emulsify. Just a teaspoon should do the trick!
2. My cups are breaking apart when I remove them from the molds. Help!
If the chocolate is too cold when you try to remove it, it can become brittle. Let them sit at room temperature for a few minutes for easier removal. Using silicone molds can also help with peeling them out.
3. Can I store these cups, and how long do they last?
Absolutely! Store them in an airtight container in the fridge for up to a week. You can also freeze them for up to three months. Just let them soften for a few minutes at room temperature before enjoying!
4. Can I use white chocolate instead?
You sure can, but keep in mind that white chocolate is sweeter and may alter the flavor balance. Consider adding a pinch of salt to counteract the sweetness!
Now you’re ready to create your own Healthy Strawberry Peanut Butter Cups! Remember, cooking is all about sharing love through food, and these little delights are perfect for sharing with friends, family, or simply indulging in yourself. Happy cooking, and I can’t wait to hear about your kitchen adventures!
Print
Healthy Strawberry Peanut Butter Cups
- Total Time: 30 minutes
- Yield: 12 servings 1x
- Diet: Vegetarian
Description
A delightful blend of strawberries, creamy peanut butter, and silky dark chocolate make these Healthy Strawberry Peanut Butter Cups a guilt-free indulgence.
Ingredients
- 1 cup Fresh Strawberries
- 1/2 cup Natural Peanut Butter
- 1 cup Dark Chocolate Chips (or Cocoa Powder)
- 2 tablespoons Honey or Maple Syrup (optional)
- 1/4 teaspoon Sea Salt
Instructions
- Prep your strawberries: wash and hull them, and slice larger ones in half.
- Melt the chocolate in a microwave-safe bowl in 30-second increments, stirring until smooth.
- Assemble your cups by spooning melted chocolate into muffin tins, and spreading it up the sides.
- Layer the peanut butter and strawberries in the chocolate cups.
- Cover the layers with more melted chocolate until fully sealed.
- Chill the cups in the freezer for 30 minutes to set before serving.
Notes
These cups are versatile and can be made with different fruits or nut butters. They can also be kept in the fridge for up to a week or frozen for three months.
- Prep Time: 15 minutes
- Cook Time: 15 minutes
- Category: Dessert
- Method: No-Cook
- Cuisine: American
Nutrition
- Serving Size: 1 cup
- Calories: 200
- Sugar: 10g
- Sodium: 150mg
- Fat: 12g
- Saturated Fat: 3g
- Unsaturated Fat: 9g
- Trans Fat: 0g
- Carbohydrates: 20g
- Fiber: 3g
- Protein: 4g
- Cholesterol: 0mg
Keywords: strawberry, peanut butter, chocolate, dessert, healthy


