
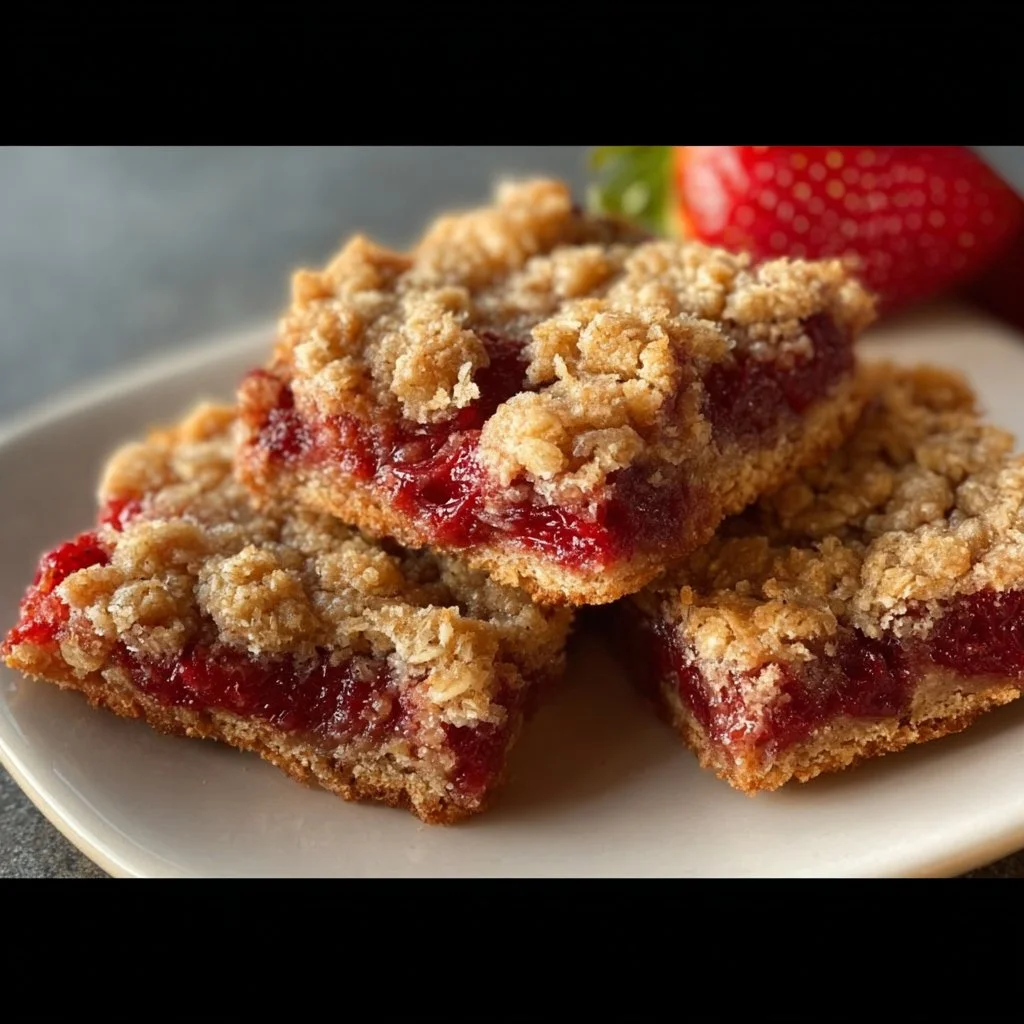
Strawberry Oatmeal Bars
Strawberry Oatmeal Bars: A Delicious Adventure in Your Kitchen
Welcome back to my cozy corner of culinary delights! Today, we’re going to dive into a recipe that is not just a treat for your taste buds, but also a joy to make. I’m talking about Strawberry Oatmeal Bars—the perfect blend of sweet, fruity goodness tucked between layers of oat perfection. These bars are like a hug in dessert form, combining the nostalgic flavors of childhood with a healthy twist. Trust me, once you take a bite, you’ll be transported to sunny picnics and warm family gatherings, all while feeling good about what you’re eating!
The beauty of these bars lies in their versatility. They’re great for breakfast on-the-go, a delightful snack, or even a sweet ending to your day. Packed with wholesome oats and fresh strawberries, they strike the perfect balance between nourishing and indulgent. Here’s the best part: you don’t need to be a master chef to whip these up! With just a few simple steps, you’ll create a dish that not only tastes amazing but also makes your kitchen smell like a bakery.
As we journey through this recipe together, I’ll share some of my favorite tips and personal stories to make your cooking experience as delightful as the bars themselves. So, grab your apron, and let’s create something beautiful to savor!
Personal Story
Ah, the memories of summer! One of my fondest recollections is from when I was a little girl, proudly watching my grandmother bake in her sun-filled kitchen. She had this magical ability to transform the most humble ingredients into something divine. One of her specialties was a similar version of today’s recipe—strawberry crumble bars. I remember sitting on the counter, legs swinging, as she handed me strawberries to wash, teaching me the importance of paying attention to detail.
She would tell me stories about her summers spent picking strawberries at the local farm, her eyes sparkling with joy. There was something so enchanting about sharing those moments—the sounds of our laughter and the delightful aroma of strawberries mingling with butter and oats. It was during those times that my love for cooking truly blossomed. In her kitchen, I not only learned about flavors but also about the warmth and love that food could bring to each gathering.
As we prepare these Strawberry Oatmeal Bars, I can’t help but think of those sunlit afternoons, the joy of creation, and the importance of sharing delicious food with the people we love.
Ingredients
Here’s what you’ll need to create these scrumptious Strawberry Oatmeal Bars:
-
Rolled oats (2 cups): These are the backbone of our bars, giving them that chewy texture we all adore! If you’re in a pinch, quick oats can work too but steer clear of instant oats as they might turn mushy.
-
All-purpose flour (1 cup): Helps bind the ingredients together. For a gluten-free option, you can substitute with almond flour or a gluten-free baking mix.
-
Brown sugar (1/2 cup): Adds a lovely depth of sweetness and a hint of caramel flavor. If you prefer a less sugary version, coconut sugar or a sugar substitute can work beautifully.
-
Baking powder (1 teaspoon): This will give your bars just the right lift. Don’t skip it—otherwise, they might end up a little dense!
-
Salt (1/2 teaspoon): A pinch of salt enhances all the flavors. Trust me, you can’t skip this!
-
Unsalted butter (1/2 cup, melted): Richness in a bar! If you need a dairy-free alternative, coconut oil would be a great substitute.
-
Honey or maple syrup (1/4 cup): We’ll use this to add liquid sweetness. Either works well, but don’t mix them—choose one for a consistent flavor profile.
-
Fresh strawberries (2 cups, hulled and sliced): The star ingredient! Feel free to substitute with other berries like blueberries or raspberries for a fun twist.
-
Lemon juice (1 tablespoon): Brightens the strawberry flavor. If you’re out of lemons, a splash of apple cider vinegar can also do the trick.
Step-by-Step Instructions
Now, let’s bring our ingredients together and create some magic! Here’s how to make these delightful Strawberry Oatmeal Bars:
-
Preheat your oven: Set it to 350°F (175°C). This step is crucial because starting with a hot oven will help your bars rise and get that delightful golden hue.
-
Prepare your baking pan: Grease a 9×9-inch square baking pan with butter or line it with parchment paper. Parchment paper makes it easy to lift out the bars later, so consider it a lifesaver!
-
Mix the dry ingredients: In a large bowl, combine the rolled oats, flour, brown sugar, baking powder, and salt. Stir well to ensure all the dry ingredients are evenly distributed.
-
Incorporate the wet ingredients: In another bowl, whisk together the melted butter, honey (or maple syrup), and lemon juice. Pour this mixture into your dry ingredients. Grab a spatula and gently fold them together until combined. You want a crumbly texture—sort of like damp sand—so avoid overmixing.
-
Set aside some mixture: Take about 1 cup of the crumbly dough mixture and place it in a small bowl. This will be our topping later! The rest will form the bottom layer.
-
Press the base into the pan: Pour the larger portion of the oat mixture into the prepared pan and press it down firmly to create an even layer. This will serve as the sturdy base for our strawberries.
-
Layer the strawberries: Spread the sliced strawberries evenly over the base. Be generous! If you love fruit, don’t hold back.
-
Top it off: Crumble the reserved oat mixture over the strawberries, ensuring an even coverage. This creates that wonderful crunchy topping we all love.
-
Bake: Place the pan in the preheated oven and bake for 25-30 minutes, or until the top is golden brown and the fruit is bubbly. The aroma? Oh, it will be divine!
-
Cool and slice: Once baked, remove from the oven and let it cool in the pan for about 10-15 minutes, then lift it out (if using parchment) and let it cool completely on a wire rack before slicing into squares. This patience will pay off with clean, beautiful edges!
Serving Suggestions
These Strawberry Oatmeal Bars are delicious on their own, but if you want to elevate the experience, consider serving them with a dollop of Greek yogurt or a scoop of vanilla ice cream. They’re also delightful with a sprinkle of powdered sugar on top or served alongside a warm cup of tea or coffee. Feel free to pack them up for a picnic or a lunchbox treat—we all know they’re the perfect companion for any outing!
Recipe Variations
-
Berry Medley: Mix in a variety of your favorite berries. A combination of blueberries, raspberries, and strawberries would take these bars to the next fruity level!
-
Nutty Crunch: Add in half a cup of chopped nuts like walnuts or almonds for a delightful crunch and added nutrition.
-
Spiced Up: Spice things up with a dash of cinnamon or nutmeg in the oat mixture for a warm flavor twist.
-
Coconut Delight: Incorporate shredded coconut for a tropical flair—it pairs beautifully with strawberries!
-
Reduce Sugar: For a healthier option, reduce the sugar and replace it with mashed ripe bananas for sweetness and moisture.
Chef’s Notes
These Strawberry Oatmeal Bars have been a family favorite for years, with countless variations tested and approved! I remember one time I decided to throw in some leftover dark chocolate chips for an indulgent treat. Let’s just say, those bars vanished in a matter of minutes at our family gathering!
Over time, I’ve also figured out that they make for an excellent breakfast option when you pair them with yogurt and fresh fruit. Soaking them overnight in a bit of almond milk makes them even more decadent.
Cooking should be fun, so don’t hesitate to experiment with textures and flavors. After all, every time you step into the kitchen is an opportunity for adventure!
FAQs and Troubleshooting
Q: My bars are too crumbly. What did I do wrong?
A: If your bars are too crumbly, it might be because the ratio of dry ingredients to wet ingredients is off—make sure to measure correctly. You can also press the mixture more firmly into the pan before baking to help it hold together.
Q: Can I use frozen strawberries instead?
A: Yes! Frozen strawberries can work, but be sure to thaw and drain them well to avoid excess moisture in your bars. This might slightly alter the texture but will still taste delicious.
Q: How do I store leftover bars?
A: Store your Strawberry Oatmeal Bars in an airtight container at room temperature for up to three days. For longer storage, keep them in the fridge for a week or freeze them for up to three months.
Q: Why did my bars not set properly?
A: If your bars didn’t set, they might not have baked long enough or the oven temperature could be off. Always trust your nose—if they smell good and look golden, they’re likely close to done.
Nutritional Info
While I usually focus on the joy of cooking and the wonderful flavors, here’s a quick look at the estimated nutritional breakdown for one bar (assuming you cut the recipe into 12 bars):
- Calories: 180
- Protein: 3g
- Carbohydrates: 28g
- Dietary Fiber: 3g
- Sugars: 6g
- Fats: 7g
Of course, these numbers can vary based on ingredient choices, but it gives you a great idea of how to balance this treat with your daily meals.
And there you have it! Your very own Strawberry Oatmeal Bars recipe—a journey through flavors and memories. I hope you enjoy making (and sharing) these bars as much as I do! Happy baking, and don’t forget to sprinkle a little love in every bite! 🍓
Print
Strawberry Oatmeal Bars
- Total Time: 45 minutes
- Yield: 12 servings
- Diet: Vegetarian
Description
Delicious strawberry oatmeal bars that blend sweet fruity goodness with wholesome oats.
Ingredients
- Rolled oats (2 cups)
- All-purpose flour (1 cup)
- Brown sugar (1/2 cup)
- Baking powder (1 teaspoon)
- Salt (1/2 teaspoon)
- Unsalted butter (1/2 cup, melted)
- Honey or maple syrup (1/4 cup)
- Fresh strawberries (2 cups, hulled and sliced)
- Lemon juice (1 tablespoon)
Instructions
- Preheat your oven to 350°F (175°C).
- Prepare a 9×9-inch square baking pan by greasing it with butter or lining it with parchment paper.
- Mix the dry ingredients in a bowl: rolled oats, flour, brown sugar, baking powder, and salt.
- Incorporate the wet ingredients in another bowl: whisk together melted butter, honey (or maple syrup), and lemon juice. Pour into the dry mix and fold gently.
- Set aside about 1 cup of the mixture for topping.
- Press the remaining mixture into the prepared pan to create an even layer.
- Layer the sliced strawberries evenly over the base.
- Top with the reserved mixture, crumbling evenly over the strawberries.
- Bake for 25-30 minutes until golden brown and bubbly.
- Cool in the pan for 10-15 minutes before moving to a wire rack to cool completely. Slice into squares.
Notes
Serve warm or at room temperature. These bars are excellent with Greek yogurt or vanilla ice cream.
- Prep Time: 15 minutes
- Cook Time: 30 minutes
- Category: Dessert
- Method: Baking
- Cuisine: American
Nutrition
- Serving Size: 1 bar
- Calories: 180
- Sugar: 6g
- Sodium: 150mg
- Fat: 7g
- Saturated Fat: 4g
- Unsaturated Fat: 2g
- Trans Fat: 0g
- Carbohydrates: 28g
- Fiber: 3g
- Protein: 3g
- Cholesterol: 15mg
Keywords: Strawberry, Oatmeal, Bars, Dessert, Healthy Snack
Healthy Strawberry Peanut Butter Cups
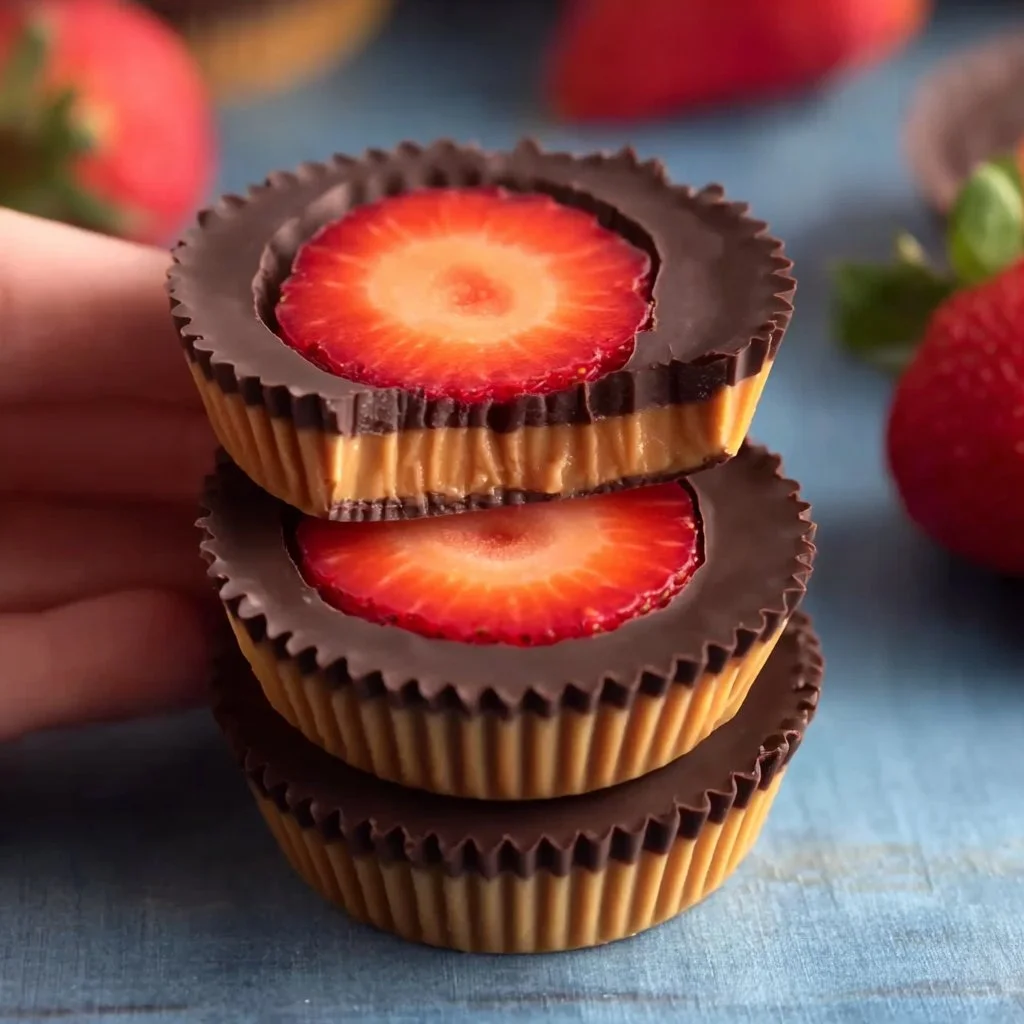
Healthy Strawberry Peanut Butter Cups: A Delightfully Sweet Indulgence
Welcome to my kitchen! This week, I’m thrilled to share a recipe that perfectly marries sweetness with wholesome ingredients: Healthy Strawberry Peanut Butter Cups. Picture this: luscious strawberries sandwiched between creamy peanut butter and a silky chocolate coat. Yes, please! These little gems are not just a treat for your taste buds but also a guilt-free indulgence you can feel great about. Grab your apron and let’s dive into the delicious world of strawberry peanut butter cups — it’s about to get cozy in here!
A Delightful Memory
Let me take you back to a sun-soaked summer afternoon at my grandmother’s house. I was about ten years old, and the kitchen was filled with the aroma of freshly picked strawberries simmering on the stove. My grandmother believed that every fruit deserved a little magic, and her specialty was combining sweet and savory flavors. That day, she decided to make peanut butter and strawberry sandwiches, but not in the traditional way — oh no! She transformed them into delightful little cups, using chocolate that melted my heart (and made my taste buds sing).
We spent the afternoon creating these delicious treats together, carefully layering peanut butter and strawberries in chocolate molds. It was messy, sticky, and absolutely perfect! As we licked our fingers clean, I realized the joyful beauty of cooking and the cherished moments we create in the kitchen. Those blissful peanut butter cups became an emblem of not just a recipe, but a deep, nostalgic love for cooking, family, and a sprinkle of magic in everyday moments.
Ingredients
Now that you’ve got a taste of the story behind this recipe, let’s gather our ingredients. Here’s what you’ll need to whip up your own batch of Healthy Strawberry Peanut Butter Cups:
-
Fresh Strawberries
Fresh strawberries are the star of the show here! Look for bright, red berries with no blemishes. If fresh strawberries aren’t in season, frozen ones can work too; just make sure to thaw them beforehand. -
Natural Peanut Butter
Choose a natural peanut butter without added sugar or oils. It adds rich flavor and creamy texture. If you’re allergic or prefer something different, sunflower seed butter makes an excellent substitute. -
Dark Chocolate Chips (or Cocoa Powder)
For the chocolate coating, go for high-quality dark chocolate chips (70% cocoa or higher). If you want to keep it dairy-free, dark dairy-free chocolate works wonders! Alternatively, you can use cocoa powder mixed with a little coconut oil for a lighter version. -
Honey or Maple Syrup (optional)
A drizzle of honey or maple syrup can add a touch of sweetness. If you’re vegan, maple syrup is the way to go. If you’re looking for a sugar-free option, consider using stevia or monk fruit sweetener. -
Sea Salt
Just a pinch! Sea salt balances the sweetness of the strawberries and chocolate beautifully, elevating the flavors.
Step-by-Step Instructions
Ready to make some magic happen? Here’s how to prepare these heavenly Healthy Strawberry Peanut Butter Cups:
Step 1: Prep Your Strawberries
First things first, wash your fresh strawberries under cool water and gently pat them dry with a clean kitchen towel. Hull the strawberries by removing the green tops and any white parts left behind. If you’re using larger strawberries, you might want to slice them in half for easy layering.
Step 2: Melt the Chocolate
In a microwave-safe bowl, add your dark chocolate chips. Microwave them in 30-second increments, stirring in between until they are fully melted and smooth. If you prefer, you can melt the chocolate using a double boiler — simply fill a pot with water, bring it to a simmer, and place a heatproof bowl on top. Once melted, stir in a sprinkle of sea salt for that chocolatey perfection.
Step 3: Assemble Your Cups
Grab a muffin tin or silicone mold for this part. Spoon a small amount of melted chocolate into each cup, just enough to cover the bottom (about 1 tablespoon). Use a pastry brush or the back of a spoon to spread the chocolate up the sides a bit, creating a little “cup.” Place the muffin tin in the freezer for about 10-15 minutes until the chocolate is set.
Step 4: Layer the Goodness
Once the chocolate has set, it’s time to add your peanut butter. Spoon a generous dollop of peanut butter into each chocolate cup. Add the strawberry slices on top, stacking them if you’d like. Feel free to sprinkle a pinch of salt on top of the strawberries for that sweet-savory balance.
Step 5: Final Chocolate Coating
Now comes the fun part! Pour more melted chocolate on top of the strawberries and peanut butter until they are covered completely. Tap the muffin tin gently on the counter to eliminate any air bubbles and allow the chocolate to settle.
Step 6: Chill and Serve
Pop your cups back into the freezer for another 30 minutes to set the chocolate completely. Once done, carefully peel the chocolate cups out of the muffin tin or mold. They might break apart a bit, but don’t worry — they’ll still be deliciously delightful!
Serving Suggestions
Serve these delectable strawberry peanut butter cups on a beautiful platter. They make a fabulous centerpiece for a brunch spread or a sweet treat at a picnic! Drizzle a bit of melted chocolate or a dusting of cocoa powder on top for a touch of elegance. If you love presentation, feel free to sprinkle some crushed nuts or coconut flakes for added flair!
Recipe Variations
Here are a few fun twists on the classic Healthy Strawberry Peanut Butter Cups:
-
Nuts About It
Mix in some chopped nuts or seeds (like almonds or chia seeds) into the peanut butter for added crunch. -
Extra Fruity
Use diced bananas or raspberries in addition to or instead of strawberries. The flavor combinations are endless! -
Nut-Free Version
Swap out peanut butter for almond butter or tahini for a nut-free alternative. Cream cheese can also be a delightful twist! -
Flavor Infusion
Add a splash of vanilla extract to the peanut butter for extra flavor, or a pinch of cinnamon for warmth. -
Vegan Delight
Make them completely dairy-free by using vegan chocolate and sweetening with maple syrup instead of honey.
Chef’s Notes
These Healthy Strawberry Peanut Butter Cups hold a special place in my heart. They’re not just a nostalgic treat from my childhood; they’ve evolved over time. Initially, I made them for my family, and now they’ve become a go-to recipe for celebrations and special gatherings. My friends often ask me to whip them up for parties, and I always happily oblige — who can resist a little homemade sweetness?
I’ve also found that they’re incredibly forgiving! Want a darker chocolate? No problem! Not a fan of strawberries? Use your favorite fruit instead. This flexibility allows everyone to put their own spin on them while keeping the heart of the recipe intact. Just remember, cooking is about creativity and joy, so feel free to experiment!
FAQs and Troubleshooting
1. What if my chocolate is too thick or chunky?
If your chocolate isn’t melting smoothly, try adding a tiny bit of coconut oil to help it emulsify. Just a teaspoon should do the trick!
2. My cups are breaking apart when I remove them from the molds. Help!
If the chocolate is too cold when you try to remove it, it can become brittle. Let them sit at room temperature for a few minutes for easier removal. Using silicone molds can also help with peeling them out.
3. Can I store these cups, and how long do they last?
Absolutely! Store them in an airtight container in the fridge for up to a week. You can also freeze them for up to three months. Just let them soften for a few minutes at room temperature before enjoying!
4. Can I use white chocolate instead?
You sure can, but keep in mind that white chocolate is sweeter and may alter the flavor balance. Consider adding a pinch of salt to counteract the sweetness!
Now you’re ready to create your own Healthy Strawberry Peanut Butter Cups! Remember, cooking is all about sharing love through food, and these little delights are perfect for sharing with friends, family, or simply indulging in yourself. Happy cooking, and I can’t wait to hear about your kitchen adventures!
Print
Healthy Strawberry Peanut Butter Cups
- Total Time: 30 minutes
- Yield: 12 servings 1x
- Diet: Vegetarian
Description
A delightful blend of strawberries, creamy peanut butter, and silky dark chocolate make these Healthy Strawberry Peanut Butter Cups a guilt-free indulgence.
Ingredients
- 1 cup Fresh Strawberries
- 1/2 cup Natural Peanut Butter
- 1 cup Dark Chocolate Chips (or Cocoa Powder)
- 2 tablespoons Honey or Maple Syrup (optional)
- 1/4 teaspoon Sea Salt
Instructions
- Prep your strawberries: wash and hull them, and slice larger ones in half.
- Melt the chocolate in a microwave-safe bowl in 30-second increments, stirring until smooth.
- Assemble your cups by spooning melted chocolate into muffin tins, and spreading it up the sides.
- Layer the peanut butter and strawberries in the chocolate cups.
- Cover the layers with more melted chocolate until fully sealed.
- Chill the cups in the freezer for 30 minutes to set before serving.
Notes
These cups are versatile and can be made with different fruits or nut butters. They can also be kept in the fridge for up to a week or frozen for three months.
- Prep Time: 15 minutes
- Cook Time: 15 minutes
- Category: Dessert
- Method: No-Cook
- Cuisine: American
Nutrition
- Serving Size: 1 cup
- Calories: 200
- Sugar: 10g
- Sodium: 150mg
- Fat: 12g
- Saturated Fat: 3g
- Unsaturated Fat: 9g
- Trans Fat: 0g
- Carbohydrates: 20g
- Fiber: 3g
- Protein: 4g
- Cholesterol: 0mg
Keywords: strawberry, peanut butter, chocolate, dessert, healthy


