
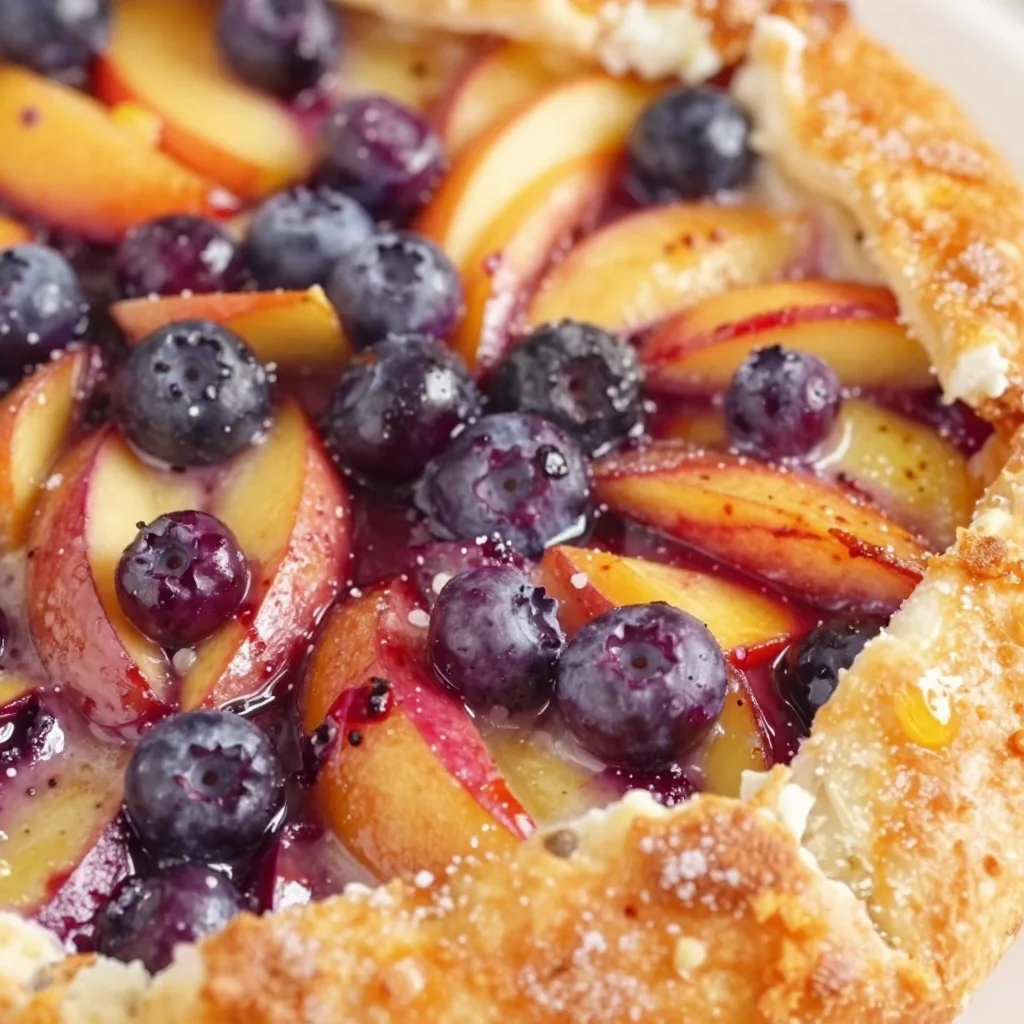
French Nectarine-Blueberry Galette: 30-Minute Summer Recipe
The Sweet Symphony of Summer: French Nectarine Blueberry Galette
Welcome to my kitchen, friend! If there’s one dish that perfectly captures the essence of summer, it’s a French Galette. I’m Olivia Bennett, and today, I’m thrilled to whip up a delightful Nectarine Blueberry Galette with you. Picture this: the sun is shining, the fruits are ripe, and the kitchen is filled with a sweet aroma that promises joy. That’s exactly what we’ll create together — a rustic, flaky pastry enveloping juicy nectarines and plump blueberries.
Let’s be honest; summer desserts are a magical experience. They bring us together, tug at our heartstrings, and create memorable moments around the table. This galette is not just delicious; it’s a celebration of the bounty of the season. It evokes lazy afternoons and laughter shared over slices of something homemade.
In this post, I’ll walk you through the process of making your very own galette from scratch. Trust me; you don’t need to be a pastry chef to achieve stunning results. With just a few simple steps, you’ll create a dessert that shines with flavors and textures. Are you ready? Roll up those sleeves, and let’s dive into this culinary adventure!
A Slice of Nostalgia
Growing up, summer holidays meant time spent at my grandma’s cozy farmhouse. One of my fondest memories is of her in the kitchen, bustling about as she prepared her famous fruit galette. The air was filled with laughter, her favorite tunes playing in the background, and the intoxicating scent of baking wafting through the house. I remember standing on a stool, watching her knead dough, sprinkle sugar, and arrange fruits with such care and love.
The galettes were always an adventure! Each time, she’d clutch a basket of freshly picked fruits from her garden — peaches, apricots, whatever was ripe for picking. But it was the nectarines and blueberries that stole my heart. Grandma would let me drizzle honey over the fruits, and my little fingers would scatter the sugar like confetti. That simple process, combined with her gentle guidance, made cooking feel magical.
Years later, I find myself recreating this cherished tradition, putting my own twist into the recipe. Today’s Nectarine Blueberry Galette is a delicious tribute to my grandma’s love, and I hope it becomes a beloved family recipe for you too.
Ingredients
Let’s gather our ingredients, shall we? Here’s what you’ll need:
-
1 ½ cups all-purpose flour
This is the backbone of our galette crust. For gluten-free options, you can use a 1:1 gluten-free flour blend. -
½ teaspoon salt
A pinch of salt enhances the flavors of the dough. If you want to experiment, try using sea salt for a different taste. -
1 tablespoon granulated sugar
Just enough to add a touch of sweetness to the crust! If you prefer a more natural alternative, coconut sugar works well too. -
½ cup unsalted butter (cold, cubed)
Cold butter is key for a flaky crust. You can substitute with coconut oil for a dairy-free version, but be mindful of the texture. -
4-6 tablespoons ice water
The magic ingredient! This keeps the dough cool and manageable. You can infuse it with a little lemon juice for a subtle zing! -
2-3 ripe nectarines (sliced)
Sweet, juicy nectarines are our star ingredients. If they’re not in season, peaches are a fabulous substitute! -
1 cup fresh blueberries
These little jewels are packed with flavor; frozen blueberries can work in a pinch, but be sure to drain them well after thawing. -
¼ cup brown sugar
For that rich, caramel-like flavor! You can use white sugar if that’s all you have on hand. -
1 tablespoon cornstarch
This helps thicken the filling; if you’re looking for a gluten-free option, arrowroot powder is a great substitution. -
1 teaspoon vanilla extract
A splash of vanilla adds warmth and depth! Feel free to use almond extract for a delightful twist. -
1 egg (for egg wash)
A beautifully golden crust, thanks to this little egg! For a vegan option, use a bit of plant-based milk.
Step-by-Step Instructions
Alright, let’s put on our aprons and get cooking! Follow these steps for galette perfection:
-
Prepare the Crust
In a large mixing bowl, combine the flour, salt, and sugar. Whisk them together to incorporate air. Now, add the cold, cubed butter. Using a pastry cutter (or your fingertips), work the butter into the flour until it resembles coarse crumbs. Keep it as cool as possible; you want those butter bits to stay intact for a flaky crust. -
Add the Ice Water
Gradually stir in the ice water, one tablespoon at a time, just until the dough starts to come together. You might not need the full amount, so go slow! Once it clumps up, form it into a disc, wrap it in plastic, and refrigerate for at least 30 minutes. -
Preheat the Oven
Preheat your oven to 400°F (200°C) while the dough chills. -
Make the Filling
In a bowl, toss your sliced nectarines and blueberries with brown sugar, cornstarch, vanilla extract, and a pinch of salt. This filling smells divine already! Allow it to sit for a bit to let the flavors meld while you roll out your dough. -
Roll Out the Dough
On a lightly floured surface, roll out your chilled dough into a rough circle about 12 inches in diameter. Don’t stress about perfection; the rustic look is part of the charm! -
Assemble the Galette
Transfer the rolled-out dough onto a parchment-lined baking sheet. Spoon the fruit filling onto the center, leaving at least a 2-inch border. Carefully fold the edges of the dough over the filling, pleating it as you go to create a beautiful edge. -
Apply the Egg Wash
Beat an egg and brush it over the exposed dough. This will give it that gorgeous golden hue. If you’re using milk, brush that on for similar results. -
Bake
Pop your galette into the preheated oven and bake for about 35-40 minutes, or until the crust is golden and the filling is bubbling. The aroma will be irresistible, trust me! -
Cool and Serve
Once golden, let your galette cool on the baking sheet for about 10 minutes before transferring it to a wire rack. This cooling time allows the filling to set up a bit more.
Serving Suggestions
Now, for the best part — serving your beautiful galette! Slice it into wedges and serve warm or at room temperature. It’s delightful on its own, but pairing it with a scoop of vanilla ice cream or a dollop of whipped cream takes it to another level of indulgence! A sprinkle of fresh mint or a dusting of powdered sugar can make for that extra touch of elegance. Your guests will be swooning!
Recipe Variations
Feeling creative? Here are some fun ways to twist up this galette recipe:
- Mixed Berry Galette: Substitute the nectarines and blueberries with strawberries and raspberries for a berry bonanza.
- Peach and Apricot Galette: Embrace the summer stone fruit season by using a combination of peaches and apricots.
- Spiced-Up Galette: Add a dash of cinnamon or cardamom to the fruit filling for a warm, spiced flavor.
- Nutty Crust: Swap out some of the all-purpose flour for almond flour for a nutty twist.
- Savory Option: Go savory by replacing the fruit with sautéed vegetables, cheese, and herbs!
Chef’s Notes
This Nectarine Blueberry Galette has a special place in my heart, and it has evolved over the years. Every summer brings its unique twist; sometimes I add a splash of bourbon or a hint of citrus zest for an unexpected flavor boost. The beauty of a galette lies in its versatility! I also love to bake two at once — one for sharing and one to savor all by myself (shh, don’t tell!). It’s the kind of recipe that invites creativity, and it feels like a celebration each time it comes out of the oven.
FAQs and Troubleshooting
1. My crust is tough; what happened?
It’s likely that the dough was overworked or the butter wasn’t kept cold enough. Remember, less is more when mixing!
2. How do I prevent a soggy bottom?
Pre-bake the crust for 5-10 minutes before adding your filling, or sprinkle a layer of brown sugar or crushed almonds on the base to absorb moisture.
3. Can I make this galette ahead of time?
Absolutely! You can prepare the dough ahead of time and keep it in the fridge for up to 3 days. You can also assemble the galette and freeze it before baking. Just add a few minutes to the baking time if baking from frozen.
4. What’s the best way to store leftovers?
Cover any leftovers tightly in plastic wrap or store in an airtight container at room temperature for a couple of days. Reheat gently in the oven to keep the crust crispy.
Nutritional Info
While I believe in enjoying dessert, a slice of this galette does carry some calories! (But hey, happiness is worth it!). This recipe makes about 8 servings. Each serving has approximately:
- Calories: 250
- Carbohydrates: 36g
- Protein: 3g
- Fat: 12g
Remember, these numbers can vary based on specific ingredient choices and portion sizes.
And there you have it! A delightful French Nectarine Blueberry Galette that’s bound to become a favorite in your home. Whether you’re hosting a gathering, surprising your loved ones, or treating yourself, this galette is a slice of summer bliss. So gather the ingredients, let your creativity flow, and enjoy this heartfelt dish. Happy baking!
Print
Nectarine Blueberry Galette
- Total Time: 70 minutes
- Yield: 8 servings 1x
- Diet: Vegetarian
Description
A delightful French dessert featuring a rustic, flaky pastry filled with juicy nectarines and blueberries, perfect for summer gatherings.
Ingredients
- 1 ½ cups all-purpose flour
- ½ teaspoon salt
- 1 tablespoon granulated sugar
- ½ cup unsalted butter (cold, cubed)
- 4–6 tablespoons ice water
- 2–3 ripe nectarines (sliced)
- 1 cup fresh blueberries
- ¼ cup brown sugar
- 1 tablespoon cornstarch
- 1 teaspoon vanilla extract
- 1 egg (for egg wash)
Instructions
- Prepare the crust: In a large mixing bowl, combine the flour, salt, and sugar. Whisk them together to incorporate air. Now, add the cold, cubed butter. Using a pastry cutter (or your fingertips), work the butter into the flour until it resembles coarse crumbs.
- Add the ice water: Gradually stir in the ice water, one tablespoon at a time, just until the dough starts to come together. Form it into a disc, wrap it in plastic, and refrigerate for at least 30 minutes.
- Preheat the oven to 400°F (200°C) while the dough chills.
- Make the filling: In a bowl, toss your sliced nectarines and blueberries with brown sugar, cornstarch, vanilla extract, and a pinch of salt. Allow it to sit to let the flavors meld.
- Roll out the dough: On a lightly floured surface, roll out your chilled dough into a rough circle about 12 inches in diameter.
- Assemble the galette: Transfer the rolled-out dough onto a parchment-lined baking sheet. Spoon the fruit filling onto the center, leaving at least a 2-inch border. Fold the edges of the dough over the filling, pleating it as you go.
- Apply the egg wash: Beat an egg and brush it over the exposed dough.
- Bake: Pop your galette into the preheated oven and bake for about 35-40 minutes, or until the crust is golden and the filling is bubbling.
- Cool and serve: Let your galette cool on the baking sheet for about 10 minutes before transferring it to a wire rack.
Notes
Serve warm or at room temperature with a scoop of vanilla ice cream or whipped cream for a delightful treat.
- Prep Time: 30 minutes
- Cook Time: 40 minutes
- Category: Dessert
- Method: Baking
- Cuisine: French
Nutrition
- Serving Size: 1 slice
- Calories: 250
- Sugar: 15g
- Sodium: 150mg
- Fat: 12g
- Saturated Fat: 7g
- Unsaturated Fat: 5g
- Trans Fat: 0g
- Carbohydrates: 36g
- Fiber: 1g
- Protein: 3g
- Cholesterol: 70mg
Keywords: galette, dessert, summer, nectarines, blueberries, French pastry
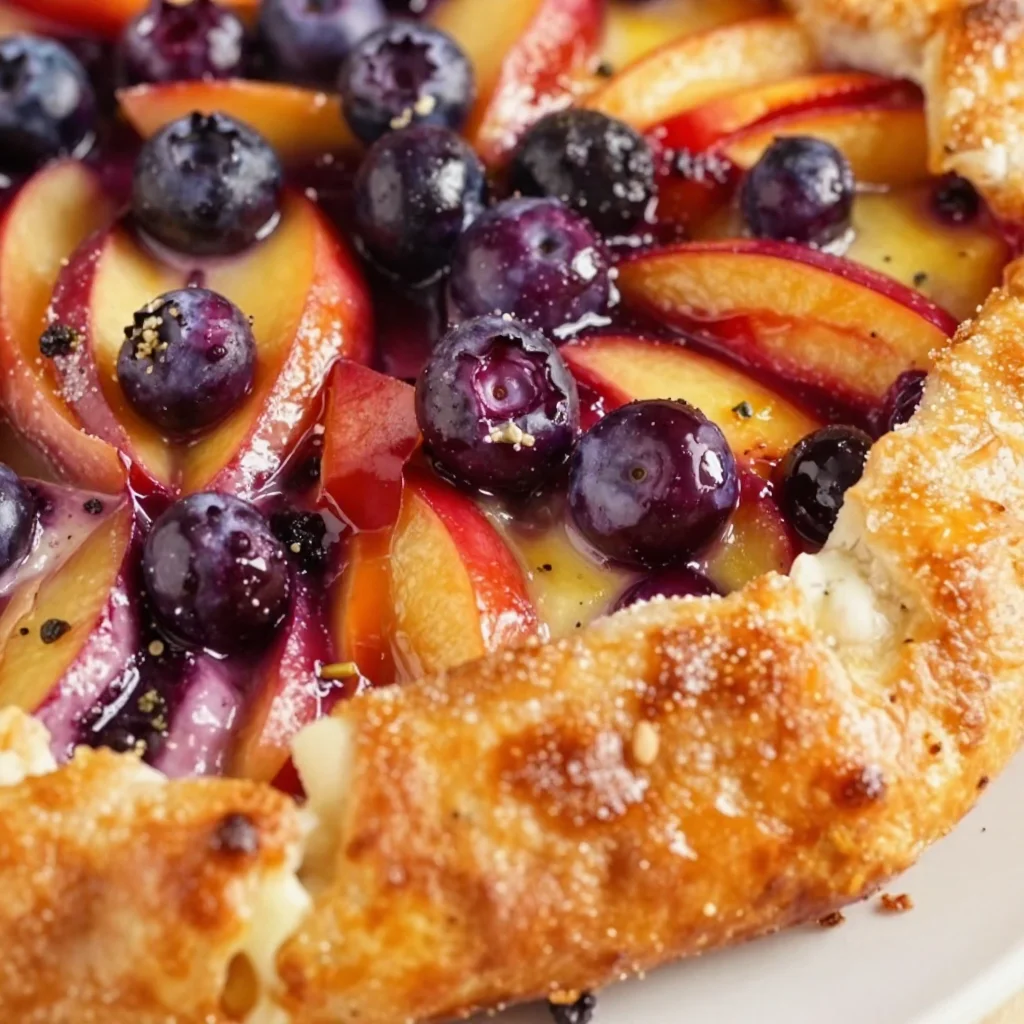
Summer Nectarine Blueberry Galette: 30-Minute Recipe
Deliciously Simple: French Nectarine Blueberry Galette Recipe
Hello, fellow food lovers! Welcome back to my cozy kitchen! Today, I’m excited to whisk you away to a rustic French bistro table with a heavenly dessert that’s as delightful to eat as it is to make. So, grab your apron and get ready to dive into the scrumptious world of this French Nectarine Blueberry Galette!
Introduction
Ah, the galette! This baked wonder captures the essence of rustic French baking, bringing together the sweet juiciness of nectarines and the vibrant burst of blueberries nestled within a flaky crust. Picture this: a golden, slightly rustic pastry enveloping a tender filling, straight from the oven, lightly dusted with sugar. Sounds heavenly, right?
You don’t need to be a master chef to create this masterpiece! Galettes are all about celebrating the simplicity of fresh ingredients. They don’t require the precision of a traditional pie and allow for a little artistic flair in the folding of that lovely crust. Whether you’re hosting a dinner party, having a cozy family night, or looking for a sweet treat to impress your guests, this galette is here to shine.
What I love most about this recipe is its versatility. Grab some local nectarines and blueberries from your farmer’s market—trust me, those summer flavors are unbeatable—and let’s create something beautiful! But first, let me take you down memory lane, sharing a little personal story behind my love for this delightful dessert.
Personal Story
When I was a little girl, summers were synonymous with sweet fruit and family gatherings. One of my fondest memories is of my grandmother bustling around her kitchen, her apron dusted with flour, while we picked fresh fruit from the garden. I can still hear her laugh, the smell of sweet nectarines and blueberries wafting through the air as she prepared her famous galette.
Every time she pulled that glorious, golden pastry from the oven, my heart would skip a beat. The crispy crust paired with the sweet, juicy filling was pure bliss! It wasn’t just dessert; it was a celebration of family, tastes, and stories shared over the kitchen table. As I grew older, I realized that this wasn’t just about baking—it was about bringing people together. It’s this very spirit that inspired me to recreate her recipe and share it with all of you. Now let’s get into the nitty-gritty of making this scrumptious galette!
Ingredients
Let’s take a close look at what you’ll need for this delicious treat:
-
All-Purpose Flour (1 ¼ cups)
- This is the backbone of your crust. You can substitute it with a 1:1 gluten-free blend if you need a gluten-free option.
-
Unsalted Butter (½ cup, chilled and cubed)
- Chilling the butter ensures that we get a flaky crust. For a dairy-free option, try coconut oil or vegan butter.
-
Powdered Sugar (2 tablespoons)
- This adds a subtle sweetness without the graininess of granulated sugar. Feel free to use granulated sugar if that’s what you have!
-
Ice Water (3-4 tablespoons)
- This helps bring the dough together. You can use cold mineral water for an extra crisp crust!
-
Nectarines (3 medium, sliced)
- The stars of this recipe! Summer nectarines are juicy and flavorful. You can interchange them with peaches or other stone fruits!
-
Blueberries (1 cup, fresh or frozen)
- These little bursts of sweetness add a vibrant color and flavor. If using frozen, don’t thaw; just add them straight to the filling.
-
Granulated Sugar (¼ cup, plus extra for sprinkling)
- This elevates the sweetness of the fruit. Adjust according to your taste!
-
Cornstarch (1 tablespoon)
- This is essential for thickening the filling and absorbing excess juices. You can use arrowroot powder as an alternative.
-
Ground Cinnamon (¼ teaspoon)
- A hint of warmth and spice! If you like a little more zing, feel free to add a pinch of nutmeg.
Now that we have our ingredients, let’s move on to the fun part—putting everything together!
Step-by-Step Instructions
-
Prepare the Dough:
- In a large mixing bowl, whisk together the all-purpose flour and powdered sugar. Add the cubed, chilled butter. Use a pastry cutter or simply your fingertips to mix until the mixture resembles coarse crumbs. The key is to keep some chunks of butter; these will give us that flaky crust.
-
Bring it Together:
- Gradually add ice water, one tablespoon at a time, mixing until the dough just comes together. Don’t overmix! Once it forms a cohesive ball, wrap it in plastic wrap and pop it into the fridge for about 30 minutes.
-
Make the Filling:
- While the dough chills, prepare the fruit filling. In a mixing bowl, toss together the sliced nectarines, blueberries, granulated sugar, cornstarch, and ground cinnamon. Let this mixture sit for about 10 minutes to allow the flavors to meld together.
-
Preheat Your Oven:
- Preheat your oven to 400°F (200°C). This is perfect for getting that crust golden and crisp!
-
Roll Out the Dough:
- Lightly flour your surface and roll out the chilled dough into a circle about 12 inches in diameter. It doesn’t have to be perfect! Transfer it to a parchment-lined baking sheet.
-
Add the Filling:
- Spoon the fruit mixture into the center of the dough, leaving about a 2-inch border around the edges. Don’t worry if some juice spills over; it’ll caramelize and taste amazing!
-
Fold the Edges:
- Carefully fold the edges of the dough over the filling, pleating it as you go. This rustic look is what makes galettes so charming!
-
Egg Wash and Sugar Sprinkle:
- Beat an egg with a bit of water to create an egg wash, then brush it over the crust. Sprinkle a little granulated sugar on top for that extra sweet touch.
-
Bake to Perfection:
- Bake for about 30-35 minutes, or until the crust is golden brown and the filling is bubbling. Your kitchen will smell heavenly, and your friends and family will wonder what’s cooking!
-
Cool and Serve:
- Let the galette cool on the baking sheet for a few minutes before transferring it to a wire rack. This cooling time lets the filling set, making it easier to slice.
Serving Suggestions
To serve this galette, cut it into wedges and place them on beautiful plates. A scoop of vanilla ice cream or a dollop of freshly whipped cream on top takes it to the next level! For an elegant touch, garnish with a sprig of fresh mint. Trust me; your guests will be impressed!
Recipe Variations
Want to switch things up a bit? Here are a few creative ideas:
- Summer Berry Galette: Swap out nectarines for peaches or toss in some strawberries along with blueberries.
- Spiced Galette: Add some ginger or cardamom to the fruit filling for an exotic twist.
- Nutty Addition: Sprinkle some chopped almonds or walnuts over the filling before folding the dough for an added crunch.
- Vegan Option: Use coconut oil rather than butter and substitute the egg wash with almond milk.
Chef’s Notes
This French Nectarine Blueberry Galette is not just a recipe to me; it’s a reminder of family traditions and summertime joy. Over the years, I’ve played with different fruits and spices, turning it into an ever-evolving dish that matches the season. I once made an apricot and raspberry version at a friend’s wedding, and it was a total hit! Whatever the variations, the core idea remains the same: to bring people together through the love of food. Don’t worry if it doesn’t look perfect; those little rustic edges are what make it unique!
FAQs and Troubleshooting
1. My dough is too dry. What do I do?
If your dough seems crumbly, add a teaspoon of cold water at a time until it comes together. Remember, the key is to handle it minimally!
2. How can I prevent the galette from getting soggy?
Make sure to use well-drained fruits and avoid overmixing them with sugar and cornstarch. Letting the filling sit for a few minutes allows the juices to combine beautifully without making the crust soggy.
3. What if my galette crust cracks?
It’s okay! Just gently pinch or fold it back together while assembling. Remember, the rustic look is part of its charm!
4. Can I make the dough ahead of time?
Absolutely! You can prepare the dough a day in advance and keep it wrapped in the refrigerator. Just allow it to sit at room temperature for a few minutes before rolling it out.
Nutritional Info
(If applicable, please add here)
Now that you’ve got all the details, it’s time to roll up your sleeves and get to baking! This French Nectarine Blueberry Galette is bound to be a showstopper at your next gathering. I can’t wait to hear how it turns out for you. Remember, cooking is all about joy, experimentation, and creating memories. Happy baking! 🍑✨
Print
French Nectarine Blueberry Galette
- Total Time: 50 minutes
- Yield: 8 servings 1x
- Diet: Vegetarian
Description
A rustic French galette filled with juicy nectarines and sweet blueberries, perfect for summer gatherings.
Ingredients
- 1 ¼ cups All-Purpose Flour
- ½ cup Unsalted Butter, chilled and cubed
- 2 tablespoons Powdered Sugar
- 3–4 tablespoons Ice Water
- 3 medium Nectarines, sliced
- 1 cup Blueberries, fresh or frozen
- ¼ cup Granulated Sugar, plus extra for sprinkling
- 1 tablespoon Cornstarch
- ¼ teaspoon Ground Cinnamon
Instructions
- Prepare the Dough: In a large mixing bowl, whisk together the all-purpose flour and powdered sugar. Add the cubed, chilled butter. Use a pastry cutter or your fingertips to mix until the mixture resembles coarse crumbs.
- Bring it Together: Gradually add ice water, one tablespoon at a time, mixing until the dough just comes together. Wrap it in plastic wrap and refrigerate for about 30 minutes.
- Make the Filling: While the dough chills, prepare the fruit filling. Toss together the sliced nectarines, blueberries, granulated sugar, cornstarch, and ground cinnamon. Let sit for about 10 minutes.
- Preheat Your Oven: Preheat your oven to 400°F (200°C).
- Roll Out the Dough: Lightly flour your surface and roll out the chilled dough into a circle about 12 inches in diameter. Transfer it to a parchment-lined baking sheet.
- Add the Filling: Spoon the fruit mixture into the center of the dough, leaving about a 2-inch border around the edges.
- Fold the Edges: Carefully fold the edges of the dough over the filling, pleating it as you go.
- Egg Wash and Sugar Sprinkle: Beat an egg with a bit of water, brush it over the crust, and sprinkle a little granulated sugar on top.
- Bake to Perfection: Bake for about 30-35 minutes, or until the crust is golden brown and the filling is bubbling.
- Cool and Serve: Let the galette cool on the baking sheet for a few minutes before transferring it to a wire rack.
Notes
Serve with vanilla ice cream or whipped cream for an elevated touch.
- Prep Time: 15 minutes
- Cook Time: 35 minutes
- Category: Dessert
- Method: Baking
- Cuisine: French
Nutrition
- Serving Size: 1 slice
- Calories: 280
- Sugar: 15g
- Sodium: 300mg
- Fat: 12g
- Saturated Fat: 7g
- Unsaturated Fat: 4g
- Trans Fat: 0g
- Carbohydrates: 36g
- Fiber: 2g
- Protein: 3g
- Cholesterol: 30mg
Keywords: galette, dessert, summer fruits, baking, rustic dessert, French dessert
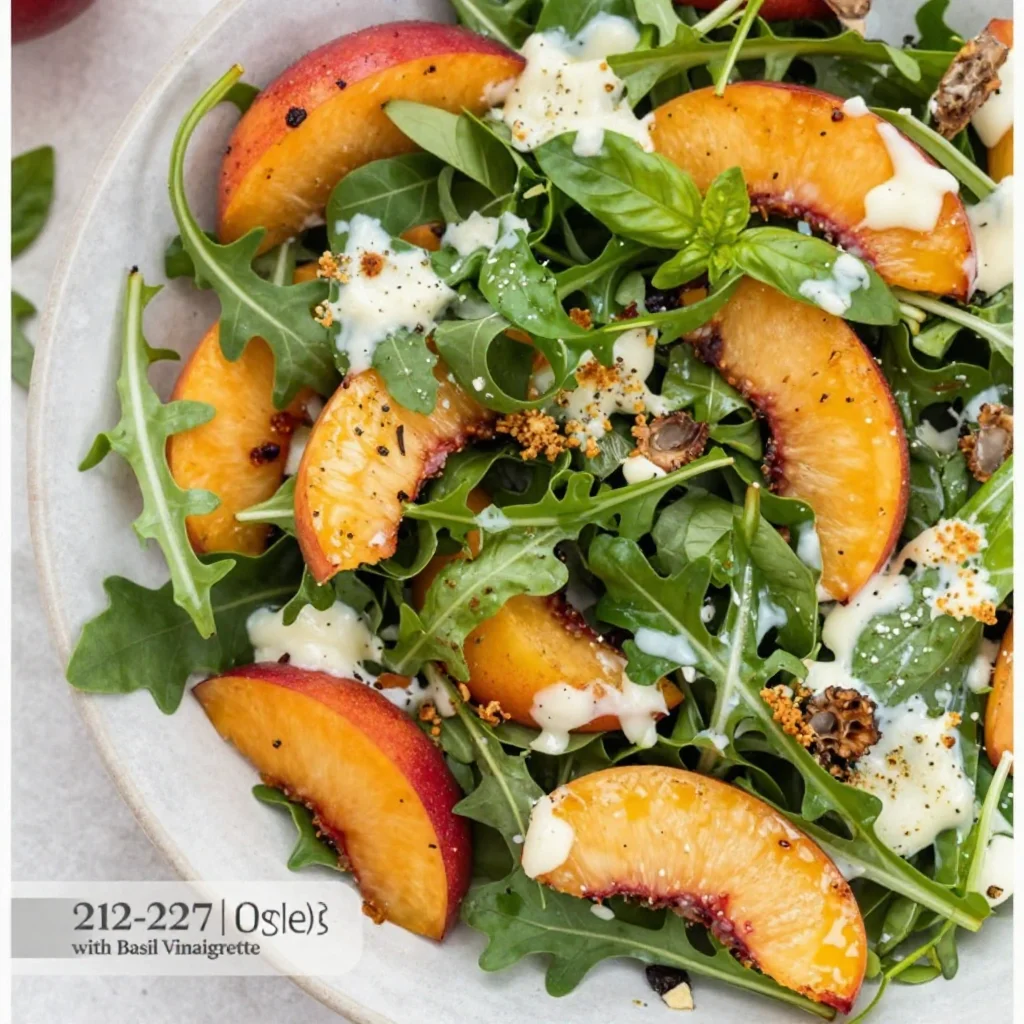
Crisp Summer Arugula Nectarine Salad with Basil Vinaigrette
Arugula Nectarine Salad with Fresh Basil Dressing
Welcome to my kitchen! I’m so thrilled to have you here. Today, we’re talking about a dish that embodies summer and sunshine on a plate—the Arugula Nectarine Salad with Fresh Basil Dressing. This vibrant salad isn’t just a feast for the eyes; it’s also a delightful explosion of flavors that’ll have you coming back for seconds. The peppery arugula paired with the sweet juiciness of nectarines, all drizzled with a fresh basil dressing, creates a harmony of tastes that feels both light and indulgent. Whether you’re preparing a quick weeknight dinner or elevating your weekend brunch game, this salad is a star player.
I’d love to take a moment to share my personal connection to this dish. You see, I grew up in a family that cherished every meal. My grandmother had a beautiful garden overflowing with fresh herbs and fruits. I remember the magical summer afternoons when I would help her pick ripe nectarines and basil. The air was filled with laughter, and the simple act of harvesting seemed like a special adventure. Fast forward to today, and I find myself recreating that love for fresh ingredients in my own kitchen. This salad is my nod to those sunny days and the joy of sharing food with loved ones.
Now, let’s dive into the delicious details!
Ingredients
To make this delicious Arugula Nectarine Salad, you’ll need the following ingredients:
-
Arugula (4 cups): This peppery green forms the base of our salad. It’s packed with vitamins A, C, and K. You can substitute it with spinach for a milder flavor or kale for a heartier bite.
-
Nectarines (2 large): Sweet and juicy nectarines add a refreshing touch. If nectarines aren’t in season, peaches or plums are excellent substitutes—just look for ones that are ripe but firm.
-
Fresh Basil (1/4 cup, packed): This fragrant herb lends an aromatic flair to the dressing. If you don’t have basil, mint could be an exciting alternative that offers a different, bright flavor.
-
Olive Oil (1/4 cup): A quality olive oil will enhance your dressing. For a change, you can use avocado oil or even a nut oil like hazelnut for a unique twist.
-
Honey (1 tablespoon): This natural sweetener balances the flavors beautifully. Maple syrup can be used for a vegan option, or you can opt for agave nectar.
-
Lemon Juice (2 tablespoons): Freshly squeezed lemon juice brightens up the salad. If you’re out of lemons, lime juice works well too, offering a slightly different but delightful tang.
-
Salt and Pepper: Essential for seasoning, ensuring all flavors come together. Feel free to add smoked salt or even a pinch of red pepper flakes for a kick.
Step-by-Step Instructions
Let’s get started on this delightful salad! Follow these steps, and I promise you’ll create a masterpiece that showcases the magic of fresh ingredients.
-
Prep the Ingredients: Begin by washing your arugula thoroughly under cold water to remove any dirt or grit. Pat it dry with a clean kitchen towel or use a salad spinner. A crisp, dry arugula provides that satisfying crunch.
-
Slice the Nectarines: Next, take your fresh nectarines and slice them into wedges. To do this, simply cut them in half and remove the pit. Then, slice each half into thin wedges. If the nectarines are perfectly ripe, they should yield to gentle pressure, making this step super easy!
-
Make the Dressing: In a small bowl, whisk together the fresh basil, olive oil, honey, lemon juice, salt, and pepper. To make chopping basil easier, stack the leaves, roll them up, and then slice. This way, you’ll get beautiful ribbons of basil that blend seamlessly into the dressing. Don’t be afraid to taste it; adjust the sweetness or acidity to your liking.
-
Combine the Salad: In a large mixing bowl, add the arugula and nectarines. Drizzle your homemade basil dressing over the top. With clean hands or salad tongs, toss gently to coat the arugula and nectarines evenly. Be careful not to crush the delicate nectarines; we want those lovely shapes to shine!
-
Plate and Serve: Transfer your salad to a serving platter or individual bowls. If you’re feeling a little extra (who isn’t when it comes to food?), you can sprinkle some toasted nuts or feta cheese on top for added texture and flavor.
Serving Suggestions
To really elevate your presentation, consider using a beautiful platter that contrasts with the vibrant greens and fruits. A simple white dish or rustic wooden board really allows the colors of the salad to pop. For an added touch, I love garnishing with a few whole basil leaves scattered on top, and of course, a drizzle of the dressing over everything just before serving. This gives guests a little sneak peek of the beautiful flavors they’re about to enjoy!
Recipe Variations
-
Cheese Lovers Delight: Crumble some feta or goat cheese over the top for a tangy kick!
-
Nuts for Crunch: Toss in some toasted walnuts or pecans for added crunch and a nutty flavor.
-
Berry Blast: Add some fresh berries like raspberries or blueberries for a sweet-tart balance.
-
Protein Power-Up: Top it off with grilled chicken or shrimp for a satisfying main dish.
-
Vegan Option: Use maple syrup in the dressing and skip the cheese for a delicious vegan version.
Chef’s Notes
This salad has become such a staple in my kitchen, and I love how it can adapt to whatever fresh ingredients I have on hand. I remember one summer my neighbor gifted me a basket of the juiciest peaches, and I couldn’t resist swapping them in for nectarines. What a game-changer that was! The joy of cooking is all about making these dishes your own, and I encourage you to experiment with flavors that speak to you.
Fun fact: the first time I made this salad for a dinner party, I completely miscalculated the lemon juice and added way too much—talk about a savory punch! But it ended up being a hit. Everyone loved the extra zing and asked for the ‘secret ingredient’ (which was just a lesson learned for me!).
FAQs and Troubleshooting
-
What if my nectarines aren’t sweet?
- Not to worry! You can increase the honey in your dressing for a little extra sweetness or add a sprinkle of brown sugar directly on the nectarines.
-
Can I make the dressing ahead of time?
- Absolutely! The dressing can be made a day in advance. Just store it in an airtight container in the refrigerator. Give it a good whisk before serving, as the ingredients may settle.
-
How do I store leftovers?
- If you have salad leftovers (if there are any!), store the components separately to maintain freshness. Keep the arugula in a dry container and the nectarines and dressing in separate, sealed containers. Combine them just before enjoying again.
-
What if I can’t find arugula?
- Any leafy green can work! Spinach or baby kale are great alternatives that will still provide wonderful texture and flavor.
Nutritional Info
While nutritional values can vary based on portion sizes and specific brands, here’s a rough estimate for one serving of the Arugula Nectarine Salad (without cheese):
- Calories: 180
- Fat: 14g (mostly healthy fats from olive oil)
- Carbohydrates: 14g
- Fiber: 3g
- Protein: 2g
This salad is not only a delight for the taste buds but also a light, nutritious option that’s perfect for any meal!
And there you have it—a vibrant, refreshing Arugula Nectarine Salad with Fresh Basil Dressing that’s equal parts easy and impressive! I hope you give this recipe a try and let it inspire you to make your kitchen your own little sanctuary of flavors and memories. Happy cooking!
Print
Arugula Nectarine Salad with Fresh Basil Dressing
- Total Time: 10 minutes
- Yield: 4 servings
- Diet: Vegetarian
Description
A vibrant salad featuring peppery arugula and sweet nectarines, topped with a fresh basil dressing.
Ingredients
- Arugula (4 cups)
- Nectarines (2 large)
- Fresh Basil (1/4 cup, packed)
- Olive Oil (1/4 cup)
- Honey (1 tablespoon)
- Lemon Juice (2 tablespoons)
- Salt and Pepper (to taste)
Instructions
- Prep the Ingredients: Wash the arugula thoroughly under cold water and pat dry.
- Slice the Nectarines: Cut nectarines into wedges, removing the pit.
- Make the Dressing: Whisk together basil, olive oil, honey, lemon juice, salt, and pepper in a small bowl.
- Combine the Salad: In a large mixing bowl, add arugula and nectarines, drizzled with dressing, and toss gently.
- Plate and Serve: Transfer to a serving platter and garnish with nuts or cheese, if desired.
Notes
Best to serve immediately to enjoy fresh flavors. Dressing can be made ahead of time.
- Prep Time: 10 minutes
- Cook Time: 0 minutes
- Category: Salad
- Method: No Cooking
- Cuisine: American
Nutrition
- Serving Size: 1 serving
- Calories: 180
- Sugar: 5g
- Sodium: 50mg
- Fat: 14g
- Saturated Fat: 2g
- Unsaturated Fat: 10g
- Trans Fat: 0g
- Carbohydrates: 14g
- Fiber: 3g
- Protein: 2g
- Cholesterol: 0mg
Keywords: salad, summer salad, nectarines, arugula, basil dressing, healthy salad
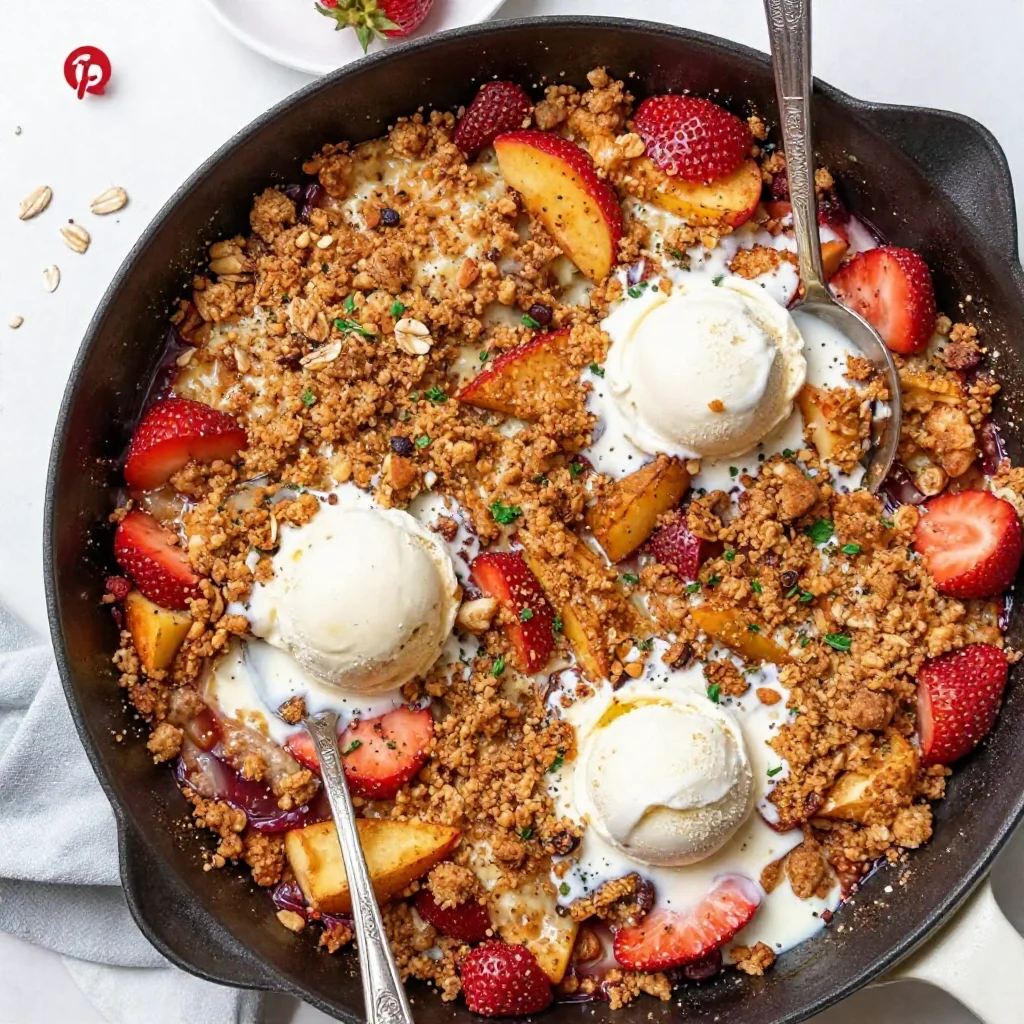
Easy Summer Strawberry-Nectarine Crisp with Ginger Streusel
Strawberry-Nectarine Fruit Crisp with Ginger Streusel
Welcome to my kitchen, dear friends! Today, I’m excited to share a recipe that perfectly captures the vibrant flavors of summer: Strawberry-Nectarine Fruit Crisp with Ginger Streusel. This is one of those dishes that brings a smile to your face as it bakes in the oven, filling your home with a warm, fragrant embrace. There’s something magical about the combination of juicy strawberries and sweet nectarines, topped with a buttery, spiced streusel that makes it irresistible!
A Flavorful Memory
Growing up, my summer afternoons were often spent in my grandmother’s sun-soaked kitchen, bursting with the colorful produce from her garden. One of my fondest memories is picking strawberries and nectarines with her. We would giggle as we inspected each piece of fruit, searching for the ripest ones, knowing they would transform into something special.
One day, we decided to experiment (as grandmas often do) with a fruit crisp because we had more fruit than we could handle. The result was a glorious mess of flavors that danced together in perfect harmony. That first bite was pure bliss—the sweetness of the fruit, the crunch of the streusel, and a hint of cinnamon! It wasn’t just dessert; it was a celebration of the seasons and a reminder of how simple ingredients can come together to create something beautiful. Today, when I make this strawberry-nectarine crisp, I’m transported back to that kitchen filled with laughter and love.
Ingredients You’ll Need
To recreate this delightful dessert, gather the following ingredients:
-
Strawberries: About 4 cups, hulled and sliced. Fresh strawberries offer the best flavor, but you can also use frozen if you can’t find fresh. Just make sure to thaw and drain them well.
-
Nectarines: Roughly 3 cups, pitted and sliced. If nectarines aren’t available, peaches make a fantastic substitute!
-
Granulated Sugar: About ¾ cup, divided. This will sweeten your fruit and the streusel. You could use coconut sugar for a deeper flavor profile.
-
Lemon Juice: 2 tablespoons. Fresh lemon juice enhances the fruit’s natural acidity and complements the sweetness. If you’re out of lemons, a splash of apple cider vinegar works too!
-
All-Purpose Flour: 1 cup. This is essential for both the fruit mixture and streusel. You can also use whole wheat flour for a nuttier taste.
-
Oats: 1 cup of rolled oats. They add a lovely chewy texture. If you’re gluten-free, make sure to use certified gluten-free oats.
-
Brown Sugar: ½ cup, packed. This will deepen the flavor of the streusel. If you’re out, white sugar can work in a pinch.
-
Butter: ½ cup, melted. Use unsalted butter for the best control over salt content. Coconut oil can be used as a dairy-free alternative.
-
Ground Ginger: 1 teaspoon. This adds a delightful warmth to the streusel. You can substitute it with ground cinnamon or nutmeg for a different twist.
-
Cinnamon: 1 teaspoon. A classic spice that pairs beautifully with fruit. Try a pinch of cardamom for something unique!
Step-by-Step Instructions
Now, let’s dive into the cooking!
-
Preheat Your Oven: Start by preheating your oven to 350°F (175°C). This ensures that your crisp gets that lovely golden brown crust as soon as it goes in.
-
Prepare the Fruit: In a large mixing bowl, combine your sliced strawberries and nectarines. Add ½ cup of granulated sugar and the lemon juice, tossing everything together gently until the fruit is well coated. Let this sit for about 10 minutes so the juices can mingle. (Oh, that smell is heavenly already!)
-
Make the Streusel: In another bowl, mix together the flour, oats, brown sugar, ground ginger, cinnamon, and a pinch of salt. Drizzle in the melted butter, and using your fingertips, mix until the mixture resembles coarse crumbs. This streusel should be crumbly but still hold together when pressed.
-
Layer the Fruit and Streusel: Spread the fruit mixture evenly in a greased 9×13 baking dish (or something similar). Now, sprinkle the streusel evenly on top. Make sure to cover the fruit well because that’s where the magic happens!
-
Bake: Slide the baking dish into the preheated oven and bake for about 35-40 minutes, or until the topping is golden and the fruit is bubbling. You might want to turn on the broiler for the last 2-3 minutes to get that crisp extra crispy—just keep a close eye on it!
-
Cool and Serve: Once out of the oven, let the crisp cool for about 10-15 minutes. This helps set the juices a bit (though I admit, it’s hard to wait!).
Serving Suggestions
Now, let’s talk about how to serve this beautiful dish! I love scooping generous portions into bowls while the crisp is still warm. A dollop of freshly whipped cream or a scoop of vanilla ice cream takes it to the next level. You can even drizzle a little bit of honey on top for extra sweetness!
Recipe Variations
Feeling creative? Here are some fun variations to try:
-
Berry Bliss: Substitute half of the strawberries with blueberries or raspberries for a mixed berry crisp.
-
Nutty Goodness: Add chopped nuts like pecans or walnuts to the streusel for an added crunch. Toast them lightly beforehand for an extra flavor boost.
-
Tropical Twist: Replace the nectarines with mangoes and add a splash of coconut milk in the fruit mixture for a beachy vibe.
-
Spicy Sweet: Add a pinch of cayenne pepper to the streusel for a surprising kick!
-
Vegan Delight: Swap the butter for coconut oil and replace the granulated sugar with maple syrup or a granular sugar substitute.
Chef’s Notes
Oh, where do I begin? This recipe has evolved over the years. Initially, I started with classic apple crisp and thought, "Why limit myself?!" I love using fruits that are in season and experimenting with spices. I once added crushed gingersnap cookies to the streusel for a holiday twist—seriously unforgettable! Cooking should be a playground for your palate, so don’t be afraid to make it your own.
One funny story: I once spilled an entire container of cinnamon into the streusel in my excitement. It certainly packed a punch! We jokingly called it “spicy crisp” for the rest of the family gathering. Even with the mishap, it ultimately turned into a hit—cooking is all about adapting and enjoying the journey!
FAQs and Troubleshooting
1. My streusel is too crumbly! What did I do wrong?
If your streusel is too dry, it could be that you didn’t add enough butter. Make sure it’s well combined but not overly moist.
2. How do I store leftovers?
Cover the crisp tightly with plastic wrap or transfer it to an airtight container. It will last in the fridge for about 3-4 days. Reheat portions in the microwave or oven.
3. Can I make this ahead of time?
Absolutely! You can prepare the fruit mixture and the streusel separately a day in advance. Just assemble and bake when you’re ready to serve!
4. My fruit mixture isn’t bubbling! What can I do?
If your fruit isn’t bubbling, it may just need a bit more time in the oven. Every oven behaves a bit differently, so don’t be afraid to give it some extra love!
Nutritional Info
While I typically focus on flavor and enjoyment in my cooking, I know many of you are curious about nutrition! A typical serving of this fruit crisp (1/4 cup) has approximately:
- Calories: 250
- Fat: 12g
- Carbohydrates: 38g
- Fiber: 3g
- Sugar: 12g
- Protein: 3g
Total values can vary based on exact ingredients and portion sizes, but hey—remember, this is a dessert to be enjoyed, so dig in without guilt!
So there you go, my friends! Now you’re armed with a scrumptious recipe for a Strawberry-Nectarine Fruit Crisp with a zing of ginger that will elevate your dessert game. I hope you find as much joy in making it as I do. Happy baking, and may your kitchen always be filled with delightful aromas and heartwarming memories! 🍓✨
Print
Strawberry-Nectarine Fruit Crisp with Ginger Streusel
- Total Time: 55 minutes
- Yield: 8 servings
- Diet: Vegetarian
Description
A delightful summer dessert combining juicy strawberries and sweet nectarines, topped with a buttery, spiced ginger streusel.
Ingredients
- Strawberries: About 4 cups, hulled and sliced
- Nectarines: Roughly 3 cups, pitted and sliced
- Granulated Sugar: About ¾ cup, divided
- Lemon Juice: 2 tablespoons
- All-Purpose Flour: 1 cup
- Oats: 1 cup of rolled oats
- Brown Sugar: ½ cup, packed
- Butter: ½ cup, melted
- Ground Ginger: 1 teaspoon
- Cinnamon: 1 teaspoon
Instructions
- Preheat your oven to 350°F (175°C).
- Prepare the fruit by combining sliced strawberries and nectarines with ½ cup of granulated sugar and lemon juice.
- Make the streusel by mixing flour, oats, brown sugar, ground ginger, cinnamon, and melted butter.
- Layer the fruit mixture in a greased 9×13 baking dish and sprinkle the streusel on top.
- Bake in the preheated oven for about 35-40 minutes until golden brown and bubbly.
- Cool for 10-15 minutes before serving.
Notes
Serving suggestions include topping with whipped cream or vanilla ice cream.
- Prep Time: 15 minutes
- Cook Time: 40 minutes
- Category: Dessert
- Method: Baking
- Cuisine: American
Nutrition
- Serving Size: 1 serving
- Calories: 250
- Sugar: 12g
- Sodium: 50mg
- Fat: 12g
- Saturated Fat: 7g
- Unsaturated Fat: 5g
- Trans Fat: 0g
- Carbohydrates: 38g
- Fiber: 3g
- Protein: 3g
- Cholesterol: 20mg
Keywords: fruit crisp, strawberry dessert, summer dessert, ginger streusel

Minute High-Protein Cottage Cheese Avocado Breakfast Wrap
Easy High-Protein Breakfast Wrap with Cottage Cheese and Avocado
Welcome to my cozy kitchen! I’m Olivia Bennett, your friendly guide to creating delicious, heartwarming meals that are as easy as pie. Today, we’re diving into one of my favorite ways to kickstart the day: the Easy High-Protein Breakfast Wrap with Cottage Cheese and Avocado. If you’re looking for a breakfast that’s not only nutritious but also bursting with flavor, you’ve clicked on the right recipe!
I believe that breakfast is more than just a meal; it’s a moment to pause and savor, to fuel up for the day ahead. Whether you’re rushing out the door or enjoying a leisurely morning, this wrap is the perfect combination of creamy, savory, and satisfying. Cottage cheese offers a fantastic protein boost, while avocado brings that buttery richness we all crave. Tuck it all into a warm tortilla, and you have a breakfast that feels indulgent yet healthy. Let’s explore this scrumptious dish that combines both nutrition and taste—trust me, it’s a game-changer!
A Nostalgic Kitchen Memory
Growing up, my mornings were filled with the joyful chaos of my family bustling around the kitchen. My mom was a wizard at concocting quick meals that kept us energized for the day ahead. I still remember one particular Saturday when we woke up to the smell of her famous breakfast burritos wafting through the house. Those magical wraps, filled to the brim with eggs, cheese, and the occasional surprise ingredient, were the highlight of my childhood.
One day, we experimented with cottage cheese and avocado, two ingredients that were always around but rarely played the starring role. As we served them up, my siblings and I couldn’t believe how deliciously creamy they were together! What started as a kitchen experiment became a cherished family recipe and a fun routine. I still whip it out on busy mornings, and sometimes I’ll even make it for friends or family. It’s a little nostalgic secret that brings back those meaningful moments of laughter and love at the table. Now, let’s get cooking!
Ingredients
Here’s what you’ll need to craft your Easy High-Protein Breakfast Wrap:
-
Whole Wheat Tortilla
Great for wrapping everything up while keeping it nutritious. For a gluten-free option, use a brown rice or corn tortilla for that perfect hand-held experience! -
Cottage Cheese (1 cup)
Packed with protein and calcium, it adds a creamy texture. Prefer Greek yogurt for a tangy twist, or silken tofu for a dairy-free alternative! -
Avocado (1 medium)
This nutrient-dense superstar provides healthy fats and a lovely creaminess. If they’re out of season, mashed banana can work in a pinch, though I must admit, it’s not quite the same! -
Spinach (1 cup, fresh)
A handful of greens adds vital vitamins and minerals. Swap in kale or any leafy greens you have available to keep that nutrition diverse! -
Cherry Tomatoes (½ cup, halved)
These little bursts of juiciness brightens your wrap with flavors and colors! You can substitute with bell pepper or cucumbers for a crunch. -
Salt and Pepper (to taste)
Perfect for enhancing flavors. Experiment with spices like paprika or cumin if you’re feeling adventurous! -
Hot Sauce (optional)
A dash of your favorite hot sauce will add an exciting kick. If you want something milder, try a sprinkle of chili powder instead.
Step-by-Step Instructions
Now that you have your ingredients ready, let’s put this breakfast wrap together!
-
Prepare Your Ingredients:
Start by gathering everything on your kitchen counter. Measure out the cottage cheese and dice the avocado. Having everything at hand makes cooking a delight! -
Season the Cottage Cheese:
In a bowl, take your cottage cheese and sprinkle in some salt and pepper. This is a simple step, but trust me, it makes all the difference in elevating the flavor. If you’re feeling adventurous, add a pinch of garlic powder for an extra zing! -
Warm the Tortilla:
Take your tortilla and heat it in a dry skillet over medium heat for about 30 seconds on each side until it’s warm and pliable. This helps it wrap without tearing and brings out that delicious toasted flavor! -
Assemble the Wrap:
On the warmed tortilla, spread a generous layer of the seasoned cottage cheese. Next, pile on the spinach, followed by the halved cherry tomatoes and avocado slices. Feel free to arrange it prettily; after all, we eat with our eyes first! -
Wrap It Up:
To wrap, fold in the sides of the tortilla and then roll the bottom over the filling. Tuck it snugly, so nothing spills out. If you’re unsure, check out some online tutorials for visual guides, but trust me, it’s easier than it sounds! -
Heat to Perfection:
For an extra crispy wrap, place it seam-side down in the skillet and cook for another 2 minutes on medium heat until golden brown. Flip and repeat! This step adds texture and makes everything melt together beautifully. -
Slice and Serve:
Once crispy, take it out and let it cool for a moment. Slice it in half, and serve it up with some extra hot sauce on the side for dipping if you like!
Serving Suggestions
Presentation can elevate any meal, even a simple breakfast wrap. I like to serve this wrap on a colorful plate to brighten up my morning. A side of fresh fruit—like sliced strawberries, blueberries, or orange segments—adds a splash of color and natural sweetness. Don’t forget some freshly brewed coffee or your favorite tea to sip alongside your creation!
Recipe Variations
Want to switch things up a bit? Here are a few fun variations to try:
-
Southwestern Twist: Add black beans and corn to the filling for a southwestern vibe. Toss in a sprinkle of cumin for extra flavor!
-
Mediterranean Style: Swap the cottage cheese for feta and the avocado for hummus. Throw in some black olives or sun-dried tomatoes for that over-the-top Mediterranean flavor!
-
Breakfast Burrito: Stir in a couple of scrambled eggs to your filling for an even more heartening option.
-
Sweet and Savory: For a sweet version, use ricotta cheese, sliced strawberries, and a drizzle of honey!
-
Herb Infusion: Add fresh herbs like dill or cilantro to your cottage cheese for an aromatic boost.
Chef’s Notes
This wrap has been my go-to for busy mornings or impromptu brunch with friends. I love how adaptable it is and how it can change with the seasons or what you have on hand. There was that one time when I accidentally used expired cottage cheese (oops!), but it turned out to be a funny story rather than a disaster. It also inspired me to ensure I always check my ingredients before diving in!
On lazy weekends, I sometimes serve these wraps alongside a fresh green smoothie, making for a vibrant, health-packed breakfast that feels amazing and energizes you for the day ahead. It’s truly a versatile dish that’s evolved over time but always brought joy into my kitchen!
FAQs and Troubleshooting
-
Can I make this wrap ahead of time?
Absolutely! Prepare the filling, wrap it up, and refrigerate it. Just be aware that the wrap might get a little soggy. I recommend enjoying it fresh for the best texture. -
What if I don’t like cottage cheese?
No problem! Greek yogurt or cream cheese can work as a substitute, keeping that creamy content. -
How do I prevent my avocado from browning?
Brush the slices with a little lemon juice, and they’ll stay fresh and vibrant for longer! -
Why did my wrap fall apart?
If the filling is too wet, it can cause the wrap to tear. Ensure you drain any excess moisture from ingredients like tomatoes before layering.
Nutritional Info (Optional)
Each wrap serves as a nutrient powerhouse, providing a great balance of protein, healthy fats, and fiber to keep you satisfied until lunchtime. Plus, it’s low in refined sugars, making it a fantastic choice for a fulfilling breakfast.
And there you have it! Your Easy High-Protein Breakfast Wrap is ready to be devoured. It’s the kind of recipe that fills your kitchen with warmth and excitement, just like my memories of cooking with my family. Enjoy every bite and the moment, and remember, cooking is all about joy, exploration, and sharing with those you love. Happy cooking, friends!
Print
Easy High-Protein Breakfast Wrap with Cottage Cheese and Avocado
- Total Time: 15 minutes
- Yield: 1 serving 1x
- Diet: Vegetarian
Description
A nutritious and flavorful breakfast wrap featuring cottage cheese, avocado, and fresh vegetables, perfect for a quick meal.
Ingredients
- 1 Whole Wheat Tortilla
- 1 cup Cottage Cheese
- 1 medium Avocado
- 1 cup fresh Spinach
- ½ cup Cherry Tomatoes, halved
- Salt and Pepper, to taste
- Hot Sauce, optional
Instructions
- Prepare Your Ingredients: Start by gathering everything on your kitchen counter. Measure out the cottage cheese and dice the avocado.
- Season the Cottage Cheese: In a bowl, take your cottage cheese and sprinkle in some salt and pepper. Add a pinch of garlic powder for extra flavor if desired.
- Warm the Tortilla: Heat your tortilla in a dry skillet over medium heat for about 30 seconds on each side until it’s warm and pliable.
- Assemble the Wrap: On the warmed tortilla, spread a generous layer of the seasoned cottage cheese, followed by spinach, cherry tomatoes, and avocado slices.
- Wrap It Up: Fold in the sides of the tortilla and roll the bottom over the filling, tucking it snugly.
- Heat to Perfection: Place the wrap seam-side down in the skillet and cook for another 2 minutes on medium heat until golden brown. Flip and repeat.
- Slice and Serve: Once crispy, slice the wrap in half and serve with extra hot sauce on the side if desired.
Notes
This wrap is versatile; feel free to add fresh herbs, scrambled eggs, or swap ingredients based on your preference.
- Prep Time: 10 minutes
- Cook Time: 5 minutes
- Category: Breakfast
- Method: Wrapping
- Cuisine: American
Nutrition
- Serving Size: 1 wrap
- Calories: 350
- Sugar: 3g
- Sodium: 350mg
- Fat: 15g
- Saturated Fat: 2g
- Unsaturated Fat: 12g
- Trans Fat: 0g
- Carbohydrates: 40g
- Fiber: 7g
- Protein: 20g
- Cholesterol: 10mg
Keywords: breakfast wrap, high-protein, cottage cheese, avocado, healthy breakfast

Summer Nectarine Muffins: Quick Batch Recipe for Meal Prep
Nectarine Muffins: A Cozy Kitchen Tale
Welcome to my kitchen, my fellow food lovers! Today, we’re diving into the delightful world of baking with a recipe that’s not only scrumptious but also holds a special place in my heart: Nectarine Muffins. These little gems are a celebration of summer’s ripest fruit and make for the perfect breakfast or snack. Trust me, the aroma of fresh nectarines mixed with the smell of baked goods will transform your kitchen into a cozy haven that even your neighbors will envy.
A Story from the Heart
Ah, nectarines. They remind me of my childhood during summer vacations at my grandmother’s house. Every year, she’d wake us up early, inviting us into the kitchen with the promise of something warm and sweet. Among the deliciousness of buttery pastries and cinnamon rolls, her nectarines always stole the show. One day, she decided to teach me how to make muffins, using those luscious, sun-kissed nectarines she’d plucked from her backyard tree.
As we mixed the ingredients together, I remember the dusting of flour on her nose and the way her eyes lit up whenever I’d crack an egg perfectly. The sound of the mixer whirling and the sweet scent of baking filled the air. It was one of those magical moments where I realized cooking was more than just feeding your body — it was about creating memories, traditions, and a feeling of connection. Those Nectarine Muffins were the sweet icing on our summer adventures, and I couldn’t wait to share this recipe with you.
Ingredients
Before we dive into the baking fun, let’s gather our ingredients. Here’s what you’ll need to make these delightful Nectarine Muffins:
-
Fresh Nectarines (2-3 medium): Choose ripe nectarines that yield slightly when pressed; this means they’re juicy and ready to shine in your muffins. If you don’t have nectarines, peaches or plums can work beautifully as substitutes.
-
All-Purpose Flour (2 cups): This is your base. For a whole grain touch, substitute half with whole wheat flour for added fiber and a deeper flavor.
-
Granulated Sugar (¾ cup): Perfect for that sweet touch. For a healthier option, try coconut sugar or honey, but keep in mind that using honey may alter the moistness of the muffins.
-
Baking Powder (1 tablespoon): This is your leavening agent, giving your muffins that delightful rise. Remember NOT to swap it out for baking soda; they aren’t interchangeable.
-
Salt (½ teaspoon): A pinch of salt enhances all the flavors. Just a touch is enough; too much can overpower your sweet nectarines.
-
Egg (1 large): This helps bind everything together. For a vegan option, you can use a flax egg (1 tablespoon of flaxseed meal mixed with 2.5 tablespoons of water) instead.
-
Milk (1 cup): I recommend whole milk for richness, but any milk or plant-based milk (like almond or oat) will work great!
-
Butter, melted (½ cup): Ah, the source of that magical muffin texture! If you’re after a dairy-free version, feel free to use coconut oil or applesauce for moisture.
-
Vanilla Extract (1 teaspoon): This little addition elevates the flavor profile. For a twist, almond extract can add a delightful depth.
-
Cinnamon (1 teaspoon): Warm and inviting, cinnamon pairs wonderfully with fruit. You could also experiment with nutmeg or cardamom for something unique.
Step-by-Step Instructions
Now that we have our ingredients, let’s get to the fun part! Here’s how you’ll bring these nectarines to life in muffin form:
-
Preheat Your Oven: Start by preheating your oven to 350°F (175°C). This ensures an even bake right from the start.
-
Prep Your Muffin Pan: Line a muffin tin with paper liners or grease it lightly with butter. This will keep your muffins from sticking and make cleanup a breeze. I love using parchment paper liners for a rustic touch.
-
Chop the Nectarines: Wash and dice your nectarines into small pieces (about ½ inch). You can peel them if you prefer, but I find the skin adds lovely texture and those beautiful, summery colors. Set them aside.
-
Mix Dry Ingredients: In a large bowl, whisk together the flour, sugar, baking powder, salt, and cinnamon. Give it a good mix to aerate everything; this is key for light, fluffy muffins!
-
Combine Wet Ingredients: In another bowl, beat the egg and add the milk, melted butter, and vanilla extract. Mix well to combine all the wet ingredients into one creamy fluid.
-
Combine Wet and Dry: Make a well in the center of your dry ingredient bowl and pour in the wet mixture. Stir gently until just combined; a few lumps are totally okay! Be careful not to overmix, as this can lead to tough muffins.
-
Fold in the Nectarines: Gently fold in your chopped nectarines. Make sure they’re evenly distributed throughout the batter; we want every muffin to have a gorgeous burst of flavor!
-
Scoop into Muffin Tin: Use a large spoon or an ice cream scoop to fill each muffin cup about 2/3 full. This helps them rise beautifully without overflowing.
-
Bake: Pop the muffin tin into your preheated oven and bake for 20-25 minutes. You’ll know they’re done when they’re golden brown on top and a toothpick inserted into the center comes out clean.
-
Cool and Devour: Once they’re done, remove the muffins from the oven and let them cool in the pan for about 5 minutes. Then, transfer them to a wire rack to cool completely. I know it’s tempting, but giving them a few minutes before munching ensures the flavors have a chance to settle.
Serving Suggestions
These Nectarine Muffins are perfect served warm from the oven, but here’s a fun serving suggestion: try them with a dollop of whipped cream cheese or a sprinkle of powdered sugar on top. You could also accompany them with a side of yogurt for a delightful breakfast spread or enjoy them with a cup of your favorite tea.
Recipe Variations
Now, if you’re feeling adventurous, here are a few creative twists you can add to your Nectarine Muffins:
-
Nectarine and Blueberry: Toss in a handful of fresh blueberries for a pop of color and flavor.
-
Nutty Delight: Fold in chopped nuts like almonds, walnuts, or pecans for added crunch and healthy fats.
-
Spiced Up: Experiment with a pinch of cardamom or ginger for a spicier flavor profile.
-
Coconut Twist: Add shredded coconut to the batter for a tropical vibe.
-
Chocolate Chip: A handful of semi-sweet or dark chocolate chips can turn these into an indulgent treat!
Chef’s Notes
Over the years, this Nectarine Muffin recipe has truly evolved. Initially, I was a bit nervous about baking with fruits, but experimenting with nectarines opened up a world of delicious possibilities! I remember using rather clumsy measuring cups back in the day, ending up with too much flour and too little nectarines. But as my skills improved (and I invested in a good kitchen scale — seriously, get one), I found the perfect balance.
And here’s a funny story: One day, I tried to impress my friends with a batch of nectarines I picked right from the tree, only to find out I was allergic to them! Let’s just say my afternoon of baking turned into an unexpected trip to the local pharmacy. But in the end, nothing could deter my love for these muffins!
FAQs and Troubleshooting
-
My muffins turned out dense! What did I do wrong?
- Denseness often comes from overmixing the batter. Mix just until combined and leave those lumps in. Trust the process!
-
Can I substitute nectarines for another fruit?
- Absolutely! Peaches, plums, or even apples would make fantastic substitutes. Just adjust the sugar depending on the fruit’s sweetness.
-
Why are my muffins sticking to the liners?
- This can happen if they aren’t completely cooled before removing from the liners or if they were greased minimally. Make sure to use quality liners and let them cool before serving.
-
How do I store leftover muffins?
- Store them in an airtight container at room temperature for up to 3 days. You can also freeze them for up to 2 months. Just reheat in the oven when you’re ready to indulge!
Nutritional Info (Optional)
These delightful Nectarine Muffins pack a flavorful punch while being relatively light. Each muffin has approximately:
- Calories: 180
- Protein: 4g
- Carbs: 30g
- Fats: 7g
Feel free to calculate this based on your specific ingredients and adjustments!
And there you have it! A step-by-step journey through creating magical Nectarine Muffins that are bound to bring smiles and warmth into your home. Remember, cooking is all about enjoying the process, so don’t rush — savor every moment because each muffin is a little piece of love baked right into your day. Happy baking!
Print
Nectarine Muffins
- Total Time: 40 minutes
- Yield: 12 servings
- Diet: Vegetarian
Description
Delightful nectarines come together in these scrumptious muffins, perfect for breakfast or a snack.
Ingredients
- Fresh Nectarines (2-3 medium)
- All-Purpose Flour (2 cups)
- Granulated Sugar (¾ cup)
- Baking Powder (1 tablespoon)
- Salt (½ teaspoon)
- Egg (1 large)
- Milk (1 cup)
- Butter, melted (½ cup)
- Vanilla Extract (1 teaspoon)
- Cinnamon (1 teaspoon)
Instructions
- Preheat your oven to 350°F (175°C).
- Prep your muffin pan by lining it with paper liners or greasing it lightly.
- Chop the nectarines into small pieces and set them aside.
- Mix dry ingredients in a bowl: flour, sugar, baking powder, salt, and cinnamon.
- Combine wet ingredients in another bowl: egg, milk, melted butter, and vanilla extract.
- Combine the wet and dry mixtures, stirring gently until just mixed.
- Fold in the chopped nectarines evenly throughout the batter.
- Scoop the batter into the muffin tin, filling each cup about 2/3 full.
- Bake for 20-25 minutes, or until golden brown.
- Cool in the pan for 5 minutes before transferring to a wire rack.
Notes
Serve warm with whipped cream cheese or sprinkled with powdered sugar.
- Prep Time: 15 minutes
- Cook Time: 25 minutes
- Category: Breakfast
- Method: Baking
- Cuisine: American
Nutrition
- Serving Size: 1 muffin
- Calories: 180
- Sugar: 5g
- Sodium: 200mg
- Fat: 7g
- Saturated Fat: 4g
- Unsaturated Fat: 2g
- Trans Fat: 0g
- Carbohydrates: 30g
- Fiber: 1g
- Protein: 4g
- Cholesterol: 30mg
Keywords: nectarine, muffins, breakfast, baking, summer
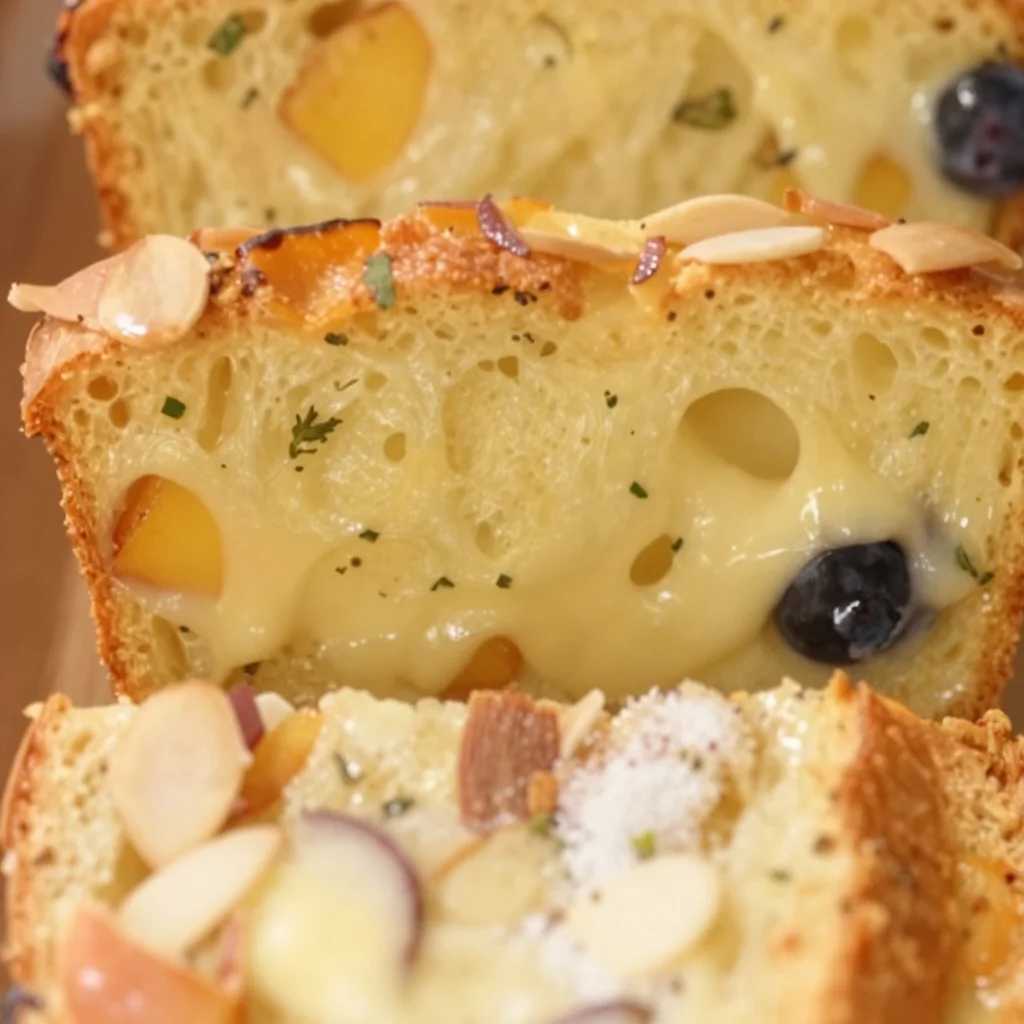
Nectarine Bread
Nectarine Bread: A Slice of Summer in Every Bite
Welcome to my cozy kitchen! Today, I’m thrilled to share a recipe that warms my heart and fills my home with the delightful aroma of baked goodness: Nectarine Bread. Picture this: it’s a sunny afternoon, and you’ve just been to the local farmer’s market, where the luscious nectarines are practically begging to be taken home. It’s that sweet, juicy fruit that gives this bread its unique flavor and makes every bite taste like summer.
What I love about Nectarine Bread is how versatile it is—it’s perfect for breakfast, a snack, or even dessert. Whether you enjoy it plain, toasted with a sprinkle of cinnamon sugar, or slathered with creamy butter, this bread is bound to bring smiles and cozy chats to your table. Plus, when you take a loaf to share with friends or family, they’ll feel the love in every slice!
Not only is this recipe easy to whip up, but it’s also a wonderful way to step into the summer vibe, even when the seasons change. You see, baking with seasonal fruits like nectarines infuses your home with warmth, transforming ordinary moments into something magical. So grab your favorite apron (mine’s definitely stained—it tells the story of countless kitchen adventures!) and let’s get started on this delightful Nectarine Bread!
A Slice of Nostalgia
Ah, the memories that flood back when I think of Nectarine Bread! I can still hear the laughter of my childhood summers spent at my Grandma’s house. Every Saturday, my siblings and I would gather in her sunlit kitchen, where the scents of fresh fruit and warm bread danced through the air. Grandma had this way of making even the simplest recipes feel special, and her Nectarine Bread was no exception.
I remember the first time I helped her bake it. Speckles of flour covered the countertops, and we giggled as we tried to measure the sugar accurately—always a little more than the recipe called for, of course! She taught me the importance of using fresh, ripe nectarines, and the thrill of getting your hands messy while mixing batter. The best part? We could hardly wait for it to cool before we had our first slice, warm from the oven, with a pat of butter melting into the fresh loaf.
To this day, whenever I bake Nectarine Bread, I feel a wave of nostalgia wrap around me like a warm hug. It’s more than just a recipe; it’s a love letter to those carefree summer days, celebrating the joy of cooking with the people we cherish. And I can’t wait for you to create your own memories with this simple yet profound dish!
Ingredients
Here are the ingredients you’ll need to whip up this delicious Nectarine Bread:
-
3 ripe nectarines: Look for slightly soft, fragrant nectarines. They should give a bit when gently pressed. If you can’t find nectarines, peaches make for a fantastic substitute since they have a similar flavor and texture.
-
1 cup granulated sugar: This is the sweet love that brings it all together! If you want to cut down on sugar, feel free to use coconut sugar or a sugar substitute, but keep in mind that it might alter the flavor slightly.
-
1/2 cup unsalted butter, softened: The richness of butter adds depth to the bread’s flavor. If you’re in a pinch, you can substitute it with applesauce for a healthier option or use vegan butter for a dairy-free version.
-
2 large eggs: These little powerhouses help bind the ingredients. If you need an egg replacement, try using 1/4 cup of unsweetened applesauce for each egg!
-
1 teaspoon vanilla extract: A hint of vanilla makes everything taste amazing! If you want to get fancy, try using almond extract for a nutty twist.
-
1 teaspoon baking soda: This will help the bread rise beautifully. Make sure it’s fresh for the best results—if it’s been sitting in your pantry for a while, it might be time to replace it!
-
1 teaspoon baking powder: Another leavening agent that makes your bread fluffy. Similar to baking soda, check the expiration date for optimal performance.
-
1/2 teaspoon salt: This enhances the flavors of all the ingredients. If you’re watching your sodium intake, you can use a lower-sodium salt.
-
2 cups all-purpose flour: The base of the bread! If you’re looking for a whole wheat alternative, feel free to substitute half of the flour with whole wheat flour for added nutrition.
-
1/2 cup chopped walnuts (optional): These add a delightful crunch! Feel free to swap them with pecans, or omit them altogether if you’re nut-free.
Step-by-Step Instructions
Now, let’s get our hands a little dirty and dive into the making of this glorious Nectarine Bread!
-
Preheat your oven: Start by preheating your oven to 350°F (175°C). This ensures your bread bakes evenly and comes out perfectly every time.
-
Prepare the nectarines: Wash, pit, and chop your nectarines into small pieces. Don’t worry if they’re a bit messy—remember, we’re all about love and coziness in the kitchen! You can leave the skin on for added texture and nutrients, or peel them if that’s your preference.
-
Cream the butter and sugar: In a large mixing bowl, use an electric mixer to beat the softened butter and granulated sugar together until it’s light and fluffy. This should take about 2-3 minutes. Pro tip: Scrape down the sides of the bowl halfway through to ensure everything gets mixed evenly!
-
Add the eggs and vanilla: One at a time, add the eggs to the butter-sugar mixture, beating well after each addition. Then mix in the vanilla extract. Your batter should be looking smooth and delicious at this stage!
-
Combine dry ingredients: In another bowl, whisk together the flour, baking powder, baking soda, and salt until well blended. This helps distribute the leavening agents evenly throughout the flour.
-
Mix it all together: Gradually add the dry mixture to your wet mixture. You want to mix thoroughly but be careful not to overmix. Stir in the chopped nectarines and walnuts (if using), folding them into the batter gently.
-
Prepare the loaf pan: Grease a 9×5-inch loaf pan with some butter or cooking spray to prevent sticking. You can also line it with parchment paper for easy removal.
-
Pour and spread: Pour the batter into the prepared loaf pan, and use a spatula to spread it evenly. Tap it gently on the counter to release any air bubbles lurking inside.
-
Bake: Pop your loaf pan in the preheated oven and let it bake for about 60-70 minutes. You’ll know it’s done when a toothpick inserted into the center comes out clean. If the top starts browning too quickly, you can cover it loosely with aluminum foil.
-
Cool it down: Once baked, remove it from the oven and let it cool in the pan for about 10 minutes. After that, transfer it onto a wire rack to cool completely. This is the hardest part—waiting to slice into that warm, fragrant bread!
Serving Suggestions
Now the best part: serving your Nectarine Bread! Once it’s cooled, slice it into hearty pieces. You can serve it plain, sprinkle a bit of cinnamon sugar on top, or even spread a thin layer of butter or cream cheese for a decadent touch. It’s perfect alongside a cup of tea or coffee, making it a delightful afternoon treat or a lovely addition to your brunch spread!
Recipe Variations
While the classic Nectarine Bread is a joy on its own, let’s explore a few fun variations to keep things exciting:
-
Peachy Keen: Swap out the nectarines for ripe peaches for a similar, yet uniquely sweet flavor.
-
Berry Blast: Add in a cup of fresh or frozen berries, like blueberries or raspberries, for a burst of color and extra fruitiness.
-
Zesty Citrus: Incorporate some grated lemon or orange zest into the batter for a refreshing citrus twist.
-
Spiced Up: Experiment with spices like cinnamon, nutmeg, or allspice for a warm flavor narrative that deepens the taste of your bread.
-
Vegan Delight: Replace the eggs with flaxseed meal and water, and use plant-based yogurt instead of butter for a delightful vegan version that’s just as scrumptious!
Chef’s Notes
As I look back on my journey with this Nectarine Bread, it’s been a recipe that has grown with me. I often think about Grandma’s method of mixing—how her love for baking showed in every detail. Over the years, I’ve added my flair with different spices and flavors. This bread has welcomed countless variations and adaptations as I’ve experimented with flavors.
One of the funniest kitchen stories I have involves a baking mishap where I accidentally substituted salt for sugar one evening—thankfully, the nectarines saved the day, masking the salty flavor (though I wouldn’t recommend this method!).
No matter how it evolves, the beauty of Nectarine Bread is that it remains an expression of care, love, and the warmth of gathering around the table with those you cherish.
FAQs and Troubleshooting
Q: My bread didn’t rise! What went wrong?
A: If your bread didn’t rise, check the freshness of your baking powder and baking soda—they should be active. Also, make sure the mixture was mixed just enough; overmixing can lead to dense bread!
Q: Can I freeze Nectarine Bread?
A: Absolutely! This bread freezes beautifully. Wrap it tightly in plastic wrap and aluminum foil before placing it in the freezer. It’ll last for up to three months. Just thaw it overnight in the fridge when you want to enjoy it.
Q: My bread is too dry. How can I fix that?
A: This could be due to overbaking or too much flour. Make sure to measure your flour accurately (spoon it into the cup rather than packing it down). If it happens again, try adding a tablespoon of yogurt or applesauce to the batter next time!
Q: Can I add other fruits?
A: Definitely! You can mix and match with fruits like apricots, apples, or even a medley of summer fruits, keeping the spirit of the season alive in your bread!
Nutritional Info
(For approximate nutritional information)
- Serving size: 1 slice (approx. 1/12 of a loaf)
- Calories: 210
- Total fat: 8g
- Saturated fat: 4g
- Cholesterol: 40mg
- Sodium: 120mg
- Total carbohydrates: 32g
- Dietary fiber: 1g
- Sugars: 12g
- Protein: 3g
As you embark on your baking adventure, just remember—cooking is all about love, creativity, and sharing with those around you. So, dive in and make this Nectarine Bread your own. I can’t wait to hear about your kitchen stories and the memories you create as you bake! Happy cooking, friends!
Print
Nectarine Bread
- Total Time: 85 minutes
- Yield: 12 servings 1x
- Diet: Vegetarian
Description
A delightful bread infused with juicy nectarines, perfect for breakfast, snacks, or dessert.
Ingredients
- 3 ripe nectarines, chopped
- 1 cup granulated sugar
- 1/2 cup unsalted butter, softened
- 2 large eggs
- 1 teaspoon vanilla extract
- 1 teaspoon baking soda
- 1 teaspoon baking powder
- 1/2 teaspoon salt
- 2 cups all-purpose flour
- 1/2 cup chopped walnuts (optional)
Instructions
- Preheat your oven to 350°F (175°C).
- Wash, pit, and chop your nectarines into small pieces.
- Cream the butter and sugar together until light and fluffy.
- Add the eggs one at a time, beating well after each, then mix in the vanilla extract.
- Whisk together the flour, baking powder, baking soda, and salt in another bowl.
- Gradually add the dry mixture to the wet mixture, mixing until just combined.
- Fold in the chopped nectarines and walnuts (if using).
- Grease a 9×5-inch loaf pan and pour in the batter, spreading it evenly.
- Bake for 60-70 minutes or until a toothpick comes out clean.
- Cool in the pan for 10 minutes before transferring to a wire rack.
Notes
This bread can be served plain, with cinnamon sugar, or butter. Also freezes well for up to three months.
- Prep Time: 15 minutes
- Cook Time: 70 minutes
- Category: Baked Goods
- Method: Baking
- Cuisine: American
Nutrition
- Serving Size: 1 slice
- Calories: 210
- Sugar: 12g
- Sodium: 120mg
- Fat: 8g
- Saturated Fat: 4g
- Unsaturated Fat: 4g
- Trans Fat: 0g
- Carbohydrates: 32g
- Fiber: 1g
- Protein: 3g
- Cholesterol: 40mg
Keywords: nectarine, quick bread, summer recipe, easy baking, fruit bread
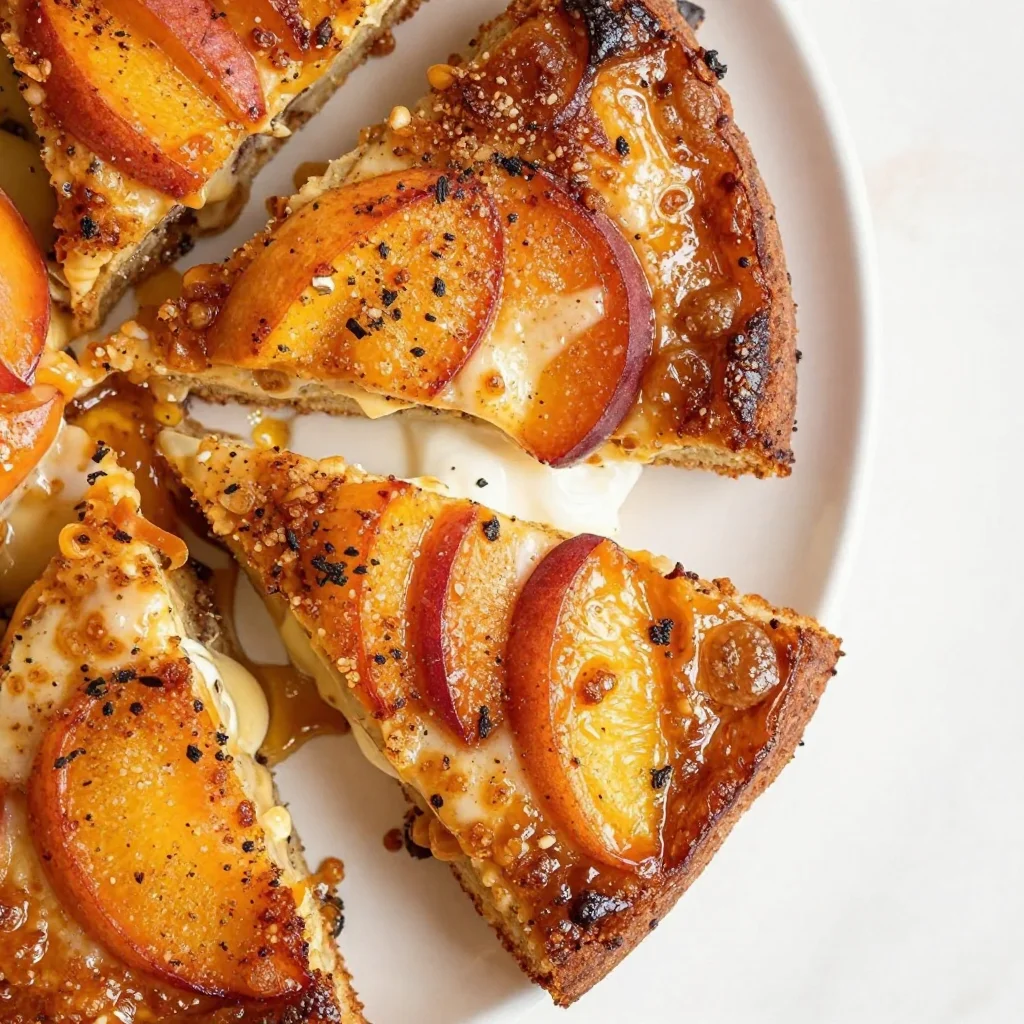
Quick Summer Peach Upside-Down Cake with Browned Butter
Browned Butter Peach Upside Down Cake: A Slice of Summer Serenity
Welcome back to my cozy kitchen! If you’ve ever wanted to bring a taste of summer inside and indulge in something that will remind you of lazy afternoons spent under the sun, then you’re in for a treat. Today, we’re baking a luscious Browned Butter Peach Upside Down Cake—a dish that encapsulates the essence of summer, wrapped in warm, buttery goodness.
Imagine this: the sweet aroma of peaches mixing with the nutty scent of browned butter is enough to make any home feel like a comforting embrace. When you flip this cake over and reveal the golden, caramelized peaches glistening in their sugary glory, you’re not just serving dessert; you’re sharing a piece of your heart. This cake is perfect for everything from a summer picnic to a cozy family dinner, and trust me, it will have everyone asking for seconds!
Now, let’s dive into the journey of making this delightful cake, where I’ll share a personal story, and the joys of cooking along the way.
A Slice of Nostalgia
Growing up, summer meant my grandmother’s kitchen bustling with activity. On weekends, we would gather as a family, chatting and laughing while she whipped up her famous peach cobbler. I can still hear the sound of the oven timer reminding us that something extraordinary was on the way. I remember trying to sneak a taste of the juicy peaches and sugary syrup before they made it into the oven, a feat that often ended with a playful slap on the hand.
One particularly sunny Saturday, grandma introduced me to the magic of caramelizing butter. The nutty aroma erupted as she explained how browned butter could transform an ordinary dish into something extraordinary. As we layered the peaches in the pan, I felt the excitement of creating something special alongside her. That moment sparked a lifelong love for not just baking, but for the memories and togetherness that come with sharing food. Now, I keep that spirit alive in my kitchen by creating dishes that not only taste good but also bring people together—just like my grandmother did.
Ingredients
To create your Browned Butter Peach Upside Down Cake, you’ll need the following ingredients. Each one has a purpose, and I’ll share some insights and substitutions to elevate your baking game!
-
Peaches (4-5 medium): Fresh, ripe peaches are best as they provide sweetness and juiciness. If peaches aren’t in season, feel free to use canned peaches (drained) or substitute with nectarines for a similar flavor profile.
-
Unsalted Butter (1/2 cup): We’re browning this butter to create depth and flavor. If you’re dairy-free, switch to coconut oil for a slightly different but delicious flavor.
-
Brown Sugar (3/4 cup): A must for that rich caramelized flavor. You can swap it for coconut sugar for a healthier option, though it may alter the taste slightly.
-
Granulated Sugar (1/2 cup): This sweetens the cake batter itself. If you prefer a low-calorie option, consider a sugar substitute, but keep in mind it may affect the texture.
-
All-Purpose Flour (1 ½ cups): This provides the structure for our cake. Whole wheat flour can be used for a nuttier flavor, or if you’re gluten-free, almond or oat flour can be great alternatives.
-
Baking Powder (2 teaspoons): Essential for helping our cake rise. Always check your baking powder’s expiration date to ensure the cake rises beautifully.
-
Salt (1/4 teaspoon): A pinch enhances the flavors. If you’re on a low-sodium diet, use sea salt as a substitute.
-
Eggs (2 large): Eggs bind the ingredients and provide moisture. For a vegan version, you can use flax eggs (1 tbsp flaxseed meal + 2.5 tbsp water per egg, let sit until gel-like).
-
Vanilla Extract (1 teaspoon): This elevates the flavor profile of the cake. Feel free to use almond extract for an aromatic twist.
Step-by-Step Instructions
Let’s get cooking! Follow these steps to make your own Browned Butter Peach Upside Down Cake. Don’t worry—I’ll sprinkle in some handy tips along the way!
-
Preheat the Oven: Begin by preheating your oven to 350°F (175°C). This ensures a consistent baking temperature from the moment your cake goes in.
-
Brown the Butter: In a medium saucepan over medium heat, melt the butter. Stir frequently until it begins to foam. Keep an eye on it, as it can turn quickly; you’re aiming for a golden brown color with a nutty aroma. Remove it from heat and let it cool.
-
Prepare the Peaches: While your butter cools, slice your peaches. If you’re using fresh ones, cut them into wedges. If using canned, remember to drain them.
-
Caramelize the Peaches: In a 9-inch round cake pan, pour in the brown sugar and the browned butter (reserving about 2 tablespoons of the butter for the cake batter). Spread it evenly and arrange the sliced peaches on top in a circular pattern. Set this aside while you make the batter.
-
Make the Batter: In a mixing bowl, whisk together the flour, baking powder, and salt. In another bowl, beat the eggs with the remaining granulated sugar until light and fluffy—about 2-3 minutes. Mix in the reserved browned butter and vanilla extract until well combined. Gradually add the flour mixture, mixing until just combined (be careful not to overmix!).
-
Combine and Bake: Pour the batter over the arranged peach slices in the pan, smoothing out the top with a spatula. Bake in your preheated oven for about 30-35 minutes or until a toothpick comes out clean from the center.
-
Cool and Flip: Once baked, let the cake cool in the pan for about 10 minutes. Carefully run a knife around the edges and flip the pan onto a serving plate. The peaches should be beautifully caramelized and glistening—how beautiful is that?
-
Serve: Serve warm or at room temperature with a scoop of vanilla ice cream or a dollop of whipped cream for an extra layer of indulgence. Trust me, this cake is heavenly just as it is, but ice cream takes it up a notch!
Serving Suggestions
To serve your Browned Butter Peach Upside Down Cake, simply slice it into wedges, revealing the beautiful golden peaches on top. You can dress it up by dusting it with powdered sugar or adding a scoop of vanilla ice cream or a dollop of freshly whipped cream on the side. Garnishing with fresh mint leaves can add a lovely touch of color and freshness, making it spring and summer-ready!
Recipe Variations
Here are a few fun twists to keep your Browned Butter Peach Upside Down Cake exciting:
-
Spiced Version: Add a teaspoon of ground cinnamon or nutmeg to the batter for a warm, spiced flavor.
-
Seasonal Swap: Try swapping peaches for plums, cherries, or even apples in the fall for a seasonal treat.
-
Nutty Crunch: Incorporate chopped pecans or walnuts into the batter for some added crunch and richness.
-
Coconut Twist: Substitute half the all-purpose flour with coconut flour for a tropical flair that pairs beautifully with the peaches.
-
Lemon Zest: Add the zest of one lemon to the batter for a fresh, tangy brightness that balances the sweetness of the peaches perfectly.
Chef’s Notes
As I dive into this recipe, it brings back so many wonderful memories of summer with my grandmother—especially the time I entered a baking contest with this very cake! I was nervous, hovering around the oven, hoping that it would turn out perfectly. It didn’t just win over the judges; it won the hearts of everyone at the picnic!
This cake has been through many variations over the years, from adding blueberries for an extra fruity punch to experimenting with different spices. Each version holds a special memory, and that’s the beauty of cooking—recipes evolve as we do, filled with stories, laughter, and love.
FAQs and Troubleshooting
Q: My cake didn’t rise as much as I expected. What happened?
A: First, check that your baking powder isn’t expired; old leavening agents can prevent the cake from rising. Also, ensure you don’t overmix the batter, as this can create a dense texture.
Q: My peaches were mushy. How can I prevent this?
A: Use ripe but firm peaches to ensure they hold their shape during baking. If using canned peaches, drain them well to prevent excess moisture.
Q: Can I prepare this cake in advance?
A: Yes! You can bake the cake a day ahead. Just cover it tightly and store it at room temperature. When ready to serve, gently warm it in the oven.
Q: How can I keep this cake moist?
A: Be careful not to overbake it, as this can lead to a dry cake. Check it a few minutes before the recommended baking time. For added moisture, you can also brush a sugar syrup over the cake after baking.
Nutritional Info
While I love indulging in a sweet treat every now and then, it’s good to be mindful of portions. Here’s a rough estimate of the nutritional value per slice, based on 12 slices:
- Calories: 220
- Total Fat: 9g
- Saturated Fat: 5g
- Cholesterol: 40mg
- Sodium: 150mg
- Total Carbohydrates: 34g
- Dietary Fiber: 1g
- Sugars: 17g
- Protein: 3g
Note: Nutritional values may vary based on ingredient substitutes and portion sizes.
And there you have it—a journey through the delightful world of Browned Butter Peach Upside Down Cake! I hope this recipe brings as much joy and warmth to your kitchen as it has to mine. So gather your loved ones, indulge in some sweet nostalgia, and celebrate the joy of home cooking. Happy baking!
Print
Browned Butter Peach Upside Down Cake
- Total Time: 50 minutes
- Yield: 12 servings
- Diet: Vegetarian
Description
A delightful Browned Butter Peach Upside Down Cake that captures the essence of summer with caramelized peaches and nutty butter flavor.
Ingredients
- Peaches (4-5 medium)
- Unsalted Butter (1/2 cup)
- Brown Sugar (3/4 cup)
- Granulated Sugar (1/2 cup)
- All-Purpose Flour (1 ½ cups)
- Baking Powder (2 teaspoons)
- Salt (1/4 teaspoon)
- Eggs (2 large)
- Vanilla Extract (1 teaspoon)
Instructions
- Preheat the oven to 350°F (175°C).
- Brown the butter in a medium saucepan over medium heat until golden brown with a nutty aroma, then let it cool.
- Prepare the peaches by slicing them into wedges.
- Caramelize the peaches by combining brown sugar and browned butter in a cake pan and layering the peach slices on top.
- Make the batter by whisking flour, baking powder, and salt, then mixing in beaten eggs, granulated sugar, reserved butter, and vanilla.
- Combine the batter with the peaches and bake for 30-35 minutes until a toothpick comes out clean.
- Cool the cake for 10 minutes, then flip onto a serving plate to reveal the caramelized peaches.
- Serve warm with vanilla ice cream or whipped cream.
Notes
This cake is best served warm and can be made a day in advance; warm before serving.
- Prep Time: 15 minutes
- Cook Time: 35 minutes
- Category: Dessert
- Method: Baking
- Cuisine: American
Nutrition
- Serving Size: 1 slice
- Calories: 220
- Sugar: 17g
- Sodium: 150mg
- Fat: 9g
- Saturated Fat: 5g
- Unsaturated Fat: 3g
- Trans Fat: 0g
- Carbohydrates: 34g
- Fiber: 1g
- Protein: 3g
- Cholesterol: 40mg
Keywords: Peach Cake, Upside Down Cake, Summer Dessert, Browned Butter
Nectarine Spice Butter: Quick 5-Minute Summer Toast Spread
Nectarine Spice Butter: The Ultimate Cozy Spread
Welcome to my warm and inviting kitchen! I’m Olivia Bennett, your friendly guide to creating delicious dishes that fill your home with love and mouthwatering aromas. Today, I’m excited to share one of my favorite recipes that’s perfect for spreading on toast, pancakes, or even as a delightful topping for ice cream: Nectarine Spice Butter.
There’s something truly magical about the combination of ripe nectarines and warming spices. With every bite, you’re transported to sun-kissed orchards and cozy afternoons spent with loved ones. This nectarines’ sweet, juicy flesh paired with spices like cinnamon and nutmeg creates a luscious spread that embodies everything I love about cooking — it’s about bringing people together and savoring the simple pleasures.
In this blog post, we’ll explore the joyous process of making Nectarine Spice Butter, filled with personal anecdotes, tips, and variations that will inspire you to get creative in the kitchen. So, grab your apron, and let’s get started on this delightful culinary adventure!
A Sweet Memory with Nectarine Spice Butter
Before we dive into the recipe, let me take you back to my childhood. I remember spending long summer afternoons at my grandmother’s house, where she would whip up her famous fruit butters. The sound of her hand mixer buzzing through the kitchen would bring the whole family together, eagerly waiting for a taste of whatever she was concocting that day.
Nectarines were her favorite, and she would always have a basket of them ripening on the counter, their sweet fragrance permeating the air. One hot afternoon, as she carefully blended the nectarines with spices, I was her little sous-chef, perched on a stool, watching every meticulous step. The result was an incredibly creamy Nectarine Spice Butter that was both refreshing and comforting.
This buttery, dreamy concoction became our favorite spread for Sunday brunch. Slathered on warm, homemade biscuits and paired with a cup of chamomile tea, it was pure bliss. Every bite was a reminder of the love and warmth that my grandmother infused into her cooking. I want to share those feelings with you as we recreate this delightful Nectarine Spice Butter together.
Ingredients You’ll Need
Here’s what you’ll need to create your own batch of Nectarine Spice Butter. Each ingredient plays an essential role in developing the rich, harmonious flavors that make this butter a treat!
-
Fresh Nectarines (4-6 medium-sized): Choose ripe nectarines for the best flavor! If they’re unavailable, peaches can be a fantastic stand-in.
-
Unsalted Butter (1 cup): Bring this to room temperature for easy mixing. If you’re looking for a lighter option, try using a plant-based butter for a vegan alternative.
-
Brown Sugar (1/2 cup): This adds a lovely caramelized flavor. If you prefer less sweetness, reduce the sugar, or go for maple syrup instead for a different flavor twist.
-
Ground Cinnamon (1 teaspoon): Cinnamon complements the sweetness of the nectarines beautifully! If you’re feeling adventurous, try adding a bit of cardamom for extra warmth.
-
Ground Nutmeg (1/4 teaspoon): A pinch goes a long way! Nutmeg adds a cozy depth to the butter. If you don’t have it on hand, allspice can be a good substitute.
-
Vanilla Extract (1 teaspoon): A splash of vanilla ties everything together with a sweet, aromatic note. Feel free to experiment with almond extract if you want a slightly different taste.
-
Lemon Juice (1 tablespoon): This adds brightness and balances the sweetness. Freshly squeezed is best, but bottled lemon juice works in a pinch!
Step-by-Step Instructions
Step 1: Prepare the Nectarines
First, wash your nectarines thoroughly under cool water. Cut them in half, remove the pits, and chop them into small chunks. If you’re not a fan of the skin, feel free to peel them, but I promise the skin adds plenty of nutrients and flavor!
Step 2: Cook the Nectarines
In a medium saucepan over medium heat, add the chopped nectarines. Allow them to cook for about 5-7 minutes, stirring occasionally until they start to soften and release their juices. This step allows the nectarine flavor to intensify! You’ll know they’re ready when they become fragrant and mushy.
Step 3: Blend it Up!
Once your nectarines are cooked, remove them from heat and let them cool slightly. Now, transfer the mixture to a blender or food processor. Add the room-temperature unsalted butter, brown sugar, ground cinnamon, ground nutmeg, vanilla extract, and lemon juice. This is where the magic happens!
Step 4: Blend Until Smooth
Blend the mixture on high speed until it reaches a creamy, smooth consistency. If you prefer a chunkier texture, pulse it a few times instead of blending completely. Don’t forget to scrape down the sides of the blender for an even mix. I find this part to be the most exciting — watching all those ingredients transform into something so luscious!
Step 5: Taste and Adjust
Take a moment to taste the Nectarine Spice Butter. If you desire more sweetness, feel free to stir in a little extra brown sugar or maple syrup. Similarly, if you want more spice or brightness, add a pinch more cinnamon or a touch more lemon juice. Remember, this is your creation!
Step 6: Chill the Butter
Transfer your Nectarine Spice Butter into an airtight container and let it cool at room temperature for about 30 minutes. After that, pop it in the fridge to allow the flavors to meld. It’s like a mini flavor party that only gets better with time!
Serving Suggestions
Serving this delightful Nectarine Spice Butter is as fun as making it. Spread it generously over warm toast, pancakes, or waffles for a breakfast that feels like a hug on a plate. You can serve it as a delectable dip with fresh fruit slices or use it as a topping for oatmeal and yogurt for a delightful snack. Get creative and pair it with cheese for a unique charcuterie board addition!
Recipe Variations
-
Spicy Kick: Add a pinch of cayenne pepper or a dash of ground ginger for some heat.
-
Nutty Delight: Stir in some chopped walnuts or pecans for added crunch and flavor.
-
Herbal Twist: Try incorporating finely chopped fresh mint or basil for a refreshing element.
-
Citrus Burst: Replace the lemon juice with orange juice for a zesty alternative.
-
Caramel Swirl: Drizzle in some caramel sauce for a decadent twist that’s sure to impress!
Chef’s Notes
I’ve been making this Nectarine Spice Butter for years, and every time, it brings a smile to my face. I remember gifting jars to my friends during the holidays, complete with handmade labels and a little spoon for serving. They loved it! The recipe has evolved over time, but the heart behind it remains the same. It’s all about sharing love through food.
One time, I experimented and added a blend of tea spices that my friend suggested—cinnamon, cardamom, and ginger. It was such a delightful twist! If you’re feeling adventurous, don’t hesitate to put your spin on this classic recipe. Cooking is all about exploring and enjoying the process.
FAQs and Troubleshooting
1. Can I use frozen nectarines?
Absolutely! Frozen nectarines can work well in this recipe. Just be sure to thaw them first and drain any excess moisture to avoid a watery butter.
2. How long will my Nectarine Spice Butter last?
When stored in an airtight container in the refrigerator, it should last about 2-3 weeks. You can also freeze it for up to 3 months.
3. What can I serve with Nectarine Spice Butter besides bread?
This delicious spread pairs beautifully with pancakes, waffles, oatmeal, and even Greek yogurt. It’s also excellent drizzled over cheesecake or enjoyed with cheese.
4. My recipe turned out too sweet! What can I do?
If your Nectarine Spice Butter finished too sweet for your liking, you might try blending in a little more lemon juice or adding a pinch of salt to balance out the sweetness.
Nutritional Info
While I often focus on flavor, it’s also nice to be mindful of nutrition. This Nectarine Spice Butter contains natural sugars from the nectarines and some healthy fats from the unsalted butter, making it both a treat and a source of energy, especially when enjoyed in moderation.
So there you have it — a warm, delightful recipe for Nectarine Spice Butter that’s not just a spread; it’s a flavor-packed journey filled with memories, love, and community. I hope it brings as much joy to your kitchen as it has to mine. Happy cooking!
Print
Nectarine Spice Butter
- Total Time: 25 minutes
- Yield: 2 cups 1x
- Diet: Vegetarian
Description
A luscious spread made with ripe nectarines and warming spices, perfect for toast, pancakes, or as a topping for desserts.
Ingredients
- 4–6 medium-sized Fresh Nectarines
- 1 cup Unsalted Butter, room temperature
- 1/2 cup Brown Sugar
- 1 teaspoon Ground Cinnamon
- 1/4 teaspoon Ground Nutmeg
- 1 teaspoon Vanilla Extract
- 1 tablespoon Lemon Juice
Instructions
- Prepare the Nectarines by washing and chopping them.
- Cook the Nectarines in a saucepan over medium heat for 5-7 minutes.
- Blend the cooked nectarines with butter, sugar, spices, and lemon juice.
- Blend until smooth.
- Taste and adjust sweetness or spice as desired.
- Chill the butter in an airtight container.
Notes
Serve on toast, pancakes, or as a creative dip. Store in the fridge for up to 2-3 weeks.
- Prep Time: 15 minutes
- Cook Time: 10 minutes
- Category: Spread
- Method: Blending
- Cuisine: American
Nutrition
- Serving Size: 1 tablespoon
- Calories: 100
- Sugar: 8g
- Sodium: 50mg
- Fat: 9g
- Saturated Fat: 5g
- Unsaturated Fat: 4g
- Trans Fat: 0g
- Carbohydrates: 10g
- Fiber: 1g
- Protein: 1g
- Cholesterol: 30mg
Keywords: nectarine butter, fruit spread, cozy recipe, summer spread, homemade butter
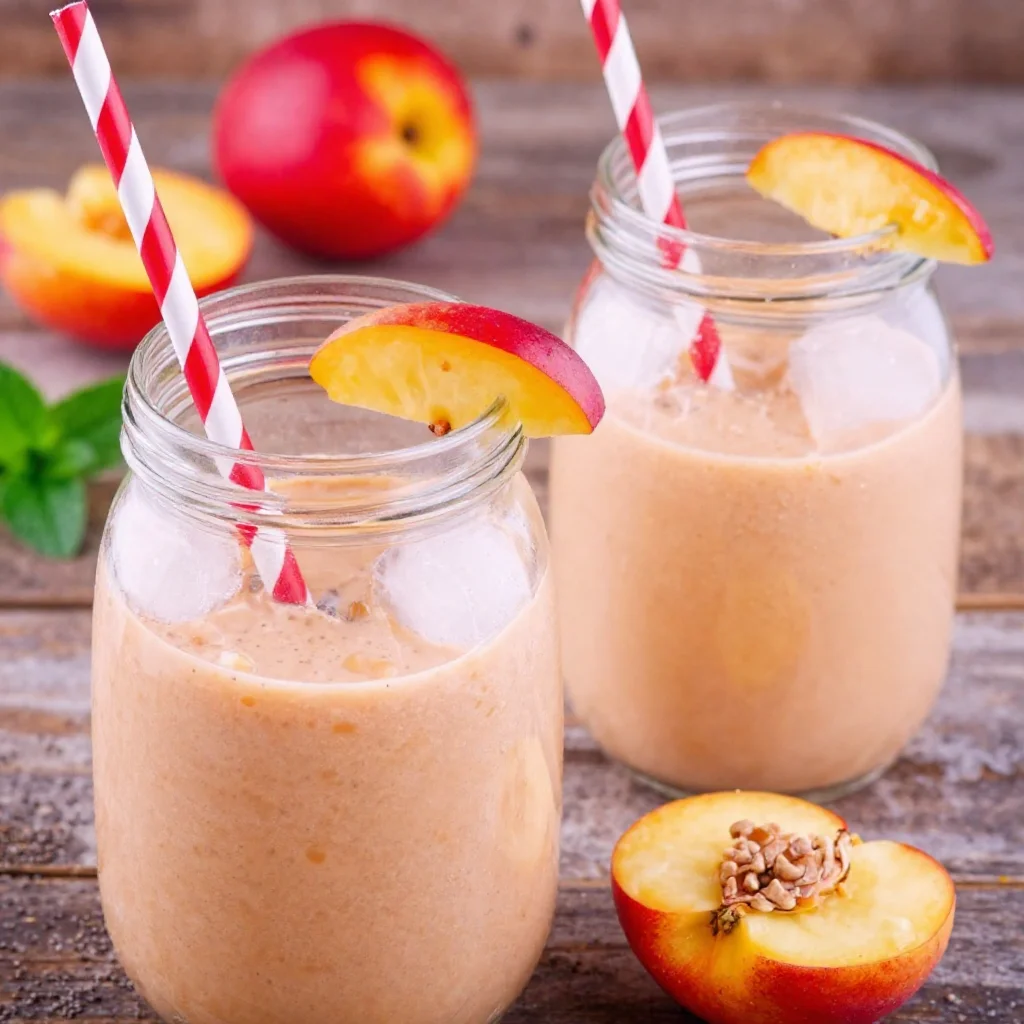
Minute Sunny Nectarine Smoothie for Busy Mornings
Embrace Summer with a Sunny Nectarine Smoothie
Welcome to my kitchen! Today, I’m all about celebrating the sunshine—both outside and in a glass. If you’re like me, summertime is a golden opportunity to enjoy fresh fruits and vibrant flavors. Enter the Sunny Nectarine Smoothie, a refreshing blend that captures the essence of sun-soaked days and lazy afternoons. This smoothie is not just a treat for your taste buds; it’s a bright and cheerful addition to your morning routine, afternoon pick-me-up, or even a post-workout refresher.
Nectarines are one of those delightful fruits that feel almost like a celebration of summertime. Their sweet, juicy flesh and delicate fragrance bring back memories of summer picnics and lazy days spent in the sun, and they’re packed with vitamins and nutrients, making them the perfect smoothie star. Picture this: A sunny kitchen filled with laughter, the scent of ripe nectarines wafting through the air while you whip together a luscious drink that you can share with friends or savor solo. Sounds blissful, right?
In this blog post, I’ll guide you through making a Sunny Nectarine Smoothie from scratch—a recipe so easy and delicious that even the most novice cook can impress their friends and family. I’ll share a personal story that connects me deeply to this dish, tips to ensure your smoothie comes out perfectly, and ways you can customize it to suit your taste. Trust me, after you blend this up, you’ll find yourself dreaming of summer long after it’s over!
So, grab your blender, and let’s get started on this delicious journey!
A Sweet Nostalgic Memory
When I was little, my grandmother’s backyard was my favorite playground. It was like an enchanted garden bursting with color, where she grew everything from juicy tomatoes to vibrant nectarines. One summer day, while exploring the treasure trove of fruits, I stumbled upon a hidden spot. Climbing the small tree, I found myself surrounded by ripe nectarines, glistening in the sunlight, waiting for someone to pick them. I remember the thrill of snatching a few and running inside to show my grandma.
She would often make this delightful nectarine dessert that we devoured in the shade of that tree. But one particularly warm afternoon, she blended some nectarines with yogurt and a splash of orange juice, creating a refreshing treat she called "nectarine sunshine." That was my first-ever smoothie experience, and I was hooked!
I love to honor that memory every time I blend up a Sunny Nectarine Smoothie. It brings me back to that magical summer, a reminder of how food can create lasting connections and joyful moments. This recipe is more than just a drink; it’s a comforting nod to my childhood, embodying warmth, flavor, and a sprinkle of nostalgia.
Ingredients
Here’s what you’ll need to make a delicious Sunny Nectarine Smoothie. Each ingredient plays an important role in flavor and texture, so let’s dive in:
-
2 ripe nectarines:
Sweet, juicy nectarines are the stars of our smoothie! Look for ones that give slightly when pressed for maximum ripeness. If nectarines aren’t available, peaches can be a great substitute, offering a similar sweetness. -
1 banana:
The banana adds creaminess and natural sweetness. If you prefer a low-sugar option, consider using half a banana or substituting it with avocado for a silky texture without the sweetness. -
1 cup of Greek yogurt or non-dairy yogurt:
This adds a wonderful creaminess and a protein boost. Feel free to swap it with your favorite yogurt style—dairy-free, coconut, or almond-based yogurts work well too! -
1 cup of orange juice:
Freshly squeezed orange juice is best for vibrant flavor, but you can use store-bought varieties. For a twist, try pineapple juice or coconut water for an added tropical flair. -
1 tablespoon of honey or maple syrup (optional):
Depending on your taste preference, you can add a splash of honey or maple syrup for extra sweetness. If you’re aiming for a vegan option, go with agave syrup or simply omit it if you love the natural sweetness of the fruits. -
1 cup of ice:
Ice helps create that frosty, refreshing smoothie texture. Need a creamier blend? Substitute half of the ice with frozen banana slices instead!
Step-by-Step Instructions
Now that we have our ingredients ready, let’s dive into the preparation! I’ll guide you through each step, sprinkling in some handy tips along the way.
-
Prep Your Ingredients:
Start by thoroughly washing the nectarines—they’re often exposed to soil, so a good rinse makes them nice and clean. After washing, slice the nectarines in half, remove the pit, and chop them into chunks. If you’re using peaches instead, follow the same process. Peel the banana and set aside. -
Add the Fruit:
Toss the nectarines, banana, and one cup of yogurt into your blender. As you add them, take a moment to admire the beautiful colors—the vibrant orange and yellow will instantly uplift your mood! -
Pour in the Juice:
Next, add the cup of bright orange juice to the blender. If you’re using freshly squeezed juice, it’s worth the extra effort. The zestiness of fresh juice elevates the flavors remarkably! -
Sweeten It Up:
If you’re using honey or maple syrup, now’s the time to drizzle it in! Adjust according to your taste. Pro tip: If you’re unsure how sweet your smoothie will be, start with a smaller amount of sweetener, and you can always add more later. -
Ice, Ice, Baby!:
Add the ice to the blender for that frosty, refreshing touch. For a creamier version, use frozen banana slices instead of ice. -
Blend Until Smooth:
Cover the blender and blend on high until the mixture is completely smooth and creamy—about 30-60 seconds. If your blender struggles, pause and scrape down the sides to incorporate everything. If the mixture seems too thick, add a splash of water or more juice to help it along. -
Taste & Adjust:
Take a quick taste of your smoothie. If it needs a little more sweetness, feel free to blend in a tad more honey. If you crave more tang, add another splash of orange juice. -
Serve Immediately:
Once you’re satisfied with the flavor and texture, pour the smoothie into your favorite glass or bowl. The vibrant colors are sure to brighten your day!
Serving Suggestions
To make your Sunny Nectarine Smoothie even more delightful, consider garnishing with a sprig of fresh mint or a sprinkle of granola on top. You can also add a thin slice of nectarine for that extra touch of elegance. If you’re feeling adventurous, serve it in a bowl topped with nuts, seeds, and fresh berries for a smoothie bowl vibe!
Recipe Variations
Love to mix things up? Here are a few creative twists you can try with this Sunny Nectarine Smoothie:
-
Tropical Twist: Add a handful of fresh spinach and some frozen pineapple for a tropical vibe that’s as delicious as it is healthy.
-
Nutty Flavor: Add a tablespoon of almond butter or peanut butter for a creamy texture and an extra protein kick.
-
Smoothie Bowl: For a thicker consistency, reduce the juice or yogurt slightly, then pour into a bowl and top with sliced fruits, granola, and coconut flakes.
-
Spice It Up: A sprinkle of ground ginger or cinnamon can bring a warm, spicy note that pairs beautifully with the fruit flavors.
-
Chia Boost: Add a tablespoon of chia seeds for added fiber and omega-3s—a great nutritional boost!
Chef’s Notes
Isn’t it funny how recipes evolve over time? My Sunny Nectarine Smoothie has seen several iterations in my kitchen. Originally, I used to add a scoop of protein powder, but I found that the fruit and yogurt combo was already packed with enough goodness. Over time, I also discovered that experimenting with different fruits and spices keeps the recipe fresh and exciting. Sometimes I throw in a few blueberries or a twist of fresh lime for a zesty kick!
I remember one day hosting a brunch for friends; I decided to serve this smoothie along with homemade muffins and a colorful fruit platter. Everyone loved it, and we ended up creating a smoothie bar where everyone customized their blends. Food has a magical way of bringing people together, don’t you think?
FAQs and Troubleshooting
Here are some common questions you might have while making your Sunny Nectarine Smoothie:
1. What should I do if my smoothie is too thick?
If your smoothie turns out thicker than desired, simply add a splash of juice or water and blend again until it reaches your desired consistency.
2. Can I use frozen nectarines?
Absolutely! Frozen nectarines can work perfectly; they’ll make your smoothie extra cold and refreshing. Just skip the ice, as the frozen fruit will provide enough chill.
3. How can I make it vegan?
To make this smoothie vegan, simply use plant-based yogurt and choose agave syrup or leave out the sweetener altogether if the fruits provide enough sweetness for your taste!
4. What if I don’t like yogurt?
No worries! You can replace yogurt with silken tofu for a similar creaminess or opt for plant-based milk, like almond or oat milk, for a lighter consistency.
Nutritional Info
While I always encourage enjoying food in moderation, it’s nice to be aware of what you’re consuming. This Sunny Nectarine Smoothie typically includes:
- Calories: ~250 per serving (depending on added ingredients and sweeteners)
- Protein: ~10g (if using Greek yogurt)
- Fiber: ~4g
- Vitamin C: High, thanks to fresh fruits and orange juice
Smoothies can be a nutritious way to start your day or refuel in the afternoon. As always, customize based on your dietary needs!
There you have it—a delightfully sunny treat that’s not just refreshing but also a trip down memory lane! I hope this Sunny Nectarine Smoothie inspires you in the kitchen. After all, cooking should always be about joy, connection, and delighting in the flavors of the season. Happy blending!
Print
Sunny Nectarine Smoothie
- Total Time: 10 minutes
- Yield: 2 servings 1x
- Diet: Vegan
Description
A refreshing blend of ripe nectarines and yogurt that captures the essence of summer.
Ingredients
- 2 ripe nectarines
- 1 banana
- 1 cup of Greek yogurt or non-dairy yogurt
- 1 cup of orange juice
- 1 tablespoon of honey or maple syrup (optional)
- 1 cup of ice
Instructions
- Prep your ingredients by washing the nectarines and slicing them.
- Add the nectarines, banana, and yogurt into the blender.
- Pour in the orange juice.
- Sweeten it up with honey or maple syrup if desired.
- Add the ice to your blender.
- Blend until smooth and creamy.
- Taste and adjust sweetness if needed.
- Serve immediately in your favorite glass or bowl.
Notes
Customize by adding fresh mint for garnish or replacing part of the ice with frozen fruit for a creamier texture.
- Prep Time: 10 minutes
- Cook Time: 0 minutes
- Category: Beverage
- Method: Blending
- Cuisine: American
Nutrition
- Serving Size: 1 serving
- Calories: 250
- Sugar: 20g
- Sodium: 50mg
- Fat: 4g
- Saturated Fat: 2g
- Unsaturated Fat: 2g
- Trans Fat: 0g
- Carbohydrates: 45g
- Fiber: 4g
- Protein: 10g
- Cholesterol: 5mg
Keywords: nectarine smoothie, summer drink, healthy smoothie, refreshing smoothie, vegan smoothie




