
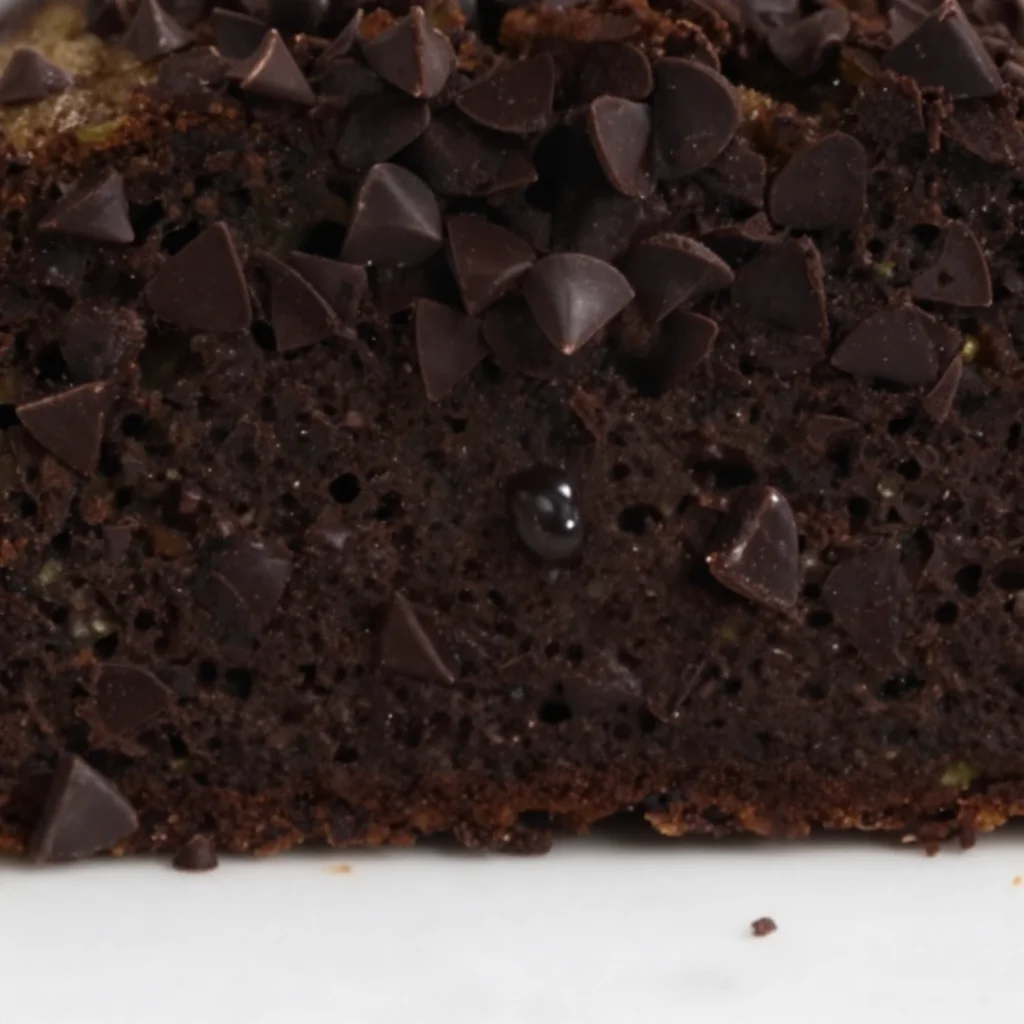
Quick Double Chocolate Zucchini Bread for Weeknight Prep
Double Chocolate Zucchini Bread: A Recipe That Feels Like Home
Welcome to my kitchen! I’m so glad you’ve decided to stop by today to explore one of my absolute favorite recipes: Double Chocolate Zucchini Bread! This delightful treat not only satisfies your sweet tooth but also gives a nod to the garden that we all love—yes, that sneaky zucchini that shows up every summer. This recipe combines the rich, indulgent flavors of chocolate with the moisture of zucchini, creating a loaf that’s both decadent and surprisingly wholesome. It’s the perfect pick-me-up for breakfast, a snack, or even dessert. Plus, it’s a great way to sneak in some veggies (shh, don’t tell the kids)!
There’s just something magical about the aroma of chocolate wafting through my kitchen. It takes me back to my childhood, where the scent of baking would drift through the house on lazy Sundays. My mom made zucchini bread every summer when our garden overflowed with those green beauties. At first, I was skeptical about anything green making its way into my dessert, but she swore by it. One slice in, and I was hooked! It was moist, chocolatey, and oh-so-delicious—a winning combination that turned me into a zucchini bread believer.
Today, I want to share not just the recipe, but the memories, tips, and tricks that make this Double Chocolate Zucchini Bread a beloved staple in my kitchen. Whether you’re a seasoned baker or just starting your culinary journey, I promise to guide you through every step in the most fun and approachable way. So, grab your favorite apron—let’s get baking!
A Slice of Nostalgia
Growing up, my summer vacations were filled with long, lazy days spent outdoors, and of course, we had our fair share of garden bounty. And oh, how those zucchinis multiplied! I remember one summer in particular when my mom decided to make her famous zucchini bread. Standing on my tiptoes at the counter, I helped her grate the zucchini, marveling at how something so unassuming could become something so delicious.
The real magic happened when she added cocoa powder and chocolate chips to the mix. “Trust me,” she said with a wink, “no one will guess there’s zucchini in here!” And she was right. My siblings and I devoured slice after slice, savoring the unique flavor and moist texture. It was our secret—an amazing treat with a veggie twist that we didn’t feel guilty about devouring. From that day on, I promised myself that I would carry on this tradition and share this delightful recipe with friends and family.
Ingredients
Here’s what you’ll need to whip up your own Double Chocolate Zucchini Bread:
-
2 cups finely grated zucchini
Fresh zucchini makes all the difference in moisture. If you don’t have fresh zucchini, you can substitute with summer squash, but aim for a similar texture! -
1 cup all-purpose flour
You can use whole wheat flour for a heartier texture or a gluten-free blend if you’re avoiding gluten! -
1 cup unsweetened cocoa powder
The star of our recipe! Dutch-process cocoa is less acidic than natural cocoa, which can give a richer taste. If you want a less intense flavor, use half cocoa powder and half all-purpose flour instead. -
1/2 cup granulated sugar
Adjust to your sweetness preference—feel free to substitute with coconut sugar or a natural sweetener! -
1/2 cup brown sugar
For that rich caramel flavor. You can use all granulated sugar, but it would lose some of that deep sweetness. -
1/2 cup vegetable oil
You can swap this for melted coconut oil for a subtler flavor. Applesauce is a fantastic lower-calorie swap but will alter the texture slightly. -
2 large eggs
They add moisture and binding. If you’re looking for a vegan alternative, try using flaxseed meal mixed with water instead! -
1 teaspoon vanilla extract
A must for every baked good! Use pure vanilla extract for optimal flavor, or try almond extract for a unique twist. -
1 teaspoon baking soda
Essential for leavening! If you run out, baking powder can work in a pinch—just adjust the measurements accordingly. -
1/2 teaspoon salt
Never underestimate the power of salt in sweet recipes; it brings everything together! -
1 cup semi-sweet chocolate chips
Who doesn’t love a little extra chocolate? Dark chocolate chips or even white chocolate can be fun substitutions!
Step-by-Step Instructions
Now that we have our ingredients lined up, let’s dive into the baking process! Here’s a detailed guide to making this delicious loaf.
-
Preheat Your Oven:
Start by preheating your oven to 350°F (175°C). This is your first step towards ensuring even baking. While the oven heats, you can focus on prepping your loaf pan! -
Prepare Your Loaf Pan:
Grease a 9×5-inch loaf pan with oil or cooking spray. For an extra precaution against sticking, line the bottom and sides with parchment paper. This little tip makes flipping the bread out a breeze! -
Grate the Zucchini:
Grab your grater and finely grate the zucchini. It should yield about 2 cups. After grating, use a clean kitchen towel to squeeze out any excess moisture. This step is crucial to prevent a soggy loaf! -
Mix the Wet Ingredients:
In a mixing bowl, whisk together the vegetable oil, granulated sugar, brown sugar, and eggs until well combined. Then, mix in the vanilla extract. The combination should be light and fluffy. -
Combine the Dry Ingredients:
In another bowl, mix the flour, cocoa powder, baking soda, and salt. It’s essential to combine these dry elements before adding them to the wet mix to avoid clumps. -
Combine Wet and Dry Ingredients:
Gradually fold the dry mixture into the wet mixture. As you do this, be gentle! Overmixing can lead to a dense loaf. -
Fold in the Zucchini and Chocolate Chips:
Now, carefully bring in that zucchini and chocolate chips. Gently fold until just combined—this is where the magic happens! -
Pour Into the Loaf Pan:
Transfer your batter into the prepared loaf pan. Use a spatula to smooth the top for an even bake. -
Bake:
Place the loaf in the preheated oven and bake for about 50-60 minutes. Check for doneness by inserting a toothpick into the center. It should come out with a few moist crumbs, not wet batter! -
Cool and Remove:
Once it’s done baking, let the bread cool in the pan for about 10 minutes before transferring it to a wire rack. This allows steam to escape and helps the crust set! -
Slice and Enjoy:
Once cool, slice into that beautiful loaf! Whether you enjoy it warm or at room temperature, this bread is out of this world.
Serving Suggestions
When it comes to serving your Double Chocolate Zucchini Bread, let your creativity shine! Slice it up into generous portions and serve it warm with a pat of butter or a drizzle of honey. For an extra indulgence, consider a scoop of vanilla ice cream on the side or a dollop of whipped cream on top. You could even sprinkle some more chocolate chips or a dusting of powdered sugar for that café-style presentation. This loaf is just as delicious on its own or as part of a fun brunch spread alongside fresh fruit and coffee.
Recipe Variations
As with any recipe, there’s always room for creativity! Here are a few fun variations to consider:
-
Nutty Zucchini Bread: Add a cup of chopped walnuts or pecans for some delightful crunch.
-
Spicy Kick: Incorporate a teaspoon of cinnamon or even cayenne for a surprising twist that pairs beautifully with chocolate.
-
Fruity Surprise: Toss in a half cup of dried cherries or cranberries for a sweet and tangy contrast. You could also swap some zucchini for finely grated carrots!
-
Minty Fresh: Add a teaspoon of peppermint extract for a refreshing mint chocolate version—perfect for the holiday season!
-
Dairy-Free Option: Use almond milk or any non-dairy milk in place of eggs and oil to make this loaf suitable for a dairy-free diet!
Chef’s Notes
This Double Chocolate Zucchini Bread isn’t just a delightful treat; it’s an experience that evolves each time you make it. Over the years, I’ve played around with different add-ins, trying everything from espresso powder for a mocha flavor to orange zest for a citrusy twist. It’s fascinating how a simple recipe can shift with the seasons or what ingredients you have on hand. My biggest lesson? Always taste as you go! You might just discover the next big twist that will become a family favorite. And remember, the best recipes come filled with love, laughter, and a bit of messiness along the way!
FAQs and Troubleshooting
Q: What if my bread is too dry?
A: If your bread ends up dry, it could be due to over-baking or too much flour. Always check for doneness on the lower end of the baking time, and gently pack the flour into your measuring cup.
Q: Can I freeze this zucchini bread?
A: Absolutely! Once cooled, wrap it tightly in plastic wrap and then in aluminum foil, or place it in a freezer-safe bag. It can last for about 3 months in the freezer. Thaw at room temperature when you’re ready to enjoy!
Q: What should I do if I don’t have zucchini?
A: Don’t fret! You can use grated carrots, applesauce, or mashed bananas as alternatives, keeping in mind that the flavor profile will change a bit. But the result will still be delicious!
Q: How do I know when my bread is done?
A: A toothpick inserted into the center should come out clean or with just a few moist crumbs. If it comes out wet, give it a few more minutes before checking again.
Nutritional Info
This Double Chocolate Zucchini Bread is not only tasty but also a bit nutritious thanks to the zucchini! While the exact nutritional values can vary based on substitutions and portion sizes, a typical slice (out of 12) will generally be around:
- Calories: 210
- Fat: 10g
- Carbohydrates: 28g
- Fiber: 2g
- Protein: 3g
Enjoy the delightful balance of flavors that this recipe brings to your kitchen. With every slice, you’re not just indulging in a decadent treat; you’re creating memories, sharing stories, and maybe even sneaking in a few veggies! Happy baking, and don’t forget to share your own kitchen stories with me!
Print
Double Chocolate Zucchini Bread
- Total Time: 75 minutes
- Yield: 12 servings 1x
- Diet: Vegetarian
Description
A delightful and moist Double Chocolate Zucchini Bread that perfectly combines the richness of chocolate with the nutritious green veggie, making it a perfect treat for any time of the day.
Ingredients
- 2 cups finely grated zucchini
- 1 cup all-purpose flour
- 1 cup unsweetened cocoa powder
- 1/2 cup granulated sugar
- 1/2 cup brown sugar
- 1/2 cup vegetable oil
- 2 large eggs
- 1 teaspoon vanilla extract
- 1 teaspoon baking soda
- 1/2 teaspoon salt
- 1 cup semi-sweet chocolate chips
Instructions
- Preheat your oven to 350°F (175°C).
- Grease a 9×5-inch loaf pan with oil or cooking spray.
- Grate the zucchini and squeeze out excess moisture.
- Mix the vegetable oil, granulated sugar, brown sugar, and eggs until combined, then add vanilla extract.
- Combine the flour, cocoa powder, baking soda, and salt in another bowl.
- Fold the dry mixture into the wet mixture gently.
- Fold in the zucchini and chocolate chips until just combined.
- Pour the batter into the prepared loaf pan.
- Bake for 50-60 minutes, checking for doneness with a toothpick.
- Cool in the pan for 10 minutes, then transfer to a wire rack to cool completely.
- Slice and enjoy!
Notes
For variations, consider adding nuts, dried fruits, or spices for added flavor.
- Prep Time: 15 minutes
- Cook Time: 60 minutes
- Category: Dessert
- Method: Baking
- Cuisine: American
Nutrition
- Serving Size: 1 slice
- Calories: 210
- Sugar: 18g
- Sodium: 150mg
- Fat: 10g
- Saturated Fat: 3g
- Unsaturated Fat: 5g
- Trans Fat: 0g
- Carbohydrates: 28g
- Fiber: 2g
- Protein: 3g
- Cholesterol: 30mg
Keywords: zucchini bread, chocolate bread, baking, dessert, healthy dessert
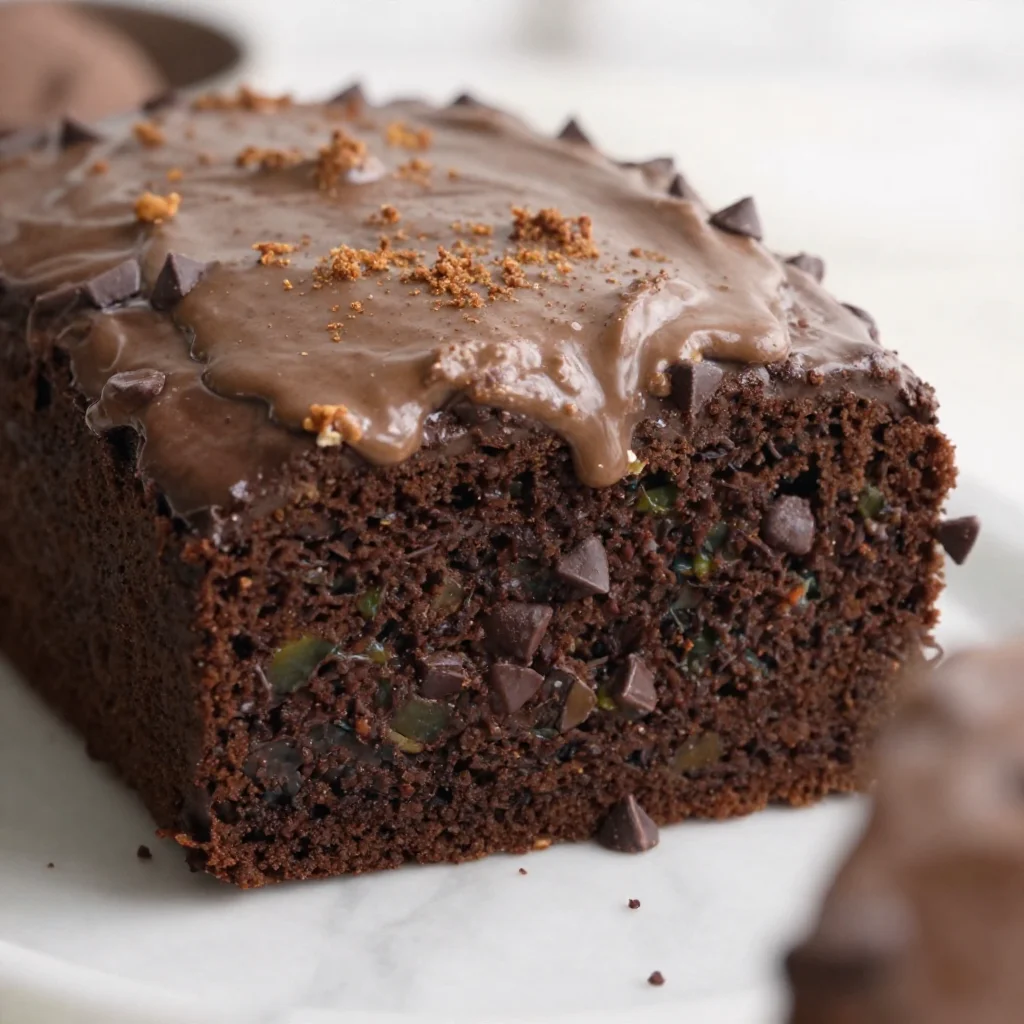
Healthy Chocolate Zucchini Cake (Easy One-Bowl Recipe)
The Ultimate Chocolate Zucchini Cake: A Cozy Baking Adventure
Welcome to my kitchen, friends! Today, I’m thrilled to share a delightful recipe that beautifully blends the rich, indulgent flavor of chocolate with the subtle earthiness of zucchini. Yes, you heard that right — zucchini in a cake! This isn’t just any cake; it’s a chocolate zucchini cake that’s moist, decadent, and sure to impress.
Picture this: It’s a rainy afternoon, the scent of chocolate wafting through the air, and you find yourself cozy in your kitchen, ready to create something special. Chocolate zucchini cake is the perfect answer. It’s comfort food at its finest — a sweet treat that brings back childhood memories while providing a chance to sneak in some veggies. Whether you’re hosting guests or just in need of a little self-care, this cake is a fantastic choice.
If you’re new to baking or just looking for that extra spark of inspiration, fear not! I’m here to guide you through every step of the process. We’ll explore not only how to make this delicious cake but also why zucchini deserves a spotlight in your dessert repertoire. From the creamiest chocolate frosting to tips and tricks to elevate your baking game, let’s dive into this adventure together!
A Sweet Memory with Zucchini
Let me take you back to my childhood, where everything revolved around my grandma’s kitchen. She had a magical way of turning simple ingredients into moments of joy. One summer, after spending countless hours tending to her vegetable garden, she pulled out a basket brimming with squash and zucchinis. Instead of the usual savory dishes, she decided to make a chocolate zucchini cake.
I can still taste the first bite — the outer layer was rich and chocolaty, while the inside was surprisingly fluffy and moist. We enjoyed it as a family after a long day spent in her garden. It was a simple yet profound lesson on how something unexpected could bring so much happiness. Ever since that day, this recipe has held a special place in my heart, and I can’t wait for you to experience the same warmth and joy!
Ingredients
Here’s what you’ll need to whip up this chocolate zucchini cake, along with some helpful insights:
-
Zucchini (1 ½ cups, grated): The star of the show! Zucchini adds moisture without a strong flavor. If you can’t find zucchini, look for yellow squash as a substitute.
-
All-Purpose Flour (1 ¾ cups): This forms the base of our cake. If you want a healthier twist, you can use whole wheat flour, but reduce the quantity slightly as it absorbs more liquid.
-
Granulated Sugar (1 cup): Adds sweetness, of course! Consider using coconut sugar for a lower glycemic index option.
-
Cocoa Powder (½ cup): Use unsweetened cocoa for a deep chocolate flavor. Dutch-processed cocoa will give a richer taste, while natural cocoa will provide a lighter flavor.
-
Baking Soda (1 tsp): Leavening agent to help our cake rise. Make sure it’s fresh for the best results!
-
Baking Powder (½ tsp): Another leavening agent, ensuring a light and fluffy texture.
-
Salt (½ tsp): Enhances the overall flavor of the cake.
-
Eggs (2 large): Binds the ingredients together and adds moisture. For a vegan option, you can use flax eggs (1 tbsp ground flaxseed mixed with 2.5 tbsp water).
-
Vegetable Oil (½ cup): Gives richness and moisture. You can substitute melted coconut oil for a different flavor profile.
-
Vanilla Extract (1 tsp): A kitchen staple that amplifies the sweetness.
-
Chocolate Chips (¾ cup): I love adding semi-sweet chocolate chips to make this cake extra decadent. Dark chocolate chips work well too!
With these ingredients ready, we’re set to create something truly special!
Step-by-Step Instructions
-
Preheat Your Oven: Start by preheating your oven to 350°F (175°C). This ensures your cake bakes evenly.
-
Prep Your Pan: Grease and flour a 9×13-inch baking pan or line it with parchment paper for easy removal and cleanup.
-
Grate the Zucchini: Using a box grater, grate the zucchini. Once done, use a clean kitchen towel to squeeze out any excess moisture. Trust me, you want to eliminate that extra water!
-
Combine Dry Ingredients: In a large mixing bowl, whisk together the flour, cocoa powder, baking soda, baking powder, and salt. This step evenly distributes the leavening agents and cocoa, allowing for a uniform rise.
-
Mix Wet Ingredients: In another bowl, combine the sugar, eggs, oil, and vanilla extract. Use an electric mixer or whisk until it’s well blended, about 2-3 minutes.
-
Combine the Mixtures: Gradually add the dry ingredients to the wet mixture. Stir until just combined; be careful not to overmix! A few lumps are okay.
-
Add Zucchini and Chocolate Chips: Fold in the grated zucchini and chocolate chips. This is where the magic happens! The batter will look thick, but you’ll love the texture.
-
Bake: Pour the batter into your prepared pan, smoothing the top with a spatula. Bake in the preheated oven for 30-35 minutes or until a toothpick inserted in the center comes out clean.
-
Cool: Once baked, remove the cake from the oven and let it cool in the pan for about 10 minutes. Then transfer it to a wire rack to cool completely.
-
Frost (Optional): If you want to take your cake to the next level, top it with a creamy chocolate frosting or a dusting of powdered sugar.
Chef Hack: If you’re short on time, feel free to skip the frosting and serve it warm with a scoop of vanilla ice cream for a delicious dessert à la mode!
Serving Suggestions
When it comes to plating your chocolate zucchini cake, the choices are endless! For a rustic approach, simply cut a generous square and dust with powdered sugar. Is it a special occasion? Elevate the presentation with a dollop of whipped cream, a few fresh berries, or a drizzle of chocolate syrup. If you are feeling adventurous, try adding a sprinkle of sea salt on top for that sweet-savory experience!
Recipe Variations
Now for the fun part! Here are a few creative alternatives to switch up your chocolate zucchini cake:
-
Spice it Up: Add a teaspoon of cinnamon or a pinch of nutmeg to the batter for a warm, cozy flavor twist.
-
Nutty Delight: Fold in some chopped nuts, like walnuts or pecans, for extra crunch.
-
Fruity Surprise: Stir in a handful of fresh raspberries or cherries for a fruity burst that complements the chocolate perfectly.
-
Gluten-Free Option: Substitute the all-purpose flour with a 1:1 gluten-free baking blend. It works wonderfully!
-
Frosting Fun: Experiment with different types of frosting! Try a cream cheese frosting, peanut butter frosting, or even a light citrus glaze to brighten things up.
Chef’s Notes
This chocolate zucchini cake recipe has evolved over the years. Initially, I followed my grandma’s instructions verbatim, but as I delved deeper into the world of baking, I started playing with flavors and textures. I often reminisce about that rainy afternoon spent in her kitchen. Now, when I bake, I aim to recapture that enchanting aroma that made my heart sing.
You know those "oops" moments in the kitchen? Once, I accidentally added a whole cup of cocoa powder instead of a half! It turned out to be a chocolate explosion that everyone enjoyed — just a little too rich! Embrace the mishaps; they often lead to delicious discoveries!
FAQs and Troubleshooting
1. My cake came out too dry. What went wrong?
- This can happen if the zucchini wasn’t grated finely or if it was overbaked. Make sure to check for doneness at the lower end of the baking time.
2. Why is my cake sinking?
- Sinking cakes can result from underbaking or too much liquid in the batter. Make sure you’re using the correct amount of grated zucchini and check that your leavening agents are fresh!
3. Can I make this cake ahead of time?
- Absolutely! The flavors often deepen after a day. Store it in an airtight container at room temperature for up to 3 days.
4. How do I know when my cake is done baking?
- Use the toothpick test! Insert a toothpick in the center; if it comes out clean or with a few moist crumbs, it’s perfect.
Nutritional Info (Optional)
While I won’t dive deep into the numbers, a slice of this chocolate zucchini cake typically contains calories from wholesome ingredients, thanks to the hidden veggies! It’s a treat for the soul that doesn’t leave you feeling too guilty.
There you have it, lovely people! A chocolate zucchini cake that merges the comfort of baking with clever, healthy substitutes. As you venture through this journey in your kitchen, remember: cooking is all about joy, creativity, and the love you put into it. So, roll up those sleeves, pour yourself a cup of coffee, and get ready for a delicious adventure! Happy baking! 🍫🧁
Print
The Ultimate Chocolate Zucchini Cake
- Total Time: 50 minutes
- Yield: 12 servings 1x
- Diet: Vegetarian
Description
A delightful blend of rich chocolate flavor with the moistness of zucchini, creating a decadent chocolate cake that’s sure to impress.
Ingredients
- 1 ½ cups Zucchini, grated
- 1 ¾ cups All-Purpose Flour
- 1 cup Granulated Sugar
- ½ cup Cocoa Powder
- 1 tsp Baking Soda
- ½ tsp Baking Powder
- ½ tsp Salt
- 2 large Eggs
- ½ cup Vegetable Oil
- 1 tsp Vanilla Extract
- ¾ cup Chocolate Chips
Instructions
- Preheat your oven to 350°F (175°C).
- Prep a 9×13-inch baking pan by greasing it and flouring it or lining it with parchment paper.
- Grate the zucchini and squeeze out excess moisture using a clean towel.
- Combine dry ingredients: In a large bowl, whisk together the flour, cocoa powder, baking soda, baking powder, and salt.
- Mix wet ingredients: In another bowl, mix together the sugar, eggs, oil, and vanilla extract until well blended.
- Combine the dry ingredients with the wet ingredients, stirring until just combined.
- Add the grated zucchini and chocolate chips, folding them into the batter.
- Bake the batter in the prepared pan for 30-35 minutes, or until a toothpick inserted in the center comes out clean.
- Cool the cake for 10 minutes in the pan before transferring it to a wire rack to cool completely.
- Frost with chocolate frosting or dust with powdered sugar if desired.
Notes
For a healthier option, you can use whole wheat flour instead of all-purpose flour, but reduce the quantity. You can also use flax eggs for a vegan version.
- Prep Time: 15 minutes
- Cook Time: 35 minutes
- Category: Dessert
- Method: Baking
- Cuisine: American
Nutrition
- Serving Size: 1 slice
- Calories: 350
- Sugar: 22g
- Sodium: 400mg
- Fat: 12g
- Saturated Fat: 4g
- Unsaturated Fat: 6g
- Trans Fat: 0g
- Carbohydrates: 45g
- Fiber: 3g
- Protein: 5g
- Cholesterol: 30mg
Keywords: chocolate zucchini cake, baking, dessert, comfort food
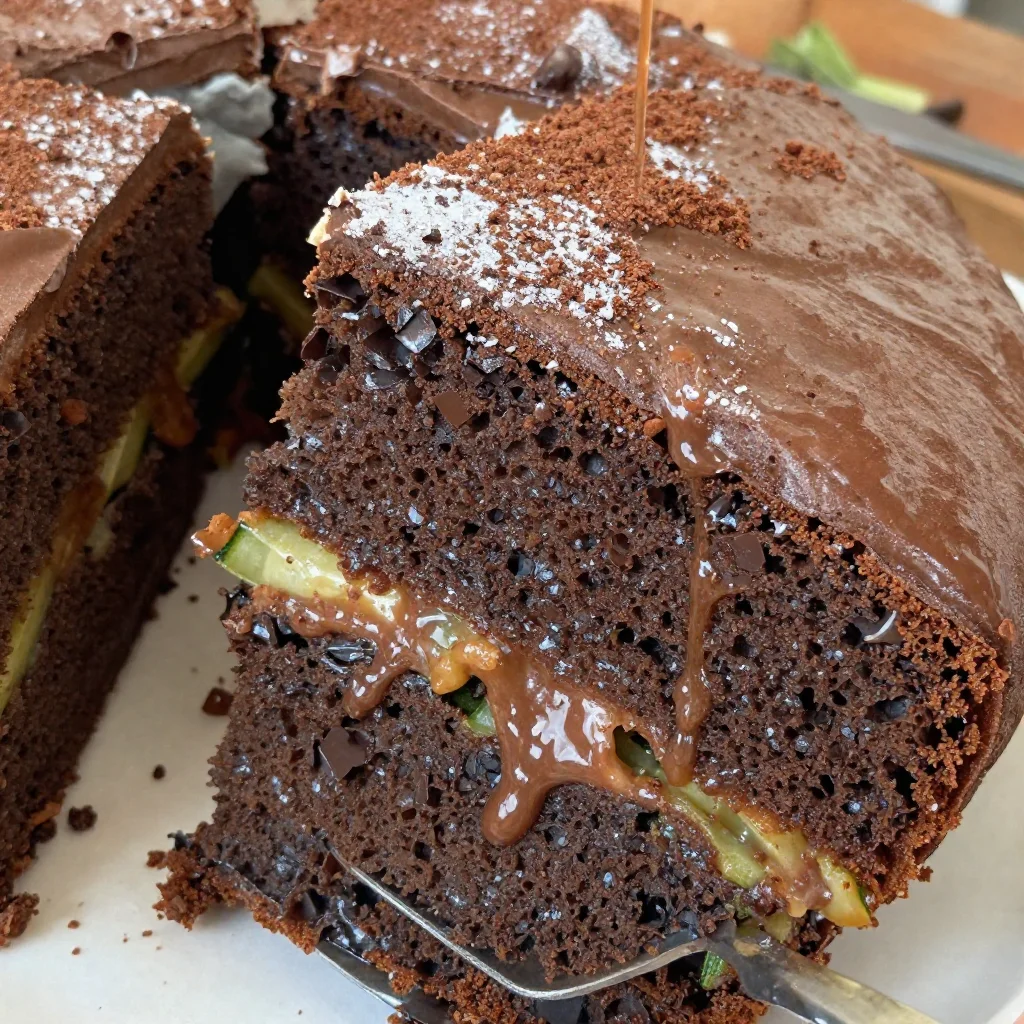
Chocolate Lover’s Zucchini Cake
Chocolate Lover’s Zucchini Cake: Indulge in the Unexpected Delight!
Welcome to my cozy corner of the world, where the scent of something delicious baking is just a whisk away! Today, we’re diving into a delightful recipe that embraces the essence of comfort and surprises: Chocolate Lover’s Zucchini Cake. Yes, you heard me right—zucchini! This humble vegetable takes on a whole new persona when combined with rich chocolate, and I promise, you’ll never look at zucchini the same way again.
Imagine a cake that’s moist, fudgy, and bursting with flavors that make you wonder if there’s truly a vegetable lurking inside. As someone who adores the charm of homemade goodies, I can say this cake checks all the boxes: it’s simple to whip up, secretly healthy, and absolutely indulgent. Whether you’re looking to impress a crowd or just seeking a cozy treat to savor with your favorite cup of coffee, this cake has got you covered.
My goal here is to inspire you to embrace your inner baker, even on the craziest of days. After all, cooking isn’t just about sustenance; it’s about creating memories, sharing joy, and enjoying the little moments. So get ready, pull out your beaters, and let’s get baking!
A Slice of Nostalgia
I’ll never forget the first time I tried a slice of zucchini cake. It was a beautiful sunny afternoon, and my neighbor, Mrs. Johnson, had just pulled a warm cake out of her oven. The rich aroma wafted through our open windows, beckoning my siblings and me to investigate. With a twinkle in her eye, she served us slices topped with a creamy chocolate frosting that seemed to glide off the plate. We dove in, and that first bite was magical. The cake was soft and moist, the chocolate rich and decadent, yet there was this delightful mystery to it—the hidden zucchini!
It turned out her secret ingredient not only made the cake incredibly moist but also contributed a subtle sweetness that made it dangerously delicious. Since that sunny afternoon, I’ve made it a tradition to bake a version of her zucchini cake anytime my friends come over or when I’m simply in need of a treat. It’s a recipe that carries love, nostalgia, and the spirit of sharing good food.
Ingredients
Here’s what you’ll need to create your Chocolate Lover’s Zucchini Cake. Let’s gather our ingredients!
-
Zucchini (2 cups, grated): The star of our recipe! Grating zucchini allows it to blend seamlessly into the cake, keeping it moist. You can also use yellow squash as a great substitute if zucchini isn’t available.
-
Unsweetened cocoa powder (½ cup): This is what gives our cake that deep, rich chocolate flavor. Make sure to use unsweetened to avoid over-sweetening your cake.
-
All-purpose flour (1½ cups): A classic choice for structure! You can substitute with whole wheat flour for added fiber or gluten-free flour blends if you’re avoiding gluten.
-
Granulated sugar (1 cup): Sweetness is key! You can adjust the sugar to your taste; using coconut sugar offers a healthier alternative with a caramel-like flavor.
-
Baking soda (1 tsp): This little powerhouse helps the cake rise beautifully and gives it a lovely texture. No substitutes—this is essential!
-
Baking powder (½ tsp): Works in conjunction with baking soda to create fluffiness in your cake.
-
Salt (½ tsp): A pinch of salt enhances all the flavors and balances the sweetness.
-
Eggs (2 large): These provide moisture and help the cake hold together. For a vegan option, you can use flax eggs (1 tbsp flaxseed meal + 2.5 tbsp water for each egg, let it sit for 5 mins).
-
Plant-based oil (½ cup): I love using vegetable or canola oil for this recipe, but for a richer flavor, you can use melted coconut or avocado oil.
-
Vanilla extract (1 tsp): A splash of vanilla brings warmth and depth to the flavor profile. Opt for pure vanilla for the best taste!
-
Chocolate chips (1 cup): Because we can never have too much chocolate, right? You can use dark chocolate chips, milk chocolate, or even white chocolate for a fun twist!
Step-by-Step Instructions
Now, let’s dive into the baking process! Don your apron, roll up those sleeves, and prep yourself for a delightful kitchen adventure.
-
Preheat the Oven: Start by preheating your oven to 350°F (175°C). This ensures your cake rises beautifully and bakes evenly.
-
Prepare the Pan: Grease a 9×13-inch baking pan or line it with parchment paper for easy removal. This step is essential for a clean exit!
-
Grate the Zucchini: Grab your box grater and shred that zucchini. No need to peel it—just give it a good wash. Once grated, squeeze out some of the excess moisture using a clean kitchen towel. We want the zucchini to add moisture without making the cake too soggy.
-
Mix Dry Ingredients: In a large mixing bowl, whisk together the flour, cocoa powder, baking soda, baking powder, and salt. This step not only combines the ingredients but also aerates them, which is vital for a fluffy cake.
-
Combine Wet Ingredients: In a separate bowl, beat the eggs, then add the oil and sugar, mixing until it’s well combined. Add in the vanilla extract and stir in the grated zucchini. Get ready for the magic—it’s going to smell amazing!
-
Bring it Together: Gradually add the dry ingredients to the wet mix, stirring just until combined. Be careful not to overmix; our goal is to keep the cake light and airy!
-
Chocolate Chips Galore: Fold in those chocolate chips! You can also sprinkle some on top for an extra chocolatey finish.
-
Bake: Pour the batter into your prepared pan and smooth the top. Bake in the preheated oven for about 30 to 35 minutes, or until a toothpick inserted in the center comes out clean. Your kitchen will become a haven of chocolate goodness!
-
Cool and Frost: Once baked, allow the cake to cool in the pan for about 10 minutes before transferring it to a wire rack. Once completely cooled, frost it with your favorite chocolate frosting—or enjoy it plain if you’re feeling simple!
-
Serve and Enjoy: Slice it up, serve it with a dollop of whipped cream or a scoop of ice cream, and watch your loved ones light up as they take their first bite!
Chef Tips: Remember, baking is all about feeling it out! Don’t hesitate to taste as you go and adjust ingredients. If you love a touch of spice, throwing in cinnamon or even chili powder can offer a delightful kick that pairs beautifully with chocolate.
Serving Suggestions
When it comes to serving this decadent zucchini cake, less is often more. A simple dusting of powdered sugar adds a lovely touch of elegance, and if you’re feeling adventurous, a dollop of whipped cream or a scoop of vanilla ice cream turns it into an indulgent dessert. Serve it warm for maximum deliciousness, and consider pairing it with a side of fresh berries for a burst of freshness that balances out the rich chocolate.
Recipe Variations
Want to shake things up? Here are a few creative twists to make this cake your own:
- Nutty Add-In: Toss in chopped walnuts or pecans for a delightful crunch.
- Fruity Zing: Add orange zest to the batter for a subtle citrus flavor that blends beautifully with chocolate.
- Minty Fresh: Infuse some peppermint extract into the frosting to create a refreshing mint chocolate experience.
- Sheet Pan Brownies: Use the same batter and bake in an 8×8 pan for fudgy brownie-like squares—perfect for those chocolate cravings!
- Gluten-Free Option: Use a 1:1 gluten-free flour blend to create a delicious version for those with dietary needs.
Chef’s Notes
This recipe has been a staple in my kitchen for years, evolving along with my own baking journey. Initially, I made it for family gatherings, and it was always a hit. Over time, I started experimenting with different frostings and add-ins! The best part is how this cake invites you to get creative. One day, I decided to add leftover chocolate ganache I had from another dessert, and let’s just say it was a game-changer!
And let’s not forget the fun of sharing this cake with friends. It’s the perfect conversation starter at gatherings, and I always love witnessing the surprise on people’s faces when they find out it’s made with zucchini. It’s a dish that proves the unexpected can be wonderfully delicious!
FAQs and Troubleshooting
1. My cake didn’t rise. What went wrong?
There could be several reasons for a flat cake. Make sure your baking soda and baking powder are fresh, as expired leavening agents may not work effectively. Also, be cautious about overmixing; that can result in a denser cake.
2. Can I use other types of flour?
Absolutely! You can play with different flours. Just keep in mind that whole wheat flour will yield a denser texture. If using gluten-free flour, opt for a blend specifically designed for baking.
3. How long does this cake last?
Stored in an airtight container, this cake should last for about 3-4 days at room temperature, or up to a week in the fridge. Trust me, it’s unlikely to last that long—you’ll be going back for seconds!
4. What if I want to make it ahead of time?
This cake holds up beautifully! You can bake it a day in advance and keep it covered at room temperature. Just frost it on the day of serving for the best presentation and flavor.
Nutritional Info
(Please note that this is an approximation and can varies by ingredient brands and substitutes.)
- Serving Size: 1 slice (1/12 of cake)
- Calories: 230
- Fat: 10g
- Carbohydrates: 34g
- Fiber: 2g
- Sugar: 12g
- Protein: 4g
And there you have it—a delightful exploration into the world of Chocolate Lover’s Zucchini Cake! I hope you feel inspired to try this recipe, share it with loved ones, and maybe even create your own kitchen memories. Happy baking, and don’t forget to embrace the mess—it’s all part of the joy of cooking!
Print
Chocolate Lover’s Zucchini Cake
- Total Time: 50 minutes
- Yield: 12 servings 1x
- Diet: Vegetarian
Description
A delightful and moist chocolate zucchini cake that’s secretly healthy and indulgent.
Ingredients
- 2 cups zucchini, grated
- ½ cup unsweetened cocoa powder
- 1½ cups all-purpose flour
- 1 cup granulated sugar
- 1 tsp baking soda
- ½ tsp baking powder
- ½ tsp salt
- 2 large eggs
- ½ cup plant-based oil
- 1 tsp vanilla extract
- 1 cup chocolate chips
Instructions
- Preheat the oven to 350°F (175°C).
- Prepare a 9×13-inch baking pan by greasing it or lining it with parchment paper.
- Grate the zucchini and squeeze out excess moisture.
- Mix dry ingredients: flour, cocoa powder, baking soda, baking powder, and salt in a bowl.
- Combine wet ingredients: beat eggs, then mix in oil and sugar, followed by vanilla extract and zucchini.
- Bring the dry mixture into the wet ingredients, stirring just until combined.
- Fold in the chocolate chips.
- Bake for 30 to 35 minutes, or until a toothpick comes out clean.
- Cool the cake for 10 minutes, then transfer to a wire rack.
- Frost with your favorite chocolate frosting or enjoy plain.
- Serve with a dollop of whipped cream or ice cream, if desired.
Notes
For added flavor, experiment with nuts, citrus zest, or different frostings.
- Prep Time: 15 minutes
- Cook Time: 35 minutes
- Category: Dessert
- Method: Baking
- Cuisine: American
Nutrition
- Serving Size: 1 slice
- Calories: 230
- Sugar: 12g
- Sodium: 200mg
- Fat: 10g
- Saturated Fat: 1g
- Unsaturated Fat: 8g
- Trans Fat: 0g
- Carbohydrates: 34g
- Fiber: 2g
- Protein: 4g
- Cholesterol: 60mg
Keywords: zucchini cake, chocolate cake, healthy dessert, vegan options, baking
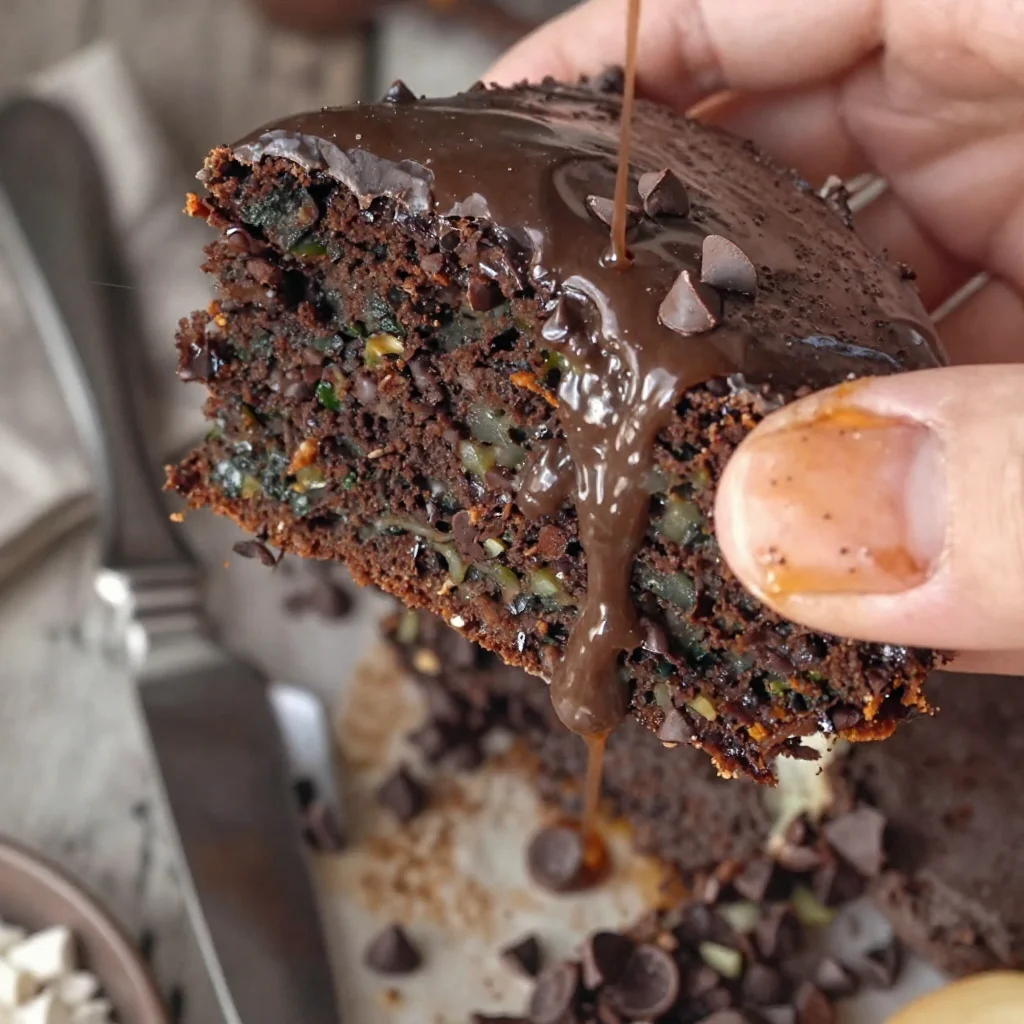
One-Bowl Chocolate Zucchini Cake: Easy Weeknight Dessert
Chocolate Zucchini Cake: A Sweet Surprise from the Garden
Welcome to my kitchen, where the magic of baking is about to unfold! I’m so thrilled to share one of my all-time favorite recipes with you: Chocolate Zucchini Cake. Now, before you raise an eyebrow at the idea of veggie-infused dessert, let me assure you that this cake is velvety, rich, and incredibly delicious. The secret? Fresh zucchini adds moisture and a subtle sweetness that takes chocolate to a whole new level. So grab your apron, let’s make some kitchen magic together!
When summertime rolls around, gardens burst with vibrant zucchinis, and that’s when I find myself getting a little creative. My fondest food memories revolve around those lazy summer afternoons spent in my grandmother’s kitchen. She had a spectacular garden, overflowing with vegetables, and there were always a few overflowing bowls of freshly grated zucchini in her fridge. I can still picture her hands, dusted with flour, stirring a divine chocolate cake batter, while the inviting smell of cocoa danced around the room. It was a baking tradition that filled my heart (and belly) with joy, and today, I continue that legacy right from my cozy kitchen.
Delightfully moist and decadent, this Chocolate Zucchini Cake is a perfect balance of flavors. Whether you have an abundance of zucchini or just want to sneak some veggies into your dessert (no judgment here!), this cake brings smiles all around. Plus, it’s super easy to make—let’s dive into the details!
Ingredients
Here’s what you’ll need to create this scrumptious cake:
- Zucchini: About 2 cups, grated. Choose medium-sized zucchinis for the best flavor. You can use yellow squash if zucchini isn’t available!
- All-Purpose Flour: 1 ½ cups for structure. Whole wheat flour can add nice density, or gluten-free flour works fine too.
- Unsweetened Cocoa Powder: ½ cup for that rich chocolate flavor. Look for high-quality cocoa for the best results; Dutch-processed cocoa gives a deeper taste.
- Granulated Sugar: 1 cup to balance the cocoa. For a healthier twist, substitute with coconut sugar or maple syrup.
- Brown Sugar: ½ cup for added moisture and flavor depth. Use light brown sugar for a milder taste or dark for more robust caramel notes.
- Baking Soda & Baking Powder: 1 tsp each to ensure a fluffy cake. If you’re out of baking powder, you can use 2 tsp of baking soda or swap it with self-rising flour.
- Salt: Just a pinch to enhance sweetness.
- Eggs: 2 large, room temperature. If you’re vegan or egg-free, unsweetened applesauce or flaxseed meal mixed with water can work as great substitutes (1 egg = ¼ cup applesauce or 1 tbsp flaxseed + 2.5 tbsp water).
- Vanilla Extract: 2 tsp for flavor. Homemade vanilla is a game-changer!
- Vegetable Oil: ½ cup for moisture. If you prefer, melted coconut oil or apple sauce can replace it.
- Chopped Walnuts or Pecans: Optional, about ½ cup for crunch! If you have nut allergies, feel free to skip or substitute with seeds.
Step-by-Step Instructions
Baking this Chocolate Zucchini Cake is a delightful journey, and I’m here to guide you step-by-step!
-
Preheat Your Oven: Start by preheating your oven to 350°F (175°C). This is an essential first step—trust me, no one likes a cake that’s in the oven too long after you’ve already mixed the batter.
-
Prep Your Pan: Grease and flour a 9×13-inch baking dish or two 9-inch round cake pans if you want to make a layered cake. If you’re feeling fancy, line the bottom with parchment paper for easy removal.
-
Grate the Zucchini: Grab your box grater, and grate that zucchini! You don’t need to peel it; the skin adds color and nutrients. Once you’ve got the zucchini grated, place it in a clean kitchen towel, twist it up, and squeeze out excess moisture. This keeps your cake from getting overly soggy.
-
Combine Dry Ingredients: In a large mixing bowl, sift together all-purpose flour, cocoa powder, baking soda, baking powder, and salt. Whisking them together ensures even distribution and helps combat lumps.
-
Mix the Sugars: In another bowl, whisk together the granulated sugar, brown sugar, and eggs until blended and slightly frothy. This introduces air into the mix and will help your cake rise beautifully!
-
Pour in Oil and Vanilla: Add the vegetable oil and vanilla extract to your sugar and egg mixture. Whisk until combined. A little tip: Make sure your oil is room temperature too—cold oil can create lumps.
-
Add Zucchini: Stir in the grated zucchini until fully incorporated. This is where the magic happens—the moisture from the zucchini makes the cake luscious.
-
Combine Wet and Dry: Gradually fold the dry ingredients into the wet ingredients using a spatula or wooden spoon. Mix until just combined; overmixing can lead to a dense cake.
-
Include Nuts: If using, fold in your chopped nuts. This is optional but adds a lovely crunch.
-
Bake: Pour the batter into your prepared pan(s) and smooth the top. Bake for about 30–35 minutes, checking for doneness with a toothpick inserted into the center; it should come out clean or with just a few crumbs attached.
-
Cool: Let the cake cool in the pan for about 10 minutes, then transfer it to a wire rack to cool completely before frosting.
Serving Suggestions
This Chocolate Zucchini Cake is divine on its own, but a light dusting of powdered sugar or a generous slather of cream cheese frosting takes it to the next level. Serve it warm with a scoop of vanilla ice cream or drizzle with chocolate sauce for an indulgent dessert. Plate it up with fresh berries or a mint sprig for a pop of color!
Recipe Variations
Get creative with this recipe! Here are a few twists you can try:
- Spicy Chocolate Zucchini Cake: Add a teaspoon of cinnamon or a pinch of cayenne for a flavorful kick.
- Minty Delight: Stir in mint extract or top with mint-flavored frosting for a refreshing zing.
- Double Chocolate: Throw in some chocolate chips for an extra chocolatey experience.
- Gluten-Free Option: Use a 1-to-1 gluten-free flour blend to make this entirely gluten-free without sacrificing flavor.
Chef’s Notes
Ah, the journey of this recipe! It’s evolved over the years, and I’ll confess there have been flops—like the time I thought I could skip squeezing the zucchini and ended up with a chocolate soup! Each failure brought me a fresh perspective: getting the right moisture without compromising the cake’s texture is key. Now, this cake holds a special place in my heart (and on my dinner table) as it embodies what cooking is all about—experimenting, sharing, and enjoying.
FAQs and Troubleshooting
-
Why did my cake turn out too dense?
This can happen if you overmix the batter or inadvertently add too much flour. Remember, just mix until combined! -
How do I know if my cake is done?
The toothpick test is your best friend! A toothpick should come out with a few moist crumbs, not wet batter. Also, the cake should spring back when lightly pressed. -
Can I store leftovers?
Absolutely! Store cooled cake in an airtight container at room temperature for up to 2 days, or refrigerate for up to a week. You can also freeze slices wrapped in plastic wrap for up to 3 months! -
Can I use frozen zucchini?
Yes! Just ensure you thaw it thoroughly and squeeze out excess moisture before adding it to your batter.
Nutritional Info
While I focus more on flavor and joy than strict nutritional guidelines when baking, this cake does offer a delicious way to sneak in some veggies! Each slice is rich in antioxidants from cocoa and adds some fiber from zucchini—great justification for that second piece, right?
Thank you for joining me in this baking adventure! I hope this Chocolate Zucchini Cake finds a special spot in your home, just like it has in mine. Happy baking, and may your kitchen always be filled with love and laughter!
Print
Chocolate Zucchini Cake
- Total Time: 50 minutes
- Yield: 8 servings 1x
- Diet: Vegetarian
Description
A rich and moist chocolate cake infused with fresh zucchini, perfect for sneaking veggies into dessert.
Ingredients
- About 2 cups zucchini, grated
- 1 ½ cups all-purpose flour
- ½ cup unsweetened cocoa powder
- 1 cup granulated sugar
- ½ cup brown sugar
- 1 tsp baking soda
- 1 tsp baking powder
- Salt, a pinch
- 2 large eggs, room temperature
- 2 tsp vanilla extract
- ½ cup vegetable oil
- ½ cup chopped walnuts or pecans (optional)
Instructions
- Preheat your oven to 350°F (175°C).
- Grease and flour a 9×13-inch baking dish or two 9-inch round cake pans.
- Grate the zucchini and squeeze out excess moisture using a clean kitchen towel.
- Combine the flour, cocoa powder, baking soda, baking powder, and salt in a large mixing bowl.
- Mix the granulated sugar, brown sugar, and eggs in another bowl until blended.
- Pour in the oil and vanilla extract, whisking until combined.
- Add the grated zucchini and stir until fully incorporated.
- Combine the dry ingredients with the wet ingredients until just mixed.
- Fold in the chopped nuts if using.
- Bake for about 30–35 minutes, checking with a toothpick for doneness.
- Cool the cake in the pan for 10 minutes before transferring to a wire rack.
Notes
A dusting of powdered sugar or cream cheese frosting enhances the cake’s flavor. Experiment with additional flavors or toppings to make it your own.
- Prep Time: 15 minutes
- Cook Time: 35 minutes
- Category: Dessert
- Method: Baking
- Cuisine: American
Nutrition
- Serving Size: 1 slice
- Calories: 280
- Sugar: 23g
- Sodium: 180mg
- Fat: 10g
- Saturated Fat: 1g
- Unsaturated Fat: 8g
- Trans Fat: 0g
- Carbohydrates: 38g
- Fiber: 2g
- Protein: 3g
- Cholesterol: 60mg
Keywords: chocolate cake, zucchini cake, dessert, baking, garden recipes
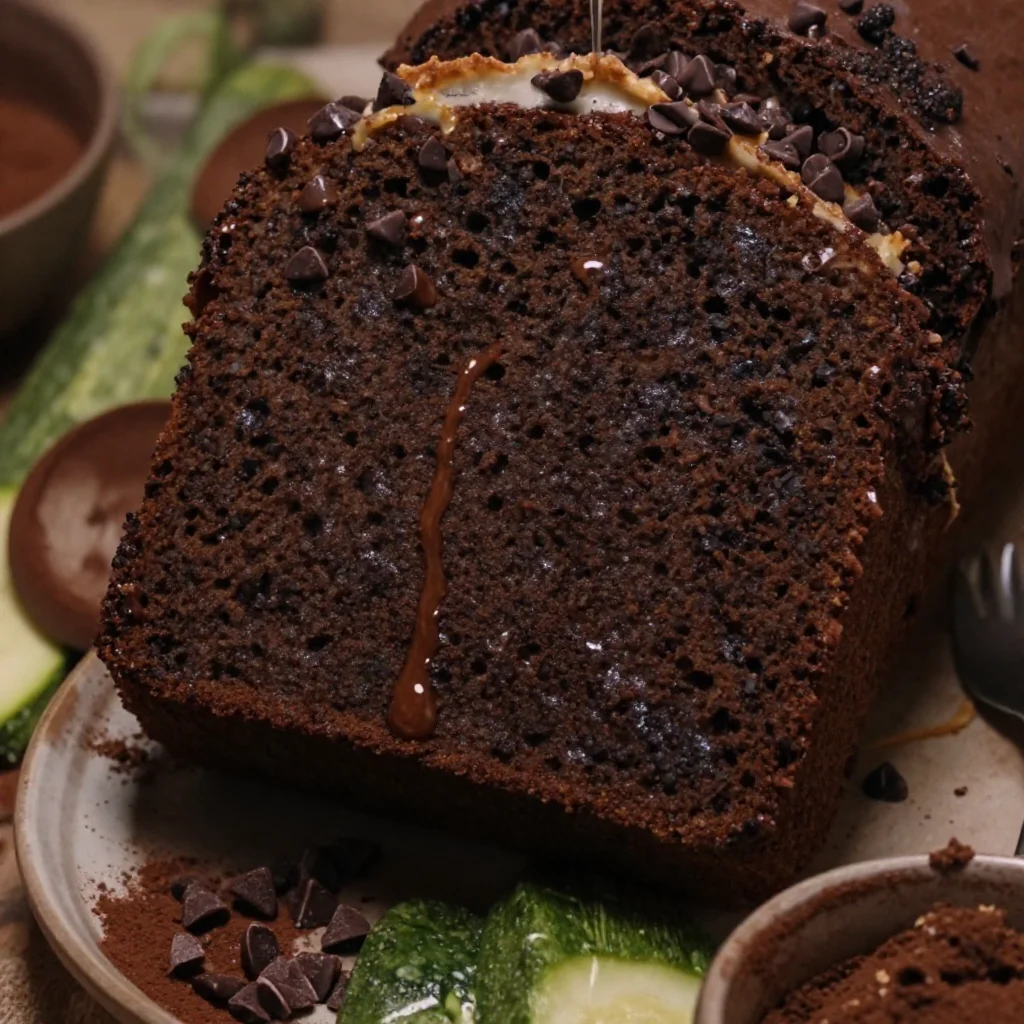
One-Bowl Chocolate Zucchini Cake: Quick Weeknight Bake
The Ultimate Chocolate Zucchini Cake Recipe: A Sweet Surprise from My Kitchen
Welcome back to my cozy kitchen, my lovely foodies! Today, I’m excited to share with you one of my all-time favorite recipes — a rich, indulgent, and surprisingly moist Chocolate Zucchini Cake. Now, before you raise an eyebrow at the idea of mixing chocolate and zucchini, let me assure you that this delightful treat is a hidden gem in the world of desserts. Seriously, it’s the kind of cake that’ll leave everyone guessing what that secret ingredient might be. Trust me, if you’ve had trouble getting the kids (or even some grown-ups) to eat their vegetables, this cake is going to be your new best friend!
As a home cook who genuinely enjoys the process of creating delicious meals, I’ve always found comfort in the idea that something as humble as zucchini can contribute to a decadent dessert. It makes me feel warm and fuzzy inside, knowing that the world of baking is full of surprises, and today I’m here to share that joy with you! So, grab a cup of tea (or coffee, if that’s more your speed), put on your favorite apron, and let’s dive into the lush, chocolatey depths of this recipe!
A Slice of Nostalgia: My Zucchini Cake Story
Let’s rewind a few years. I remember the sunny late summer afternoons when my grandmother would send me to the garden with her big wicker basket, asking me to gather the beautiful green zucchinis that had taken over her carefully-tended patch. She had a special knack for planting enough zucchini to feed an army, and we often found ourselves with basket loads of the stuff. Her answer to this bounty? Her famous Chocolate Zucchini Cake!
One memorable day, as the aroma of melted chocolate wafted through the air, I hovered in the kitchen, fascinated by my grandmother’s effortless grace. She told me that the key was to finely grate the zucchini so that it would blend seamlessly into the batter. That day we laughed, we shared stories, and with every bite of that cake, we felt a little closer. Now, whenever I bake this cake, it’s not just about satisfying a sweet tooth; it’s truly a trip down memory lane filled with love and gratitude.
Ingredients You’ll Need
Let’s gather our ingredients! This recipe is straightforward, and I’ll include some handy tips and substitutions along the way.
-
2 cups grated zucchini: Zucchini acts as a natural sweetener and keeps the cake moist. No zucchini? Use grated carrots instead for a similar texture and sweetness!
-
1½ cups all-purpose flour: The backbone of the cake’s structure. For a gluten-free option, try almond or oat flour.
-
½ cup unsweetened cocoa powder: This gives our cake its rich chocolate flavor. Dutch-processed cocoa will yield a smoother taste, while natural cocoa gives a bit of acidity to balance the sweetness.
-
1 teaspoon baking soda: This leavening agent ensures your cake rises beautifully. Double-check its expiration date to avoid a flat cake!
-
½ teaspoon salt: Just a pinch to enhance flavors. Use sea salt for a more complex taste or omit if you’re watching your sodium intake.
-
1 teaspoon vanilla extract: This adds warmth to the chocolate flavor. Feel free to substitute with almond extract for a different flavor profile.
-
3 large eggs: Eggs provide structure and moisture. You can replace them with flax eggs (1 tablespoon ground flaxseed mixed with 2.5 tablespoons water = 1 egg) for a vegan option.
-
1 cup granulated sugar: The sweetness you expect! For a healthier alternative, use maple syrup (just reduce the liquid in the recipe by a couple of tablespoons).
-
½ cup vegetable oil or melted coconut oil: This keeps our cake moist. If you prefer a lighter option, try applesauce.
-
1 cup semi-sweet chocolate chips: The crowning glory of our cake! You can swap these for dark chocolate chips or even white chocolate if you’re feeling adventurous.
Are you ready to gather everything? Let’s move on to the fun part — the baking!
Step-by-Step Instructions
Step 1: Preheat and Prepare
Begin by preheating your oven to 350°F (175°C). While that magical process happens, grease and flour a 9×13-inch baking pan or line it with parchment paper for easy release. A well-prepared pan makes all the difference!
Step 2: Grate the Zucchini
Grab that zucchini and finely grate it using the large holes of a box grater or a food processor. I love using a box grater — it feels so rustic and old-school! Once grated, place it in a clean kitchen towel and squeeze out any excess moisture. This is crucial to avoid a soggy cake.
Step 3: Mix Dry Ingredients
In a large bowl, whisk together the flour, cocoa powder, baking soda, and salt. This step not only combines the ingredients but also aerates the flour, leading to a lighter cake. The more you whisk, the more love goes into that bowl!
Step 4: Beat the Wet Ingredients
In another bowl, beat the eggs and sugar together until pale and fluffy. I usually do this in a stand mixer, but a hand mixer works just fine! Add in the oil and vanilla, and mix until everything is well combined.
Step 5: Combine and Fold
Now, gently fold the dry ingredients into the wet mixture in three parts, alternating with the grated zucchini. Make sure not to overmix — you want a tender crumb. This is where the magic happens; you’ll be amazed at how zucchini almost disappears into the batter!
Step 6: Add Chocolate Chips
Fold in the chocolate chips, making sure they’re evenly distributed throughout the batter. This is also the part where you can sneak a few morsels for yourself. Yum!
Step 7: Bake
Pour the batter into your prepared pan and spread it evenly. Pop it into your preheated oven and bake for about 30-35 minutes, or until a toothpick inserted in the center comes out clean (a few chocolate bits are okay!).
Step 8: Cool and Serve
Once baked to perfection, remove the cake from the oven and let it cool in the pan for about 15 minutes before transferring it to a wire rack to cool completely. Trust me, the anticipation makes the first slice all the more satisfying!
Serving Suggestions
When it comes to plating this delightful Chocolate Zucchini Cake, simplicity is key! Serve it dusted with powdered sugar, and maybe a dollop of whipped cream or a scoop of vanilla ice cream on the side. A sprinkle of fresh mint can add a refreshing touch. I love serving it with a strong cup of coffee or a warm herbal tea — the flavors dance together like old friends!
Recipe Variations
- Nutty Addition: Add a half cup of chopped walnuts or pecans for a rich, crunchy texture.
- Spicy Twist: Mix in a dash of cinnamon or chili powder for a warm, spicy kick.
- Frosted Delight: Top with cream cheese frosting or a rich ganache for an even more decadent experience.
- Fruit Fusion: Fold in some fresh berries or chopped pineapple for a tropical twist.
- Vegan Version: Replace eggs with flax eggs and use a plant-based oil for a completely vegan cake.
Chef’s Notes
I’ll let you in on a little secret: I often find myself sneaking extra zucchini into this cake when I have some leftovers from the farmers’ market. It’s a great way to use up any extra veggies and ensures that every bake is a bit different. Plus, the more zucchini, the moister the cake, in my opinion! Sometimes I even drizzle a quick ganache over the top for that extra pizzazz when I’m feeling fancy.
And let’s not forget that every kitchen disaster has its silver lining. There was a time I accidentally dropped half a jar of chocolate chips into the batter because I was multitasking (hello, chaos!). It turned out to be one of my best batches! So don’t be afraid to experiment — you never know what delicious surprises await!
FAQs and Troubleshooting
Q: Why did my cake turn out dry?
Dryness can occur if you overbaked the cake or if there wasn’t enough moisture in the batter. Don’t forget to check your oven temperature and use fresh ingredients!
Q: Can I freeze this cake?
Absolutely! This cake freezes beautifully. Just wrap it tightly in plastic wrap and then in foil. It can last up to 3 months in the freezer. Thaw it overnight in the fridge when you’re ready to enjoy!
Q: How do I know when the cake is done?
The toothpick test is your best friend! If it comes out clean or with just a few moist crumbs, you’re good to go.
Q: Can I reduce the sugar?
Absolutely! Feel free to reduce the sugar by about ¼ cup, especially if you plan to add frosting or serve it with sweet toppings.
Nutritional Info
While I don’t delve too deeply into numbers in my kitchen, here’s a rough estimate for a slice of this delightful cake (based on a cake yielding 12 slices):
- Calories: 220
- Carbs: 30g
- Fat: 8g
- Protein: 4g
Just remember, this recipe is all about sharing love and deliciousness — any cake made from the heart is good for the soul!
So there you have it! A hearty, delicious recipe for Chocolate Zucchini Cake that brings back fond memories while delivering an irresistible flavor. I can’t wait for you to try this out in your kitchen and share it with your loved ones. Don’t forget to let me know how it turned out and any fun kitchen stories you whip up along the way! Happy baking!
Print
Ultimate Chocolate Zucchini Cake
- Total Time: 50 minutes
- Yield: 12 servings 1x
- Diet: Vegetarian
Description
A rich, moist Chocolate Zucchini Cake that surprisingly hides its secret ingredient, zucchini, making it a delightful dessert for all ages.
Ingredients
- 2 cups grated zucchini
- 1½ cups all-purpose flour
- ½ cup unsweetened cocoa powder
- 1 teaspoon baking soda
- ½ teaspoon salt
- 1 teaspoon vanilla extract
- 3 large eggs
- 1 cup granulated sugar
- ½ cup vegetable oil or melted coconut oil
- 1 cup semi-sweet chocolate chips
Instructions
- Preheat your oven to 350°F (175°C). Grease and flour a 9×13-inch baking pan or line it with parchment paper.
- Grate the zucchini and squeeze out excess moisture using a kitchen towel.
- Whisk together the flour, cocoa powder, baking soda, and salt in a large bowl.
- Beat the eggs and sugar in another bowl until pale and fluffy. Add in the oil and vanilla, mixing well.
- Fold the dry ingredients into the wet mixture in three parts, alternating with the grated zucchini.
- Fold in the chocolate chips, ensuring even distribution.
- Pour the batter into the prepared pan and bake for 30-35 minutes, or until a toothpick comes out clean.
- Cool the cake in the pan for 15 minutes before transferring it to a wire rack to cool completely.
Notes
For a nutty addition, consider adding ½ cup of chopped walnuts or pecans. This cake can be frosted with cream cheese frosting for added decadence.
- Prep Time: 15 minutes
- Cook Time: 35 minutes
- Category: Dessert
- Method: Baking
- Cuisine: American
Nutrition
- Serving Size: 1 slice
- Calories: 220
- Sugar: 15g
- Sodium: 200mg
- Fat: 8g
- Saturated Fat: 1g
- Unsaturated Fat: 5g
- Trans Fat: 0g
- Carbohydrates: 30g
- Fiber: 2g
- Protein: 4g
- Cholesterol: 30mg
Keywords: chocolate zucchini cake, dessert, baking, zucchini recipes, chocolate cake
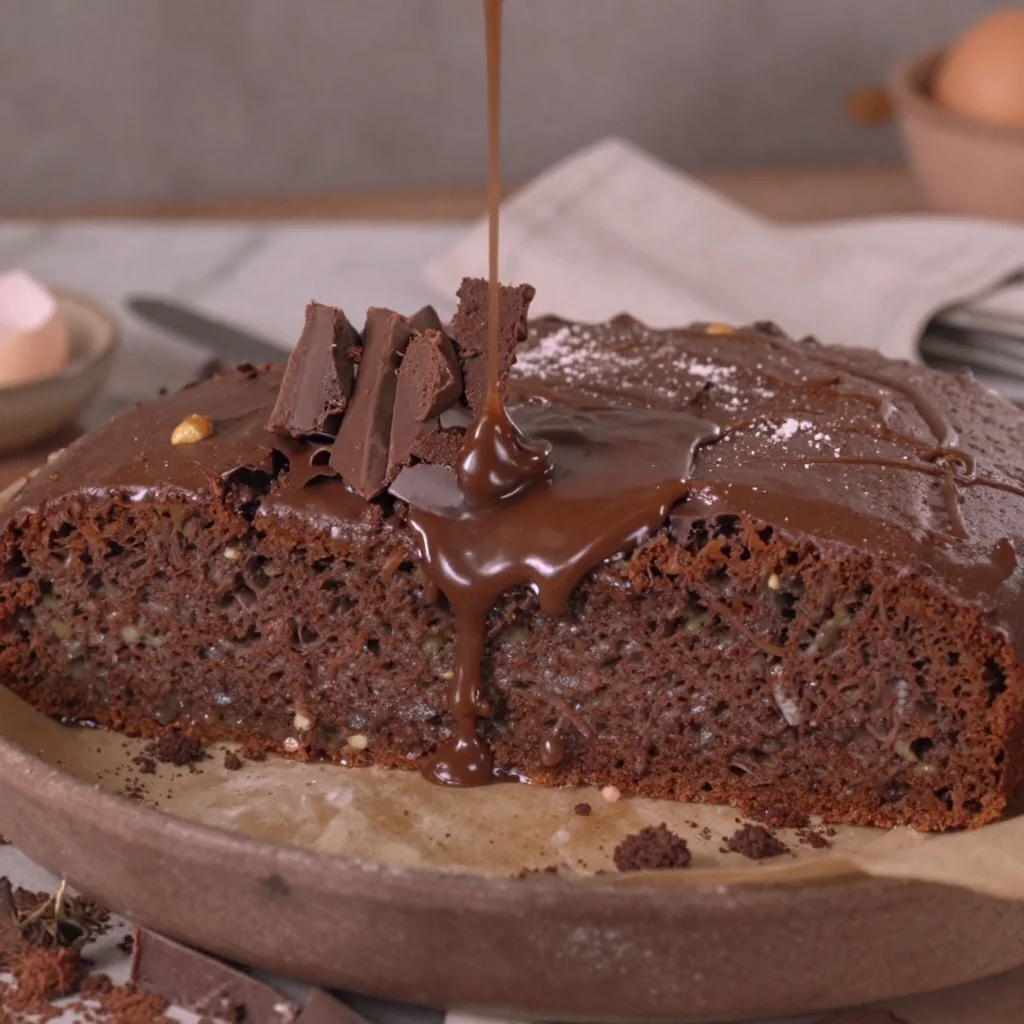
One-Bowl Chocolate Zucchini Cake: Easy, Moist & Quick
A Slice of Love: The Ultimate Chocolate Zucchini Cake Recipe
Welcome to my kitchen, my dear friends! If you’re anything like me, the scent of something baking in the oven can transport you back to cherished moments and warm the soul like nothing else. Today, I’m excited to share a recipe that’s not only decadent and delicious but also incredibly nostalgic: Chocolate Zucchini Cake! This scrumptious dessert perfectly marries the richness of chocolate with the unexpected moisture of zucchini, all while being a fantastic way to sneak in a bit of veggies into our sweets. Let’s embark on this flavorful journey together!
A Sweet Memory
I remember the first time I encountered Chocolate Zucchini Cake. It was during a hot summer in my grandmother’s cozy kitchen, surrounded by the incredible aromas of freshly baked goodies. My grandmother was a wiz in the kitchen — she could turn even the most ordinary ingredients into foodie gold. One day, she whipped up this rich chocolate cake that left us all guessing. “What’s in this?” we kept asking, our forks eagerly digging into the moist, tender slices. Her mischievous smile as she revealed the secret ingredient — zucchini! — was priceless.
That moment has stuck with me through the years, a reminder that the magic often comes from unexpected places. The joy of that cake became a staple in summer gatherings, turning simple zucchini from our garden into a family favorite. It’s not just a cake; it’s a delicious recall of laughter, warmth, and togetherness. That’s the beauty of baking — it brings people closer, and it’s this spirit of shared joy that I strive to capture in my own kitchen.
So, are you ready to bake a cake that will not only tickle your taste buds but also fill your home with love and a dash of nostalgia? Let’s get started!
Ingredients
Here’s what you’ll need to make your own Chocolate Zucchini Cake:
-
2 cups grated zucchini
A great way to use up those garden zucchinis! No need to peel, just wash and grate. For a lighter version, you can swap half of the zucchini for applesauce. -
1/2 cup unsweetened cocoa powder
This adds the deep, rich chocolate flavor. Make sure to choose a high-quality cocoa for best results. You can substitute with dark cocoa powder for a more intense flavor. -
1 cup granulated sugar
This balances the bitterness of the cocoa. For a healthier alternative, you can use coconut sugar or even maple syrup — just remember to adjust the liquid content! -
1/2 cup brown sugar
Brown sugar adds moisture and a lovely caramel undertone. Feel free to replace half with honey or agave syrup. -
1/2 cup vegetable oil
This helps keep the cake moist. Instead, you can use melted coconut oil or even applesauce for a healthier option. -
2 large eggs
These act as a binder for the ingredients. If you’re looking for an egg-free option, try using a flax egg (1 tablespoon flaxseed meal + 3 tablespoons water, mixed and rested for 5 minutes). -
1 teaspoon vanilla extract
Vanilla enhances the overall flavor of the cake. Feel free to experiment with almond extract for a nutty twist. -
1 teaspoon baking soda
This is crucial for that beautiful rise! In a pinch, baking powder can be used — just remember to adjust the quantities. -
1/2 teaspoon baking powder
This also helps with leavening. You can omit this if you’re using self-rising flour. -
1/2 teaspoon salt
A little salt brings out the sweetness and balances flavors. Always use fine sea salt for the best results. -
1 cup semi-sweet chocolate chips (optional)
A delightful addition for those who crave extra chocolate! Feel free to use dark chocolate chips or even chopped nuts for some crunch.
Let’s whip up some magic with these ingredients, shall we?
Step-by-Step Instructions
-
Preheat your oven
Start by preheating your oven to 350°F (175°C). This initial step is essential to achieve that perfect bake. -
Prepare your baking pan
Grease and flour a 9×13 inch baking pan (or line it with parchment paper for easy removal). This little trick makes sure our cake comes out without a fuss. -
Grate the zucchini
Wash and grate 2 cups of zucchini. If you’re feeling productive (and you definitely should be!), squeeze the grated zucchini in a clean kitchen towel to remove excess moisture. This helps maintain the perfect cake consistency. -
Mix the wet ingredients
In a large bowl, whisk together the granulated sugar, brown sugar, and vegetable oil until nice and smooth. Then, beat in the eggs one at a time, followed by the vanilla extract. Feel free to dance around a bit during this step — it’s always more fun to bake with a bit of joyful noise! -
Combine the dry ingredients
In a separate bowl, sift together the flour, cocoa powder, baking soda, baking powder, and salt. Sifting is key here, as it helps aerate the flour and makes for a lighter cake. -
Combine wet and dry
Gradually add the dry ingredient mixture into the wet ingredients, mixing just until combined. Be careful not to overmix — we want that cake tender, not tough! Fold in the grated zucchini and chocolate chips gently. -
Pour and spread
Pour the batter into the greased pan, spreading it evenly with a spatula. Look at that beautiful swirl of chocolatey goodness! -
Bake the cake
Place the pan in the preheated oven and bake for 25-30 minutes, or until a toothpick inserted into the center comes out clean. Oh, the heavenly aroma wafting through your kitchen during this time — it’s truly irresistible! -
Cool and serve
Once baked, allow the cake to cool in the pan for about 10 minutes, then transfer it to a wire rack to cool completely. This cake is delightful warm, but allow yourself to enjoy the tantalizing anticipation of slicing into it.
Serving Suggestions
To serve your delightful Chocolate Zucchini Cake, slice it into squares and dust with powdered sugar or drizzle with a rich chocolate ganache for an extra touch of indulgence. A dollop of whipped cream or a scoop of vanilla ice cream on the side can elevate your serving to blissful heights. Or, if you’re feeling adventurous, serve it with a scoop of creamy salted caramel ice cream for that sweet-salty combo that dreams are made of!
Recipe Variations
Here are some creative twists and alternatives to try with this cake:
-
Double Chocolate Delight: Use chocolate cake mix instead of flour for an ultra-rich chocolate version.
-
Spiced Zucchini Cake: Add a teaspoon of cinnamon or a mix of fall spices for a warm twist.
-
Nutty Chocolate Cake: Stir in some chopped walnuts or pecans for added crunch and flavor.
-
Fruity Zucchini Cake: Mix in 1 cup of mashed bananas or applesauce for a fruity dimension.
-
Gluten-Free Option: Swap the all-purpose flour for a gluten-free flour blend, and make sure your baking powder is gluten-free.
Chef’s Notes
This Chocolate Zucchini Cake has evolved in my kitchen over the years. I’ve tried it with various types of sugars and can attest that each one lends its distinct sweetness to the mix. One particularly memorable baking attempt happened when I decided to add a splash of coffee to enhance the chocolate flavor. Let me tell you — we devoured that version! It’s those little experiments, those kitchen adventures, that keep the love for cooking alive.
And a funny little story? One time, in my excitement to get this cake into the oven, I forgot the baking powder! I was scared it would turn into a chocolate brick, but to my surprise, it still emerged fluffy and delicious. Sometimes, the best baking moments come from those unexpected mishaps!
FAQs and Troubleshooting
1. My cake sank in the middle. What happened?
This can happen if the batter is overmixed or if there wasn’t enough leavening. Make sure to mix just until combined and check the freshness of your baking soda and powder.
2. Can I freeze this cake?
Yes, indeed! Wrap slices tightly in plastic wrap and freeze for up to 3 months. Just remember to thaw them in the fridge overnight before serving.
3. My batter is too thick/runny. Help!
If it’s too thick, you can add a tiny splash of milk. If it’s too runny, simply add a bit more flour or cocoa powder, a tablespoon at a time.
4. How can I tell when it’s done baking?
A toothpick inserted into the center should come out clean or with only a few moist crumbs attached. Don’t rely solely on time; every oven behaves differently, so keep an eye on it!
Nutritional Info
While I believe in balance and indulging in our favorite treats, I know health is also a priority for many of us. This Chocolate Zucchini Cake can be a sneaky source of moisture and nutrients, thanks to the zucchini!
To keep it lighter, consider using natural sweeteners and substituting half of the oil with unsweetened applesauce. It’s a fun and tasty way to enjoy a slice of heaven without the guilt!
So there you have it — a lovingly crafted Chocolate Zucchini Cake recipe, complete with stories, tips, and plenty of joy. I hope it brings as much happiness and warmth to your kitchen as it has to mine. Remember, cooking is all about love, fun, and a pinch of creativity. Happy baking, friends!
Print
Chocolate Zucchini Cake
- Total Time: 45 minutes
- Yield: 12 servings 1x
- Diet: Vegetarian
Description
A decadent Chocolate Zucchini Cake that marries rich chocolate flavor with moist zucchini for a delightful dessert.
Ingredients
- 2 cups grated zucchini
- 1/2 cup unsweetened cocoa powder
- 1 cup granulated sugar
- 1/2 cup brown sugar
- 1/2 cup vegetable oil
- 2 large eggs
- 1 teaspoon vanilla extract
- 1 teaspoon baking soda
- 1/2 teaspoon baking powder
- 1/2 teaspoon salt
- 1 cup semi-sweet chocolate chips (optional)
Instructions
- Preheat your oven to 350°F (175°C).
- Prepare a 9×13 inch baking pan by greasing and flouring it.
- Grate the zucchini and squeeze it in a clean kitchen towel to remove excess moisture.
- Mix together the granulated sugar, brown sugar, and vegetable oil until smooth. Add the eggs one at a time, then the vanilla extract.
- Combine the flour, cocoa powder, baking soda, baking powder, and salt in a separate bowl.
- Combine the dry ingredients into the wet ingredients until just mixed, then fold in the zucchini and chocolate chips.
- Pour the batter into the prepared pan, spreading evenly.
- Bake for 25-30 minutes or until a toothpick comes out clean.
- Cool in the pan for 10 minutes, then transfer to a wire rack to cool completely.
Notes
Serve with powdered sugar dust or chocolate ganache. Pair with whipped cream or ice cream for extra indulgence.
- Prep Time: 15 minutes
- Cook Time: 30 minutes
- Category: Dessert
- Method: Baking
- Cuisine: American
Nutrition
- Serving Size: 1 slice
- Calories: 350
- Sugar: 28g
- Sodium: 200mg
- Fat: 15g
- Saturated Fat: 3g
- Unsaturated Fat: 10g
- Trans Fat: 0g
- Carbohydrates: 50g
- Fiber: 2g
- Protein: 6g
- Cholesterol: 30mg
Keywords: chocolate zucchini cake, dessert, baking, chocolate, summer recipes, zucchini recipes, moist cake
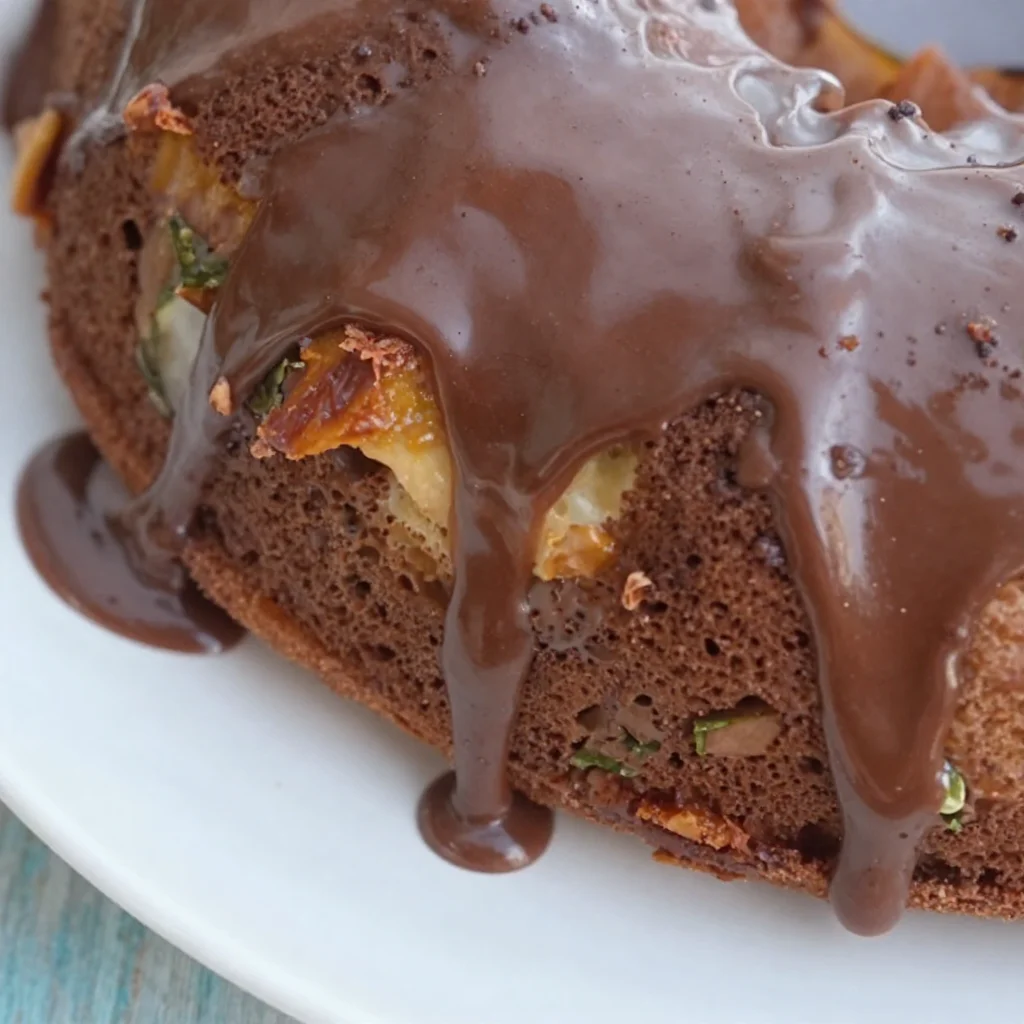
Chocolate Zucchini Bundt Cake
The Divine Chocolate Zucchini Bundt Cake: Sweetness with a Twist!
Welcome to my kitchen, friends! Today, we’re diving into a recipe that’s not just any dessert; it’s an enchanting blend of flavors that will have you questioning why you ever hesitated to pair chocolate with vegetables. Yes, you heard me right! Our star ingredient is zucchini, which brings moisture and a pleasant texture to the cake while magically disappearing into the rich, velvety chocolate. This Chocolate Zucchini Bundt Cake is a beloved family recipe that has graced our table during countless gatherings, and I can’t wait to share it with you.
Baking is like a little science experiment, don’t you think? The kitchen becomes a laboratory where everyday ingredients transform into something delightful. Whether you’re indulging on a rainy afternoon or impressing guests at your next gathering, this cake checks all the boxes: delicious, easy to make, and surprisingly healthy! With each slice, you’ll enjoy a moist, rich, and oh-so-chocolatey experience that’s sure to spark smiles and conversation.
Now, before we roll up our sleeves and get our hands into some chocolatey goodness, let me share a delightful little backstory related to my experience with this cake.
A Journey Through a Sweet Memory
Flashback to a sun-filled afternoon back in my grandmother’s kitchen—this is where my love for baking first blossomed. Each summer, when her garden overflowed with zucchini, she would whip up her delightful Chocolate Zucchini Bundt Cake. The smell of chocolate wafting through the house was always enticing! I remember standing on a stool by the counter, eagerly awaiting the moment I could sneak a taste of the batter.
As she grated the green squash and folded it into the rich cocoa mix, she’d beam with pride, sharing stories about how zucchini becomes a secret ingredient in desserts. “People will never guess there’s a veggie in here, but it’s what makes this cake luxurious,” she’d giggle.
Baking with her felt magical; it wasn’t just about the cake—it was about connection, family, and love. She taught me that baking is not just a task: it’s an invitation to create joyful memories. Fast forward to today, and I’m excited to pass this recipe down to you! So grab your mixing bowl and let’s get started on this journey together.
Ingredients You’ll Need
Now that we’re all nostalgic and inspired, let’s gather our ingredients for this glorious Chocolate Zucchini Bundt Cake!
-
Zucchini (2 cups, grated): The star of our show! Zucchini keeps the cake moist without adding a strong flavor. You can substitute it with grated carrots or unsweetened applesauce if you’re in a pinch.
-
All-Purpose Flour (1 ¾ cups): Provides structure to the cake. If you want a healthier twist, you can use whole wheat flour or a gluten-free blend.
-
Granulated Sugar (1 ½ cups): Sweetens the cake and helps with moisture. For a lower-calorie option, try coconut sugar or a sugar substitute, but keep in mind this may slightly alter the texture.
-
Unsweetened Cocoa Powder (¾ cup): This gives the cake its deep chocolate flavor. Be sure to use high-quality cocoa for the best taste! Dutch-processed cocoa can also be used for a milder flavor.
-
Baking Soda (1 teaspoon) and Baking Powder (1 teaspoon): These are our leavening agents that help the cake rise. Make sure they are fresh; old baking powder or soda can lead to a dense cake.
-
Salt (½ teaspoon): A crucial component that enhances flavors—never skip it!
-
Eggs (2 large): Acts as a binder and adds richness. If you’re vegan, you can replace them with flax eggs (2 tablespoons ground flaxseed + 6 tablespoons water, mixed and set for 10 minutes).
-
Vanilla Extract (1 teaspoon): A flavor booster that elevates the cocoa and makes everything more aromatic. You can swap it for almond extract for a unique twist!
-
Vegetable Oil (½ cup): For moisture! You can also use melted coconut oil for a different flavor profile.
-
Chocolate Chips (optional, ½ cup): Add a little extra decadence! Dark or semi-sweet chips work wonderfully.
Each ingredient has its role in making this cake spectacular, so let’s dive into some delightful cooking steps!
Step-by-Step Instructions
-
Preheat Your Oven: Preheat your oven to 350°F (175°C). Don’t skip this step, as it ensures your cake bakes evenly from the get-go!
-
Prepare the Bundt Pan: Generously grease your bundt pan with cooking spray or butter, and dust it lightly with flour. This helps the cake release easily after baking. You can also use cocoa powder instead of flour to give it that little extra chocolate kick!
-
Grate the Zucchini: With a box grater or food processor, grate your zucchini. You can choose to squeeze it in a clean kitchen towel to eliminate excess moisture, but I usually don’t. A little moisture doesn’t hurt!
-
Mix Dry Ingredients: In a large bowl, whisk together the flour, cocoa powder, baking soda, baking powder, and salt until well combined. This is essential; it ensures your leavening agents are evenly distributed throughout the cake.
-
Combine Wet Ingredients: In another bowl, whisk together sugar, eggs, oil, and vanilla extract until fluffy. This mixture should look slightly frothy. The air you incorporate will lead to a lighter cake!
-
Combine It All: Gradually add the dry ingredients to the wet ingredients and mix until just combined. Over-mixing can lead to a tough cake, so be gentle here. Fold in the grated zucchini and chocolate chips (if using).
-
Pour into the Bundt Pan: Transfer the batter into your prepared bundt pan, smoothing it out so it’s level. Give the pan a gentle tap on the counter to remove any air bubbles.
-
Bake: Bake in the preheated oven for about 50-60 minutes or until a toothpick inserted into the center comes out clean. Your kitchen will smell absolutely divine, and this is when the magic happens!
-
Cool Down: Once baked, take the cake out and let it cool in the pan for about 15-20 minutes. Then, carefully invert it onto a wire rack to cool completely.
-
Serve with Love: Dust the cooled cake with powdered sugar or drizzle chocolate ganache over the top for a stunning presentation!
Serving Suggestions
This Chocolate Zucchini Bundt Cake shines when served with a scoop of vanilla ice cream or a dollop of fresh whipped cream! For a more sophisticated touch, consider pairing it with a side of fresh berries. Dust the top with a bit of powdered sugar or drizzle some salted caramel over each slice for that glorious finish. It’s a cake that truly steals the show in any setting!
Recipe Variations
Ready to mix things up? Here are a few delicious twists on this recipe:
- Spicy Chocolate Zucchini Bundt Cake: Add ½ teaspoon of cinnamon and a pinch of cayenne pepper for a warm kick.
- Nutty Delight: Toss in some chopped walnuts or pecans for added texture and flavor. They pair wonderfully with chocolate!
- Dairy-Free Option: Use almond or oat milk in place of dairy milk with your eggs or substitute for flax eggs if you’re going vegan.
- Fruits and Spices: Add apple sauce or mashed bananas to enhance the moistness, or incorporate orange zest for a citrus twist!
- Frosting Ideas: Instead of dusting with sugar, consider a cream cheese frosting for a tangy complement to the chocolate.
Chef’s Notes
This recipe has evolved over the years as I’ve experimented with different ingredients and techniques. The original had more sugar, but the healthier iterations now make it a guilt-free treat! I fondly remember the first time I cooked this for a group of friends. The skeptical looks at a chocolate-veggie cake turned to joyous smiles after the first bite! Each time I bake it, I’m reminded of those summer days in my grandmother’s kitchen, sweltering heat, laughter, and, of course, chocolate.
Keep in mind that cakes are forgiving! Feel free to play around and make this recipe your own. Perhaps one day, your unique twist will be a new family tradition!
FAQs and Troubleshooting
Why is my cake dense?
This could be due to over-mixing the batter or using too many wet ingredients. Make sure to mix until just combined and keep an eye on your zucchini moisture.
Can I freeze this cake?
Absolutely! Wrap individual slices in plastic wrap and store in an airtight container. It’ll stay fresh for up to three months—perfect for when you need a sweet treat later!
How do I know when the cake is done?
Insert a toothpick into the center of the cake. If it comes out clean or with just a few moist crumbs, it’s ready. If it has wet batter on it, give it some more time in the oven.
Can I use other types of flour?
Yes! Feel free to sub in whole wheat flour or gluten-free alternatives. Just remember, your cake may have a slightly different texture, but it’s all about experimentation!
Nutritional Info (optional)
A slice of your Chocolate Zucchini Bundt Cake brings a nice mix of carbohydrates, a bit of protein from the eggs, and healthy fats from the oil. Plus, the zucchini offers a range of vitamins, making it a surprisingly nutritious dessert option!
Now that you have all this information, it’s time to don that apron and bake something incredible! Remember to enjoy the process, share stories, and maybe, just maybe, inspire someone else to create their own baking memories. Happy baking!
Print
Chocolate Zucchini Bundt Cake
- Total Time: 75 minutes
- Yield: 12 servings 1x
- Diet: Vegetarian
Description
A moist and rich cake that beautifully blends chocolate and zucchini, perfect for any occasion.
Ingredients
- 2 cups Zucchini, grated
- 1 ¾ cups All-Purpose Flour
- 1 ½ cups Granulated Sugar
- ¾ cup Unsweetened Cocoa Powder
- 1 teaspoon Baking Soda
- 1 teaspoon Baking Powder
- ½ teaspoon Salt
- 2 large Eggs
- 1 teaspoon Vanilla Extract
- ½ cup Vegetable Oil
- ½ cup Chocolate Chips (optional)
Instructions
- Preheat your oven to 350°F (175°C).
- Prepare your bundt pan by greasing it with cooking spray and dusting with flour.
- Grate the zucchini using a box grater or food processor.
- Mix the dry ingredients: whisk together flour, cocoa powder, baking soda, baking powder, and salt.
- Combine the wet ingredients: whisk sugar, eggs, oil, and vanilla until fluffy.
- Combine the wet and dry ingredients until just mixed. Fold in zucchini and chocolate chips.
- Pour the batter into the bundt pan and smooth out.
- Bake for 50-60 minutes or until a toothpick comes out clean.
- Cool for 15-20 minutes in the pan before inverting onto a wire rack.
- Serve dusted with powdered sugar or drizzled with chocolate ganache.
Notes
This cake can be served with vanilla ice cream or fresh berries for added indulgence. It can also be frozen for up to three months.
- Prep Time: 15 minutes
- Cook Time: 60 minutes
- Category: Dessert
- Method: Baking
- Cuisine: American
Nutrition
- Serving Size: 1 slice
- Calories: 350
- Sugar: 20g
- Sodium: 250mg
- Fat: 16g
- Saturated Fat: 2g
- Unsaturated Fat: 14g
- Trans Fat: 0g
- Carbohydrates: 45g
- Fiber: 3g
- Protein: 4g
- Cholesterol: 30mg
Keywords: chocolate cake, zucchini cake, bundt cake, dessert, easy baking
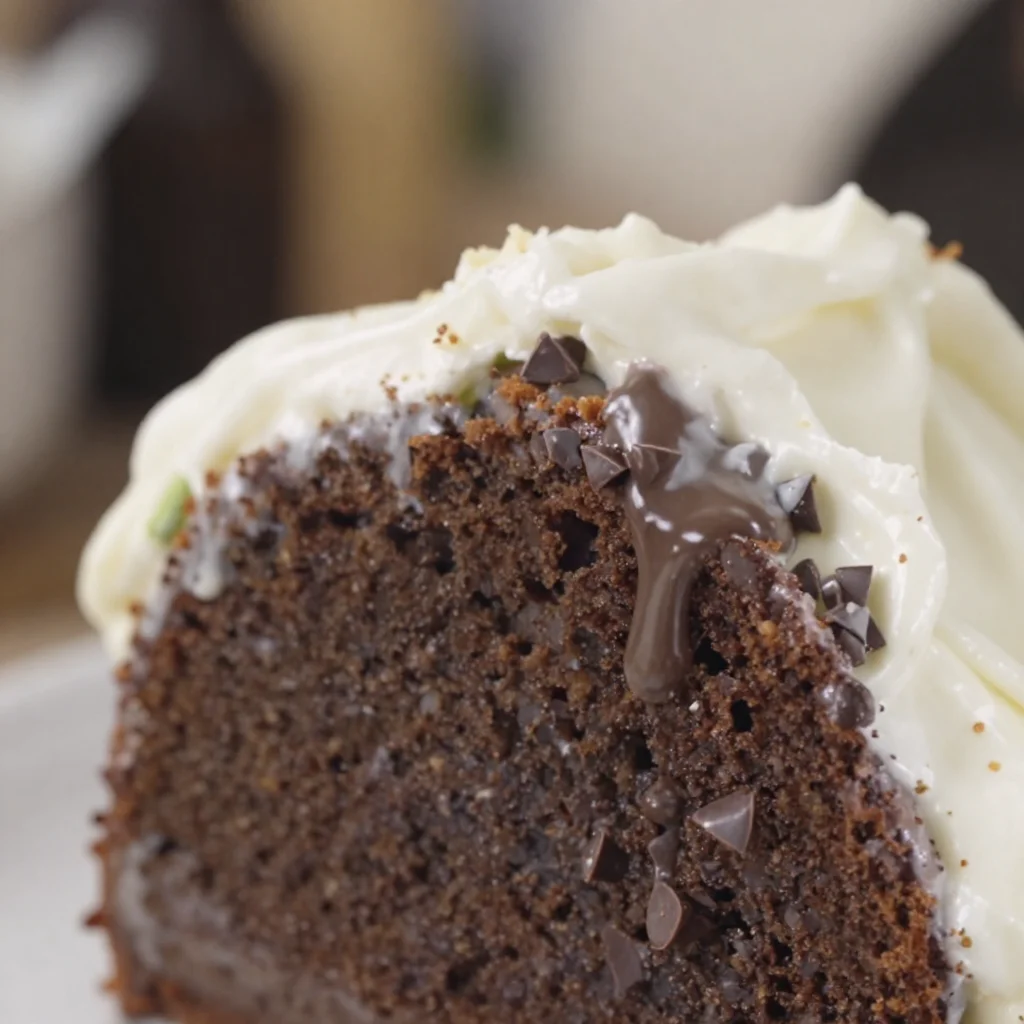
One-Bowl Chocolate Zucchini Cake: Easy Weeknight Dessert
The Ultimate Chocolate Zucchini Cake Recipe That Will Steal Your Heart
Welcome to my cozy corner of the internet! I’m Olivia Bennett, your friendly kitchen companion, and today, we’re diving into a recipe that’s not just about satisfying your sweet tooth—it’s a delightful way to sneak in a bit of goodness too! Yes, I’m talking about the incredible Chocolate Zucchini Cake. Now, I know what you might be thinking: “Zucchini in my cake? Really?” But trust me, this cake is a game changer; it’s moist, rich, and oh-so-decadent, all while packing a healthy punch with those sneaky veggies.
There’s something truly magical about combining flavors that you wouldn’t typically think go together. The cocoa brings out an amazing depth of flavor while the zucchini lends moisture without making it taste like you’re getting a serving of vegetables—this is truly comfort food at its finest. Whether you’re looking for a treat to share or just craving a slice of something sweet with your afternoon coffee, this cake is your new go-to.
Now, you might be wondering how I stumbled upon this delightful recipe. Let me take you back to one of my favorite summertime memories in my grandmother’s kitchen.
Growing up, summers at Grandma’s house were filled with endless treats, and her signature dish was her deliciously rich chocolate cake. One day, when I visited her during peak zucchini season, she decided to take a leap of faith and add this garden vegetable to her famous chocolate cake. At first, I was skeptical; I mean, who adds zucchini to cake? But the divine smell wafting through her house as it baked melted away my doubts. The moment I sunk my fork into that first slice and tasted the moist, chocolaty goodness was pure bliss. She told me the trick was to finely grate the zucchini, ensuring it blended seamlessly into the batter. From that day forward, I carried that lesson into my kitchen and have been enchanting friends and family with my version of her chocolate zucchini cake ever since!
Ingredients
To whip up your own Chocolate Zucchini Cake, gather the following ingredients. I’ve included some substitution tips and quick chef insights to help you along the way!
-
2 cups finely grated zucchini
Use fresh zucchini, and don’t worry about peeling it! The skin adds great color and nutrients. If you’re in a pinch, you can use pre-grated zucchini, but ensure it’s well-drained. -
1 ¾ cups all-purpose flour
All-purpose flour works perfectly, but if you want a gluten-free option, try a 1:1 gluten-free flour blend. Just make sure it contains xanthan gum for the right texture! -
¾ cup unsweetened cocoa powder
Quality matters! Choose a good quality unsweetened cocoa powder for soul-satisfying depth. Dark cocoa powder can also be used for a deeper chocolate flavor. -
1 tsp baking soda
This is your rising agent. Make sure it’s fresh! An expired baking soda will lead to a dense cake—no one wants that. -
½ tsp baking powder
For that perfect rise! This helps the cake stay soft and fluffy. Again, freshness is key here! -
1 tsp salt
Balances the sweetness. If you’re watching your sodium, you can cut this back slightly without compromising too much. -
1 ¼ cups granulated sugar
Feel free to reduce the sugar if you’d like it less sweet, or try coconut sugar for a healthier twist! -
½ cup vegetable oil
Oil keeps the cake moist, but you can substitute it with melted coconut oil or even applesauce for a lighter version—it will change the texture slightly but still be delicious! -
½ cup buttermilk
Buttermilk lends a delightful tang. You can make your own by adding a tablespoon of lemon juice or vinegar to milk and letting it sit for 5 minutes! -
2 large eggs
These provide structure. You can replace them with flax eggs (1 tablespoon ground flaxseed mixed with 2.5 tablespoons water) for a vegan version! -
1 tsp pure vanilla extract
Enhances the overall flavor. Always opt for pure over imitation for the best taste! -
1 cup semi-sweet chocolate chips
Baking chips are great for melting, but feel free to use dark chocolate chunks for a richer flavor. If you’re avoiding dairy, seek out vegan chocolate options!
Step-by-Step Instructions
Ready to embark on this chocolatey adventure? Let’s get baking!
-
Preheat Your Oven: Start by preheating your oven to 350°F (175°C). While it heats up, you can prepare your baking pan.
-
Prepare the Pan: Grease and flour a 9×13-inch baking dish. Alternatively, you can line the dish with parchment paper for easier removal later. I swear by this method for any cake!
-
Grate the Zucchini: Grab your box grater or a food processor and finely grate the zucchini. The key here is to squeeze out excess moisture—put that grated zucchini in a clean kitchen towel and give it a good twist. This ensures that your cake won’t turn out soggy!
-
Mix the Dry Ingredients: In a large mixing bowl, whisk together the flour, cocoa powder, baking soda, baking powder, and salt. This step is crucial as it helps to evenly distribute your leavening agents and prevents lumps in the batter.
-
Mix the Wet Ingredients: In another bowl, combine the granulated sugar, oil, buttermilk, eggs, and vanilla. Whisk until smooth. This is where all the magic happens! The sugar will dissolve partially, and the mixture will have a lovely creamy texture.
-
Combine the Mixtures: Gradually add your dry ingredients to the wet ingredients, stirring just until everything is combined. Be gentle—overmixing can lead to tough cake. A few lumps are perfectly okay!
-
Add the Zucchini and Chocolate Chips: With a spatula, fold in the grated zucchini and chocolate chips. The mixture will be thick and chunky, and it smells heavenly!
-
Transfer to the Baking Dish: Pour the batter into your prepared baking dish and spread it evenly. Give it a little shake to settle it nicely.
-
Bake: Place the dish in the oven and bake for 35-40 minutes, or until a toothpick inserted in the center comes out clean (or with just a few moist crumbs).
-
Cool: Once baked, remove from the oven and let it cool for about 10-15 minutes in the pan. Then, transfer it to a wire rack to cool completely. The aroma wafting through your kitchen will have everyone asking, “What’s baking?”
Serving Suggestions
Once your cake has cooled, it’s time to serve! Dust it with powdered sugar for a simple yet elegant touch, or slather on a rich chocolate frosting or cream cheese frosting for some serious indulgence. You can also serve it with a dollop of whipped cream or a scoop of vanilla ice cream for that extra touch of sweetness. A slice of this moist and chocolaty delight pairs beautifully with a warm cup of coffee or a luscious glass of cold milk.
Recipe Variations
Here are a few fun twists to take your Chocolate Zucchini Cake to the next level!
-
Chocolate Orange Zucchini Cake: Add the zest of one orange to the batter for a refreshing citrus twist that complements the chocolate beautifully.
-
Nutty Delight: Stir in half a cup of chopped walnuts or pecans for added crunch and flavor.
-
Swapping Sweeteners: Experiment with maple syrup or honey instead of granulated sugar for a different sweet profile.
-
Gluten-Free Option: Use almond flour or a gluten-free flour blend to cater to gluten sensitivity—just adjust the liquid slightly since almond flour can absorb more moisture.
-
Chocolate Mint Zucchini Cake: Incorporate a few drops of peppermint extract for a refreshing chocolate mint twist. Perfect for the holiday season!
Chef’s Notes
As with all recipes, this chocolate zucchini cake has a life of its own in terms of evolution. I’ve experimented with various sweeteners, flours, and add-ins over the years. One fun memory I have is testing this cake in my friend Jamie’s kitchen, where we tried adding leftover cream cheese frosting from another dish—it took the whole experience to a new level! Now, I often use that frosting to make it more indulgent. Each batch has its own quirks and character, and I love that it can be customized. This recipe has unwittingly become a foundation for creativity in the kitchen, and it always brings a smile to faces around the table.
FAQs and Troubleshooting
-
Why did my cake come out dense?
Ensure you’re not overmixing the batter—gently combine the ingredients and remember to measure accurately. Also, check the freshness of your leavening agents. -
Can I freeze this cake?
Absolutely! Wrap the completely cooled cake in plastic wrap and then in aluminum foil. It will keep well for about 3 months in the freezer. Just thaw before serving! -
What’s the best way to store leftover cake?
Keep your cake covered at room temperature for about 2-3 days or store it in the fridge for up to a week. -
How can I make the frosting extra fluffy?
When preparing cream cheese frosting, beat the cream cheese and butter very well until light and fluffy before adding powdered sugar. This will give your frosting that airy texture!
There you have it—my cherished Chocolate Zucchini Cake recipe! I invite you to step into your kitchen and immerse yourself in these flavors. May every slice remind you of sweet memories and cozy moments shared with your loved ones. Happy baking, my friend!
Print
The Ultimate Chocolate Zucchini Cake
- Total Time: 55 minutes
- Yield: 12 servings 1x
- Diet: Vegetarian
Description
A moist and rich chocolate cake that cleverly incorporates zucchini for added nutrition without compromising on flavor.
Ingredients
- 2 cups finely grated zucchini
- 1 ¾ cups all-purpose flour
- ¾ cup unsweetened cocoa powder
- 1 tsp baking soda
- ½ tsp baking powder
- 1 tsp salt
- 1 ¼ cups granulated sugar
- ½ cup vegetable oil
- ½ cup buttermilk
- 2 large eggs
- 1 tsp pure vanilla extract
- 1 cup semi-sweet chocolate chips
Instructions
- Preheat your oven to 350°F (175°C).
- Prepare a 9×13-inch baking dish by greasing and flouring it.
- Grate the zucchini and squeeze out excess moisture using a kitchen towel.
- Mix the dry ingredients: flour, cocoa powder, baking soda, baking powder, and salt.
- Mix the wet ingredients: sugar, oil, buttermilk, eggs, and vanilla until smooth.
- Combine the dry and wet ingredients until just blended.
- Add in the grated zucchini and chocolate chips, folding gently.
- Transfer the batter to the prepared baking dish.
- Bake for 35-40 minutes, until a toothpick comes out clean.
- Cool for 10-15 minutes in the pan, then transfer to a wire rack to cool completely.
Notes
Dust with powdered sugar or top with chocolate frosting. Consider adding nuts or citrus zest for variations.
- Prep Time: 15 minutes
- Cook Time: 40 minutes
- Category: Dessert
- Method: Baking
- Cuisine: American
Nutrition
- Serving Size: 1 slice
- Calories: 350
- Sugar: 20g
- Sodium: 400mg
- Fat: 16g
- Saturated Fat: 3g
- Unsaturated Fat: 8g
- Trans Fat: 0g
- Carbohydrates: 50g
- Fiber: 3g
- Protein: 5g
- Cholesterol: 30mg
Keywords: chocolate cake, zucchini cake, dessert recipe, moist cake, healthy desserts
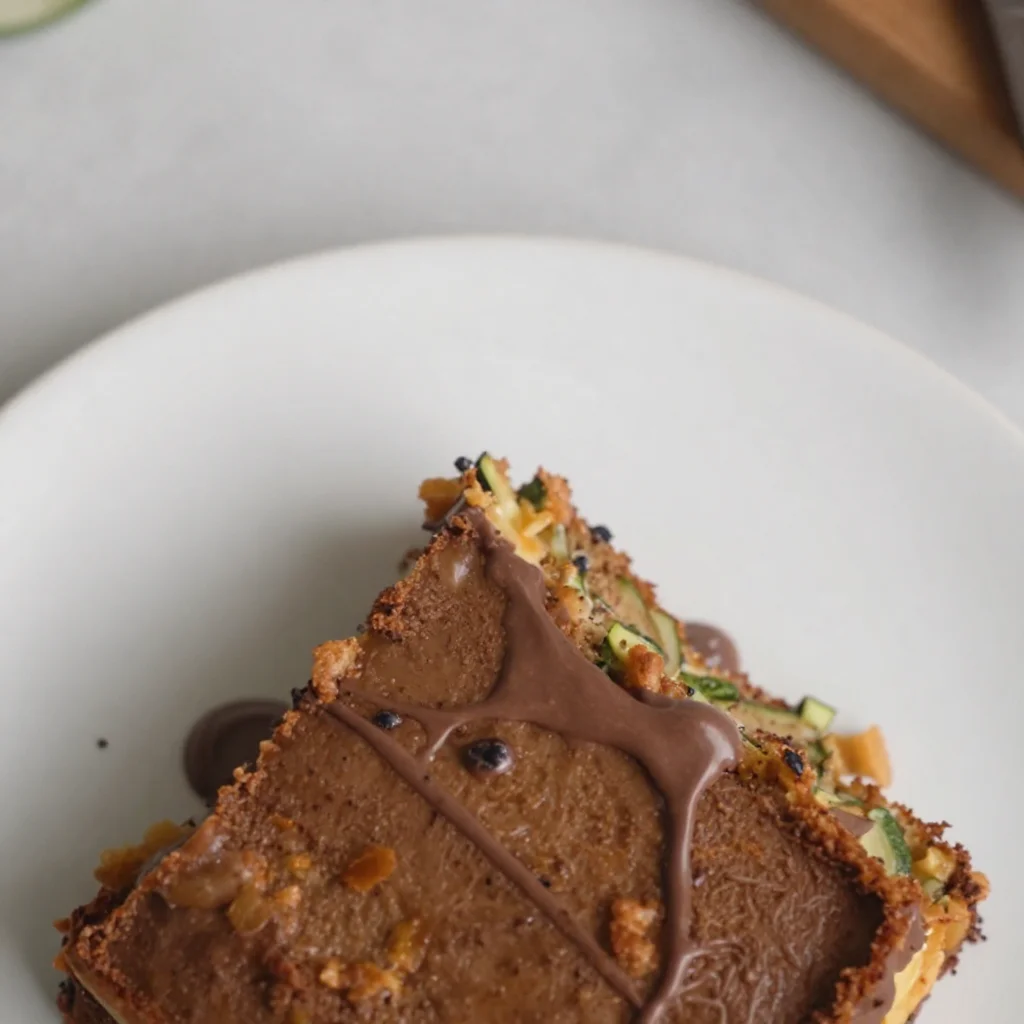
One-Pan Chocolate Zucchini Sheet Cake (Easy Make-Ahead)
The Ultimate Chocolate Zucchini Sheet Cake Recipe: A Slice of Heaven
Welcome to my kitchen, dear friends! Today, we’re diving into a recipe that combines two unlikely heroes: chocolate and zucchini. Before you raise an eyebrow, let me tell you, this Chocolate Zucchini Sheet Cake is nothing short of a culinary masterpiece that even the pickiest eaters won’t be able to resist. Think rich, moist chocolate cake with the unexpected twist of tender zucchini hidden within.
If you’re anything like me, you love the thrill of a surprise ingredient. It adds character to the dish and spices up the cooking experience. Trust me, no one will ever suspect there’s a green vegetable lurking in this indulgent slice of heaven — and that’s the beauty of it! This cake is perfect for everything from potlucks to birthday parties or just a cozy night at home.
It was on a sunny autumn afternoon in my grandmother’s kitchen when I first laid eyes (and taste buds) on a chocolate zucchini cake. The aroma of cocoa and something utterly delightful wafted through the air, and I was instantly intrigued. As my grandmother whipped up this rich dessert, she told me how zucchini helped to keep the cake moist. I watched in awe as she sprinkled the batter with mini chocolate chips and popped it into the oven. The moment we pulled that cake out, the entire family gathered around, ready to dig in. That day marked my love affair with chocolate zucchini cake, and I’ve been making my own versions ever since.
Ingredients You’ll Need
To make this beautiful creation, you’ll need the following simple ingredients:
-
Zucchini (about 2 cups, grated): The star ingredient! Zucchini adds moisture and a subtle flavor without overpowering the chocolate. It’s best to use young zucchini for this recipe as they have a milder taste and smaller seeds. No zucchini? No problem! You can substitute with grated carrots for a similar texture.
-
All-Purpose Flour (1 ¾ cups): This is the backbone of your cake. For a gluten-free version, feel free to use a 1:1 gluten-free flour blend.
-
Granulated Sugar (1 ½ cups): To balance the chocolate flavor. You could replace some of this with coconut sugar for a deeper flavor and lower glycemic index.
-
Unsweetened Cocoa Powder (½ cup): The heart and soul of your cake. Sift it before using to ensure there are no lumps! Want to skip the cocoa? You can opt for carob powder, though the flavor will differ.
-
Baking Soda (1 tsp): This is your leavening agent, ensuring the cake rises beautifully.
-
Baking Powder (1 tsp): Works alongside the baking soda for extra lift. They’re a dynamic duo!
-
Salt (½ tsp): Don’t skip this! Salt enhances all the flavors in the cake.
-
Large Eggs (2): Eggs bind the ingredients and give structure to your cake. You can substitute with flaxseed meal mixed with water for a vegan version (1 tablespoon of flax + 2.5 tablespoons of water per egg).
-
Vegetable Oil (¾ cup): This keeps your cake moist and tender. You can switch to melted coconut oil for a subtly sweet flavor.
-
Vanilla Extract (2 tsp): For that warm, inviting flavor. You can also use almond extract for a different twist.
-
Chocolate Chips (1 cup): A delightful addition that melts in your mouth! Use dark chocolate chips for a richer flavor or white chocolate for a sweeter contrast.
Step-by-Step Instructions
-
Prep Your Oven and Pan: Preheat your oven to 350°F (175°C). Grab a 9×13-inch baking dish and grease it lightly with oil or use parchment paper for easy removal.
-
Grate that Zucchini: Rinse your zucchini and grab the grater. No need to peel! Just grate them using the coarse side of the grater. Don’t forget to squeeze out the excess moisture using a clean kitchen towel or cheesecloth — we want a moist cake, but we don’t need it swimming!
-
Mix Your Dry Ingredients: In a large bowl, whisk together the flour, cocoa powder, baking soda, baking powder, and salt until well combined. Your cocoa may want to form clumps, so give it some extra love with that whisk!
-
Blend the Wet Ingredients: In another bowl, beat the eggs and sugar together until light and fluffy (about 2–3 minutes using an electric mixer). This step is key because it incorporates air, resulting in a lighter cake. Add in the oil and vanilla extract, and mix until combined.
-
Combine Dry and Wet Mixtures: Gradually add the dry ingredients into the wet mixture. Fold gently using a spatula — be careful not to overmix, or your cake will end up tough. Just mix until the flour is incorporated.
-
Stir in the Zucchini and Chocolate Chips: Gently fold in the grated zucchini and chocolate chips until evenly distributed throughout the batter. Taste test a bit of that batter — yum!
-
Pour and Bake: Transfer the batter to your prepared baking dish, spreading it evenly. Bake for 30-35 minutes or until a toothpick inserted in the center comes out clean. Don’t let it overbake; a little gooeyness is desirable!
-
Cool Down: Allow the cake to cool in the pan for about 10 minutes, then transfer it to a wire rack to cool completely. You could frost it while it’s still slightly warm, but I like to wait for the fun of layering!
Serving Suggestions
Now that you’ve created this scrumptious Chocolate Zucchini Cake, it’s time to indulge! Serve it warm, dusted with powdered sugar, or go all out and slather on some rich chocolate frosting for a dessert that’s totally show-stopping. Paired with a scoop of vanilla ice cream or whipped cream? Pure bliss! Don’t forget to grab a slice for yourself before someone else snatches the last piece!
Recipe Variations
- Spiced Zucchini Cake: Add a teaspoon of cinnamon and a pinch of nutmeg for a warm, spiced version.
- Nutty Delight: Fold in a half cup of toasted walnuts or pecans for a delightful crunch.
- Fruity Twist: Add some mashed bananas or applesauce if you want to pack in extra flavor and moisture.
- Gluten-Free Option: Swap out the all-purpose flour for almond flour or a gluten-free flour blend.
- Double Chocolate: Use chocolate cake mix instead of flour and replace half the oil with unsweetened applesauce to make it even fudgier.
Chef’s Notes
Every time I whip up this Chocolate Zucchini Sheet Cake, I can’t help but reminisce about those sweet afternoons in my grandmother’s kitchen. There’s something so comforting about the smell of chocolate and the warmth of family gathered around the table. Over the years, I’ve played with this recipe, and it’s evolved from my grandma’s classic to a modern delight with my own twists. Each time, it brings smiles and happy memories with every slice!
FAQs and Troubleshooting
1. My cake came out dry! What happened?
Don’t fret! If the cake is dry, it’s likely overbaked. Make sure to check it towards the end of the baking time and rely on the toothpick test — moist crumb is okay!
2. Can I make this ahead of time?
Absolutely! This cake stays moist for several days, making it perfect for meal prep or entertaining. Just store it covered at room temperature or in the fridge for longer freshness.
3. Can I freeze this cake?
Yes, you can! Once the cake has completely cooled, wrap it tightly in plastic wrap, followed by aluminum foil, and store it in the freezer for up to three months. Thaw in the fridge overnight before serving.
4. How do I know if my zucchini is fresh?
Fresh zucchini should be firm, with smooth skin and vibrant color. Avoid any that feel soft or show signs of wrinkles!
Nutritional Info
Note: Nutritional values may vary based on ingredient brands and specific measurements used in the recipe. Always consult a nutritionist for personalized dietary advice.
Now that you have the full scoop on creating this Chocolate Zucchini Sheet Cake, get ready to impress your friends and family. Remember, cooking is all about fun and creativity — so don’t be afraid to make it your own! Happy baking and enjoy every delicious bite!
Print
Ultimate Chocolate Zucchini Sheet Cake
- Total Time: 50 minutes
- Yield: 12 servings 1x
- Diet: Vegetarian
Description
Indulge in a moist chocolate cake with a twist of zucchini that’s perfect for any occasion.
Ingredients
- 2 cups Zucchini, grated
- 1 ¾ cups All-Purpose Flour
- 1 ½ cups Granulated Sugar
- ½ cup Unsweetened Cocoa Powder
- 1 tsp Baking Soda
- 1 tsp Baking Powder
- ½ tsp Salt
- 2 Large Eggs
- ¾ cup Vegetable Oil
- 2 tsp Vanilla Extract
- 1 cup Chocolate Chips
Instructions
- Preheat your oven to 350°F (175°C). Grease a 9×13-inch baking dish.
- Grate the zucchini using the coarse side of a grater, then squeeze out excess moisture.
- Whisk together flour, cocoa powder, baking soda, baking powder, and salt in a large bowl.
- Beat eggs and sugar in another bowl until light and fluffy, then mix in oil and vanilla.
- Fold the dry ingredients into the wet mixture until just combined.
- Gently fold in grated zucchini and chocolate chips.
- Pour the batter into the prepared baking dish and spread evenly.
- Bake for 30-35 minutes, or until a toothpick comes out clean.
- Cool in the pan for about 10 minutes, then transfer to a wire rack.
Notes
Serve warm or with chocolate frosting and vanilla ice cream for a delightful treat.
- Prep Time: 15 minutes
- Cook Time: 35 minutes
- Category: Dessert
- Method: Baking
- Cuisine: American
Nutrition
- Serving Size: 1 slice
- Calories: 350
- Sugar: 22g
- Sodium: 370mg
- Fat: 15g
- Saturated Fat: 2g
- Unsaturated Fat: 10g
- Trans Fat: 0g
- Carbohydrates: 49g
- Fiber: 2g
- Protein: 4g
- Cholesterol: 60mg
Keywords: chocolate cake, zucchini cake, desserts, baking, sweet treats
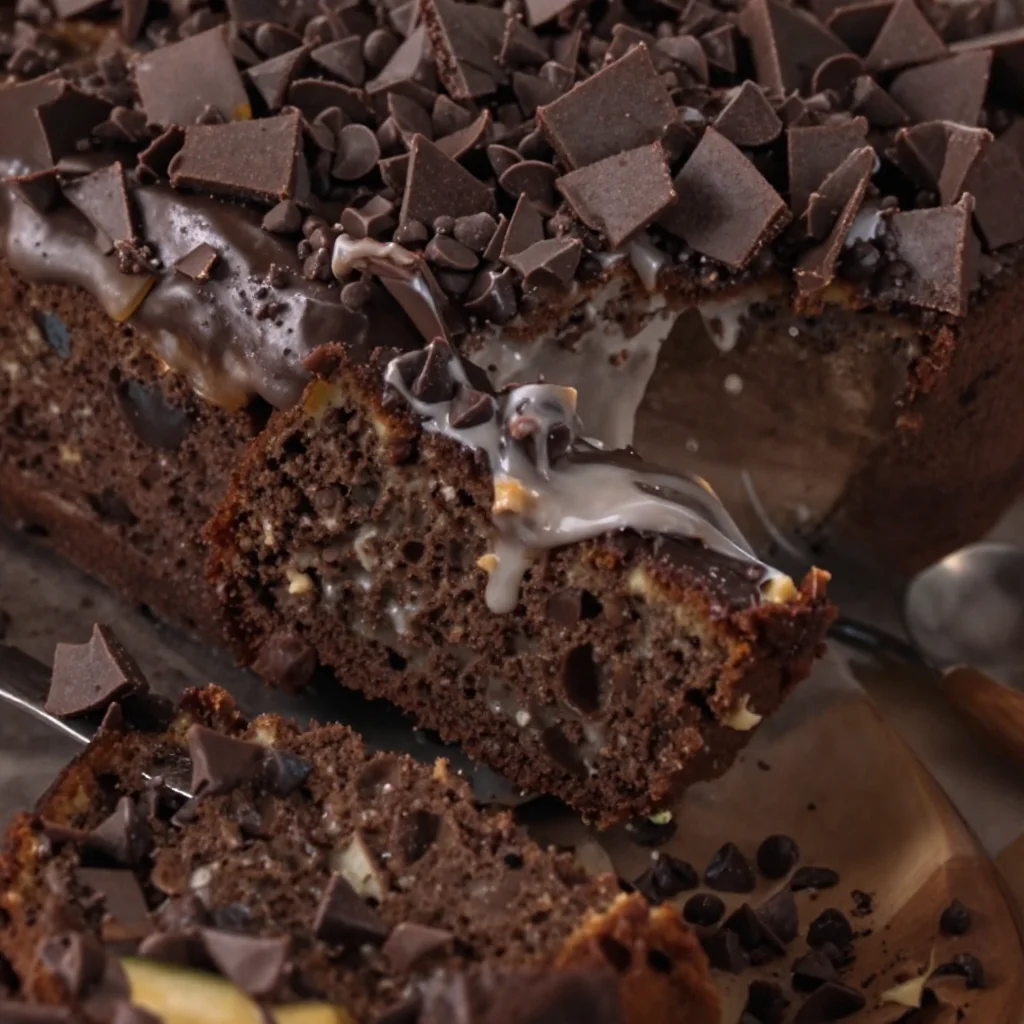
One-Bowl Chocolate Zucchini Cake: Easy Weeknight Dessert
Indulge in the Sweetness of Chocolate Zucchini Cake
Welcome to my kitchen, everyone! I’m Olivia Bennett, and today we’re diving into something truly delightful — Chocolate Zucchini Cake. Now, I know what you might be thinking: “Zucchini? In a cake?” But trust me, this is a match made in heaven that will leave your taste buds dancing with joy. Picture warm, chocolatey goodness sprinkled with a hint of moisture from zucchini — a secret ingredient that makes this cake incredibly rich and fudgy!
Baking has always been my love language, a way to spread joy and comfort to the people around me. The aroma of something sweet bubbling away in the oven can turn any ordinary day into a special occasion. Chocolate Zucchini Cake is one of those recipes that embodies both comfort and surprise. It’s the kind of dessert that everyone raves about, and yet, no one really needs to know it has veggies sneaking in!
I adore this cake not just for its flavor but also for the memories it brings. Picture a warm summer afternoon in my grandmother’s kitchen: she’s elbow-deep in flour, insisting that every great cake needs a secret twist. One day, she decided to throw in some grated zucchini from her overflowing garden. We giggled at the idea at first, but let me tell you, that cake quickly became a household favorite. It was luscious and moist, and we devoured every crumb!
So, if you’re ready to get your hands a little messy and treat yourself (and your loved ones) to something special, let’s pull on our aprons and jump right into making this scrumptious Chocolate Zucchini Cake. I promise you won’t be disappointed!
Ingredients
Here’s what you’ll need to whip up this delectable treat. Remember, cooking is all about adapting to what you have, so feel free to make substitutions if you need to!
-
Zucchini (2 medium-sized): Zucchini adds moisture to the cake without overpowering the flavor. If you don’t have zucchini, you can use grated carrots for a similar moisture level and sweetness.
-
All-purpose flour (1 ¾ cups): This is the base of the cake. For a gluten-free option, try almond flour or a 1:1 gluten-free blend, which has worked well for me in the past!
-
Cocoa powder (¾ cup): Unsweetened cocoa powder gives richness and depth to the chocolate flavor. You can use Dutch-processed cocoa for a smoother taste.
-
Granulated sugar (1 cup): Adds sweetness and balances the bitterness of cocoa. For a healthier twist, you can substitute it with coconut sugar or honey (but remember to adjust the liquid in the recipe).
-
Baking soda (1 tsp): This helps the cake rise. Be careful with this ingredient, as too much can make your cake taste soapy.
-
Baking powder (½ tsp): Gives the cake a bit of extra lift. Make sure it’s fresh for the best results!
-
Salt (½ tsp): A humble but crucial ingredient that enhances the flavors.
-
Eggs (2 large): Eggs act as a binding agent, giving structure to the cake. If you want to make it vegan, you can substitute each egg with ¼ cup of unsweetened applesauce.
-
Vegetable oil (½ cup): This keeps the cake moist and tender. You can also use melted coconut oil or melted butter for added flavor.
-
Vanilla extract (1 tsp): Adds depth and warmth. Don’t skip this one! You could also experiment with almond extract for a unique twist.
-
Chocolate chips (optional, ½ cup): Because, why not? Chocolate chips can turn a good cake into an unforgettable one! You can swap these for nuts if you prefer some crunch.
Step-by-Step Instructions
Ready to bake? Let’s roll up our sleeves and get started!
-
Preheat Your Oven: Preheat your oven to 350°F (175°C). This step is crucial! A properly heated oven ensures even baking.
-
Prep Your Zucchini: Grate the zucchini using a box grater. Make sure to squeeze out any excess moisture using a clean kitchen towel. It’s important to keep the cake from getting soggy. Trust me, I’ve made that mistake before, and it’s not a good time!
-
Mix Dry Ingredients: In a large bowl, whisk together your flour, cocoa powder, baking soda, baking powder, and salt. This helps distribute the leavening agents evenly, ensuring your cake rises beautifully.
-
Combine Wet Ingredients: In a separate bowl, whisk the sugar, eggs, oil, and vanilla until combined. The mixture should be slightly frothy, which means you’re incorporating air — a good sign of a fluffy cake!
-
Combine It All: Gradually add the dry mixture to the wet ingredients, stirring gently until just combined. Overmixing can lead to a dense cake, and no one wants that!
-
Fold in Zucchini: Gently fold in the grated zucchini and chocolate chips (if using). This is my favorite part, watching the lovely green flecks combine with the rich chocolate batter!
-
Prepare Your Baking Pan: Grease a 9×13 inch baking pan or line it with parchment paper for easy removal. Trust me; this step can save you a lot of frustration later.
-
Pour and Smooth: Pour the batter into the prepared pan and smooth the top with a spatula. Give it a little jiggle to let any air bubbles escape.
-
Bake: Place the pan in the oven and bake for about 30-35 minutes, or until a toothpick inserted in the center comes out clean. The aroma wafting through your kitchen will be irresistible at this point!
-
Cool Completely: Once baked, remove the cake from the oven and allow it to cool in the pan for 10 minutes. Then, transfer it to a wire rack to cool completely. Patience is key, my friends — we want the icing to stick nicely later!
Serving Suggestions
Now comes the fun part: serving up this beauty! Once your chocolate zucchini cake is completely cool, you can dust it with powdered sugar for a simple yet elegant look, or slather on your favorite frosting. A classic chocolate frosting pairs beautifully, but you could also go for a cream cheese frosting to add a nice tang. Slice it into squares and serve it with a scoop of vanilla ice cream on the side for a decadent treat. Trust me, your guests will be begging for seconds!
Recipe Variations
Don’t be afraid to get creative with this recipe! Here are a few ideas to switch things up:
-
Add Spices: Experiment with adding cinnamon or a pinch of nutmeg for a cozy flavor twist.
-
Nutty Goodness: Fold in some chopped walnuts or pecans for an extra crunch.
-
Fruit Medley: Mix in some chocolate or banana to create a chocolate-zucchini-banana combo that’s absolutely scrumptious.
-
Vegan Delight: Replace the eggs with flax eggs (1 tbsp of flaxseed meal mixed with 2.5 tbsp of water for each egg). You can also substitute oil with applesauce for a lighter version!
-
Frosting Flavors: Change the chocolate frosting to peanut butter frosting for a delightful nutty pairing!
Chef’s Notes
This recipe has been through a few iterations in my kitchen. I remember experimenting with it during one summer when my garden was just overflowing with zucchini. Initially, I hesitated to share it because of the secret veggie, but it ended up delighting everyone! Over the years, I’ve refined it into what I think is the perfect balance of rich chocolate and moist texture. I love hearing the surprise in people’s voices when they find out there’s zucchini in it. It’s like revealing a little culinary secret that brings joy!
And let me tell you, if you have any leftovers (which is rare!), the cake tastes even better the next day; the flavors have more time to meld together. Just make sure to store it covered at room temperature!
FAQs and Troubleshooting
Q: Why did my cake sink?
A: This can happen if you overmixed the batter or if your baking soda/powder is expired. Make sure to gently combine your ingredients and check the freshness of your leavening agents!
Q: My cake turned out dry. Help!
A: This usually means it was over-baked or overmeasured. Always keep an eye on the time and check with a toothpick a few minutes before it’s supposed to be done.
Q: Can I freeze leftover cake?
A: Absolutely! Wrap the cooled cake tightly in plastic wrap and then foil before freezing. Just thaw it in the fridge overnight when you’re ready to eat it again.
Q: Can I use other vegetables?
A: Yes! While this recipe is specifically for zucchini, you can try using finely grated carrots or even beets for a fun twist!
Nutritional Info
Calories per serving (1 slice): approximately 230 calories (varies depending on serving size and specific ingredients used).
Total Fat: 10g, Saturated Fat: 2g, Carbohydrates: 33g, Fiber: 2g, Sugar: 16g, Protein: 3g.
And there you have it! A decadent Chocolate Zucchini Cake that’s perfect for any occasion. I hope you enjoy making this recipe as much as I do! Remember, every bite is a little hug from your kitchen. Happy baking, and I can’t wait to hear about your baking adventures!
Print
Chocolate Zucchini Cake
- Total Time: 50 minutes
- Yield: 12 servings 1x
- Diet: Vegetarian
Description
A delightful Chocolate Zucchini Cake that’s rich, moist, and full of surprise with the addition of zucchini!
Ingredients
- 2 medium-sized Zucchini
- 1 ¾ cups All-purpose flour
- ¾ cup Cocoa powder
- 1 cup Granulated sugar
- 1 tsp Baking soda
- ½ tsp Baking powder
- ½ tsp Salt
- 2 large Eggs
- ½ cup Vegetable oil
- 1 tsp Vanilla extract
- ½ cup Chocolate chips (optional)
Instructions
- Preheat your oven to 350°F (175°C).
- Prep the zucchini by grating it and squeezing out excess moisture.
- Mix the flour, cocoa powder, baking soda, baking powder, and salt in a large bowl.
- Combine the sugar, eggs, oil, and vanilla in another bowl.
- Combine the dry mixture with the wet ingredients.
- Fold in the grated zucchini and chocolate chips (if using).
- Prepare a 9×13 inch baking pan.
- Pour the batter into the pan and smooth the top.
- Bake for 30-35 minutes or until a toothpick comes out clean.
- Cool the cake completely before serving.
Notes
Feel free to experiment with spices or nuts for added flavor and texture. Leftovers taste even better the next day!
- Prep Time: 15 minutes
- Cook Time: 35 minutes
- Category: Dessert
- Method: Baking
- Cuisine: American
Nutrition
- Serving Size: 1 slice
- Calories: 230
- Sugar: 16g
- Sodium: 200mg
- Fat: 10g
- Saturated Fat: 2g
- Unsaturated Fat: 8g
- Trans Fat: 0g
- Carbohydrates: 33g
- Fiber: 2g
- Protein: 3g
- Cholesterol: 30mg
Keywords: Chocolate Cake, Zucchini Cake, Dessert, Baking, Vegetarian




