
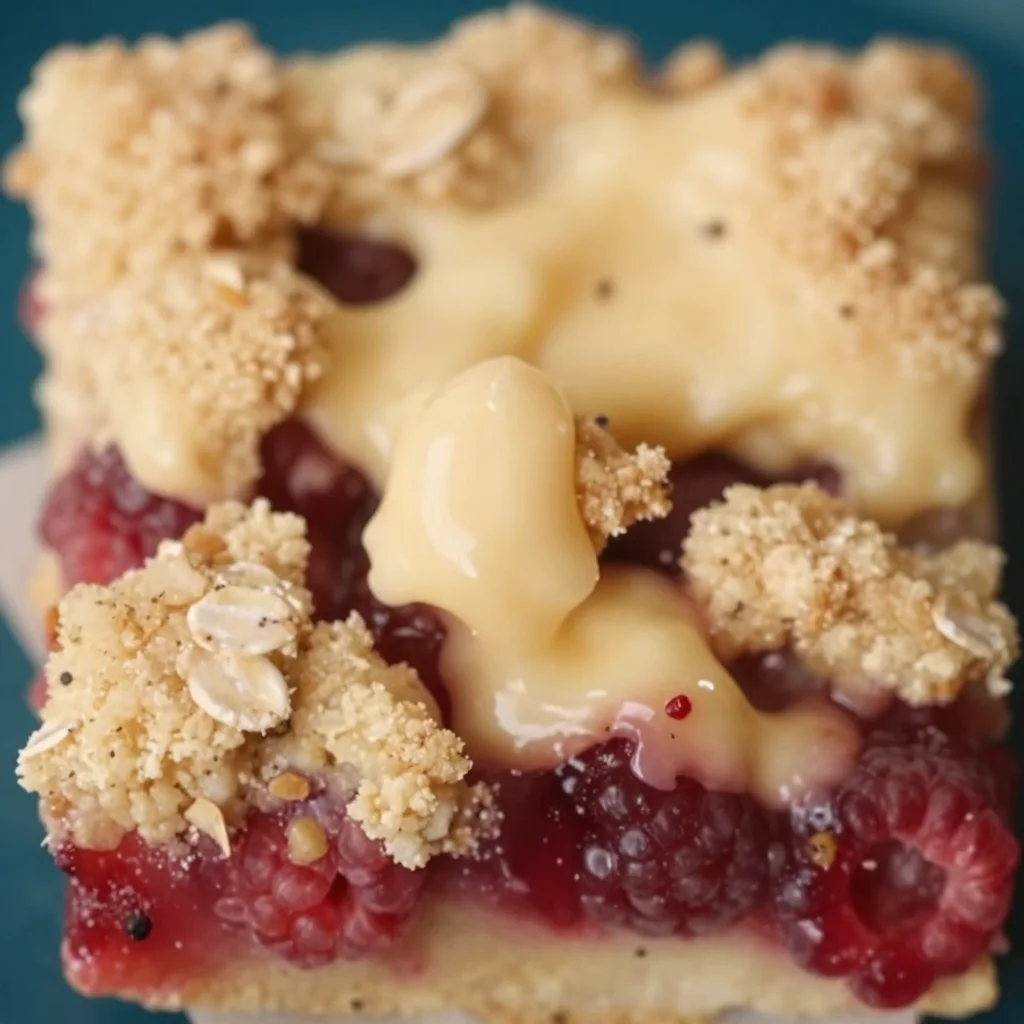
No-Bake Raspberry Crumb Bars: Easy 20-Minute Summer Treat
Raspberry Crumb Bars: A Sweet Slice of Nostalgia
Welcome to my cozy corner of the internet! Today, I’m thrilled to share a delightful treat that holds a special place in my heart: Raspberry Crumb Bars. Let me tell you—the moment you take your first bite of these sweet, tart bars, you’ll be transported to a sun-drenched afternoon filled with laughter and joy.
There’s something magical about the combination of buttery, crumbly crust layered with a vibrant raspberry filling. Whether you’re a fruit lover or just enjoy a good old-fashioned sweet treat, these bars are the perfect addition to any gathering or a lovely afternoon snack while curled up with your favorite book.
Growing up, my summer days were often spent in my grandmother’s kitchen, where the aroma of freshly baked goods wafted through the air. One summer, she decided we would make raspberry bars together. We picked the juiciest, plumpest raspberries from her garden, giggling as juice dripped from our fingers. I can still hear her playful teasing about my messy apron (which, let’s be honest, has become a badge of honor for me!). Those days are etched in my memory, each bite of those crumb bars filled with sweet nostalgia.
So, roll up your sleeves, don that apron—messy or not—and let’s dive into making these Raspberry Crumb Bars together!
Key Ingredients
For the Crust and Topping:
- All-purpose flour (2 cups): The backbone of the crumb bar. For a gluten-free option, substitute with gluten-free flour blend.
- Granulated sugar (¾ cup): Added for sweetness. Brown sugar can be used for a deeper flavor.
- Baking powder (1 teaspoon): This will give your bars a nice lift; make sure it’s fresh to ensure better rising.
- Salt (½ teaspoon): A pinch of salt helps balance the sweetness and enhances flavor.
- Butter (½ cup, cold and cubed): The heart and soul of these crumb bars. You can use unsalted butter or vegan butter as a substitute for dairy-free.
- Egg (1 large): Acts as a binding agent. For a vegan option, try using flaxseed meal (1 tablespoon mixed with 2.5 tablespoons water) as a substitute.
For the Raspberry Filling:
- Fresh raspberries (2 cups): The star of the show! Frozen raspberries will work, but fresh fruit provides the best flavor and texture.
- Lemon juice (1 tablespoon): Brings brightness to the raspberry filling. Lime juice can also be a zesty alternative.
- Cornstarch (2 tablespoons): Thickens the filling so it doesn’t ooze all over. Feel free to swap it with arrowroot powder for a different thickening agent.
- Granulated sugar (½ cup): Sweetens the tangy raspberries. Adjust to your taste depending on the ripeness of your fruit.
Step-by-Step Instructions
Step 1: Preheat Your Oven
Let’s get started by preheating your oven to 350°F (175°C) and greasing a 9×9-inch baking pan. Trust me; it’s going to be worth the wait!
Step 2: Prepare the Crust
In a large mixing bowl, combine the all-purpose flour, granulated sugar, baking powder, and salt. Now, here’s the fun part: use a fork or your fingers to cut the cold, cubed butter into the dry ingredients. You want a crumbly texture, similar to wet sand. You can also use a pastry cutter for a quicker method. Pro tip: Keep the butter cold for flakier crusts!
Step 3: Add the Egg
Crack in the egg and mix until everything just comes together. Don’t overmix! We want a tender crumb, not tough bars.
Step 4: Bake the Crust
Press about two-thirds of this mixture into the prepared baking pan. Bake for 15 minutes just until it starts to turn golden. The smell will be tantalizing, trust me!
Step 5: Make Raspberry Filling
While the crust is baking, it’s time to prepare the filling. In a medium saucepan over medium heat, combine the raspberries, lemon juice, granulated sugar, and cornstarch. Cook it down until the raspberries release their juices and thicken slightly, about 5-7 minutes. Stir gently to avoid smashing the fruit into mush.
Step 6: Assemble and Bake
Once your crust has baked and the filling is ready, pour it evenly over the crust. Crumble the remaining crust mixture on top. Bake these beauties for an additional 25 minutes until the top is golden brown and the filling is bubbling. It might take some patience, but oh, is it worth it!
Step 7: Cool and Slice
Let the bars cool in the pan for at least 30 minutes before slicing. (I know it’s tempting, but trust me—this step is crucial!) Once they’re cool, dust with powdered sugar for a little extra flair.
Serving Suggestions
These Raspberry Crumb Bars are best served slightly warm or at room temperature. You can serve them as is or dress them up with a scoop of vanilla ice cream or a dollop of freshly whipped cream for an elevated experience!
Recipe Variations
- Berry Blast: Mix in blueberries or blackberries with the raspberries for a delightful berry medley.
- Nutty Addition: Stir in some chopped nuts, such as almonds or walnuts, to the crumb topping for added crunch.
- Zesty Surprise: Add some grated lemon or orange zest to the filling for an extra fresh flavor.
- Chocolate Drizzle: Once cooled, drizzle melted dark chocolate over the bars for a luscious twist.
- Spiced Version: Sprinkle in some cinnamon or nutmeg to the crumb mixture for a warm, cozy flavor profile.
Chef’s Notes
Ah, Raspberry Crumb Bars—they’ve become a staple in my kitchen, evolving over the years from my grandmother’s simple recipe to something I love putting my own stamp on. I’ll never forget the time I added a pinch of cayenne pepper to the berry filling out of curiosity. I was surprised by how the heat enhanced those sweet, tangy raspberries; just a little spice gives it a whole new depth!
And of course, you can always sprinkle some crumbs into a bowl of yogurt for breakfast or even use the filling in a tart. So versatile!
FAQs and Troubleshooting
Q: My crumb topping didn’t come out crumbly! What went wrong?
A: This usually happens if the butter is too soft or if the mixture was overmixed. Keep your butter cold and mix just until combined for that perfect crumble.
Q: Can I make these ahead of time?
A: Absolutely! These bars hold up well for 3-4 days in an airtight container. Just let them cool completely before storing.
Q: How do I store leftovers?
A: Keep them in an airtight container in the fridge for up to a week, or freeze them for longer storage – I love pulling out a slice on a quiet afternoon!
Q: Can I use other fruits for the filling?
A: Yes! Feel free to experiment with strawberries, peaches, or even a mix of fruits. Just adjust the sugar according to the fruit’s sweetness.
Nutritional Info
Calories per serving: Approximately 200
Fat: 10g
Carbohydrates: 28g
Fiber: 1g
Protein: 2g
There you have it! Raspberry Crumb Bars that are sure to warm your heart and delight your taste buds. I hope these bars inspire many happy memories for you and your loved ones—just like they did for me. So go ahead, grab those raspberries, and let’s get baking! Happy cooking, friends!
Print
Raspberry Crumb Bars
- Total Time: 55 minutes
- Yield: 16 servings 1x
- Diet: Vegetarian
Description
Delightful and nostalgic Raspberry Crumb Bars with a buttery crust and vibrant raspberry filling, perfect for any gathering or an afternoon snack.
Ingredients
- 2 cups all-purpose flour
- ¾ cup granulated sugar
- 1 teaspoon baking powder
- ½ teaspoon salt
- ½ cup butter, cold and cubed
- 1 large egg
- 2 cups fresh raspberries
- 1 tablespoon lemon juice
- 2 tablespoons cornstarch
- ½ cup granulated sugar (for filling)
Instructions
- Preheat your oven to 350°F (175°C) and grease a 9×9-inch baking pan.
- Combine the all-purpose flour, granulated sugar, baking powder, and salt in a large mixing bowl.
- Cut the cold, cubed butter into the dry ingredients until crumbly.
- Crack in the egg and mix until just combined.
- Press about two-thirds of the mixture into the prepared baking pan and bake for 15 minutes.
- Cook the raspberries, lemon juice, granulated sugar, and cornstarch in a medium saucepan over medium heat until thickened, about 5-7 minutes.
- Pour the raspberry filling over the baked crust and crumble the remaining crust mixture on top.
- Bake for an additional 25 minutes until golden brown and bubbling.
- Cool the bars in the pan for at least 30 minutes before slicing.
Notes
Dust with powdered sugar before serving. These bars pair wonderfully with vanilla ice cream or whipped cream.
- Prep Time: 15 minutes
- Cook Time: 40 minutes
- Category: Dessert
- Method: Baking
- Cuisine: American
Nutrition
- Serving Size: 1 bar
- Calories: 200
- Sugar: 14g
- Sodium: 150mg
- Fat: 10g
- Saturated Fat: 6g
- Unsaturated Fat: 4g
- Trans Fat: 0g
- Carbohydrates: 28g
- Fiber: 1g
- Protein: 2g
- Cholesterol: 30mg
Keywords: raspberry, crumb bars, dessert, sweet treat, baking
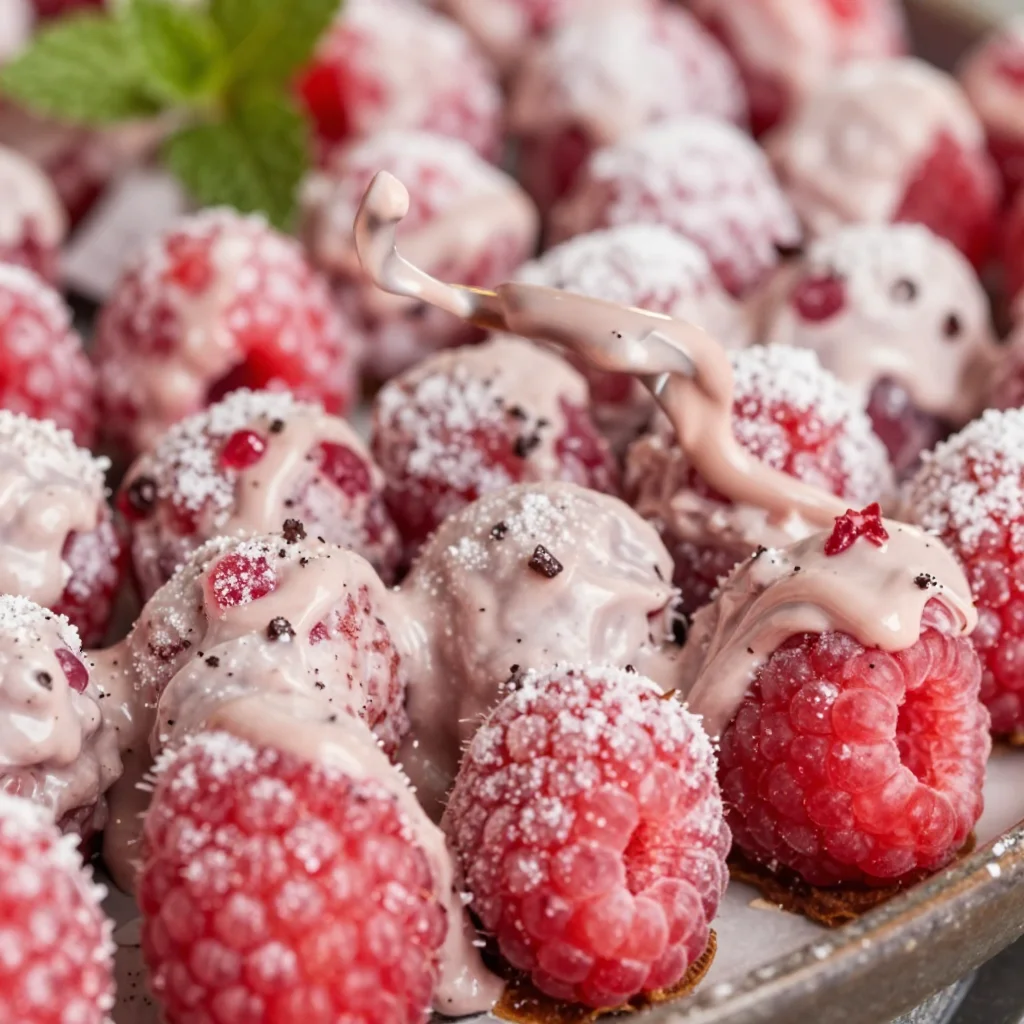
Easy Chocolate Raspberry Tart
Easy Chocolate Raspberry Tart: A Delightful Indulgence
Welcome to my kitchen, friends! Today, I’m bursting with excitement to share a dessert that never fails to dazzle—my Easy Chocolate Raspberry Tart. You know, the kind of treat that can make a regular Tuesday evening feel like a special occasion. Imagine this: a buttery, flaky crust cradling a rich chocolate ganache, topped with vibrant, juicy raspberries. It’s a dessert that’s not just about flavor; it’s about creating beautiful memories in the kitchen and around the table.
When I first made this tart, it was a labor of love and a delightful way to impress my friends at a little potluck dinner. The anticipation as it cooled on the counter, the aroma of chocolate sinking into my skin, and the thrill of cutting into that shiny ganache are moments etched in my memory. I’ve served it for birthdays, anniversaries, and even casual get-togethers with a glass of red wine. It’s the kind of dessert that always brings smiles and often leads to second helpings—which, let’s be honest, is the best kind of feedback!
So, whether you’re an experienced home cook or just starting your culinary journey, this Easy Chocolate Raspberry Tart is a recipe you’ll want to try. It’s simple yet impressive, and while chocolate and raspberries may seem fancy, I promise you’ll feel like a star chef whipping it up in your cozy kitchen. Let’s dive into the delicious details!
Personal Story: The First Time I Made This Tart
I still remember the day I first attempted this chocolate raspberry tart. It was a chilly evening, and my friend Sarah invited me over for a cozy dinner, encouraging me to bring dessert. Now, I can’t resist a challenge—especially when it comes to impressing friends with something delicious!
Armed with a desire to create magic, I rummaged through my recipe collection and found this tart. Learning to make the buttery crust was a bit like a dance, and let me tell you, I had my fair share of mishaps, flour everywhere and giggles aplenty. But when I pulled the tart from the oven, the sight of that glossy ganache and the vibrant raspberries made all the chaos worthwhile. As I sliced into the tart, the decadent chocolate filling flowed as if it had a heartbeat of its own, and the first bite was pure bliss.
That evening turned into a sweet success story—everybody at the table was asking for seconds. It became a cherished recipe in my repertoire, not just for its rich flavors, but for the memories of laughter and joy that filled that dinner. I hope this tart brings the same warmth and happiness into your home.
Ingredients
Here’s what you’ll need to whip up this delicious tart:
-
1 ½ cups all-purpose flour: The base of our pastry. To make it gluten-free, substitute with a gluten-free 1:1 baking flour blend.
-
½ cup unsalted butter: Freshness is key! For a dairy-free option, try using coconut oil or a non-dairy butter substitute.
-
¼ cup sugar: Sweetens the crust perfectly. For a healthier alternative, coconut sugar does a lovely job too.
-
1 large egg yolk: Adds richness to the crust. If you need an egg-free version, try 3 tablespoons of applesauce or a flax egg (mix 1 tablespoon of flaxseed meal with 2.5 tablespoons of water).
-
1 cup heavy cream: Essential for the ganache’s silky texture. You can use full-fat coconut milk for a dairy-free option.
-
8 ounces dark chocolate (70% cacao or more): This is where the magic happens! Feel free to substitute with semi-sweet chocolate if that’s more your style.
-
1 cup fresh raspberries: They add a gorgeous pop of color and a tangy flavor. If raspberries aren’t in season, you can use frozen, just thaw and drain them beforehand!
-
Powdered sugar (for dusting): This is optional but adds a touch of elegance. You can leave it off if you prefer.
Step-by-Step Instructions
Let’s get started on this delightful tart!
-
Preheat Your Oven: First things first, preheat your oven to 350°F (175°C). This is essential for a perfectly baked crust!
-
Make the Tart Crust: In a mixing bowl, combine 1 ½ cups of all-purpose flour, ¼ cup of sugar, and a pinch of salt. Add the diced cold unsalted butter and use your fingers or a pastry cutter to blend until it resembles coarse crumbs with some pea-sized bits of butter remaining (this is what gives us that flaky texture!).
-
Add Egg Yolk and Form Dough: Mix in 1 large egg yolk and a tablespoon of ice water. Combine until the dough clings together. If it’s too crumbly, add a bit more water, just a teaspoon at a time.
-
Chill Before Rolling: Wrap the dough in plastic wrap and chill it in the refrigerator for about 30 minutes. This step is crucial for keeping the crust from shrinking while baking.
-
Roll Out the Dough: Once chilled, lightly flour your work surface and roll out the dough to about ¼ inch thick. Carefully transfer it to a 9-inch tart pan. Press it gently to fit the bottom and sides. Trim off any excess dough hanging over the edges.
-
Blind Bake the Crust: Prick the bottom of the crust with a fork (to prevent bubbling), cover it with parchment paper, and fill it with pie weights or dried beans. Bake for 20 minutes. After that, remove the weights and parchment, and bake for an additional 10 minutes until golden. Let it cool.
-
Prepare the Ganache: While the crust is cooling, heat 1 cup of heavy cream in a saucepan over medium heat until steaming—not boiling! Remove from heat, then add 8 ounces of chopped dark chocolate. Let it sit for a minute, then stir until smooth and glossy.
-
Assemble the Tart: Pour the chocolate ganache into the cooled tart crust, spreading it evenly. Allow it to set at room temperature for about 30 minutes.
-
Add the Raspberries: Once the ganache is slightly firmed up, artfully arrange 1 cup of fresh raspberries on top. You can go for a loose, casual look or a more structured design—it’s entirely up to you!
-
Chill and Serve: Place the tart in the fridge for at least 2 hours before serving. This allows the ganache to fully set and makes slicing much easier.
Serving Suggestions
When it’s time to serve, grab a sharp knife and cut the tart into wedges. You can simply arrange the slices on beautiful plates or serve it right from the tart pan for a rustic feel. A light dusting of powdered sugar on top brings a whimsical touch. For an extra indulgence, pair it with a dollop of fresh whipped cream or a scoop of vanilla ice cream.
Recipe Variations
Feeling adventurous? Here are a few variations to try:
-
Nutty Crust: Swap out ½ cup of the all-purpose flour for finely ground almonds or hazelnuts for a nutty flavor that combines beautifully with chocolate.
-
Mint Chocolate: Add a few drops of peppermint extract to the ganache for a refreshing minty twist.
-
Different Fruits: Replace the raspberries with strawberries, blueberries, or even a mix of seasonal fruits for a colorful explosion!
-
Spicy Chocolate: Add a pinch of cayenne pepper to your ganache for a subtle kick that pairs perfectly with the sweetness of the tart.
-
Extra Crunch: Fold in crushed cookies or nuts into the ganache for a delightful texture contrast.
Chef’s Notes
I absolutely adore how versatile this tart is; it feels like a blank canvas waiting for your personality to shine through! What I find particularly endearing is how each occasion brings its flavor—whether it’s the laughter of friends or a quiet moment of indulgence at home, this tart always seems to fit right in.
Over the years, I’ve experimented with countless variations, and while I’ve settled on this classic recipe as my go-to, each time I make it, I discover something new about the joy of cooking. Don’t be afraid to get a little messy and experiment in your own kitchen. Who knows? You might just come up with the next big twist on this beloved dessert!
FAQs and Troubleshooting
-
Why did my tart crust shrink?
A common issue! Make sure to chill your dough sufficiently before baking. Blind baking with weights can also help minimize shrinking. -
My ganache didn’t set! What did I do wrong?
If your ganache is too runny, it might not have cooled long enough after mixing. Be patient and let it sit until slightly thickened before pouring into the tart shell. -
Can I make this tart ahead of time?
Absolutely! You can bake the crust and prepare the ganache a day in advance. Just assemble it with the raspberries the day you plan to serve it. -
What if I don’t have a tart pan?
No worries! You can use a pie dish or even a square baking pan—your tart will still be delicious regardless of its shape!
Nutritional Info
While I always encourage baking in moderation and enjoying treats, it’s worth noting that this tart is indulgent! Each slice offers a delightful balance of rich flavors and textures. As a rough estimate (per slice based on an 8-slice tart), expect around 300-400 calories with carbs, fats, and sugars playing a significant role.
So grab your apron, gather your ingredients, and let’s make some kitchen magic together! I can’t wait for you to taste this Easy Chocolate Raspberry Tart and create your cozy moments filled with joy, laughter, and, of course, chocolate! Happy baking!
Print
Easy Chocolate Raspberry Tart
- Total Time: 45 minutes
- Yield: 8 servings 1x
- Diet: Vegetarian
Description
A delightful indulgence featuring a buttery crust, rich chocolate ganache, and vibrant raspberries.
Ingredients
- 1 ½ cups all-purpose flour
- ½ cup unsalted butter
- ¼ cup sugar
- 1 large egg yolk
- 1 cup heavy cream
- 8 ounces dark chocolate (70% cacao or more)
- 1 cup fresh raspberries
- Powdered sugar (for dusting, optional)
Instructions
- Preheat your oven to 350°F (175°C).
- Combine 1 ½ cups of all-purpose flour, ¼ cup of sugar, and a pinch of salt in a mixing bowl. Add the diced cold unsalted butter and blend until it resembles coarse crumbs.
- Mix in 1 large egg yolk and a tablespoon of ice water until the dough clings together.
- Wrap the dough in plastic wrap and chill in the refrigerator for about 30 minutes.
- Roll out the chilled dough to about ¼ inch thick and transfer it to a 9-inch tart pan.
- Prick the bottom of the crust with a fork, cover with parchment paper, and fill with pie weights. Bake for 20 minutes, then remove weights and bake for an additional 10 minutes until golden.
- Heat 1 cup of heavy cream in a saucepan until steaming, then remove from heat and add 8 ounces of chopped dark chocolate. Stir until smooth.
- Pour the chocolate ganache into the cooled tart crust and spread evenly. Allow to set for about 30 minutes.
- Arrange 1 cup of fresh raspberries on top of the ganache.
- Chill the tart in the fridge for at least 2 hours before serving.
Notes
For added flair, dust with powdered sugar before serving. This tart is versatile; feel free to experiment with different fruits or flavorings.
- Prep Time: 15 minutes
- Cook Time: 30 minutes
- Category: Dessert
- Method: Baking
- Cuisine: French
Nutrition
- Serving Size: 1 slice
- Calories: 350
- Sugar: 20g
- Sodium: 150mg
- Fat: 25g
- Saturated Fat: 15g
- Unsaturated Fat: 8g
- Trans Fat: 0g
- Carbohydrates: 30g
- Fiber: 3g
- Protein: 5g
- Cholesterol: 30mg
Keywords: chocolate tart, raspberry tart, dessert recipe, easy dessert, baking

No-Bake Raspberry Truffles: Quick 5-Ingredient Treat
Indulge in Decadence: Homemade Raspberry Truffles
Welcome to my cozy corner of the kitchen! Today, we’re diving into a delightful DIY adventure that’s bound to tickle your taste buds—homemade raspberry truffles. There’s something incredibly satisfying about creating these bite-sized pieces of heaven in your very own kitchen. Not only do they look impressive, but they also make for a perfect treat to share with friends, family, or just to indulge in during a quiet moment at home.
I can’t help but smile every time I think about chocolate. The rich, velvety goodness brings me back to my childhood, where each visit to my grandmother’s house was laced with the aroma of chocolate chip cookies baking in the oven. However, my absolute favorite sweet treat was her famous raspberry truffles. Fluffy ganache mixed with the vibrant, tart sweetness of raspberries, coated in a delicate layer of chocolate—pure bliss!
Now, imagine inviting friends over and showering them with these elegant delights. It’s impressive and utterly delightful. And here’s the best part—you don’t need a culinary degree to whip up these little luxuries. With just a handful of simple ingredients and a bit of love, you can create your raspberry truffles right at home. Are you ready? Let’s roll!
A Whiff of Nostalgia
When I think back to my grandmother’s kitchen, I can almost feel the warmth radiating from the oven as she expertly crafted her truffles. The moment those little chocolate gems were ready, she’d call us over, and we’d gather around the table in anticipation. It was one of those familial traditions that bonded us over shared smiles and laughter.
I remember the joyous chaos as we helped her dip the ganache in melted chocolate, our little hands smudged with the magical concoction while chocolate dripped melodramatically down our arms. And each time we bit into those truffles, a burst of flavors would dance on our pallets, each one reminding us just how special and meaningful those moments were.
Now, when I make these raspberry truffles, I’m not just making a treat—I’m creating memories. Every bite is a flashback to those lovely afternoons, where love was the secret ingredient. So, let’s grab those aprons, roll up our sleeves, and make some raspberry truffles that will have you reminiscing for years to come!
Ingredients
- Dark chocolate (8 oz): Use high-quality dark chocolate, preferably 60-70% cocoa for a rich flavor. If you prefer a sweeter taste, feel free to use semi-sweet chocolate as a substitute.
- Fresh raspberries (1 cup): Use fresh raspberries for the brightest flavor. Frozen can work too; just make sure to drain excess moisture.
- Heavy cream (1/2 cup): This is essential for a smooth ganache. If you want a lighter version, coconut cream is a fantastic substitute!
- Powdered sugar (1/4 cup): For sweetness and easy incorporation into the mixture. You can use maple syrup or honey as an alternative if you’re looking for a natural sweetener.
- Vanilla extract (1 tsp): This adds depth to the flavor! Vanilla bean paste is a yummy alternative for a more intense flavor.
- Coating options: You can use cocoa powder, crushed nuts, or even sprinkles to roll the truffles in. Get creative here!
Step-by-Step Instructions
-
Prepare the Raspberries: Start by washing the fresh raspberries gently under cold water. Pat them dry carefully with a paper towel. This is key to avoiding excess moisture in your truffles. Set aside about 4-5 beautiful berries for garnish later.
-
Make the Ganache: In a small saucepan, heat the heavy cream over medium heat until it just begins to simmer. You don’t want it boiling—this can scorch the cream! Turn off the heat and add the chopped dark chocolate. Let it sit for a minute to soften. Gently stir until the chocolate is fully melted and the mixture is smooth. This is your ganache, folks!
-
Add the Raspberries: With a fork, mash the fresh raspberries in a bowl until they’re pureed. You want to get those juices flowing to combine with the ganache. Fold the raspberry puree into the chocolate mixture with a spatula. The explosion of flavors here is going to be incredible! Add the vanilla extract and powdered sugar, mixing until well combined.
-
Chill the Mixture: Transfer the ganache mixture to a container and cover it with plastic wrap. Refrigerate for at least 2 hours, or until it’s firm enough to handle. Patience is key, friends—this is where the magic happens!
-
Shape the Truffles: Once chilled, it’s time to roll! Use a small cookie scoop or a spoon to scoop out the mixture. Roll the scoops of ganache between your palms to form small balls. Don’t worry if they’re not perfect—each one has its own charm!
-
Coat Your Truffles: Use your chosen coating options to roll the truffles. You can coat them in cocoa powder, crushed nuts, or sprinkles. This adds texture and makes them visually stunning! I like to roll them in cocoa powder for that classic look—just be sure to shake off any excess.
-
Serve and Enjoy: Place them in an airtight container in the fridge until you’re ready to serve. These little gems can last up to a week, so feel free to make them ahead of time for your next gathering!
Serving Suggestions
When it comes to serving your homemade raspberry truffles, presentation is everything! Arrange them on a beautiful platter, perhaps with some fresh raspberries scattered alongside for a pop of color. For a special touch, you could dust them lightly with more cocoa powder or add a drizzle of melted chocolate on top. Voila! You’ve transformed a simple treat into a stunning centerpiece!
Recipe Variations
- Minty Chocolate Raspberry Truffles: Add a few drops of peppermint extract to the ganache for a refreshing twist. Garnish with mint leaves for an extra pop of color!
- Nutty Raspberry Truffles: Roll your truffles in finely chopped nuts like pistachios or walnuts for a delightful crunch.
- Vegan Option: Swap dark chocolate for a vegan version, such as dairy-free chocolate, and use coconut cream for the ganache. Make sure to check that your powdered sugar is vegan-friendly!
- Fruit Surprise: Mix in diced strawberries or blueberries along with the raspberries for a mixed berry truffle that adds variety to each bite.
Chef’s Notes
Ah, the beauty of cooking is that it’s always evolving! I remember when I first tried making these truffles, I thought I could skip the chilling phase—what a mess that turned out to be! The ganache was too soft to roll, and I had a gooey situation on my hands. Trust me, don’t rush this step! Now, I embrace the chilling time as the perfect moment for a cup of tea or a good book.
Feel free to experiment with flavors; I once added a hint of orange zest for a zesty kick. They were a hit at my last dinner party, proving that truffles can have many faces!
FAQs and Troubleshooting
-
Why is my ganache too runny?
If your ganache is too runny, it could be that the cream was too hot or there wasn’t enough chocolate. You can fix this by melting a bit more chocolate and mixing it in, letting it chill again until firm. -
Can I use frozen raspberries?
Yes, but be sure to drain excess moisture after thawing. The texture will be slightly different, but they’ll still taste great! -
How do I store my truffles?
Keep your truffles in an airtight container in the refrigerator to maintain their freshness. Bring them to room temperature before serving for the best flavor! -
What can I do if my truffles are too soft to roll?
Simply refrigerate the ganache longer until it firms up enough to handle. You could also try adding a little cocoa powder or melted chocolate to help with consistency.
Nutritional Info (Optional)
While I encourage you to enjoy these raspberry truffles as an occasional indulgence, here’s some quick info to keep in mind:
- Serving Size: 1 truffle
- Calories: Approximately 110 calories per truffle
- Fat: 7g (from chocolate and cream)
- Carbohydrates: 10g
- Protein: 1g
And there you have it—your very own raspberry truffles! These delectable bites of sweetness will surely impress anyone lucky enough to receive them. So roll up your sleeves, gather those ingredients, and enjoy the delightful journey of creating these little bursts of joy. Happy cooking!
Print
Homemade Raspberry Truffles
- Total Time: 135 minutes
- Yield: 24 truffles
- Diet: Vegetarian
Description
Delicious homemade raspberry truffles with fluffy ganache and a rich chocolate coating.
Ingredients
- Dark chocolate (8 oz, 60-70% cocoa)
- Fresh raspberries (1 cup)
- Heavy cream (1/2 cup)
- Powdered sugar (1/4 cup)
- Vanilla extract (1 tsp)
- Coating options: cocoa powder, crushed nuts, or sprinkles
Instructions
- Prepare the raspberries by washing them gently under cold water and patting them dry. Set aside 4-5 berries for garnish.
- Make the ganache: Heat the heavy cream in a saucepan until it simmers, then turn off the heat and stir in the chopped dark chocolate until smooth.
- Add the raspberries: Mash them with a fork and fold the puree into the ganache, then mix in the vanilla extract and powdered sugar.
- Chill the mixture for at least 2 hours until firm.
- Shape the truffles by scooping the ganache mixture and rolling them into balls.
- Coat the truffles in your chosen coatings.
- Serve and enjoy! Store in an airtight container in the fridge for up to a week.
Notes
For a refreshing twist, add mint extract. Experiment with different coatings for variety!
- Prep Time: 15 minutes
- Cook Time: 0 minutes
- Category: Dessert
- Method: Chilling
- Cuisine: French
Nutrition
- Serving Size: 1 truffle
- Calories: 110
- Sugar: 7g
- Sodium: 5mg
- Fat: 7g
- Saturated Fat: 4g
- Unsaturated Fat: 2g
- Trans Fat: 0g
- Carbohydrates: 10g
- Fiber: 1g
- Protein: 1g
- Cholesterol: 15mg
Keywords: raspberry truffles, chocolate dessert, homemade sweets
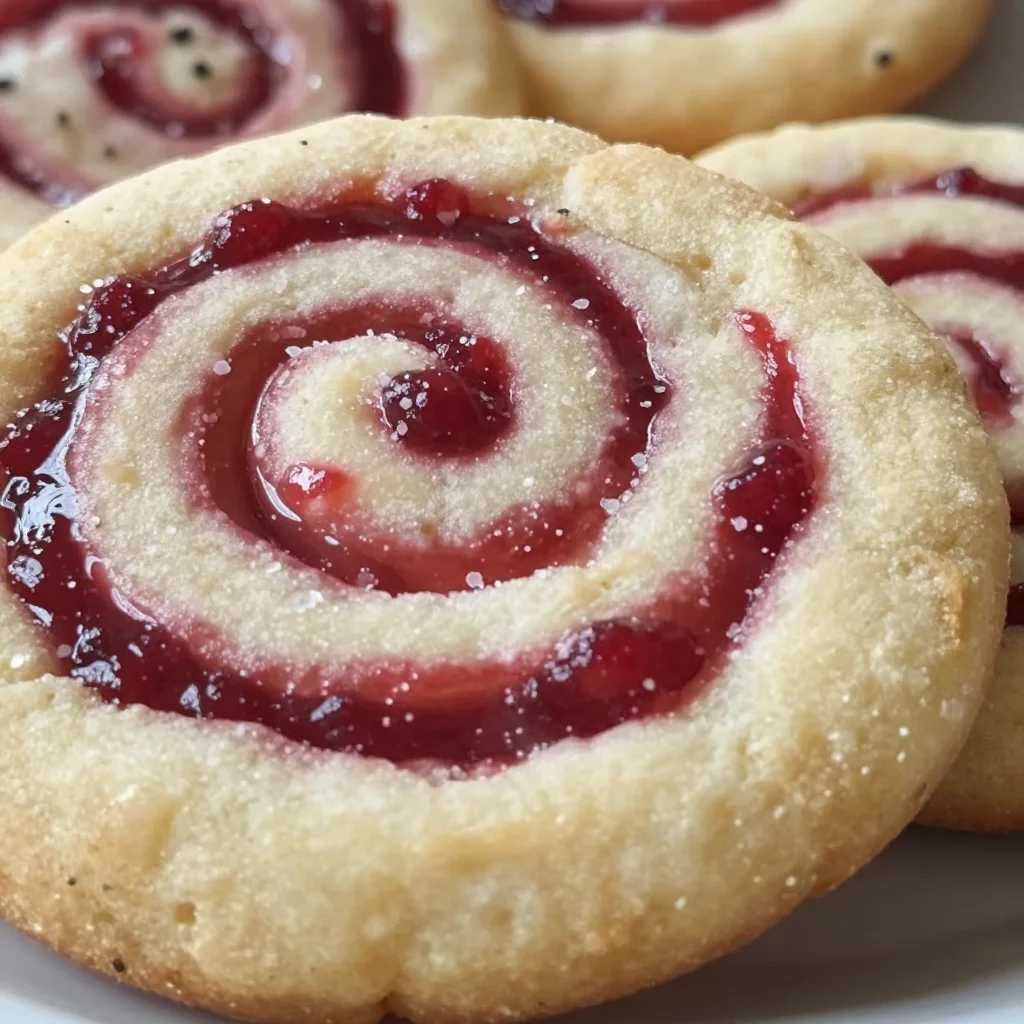
Minute Raspberry Swirl Butter Shortbread Cookies
Buttery Raspberry Swirl Shortbread Cookies: A Sweet Slice of Nostalgia
Welcome to my cozy corner of the kitchen! Today, we’re diving into a delightful treat that perfectly embodies the joys of homemade baking—Buttery Raspberry Swirl Shortbread Cookies. These cookies are not just any ordinary dessert; they encapsulate warmth, nostalgia, and a touch of creativity. Picture this: the buttery aroma wafting through your home, the vibrant red raspberry swirls dancing across each cookie, and the sound of crunching as you take your first bite. Yes, my friends, we’re about to embark on a delicious journey!
Now, why shortbread, you may ask? For me, shortbread cookies are the ultimate canvas for flavor. They have a simple base that’s both tender and crumbly, allowing other ingredients like raspberries to shine. Over the years, I have made these cookies countless times for family gatherings, friendly get-togethers, and even rainy afternoons when I need a little pick-me-up. Each batch has its own story, its own quirks, and I can’t wait to share them with you.
Baking these Buttery Raspberry Swirl Shortbread Cookies isn’t just about following a recipe; it’s about creating memories in the kitchen. When you bake, you’re not only crafting something delicious; you’re filling your home with love and laughter. So grab your apron and let’s get started on a cookie adventure that will surely charm your taste buds and the hearts of your loved ones!
A Sweet Memory from My Childhood
Let me share a little story with you. Growing up, my grandma always had a batch of something sweet resting on her kitchen counter, waiting to be nibbled on after school. I can still remember the summer afternoons spent in her sun-drenched kitchen, where the walls seemed to hum with laughter and love. One day, she decided it was time for a new treat—she had spotted a recipe for raspberry swirl cookies in an old cookbook and was eager to give it a try.
As we combined the buttery dough with vibrant raspberry jam, I was in charge of swirling it all together. My grandma guided me, sharing her wisdom as we created our masterpiece. Those cookies baked perfectly, and the sweet-tart burst of raspberry was unlike anything I had ever tasted.
After a long wait (it felt like a lifetime at the time), we delighted in the buttery bliss of those cookies. Laughter filled our kitchen as we enjoyed them fresh out of the oven with a tall glass of milk. That moment cemented my love for baking—and for these very cookies. Decades later, I still whip up a batch, carrying on that cherished memory while creating new ones in my own kitchen.
Ingredients
Here’s what you’ll need to make your own Buttery Raspberry Swirl Shortbread Cookies:
-
1 cup unsalted butter (softened)
The star of the show! Unsalted lets you control the salt in the recipe. If you’re in a pinch, you can substitute with salted butter; just reduce the added salt. -
1/2 cup powdered sugar
Powdered sugar gives the cookies their smooth texture and sweetness. You could use granulated sugar as a substitute, but the texture will differ slightly. -
1 teaspoon vanilla extract
A touch of vanilla enhances the flavor profile beautifully. Feel free to use almond or lemon extract for a different twist. -
2 cups all-purpose flour
This creates the structure of your cookies. If you want a gluten-free option, try using a 1:1 gluten-free flour blend. -
1/4 teaspoon salt
Salt amplifies the sweetness and balances the flavors. This can be omitted if using salted butter. -
3/4 cup raspberry jam
The vibrant swirl! You can swap for strawberry or blackberry jam if you prefer. Homemade jam also works splendidly here. -
Optional: Fresh raspberries
For a burst of fresh flavor, you can add chopped fresh raspberries to the dough, but be careful not to overmix as it can affect the dough’s texture.
Step-by-Step Instructions
Let’s roll up our sleeves and get baking! Here’s how to whip up these delightful cookies step by step:
-
Preheat Your Oven
Start by preheating your oven to 350°F (175°C). This ensures your cookies bake evenly. While that’s heating up, you can prepare your baking sheets by lining them with parchment paper. A little prep goes a long way! -
Cream Butter and Sugar
In a large mixing bowl, place your softened unsalted butter and powdered sugar. Beat them together using an electric mixer on medium speed until the mixture is light and fluffy. This should take about 2-3 minutes. Don’t skip this step; it incorporates air and gives your cookies that melt-in-your-mouth texture! -
Add Vanilla
Mix in the vanilla extract, scraping down the sides of the bowl to make sure everything is evenly combined. You want that delightful aroma to fill your kitchen! -
Combine Dry Ingredients
In another bowl, whisk together the all-purpose flour and salt. Gradually add this mixture to the butter mixture, mixing just until combined. Avoid overmixing, as this can make your cookies tough. The dough will be a bit crumbly—don’t worry, this is normal! -
Incorporate the Jam
Take the raspberry jam and gently swirl it into the dough using a spatula or a clean hand. You want pretty swirls, not a fully mixed color. This gives you those gorgeous raspberry streaks in each cookie! -
Scoop and Roll
Using a cookie scoop or tablespoon, portion out a tablespoon of dough. Roll it into a ball and place it on the prepared baking sheet, spacing them about 2 inches apart. Flatten each ball slightly with the back of a fork or your hand, just to create a nice shape. -
Bake
Pop the baking sheet into your preheated oven and bake for 12-15 minutes, or until the edges are a lovely golden brown. Keep an eye on them—oven temperatures can vary! -
Cool and Enjoy
Once baked, remove the cookies from the oven and let them sit on the baking sheet for about 5 minutes. This allows them to firm up before transferring them to a wire rack to cool completely. Try not to munch on them straight away… though, let’s be honest, I can’t resist!
Serving Suggestions
Once your Buttery Raspberry Swirl Shortbread Cookies have completely cooled, it’s time to serve them up! I love to stack a few on a beautiful plate, dust them lightly with powdered sugar for a touch of elegance, and serve them alongside a steaming cup of tea or coffee. They’re perfect for sharing at gatherings or simply for enjoying during a quiet moment alone.
Recipe Variations
- Chocolate Dipped Cookies: Melt some dark or white chocolate and dip half of each cookie for an extra indulgent treat!
- Lemon Zest: Add the zest of one lemon to the dough for a bright, citrusy flavor.
- Nuts: Fold in some chopped almonds or walnuts for an added crunch.
- Herbs: For a unique twist, try adding a teaspoon of finely chopped fresh basil or thyme to the dough; it pairs surprisingly well with raspberries!
- Gluten-Free Version: Use a gluten-free baking flour blend to make these cookies suitable for gluten-sensitive friends.
Chef’s Notes
Every recipe is a canvas for creativity, and this one is no exception! I’ve been known to experiment with various jams over the years—raspberry will always have my heart, but peach and apricot have also made a glorious appearance on my cookie platter. One mishap that cracked me up? I accidentally used a savory herb jelly once—I’ll spare you the details, but let’s just say not all experiments are successful!
FAQs and Troubleshooting
-
Why are my cookies too crumbly?
If your dough feels crumbly, it might need a touch more moisture. Try adding a teaspoon of milk or water to help bind it together without overmixing. -
My cookies spread too much while baking. What happened?
This could be due to the butter being too soft. Make sure your butter is softened to room temperature but not melted. If your cookies spread, chill the dough for about 30 minutes before baking. -
Can I freeze the dough?
Yes! You can freeze the dough before baking. Just wrap it in plastic wrap and store it in an airtight container. When ready to bake, let it thaw in the fridge overnight and then proceed with rolling out and baking. -
How do I store leftover cookies?
Store your cookies in an airtight container at room temperature for up to a week. If you want them to last longer, pop them in the fridge for up to two weeks, or freeze them for up to three months!
Nutritional Info
These delightful shortbread cookies offer a satisfying taste without all the guilt, but if you’re curious about the nutritional info per cookie, here’s a general breakdown:
- Calories: Approximately 120
- Total Fat: 7g
- Saturated Fat: 4g
- Carbohydrates: 14g
- Sugars: 5g
- Protein: 1g
So, there you have it—my recipe for Buttery Raspberry Swirl Shortbread Cookies, brimming with heart and sweet memories. It’s time to gather your ingredients, get in the kitchen, and create some magic of your own! Happy baking!
Print
Buttery Raspberry Swirl Shortbread Cookies
- Total Time: 30 minutes
- Yield: 24 cookies 1x
- Diet: Vegetarian
Description
Delightful homemade cookies with a buttery base and vibrant raspberry swirls, perfect for sharing and creating sweet memories.
Ingredients
- 1 cup unsalted butter (softened)
- 1/2 cup powdered sugar
- 1 teaspoon vanilla extract
- 2 cups all-purpose flour
- 1/4 teaspoon salt
- 3/4 cup raspberry jam
- Optional: Fresh raspberries
Instructions
- Preheat your oven to 350°F (175°C) and prepare baking sheets with parchment paper.
- Cream the butter and powdered sugar together until light and fluffy.
- Add the vanilla extract and mix until combined.
- Combine the flour and salt in another bowl, then gradually add to the butter mixture until just combined.
- Incorporate the raspberry jam gently into the dough.
- Scoop tablespoon-sized balls of dough onto the baking sheet, flattening them slightly.
- Bake for 12-15 minutes until the edges are golden brown.
- Cool on a wire rack before enjoying.
Notes
For variations, try chocolate dipping, adding lemon zest, or incorporating nuts and herbs into the dough.
- Prep Time: 15 minutes
- Cook Time: 15 minutes
- Category: Dessert
- Method: Baking
- Cuisine: American
Nutrition
- Serving Size: 1 cookie
- Calories: 120
- Sugar: 5g
- Sodium: 50mg
- Fat: 7g
- Saturated Fat: 4g
- Unsaturated Fat: 2g
- Trans Fat: 0g
- Carbohydrates: 14g
- Fiber: 0g
- Protein: 1g
- Cholesterol: 30mg
Keywords: cookies, raspberry, dessert, holiday baking, shortbread
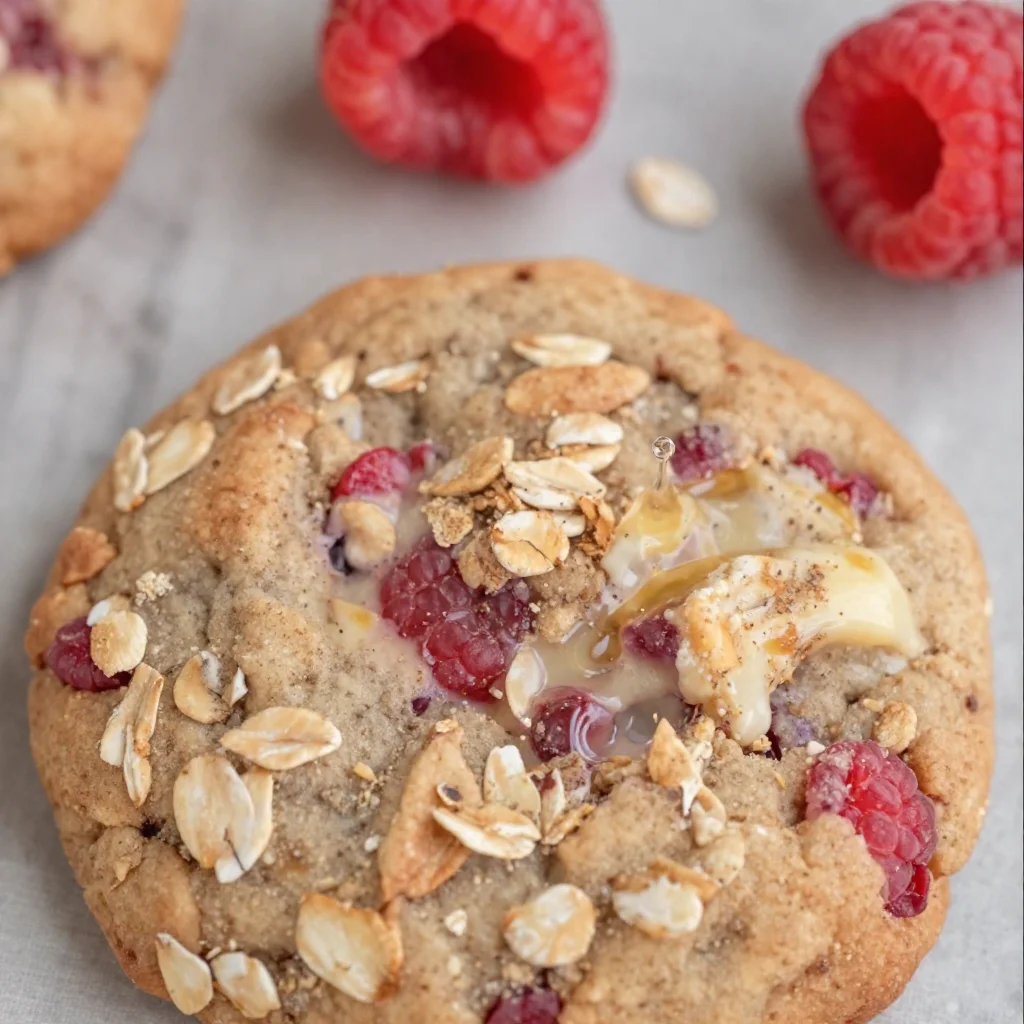
Healthy Raspberry Oatmeal Cookies: Quick Meal-Prep Treats
Healthy Raspberry Oatmeal Cookies: A Sweet Treat for Every Occasion
Welcome to my cozy corner of the kitchen! I’m Olivia Bennett, and I’m so glad you’re here. Today, we’re diving into a delightful treat that balances healthy ingredients with the kind of sweetness that warms your heart: healthy raspberry oatmeal cookies. Whether you’re looking for a nutritious snack to power through your afternoon slump or a wholesome dessert to satisfy your sweet tooth, these cookies are your answer.
There’s something incredibly satisfying about baking cookies. The aroma of warm oats and sweet berries wafting through the kitchen feels like a hug on a chilly day, doesn’t it? I remember the first time I made oatmeal cookies with my grandma. Every Saturday, after a long week of school, we would whip up a batch in her little green kitchen. Flour would fly, laughter would echo, and countless anecdotes flowed like the batter we mixed. Raspberry was always her favorite addition, and now it’s become one of mine. The tartness of the berries perfectly complements the wholesome oats, creating a cookie that’s not just tasty but also nourishing.
These cookies are so easy to whip up and truly customizable. Let’s get started on making your new favorite healthy snack!
Ingredients
Here’s what you’ll need for these scrumptious cookies:
-
1 cup rolled oats
Oats provide a hearty base and are full of fiber. You can swap them with quick oats if that’s what you have on hand, but rolled oats give that perfect chewy texture. -
½ cup whole wheat flour
Whole wheat flour adds nutrition and a slight nuttiness. If you want to be gluten-free, feel free to use almond flour or a gluten-free all-purpose blend. -
½ teaspoon baking soda
This helps our cookies rise a little and gives them that soft texture. If you don’t have baking soda, you can use baking powder, but the texture may vary slightly. -
½ teaspoon salt
A little salt helps balance the sweetness. You can add less if you’re watching your sodium intake. -
¼ cup honey or maple syrup
This natural sweetener keeps the cookies moist. If you’re looking for a vegan option, go for maple syrup. For low-calorie sweetness, a sugar substitute like stevia works too—just adjust according to your brand’s instructions! -
¼ cup coconut oil or unsalted butter, melted
Both are great for binding the ingredients. Coconut oil adds a subtle tropical flavor, while butter gives that rich cookie essence. Use applesauce for a lower-fat alternative! -
1 tablespoon vanilla extract
This is a must-have for flavor! Feel free to experiment with almond extract for a different twist. -
¾ cup fresh raspberries
These juicy gems are the star of our cookies! If fresh raspberries are out of season, frozen ones work too; just be sure to thaw and drain them first. -
¼ cup dark chocolate chips (optional)
Because who can resist chocolate? You can easily swap this with any nut or leave it out entirely for a simpler cookie.
Step-by-Step Instructions
Now that we have our ingredients lined up, let’s roll up our sleeves and get baking!
-
Preheat the Oven
Preheat your oven to 350°F (175°C). This ensures your cookies bake evenly. While it’s heating, you can prep everything else. -
Mix Dry Ingredients
In a large bowl, combine the rolled oats, whole wheat flour, baking soda, and salt. Whisk it together to make sure there’s an even distribution of dry ingredients. This prevents pockets of flour or baking soda in your batter. -
Combine Wet Ingredients
In a separate bowl, mix the melted coconut oil (or butter), honey (or maple syrup), and vanilla extract. If your oil has cooled down and solidified slightly, you can pop it in the microwave for a few seconds to melt it again. A well-mixed wet combination gives the cookies a lovely, even texture. -
Blend Wet and Dry Mixtures
Pour the wet ingredients into the dry mixture and stir until just combined. Over-mixing can lead to tough cookies, so don’t be afraid to leave some lumps—it’s all part of the charm! -
Gently Fold in Raspberries
Using a spatula or wooden spoon, carefully fold in the fresh raspberries and chocolate chips (if using). This step is important! You want to integrate the berries without smashing them too much. You want those beautiful bursts of color and flavor in every bite. -
Scoop the Dough
Using a cookie scoop or a tablespoon, drop the dough onto a parchment-lined baking sheet, leaving about 2 inches between each cookie. This gives them room to spread. -
Bake
Pop the baking sheet in the oven and bake for 12-15 minutes, or until the cookies are golden brown around the edges and still soft in the center. Trust your nose; the aroma will be a heavenly hint that they’re almost ready! -
Cool and Enjoy
Let the cookies cool on the baking sheet for about 5 minutes before transferring them to a wire rack. This helps them set as they cool down. If you try to move them too soon, they may fall apart. Patience, my friend!
Serving Suggestions
Once your cookies are completely cool, stack them on a cute plate, or for a cozy breakfast treat, serve them warm alongside a hot cup of tea or coffee. Crumble one over some Greek yogurt with a sprinkle of granola for a delicious breakfast bowl. They’re perfect for sharing too—line them up in mason jars for thoughtful gifts!
Recipe Variations
Looking to mix things up? Here are a few ideas for you to get creative with:
- Nutty Raspberry Cookies: Add ¼ cup of chopped nuts, like walnuts or almonds, for an extra crunch.
- Cinnamon Twist: Sprinkle in some ground cinnamon (about ½ teaspoon) for a warm, cozy flavor.
- Lemon Zing: Grate some lemon zest into the dough for a refreshing citrus burst. This pairs beautifully with raspberries.
- Peanut Butter Bliss: Incorporate 2 tablespoons of your favorite nut butter into the wet ingredients for added creaminess and flavor.
Chef’s Notes
Oh, the stories my kitchen holds! One time, I had a bunch of overripe bananas about to meet their fate in the compost bin, so I decided to mash them into this dough. My raspberry oatmeal cookies transformed into a delightful banana-raspberry combo, and let me tell you, they were a hit! It just goes to show you how versatile this recipe is. If you find yourself with ingredients that need using up, don’t hesitate to experiment—there’s always something delicious waiting to be discovered!
FAQs and Troubleshooting
1. My cookies are too dry. What went wrong?
This usually means that there was too much flour or a lack of moisture in your dough. Make sure to measure your ingredients accurately. If your dough looks a bit dry before baking, try adding another tablespoon of coconut oil or a splash of milk.
2. How can I store these cookies?
These cookies can be stored in an airtight container at room temperature for up to a week. You can freeze them as well! Just wrap each cookie in plastic wrap or place them in a freezer bag for up to 3 months.
3. Can I use frozen raspberries?
Absolutely! Just remember to thaw and drain them before adding them to the dough. You might want to reduce the number slightly, as frozen berries can be juicier.
4. What’s the secret to chewy cookies?
The key is not to overbake! When you pull these cookies out of the oven, they might look a bit underbaked in the center—that’s okay! Let them cool. They will continue to cook on the baking sheet and become deliciously chewy.
Nutritional Info
While the nutritional info can vary based on your specific ingredients and portion sizes, these cookies are generally low in sugar and high in fiber, thanks to the oats and raspberries. Each cookie (with the recipe yielding about 12-15 cookies) contains approximately:
- Calories: 120
- Protein: 2g
- Fat: 5g
- Carbohydrates: 18g
- Fiber: 3g
Feel free to adjust elements based on your dietary needs or to create different variations!
Thank you so much for joining me in the kitchen today! I hope these healthy raspberry oatmeal cookies become a delightful addition to your baking repertoire. Remember, cooking is all about joy, love, and a little bit of mess. Now, go bake, share, and enjoy! Bon Appétit!
Print
Healthy Raspberry Oatmeal Cookies
- Total Time: 25 minutes
- Yield: 12-15 cookies 1x
- Diet: Vegetarian
Description
Deliciously wholesome raspberry oatmeal cookies, perfect for a nutritious snack or dessert.
Ingredients
- 1 cup rolled oats
- ½ cup whole wheat flour
- ½ teaspoon baking soda
- ½ teaspoon salt
- ¼ cup honey or maple syrup
- ¼ cup coconut oil or unsalted butter, melted
- 1 tablespoon vanilla extract
- ¾ cup fresh raspberries
- ¼ cup dark chocolate chips (optional)
Instructions
- Preheat your oven to 350°F (175°C).
- Mix the rolled oats, whole wheat flour, baking soda, and salt in a large bowl.
- Combine the melted coconut oil (or butter), honey (or maple syrup), and vanilla extract in a separate bowl.
- Blend the wet ingredients into the dry mixture and stir until just combined.
- Gently fold in the fresh raspberries and chocolate chips (if using).
- Scoop the dough onto a parchment-lined baking sheet, leaving about 2 inches between each cookie.
- Bake for 12-15 minutes, until golden brown around the edges.
- Cool on the baking sheet for about 5 minutes before transferring to a wire rack.
Notes
These cookies can be stored in an airtight container for up to a week and can be frozen for up to 3 months.
- Prep Time: 10 minutes
- Cook Time: 15 minutes
- Category: Dessert
- Method: Baking
- Cuisine: American
Nutrition
- Serving Size: 1 cookie
- Calories: 120
- Sugar: 5g
- Sodium: 60mg
- Fat: 5g
- Saturated Fat: 3g
- Unsaturated Fat: 2g
- Trans Fat: 0g
- Carbohydrates: 18g
- Fiber: 3g
- Protein: 2g
- Cholesterol: 10mg
Keywords: raspberry, oatmeal, cookies, healthy baking, vegetarian dessert
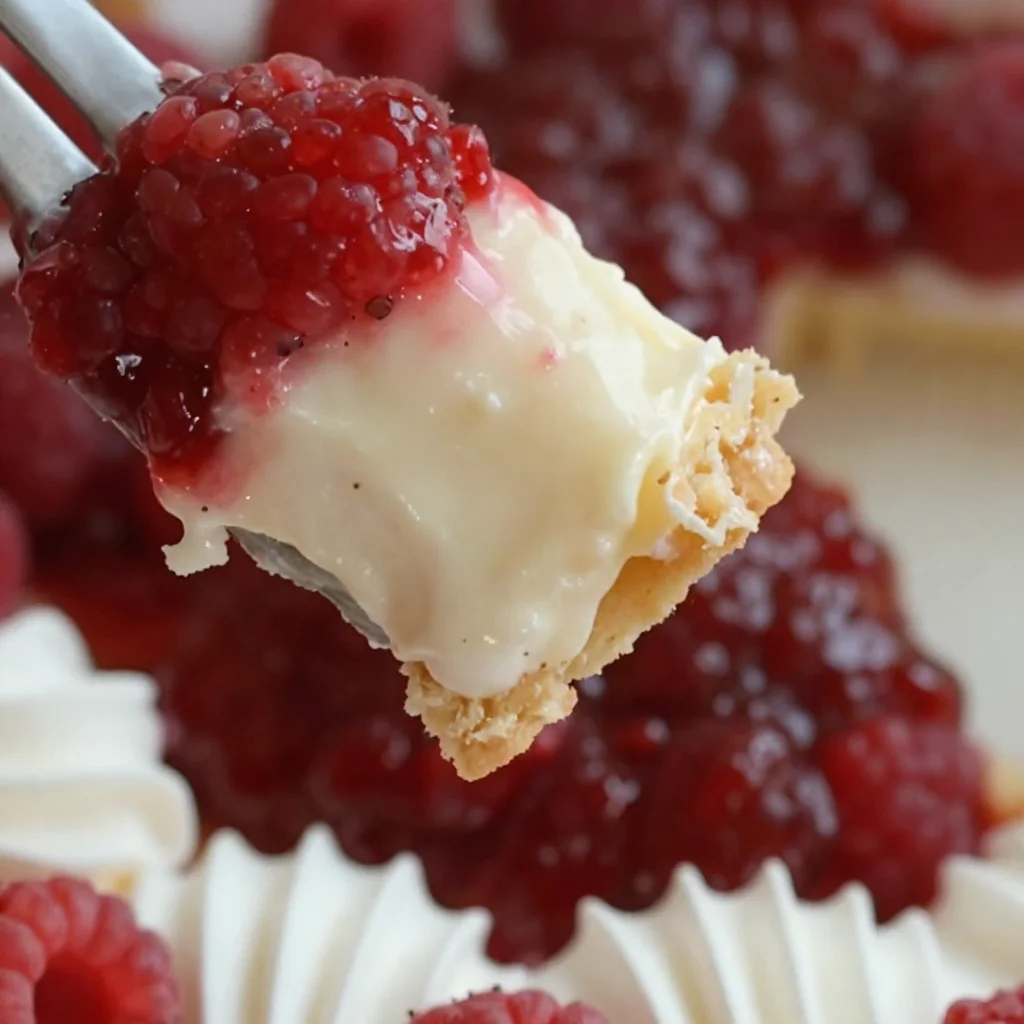
No-Bake Raspberry Cream Pie: Easy Summer Dessert Recipe
Raspberry Cream Pie: A Slice of Summer in Every Bite
Welcome to my kitchen! Today, I’m thrilled to take you on a delightful journey, where we’ll celebrate the vibrant flavors of fresh raspberries with a recipe that truly captures the essence of summer — Raspberry Cream Pie. This dessert is one of my all-time favorites, and I can’t wait to share it with you. Whether you’re a seasoned pro or a kitchen newbie, this pie is approachable, satisfying, and guaranteed to put a smile on your face.
Imagine this: it’s a warm afternoon, sunlight filters through the trees, and you’re surrounded by loved ones. The sweet scent of freshly baked crust fills the air, mingling with the tangy aroma of ripe raspberries, creating a cozy atmosphere that feels like home. That’s what Raspberry Cream Pie is all about — sharing, laughter, and the joy of good food.
Personal Story
Let me take you back to my childhood summers at my grandmother’s house, where the most decadent treats blossomed from her kitchen. She had a small garden filled with plump, juicy raspberries that I would pick during our outdoor escapades. I remember the sweet, tart juice staining my fingers as I quickly snacked on the ripe berries, forgetting entirely that they were meant for dessert.
One day, she decided we’d make the Raspberry Cream Pie together. I was enthralled by the whir of the mixer and the rich cream taking shape. She guided me patiently, every now and then giving me tastes of the luscious filling. That pie wasn’t just a dessert; it was a piece of my childhood wrapped in buttery crust and fluffy filling, a creation of love and togetherness. Each summer since, I’ve held onto that memory, eager to recreate it and share its magic with others. And now, I’m excited for you to experience it too!
Ingredients
Before we dive into the cooking, let’s gather our ingredients. Having everything prepped and ready to go will make the process smooth and enjoyable.
-
For the Pie Crust:
- 1 ½ cups all-purpose flour: This is the backbone of your crust. If you’re looking for a gluten-free option, almond or oat flour works beautifully!
- ½ cup unsalted butter, chilled and cubed: Butter adds richness and flavor. If you prefer a lighter version, you could use coconut oil.
- 2-4 tablespoons ice water: This brings the dough together. If you don’t have ice water, cold milk can also work in a pinch.
-
For the Raspberry Filling:
- 2 cups fresh raspberries: The star of the show! Frozen raspberries are also a great alternative if fresh ones aren’t available.
- ½ cup granulated sugar: This balances the tartness of the berries. Substitute with honey or maple syrup for a natural touch.
- 2 tablespoons cornstarch: This helps to set the filling. If you’re avoiding cornstarch, arrowroot powder can be an excellent alternative.
- 1 tablespoon lemon juice: A splash of acidity enhances the raspberry flavor. Lime juice also adds a lovely twist!
-
For the Cream Topping:
- 1 cup heavy cream: This creates the dreamy whipped topping. You could try coconut cream for a dairy-free version.
- 2 tablespoons powdered sugar: Adds sweetness and stability. You can use agave syrup instead for a less processed option.
- 1 teaspoon vanilla extract: This adds depth to your cream. Feel free to experiment with almond or lemon extract!
Step-by-Step Instructions
Alright, let’s get cooking! Follow these steps, and I promise you’ll create a gorgeous Raspberry Cream Pie that’ll wow your friends and family.
Step 1: Prepare the Pie Crust
-
Mix the Dry Ingredients: In a large bowl, combine the all-purpose flour and a pinch of salt. This combo creates a flavorful crust base.
-
Cut in the Butter: Add the chilled, cubed butter to the flour mixture. Using a pastry cutter or your fingertips, work the butter into the flour until the mixture resembles coarse crumbs. This step is crucial for obtaining that flaky texture we all love.
-
Add Ice Water: Gradually add the ice water, one tablespoon at a time. Mix until the dough comes together but is not sticky. If you squeeze it and it holds, you’re golden!
-
Chill the Dough: Shape the dough into a disk, wrap it in plastic, and refrigerate it for at least 30 minutes. This helps the gluten relax and makes rolling easier later on.
Step 2: Bake the Pie Crust
-
Preheat Your Oven: While the dough chills, preheat your oven to 375°F (190°C).
-
Roll out the Dough: On a lightly floured surface, roll out your chilled dough until it’s about 1/8 inch thick. Carefully place it into a 9-inch pie pan. Trim any excess dough and crimp the edges for that homemade touch.
-
Pre-bake the Crust: Prick the bottom of the crust with a fork to prevent it from puffing up. Place it in the oven and bake for about 20 minutes, or until it’s just golden brown. A little chef hack? Cover the edges with aluminum foil halfway through to prevent over-browning.
Step 3: Prepare the Raspberry Filling
-
Cook the Raspberries: In a saucepan over medium heat, combine the raspberries, sugar, cornstarch, and lemon juice. Stir gently until the mixture comes to a simmer. This will take about 5-7 minutes. You want the raspberries to break down a bit and create a beautiful sauce.
-
Cool the Mixture: Once simmered, remove the pan from the heat and let the filling cool slightly. This ensures it doesn’t cook the crust when assembled.
Step 4: Whip the Cream
- Make the Whipped Cream: In a mixing bowl, combine the heavy cream, powdered sugar, and vanilla extract. Using a hand mixer, beat on medium speed until soft peaks form. Don’t whip too much or you’ll end up with butter — not what we want here!
Step 5: Assemble the Pie
-
Fill the Crust: Pour the raspberry filling into your cooled pie crust, spreading it evenly.
-
Top with Cream: Spoon the whipped cream over the raspberries, creating a fluffy blanket of goodness. If you’re feeling fancy, use a piping bag to create decorative swirls!
-
Chill: Refrigerate the pie for at least 2 hours to allow everything to set up nicely.
Serving Suggestions
When it’s finally time to serve, slice into your beautiful Raspberry Cream Pie and present it like a true masterpiece. Fresh mint leaves make a lovely garnish, and a sprinkle of extra raspberries on top adds a burst of color. Consider serving it alongside a scoop of vanilla ice cream or a glass of sparkling lemonade for the full summer experience!
Recipe Variations
- Berry Medley Pie: Mix in some blueberries or blackberries for a colorful twist.
- Chocolate Raspberry Cream: Add some melted chocolate to the cream for a delicious chocolate raspberry combo!
- Lemon Raspberry Pie: Incorporate lemon zest into the filling for a zesty kick.
- Vegan Version: Substitute the heavy cream with coconut cream and the butter in the crust with vegan butter.
- Healthier Option: Swap sugar for a natural sweetener like stevia or monk fruit in the filling.
Chef’s Notes
As I reflect on this recipe, I can’t help but think about how it’s evolved over the years. Originally, my grandmother added a sprinkle of nutmeg to her crust, which I still adore. The beauty of cooking is that it can adapt to your palate and personal touch. Don’t be afraid to play around with flavors! And trust me, this pie isn’t just a dessert — it’s a celebration of flavors, seasons, and memories.
FAQs and Troubleshooting
1. My filling didn’t thicken; what happened?
This could be due to not enough cornstarch or cooking the filling for too short a time. Make sure to simmer it long enough for the cornstarch to activate fully!
2. Can I make this pie ahead of time?
Absolutely! You can prepare it one day in advance. Just make sure to cover it well to keep it fresh.
3. What if my crust is too dry?
If your crust feels crumbly, it likely needed a bit more water when mixing. Next time, add just a teaspoon at a time until you get a workable dough.
4. How do I store leftovers?
Cover the pie with plastic wrap and store it in the refrigerator. It’s best enjoyed within 3 days for the freshest flavor!
Nutritional Info
While I understand that desserts should be enjoyed, I know some of you keep an eye on nutritional values. A slice of Raspberry Cream Pie contains approximately:
- Calories: 350
- Fat: 20g
- Carbohydrates: 40g
- Protein: 3g
Remember, the joy of cooking is about balance and indulgence, so treat yourself to a slice or two!
And there you have it, your very own Raspberry Cream Pie! I hope you’ve enjoyed this journey with me and feel empowered to recreate this recipe in your kitchen. Cooking is all about love, creativity, and sharing delicious moments. Happy baking, my friends — I can’t wait to hear your stories and see your beautiful pies!
Print
Raspberry Cream Pie
- Total Time: 150 minutes
- Yield: 8 servings 1x
- Diet: Vegetarian
Description
A delightful Raspberry Cream Pie that captures the essence of summer with vibrant flavors of fresh raspberries.
Ingredients
- 1 ½ cups all-purpose flour
- ½ cup unsalted butter, chilled and cubed
- 2–4 tablespoons ice water
- 2 cups fresh raspberries
- ½ cup granulated sugar
- 2 tablespoons cornstarch
- 1 tablespoon lemon juice
- 1 cup heavy cream
- 2 tablespoons powdered sugar
- 1 teaspoon vanilla extract
Instructions
- Mix the dry ingredients: In a large bowl, combine the all-purpose flour and a pinch of salt.
- Cut in the butter: Add the chilled, cubed butter and work it into the flour until it resembles coarse crumbs.
- Add ice water: Gradually mix in the ice water until the dough comes together.
- Chill the dough: Shape into a disk, wrap in plastic, and refrigerate for at least 30 minutes.
- Preheat your oven: Preheat to 375°F (190°C).
- Roll out the dough: On a floured surface, roll out the dough to 1/8 inch thick and place into a 9-inch pie pan.
- Pre-bake the crust: Prick the bottom and bake for about 20 minutes until golden brown.
- Cook the raspberries: In a saucepan, combine raspberries, sugar, cornstarch, and lemon juice and simmer for 5-7 minutes.
- Cool the mixture: Remove from heat and let it cool slightly.
- Make the whipped cream: Beat heavy cream, powdered sugar, and vanilla until soft peaks form.
- Fill the crust: Pour the raspberry filling into the cooled crust.
- Top with cream: Spoon the whipped cream over the raspberries.
- Chill: Refrigerate for at least 2 hours.
Notes
For variations, consider adding blueberries for a berry medley, or substitute coconut cream for a dairy-free option.
- Prep Time: 30 minutes
- Cook Time: 20 minutes
- Category: Dessert
- Method: Baking
- Cuisine: American
Nutrition
- Serving Size: 1 slice
- Calories: 350
- Sugar: 18g
- Sodium: 100mg
- Fat: 20g
- Saturated Fat: 12g
- Unsaturated Fat: 6g
- Trans Fat: 0g
- Carbohydrates: 40g
- Fiber: 4g
- Protein: 3g
- Cholesterol: 60mg
Keywords: Raspberry Pie, Summer Dessert, Cream Pie, Fresh Berries

Ingredient 15-Minute No-Bake Raspberry Chocolate Bites
Indulge in the Sweet Symphony of Chocolate-Covered Raspberry Bites
Welcome back to my cozy kitchen! Today, I’m thrilled to share a delightful treat that perfectly balances indulgence and freshness: Chocolate-Covered Raspberry Bites. If you’re like me, the combination of rich chocolate and vibrant, tangy raspberries makes your heart skip a beat. These little bites are not just a feast for the taste buds; they’re also a nod to the sweet moments that we get to share with family and friends.
Now, you might be wondering why I’m so drawn to this delicious combination. Well, let me take you on a little trip down memory lane. When I was a child, my grandmother had the most magical garden overflowing with raspberry bushes. During the summer months, my cousins and I would spend hours picking those ruby-red gems right off the vines. We’d pop them in our mouths like candy, their sweetness bursting with each bite.
One hot afternoon, my grandma decided it was time to create something special with our bounty. We melted chocolate together and dipped those fresh raspberries, creating a dessert that was as beautiful as it was delicious. This moment was more than just about the food; it was about bonding with loved ones and creating lasting memories. Now, every time I make these Chocolate-Covered Raspberry Bites, I’m reminded of those sun-soaked days spent laughing in the garden, and I’m excited to pass that joy along to you!
So, let’s get started on a recipe that’s not just accessible but also a fantastic way to impress. Whether you’re planning a cozy night in or need a sweet addition for a party, these bites are sure to steal the show.
Ingredients
Here’s what you’ll need to whip up these delectable morsels:
-
Fresh Raspberries: About 12 ounces. The freshness makes all the difference! You can also use strawberries or blackberries if raspberries aren’t your thing.
-
Dark Chocolate: 8 ounces, chopped. I love using at least 70% cocoa for that rich taste, but feel free to swap it out for milk chocolate if you prefer something sweeter.
-
White Chocolate: 4 ounces, for drizzling (optional). A touch of sweetness that contrasts beautifully with dark chocolate. If you want a bit more color, use colored candy melts instead!
-
Coconut Oil: 1 tablespoon (optional). Mixing a bit of coconut oil with your chocolate will give it a lovely sheen and a smoother texture when melted.
-
Sea Salt: A sprinkle for garnish. The salt enhances the flavor of the chocolate and berries. It’s optional, but trust me, it’s worth it!
-
Parchment Paper: For easy cooling. Not an ingredient, but a handy tool to make clean-up a breeze!
Let’s get those taste buds tingling with anticipation!
Step-by-Step Instructions
Alright, let’s dive into the fun part! Here’s how to create these divine chocolate-covered raspberry bites:
-
Prepare Your Workspace: Start by gathering all your ingredients and tools. This is a great time to put on your favorite playlist! A little music makes all the difference in the kitchen.
-
Wash and Dry the Raspberries: Gently wash the raspberries under cold water and pat them dry with a paper towel. It’s crucial to get them nice and dry; otherwise, the chocolate won’t stick as well.
-
Melt the Dark Chocolate: In a microwave-safe bowl, combine the chopped dark chocolate and coconut oil, if using. Melt the mixture in 30-second increments, stirring in between until smooth. Be patient — overcooking can lead to a lumpy mess. Alternatively, you can use a double boiler to melt the chocolate gently.
-
Dip the Raspberries: Once the chocolate is melted and silky, it’s time for some fun! Hold each raspberry by the stem and dip it into the chocolate, making sure to cover it completely. You can roll it around a bit to get an even coat. Let the excess chocolate drip off before placing the berry on a parchment-lined baking sheet.
-
Chill: Pop the baking sheet into the refrigerator for about 30 minutes to allow the chocolate to set. This is the perfect time to enjoy a snack or sip on some herbal tea.
-
Melt the White Chocolate (Optional): If you’re feeling fancy and want to add a drizzle, melt the white chocolate in the same way as the dark chocolate. Once melted, use a fork to drizzle it over the set dark chocolate raspberries for that extra touch of flair.
-
Garnish: After drizzling, toss a tiny pinch of sea salt over the top while the chocolate is still warm. This little touch elevates the flavor and adds a subtle crunch.
-
Serve & Enjoy: Once set, you can transfer the raspberry bites to a serving platter or simply keep them on the baking sheet for a more casual presentation. These little gems are perfect for sharing (or keeping all to yourself!).
Serving Suggestions
To make your chocolate-covered raspberry bites truly shine, consider serving them on a beautiful platter alongside a sprig of mint for a pop of color. You can also pair them with a scoop of vanilla ice cream or on a bed of whipped cream for a more indulgent dessert. They’re blissful on their own, but there’s nothing wrong with going all out!
Recipe Variations
Feeling adventurous? Here are a few fun twists you can try:
-
Nutty Addition: Dip the chocolate-covered raspberries in crushed nuts or sprinkles for extra crunch and flavor.
-
Spicy Kick: Add a hint of cayenne pepper or chili powder to the melted chocolate for a surprising kick that offsets the sweetness.
-
Coconut Delight: Roll the chocolate-covered raspberries in shredded coconut before chilling. This gives them a tropical twist!
-
Flavor Infusions: Infuse the melted chocolate with flavors such as orange zest, mint extract, or espresso powder for a flavor boost.
-
Dairy-Free: Swap the dark chocolate for a dairy-free chocolate variant to make these vegan-friendly.
Chef’s Notes
As I’ve been perfecting this recipe over the years, I can’t help but chuckle at the kitchen mishaps along the way. Once, I tried to multitask and ended up with chocolate everywhere — on my hands, my face, and even my hair! These moments remind me that cooking isn’t just about perfection; it’s about joy and laughter. Plus, those little spills can lead to some of the best kitchen stories to share with friends and family.
This recipe has evolved into my go-to for so many occasions, from birthday parties to cozy movie nights. The tantalizing aroma of melted chocolate fills the kitchen, and the first bite back to the summer days spent in my grandmother’s garden is always a heartwarming reminder of where it all began.
FAQs and Troubleshooting
Q1: The chocolate is clumpy! What did I do wrong?
A: This usually happens when the chocolate gets overheated. Always melt chocolate in short intervals and stir well. If it does clump, try adding a tiny bit of coconut oil to smooth it out.
Q2: How do I prevent the chocolate from cracking when bitten?
A: Make sure the raspberries are thoroughly chilled before dipping. This will help the chocolate set perfectly around the berry.
Q3: My chocolate didn’t stick to the raspberries. Why?
A: This usually happens if the raspberries are wet. Ensure they’re completely dry before dipping. If needed, you can give them a quick dip in a thin layer of melted chocolate, let it set, and then dip again.
Q4: How long can I store these chocolate-covered raspberry bites?
A: You can store them in an airtight container in the refrigerator for up to three days. But with how delicious they are, I doubt they’ll last that long!
Nutritional Info
- Serving Size: 1 Chocolate-Covered Raspberry Bite
- Calories: Approx. 50 calories (varies based on chocolate choice)
- Protein: 0.5g
- Carbohydrates: 6g
- Fats: 3.5g
So there you have it — a sweet, simple recipe to brighten your day and fill your home with delicious memories. Give these Chocolate-Covered Raspberry Bites a try this weekend and let me know how they turn out! Happy cooking, my fellow foodies!
Print
Chocolate-Covered Raspberry Bites
- Total Time: 45 minutes
- Yield: 4 servings
- Diet: Vegetarian
Description
Delightful chocolate-covered raspberry bites that perfectly balance indulgence and freshness, inspired by childhood memories.
Ingredients
- Fresh Raspberries: About 12 ounces
- Dark Chocolate: 8 ounces, chopped
- White Chocolate: 4 ounces, for drizzling (optional)
- Coconut Oil: 1 tablespoon (optional)
- Sea Salt: A sprinkle for garnish (optional)
- Parchment Paper: For easy cooling
Instructions
- Prepare Your Workspace: Start by gathering all your ingredients and tools.
- Wash and Dry the Raspberries: Gently wash the raspberries under cold water and pat them dry.
- Melt the Dark Chocolate: In a microwave-safe bowl, combine the chopped dark chocolate and coconut oil, if using. Melt in 30-second increments, stirring until smooth.
- Dip the Raspberries: Hold each raspberry by the stem and dip it into the chocolate, then let the excess drip off.
- Chill: Place the baking sheet in the refrigerator for about 30 minutes.
- Melt the White Chocolate (Optional): Melt the white chocolate and drizzle over the set dark chocolate raspberries.
- Garnish: Sprinkle with sea salt while the chocolate is still warm.
- Serve & Enjoy: Transfer to a serving platter or keep on the baking sheet.
Notes
These bites can be served with mint or alongside ice cream for an indulgent dessert.
- Prep Time: 15 minutes
- Cook Time: 30 minutes
- Category: Dessert
- Method: Dipping
- Cuisine: American
Nutrition
- Serving Size: 1 bite
- Calories: 50
- Sugar: 5g
- Sodium: 30mg
- Fat: 3.5g
- Saturated Fat: 2g
- Unsaturated Fat: 1.5g
- Trans Fat: 0g
- Carbohydrates: 6g
- Fiber: 1g
- Protein: 0.5g
- Cholesterol: 0mg
Keywords: chocolate, raspberries, dessert, sweet treat, snacks
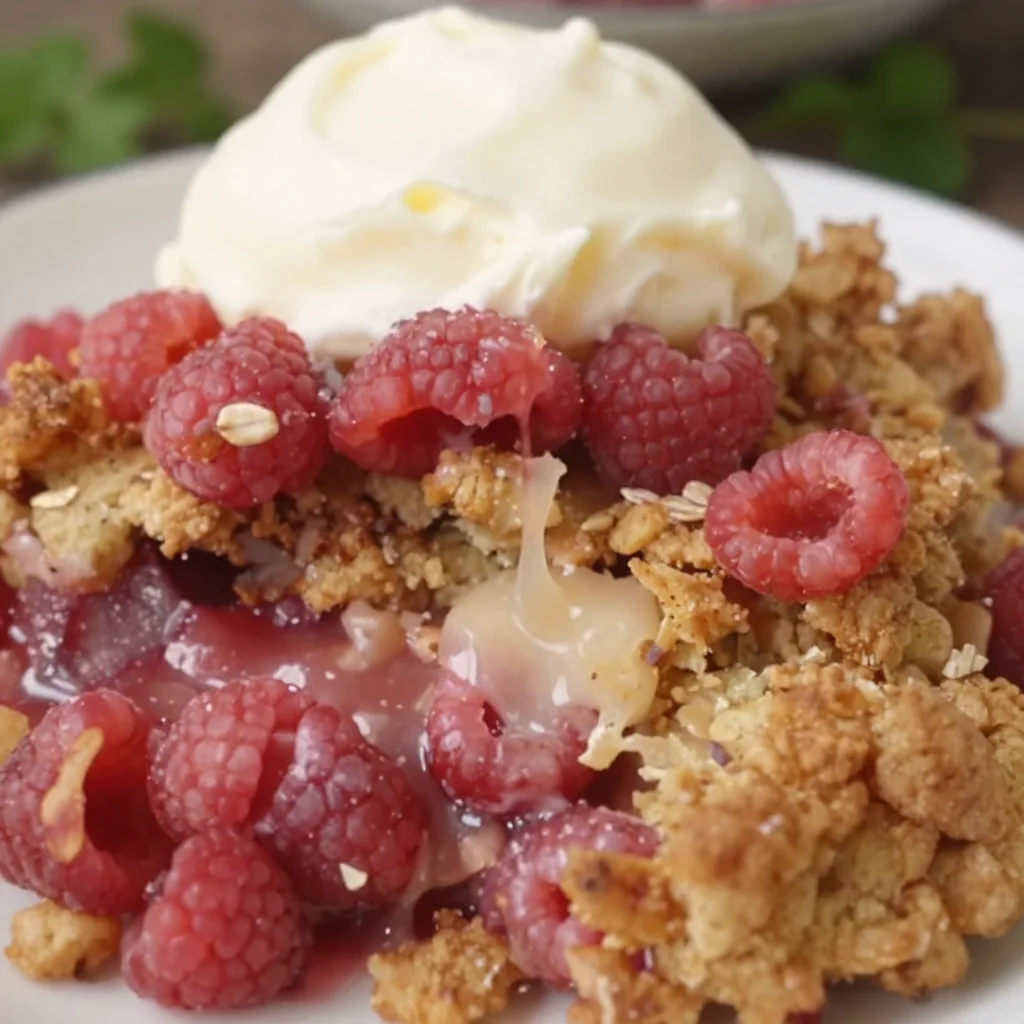
One-Pan Raspberry Crumble: 15-Minute Weeknight Dessert
Sweet Nostalgia: Raspberry Crumble Recipe
Welcome to my kitchen! Today, we’re diving into a delightful dish that sings of summer’s sweetness and brings back cherished memories: Raspberry Crumble. Picture this: the aroma of baked berries wafting through the air, golden and crumbly topping glistening under kitchen lights, and laughter echoing around the table as loved ones dig in. This dessert has a knack for creating cozy moments, sharing stories, and indulging our sweet tooth!
Raspberry crumble is the kind of recipe that feels familiar and welcoming. It’s not just a dish; it’s a story. Maybe it’s the warmth of a family gathering or a simple weekend treat. Whatever it is, when you make this recipe, you’re not just baking – you’re creating moments to savor. With juicy berries enveloped in a luscious topping, each bite transports you to a sun-kissed picnic or a Sunday afternoon spent with friends.
The beauty of this crumble is its versatility. You can whip it up for a casual dessert, take it to a potluck, or simply enjoy a cozy night in with a scoop of vanilla ice cream on the side. And the best part? It’s super easy to make. Whether you’re a seasoned chef or a kitchen newbie, I promise you’ll be able to create something that’s both stunning and delicious.
So, let’s roll up our sleeves, don our favorite aprons, and let the kitchen magic begin!
A Bite of Memory: My Raspberry Crumble Journey
I still remember the first time I made raspberry crumble. It was a sunny Saturday afternoon, and the local farmers’ market was bustling with vibrant colors and sweet aromas. The minute I laid eyes on those plump, juicy raspberries, I felt the tug of nostalgia. My grandmother used to make her famous berry crumbles during family gatherings, and the mere thought of it could make my stomach rumble.
After a bit of haggling (okay, maybe just a friendly chat) with the vendor, I carted home a basket bursting with raspberries, determined to recreate my grandmother’s magic. That Saturday turned into an afternoon of laughter and floury messiness as I stumbled through the steps, trying to remember her process.
As I pulled that first golden-brown crumble out of the oven, the smell wrapped around me like a warm hug. I felt transported back to my childhood, sitting around a long table filled with family, all eagerly waiting for a taste. When I finally took a bite, my heart swelled with joy – I had done it! That very first batch was imperfect but incredibly special; each bite echoed laughter, love, and cherished memories. And that’s the beauty of this raspberry crumble recipe – it’s not just about the dessert; it’s about the moments you create along the way.
Ingredients You’ll Need
To make this stunning raspberry crumble, gather these key ingredients:
-
Fresh Raspberries (2 cups): The star of the show! Look for plump, vibrant berries; they should be sweet and slightly tart. If you can’t find fresh ones, frozen raspberries work too; just make sure to thaw and drain them well.
-
Granulated Sugar (1/2 cup): This sweetener helps balance the tartness of the raspberries. If you prefer less sugar, feel free to reduce it to 1/4 cup. You can also use coconut sugar for a healthier twist!
-
Oats (1 cup): They add a delightful chewiness to the crumble topping. Use rolled oats for the best texture. If you’re aiming for gluten-free, ensure you use certified gluten-free oats.
-
All-Purpose Flour (1 cup): This will help bind your crumble topping together. For a gluten-free option, almond flour or a gluten-free blend works great.
-
Brown Sugar (1/2 cup): It gives depth and a lovely caramel note to the topping. Dark brown sugar imparts a richer flavor, but light brown works as well.
-
Butter (1/2 cup, cold): Cut into cubes; this adds richness to the crumble and helps achieve that desired flaky texture. You can substitute with coconut oil or a vegan butter alternative if you prefer.
-
Cinnamon (1 teaspoon): A warm spice that enhances the overall flavor. Don’t skip it! It’s what takes this crumble to the next level.
-
Salt (1/4 teaspoon): A pinch of salt elevates the sweetness of the crumble and balances the flavors beautifully.
Step-by-Step Instructions
Let’s get cooking! Follow these detailed steps to create your delicious raspberry crumble:
-
Preheat Your Oven: Preheat your oven to 350°F (175°C). This may seem simple, but starting with a hot oven ensures your crumble cooks evenly and becomes perfectly golden!
-
Prepare the Berries: In a medium bowl, gently toss the fresh raspberries with granulated sugar. Don’t squish them; you want to keep those juicy berries intact! Set this bowl aside to let the sugar work its magic and draw out the raspberry juices. It’ll enhance the overall flavor and create a lovely filling.
-
Make the Crumble Topping: In a separate mixing bowl, combine the oats, flour, brown sugar, cinnamon, and salt. Mix them well. Now, add the cold butter cubes. Using your fingers or a pastry cutter, work the butter into the dry ingredients until it resembles coarse crumbs. It’s okay if there are some larger chunks – they’ll create delicious crispy bits when baked!
-
Combine the Filling and Topping: Take your raspberry mixture and transfer it into an 8×8-inch (or similarly-sized dish). Spread it evenly. Then, sprinkle the crumble topping generously over the berries, making sure it’s well-covered. This is where the magic happens – every bite will be a blissful balance of tart and sweet!
-
Bake to Perfection: Pop the dish into your preheated oven and let it bake for about 30-35 minutes. You’ll know it’s ready when the topping is golden and crispy and the berries are bubbling around the edges. Don’t rush this process!
-
Cool and Serve: Allow the raspberry crumble to cool for at least 10 minutes before digging in. This will help the juices set a bit and make serving easier. You can serve it warm, at room temperature, or even chilled – it’s delicious any way you choose!
Serving Suggestions
When it comes to serving your raspberry crumble, think about how to elevate the experience! Consider a scoop of vanilla ice cream or a dollop of whipped cream on top for an extra layer of indulgence. If you’re feeling fancy, a sprinkle of fresh mint or a dusting of powdered sugar adds a nice touch of elegance and freshness. Serve it in charming bowls or a rustic baking dish for that homey feel, and watch as everyone digs in with joyful anticipation!
Recipe Variations: Get Creative!
This raspberry crumble recipe is wonderfully adaptable! Here are a few fun variations to inspire your inner chef:
-
Mixed Berry Crumble: Swap out raspberries for any combination of berries like blueberries, strawberries, or blackberries for a delightful twist!
-
Nutty Crumble: Add chopped nuts such as almonds or pecans to the topping mixture for an extra crunch and richness.
-
Spiced Up: Experiment by adding a pinch of nutmeg or cardamom in addition to cinnamon for a warm, aromatic flair.
-
Healthy Twist: Replace half the butter with applesauce for a lighter option without sacrificing flavor.
-
Gluten-Free Delight: Substitute all-purpose flour with a blend of oat flour and almond flour for a gluten-free version everyone can enjoy.
Chef’s Notes
Oh, have I had my share of raspberry crumble adventures! One time, as a novice baker, I forgot to add sugar to the raspberry filling. Can you imagine? I blew my family’s minds with what looked like a beautifully baked dessert but turned out to be completely tart! Lesson learned: sugar is essential in a dessert!
Over the years, I’ve refined this recipe, and I can assure you that it has become a staple at our family gatherings. Each new iteration brings a little twist, whether it’s an experimental spice or a new type of berry. My favorite? A mixture of raspberries and peaches—oh, the summer vibes!
FAQs and Troubleshooting
1. Why is my crumble topping soggy?
A soggy topping can happen if there’s too much moisture in the fruit filling or if it’s not baked long enough. Make sure to evenly distribute the topping and keep an eye on it as it bakes until it’s golden brown.
2. Can I use frozen raspberries?
Absolutely! Just make sure to thaw them first and drain any excess liquid to prevent your crumble from becoming too watery.
3. How do I store leftovers?
Store any leftover crumble in an airtight container in the refrigerator for up to 3 days. Just reheat in the oven before serving for that fresh-out-of-the-oven taste!
4. What can I pair with raspberry crumble?
This crumble goes beautifully with a scoop of vanilla ice cream, a dollop of whipped cream, or even a drizzle of chocolate sauce for those chocolate lovers out there!
Nutritional Info
(Note: Nutritional values may vary based on ingredient choices.)
- Serving size: 1/8 of an 8×8 dish
- Calories: Approximately 250-300
- Fat: 12g
- Carbohydrates: 36g
- Fiber: 4g
- Sugars: 14g
- Protein: 4g
So, there you have it, my friends! A delightful raspberry crumble that not only tastes incredible but also brings a little nostalgia, joy, and comfort to your table. Remember, cooking is all about love, creativity, and sharing with those you care about. Now, get out there and whip up some sweetness! Happy baking!
Print
Raspberry Crumble
- Total Time: 45 minutes
- Yield: 8 servings 1x
- Diet: Vegetarian
Description
A delightful dessert featuring juicy raspberries topped with a golden, crumbly mixture, perfect for cozy moments and gatherings.
Ingredients
- 2 cups Fresh Raspberries
- 1/2 cup Granulated Sugar
- 1 cup Oats
- 1 cup All-Purpose Flour
- 1/2 cup Brown Sugar
- 1/2 cup Butter, cold, cut into cubes
- 1 teaspoon Cinnamon
- 1/4 teaspoon Salt
Instructions
- Preheat your oven to 350°F (175°C).
- Prepare the berries by tossing raspberries with granulated sugar in a medium bowl.
- Make the crumble topping by combining oats, flour, brown sugar, cinnamon, and salt in a separate bowl.
- Add cold butter cubes to the crumble mixture and mix until it resembles coarse crumbs.
- Combine the raspberry mixture in a baking dish and spread evenly before topping with the crumble mixture.
- Bake for about 30-35 minutes until the topping is golden and crispy.
- Cool the crumble for at least 10 minutes before serving.
Notes
Serve warm with vanilla ice cream or whipped cream for a delightful treat.
- Prep Time: 15 minutes
- Cook Time: 30 minutes
- Category: Dessert
- Method: Baking
- Cuisine: American
Nutrition
- Serving Size: 1 serving
- Calories: 275
- Sugar: 14g
- Sodium: 100mg
- Fat: 12g
- Saturated Fat: 7g
- Unsaturated Fat: 4g
- Trans Fat: 0g
- Carbohydrates: 36g
- Fiber: 4g
- Protein: 4g
- Cholesterol: 30mg
Keywords: raspberry crumble, dessert, summer dessert, berry dessert, comfort food
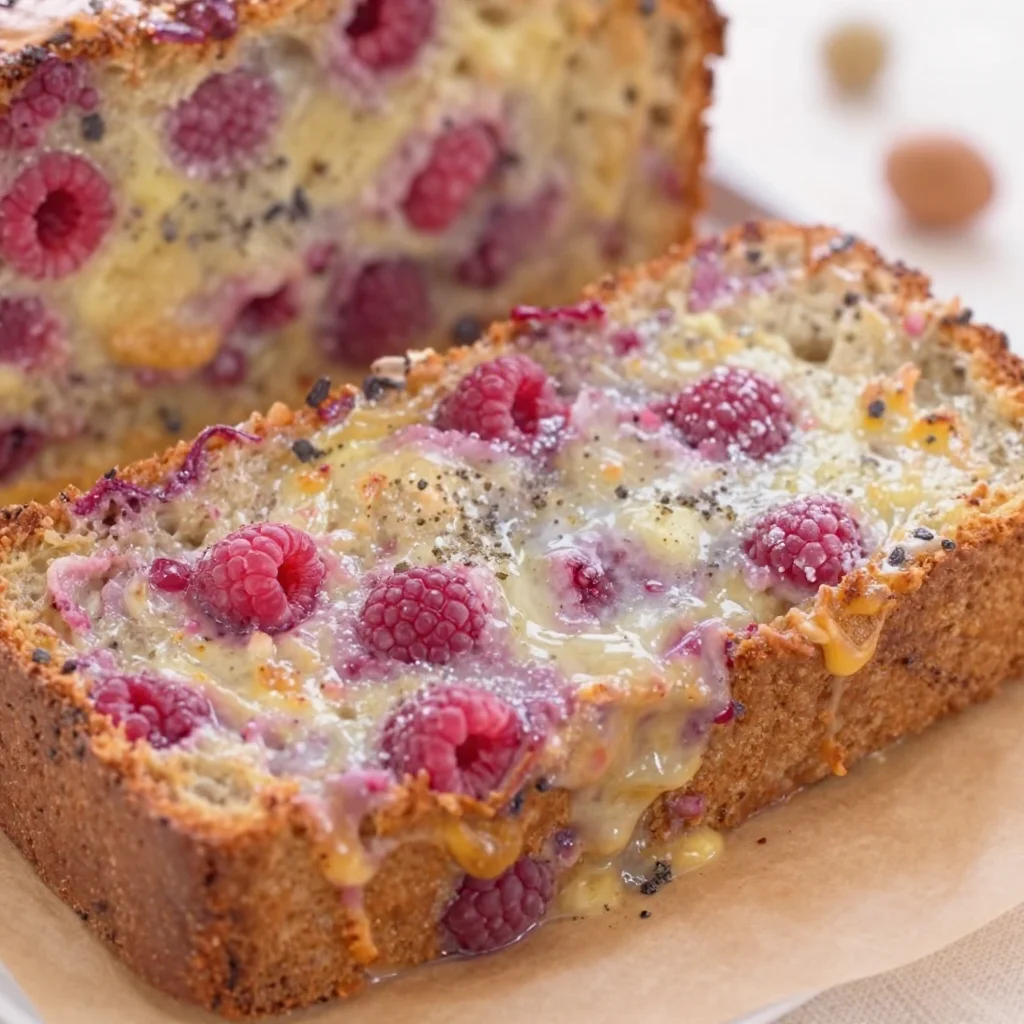
Easy Raspberry Bread for Busy Weeknights (20-Min Prep)
The Best Raspberry Bread: A Sweet Slice of Nostalgia
Welcome to my kitchen, foodies! Today, I want to share a recipe that’s close to my heart—the Best Raspberry Bread. If you’ve ever stepped into a café and been greeted by the tantalizing aroma of baked goods, you know exactly how that scents can brighten your day. This delightful bread brings that cozy vibe straight into your home, and I can promise you, it’s as rewarding to bake as it is to eat!
Baking has always been my therapy. The act of mixing flour, sugar, and fresh fruit transports me to memories of my childhood, where Saturdays were reserved for baking marathons with my mom. We’d whip up this luscious raspberry bread, filling our small kitchen with the sweet aroma of berries and vanilla. As we pulled the warm loaves from the oven, we’d share stories, giggles, and a few flour fights—just the kind of chaos that makes a kitchen feel alive! Each slice revealed warm pink-hued ribbons dotted with juicy raspberries, creating a cheerful centerpiece for our weekend breakfasts. This raspberry bread became more than just a recipe for us; it was our love language, our way of forming lasting memories with family and friends.
So, let’s dive into this wonderful world of raspberry bread together! Whether you’re treating yourself to a leisurely brunch or surprising your loved ones with a gift from your kitchen, this recipe is bound to spark joy. Grab your apron, and let’s bake some magic!
Ingredients
Here’s what you’ll need to bring this homemade delight to life:
-
1 ½ cups all-purpose flour
- This is the backbone of our bread. For a gluten-free option, you can substitute with a 1:1 gluten-free flour blend.
-
1 cup granulated sugar
- Sweetness is key here! You can use coconut sugar or monk fruit sweetener for a lower-carb alternative.
-
½ teaspoon baking powder
- This little leavening magic will give your bread a lovely rise. Baking soda can be used, but adjust the quantity to about ⅓ teaspoon if switching.
-
½ teaspoon baking soda
- This works in tandem with baking powder to create a fluffy texture. Make sure it’s fresh for the best results!
-
¼ teaspoon salt
- Enhances the flavors and balances the sweetness. Don’t skip it!
-
2 large eggs
- They provide moisture and act as a binding agent. For a vegan alternative, use flax eggs (1 tablespoon of ground flaxseed mixed with 2.5 tablespoons of water).
-
½ cup unsalted butter, melted
- Adds richness and that delightful buttery flavor. You can use margarine or coconut oil for a dairy-free option.
-
½ cup buttermilk
- This adds moisture and a touch of tang. If you don’t have buttermilk, mix ½ cup of milk with a splash of vinegar or lemon juice and let it sit for a few minutes!
-
1 cup fresh raspberries
- The star of our dish! Frozen berries work too—just make sure to thaw and drain them so they don’t add excess moisture.
-
1 teaspoon vanilla extract
- A must-have for depth of flavor. You can use almond extract for a unique twist!
Feel free to adapt these ingredients based on availability or dietary preferences. Cooking is all about making it your own!
Step-by-Step Instructions
Now that we have our ingredients, let’s get cooking!
Step 1: Preheat Your Oven
First things first, preheat your oven to 350°F (175°C). Preheating ensures even baking, so this step is critical. While it’s heating up, you can prepare your baking pan.
Step 2: Prepare the Baking Pan
Grease a 9×5-inch loaf pan with butter or non-stick spray. If you want an extra layer of protection from sticking, you can line the bottom with parchment paper too.
Step 3: Mix Dry Ingredients
In a medium bowl, whisk together the flour, sugar, baking powder, baking soda, and salt. This step is crucial for evenly distributing the leavening agents and ensuring consistent rise throughout the loaf.
Tip: Always sift your flour before measuring it out. This will help keep your bread light and fluffy!
Step 4: Combine Wet Ingredients
In a large bowl, beat the eggs. Stir in the melted butter, buttermilk, and vanilla extract until everything is well combined. It should look creamy and slightly frothy.
Step 5: Combine Wet and Dry Mixtures
Slowly add the dry ingredients to the wet mixture, stirring gently but swiftly. Mix just until combined; a few lumps are perfectly okay. Overmixing will lead to a dense loaf!
Step 6: Fold in the Raspberries
Gently fold in the fresh raspberries. If you’re using frozen berries, be gentle to avoid turning the batter pink!
Tip: Dust the raspberries with a bit of flour before folding them in. This can help prevent them from sinking to the bottom during baking.
Step 7: Pour into the Pan
Transfer the bright pink batter into your prepared loaf pan. Smooth the top with a spatula to make it look nice and presentable!
Step 8: Bake
Pop that beauty into the preheated oven and let it bake for 55–65 minutes. About halfway, you can rotate the pan for even baking, but this isn’t strictly necessary.
Step 9: Check for Doneness
Check for doneness by inserting a toothpick into the center of the loaf. If it comes out clean or with a few moist crumbs, your bread is done!
Step 10: Cool and Serve
Allow the bread to cool in the pan for 10 minutes before transferring it to a wire rack to cool completely. This waiting game is tough, but trust me—it’s worth it! Once cooled, slice it up and prepare for your taste buds to be dazzled.
Serving Suggestions
This raspberry bread is as versatile as it is delicious! Serve it warm with a pat of butter on top, or enjoy it with a drizzle of honey or maple syrup. For an elegant touch, you can pair it with a scoop of vanilla ice cream or whipped cream. Whether for breakfast, brunch, or dessert, it’s sure to steal the spotlight!
Recipe Variations
- Chocolate Chip Raspberry Bread: Add a cup of dark chocolate chips for a delightful sweetness.
- Nut Lover’s Raspberry Bread: Fold in chopped walnuts or pecans for a crunchy texture.
- Lemon Raspberry Bread: Add a tablespoon of lemon zest and a touch of lemon juice for a refreshing twist.
- Coconut Raspberry Bread: Incorporate shredded coconut for a tropical flair.
Feel free to get creative! Food is all about personal taste, so don’t hesitate to experiment with flavors that speak to your soul.
Chef’s Notes
This raspberry bread has been through various transformations in my kitchen over the years. The first time I made it, I actually forgot to add the sugar (don’t ask how!). Instead of a sweet treat, I ended up with a rather bland loaf. But that unfortunate mishap led to some of my favorite kitchen memories as I tried to salvage the situation with plenty of spreadable goodness on top!
Now, this recipe is one I keep close! It’s the perfect canvas for other flavors, and every time I make it, it fills my kitchen with that nostalgic aroma that I fell in love with as a child.
FAQs and Troubleshooting
1. My bread is too dense. What went wrong?
Overmixing the batter or not measuring your ingredients accurately can cause density. Make sure to fold gently and measure carefully!
2. Why did my raspberries sink to the bottom?
This can happen if the berries are too wet. Dredging them in flour before adding them to the batter can help prevent sinking.
3. Can I use frozen raspberries and if so, how do I prepare them?
Absolutely! Just let them thaw and drain any excess moisture before folding them into the batter to ensure the right texture.
4. What can I do if my bread sticks to the pan?
Make sure to grease your loaf pan well and consider lining the bottom with parchment paper. If it does stick, you can use a butter knife to gently loosen the sides!
Nutritional Info
While I believe in enjoying treats like this bread in moderation, here’s a rough idea of the nutritional content per slice if you slice the loaf into 12 pieces:
- Calories: 190
- Fat: 7g
- Carbohydrates: 29g
- Protein: 3g
- Fiber: 1g
- Sugars: 10g
Note that values may vary based on specific ingredients used.
And there you have it: the Best Raspberry Bread, straight from my heart to yours! Baking shouldn’t be intimidating; it should be fun and filled with love. Share a slice with someone you adore, and you just might spark joy in their day, too! Happy baking, friends!
Print
The Best Raspberry Bread
- Total Time: 75 minutes
- Yield: 12 servings 1x
- Diet: Vegetarian
Description
A delightful raspberry bread that evokes nostalgia and warmth, perfect for any brunch or dessert.
Ingredients
- 1 ½ cups all-purpose flour
- 1 cup granulated sugar
- ½ teaspoon baking powder
- ½ teaspoon baking soda
- ¼ teaspoon salt
- 2 large eggs
- ½ cup unsalted butter, melted
- ½ cup buttermilk
- 1 cup fresh raspberries
- 1 teaspoon vanilla extract
Instructions
- Preheat your oven to 350°F (175°C).
- Grease a 9×5-inch loaf pan with butter or non-stick spray.
- In a medium bowl, whisk together the flour, sugar, baking powder, baking soda, and salt.
- In a large bowl, beat the eggs. Stir in the melted butter, buttermilk, and vanilla extract until well combined.
- Slowly add the dry ingredients to the wet mixture, stirring gently but swiftly until just combined.
- Gently fold in the fresh raspberries.
- Transfer the batter into your prepared loaf pan and smooth the top with a spatula.
- Pop the pan into the preheated oven and let it bake for 55–65 minutes.
- Check for doneness by inserting a toothpick into the center of the loaf.
- Allow the bread to cool in the pan for 10 minutes before transferring it to a wire rack.
Notes
For a gluten-free option, substitute all-purpose flour with a gluten-free blend. Variations include adding chocolate chips or nuts for different flavors.
- Prep Time: 15 minutes
- Cook Time: 60 minutes
- Category: Dessert
- Method: Baking
- Cuisine: American
Nutrition
- Serving Size: 1 slice
- Calories: 190
- Sugar: 10g
- Sodium: 200mg
- Fat: 7g
- Saturated Fat: 4g
- Unsaturated Fat: 2g
- Trans Fat: 0g
- Carbohydrates: 29g
- Fiber: 1g
- Protein: 3g
- Cholesterol: 60mg
Keywords: raspberry bread, dessert, baking, sweet bread, brunch
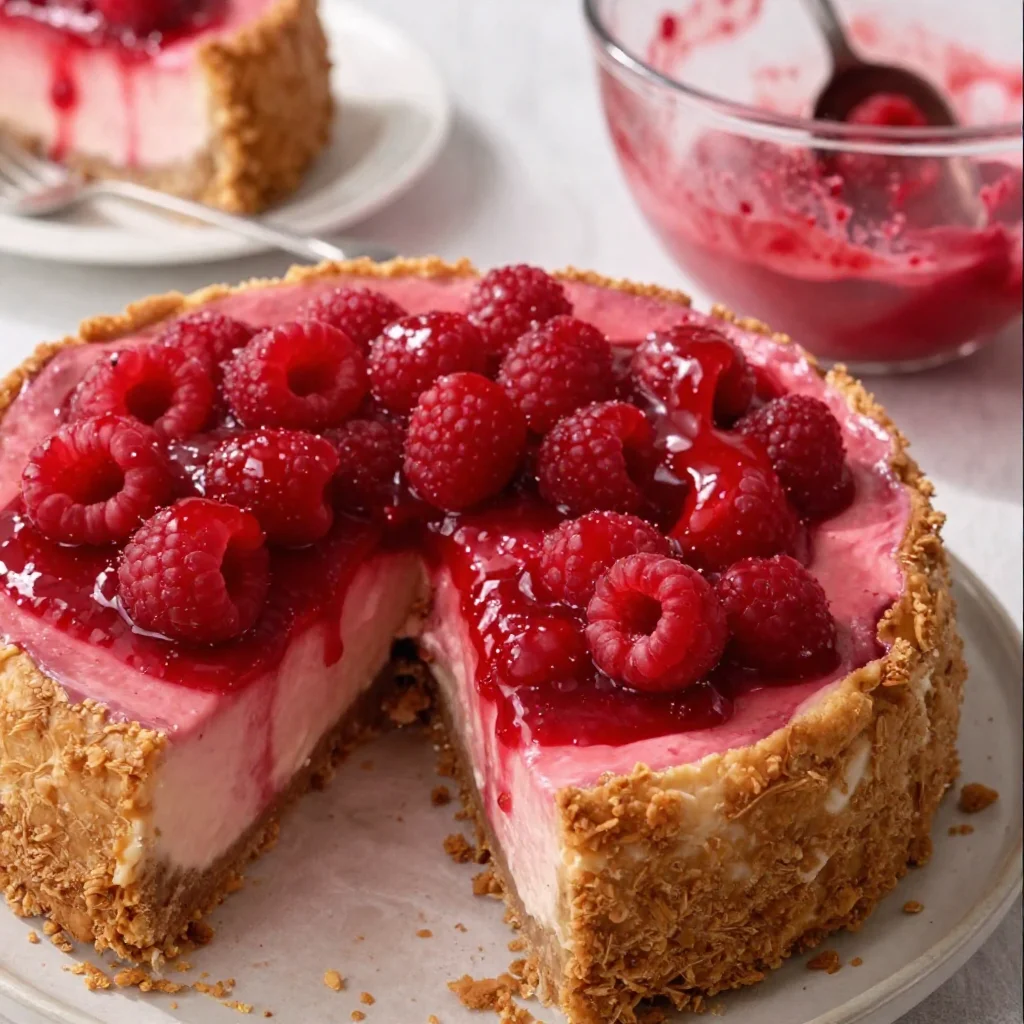
Easy Baked Raspberry Cheesecake
Easy Baked Raspberry Cheesecake: Your New Go-To Dessert
Welcome to my cozy kitchen! Today, we’re diving into a delightful treat that’s sure to steal the hearts of your friends and family: Easy Baked Raspberry Cheesecake. Oh, the joy of cheesecake—smooth, creamy, and oh-so-decadent! The best part? It’s surprisingly simple to whip up, even on those busy weeknights when you just want to treat yourself (or someone special).
For me, baking is more than just a task; it’s a form of self-expression and a way to connect with the people I love. There’s something magical about the smell of something sweet wafting from the oven, drawing everyone to the kitchen like bees to honey. As I’m prepping this cheesecake, I can practically hear the giggles and conversations bubbling and swirling around me, and that’s when I know it’s time to share a slice.
I want you to experience that same joy and love when you bake this cheesecake. With every layer and every step, we’ll turn simple ingredients into an unforgettable dessert that’s both elegant for entertaining and comforting for a cozy night in. So, grab your apron (mine might be a little messy, but that’s called character!), and let’s get started on this delicious journey together!
A Sweet Memory: My First Cheesecake
Ah, cheesecake—my love affair with this dessert dates back to childhood. I still vividly remember the first time I helped my mom make a cheesecake for a family gathering. I was about eight years old, perched on a kitchen stool, my little hands dripping in batter. I can still picture the moment when I excitedly blended the cream cheese, sugar, and eggs—all while my mom guided me with her patient words. We used a simple vanilla base, but what I remember most vividly was the feeling of joy and love that pulsed between us in that warm kitchen.
Years later, I found my way to using tangy raspberries to add a delightful twist. Raspberries have always been one of my favorites—sweet yet slightly tart, adding a perfect zing that brightens up any dish. Fast forward, and this Easy Baked Raspberry Cheesecake has become a family staple at gatherings, embodying those early lessons my mom taught me: laughter, patience, and sharing good food with the people you love.
Ingredients
Here’s a rundown of what you’ll need to create your own slice of cheesecake heaven:
-
Graham cracker crumbs (1 ½ cups)
A classic base for any cheesecake, the crispy texture provides a delightful crunch. If you’re trying to avoid glutin or want a healthier option, feel free to use almond flour or gluten-free cookies as a substitute. -
Unsalted butter (½ cup)
Melted butter holds the crust together and adds richness. If you’re looking for a dairy-free option, coconut oil works wonders here, giving a slightly different (but delightful) flavor. -
Cream cheese (24 oz, softened)
This is the star of our show! Make sure your cream cheese is at room temperature for a super smooth and creamy filling. Alternatively, ricotta cheese can be blended in for a lighter texture. -
Granulated sugar (1 cup)
The sugar balances out the rich creaminess. If you’re watching your sugar intake, you might try using coconut sugar or a sugar substitute, but keep in mind the flavor might differ a bit. -
Sour cream (1 cup)
Adds tanginess and creaminess! Greek yogurt is a fantastic alternative, and it’ll give you a slightly different flavor while keeping it creamy. -
Eggs (3 large)
These bind everything together and create that dreamy texture. For a vegan option, you can experiment with flax eggs (1 tablespoon ground flaxseed mixed with 2.5 tablespoons of water equals one egg). -
Vanilla extract (1 tablespoon)
A classic flavor enhancer! You can also use almond or peppermint extract for an exciting twist. -
Fresh raspberries (1 cup)
These beauties add flavor and color. If they’re out of season, frozen raspberries work just as well—just make sure to thaw and drain them before mixing! -
Optional: powdered sugar (for dusting)
Just a light dusting on top before serving adds the perfect finishing touch!
Step-by-Step Instructions
Let’s jump into the fun part! Grab your mixing bowls, and let’s create some dessert magic.
-
Preheat your oven to 325°F (160°C)
The first step is always the most important! Preheating ensures even baking and a perfectly set cheesecake. Trust me, there’s nothing worse than a cheesecake that hasn’t fully baked. -
Make the crust
- In a mixing bowl, combine graham cracker crumbs and melted butter until well mixed. You want it to feel like wet sand—moist enough to hold together. If it’s too crumbly, just add a little more melted butter.
- Press the mixture firmly into the bottom of a springform pan (9 inches works perfectly). Don’t be shy! You want a firm base—use the bottom of a measuring cup for an even finish.
-
Bake the crust
- Pop that crust into the preheated oven for 10 minutes until it’s lightly golden. This step is crucial—it gives the crust a nice crunch and locks in the flavor.
-
Prepare the filling
- In a large mixing bowl, add your softened cream cheese. Use a hand mixer or a stand mixer on medium speed to cream it until it’s super smooth! Scrape down the sides to ensure everything is blended.
- Gradually add the granulated sugar and mix until it’s fully incorporated. Can you smell that sweet goodness already?
- Beat in the sour cream, eggs, and vanilla extract one at a time, mixing just until combined after each addition. Remember, overmixing can lead to cracks in your cheesecake. Yikes!
-
Fold in the raspberries
- Gently fold in your fresh or thawed raspberries. You want to distribute them evenly without breaking them up too much—those little bursts of flavor are what makes this cheesecake special!
-
Pour the filling
- Carefully pour your luscious filling over the pre-baked crust, leveling it out with a spatula. This step is crucial—make it as smooth as possible for that picture-perfect finish!
-
Bake the cheesecake
- Bake in the oven for about 50-60 minutes until the edges are set but the center is still a little jiggly. It will continue to firm up as it cools.
-
Cool and chill
- When the cheesecake is done, turn off the oven and crack the oven door open, letting the cheesecake cool slowly. This will help prevent cracking! After about an hour, cover it and let it chill in the fridge for at least 4 hours (or overnight for best results).
-
Serve and enjoy
- Once chilled, remove from the springform pan, dust with powdered sugar if desired, and slice it up. Each piece should have that beautiful raspberry swirl—just like a work of art!
Serving Suggestions
When it comes to serving this gorgeous cheesecake, keep it simple to let the flavors shine. You can plate it alongside a small scoop of vanilla ice cream or whipped cream for that extra indulgence. Don’t forget to garnish with a few fresh raspberries on top and a sprig of mint for that gorgeous pop of color! Setting the scene at your dining table with soft lighting and cozy napkins will make it a memorable experience. Here’s to sweet moments with loved ones!
Recipe Variations
Now, if you’re feeling adventurous, here are a few variations to amp up your cheesecake game:
-
Chocolate Raspberry Cheesecake: Add half a cup of melted chocolate (dark or white) into the filling before baking for a decadent twist.
-
Lemon Zest: Incorporate the zest of one lemon into the filling for a refreshing citrusy flavor that pairs beautifully with raspberries.
-
Nutty Crust: Try using almond meal instead of graham cracker to create a gluten-free option, lending a unique flavor to your crust.
-
Swirled Raspberry Sauce: Drizzle raspberry sauce on top before baking for a stunning marbled effect.
-
Mixed Berries: Substitute or mix in blueberries or strawberries with raspberries for a delightful berry medley!
Chef’s Notes
Each time I make this Easy Baked Raspberry Cheesecake, I’m reminded of how versatile it is. My mom’s recipe has evolved over the years, adapting to my tastes and the seasons. Some days, I love adding hints of citrus, while others, I revel in chocolatey goodness. It’s all about experimenting with flavors! Plus, I have a little secret: if there’s any leftover cheesecake (which is rare!), it freezes beautifully! Just wrap individual slices tightly, and you’ll have instant treats ready whenever the craving strikes.
FAQs and Troubleshooting
Here are a few common questions you might have while making this cheesecake:
-
Why did my cheesecake crack?
Overmixing the batter or baking at too high a temperature can lead to cracks during cooling. Be gentle with the mixing and monitor the baking temperature closely! -
How do I know my cheesecake is done?
The edges should be set, while the center looks slightly jiggly. Remember that it continues to cook as it cools! -
Can I make this a day ahead?
Absolutely! In fact, it’s best served chilled overnight. Just cover it well to keep those flavors intact. -
What if I don’t have a springform pan?
You can use a regular round cake pan. Just make sure to line it with parchment paper for easy removal, or you can also convert this recipe into cupcake form for individual servings!
Nutritional Info
While I don’t typically dwell on the nitty-gritty of calories, here’s a quick glance at the estimated nutritional info for one slice (based on 12 servings):
- Calories: 300
- Total fat: 20g
- Saturated fat: 12g
- Carbohydrates: 30g
- Sugars: 18g
- Protein: 5g
With that said, enjoy in moderation—this cheesecake is all about celebrating special moments!
So there you have it, my friends! This Easy Baked Raspberry Cheesecake isn’t just a recipe; it’s a celebration of flavors, memories, and love. Each slice tells a story filled with warmth and joy, evoking laughter and connection. I can’t wait for you to try it and create your own memories in the kitchen. Happy baking, foodie friends!
Print
Easy Baked Raspberry Cheesecake
- Total Time: 80 minutes
- Yield: 12 servings
- Diet: Vegetarian
Description
A delightful and creamy raspberry cheesecake that’s simple to make and perfect for any occasion.
Ingredients
- Graham cracker crumbs (1 ½ cups)
- Unsalted butter (½ cup, melted)
- Cream cheese (24 oz, softened)
- Granulated sugar (1 cup)
- Sour cream (1 cup)
- Eggs (3 large)
- Vanilla extract (1 tablespoon)
- Fresh raspberries (1 cup)
- Powdered sugar (for dusting, optional)
Instructions
- Preheat your oven to 325°F (160°C).
- Combine graham cracker crumbs and melted butter until well mixed. Press the mixture into the bottom of a springform pan.
- Bake the crust in the oven for 10 minutes.
- Add softened cream cheese to a large mixing bowl and cream until smooth. Gradually add the granulated sugar and mix fully.
- Beat in the sour cream, eggs, and vanilla extract one at a time, mixing just until combined.
- Fold in the raspberries gently.
- Pour the filling over the pre-baked crust and level it out.
- Bake in the oven for about 50-60 minutes until the edges are set.
- Cool and chill the cheesecake for at least 4 hours in the fridge.
- Serve chilled, dusting with powdered sugar if desired.
Notes
This cheesecake can be made a day ahead for the best flavor. It can also be frozen for future treats.
- Prep Time: 20 minutes
- Cook Time: 60 minutes
- Category: Dessert
- Method: Baking
- Cuisine: American
Nutrition
- Serving Size: 1 slice
- Calories: 300
- Sugar: 18g
- Sodium: 400mg
- Fat: 20g
- Saturated Fat: 12g
- Unsaturated Fat: 8g
- Trans Fat: 0g
- Carbohydrates: 30g
- Fiber: 1g
- Protein: 5g
- Cholesterol: 80mg
Keywords: cheesecake, raspberry, dessert, baking, easy recipe




