
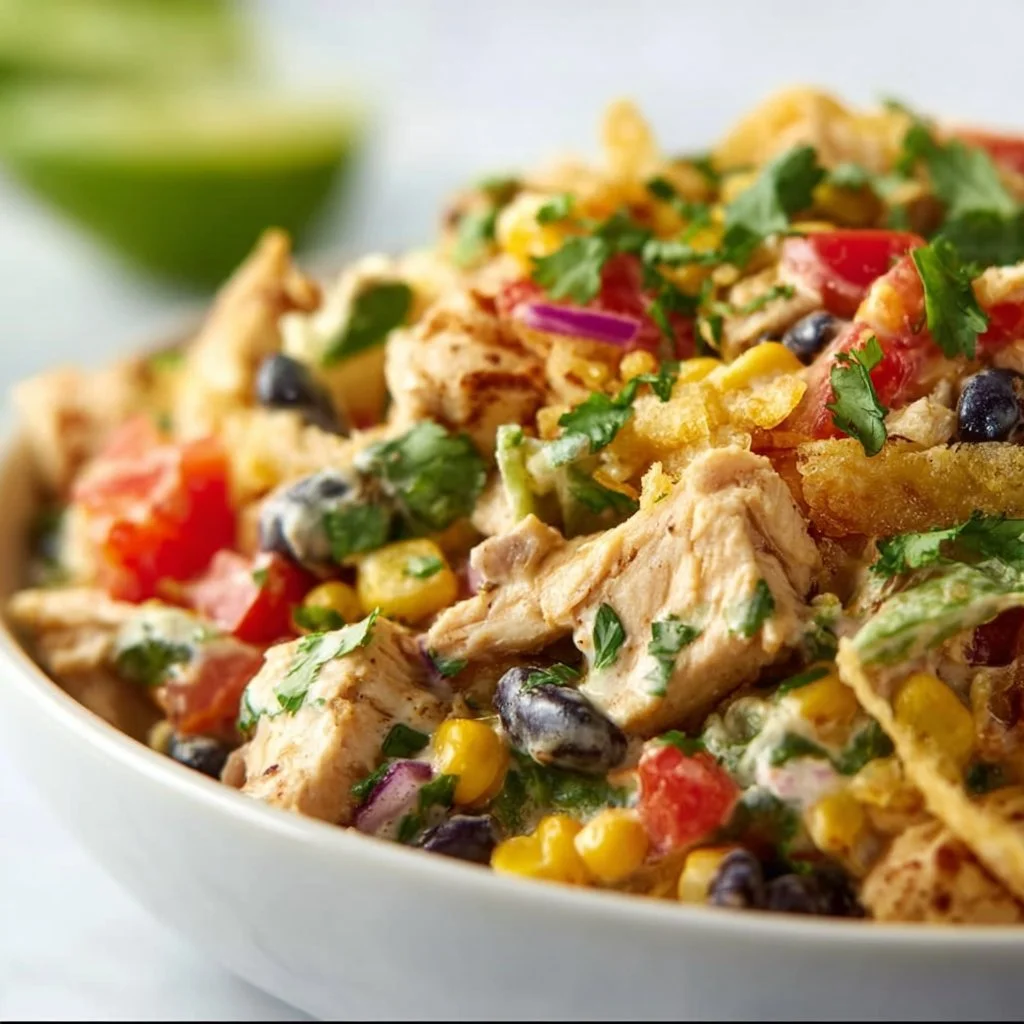
Southwest Chicken Salad
# Southwest Chicken Salad: A Flavorful Fiesta in a Bowl!

## Introduction

Hey there, wonderful foodies! Welcome back to my cozy corner of the culinary world. Today, we’re diving into a vibrant dish that’s not only bursting with color but also loaded with flavor — the Southwest Chicken Salad! This salad is the ultimate culmination of refreshing ingredients and zesty spices, making it perfect for a sunny lunch, a backyard barbecue, or even a light dinner during busy weeknights. It’s a bowl full of joy!

Now, you might be thinking: “What’s so special about a salad?” But this isn’t just any salad, my friends. Think succulent grilled chicken, crunchy bell peppers, creamy avocado, and a spicy salsa dressing that will make your taste buds do a happy dance. Yes, it’s that good! Plus, the best part? It comes together in a snap—meaning you can have a delicious, healthy meal ready in no time. So grab your apron and prepare for a cooking adventure that promises to tantalize your palate and brighten your day!

Imagine this: It’s a warm summer evening, and you’ve gathered friends and family around for dinner. The laughter is flowing, and the aroma of grilled chicken fills the air. The best stories are shared over meals, and this Southwest Chicken Salad is sure to spark conversation and create memories. Everything from the juicy chicken to the crisp vegetables and creamy dressing comes together to not just create a meal, but an experience.

Can you already feel the excitement bubbling? I thought so! Let’s get started on this flavorful journey. I’ll walk you through the steps, share some tips from my kitchen as we chop and mix, and by the end, you’ll not only have a delightful salad but also a smile on your face and a spark of creativity for your next cooking endeavor. Ready? Let’s do this!

## Personal Story

I’ll never forget the first time I made a Southwest Chicken Salad. It was during a particularly scorching summer, and I had friends visiting from out of town. We were all so excited to catch up, but I quickly realized that cooking something hearty would be too much given the heat! I rummaged through my fridge and pantry, finding remnants of chicken from a previous dinner, some veggies that needed to be used, and an avocado that was just begging to be incorporated.

That day, as I tossed everything together in a big bowl, I felt an overwhelming sense of satisfaction. The vibrant colors of red, yellow, and green literally jumped out at me, and as I drizzled my newly concocted spicy dressing over the top, I knew I had stumbled onto something magical. The laughter of my guests echoed in the background as we all dug in—what was meant to be a quick meal turned into a feast of flavors and a long-lasting memory. Ever since, this Southwest Chicken Salad has been a staple in my kitchen, reminding me of the power of simple ingredients and the joy of sharing good food with even better company.

## Ingredients

Let’s break down the components that make this Southwest Chicken Salad a home run!

- **Chicken Breast**: The star of the show! I recommend using boneless, skinless chicken breast for a leaner option. Substitute with grilled tofu or black beans for a vegetarian twist.

- **Olive Oil**: This liquid gold not only coats our chicken for grilling but also enhances the overall flavor. Feel free to use avocado oil or sunflower oil for a neutral option.

- **Bell Peppers** (Red and Yellow): These add a sweet crunch and bright color. If you prefer, swap them with cherry tomatoes or cucumbers for a different texture.

- **Red Onion**: A subtle crunch and a zing! For a milder flavor, soak the onion slices in cold water for 10 minutes before adding them to your salad.

- **Avocado**: Creamy and delicious! Look for ripe avocados that yield slightly to pressure. If you don’t have any, a handful of nuts or seeds can add a delightful crunch.

- **Corn**: Sweet and crunchy, corn adds depth. Canned or frozen (thawed) corn works just as well. If you're avoiding corn, try adding quinoa for added texture.

- **Black Beans**: They bring protein and fiber to the dish. Canned black beans work perfectly, but be sure to rinse and drain them first!

- **Fresh Cilantro**: This herb adds a fresh note. Don’t love cilantro? Parsley or green onions make excellent substitutes.

- **Lime**: Freshly squeezed lime juice brings brightness! If you're out of limes, lemon juice makes a great alternative.

- **Spices (Cumin & Chili Powder)**: These spices give our salad a Southwest flair. If you want to kick the heat up, add a dash of cayenne pepper.

- **Greek Yogurt or Sour Cream**: This is for our dressing! Greek yogurt gives a creamy texture with added protein. You can omit it for a lighter dressing or use dairy-free yogurt options.

- **Salsa**: The secret sauce! Use your favorite store-bought salsa or whip up your own with diced tomatoes, jalapeños, and more!

## Step-by-Step Instructions

Now that you have all your ingredients lined up, let’s dive into cooking! Don’t worry; this is going to be super straightforward and fun.

1. **Prep the Chicken**: Start by seasoning your chicken breast with olive oil, cumin, chili powder, salt, and pepper. Use your hands for this part—it’s much easier to get the spices evenly distributed. After seasoning, let the chicken rest for about 10 minutes. If you have time, marinating it for a few hours or overnight can enhance the flavor even more!

2. **Grill the Chicken**: Preheat your grill or grill pan over medium-high heat. Once hot, add the chicken and grill for about 6-7 minutes on each side, or until the internal temperature reaches 165°F (75°C). You want that gorgeous grill mark! No grill? No problem! A skillet works just as well.

3. **Slice the Chicken**: Once cooked, transfer your chicken to a cutting board to rest for a few minutes. This allows the juices to redistribute, keeping it juicy and tender. After resting, slice it thinly against the grain.

4. **Chop and Dice**: While the chicken is resting, it’s time to chop! Dice the bell peppers, slice the red onion, cube the avocado, and rinse your beans. Don’t forget to add that fresh cilantro—chop it coarsely to keep its vibrant flavor!

5. **Make the Dressing**: In a small bowl, mix Greek yogurt (or sour cream) with salsa to create a creamy dressing! You can adjust the ratio based on how creamy you want it. Add a splash of lime juice for that extra zing!

6. **Combine Everything**: In a large mixing bowl, combine the grilled chicken, bell peppers, red onion, avocado, corn, and black beans. Toss gently to combine. Drizzle with your dressing and give it another gentle toss—just enough so that everything is coated and mixed without squishing the avocados!

7. **Taste and Adjust**: Now for the fun part! Grab a fork and taste your creation. Need more lime juice or spice? Adjust it here. The beauty of cooking is making the dish your own!

## Serving Suggestions

Now that your Southwest Chicken Salad is ready and looking vibrant, it’s time to serve it up! Topping it with extra avocado slices, a sprinkle of feta cheese, or a handful of tortilla strips can add a lovely finishing touch. Serve in a beautiful bowl or platter to showcase those colors. This salad can also be served in individual bowls or even wrapped in a tortilla for a satisfying wrap!

## Recipe Variations

Looking to switch things up a bit? Here are some fun variations to keep things exciting:

- **Quinoa Southwest Chicken Salad**: Add cooked quinoa to the mix for an extra protein boost and a nutty flavor.

- **Spicy Chicken Twist**: Add jalapeños or switch to a spicy salsa to turn up the heat!

- **Shrimp or Fish Option**: For seafood lovers, grilled shrimp or white fish can replace the chicken for a lighter, yet equally flavorful salad.

- **Vegan Delight**: Replace the chicken with grilled portobello mushrooms and use a vegan yogurt for the dressing.

- **Cheesy Spin**: Add shredded cheese (like pepper jack or cheddar) for a creamy flavor.

## Chef’s Notes

It’s always fascinating how recipes evolve in the kitchen, isn’t it? Over the years, I’ve played with this recipe so much. I remember a time when I threw in leftover roasted sweet potatoes, and it added such a delightful sweetness that it became a regular in my summer rotation. One mishap, however, was when I grabbed the chili powder instead of cinnamon (oops!). The resulting salad was unexpectedly spicy, but we laughed about it and edited the recipe! It's those little moments that keep cooking joyous and lighthearted.

## FAQs and Troubleshooting

- **Q: My chicken turned out dry. What went wrong?**
  A: Dry chicken often means it was overcooked. Always use a meat thermometer; 165°F is your sweet spot. Letting the chicken rest is equally important to keep it juicy.

- **Q: Can I make this salad ahead of time?**
  A: Absolutely! You can prep all ingredients and store them separately. Keep the dressing aside until you’re ready to serve to avoid sogginess.

- **Q: What if I don’t like black beans?**
  A: No worries! You can substitute them with chickpeas or just skip them altogether. You’ll still have a fantastic salad.

- **Q: How do I store leftovers?**
  Store in an airtight container in the fridge for up to two days. The flavors will meld beautifully, just make sure to add fresh avocado just before serving.

## Nutritional Info

This salad isn’t just delicious but also nutritious! Packed with protein from the chicken and black beans, healthy fats from the avocado and olive oil, and a multitude of vitamins from the veggies, it’s a balanced meal. Each serving offers a great mix of nutrients without overwhelming calories, making it perfect for anyone looking for a wholesome option!

---

And there you have it—a scrumptious Southwest Chicken Salad that’s equal parts easy and exciting! I hope this recipe brings as much joy to your kitchen as it has brought to mine. Happy cooking, and remember—every meal is a chance to create and connect!
Southwest Chicken Salad
- Total Time: 30 minutes
- Yield: 4 servings 1x
- Diet: Gluten-Free
Description
A flavorful salad loaded with grilled chicken, fresh vegetables, and a zesty dressing, perfect for a warm day or a light dinner.
Ingredients
- 1 lb Boneless, skinless chicken breast
- 2 tbsp Olive oil
- 1 Red bell pepper, diced
- 1 Yellow bell pepper, diced
- 1/2 Red onion, thinly sliced
- 1 Avocado, diced
- 1 cup Corn, canned or frozen
- 1 can Black beans, rinsed and drained
- 1/4 cup Fresh cilantro, chopped
- Juice of 1 Lime
- 1 tsp Cumin
- 1 tsp Chili powder
- 1/2 cup Greek yogurt or sour cream
- 1 cup Salsa
Instructions
- Prep the chicken by seasoning with olive oil, cumin, chili powder, salt, and pepper; let it rest for 10 minutes.
- Grill the chicken on a preheated grill for 6-7 minutes on each side until fully cooked.
- Slice the chicken after resting to retain juices.
- Chop the bell peppers, red onion, avocado, and rinse the black beans.
- Make the dressing by mixing Greek yogurt with salsa and lime juice.
- Combine all chopped ingredients and chicken in a large bowl, then gently toss with the dressing.
- Taste and adjust seasoning as needed.
Notes
You can serve the salad in a bowl, on a plate, or rolled in a tortilla for a wrap. For a vegan option, substitute chicken with grilled tofu.
- Prep Time: 15 minutes
- Cook Time: 15 minutes
- Category: Salad
- Method: Grilling
- Cuisine: Mexican
Nutrition
- Serving Size: 1 serving
- Calories: 350
- Sugar: 4g
- Sodium: 300mg
- Fat: 18g
- Saturated Fat: 3g
- Unsaturated Fat: 11g
- Trans Fat: 0g
- Carbohydrates: 27g
- Fiber: 8g
- Protein: 24g
- Cholesterol: 70mg
Keywords: southwest chicken salad, healthy salad, grilled chicken salad, summer salad, meal prep
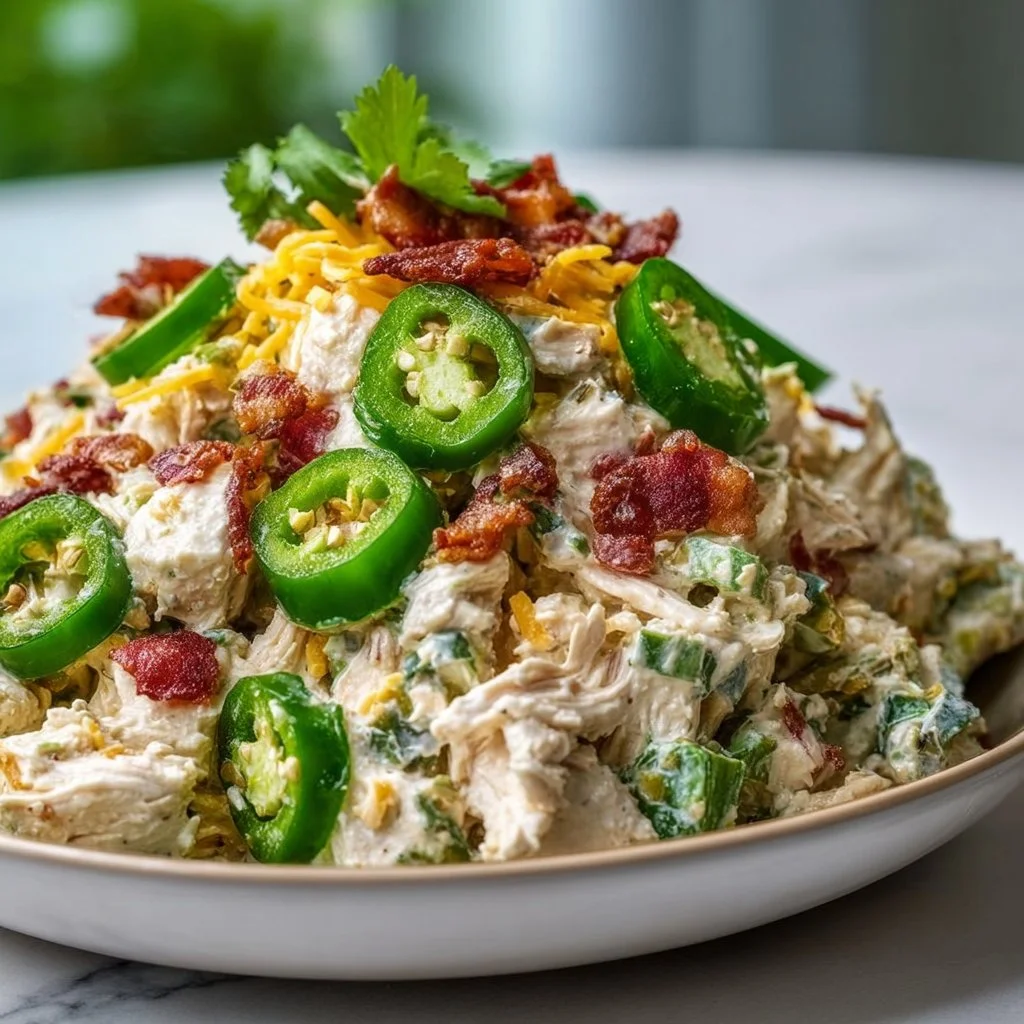
High Protein Jalapeno Popper Chicken Salad Recipe – Low Carb Chicken Salad with Bacon, Cheese & Jalapeños
High Protein Jalapeno Popper Chicken Salad: A Low Carb Delight!
Welcome back to my cozy kitchen, friends! Today, I have something really exciting in store for you—my High Protein Jalapeno Popper Chicken Salad! If you love the spicy zing of jalapeno poppers but want a healthier, low-carb version that’s perfect for any occasion, you’re in for a treat. This salad is not only bursting with flavor but also packed with protein, making it a satisfying meal that won’t derail your healthy eating goals.
Imagine this: it’s a sunny afternoon, and you’re gathering with friends for a casual lunch. The grill is fired up, and while you’re busy flipping burgers and searing veggies, you want something incredibly easy to whip up that everyone will rave about. Enter this chicken salad! It’s a delightful blend of tender chicken, zesty jalapeños, smoky bacon, creamy cheese, and just the right amount of crunch. Your guests will be singing your praises, asking for the recipe even before they finish their first bite!
But more than just a delicious dish, this salad is packed with memories for me. I grew up in a family where gatherings were centered around great food. My mother would often bring her spin on jalapeno poppers to parties—crisp bacon, creamy cheese, and spicy jalapeños lovingly stuffed inside a tender pepper. It was a hit every time! Inspired by those memories, I created this salad as a tribute to those lively family get-togethers. So, let’s get cooking, and I’ll share all the details you need to recreate this fabulous dish in your own kitchen!
Personal Story
One of my fondest kitchen memories revolves around my late grandmother, who was the queen of comfort food in our family. Whenever the family got together, you could almost always find her whipping up her famous jalapeño poppers. I still remember the laughter and stories shared around the table while those poppers baked in the oven, filling the air with an irresistible smoky aroma. Naturally, they would disappear almost as soon as they were served!
But one time, she decided to experiment and turned her beloved poppers into a salad. I’ll never forget the look on everyone’s faces when she presented it—half surprised, half intrigued! Taking the risk to change tradition for something new was such a bold move, and believe it or not, that salad became a hit! Fast forward to today, I’ve put my own spin on that nostalgic recipe, turning it into a high-protein, low-carb delight that brings comfort and joy, just like Grandma used to.
Ingredients
Here’s what you’ll need to make this delectable High Protein Jalapeno Popper Chicken Salad:
-
2 cups cooked chicken, shredded
You can use rotisserie chicken for convenience or cook your own. Shredded grilled chicken breast also works well! -
1/2 cup cream cheese, softened
This is the creamy element that brings the salad together! If you want a lighter option, you can substitute with Greek yogurt, which adds protein and tanginess. -
1/2 cup mayonnaise
For that luscious, creamy texture. Opt for avocado oil mayo for a healthier choice—it’s just as tasty! -
1/2 cup bacon, cooked and crumbled
Bacon adds a delightful crunch and smoky flavor. Use turkey bacon for a lower-fat option, or skip it entirely for a vegetarian version (just add extra seasoning!). -
1/2 cup jalapeños, diced (fresh or pickled)
This is where the spice comes in! Fresh jalapeños give a kick, while pickled ones add a tangy flavor. Use banana peppers as a milder substitute if you prefer less heat. -
1 cup cheddar cheese, shredded
I like sharp cheddar for its robust flavor, but feel free to mix it up with pepper jack for an extra spicy touch or mozzarella for a milder flavor. -
1/4 cup green onion, sliced
These add a fresh, mild onion flavor. Fresh chives work beautifully in a pinch! -
Salt and pepper to taste
Season appropriately! Smoked paprika is also a lovely addition for a depth of flavor.
Ingredient Insight
Choosing quality ingredients can elevate your dish. For chicken, go for organic or free-range when possible for better flavor! And remember, the beauty of cooking is that you can adapt ingredients based on what you have on hand or what you prefer.
Step-by-Step Instructions
-
Prep Your Chicken: Start by shredding your cooked chicken into bite-sized pieces. The simplicity of this step is that you can easily do it with two forks or your hands for a more personal touch! If you don’t have pre-cooked chicken available, poaching some chicken breasts in salted water works beautifully too. Just remember to let them cool before shredding!
-
Cook Your Bacon: In a skillet over medium heat, cook your bacon until crispy. Once done, transfer it to a paper towel-lined plate to absorb excess grease and cool before crumbling into pieces. Here’s a little hack: if you want perfectly crispy bacon without much fuss, try baking it in the oven. Spread it out on a foil-lined baking sheet and cook at 400°F for about 20 minutes—you’ll thank me later!
-
Make the Dressing: In a large mixing bowl, combine the softened cream cheese and mayonnaise. Use a hand mixer or a whisk to blend them until you reach a smooth consistency. This creamy base is what makes the salad luscious!
-
Add the Mix-Ins: Fold in shredded chicken, crumbled bacon, diced jalapeños, shredded cheddar cheese, and sliced green onion. As you mix these ingredients together, don’t hesitate to taste as you go. Adjust the seasonings (salt, pepper, and a touch of smoked paprika) to your liking. The key here is to get everything evenly coated with that creamy dressing!
-
Chill and Serve: Once everything is thoroughly mixed, cover your bowl with plastic wrap or a lid and let the salad chill in the fridge for at least 30 minutes. This allows the flavors to meld beautifully. Trust me, waiting is the hardest part, but it’s so worth it!
-
Plating Tips: When you’re ready to serve, scoop generous portions onto crunchy lettuce leaves or in a wrap for a fun meal. Garnish with extra bacon bits or a sprinkle of cheese on top for that aesthetic touch.
Pro Tip:
If you’re in a rush, you can skip the chilling step, but just know that allowing the flavors to meld together will take your salad to the next level!
Serving Suggestions
This High Protein Jalapeno Popper Chicken Salad is so versatile! Serve it nestled in halved bell peppers or wrapped in large lettuce leaves for a fresh crunch. You could even scoop it onto whole-grain crackers for a fantastic appetizer! And let’s not forget about serving it on top of a bed of mixed greens—perfect for brightening up your plate and adding some extra fiber.
Recipe Variations
Feeling creative? Here are a few adaptations you can try:
-
Crispy Mexican Twist: Add black beans and corn for a burrito-style fun twist.
-
Creamy Avocado Upgrade: Fold in diced avocado for a creamy texture and healthy fat.
-
Keto-friendly Option: Skip the bacon and use unsweetened coconut flakes for a tropical vibe without compromising on flavor!
-
Herbes de Provence: Incorporate herbs like thyme or rosemary for an aromatic touch and an added layer of flavor.
-
Mediterranean Flair: Swap out the jalapeños for olives and sundried tomatoes for a Mediterranean-themed salad—hello, sundried tomato and basil flavor profile!
Chef’s Notes
As with any recipe, feel free to adjust based on what your taste buds are craving! This salad is super forgiving, and one of my favorite things is that it has evolved over time thanks to feedback from my family and friends who have tried it. Each time, someone would suggest something new, leading me to discover fabulous twists that just gel perfectly together.
Also, I remember a time when I mistakenly added garlic powder instead of onion powder. It turned out to be a happy accident, and surprisingly, it resonated with everyone tasting it. So don’t be afraid to improvise—you might just surprise yourself!
FAQs and Troubleshooting
-
Can I use canned chicken instead of cooking my own?
Yes, canned chicken works just fine! Just make sure to drain and rinse it well before shredding. -
What if my salad is too salty?
If your salad turns out too salty, add more cream cheese and mayonnaise to balance it out. You can also increase the volume by adding in some chopped lettuce or vegetables. -
How can I store leftovers?
Store any leftovers in an airtight container in the fridge. It should stay fresh for about 3-4 days. Just give it a good stir before serving again! -
Can I freeze this salad?
I don’t recommend freezing this salad as the creaminess may change in texture. It’s best enjoyed fresh!
Nutritional Info
While not mandatory, here’s a rough breakdown to keep you informed (per serving, based on 4 servings total):
- Calories: Approximately 350
- Protein: 30g
- Carbohydrates: 6g
- Fat: 24g
- Fiber: 1g
And there you have it! Your High Protein Jalapeno Popper Chicken Salad awaits—a delicious tribute to the flavors we love and the comfort of shared meals. Enjoy making it as much as I enjoy sharing it with you! Happy cooking!
Print
High Protein Jalapeno Popper Chicken Salad
- Total Time: 30 minutes
- Yield: 4 servings 1x
- Diet: Low Carb
Description
A low-carb, protein-packed chicken salad that brings the flavors of jalapeno poppers into a healthy dish.
Ingredients
- 2 cups cooked chicken, shredded
- 1/2 cup cream cheese, softened
- 1/2 cup mayonnaise
- 1/2 cup bacon, cooked and crumbled
- 1/2 cup jalapeños, diced (fresh or pickled)
- 1 cup cheddar cheese, shredded
- 1/4 cup green onion, sliced
- Salt and pepper to taste
Instructions
- Prep your chicken: Start by shredding your cooked chicken into bite-sized pieces.
- Cook your bacon: In a skillet over medium heat, cook your bacon until crispy.
- Make the dressing: In a large mixing bowl, combine the softened cream cheese and mayonnaise.
- Add the mix-ins: Fold in shredded chicken, crumbled bacon, diced jalapeños, shredded cheddar cheese, and sliced green onion.
- Chill and serve: Cover your bowl with plastic wrap and let the salad chill in the fridge for at least 30 minutes.
- Plate and serve: Scoop servings onto crunchy lettuce leaves or in a wrap for a fun meal.
Notes
If you’re in a rush, you can skip the chilling step, but allowing the flavors to meld together will enhance the dish.
- Prep Time: 15 minutes
- Cook Time: 15 minutes
- Category: Salad
- Method: Mixing
- Cuisine: American
Nutrition
- Serving Size: 1 serving
- Calories: 350
- Sugar: 2g
- Sodium: 600mg
- Fat: 24g
- Saturated Fat: 10g
- Unsaturated Fat: 5g
- Trans Fat: 0g
- Carbohydrates: 6g
- Fiber: 1g
- Protein: 30g
- Cholesterol: 85mg
Keywords: chicken salad, jalapeno popper, protein salad, low carb recipe
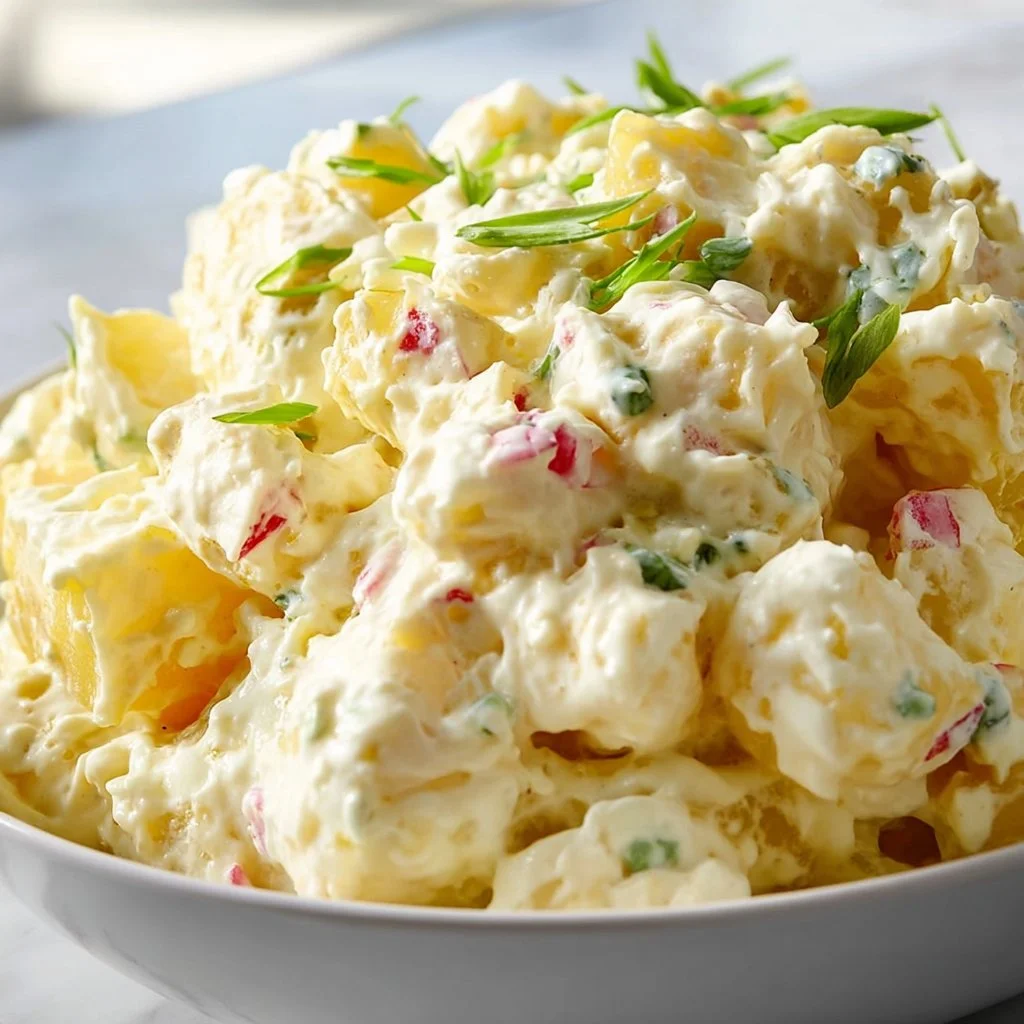
Potato Salad Recipe
The Ultimate Potato Salad Recipe That Brings Everyone Together
Introduction
Hello, food friends! Welcome back to my cozy kitchen. I’m so excited to share one of my absolute favorite recipes with you today: the Ultimate Potato Salad! This isn’t your everyday potato salad; we’re talking about a dish that’s been elevated to a party centerpiece, a summer BBQ staple, and even a comforting side for that cozy family gathering. You know the one—that dish that brings everyone to the table and sparks laughter and stories? Yep, that’s this potato salad.
I remember my first experience with potato salad. It was a hot summer day, the sun was shining, and we had a big family barbecue in the backyard. Grandma was at the helm, armed with her trusty mixing bowl and a smile that could warm your soul. As she whipped up her infamous potato salad, it was like watching a culinary magician. The aroma of fresh herbs, crisp veggies, and vibrant mustard filled the air, and I was hooked. Each bite was creamy, tangy, and had just the right amount of crunch. Fast forward to today, and I’ve put my own twist on it, creating a recipe that combines nostalgia with modern flavors.
This potato salad is simple enough for a weeknight dinner yet fancy enough for your holiday table. We’ll be using fresh ingredients and a few unexpected surprises that will make your taste buds sing. So, whether you’re a kitchen novice or a seasoned pro, let’s roll up our sleeves and dive into this delicious, heart-warming adventure together!
Personal Story
You know, I often think about the stories behind the meals that mean the most to us, and for me, potato salad is wrapped up in family bonding moments. One summer, we had an epic potluck with all the relatives—shouting cousins and giggling aunts everywhere. Grandma insisted on bringing her potato salad, and she was determined to win the "Best Dish" contest. The pressure was on!
As we gathered around the table, I watched everyone’s eyes light up when they saw Grandma’s creation. It was this beautiful blend of Yukon gold potatoes, fresh herbs, and a touch of her whimsical ingredient—a secret dash of dill pickles! As people savored her dish, laughter erupted, and stories started flying around the table like confetti. I’ll never forget how that potato salad broke the ice and brought everyone closer, reminding us all that food is truly a bridge that connects hearts. Every family has a version of this dish, and now, I can’t wait for you to create lasting memories with your loved ones using my take on Grandma’s delightful recipe!
Ingredients
Here’s what you’ll need for the Ultimate Potato Salad:
-
Yukon Gold Potatoes: These creamy spuds are my go-to for potato salad. Their buttery flavor and smooth texture make this dish irresistible. Plus, they hold up well, ensuring no mushy mess! Substitute with red potatoes for a slightly firmer bite.
-
Mayonnaise: The creamy star of the show! Use a good quality mayo for the best flavor. If you’re looking for a lighter option, Greek yogurt or a vegan mayo can make a delicious substitute.
-
Dijon Mustard: This adds a nice tang and depth of flavor. It’s a game-changer! If you’re sensitive to mustard, yellow mustard works well too, or – for something different – try a tablespoon of vinegar.
-
Lemon Juice: Freshly squeezed is best and adds a bright, zesty kick that cuts through the creaminess perfectly. If you don’t have fresh lemons, a splash of vinegar can work in a pinch.
-
Celery: For that crisp crunch! It adds a refreshing bite and a pop of color. If you’re not a fan of celery, chopped bell peppers or carrots can offer similar crunch with their own flavor twist.
-
Red Onion: This gives the potato salad its kick! Apple cider vinegar-soaked onions can substitute if you’re looking for a milder flavor.
-
Fresh Dill: It’s a must for that classic potato salad flavor! If you can’t find fresh, dried dill works, but you’ll need much less—about a teaspoon.
-
Salt and Pepper: Essential for seasoning! A little salt boosts all the flavors, and freshly cracked black pepper adds a nice peppery kick.
These simple ingredients come together to create a potato salad that’s creamy, tangy, and will surely steal the show at your next gathering!
Step-by-Step Instructions
Let’s get cooking! Follow these simple steps and keep an eye out for my chef hacks along the way:
-
Prep the Potatoes: Start by washing your Yukon gold potatoes. You can peel them or leave the skins on for extra texture and nutrients—personal choice here! Cut them into equal-sized chunks, about 1–2 inches, for even cooking.
Chef Hack: Do you want to save time? You can boil the potatoes whole and chop them afterward! Just ensure they’re fork-tender.
-
Boil the Potatoes: Place the potatoes in a large pot, cover them with cold water, and add a generous pinch of salt. Bring to a boil and let ’em cook for 12–15 minutes until tender but not mushy—nobody likes mushy potato salad! Test by poking with a fork; it should go in easily but have a little resistance.
-
Cool the Potatoes: Once cooked, drain the potatoes and let them cool on the counter. This step is crucial—if they’re too hot when you mix in the mayo, it can turn into a gloppy mess!
Chef Hack: For even faster cooling, spread them out on a baking sheet.
-
Make the Dressing: In a large mixing bowl, combine mayo, Dijon mustard, lemon juice, salt, and pepper. Give it a good mix until it’s creamy and smooth.
-
Chop the Veggies: While the potatoes are cooling, finely chop your celery, red onion, and fresh dill. You want everything to be bite-sized and evenly distributed throughout the salad.
-
Combine: Once the potatoes are cool, gently fold them into the dressing along with the chopped veggies. Be careful not to mash them; we want those lovely chunks of potato to shine!
-
Taste Test: This is my favorite part! Give your potato salad a taste, and adjust the seasoning as needed. Need more zing? Add more lemon juice or salt; craving even more creaminess? Fold in a bit more mayo.
-
Chill: Cover the potato salad and let it chill in the fridge for at least 1 hour before serving. This rest time allows the flavors to meld beautifully.
Chef Hack: If you can, make this the day before! It gets better overnight!
-
Serve: When ready to serve, give it a gentle toss and top with a sprinkle of fresh dill for a pop of color.
Serving Suggestions
Serve the Ultimate Potato Salad chilled, either in a large bowl or for a more elegant presentation, scoop it into individual serving dishes. Garnish with a pinch of paprika or more dill on top to add flair. Pair it with grilled meats, sandwiches, or enjoy it by itself as a satisfying bite!
Recipe Variations
- Bacon & Chive: Add crispy cooked bacon and chopped chives for extra flavor and crunch!
- Mediterranean Twist: Toss in some olives, cherry tomatoes, and feta cheese for a fresh, tangy bite.
- Vegan Delight: Swap mayo for avocado or vegan mayo, and use chickpeas instead of potatoes for a protein-rich alternative.
- Spicy Kick: Add diced jalapeños or a dash of hot sauce for those who like it a little hot!
- Herb Blend: Experiment with different herbs like parsley, tarragon, or basil for a unique flavor profile.
Chef’s Notes
Potato salad is one of those fantastic recipes that can evolve with your tastes and the seasons. Over the years, I’ve added and tweaked many versions, but the heart of it always remains the same: comfort food. One funny memory I have is attempting to impress a friend by infusing my potato salad with an array of spices—only to find that they were not a fan of "spicy" salad. Let’s stick to flavors that make people feel warm and satisfied!
As you create your own versions, don’t forget to make this recipe your own. It’s all about the love you put into it (and maybe a bit of trial and error)!
FAQs and Troubleshooting
1. My potato salad is too mushy. What went wrong?
- It sounds like the potatoes may have been overcooked. For the best texture, test them with a fork and remove them from heat before they turn into mush.
2. Can I make this dish ahead of time?
- Absolutely! In fact, it tastes better after a night in the fridge as the flavors meld together. Just be sure to give it a good stir before serving!
3. What can I use if I don’t have fresh dill?
- No worries! Dried dill works well; just use about 1/3 of the amount for the best balance. Fresh herbs like parsley or chives can also be great alternatives.
4. Can I add other veggies?
- Definitely! Chopped bell peppers, corn, or even peas can add a pop of color and flavor. Get creative!
Nutritional Info (Optional)
This potato salad can serve as a hearty side dish, providing essential nutrients from the potatoes and veggies. Here’s a rough breakdown per serving:
- Calories: 200
- Protein: 3g
- Carbohydrates: 30g
- Fats: 10g
- Fiber: 2g
Feel free to adjust portions for a lighter version by reducing mayo or potatoes!
And there you have it: the Ultimate Potato Salad to help you create memories in your kitchen! I can’t wait for you to try this recipe and see the joy it brings to your gatherings. Happy cooking, my friends! 🍽️
Print
The Ultimate Potato Salad
- Total Time: 30 minutes
- Yield: 8 servings 1x
- Diet: Vegetarian
Description
A creamy, tangy potato salad that brings everyone together, perfect for summer BBQs and family gatherings.
Ingredients
- 3 lbs Yukon Gold Potatoes, cubed
- 1 cup mayonnaise
- 1/4 cup Dijon Mustard
- 2 tbsp Lemon Juice
- 1 cup Celery, chopped
- 1/2 cup Red Onion, finely chopped
- 1/4 cup Fresh Dill, chopped
- Salt and Pepper, to taste
Instructions
- Prep the Potatoes: Wash and cut potatoes into equal-sized chunks, about 1–2 inches.
- Boil the Potatoes: Place potatoes in a pot, cover with cold water, add salt, and bring to a boil. Cook for 12–15 minutes until tender.
- Cool the Potatoes: Drain and let cool on a counter.
- Make the Dressing: In a bowl, mix mayo, Dijon mustard, lemon juice, salt, and pepper.
- Chop the Veggies: Finely chop celery, red onion, and dill.
- Combine: Fold cooled potatoes into the dressing with chopped veggies.
- Taste Test: Adjust seasoning as needed.
- Chill: Cover and chill for at least 1 hour.
- Serve: Toss before serving, garnish with fresh dill.
Notes
This dish tastes better if made a day in advance.
- Prep Time: 15 minutes
- Cook Time: 15 minutes
- Category: Side Dish
- Method: Boiling
- Cuisine: American
Nutrition
- Serving Size: 1 cup
- Calories: 200
- Sugar: 1g
- Sodium: 300mg
- Fat: 10g
- Saturated Fat: 1g
- Unsaturated Fat: 9g
- Trans Fat: 0g
- Carbohydrates: 30g
- Fiber: 3g
- Protein: 3g
- Cholesterol: 10mg
Keywords: potato salad, summer recipes, BBQ side dish, creamy potato salad, family recipes
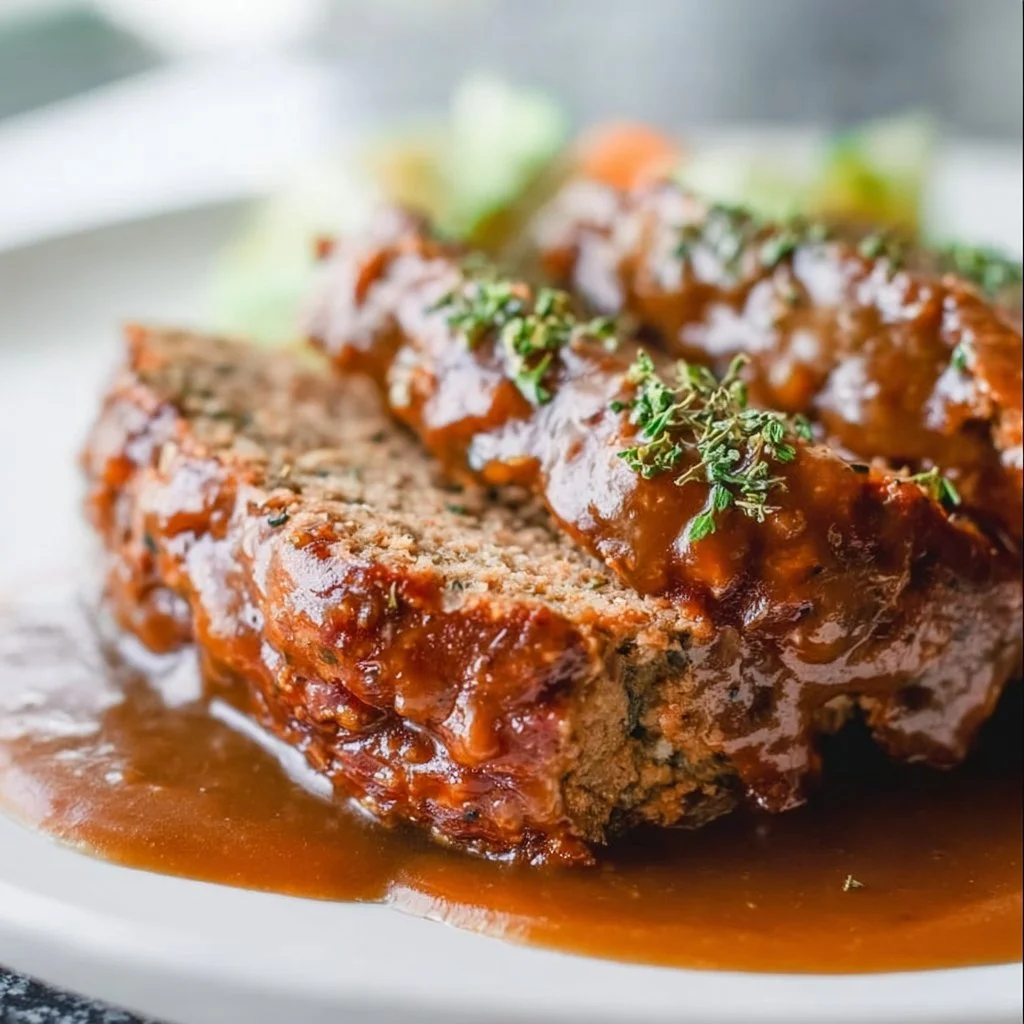
Meatloaf with Brown Gravy
The Ultimate Meatloaf with Rich Brown Gravy: A Cozy Classic
Welcome to my cozy kitchen, friends! Today, we’re diving headfirst into the heartwarming world of Meatloaf with Brown Gravy. This classic dish is one that evokes feelings of nostalgia, comfort, and home — and I can almost smell the savory aroma wafting through the air just writing about it!
Meatloaf isn’t just food; it’s a celebration of togetherness, warmth, and family. Picture this: a cold winter evening, the fire crackling softly in the background, and you setting the table for a hearty meal that brings everyone together. It’s the kind of dish that fills your belly and warms your soul, isn’t it? When I think of meatloaf, I also think of my beloved grandmother, who would whip this up every Sunday without fail. The anticipation of dinner was half the thrill, as my siblings and I rumbled through the house, from the kitchen to the dining room, always gathering for a bite of the magic happening in the oven.
This dish is the epitome of comfort food and, trust me, it’s easier to make than you might think! Whether you’re an experienced home cook or just someone looking to experiment with simple, flavorful recipes, I’m here to show you just how approachable and delightful making a homey meatloaf can be. It’s a dish that’s perfect for cozy dinners with family, laid-back weekend meals, or even meal prep for the busy week ahead!
So roll up your sleeves, grab that apron (messes happen, but that’s all part of the fun!), and let’s embark on this culinary adventure together. I promise you’ll walk away with a new favorite recipe, a full belly, and perhaps a few fun kitchen stories to share along the way!
Personal Story
Growing up, meatloaf was a cornerstone of our family gatherings. Each bite was fortified with love, laughter, and, of course, a sprinkle of chaos that came from having three siblings darting around the table, vying for the biggest piece. One specific Sunday stands out in my memory: it was my little brother’s birthday, and instead of the traditional cake, he cheekily requested meatloaf as the star of his celebration. Naturally, Grandma was more than happy to oblige!
That day, our kitchen turned into a delightful mix of essential ingredients: ground beef, breadcrumbs, and those must-have spices. We each had our roles; I was in charge of mashing the potatoes, while my sister crafted a stunning salad (which just meant she added a generous splash of dressing). Our little assembly line was a riot, and with Grandma overseeing the process, she shared snippets of wisdom and laughter that made the experience unforgettable.
As we feasted together around the table that night, I remember us joyfully discussing our favorite parts of the meatloaf. Grandma’s unique twist—instruction to swirl in some sautéed onions and pour an extra drizzle of her homemade brown gravy—made the dish not only delicious but also a topic of conversation that lingered long past dinnertime. Meatloaf became more than just food; it became a cherished memory, a family tradition that continued to nourish not just our bodies but our bonds.
Ingredients
Before we roll into the cooking phase, let’s gather our ingredient arsenal. Here’s what you’ll need for this delightful Meatloaf with Brown Gravy:
-
Ground Beef (80/20)
A classic choice for meatloaf, the fat content keeps the dish juicy and full of flavor. You could swap this with ground turkey for a leaner option, but remember—it may need a bit more seasoning! -
Breadcrumbs
These not only absorb moisture but also help the meatloaf maintain its shape. Fresh or dried like panko works wonders! For a gluten-free option, try almond flour or gluten-free breadcrumbs. -
Onion (Chopped)
This adds essential flavor to the meatloaf. A yellow or sweet onion works beautifully here. If you’re not a fan of hefty onion pieces, try grating it for a milder taste. -
Egg
Acts as a binding agent to hold everything together, keeping the meatloaf from crumbling. If you’re vegan, replace it with a flax egg (1 tablespoon of flaxseed meal mixed with 2.5 tablespoons of water) as a binder! -
Milk
A touch of milk helps keep the meatloaf moist. You can swap it out for vegetable broth or dairy-free milk if you desire a non-dairy version. -
Worcestershire Sauce
It adds depth and umami flavor that elevates the dish. You could substitute with soy sauce for a different profile, but be mindful of the saltiness! -
Garlic (Minced)
Garlic adds another layer of flavor. Fresh is best, but you can use powdered garlic if you’re out! -
Salt and Pepper
Simple but essential. Don’t be shy with the seasoning! Adjust as needed based on your spice preference. -
Brown Gravy
This is where the magic happens! You can make your own or use store-bought; I prefer homemade for that fresh taste. Keep reading for the simple recipe for that below!
Step-by-Step Instructions
Now, the fun part — cooking! Let’s make this meatloaf come to life.
-
Preheat Your Oven:
Preheat your oven to 350°F (175°C). If your kitchen has an aromatic scent wafting in – it’s time to kick this process off. -
Mix the Ingredients:
In a large mixing bowl, combine the ground beef, chopped onions, breadcrumbs, minced garlic, milk, egg, Worcestershire sauce, salt, and pepper. Now, here’s the trick: Use your hands! It may feel a bit messy, but trust me, this is the best way to ensure everything is blended thoroughly without over-mixing. You want a cohesive mixture, not a mushy mess! -
Shape the Meatloaf:
Once everything is mixed and well incorporated, shape the mixture into a loaf form. You can place it atop a lined baking sheet or in a loaf pan for an easier cleanup. If using a baking sheet, I usually shape the loaf into an elongated mound. This allows for even cooking and crispy edges. Yum! -
Make the Brown Gravy:
Now, for that luscious gravy! In a saucepan over medium heat, melt 2 tablespoons of butter. Add in a tablespoon of all-purpose flour and whisk until smooth. Slowly pour in two cups of beef broth, continuing to whisk away any lumps. Let it simmer for about 5 minutes until the gravy thickens up nicely. Don’t forget to season with a pinch of salt and pepper! -
Bake the Meatloaf:
Pop the meatloaf into your preheated oven and bake for about 1 hour. At around 30 minutes in, I recommend brushing some of that savory brown gravy over the top to keep everything incredibly moist and flavorful. -
Check for Doneness:
After an hour, check for doneness using a meat thermometer. The internal temperature should hit 160°F (70°C). If it needs a few more minutes to reach perfection, give it a little more time. -
Rest and Slice:
Once it’s beautifully cooked, take it out and let it rest for about 10 minutes before slicing. This helps lock in those delicious juices! -
Serve with Gravy:
When you are ready to serve, drizzle that rich, homemade brown gravy all over your slices. Pro tip: If you have any leftover gravy, it’s delightful over mashed potatoes or a side of veggies!
Serving Suggestions
For an exquisite presentation, slice your meatloaf neatly and plate it with a generous drizzle of brown gravy on top. I love to serve it alongside creamy mashed potatoes, sautéed green beans, or a fresh side salad for a pop of color. Just picture it: a great slice of meatloaf on a cozy plate with a sprinkle of parsley to add that touch of warmth. Comfort food at its best!
Recipe Variations
Want to mix things up? Here are some creative twists you can incorporate into your meatloaf magic:
-
Italian Style: Add Italian seasoning, Parmesan cheese, and marinara sauce for a taste reminiscent of classic spaghetti night.
-
BBQ Meatloaf: Swap Worcestershire sauce for BBQ sauce, giving it a sweet, tangy flavor that really shines through.
-
Mushroom Lover’s Delight: Sauté some diced mushrooms and mix them into your meatloaf for an earthier flavor.
-
Spicy Kick: Toss in some diced jalapeños or a sprinkle of red pepper flakes for a flavorful punch!
-
Vegetarian/Plant-Based Option: Use lentils, black beans, or chickpeas as a base instead of beef, bind it with eggs or flax eggs, and jazz it up with herbs and spices.
Chef’s Notes
Throughout the years, this meatloaf recipe has been refined with love and creativity! I love to experiment with flavors based on what I have on hand. Whether it’s adding a dash of A1 sauce for zing or replacing breadcrumbs with quinoa for a gluten-free option, each dish takes on a unique charm.
Oh, and speaking of memories, I can’t help but chuckle when I think about an adventurous cooking attempt where my mischievous little sister substituted all the breadcrumbs with cornflakes! Let’s just say that night ended with some surprised faces and a reshaping of the family recipe. But these little accidents are what it’s all about—learning, laughing, and of course, arriving at delicious outcomes together!
FAQs and Troubleshooting
1. Why is my meatloaf falling apart?
This typically happens when there’s too much moisture or not enough binding agent. Make sure your mixture is cohesive, and if it’s too wet, consider adding a bit more breadcrumbs.
2. Can I make meatloaf ahead of time?
Absolutely! You can mix your ingredients, shape your loaf, and wrap it tightly in plastic wrap. Store it in the fridge for up to 24 hours ahead of baking. It’s a fantastic meal prep hack!
3. How can I keep my meatloaf from drying out?
A combination of fat content (the 80/20 beef works great), adding moisture with milk and avoiding over-cooking will keep it juicy. Brushing gravy on top while it bakes also helps maintain moisture.
4. Is it necessary to use a meat thermometer?
While it’s not required, using a meat thermometer ensures you reach the safe internal temperature of 160°F. This way, you avoid foodborne illnesses, and your meatloaf will be cooked just right!
Nutritional Info
While I won’t delve extensively into the numbers, one hearty slice of this meatloaf provides a satisfying amount of protein, essential vitamins from the vegetables, and a flavorful punch that’ll leave you feeling nourished and happy!
And there you have it! A warm, inviting, and utterly delicious Meatloaf with Brown Gravy recipe that’s truly a labor of love. I hope you enjoy making this as much as I cherish sharing it with you. Keep your hearts and kitchens warm until our next culinary adventure! Happy cooking!
Print
The Ultimate Meatloaf with Rich Brown Gravy
- Total Time: 75 minutes
- Yield: 4 servings 1x
- Diet: None
Description
A heartwarming and classic Meatloaf recipe topped with homemade rich brown gravy, perfect for cozy family dinners.
Ingredients
- 1 lb Ground Beef (80/20)
- 1 cup Breadcrumbs
- 1 Onion (Chopped)
- 1 Egg
- ½ cup Milk
- 2 tbsp Worcestershire Sauce
- 2 cloves Garlic (Minced)
- Salt and Pepper to taste
- 2 cups Brown Gravy
Instructions
- Preheat your oven to 350°F (175°C).
- Mix the ground beef, chopped onions, breadcrumbs, minced garlic, milk, egg, Worcestershire sauce, salt, and pepper in a large mixing bowl.
- Shape the mixture into a loaf form and place it on a lined baking sheet or in a loaf pan.
- Make the brown gravy by melting butter in a saucepan, whisking in flour, and gradually adding beef broth.
- Bake the meatloaf for about 1 hour, brushing gravy on top halfway through.
- Check for doneness using a meat thermometer; internal temperature should be 160°F (70°C).
- Rest for 10 minutes before slicing.
- Serve with additional brown gravy over slices.
Notes
For a leaner option, substitute ground turkey. You can also use gluten-free breadcrumbs for a gluten-free option.
- Prep Time: 15 minutes
- Cook Time: 60 minutes
- Category: Main Course
- Method: Baking
- Cuisine: American
Nutrition
- Serving Size: 1 slice
- Calories: 350
- Sugar: 5g
- Sodium: 400mg
- Fat: 12g
- Saturated Fat: 4g
- Unsaturated Fat: 6g
- Trans Fat: 0g
- Carbohydrates: 45g
- Fiber: 3g
- Protein: 15g
- Cholesterol: 60mg
Keywords: meatloaf, comfort food, family meal, brown gravy
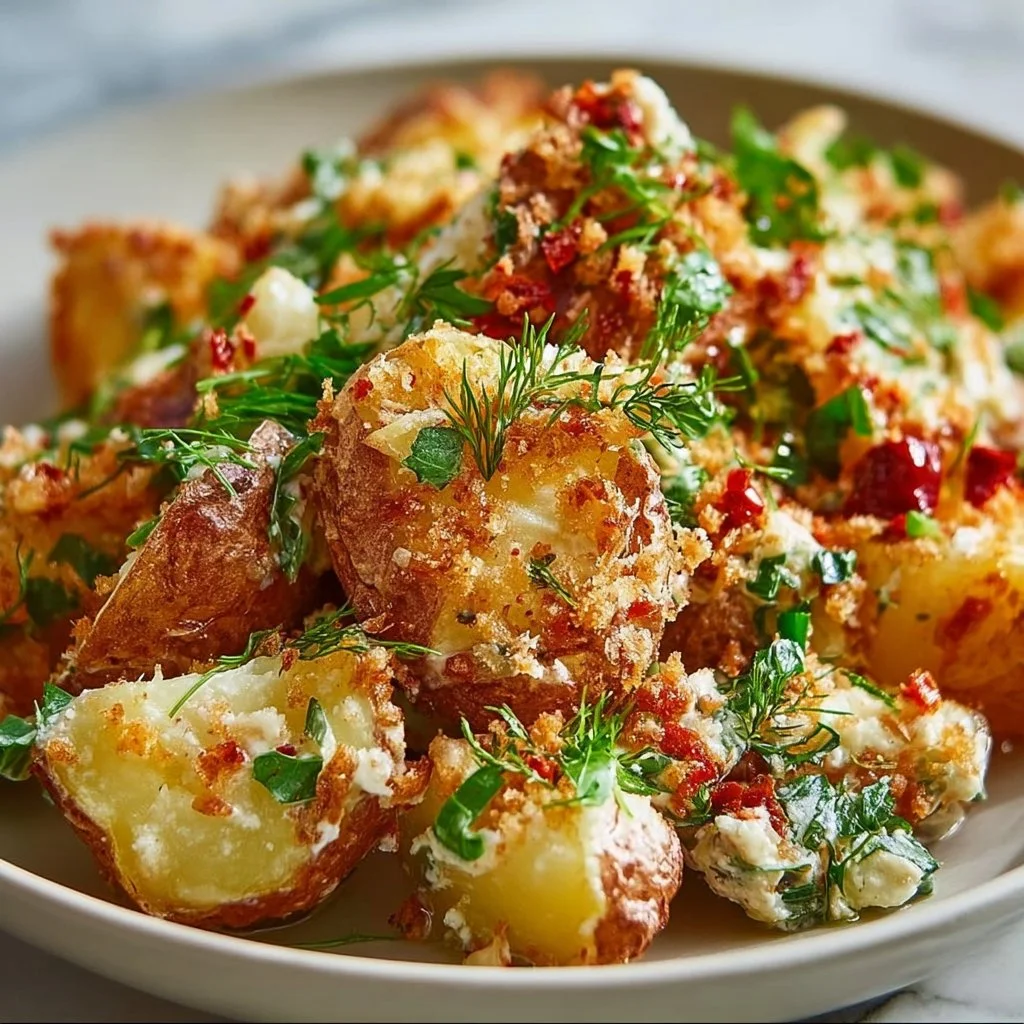
Crispy Smashed Potato Salad
# Crispy Smashed Potato Salad: The Ultimate Comfort on a Plate

## Introduction

Welcome to my kitchen, my fellow food enthusiasts! Today, I’m excited to share a dish that’s been a true favorite in my home—the Crispy Smashed Potato Salad. Imagine golden, crispy potatoes nestled in a fresh, zesty dressing that brings everything together in a beautiful symphony of flavors. This dish is perfect for sunny picnics, cozy gatherings, or simply a comforting dinner at home.

What makes this potato salad so special? For starters, it combines two beloved classics: crispy smashed potatoes and classic salad elements. Think of it as a mash-up of flavors and textures, with crunchy potatoes, creamy dressing, and a burst of herbs. Whenever I whip this up, I can’t help but smile, as it always reminds me of sunny days spent with friends and family.

As you cook along, I encourage you to channel your inner chef! This isn’t just any potato salad; each crispy bite transports me right back to childhood picnics, where laughter and good food were always plentiful. If you love the smell of something baking or the joy of feeding the people you love, you’re in for a treat with this recipe!

So roll up your sleeves, grab that apron, and let’s dive into a dish that is sure to become a staple in your culinary repertoire. Trust me, you’ll want to share this crispy delight with everyone you know. Now, onto the fun part—my personal story with this recipe!

## Personal Story

Growing up, my family had a tradition of summer barbecues in our backyard every Saturday. My mom would work her magic, crafting delicious dishes that filled the air with mouthwatering aromas. One Saturday, she decided to try her hand at a potato salad that was unlike anything we had ever tasted. Instead of the usual boiled potatoes, she introduced us to the concept of smashing and crisping them up!

I will never forget the moment we sat down to eat. My mom served the Crispy Smashed Potato Salad with a side of her famous grilled burgers. The potatoes were toasty and crunchy, and the light dressing added the perfect zing. As the sun set and laughter echoed around the table, I realized how beneficial it was to not only enjoy good food but also to cherish the company of loved ones. It was one of those moments when a recipe becomes more than just food; it’s a vessel for memories.

From that day on, crispy smashed potatoes became a staple in our household, always reminding us of those cherished summer days. Fast forward to today, and I love reinventing this dish while adding my own twists. I hope this recipe brings you just as much joy and nostalgia as it has brought me over the years!

## Ingredients

To make our glorious Crispy Smashed Potato Salad, let’s gather our ingredients. Here’s what you’ll need:

- **Baby Potatoes** (2 pounds): I love using baby potatoes as they are tender and perfect for smashing. If you can’t find baby potatoes, feel free to use regular ones—just cut them into smaller chunks to ensure even cooking.

- **Olive Oil** (1/4 cup): This will give our potatoes a lovely, crispy exterior. You can substitute it with avocado oil for a different flavor profile or use melted butter for a richer taste.

- **Garlic Powder** (1 teaspoon): A lovely addition to enhance the flavor of our potatoes. You can substitute this with fresh minced garlic for a more robust garlic flavor.

- **Salt** (to taste): Essential for bringing out all the flavors. Feel free to use sea salt or kosher salt based on your preference.

- **Black Pepper** (to taste): Freshly cracked black pepper adds a delightful warmth. If you want to spice things up, consider adding some cayenne pepper or smoked paprika.

- **Greek Yogurt** (1 cup): A creamy base for our dressing that’s healthier than mayonnaise. You can swap it for sour cream or a plant-based yogurt if you want to keep it vegan.

- **Dijon Mustard** (2 tablespoons): Adds a wonderful tang to the dressing. For a milder taste, yellow mustard works well here.

- **Fresh Herbs** (1/2 cup, chopped): A mix of chives, parsley, and dill is a colorful, herby medley that brightens up the salad. Feel free to use any herbs you love or have on hand—basil or cilantro could be great alternatives.

- **Cherry Tomatoes** (1 cup, halved): These add a pop of color and sweetness. Swap them for diced cucumbers if you prefer a different crunch.

- **Red Onion** (1/2 cup, finely diced): Provides a lovely crunch and bite. You could use green onions or shallots for a milder flavor.

- **Lemon Juice** (1 tablespoon): A squeeze of acidity to elevate the flavors. Lime juice could also offer a refreshing touch!

Let’s gather these ingredients and prepare to create something scrumptious!

## Step-by-Step Instructions

Ready to dive in? Here’s how to make your Crispy Smashed Potato Salad:

### Step 1: Cook the Potatoes
Begin by placing your baby potatoes in a large pot and covering them with water. Add a generous pinch of salt to the water. Bring it to a boil, then reduce the heat and simmer for about 15-20 minutes, or until a fork easily pierces the potatoes.

*Chef’s Tip*: To save time, you can go for the microwave method! Place the washed potatoes in a microwave-safe bowl with a bit of water. Cover with a damp paper towel and microwave for 8-10 minutes, checking for tenderness halfway through.

### Step 2: Preheat the Oven
While your potatoes are boiling, preheat your oven to 425°F (220°C). This high heat is crucial for getting that perfect crispy finish!

### Step 3: Smash and Season
Once the potatoes are tender, drain the water and let them cool slightly. Use the bottom of a sturdy glass or a potato masher to gently smash each potato until they’re about 1/2 inch thick. Place them on a parchment-lined baking sheet for easy cleanup.

*Chef’s Hack*: If you're in the mood for some culinary fun, let the kids help with the smashing! Get creative and let them make fun shapes with their potato creations!

Then drizzle the smashed potatoes with olive oil, sprinkle with garlic powder, salt, and black pepper. Ensure they are evenly coated to maximize crispiness.

### Step 4: Roast to Perfection
Pop the baking sheet in the preheated oven and roast for about 25-30 minutes. Halfway through, carefully flip the potatoes for even browning. You want them golden and crispy on both sides!

*Pro Tip*: If you want that next-level crunch, broil them for the last 2-3 minutes of cooking. Just keep a close eye on them to prevent any burning!

### Step 5: Whip up the Dressing
While the potatoes roast, let’s make our dressing! In a large mixing bowl, combine Greek yogurt, Dijon mustard, lemon juice, and a pinch of salt and pepper. Whisk until smooth. Taste and adjust the seasoning to your liking.

*Chef’s Note*: If you like a bit of sweetness, add a drizzle of honey or maple syrup to the dressing. It creates a nice balance with the tanginess!

### Step 6: Combine it All
Once the potatoes are perfectly crispy, remove them from the oven and let them cool slightly. Add the smashed potatoes to the mixing bowl with the dressing. Toss gently to coat the potatoes in the creamy goodness. Then fold in the chopped herbs, cherry tomatoes, and red onion.

*Tip*: For extra flavor, let the salad sit for about 10-15 minutes before serving. This allows the potatoes to soak up the dressing and elevate the taste even more!

## Serving Suggestions

When it comes to serving this delightful salad, you can easily plate it up on a large serving platter or individual bowls. Drizzle with a little extra olive oil and garnish with more fresh herbs on top. Pair it with anything from grilled meats to fresh greens, and let everyone dig in!

## Recipe Variations

1. **Vegan Version**: Substitute Greek yogurt with your favorite dairy-free yogurt and skip the eggs for a delicious vegan option.
2. **Spicy Twist**: Add a sprinkle of red pepper flakes or jalapeños for a bit of heat!
3. **Cheesy Delight**: Mix in crumbled feta cheese or grated Parmesan for a savory touch.
4. **Bacon Lovers**: Crumble crispy bacon on top of the salad for an added crunch and flavor.
5. **Seasonal Veggies**: Add roasted asparagus or blanched green beans for a refreshing seasonal twist.

## Chef's Notes

I come from a family that treasures food memories, and this Crispy Smashed Potato Salad is one of those recipes that has been passed down and modified over time. I love how versatile it is, and each time I make it, I may toss in whatever I have left in the fridge. If you don’t have one of the ingredients? Do not fret! This dish is perfect for kitchen experimentation.

One time, I got a little too carried away with the crispy process—I accidentally left a batch in the oven a bit too long! Instead of panicking, I crumbled that batch over another salad, and let me tell you, that crispy topping became the next big hit at dinner!

## FAQs and Troubleshooting

**1. My potatoes didn’t get crispy—what went wrong?**
- Crispy texture comes from high heat, so make sure your oven is fully preheated before roasting. Also, ensure the potatoes are well spaced out on your baking sheet—crowding them can lead to steaming instead of roasting.

**2. Can I make this salad ahead of time?**
- Absolutely! You can prepare the potatoes in advance and just toss everything together right before serving. However, I recommend adding the tomatoes and herbs just before serving to keep them fresh.

**3. What can I do with leftovers?**
- Leftover potato salad makes for a delicious lunch the next day! Serve it cold or reheat it in the oven for a crispy texture again. You can also incorporate it into omelets or as a filling for a wrap—very versatile!

**4. Is it possible to scale this recipe?**
- Definitely! You can easily double or halve this recipe depending on how many people you’re serving. Adjust the ingredients accordingly, and remember, the best part about cooking is that there are no hard and fast rules—just have fun!

## Nutritional Info
*(Optional but helpful)*

This Crispy Smashed Potato Salad serves about 6-8 people. Each serving is packed with love and flavor, including approximately:

- Calories: 250
- Protein: 6g
- Carbohydrates: 35g
- Fat: 10g
- Fiber: 4g

And there you have it! A delicious, crispy, and nostalgic dish that is sure to impress and nourish anyone who indulges. Enjoy the process, and happy cooking, friends!

Crispy Smashed Potato Salad
- Total Time: 45 minutes
- Yield: 6 servings 1x
- Diet: Vegetarian
Description
A delightful mash-up of crispy smashed potatoes and classic salad elements, drizzled with a creamy, zesty dressing.
Ingredients
- 2 pounds Baby Potatoes
- 1/4 cup Olive Oil
- 1 teaspoon Garlic Powder
- Salt to taste
- Black Pepper to taste
- 1 cup Greek Yogurt
- 2 tablespoons Dijon Mustard
- 1/2 cup Fresh Herbs, chopped
- 1 cup Cherry Tomatoes, halved
- 1/2 cup Red Onion, finely diced
- 1 tablespoon Lemon Juice
Instructions
- Cook the Potatoes by placing baby potatoes in a large pot and covering them with water. Add a generous pinch of salt and bring to a boil, then simmer for 15-20 minutes until tender.
- Preheat the Oven to 425°F (220°C).
- Smash and Season the potatoes until about 1/2 inch thick, then drizzle with olive oil, garlic powder, salt, and black pepper.
- Roast to Perfection for 25-30 minutes, flipping halfway through until golden and crispy.
- Whip up the Dressing by combining Greek yogurt, Dijon mustard, lemon juice, salt, and pepper in a bowl.
- Combine it All by mixing the dressing with the crispy potatoes and adding fresh herbs, cherry tomatoes, and red onion.
Notes
For extra flavor, let the salad sit for 10-15 minutes before serving. This will allow the potatoes to absorb the dressing.
- Prep Time: 15 minutes
- Cook Time: 30 minutes
- Category: Salad
- Method: Roasting
- Cuisine: American
Nutrition
- Serving Size: 1 serving
- Calories: 250
- Sugar: 3g
- Sodium: 300mg
- Fat: 10g
- Saturated Fat: 2g
- Unsaturated Fat: 8g
- Trans Fat: 0g
- Carbohydrates: 35g
- Fiber: 4g
- Protein: 6g
- Cholesterol: 10mg
Keywords: potato salad, crispy potatoes, summer salad, side dish, easy recipe
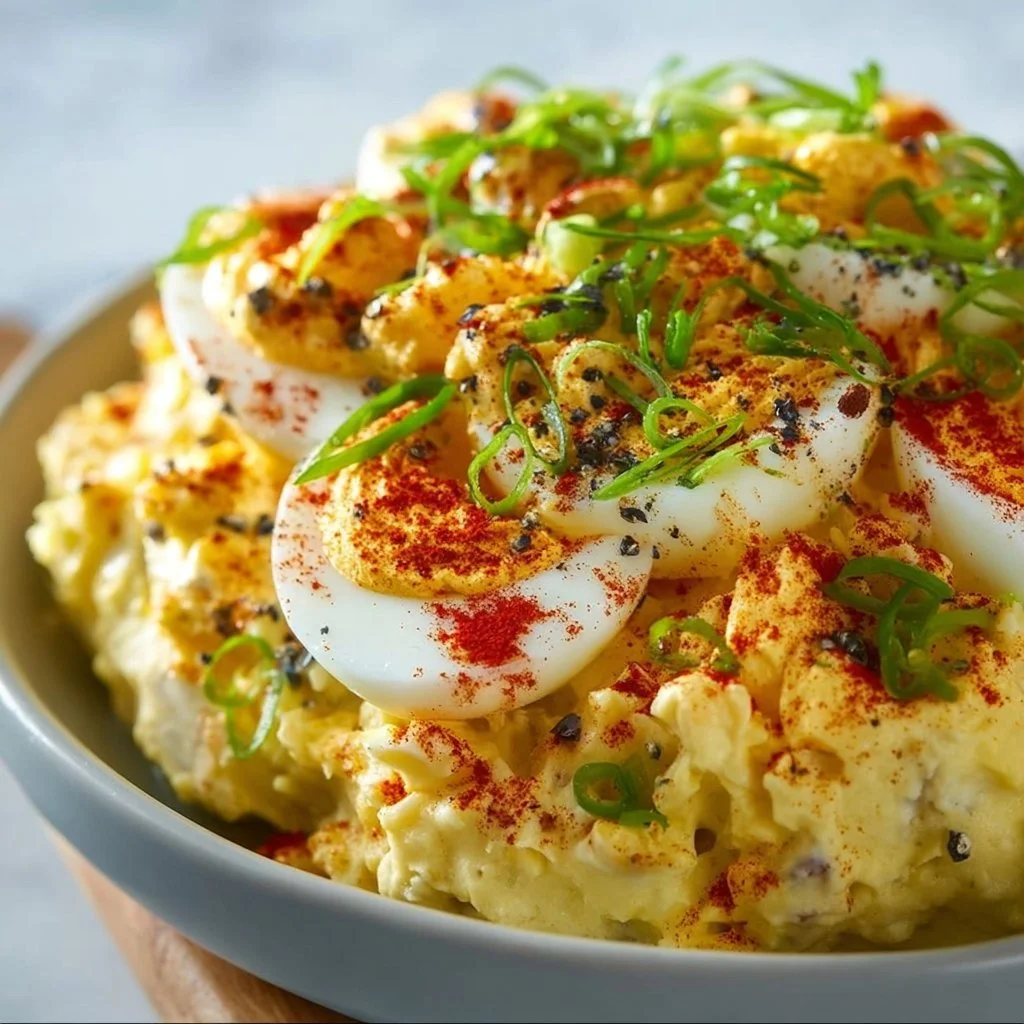
Deviled Egg Potato Salad
Deviled Egg Potato Salad: A Creamy Twist on a Classic Dish
Hello, fellow food lovers! Welcome back to my cozy kitchen! Today, I’m thrilled to share a delightful twist on a classic that’s guaranteed to spark joy at your next gathering or even just a laid-back dinner at home. We’re diving into my Deviled Egg Potato Salad — a creamy, tangy dish that brings all the nostalgic vibes with a fancy, flavorful kick! Trust me; this is not your ordinary potato salad.
Growing up, summer picnics were not complete without my grandmother’s renowned potato salad. It was creamy, packed with flavors, and always had that garnish of paprika on top that just made it look extra special. Fast forward to my culinary adventures, and I found myself craving the flavors of deviled eggs, which were another family favorite. It struck me—what if I combined the best of both worlds? And, just like that, Deviled Egg Potato Salad was born!
This dish gives you the comfort of classic potato salad while introducing the rich creaminess and zesty kick of deviled eggs. It’s perfect for potlucks, barbecues, or just a side dish that feels gourmet without breaking a sweat. Prepare for some delightful kitchen antics and cooking tips, all while creating a dish that’s as beautiful as it is delectable.
So, roll up those sleeves, grab your apron (get ready for a little mess!), and let’s dive into this scrumptious recipe that’s sure to become a staple in your kitchen!
Personal Story
The memories I cherish most often revolve around food. I remember bustling around my grandmother’s kitchen, the air thick with the aroma of garlic and herbs, while she would deftly chop vegetables and guide me through her age-old family recipes. One of my favorites was her potato salad, with its smooth texture and vibrant flavors. It was the highlight of every family barbecue, always served alongside juicy burgers and grilled corn.
I was the self-proclaimed potato salad expert among my cousins, and my only job was to sprinkle the paprika on top—oh, the pride! As I grew older and started experimenting in the kitchen, I couldn’t resist adding my little twist to the classic flavors I loved so much. When I eventually made this Deviled Egg Potato Salad, I couldn’t help but smile, not just from the deliciousness that unfolded but from the memories that flooded back.
Now, as I share this recipe with you, I believe food has a special way of connecting us, evoking memories, and creating new ones. I can’t wait for you to create your version, with laughter and joy woven into every bite!
Ingredients
Here are the ingredients you’ll need to make this scrumptious Deviled Egg Potato Salad:
-
Potatoes (about 2 pounds)
- I love using Yukon Golds for their buttery flavor, but Russets work well too! Just remember to peel and cube them before boiling for even cooking.
-
Eggs (4 large)
- Hard-boiled eggs are key! They not only enhance the creaminess but also provide protein. For easier peeling, try using older eggs or steaming them before boiling.
-
Mayonnaise (1/2 cup)
- The creamy base of our salad! Feel free to use Greek yogurt for a lighter option or an avocado-based mayo for a healthier twist.
-
Dijon Mustard (1 tablespoon)
- A little tang goes a long way. If you’re a mustard fan, you can double this for that zesty kick!
-
Apple Cider Vinegar (1 tablespoon)
- Brightens the flavors. White vinegar works too, or lemon juice if you want a fresh twist!
-
Celery (2 stalks, chopped)
- Adds crunch! If you prefer a sweeter flavor, try using chopped pickles or relish instead.
-
Red Onion (1/4 cup, finely chopped)
- A punch of flavor! If red onion feels too strong, go for green onions or shallots.
-
Salt and Pepper (to taste)
- Essential for balancing flavors! Always taste as you go—you want that perfect savory touch!
-
Paprika (for garnish)
- The crowning glory! Smoked paprika adds an amazing depth, but sweet paprika works just as well.
Step-by-Step Instructions
Let’s get cooking! Follow these detailed steps to create a creamy and indulgent Deviled Egg Potato Salad.
Step 1: Boil the Potatoes
-
Prepare the potatoes: Start by washing and peeling the potatoes. Cut them into uniform cubes, about 1-inch in size. This will ensure even cooking.
-
Boil them up: Fill a large pot with water, add a generous pinch of salt, and bring it to a rolling boil. Carefully add the cubed potatoes, letting them cook for 10-15 minutes until fork-tender (but not mushy!). You want them to hold their shape.
-
Drain and cool: Once cooked, drain the potatoes and let them cool slightly in the sink, giving them a little shake to release some steam. You want them warm but not steaming hot when you mix them in.
Step 2: Hard-Boil the Eggs
-
Boil the eggs: In a separate pot, gently place the eggs and cover them with cold water. Bring it to a boil, then cover and remove from heat. Let them sit for about 12-14 minutes.
-
Cool and peel: Once done, transfer the eggs to an ice bath to stop the cooking process. After they cool for about 5-10 minutes, peel them under running water for easier shell removal.
Step 3: Mix the Creamy Base
- Prepare the dressing: In a large bowl, combine the mayonnaise, Dijon mustard, apple cider vinegar, salt, and pepper. Mix well until it’s creamy and smooth. This will be the glorious dressing that brings everything together!
Step 4: Assemble the Salad
-
Chop the eggs and veggies: Dice the hard-boiled eggs. You can either chop them finely for a more blended texture or leave them in bigger pieces for a chunkier bite—totally your call!
-
Combine ingredients: Add the cooled potatoes, chopped celery, and red onion to the bowl with the dressing. Gently fold in the chopped eggs, being careful not to mash the potatoes or eggs.
-
Taste and adjust: This is your moment! Taste your salad and adjust the seasoning as needed. If you prefer more tanginess, add a little more vinegar or mustard.
Step 5: Chill and Garnish
-
Chill out: Once everything is beautifully mixed, cover the bowl and let the salad chill in the refrigerator for at least an hour. This allows all the flavors to meld beautifully.
-
Serve with flair: Before serving, sprinkle a generous dusting of paprika on top for that pop of color and flavor.
Serving Suggestions
When it’s time to serve your Deviled Egg Potato Salad, consider presenting it in a lovely bowl garnished with fresh herbs like parsley or chives. Pair it alongside classic barbecue dishes, grilled meats, or serve it on a picnic platter. It’s equally fantastic as a hearty side or as the centerpiece of a lunch spread!
Recipe Variations
-
Herbed Delight: Add fresh dill or parsley for an herbal touch that brightens up the flavors.
-
Spicy Kick: Mix in a dash of sriracha or hot sauce for a spicy twist on the classic taste.
-
Bacon Love: Crumble crispy bacon on top for a smoky flavor that contrasts beautifully with the creaminess.
-
Veggie Lovers: Toss in some sweet peas or diced bell peppers for extra color and sweetness.
-
Dietary Swaps: Use plant-based mayo for a vegan option, or swap potatoes for diced cauliflower for a low-carb alternative.
Chef’s Notes
I like to think of this recipe as a canvas. The foundations of potatoes and eggs create a perfect base, while your creativity can shine through in the seasonings and toppings. Over the years, I’ve played around with various herbs and spices, and each iteration tells a story of its own. One fateful summer, I even tossed in some pickled jalapeños, and it became a favorite among friends—we dubbed it the “spicy deviled egg potato salad”!
In the kitchen, the possibilities are endless, and that’s what makes cooking such a joy. So, don’t hesitate to make it your own and let your personality shine!
FAQs and Troubleshooting
Q: My potatoes are mushy. What went wrong?
A: If they’re mushy, it usually means they were over-boiled. Aim for that fork-tender state!
Q: How can I make my eggs easier to peel?
A: Use older eggs or steam them instead of boiling; it works like a charm to loosen the shell.
Q: Can I prep this ahead of time?
A: Absolutely! It’s best made a day in advance; just ensure you store it in an airtight container in the fridge.
Q: How long does it last in the refrigerator?
A: Your Deviled Egg Potato Salad will last about 3-4 days in the fridge. Just give it a stir before serving again!
Nutritional Info
While this dish is rich and creamy, it’s also packed with protein and vitamins! Each serving provides a satisfying blend of healthy fats and nutrients, perfect as a side at your next meal.
I hope you loved this journey into the world of Deviled Egg Potato Salad! Remember, the best meals are the ones that stir our hearts and fill our bellies. So, gather your loved ones and feast on this deliciousness. Cheers to cozy cooking and happy memories in the kitchen!
Print
Deviled Egg Potato Salad
- Total Time: 45 minutes
- Yield: 6 servings 1x
- Diet: Vegetarian
Description
A creamy twist on classic potato salad combined with the flavors of deviled eggs.
Ingredients
- 2 pounds Potatoes (peeled and cubed)
- 4 large Eggs (hard-boiled)
- 1/2 cup Mayonnaise
- 1 tablespoon Dijon Mustard
- 1 tablespoon Apple Cider Vinegar
- 2 stalks Celery (chopped)
- 1/4 cup Red Onion (finely chopped)
- Salt and Pepper (to taste)
- Paprika (for garnish)
Instructions
- Prepare the potatoes: Start by washing and peeling the potatoes. Cut them into uniform cubes, about 1-inch in size.
- Boil them up: Fill a large pot with water, add a pinch of salt, and bring it to a rolling boil. Carefully add the cubed potatoes, cooking for 10-15 minutes until fork-tender.
- Drain and cool: Once cooked, drain the potatoes and let them cool slightly.
- Boil the eggs: In a separate pot, place the eggs and cover with cold water. Bring to a boil, cover, and let sit for 12-14 minutes.
- Cool and peel: Transfer the eggs to an ice bath and cool for 5-10 minutes before peeling.
- Prepare the dressing: In a large bowl, combine the mayonnaise, Dijon mustard, apple cider vinegar, salt, and pepper. Mix well until creamy.
- Chop the eggs and veggies: Dice the hard-boiled eggs, and add the cooled potatoes, chopped celery, and red onion to the bowl with the dressing.
- Combine ingredients: Carefully fold in the chopped eggs without mashing.
- Taste and adjust: Taste the salad and adjust seasoning as necessary.
- Chill out: Cover the salad and chill in the refrigerator for at least an hour.
- Serve with flair: Sprinkle paprika on top before serving.
Notes
Feel free to add herbs or spices to tailor to your taste. Best if made a day ahead!
- Prep Time: 15 minutes
- Cook Time: 30 minutes
- Category: Side Dish
- Method: Boiling, Chilling
- Cuisine: American
Nutrition
- Serving Size: 1 serving
- Calories: 350
- Sugar: 2g
- Sodium: 400mg
- Fat: 22g
- Saturated Fat: 5g
- Unsaturated Fat: 15g
- Trans Fat: 0g
- Carbohydrates: 35g
- Fiber: 4g
- Protein: 8g
- Cholesterol: 190mg
Keywords: deviled eggs, potato salad, creamy salad, side dish, summer picnic
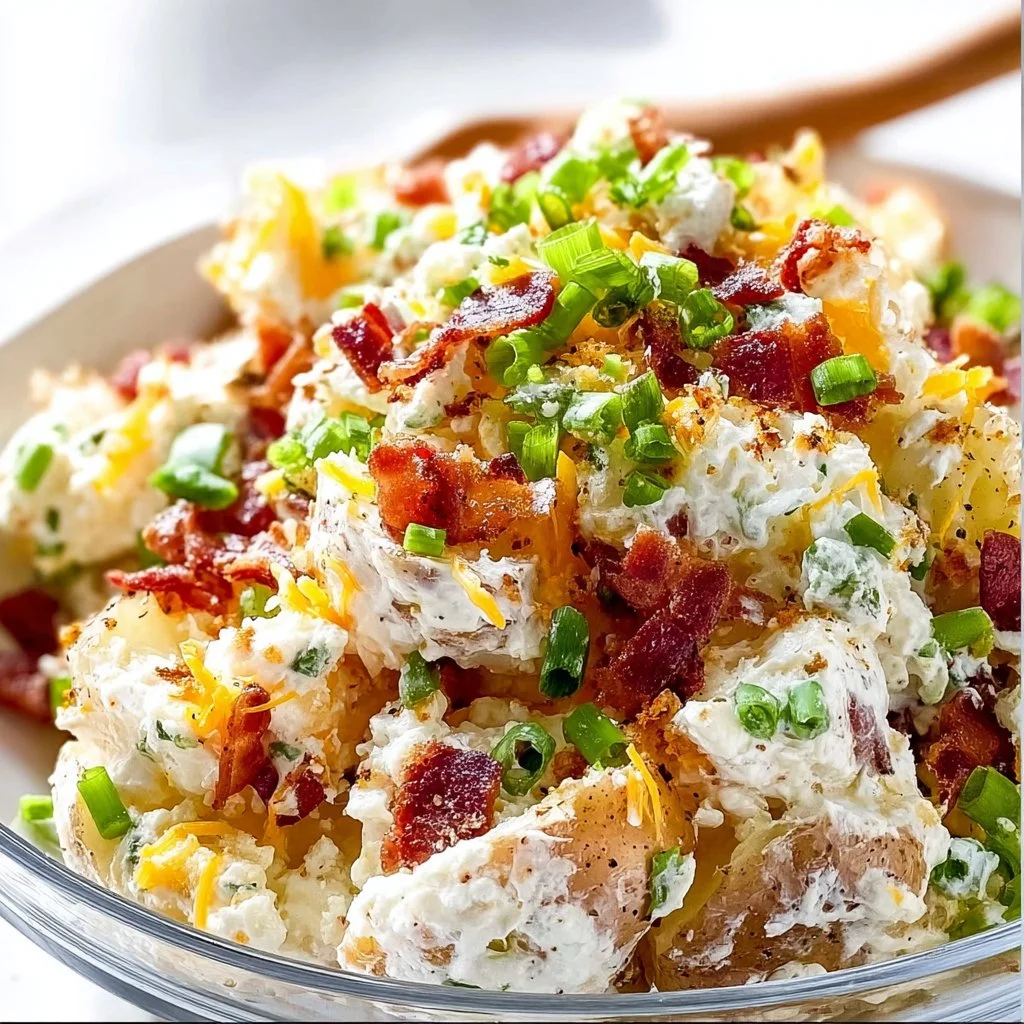
Loaded Baked Potato Salad
Loaded Baked Potato Salad: Comfort Food with a Twist
Introduction
Welcome back to my kitchen, friends! Today we’re diving into a dish that’s guaranteed to make your taste buds dance with joy—Loaded Baked Potato Salad! If you’re anything like me, the combination of creamy, smoky, and savory flavors makes you feel all warm and fuzzy inside. This dish isn’t just any old potato salad; it’s a delicious mashup of a classic baked potato and everyone’s favorite picnic side, with a little spin that adds that extra layer of awesomeness.
Picture this: a sunny afternoon gathering with friends, laughter filling the air, and the unmistakable aroma of something fabulous cooking in the background. You reach for a spoonful of this Loaded Baked Potato Salad, and suddenly, your taste buds are in for a treat—fluffy potatoes mingling with crispy bacon, sharp cheese, and tangy dressing. It’s pure bliss!
Now, this dish isn’t just really tasty; it also carries a deep sense of nostalgia for me. My family often hosted potluck dinners, and there was always a race to bring the best dish. I’ll never forget the time my aunt brought her famous potato salad, but instead of the usual mayonnaise mixed with plain potatoes, she transformed it into a loaded masterpiece. That magical moment sparked my obsession with combining flavors and textures, and that’s why I’m sharing my own twist on her classic today!
So, grab your apron, and let’s get cooking. You’re going to love how easy it is to whip up a big bowl of Loaded Baked Potato Salad that will wow your guests or fuel a cozy night in!
Personal Story
One of my fondest kitchen memories revolves around backyard barbecues at my childhood home. We were all about summer gatherings, where good food and laughter created unforgettable bonds. My uncle would fire up the grill, filling the air with the mouthwatering scent of burgers and hot dogs, while the entire family gathered around a long table set underneath our sprawling oak tree.
One year, my cousin Sam decided to switch things up. He took the classic potato salad that everyone knew and loved and added a mountain of toppings. As he called it his "Loaded Potato Salad," it sounded a little outrageous, maybe even chaotic—but it was a revelation! The rich creaminess of ranch dressing, the crispy bits of bacon, and fresh green onions created a symphony of flavors that had everyone rushing back for seconds.
I remember thinking, "Why stick to the ordinary when we can elevate the simple?!" That spirit of creativity in the kitchen has followed me through my culinary adventures, and I knew I had to recreate that cozy, nostalgic dish that made my childhood summers so special. Today, I’m sharing my take on that iconic Loaded Baked Potato Salad with all the love and memories sprinkled in between.
Ingredients
Here’s a list of the ingredients you’ll need to whip up this delightful Loaded Baked Potato Salad. Each ingredient adds its own touch, and I’ve provided some useful tips and substitutions to make sure you can create your perfect salad!
-
Potatoes (about 2 pounds, Yukon Gold or Russet)
- Why? They’re the star of the show, providing a fluffy base.
- Tip: Use waxy potatoes for creaminess, or starchy potatoes for fluffier results. If you’re in a pinch, you can swap with pre-packaged potato salad or even cauliflower for a low-carb option.
-
Bacon (6 slices, cooked and crumbled)
- Why? Crispy bacon adds an irresistible smokiness and crunch.
- Substitution: If you prefer a vegetarian option, crisped chickpeas or sunflower seeds work wonderfully!
-
Cheddar Cheese (1 cup, shredded)
- Why? Sharp cheddar creates a beautiful richness that complements the potatoes.
- Tip: Feel free to swap it out with any cheese you love or a dairy-free alternative to suit your dietary needs.
-
Green Onions (3, chopped)
- Why? These add a fresh crunch and a hint of onion flavor.
- Tip: You can substitute with chives or even finely diced red onion for a twist!
-
Sour Cream (1/2 cup)
- Why? It gives the salad a creamy texture without being overly rich.
- Alternative: Greek yogurt works well here too—just as creamy with an added protein kick!
-
Ranch Dressing (1 cup)
- Why? The tangy flavor pairs perfectly with the other ingredients.
- Twist: Need a lighter option? A homemade vinaigrette will also do the trick!
-
Salt & Pepper (to taste)
- Chef’s Insight: Don’t forget to taste as you go—seasoning makes all the difference!
Be sure to gather these goodies before we get cooking—they’ll each play a vital role in creating a heavenly dish that everyone will adore!
Step-by-Step Instructions
Now, let’s get into the good stuff—the cooking! Follow these simple steps, and I promise you’ll whip up an incredible Loaded Baked Potato Salad in no time.
-
Prepare the Potatoes:
- Start by washing your potatoes thoroughly, scrubbing off any dirt. No need to peel them, as the skin adds great texture and nutrients!
- Cut them into bite-sized cubes for even cooking. Place them in a large pot, cover with water, and sprinkle in some salt.
- Bring the pot to a rolling boil, then reduce to a simmer for about 10-15 minutes or until fork-tender. Pro Tip: Do the fork test—poke in a potato cube; if it slides off easily, they’re done!
-
Cook the Bacon:
- While those lovely potatoes are boiling, let’s work on the bacon! Heat a skillet over medium-high heat and add your bacon strips.
- Cook until crispy and golden, about 5-7 minutes, flipping halfway through. Drain on paper towels and set aside to cool, then crumble it into pieces. Tip: Save some of that bacon grease for sautéing if you’d like that smoky flavor somewhere else in the meal!
-
Combine Ingredients:
- Once the potatoes are cooked, drain and let them cool for about 10 minutes; they should be warm but not overly hot.
- In a large mixing bowl, combine the warm potatoes with crumbled bacon, shredded cheese, chopped green onions, sour cream, and ranch dressing. Commentary: The warmth of the potatoes will slightly melt the cheese too, creating a delightful creaminess that you’ll love!
-
Mix It Up:
- Gently fold all the ingredients together until evenly coated. This is where the magic really happens! Avoid over-mixing—some potato chunks should remain intact for that lovely, rustic vibe.
- Taste and season with salt and pepper as needed. If you’re feeling adventurous, a sprinkle of garlic powder or a dash of hot sauce can take it to the next level!
-
Chill and Serve:
- At this point, you can dive right into this creamy goodness, but I highly recommend letting it chill in the fridge for at least 30 minutes to let the flavors meld beautifully together. The longer, the better!
- When you’re ready to serve, give it a good stir and add any extra green onions or bacon on top for garnish. It’s the perfect showstopper for any gathering!
Serving Suggestions
When it comes to serving your Loaded Baked Potato Salad, let your creativity shine! Scoop it into a beautiful serving bowl or dish and top it off with additional crispy bacon bits, a sprinkle of fresh herbs, or even a drizzle of extra ranch dressing for an added visual appeal. Serve them alongside burgers, grilled chicken, or just on its own with some crusty bread for dipping. Your guests will love it, and you might want to keep the leftovers all to yourself!
Recipe Variations
What’s incredible about this Loaded Baked Potato Salad is its versatility! Here are a few tasty twists to customize it to your liking:
- Spicy Loaded Baked Potato Salad: Add diced jalapeños or a dash of hot sauce for a fiery kick.
- Italian Twist: Swap out the ranch for a tangy vinaigrette and add olives, sun-dried tomatoes, and Italian herbs for a Mediterranean flair.
- Mexican-Style: Incorporate crumbled queso fresco, corn, black beans, and a drizzle of lime dressing for a fresh, zesty take on the original!
- Herb Infusion: Mix in fresh herbs like dill or parsley to elevate the flavor profile.
- Vegan Delight: Use vegan mayo, plant-based sour cream, and swap bacon for smoked tempeh or mushrooms.
The sky’s the limit!
Chef’s Notes
As I was whipping up this Loaded Baked Potato Salad, I couldn’t help but chuckle at some of my previous kitchen mishaps. Like that time I confused the measurements and accidentally dumped a cup of salt into the mix instead of sugar! Talk about inedible! But learning from those blunders has made me better in the kitchen, and now I place emphasis on tasting and trusting your instincts.
Over time, I’ve toyed with this recipe, adjusting components depending on my mood or what I have on hand. The joy of cooking comes from experimenting, and with this adaptable Loaded Baked Potato Salad, you’ll always find a great way to bring a bit of yourself to the kitchen!
FAQs and Troubleshooting
-
Can I make this salad in advance?
- Absolutely! In fact, it tastes even better when the flavors have had some time to meld together. Just be sure to store it in an airtight container in the refrigerator.
-
What if my potatoes are mushy?
- This can happen if they are cooked too long. To avoid this in the future, keep an eye on them while boiling and perform the fork test often to get them perfectly tender without turning into mush!
-
How do I prevent the salad from browning?
- Be sure to store the salad properly in an airtight container, and adding a squeeze of lemon juice to the potatoes before mixing can help slow down oxidation.
-
What’s the best way to reheat leftovers?
- If you prefer the salad warm, pop individual servings in the microwave for 20-30 seconds. Just be careful not to overheat, as this may alter the texture.
Nutritional Info
While I’m not a nutritionist, I’m more about enjoying food and finding balance. However, remember that potatoes provide a good source of vitamins C and B6, and the salad can be a satisfying dish when eaten in moderation, especially loaded with protein and healthy fats from the toppings. Check out the labels for specifics on your chosen ingredients, especially if you’re adapting this recipe to fit dietary restrictions!
There you have it, my friends! A delightfully scrumptious recipe for Loaded Baked Potato Salad that packs flavor and fond memories into every bite. I hope this inspires your next gathering and brings you as much joy as it brings me. Happy cooking, and remember—every dish tells a story, so let yours be one of laughter, love, and delicious flavors!
Print
Loaded Baked Potato Salad
- Total Time: 40 minutes
- Yield: 6 servings 1x
- Diet: Vegetarian (can be made vegan by substituting ingredients)
Description
A delightful twist on classic potato salad featuring fluffy potatoes, crispy bacon, sharp cheddar cheese, and tangy ranch dressing.
Ingredients
- 2 pounds Potatoes (Yukon Gold or Russet)
- 6 slices Bacon (cooked and crumbled)
- 1 cup Cheddar Cheese (shredded)
- 3 Green Onions (chopped)
- 1/2 cup Sour Cream
- 1 cup Ranch Dressing
- Salt & Pepper (to taste)
Instructions
- Prepare the Potatoes: Wash and cube the potatoes. Boil in salted water for 10-15 minutes until fork-tender.
- Cook the Bacon: Cook bacon in a skillet until crispy, then crumble it.
- Combine Ingredients: In a bowl, mix warm potatoes, bacon, cheese, green onions, sour cream, and ranch dressing.
- Mix It Up: Gently fold all ingredients together, season with salt and pepper.
- Chill and Serve: Allow to cool for 30 minutes in the fridge, then serve with extra toppings if desired.
Notes
This salad is best when chilled for at least 30 minutes to allow flavors to meld. Perfect for gatherings or as a side dish!
- Prep Time: 15 minutes
- Cook Time: 25 minutes
- Category: Side Dish
- Method: Mixing
- Cuisine: American
Nutrition
- Serving Size: 1 cup
- Calories: 300
- Sugar: 3g
- Sodium: 600mg
- Fat: 20g
- Saturated Fat: 10g
- Unsaturated Fat: 6g
- Trans Fat: 0g
- Carbohydrates: 28g
- Fiber: 3g
- Protein: 8g
- Cholesterol: 45mg
Keywords: potato salad, loaded baked potato salad, summer recipes, picnic, comfort food
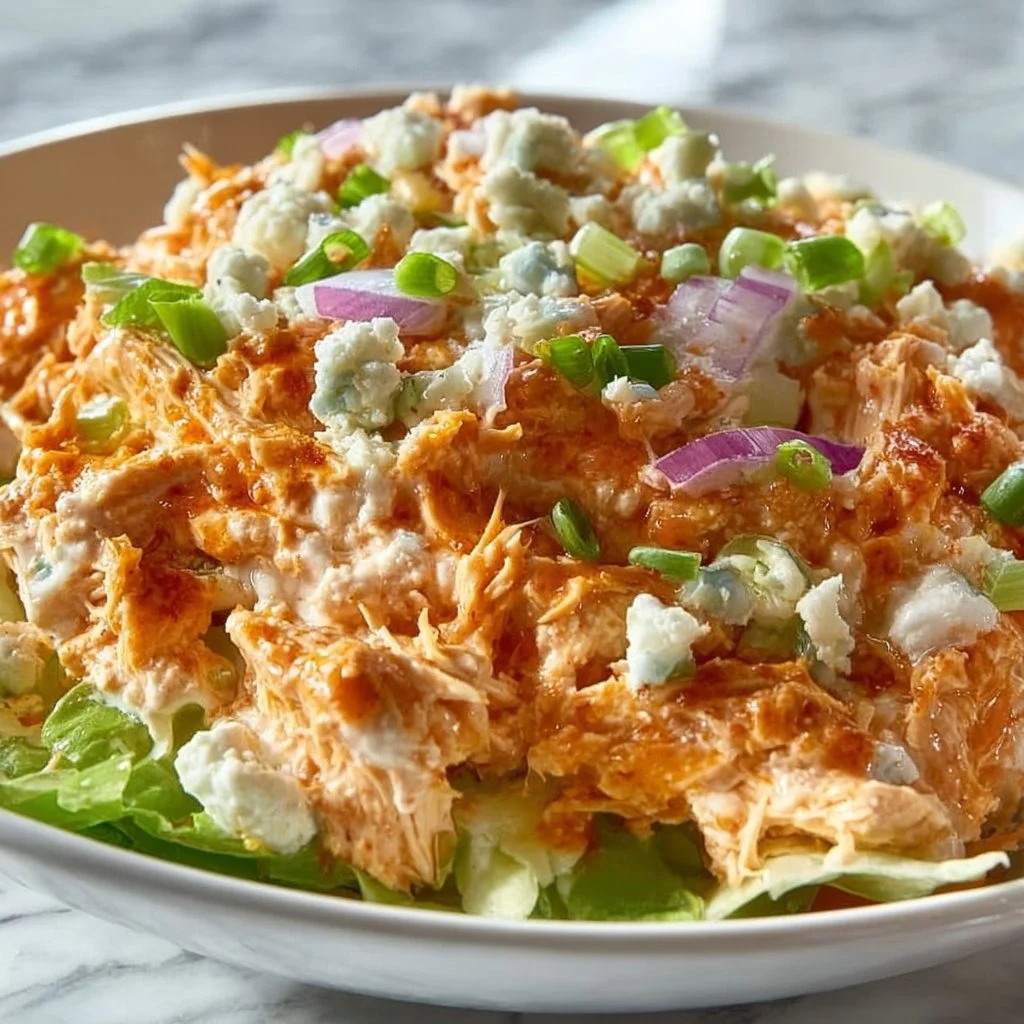
Buffalo Chicken Salad
Buffalo Chicken Salad: A Spicy Twist on a Classic Favorite
Welcome to my kitchen, dear friends! Today, we’re diving deep into a dish that’s as vibrant and bold as the flavors it boasts—Buffalo Chicken Salad. If you’ve ever found yourself caught in that deliciously tricky conundrum of wanting healthy eating while also craving something spicy and satisfying, this is the recipe for you! Trust me, this salad is a game changer.
Now, let’s talk about what makes this dish so special. Imagine succulent pieces of tender chicken tossed in a tangy Buffalo sauce, nestled atop a bed of crisp greens, and punctuated by creamy blue cheese and crunchy celery. It’s the perfect combination of flavors and textures that will make you cheer for joy at the dinner table!
But here’s the thing: there’s more to this salad than just its incredible taste. It’s a dish that holds memories for me. Whenever I whip up a batch, I’m transported back to those joyful days spent watching games with family and friends, where we’d gather around the table, sharing stories, and of course, devouring every last bite of Buffalo chicken goodness. The comfort of shared meals is irreplaceable and absolutely one of my favorite parts of being in the kitchen.
So grab your apron (don’t worry if it gets messy—we like it that way) and let’s embark on this flavor-filled journey together. Whether you’re cooking for one or hosting a gathering, this Buffalo Chicken Salad will wow everyone at the table!
Personal Story
Growing up, game day was more than just a day for sports; it was a festive occasion filled with laughter, excitement, and most importantly, amazing food! My family had a tradition of preparing a huge spread of snacks, but the star of the show was always Buffalo chicken.
I remember being just a child, perched on a stool in our kitchen, the spicy aroma of sauce wafting through the air as my mom marinated the chicken. We’d watch the games, and if things got too intense, we’d reach for our Buffalo chicken wings, tangy and spicy, their saucy goodness making the moment even more exhilarating.
As years rolled on, I found myself craving a healthier version of that nostalgic favorite. Thus, the idea for Buffalo Chicken Salad was born! It beautifully combines the essence of those game days with a fresh and vibrant twist, allowing me to enjoy the flavors I love while keeping it light.
Now, every time I make this salad, it transports me back to those cherished moments spent with family, gathering around the TV with plates piled high and hearts full of joy.
Ingredients
Here’s what you’ll need to whip up this delightful Buffalo Chicken Salad:
-
Chicken Breast (1 pound):
The star ingredient! Boneless, skinless chicken breasts offer lean protein. For easy prep, consider using rotisserie chicken to save time. -
Buffalo Sauce (½ cup):
This spicy, tangy sauce is essential. You can make your own with hot sauce and melted butter or opt for store-bought for convenience. Try a mild version if you prefer less heat! -
Romain Lettuce (4 cups, chopped):
Crisp and fresh, Romaine adds a nice crunch. Feel free to swap with spinach or mixed greens for a different texture. -
Celery (1 cup, chopped):
The crunchy texture complements the tender chicken. If celery isn’t your favorite, diced cucumbers work wonderfully. -
Cherry Tomatoes (1 cup, halved):
These juicy bursts of flavor brighten up the salad. Substitute with diced bell peppers for a delightful alternative. -
Red Onion (½ small, thinly sliced):
Adds a zesty bite. If raw onion is too strong, soak the slices in cold water for a milder taste. -
Blue Cheese Crumbles (½ cup):
This creamy addition is what makes Buffalo flavors sing! If blue cheese isn’t your jam, feta cheese is a great substitute. -
Avocado (1, diced):
Creamy and nutritious, avocado adds richness. Alternatively, use sliced almonds for a crunchy topping. -
Olive Oil & Lemon Juice (for dressing):
A drizzle of olive oil and a squeeze of lemon juice will round out the flavors beautifully! You can use any vinaigrette you love.
These ingredients work together to create a delicious and satisfying dish, perfect for any occasion!
Step-by-Step Instructions
Now that we have our ingredients, it’s time to jump into the cooking process! Here’s how to make the perfect Buffalo Chicken Salad:
-
Cook the Chicken:
- Tip: Start by preheating your oven to 375°F (190°C). Season the chicken breasts with salt and pepper (always season, my friends!). Place them in a greased baking dish, and bake for about 20-25 minutes or until they reach an internal temperature of 165°F (74°C).
- Once cooked, let them rest for a few minutes before shredding or chopping into bite-sized pieces. This resting time helps the juices redistribute, ensuring moist chicken.
-
Prepare the Buffalo Sauce:
- While the chicken is cooling, let’s whip up some Buffalo sauce! If you’re making your own, melt ½ cup of unsalted butter and stir in 1 cup of your favorite hot sauce. Toss the cooked chicken in the sauce until it’s beautifully coated. This is where the magic begins!
- Chef Hack: For a milder sauce, you can use a blend of BBQ sauce and hot sauce. Experimentation is key!
-
Mix the Salad Base:
- In a large salad bowl, combine the chopped Romaine lettuce, diced celery, cherry tomatoes, and red onion. This should be your crunchy and colorful base.
- Pro Tip: To keep your salad fresh for longer, add the dressing just before serving!
-
Assemble the Salad:
- Gently fold in the Buffalo chicken. This is the star of the show! Make sure every piece of chicken gets a taste of those zesty flavors.
- Add the diced avocado and blue cheese crumbles last. They’ll add a delightful creaminess that balances the spiciness.
- Chef’s Secret: If you’re looking for extra flavor, sprinkle in some chopped fresh parsley or cilantro!
-
Dressing:
- In a small bowl, mix olive oil and lemon juice (adjusting the ratio to taste). Drizzle it over the salad and gently toss everything together. Tada! You’re ready to serve!
-
Serving:
- Serve immediately while the chicken is still warm! Share this vibrant dish in large bowls or on individual plates garnished with additional blue cheese and a sprinkle of chopped chives.
Serving Suggestions
To elevate your presentation, try serving this Buffalo Chicken Salad in a rustic wooden bowl or on a colorful platter. Garnish with extra blue cheese crumbles or sliced green onions for that extra pop! Pair it with whole-grain rolls or tortilla chips for some added crunch.
This salad makes a fantastic centerpiece at any gathering—everyone loves it! Not to mention, it can be enjoyed as a healthy lunch option the following day (if there are leftovers, that is).
Recipe Variations
Looking to switch it up? Here are some creative twists:
-
Taco Twist: Add black beans and corn, top with taco seasoning, and use tortilla strips instead of croutons for a fun Tex-Mex flair!
-
Asian Inspired: Swap Buffalo sauce for teriyaki sauce, and add shredded carrots and sesame seeds for an Asian twist. Use cashews for that crunchy bite and fresh cilantro for garnish!
-
Mediterranean Style: Replace the Buffalo sauce with a zesty lemon-oregano dressing, and add ingredients like chickpeas and feta cheese for a Mediterranean vibe.
-
Cauliflower for the Win: Swap out the chicken for roasted cauliflower tossed in Buffalo sauce for a vegetarian version that still packs a punch!
-
Big Batch Meal Prep: Prepare all your ingredients in a container, and pack some extra dressing on the side. When you’re ready to eat, just toss it all together!
Chef’s Notes
This Buffalo Chicken Salad has truly evolved through the years. Initially, I served it as a dish for game days, but I’ve come to love how versatile it is! I’ve experimented with grill marks on the chicken, and I’ve played with various sauces—each version brings new memories and experiences.
One time, I had a kitchen disaster that turned into a delightful surprise: I accidentally added too much hot sauce. Instead of tossing the batch, I embraced the spice, added more creaminess with extra blue cheese, and voila! A new favorite transformation was born.
Cooking is all about experimentation and having fun. Don’t hesitate to make this recipe your own!
FAQs and Troubleshooting
1. How can I make it less spicy?
If you find the Buffalo sauce too hot, start with half the amount, and add it incrementally until it reaches your preferred heat level. Mixing with a little ranch or creamy dressing can also help mellow the spice.
2. Can I use frozen chicken?
Yes! Just make sure to thaw it safely before cooking. You can also use leftover chicken for a quick and easy meal.
3. What if I don’t like blue cheese?
No worries! Substitute with crumbled feta, goat cheese, or even a dollop of creamy ranch or avocado dressing for a flavorful twist.
4. Can I make this salad ahead of time?
Absolutely! Pre-cook the chicken and prepare the veggies in advance, but add the avocado and dressing just before serving to keep everything fresh and crisp.
Nutritional Info
Cooking at home gives you control over ingredients, and this Buffalo Chicken Salad is not only delicious but packed with nutrients.
- Calories: Approximately 450 kcal per serving
- Protein: 40g
- Fat: 20g
- Carbohydrates: 30g
- Fiber: 5g
- Sugars: 5g
And there you have it! A simple, fun, and satisfying recipe that I can guarantee will become a favorite in your home as it is in mine. Thank you for joining me in the kitchen today! Feel free to share your own Buffalo Chicken Salad stories, variations, or memories—we’re all friends here! Happy cooking! 🍽❤️
Print
Buffalo Chicken Salad
- Total Time: 40 minutes
- Yield: 4 servings 1x
- Diet: Healthy
Description
A delicious Buffalo Chicken Salad, combining succulent chicken with crisp greens and zesty flavors.
Ingredients
- 1 pound Boneless, skinless Chicken Breast
- ½ cup Buffalo Sauce
- 4 cups Romain Lettuce, chopped
- 1 cup Celery, chopped
- 1 cup Cherry Tomatoes, halved
- ½ small Red Onion, thinly sliced
- ½ cup Blue Cheese Crumbles
- 1 Avocado, diced
- Olive Oil & Lemon Juice for dressing
Instructions
- Cook the Chicken by preheating the oven to 375°F (190°C). Season the chicken breasts with salt and pepper, place in a greased baking dish, and bake for 20-25 minutes or until reaching an internal temperature of 165°F (74°C).
- Prepare the Buffalo Sauce by melting ½ cup of unsalted butter and stirring in 1 cup of your favorite hot sauce. Toss the cooked chicken in the sauce until coated.
- Mix the Salad Base in a large bowl combining Romaine lettuce, diced celery, cherry tomatoes, and red onion.
- Assemble the Salad by gently folding in the Buffalo chicken, diced avocado, and blue cheese crumbles.
- Dressing by mixing olive oil and lemon juice in a small bowl, drizzling it over the salad, and tossing everything together.
- Serve immediately while the chicken is still warm!
Notes
For a lighter concoction, use rotisserie chicken. Adjust spice levels of the sauce as desired.
- Prep Time: 15 minutes
- Cook Time: 25 minutes
- Category: Main Course
- Method: Baking
- Cuisine: American
Nutrition
- Serving Size: 1 serving
- Calories: 450
- Sugar: 5g
- Sodium: 800mg
- Fat: 20g
- Saturated Fat: 8g
- Unsaturated Fat: 10g
- Trans Fat: 0g
- Carbohydrates: 30g
- Fiber: 5g
- Protein: 40g
- Cholesterol: 85mg
Keywords: Buffalo chicken, salad, healthy, spicy, game day, chicken salad
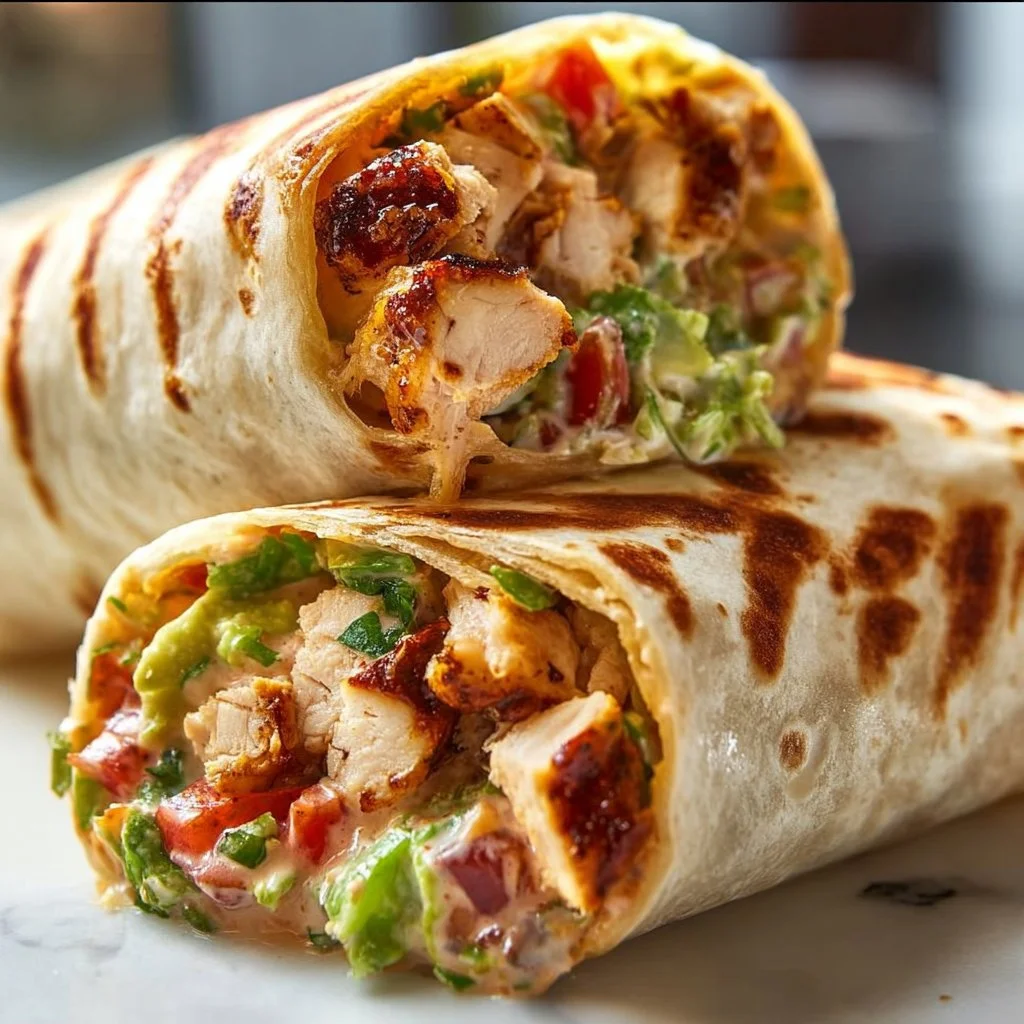
Chipotle Ranch Grilled Chicken Burrito
Chipotle Ranch Grilled Chicken Burrito: A Flavorful Adventure
Welcome to my cozy kitchen, friends! Today, we’re diving into a recipe that perfectly encapsulates my culinary philosophy: simple ingredients that come together to create something truly mouthwatering. Allow me to introduce you to the Chipotle Ranch Grilled Chicken Burrito — a dish that’s not only bursting with flavor but is also an absolute crowd-pleaser. Whether you’re looking for a quick weeknight dinner or something delicious to impress your friends at a weekend gathering, this burrito ticks all the boxes!
Now let me tell you, the burrito has its roots in the vibrant streets of Mexico, where food not only nourishes the body but also brings people together. Every bite is infused with love, culture, and history. And while I adore traditional recipes, I am all about adding my own twist to keep things exciting in the kitchen. That’s where the zesty Chipotle Ranch dressing comes into play. The combination of smoky chipotle peppers and creamy ranch is as delightful as it sounds — trust me!
Imagine for a moment that you’re at a sunny picnic, enjoying a perfectly grilled burrito bursting with juicy chicken, fresh veggies, and that amazing chipotle ranch drizzled all over. Does that image make you feel warm and fuzzy inside? It does for me every single time! So roll up your sleeves, grab your favorite apron (don’t worry, my aprons are always messy too), and let’s embark on this culinary adventure together!
Personal Story
The first time I made burritos was a lazy Sunday afternoon during my college years. It was one of those rare weekends where I wasn’t swamped with assignments, and my friends decided to come over for a little get-together. We raided the fridge, which was more like a pantry than anything — leftover grilled chicken from dinner, a few wilted veggies, and some tortillas that had somehow managed to survive the week.
As we started mixing things up, someone suggested adding ranch dressing to the chicken. I laughed at the thought, but in the spirit of culinary experimentation, we went for it, tossing in some chipotle seasoning for good measure. The interesting blend of textures and flavors turned out to be something special — that homemade burrito was a revelation!
Fast forward to today, I’ve perfected my recipe, honed my skills, and added layers of flavor, but that initial burst of inspiration still reminds me that sometimes, the best dishes emerge from teamwork, a little creativity, and the willingness to throw caution to the wind. And now, I’m thrilled to share this delightful recipe with you!
Ingredients
For our Chipotle Ranch Grilled Chicken Burrito, here are the key ingredients you’ll need:
-
Chicken Breasts:
- Preferably boneless, skinless. You can substitute with thighs for a juicier flavor or use grilled tofu for a vegetarian twist.
-
Tortillas:
- I like using large flour tortillas for their flexibility, but corn tortillas are fantastic too! Just be aware that they may crack if not warmed properly.
-
Chipotle Ranch Dressing:
- You can buy this pre-made, but I encourage you to try your hand at making your own (recipe coming soon!). Use yogurt or sour cream for a creamy texture.
-
Shredded Lettuce:
- A crisp, fresh choice! Rinse and dry thoroughly. Substitute with spinach or arugula for a peppery bite.
-
Diced Tomatoes:
- Fresh is best! But you could easily swap in canned diced tomatoes if you’re in a pinch. Just drain them first!
-
Shredded Cheese:
- A blend of cheddar and Monterey Jack is a classic choice. Consider pepper jack for an extra kick!
-
Sliced Avocado:
- The creaminess balances out the spice. If you’re looking for a swap, try Greek yogurt or guacamole.
-
Black Beans (optional):
- Adds fiber and protein. If you want to keep things lighter, feel free to skip them or use pinto beans instead.
Remember, cooking is about making the ingredients work for you! Don’t be afraid to mix and match as per your taste.
Step-by-Step Instructions
Ready to grill? Let’s get cooking! Follow these steps to create your Chipotle Ranch Grilled Chicken Burrito.
-
Marinate the Chicken:
- In a bowl, mix together your chipotle ranch dressing with a squeeze of lime juice, salt, and pepper. Soak the chicken in this mixture for at least 30 minutes. If you’re short on time, even 10 minutes will amp up the flavor! This step infuses the chicken with a zesty kick.
-
Grill the Chicken:
- Preheat your grill or grill pan over medium-high heat. Once heated, place the marinated chicken on the grill and cook for about 6-7 minutes on each side, or until the internal temperature reaches 165°F (75°C). A little grill char adds to the flavor, so don’t skip this step!
-
Rest the Chicken:
- Once done, remove the chicken from the grill and let it rest for 5 minutes. This keeps the juices inside for a succulent bite! During this time, I like to contemplate which flavors will dance together in my burrito.
-
Prepare the Fillings:
- While the chicken is resting, prepare your veggies. Slice your avocado, dice the tomatoes, and chop the lettuce. Layout everything you want to stuff into your burrito — it’s like setting the stage for a beautiful culinary performance!
-
Shred the Chicken:
- Once the chicken has rested, slice it into bite-sized pieces or shred it using a fork. Mix it back up with any remaining chipotle ranch so those flavors can meld!
-
Assemble the Burrito:
- Take a tortilla and add a generous spoonful of the chicken, followed by your layer of shredded lettuce, tomatoes, black beans (if using), cheese, and avocado. Don’t overstuff; instead, think about how you’ll roll it without making a mess (and trust me, even now, I still have burrito-folding fails sometimes!).
-
Roll It Up:
- Fold in the sides of the tortilla first, then roll it from the bottom up while tucking everything inside. You’re building a beautiful burrito burrito here, folks!
-
Grill it Again (Optional):
- If you’d like a warm, crispy exterior, pop the assembled burrito back onto the grill or a non-stick skillet for about 2-3 minutes on each side until golden brown. This adds an extra layer of flavor — yum!
Serving Suggestions
Your burrito is now ready to take center stage! You can serve it on a wooden cutting board, slice it in half for a fun presentation, and drizzle a little extra chipotle ranch on top, just to be extra indulgent. A side of tortilla chips and some fresh salsa would be a fantastic accompaniment!
Recipe Variations
Let’s keep the burrito fun rolling with some creative twists:
-
Breakfast Burrito: Replace chicken with scrambled eggs, and add some sautéed bell peppers and onions for a delightful start to your day!
-
Vegetarian Option: Skip the chicken entirely and load up on grilled veggies (think zucchini, peppers, and corn!) along with black beans for a hearty meal.
-
Spicy Kick: Add some diced jalapeños either in the filling or as a garnish for those who crave a kick!
-
Tropical Twist: Add freshly diced pineapple for a sweet balance, or drizzle with some chili mango sauce for a flavor explosion!
Chef’s Notes
Every recipe I create has my heart layered into it. This Chipotle Ranch Grilled Chicken Burrito has come a long way since that lazy college day! Through trial and error, I’ve honed the marinating techniques and learned that a little resting time goes a long way. Also, I promise you can’t go wrong with the chipotle ranch dressing — it’s like a secret weapon in my kitchen!
FAQs and Troubleshooting
1. What if my tortillas tear while rolling?
It happens to the best of us! Be sure to warm them slightly before filling; this makes them more pliable. If they tear, embrace the mess and call it a deconstructed burrito!
2. Can I make it ahead of time?
Absolutely! You can marinate the chicken ahead, and prep your fillings. Assemble right before serving for the best texture and taste.
3. How spicy is the chipotle ranch dressing?
That really depends on your taste buds! You can adjust the chipotle content for more or less heat. I recommend starting with a small amount and adjusting to your preference.
4. What’s a good side dish to serve?
A simple corn salad or Mexican-style rice complements this burrito so well. You can also whip up a refreshing slaw for a nice crunch!
Nutritional Info
Note: Nutritional values may vary based on specific ingredients and portion sizes. Always check the packaging for the most accurate information.
- Serving Size: 1 burrito
- Calories: 450
- Protein: 30g
- Carbohydrates: 50g
- Fat: 15g
And there you have it — a hearty, flavorful Chipotle Ranch Grilled Chicken Burrito that’s sure to impress! I can’t wait to hear how yours turns out! Whether it becomes a family favorite or a fun weeknight meal, I hope it brings as much joy to your kitchen as it does to mine. Happy cooking, and until next time, keep it cozy!
Print
Chipotle Ranch Grilled Chicken Burrito
- Total Time: 45 minutes
- Yield: 4 servings
- Diet: Paleo
Description
A flavorful burrito filled with grilled chicken, fresh veggies, and zesty chipotle ranch dressing, perfect for any occasion.
Ingredients
- Chicken Breasts (boneless, skinless)
- Tortillas (large flour or corn)
- Chipotle Ranch Dressing
- Shredded Lettuce
- Diced Tomatoes
- Shredded Cheese (cheddar and Monterey Jack)
- Sliced Avocado
- Black Beans (optional)
Instructions
- Marinate the chicken in chipotle ranch dressing with lime juice, salt, and pepper for at least 30 minutes.
- Grill the marinated chicken for 6-7 minutes on each side until fully cooked.
- Rest the chicken for 5 minutes after grilling.
- Prepare the fillings: slice avocado, dice tomatoes, and chop lettuce.
- Shred the chicken and mix it with remaining chipotle ranch dressing.
- Assemble the burrito with chicken, lettuce, tomatoes, beans, cheese, and avocado.
- Roll the tortilla and optionally grill the assembled burrito for 2-3 minutes on each side until golden brown.
Notes
Warm tortillas before filling to prevent tearing. Can be made ahead by marinating chicken and prepping fillings in advance.
- Prep Time: 15 minutes
- Cook Time: 30 minutes
- Category: Main Course
- Method: Grilling
- Cuisine: Mexican
Nutrition
- Serving Size: 1 burrito
- Calories: 450
- Sugar: 3g
- Sodium: 600mg
- Fat: 15g
- Saturated Fat: 6g
- Unsaturated Fat: 7g
- Trans Fat: 0g
- Carbohydrates: 50g
- Fiber: 7g
- Protein: 30g
- Cholesterol: 90mg
Keywords: burrito, grilled chicken, chipotle, ranch dressing, Mexican food
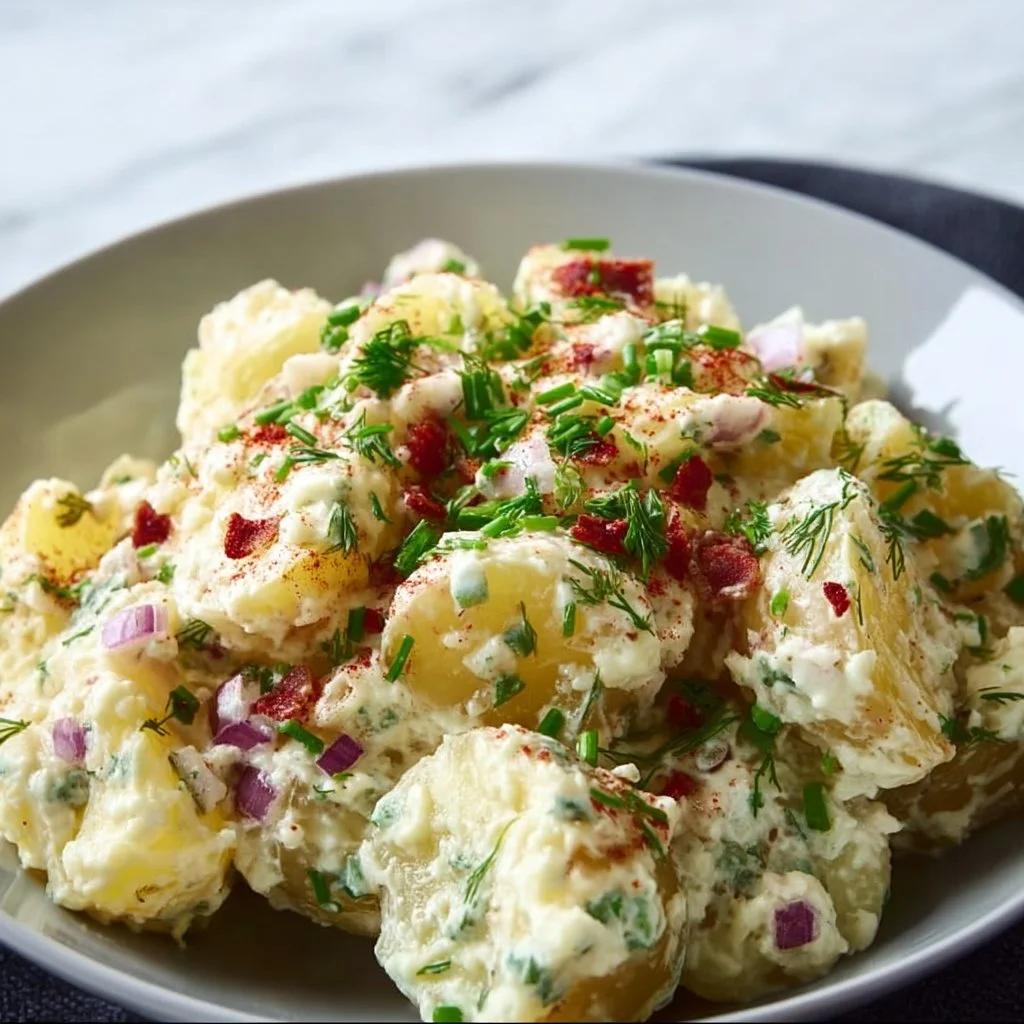
German Potato Salad
German Potato Salad: A Heartwarming Classic with a Modern Twist
Welcome to my cozy corner of the kitchen! Today, we’re diving into a beloved classic that carries a sprinkle of nostalgia and a whole lot of flavor — German Potato Salad. If you’ve ever experienced the joy of biting into a fluffy potato that’s been lovingly mixed with a tangy, savory dressing, you’ll know exactly what I’m talking about. This dish is more than just a salad; it’s a celebration of comfort, family gatherings, and good times shared over a table filled with laughter and warmth.
Now, before you think this is just any potato salad, let me tell you that German Potato Salad is a delightful departure from its mayonnaise-heavy counterparts. Instead of the usual heavy dressing, we’re talking about a warm, zesty concoction made with mustard, vinegar, and a hint of bacon. Yes, you heard that right — bacon! Each bite is packed with flavor, often leaving you wanting more. Plus, it’s a dish that’s incredibly versatile. Whether you’re serving it as a side for holiday dinners, summer barbecues, or just because it’s a Tuesday, German Potato Salad will shine on your table.
And here’s the best part: It’s super easy to make! I promise that even if you’re new to cooking, this dish will bolster your confidence and make you feel like a seasoned pro in no time. So, roll up your sleeves, grab that apron (yes, the one with the spaghetti stains — we celebrate messy cooking around here!), and let’s create some culinary magic together!
Personal Story
The first time I made German Potato Salad, it was for a family reunion at my grandparents’ house. I remember the warm summer breeze and the smell of the grill wafting through the air. My grandmother had promised that I could help in the kitchen, and there was something about that moment that made me feel so grown-up. As I diligently chopped the potatoes and tried my hand at frying bacon, I couldn’t help but feel the presence of generations before me.
Grandma’s secret ingredient? A splash of apple cider vinegar infused with a bit of her love and laughter. And let me tell you, that secret ingredient transformed what could have been a simple side dish into a sensational experience. When I finally plated it up, the vibrant colors and delightful aromas made me proud. Watching my family swoon over my creation was a moment I’ll cherish forever. To this day, German Potato Salad remains my go-to dish for any family gathering, igniting fond memories and creating new ones.
Ingredients
Here’s what you’ll need to whip up your very own German Potato Salad, along with some insights and substitution tips:
-
2 pounds of Yukon Gold potatoes
These creamy potatoes hold their shape beautifully when cooked. You can substitute with red potatoes for a similar texture but keep in mind they tend to be a bit waxier. -
4 slices of thick-cut bacon (about 4 ounces)
Bacon adds a savory, smoky flavor! If you want a vegetarian version, consider using smoked tempeh or skip the bacon altogether for a lighter dish. -
1 small onion, finely chopped (about 1/2 cup)
Onions add depth to the flavor. If you’re sensitive to onions, feel free to swap them for shallots or chives for a milder taste. -
1/4 cup apple cider vinegar
This is our tangy backbone! You can use white wine vinegar or red wine vinegar for a different flavor profile. -
2 tablespoons Dijon mustard
For that characteristic zing! You can mix it with yellow mustard if you prefer a milder flavor, or even opt for whole grain mustard for an interesting texture. -
1/2 cup chicken or vegetable broth
This adds moisture and flavor. Feel free to use low-sodium broth or even water if you’re in a pinch. -
1 tablespoon granulated sugar
Just a touch of sweetness balances the tang of the vinegar. Honey or maple syrup can also work in a pinch. -
Salt and black pepper to taste
Essential seasonings. Don’t skimp on the salt; it brings all the flavors together! -
Fresh parsley, chopped (for garnish)
It adds a beautiful pop of color and freshness! Use chives or green onions if parsley isn’t on hand.
Step-by-Step Instructions
Now that we have our ingredients lined up, let’s jump into the cooking process! Each step is thoughtfully curated to ensure you create the most delicious German Potato Salad.
Step 1: Cooking the Potatoes
-
Prepare the Potatoes
Begin by thoroughly washing the Yukon Gold potatoes to remove any dirt. Place the whole potatoes (skin on!) into a large pot and cover with cold water. Add a pinch of salt to the water — it helps season the potatoes as they cook. -
Boil with Love
Bring the pot to a boil over medium-high heat and reduce to a simmer. Boil the potatoes for about 15-20 minutes or until they are tender when pierced with a fork. (A great tip here: be careful not to overcook them! We want them fork-tender but not mushy.) -
Cooling Them Down
Once cooked, drain the potatoes and let them cool slightly before peeling the skins. (If you’re feeling adventurous, you can leave the skins on for added texture and flavor. Talk about rustic!)
Step 2: Bacon Bliss
-
Sizzle, Sizzle
While the potatoes cool, heat a skillet over medium heat. Add the bacon slices and cook until crispy, roughly 4-5 minutes, flipping halfway through. You’ll know it’s done when it’s golden brown and emitting a heavenly aroma. -
Save that Bacon Grease!
Once crispy, remove the bacon from the skillet and set it on a paper towel to drain. Leave about 2 tablespoons of bacon grease in the pan — trust me, this is where the magic happens! It’ll add a rich flavor to our dressing.
Step 3: Mixing Things Up
-
Onion in the Mix
In the same skillet with the bacon grease, add the finely chopped onion. Sauté for about 3-4 minutes until they’re softened and slightly translucent. This adds a lovely flavor backdrop for our dressing. -
The Dressing Ensemble
Lower the heat and add the apple cider vinegar, Dijon mustard, chicken broth, sugar, salt, and pepper. Stir everything together while scraping up those delicious brown bits from the bottom of the pan. Let this simmer for about 5 minutes to meld those flavors.
Step 4: The Grand Assembly
-
Dice the Potatoes
Once the potatoes are cool enough to handle, cut them into bite-sized pieces. (Don’t worry about them being perfectly even — rustic is charming!) -
Combine It All
In a large bowl, combine the diced potatoes with the sautéed onion mixture. Crumble the crispy bacon and add it too! Gently toss everything together until the potatoes are evenly coated in that luscious dressing.
Step 5: The Finishing Touch
- Adjust and Serve
Give it a taste and adjust seasoning — you might want more salt or vinegar, depending on your preference. This dish shines best served warm, but it’s also delightful at room temperature.
Serving Suggestions
To present your German Potato Salad like a pro, simply transfer it to a beautiful serving bowl. Garnish with a sprinkle of freshly chopped parsley for a pop of color and freshness. It pairs wonderfully with grilled meats, barbecued chicken, or as a fabulous side dish for any potluck. Don’t forget to grab a great big wooden spoon for serving; it adds that cozy, homey touch!
Recipe Variations
Feeling adventurous? Here are a few fun twists you can explore:
- Herbed Delight: Toss in some fresh dill or thyme for an herbal twist.
- Spicy Kick: Add a pinch of red pepper flakes or some sriracha to the dressing for a spicy version.
- Nutty Flavor: Mix in some toasted pecans or walnuts for a crunchy texture.
- Vegan Version: Skip the bacon and use smoked paprika for a hint of smokiness. Substitute chicken broth with vegetable broth and use a vegan-friendly mustard.
Chef’s Notes
Oh, the memories this dish brings! I recall one potluck when I decided to experiment with adding pickles, thinking, “What’s the worst that could happen?” Let’s just say that was an interesting night; some loved the twist while others were definitely raised eyebrows! Over the years, I’ve found that sticking to the basics often yields the best results. Yet, that playful spirit is what keeps cooking exciting!
If you find yourself with leftovers (which often happens because this recipe makes a generous batch), it’s worth noting that the flavors deepen overnight. Just give it a good stir before serving.
FAQs and Troubleshooting
1. Why did my potatoes fall apart?
Overcooking is the prime culprit! Make sure to check your potatoes for doneness around the 15-minute mark to ensure they hold their shape.
2. Can I make this salad ahead of time?
Yes! If you want to prepare it in advance, do so a few hours ahead of serving. Keep it covered in the refrigerator, but let it sit at room temperature for about 30 minutes before serving for the best flavor.
3. Can I make it gluten-free?
Absolutely! Just ensure that your mustard and broth are labeled gluten-free, and you’ll be set!
4. What’s the ideal way to store leftovers?
Store any leftovers in an airtight container in the fridge for up to 4 days. You can easily reheat it in the microwave or enjoy it cold — it’s delicious either way!
Nutritional Info
Feel free to include nutritional info here if applicable. Just remember, while this dish is hearty, it’s all about balance! Enjoy in moderation and savor every bite!
And there you have it, my dear culinary companion! A heartwarming German Potato Salad recipe that invites connection, conversation, and absolutely zero fuss. Now go forth and bring a little warmth and goodness to your dining table — because that’s what cooking is all about! Happy cooking!
Print
German Potato Salad
- Total Time: 40 minutes
- Yield: 4 servings 1x
- Diet: Paleo
Description
A heartwarming classic with a tangy, zesty dressing made with mustard, vinegar, and a hint of bacon.
Ingredients
- 2 pounds Yukon Gold potatoes
- 4 slices thick-cut bacon (about 4 ounces)
- 1 small onion, finely chopped (about 1/2 cup)
- 1/4 cup apple cider vinegar
- 2 tablespoons Dijon mustard
- 1/2 cup chicken or vegetable broth
- 1 tablespoon granulated sugar
- Salt and black pepper to taste
- Fresh parsley, chopped (for garnish)
Instructions
- Prepare the Potatoes: Wash the Yukon Gold potatoes thoroughly and place them in a large pot with cold water. Add a pinch of salt.
- Boil with Love: Bring to a boil over medium-high heat, then reduce to a simmer for 15-20 minutes until tender.
- Cooling Them Down: Drain and let cool slightly before peeling (or leave skins on for texture).
- Sizzle: Heat a skillet over medium heat, add bacon, and cook until crispy, about 4-5 minutes.
- Save that Bacon Grease: Remove bacon, leaving about 2 tablespoons of grease in the skillet.
- Onion in the Mix: Add chopped onion to the skillet and sauté for 3-4 minutes until softened.
- The Dressing Ensemble: Lower heat and stir in vinegar, mustard, broth, sugar, salt, and pepper. Simmer for 5 minutes.
- Dice the Potatoes: Cut cooled potatoes into bite-sized pieces.
- Combine It All: In a large bowl, mix diced potatoes with the onion mixture and crumbled bacon.
- Adjust and Serve: Taste and adjust seasoning; serve warm or at room temperature, garnished with parsley.
Notes
For a vegetarian version, substitute bacon with smoked tempeh or skip it altogether. This potato salad is delicious warm or at room temperature.
- Prep Time: 15 minutes
- Cook Time: 25 minutes
- Category: Side Dish
- Method: Stovetop
- Cuisine: German
Nutrition
- Serving Size: 1 serving
- Calories: 450
- Sugar: 6g
- Sodium: 600mg
- Fat: 20g
- Saturated Fat: 6g
- Unsaturated Fat: 12g
- Trans Fat: 0g
- Carbohydrates: 50g
- Fiber: 4g
- Protein: 10g
- Cholesterol: 25mg
Keywords: potato salad, German salad, comfort food, side dish, family recipes




