
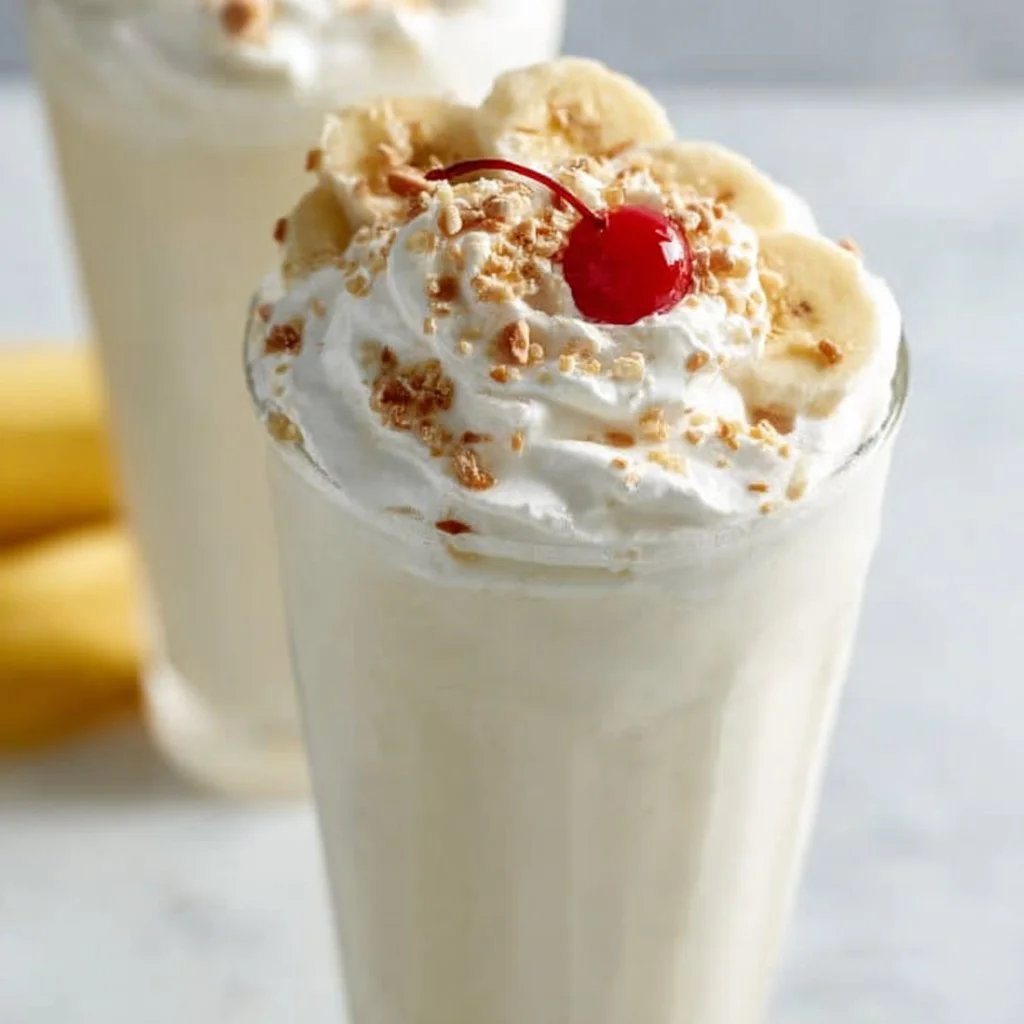
Banana Milkshake
# The Ultimate Banana Milkshake Recipe: A Creamy Delight

## Introduction

Hello there, fellow foodies! Welcome back to my cozy kitchen, where aromas swirl and flavors dance. Today we’re diving into a classic treat that’s as simple as it is delightful: the **banana milkshake**. This creamy concoction is not just a drink; it's a memory, a joy, and sometimes a cure for the ordinary day blues!

I still remember those summer afternoons spent on the porch, sipping cold milkshakes with my family as we watched the clouds drift lazily by. Each slurp was a sweet reminder of carefree days and endless laughter. The best part? Banana milkshakes are not just for hot weather; they’re perfect for any season when you need a little pick-me-up.

Now, you might think that making a milkshake requires some special skills or expensive equipment, but let me tell you, it’s as easy as pie! In fact, it's so quick and fun that I bet you'll do a happy dance in the kitchen once you whip one up. You will need just a few pantry staples and, of course, ripe bananas to create this dreamy, creamy shake that will take you straight back to childhood!

So, grab your blender, and let’s get started on this nostalgic journey of flavors. Trust me; your tastebuds will thank you!

## Personal Story

When I think of banana milkshakes, I instantly flash back to those sweltering summer days when my mom would whip up a big batch for me and my siblings after a long afternoon of running around outside. The kitchen would be filled with the sound of our laughter mixed with the loud whir of the blender—an auditory reminder that something delicious was on its way.

We often had bananas on the counter, and my mom had a vigilant eye for those that were ripening just right. "Too brown, you've got to make the milkshake," she used to say, as if they were crying out to be transformed into something more than just a snack. And boy, was she right! Those milkshakes were like golden sunshine in a glass—thick, creamy, and bursting with flavor.

I can still picture my little hands wrapped around a frosty glass, a generous dollop of whipped cream on top, and a sprinkle of chocolate syrup for that extra treat. With each sip, I felt like the happiest kid in the world, and that feeling, dear friends, is what I want to recreate today. So let’s just jump right into crafting our own banana milkshake magic together!

## Ingredients

Here’s what you'll need to create your own luscious banana milkshake:

- **Ripe Bananas (2 large)**
  *The star of our milkshake! Ripe bananas are sweeter and add the perfect creamy texture. If you don’t have ripe bananas, you can use frozen ones—just skip the ice cream for that batch!*

- **Whole Milk (1 cup)**
  *Adds creaminess to your shake. You can use any milk you prefer—almond, soy, oat, or skim milk work wonderfully too!*

- **Vanilla Ice Cream (2 cups)**
  *This ingredient is essential for that rich and creamy mouthfeel. For a lighter option, try using frozen yogurt; it will still be delicious.*

- **Vanilla Extract (1 teaspoon)**
  *Just a splash enhances the banana flavor and adds a nice aromatic quality. Feel free to swap it for almond extract for a twist!*

- **Honey or Sugar (to taste)**
  *Depends on how sweet you like it! You can also use agave syrup or maple syrup to keep it natural.*

- **Ice (1/2 cup, optional)**
  *If you prefer your shake extra frosty, add some ice. But if you use frozen bananas, you can skip this.*

## Step-by-Step Instructions

Now, let’s get down to the nitty-gritty and make this banana milkshake! Follow along, and I promise you won't mess this up.

1. **Prep Your Bananas**
   Start by peeling those lovely, ripe bananas and breaking them into chunks. This helps them blend more smoothly. Trust me, you want a silky-smooth shake, not a chunky one!

2. **Gather Your Ingredients**
   Measuring out your ingredients ahead of time can make the process smoother. Place your bananas, milk, vanilla ice cream, and vanilla extract ready to go. It’s like setting the stage before the big performance!

3. **Blend It Baby!**
   Pop all your ingredients into the blender. Start on a low speed and gradually increase to high. Mix until smooth and creamy—this should only take about 30 seconds to a minute. If it’s too thick for your liking, add a splash more milk.

4. **Taste Test**
   Here’s where the magic happens! Grab a spoon or a straw and take a little taste. If you want it sweeter—now is the time to add honey or sugar! Blend again for a few seconds. Remember, always taste as you go; it’s how great dishes are born!

5. **Final Blend**
   Give it another quick whirl to ensure everything is perfectly combined. Make sure the texture is just how you like it—smooth with no lumps!

6. **Serve Right Away**
   The banana milkshake is best enjoyed immediately. Grab some tall glasses and pour in that sumptuous shake.

## Serving Suggestions

To serve, you can keep it simple or go all out! Drizzle a bit of chocolate syrup inside the glass before pouring in the milkshake for a fun visual treat. Top it with a generous swirl of whipped cream, a sprinkle of crushed nuts, or even a cherry on top if you’re feeling festive. Serve with colorful straws and enjoy that classic diner vibe right at home!

## Recipe Variations

1. **Chocolate Banana Milkshake**: Add 2 tablespoons of chocolate syrup into the blender for a delicious chocolate twist.

2. **Peanut Butter Banana Milkshake**: A tablespoon of peanut butter adds a rich, nutty flavor—perfect if you love that classic banana and peanut butter pairing!

3. **Dairy-Free Delight**: Use coconut milk and dairy-free ice cream for a creamy vegan version that doesn’t compromise on flavor.

4. **Spiced Banana Shake**: Sprinkle in a pinch of cinnamon or nutmeg for a warm, cozy accent to those banana flavors.

5. **Banana Berry Blast**: Toss in a handful of frozen berries for a fruity explosion that adds a beautiful color!

## Chef’s Notes

Ah, the banana milkshake—a timeless classic! I’ve played around with this recipe over the years, always falling back to the basics but adding my little cardi B twist here and there. One of my kitchen blunders was when I decided to make a milkshake with unripe bananas—you can guess how that turned out! It was like blending up a whole bunch of green nonsense. Lesson learned: always wait for the bananas to ripen.

One of my favorite memories about making banana milkshakes is sharing the results with friends. It became a tradition during movie nights, complete with cozy blankets and laughter. Now, that's what I call sweet bonding time!

## FAQs and Troubleshooting

**Q1: What should I do if my milkshake is too thick?**
If your milkshake is too thick, simply add a little more milk, blend it again, and check the consistency. Go slowly, so it doesn't turn into a thin soup!

**Q2: Can I use frozen bananas for a milkshake?**
Absolutely! Frozen bananas create a wonderfully thick texture and keep your shake extra cold, making them perfect for milkshakes!

**Q3: How can I make it vegan?**
For a vegan version, swap regular milk with plant-based milk like almond or oat milk, and use dairy-free ice cream or frozen bananas.

**Q4: Can I store leftovers?**
Milkshakes are best enjoyed fresh. However, if you have leftovers, pour them into a sealed container and place them in the freezer. Just remember to give them a good stir before enjoying again!

## Nutritional Info (per serving)

- **Calories**: 350
- **Fat**: 10g
- **Carbohydrates**: 62g
- **Protein**: 7g
- **Fiber**: 3g
- **Sugar**: 32g

And there you have it—the ultimate banana milkshake recipe that will bring a smile to your face with every delicious sip. I hope you enjoy crafting this delightful drink as much as I do! Be sure to share your banana milkshake adventures with me. Happy blending!
The Ultimate Banana Milkshake
- Total Time: 5 minutes
- Yield: 2 servings 1x
- Diet: Vegetarian
Description
A creamy and nostalgic banana milkshake recipe that is easy to make and perfect for any season.
Ingredients
- 2 large ripe bananas
- 1 cup whole milk
- 2 cups vanilla ice cream
- 1 teaspoon vanilla extract
- Honey or sugar (to taste)
- 1/2 cup ice (optional)
Instructions
- Prep your bananas by peeling and breaking them into chunks.
- Gather your ingredients and measure them out.
- Blend all ingredients in a blender on low, increasing to high until smooth.
- Taste your shake and adjust sweetness if necessary.
- Final blend to ensure everything is perfectly combined.
- Serve immediately in tall glasses.
Notes
For variations, add chocolate syrup for a chocolate twist or peanut butter for extra flavor.
- Prep Time: 5 minutes
- Cook Time: 0 minutes
- Category: Beverage
- Method: Blending
- Cuisine: American
Nutrition
- Serving Size: 1 serving
- Calories: 350
- Sugar: 32g
- Sodium: 100mg
- Fat: 10g
- Saturated Fat: 5g
- Unsaturated Fat: 5g
- Trans Fat: 0g
- Carbohydrates: 62g
- Fiber: 3g
- Protein: 7g
- Cholesterol: 30mg
Keywords: banana milkshake, creamy shake, summer drink

Pin by Elizabeth Doherty on Food and Drink | Lemon dessert recipes, Low calorie desserts, No calorie foods
The Zesty Delight of Lemon Bars: A Recipe for Joy
Welcome to my kitchen! I’m Olivia Bennett — your friendly culinary companion with a passion for creating heartwarming dishes that make every meal a little extra special. Today, we’re diving into the uplifting world of lemon bars, a dessert that’s not only delicious but also packs a tangy punch of flavor that’s perfect for any occasion. Whether you’re celebrating a sunny day or simply indulging in a sweet treat during the week, these lemon bars are sure to brighten your mood and tantalize your taste buds.
The Sunshine in My Kitchen: A Personal Story
I still remember the day my grandmother taught me how to make lemon bars in her warm, cozy kitchen. The sun streamed through the little window above the sink, illuminating the flour-covered countertop, and the aroma of fresh lemons filled the air. With her expert hands, she whisked together the ingredients, explaining each step with care and a sparkle in her eye. That day, we not only baked a tasty treat but also forged a connection that has lingered in my heart ever since.
As we took those first bites, the creamy, tart filling combined with the buttery crust sent waves of happiness cascading through me. It was one of those moments — a simple kitchen task transforming into a precious memory. From that day onward, lemon bars became a staple in our family gatherings, always eliciting nostalgia and smiles. So, let’s pass on that joy and learn how to make these delectable lemon bars together. Get your apron on; we’re about to spread some sunshine!
Ingredients
Here’s what you’ll need to create these lovely lemon bars:
-
For the crust:
- 1 ½ cups all-purpose flour: A versatile base for your crust; can be substituted with almond flour for a gluten-free option.
- ½ cup powdered sugar: It adds sweetness and gives a lovely melt-in-your-mouth texture. If you’re watching sugar intake, feel free to use a sugar substitute like erythritol.
- ½ cup unsalted butter, softened: This brings richness and a lush flavor. If you prefer a dairy-free version, coconut oil works beautifully too.
- ¼ teaspoon salt: Enhances all the other flavors beautifully.
-
For the filling:
- 1 cup granulated sugar: The perfect sweet contrast to the tartness of the lemons. Consider using coconut sugar for a lower glycemic index.
- 2 large eggs: They help set the filling and provide a lovely texture. You can use flaxseed meal mixed with water as a vegan substitute.
- 1/2 cup fresh lemon juice: Freshly squeezed juice delivers bright, zesty flavor. If you’re in a pinch, bottled lemon juice can work, but fresh is always better.
- Zest of 1 lemon: This adds an intense lemony aroma and flavor. Use organic lemons for zesting, avoiding wax-coated ones.
- 1/4 cup all-purpose flour (for thickening): This helps achieve that perfect creamy consistency.
Step-by-Step Instructions
Ready to whip up these luminous lemon bars? Let’s get into it!
-
Preheat Your Oven: Start by preheating your oven to 350°F (175°C). This ensures an even bake for your lemon bars, but don’t be surprised if the scent of butter and sugar begins to waft around your kitchen!
-
Make the Crust:
- In a large bowl, cream together the softened butter and powdered sugar until light and fluffy (about 2-3 minutes).
- Add the flour and salt, mixing until the dough comes together. You want it to look like wet sand.
- Press the mixture firmly into the bottom of a greased 8-inch square baking dish. Here’s a little chef hack: Use the bottom of a measuring cup to press it down evenly! It makes it easier and creates a lovely, smooth crust.
-
Bake the Crust: Place the baking dish in the preheated oven and bake for 15-20 minutes or until the edges are slightly golden. Keep an eye on it; we want a golden crust, not a brown one!
-
Prepare the Filling:
- While the crust is baking, whisk together the granulated sugar, eggs, and flour in a medium bowl until well-combined.
- Incorporate the freshly squeezed lemon juice and lemon zest, and mix until smooth and creamy. The combination of eggs and lemon juice creates that heavenly tangy filling we adore.
-
Combine and Bake Again: Once the crust has cooled slightly, pour the lemon filling over it. Bake for an additional 20-25 minutes until the filling is set, but there’s still a slight jiggle in the center. You want it to be firm around the edges but just a touch wobbly in the middle for that perfect texture!
-
Cool and Slice: Allow it to cool completely in the pan at room temperature. Once cooled, dust with powdered sugar and slice into squares. For those clean edges, use a sharp knife; wiping it down between cuts keeps everything tidy!
Serving Suggestions
Serve your lemon bars chilled or at room temperature, dusted with additional powdered sugar for that classic sweet touch. Consider adding a dollop of whipped cream or a scoop of vanilla ice cream on the side — lemon pairs beautifully with creamy flavors. If you’re feeling fancy, garnish with a twist of lemon peel or a sprig of mint for an extra pop of color!
Recipe Variations
Want to get a little creative? Here are some fun variations you can try with your lemon bars:
- Lavender Lemon Bars: Add a teaspoon of culinary lavender to your filling for a fragrant twist!
- Blueberry Lemon Bars: Fold in some fresh blueberries before pouring the filling into the crust for a fruity explosion.
- Ginger Lemon Bars: Incorporate ground ginger into the crust for a warm, spicy note that pairs perfectly with the tart lemon.
- Coconut Lemon Bars: Replace part of the flour with shredded coconut for a tropical flair.
- Gluten-Free Lemon Bars: Substitute all-purpose flour with a 1:1 gluten-free flour blend for an easy swap.
Chef’s Notes
Oh, how these lemon bars have evolved! Over the years, I’ve played with different zests, sugars, and even added a bit of rosemary for an herbaceous touch. Each variation is a testament to the boundaries we can push in our kitchens. I sometimes find myself sneaking bites off the cutting board when no one is looking. Can you relate? Just a little nibble to check the flavor—whoops!
FAQs and Troubleshooting
-
Why did my lemon bars turn out watery?
- This usually happens if they’re underbaked. Make sure to bake until the filling is just set and has a slight jiggle in the center for that perfect texture.
-
Can I use bottled lemon juice?
- Sure, but fresh juice yields a brighter, bolder flavor. I highly recommend going for the real deal if you can.
-
How do I store leftover lemon bars?
- Keep them in an airtight container in the refrigerator for up to 5 days. They also freeze well—just wrap them tightly!
-
Can I substitute the eggs?
- Absolutely! You can use flax eggs (1 tablespoon of flaxseed meal mixed with 2.5 tablespoons of water per egg) for a vegan option.
Nutritional Info
While I usually focus on the joy of cooking rather than the numbers, here’s a quick breakdown for each lemon bar (based on a standard recipe cut into 16 bars):
- Calories: 150
- Protein: 2g
- Fat: 8g
- Carbohydrates: 19g
- Sugars: 10g
See? Making lemon bars is not just about mixing and baking; it’s an adventure filled with joy, nostalgia, and creativity. I hope this recipe brings zest to your kitchen and warm smiles to your loved ones. Can’t wait to hear how your lemon bars turn out! Happy baking! 🍋
Print
Lemon Bars
- Total Time: 55 minutes
- Yield: 16 servings 1x
- Diet: Vegetarian
Description
A tangy and delicious lemon bar recipe that’s sure to brighten your day.
Ingredients
- 1 ½ cups all-purpose flour
- ½ cup powdered sugar
- ½ cup unsalted butter, softened
- ¼ teaspoon salt
- 1 cup granulated sugar
- 2 large eggs
- ½ cup fresh lemon juice
- Zest of 1 lemon
- ¼ cup all-purpose flour (for thickening)
Instructions
- Preheat your oven to 350°F (175°C).
- Cream together the softened butter and powdered sugar until light and fluffy (about 2-3 minutes).
- Add the flour and salt, mixing until the dough comes together.
- Press the mixture firmly into the bottom of a greased 8-inch square baking dish.
- Bake the crust for 15-20 minutes or until the edges are slightly golden.
- Whisk together the granulated sugar, eggs, and flour in a medium bowl until well-combined.
- Incorporate the lemon juice and zest, and mix until smooth and creamy.
- Pour the lemon filling over the cooled crust and bake for an additional 20-25 minutes.
- Cool completely in the pan at room temperature. Dust with powdered sugar and slice into squares.
Notes
For extra flavor, consider adding culinary lavender, blueberries, or ginger to the recipe.
- Prep Time: 15 minutes
- Cook Time: 40 minutes
- Category: Dessert
- Method: Baking
- Cuisine: American
Nutrition
- Serving Size: 1 bar
- Calories: 150
- Sugar: 10g
- Sodium: 100mg
- Fat: 8g
- Saturated Fat: 5g
- Unsaturated Fat: 3g
- Trans Fat: 0g
- Carbohydrates: 19g
- Fiber: 0g
- Protein: 2g
- Cholesterol: 30mg
Keywords: lemon bars, dessert, baking, citrus dessert, sweet treat


