
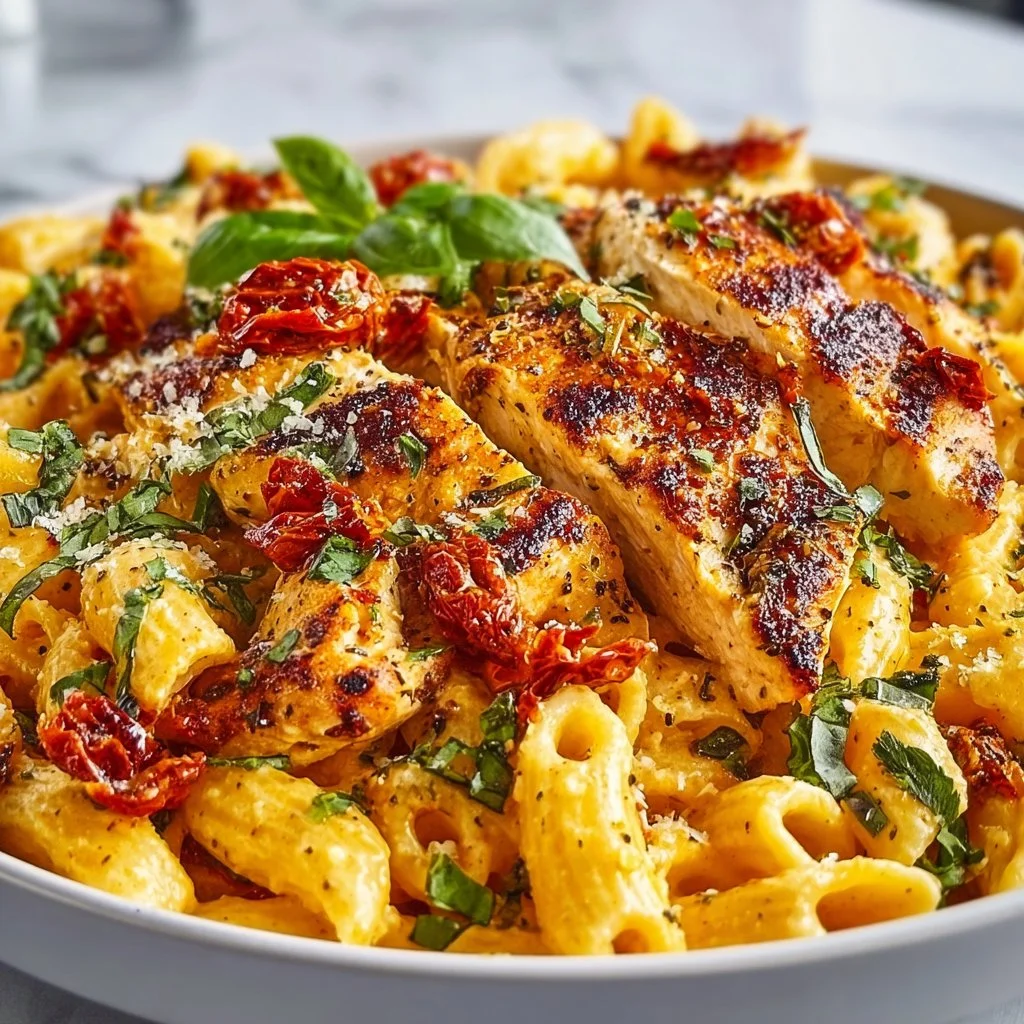
Marry Me Chicken Pasta
Marry Me Chicken Pasta: The Dish That Steals Hearts
Welcome back to my cozy corner of the kitchen, food friends! Today, I’m excited to share with you a dish that not only tantalizes the taste buds but also has a reputation for sparking romance—Marry Me Chicken Pasta! Yes, you heard that right. This scrumptious entrée is the kind of meal that might just inspire a question that’ll make you blush. It brings together tender chicken bathed in a creamy sun-dried tomato sauce, paired with comforting pasta and fresh herbs that’ll leave everyone at the table wanting more.
I first stumbled upon the idea of Marry Me Chicken during a blissful Sunday brunch with friends. We talked about everything from our favorite movies to the best dishes we’ve cooked up over the years. Someone mentioned this “Marry Me Chicken” dish, and curiosity piqued, I knew I had to give it a whirl! Cue the delightful kitchen chaos that ensued—the sizzling sounds, the fragrant aromas, and the inevitable call for taste testers. Let me tell you, when I presented my version of Marry Me Chicken Pasta, it didn’t just please the palette; it created a moment. There were smiles, giggles, and even a few light-hearted proposals tossed around the table. And that’s what cooking is all about, right? Creating memories and sharing joy with those we love.
My hope is that this dish becomes a staple in your kitchen—it’s a great go-to for cozy weeknight dinners, festive gatherings, or even just to treat yourself on a well-deserved day off. So, grab your apron, and let’s dive into the delightful world of Marry Me Chicken Pasta!
Personal Story
Oh, let me take you back to that delightful Saturday morning when I first conjured up the idea of making my version of Marry Me Chicken. Picture this: I was in my tiny kitchen, a radio playing softly in the background, and the warm golden sunlight streaming through the windows. It was one of those perfect fall days where the air was crisp, and the leaves danced in the breeze.
As I rummaged through my pantry, I found some forgotten sun-dried tomatoes and a melancholy, half-full bottle of heavy cream. Bingo! The beginnings of something wonderful were unfolding. I decided to whip up a creamy pasta dish, combining the sun-dried tomatoes with juicy chicken thighs. As the scents swirled through my kitchen, I was taken back to my childhood—my mom’s chicken alfredo always had a special place in my heart. With each stir of the pot, I felt that same warmth, excitement, and comfort!
Before I knew it, my friends showed up unannounced, drawn in by the delightful smells wafting through the door. I tossed them a glass of wine and invited them to join in the madness of my culinary creation. That night, with laughter and clinking glasses, we relished every bite of Marry Me Chicken Pasta. It was a beautiful reminder that cooking is as much about the love we share as it is about the food itself.
Ingredients
Let’s gather all the ingredients you’ll need for this heartwarming dish!
-
Chicken Thighs (boneless, skinless)
Moist and tender, chicken thighs are perfect for this recipe because they stay juicy even when cooked. If you prefer, you can swap them for chicken breasts, but be cautious not to overcook them! -
Sun-Dried Tomatoes (packed in oil)
These provide a sweet, tangy flavor that elevates the creamy sauce. If you can’t find oil-packed, don’t worry! You can use dried ones—just soak them in hot water for about 30 minutes first. -
Heavy Cream
This adds a luxurious creaminess to the sauce. For a lighter version, you can use half-and-half, but the rich flavor will be dialed down. -
Garlic (minced)
Because garlic is essential, isn’t it? It deepens the flavor profile. Fresh is best, but if you have garlic powder, you could sub in about 1/8 teaspoon for each clove. -
Parmesan Cheese (grated)
This gives that salty, nutty flavor that perfectly complements the cream. If you’re feeling adventurous, try Pecorino Romano for a sharper bite. -
Italian Seasoning
A blend of herbs like oregano, basil, and thyme adds depth to the sauce. You can substitute with fresh herbs if you have them on hand—just chop up about three times as much! -
Olive Oil
A drizzle of extra virgin olive oil adds flavor and helps brown the chicken. You can also use butter for added richness. -
Pasta (any shape you prefer)
Fettuccine, penne, or even spaghetti work great. Just make sure to cook it al dente so that it doesn’t get mushy in the sauce! -
Fresh Basil (for garnish)
A little sprinkle at the end brings freshness and a splash of color to your plate.
Step-by-Step Instructions
Step 1: Preparing the Ingredients
First things first, let’s prep our ingredients. Rinse the chicken thighs under cold water and pat them dry with a paper towel. Season both sides generously with salt and pepper. Chop up those sun-dried tomatoes into smaller pieces so they can meld into the sauce beautifully. And don’t forget to mince the garlic—it’s the backbone of our flavor!
Step 2: Brown the Chicken
In a large skillet, heat about two tablespoons of olive oil over medium heat. Once it’s shimmering, place your chicken thighs in the skillet, skin-side down (or top-side, if using boneless). Let them sear beautifully for about 5-7 minutes without moving them. Trust me on this one; you want that golden crust! Flip them over and cook for another 3-4 minutes until browned. Remove them from the skillet and set them aside on a plate; they’ll finish cooking later.
Step 3: Create the Flavorful Base
In the same skillet, reduce the heat slightly, and toss in your minced garlic and chopped sun-dried tomatoes. Sauté for about a minute or until fragrant, stirring constantly. You’ll know it’s ready when your kitchen smells heavenly! Add in a splash of the leftover oil from the sun-dried tomatoes (don’t waste that good stuff!) and stir to combine.
Step 4: Make It Creamy
Pour in the heavy cream and stir. As it heats up, take a moment to season with the Italian seasoning, and a good pinch of salt and pepper. Reduce the heat to low and stir continuously, letting it bubble away for a couple of minutes. You want it to thicken just slightly, but not so much that it won’t coat the pasta.
Step 5: Combine Chicken and Sauce
Return the chicken thighs to the pan, nestling them into the creamy sauce. Cover the skillet and let it simmer on low heat for about 10-15 minutes, until the chicken is cooked through and the sauce is rich and inviting. Tender and juicy chicken is what we’re after!
Step 6: Cook the Pasta
While the chicken simmers away, cook your pasta according to package directions until it’s al dente. Drain, and remember to save a cup of that pasta water. Trust me; it’s liquid gold!
Step 7: Combine Everything
Once the chicken is finished cooking, remove it from the skillet again (you can slice it up or leave it whole, your call!). Add the drained pasta right into that dreamy sauce, stirring to coat every piece. If it seems too thick, gradually stir in some reserved pasta water until you reach the desired consistency. Toss in the grated Parmesan cheese, and give it a good stir!
Step 8: Finish with Flair
Slice up the chicken (if that’s your style) and lay it atop the creamy pasta. To serve, garnish with fresh basil and an extra sprinkle of Parmesan for good measure. Voilà! Your Marry Me Chicken Pasta is ready to impress!
Serving Suggestions
When plating this dish, think of a beautiful garden party—bright colors, fresh herbs, and a feeling of warmth! Serve the Marry Me Chicken Pasta on a large platter, family-style, or portion it into individual bowls. A side of garlic bread and a simple green salad dressed with lemon vinaigrette makes the perfect complement to this decadent meal. Your dining companions will feel like they’ve stepped into an Italian bistro!
Recipe Variations
-
Spicy Kick: Toss in some red pepper flakes or diced jalapeños for an added layer of warmth.
-
Mushroom Lover: Sauté mushrooms alongside the garlic for an earthy flavor that pairs wonderfully with the sauce.
-
Vegan Version: Substitute the chicken with tofu or chickpeas, use coconut cream instead of heavy cream, and nutritional yeast instead of Parmesan.
-
Leaner Swap: Use skinless chicken breasts to lighten it up entirely and skip the cream for a yogurt-based sauce.
-
Herbal Delight: Swap regular pasta for spinach or whole wheat pasta for an extra nutritional boost and color.
Chef’s Notes
Cooking is all about experimenting! This Marry Me Chicken Pasta recipe has evolved countless times as I’ve played with ingredients and flavors based on what I had on hand. One day, I might add a splash of white wine to the sauce for an extra dimension, and another day, I decide to use leftover roasted vegetables. And let’s not even get started on the many types of cheese I’ve used over time—from cheddar to gouda!
One of my favorite things about this dish? It’s a crowd-pleaser! I once made it for my friends’ engagement party, and I’m pretty sure the couple got a dozen proposals from our playful group all night. Just goes to show, food can be sprinkled with a little magic—and love!
FAQs and Troubleshooting
-
Q: My chicken is tough. What went wrong?
A: Overcooking chicken can lead to it being dry and tough. Make sure to check it early, especially with chicken breasts! -
Q: My sauce is too thick. Help!
A: No worries! This is why we keep a bit of pasta water on hand. Gradually add it into the sauce until you get the perfect creamy consistency. -
Q: Can I make this ahead of time?
A: Absolutely! Just store your cooked pasta and chicken separately, and combine them with the sauce when you’re ready to serve to avoid mushiness. -
Q: Can I freeze Marry Me Chicken Pasta?
While freezing is possible, the cream sauce may separate slightly once thawed. It’s best enjoyed fresh, but if you must freeze, use an airtight container and enjoy within 2-3 months.
Nutritional Info
Estimated per serving (based on 4 servings):
- Calories: 520
- Protein: 30g
- Carbs: 45g
- Fat: 25g
- Fiber: 3g
And there you have it! I hope you give this Marry Me Chicken Pasta a try in your kitchen. Let me know how it goes, and don’t forget to share your delicious moments with me! Here’s to unforgettable meals and the love we share around the table! 🥂🍝❤️
Print
Marry Me Chicken Pasta
- Total Time: 45 minutes
- Yield: 4 servings
- Diet: None
Description
A romantic dish featuring tender chicken in a creamy sun-dried tomato sauce, served with pasta and fresh herbs.
Ingredients
- Chicken Thighs (boneless, skinless)
- Sun-Dried Tomatoes (packed in oil)
- Heavy Cream
- Garlic (minced)
- Parmesan Cheese (grated)
- Italian Seasoning
- Olive Oil
- Pasta (any shape you prefer)
- Fresh Basil (for garnish)
Instructions
- Prepare the ingredients: Rinse the chicken thighs, pat dry, season with salt and pepper, chop sun-dried tomatoes, and mince garlic.
- Brown the chicken: Heat olive oil in a large skillet over medium heat, sear chicken thighs for 5-7 minutes on one side, flip and cook for another 3-4 minutes.
- Create the flavorful base: In the same skillet, sauté garlic and sun-dried tomatoes until fragrant, adding a splash of oil.
- Make it creamy: Pour in heavy cream, season with Italian seasoning, salt, and pepper, letting it thicken slightly.
- Combine chicken and sauce: Return chicken to the pan, cover and simmer on low for 10-15 minutes.
- Cook the pasta: Prepare pasta according to package instructions until al dente, reserving a cup of pasta water.
- Combine everything: Stir drained pasta into the sauce, adding reserved pasta water for consistency, and mix in Parmesan cheese.
- Finish with flair: Slice chicken if desired, serve over pasta, and garnish with fresh basil and more Parmesan.
Notes
Serve with garlic bread and a salad for a complete meal. Feel free to experiment with ingredients for variations.
- Prep Time: 15 minutes
- Cook Time: 30 minutes
- Category: Main Course
- Method: Baking
- Cuisine: Italian
Nutrition
- Serving Size: 1 serving
- Calories: 520
- Sugar: 6g
- Sodium: 800mg
- Fat: 25g
- Saturated Fat: 15g
- Unsaturated Fat: 9g
- Trans Fat: 0g
- Carbohydrates: 45g
- Fiber: 3g
- Protein: 30g
- Cholesterol: 120mg
Keywords: pasta, chicken, creamy sauce, sun-dried tomatoes, romantic dinner
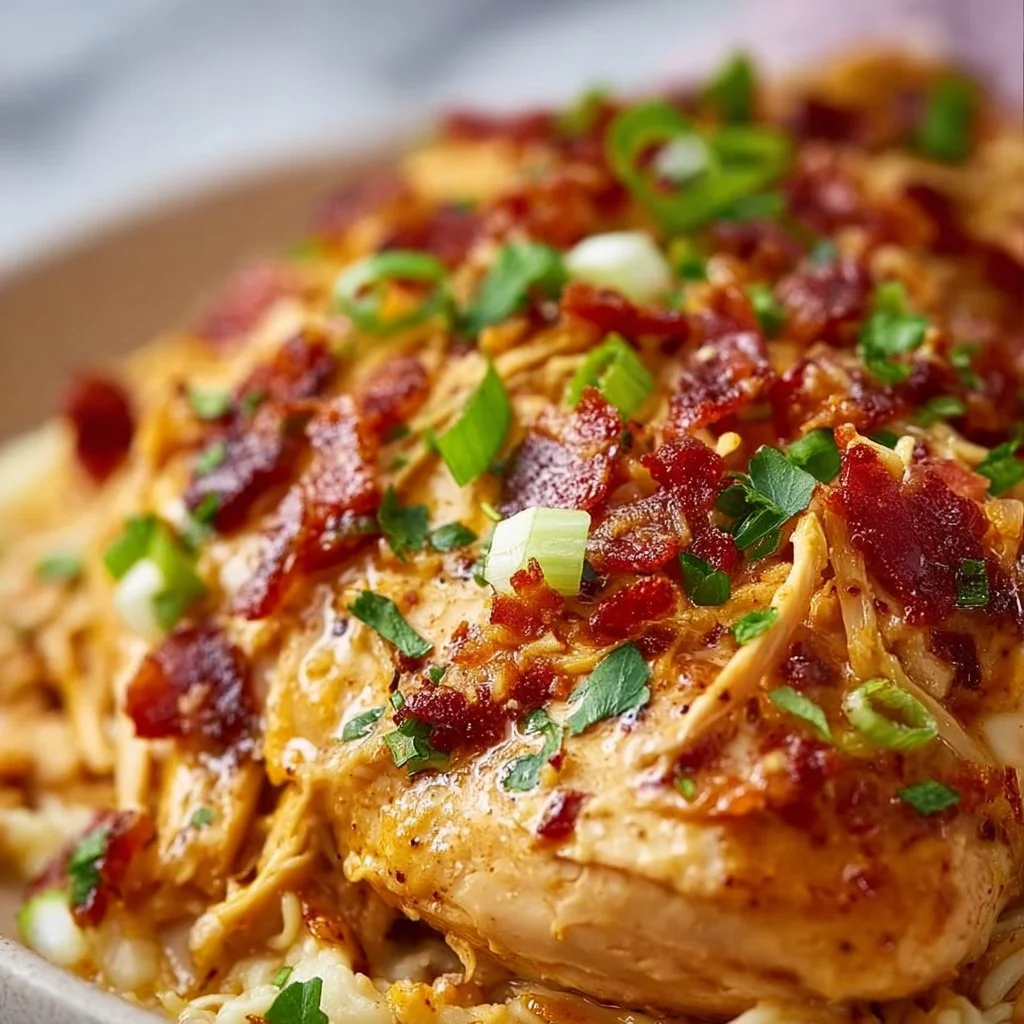
Crock Pot Crack Chicken
Crock Pot Crack Chicken: The Ultimate Comfort Dish
Hey there, kitchen enthusiasts and fellow food lovers! Welcome back to my cozy corner of culinary adventures! Today, I’m super excited to share one of my all-time favorite recipes — Crock Pot Crack Chicken. This dish has a special place in my heart and is guaranteed to become a family favorite at your dinner table, too.
Picture this: it’s a chilly Sunday afternoon, and you’re snuggled up at home with your loved ones. You catch a whiff of something absolutely mouth-watering simmering away in your kitchen — that’s the magic of crack chicken! This creamy, flavorful dish is not only packed with savory goodness but is also ridiculously easy to whip up in your trusty crock pot, making it perfect for busy days or lazy weekends.
What’s more, this recipe is versatile; you can serve it over rice, on a baked potato, or even stuffed into a tortilla or bun! The possibilities are endless, just like the flavors. Trust me, once you taste it, you’ll not only understand the name but will also find yourself coming back for second (or third) helpings. So, let’s roll up our sleeves and dive into this comforting, creamy dish that’s bound to make your taste buds dance!
Personal Story
Let me take you back to a fond memory that made this dish even more special for me. Several winters ago, I decided to host a game night for my friends. It was the perfect excuse to gather around and enjoy some hearty comfort food. I wanted something easy yet delicious, something that would fill our bellies and warm our hearts.
That’s when I stumbled upon a version of crock pot crack chicken. With a bit of tweaking and love, I created the version I’m sharing with you today. As the aroma filled my little apartment, my kitchen transformed into a bustling hub of laughter and chatter. Everyone was digging in, and I could see the delight on their faces with every bite. My friends asked for the recipe, and well, the rest is history! This dish has been a part of my cooking repertoire ever since. It serves as a reminder that food not only nourishes but also brings people together, creating precious moments worth cherishing.
Ingredients
Here’s what you’ll need to create this delectable dish:
-
Boneless, Skinless Chicken Breasts (3-4)
A classic choice! You can substitute with chicken thighs for a richer flavor or even use rotisserie chicken if you’re in a pinch for time! -
Cream Cheese (8 oz)
This creamy base is a game-changer! You can use reduced-fat cream cheese for a lighter version, or even dairy-free options if you’re avoiding dairy. -
Ranch Seasoning Mix (1 packet)
The secret flavor booster! For a homemade twist, try mixing dried herbs (dill, parsley, chives, and garlic powder). Just make sure you have enough to equal the one packet amount. -
Buffalo Sauce (1/2 cup)
Adds a kick! If you’re looking for less heat, go for a mild buffalo sauce or replace it with barbecue sauce for a sweeter touch. -
Shredded Cheddar Cheese (1 cup)
Because who doesn’t love cheese? Feel free to use a mix of cheeses such as Monterey Jack or pepper jack for an extra kick! -
Sliced Green Onions (1/4 cup)
Fresh and vibrant! If you’re not a green onion fan, you can replace them with chives for a subtler flavor. -
Cooked Bacon (4-6 slices, crumbled)
Because bacon makes everything better! Turkey bacon can be used as a healthier alternative or omit it altogether for a vegetarian version. -
Salt and Pepper to taste
Essential for enhancing flavor! Always taste and adjust to suit your preferences!
Step-by-Step Instructions
Now, let’s get to the fun part — cooking! Follow these easy steps to create your delicious Crock Pot Crack Chicken:
-
Prep the Chicken:
- Begin by placing the boneless and skinless chicken breasts in the bottom of your crock pot. No need for oil; as the chicken cooks, it will release juices that keep everything moist.
-
Cream Cheese Layer:
- Take the entire block of cream cheese and place it right on top of the chicken. Don’t worry about spreading it; it will melt beautifully throughout the cooking process.
-
Add Ranch Seasoning Mix:
- Sprinkle the ranch seasoning all over the cream cheese and chicken. It’s the secret to that classic “crack” flavor!
-
Buffalo Sauce Time:
- Pour the buffalo sauce over everything. You can adjust the amount here depending on how spicy you like it. Mix it all around a bit — it’s messy, but that’s part of the fun!
-
Set the Temperature:
- Cover the crock pot and cook on LOW for 6-7 hours or HIGH for 3-4 hours until the chicken is fully cooked and shreddable. Make sure you resist the urge to lift the lid and peek too often; trust me, you want all that heat to stay inside!
-
Shred the Chicken:
- Once fully cooked, take two forks and shred the chicken right in the pot. Mix it all up to combine with the cheesy goodness.
-
Final Touches:
- Add the crumbled bacon and shredded cheese, then cover for an additional 15-20 minutes until the cheese is melted and everything is well combined.
-
Garnish and Serve:
- Finally, sprinkle those freshly sliced green onions on top for a pop of color and flavor.
And there you have it — easy peasy!
Serving Suggestions
To serve up your fantastic crack chicken, try plating it over a bed of fluffy rice, in a warm baked potato, or heaped inside soft tortillas. You can also enjoy it as a hearty dip for tortilla chips! I love to garnish it with a few extra green onions and maybe a dollop of sour cream for richness. Everyone will be grabbing seconds, so be prepared!
Recipe Variations
Feeling inspired? Here are a few variations to suit your taste preferences:
- Italian Twist: Swap the ranch seasoning for Italian seasoning and toss in some spinach for a fresh take!
- Southwest Style: Add black beans and corn, and serve with a cilantro-lime crema for a fiesta in your mouth.
- BBQ Sliders: Replace buffalo sauce with barbecue sauce and serve it on slider buns with a side of slaw.
- Vegetarian Delight: Use chickpeas instead of chicken for a hearty vegetarian alternative.
Chef’s Notes
This recipe has truly evolved over time! The first time I made it, I almost dumped in too much buffalo sauce in my excitement, and boy, was it spicy! But hey, that’s the beauty of cooking in the home kitchen — it’s all a learning curve. I love the way this dish brings people together, and I can’t wait to hear your stories as you share it with your loved ones. Cooking is as much about the journey as it is the destination, and every spoonful of crack chicken is sure to create some wonderful memories.
FAQs and Troubleshooting
Here are some common questions that folks often have about making Crock Pot Crack Chicken:
-
What if my chicken is dry after cooking?
- If overcooked, chicken can definitely dry out. Make sure to set an appropriate timer, and trust your crock pot! Always check for doneness a bit earlier if you’re unsure.
-
Can I use frozen chicken breasts?
- Yes, you can! Just note that you’ll need to extend the cooking time by about an hour and make sure the chicken reaches a safe internal temperature.
-
What if I don’t have ranch seasoning?
- No worries! Homemade seasonings with dried herbs like dill, garlic powder, and black pepper will work just fine.
-
How do I store leftovers?
- Store any leftovers in an airtight container in the fridge for up to four days. Reheat in the microwave or on the stove with a splash of broth to keep it moist.
Nutritional Info
While enjoying your delicious crock pot crack chicken, you may want to know the nutritional breakdown. A typical serving (about 1 cup) includes approximately 450 calories, 25g protein, 30g fat, and 6g carbohydrates. It’s a comforting dish, so enjoy it as part of a balanced meal!
And there you have it, a cozy journey into one of my all-time favorite dishes! I can’t wait for you to try this Crock Pot Crack Chicken and make it your own. Happy cooking, friends — let’s make those taste buds sing!
Print
Crock Pot Crack Chicken
- Total Time: 255 minutes
- Yield: 6 servings 1x
- Diet: None
Description
A creamy, flavorful crock pot dish that combines chicken, cream cheese, ranch seasoning, and buffalo sauce for a comforting family favorite.
Ingredients
- 3–4 Boneless, Skinless Chicken Breasts
- 8 oz Cream Cheese
- 1 packet Ranch Seasoning Mix
- 1/2 cup Buffalo Sauce
- 1 cup Shredded Cheddar Cheese
- 1/4 cup Sliced Green Onions
- 4–6 slices Cooked Bacon, crumbled
- Salt and Pepper to taste
Instructions
- Place the boneless and skinless chicken breasts in the bottom of your crock pot.
- Add the entire block of cream cheese on top of the chicken.
- Sprinkle ranch seasoning all over the cream cheese and chicken.
- Pour the buffalo sauce over everything and mix it around.
- Cover the crock pot and cook on LOW for 6-7 hours or HIGH for 3-4 hours until fully cooked.
- Take two forks and shred the chicken right in the pot.
- Add the crumbled bacon and shredded cheese, then cover for an additional 15-20 minutes.
- Sprinkle sliced green onions on top for garnish.
Notes
Serve over rice, in baked potatoes, or stuffed in tortillas. This dish can also be a hearty dip for tortilla chips.
- Prep Time: 15 minutes
- Cook Time: 240 minutes
- Category: Main Course
- Method: Slow Cooking
- Cuisine: American
Nutrition
- Serving Size: 1 serving
- Calories: 450
- Sugar: 4g
- Sodium: 900mg
- Fat: 30g
- Saturated Fat: 12g
- Unsaturated Fat: 16g
- Trans Fat: 0g
- Carbohydrates: 6g
- Fiber: 0g
- Protein: 25g
- Cholesterol: 80mg
Keywords: crock pot, crack chicken, comfort food, easy dinner, creamy chicken

Cottage Cheese Parmesan Firecracker Chicken: 10 Cozy Skillet Secrets
Cottage Cheese Parmesan Firecracker Chicken: 10 Cozy Skillet Secrets
Hey there, fellow food lovers! Welcome back to my cozy kitchen! I can hardly contain my excitement to share this delightful recipe with you today – Cottage Cheese Parmesan Firecracker Chicken! This dish has truly become a staple in my home, and I think you’re going to love it just as much as I do.
Imagine this: the savory aroma of chicken sizzling in a hot skillet, the creaminess of cottage cheese melting into a cheesy, Parmesan crust that’s golden and crispy, with just the right amount of kick to make your taste buds dance! Yes, please! Whether you’re preparing a weeknight dinner for your family or looking to impress friends at a cozy get-together, this dish has got you covered.
Now let me tell you, this recipe is not just a tasty dinner, it’s a memory-maker. There’s something truly magical about cooking – the joy of gathering around the table, the laughter, those heartwarming smiles as a delicious meal unfolds. This recipe marries comfort food with a little bit of spice, creating a dish that warms not just your stomach, but your soul. Plus, it’s super easy to whip up! You don’t need to be a Michelin star chef to have fun in the kitchen. Grab your apron, and let’s dive into this mouthwatering world of flavors!
Personal Story
One of my fondest memories tied to this recipe goes back to a chilly autumn evening when my best friend, Jess, and I decided to host a cozy dinner for our families. Both of us were passionate about food and enjoyed experimenting in the kitchen, so it was only natural we would come together. We were looking for something impressive yet comforting, and I remembered my grandma’s chicken recipe, which was always a hit in our family, but we needed to spice it up a bit for this special occasion.
With a touch of inspiration and a few swaps, we created the Cottage Cheese Parmesan Firecracker Chicken! As the golden chicken filled the kitchen with an array of tempting aromas, our families began to gather, and what a beautiful sight it was! That evening was filled with laughter, heartwarming stories, and a shared love for food that brought us all closer. Now, whenever I prepare this dish, I’m transported back to that cozy night, surrounded by loved ones and the kind of joy only shared meals can create. And trust me, that’s the kind of experience I want to spread with you through this blog!
Ingredients
Let’s get to the fun part—the ingredients! Ready? Here’s what you’ll need to bring this cozy dish to life:
-
Chicken Breast: Boneless, skinless chicken breasts are the star of the show here. They’re lean, easy to cook, and soak up flavors wonderfully. If you prefer dark meat, feel free to use boneless thighs for a juicier bite!
-
Cottage Cheese: This creamy goodness serves as the secret hero in our dish. It adds moisture and a lovely richness. If you’re looking for a dairy-free option, try using Vegan Ricotta or Cashew Cream instead!
-
Parmesan Cheese: For that crunchy, cheesy crust, you can’t skip this must-have. Grated or shredded, it brings both flavor and texture. No Parmesan? No problem! You can swap it out for Romano or Pecorino for a slightly different taste.
-
Firecracker Sauce: This zingy sauce is the twist that makes this dish irresistible! It’s typically a delightful blend of hot sauce, honey, and a touch of garlic. Feeling adventurous? Try making your own sauce to really amp up the flavor.
-
Garlic Powder: A dash of garlic powder enhances the overall flavor without overpowering the dish. Fresh garlic is also an option if you want that punchy flavor!
-
Paprika: This adds a smoky depth to balance the heat. Smoked paprika is ideal if you want to take those flavors up a notch!
-
Salt & Pepper: Never forget these essentials! They bring all the flavors together with a bright touch.
-
Olive Oil: You’ll need some for pan-frying the chicken. It’s a healthier fat option that enhances the taste without overwhelming it. Canola oil or avocado oil also work beautifully!
Chef Insights:
When cooking chicken, ensuring it’s cooked to the right temperature is crucial for safety and flavor. Aim for an internal temperature of 165°F (75°C). Consider using a meat thermometer for accuracy!
Step-by-Step Instructions
Alright, now that we’re prepped and ready, let’s get cookin’! Here’s how to create your Cottage Cheese Parmesan Firecracker Chicken, step by step:
-
Preparing the Chicken: Start by patting the chicken breasts dry with paper towels. This step is super important as it helps the chicken crisp up nicely in the pan. Season both sides generously with salt, pepper, and garlic powder for those foundational flavors!
-
Creating the Cottage Cheese Mix: In a bowl, combine the cottage cheese, Parmesan cheese, paprika, and half of your Firecracker sauce. Mix until well combined – you want a creamy, cheesy concoction that will cling beautifully to the chicken. If you prefer a slightly smoother texture, blend the cottage cheese first before mixing with the other ingredients.
-
Coating the Chicken: Take your seasoned chicken and coat them generously with the cottage cheese mix on both sides. Don’t be shy here; you want every bite to be flavor-packed! The creaminess will also help keep the chicken moist while cooking.
-
Heating the Skillet: Drizzle olive oil in a large skillet over medium-high heat. You want the oil to shimmer before adding the chicken; this step ensures that your chicken achieves that perfect golden-brown crust.
-
Cooking the Chicken: Once your skillet is hot, add the coated chicken breasts. Cook for about 5-6 minutes on each side. Remember, the key here is to resist the urge to flip too early; that’s how you get that beautiful crust! You’ll know it’s time to flip when the edges look opaque and the chicken releases easily from the pan.
-
Adding More Sauce: After you flip the chicken, drizzle the rest of your Firecracker sauce on top for an extra kick! Cook for another 5-6 minutes until the chicken is cooked through and the flavor has permeated every morsel.
-
Finishing Touches: Once the chicken reaches that desired internal temperature, remove it from the skillet and let it rest for about five minutes. This step is crucial for juicy chicken; it allows the juices to redistribute throughout the meat!
Pro Tip:
For a crispy finish, you can pop the chicken under the broiler for a minute or two at the very end – just keep an eye on it to avoid burning!
Serving Suggestions
To serve up your Cottage Cheese Parmesan Firecracker Chicken, slice it into juicy pieces and arrange them on a plate or a wooden board for a rustic feel. Drizzle some extra Firecracker sauce on top for good measure, and maybe sprinkle with fresh parsley or basil for a pop of color! Serve alongside some fluffy rice or a fresh salad for a complete meal. You can even add a side of roasted vegetables for a wholesome touch – your guests will be in love with this vibrant plate!
Recipe Variations
Feeling creative? Here are a few variations to switch things up:
- Spicy Alternative: Add some crushed red pepper flakes to the cottage cheese mix for an extra kick!
- Herbaceous Twist: Mix in some fresh chopped herbs like dill, parsley, or basil to brighten up the creamy cottage cheese.
- Vegetarian Option: Substitute chicken with eggplant or cauliflower for a plant-based delight!
- Cheesy Delight: Layer some extra mozzarella cheese on top before broiling for an even cheesier finish!
- Mediterranean Flair: Swap out the Firecracker sauce for a tangy tzatziki sauce for a Mediterranean-inspired dish!
Chef’s Notes
Over the years, I’ve experimented with this recipe in countless ways. The journey began with my grandma’s chicken dish, but I never thought cottage cheese would become one of my go-to ingredients! I once forgot to season the chicken properly, and while it was a flop at the moment, it taught me the importance of layering flavors from the very beginning. I also learned that cooking is a wonderful adventure—sometimes the best meals arise from minor mishaps.
This dish has become a family favorite, and I hope it finds a special place in your hearts (and your table) too!
FAQs and Troubleshooting
1. Can I use frozen chicken?
Absolutely! Just make sure to thaw your chicken completely before cooking. It’s best to do this in the refrigerator overnight for even cooking.
2. My coating won’t stick; what did I do wrong?
If your cottage cheese mixture isn’t sticking, it may be due to wet chicken. Patting the chicken dry before seasoning is crucial! Also, ensure you’re coating each piece thoroughly.
3. How do I know when the chicken is done?
Using a meat thermometer is the best way! Aim for 165°F (75°C) in the thickest part of the chicken for perfectly cooked, juicy meat.
4. Can I make this dish ahead of time?
Definitely! You can prep the chicken and cottage cheese mixture, then store it separately in the fridge for up to 24 hours. Cook them just before serving for fresh, hot deliciousness.
Nutritional Info (per serving)
- Calories: Approx. 350
- Protein: 40g
- Carbohydrates: 5g
- Fat: 16g
Indulge guilt-free, savor the moment, and enjoy the art of cooking!
There you have it—your guide to making a fantastic Cottage Cheese Parmesan Firecracker Chicken! With stories and tips sprinkled throughout, I hope you’re inspired to whip up this cozy dish in your own kitchen. Happy cooking, and let’s keep those delicious moments going! 🍽️✨
Print
Cottage Cheese Parmesan Firecracker Chicken
- Total Time: 27 minutes
- Yield: 4 servings 1x
- Diet: Gluten-Free
Description
A delightful dish featuring chicken breasts coated in a creamy cottage cheese and Parmesan crust with a kick from Firecracker sauce.
Ingredients
- 4 Boneless, skinless chicken breasts
- 1 cup Cottage cheese
- 1/2 cup Grated Parmesan cheese
- 1/4 cup Firecracker sauce
- 1 tsp Garlic powder
- 1 tsp Paprika
- Salt and pepper to taste
- 2 tbsp Olive oil
Instructions
- Pat the chicken breasts dry with paper towels and season with salt, pepper, and garlic powder.
- Combine the cottage cheese, Parmesan cheese, paprika, and half of the Firecracker sauce in a bowl.
- Coat the chicken breasts generously with the cottage cheese mix on both sides.
- Drizzle olive oil in a skillet over medium-high heat and let it shimmer.
- Add the coated chicken breasts and cook for about 5-6 minutes on each side until golden brown.
- Drizzle the remaining Firecracker sauce on top after flipping.
- Remove from the skillet and let the chicken rest for about five minutes before serving.
Notes
For a crispy finish, briefly broil the chicken at the end. Use a meat thermometer to ensure chicken reaches 165°F (75°C).
- Prep Time: 15 minutes
- Cook Time: 12 minutes
- Category: Main Course
- Method: Skillet Cooking
- Cuisine: American
Nutrition
- Serving Size: 1 serving
- Calories: 350
- Sugar: 5g
- Sodium: 400mg
- Fat: 16g
- Saturated Fat: 5g
- Unsaturated Fat: 9g
- Trans Fat: 0g
- Carbohydrates: 5g
- Fiber: 0g
- Protein: 40g
- Cholesterol: 100mg
Keywords: chicken, cottage cheese, Firecracker sauce, Parmesan, easy dinner
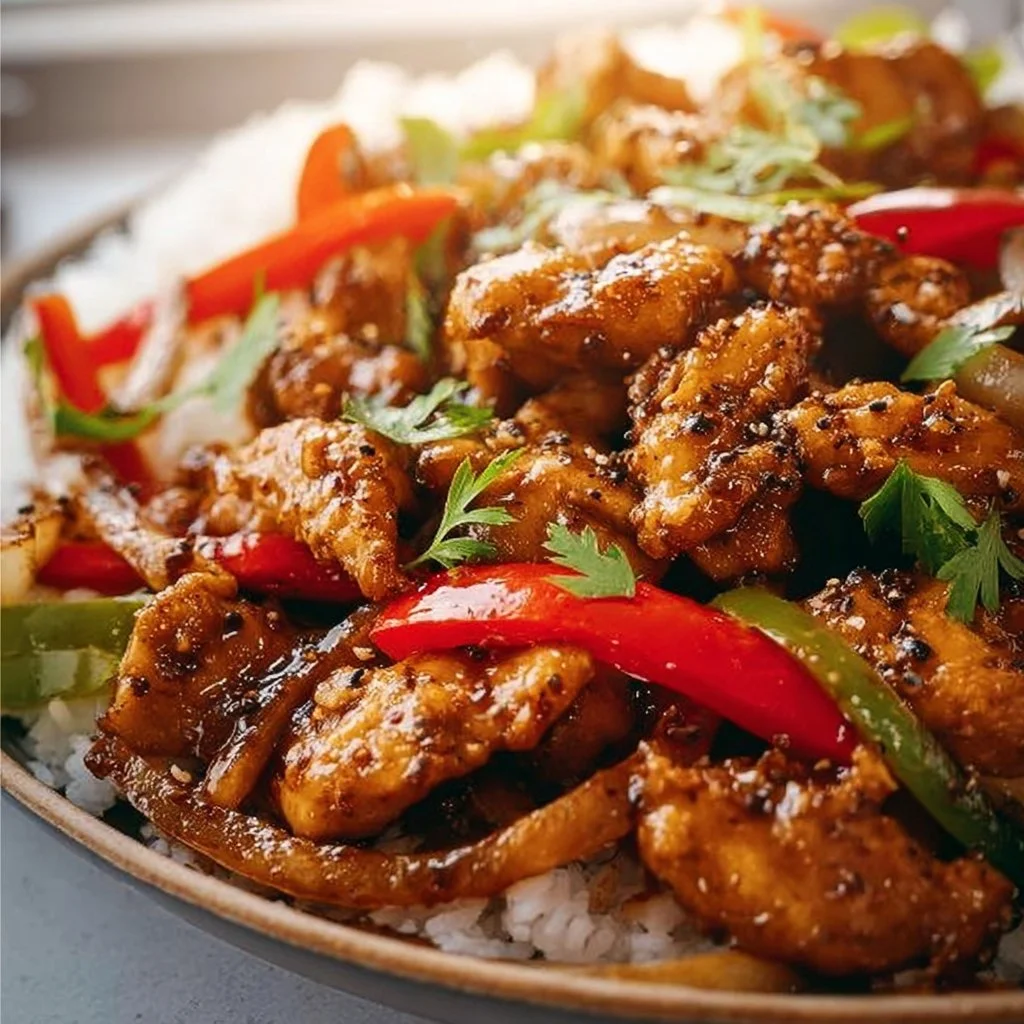
Black Pepper Chicken
Black Pepper Chicken: A Flavorful Journey in Your Kitchen
Welcome back to my cozy kitchen, friends! Today, I’m thrilled to share one of my all-time favorite recipes: Black Pepper Chicken. This dish is a celebration of bold flavors, simplicity, and the kind of comfort food that warms your soul and brings everyone to the table. It’s one of those dishes that has a fantastic balance of spicy and savory, making every bite feel like a little culinary adventure.
Black Pepper Chicken is not just your everyday chicken stir-fry. Oh no, my friend! It’s a delightful dish that’s quick enough for weeknights but special enough to impress your crowd during weekend gatherings. Picture this: juicy chicken pieces, fresh veggies, and a aromatic pepper sauce that packs a punch—who could resist that?
What I love most about this recipe is its versatility. You can amp up the heat or keep it mild; it’s all about catering to your taste buds or that of your loved ones. As we dive into this recipe, I want you to feel inspired and excited to cook! There’s something magical that happens when you transform simple ingredients into something so delightful that it leaves everyone wanting more. So, roll up your sleeves and let’s make some delicious Black Pepper Chicken together!
Personal Story
Every dish I create has a story, and Black Pepper Chicken is no exception. I remember the first time I made this dish—it was a rainy Saturday afternoon, the kind of day where you want to stay indoors, cozy, and surrounded by delicious aromas. I had just moved into my quaint little apartment and wanted to make something special. With only a few ingredients on hand and a craving for something flavorsome, I decided it was the perfect time to experiment.
As I chopped the onions and bell peppers, my best friend, Mia, dropped by unannounced with a bottle of wine and an appetite for adventure. We laughed, danced around the kitchen, and concocted what would become our go-to recipe for busy weeknights. I remember the look of sheer happiness on her face with the first mouthful. Since then, Black Pepper Chicken has graced our table countless times, during both impromptu dinners and “fancy” get-togethers. I think it’s safe to say, this dish has truly woven itself into the fabric of my culinary journey, reminding me of the joy that cooking and sharing food with loved ones can bring.
Ingredients
Here’s everything you’ll need to whip up this tantalizing Black Pepper Chicken:
-
Chicken Breast (500g): The star of the show! Boneless, skinless chicken breast is lean and cooks quickly, but thighs also work beautifully for a juicier result. If you’d like a vegetarian option, tofu is a fantastic substitution.
-
Bell Peppers (2): A colorful addition that not only looks amazing but adds sweetness and crunch. You can use any color you like—red, green, or yellow! If you’re out of bell peppers, snap peas or broccoli could step in nicely.
-
Onion (1 large): Sweet and aromatic, onions create a foundation of flavor. Yellow or white onions provide a perfect balance for the dish, but red onions can add a hint of sweetness if preferred.
-
Garlic (3 cloves): Fresh garlic adds an unbeatable aroma and depth to your dish. If you’re in a pinch, minced garlic from a jar works, but nothing beats the fresh stuff!
-
Fresh Black Pepper (2 tsp): The true hero here! A robust and spicy kick; freshly cracked black pepper elevates your dish onto another level. If you prefer milder flavors, reduce the amount or swap with white pepper.
-
Soy Sauce (1 tablespoon): Provides a savory base while enhancing the earthy, umami notes of the chicken. Tamari or coconut aminos are great gluten-free alternatives.
-
Honey (1 tablespoon): A touch of sweetness to balance out the heat. If you’re vegan, feel free to swap with maple syrup or agave.
-
Sesame Oil (1 tablespoon): Adds a nutty aroma that perfectly complements the dish. If you don’t have any on hand, you can use vegetable oil, though the flavor won’t be as rich.
-
Cornstarch (for coating): Helps achieve a beautiful texture on the chicken. If you prefer a gluten-free option, arrowroot powder works well too.
-
Spring Onions (optional): For garnish. They’re not just pretty; they add a fresh pop of flavor! You can also use cilantro if you prefer.
Now that we have our lineup ready, we’re all set to dive into the cooking process!
Step-by-Step Instructions
Step 1: Prepare the Chicken
Start by cutting your chicken breast into bite-sized pieces. Aim for uniform pieces so they cook evenly. In a small bowl, toss the chicken pieces with cornstarch. This will help create that irresistible crispy coating that elevates the dish! Set this bowl aside while you tackle the veggies.
Step 2: Chop the Veggies
Next, let’s chop our onion and bell peppers. For the onion, slice it in half, then make thin quarter-inch slices. With the bell peppers, remove the stem and seeds, and cut them into similar-sized strips. Don’t worry if they’re not perfect—cooking is about joy, not precision!
Step 3: Heat Things Up
In a large skillet or wok, heat about 2 tablespoons of oil over medium-high heat. Once it’s shimmering, add the chicken—all at once, please! Sear the chicken until it’s golden brown and cooked through, about 4-5 minutes, stirring occasionally. Don’t overcrowd the pan; you want those crispy bits!
Step 4: Aromatic Time
Toward the end of the chicken cooking time, push the chicken to the side of the skillet and toss in your onions and garlic. Cook them for about 2 minutes until fragrant, stirring occasionally. The garlic should start to turn golden without burning, or it’ll develop a bitter taste. Sprinkle in the black pepper here—it’ll fill your kitchen with an amazing aroma.
Step 5: Let it Sizzle
Now add the sliced bell peppers to the pan. Stir everything together, allowing the veggies to get tender-crisp—around 3-4 minutes should do the trick. At this point, add in the soy sauce and honey, stirring well to coat all the chicken and vegetables. This is where the magic happens!
Step 6: Final Touches
Cook for another minute, allowing the flavors to marry, and take it off the heat. Taste and adjust the seasoning, adding more pepper or a drizzle of soy sauce if needed.
Step 7: Plating Up
Time to serve up your delicious Black Pepper Chicken! Plate it with some fluffy rice or noodles, and don’t forget those fresh spring onions on top—they’ll add a beautiful pop of green!
Serving Suggestions
For an authentic experience, serve your Black Pepper Chicken over a bed of steamed jasmine rice or alongside some tender udon noodles. For an added touch of fun and crunch, consider sprinkling some toasted sesame seeds over the top. You can create a delightful family-style spread by putting the chicken and rice in the center of the table and allowing everyone to help themselves. Trust me; the communal vibe adds to the experience!
Recipe Variations
- Spicy Twist: If you love heat, add some sliced fresh jalapeños or crushed red pepper flakes to the mix for an extra kick.
- Veggie-Heavy: Swap out half the chicken for more veggies like carrots, snow peas, or broccoli to bulk up the nutritional factors.
- Gluten-Free Delight: Use tamari instead of soy sauce, and make sure your cornstarch is certified gluten-free.
- Creamy Version: Add a splash of coconut cream toward the end for a creamy, comforting twist.
- High-Protein Option: Swap chicken for shrimp or tofu for a different, yet equally delicious protein source!
Chef’s Notes
Oh, the stories this dish could tell! As I’ve traveled and explored various cultures, I’ve come to learn that every corner of the world has a unique way of spicing up chicken, and this recipe holds a special place in my heart. I’ve tweaked it here and there depending on what was fresh at the market, and each adjustment has brought a delightful new experience. Sometimes, it’s the simplest recipes that evolve with you, and this one has been by my side through many meal-prepping sessions.
Remember, cooking is a journey, not a destination. So, don’t stress if things aren’t going perfectly—every mistake is a lesson learned!
FAQs and Troubleshooting
1. Why is my chicken not browning?
- If your chicken isn’t browning, it’s likely overcrowded in the pan. Cook in batches, ensuring enough space for the chicken to sear.
2. How do I store leftovers?
- Store your Black Pepper Chicken in an airtight container in the fridge for up to 3 days. Reheat gently on the stove or microwave to enjoy the next day!
3. Can I make this ahead of time?
- Absolutely! You can marinate the chicken beforehand or prep the veggies. Just cook everything fresh the day you plan to serve it for the best flavor.
4. What if it’s too spicy?
- If it’s too spicy, serve with a side of yogurt or sour cream to balance the heat. You could also add a touch more honey to mellow things out.
Nutritional Info
Here’s a rough estimate per serving (based on 4 servings):
- Calories: 350
- Protein: 30g
- Carbohydrates: 30g
- Fat: 15g
So there you have it—my beloved Black Pepper Chicken recipe that’s as easy to make as it is delicious! I hope you find as much joy in cooking and sharing this dish as I do. Happy cooking! 🍽️
Print
Black Pepper Chicken
- Total Time: 30 minutes
- Yield: 4 servings 1x
- Diet: Non-Vegetarian
Description
A delightful blend of juicy chicken, fresh veggies, and a bold pepper sauce, perfect for weeknight dinners or weekend gatherings.
Ingredients
- 500g Chicken Breast
- 2 Bell Peppers
- 1 large Onion
- 3 cloves Garlic
- 2 tsp Fresh Black Pepper
- 1 tablespoon Soy Sauce
- 1 tablespoon Honey
- 1 tablespoon Sesame Oil
- Cornstarch (for coating)
- Spring Onions (optional, for garnish)
Instructions
- Prepare the Chicken by cutting into bite-sized pieces and tossing with cornstarch.
- Chop the Veggies including onion and bell peppers.
- Heat about 2 tablespoons of oil in a large skillet over medium-high heat and sear the chicken until golden brown.
- Aromatic Time: Push chicken to the side and cook onions and garlic until fragrant.
- Let it Sizzle by adding bell peppers and stir well with soy sauce and honey.
- Final Touches: Cook a minute more and taste for seasoning adjustments.
- Plating Up with fluffy rice or noodles and garnish with spring onions.
Notes
For added heat, incorporate jalapeños or crushed red pepper flakes. Store leftovers in an airtight container for up to 3 days.
- Prep Time: 15 minutes
- Cook Time: 15 minutes
- Category: Main Course
- Method: Stir-frying
- Cuisine: Asian
Nutrition
- Serving Size: 1 serving
- Calories: 350
- Sugar: 6g
- Sodium: 800mg
- Fat: 15g
- Saturated Fat: 2g
- Unsaturated Fat: 7g
- Trans Fat: 0g
- Carbohydrates: 30g
- Fiber: 2g
- Protein: 30g
- Cholesterol: 75mg
Keywords: chicken stir fry, black pepper chicken, quick dinner, comfort food
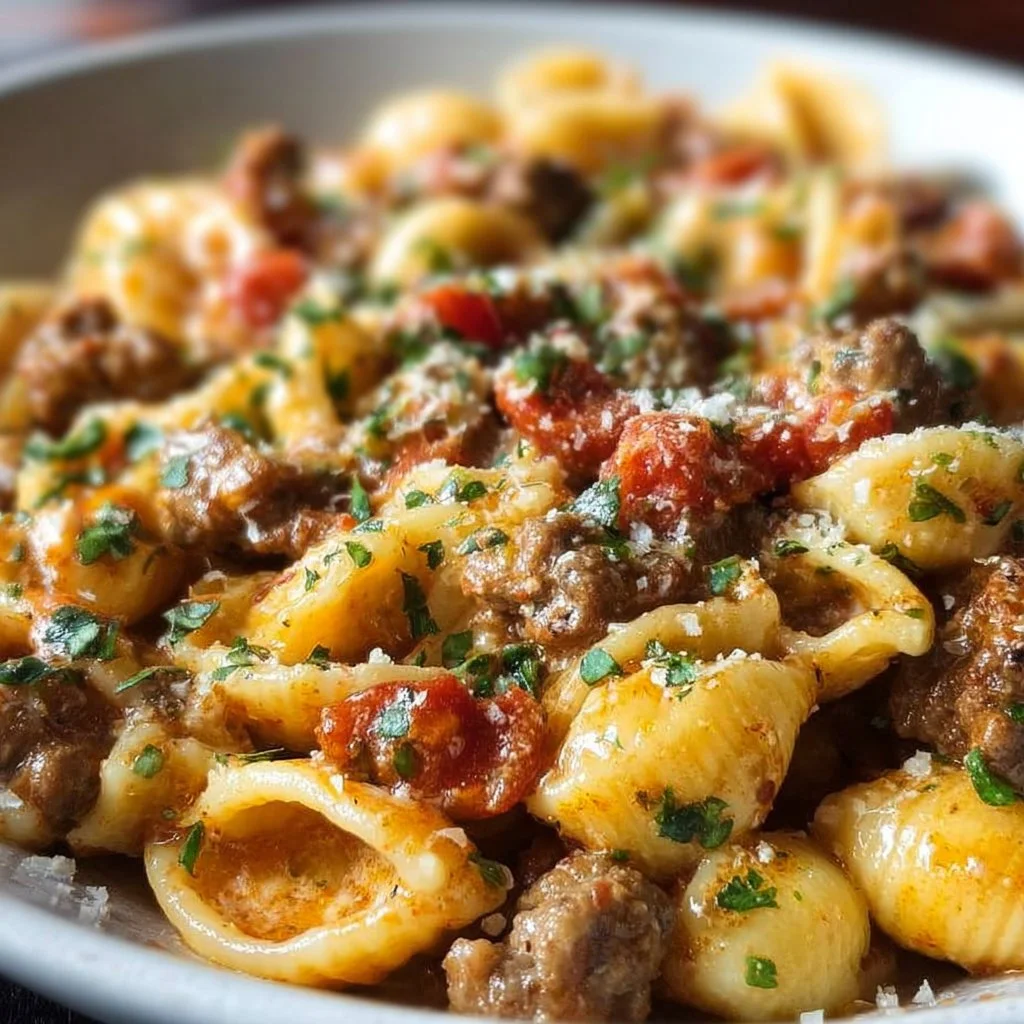
Creamy One Pot Italian Sausage and Shells
Creamy One Pot Italian Sausage and Shells: A Cozy Kitchen Classic
Welcome to my kitchen! I’m thrilled to have you here, ready to dive into a delicious adventure. Today, we’re making a dish that embodies everything I love about cooking: it’s creamy, comforting, and comes together in just one pot. We’re talking about Creamy One Pot Italian Sausage and Shells.
Picture this: it’s a chilly evening, and the wind is rustling outside, but inside, the kitchen is warm and filled with the aroma of savory Italian sausage, garlic, and melting cheese. This dish is not only comforting but also oh-so-simple to whip up, making it perfect for a weeknight dinner or a cozy gathering with friends and family.
This recipe is a celebration of flavor. The richness of the cream melds beautifully with the spices of the Italian sausage, while the shells provide just the right bite. Seriously, every spoonful is like a warm embrace, and the best part? Everything cooks in one pot, so cleanup is a breeze!
Personal Story
Let me take you back to a chilly autumn afternoon a few years ago. I was eagerly preparing for a family gathering—my favorite time of the year! My kitchen was buzzing with laughter as my loved ones pitched in, chopping veggies, and stirring pots. I wanted to create a dish that would not only warm us up but also spark conversations and create lasting memories around the dinner table.
As I rummaged through my pantry, I found Italian sausage nestled next to a box of shell pasta. A little creative impulse kicked in, and before I knew it, I was sautéing sausage, tossing in a few aromatics, and dreaming up a creamy sauce. The blend of flavors wafting through my kitchen was irresistible. When I finally served up my Creamy One Pot Italian Sausage and Shells, it was an instant hit! The laughter, the warmth, and the satisfaction in everyone’s eyes reminded me of why I love to cook. This dish became a staple in my home, and I can’t wait for you to experience the joy it brings!
Ingredients
Let’s gather our ingredients, shall we? Here’s what you’ll need to create this sumptuous dish:
-
Italian Sausage (1 pound)
- Explanation: I love using sweet or mild Italian sausage for this dish. It provides tons of flavor without being too spicy. For a leaner option, feel free to swap it out with chicken sausage.
-
Shell Pasta (8 ounces)
- Explanation: The size and shape of shell pasta are perfect for catching the creamy sauce! If you’re gluten-free, there are plenty of alternatives made from rice or chickpeas that work just as well.
-
Heavy Cream (1 cup)
- Explanation: This is what makes our dish super creamy and dreamy! If you’re looking for a lighter option, you could use half-and-half, but keep in mind that it won’t be quite as rich.
-
Chicken Broth (3 cups)
- Explanation: The broth adds depth to the flavor and helps the pasta cook to perfection. You can use vegetable broth for a vegetarian option; just be mindful of the added flavors.
-
Onion (1 medium, diced)
- Explanation: Sweet and aromatic, onion is essential for building our flavor base. If you’re in a pinch, shallots or even a bit of onion powder can save the day.
-
Garlic (3 cloves, minced)
- Explanation: Garlic adds that lovely aromatic punch! You can substitute it with garlic powder, but fresh garlic really takes this dish to the next level.
-
Spinach (3 cups, fresh)
- Explanation: This not only adds nutrients but also a beautiful pop of color! Feel free to swap with other greens like kale or arugula if that’s what you have on hand.
-
Parmesan Cheese (1 cup, grated)
- Explanation: A must-have for that final touch of flavor! You could use Pecorino Romano for a sharper taste, or nutritional yeast for a vegan alternative.
-
Red Pepper Flakes (optional, to taste)
- Explanation: For those who like a little heat, these will do the trick! You can always leave them out if you prefer a milder dish.
Step-by-Step Instructions
Now that we have our ingredients, let’s get cooking! Here’s how you can whip up this recipe step by step:
-
Sauté the Sausage:
- In a large pot over medium heat, add the Italian sausage. Use a wooden spoon to break it up into smaller pieces. Cook it until it’s browned and cooked through, about 5-7 minutes.
- Tip: Make sure to get some nice color on the sausage; that caramelization adds lots of flavor to the dish!
-
Add the Aromatics:
- Next, toss in the diced onion and cook until it’s translucent, about 3-4 minutes. Add the minced garlic and red pepper flakes, cooking for another minute until fragrant.
- Chef Hack: To save on time and dishes, you can chop the onion while the sausage cooks. Multitasking makes the cooking process flow smoothly!
-
Pour in the Broth:
- Pour in the chicken broth, scraping up any brown bits at the bottom of the pot (those bits hold tons of flavor!). Bring to a simmer.
- Tip: Simmering brings those delicious flavors together. It’s a good time to taste the broth. You want it to be slightly seasoned since our pasta will absorb some of this deliciousness!
-
Add the Pasta:
- Stir in the shell pasta, ensuring it’s fully submerged. Cook according to package instructions until al dente, about 9-11 minutes.
- Chef’s Advice: Stir occasionally to prevent sticking, and if it looks like it’s drying out too much, you can add a splash more broth or water.
-
Stir in the Cream:
- Once the shells are tender, reduce the heat to low. Stir in the heavy cream and let it simmer for another 2–3 minutes, allowing it to thicken.
- Tip: If you want an ultra-creamy texture, you can toss in an extra splash of cream or a little butter—because why not?
-
Incorporate the Greens:
- Fold in the fresh spinach, letting it wilt in the heat of the dish. Add the grated Parmesan cheese and stir well to combine.
- Chef Insight: For an even creamier texture, reserve a bit of the cheese to sprinkle on top when serving.
-
Season to Taste:
- Finally, take it off the heat, and taste. Adjust with more salt, pepper, or red pepper flakes as needed.
- Pro Tip: Freshly cracked black pepper will always elevate your finished dish!
Serving Suggestions
For an eye-catching presentation, serve your Creamy One Pot Italian Sausage and Shells in deep, rustic bowls. A sprinkle of fresh parsley or extra Parmesan on top adds a beautiful contrast and makes it all the more inviting. Pair it with a simple side salad or some buttery garlic bread to soak up that creamy goodness—trust me, you’ll want every last bite!
Recipe Variations
- Veggie Delight: Swap out the sausage for sautéed mushrooms or a medley of your favorite veggies for a vegetarian twist.
- Spicy Kick: Swap the sweet Italian sausage with hot Italian sausage for a little extra heat.
- Cheesy Goodness: Add in a mix of cheeses—mozzarella and fontina work beautifully to add even more creaminess.
- Herbaceous Flavor: Stir in fresh basil or oregano right before serving to elevate the flavor profile.
- Low-Carb Option: Replace shell pasta with cauliflower florets or zucchini noodles for a lower-carb alternative.
Chef’s Notes
This recipe has evolved over the years, and I love changing it up based on what’s in my fridge. I’ve experimented with different proteins and greens, making it a versatile dish that’s always a hit at gatherings. It’s funny how a quick decision to toss together a couple of ingredients turned into one of my go-to recipes!
I also remember one holiday season making this dish for friends who were visiting. The kitchen was filled with laughter, and I accidentally spilled a bit of cream on my apron. Instead of panicking, we all ended up laughing together, which just goes to show that imperfections are often the best part of cooking!
FAQs and Troubleshooting
1. Can I make this recipe ahead of time?
- Yes! You can prepare the sausage and aromatics ahead. Just store them in an airtight container in the fridge, and then add the pasta and cream when you’re ready to cook. The dish is best eaten fresh, but it can last in the fridge for up to 3 days.
2. What if my sauce is too thick?
- Don’t fret! If your sauce thickens too much, simply add a splash more broth or cream and stir until you reach the desired consistency. Cooking is all about adjusting!
3. My pasta is still hard after cooking! What did I do wrong?
- Make sure you’re simmering the pasta long enough—sometimes, the cooking time on the package can be a little off. If it’s not al dente after the suggested time, give it an extra minute or two.
4. Can I freeze leftovers?
- Yes, you can freeze the leftovers, but be aware that the texture may change upon reheating. Store in airtight freezer-safe containers for up to two months. Just don’t forget to label them!
Nutritional Info (Optional)
While I want you to enjoy this creamy goodness, being mindful of nutritional balance can also be fun! Here’s a rough breakdown for one serving (based on 6 total servings):
- Calories: 480
- Protein: 22g
- Carbohydrates: 42g
- Fat: 24g
- Fiber: 3g
Please note that nutritional values may vary based on specific ingredients used.
And there you have it—Creamy One Pot Italian Sausage and Shells is now in your kitchen repertoire! I hope this dish brings warmth to your home just as it has to mine. Happy cooking, and remember, the best meals are made with love. 🍽️❤️
Print
Creamy One Pot Italian Sausage and Shells
- Total Time: 35 minutes
- Yield: 6 servings 1x
- Diet: Paleo
Description
A creamy and comforting one pot dish featuring Italian sausage, shell pasta, and fresh spinach, perfect for weeknight dinners.
Ingredients
- 1 pound Italian Sausage
- 8 ounces Shell Pasta
- 1 cup Heavy Cream
- 3 cups Chicken Broth
- 1 medium Onion, diced
- 3 cloves Garlic, minced
- 3 cups fresh Spinach
- 1 cup grated Parmesan Cheese
- Red Pepper Flakes, to taste (optional)
Instructions
- Sauté the sausage in a large pot over medium heat, breaking it up until browned, about 5-7 minutes.
- Add the diced onion and cook until translucent, about 3-4 minutes. Stir in the minced garlic and red pepper flakes for another minute.
- Pour in the chicken broth, scraping any brown bits. Bring to a simmer.
- Add the shell pasta and cook until al dente, about 9-11 minutes, stirring occasionally.
- Stir in the heavy cream and let it simmer for another 2-3 minutes to thicken.
- Incorporate the spinach and Parmesan cheese, stirring until well combined.
- Season to taste with salt, pepper, and more red pepper flakes if desired.
Notes
Serve with a sprinkle of fresh parsley or extra Parmesan. Pairs well with a simple side salad or garlic bread.
- Prep Time: 10 minutes
- Cook Time: 25 minutes
- Category: Main Course
- Method: Cooking
- Cuisine: Italian
Nutrition
- Serving Size: 1 serving
- Calories: 480
- Sugar: 6g
- Sodium: 800mg
- Fat: 24g
- Saturated Fat: 12g
- Unsaturated Fat: 8g
- Trans Fat: 0g
- Carbohydrates: 42g
- Fiber: 3g
- Protein: 22g
- Cholesterol: 80mg
Keywords: creamy pasta, one pot meal, italiano sausage, comfort food, easy dinner
One Pot Creamy Garlic Pasta
One Pot Creamy Garlic Pasta: The Ultimate Comfort Dish!
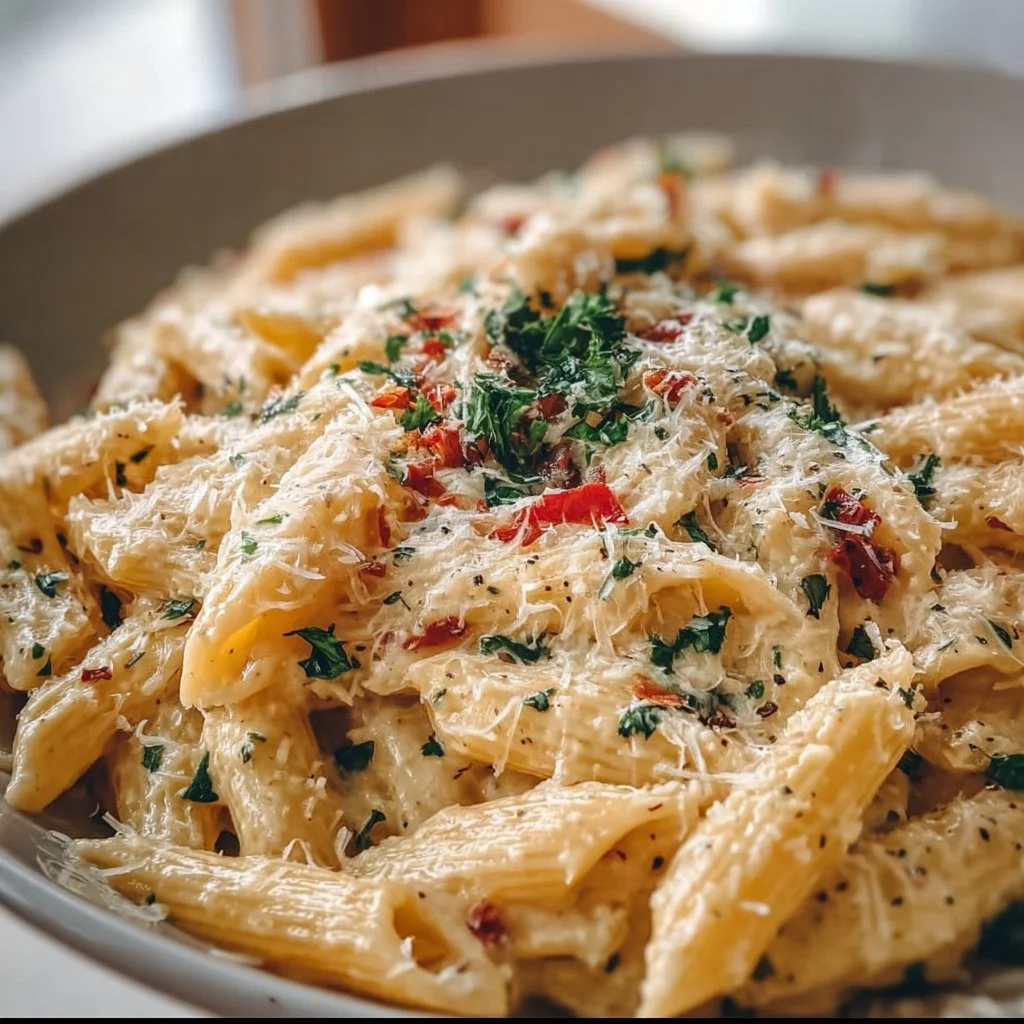
Welcome to my kitchen! I’m so excited to share one of my all-time favorite recipes with you today: One Pot Creamy Garlic Pasta. This dish is a cozy hug on a plate, perfect for when you need a little comfort food in your life. Whether it’s a rainy day or you’ve had a long week, this creamy pasta will warm your heart in no time. Better yet, it all comes together in one pot, meaning fewer dishes to wash—who doesn’t love that?
Let’s talk about garlic for a second. Ah, garlic. It’s the aromatic hero of the kitchen that can elevate any dish from mundane to marvelous. The moment you sauté those cloves and let the fragrant oil envelop your kitchen, you’ll find your spirits lifting, and I assure you, so will the appetites of everyone around you!
This recipe is all about simplicity and flavor. You’ll see how straightforward it is to make this creamy delight, even on a weeknight when you don’t feel like spending hours at the stove. Anyone can take ingredients you already have and turn them into a sumptuous meal that feels like a fancy restaurant dish—minus the hefty price tag and drive. It’s all about creating a space of comfort and joy in your kitchen, and that’s what cooking is truly about.
So grab your favorite apron, a big pot, and let’s dive into this culinary adventure. With creamy pasta as our canvas, we’re going to turn a handful of ingredients into something truly unforgettable!
A Taste of Nostalgia
I still vividly remember the first time I made this dish. It was a chilly evening, and I was a college student living in a tiny apartment. My cooking skills were pretty basic—think ramen and frozen pizza—until I decided to experiment one night. Armed only with a flurry of garlic, some pasta, and a splash of cream, I whimsically set out to whip up something new. As steam filled my little kitchen, I couldn’t help but giggle at the thought that a mere few ingredients could take me to Italy, at least in spirit!
That first bite was magical. The richness of the cream combined with the savory garlic brought me so much comfort that I knew instantly I’d stumbled upon something special. It quickly became a staple; I’d whip it up for friends during study sessions or cozy movie nights. As we gathered around the table, forks in hand and laughter spilling into the air, I realized that this dish wasn’t just a meal—it was a way to forge connections, create memories, and provide warmth. And now, I’m thrilled to share this beloved recipe with you!
Ingredients
Here’s what you need to create your own creamy garlic pasta masterpiece:
-
Pasta (400g): Any kind will do! I usually prefer fettuccine or penne for their ability to hold onto that luscious sauce. Gluten-free pasta works too—just follow the package instructions.
-
Garlic (6 cloves): Freshly minced garlic is a must for that aromatic flavor. If you’re in a pinch, you can use jarred minced garlic but nothing beats fresh!
-
Olive Oil (2 tablespoons): Good quality olive oil adds a fruity note and richness to the dish. You can substitute it with unsalted butter if you want a more delicate flavor profile.
-
Heavy Cream (1 cup): This is where the magic happens! It gives the sauce its creamy velvety texture. For a lighter version, you can use half-and-half or a dairy-free alternative—coconut milk works wonderfully, but it has a unique flavor!
-
Parmesan Cheese (1 cup, grated): A staple in many Italian dishes, it adds that salty, umami flavor we crave. If you’re looking for a vegan alternative, cashew cheese or nutritional yeast can give a similar effect.
-
Vegetable Broth (2 cups): This helps to flavor the pasta as it cooks. You can substitute it with chicken broth or even water if you’re in a bind, but broth gives extra depth.
-
Salt (to taste): Enhances all the flavors. Remember, go easy if your broth is already salty!
-
Black Pepper (to taste): Freshly cracked is always best! It provides just a hint of heat that balances the richness of the cream.
-
Parsley (for garnish): Optional, but it brightens up the dish—plus, who doesn’t love a pop of color? Fresh basil also works if you have some on hand!
Step-by-Step Instructions
Now that you’ve assembled your ingredients, let’s get cooking! Follow these simple steps to create your own One Pot Creamy Garlic Pasta:
-
Sauté the Garlic: Start by heating the olive oil in a large pot over medium heat. Once hot, add the minced garlic and sauté for about 30 seconds until it’s fragrant but not browned. This is where your kitchen will start smelling divine! Keep an eye on it; burnt garlic can turn bitter quickly.
-
Add the Pasta: Toss in the uncooked pasta, stirring to coat it in the garlic-infused oil. This little step adds flavor right to the pasta itself—such a game-changer!
-
Pour in the Broth: Next, add the vegetable broth. Turn up the heat until it reaches a boil. This will soften the pasta as it cooks, creating a creamy sauce that clings beautifully to every strand.
-
Cook the Pasta: Reduce the heat to a simmer and cover the pot. Let it cook for about 10–12 minutes, stirring occasionally to ensure the pasta cooks evenly and doesn’t stick to the bottom of the pot. If your pasta absorbs too much liquid, feel free to add a splash of water to keep things saucy!
-
Mix in the Cream and Cheese: Once your pasta is cooked to al dente perfection, it’s time to stir in the heavy cream and parmesan cheese. This is where the transformation happens! Stir until the cheese melts, and the sauce thickens. You might notice the pasta becoming glossier and more inviting with every stir—the visual anticipation builds!
-
Season to Taste: This is your moment to shine! Taste the pasta and season with salt and freshly cracked pepper. Remember, some cheeses can be salty, so add salt gradually.
-
Garnish and Serve: Once seasoned, remove from the heat and let it sit for a minute to thicken further before serving. Don’t forget to sprinkle with freshly chopped parsley or basil for that hit of freshness and color!
And voilà! You’ve created a delectable dish bursting with flavors, all in one pot.
Serving Suggestions
When it comes to serving this creamy garlic pasta, I love to present it in a large, colorful bowl, garnished generously with fresh parsley. Serve it alongside a simple green salad with a light vinaigrette to cut through the richness of the pasta. A slice of crusty baguette for sopping up the leftover sauce is non-negotiable in my book! If you’re feeling extra fancy, a sprinkle of extra parmesan on top gives it a nice finish and makes it feel like a restaurant-worthy dish right at your dining table.
Recipe Variations
Now, let’s spark your creativity with some fun twists on this dish:
-
Add Vegetables: Toss in some sautéed spinach, cherry tomatoes, or asparagus for color and nutrition. You can even add roasted veggies for depth!
-
Protein Boost: For a heartier meal, throw in grilled chicken, shrimp, or cooked sausage. Just remember to adjust the cooking time accordingly.
-
Herbs and Spices: Experiment with fresh herbs like thyme or rosemary for a different flavor profile. You can also add a pinch of red pepper flakes for an added kick!
-
Lemon Zest: Brighten things up with a touch of lemon zest or a squeeze of lemon juice just before serving for a fresh zing that balances the cream.
-
Nutty Flavor: Stir in some toasted pine nuts or walnuts for a delightful crunch. This also adds a nutty flavor, giving the dish some unique texture.
Chef’s Notes
As I reminisce about the first time I crafted this dish, I can’t help but chuckle at the memory! One of my friends got a bit too enthusiastic with the garlic, thinking more would equal more flavor. Spoiler alert: it didn’t end well for our taste buds! But, that little kitchen disaster turned into a running inside joke among us. Now, whenever anyone visits, we reference the "garlic incident" with a knowing smile. It just goes to show that even kitchen flops can become cherished memories!
Over the years, I’ve adjusted this recipe, swapping in different cheeses or adding seasonal vegetables. Each variation tells a story, and every dish carries a bit of love into the hearts of those who share it.
FAQs and Troubleshooting
Q1: My sauce is too thick; how do I fix it?
A: No need to worry! If your sauce is thicker than desired, simply stir in a bit more broth or pasta water, little by little, until you reach your desired consistency.
Q2: Can I make this dish in advance?
A: Absolutely! This pasta can be made ahead of time and stored in the fridge for up to three days. Just note that it might thicken as it sits, so adding a splash of cream or broth during reheating can help maintain the creaminess.
Q3: What if I don’t have heavy cream?
A: No problem! Half-and-half or a mixture of milk and Greek yogurt can work as substitutes. Just keep in mind that the texture may be slightly different.
Q4: How do I store leftovers?
A: Store any leftovers in an airtight container in the refrigerator. It can typically last for about 3–4 days. Reheat gently on the stove with a bit of water or broth to bring back the creamy texture.
Nutritional Info (optional)
While I’m all about enjoying food in moderation, I know many of you like to keep track of nutritional data. Here’s a rough breakdown per serving (based on 4 servings):
- Calories: 550
- Protein: 15g
- Fat: 30g
- Carbohydrates: 50g
- Fiber: 3g
Please note, values may vary based on specific ingredient brands and variations made.
Thank you for joining me in this culinary adventure! I hope this One Pot Creamy Garlic Pasta warms your heart and becomes a new favorite in your kitchen as it has in mine. Now, let’s get cooking and create something delicious together! Happy eating! 🍝❤️
Print
One Pot Creamy Garlic Pasta
- Total Time: 25 minutes
- Yield: 4 servings
- Diet: Vegetarian
Description
A cozy, creamy garlic pasta dish that comes together in one pot, perfect for comfort food cravings.
Ingredients
- Pasta (400g)
- Garlic (6 cloves, minced)
- Olive Oil (2 tablespoons)
- Heavy Cream (1 cup)
- Parmesan Cheese (1 cup, grated)
- Vegetable Broth (2 cups)
- Salt (to taste)
- Black Pepper (to taste)
- Parsley (for garnish)
Instructions
- Sauté the garlic by heating the olive oil in a large pot over medium heat. Add the minced garlic and sauté for about 30 seconds until fragrant.
- Add the uncooked pasta, stirring to coat it in the garlic-infused oil.
- Pour in the vegetable broth and turn up the heat until it reaches a boil.
- Cook the pasta by reducing the heat to a simmer, cover the pot, and let it cook for about 10–12 minutes.
- Mix in the heavy cream and parmesan cheese, stirring until the cheese melts and the sauce thickens.
- Season to taste with salt and freshly cracked pepper.
- Garnish and serve with chopped parsley or basil.
Notes
For variations, consider adding vegetables, proteins, herbs, or lemon zest to enhance the dish.
- Prep Time: 10 minutes
- Cook Time: 15 minutes
- Category: Main Course
- Method: Cooking
- Cuisine: Italian
Nutrition
- Serving Size: 1 serving
- Calories: 550
- Sugar: 5g
- Sodium: 400mg
- Fat: 30g
- Saturated Fat: 15g
- Unsaturated Fat: 10g
- Trans Fat: 0g
- Carbohydrates: 50g
- Fiber: 3g
- Protein: 15g
- Cholesterol: 75mg
Keywords: creamy pasta, garlic pasta, one pot recipes, comfort food

Cattle Drive Casserole
Cattle Drive Casserole: A Cozy Comfort Dish That Tells a Story
Hey there, kitchen adventurers! Welcome back to my cozy corner of the culinary world. Today, I am beyond excited to share one of my absolute favorite recipes with you: Cattle Drive Casserole. This dish is not just a recipe; it’s a flavorful story wrapped in layers of hearty ingredients that will warm your soul.
Picture this: the heart of Texas, wide-open spaces, and a sky so blue it feels like you could dive right in. As the sun sets, the hearty aroma of a casserole starts to waft through the air, beckoning everyone to gather around the table. That’s what this dish brings to me—a sense of home, community, and love all baked into one delicious bite.
This Cattle Drive Casserole is the perfect blend of tender beef, zesty spices, creamy cheesy goodness, and a bit of crunch, all topped with the comforting embrace of potatoes. It’s easy enough for a weeknight meal yet impressive enough to serve to friends over a casual weekend gathering. Plus, it’s the kind of meal that begs for seconds—because who could resist a warm, cheesy hug in a dish?
Whether you’re cooking for a quiet night in or planning a gathering, you’ll find that this casserole not only satisfies your hunger but also provides a lovely backdrop for wonderful conversations and laughter. Get ready to roll up your sleeves and dive into a dish that will become a cherished part of your recipe collection! Let’s get cooking!
Personal Story
Ah, the memories I have associated with Cattle Drive Casserole! My first encounter with this delightful dish was during one of those classic family reunions every summer. We’d gather at my Aunt Betty’s sprawling ranch, where the laughter of kids and the sizzle of barbecue filled the air. Late afternoons were all about mingling, and dinner was the highlight.
Aunt Betty took it upon herself to prepare this casserole, and I remember watching her in the kitchen—she was a wizard with spices! As she diced the onions and sautéed the beef, I was captivated by how she turned simple ingredients into something magical. Each layer that went into the casserole dish seemed to carry a story, a memory, or a secret from her own childhood. When it finally came out of the oven, golden and bubbly, it was like the whole room held its breath. The first bite offered a warm embrace, and I knew I had stumbled upon something special.
From that day forward, Cattle Drive Casserole became a staple at family gatherings, reminding us of the power of food to connect us, comfort us, and create lingering memories. Today, I strive to recreate Aunt Betty’s magic in my kitchen, hoping to weave my own stories and spark new memories with each batch I make.
Ingredients
To whip up this Cattle Drive Casserole, you’ll need the following ingredients:
-
Ground Beef (1 pound)
A classic choice for this casserole, ground beef adds richness and heartiness. If you want to lighten it up, turkey or ground chicken works well, too! -
Onion (1 medium, diced)
This aromatic veggie creates a flavor base for the dish. If you’re sensitive to onion, feel free to use shallots or leeks as a milder alternative. -
Garlic (2 cloves, minced)
Garlic enhances the overall taste with its aromatic flavor. Don’t overdo it—just a bit can elevate the entire dish! -
Green Bell Pepper (1 medium, diced)
A great way to add color and a slight sweetness. You can swap it out for red, yellow, or even jalapeño if you want some heat! -
Canned Tomato Sauce (1 can, 15 oz)
This brings moistness and tanginess to the casserole. For a different flavor profile, you can use diced tomatoes or crushed tomatoes instead. -
Corn (1 cup, frozen or canned)
Sweet corn adds texture and a pop of sweetness. If you’re going fresh, you can use sweet corn off the cob. -
Cream of Mushroom Soup (1 can, 10.5 oz)
It provides a creamy consistency and depth of flavor. To keep it from being too heavy, consider using a homemade or low-fat version. -
Cheddar Cheese (2 cups, shredded)
A classic for casseroles, this cheese melts beautifully and adds that gooey, comforting feeling. If you’re feeling fancy, try pepper jack for a spicy kick! -
Tater Tots (about 20-30 oz)
The crowning glory of the casserole! These give you a crunchy topping. If you’re avoiding potatoes, try using cauliflower tots as a fun twist or a low-carb option. -
Salt and Pepper (to taste)
Don’t forget to season as you go! A little salt and pepper will make each layer sing. -
Paprika (1 teaspoon)
For a hint of smokiness and color. You could experiment with smoked paprika to elevate those flavors!
Together, these fresh and fulfilling ingredients come together, making each spoonful a blissful experience.
Step-by-Step Instructions
Now that you’ve got your ingredients ready, let’s bring this Cattle Drive Casserole to life! Follow these essential steps, with some tips and tricks along the way:
-
Preheat the Oven
Start by preheating your oven to 375°F (190°C). This is key to ensuring your casserole comes out bubbling and golden brown. -
Sauté the Veggies
In a large skillet over medium heat, add a splash of olive oil and throw in the diced onion, bell pepper, and minced garlic. Sauté for about 3-5 minutes until the veggies are softened. Chef Tip: If you want an aromatic kick, add in some red pepper flakes while sautéing for a bit of spice! -
Brown the Ground Beef
Add the ground beef to the skillet, breaking it apart with a wooden spoon. Cook until browned all the way through, about 5-7 minutes. Make sure to drain any excess fat—nobody wants a greasy casserole! You can also season the beef with salt, pepper, and paprika for a flavor boost during this step. -
Combine Ingredients
Once the beef is fully cooked, stir in the tomato sauce, corn, and cream of mushroom soup until well combined. Keep it on low heat, allowing those flavors to meld together for a minute or two. -
Layer It Up
In a greased 9×13 inch casserole dish, pour the beef mixture evenly across the bottom. Now, sprinkle the shredded cheese over the beef—don’t be shy; cheese is love! Chef Hack: Save a little cheese for the top to achieve that glorious melty goodness later! -
Top with Tater Tots
Arrange the tater tots on top of the cheese layer. It doesn’t have to be perfect; the rustic charm is part of what makes this dish feel like home! -
Bake to Perfection
Pop the casserole in the preheated oven for 30-35 minutes, or until the tater tots are golden brown and crispy. Your whole house will smell like comfort food magic by this time! -
Let It Rest
Once it comes out of the oven, give it a few minutes of rest before digging in. This also allows the flavors to settle back down into the dish. -
Serve and Enjoy!
Serve warm, and don’t forget to scoop out generous portions. This dish pairs wonderfully with a crisp side salad or garlic bread. Chef’s note: for some brightness, sprinkle chopped fresh parsley or green onions on top before serving.
Serving Suggestions
When it comes to serving Cattle Drive Casserole, I recommend keeping it simple yet inviting! Use a large spoon to scoop generous portions into bowls, letting those cheesy, golden tater tots steal the show. You can add a dollop of sour cream or a sprinkle of fresh herbs like parsley or chives on top to enhance the visual appeal.
For a vibrant touch, serve it alongside a mixed greens salad dressed with a zesty vinaigrette. This balances the richness of the casserole beautifully and offers a refreshing crunch. Alternatively, a slice of crispy cornbread serves as the perfect companion for soaking up every last bit of that saucy goodness.
Recipe Variations
-
Southwestern Twist: Add black beans and diced jalapeños to give the casserole a spicy southwestern flair.
-
Vegetarian Option: Substitute the ground beef with lentils or black beans for a hearty, plant-based version.
-
Sloppy Joe Style: Mix in some barbecue sauce along with the tomato sauce for a sweet and smoky flavor.
-
Cheesy Broccoli: Toss in some steamed broccoli florets for added color and nutrition.
-
Spicy Cheese: Swap regular cheddar with pepper jack or a spicy cheese blend for an extra kick.
Each twist offers a fresh perspective, ensuring you can make this dish your own time and again!
Chef’s Notes
Cattle Drive Casserole holds a special place in my heart, not just for its incredible flavor but for the stories and camaraderie it fosters. This recipe has evolved over the years—each time I make it, I find myself tweaking it based on what’s available in my pantry or the season’s produce. And let me tell you, nothing beats the satisfaction of a family member asking for the recipe while devouring a plateful!
The casserole has also become a go-to dish during colder months when comfort foods provide that extra layer of warmth. My friends often joke that they could smell it cooking from down the street! It’s proof that food, in all its forms, has an incredible power to draw people together.
FAQs and Troubleshooting
-
Can I make this casserole ahead of time?
Absolutely! You can prepare the casserole a day in advance. Just assemble the layers and cover tightly with foil. When ready to bake, allow it to sit at room temperature for about 30 minutes before placing it in the oven. -
Why is my casserole too watery?
If your casserole turns out too watery, it could be due to excess moisture from the veggies or canned ingredients. Try draining the canned items well and consider sautéing the veggies first to release some moisture before combining. -
Can leftovers be frozen?
Yes! Cattle Drive Casserole freezes remarkably well. Store in an airtight container, and it can last for about 2-3 months. Reheat in the oven until warmed through. -
How do I know when it’s done?
Your casserole is done when the tater tots are golden brown, and the cheese is bubbly—keep an eye on it during the last few minutes to ensure that beautiful top doesn’t burn.
Nutritional Info
For a single serving (approximately 1/8 of the casserole), you can expect roughly:
- Calories: 350
- Total Fat: 15g
- Saturated Fat: 6g
- Cholesterol: 70mg
- Sodium: 800mg
- Total Carbohydrates: 30g
- Dietary Fiber: 3g
- Sugars: 3g
- Protein: 25g
This dish is hearty and satisfying, but feel free to adjust ingredients based on your dietary preferences!
I hope you enjoy making (and devouring) this Cattle Drive Casserole as much as I do! Remember, cooking is all about love, creativity, and connection, so have fun with it. Gather your loved ones, and let this recipe become part of your kitchen stories. Happy cooking, friends! 🍽️❤️
Print
Cattle Drive Casserole
- Total Time: 50 minutes
- Yield: 8 servings 1x
- Diet: None
Description
A cozy comfort dish featuring layers of tender beef, zesty spices, creamy cheese, and crunchy tater tots.
Ingredients
- 1 pound Ground Beef
- 1 medium Onion, diced
- 2 cloves Garlic, minced
- 1 medium Green Bell Pepper, diced
- 1 can (15 oz) Canned Tomato Sauce
- 1 cup Corn, frozen or canned
- 1 can (10.5 oz) Cream of Mushroom Soup
- 2 cups Cheddar Cheese, shredded
- 20–30 oz Tater Tots
- Salt and Pepper, to taste
- 1 teaspoon Paprika
Instructions
- Preheat the oven to 375°F (190°C).
- Sauté the diced onion, bell pepper, and minced garlic in olive oil for 3-5 minutes until softened.
- Brown the ground beef, breaking it apart, and cook until browned (5-7 minutes) while draining excess fat.
- Combine the cooked beef with tomato sauce, corn, and cream of mushroom soup until well mixed.
- Layer the beef mixture in a greased 9×13 inch casserole dish and sprinkle shredded cheese on top.
- Top with tater tots, arranging them evenly.
- Bake for 30-35 minutes until tater tots are golden brown.
- Let the casserole rest for a few minutes before serving.
- Serve warm, optionally with fresh herbs on top.
Notes
Pair with a side salad or garlic bread. Can be made ahead and frozen.
- Prep Time: 15 minutes
- Cook Time: 35 minutes
- Category: Main Course
- Method: Baking
- Cuisine: American
Nutrition
- Serving Size: 1 serving
- Calories: 350
- Sugar: 3g
- Sodium: 800mg
- Fat: 15g
- Saturated Fat: 6g
- Unsaturated Fat: 6g
- Trans Fat: 0g
- Carbohydrates: 30g
- Fiber: 3g
- Protein: 25g
- Cholesterol: 70mg
Keywords: casserole, comfort food, beef casserole, family recipe

Loaded Baked Potato Salad
Loaded Baked Potato Salad: The Ultimate Comfort Dish
Hello, fellow food enthusiasts! Welcome back to my cozy corner of the kitchen. Today, I am thrilled to share a recipe that’s close to my heart and has been a family favorite for years—Loaded Baked Potato Salad! If you’re anything like me, the thought of creamy potatoes, crispy bacon, and tangy cheese brings back a flood of warm memories. This dish blends the joyful flavors of a classic baked potato with the refreshing crunch of a salad, making it a perfect side or standalone meal.
Picture this: It’s a sunny afternoon and the aroma of something delicious bubbling away in the oven fills the air. Friends are gathered around the table, laughter echoes, and there’s an unmistakable sense of comfort that can only come from hearty home-cooked food. Loaded Baked Potato Salad captures that essence beautifully! Whether you’re whipping it up for a casual family dinner, a summer barbecue, or any festive gathering, this dish will surely steal the spotlight.
What I adore most about this recipe is its versatility. It’s incredibly easy to make yet gives off those “fancy dinner party” vibes—trust me, your guests will be impressed! As you dive into the process, you’ll find that it’s less about perfectly measuring out each ingredient and more about enjoying the experience of cooking. Grab your apron; let’s transform simple potatoes into something spectacular!
So grab a potato and a spatula, and let’s get started on this culinary adventure together!
Personal Story
I’ll never forget the first time I made Loaded Baked Potato Salad. I was in college, and I wanted to impress my friends with a potluck dish that wasn’t just chips and dip—a rite of passage for any home cook, right? I had just discovered my love for cooking and thought, “Why not combine my two favorites: baked potatoes and salad?” So, I rifled through my mom’s old cookbook and pieced together my version.
The day of the potluck, I nervously mixed together the ingredients, stole a taste, and felt like a culinary genius! Seeing my friends’ faces light up when they took their first bites was the ultimate validation. We ended up devouring nearly the entire bowl! That experience taught me the magic of cooking—it’s not just about the food, but the connections and memories made around the table. Ever since then, I’ve made this Loaded Baked Potato Salad for every gathering possible, and it never fails to bring smiles and satisfied bellies.
Ingredients
Here’s what you’ll need to create this delightful dish:
-
Potatoes (about 2 pounds)
*Choose Russet or Yukon Gold for that fluffy texture. If you’re in a pinch, you can substitute with red potatoes, but they’ll be a bit creamier. -
Bacon (6 slices)
*Crispy bacon adds that savory crunch! If you’re looking for a healthier option, turkey bacon or a vegan alternative work well too. -
Sour Cream (1 cup)
*This is essential for creaminess! Greek yogurt is a great substitute if you’re aiming for a healthier dish. -
Mayonnaise (1/2 cup)
*It gives an ultra creamy texture. To lighten it up, consider using a light mayo or even avocado instead! -
Green Onions (4-5, chopped)
*They add a pop of color and flavor! If you’re not a fan, shallots or chives are perfect alternatives. -
Cheddar Cheese (1 cup, shredded)
*I recommend sharp cheddar for a bolder flavor! Vegan cheese can be a fantastic substitute if you’re dairy-free. -
Salt and Pepper (to taste)
*Always season to your liking—don’t skip this step for the best flavor! -
Paprika (1 tsp)
*This gives a subtle smokiness; smoked paprika can take it to the next level! -
Mustard (1 tsp)
*Dijon adds a nice tang. Yellow mustard does the trick too, just adjust the amount to your taste.
Together, these ingredients create a symphony of flavors that makes every bite delectable. Let’s get cooking!
Step-by-Step Instructions
-
Prep the Potatoes:
Start by washing your potatoes under cold water. It’s important to remove any dirt since we want our dish to shine! Cut them into quarters or cubes—this helps them cook faster. Pop them into a pot of salted water and boil until fork-tender, about 15-20 minutes. Pro tip: If you’re short on time, microwaving them in a covered bowl works in a pinch. -
Cook the Bacon:
While the potatoes are cooking, it’s bacon time! In a skillet over medium heat, add the bacon slices. Let them sizzle until they become delightfully crispy. This usually takes about 7-10 minutes. Chef hack: Save some bacon grease for drizzling later—it adds extra flavor! Once done, place the bacon on a paper towel to drain, then chop into bits. -
Mix the Dressing:
In a large bowl, combine the sour cream, mayonnaise, mustard, paprika, salt, and pepper. Whisk it all together until creamy and smooth. Taste as you go! Adjust seasoning for your palate—sometimes a little extra mustard or salt can elevate the dish. -
Combine the Ingredients:
Once the potatoes are cooked and drained, let them cool for a few minutes. This step helps meld the flavors without turning the dressing into a hot mess. Gently fold the warm potatoes into the dressing, ensuring they’re well-coated. Add in the bacon, shredded cheese, and chopped green onions. Mix carefully to avoid mashing the potatoes—it’s all about that fluffy texture! -
Chill:
Cover the bowl and let it chill in the fridge for at least 30 minutes before serving. This allows the flavors to marry beautifully! If you can resist the temptation to dive in right away, patience will pay off. -
Serve:
When ready to serve, give it a good stir. If it seems a bit thick, add a splash of milk or more sour cream to achieve your desired consistency. Garnish with extra bacon bits, cheese, and green onions. Your Loaded Baked Potato Salad is now ready to impress!
Serving Suggestions
For serving, I recommend presenting your Loaded Baked Potato Salad in a beautiful large bowl to showcase the colorful layers. You can also use mason jars for individual servings, which adds a fun twist! Pair it with grilled meats, burgers, or fresh veggies for a well-rounded meal. Watching your friends dive in and scoop out that creamy goodness is one of the best parts!
Recipe Variations
Feel free to put your own twist on this dish! Here are some ideas:
- Spicy Twist: Add diced jalapeños or a few dashes of hot sauce for a kick.
- Herbaceous Mix: Mix in chopped dill or parsley for a fresh herbal vibe.
- Baked Potato Bar: Serve with an array of toppings like olives, chili, or avocado!
- Vegan Version: Swap all dairy products with vegan alternatives to make this salad plant-based.
- Pesto Perfection: Stir in some basil pesto for an herbaceous depth!
Chef’s Notes
Over the years, I’ve made loads of memories with this Loaded Baked Potato Salad. It has traveled from BBQs in the park to family holiday dinners! I remember one summer picnic where I accidentally added too much mustard—everyone got a kick out of it, and we laughed until our sides hurt! Embrace those little kitchen slip-ups; they often lead to the most cherished culinary adventures.
This recipe has evolved, too. I’ve tweaked it over the years based on seasonality, different gatherings, and new inspirations. It’s amazing how a little creativity can transform a classic dish!
FAQs and Troubleshooting
1. Can I prep this salad a day in advance?
Yes, absolutely! This dish tastes even better the next day once the flavors blend. Just keep it covered in the fridge.
2. My dressing seems too thick; what should I do?
No worries! Just mix in a little bit of milk or extra sour cream until it reaches your desired creaminess.
3. How can I avoid overcooking the potatoes?
Start checking for doneness at about 15 minutes. Remember that the potatoes will continue to cook slightly once you remove them from the heat, so you want them tender but not mushy.
4. Can I freeze Loaded Baked Potato Salad?
I wouldn’t recommend it. The texture can change when frozen and thawed, especially the potatoes and creamy dressing. Best enjoyed fresh!
Nutritional Info
Note: Nutritional values can vary based on brands and substitutions.
- Calories: ~350 per serving
- Protein: 10g
- Total Fat: 25g
- Saturated Fat: 10g
- Carbs: 30g
- Fiber: 3g
- Sugars: 2g
And there you have it—your ultimate guide to mastering Loaded Baked Potato Salad! I hope you enjoy making it as much as I do! Remember, it’s not just about the recipe, but the connections we create and the love we pour into our cooking. Until next time, happy cooking and happy eating!
Print
Loaded Baked Potato Salad
- Total Time: 45 minutes
- Yield: 6 servings 1x
- Diet: Vegetarian
Description
A delightful fusion of creamy baked potatoes and a refreshing salad, perfect for any gathering.
Ingredients
- 2 pounds Potatoes (Russet or Yukon Gold)
- 6 slices Bacon
- 1 cup Sour Cream
- 1/2 cup Mayonnaise
- 4–5 Green Onions, chopped
- 1 cup Cheddar Cheese, shredded
- Salt and Pepper, to taste
- 1 tsp Paprika
- 1 tsp Mustard
Instructions
- Prep the potatoes by washing under cold water and cutting them into quarters or cubes. Boil until fork-tender, about 15-20 minutes.
- Cook the bacon in a skillet until crispy, about 7-10 minutes. Drain and chop.
- Mix the dressing ingredients: sour cream, mayonnaise, mustard, paprika, salt, and pepper in a bowl.
- Combine the cooked potatoes with the dressing, bacon, cheese, and green onions.
- Chill in the fridge for at least 30 minutes before serving.
- Serve garnished with extra bacon bits, cheese, and green onions.
Notes
This salad can be made a day in advance for better flavor. Adjust seasoning to taste.
- Prep Time: 15 minutes
- Cook Time: 30 minutes
- Category: Side Dish
- Method: Mixing
- Cuisine: American
Nutrition
- Serving Size: 1 serving
- Calories: 350
- Sugar: 2g
- Sodium: 500mg
- Fat: 25g
- Saturated Fat: 10g
- Unsaturated Fat: 10g
- Trans Fat: 0g
- Carbohydrates: 30g
- Fiber: 3g
- Protein: 10g
- Cholesterol: 30mg
Keywords: potato salad, baked potatoes, comfort food, side dish, gathering

The Best Creamy Potato Salad
# The Best Creamy Potato Salad: A Culinary Hug in a Bowl

## Introduction

Hello there, fellow food lovers! Welcome back to my cozy corner of the internet, where we whip up delicious dishes that nourish not just the body, but the soul. Today, we’re diving into a classic that’s close to my heart and even closer to my taste buds: Creamy Potato Salad. It's the dish that effortlessly navigates from barbecues to picnics to family gatherings—truly the life of any party!

What I love most about this potato salad is its versatility. You can serve it alongside grilled chicken, use it as a sandwich filler, or enjoy it on its own as a satisfying snack. The creamy dressing envelops fluffy potatoes and bursts with flavor thanks to the addition of fresh herbs and crunchy vegetables. And let's not forget how good it smells as it comes together—that delightful scent wafting through the kitchen always brings the warmth of summer.

But what makes this creamy potato salad even more special? Well, it’s not just about the ingredients; it’s all about the memories and connections we create around food. As I reminisce about backyard barbecues with family and friends (and that one infamous potato-salad-championship my cousin claimed she’d win!), I can’t help but smile. Each bite of this lovingly prepared salad tells a story, and I can’t wait for you to share your stories over a bowl of this creamy goodness. So, grab your apron and let’s get cooking!

## Personal Story

Let me take you back to a sun-kissed afternoon at my grandmother’s house, where gatherings were always filled with laughter, sunshine, and, of course, amazing food. One of my favorite memories is the annual family picnic—everyone brought their signature dish, and my grandma’s creamy potato salad was always the star of the show. She had this magic touch, transforming simple potatoes into pure comfort with her secret ingredients.

I vividly remember how she would insist I help her in the kitchen. We’d peel and chop potatoes together, her wise eyes twinkling as she shared stories about her own childhood! Not only did I learn how to make the dish, but the experience also instilled in me the joy of cooking and the importance of bringing together family and friends around a hearty meal. Now, whenever I make this creamy potato salad, I can almost hear her laughter and feel her embrace. It’s a dish steeped in love, and you’ll see why it has become such a tradition in my own home.

## Ingredients

Let’s gather our ingredients! Here’s what you’ll need to create this creamy potato salad, along with some substitutions and chef insights to help you make it your own:

- **2 pounds of potatoes (Yukon Gold or red-skinned)**
  - *Insight*: Yukon Gold provides a buttery texture, while red-skinned adds a bit of color. Both work beautifully!

- **1 cup mayonnaise**
  - *Substitution*: Greek yogurt is a healthier alternative that still gives that creamy texture, while vegan mayo works great for a plant-based option.

- **2 tablespoons Dijon mustard**
  - *Tip*: This adds a wonderful tanginess. If you prefer a milder flavor, opt for yellow mustard.

- **1 tablespoon apple cider vinegar**
  - *Chef Insight*: The acidity balances the creaminess, so don’t skip this! You can sub with white wine vinegar if needed.

- **1 teaspoon garlic powder**
  - *Quick Tip*: Fresh minced garlic can be used if you want a stronger garlic flavor, but use sparingly!

- **Salt and pepper to taste**
  - *Insight*: Always season your layers as you go—this builds more flavor!

- **1 cup celery, finely chopped**
  - *Substitution*: For a touch of sweetness, try bell peppers instead!

- **1 cup red onion, diced**
  - *Tip*: Soak in cold water for a few minutes to mellow their bite if you’re sensitive to raw onions.

- **1/4 cup fresh parsley, chopped**
  - *Substitution*: Fresh dill or chives also work wonderfully and bring different flavors to the table.

- **3 hard-boiled eggs, chopped** *(optional)*
  - *Insight*: These add richness and protein. Feel free to leave them out for a vegan twist!

## Step-by-Step Instructions

Ready to create some magic? Here’s how you can bring this creamy potato salad to life, step by step!

### Step 1: Cook the Potatoes
Start by washing your potatoes thoroughly. Place them in a large pot, cover with water, and add a generous pinch of salt. Bring it to a boil over medium-high heat. Once boiling, reduce the heat to a simmer and cook for 15-20 minutes, or until they’re fork-tender but not falling apart. The key here is to cook them just long enough to be creamy and soft!

**Tip**: Avoid chopping potatoes before cooking; cooking them whole prevents them from absorbing too much water.

### Step 2: Prepare the Dressing
While your potatoes are doing their thing, let’s whip up that delectable dressing. In a large bowl, combine the mayonnaise, Dijon mustard, apple cider vinegar, garlic powder, salt, and pepper. Whisk until smooth and creamy, and don’t hesitate to taste! This is your chance to adjust the seasoning.

**Chef Hack**: Make the dressing ahead of time and store it in the fridge; this enhances the flavors!

### Step 3: Mix the Vegetables
Chop the celery, red onion, and parsley. Once your potatoes are cooked, drain and let them cool slightly before cutting them into bite-sized cubes (about 1-inch pieces).

**Tip**: For a little extra flavor, you can toss the warm potatoes in a little vinegar and salt before mixing them with the dressing—this helps deepen the overall flavor!

### Step 4: Combine Everything
In the bowl with the dressing, add the chopped potatoes, celery, red onion, and hard-boiled eggs (if using). Gently toss everything together until the potatoes are well coated with the creamy dressing. Remember, be gentle so your potatoes stay intact!

### Step 5: Chill and Serve
Transfer your potato salad to a serving bowl, cover with plastic wrap, and let it chill in the refrigerator for at least one hour. This allows the flavors to meld beautifully. When ready to serve, don’t forget to sprinkle a bit of fresh parsley on top for that beautiful finishing touch!

## Serving Suggestions

To truly impress your guests (or just yourself!) when serving, present the potato salad in a pretty bowl. You can garnish it with extra parsley or a sprinkle of paprika to add depth and color. This creamy potato salad pairs wonderfully with grilled meats or is delightful on its own for a light meal. Consider serving it alongside some fresh bread or on a buffet table with other summer salads!

## Recipe Variations

Feel like switching things up? Here are a few creative variations to inspire your next batch of potato salad:

1. **Mediterranean Twist**: Add olives, sun-dried tomatoes, and feta cheese for a vibrant Mediterranean flavor.
2. **Bacon Lovers**: Mix in crispy bacon bits for a smokiness that elevates the classic.
3. **Spicy Kick**: Add diced jalapeños or a dollop of Sriracha to the dressing for a zingy twist.
4. **Herbed Variation**: Swap out the parsley for fresh dill and add capers for a zingy flavor profile.
5. **Whole30-Friendly**: Use avocado instead of mayonnaise for a creamy, touch of healthy fats!

## Chef’s Notes

As I reflect on my cooking journey, this potato salad has been a constant companion. I can’t help but chuckle thinking about that family picnic where everything went perfectly—not until my cousin spilled hers all over the grass! Rather than panic, we all turned it into an impromptu game of “who can eat with a fork without spilling?”—laughter truly was the best side dish that day!

Over time, I’ve learned to be more adventurous with my potato salad ingredients, often using whatever is left in the fridge. What's great is that every variation has its own story—making each one unique.

## FAQs and Troubleshooting

**Q1: How do I prevent my potatoes from getting mushy?**
A: The secret is to cook them until just tender. Also, make sure not to skip the cooling step before mixing in the dressing.

**Q2: My potato salad is too dry. What should I do?**
A: Add a splash of milk or more mayonnaise to loosen up the texture!

**Q3: Can I make this a day ahead?**
A: Absolutely! In fact, it often tastes better the next day when the flavors fully develop.

**Q4: My salad ended up too salty. Now what?**
A: If it’s too salty, try adding extra potatoes (without additional salt), or balance with a bit of sugar or vinegar to cut the saltiness.

## Nutritional Info

(Approximately per serving - makes 8 servings)
- Calories: 300
- Fat: 18g
- Saturated Fat: 3g
- Carbohydrates: 33g
- Fiber: 3g
- Protein: 5g

So there you have it! A comforting bowl of creamy potato salad that evokes memories and gathers loved ones. Dive in, enjoy, and don’t forget to share your stories in the comments. Happy cooking, and until our next culinary adventure—stay cozy!

The Best Creamy Potato Salad
- Total Time: 35 minutes
- Yield: 8 servings 1x
- Diet: Vegetarian
Description
A comforting, creamy potato salad that brings memories and flavors together in one delicious bowl.
Ingredients
- 2 pounds of potatoes (Yukon Gold or red-skinned)
- 1 cup mayonnaise
- 2 tablespoons Dijon mustard
- 1 tablespoon apple cider vinegar
- 1 teaspoon garlic powder
- Salt and pepper to taste
- 1 cup celery, finely chopped
- 1 cup red onion, diced
- 1/4 cup fresh parsley, chopped
- 3 hard-boiled eggs, chopped (optional)
Instructions
- Cook the potatoes in salted water until fork-tender, about 15-20 minutes.
- Prepare the dressing by whisking together mayonnaise, Dijon mustard, apple cider vinegar, garlic powder, salt, and pepper.
- Mix the chopped vegetables and cooled diced potatoes in a bowl.
- Combine everything with the dressing, tossing gently.
- Chill in the refrigerator for at least one hour before serving.
Notes
Great for barbecues, picnics, and family gatherings. Enhance flavors by letting it chill.
- Prep Time: 15 minutes
- Cook Time: 20 minutes
- Category: Salad
- Method: Boiling and Mixing
- Cuisine: American
Nutrition
- Serving Size: 1 serving
- Calories: 300
- Sugar: 2g
- Sodium: 300mg
- Fat: 18g
- Saturated Fat: 3g
- Unsaturated Fat: 10g
- Trans Fat: 0g
- Carbohydrates: 33g
- Fiber: 3g
- Protein: 5g
- Cholesterol: 60mg
Keywords: potato salad, creamy salad, barbecue side dish, comfort food
Chicken Salad with Apples
Savory Delights: A Cozy Chicken Salad with Apples Recipe
Welcome back to my cozy kitchen! Today, I’m so excited to share one of my all-time favorite recipes: Chicken Salad with Apples. Whether you’re in need of a light lunch, a refreshing dinner, or a dish to impress at your next gathering, this salad is the answer. It’s vibrant, crunchy, slightly sweet, and packed with flavor — a perfect marriage of tender chicken, crisp apples, and a creamy dressing that brings all the elements together for a thrilling taste sensation!
The best thing about this chicken salad is its versatility! You can serve it on a bed of greens, inside a sandwich, or all on its own. It celebrates the harmonious relationship between savory and sweet, and each bite bursts with fresh ingredients that remind me of sunny picnics and lazy afternoons spent with loved ones. Plus, it’s an excellent way to transform leftover chicken into a dish that feels entirely new!
Speaking of transformations, let me take you back to a meaningful memory that truly highlights just how special this dish can be.
Personal Story
I remember the first time I made this chicken salad. I was lounging around my apartment on a lazy Sunday afternoon — the kind where the sun spills golden light through the windows, encouraging warmth and creativity. Inspired by the beautiful day and craving something light yet satisfying, I rummaged through my fridge. I pulled out some leftover roast chicken, a couple of crisp apples, and a handful of greens from my weekly trip to the farmer’s market.
As I chopped and mixed, the sweet aroma of fresh apples mingled with the savory scent of chicken; it instantly transported me back to my grandmother’s kitchen. She had a knack for creating meals that were both simple and extraordinary, always using what she had on hand. After some experimentation, I crafted a chicken salad that mirrored those fond memories of her warm hugs and delicious feasts.
When I served it to my friends that evening, their delighted reactions reminded me of the joy cooking brings — how a simple salad can spark conversations and create new memories. Since then, Chicken Salad with Apples has become a staple in my household and an ode to all the wonderful moments that food can share.
Ingredients
To whip up this delightful Chicken Salad with Apples, you’ll need the following ingredients:
-
2 cups cooked chicken breast: Use rotisserie chicken or leftover grilled chicken. If you prefer, roasted turkey works beautifully as well!
-
1 large apple (preferably Granny Smith or Fuji): Their crisp texture and sweet-tart flavor are perfect for balancing out the richness of the chicken. No apple? No problem! Pears work great too.
-
1/2 cup celery, chopped: Adds a lovely crunch and fresh flavor. You can substitute with bell peppers or cucumber if you’re not a fan of celery.
-
1/4 cup red onion, finely diced: Offers a bit of zing. To tone down the sharpness, soak it in cold water for a few minutes.
-
1/2 cup Greek yogurt (or mayo): Greek yogurt gives a lighter creamy texture, but classic mayonnaise adds that traditional taste. You can even mix both!
-
1 tablespoon Dijon mustard: Infuses a lovely tanginess. If you’re looking for a milder option, yellow mustard will work too.
-
2 tablespoons lemon juice: Brightens the flavors and keeps the apples from browning. Freshly squeezed lemon juice is best, but bottled works in a pinch.
-
Salt and pepper to taste: Essential for enhancing all the flavors. Seriously, don’t skip out on this!
-
Optional: 1/4 cup walnuts or pecans, chopped: For a tasty crunch. If you’re nut-free, try sunflower seeds or skip it entirely.
You can also get creative with your salad by adding dried cranberries or grapes for an extra layer of sweetness and texture.
Step-by-Step Instructions
Let’s dive into the cooking process! I promise this will be as easy as pie (or should I say chicken salad?).
Step 1: Prepare the Chicken
Shred or cube your cooked chicken breast into bite-sized pieces. If you’re using rotisserie chicken, just make sure to remove the skin for a lighter dish. If you have time, seasoning the chicken with a sprinkle of salt and pepper beforehand elevates the flavor.
Step 2: Chop the Veggies and Fruits
While your chicken is sitting pretty, grab your cutting board! Dice the celery and red onion, and slice up your apple. Keep the peel on for color and nutrients – plus, who doesn’t love that pop of red or green? Remember to squeeze a bit of lemon juice over the apple pieces to keep them bright and fresh.
Step 3: Mix the Dressing
In a medium bowl, combine the Greek yogurt (or mayo) with Dijon mustard and lemon juice. Whisk until smooth! This is where the magic happens, folks. You can also add a touch of honey if you want an extra hint of sweetness.
Step 4: Assemble the Salad
In a large bowl, combine the shredded chicken, chopped celery, red onion, and apple. Pour your dressing over the mixture and toss gently until everything is beautifully coated. Don’t go overboard on the mixing — we want those apple and celery bits to maintain some crunch!
Step 5: Taste and Adjust Seasoning
Here’s the fun part: give your chicken salad a little taste! Adjust with salt and pepper as needed, and feel free to add a dash more lemon juice if you love that tang.
Step 6: Chill and Serve
Letting the salad chill for about 30 minutes in the fridge allows the flavors to meld together beautifully. Honestly, I sometimes whip this up in advance just to enjoy those fabulous flavors on a busy day!
Serving Suggestions
Now that you have your delicious Chicken Salad with Apples ready, how are you going to serve it? Here are some tasty ideas:
- On a bed of mixed greens: For a fresh and vibrant meal, spoon your chicken salad over a colorful mix of greens.
- In a sandwich or wrap: Spread the salad on whole-grain bread or in a wrap with some fresh lettuce — a perfect lunch on the go!
- With crackers: Scoop the chicken salad onto whole grain or gluten-free crackers for a delightful snack.
- Stuffed into a pita: Warm, soft pita pockets filled with your chicken salad make for a filling dinner option.
The presentation matters too! Feel free to sprinkle a few chopped nuts or herbs on top for added texture and color.
Recipe Variations
Let’s get creative! Here are a few variations to spice things up:
- Add a fruit twist: Instead of apples, try diced pears or grapes for a different flavor profile.
- Zesty addition: Stir in some chopped fresh herbs like dill or parsley for an aromatic touch.
- Spiced up version: Add some sliced jalapeños or a dash of your favorite hot sauce for a spicy kick!
- Greener version: Toss in some baby spinach or arugula for added nutrition and flavor.
- Dairy-free: Swap Greek yogurt or mayo for avocado for a creamy vegan version.
Chef’s Notes
Whenever I make this chicken salad, I can’t help but reflect on how it has evolved over the years. Initially, I followed my grandmother’s basic recipe, but then I started experimenting with different ingredients and flavors. It became a fun challenge to see how I could make it my own.
I remember one time I accidentally grabbed a can of coconut milk instead of Greek yogurt — whoops! But, you know what? That coconut chicken salad turned out unexpectedly delicious, so don’t be afraid to embrace those kitchen mishaps!
FAQs and Troubleshooting
1. What can I do if the salad is too dry?
If your chicken salad feels dry, simply add a splash of lemon juice or a spoonful of Greek yogurt/mayo to bring moisture back into the mix!
2. How do I store leftovers?
Keep it in an airtight container in the fridge for up to 3 days. I wouldn’t recommend freezing it, as the texture of the apples will change once thawed.
3. How do I make it gluten-free?
Most of the ingredients are naturally gluten-free. Just be sure to check the labels on your mayonnaise or any additional ingredients!
4. Can I make this chicken salad ahead of time?
Absolutely! In fact, letting it sit for a few hours (or overnight) allows the flavors to develop beautifully. Just remember to add any crunchy ingredients, like nuts, right before serving to keep them fresh.
Nutritional Info
While I won’t bog you down with heavy stats, this Chicken Salad with Apples is a balanced dish. It’s filled with protein from the chicken, healthy fats from the yogurt or mayo, and delightful crunch from the apples and veggies. Each serving includes a good amount of fiber, vitamins, and minerals too, making it a wholesome choice for any meal.
I hope you find joy in making this Chicken Salad with Apples! Remember, cooking is all about love, creativity, and savoring the experience. Keep experimenting in the kitchen, and who knows what incredible flavors you’ll discover! Happy cooking, foodies! 🍏🍗❤️
Print
Cozy Chicken Salad with Apples
- Total Time: 30 minutes
- Yield: 4 servings 1x
- Diet: Healthy
Description
A delicious chicken salad with apples that combines savory and sweet flavors, perfect for a light lunch or dinner.
Ingredients
- 2 cups cooked chicken breast
- 1 large apple (preferably Granny Smith or Fuji)
- 1/2 cup celery, chopped
- 1/4 cup red onion, finely diced
- 1/2 cup Greek yogurt (or mayonnaise)
- 1 tablespoon Dijon mustard
- 2 tablespoons lemon juice
- Salt and pepper to taste
- Optional: 1/4 cup walnuts or pecans, chopped
Instructions
- Prepare the chicken by shredding or cubing it into bite-sized pieces.
- Chop the celery and red onion, and slice the apple while squeezing lemon juice over it.
- Mix the dressing by combining Greek yogurt (or mayo), Dijon mustard, and lemon juice in a bowl.
- Assemble the salad by combining chicken, celery, red onion, and apple, and then pouring the dressing over it.
- Taste and adjust seasoning with salt and pepper.
- Chill the salad for about 30 minutes to meld flavors.
Notes
Serve on a bed of greens, in a sandwich, or with crackers. Feel free to add dried cranberries or grapes for additional sweetness.
- Prep Time: 15 minutes
- Cook Time: 0 minutes
- Category: Salad
- Method: Mixing
- Cuisine: American
Nutrition
- Serving Size: 1 serving
- Calories: 280
- Sugar: 6g
- Sodium: 320mg
- Fat: 14g
- Saturated Fat: 2g
- Unsaturated Fat: 8g
- Trans Fat: 0g
- Carbohydrates: 24g
- Fiber: 3g
- Protein: 22g
- Cholesterol: 60mg
Keywords: chicken salad, apple salad, healthy recipe, light lunch, easy dinner




