

Easy Stuffed Butternut Squash with Bacon & Goat Cheese
Butternut Squash Stuffed with Bacon and Goat Cheese | Easy Recipe
Welcome to my cozy corner of the kitchen! Today, I’m here to share a delightful recipe that perfectly balances warm, comforting flavors with a touch of sophistication — Butternut Squash Stuffed with Bacon and Goat Cheese. If you’ve ever been enchanted by the rich aroma of roasted squash mingling with crispy bacon, you’re in for a treat. This dish not only warms your heart but also serves as a beautiful centerpiece for any meal, making it perfect for family gatherings or an intimate dinner for two. Let’s dive into the world of cooking with warmth, flavor, and a sprinkle of nostalgia!
Introduction
Ah, butternut squash! This beautiful, pear-shaped gem is a staple in my autumn kitchen; its sweet, nutty flavor and velvety texture just scream comfort. Every time I slice into one, I can’t help but feel transported back to my childhood, where hearty meals made with love brought my family together around the dinner table. There’s something magical about turning simple ingredients into a scrumptious dish that evokes such warm feelings.
In today’s recipe, I’ve combined creamy goat cheese, savory bacon, and the natural sweetness of butternut squash for a dish that encapsulates all the best aspects of home cooking. But don’t worry; you don’t need to be a gourmet chef to create this masterpiece! This recipe is straightforward and packed with tips and tricks to help you recreate that cozy, homemade feeling in your own kitchen.
Whether you’re hosting friends for a cozy dinner party or just looking to warm up on a chilly night, this Butternut Squash Stuffed with Bacon and Goat Cheese will impress everyone at the table. So whip out your apron, let’s roll up our sleeves, and create a meal that not only tastes amazing but also fills your home with irresistible scents. Ready, set, cook!
Personal Story
I still remember the first time I made this dish. It was fall, and the world outside was draped in shades of gold and crimson. I had just returned home from the local farmer’s market, arms heavy with freshly harvested vegetables, when I spotted the perfect butternut squash. Instinctively, I grabbed it—knowing it would become the star of my dinner party that evening.
I remember sitting on the kitchen floor, peeling and cubing the squash, knowing that my friends would soon arrive. The smell of sautéing bacon wafted through the air, accompanied by laughter and chatter as my friends helped set the table. As we gathered around the table, the stuffed butternut squash turned heads and brought smiles. It was a moment filled with joy and connection, and every bite told the story of our shared evening. That’s the magic of food, isn’t it? It fosters love, friendship, and memories — and I can’t wait for you to create your own!
Ingredients
To make this scrumptious Butternut Squash Stuffed with Bacon and Goat Cheese, you’ll need the following ingredients:
-
1 large butternut squash
The star of the show! Choose a squash that feels heavy for its size, with a smooth skin. You can substitute with acorn squash for a different flavor and texture. -
4-6 slices of bacon
The savory goodness that adds a satisfying crunch! If you want a vegetarian option, feel free to swap it out for smoked or sundried tomatoes for a different but equally delightful flavor. -
1 cup goat cheese
Creamy and tangy, goat cheese complements the sweetness of the squash beautifully. If you’re not a fan, try feta or ricotta as alternatives depending on the flavor profile you desire. -
1 small onion, diced
For added sweetness and depth of flavor. Shallots can be a lovely substitute if you prefer a milder taste. -
2 cloves garlic, minced
A must-have for that aromatic punch! If you’re in a pinch, garlic powder works—just remember that one clove of garlic equals about 1/8 teaspoon of garlic powder. -
1/4 cup fresh parsley, chopped
For freshness and color! You can also use thyme or sage for an herbal twist. -
Salt and black pepper to taste
Always essential for enhancing the flavors of your dish. Just remember, you can always add more, but you can’t take it out—season gradually! -
Olive oil
A drizzle for roasting that helps bring all the flavors together. If you’re out, melted butter is a good substitute for a richer flavor.
Step-by-Step Instructions
Now that we have our ingredients, let’s get to the fun part — cooking! Follow these easy steps to make your butternut squash stuffed with bacon and goat cheese:
-
Preheat Your Oven:
Preheat your oven to 400°F (200°C). This ensures that your squash gets that perfect caramelization that brings out its natural sweetness. -
Prepare the Butternut Squash:
Carefully slice the butternut squash in half lengthwise. Scoop out the seeds using a spoon — try to get as much out without losing too much flesh. Drizzle a bit of olive oil, and season with salt and pepper. Place the halves, cut side up, on a baking sheet lined with parchment paper for easy cleanup!Chef’s Tip: Keeping the skin on while cooking can help the squash hold its shape and flavor better, so don’t be too eager to peel it!
-
Roast the Squash:
Pop those squash halves in the oven and roast for about 35-40 minutes, or until they are tender. You can test by poking a fork through the flesh; if it goes in easily, you’re good to go! -
Cook the Bacon:
While the squash roasts, chop the bacon into small pieces and cook in a skillet over medium heat until crispy. Transfer to a paper towel-lined plate to drain and set aside.Chef’s Hack: Reserve a tablespoon of the bacon grease if you’d like to sauté the onions in it for added flavor!
-
Sauté the Onion and Garlic:
In the same skillet (with or without the bacon grease), add the diced onion and sauté until soft and translucent, about 5-7 minutes. Add the minced garlic and cook for an additional minute, just until fragrant — you don’t want it to burn. -
Mix the Filling:
In a large mixing bowl, combine the sautéed onions, crispy bacon, goat cheese, and chopped parsley. Mix until evenly blended. Depending on your preference, you can crumble the cheese for a creamier texture or leave it chunkier for bites of gooeyness!Chef’s Insight: Mixing the filling while the squash is roasting makes your life easier and keeps everything warm!
-
Stuff the Squash:
Once the squash halves are roasted and tender, take them out of the oven and let them cool for a few minutes. Using a fork, fluff up the inside of the squash slightly to create room for the filling. Spoon the bacon and cheese mixture into each half generously. -
Final Roast:
Return the stuffed squash to the oven and bake for another 10-15 minutes, until the cheese is melted and slightly golden.Chef’s Tip: If you like a crispy cheese topping, turn on the broiler for the last couple of minutes—just keep a close eye on it to prevent burning!
-
Serve and Enjoy:
Serve warm, and watch as your family or friends’ eyes light up with delight when they see this beauty!
Serving Suggestions
When it comes to plating, simplicity is key. Place each stuffed squash half on a larger plate or serving platter. A sprinkle of fresh parsley or a drizzle of balsamic glaze on top can add a lovely final touch, elevating the dish with color and flavor. Pair it with a light salad or a warm crusty bread, and you’ve got an unforgettable meal perfect for any occasion!
Recipe Variations
Ready to shake things up? Here are a few creative twists on this classic dish:
- Quinoa Version: Substitute the bacon with cooked quinoa, toasted nuts, or seeds for a nutritious, vegetarian option.
- Cheese Variety: Swap goat cheese for sharp cheddar or a creamy blue cheese for a bold flavor kick!
- Herbal Twist: Add in a pinch of nutmeg for a warm, aromatic note, or try sage for a more robust earthiness.
- Spice It Up: Include a sprinkle of smoked paprika or some crushed red pepper flakes in your filling for a touch of heat!
- Sweet and Savory: Incorporate dried cranberries or sliced apples into the mixture for a sweet touch that pairs beautifully with the savory flavors.
Chef’s Notes
Over the years, this stuffed butternut squash has been a go-to recipe in my kitchen. I’ve made it for everything from cozy family dinners to festive celebrations. Each time, I find new ways to play with flavors and ingredients, and it never disappoints! One amusing kitchen anecdote involves my cat, Biscuit, who miraculously leaped onto the counter one Thanksgiving, targeting a platter of these beautiful squash halves. Needless to say, it was a source of laughter as I chased her around ensuring she didn’t make a mess of my hard work!
FAQs and Troubleshooting
-
What if my butternut squash is too hard to cut?
If you’re struggling with cutting your squash, try microwaving it for 2-3 minutes to soften it slightly. Just be careful when handling it! -
Can I make this ahead of time?
Absolutely! You can prepare the stuffed squash in advance, store it in the fridge, and then bake it just before serving. It’s great for meal prep! -
Why is my stuffing too dry?
This can happen if the cheese is too crumbly or if it’s overcooked. Ensure your cheese is creamy, and consider adding a splash of cream or olive oil to enrich the filling. -
Can I freeze the leftovers?
Yes, but I recommend freezing them before baking. You can keep unbaked stuffed squash in the freezer for up to 2 months. Just bake from frozen, adding a few extra minutes to the cooking time.
Nutritional Info
Each serving of Butternut Squash Stuffed with Bacon and Goat Cheese is packed with vitamins and minerals, including Vitamin A and potassium from the squash, as well as protein and healthy fats from the bacon and goat cheese. While this dish is comforting and hearty, it can also be part of a balanced diet when enjoyed in moderation.
So there you have it! A flavorful, nostalgic recipe to warm your heart and nourish your body—all while creating lovely memories in the kitchen. Enjoy the process of cooking, the joy of sharing, and most importantly, those amazing flavors in every bite! Happy cooking!
Print
Butternut Squash Stuffed with Bacon and Goat Cheese
- Total Time: 55 minutes
- Yield: 4 servings 1x
- Diet: Omnivore
Description
A delightful recipe that combines creamy goat cheese, savory bacon, and the natural sweetness of butternut squash for a warm and comforting dish.
Ingredients
- 1 large butternut squash
- 4–6 slices of bacon
- 1 cup goat cheese
- 1 small onion, diced
- 2 cloves garlic, minced
- 1/4 cup fresh parsley, chopped
- Salt and black pepper to taste
- Olive oil
Instructions
- Preheat your oven to 400°F (200°C).
- Prepare the butternut squash by slicing it in half lengthwise and scooping out the seeds. Drizzle with olive oil and season with salt and pepper.
- Roast the squash halves for about 35-40 minutes until tender.
- Cook the bacon in a skillet over medium heat until crispy.
- Sauté the onion until soft, then add the minced garlic and cook briefly.
- Mix the sautéed mixture with bacon, goat cheese, and parsley in a bowl.
- Stuff the roasted squash halves with the mixture.
- Final roast for another 10-15 minutes until the cheese is melted and slightly golden.
- Serve warm and enjoy!
Notes
You can prepare the stuffed squash in advance and bake it just before serving. Add a sprinkle of fresh parsley or balsamic glaze for extra flavor.
- Prep Time: 15 minutes
- Cook Time: 40 minutes
- Category: Main Course
- Method: Baking
- Cuisine: American
Nutrition
- Serving Size: 1 half of squash
- Calories: 350
- Sugar: 5g
- Sodium: 600mg
- Fat: 24g
- Saturated Fat: 8g
- Unsaturated Fat: 10g
- Trans Fat: 0g
- Carbohydrates: 30g
- Fiber: 6g
- Protein: 12g
- Cholesterol: 30mg
Keywords: butternut squash, stuffed squash, bacon, goat cheese, autumn recipe, comfort food
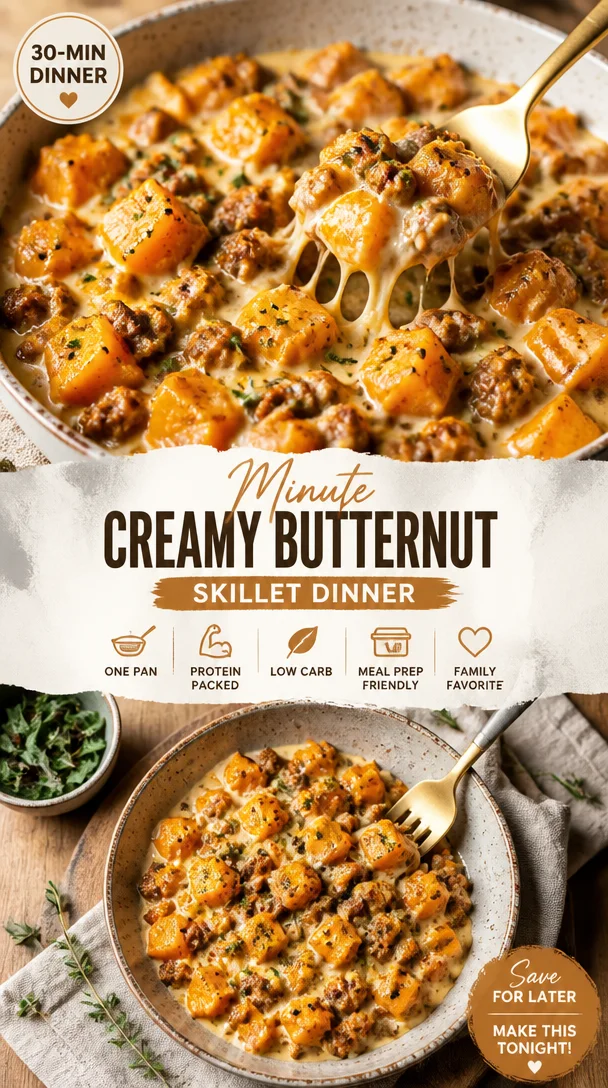
Minute One-Pan Creamy Butternut Squash Skillet Dinner
Butternut Squash Delight: A Cozy Journey in Flavor
Welcome to my kitchen, fellow food lovers! I’m Olivia Bennett, your guide on this culinary adventure, and today we’re diving into something truly magical: Butternut Squash Delight. This dish embodies everything I adore about cooking—comfort, warmth, and the ability to bring people together around the table.
As the days grow shorter and the air turns crisp, there’s nothing quite like the taste of roasted butternut squash. It’s sweet, savory, and oh-so-versatile, making it a star ingredient for any meal. Whether you’re a seasoned chef or just starting out, this recipe will become a cherished go-to in your kitchen repertoire. So, let’s transform those earthy flavors into something delightful!
A Cozy Memory
Before we jump into cooking, let me share a little story. I first fell in love with butternut squash while visiting my grandmother in the fall. She had a garden overflowing with vibrant vegetables, and as the leaves began to turn, we would venture out to collect the last of her harvest. The smell of warm spices and roasting squash would waft through her kitchen—a scent that brought an immediate sense of comfort.
One particularly chilly afternoon, she delighted me with her signature Butternut Squash Soup, creamy and rich with just the right kick of nutmeg. We sat together, spooning soup from colorful bowls, discussing everything from family traditions to dreams for the future. That simple meal was a celebration of warmth and love, and it’s a memory I treasure deeply. Today, I want to recreate that same warmth and share it with you through this delightful dish!
Ingredients
Here’s what you’ll need to create your own Butternut Squash Delight:
-
Butternut Squash (2 lbs): The star of the show! Look for squash that feels heavy for its size with a smooth, tan skin. If you can’t find butternut squash, acorn squash or pumpkin are good substitutes.
-
Olive Oil (2 tablespoons): This provides the richest flavor. You can also use coconut oil for a sweeter touch or avocado oil for a higher smoke point.
-
Garlic (3 cloves, minced): Your aromatic superstar! Honestly, you can never have too much garlic. If you’re short on fresh garlic, 1 teaspoon of garlic powder works too.
-
Ground Cinnamon (1 teaspoon): This adds that warm, cozy vibe. If you’re feeling adventurous, try substituting with nutmeg or allspice!
-
Ground Ginger (1 teaspoon): A hint of warmth and spice. If you prefer a stronger ginger flavor, feel free to add fresh grated ginger instead.
-
Salt (1 teaspoon): To enhance flavors—you can adjust this based on your taste.
-
Freshly Cracked Black Pepper (1/2 teaspoon): For a dash of heat! Feel free to use cayenne or crushed red pepper flakes if you like it spicy.
-
Vegetable Broth (4 cups): This forms the base of your dish. Chicken broth will work, but for a vegetarian option, stick with vegetable broth!
-
Fresh Thyme (1 tablespoon, chopped): This herb brings a fresh, earthy flavor. You can easily swap it for rosemary or sage, depending on your taste.
-
Cream (1/2 cup): For creaminess! If you’re looking for a dairy-free version, try coconut milk or a non-dairy cream.
Step-by-Step Instructions
Now that we have our ingredients lined up like a perfect culinary army, let’s get to cooking!
-
Prep the Butternut Squash: Start by preheating your oven to 400°F (200°C). Grab that gorgeous butternut squash and carefully cut it in half lengthwise. Scoop out the seeds—a fun job for kids if you have any little helpers! Once cleaned, cut the squash into bite-sized cubes. Pro tip: It’s easier to peel the squash after cutting it. If you’re struggling, use a vegetable peeler to remove the skin.
-
Roast the Squash: Toss the cubed squash in a mixing bowl with olive oil, minced garlic, cinnamon, ginger, salt, and pepper. Spread it out on a baking sheet lined with parchment paper. Pop it in the oven for about 25-30 minutes or until the squash is tender and starts to caramelize. You’ll know it’s done when it’s golden and smells divine!
-
Prepare the Broth: While the squash is roasting, let’s make that broth sing. In a large pot, bring the vegetable broth to a simmer over medium heat. Add in the chopped thyme and let it infuse for about 5 minutes.
-
Combine: Once the squash is ready, carefully transfer it to the pot with the broth. Let them mingle, allowing the flavors to blend for about 5-10 minutes.
-
Blend it Up: Here’s where the magic happens! Using an immersion blender, puree the mixture until it’s silky smooth. If you don’t have an immersion blender, carefully transfer to a regular blender in batches. Just watch those hot splatters!
-
Finish it Off: Return the blended soup to the pot. If you like it creamier (and who doesn’t?), stir in the cream. Adjust the seasoning with salt and pepper as necessary. If it’s too thick for your liking, feel free to stir in a splash more broth or water.
-
Serve Warm: Ladle your Butternut Squash Delight into bowls. Don’t forget to garnish with a sprinkle of fresh thyme or a swirl of cream for that lovely finishing touch!
Serving Suggestions
This Butternut Squash Delight is perfect for cozy winter nights! Serve it with crusty bread or a warm baguette. It also pairs beautifully with a fresh green salad sprinkled with nuts and cranberries for that added crunch. Each bite should bring comfort and joy!
Recipe Variations
Feeling adventurous? Here are a few creative twists to make this dish your own:
-
Spicy Kick: Add a pinch of cayenne pepper or a splash of hot sauce when blending for a spicy version.
-
Herbed Bliss: Experiment with different herbs like sage or rosemary for an aromatic twist.
-
Add Protein: Stir in some cooked lentils or chickpeas for extra nutrition and a heartier meal.
-
Nutty Flavor: Top with roasted pumpkin seeds or pecans for a delightful crunch.
-
Coconut Cream: For a tropical twist, replace the cream with coconut cream for a touch of sweetness.
Chef’s Notes
Every recipe has a life of its own, and this Butternut Squash Delight is no exception! Over the years, I’ve tweaked the ingredients and methods based on what I have on hand or what friends bring over. Some days, I’ll throw in a dash of curry powder, while other times I keep it classic. The beauty of cooking is that it can evolve with you.
I also remember a time I attempted to impress my partner with this dish, only to over-spice it with too much ginger! A quick fix with a little more cream saved the day, and we laughed about it as we enjoyed our “unexpected flavor adventure.” Cooking should always be fun and forgiving!
FAQs and Troubleshooting
Q: Why is my butternut squash soup too thick?
A: If your soup is thicker than you’d like, simply add more vegetable broth or water until you reach your desired consistency.
Q: How do I store leftovers?
A: Store any leftovers in an airtight container in the fridge for up to 4-5 days. Reheat on the stovetop, adding a splash of broth to loosen it up if necessary.
Q: Can I make this soup ahead of time?
A: Absolutely! This soup actually tastes even better the next day as the flavors meld. Just store it in the fridge and reheat before serving.
Q: I don’t have an immersion blender. What can I do?
A: A regular blender works just fine! Just be sure to let the soup cool slightly before blending, and blend in small batches to avoid any splatter.
Nutritional Info
While I won’t delve too deeply into the nitty-gritty nutritional details, this dish is packed with vitamins, fiber, and antioxidants thanks to the butternut squash! It makes for a wholesome, comforting meal that nourishes both body and soul.
Now, my dear friends, you’re ready to embark on your very own butternut squash journey! I can’t wait for you to experience the delightful flavors and the memories that will surely come with each spoonful. Gather your loved ones around the table, share some stories, and enjoy this cozy dish. Happy cooking!
Print
Butternut Squash Delight
- Total Time: 40 minutes
- Yield: 4 servings
- Diet: Vegetarian
Description
A comforting and flavorful soup made with roasted butternut squash, garlic, and cream, perfect for cozy winter nights.
Ingredients
- Butternut Squash (2 lbs)
- Olive Oil (2 tablespoons)
- Garlic (3 cloves, minced)
- Ground Cinnamon (1 teaspoon)
- Ground Ginger (1 teaspoon)
- Salt (1 teaspoon)
- Freshly Cracked Black Pepper (1/2 teaspoon)
- Vegetable Broth (4 cups)
- Fresh Thyme (1 tablespoon, chopped)
- Cream (1/2 cup)
Instructions
- Prep the Butternut Squash: Start by preheating your oven to 400°F (200°C). Cut the squash in half lengthwise, scoop out the seeds, and cut into bite-sized cubes.
- Roast the Squash: Toss the cubed squash with olive oil, garlic, cinnamon, ginger, salt, and pepper. Spread on a baking sheet and roast for 25-30 minutes.
- Prepare the Broth: In a large pot, bring the vegetable broth to a simmer and add chopped thyme. Let infuse for about 5 minutes.
- Combine: Transfer the roasted squash to the pot with the broth and let blend flavors for 5-10 minutes.
- Blend it Up: Use an immersion blender to puree the mixture until smooth.
- Finish it Off: Return the soup to the pot, stir in the cream, and adjust seasoning with salt and pepper.
- Serve Warm: Ladle into bowls and garnish with fresh thyme or a swirl of cream.
Notes
This Butternut Squash Delight is perfect for cozy winter nights! Serve it with crusty bread or a warm baguette.
- Prep Time: 10 minutes
- Cook Time: 30 minutes
- Category: Soup
- Method: Blending
- Cuisine: American
Nutrition
- Serving Size: 1 serving
- Calories: 300
- Sugar: 6g
- Sodium: 600mg
- Fat: 16g
- Saturated Fat: 8g
- Unsaturated Fat: 8g
- Trans Fat: 0g
- Carbohydrates: 36g
- Fiber: 5g
- Protein: 6g
- Cholesterol: 40mg
Keywords: butternut squash, soup, vegetarian, cozy meals, fall recipes

Creamy Chicken Pasta
Creamy Chicken Pasta: A Cozy Kitchen Adventure
Welcome to my kitchen! If there’s one dish that embodies comfort, flavor, and indulgence, it’s creamy chicken pasta. This dish is like a warm hug on a chilly evening, and it has the magical ability to bring people together around the dinner table. As the smell of garlic and herbs fills the air, I can guarantee that you’ll feel right at home.
Picture this: it’s a rainy Sunday afternoon, and the world outside feels gray and dreary. You’re lounging in your sweats, flipping through your favorite cookbooks for inspiration when suddenly, you come across that creamy chicken pasta recipe you always dreamed of preparing. It calls to you, promising a meal that’s hearty, satisfying, and ever-so-slightly indulgent. Sounds good, right? Well, grab an apron, and let’s dive into the joy of cooking!
This dish is not only quick and easy but also incredibly versatile. Whether you’re feeding your family, hosting friends for a cozy dinner, or simply indulging in a self-care night in, creamy chicken pasta has got your back. It’s the ultimate canvas for creativity, allowing you to add your favorite vegetables or spices, turning a simple dish into something truly special.
Ready to get started? Let’s embark on this cooking adventure together. You’ll not only learn how to whip up this delightful dish but also gain insights, tips, and perhaps a laugh or two along the way. So, pour yourself a glass of wine (or sparkling water, if that’s your vibe), and let’s make some creamy chicken pasta magic together!
Personal Story
Let me take you back a few years to a summer family gathering at my parents’ house. The aroma of grilled meats and fresh salads danced in the air, as we all gathered on the porch laughing and sharing stories. Amidst the chaos of family chatter and playful kids running around, my aunt Kelly decided to make her famous creamy chicken pasta.
With her signature style, she transformed a simple weekday dish into a feast that felt like an event. As she sautéed the garlic, the rich, buttery scent filled the kitchen, drawing everyone in like moths to a flame. The moment she served that pasta, complete with a sprinkle of fresh basil and grated parmesan, was unforgettable. The laughter and joy shared around the table that day stemmed from not just the food but also the love and care that went into making it.
That day, I learned that cooking is so much more than just mixing ingredients; it’s about creating memories, sparking connections, and sharing moments that strengthen the bonds we hold dear. I’ve tweaked that original recipe over the years until it became my go-to creamy chicken pasta dish. Now, I’m excited to share it with all of you!
Ingredients
To create a soul-satisfying creamy chicken pasta, let’s gather the following ingredients:
-
Chicken Breast (2 large pieces): Look for skinless, boneless chicken breasts. They’re a great source of protein. If you want to make this dish healthier, you can use grilled chicken or even lean turkey breast instead.
-
Pasta (8 ounces): I recommend using fettuccine or penne for this dish, but feel free to substitute with whole wheat or gluten-free pasta if that suits your dietary needs.
-
Heavy Cream (1 cup): This is what gives the pasta its luscious, creamy texture. If you’re looking to lighten it up, you can substitute half-and-half or use a dairy-free alternative like coconut cream.
-
Garlic (4 cloves, minced): Fresh garlic is a must for added flavor. If you’re in a pinch, you can use garlic powder, but fresh is always better!
-
Parmesan Cheese (1 cup, grated): This cheese adds richness and umami. Substitute with pecorino or nutritional yeast for a dairy-free option.
-
Chicken Broth (1 cup): This adds depth of flavor. Feel free to use low-sodium broth or homemade stock.
-
Spinach (2 cups, fresh): Adds color and nutrition! You can swap it with other greens like kale or arugula if preferred.
-
Olive Oil (2 tablespoons): For sautéing the chicken and garlic. Feel free to use butter for richer flavor or avocado oil for a high smoke point.
-
Salt and Pepper (to taste): Essential for seasoning. Experiment with your favorite herbs, too! A pinch of red pepper flakes can add a touch of heat.
-
Fresh Basil (for garnish): Basil adds a fragrant touch. Substitute with parsley or even chives if you don’t have basil on hand.
With these ingredients, you’re well on your way to creating a comforting and creamy dish that your family and friends will adore!
Step-by-Step Instructions
Step 1: Prepare the Chicken
-
Pound the Chicken: Place the chicken breasts between two sheets of plastic wrap and gently pound them to an even thickness (about ½ inch). This helps them cook evenly.
Chef Tip: If you don’t have a meat mallet, you can use a rolling pin or a heavy skillet. Just make sure not to overdo it!
-
Season: Season both sides of the chicken breasts with salt and pepper.
-
Cook the Chicken: Heat 1 tablespoon of olive oil in a large skillet over medium-high heat. Once hot, add the chicken breasts and cook for about 6-7 minutes on each side, or until golden brown and cooked through. Remove the chicken, cover it with foil, and let it rest.
Tip: To make it even more flavorful, sprinkle some garlic powder on the chicken while cooking.
Step 2: Cook the Pasta
-
Boil Water: In a large pot, bring salted water to a boil.
-
Add Pasta: Once boiling, add the pasta and cook according to package instructions until al dente. Reserve about ½ cup of pasta water, then drain the pasta.
Chef Insight: Toss the drained pasta with a drizzle of olive oil to prevent it from sticking while you prepare the sauce.
Step 3: Build the Creamy Sauce
-
Sauté Garlic: In the same skillet used for the chicken, add the remaining tablespoon of olive oil. Lower the heat to medium and add the minced garlic. Sauté for about 30 seconds until fragrant.
-
Add Broth and Cream: Pour in the chicken broth and let it simmer for a couple of minutes. Slowly stir in the heavy cream, allowing it to bubble.
Chef Hack: For extra flavor, you can add a tablespoon of Dijon mustard to the sauce while it simmers!
-
Mix in Cheese: Stir in the grated parmesan cheese until melted and smooth. If the sauce is too thick, add reserved pasta water a little at a time to reach your desired consistency.
Step 4: Combine Ingredients
-
Toss the Pasta: Add the cooked pasta directly into the sauce, tossing to coat. Chop the rested chicken into strips or bite-sized pieces and fold it into the pasta mixture.
-
Add Spinach: Gently fold in the fresh spinach and let it wilt in the sauce.
Tip: Taste and adjust seasoning with additional salt and pepper if necessary.
Serving Suggestions
When serving creamy chicken pasta, presentation is key! Use a large, shallow bowl and twirl the pasta on the plate, letting it pile attractively in the center. Finish with a sprinkle of freshly grated parmesan cheese, a few leaves of basil for color, and a drizzle of olive oil or a few cracks of fresh black pepper to add a gourmet touch. Serve it with a side of garlic bread and a crisp salad for a complete meal!
Recipe Variations
Here are some fun and creative twists to try:
-
Vegetarian Version: Substitute chicken for sautéed mushrooms or roasted eggplant for a plant-based option that packs plenty of flavors.
-
Creamy Pesto Chicken Pasta: Stir in ½ cup of your favorite pesto for a burst of herby goodness.
-
Spicy Chicken Pasta: Add a teaspoon of crushed red pepper flakes to the garlic while sautéing, or use spicy chicken sausage instead of breasts.
-
Add Veggies: Toss in cherry tomatoes, zucchini noodles, or bell peppers for more color and nutrition.
-
Cheesy Broccoli Twist: Mix in steamed broccoli florets for a delicious vegetable boost while retaining that cheesy goodness.
Chef’s Notes
Over the years, my creamy chicken pasta recipe has gone through fun iterations and experiments with different flavors. Sometimes, I’ll swear by adding sun-dried tomatoes for a tangy kick or experimenting with various cheeses based on what’s in the fridge. Cooking is all about creativity and making dishes that resonate with you!
I remember one time I tried to make this pasta in a rush before a gathering. I forgot to reserve the pasta water and ended up with a ridiculously thick sauce. Lesson learned: always reserve your pasta water! It can be a lifesaver in achieving the perfect sauce consistency.
So, feel free to play around with this recipe and make it your own. That’s the beauty of cooking—a little creativity goes a long way!
FAQs and Troubleshooting
1. How do I fix a broken creamy sauce?
If your sauce appears split or curdled, it might have cooked at too high a heat. To fix it, remove the pan from heat, add a splash of cold cream or milk, and whisk vigorously until it comes back together.
2. My sauce is too thick; what should I do?
No worries! If your sauce is too thick, you can thin it out by gradually adding reserved pasta water or a splash of chicken broth until you reach your desired consistency.
3. Can I make this recipe in advance?
Absolutely! You can prepare the sauce and cook the pasta a few hours in advance. Just reheat them together in a skillet over low heat, adding a splash of water or broth as needed to bring it back to life.
4. How do I store leftovers?
Store any leftovers in an airtight container in the fridge for up to 3 days. You can reheat it gently on the stovetop or microwave, adding cream or broth to maintain the sauce’s creaminess.
Nutritional Info
(Per serving, approximate values—based on a recipe serving four)
- Calories: 620
- Protein: 35g
- Carbohydrates: 65g
- Fat: 25g
- Fiber: 3g
I hope you are as excited to try this creamy chicken pasta as I am to share it with you! Remember, the kitchen is your playground; whip up this dish, make it your own, and enjoy the smiles it brings around your table. Happy cooking, my fellow foodies!
Print
Creamy Chicken Pasta
- Total Time: 45 minutes
- Yield: 4 servings 1x
- Diet: None
Description
A comforting and indulgent creamy chicken pasta dish perfect for family dinners or cozy nights in.
Ingredients
- 2 large pieces of Chicken Breast, skinless and boneless
- 8 ounces of Pasta (fettuccine or penne)
- 1 cup of Heavy Cream
- 4 cloves of Garlic, minced
- 1 cup of Parmesan Cheese, grated
- 1 cup of Chicken Broth
- 2 cups of fresh Spinach
- 2 tablespoons of Olive Oil
- Salt and Pepper, to taste
- Fresh Basil, for garnish
Instructions
- Pound the chicken: Place the chicken breasts between two sheets of plastic wrap and gently pound them to an even thickness (about ½ inch).
- Season both sides of the chicken breasts with salt and pepper.
- Cook the chicken: Heat 1 tablespoon of olive oil in a skillet over medium-high heat and cook the chicken for 6-7 minutes on each side.
- Boil water: In a large pot, bring salted water to a boil.
- Add pasta: Once boiling, add the pasta and cook until al dente, reserving ½ cup of pasta water.
- Sauté garlic: In the same skillet, add remaining olive oil and sauté garlic for 30 seconds.
- Add broth and cream: Pour in the chicken broth and simmer for a couple of minutes followed by stirring in the heavy cream.
- Mix in cheese: Stir in grated parmesan cheese until melted, adjusting thickness with pasta water as needed.
- Toss the pasta: Add cooked pasta to the sauce, along with chopped chicken and spinach, folding gently.
Notes
Serve with a side of garlic bread and a crisp salad for a complete meal. Reserve pasta water for sauce consistency adjustments.
- Prep Time: 15 minutes
- Cook Time: 30 minutes
- Category: Main Course
- Method: Stovetop
- Cuisine: Italian
Nutrition
- Serving Size: 1 serving
- Calories: 620
- Sugar: 3g
- Sodium: 600mg
- Fat: 25g
- Saturated Fat: 12g
- Unsaturated Fat: 6g
- Trans Fat: 0g
- Carbohydrates: 65g
- Fiber: 3g
- Protein: 35g
- Cholesterol: 85mg
Keywords: creamy chicken pasta, comfort food, Italian dish, pasta recipe

Low Carb Pizza Casserole (Easy, Cheesy & Family-Approved)
Low Carb Pizza Casserole (Easy, Cheesy & Family-Approved)
Introduction
Welcome to my cozy corner of the culinary world! Today, we’ll take a delightful dive into a dish that’s a real crowd-pleaser—Low Carb Pizza Casserole. Now, don’t let the “low carb” scare you; I promise, this casserole delivers all the cheesy, saucy goodness that you crave while hugging that carb count. Picture this: a bubbling, cheesy casserole that’s packed with flavor and makes life on a low-carb diet infinitely more delicious. If you’re anything like me, where the mere mention of ‘pizza’ makes your stomach do a happy dance—then, oh boy, are you in for a treat!
Growing up, pizza night was a sacred ritual in my family. Every Friday, like clockwork, we’d gather around our rickety dining table with a steaming pizza that my dad would whip up from scratch. The aroma of the homemade sauce simmering on the stove combined with the distinctive sound of dough being tossed in the air still brings a nostalgic smile to my face. As I got older and started my own family, I found ways to keep those joyful pizza nights alive—but with a healthy twist. That’s how this Low Carb Pizza Casserole was born!
Imagine layering your favorite pizza toppings in a warm, comforting casserole, perfect for a family dinner, parties with friends, or even a cozy night in, just you and your favorite movie. Trust me, it’s all about satisfying those cravings while keeping it healthy, and I can’t wait to share this recipe with you! So roll up those sleeves, grab that apron, and let’s dive right into this cheesy goodness that’s bound to become a family favorite!
Personal Story
Let me take you back to a chilly fall evening a few years ago. I had just come home after a long day at work, and after a tiring week, all I wanted was the comforting embrace of something cheesy and warm. As I rummaged through the fridge, I came across an assortment of veggies, some leftover cooked chicken, and a half-opened jar of marinara sauce.
I started layering everything in a baking dish—a little cheese here, a sprinkle of herbs there, and before I knew it, I had a bubbling masterpiece in the oven resembling all the flavors of pizza without the guilt of a heavy crust. As my family gathered for dinner, their eyes lit up, and the smell wafting from the oven had them entranced. As we dug in, the jokes and laughter flowed—a reminder that food is truly the heartbeat of our home. That became our first “pizza night” casserole, and it sparked ideas for countless other family meals.
That evening not only gave birth to the Low Carb Pizza Casserole you’re about to learn but also solidified my firm belief that the best recipes often come from a mix of creativity, necessity, and heart!
Ingredients
Here’s what you’ll need to create your very own Low Carb Pizza Casserole, along with some handy insights for each ingredient:
-
1 pound ground beef or Italian sausage
Chef Insight: Feel free to substitute with turkey or chicken for a healthier variant, or even omit it entirely for a vegetarian option. -
½ cup onion, chopped
Substitution Tips: You can use shallots or even green onions for a milder flavor. -
2 cloves garlic, minced
Chef Tip: Fresh garlic packs a punch, but if you’re in a pinch, garlic powder works too—just use about 1/4 teaspoon per clove. -
1 cup marinara sauce
Try This: Store-bought works great, but homemade marinara adds a personal touch, especially on special occasions! -
2 cups chopped cauliflower or zucchini
Swap It Out: If you’re not a fan of cauliflower, chopped bell peppers or mushrooms work wonders too! -
1 teaspoon Italian seasoning
Chef’s Hack: Use fresh herbs like basil or oregano for a vibrant flavor! -
2 cups shredded mozzarella cheese
Cheesy Variations: Swap in your favorite cheese—parmesan, provolone, or pepper jack for an extra kick! -
½ cup pepperoni slices or your favorite pizza toppings
Customization: Try using olives, cooked bacon, or even artichoke hearts to shake things up.
Step-by-Step Instructions
Now, let’s get cooking! Follow these detailed steps to whip up your Low Carb Pizza Casserole.
-
Preheat Your Oven
Preheat your oven to 375°F (190°C). Getting that oven nice and hot gives you the best bubbly, cheesy outcome! -
Brown the Meat
In a large skillet over medium heat, add your ground beef or Italian sausage. Cook, breaking it apart with a spatula until browned—about 5-7 minutes. Don’t forget to drain any excess fat if you’re using fatty meat. -
Sauté the Onion and Garlic
Once the meat is browned, toss in your chopped onion and minced garlic to the skillet. Sauté until the onions are translucent and fragrant, around 3-4 minutes. This is your flavor base! -
Mix in the Marinara Sauce
Stir in your marinara sauce, bringing everything together into a gorgeous mixture. Add your Italian seasoning—smell that? It’s like a warm hug in the kitchen! -
Incorporate the Veggies
Gently fold in the chopped cauliflower or zucchini. This is where the low carb magic happens! Mix until everything is evenly coated in that saucy goodness. -
Transfer to Baking Dish
Pour the meat and veggies mixture into a greased 9×13-inch baking dish. Spread it out evenly to ensure every bite is bursting with flavor. -
Cheesy Topping
Sprinkle the shredded mozzarella cheese generously over the top. You want a good blanket of cheese to melt and form that delicate, gooey layer everyone loves. -
Add Toppings
Don’t forget the pepperoni (or any of your chosen toppings) on top of the cheese. Pile them high, friends! -
Bake in the Oven
Slide the casserole into the oven and bake for 20-25 minutes, or until the cheese is bubbling and golden on top. Keep an eye on it so it doesn’t get too brown! -
Serve and Enjoy
Once out of the oven, let it sit for about 5 minutes (if you can resist!). Serve hot, maybe with a fresh side salad for a delightful dinner.
Serving Suggestions
For presentation, scoop a generous portion onto a plate and drizzle a little extra marinara on the side for dipping. A sprinkle of fresh basil or oregano on top will add a beautiful touch and fragrant aroma.
Recipe Variations
- Pepperoni Lovers: Add extra layers of pepperoni, or use spicy Italian sausage for a pepperoni explosion!
- Veggie Delight: Load up with even more veggies—spinach, olives, or artichokes for those vibrant flavors!
- Buffalo Chicken: Spice things up with buffalo sauce instead of marinara and add shredded chicken for an exciting twist.
- Cheesy Pesto: Instead of marinara, spread a thin layer of pesto and mix mozzarella with Parmesan for that classic pizza flavor.
- Free-from Options: Use vegan cheese and a cauliflower base for an entirely dairy-free and low carb version!
Chef’s Notes
As with every recipe, it’s evolved over time! Initially, I was hesitant about including cauliflower, but it truly adds that hearty bite reminiscent of crust. My kids are now huge fans and often request this casserole with various toppings—they even suggest some wild combinations! Whenever I do make this dish, it’s remarkable how the kitchen erupts with laughter and joy, making every meal a little gathering of love.
FAQs and Troubleshooting
-
Can I prep this casserole ahead of time?
Absolutely! You can prep the casserole, cover it tightly, and refrigerate until you’re ready to bake. Just add a few extra minutes to the baking time if it’s cold from the fridge. -
What if my casserole is too watery?
If you find it watery after baking, it could be due to the veggies releasing excess moisture. Next time, consider sautéing the veggies first to help them release moisture before adding them to the casserole. -
How do I check if it’s done?
Your casserole is ready when the cheese is bubbly and golden brown. You might also want to insert a knife in the center; it should come out hot and the veggies tender! -
Can I freeze leftovers?
Yes! Cool the casserole completely, then transfer to an airtight container. It should keep well in the freezer for up to 2 months. Thaw in the fridge overnight before reheating.
Nutritional Info
This section is optional, but if you’d like the nutritional breakdown of your casserole, please let me know, and I’ll be more than happy to provide it!
So there you have it—the ultimate recipe for a Low Carb Pizza Casserole that’s easy to whip up, downright delicious, and sure to light up your family dinner table. Let the leftovers disappear in a flash and look forward to the smiles and satisfied bellies around your dining table. Happy cooking, friends!
Print
Low Carb Pizza Casserole
- Total Time: 45 minutes
- Yield: 4 servings 1x
- Diet: Low Carb, Gluten-Free
Description
A delicious low carb pizza casserole, packed with flavor and cheesy goodness, perfect for family dinners.
Ingredients
- 1 pound ground beef or Italian sausage
- ½ cup onion, chopped
- 2 cloves garlic, minced
- 1 cup marinara sauce
- 2 cups chopped cauliflower or zucchini
- 1 teaspoon Italian seasoning
- 2 cups shredded mozzarella cheese
- ½ cup pepperoni slices or your favorite pizza toppings
Instructions
- Preheat your oven to 375°F (190°C).
- Brown the meat in a large skillet over medium heat for about 5-7 minutes.
- Sauté the onion and garlic in the skillet until translucent, around 3-4 minutes.
- Mix in the marinara sauce and Italian seasoning.
- Incorporate the chopped cauliflower or zucchini into the mixture.
- Transfer the mixture to a greased 9×13-inch baking dish.
- Sprinkle the shredded mozzarella cheese over the top.
- Add the pepperoni or your favorite toppings on top of the cheese.
- Bake in the oven for 20-25 minutes, until the cheese is bubbling and golden.
- Serve hot and enjoy!
Notes
You can customize this casserole with different toppings or make it vegetarian by omitting the meat.
- Prep Time: 15 minutes
- Cook Time: 30 minutes
- Category: Main Course
- Method: Baking
- Cuisine: Italian
Nutrition
- Serving Size: 1 serving
- Calories: 350
- Sugar: 5g
- Sodium: 400mg
- Fat: 20g
- Saturated Fat: 10g
- Unsaturated Fat: 8g
- Trans Fat: 0g
- Carbohydrates: 10g
- Fiber: 3g
- Protein: 25g
- Cholesterol: 70mg
Keywords: pizza, low carb, casserole, family-friendly, easy recipe

Ultimate Cheesy Ground Beef Melt
Ultimate Cheesy Ground Beef Melt: A Cozy Comfort Food for Every Occasion
Hello, fellow food lovers! Welcome back to my little corner of the culinary universe. I’m Olivia Bennett, and today I’m excited to share with you one of my all-time favorite comfort foods— the Ultimate Cheesy Ground Beef Melt! If you’re anything like me, the mere thought of gooey cheese melting over flavorful ground beef can send your taste buds into a frenzy. This dish is not just a meal; it’s an experience that takes you right back to those cozy nights spent around the dinner table, laughter filling the air as everyone digs into something delicious.
The Ultimate Cheesy Ground Beef Melt is perfect for those busy weeknights when you want something hearty and satisfying without stressing about a complicated recipe. And if you’re hosting a gathering? Oh boy, are you in for a treat! Everyone will be asking for seconds—trust me!
With layers of seasoned ground beef, a medley of melty cheeses, and served on a toasty bun, it’s a dish that brings together flavors and brings people together. This recipe is all about using simple, quality ingredients to create something magical. So, roll up those sleeves, grab your favorite apron (and maybe a glass of wine), and let’s dive into the delicious world of cheesy goodness!
Personal Story
Whenever I think of the Ultimate Cheesy Ground Beef Melt, I’m reminded of my childhood family gatherings. My mom used to make her version of this dish on chilly Saturday nights, and the aroma that filled our home was nothing short of enchanting. I remember my little brother and I eagerly waiting for dinner, our tummies growling at the enticing smell wafting from the kitchen.
One night, Mom decided to add an extra layer of cheese—a bold move at the time! As we sat around the table, our eyes wide with excitement, the first bite was pure bliss. The beef was perfectly seasoned, the cheese was gooey, and the toasted buns added the perfect crunch. That simple, yet unforgettable meal sparked my love for cooking and sharing heartfelt recipes. Now, I love replicating that magic in my own kitchen, turning simple ingredients into cherished memories, one cheesy melt at a time!
Ingredients
To whip up this mouthwatering Ultimate Cheesy Ground Beef Melt, you’ll need the following ingredients:
-
Ground Beef (1 pound)
- You can use lean ground beef, or if you’re feeling adventurous, try mixing in some ground turkey or chicken for a lighter version!
-
Onion (1 medium, diced)
- Sweet onions work wonders here, but yellow or even red onions can add a nice zing to the dish.
-
Garlic (3 cloves, minced)
- Fresh garlic is always best, but jarred minced garlic in a pinch will do the trick!
-
Our Favorite Cheese Blend (2 cups total, shredded)
- A combination of cheddar, Monterey Jack, and mozzarella is chef’s kiss perfect! You can substitute with non-dairy cheese if you’re seeking a dairy-free option.
-
Worcestershire Sauce (1 tablespoon)
- This little ingredient adds a depth of flavor that you won’t want to skip.
-
Mayonnaise (2 tablespoons)
- You can also use Greek yogurt for a slightly healthier twist—great for the creaminess!
-
Burger Buns (4)
- Pretzel buns provide a phenomenal flavor, but any bun you love works here. Try whole wheat for a healthier option.
-
Salt and Pepper (to taste)
- Seasoning is key! Don’t be shy with salt; it brings all those flavors to life.
Chef Insight:
The beauty of this dish lies in its simplicity and versatility. Don’t hesitate to mix and match ingredients based on what you have on hand or to suit your taste. Cooking should always be fun and free—and a little bit messy!
Step-by-Step Instructions
-
Prep Your Ingredients:
- Start by dicing your onion and mincing your garlic. This ensures they’re ready to go when it’s time to cook. Let’s face it; no one wants to be scrambling for ingredients mid-cook!
-
Cook the Ground Beef:
- In a large skillet over medium heat, add the ground beef. Use a spatula to break it apart as it cooks, about 5-7 minutes until it’s browned.
- Chef Hack: If you want to drain some fat for a leaner option, tilt the skillet slightly and spoon out the excess.
-
Add the Aromatics:
- Toss in the diced onion and minced garlic into the skillet. Sauté for an additional 2-3 minutes until the onion is translucent and the garlic is fragrant.
- Commentary: Stirring constantly is key here; burnt garlic can ruin the flavor profile!
-
Season the Mixture:
- It’s time to season! Add Worcestershire sauce, salt, and pepper to taste. Stir everything well to evenly distribute the seasoning.
- Let it simmer for another minute or so to help the flavors meld together.
-
Cheesy Goodness:
- Remove the skillet from heat, and stir in your mayo and the blend of cheeses until everything is melty and luxurious.
- Chef Insight: If you’re feeling cheesy (pun intended), add some cream cheese or ricotta for extra creaminess!
-
Prepare the Buns:
- While that cheesy filling cools just a tad, toast your burger buns in a separate skillet or in the oven until golden brown. This adds an irresistible crunch!
-
Assemble Your Melts:
- Spoon the cheesy ground beef mixture generously over the bottom half of each bun. Top with the other bun half.
- Serving Tip: If you want to add a little freshness, consider layer a slice of tomato or some greens before closing up the bun!
-
Final Toast:
- If you want an extra crispy crust, pop the assembled melts back onto the skillet for a minute or two, allowing the outside to develop a lovely golden hue.
Serving Suggestions
To serve your Ultimate Cheesy Ground Beef Melts, cut them in half for easy sharing, and plate them up with a side of crispy fries or a fresh salad! You can also garnish with fresh herbs like parsley or chives to brighten the dish. Remember, the presentation counts; don’t shy away from making your meal look as delicious as it tastes!
Recipe Variations
-
Spicy Kick: Add diced jalapeños or a splash of hot sauce to the ground beef mixture for a zesty twist.
-
Veggie Delight: Swap out half of the ground beef for cooked mushrooms, quinoa, or lentils for a vegetarian option that doesn’t skimp on flavor.
-
Smoky Flavor: Try adding some smoked paprika to the mixture for a hint of smokiness that elevates the dish.
-
Herbed Up: Toss in fresh herbs like basil or cilantro into the meat mixture for an aromatic flavor profile.
-
Double the Cheeses: Experiment with unusual cheeses like gorgonzola or feta for unexpected tang and creaminess.
Chef’s Notes
As a chef who believes in the joy of sharing food, I’ve seen this recipe evolve over the years! From my mom’s simpler version to my current rendition, it’s grown in complexity in the best way. One of my favorite kitchen stories comes from a time I was experimenting with beer in the beef mixture; let’s just say, not all experiments lead to culinary success, but they definitely lead to lots of laughs!
This dish is versatile, and I encourage everyone to make it their own. The Ultimate Cheesy Ground Beef Melt is now not just a meal; it’s an invitation to gather ’round the table and share stories, laughter, and, of course, delicious food!
FAQs and Troubleshooting
-
Why does my ground beef taste bland?
- Don’t skip the seasoning! Salt and pepper are crucial, but feel free to experiment with garlic powder, onion powder, or even some chili flakes for a flavor boost.
-
What if my cheese doesn’t melt well?
- Using freshly grated cheese helps! Pre-shredded cheese often contains anti-caking agents that can prevent smooth melting.
-
Can I make this ahead of time?
- Absolutely! You can prepare the beef mixture in advance and store it in the fridge. Just reheat before assembling and toasting your melts!
-
How do I prevent soggy buns?
- Toasting the buns before assembly is key! You can also serve the mixture separately for guests to assemble at will to keep everything fresh.
Nutritional Info (Optional)
This recipe makes 4 servings, with each serving roughly containing:
- Calories: 450
- Protein: 28g
- Carbohydrates: 30g
- Fat: 25g
(Disclaimer: This is an estimation; values can vary based on specific ingredients.)
And there you have it! The Ultimate Cheesy Ground Beef Melt is not just a comforting dish but a gateway to creating connections and sharing joy through food. I hope this recipe inspires you to bring some cheesy goodness into your kitchen. Happy cooking!
Print
Ultimate Cheesy Ground Beef Melt
- Total Time: 30 minutes
- Yield: 4 servings 1x
- Diet: Mixed
Description
A cozy and comforting Ultimate Cheesy Ground Beef Melt perfect for busy weeknights and gatherings.
Ingredients
- 1 pound Ground Beef
- 1 medium Onion, diced
- 3 cloves Garlic, minced
- 2 cups Our Favorite Cheese Blend (cheddar, Monterey Jack, mozzarella)
- 1 tablespoon Worcestershire Sauce
- 2 tablespoons Mayonnaise
- 4 Burger Buns
- Salt and Pepper, to taste
Instructions
- Prep your ingredients by dicing your onion and mincing your garlic.
- Cook the ground beef in a large skillet over medium heat, breaking it apart until browned, about 5-7 minutes.
- Add the diced onion and minced garlic; sauté for 2-3 minutes until the onion is translucent.
- Season the mixture with Worcestershire sauce, salt, and pepper to taste, and let simmer for another minute.
- Remove from heat and stir in mayo and the cheese blend until fully melted.
- Prepare the burger buns by toasting them until golden brown.
- Assemble the melts by spooning the cheesy mixture onto the bottom half of each bun and topping with the other half.
- Toast the assembled melts in the skillet for an extra crispy crust.
Notes
For added flavor, consider mixing in jalapeños or fresh herbs to the beef mixture. Serve with fries or salad.
- Prep Time: 15 minutes
- Cook Time: 15 minutes
- Category: Main Course
- Method: Baking
- Cuisine: American
Nutrition
- Serving Size: 1 serving
- Calories: 450
- Sugar: 2g
- Sodium: 600mg
- Fat: 25g
- Saturated Fat: 10g
- Unsaturated Fat: 8g
- Trans Fat: 1g
- Carbohydrates: 30g
- Fiber: 2g
- Protein: 28g
- Cholesterol: 75mg
Keywords: cheesy beef melt, comfort food, easy dinner, family recipe, quick meal
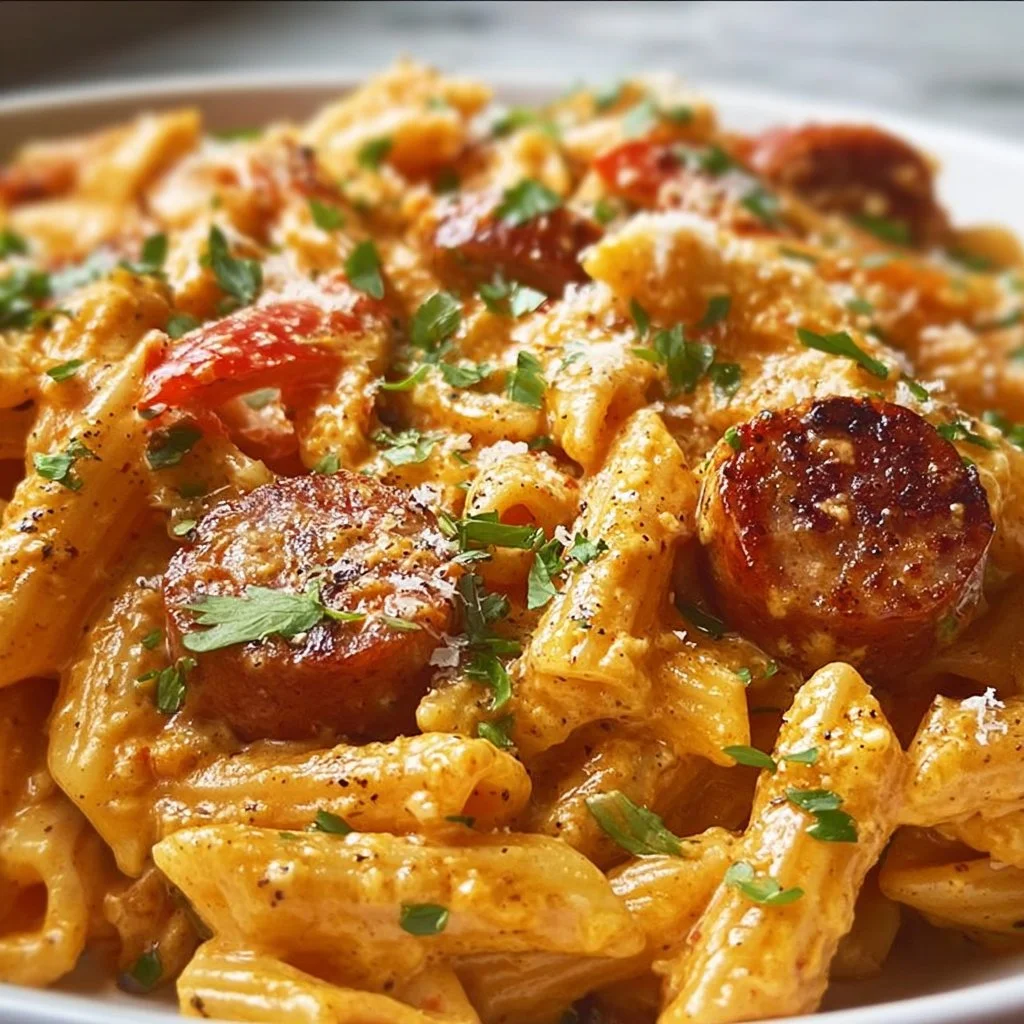
One-Pot Creamy Spicy Cajun Sausage Pasta
One-Pot Creamy Spicy Cajun Sausage Pasta
Hey there, fellow food lovers! Welcome back to my cozy corner of the internet! Today, we’re diving into the delightful world of pasta, where richness meets spice, and comfort collides with excitement. I’m thrilled to share with you my twist on a classic favorite: One-Pot Creamy Spicy Cajun Sausage Pasta!
This dish is an absolute lifesaver for busy weeknights or even a relaxed Sunday dinner when you want something a bit fancy without all the fuss. Not only does it take just around 30 minutes to whip up, but it also requires minimal cleanup because, let’s be honest, ain’t nobody got time for heaps of dishes. You’ll end up with a satisfying bowl of creamy goodness that packs a punch of flavor with a kick of Cajun spice. Oh, yes!
Now, let’s talk about the magic of this dish. Imagine you’re at home, the aroma of spices filling the air while savory sausage sizzles in the pan—just thinking about it makes me smile! This one-pot wonder combines tender pasta with a velvety, spicy sauce that’s just the right amount of creamy. Every bite is packed with flavor, warmth, and a little bit of adventure.
In my kitchen, we believe that every meal should not only feed the body but also the spirit. So gather your ingredients, roll up those sleeves, and join me! We’re not just cooking—we’re creating memories, engaging our senses, and making a meal that will have everyone at the table coming back for seconds. Get ready for some serious yum!
Personal Story
This recipe holds a special place in my heart. I remember the very first time I made it, long ago when I was a still novice in the kitchen. It was a chilly evening, and I wanted to make something cozy for my college roommates who were feeling the stress of exam week.
I had some spicy sausage lying around—thanks to a recent grocery haul—and I suddenly felt inspired! After rummaging through my pantry, I decided to throw together a pasta dish. Without a clue about what I was doing, I started layering flavors: browning the sausage, tossing in some spices, and adding cream. It began to take on a life of its own!
When I finally served it, the look on my roommates’ faces was priceless. We all dug in, and what was meant to be a simple meal turned into a laughter-filled night. The creamy, spicy blend had them all loving life and forgetting about finals, at least for a bit. Since then, this dish has become a staple in my kitchen—a reminder of how food can bring us together, create joy, and transform a regular evening into something memorable.
Ingredients
Here’s what you’ll need to create this delicious One-Pot Creamy Spicy Cajun Sausage Pasta. Each ingredient contributes to the flavorful festivity, and I’ll share some tips along the way!
-
Pasta (Fusilli or Penne):
- I love using fusilli for its ability to catch the sauce in those lovely spirals, but penne works beautifully too! You can also use whole wheat or gluten-free pasta if you’re looking for a healthier option.
-
Smoked Sausage:
- Andouille sausage is traditional and lends a fantastic smoky flavor, but feel free to swap it with your favorite type, like Italian sausage or even plant-based sausage for a vegetarian twist.
-
Olive Oil:
- This bright oil elevates the dish’s flavor. If you’re in a pinch, avocado oil or canola oil will do—just steer clear of extra virgin unless you want that bold taste.
-
Onion:
- A yellow or white onion adds sweetness and depth. Shallots can also be used for a milder flavor.
-
Bell Pepper:
- I usually reach for a red or green bell pepper for color and crunch. You can substitute it with a jalapeño for an extra kick!
-
Garlic:
- Always fresh! When cooking, garlic transforms into a sweet, aromatic wonder. If you’re all out, garlic powder can work in a pinch—just use less than fresh.
-
Cajun Seasoning:
- This spice blend is the star of the show! You can find pre-mixed Cajun seasoning at stores, or make your own with paprika, cayenne pepper, garlic powder, onion powder, thyme, and oregano.
-
Heavy Cream:
- This is what makes our dish so creamy and dreamy! Alternatively, half-and-half or even coconut cream creates a wonderful texture without the heaviness.
-
Parmesan Cheese:
- Freshly grated is best for maximum flavor. Nutritional yeast is a great dairy-free substitute that brings a cheesy essence without the lactose!
-
Green Onions:
- These are for garnish and some brightness. You can replace them with fresh parsley or even cilantro for a different flavor profile.
-
Salt and Pepper:
- Essential for elevating flavors. Always taste as you go to balance them out just right!
Step-by-Step Instructions
Alright, culinary adventurers, let’s roll up those sleeves and get cooking!
Step 1: Sauté the Sausage
Begin by heating up about 1 tablespoon of olive oil in a large pot or Dutch oven over medium heat. Once hot, add your sliced sausage. Let it sizzle! Cook for about 5-7 minutes until it gets all golden and crispy. This browning doesn’t just make the sausage beautiful; it infuses the oil with a delicious flavor bomb! Tip: Avoid overcrowding the pan; sauté in batches if necessary.
Step 2: Build the Flavor Base
Next, toss in the chopped onion and bell pepper. Cooking these veggies will enhance their natural sweetness and create a beautiful contrast to our spicy sausage. Stir them around for about 3-4 minutes until they soften. You’ll start to notice that marvelous aroma filling your kitchen!
Once they’re softened, add minced garlic and your Cajun seasoning. Let the mixture cook for a minute more. The key here is to toast the spices, which will amplify their flavors—don’t let them burn, though!
Step 3: Cook the Pasta
Now it’s time for the main star—pasta! Pour in the uncooked fusilli (or penne) and stir everything together. Immediately add about 3 cups of chicken or vegetable broth (depending on your dietary choice) to the pot. Bring it to a boil! Once boiling, reduce the heat, cover the pot, and let it simmer for about 10-12 minutes, or until the pasta is al dente and has absorbed most of the liquid. Chef Hack: Stir occasionally to prevent sticking!
Step 4: Creamy Goodness
With the pasta cooked to perfection, it’s time to add the heavy cream and half of the grated Parmesan cheese. Stir until everything is beautifully combined and creamy. Give it a taste and season with salt and pepper. If you want it spicier, feel free to sprinkle in a bit more Cajun seasoning or red pepper flakes—bring on the heat!
Step 5: Final Touches
Remove the pot from the heat, and sprinkle the remaining Parmesan on top. Toss in the chopped green onions and mix them in for a fresh pop of flavor. Let it sit for a couple of minutes to thicken up a bit. As a finishing touch, some extra cheese never hurt anyone, so don’t be shy!
Serving Suggestions
Warm weather calls for cozy gatherings! Serve your One-Pot Creamy Spicy Cajun Sausage Pasta directly from the pot into generous bowls. You can add a sprinkle of fresh parsley or more green onions on top for that beautiful presentation. This dish pairs well with crusty bread for mopping up any leftover sauce or with a side salad dressed in zesty vinaigrette for a refreshing contrast.
Recipe Variations
Feeling adventurous? Here are a few creative twists you can try:
-
Seafood Version: Replace sausage with shrimp or a mix of seafood for a delectable seafood Cajun pasta.
-
Vegetarian Delight: Go meatless with sautéed mushrooms, zucchini, or eggplant for a hearty veggie pasta.
-
Extra Veggies: Add spinach or kale for a boost of nutrients and a lovely pop of color.
-
Herby Twist: Swap Cajun seasoning for Italian herb blends for a different flavor profile that’s equally satisfying.
-
Lighter Option: Use half-and-half instead of heavy cream for a lighter sauce without losing the creaminess.
Chef’s Notes
One of the things I love about this recipe is its sheer versatility. Over the years, I’ve played around with ingredients, tweaking things based on what I had in the fridge. It started with just sausage and pasta, but then I got adventurous—adding a splash of wine here, a different veggie there, or experimenting with new spices. What remains consistent is that every time I make this dish, it feels like home.
Oh, and here’s a fun story: One time I decided to bring this dish to a potluck and overestimated how much I needed. Let’s just say my neighbors were extremely well-fed for a week!
FAQs and Troubleshooting
-
What if I don’t have Cajun seasoning?
- You can easily whip up a DIY blend using paprika, cayenne, dried thyme, oregano, and garlic powders—or just use your favorite seasoning blend!
-
My pasta is undercooked! What do I do?
- No worries! Just add a splash more broth or water and return it to heat, cooking for a few extra minutes until tender.
-
Can I make this dish in advance?
- Absolutely! You can prepare it ahead of time and reheat it gently on the stove. It can be slightly drier after refrigeration, so consider adding a splash of cream or broth when reheating.
-
Is it possible to freeze leftovers?
- Yes, you can! Store it in an airtight container in the freezer for up to 2 months. When you’re ready to enjoy, thaw it in the fridge overnight and reheat on the stovetop, adding a little additional cream or broth to revive the sauce.
Nutritional Info
This recipe serves approximately four and contains:
- Calories: 450-500 (per serving, depending on ingredient swaps)
- Protein: 25g
- Carbohydrates: 45g
- Fats: 20g
This nutritional count will vary based on your specific choices of sauces, cheeses, and sausage types used.
And there you have it, folks! A wonderfully creamy, spicy, and utterly comforting one-pot pasta dish that will bring warmth and joy to your dining table. I hope you enjoy cooking this as much as I did! Happy cooking, and don’t forget to share your creations and memories as you gather around the table. Until next time, keep those aprons messy and your hearts full!
Print
One-Pot Creamy Spicy Cajun Sausage Pasta
- Total Time: 30 minutes
- Yield: 4 servings 1x
- Diet: Meat
Description
A creamy and spicy pasta dish that combines the flavors of Cajun sausage with tender pasta in a one-pot preparation for minimal cleanup.
Ingredients
- 8 oz Fusilli or Penne pasta
- 12 oz smoked sausage (Andouille or Italian)
- 1 tbsp olive oil
- 1 onion, chopped
- 1 bell pepper, chopped
- 3 cloves garlic, minced
- 2 tbsp Cajun seasoning
- 3 cups chicken or vegetable broth
- 1 cup heavy cream
- 1/2 cup Parmesan cheese, grated
- 2 green onions, chopped (for garnish)
- Salt and pepper to taste
Instructions
- Heat the olive oil in a large pot or Dutch oven over medium heat. Add sliced sausage and cook for 5-7 minutes until golden and crispy.
- Add the chopped onion and bell pepper, cooking for 3-4 minutes until softened. Stir in garlic and Cajun seasoning, cooking for 1 minute.
- Pour in the pasta and broth, bringing it to a boil. Reduce heat, cover, and simmer for 10-12 minutes until pasta is al dente.
- Add the heavy cream and half of the Parmesan cheese, stirring until creamy. Season with salt and pepper.
- Remove from heat, top with remaining Parmesan and chopped green onions. Let sit for a few minutes before serving.
Notes
Feel free to make substitutions with different sausages or pasta types to suit your dietary preferences. You can also add additional vegetables for more nutrition.
- Prep Time: 10 minutes
- Cook Time: 20 minutes
- Category: Main Course
- Method: One-Pot Cooking
- Cuisine: Cajun
Nutrition
- Serving Size: 1 serving
- Calories: 500
- Sugar: 5g
- Sodium: 900mg
- Fat: 20g
- Saturated Fat: 8g
- Unsaturated Fat: 8g
- Trans Fat: 0g
- Carbohydrates: 45g
- Fiber: 3g
- Protein: 25g
- Cholesterol: 60mg
Keywords: pasta, one-pot meal, Cajun, creamy pasta, sausage recipe
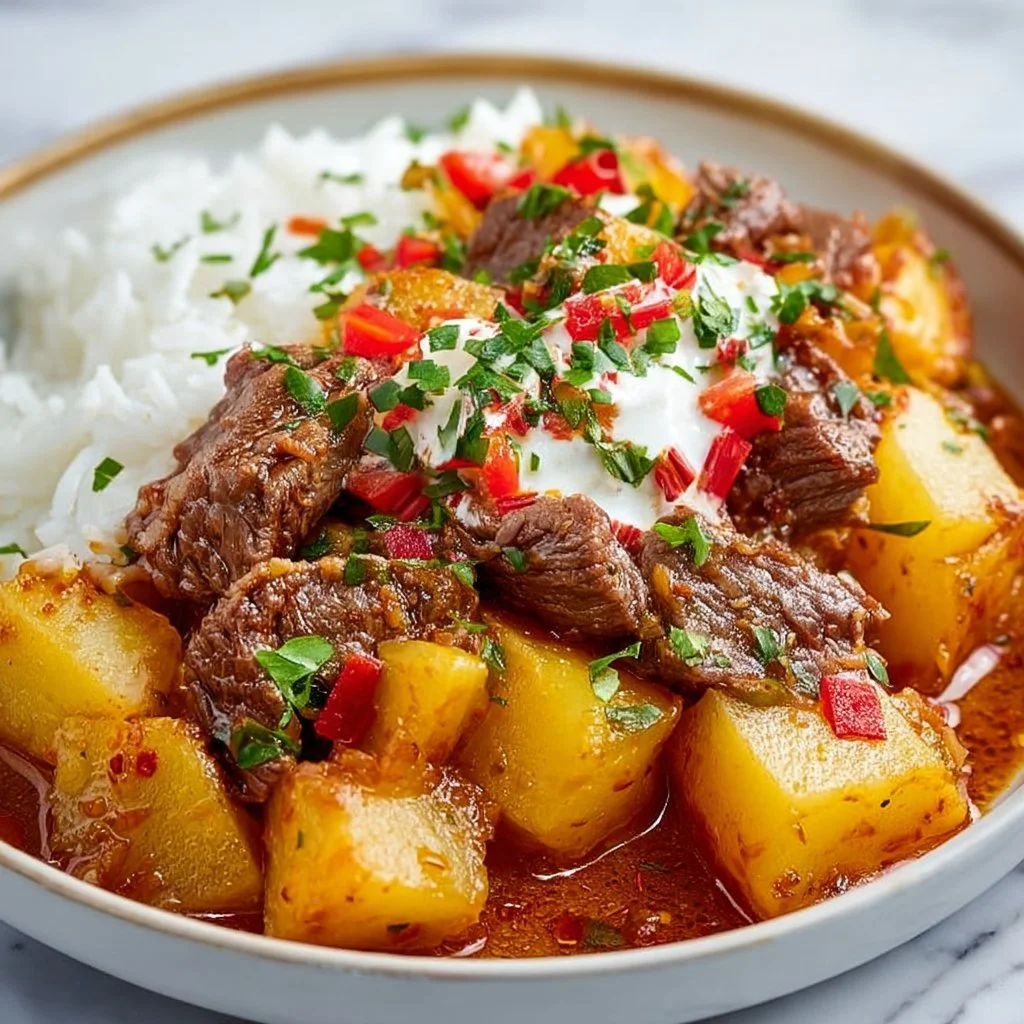
Meat with Potatoes Recipe
Cozy Comfort: Meat and Potatoes Recipe
Welcome back to the kitchen, dear foodies! Today, we’re diving into a dish that’s the heart and soul of cozy meals: the classic meat and potatoes! A meal that warms the heart and fills the belly, meat and potatoes are the ultimate comfort food, perfect for any occasion. Whether you’re coming home after a long day or gathering loved ones for a Sunday feast, this dish never fails to deliver comfort in every bite.
Picture this: the aroma of seasoned meat sizzling in a pan, merging with the earthy scent of roasted potatoes, coaxing everyone into the kitchen. Our ancestors have been cooking up meaty meals served with hearty potatoes for generations. It’s a tradition steeped in love, and while we may tweak flavors here and there, the essence remains unchanged. Today, I want to share with you my favorite take on this classic.
We’ll journey through a simple, yet flavorful recipe that lets the ingredients shine. You’ll learn not only how to cook it but also how to add your own unique twist to this timeless dish. So, roll up those sleeves, tie on that apron, and let’s get started!
Personal Story
Ah, meat and potatoes—where do I begin? Growing up, Sunday dinners at my grandmother’s house were sacred. She would usher us into her cozy kitchen, where the sweet scents of herbs and roasted garlic would dance through the air. The star of the show was always her braised beef with a side of crispy, fluffy potatoes.
One fond memory was when I accidentally knocked her cherished cast-iron skillet off the counter. The clatter that ensued echoed throughout her home, and I braced for an earful. Instead, she burst out laughing and said, “Well, you’ll need to learn to cook properly, or we may all starve!” With a quick flick of her wrist, she passed down countless cooking tips as we prepared that day’s meal together. It was a bonding moment that forged a lifelong love for cooking in me.
Every time I make this dish, I think of her smile and that warm kitchen. It’s not just food; it’s nostalgia served on a plate, inviting everyone to the table. So, let’s create some memories together in our kitchens, shall we?
Ingredients
Let’s gather our ingredients! Here’s what you’ll need for this delightful meat and potatoes dish:
-
2 lbs of beef chuck roast
A great choice for slow cooking, this cut becomes wonderfully tender. If you want to swap it for something leaner, try a sirloin roast, but be cautious as it may not be as forgiving when simmering for long hours. -
4 medium-sized potatoes (Russet or Yukon Gold)
I love Russets for their fluffiness, but Yukon Golds give a buttery flavor. You can also use sweet potatoes for a nutritional boost and a hint of sweetness. -
2 tablespoons of olive oil
It adds richness and helps brown the beef beautifully! You can substitute with vegetable oil, but it won’t impart the same flavor. -
1 large onion, diced
A workhorse in the flavor department! Yellow onions are perfect here, but if you prefer something sweeter, red onions can do the trick. -
4 cloves of garlic, minced
Because you can never have too much garlic! Feel free to dial it back if you’re not a fan—two cloves still pack a punch! -
2 cups beef broth
Enhances the meaty flavor and keeps everything moist. You can utilize chicken broth if beef isn’t available, or vegetable broth for a lighter option. -
1 tablespoon of fresh thyme (or 1 teaspoon dried)
A little herbal goodness goes a long way! If you don’t have thyme, rosemary is a fragrant and delicious alternative. -
Salt and pepper to taste
Essential seasonings that elevate your dish! -
1 tablespoon of Worcestershire sauce
For that umami kick! If you’re out, soy sauce can work as a substitute but will alter the flavor slightly.
Step-by-Step Instructions
Now that we’ve gathered all our ingredients, let’s dive into the cooking process!
-
Prep the Meat: Start by trimming any excess fat off the beef chuck roast. Pat it dry with a paper towel—this step is crucial for a good sear! Season generously with salt and pepper on all sides.
-
Sear the Beef: Heat the olive oil in a large, heavy-bottomed pot or Dutch oven over medium-high heat. Once the oil is shimmering, add the roast. Sear it for about 4-5 minutes on each side until it’s beautiful and browned. Don’t rush this part; a nice crust adds tons of flavor.
-
Remove and Sauté Veggies: Once the meat is seared, remove it from the pot and set it aside. In that same pot, toss in the diced onion and sauté for about 5 minutes until it’s translucent. Scrape up any brown bits stuck to the bottom of the pot—you want all that flavor! Then, add the minced garlic and cook for another minute until fragrant.
-
Add the Broth and Herbs: It’s time to build flavor! Pour in the beef broth, then add the Worcestershire sauce, fresh thyme, and more salt and pepper. Bring it to a simmer, letting all those delicious aromas mingle.
-
Return the Meat: Nestle that glorious seared roast back into the pot. It should be almost fully submerged. If it’s not, feel free to add a splash of water or more broth. Cover it and reduce the heat to low. Simmer for about 3 hours until the meat is fork-tender. Come on, patience is a virtue here!
-
Prep the Potatoes: While the meat simmers, chop your potatoes into equal-sized chunks, around 1-2 inches. This ensures they cook evenly. If you’re using sweet potatoes, keep in mind they cook faster, so adjust cooking time accordingly.
-
Add Potatoes: After 3 hours, carefully remove the roast from the pot (it’ll be tender, so use tongs!). Add the potatoes to the aromatic broth and bring it to a gentle boil. Reduce the heat and let them cook for about 20-25 minutes, until fork-tender.
-
Shred the Meat: Meanwhile, shred the beef into bite-sized pieces. It should fall apart easily! Add it back into the pot with your potatoes, stirring gently to coat them in that divine broth.
-
Taste and Adjust: Give everything a good stir and taste for seasoning. Adjust salt and pepper as needed. If you want to thicken the broth, you can mix a tablespoon of cornstarch with water and add it to the pot, cooking for a few more minutes.
-
Serve Up the Love: Ladle your comforting meat and potatoes into bowls and enjoy it warm. This is a dish meant for sharing!
Serving Suggestions
For a delightful presentation, serve your meat and potatoes in rustic bowls or on sturdy plates. To enhance the flavor, swirl a bit of fresh parsley on top for a pop of color and an added freshness. You can also offer crusty bread on the side for soaking up all those delicious juices. And don’t forget a simple side salad to bring some freshness to the table!
Recipe Variations
-
Herb-Roasted Twist: Add a mixture of rosemary and thyme for an extra level of flavor, giving it an herbaceous aroma that uplifts the dish.
-
Spicy Kick: Incorporate red pepper flakes into the pot for a bit of heat. Spice lovers will appreciate this flavor blast!
-
Mushroom Medley: Add sliced mushrooms when you sauté the onions for an earthy depth that complements the meat beautifully.
-
Vegetarian Version: Substitute the beef for hearty mushrooms like portobellos and use vegetable broth to create a wholesome plant-based version.
-
Creamy Comfort: Stir in a splash of heavy cream just before serving to give it a rich and luxurious twist. You’ll be amazed at how creamy and dreamy it becomes!
Chef’s Notes
This meat and potatoes recipe has been with me for years, evolving with every kitchen adventure. I remember one rainy Sunday when the power went out, and I had to adapt. I cooked it all in a cast-iron skillet over an open flame outside. The fresh air and slight smokiness that developed became an unexpected favorite! While I love this recipe as is, don’t hesitate to experiment—every family meal is an opportunity to create your unique favorite!
FAQs and Troubleshooting
1. My meat turned out tough! What happened?
This usually means that the meat was cooked at too high a temperature or for not long enough. A key component of this dish is low and slow cooking. Always make sure to simmer gently!
2. Can I use chicken or pork instead?
Absolutely! Just adjust the cooking times accordingly—chicken should be cooked until the juices run clear (about 1-1.5 hours), and pork would take a similar time to the beef.
3. How do I store leftovers?
Leftovers can be stored in an airtight container in the fridge for up to 4 days or frozen for up to 3 months. Reheat gently on the stove or in the microwave.
4. My potatoes are mushy—what went wrong?
If your potatoes turn mushy, they may have been overcooked. It’s important to check for doneness with a fork; they should be tender but not falling apart.
Nutritional Info
(Per serving, assuming 6 servings)
- Calories: 400
- Protein: 35g
- Carbohydrates: 45g
- Fat: 15g
- Fiber: 4g
And there you have it—the cheerful journey of creating a delightful meat and potatoes dish to share with family and friends! Cooking isn’t just about the food; it’s about cherishing moments, creating memories, and spreading love through every meal. I can’t wait to hear about your cooking adventures in the comments. Happy cooking, my fellow foodies!
Print
Cozy Comfort: Meat and Potatoes Recipe
- Total Time: 195 minutes
- Yield: 6 servings 1x
- Diet: None
Description
A classic meat and potatoes dish that warms the heart and fills the belly, embracing the essence of cozy meals.
Ingredients
- 2 lbs of beef chuck roast
- 4 medium-sized potatoes (Russet or Yukon Gold)
- 2 tablespoons of olive oil
- 1 large onion, diced
- 4 cloves of garlic, minced
- 2 cups beef broth
- 1 tablespoon of fresh thyme (or 1 teaspoon dried)
- Salt and pepper to taste
- 1 tablespoon of Worcestershire sauce
Instructions
- Prep the meat by trimming any excess fat off the beef chuck roast. Pat it dry with a paper towel, season generously with salt and pepper on all sides.
- Sear the beef by heating olive oil in a large pot over medium-high heat. Add the roast and sear for about 4-5 minutes on each side until browned.
- Remove the meat and set aside. In the same pot, sauté the diced onion for about 5 minutes until translucent. Scrape brown bits from the pot.
- Add the minced garlic and cook for another minute until fragrant.
- Pour in the beef broth, add Worcestershire sauce, thyme, and seasonings. Bring to a simmer.
- Return the seared roast to the pot, cover, and reduce heat to low. Simmer for about 180 minutes until fork-tender.
- Prep the potatoes by chopping them into equal-sized chunks, around 1-2 inches.
- Add the potatoes to the pot after 3 hours, bringing it to a gentle boil and cooking for about 20-25 minutes until fork-tender.
- Shred the beef into bite-sized pieces and add it back into the pot with the potatoes.
- Taste and adjust for seasoning as needed. Optionally thicken the broth using cornstarch mixed with water.
- Serve warm in bowls, enjoying it together with loved ones.
Notes
For added flavor, serve with crusty bread and a side salad. Experiment with variations like adding mushrooms or making a vegetarian version.
- Prep Time: 15 minutes
- Cook Time: 180 minutes
- Category: Main Course
- Method: Braised
- Cuisine: American
Nutrition
- Serving Size: 1 serving
- Calories: 400
- Sugar: 3g
- Sodium: 600mg
- Fat: 15g
- Saturated Fat: 6g
- Unsaturated Fat: 8g
- Trans Fat: 0g
- Carbohydrates: 45g
- Fiber: 4g
- Protein: 35g
- Cholesterol: 100mg
Keywords: meat and potatoes, comfort food, braised beef, hearty meal, family recipe
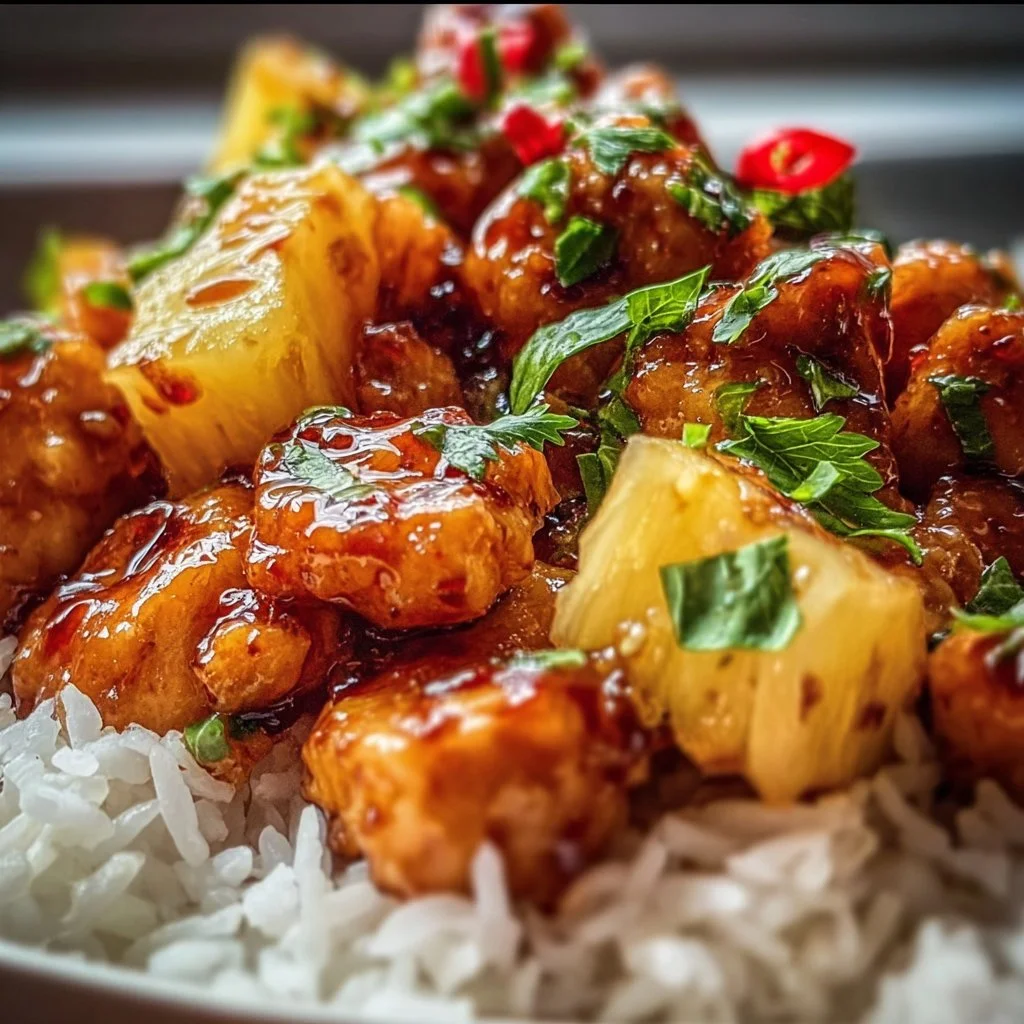
Pineapple Chicken and Rice: Sweet, Savory, Effortlessly Easy
# Pineapple Chicken and Rice: Sweet, Savory, Effortlessly Easy

## Introduction

Welcome back to my cozy kitchen, my fellow foodies! Today, we’re diving into a dish that radiates warmth, joy, and a touch of tropical charm: **Pineapple Chicken and Rice**. Picture this: tender chicken mingling with juicy pineapple chunks, all resting atop a bed of fluffy rice. It’s like a mini vacation on your dinner plate! Whether you’re looking to impress friends, whip up something special for family night, or simply savor the flavors of summer, this dish has got you covered.

I first stumbled upon this delightful combination in a little restaurant tucked away on a busy street. The moment I took a bite, I was hooked. The sweet, caramelized pineapple paired with the savory chicken felt like a warm hug—comforting and utterly satisfying. Since then, I’ve made it countless times in my own kitchen, always tweaking things here and there to make it uniquely mine. What I love most about Pineapple Chicken and Rice is its versatility! It can be dressed up for a dinner party or enjoyed as a casual weeknight meal.

Now, don’t let the tropical vibes fool you—this dish is easy-peasy to make! With just a handful of ingredients, you can create something that feels a bit fancy yet is totally achievable for cooks of all skill levels. So, roll up your sleeves, grab your apron (perhaps a messy one will do!), and let’s get cooking—we’re about to make magic happen in the kitchen!

## Personal Story

One of my fondest memories of cooking this dish was during a summer family reunion a few years back. My cousins, aunts, and uncles all gathered in our backyard for a barbecue and good times. The sun was shining, laughter filled the air, and the unmistakable scent of grilled chicken wafted through the breeze. As I prepared my version of Pineapple Chicken and Rice under the eaves of our old wooden porch, I couldn’t help but feel a sense of nostalgia for the family gatherings of my childhood.

My grandma used to make a similar dish on special occasions, filling the house with sweet and savory aromas. As I diced the pineapple, I reminisced about her using fresh fruit and hand-picking every ingredient—each slice connected us through time. That day, as I passed around my creation, it sparked conversations and smiles, reminding us all of the love that really comes through in homemade meals. The joy in my family’s eyes as they dug into the dish was the best compliment I could ask for.

Now, every time I make Pineapple Chicken and Rice, I find myself transported back to those carefree summer days, surrounded by the people I cherish. This dish isn’t just food; it’s a connection to my roots, making it all the more special.

## Ingredients

Let’s gather our ingredients, shall we? Here’s what you’ll need to whip up this delectable Pineapple Chicken and Rice:

- **2 cups jasmine rice**
  *This aromatic rice adds a subtle floral fragrance and fluffy texture to our dish. If jasmine isn’t available, white basmati or brown rice work well too.*

- **1 pound chicken breast, diced**
  *Use boneless, skinless chicken for a quick cook. Alternatively, you can swap for thigh meat for extra juiciness, or even tofu for a plant-based option!*

- **1 can (20 ounces) pineapple chunks**
  *Canned pineapple is sweet and convenient, but feel free to use fresh pineapple for a brighter flavor! Just cut it into bite-sized pieces.*

- **1 medium onion, finely chopped**
  *Onions add depth to your dish. If you prefer milder flavors, you could use green onions or scallions instead.*

- **2 cloves garlic, minced**
  *Garlic gives this dish a fragrant kick. If you’re feeling adventurous, try using shallots for a sweeter flavor or garlic powder if you’re in a pinch!*

- **1 bell pepper (red or yellow), diced**
  *Bell peppers contribute a lovely sweetness and crunch. You can mix it up with different colors or opt for zucchini if you prefer.*

- **Soy sauce (¼ cup)**
  *This savory sauce enhances the flavors beautifully. Low-sodium soy sauce is a great way to cut back on salt without sacrificing taste.*

- **Olive oil (2 tablespoons)**
  *A touch of olive oil will help cook everything to perfection. You could also use sesame oil for a nutty flavor twist.*

- **Salt and pepper** (to taste)
  *Simple yet essential! You can elevate the flavors by adding spices like paprika or black pepper, or even a sprinkle of red pepper flakes for heat.*

- **Fresh cilantro (for garnish)**
  *A handful of fresh cilantro adds a bright finish to the dish. If you’re not a fan of cilantro, green onions make a lovely substitute for garnish!*

With these ingredients gathered, you’re almost ready to create your masterpiece!

## Step-by-Step Instructions

Now let’s get into the fun part—the actual cooking! Follow these steps to bring your Pineapple Chicken and Rice to life.

1. **Cook the Rice:**
   Start by rinsing your jasmine rice under cold water until the water runs clear. This step helps remove excess starch, giving you fluffy rice. In a pot, combine 2 cups of rice with 4 cups of water. Bring it to a boil, then reduce the heat and cover. Let it simmer on low for about 18-20 minutes, or until the water is absorbed. Fluff with a fork when done.

   *Tip: Remember to check if your rice is cooked to your liking. If you prefer it softer, add an extra splash of water during the cooking process!*

2. **Sauté the Chicken:**
   In a large skillet or wok, heat 2 tablespoons of olive oil over medium-high heat. Once hot, add your diced chicken and season with a pinch of salt and pepper. Cook the chicken for about 5-7 minutes, tossing occasionally until beautifully browned and no longer pink in the center.

   *Chef Hack: For maximum flavor, you can marinate the chicken in soy sauce for about 30 minutes before cooking! This step intensifies the taste!*

3. **Add Aromatics and Veggies:**
   Once the chicken is fully cooked, add your chopped onion and garlic to the skillet. Sauté them for about 2-3 minutes until they’re translucent and fragrant. Then, toss in the bell pepper and continue to cook for another 2-3 minutes until it’s tender-cooked.

   *Note: If you love crunchier veggies, feel free to add them after the chicken is cooked. This will keep them crisp!*

4. **Incorporate Pineapple and Sauce:**
   Next, drain the canned pineapple (reserve a bit of juice if you'd like to add later!) and add it to the skillet with the chicken and veggies. Pour in the ¼ cup of soy sauce and stir everything together gently, bringing it to a simmer. If you’ve reserved pineapple juice, add a splash to enhance the caramelization!

   *Pro Tip: Allow the pineapple to slightly caramelize for about 2-3 minutes. This creates those divine, golden-brown edges that truly elevate the dish!*

5. **Combine with Rice:**
   Finally, lower the heat and add your fluffy, cooked rice to the skillet, mixing it thoroughly with the chicken and pineapple mixture. Stir gently to avoid breaking up the rice grains. Adjust the seasoning with additional soy sauce, salt, or pepper if necessary!

   *Extra Touch: For a hint of sweetness, add a tablespoon of brown sugar into the mix. It’ll create a lovely balance!*

6. **Serve it Stylishly:**
   Once everything is combined and heated through, it’s time to serve! Dish the Pineapple Chicken and Rice into bowls or on plates, and sprinkle freshly chopped cilantro on top for a bright finishing touch.

   *Tip: For an extra zest, squeeze some lime juice over it before serving! It adds a delightful zing you won't want to miss!*

## Serving Suggestions

When it comes to serving, the presentation matters! If you're aiming for a cozy family dinner setup, scoop generous portions of Pineapple Chicken and Rice into deep bowls. For more formal gatherings, use white plates to make the vibrant colors pop! Pair with a refreshing cucumber salad or tropical fruit on the side for a complete meal.

And don't forget those shiny lime wedges perched alongside—presentation is key, and those wedges are like little jewels that scream freshness!

## Recipe Variations

Need to switch things up? Here are a few creative variations you can try:

1. **Spicy Pineapple Chicken:** Add a teaspoon (or more) of sriracha or red pepper flakes while cooking for a spicy kick!

2. **Curry Pineapple Chicken:** Incorporate 1-2 tablespoons of your favorite curry powder when cooking the chicken for a warming, aromatic twist.

3. **Quinoa Alternative:** Swap rice for quinoa for a protein-packed, gluten-free variation!

4. **Vegetable Medley:** Throw in diced carrots, snap peas, or broccoli for an extra colorful veggie boost!

5. **Sweet and Sour Twist:** Replace soy sauce with sweet and sour sauce for a more tangy flavor profile!

## Chef’s Notes

This Pineapple Chicken and Rice recipe has been a cherished staple in my kitchen for years, evolving with every new experience and gathering. The memories it brings me are the heart of this dish! One time, I added too much soy sauce and had to add more rice to balance out the flavors. Surprisingly, it became a hit for its extra savory notes!

Cooking is all about experimentation, and it’s okay to make mistakes. Sometimes those “oops” moments turn into the most cherished recipes! So, feel free to adapt this dish to suit your taste—embrace the chaos and enjoy the journey!

## FAQs and Troubleshooting

**Q: My rice turned out mushy; what went wrong?**
A: This could happen if you added too much water or overcooked the rice. Next time, try measuring the water carefully and cooking the rice until just tender!

**Q: What can I substitute for soy sauce?**
A: You can use tamari for a gluten-free option or coconut aminos for a sweeter flavor.

**Q: Can I make this dish ahead of time?**
A: Absolutely! You can prep everything and store it in the fridge for a day, then just reheat before serving!

**Q: My chicken is tough; how can I make it tender?**
A: Make sure not to overcook your chicken as it can become chewy. Also, marinating it helps break down proteins, making for a juicy bite!

## Nutritional Information (Optional)

If you’re curious about the nutritional breakdown, Pineapple Chicken and Rice typically offers:

- **Calories:** ~400 per serving
- **Protein:** ~25g
- **Fat:** ~10g
- **Carbohydrates:** ~60g

Remember, these values can change based on the specific ingredients you use, so consider this a rough guide!

---

And there you have it, my culinary adventurers! Your very own Pineapple Chicken and Rice recipe, packed with personal stories and chef insights to guide you. I hope you find as much joy making this dish as I have sharing it with you. Until next time, keep cooking with love and passion, and remember that every meal is an opportunity to create connections!

Pineapple Chicken and Rice
- Total Time: 45 minutes
- Yield: 4 servings 1x
- Diet: Gluten-Free
Description
A delightful dish of tender chicken and juicy pineapple served on a bed of fluffy jasmine rice, perfect for a cozy family dinner or a special gathering.
Ingredients
- 2 cups jasmine rice
- 1 pound chicken breast, diced
- 1 can (20 ounces) pineapple chunks
- 1 medium onion, finely chopped
- 2 cloves garlic, minced
- 1 bell pepper (red or yellow), diced
- ¼ cup soy sauce
- 2 tablespoons olive oil
- Salt and pepper (to taste)
- Fresh cilantro (for garnish)
Instructions
- Cook the rice: Rinse jasmine rice under cold water until clear. Combine 2 cups rice with 4 cups water in a pot. Bring to a boil, reduce heat, and cover. Simmer for 18-20 minutes until water is absorbed. Fluff with a fork.
- Sauté the chicken: Heat olive oil in a skillet. Add diced chicken, season with salt and pepper, and cook for 5-7 minutes until browned and cooked through.
- Add onions and garlic: Stir in chopped onion and minced garlic, sauté for 2-3 minutes until fragrant. Add diced bell pepper and cook for another 2-3 minutes.
- Incorporate pineapple and sauce: Drain pineapple and add to skillet along with soy sauce. Stir gently, bring to a simmer, and let pineapple caramelize for 2-3 minutes.
- Combine with rice: Lower heat and mix in the cooked rice gently with the chicken and pineapple mixture. Adjust seasoning as needed.
- Serve stylishly: Portion into bowls, garnish with cilantro, and optional lime juice before serving.
Notes
Feel free to substitute ingredients or add more vegetables as desired. Adjust tofu for a plant-based option.
- Prep Time: 15 minutes
- Cook Time: 30 minutes
- Category: Main Course
- Method: Sautéing
- Cuisine: American
Nutrition
- Serving Size: 1 serving
- Calories: 400
- Sugar: 12g
- Sodium: 800mg
- Fat: 10g
- Saturated Fat: 1g
- Unsaturated Fat: 8g
- Trans Fat: 0g
- Carbohydrates: 60g
- Fiber: 2g
- Protein: 25g
- Cholesterol: 60mg
Keywords: Pineapple Chicken, Easy Dinner, Tropical Recipes, Chicken and Rice

Irresistible Crack Chicken Casserole
Irresistible Crack Chicken Casserole: A Comforting Dish for Every Occasion
Welcome back to my cozy corner of the internet! Today, I am thrilled to share one of my absolute favorite comfort food recipes: Crack Chicken Casserole. Picture this: a creamy, cheesy chicken dish baked to golden perfection that spirals into the hearts of everyone around the table. Whether you’re prepping for a family gathering, a laid-back weeknight dinner, or just craving some hearty goodness, this casserole is your go-to!
Let me tell you, the origins of this dish are quite delightful. It’s known to be a crowd-pleaser for its rich flavors and the simple joy of homemade cooking. Every time I whip this up, I can’t help but reminisce about family gatherings where the table was overflowing with love, laughter, and delicious food. It’s those relatable moments behind every spoonful that make cooking truly special.
What’s not to love? This casserole is packed with tender chicken, crispy bacon, tangy ranch seasoning, and gooey cheese — an ensemble cast that transforms ordinary ingredients into sheer magic. And the best part? You don’t need to be a culinary whiz to get it right; anyone can master this dish with a little guidance. Plus, the scent wafting through your kitchen? That’s the smell of happiness!
So strap on your apron and let’s jump into this delicious journey together. Get ready to create some unforgettable bites — trust me, you’ll want to make this time and time again. Let’s heat up those ovens and dive into the world of crack chicken casserole!
Personal Story
I still remember the first time I made this dish for my family. It was a rainy evening, and I was feeling a bit nostalgic. My grandmother used to make chicken casseroles whenever the weather turned chilly, filling the house with warmth and love. I decided to recreate that comforting feeling by experimenting in my kitchen.
I didn’t have a specific recipe at hand, just a few memories and a heart full of enthusiasm. After some trial and error, I finally found the right combination of flavors that brought me back to my grandmother’s kitchen. As I pulled it out of the oven, the candlelight flickered around the table, turning that rainy evening into a treasure trove of laughter and delicious bites. My family loved it, and that sealed the deal for me. I knew I needed to share this lovely dish so others could feel the joy it brings.
Ingredients
Let’s gather our ingredients to create this delicious Crack Chicken Casserole! Here’s what you’ll need:
-
2 cups cooked chicken, shredded: Leftover rotisserie chicken works great here! You can substitute with turkey or even canned chicken if you’re in a pinch.
-
6 slices of crispy bacon, crumbled: You can fry your bacon in advance, or go for turkey bacon for a healthier twist.
-
1 packet ranch seasoning mix: This is the secret ingredient! You can either buy premade seasoning or whip up your own with a mix of dried parsley, dill, garlic powder, and onion powder.
-
1 cup cream cheese, softened: Full-fat cream cheese will give you the best flavor and creaminess. For a lighter option, go for low-fat cream cheese.
-
1 cup shredded cheddar cheese: Sharp cheddar adds a wonderful flavor! If you’re dairy-free, try a plant-based cheese alternative.
-
1 cup sour cream: This adds richness to our casserole, but Greek yogurt works just as well for a healthier alternative.
-
1 cup frozen mixed veggies (peas and carrots): Not mandatory but adds color and nutrition! Feel free to add your favorites, like broccoli or bell peppers.
-
1 cup chicken broth: Homemade is fabulous, but store-bought works just fine. Use veggie broth for a vegetarian option or simply water if you’re in a bind.
-
Salt and pepper to taste: Essential for enhancing flavors! Don’t shy away from seasoning as per your palate.
Get excited, because each ingredient is a step towards something delightful. Now that we have everything, let’s get cooking!
Step-by-Step Instructions
-
Preheat Your Oven: Start by preheating the oven to 350°F (175°C). This ensures your cheese will melt perfectly, creating that irresistible gooey texture we crave.
-
Prepare the Chicken: If you’re starting from scratch, boil or bake your chicken until fully cooked. Shred it into bite-sized pieces, leaving it slightly chunky for texture.
Chef Tip: If you have leftover chicken, even better! That flavor is truly the best.
-
Stir Together the Base: In a large mixing bowl, combine the cooked chicken, crumbled bacon, cream cheese, and sour cream. Use a spatula or wooden spoon to mix until they’re well blended.
Little Hack: You can soften cream cheese quicker by microwaving it in a bowl for about 20-30 seconds. Just be careful it doesn’t get too hot!
-
Add the Flavoring: Toss in the ranch seasoning and chicken broth. Stir until everything is uniform and creamy. You should see that glorious ranch sauce coating everything evenly.
-
Incorporate Veggies and Cheese: Fold in the frozen mixed veggies and half of the shredded cheddar cheese. This is where the dish starts to look colorful and inviting!
Chef Insight: If you want to sneak in extra nutrients, try adding some finely chopped spinach or kale.
-
Transfer to Baking Dish: Pour the mixture into a greased 9×13 baking dish, spreading it evenly.
-
Top It Off: Sprinkle the remaining cheddar cheese generously on top. Don’t hold back — cheese makes everything better!
-
Bake in the Oven: Slide the dish into the preheated oven and bake for about 25-30 minutes, or until the casserole is bubbly and golden on top.
Pro Tip: If you like a crunchier topping, you can broil it for the last 2-3 minutes — just keep an eye on it!
-
Let It Rest: Once it’s out of the oven, let it rest for about 5-10 minutes. This helps it set up just right and allows you to serve perfect portions.
-
Serve and Enjoy: Dig in with a big spoonful of goodness! It can be served on its own, with a side salad, or some warm crusty bread.
Serving Suggestions
Presentation is key! Serve your Crack Chicken Casserole on a lovely platter with a sprig of parsley for garnish. Pair it with a fresh green salad drizzled with a lemon-basil vinaigrette for a burst of flavor. If you’re feeling adventurous, serve it over rice or quinoa for a hearty meal. Don’t forget to have extra bacon bits and cheese on the side for those who like to go the extra mile!
Recipe Variations
-
Buffalo Style: Add buffalo sauce to the mixture for a spicy kick. You can even top it off with blue cheese crumbles!
-
Mexican Twist: Incorporate black beans, corn, and taco seasoning for a fiesta-style casserole. Top with tortilla chips before baking for an extra crunch!
-
Vegetarian Option: Swap out the chicken for chickpeas, lentils, or your favorite veggies. Just make sure to adjust the seasonings accordingly.
-
Pasta Bake: Mix in cooked pasta to create a hearty pasta bake! Macaroni, penne, or fusilli would work beautifully.
-
Cheesy Broccoli Version: Mix in steamed broccoli florets for added health benefits and a nice crunch!
Chef’s Notes
Every time I make this casserole, it reminds me how food leads the way to joy and connection. I’ve even experimented with different flavors over the years—once, I added some sun-dried tomatoes, and oh, what a game-changer! This recipe has evolved into a beloved family staple, but you have the freedom to make it your own with whatever you have at hand. Just remember, cooking is all about playing and improvising!
FAQs and Troubleshooting
-
Can I use rotisserie chicken?
- Absolutely! It’s a fantastic shortcut that saves time and adds great flavor.
-
What if it’s too thick?
- If your mixture seems too thick while mixing, add a splash more chicken broth or sour cream to loosen it up without sacrificing creaminess.
-
Can I make this ahead of time?
- Yes! You can assemble the casserole the night before and store it in the fridge until baking time. Just be sure to let it sit out for a few minutes before it goes into the oven.
-
How do I store leftovers?
- Store leftovers in an airtight container in the fridge. It should be good for 3-4 days, and you can reheat in the oven or microwave.
Nutritional Info (Optional)
While I didn’t dive deep into numbers here, I encourage you to be mindful of portion sizes when indulging. With ingredients like cream cheese and sour cream, it’s deliciously rich but worth every bite. If you’re health-conscious, swapping in low-fat versions can lighten the dish without losing the flavor!
And there you have it! Irresistible Crack Chicken Casserole is waiting for you, filled with flavors that will warm your heart and bring smiles to your loved ones. Dig in, enjoy every bite, and remember: cooking is about joy, creativity, and sharing with those who matter most. Happy cooking!
Print
Irresistible Crack Chicken Casserole
- Total Time: 45 minutes
- Yield: 4 servings 1x
- Diet: Non-Vegetarian
Description
A creamy, cheesy chicken casserole packed with tender chicken, crispy bacon, and tangy ranch seasoning – a true crowd-pleaser!
Ingredients
- 2 cups cooked chicken, shredded
- 6 slices of crispy bacon, crumbled
- 1 packet ranch seasoning mix
- 1 cup cream cheese, softened
- 1 cup shredded cheddar cheese
- 1 cup sour cream
- 1 cup frozen mixed veggies (peas and carrots)
- 1 cup chicken broth
- Salt and pepper to taste
Instructions
- Preheat your oven to 350°F (175°C).
- Prepare the chicken by boiling or baking until fully cooked, then shred into bite-sized pieces.
- Stir together the cooked chicken, crumbled bacon, cream cheese, and sour cream in a large mixing bowl.
- Add the ranch seasoning and chicken broth, mixing until creamy.
- Incorporate the frozen mixed veggies and half of the shredded cheddar cheese.
- Transfer the mixture to a greased 9×13 baking dish.
- Top with the remaining cheddar cheese.
- Bake in the oven for about 25-30 minutes, or until bubbly and golden.
- Let it rest for 5-10 minutes before serving.
- Serve and enjoy!
Notes
Feel free to add your own twist with different veggies or flavors!
- Prep Time: 15 minutes
- Cook Time: 30 minutes
- Category: Main Course
- Method: Baking
- Cuisine: American
Nutrition
- Serving Size: 1 serving
- Calories: 500
- Sugar: 4g
- Sodium: 900mg
- Fat: 30g
- Saturated Fat: 12g
- Unsaturated Fat: 15g
- Trans Fat: 0g
- Carbohydrates: 25g
- Fiber: 2g
- Protein: 35g
- Cholesterol: 90mg
Keywords: crack chicken casserole, comfort food, cheesy chicken dish, easy casserole, family dinner

One-Pan Cowboy Butter Tortellini Steak Bites Recipe
One-Pan Cowboy Butter Tortellini Steak Bites Recipe
Hey there, fellow food lovers! Welcome back to my cozy little corner of the culinary world! Today, I’m thrilled to share with you a recipe that is equal parts comforting and adventurous: One-Pan Cowboy Butter Tortellini Steak Bites. If you’re like me and find joy in the exhilarating sizzle of steak, the richness of seasoned butter, and the delightful chew of tortellini, then you’re in for a real treat!
This dish is all about the harmony of flavors and textures. Picture succulent marinated steak bites sizzling in a buttery, garlicky sauce that envelops every piece of tortellini. It’s the perfect solution for busy weeknights when you crave a home-cooked meal without spending hours in the kitchen. Plus, everything cooks in just one pan – yes, you heard that right! Less mess and more deliciousness.
But wait, it gets better! This recipe embodies cozy family dinners while also being a crowd-pleaser for gatherings with friends. The ease of preparation doesn’t skimp on flavor, making it ideal for impressing that special someone or simply treating yourself to a well-deserved feast. So, grab your apron (and your favorite playlist) because we’re diving into this flavorful adventure together!
Personal Story
Let me take you back to a chilly autumn evening a few years ago when I first concocted a casual version of this hearty dish. It was one of those nights where the leaves were swirling outside, and the air was filled with the aroma of wood smoke. My friends were coming over for dinner, and I wanted to whip up something that would warm their hearts and tickle their taste buds.
I had a bag of tortellini in the fridge, leftover steak from a summer barbecue, and an irresistible craving for comfort food. As I combined the ingredients and drizzled that decadent cowboy butter, memories poured in of my family gathered around the table, laughing and tasting my latest culinary experiments. When the dish was finally ready, we couldn’t stop raving about it. I remember my friend Sara looking up with a mouthful of buttery goodness and declaring, “This needs to be a regular in your kitchen!” It was that moment that sparked the inspiration to refine the recipe into the one I’m sharing today.
So, let’s get into the kitchen and recreate that magic!
Ingredients
Here’s what you’ll need to create this mouthwatering One-Pan Cowboy Butter Tortellini Steak Bites. Don’t worry; these ingredients are straightforward and versatile!
-
Steak (1 lb, sirloin or ribeye): Opt for a good cut that can be easily cubed. If you’re looking for a leaner alternative, try chicken breast or diced portobello mushrooms for a vegetarian twist.
-
Cheese tortellini (12 oz): You can use fresh or frozen tortellini, depending on what you have handy. If you want a gluten-free option, look for gluten-free tortellini, often made with chickpea or lentil flour.
-
Unsalted butter (4 tbsp): This is where the magic happens! Unsalted butter allows you to control the seasoning. If you want a healthier option, coconut oil can be a great substitute for a slightly different flavor.
-
Olive oil (1 tbsp): A splash of olive oil adds flavor and helps to prevent sticking. You could also use avocado oil for a mild flavor and higher smoke point.
-
Garlic (4 cloves, minced): Freshly minced garlic is a game changer in this dish. If you’re in a pinch, garlic powder will work, but fresh garlic just makes everything better!
-
Cowboy seasoning (2 tbsp): If you don’t have cowboy seasoning on hand, make your own with a blend of paprika, chili powder, cumin, garlic powder, and a pinch of cayenne for heat.
-
Fresh parsley (for garnish): A pop of green for presentation! You can swap it with basil or chives if you prefer a different herb flavor.
-
Salt & Pepper (to taste): Always a must-have to elevate flavors! Feel free to use sea salt for a more intense flavor.
Let’s gather these ingredients and get cooking!
Step-by-Step Instructions
Now, let’s roll up our sleeves and dive right into the cooking process of this One-Pan Cowboy Butter Tortellini Steak Bites. Trust me; it’s easier than it sounds!
-
Prepare the Steak:
Start by trimming any excess fat from the steak, if necessary. Cut the steak into bite-sized cubes, approximately 1 inch thick. Season generously with salt, pepper, and cowboy seasoning. This will ensure every piece is packed with flavor. Chef’s tip: Letting the seasoned steak sit for about 15 minutes at room temperature will help with even cooking. -
Cook the Tortellini:
In a large pot of salted boiling water, cook the tortellini according to the package directions until they are al dente. Fresh tortellini usually takes about 3-5 minutes, while frozen may take a bit longer. Once done, drain the tortellini and set it aside. Hack: Add a splash of olive oil to the pasta after draining to prevent it from sticking. -
Sear the Steak:
In a large skillet (a cast iron or non-stick works great), heat 1 tablespoon of olive oil over medium-high heat. Once hot, add the steak cubes in a single layer. Cook for about 2-3 minutes on each side until they are wonderfully browned and cooked to your desired doneness. You might want them medium-rare for the juiciest bites. Pro tip: Avoid overcrowding the pan – cook in batches if necessary to achieve a good sear. -
Make the Cowboy Butter:
After removing the steak, reduce the heat to medium and add the unsalted butter to the skillet. Once melted, toss in the minced garlic, stirring for about 30 seconds until fragrant. Then add the remaining cowboy seasoning and quickly stir to combine. The aroma is already dreamy, right? -
Combine Everything:
In this step, add the cooked tortellini directly to the skillet, tossing it in that lush cowboy butter to coat. Sprinkle the cooked steak back into the pan, gently combining everything so every piece gets that delicious garlic-y flavor. Little chef hack: If the mixture looks dry, a splash of pasta water will help it come together beautifully! -
Final Touches:
Let it all simmer for about 2-3 minutes, allowing the flavors to meld, and then taste and adjust seasoning with additional salt and pepper if necessary. Before serving, sprinkle freshly chopped parsley over the top for that delightful pop of color.
Serving Suggestions
To serve your One-Pan Cowboy Butter Tortellini Steak Bites, scoop generous portions into shallow bowls or on rustic plates. You can drizzle a little extra melted butter or a sprinkle of freshly grated Parmesan cheese for an extra cheesy touch. Pair it with a simple side salad or garlic bread to complete this cozy meal. Everyone at the table will want seconds, trust me!
Recipe Variations
Here are some creative twists you can try with this recipe:
-
Veggie Boost: Add in some sautéed vegetables like spinach, bell peppers, or sun-dried tomatoes for a vibrant, nutritious kick!
-
Spicy Kick: Incorporate some crushed red pepper flakes or jalapeños to spice things up.
-
Creamy Twist: For a richer dish, throw in a splash of heavy cream or cream cheese when combining the tortellini and steak for a delightful creamy texture.
-
Herbed Up: Swap out the cowboy seasoning for an Italian herb mix to give it an entirely different flavor profile.
-
Gluten-Free Goodness: Use gluten-free tortellini and ensure the seasoning is also gluten-free for a dish that fits dietary needs without losing flavor.
Chef’s Notes
Looking back on my culinary journey, I chuckle sometimes at my earlier days in the kitchen – like the time I accidentally swapped salt with sugar in a sauce! The contrasts can create some comedy gold, but thankfully, I haven’t had that experience with this recipe. Over the years, I’ve seen it evolve from a haphazard mix of leftovers into a go-to dish that friends and family rave about. Now, as I share this with you, it makes me feel all warm and fuzzy thinking about all the kitchens it’ll find its way into!
FAQs and Troubleshooting
-
What type of steak is best for this recipe?
Sirloin and ribeye are great choices due to their flavor and tenderness, but feel free to experiment with flank or filet mignon. -
Can I make this dish ahead of time?
While you can prep the steak and tortellini in advance, I’d recommend cooking them just before serving to retain optimal flavor and texture. -
What if I overcooked the steak?
Try using thinner cut steak next time, or keep a close eye on the time while cooking. If it’s too chewy, consider slicing it thinner before serving for a more tender bite. -
How do I know when the steak is done?
For medium-rare, aim for an internal temperature of about 130°F-135°F. Use an instant-read thermometer for the best results.
Nutritional Info
(Optional as this remains a personal choice, but if you want to include, you could provide:)
- Calories: Approximately 550 per serving (includes steak and tortellini)
- Protein: 35g
- Carbohydrates: 50g
- Fat: 25g
- Fiber: 3g
And there you have it, my dear food friends! From heartfelt kitchen stories to a delightful recipe, I hope this One-Pan Cowboy Butter Tortellini Steak Bites finds a special place in your home. Whether you’re cooking for family or just treating yourself, food is about connection, love, and sharing. Enjoy every bite, and remember, cooking is all about having fun! Happy cooking! 🥳
Print
One-Pan Cowboy Butter Tortellini Steak Bites
- Total Time: 35 minutes
- Yield: 4 servings 1x
- Diet: Non-Vegetarian
Description
A comforting and adventurous dish combining marinated steak bites, seasoned butter, and tortellini, all cooked in one pan for a quick and flavorful meal.
Ingredients
- 1 lb Sirloin or ribeye steak, cubed
- 12 oz Cheese tortellini, fresh or frozen
- 4 tbsp Unsalted butter
- 1 tbsp Olive oil
- 4 cloves Garlic, minced
- 2 tbsp Cowboy seasoning
- Fresh parsley, for garnish
- Salt & Pepper, to taste
Instructions
- Prepare the steak by trimming excess fat and cutting into bite-sized cubes. Season with salt, pepper, and cowboy seasoning.
- Cook the tortellini in a large pot of boiling water according to package directions until al dente.
- Sear the steak in a skillet with olive oil for 2-3 minutes on each side until browned.
- Make the cowboy butter by melting the unsalted butter in the skillet, then adding garlic and seasoning.
- Combine the cooked tortellini with the cowboy butter and add the cooked steak back in.
- Final touches: Simmer for 2-3 minutes, taste, adjust seasoning, and garnish with parsley.
Notes
For a lighter version, substitute coconut oil for butter. You can also add vegetables or spices to customize the dish.
- Prep Time: 15 minutes
- Cook Time: 20 minutes
- Category: Main Course
- Method: Stovetop
- Cuisine: American
Nutrition
- Serving Size: 1 serving
- Calories: 550
- Sugar: 2g
- Sodium: 700mg
- Fat: 25g
- Saturated Fat: 12g
- Unsaturated Fat: 10g
- Trans Fat: 0g
- Carbohydrates: 50g
- Fiber: 3g
- Protein: 35g
- Cholesterol: 90mg
Keywords: tortellini, steak bites, one-pan, cowboy butter, comfort food


