

Asian Crockpot Orange Chicken
Savory Simplicity: Asian Crockpot Orange Chicken
Welcome back to my cozy kitchen! Today, I’m excited to share one of my all-time favorite comfort recipes: Asian Crockpot Orange Chicken. This dish is like a warm hug on a plate, infusing your home with the irresistible aroma of zesty citrus and tender chicken. A few simple ingredients blend in your slow cooker to create a flavor explosion that’s bound to impress your family and friends.
Picture this: it’s a chilly evening, you’ve got a little extra time to unwind, and you’re in the mood for something delicious without the fuss of standing over the stove. That’s where my trusty crockpot comes into play! I absolutely love how it transforms everyday ingredients into a rich, melty masterpiece with minimal effort. Just set it and forget it!
But let’s be real: life gets busy, and no one wants to spend hours in the kitchen, especially after a long day. That’s why I’m here to ensure that you can whip up an amazing meal that will transport you to flavor heaven — even on a weeknight. With a tangy orange glaze, tender chicken, and a delightful hint of Asian spices, this recipe is the perfect balance of sweet and savory.
So grab your apron, and let’s embark on a culinary adventure together. Whether you’re hosting a dinner party or just treating yourself, this Asian Crockpot Orange Chicken will not disappoint. And I promise — coming home to that delectable aroma will make you feel like a superstar chef, even if all you did was turn a dial!
Personal Story
Let me take you back to my childhood for a moment. One of my fondest memories is spending weekends at my grandma’s house. She had this incredible knack for creating magic in the kitchen — her secret ingredient was always love (and a generous dash of soy sauce!). One of the dishes that I’d eagerly anticipate was her sweet and tangy orange chicken. She’d make it on special occasions, and we’d gather around the table, filling our plates with steaming rice and saucy, succulent chicken.
I can still picture us sitting around, laughing and chatting as we dove into that warm, vibrant dish. It not only filled our bellies but also filled our hearts with joy. Years later, I’ve taken that nostalgia and created a simpler, more accessible version that captures the same delicious essence my grandma made. My Asian Crockpot Orange Chicken is meant to evoke your own precious kitchen memories and welcome you to the table.
Ingredients
Here’s what you’ll need to make this scrumptious Orange Chicken. Each ingredient plays a key role in bringing this dish to life!
-
Chicken Thighs: Juicy and tender, chicken thighs hold up beautifully in the crockpot. You can substitute with chicken breasts if you prefer, but they may be less juicy.
-
Fresh Orange Juice: This is your star ingredient for the sauce! Freshly squeezed orange juice balances sweetness and acidity. If oranges are out of season, bottled juice can work, but fresh is best!
-
Soy Sauce: A staple in Asian cuisine that adds umami depth to the dish. If you’re avoiding gluten, try tamari or coconut aminos.
-
Honey: For that wonderful sweetness! You can swap it out for maple syrup or agave nectar if you want a vegan option.
-
Garlic: Minced garlic brings warmth and aromatic flavor. Feel free to use garlic powder in a pinch, though fresh is preferred.
-
Ginger: A touch of fresh ginger packs a zesty punch; however, ground ginger can work if you don’t have fresh on hand.
-
Cornstarch: This will help thicken your sauce to a luscious glaze. Arrowroot powder can be a good substitute if preferred.
-
Sesame Oil: Just a dash adds a rich, nutty flavor to the dish; olive oil works fine, but sesame oil brings a unique touch.
-
Salt & Pepper: To taste, these seasonings help elevate all of the vibrant flavors.
With everything gathered and understanding their importance, you’re already on your way to creating something delightful!
Step-by-Step Instructions
Now, let’s dive into the cooking process. Follow these steps, and I promise you’ll make a stellar meal with ease!
-
Prep the Chicken:
- Start by trimming any excess fat off your chicken thighs. This will ensure your dish doesn’t get too greasy while cooking.
- Pat the chicken dry with some paper towels. This helps with browning later on, even though we’re using a crockpot!
-
Mix the Sauce:
- In a separate bowl, whisk together the fresh orange juice, soy sauce, honey, minced garlic, and grated ginger.
- It’s important to blend these flavors well, so the chicken will be fully coated and deliciously infused.
-
Layer Ingredients:
- Place the chicken thighs at the bottom of your crockpot.
- Pour the orange sauce over the chicken, ensuring every piece is well-coated. Use a spatula to make sure everything is evenly coated and surrounded by that zesty sauce.
-
Cook Time:
- Cover the crockpot and set it to low for 6-8 hours or high for 3-4 hours.
- As it cooks, the chicken will absorb all those wonderful flavors and become tender.
-
Thicken the Sauce:
- About 30 minutes before serving, make a cornstarch slurry by combining the cornstarch with a tablespoon of water to create a smooth mixture. Stir this into the crockpot to thicken the sauce.
- Stir occasionally until the sauce bubbly and luscious.
-
Finish and Serve:
- When the chicken is done cooking, shred it right in the pot with two forks, coating it in the food.
- Serve hot over your choice of rice (like jasmine or basmati) or alongside steamed veggies to soak up the wonderful orange sauce.
See? It’s as easy as that!
Serving Suggestions
To really wow your guests (or just yourself!), plate a generous portion of fluffy rice, and nestle the tender orange chicken right on top. Drizzle some extra sauce over to highlight that glossy finish.
For an extra flair, sprinkle some sliced green onions or sesame seeds for a pop of color and texture. A side of colorful stir-fried vegetables or a fresh green salad dressed lightly with sesame vinaigrette pairs beautifully as well.
Recipe Variations
For those looking to shake things up, consider these flavorful twists on my Orange Chicken:
-
Crispy Orange Chicken: Before adding to the crockpot, lightly coat the chicken in cornstarch and pan-fry it until crispy before tossing it in with the sauce to get that delightful crunch.
-
Spicy Orange Chicken: Add in some crushed red pepper flakes or sriracha for a spicy kick; it’ll contrast deliciously with the sweetness of the orange.
-
Orange-Garlic Cauliflower: For a vegetarian option, swap chicken for cauliflower or tofu – both soak up that orange glaze beautifully.
-
Add Pineapple: Toss in some diced pineapple chunks for a tropical twist and added sweetness.
-
Coconut Milk Twist: For a creamier sauce, stir in a can of coconut milk along with the orange mixture for a unique flavor combination.
Chef’s Notes
This Orange Chicken recipe has evolved over time! Initially, I was a bit hesitant about using my crockpot for Asian dishes. Like many foodies, I thought true Asian flavors could only be achieved through stovetop cooking or wok techniques. But after some experimentation, I discovered that cooking low and slow allows the flavors to meld together beautifully and gives you a succulent dish.
One of my funniest kitchen memories involves an early attempt at this recipe: I mistook ginger for turmeric, resulting in a vibrant yellow sauce instead of the beautiful orange glow I had aimed for. Thankfully, we laughed it off, and it turned out pretty tasty too! This just goes to show that cooking is all about having fun.
FAQs and Troubleshooting
-
Why is my orange chicken watery?
- If your sauce is too thin, make sure you add the cornstarch slurry and allow it to thicken properly. If it still seems watery, try cooking with the lid slightly ajar for the last 30 minutes to reduce the liquid.
-
Can I use frozen chicken?
- Yes, you can use frozen chicken thighs in your crockpot. Just make sure to extend your cooking time by an hour or so. Ensure the internal temperature reaches 165°F.
-
How do I store leftovers?
- Leftover orange chicken can be stored in an airtight container in the fridge for up to 3 days. Reheat gently on the stovetop or microwave, adding a splash of water to keep it moist.
-
Is it possible to make this gluten-free?
- Absolutely! Use gluten-free soy sauce (like tamari) and ensure that your other condiments are gluten-free as well.
Nutritional Info
(Insert detailed nutritional information if desired, or a simple statement about the nutritional benefits of the dish.)
And there you have it — my cozy take on Asian Crockpot Orange Chicken! I hope this recipe fills your kitchen with love, warmth, and unforgettable flavors. It’s all about enjoying the process and sharing these moments with those you care about. Happy cooking, my friends!
Print
Asian Crockpot Orange Chicken
- Total Time: 255 minutes
- Yield: 4 servings 1x
- Diet: Gluten-Free
Description
A comforting Asian dish featuring juicy chicken thighs coated in a tangy orange glaze, all cooked effortlessly in a crockpot.
Ingredients
- 2 lbs Chicken Thighs
- 1 cup Fresh Orange Juice
- 1/4 cup Soy Sauce
- 1/4 cup Honey
- 3 cloves Garlic, minced
- 1 tablespoon Fresh Ginger, grated
- 2 tablespoons Cornstarch
- 1 tablespoon Sesame Oil
- Salt & Pepper, to taste
Instructions
- Trim any excess fat off your chicken thighs.
- Pat the chicken dry with paper towels.
- In a separate bowl, whisk together the fresh orange juice, soy sauce, honey, minced garlic, and grated ginger.
- Place the chicken thighs at the bottom of your crockpot.
- Pour the orange sauce over the chicken.
- Cover the crockpot and set it to low for 6-8 hours or high for 3-4 hours.
- About 30 minutes before serving, make a cornstarch slurry with a tablespoon of water.
- Stir the slurry into the crockpot to thicken the sauce.
- When the chicken is done, shred it in the pot with two forks and serve hot over rice or with steamed veggies.
Notes
For a crispy variation, coat the chicken in cornstarch and pan-fry before adding to the crockpot. Add crushed red pepper for a spicy kick.
- Prep Time: 15 minutes
- Cook Time: 240 minutes
- Category: Main Course
- Method: Crockpot
- Cuisine: Asian
Nutrition
- Serving Size: 1 serving
- Calories: 350
- Sugar: 25g
- Sodium: 600mg
- Fat: 10g
- Saturated Fat: 2g
- Unsaturated Fat: 5g
- Trans Fat: 0g
- Carbohydrates: 45g
- Fiber: 1g
- Protein: 20g
- Cholesterol: 90mg
Keywords: crockpot, orange chicken, Asian cuisine, comfort food, slow cooker, easy recipe

Black Pepper Chicken
A Journey to Flavor: Black Pepper Chicken
Welcome back to my kitchen, my fellow food lovers! Today, I’m excited to take you on a culinary adventure that will ignite your taste buds and fill your home with irresistible aromas. We’re diving into the world of Black Pepper Chicken—a dish that perfectly balances the heat of freshly cracked black pepper with tender, juicy chicken. It’s simple yet supremely satisfying, making it a fantastic choice for both cozy weeknight dinners and lively weekend gatherings.
Now, who doesn’t love a dish that requires minimal ingredients but delivers maximum flavor? Black Pepper Chicken is just that—easy to whip up and utterly delicious. The beauty of this dish lies in its straightforward simplicity and rich, peppery essence. Whether you’re an experienced chef or a beginner finding your way around the kitchen, this recipe is designed to boost your culinary confidence and bring a smile to your face.
Not only does this dish come together fast, but it’s also versatile! You can pair it with rice, steam some veggies, or stuff it into savory wraps. When I think of Black Pepper Chicken, I’m reminded of cozy family dinners where laughter filled the air as we all savored the comforting flavors of home-cooked food. So, grab your apron, and let’s turn up the heat in the kitchen!
Personal Story
I’ll never forget the first time I tasted Black Pepper Chicken. It was one of those spontaneous kitchen moments that turned into a lasting memory. My grandmother, who was my culinary muse, decided to teach me how to cook this dish one lazy Sunday afternoon. She called it her “weekend warrior,” saying it was her go-to when she wanted to impress guests without spending all day in the kitchen.
As we cooked together, the scent of sizzling chicken mingled with the warm aroma of black pepper—such a delightful combo! We were sharing stories, laughter, and a few dance moves in between stirring and seasoning. That day, I learned the magic that a few simple ingredients could create, and I felt an undeniable bond with my grandmother as we made something extraordinary together. Black Pepper Chicken became one of those recipes that I promised to keep alive and pass down to the next generation, celebrating both flavor and the love that goes into each meal.
Ingredients
Here’s what you’ll need to create your own mouthwatering Black Pepper Chicken:
-
Chicken Breast (or thighs):
- What to know: I typically prefer chicken breast for its quick cooking, but thighs give a richer flavor if that’s your jam!
- Substitution tip: Feel free to use tofu or tempeh for a plant-based option.
-
Black Pepper:
- What to know: Freshly cracked black pepper is key here! It delivers a punch of flavor that pre-ground pepper simply can’t match.
- Chef insight: If you want to switch things up, try using white pepper for a more subtle spice.
-
Garlic:
- What to know: You can never go wrong with garlic! It adds a robust flavor that pairs beautifully with chicken.
- Substitution tip: Garlic powder also works in a pinch, but fresh garlic is always better!
-
Soy Sauce:
- What to know: This umami-packed staple enhances the savoriness of your chicken and creates a nice caramelization when cooked.
- Substitution tip: For a gluten-free version, tamari is a fantastic alternative.
-
Cornstarch:
- What to know: This ingredient is the secret to getting that lovely crispy outer layer on your chicken.
- Substitution tip: If you’re avoiding cornstarch, consider using arrowroot powder instead.
-
Green Onions:
- What to know: These bright little gems add freshness and color to your dish.
- Substitution tip: Chives or shallots can serve as great substitutes if green onions aren’t on hand.
-
Sugar (optional):
- What to know: Just a dash to balance out the flavors. Sweetness counteracts heat beautifully!
- Substitution tip: Feel free to use honey or maple syrup if that’s what you have.
Step-by-Step Instructions
Now that you’ve gathered your ingredients, let’s get cooking! Follow these simple steps to create the perfect Black Pepper Chicken:
Step 1: Marinate the Chicken
-
Cut the Chicken: Start by slicing your chicken breast (or thighs) into bite-sized pieces. Visualize how it’ll look on your plate—it’s all about the presentation!
-
Season the Chicken: In a bowl, combine the chicken pieces with 1 tablespoon of freshly cracked black pepper, 2 tablespoons of soy sauce, and 1 tablespoon of cornstarch. Trust me, the cornstarch creates that irresistible crispy coating.
-
Let it Sit: Allow the chicken to marinate for at least 15 minutes. This step is essential for flavor and helps to tenderize the meat. Grab a cup of tea and relax while you wait.
Step 2: Stir-Fry with Style
-
Heat the Pan: In a large skillet or wok, heat 2 tablespoons of oil over medium-high heat. You want that sizzle when the chicken hits the pan!
-
Cook the Chicken: Add the marinated chicken in a single layer, making sure not to overcrowd the pan. Let it sear for about 2-3 minutes on one side until golden. Flip it and let it cook for an additional 2-3 minutes until fully cooked through.
-
Garlic Time: Toss in minced garlic and stir-fry for another 30 seconds. The aroma will be heavenly, and your kitchen will feel like a cozy restaurant!
Step 3: Bring It All Together
-
Add the Green Onions: At the last minute, throw in sliced green onions and give them a quick stir to soften slightly. They add a beautiful pop of color and flavor!
-
Taste and Adjust: Now’s your moment! Give it a taste and add a pinch of sugar or more black pepper if you need to elevate the flavors further.
-
Serve It Hot: Once everything is cooked to perfection, remove it from the heat, and it’s ready to serve! Keep it on low until you’re set at the table.
Serving Suggestions
Plating is where you can truly shine with this dish. Serve your Black Pepper Chicken on a fluffy bed of steamed rice, allowing the sauce to soak in and create the ultimate comfort food experience. Want to impress your guests? Garnish with additional green onions and a sprinkle of sesame seeds for that touch of restaurant flair. Add a side of stir-fried vegetables or a fresh cucumber salad to round out the meal and add more vibrant colors!
Recipe Variations
Want to mix things up? Here are a few creative twists on the classic Black Pepper Chicken:
- Spicy Pepper Chicken: Add red pepper flakes or chili paste for an extra kick.
- Mango Black Pepper Chicken: Toss in diced ripe mangoes during the last few minutes of cooking for a sweet twist.
- Lemon-Herb Variation: Substitute half the soy sauce with fresh lemon juice and add in chopped parsley or cilantro for a bright flavor.
- Peanut Butter Chicken: For a nutty twist, mix in some peanut butter to the sauce for an Asian-inspired flavor.
Chef’s Notes
This recipe has evolved over the years in my kitchen, inspired by many different cultures. I love how Black Pepper Chicken also fosters creativity—you can tweak the base recipe and experiment with flavors anytime! I remember one time trying a savory coconut milk sauce. It was a little risky, doing something so different, but it ended up being a huge hit! So, don’t hesitate to use this recipe as a springboard to explore new culinary horizons in your own kitchen!
FAQs and Troubleshooting
1. My chicken turned out dry! What did I do wrong?
- Be mindful of cooking time! Chicken breast can dry out quickly. Remove it from the heat as soon as it’s no longer pink inside.
2. The black pepper flavor is too strong. What can I do?
- If fresh black pepper is overwhelming, reduce the amount next time or mix it with other spices like garlic powder or onion powder to balance the flavor.
3. Can I make this in advance?
- Absolutely! You can marinate the chicken a day ahead. Just store it in the fridge. Cook it fresh when you’re ready to enjoy!
4. How can I thicken the sauce?
- If you want a thicker sauce, stir in a bit more cornstarch mixed with water towards the end of cooking.
Nutritional Info (Optional)
(Optional—specific nutritional information can be included here if desired)
Enjoy your culinary adventure, and remember, cooking is all about having fun and sharing heartfelt moments with those you love. I can’t wait to hear how your Black Pepper Chicken turns out—let’s keep the conversation going in the comments below or on social media! Happy cooking!
Print
Black Pepper Chicken
- Total Time: 25 minutes
- Yield: 4 servings 1x
- Diet: Gluten-Free (if using tamari)
Description
A simple yet flavorful dish featuring tender chicken marinated in freshly cracked black pepper and soy sauce, perfect for quick dinners or special occasions.
Ingredients
- 1 lb Chicken Breast (or thighs)
- 1 tbsp Black Pepper (freshly cracked)
- 2 tbsp Soy Sauce
- 1 tbsp Cornstarch
- 2 tbsp Oil
- 2–3 cloves Garlic (minced)
- 2–3 Green Onions (sliced)
- 1 tsp Sugar (optional)
Instructions
- Cut the chicken into bite-sized pieces.
- Combine the chicken with black pepper, soy sauce, and cornstarch in a bowl.
- Let it sit for at least 15 minutes.
- Heat oil in a large pan over medium-high heat.
- Cook the marinated chicken in a single layer until golden, about 2-3 minutes each side.
- Add minced garlic and stir-fry for another 30 seconds.
- Throw in sliced green onions and stir briefly.
- Taste and adjust seasoning with sugar or more pepper if needed.
- Serve hot over rice or veggies.
Notes
Feel free to experiment with different proteins or add vegetables.
- Prep Time: 15 minutes
- Cook Time: 10 minutes
- Category: Main Course
- Method: Stir-Frying
- Cuisine: Asian
Nutrition
- Serving Size: 1 serving
- Calories: 370
- Sugar: 3g
- Sodium: 600mg
- Fat: 15g
- Saturated Fat: 2g
- Unsaturated Fat: 10g
- Trans Fat: 0g
- Carbohydrates: 18g
- Fiber: 1g
- Protein: 30g
- Cholesterol: 70mg
Keywords: Black Pepper Chicken, Easy Chicken Recipes, Asian Cuisine

Dumpling Ramen Bowl
The Cozy Dumpling Ramen Bowl: A Heartwarming Hug in a Bowl
Introduction
Welcome to my cozy corner of the kitchen, friends! If there’s one thing I love as much as the smell of fresh bread baking or a pot of simmering soup, it’s the magical transformation of simple ingredients into a dish that warms not just the stomach but also the soul. Today, I’m inviting you to dive with me into the world of Dumpling Ramen Bowls!
Why Dumpling Ramen, you ask? Well, picture this: a steaming bowl loaded with tender noodles, delightful dumplings, and a rich, savory broth that beckons you with its umami goodness. It’s like a warm hug on a chilly day – perfect for Sundays spent lounging around or chilly weeknights after a busy day. This dish embodies everything I stand for in cooking: togetherness, comfort, and a splash of creativity.
One of my fondest memories as a little chef-in-training was my first attempt at making homemade dumplings with my grandma. She had this way of guiding me through each step, sharing stories from her own childhood while we enveloped flavorful fillings in delicate dough. So, when I first added dumplings to my beloved ramen, I felt like I was merging old memories with new adventures – a culinary bridge connecting generations.
In this blog post, I’ll take you through every nook and cranny of making your Dumpling Ramen Bowl, from choosing the right ingredients to serving it up with style. Whether you’re looking to impress your friends at a dinner party or simply want to treat yourself, the journey of this dish is as exhilarating as its flavor! So grab your apron (don’t worry, I’ve got a few stains on mine too) and let’s get cooking!
Personal Story
As I mentioned, dumpling-making holds a special place in my heart, and it goes way back to my childhood days with grandma. I remember one rainy Saturday, the kind that makes you want to snuggle under a blanket and stay indoors. She decided it was the perfect time to teach me the art of dumpling-making.
Flour dust filled the air as I rolled out the dough — it seemed like the universe had conspired to create a masterpiece in our tiny kitchen. The sound of laughter filled the corners of the room as I clumsily attempted to pinch the edges shut while grandma would gently tease me about my ‘unique’ shapes. Despite my amateur attempts, we ended up with a batch of glistening dumplings, ready to be cooked.
After a quick boil, we dropped them into a pot of flavorful broth. The aroma that wafted through the house was a mesmerizing blend of spices and love. We curled up on the couch, bowls in hand, enjoying not just the delicious meal but the warmth of that shared experience. This Dumpling Ramen Bowl is a tribute to that joy—it’s comfort food elevated with delightful memories I cherish.
Ingredients
To make your Dumpling Ramen Bowl, gather the following ingredients:
-
Dumplings (store-bought or homemade):
- Use your favorite variety—pork, chicken, or vegetable. If time allows, try making them from scratch! You can even try wonton wrappers instead of dumpling dough for a fun twist.
-
Ramen Noodles:
- Fresh ramen noodles are dreamy but dried will work just fine too. Cooking time will vary, so follow the package instructions.
-
Broth (chicken, pork, or vegetable):
- A good broth is key! Homemade is best, but store-bought can also save time. Opt for low-sodium varieties for better control over salt levels.
-
Soy Sauce:
- A splash for seasoning! You can use tamari for a gluten-free option or coconut aminos for a sweeter taste.
-
Scallions (green onions):
- They add a fresh, vibrant kick. Substitute with chives for a similar taste, or even fresh parsley for a different vibe.
-
Soft-Boiled Eggs:
- For that creamy richness. If you want a vegan option, consider using marinated tofu instead.
-
Nori (seaweed sheets):
- A classic garnish that adds a lovely umami note. If you can’t find nori, toasted sesame seeds can be a delightful alternative.
-
Vegetables (carrots, bok choy, or mushrooms):
- Feel free to use whatever is in season or on hand! This is a fantastic way to clean out your fridge.
-
Sesame Oil:
- Just a drizzle for a nutty flavor boost! Avocado oil can be a nice substitute if you want a milder taste.
With these ingredients, you’ll be all set to create a bowl of happiness that brings everyone around the table!
Step-by-Step Instructions
-
Cook the Dumplings:
- In a large pot of boiling water or a steamer, gently add your dumplings. If you’re using store-bought, follow the package instructions, but my tip is to cook them until they are floating; this is usually a happy sign they’re done. If you like a crispy bite, pan-fry them after boiling!
-
Prepare the Broth:
- In a separate pot, pour in your choice of broth and bring it to a gentle simmer. Add soy sauce for flavor, adjusting to your taste. I usually start with 1-2 tablespoons and adjust as needed. This is also a great time to throw in some aromatics, like minced garlic or ginger, if you fancy a little more zing.
-
Cook the Ramen Noodles:
- In another pot, cook the ramen according to the package instructions. Fresh noodles usually take just a few minutes, while dried might take a little longer. Keep an eye on them! Overcooking = mush!
-
Soft-Boil the Eggs:
- For the perfect soft-boiled egg, gently place them in boiling water for 6-7 minutes. Once that timer dings, quickly plunge them into an ice bath! This stops the cooking process and makes peeling easier. When they are cool enough, peel them, and marinate in a mixture of soy sauce, vinegar, and a hint of sugar for an extra flavor punch if you have the time!
-
Prepare Your Veggies:
- If you’re using leafy greens like bok choy, give them a quick blanch in the same water you used for the dumplings, just until they’re tender yet still vibrant in color. Carrots can be thinly sliced and added raw for a delightful crunch!
-
Assemble the Bowl:
- Here comes the fun part! In your favorite bowl, layer ramen noodles at the bottom, then ladle in that luscious broth over the top. Add your dumplings, soft-boiled egg (sliced in half for presentation!), and a generous heap of veggies. Garnish with sliced scallions, pieces of nori, and an elegant drizzle of sesame oil.
Ah, the joy of watching a friend’s eyes light up at their first forkful — that’s one of the most rewarding parts of cooking, isn’t it?
Serving Suggestions
For that Instagram-worthy moment, play with color and height! Start with a large, deep bowl. Place the noodles in the center, slightly twirling them for texture. Neatly arrange the dumplings around the noodles, followed by the vibrant veggies. Top with the soft-boiled egg, cut side up, sprinkle more scallions, add a piece of nori, and finish it all off with a sprinkle of sesame seeds. Voilà! Your beautiful Dumpling Ramen Bowl is ready to impress!
Recipe Variations
Here are a few tasty twists to try out!
- Spicy Kick: Add chili oil or a dollop of spicy miso paste to your broth for a fiery version.
- Herbicious Delight: Top the bowl with fresh cilantro or Thai basil for a refreshing herbal touch.
- Zucchini Noodles: Going low-carb? Swap out ramen noodles for spiralized zucchini for a crunchy alternative.
- Creamy Twist: Stir in a splash of coconut milk into the broth for a rich, creamy texture.
- Vegan Version: Replace dumplings with crispy tofu and use vegetable broth alongside mushrooms for depth.
The best part is: don’t hesitate to mix and match according to your taste!
Chef’s Notes
When I first started making this Dumpling Ramen Bowl, I must admit, I wasn’t the most skilled with dumpling formation. I remember one particularly fateful afternoon when I was having a "puff pastry" kind of day (a term I coined for when my dumplings looked more like pillows as opposed to cute little parcels). But you know what? The laughter that came with those culinary mishaps? Priceless!
Over time, I’ve learned that cooking is about fluidity and inspiration, not perfection. Your bowl may look different from mine, but the warmth and love you pour into it will always make it shine. Embrace the mess, savor the flavors, and enjoy every moment spent in the kitchen – that’s the heart of it!
FAQs and Troubleshooting
Q: Can I freeze the dumplings?
A: Absolutely! Freeze them uncooked on a baking sheet, then transfer them to a freezer-safe bag. They’ll keep wonderfully for up to three months. Just drop them in boiling water straight from the freezer when you’re ready to cook them.
Q: What if my broth is too salty?
A: A little sugar or vinegar can help balance salty flavors. Another trick is to add a potato while simmering – it absorbs some saltiness!
Q: How can I make this dish gluten-free?
A: Use gluten-free ramen noodles, tamari instead of soy sauce, and check that your dumplings are gluten-free as well. There are some fantastic options available in stores now!
Q: My dumpling dough keeps tearing, what am I doing wrong?
A: This usually means your dough is either too dry or overworked. Make sure you’re resting it adequately and keeping it covered to avoid drying out.
Nutritional Info (Optional)
(This section can be included if relevant)
Calories per bowl: approximately 600-800 (depending on ingredients used)
Proteins: 25-30g
Carbs: 80-90g
Fats: 15-20g
Make sure to adjust based on variations, and don’t forget that the love you put into your food? That’s the real secret ingredient!
So there you have it, folks! Your very own Dumpling Ramen Bowl, filled with flavors that dance like a gentle waltz across your taste buds. Whether you’re cooking for family, friends, or even just treating yourself — remember that every meal is an opportunity to create memories. Now go on, get cooking, and savor the warm embrace of that delicious bowl! Happy eating!
Print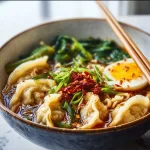
Dumpling Ramen Bowl
- Total Time: 50 minutes
- Yield: 4 servings
- Diet: Vegetarian
Description
A heartwarming bowl of ramen filled with tender dumplings, fresh vegetables, and a rich broth, perfect for chilly days.
Ingredients
- Dumplings (store-bought or homemade, pork, chicken, or vegetable)
- Ramen Noodles (fresh or dried)
- Broth (chicken, pork, or vegetable)
- Soy Sauce
- Scallions (green onions)
- Soft-Boiled Eggs
- Nori (seaweed sheets)
- Vegetables (carrots, bok choy, or mushrooms)
- Sesame Oil
Instructions
- Cook the dumplings in boiling water or a steamer until they float. Pan-fry for a crispy finish if desired.
- Prepare the broth by simmering your choice of broth and adding soy sauce for flavor.
- Cook the ramen noodles according to package instructions.
- Soft-Boil the eggs by cooking them in boiling water for 6-7 minutes, then plunge into ice water.
- Prepare your veggies by blanching leafy greens or slicing raw carrots.
- Assemble the bowl by layering ramen, broth, dumplings, soft-boiled egg, and veggies. Garnish with scallions, nori, and sesame oil.
Notes
For a spicy version, add chili oil to the broth. Customize with herbs or alternative noodles for dietary preferences.
- Prep Time: 20 minutes
- Cook Time: 30 minutes
- Category: Main Course
- Method: Boiling
- Cuisine: Asian
Nutrition
- Serving Size: 1 bowl
- Calories: 700
- Sugar: 5g
- Sodium: 800mg
- Fat: 15g
- Saturated Fat: 4g
- Unsaturated Fat: 8g
- Trans Fat: 0g
- Carbohydrates: 85g
- Fiber: 4g
- Protein: 30g
- Cholesterol: 70mg
Keywords: ramen, dumplings, comfort food, easy recipe, homemade, Asian cuisine
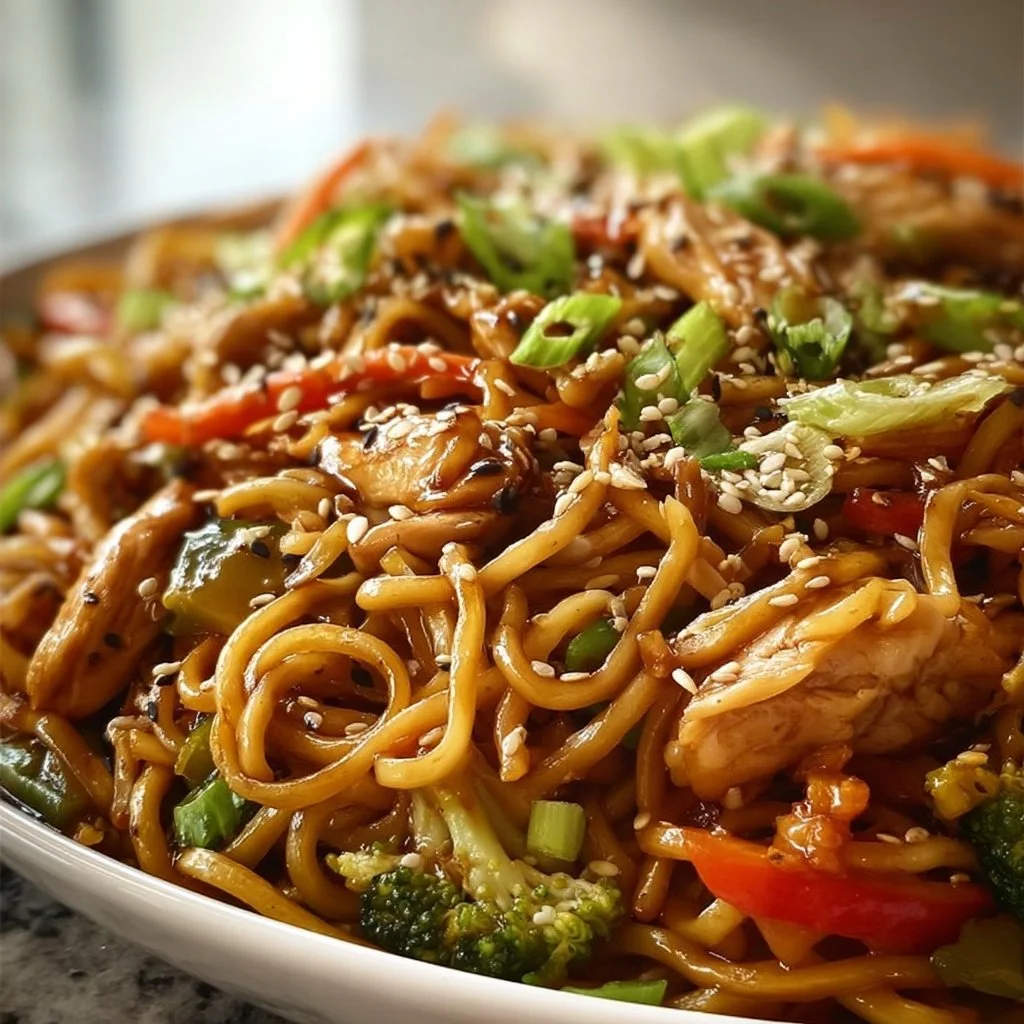
Chicken Teriyaki Stir Fry With Noodles
Chicken Teriyaki Stir Fry With Noodles
Hey there, culinary adventurers! Welcome back to my cozy kitchen! Today, I’m thrilled to share one of my absolute favorite dishes that brings back such warm memories and delightful flavors. We’re whipping up a classic Chicken Teriyaki Stir Fry with Noodles. This dish is a symphony of vibrant colors and delicious tastes, and trust me, it’s as simple as it is scrumptious!
The beauty of stir-fry? You can whip it up in a jiffy while infusing your kitchen with a delightful, mouthwatering aroma. Plus, it’s a fantastic way to sneak in loads of veggies and make everyone at your dinner table happy. It’s the sort of meal that sparks joy not just in the cooking, but also in the eating! When you pull together tender pieces of chicken, crunchy veggies, and perfectly chewy noodles all drizzled with that sweet and savory homemade teriyaki sauce, you’ve got pure magic.
I can totally remember the first time I tried making stir-fry. It was a cool evening, and the scent of garlic and ginger dancing on the stove had my family drifting into the kitchen like bees to honey. Now, I can’t cook without thinking back to that moment — the joyous conversations and laughter, with smiles all around as we divvied up heaping plates of my stir-fry experiment. That bustling energy is akin to what I hope to create in your kitchens today as you embark on making this delightful dish.
So gather your favorite spices and your trusty apron, let’s dive into this cheerful culinary adventure together! I promise you will be adding this recipe to your weekly rotation, and your loved ones will be begging for seconds!
Personal Story
When I was a kid, takeout was always an exciting event. I still remember those Saturday nights when my family would order from the local Chinese restaurant. The clatter of chopsticks, the chatter of excitement, and the irresistible aromas wafting from the kitchen filled the air. Teriyaki chicken was always a family favorite, every piece of chicken glistening with that glossy sauce.
But it wasn’t until a chilly winter evening that I decided I could recreate that magic in my own kitchen. Armed only with curiosity and a plethora of veggies from my fridge, I turned to my mom’s hidden stash of recipes and found a simple stir-fry recipe, which ignited my culinary passion. The first bite was a revelation – it was as if I was transported back to those joyful evenings. Each forkful brought a new wave of flavor, and I knew I had discovered something special. Making Chicken Teriyaki Stir Fry with Noodles not only satisfied my cravings but also turned into a heartfelt tradition I can share with friends and family alike. It’s amazing how food can tell our stories, right?
Ingredients
To create the perfect Chicken Teriyaki Stir Fry, you’ll need a list of vibrant, fresh ingredients that come together beautifully. Let’s check out what you’ll be needing!
-
Chicken Breast (1 pound): My go-to protein! Boneless, skinless chicken breast is lean and cooks quickly. If you’re aiming for a healthier option, try skinless chicken thighs for more flavor, or even go for tofu for a vegetarian twist!
-
Colored Bell Peppers (1 each of red, yellow, and green): Not only do these beauties add a pop of color to your dish, but they also bring a sweet crunch! Don’t have them on hand? Zucchini or snap peas work wonders here too!
-
Broccoli Florets (1 cup): Bright green and packed with nutrients! If your family isn’t a big fan, try green beans or bok choy instead; just be sure to cook them until they’re bright and still slightly crunchy.
-
Carrots (2 medium-sized): Slice them thinly, and they’ll add a beautiful orange hue and a sweet flavor. Frozen mixed vegetables can save time, just be mindful of adding them towards the end of cooking.
-
Garlic (3 cloves): Nothing whets the appetite like the aroma of sizzling garlic! For those less keen on garlic, shallots can add a milder flavor.
-
Ginger (1 inch fresh piece): Fresh ginger brings a zing that brightens up the dish. If you don’t have fresh ginger, a pinch of ground ginger will do in a pinch, just use less.
-
Noodles (8 ounces): Choose your favorite — lo mein, ramen, or even rice noodles! Whole wheat or gluten-free noodles work beautifully, depending on your dietary needs.
-
Soy Sauce (1/4 cup): A must-have for the teriyaki flavor. If you’re watching your sodium intake, there’s always low-sodium soy sauce or tamari!
-
Brown Sugar (1/4 cup): Adds that lovely sweetness and helps with the saucy consistency. Honey or maple syrup can be delightful substitutes but adjust the quantity based on taste.
-
Rice Vinegar (1 tbsp): For a little tanginess to balance the sweetness. Apple cider vinegar can work in a pinch!
-
Sesame Oil (1 tbsp): Infuses a nutty aroma into the dish, making it shine. Olive oil can be a viable alternative but won’t give the same flavor.
-
Cornstarch (1 tbsp): For thickening the sauce. If you don’t have cornstarch, arrowroot or even flour can work; just ensure you mix it well with cold water first.
These ingredients may seem simple, but they create a lively meal bursting with fresh flavors. You don’t need to be a master chef to use them; just your passion for cooking!
Step-by-Step Instructions
Now let’s get cooking! Here’s a step-by-step guide to making this Chicken Teriyaki Stir Fry with Noodles. Follow along, and don’t worry if things get a bit messy — trust me, it’s all part of the fun!
Step 1: Marinate the Chicken
Start by slicing your chicken breast into bite-sized pieces. In a mixing bowl, combine about 2 tablespoons of soy sauce, 1 tablespoon of brown sugar, and a teaspoon of rice vinegar with the chicken. Toss everything together until each piece is coated. Let it marinate for at least 15 minutes. This simple step will ensure your chicken is full of flavor. If you’ve got extra time, marinating for an hour can take the flavor up a notch!
Step 2: Prepare the Vegetables
While the chicken is getting all saucy, take this time to wash and chop your vegetables. Slice the bell peppers, chop the broccoli into bite-sized pieces, and thinly slice the carrots. I often find that using a sharp knife makes everything easier (and more fun!). Having everything prepped ahead is essential for a successful stir-fry since the cooking process goes quickly!
Step 3: Cook the Noodles
Bring a pot of water to boil and cook your noodles as per the package instructions until al dente. I suggest saving a cup of the pasta water before draining! It can be a lifesaver when tossing everything together later if you need to loosen the sauce.
Step 4: Start Stir-Frying
In a large skillet or wok, heat 1 tablespoon of sesame oil over medium-high heat. It’s time to toss in your marinated chicken. Cook for about 5-6 minutes until it’s golden and cooked through. Remember to give it some space — overcrowding the pan will just steam the chicken instead of searing it! Once cooked, remove the chicken from the pan and set it aside.
Step 5: Add Garlic and Ginger
In the same skillet (hey, don’t waste that flavorful residue!), add a splash more sesame oil if needed, and toss in your minced garlic and ginger. Sauté for about 30 seconds until the kitchen is filled with that irresistible aroma. Be careful not to burn it; nobody likes bitter garlic!
Step 6: Veggies Galore!
Next, add in the chopped bell peppers, broccoli, and carrots. Stir-fry for about 2-3 minutes until they’re bright and slightly tender-crisp. Treat your veggies gently; they should still have a bit of crunch!
Step 7: Combine Everything
Now, it’s time to reunite the chicken with the veggies! Add the chicken back into the skillet, along with the remaining soy sauce, brown sugar, and rice vinegar. Don’t forget to sprinkle in the cornstarch mixed with a tablespoon of water to thicken the sauce (make sure to stir it first). Toss everything together for another minute or two. If the sauce feels a bit thick, add a little pasta water to achieve your desired consistency!
Step 8: Add Noodles
Finally, toss in the cooked noodles and give everything a good mix, letting all those flavors meld together. If it looks too dry, add more of that reserved pasta water until everything is nicely coated and glistening!
Serving Suggestions
Now for the fun part — plating! Grab your favorite bowls or plates and serve this Chicken Teriyaki Stir Fry with a generous sprinkle of sesame seeds on top. For professional flair, you can even garnish with sliced green onions for that pop of fresh color. Serve it hot, and let everyone dig in family-style or plated.
Recipe Variations
Want to riff on this stir fry? Here are some delicious variations you can try:
- Protein Swaps: Swap chicken for shrimp, beef, or tofu for a variation in texture and flavor.
- Veggie Power: Add snap peas, mushrooms, or baby corn — whatever you have in your fridge. Use what’s in season to keep things fresh.
- Heat It Up: Add red pepper flakes or Sriracha for a spicy kick. Spice lovers will adore this twist!
- Noodle Upgrade: Use zoodles or quinoa for a gluten-free and low-carb option. It’s a delicious way to lighten up the dish!
- Sauce Variations: Experiment with adding pineapple juice or orange juice to the teriyaki for a sweet and fruity flavor twist!
Chef’s Notes
This recipe has a special place in my heart, not only for the flavors and memories it conjures, but also for its versatility. Over the years, I’ve dabbled with various sauces and ingredients, and each time it evolves just a bit more. There was that one time I accidentally dumped half a jar of hoisin sauce into the mix! While it was slightly too sweet, it opened my eyes to the great world of flavors. Cooking, to me, is about these happy accidents and exploration in everyday ingredients.
FAQs and Troubleshooting
1. My chicken is tough! What went wrong?
It’s likely overcooked. For a tender bite, ensure you cook the chicken until just done and try not to crowd the pan while browning.
2. My sauce is too thick!
No problem! Just add a splash of the reserved pasta water to loosen it up. It’s a lifesaver!
3. Can I prep it ahead of time?
Absolutely! Chop your veggies and marinate the chicken earlier in the day. Just store everything separately in the fridge and stir-fry when you’re ready to eat.
4. Can I use frozen veggies?
You sure can! Just add them to the pan towards the end of cooking, as they often need less time to heat through compared to fresh produce.
Nutritional Info
(While it’s optional, here’s a basic overview! Adjust according to your ingredients.)
- Calories: 450 per serving
- Protein: 32g
- Fat: 8g
- Carbohydrates: 62g
- Fiber: 4g
And there you have it, my dear food lovers! This Chicken Teriyaki Stir Fry with Noodles is not just delicious — it’s a journey through flavors and memories. Now, roll up those sleeves and bring this vibrant dish to life in your kitchen. Whether you’re cooking for friends, family, or just for you, I hope this recipe invokes the same warmth and joy it has in my home. Happy cooking! 🍽️
Print
Chicken Teriyaki Stir Fry With Noodles
- Total Time: 35 minutes
- Yield: 4 servings 1x
- Diet: Poultry
Description
A colorful and flavorful Chicken Teriyaki Stir Fry with Noodles, perfect for a quick and satisfying meal that bursts with fresh ingredients.
Ingredients
- 1 pound Chicken Breast, sliced into bite-sized pieces
- 1 each Colored Bell Peppers (red, yellow, and green), sliced
- 1 cup Broccoli Florets
- 2 medium-sized Carrots, sliced thinly
- 3 cloves Garlic, minced
- 1 inch fresh Ginger, minced
- 8 ounces Noodles (lo mein, ramen, or rice noodles)
- 1/4 cup Soy Sauce
- 1/4 cup Brown Sugar
- 1 tbsp Rice Vinegar
- 1 tbsp Sesame Oil
- 1 tbsp Cornstarch
Instructions
- Marinate the Chicken: Combine chicken with soy sauce, brown sugar, and rice vinegar; let marinate for at least 15 minutes.
- Prepare the Vegetables: Wash and chop the bell peppers, broccoli, and carrots.
- Cook the Noodles: Boil water and cook noodles according to package instructions; save a cup of pasta water.
- Start Stir-Frying: Heat sesame oil in a skillet, add marinated chicken, and cook until golden (about 5-6 minutes).
- Add Garlic and Ginger: Sauté minced garlic and ginger in the same skillet for about 30 seconds.
- Veggies Galore: Add bell peppers, broccoli, and carrots; stir-fry for 2-3 minutes until tender-crisp.
- Combine Everything: Return chicken to skillet, add remaining soy sauce, brown sugar, rice vinegar, and cornstarch mixed with water.
- Add Noodles: Toss in cooked noodles and mix until coated.
Notes
For added flavor, garnish with sesame seeds and green onions. Adjust the sauce thickness with reserved pasta water if necessary.
- Prep Time: 15 minutes
- Cook Time: 20 minutes
- Category: Main Course
- Method: Stir-frying
- Cuisine: Asian
Nutrition
- Serving Size: 1 serving
- Calories: 450
- Sugar: 20g
- Sodium: 800mg
- Fat: 8g
- Saturated Fat: 1.5g
- Unsaturated Fat: 4.5g
- Trans Fat: 0g
- Carbohydrates: 62g
- Fiber: 4g
- Protein: 32g
- Cholesterol: 85mg
Keywords: stir fry, chicken teriyaki, noodles, homemade teriyaki, quick dinner
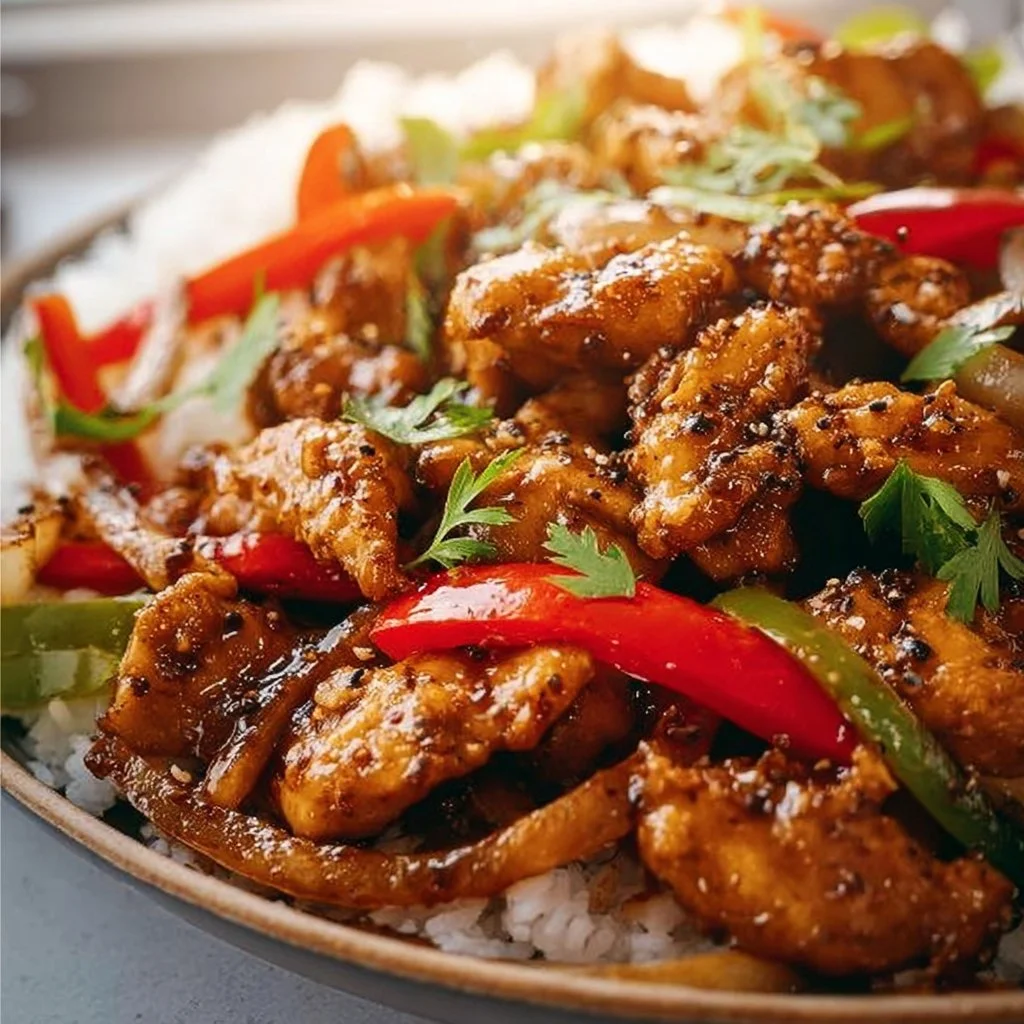
Black Pepper Chicken
Black Pepper Chicken: A Flavorful Journey in Your Kitchen
Welcome back to my cozy kitchen, friends! Today, I’m thrilled to share one of my all-time favorite recipes: Black Pepper Chicken. This dish is a celebration of bold flavors, simplicity, and the kind of comfort food that warms your soul and brings everyone to the table. It’s one of those dishes that has a fantastic balance of spicy and savory, making every bite feel like a little culinary adventure.
Black Pepper Chicken is not just your everyday chicken stir-fry. Oh no, my friend! It’s a delightful dish that’s quick enough for weeknights but special enough to impress your crowd during weekend gatherings. Picture this: juicy chicken pieces, fresh veggies, and a aromatic pepper sauce that packs a punch—who could resist that?
What I love most about this recipe is its versatility. You can amp up the heat or keep it mild; it’s all about catering to your taste buds or that of your loved ones. As we dive into this recipe, I want you to feel inspired and excited to cook! There’s something magical that happens when you transform simple ingredients into something so delightful that it leaves everyone wanting more. So, roll up your sleeves and let’s make some delicious Black Pepper Chicken together!
Personal Story
Every dish I create has a story, and Black Pepper Chicken is no exception. I remember the first time I made this dish—it was a rainy Saturday afternoon, the kind of day where you want to stay indoors, cozy, and surrounded by delicious aromas. I had just moved into my quaint little apartment and wanted to make something special. With only a few ingredients on hand and a craving for something flavorsome, I decided it was the perfect time to experiment.
As I chopped the onions and bell peppers, my best friend, Mia, dropped by unannounced with a bottle of wine and an appetite for adventure. We laughed, danced around the kitchen, and concocted what would become our go-to recipe for busy weeknights. I remember the look of sheer happiness on her face with the first mouthful. Since then, Black Pepper Chicken has graced our table countless times, during both impromptu dinners and “fancy” get-togethers. I think it’s safe to say, this dish has truly woven itself into the fabric of my culinary journey, reminding me of the joy that cooking and sharing food with loved ones can bring.
Ingredients
Here’s everything you’ll need to whip up this tantalizing Black Pepper Chicken:
-
Chicken Breast (500g): The star of the show! Boneless, skinless chicken breast is lean and cooks quickly, but thighs also work beautifully for a juicier result. If you’d like a vegetarian option, tofu is a fantastic substitution.
-
Bell Peppers (2): A colorful addition that not only looks amazing but adds sweetness and crunch. You can use any color you like—red, green, or yellow! If you’re out of bell peppers, snap peas or broccoli could step in nicely.
-
Onion (1 large): Sweet and aromatic, onions create a foundation of flavor. Yellow or white onions provide a perfect balance for the dish, but red onions can add a hint of sweetness if preferred.
-
Garlic (3 cloves): Fresh garlic adds an unbeatable aroma and depth to your dish. If you’re in a pinch, minced garlic from a jar works, but nothing beats the fresh stuff!
-
Fresh Black Pepper (2 tsp): The true hero here! A robust and spicy kick; freshly cracked black pepper elevates your dish onto another level. If you prefer milder flavors, reduce the amount or swap with white pepper.
-
Soy Sauce (1 tablespoon): Provides a savory base while enhancing the earthy, umami notes of the chicken. Tamari or coconut aminos are great gluten-free alternatives.
-
Honey (1 tablespoon): A touch of sweetness to balance out the heat. If you’re vegan, feel free to swap with maple syrup or agave.
-
Sesame Oil (1 tablespoon): Adds a nutty aroma that perfectly complements the dish. If you don’t have any on hand, you can use vegetable oil, though the flavor won’t be as rich.
-
Cornstarch (for coating): Helps achieve a beautiful texture on the chicken. If you prefer a gluten-free option, arrowroot powder works well too.
-
Spring Onions (optional): For garnish. They’re not just pretty; they add a fresh pop of flavor! You can also use cilantro if you prefer.
Now that we have our lineup ready, we’re all set to dive into the cooking process!
Step-by-Step Instructions
Step 1: Prepare the Chicken
Start by cutting your chicken breast into bite-sized pieces. Aim for uniform pieces so they cook evenly. In a small bowl, toss the chicken pieces with cornstarch. This will help create that irresistible crispy coating that elevates the dish! Set this bowl aside while you tackle the veggies.
Step 2: Chop the Veggies
Next, let’s chop our onion and bell peppers. For the onion, slice it in half, then make thin quarter-inch slices. With the bell peppers, remove the stem and seeds, and cut them into similar-sized strips. Don’t worry if they’re not perfect—cooking is about joy, not precision!
Step 3: Heat Things Up
In a large skillet or wok, heat about 2 tablespoons of oil over medium-high heat. Once it’s shimmering, add the chicken—all at once, please! Sear the chicken until it’s golden brown and cooked through, about 4-5 minutes, stirring occasionally. Don’t overcrowd the pan; you want those crispy bits!
Step 4: Aromatic Time
Toward the end of the chicken cooking time, push the chicken to the side of the skillet and toss in your onions and garlic. Cook them for about 2 minutes until fragrant, stirring occasionally. The garlic should start to turn golden without burning, or it’ll develop a bitter taste. Sprinkle in the black pepper here—it’ll fill your kitchen with an amazing aroma.
Step 5: Let it Sizzle
Now add the sliced bell peppers to the pan. Stir everything together, allowing the veggies to get tender-crisp—around 3-4 minutes should do the trick. At this point, add in the soy sauce and honey, stirring well to coat all the chicken and vegetables. This is where the magic happens!
Step 6: Final Touches
Cook for another minute, allowing the flavors to marry, and take it off the heat. Taste and adjust the seasoning, adding more pepper or a drizzle of soy sauce if needed.
Step 7: Plating Up
Time to serve up your delicious Black Pepper Chicken! Plate it with some fluffy rice or noodles, and don’t forget those fresh spring onions on top—they’ll add a beautiful pop of green!
Serving Suggestions
For an authentic experience, serve your Black Pepper Chicken over a bed of steamed jasmine rice or alongside some tender udon noodles. For an added touch of fun and crunch, consider sprinkling some toasted sesame seeds over the top. You can create a delightful family-style spread by putting the chicken and rice in the center of the table and allowing everyone to help themselves. Trust me; the communal vibe adds to the experience!
Recipe Variations
- Spicy Twist: If you love heat, add some sliced fresh jalapeños or crushed red pepper flakes to the mix for an extra kick.
- Veggie-Heavy: Swap out half the chicken for more veggies like carrots, snow peas, or broccoli to bulk up the nutritional factors.
- Gluten-Free Delight: Use tamari instead of soy sauce, and make sure your cornstarch is certified gluten-free.
- Creamy Version: Add a splash of coconut cream toward the end for a creamy, comforting twist.
- High-Protein Option: Swap chicken for shrimp or tofu for a different, yet equally delicious protein source!
Chef’s Notes
Oh, the stories this dish could tell! As I’ve traveled and explored various cultures, I’ve come to learn that every corner of the world has a unique way of spicing up chicken, and this recipe holds a special place in my heart. I’ve tweaked it here and there depending on what was fresh at the market, and each adjustment has brought a delightful new experience. Sometimes, it’s the simplest recipes that evolve with you, and this one has been by my side through many meal-prepping sessions.
Remember, cooking is a journey, not a destination. So, don’t stress if things aren’t going perfectly—every mistake is a lesson learned!
FAQs and Troubleshooting
1. Why is my chicken not browning?
- If your chicken isn’t browning, it’s likely overcrowded in the pan. Cook in batches, ensuring enough space for the chicken to sear.
2. How do I store leftovers?
- Store your Black Pepper Chicken in an airtight container in the fridge for up to 3 days. Reheat gently on the stove or microwave to enjoy the next day!
3. Can I make this ahead of time?
- Absolutely! You can marinate the chicken beforehand or prep the veggies. Just cook everything fresh the day you plan to serve it for the best flavor.
4. What if it’s too spicy?
- If it’s too spicy, serve with a side of yogurt or sour cream to balance the heat. You could also add a touch more honey to mellow things out.
Nutritional Info
Here’s a rough estimate per serving (based on 4 servings):
- Calories: 350
- Protein: 30g
- Carbohydrates: 30g
- Fat: 15g
So there you have it—my beloved Black Pepper Chicken recipe that’s as easy to make as it is delicious! I hope you find as much joy in cooking and sharing this dish as I do. Happy cooking! 🍽️
Print
Black Pepper Chicken
- Total Time: 30 minutes
- Yield: 4 servings 1x
- Diet: Non-Vegetarian
Description
A delightful blend of juicy chicken, fresh veggies, and a bold pepper sauce, perfect for weeknight dinners or weekend gatherings.
Ingredients
- 500g Chicken Breast
- 2 Bell Peppers
- 1 large Onion
- 3 cloves Garlic
- 2 tsp Fresh Black Pepper
- 1 tablespoon Soy Sauce
- 1 tablespoon Honey
- 1 tablespoon Sesame Oil
- Cornstarch (for coating)
- Spring Onions (optional, for garnish)
Instructions
- Prepare the Chicken by cutting into bite-sized pieces and tossing with cornstarch.
- Chop the Veggies including onion and bell peppers.
- Heat about 2 tablespoons of oil in a large skillet over medium-high heat and sear the chicken until golden brown.
- Aromatic Time: Push chicken to the side and cook onions and garlic until fragrant.
- Let it Sizzle by adding bell peppers and stir well with soy sauce and honey.
- Final Touches: Cook a minute more and taste for seasoning adjustments.
- Plating Up with fluffy rice or noodles and garnish with spring onions.
Notes
For added heat, incorporate jalapeños or crushed red pepper flakes. Store leftovers in an airtight container for up to 3 days.
- Prep Time: 15 minutes
- Cook Time: 15 minutes
- Category: Main Course
- Method: Stir-frying
- Cuisine: Asian
Nutrition
- Serving Size: 1 serving
- Calories: 350
- Sugar: 6g
- Sodium: 800mg
- Fat: 15g
- Saturated Fat: 2g
- Unsaturated Fat: 7g
- Trans Fat: 0g
- Carbohydrates: 30g
- Fiber: 2g
- Protein: 30g
- Cholesterol: 75mg
Keywords: chicken stir fry, black pepper chicken, quick dinner, comfort food

Asian Buffalo Wings
Asian Buffalo Wings: A Flavorful Twist on a Classic Favorite
Welcome back to my kitchen, fellow foodies! Today, I’m excited to dive into a recipe that’s sure to become a favorite in your house: Asian Buffalo Wings. These wings are a delightful fusion of spicy, savory, and tangy flavors that tickle your taste buds and keep you coming back for more. Perfect for game day, family gatherings, or just a cozy night in front of the TV, these wings combine the best of both worlds—you get the heartiness of traditional buffalo wings with a tasty twist inspired by Asian cuisine.
Now, if you’re like me, wings hold a special place in your heart. They remind me of summer barbecues, friends gathering around the dining table, and the carefree laughter that fills the air during game nights. Who doesn’t love fingers covered in sauce and the satisfaction of devouring a delicious wing? The adrenaline rush of your favorite team scoring in the background just adds to the joy of savoring these crispy delights.
This recipe is not only delicious but also simple enough to create for any occasion, whether it’s an intimate dinner for two or a bustling gathering of friends. We’ll be bathed in sweet and spicy sauce, tantalizing aromatics, and crispy textures. So, roll up your sleeves, don that apron, and let’s transform some chicken wings into a mouthwatering masterpiece. Ready? Let’s get cooking!
Personal Story
One of my fondest memories involving wings goes back to college. I lived with a group of my closest friends, and every Sunday was “Wings Day.” We turned our tiny kitchen into a makeshift sports bar, complete with funky décor, cold drinks, and, of course, plate after plate of wings. We experimented with flavors we found on the internet, varying from the classic Buffalo to honey garlic and even teriyaki.
I’ll never forget the day I decided to combine two of my favorite styles—buffalo and Asian. It all started when I got tired of my usual wing sauces and thought, “Why not mix it up?” I grabbed a bottle of sriracha and some soy sauce, threw in some ginger and garlic, and the rest is history! We called them "Asian Buffalo Wings," and the savory, spicy profile made our taste buds dance.
There we were, laughing, chatting, and devouring our wing creations while watching the game on a hot summer afternoon. As the sweat dripped from our brows—thank you, sriracha—we all shook our heads in disbelief, secretly asking if we had struck gold in the kitchen. Those moments made me fall in love with cooking even more, and I knew I had to share this recipe with you, my fellow food enthusiasts.
Ingredients
-
Chicken Wings (2 pounds)
- The main attraction! Look for fresh, organic wings if possible. You can also use frozen wings, just ensure they’re fully thawed and patted dry before cooking.
-
Soy Sauce (½ cup)
- This savory sauce adds umami depth to the wings. Feel free to swap in tamari to make this gluten-free or coconut aminos if you prefer a lighter flavor.
-
Sriracha Sauce (1/4 cup)
- This spicy, tangy condiment takes the classic buffalo flavor up a notch. If you’re sensitive to spice, reduce the amount, or use sweet chili sauce for a milder kick.
-
Honey (2 tablespoons)
- A natural sweetener balances the heat from the sriracha and adds a glossy finish to the sauce. Maple syrup can be a great alternative for a vegan version.
-
Garlic (4 cloves, minced)
- Fresh garlic provides aromatic depth. Feel free to use garlic powder in a pinch; about 1 teaspoon should suffice.
-
Ginger (1 tablespoon, minced)
- Fresh ginger adds a warm, spicy kick that amplifies the Asian flavors. You can substitute with ground ginger if necessary.
-
Rice Vinegar (2 tablespoons)
- This tangy vinegar helps cut through the richness of the wings while adding a zesty touch to the sauce. Apple cider vinegar could be used as a swap in a pinch.
-
Sesame Oil (1 teaspoon)
- A little bit of this fragrant oil goes a long way in enhancing Asian flavors. Don’t have any? Light olive oil will work in a pinch, but it won’t add that nutty aroma.
-
Green Onions (for garnish)
- Fresh green onions always liven up a dish and add a dash of color. Feel free to throw in some sesame seeds for added crunch!
Step-by-Step Instructions
Step 1: Prepare the Wings
-
Rinse and Dry: First, rinse your chicken wings under cold water and place them on a paper towel-lined baking sheet. Pat them dry thoroughly. This step is crucial—if the wings are wet, they won’t crisp up nicely!
-
Prep for Cooking: Preheat your oven to 425°F (220°C). If you prefer deep-fried wings, get your oil heated to 350°F (175°C). But for this recipe, we’ll be baking them for optimal crunch and less mess.
Step 2: Make the Marinade
-
Combine Ingredients: In a medium bowl, whisk together soy sauce, sriracha, honey, minced garlic, minced ginger, rice vinegar, and sesame oil until well combined. This sticky and spicy marinade will pack a serious punch!
-
Marinade the Wings: Place the chicken wings in a large resealable plastic bag or a bowl. Pour the marinade over the wings, ensuring they’re fully coated. Chef Tip: For best results, let them marinate for at least 30 minutes—feel free to let them sit in the fridge for up to 24 hours for deeper flavor.
Step 3: Bake the Wings
-
Arrange on Baking Sheet: Line a baking sheet with parchment paper (for easy cleanup!) or aluminum foil. Arrange the marinated wings in a single layer on the sheet, ensuring they don’t touch. If they sit too close, they’ll steam instead of crisp!
-
Bake: Pop those bad boys in the preheated oven for 40-45 minutes, flipping them halfway through. The goal is to have them golden brown and crispy. Chef Hack: For extra crispiness, toss them under the broiler for the last 5 minutes of cooking. Just keep an eye on them—no one likes burnt wings!
Step 4: Toss in the Sauce
-
Prepare a Second Batch: While the wings cook, you can strain any leftover marinade into a small saucepan. Simmer it on low heat for about 5-7 minutes until it thickens slightly. This will be your glaze!
-
Tossing Time: When the wings are done and crispy, remove them from the oven and place them in a large bowl. Pour the thickened sauce over the freshly baked wings and toss to coat evenly. Make sure each wing is beautifully glistening!
Step 5: Serve Them Up
-
Garnish: Serve the wings warm with a sprinkle of sliced green onions and sesame seeds on top. The fresh crunch complements the spicy wings perfectly.
-
Enjoy: Grab some napkins because things are about to get messy—and oh-so-delicious!
Serving Suggestions
These Asian Buffalo Wings are perfect for platters, game day, or a casual gathering. Serve them alongside cooling dips like ranch or a tangy garlic sauce to help balance out the heat. Pair your wings with a side of crispy vegetable spring rolls and Asian slaw for a complete feast, or some classic celery and carrot sticks for that crunchy detox!
Recipe Variations
-
Baked Buffalo Cauliflower Wings: For a vegetarian take, swap chicken wings for cauliflower florets and adjust the cooking time to about 25-30 minutes.
-
Spicy Honey Garlic Wings: Add extra honey and skip the sriracha for a sweeter profile.
-
Korean BBQ Wings: Replace soy sauce with gochujang (Korean chili paste) and add more sesame oil for a different kick.
-
Lemon Zest Addition: Brighten up the flavors by adding lemon zest into the marinade for a light, refreshing twist.
-
Naked Wings: Cook the wings without sauce for a classic crispy wing that can be dipped later in a variety of flavors.
Chef’s Notes
Oh, the fun I’ve had with these wings over the years! Initially, my attempts were a flavorful mess! I once miscalculated with sriracha and accidentally unleashed a firestorm that had everyone reaching for glasses of milk and running for the door. Since then, I’ve learned the importance of balance—too much heat can overshadow delicate flavors.
Over time, this recipe has evolved from mere experimentation to a family staple. I love whipping them up for get-togethers or just for a cozy movie night. There’s something magical about sharing these wings with others; they bring people together over shared laughter (and the occasional sauce-smeared face).
FAQs and Troubleshooting
Q: Why didn’t my wings get crispy?
A: Ensure the wings are thoroughly dried before cooking, and avoid overcrowding the pan. High heat also helps develop that crispy exterior!
Q: Can I use chicken breast or thighs?
A: Sure! Bone-in, skin-on chicken thighs also work well, but cooking times will vary. Thighs might take a bit longer to become tender and fully cook.
Q: What should I do if my sauce is too thick?
A: If your sauce thickens too much while simmering, just add a splash of water to achieve your desired consistency!
Q: Can these wings be made ahead of time?
A: Definitely! You can prep the wings and marinate them the day before. Just bake them before your guests arrive.
Nutritional Info
- Serving Size: 4 wings
- Calories: Approximately 350 calories
- Protein: 24g
- Carbohydrates: 14g
- Fat: 24g
So, there you have it—a labor of love and a dish that’s bound to become a new favorite. I hope you enjoy creating this delightful Asian Buffalo Wings recipe just as much as I’ve enjoyed sharing it with you. Give it a try, gather your loved ones, and make some delicious memories in the kitchen. Happy cooking!
Print
Asian Buffalo Wings
- Total Time: 75 minutes
- Yield: 4 servings
- Diet: None
Description
A flavorful fusion of spicy, savory, and tangy flavors, these Asian Buffalo Wings are perfect for game day or cozy nights in.
Ingredients
- Chicken Wings (2 pounds)
- Soy Sauce (½ cup)
- Sriracha Sauce (¼ cup)
- Honey (2 tablespoons)
- Garlic (4 cloves, minced)
- Ginger (1 tablespoon, minced)
- Rice Vinegar (2 tablespoons)
- Sesame Oil (1 teaspoon)
- Green Onions (for garnish)
Instructions
- Prepare the Wings: Rinse and dry the chicken wings under cold water and pat them dry thoroughly.
- Preheat your oven to 425°F (220°C).
- Make the Marinade: In a bowl, whisk together soy sauce, sriracha, honey, minced garlic, minced ginger, rice vinegar, and sesame oil.
- Marinade the Wings: Place wings in a large resealable bag or bowl and coat with marinade. Marinate for at least 30 minutes.
- Arrange on Baking Sheet: Line a baking sheet with parchment paper and arrange wings in a single layer.
- Bake: Bake wings for 40-45 minutes, flipping halfway through for even cooking.
- Toss in the Sauce: Remove wings and toss in thickened marinade for coating.
- Garnish: Serve warm, topped with sliced green onions and sesame seeds.
- Enjoy: Dig in and savor the flavors!
Notes
Wings can be prepared and marinated ahead of time for convenience. Adjust spice levels as per your preference.
- Prep Time: 30 minutes
- Cook Time: 45 minutes
- Category: Appetizer
- Method: Baking
- Cuisine: Asian
Nutrition
- Serving Size: 4 wings
- Calories: 350
- Sugar: 12g
- Sodium: 700mg
- Fat: 24g
- Saturated Fat: 6g
- Unsaturated Fat: 14g
- Trans Fat: 0g
- Carbohydrates: 14g
- Fiber: 0g
- Protein: 24g
- Cholesterol: 90mg
Keywords: wings, buffalo wings, Asian cuisine, game day, appetizer
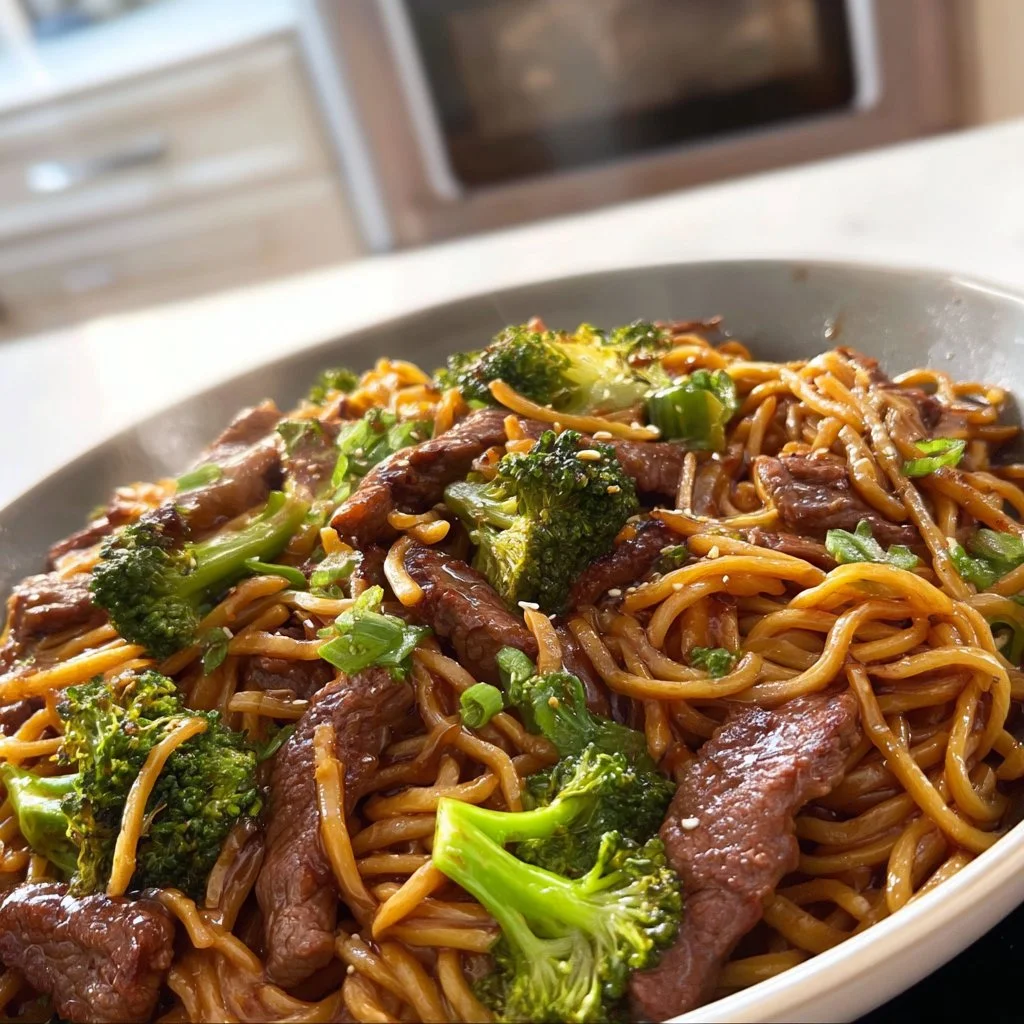
Beef and Broccoli Lo Mein
Beef and Broccoli Lo Mein: A Cozy Kitchen Delight
Hey there, fellow food lovers! Welcome back to my cozy corner of the internet. Today, we’re diving into one of my absolute favorite dishes to whip up—Beef and Broccoli Lo Mein. Perfectly tender beef, vibrant broccoli, and those chewy, comforting noodles all come together in a savory sauce that makes my heart (and taste buds) sing. This dish is like a warm hug on a plate and a sure crowd-pleaser for any time you gather with friends or family.
I remember the first time I had lo mein; I was a kid, and my parents would take me to our favorite Chinese restaurant every Friday night. The moment the plate of noodles hit the table, my excited eyes would sparkle brighter than the overhead lights. I still relish that first bite of tender beef mingling with perfectly cooked noodles—ah, the nostalgia! That warm feeling of being surrounded by the people you love, sharing stories over a delicious meal, is what cooking—and particularly this dish—is all about.
As I’ve grown as a cook (and accumulated countless kitchen mishaps), I’ve perfected this Beef and Broccoli Lo Mein recipe to transport you straight back to your favorite takeout spot—without any of the fuss. Ready to get cooking? Let’s roll up our sleeves and make some magic happen in the kitchen!
Personal Story
Growing up, my mother had a knack for creating a warm and inviting kitchen environment. One weekend, with my little brother running in and out, she decided to have a “make your own lo mein” night. I vividly recall how we set out an array of vibrant ingredients on the kitchen counter—fresh veggies, marinated beef, and, of course, those fabulous lo mein noodles.
We bounced around ideas, each of us claiming our favorite flavors and combinations. My brother went for a wild mix of sesame sauce and broccoli, while I opted for a more traditional approach. The chaotic laughter between us, combined with the delicious aromas wafting throughout the house from the sizzling pan, created one of those unforgettable memories. Even now, every time I make this dish, I’m taken back to that kitchen, the sounds of my family echoing while we clink our chopsticks over bowls of soul-soothing lo mein.
Ingredients
For this delightful dish, here’s what you’ll need:
-
Beef (flank steak or sirloin): Tender cuts work best for stir-fries. If you don’t have beef on hand, you can substitute chicken, shrimp, or even tofu!
-
Broccoli florets: Fresh is best, but frozen will work in a pinch. If you want more color, throw in some colorful bell peppers or snap peas.
-
Lo mein noodles: These egg noodles give a delightful chewiness. If you can’t find them, spaghetti or rice noodles can do the trick.
-
Soy sauce: The backbone of our savory sauce! Low-sodium soy sauce is a great alternative for a lighter option.
-
Oyster sauce: It adds a rich, umami flavor. If you want to keep it vegetarian, opt for a mushroom-based oyster sauce.
-
Sesame oil: A little drizzle gives an aromatic finish. Olive oil or peanut oil can replace it, but you’ll miss out on that nutty flavor.
-
Garlic (3-4 cloves): Minced garlic is fabulous for depth of flavor. Feel free to add ginger for an extra kick!
-
Ginger (fresh or powdered): Just a touch brings the dish alive! Ground ginger is okay if fresh isn’t accessible.
-
Cornstarch: Essential for thickening our sauce. Arrowroot powder is a nice gluten-free alternative.
-
Water or broth: For the sauce consistency. Use a good-quality beef broth for richer flavor, or vegetable broth for a lighter option.
Having a good quality soy sauce and fresh garlic available opens a whole world of flavor in any stir-fry!
Step-by-Step Instructions
Now, let’s get cooking! Follow along, and don’t hesitate to make it your own.
-
Prep Your Ingredients: Start by slicing your beef against the grain into thin strips. This ensures it stays tender. Next, chop the broccoli into bite-sized florets and set them aside. Boil water in a large pot, then add the lo mein noodles according to package instructions—usually, around 4-5 minutes. Once they’re done, drain and toss with a splash of oil to prevent sticking.
-
Marinate the Beef: In a bowl, combine the sliced beef with a tablespoon of soy sauce, a teaspoon of cornstarch, and a dash of sesame oil. This not only adds flavor but also tenderizes the beef. Let it sit for about 15 minutes while the noodles cook—perfect timing!
-
Sauté Garlic and Ginger: In a large skillet or wok, heat a tablespoon of sesame oil over medium-high heat. Add the minced garlic and grated ginger, stirring for about 30 seconds until fragrant. Be careful not to burn the garlic—nobody likes bitter!
-
Cook the Beef: Toss in the marinated beef and stir-fry until it’s browned and nearly cooked through, about 3-4 minutes. You want it beautifully seared but not overcooked. Remove the beef from the skillet and set aside—remember, we’ll return it to heat later!
-
Broccoli Time: In the same pan, add a splash of water (or broth) and stir in the broccoli. Cover and steam it for about 2-3 minutes until vibrant green and tender yet crisp. We love that crunch!
-
Make the Sauce: While the broccoli steams, whisk together ¼ cup soy sauce, 2 tablespoons oyster sauce, a teaspoon of cornstarch, and a little bit of water (about ¼ cup) in a small bowl. This will be our heavenly sauce!
-
Combine Everything: Return the cooked beef to the pan along with the sauce and loosen up everything. Toss in the drained lo mein noodles gently, incorporating all those mouthwatering flavors evenly. Let it all chat in the pan for a minute or two—trust me, the aroma will be intoxicating!
-
Final Touches: Sprinkle with sesame seeds and sliced green onions, giving it a final toss to mix everything together. Now, take a moment and breathe in that delicious scent!
Serving Suggestions
To serve your Beef and Broccoli Lo Mein, plate it warmly in shallow bowls. Garnish with extra sesame seeds and sliced green onion for that beautiful pop of color. Consider serving it with pickled vegetables or a side of steamed dumplings for a full Asian feast! Don’t forget some chopsticks to dig in—because it makes the experience feel all the more authentic.
Recipe Variations
-
Spicy Beef and Broccoli Lo Mein: Add a teaspoon of chili sauce or red pepper flakes in the sauce for a little zing.
-
Vegetable Load-Up: Swap out half of the beef for additional veggies like bell peppers, snap peas, or mushrooms for added crunch and color!
-
Sesame Chicken Lo Mein: Substitute the beef with sliced chicken breast for a lighter twist—or use a mix of chicken and beef for a protein-packed dish.
-
Vegan Tofu Lo Mein: Replace beef with tofu (extra firm works best) and use a vegan oyster sauce or mushroom sauce.
-
Noodle-Free Version: Skip the noodles and serve the beef and broccoli over riced cauliflower for a low-carb option.
Chef’s Notes
As I stirred my Beef and Broccoli Lo Mein today, memories of family gatherings and friends crowded around a table flooded back. What started as a home-cooked meal for two in my kitchen has evolved into a beloved dish I share with anyone and everyone who crosses my threshold. It’s a reminder that food is intimately linked to love, and every recipe evolves with the memories created around it. Whether you are cooking for the first time or are a seasoned chef, enjoy the process and let it bring you joy!
FAQs and Troubleshooting
-
What if my noodles stick together?
- Toss the freshly boiled noodles with a little oil—this helps keep them separate. Also, make sure you’re utilizing enough water when cooking.
-
Can I use other proteins?
- Absolutely! Feel free to swap beef for chicken, shrimp, or even tempeh for a delicious alternative. Just adjust the cooking time based on the protein you opt for.
-
I overcooked my beef, how can I avoid that next time?
- Slicing against the grain and keeping the heat high while cooking for a shorter time will help you achieve that tender texture. Remember, it will continue to cook a little after you remove it from the heat!
-
How can I make this more balanced?
- Increase the vegetable load, or serve it with a simple side salad. A sprinkle of sesame seeds also adds healthy fats!
There’s nothing quite like the comforting embrace of a warm bowl of Beef and Broccoli Lo Mein. Not only do you get a delicious meal that brings friends and family together, but you also create lasting memories with every delicious bite. I hope you enjoy making this dish as much as I do—happy cooking!
Print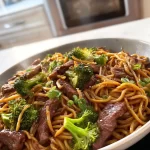
Beef and Broccoli Lo Mein
- Total Time: 45 minutes
- Yield: 4 servings 1x
- Diet: None
Description
A cozy dish of tender beef, vibrant broccoli, and chewy lo mein noodles in a savory sauce, perfect for any gathering.
Ingredients
- 1 pound Beef (flank steak or sirloin)
- 2 cups Broccoli florets
- 8 ounces Lo mein noodles
- ¼ cup Soy sauce
- 2 tablespoons Oyster sauce
- 1 tablespoon Sesame oil
- 3–4 cloves Garlic (minced)
- 1 teaspoon Ginger (fresh or powdered)
- 1 tablespoon Cornstarch
- ½ cup Water or broth
Instructions
- Prep Your Ingredients: Slice beef against the grain, chop broccoli into florets, and boil water for the noodles. Cook noodles according to package instructions, then drain and toss with oil.
- Marinate the Beef: In a bowl, mix sliced beef with soy sauce, cornstarch, and sesame oil. Let sit for 15 minutes.
- Sauté Garlic and Ginger: Heat sesame oil in a skillet, add garlic and ginger, and stir for 30 seconds.
- Cook the Beef: Stir-fry marinated beef until browned, about 3-4 minutes. Remove from skillet.
- Broccoli Time: Add water or broth, then stir in broccoli and steam for 2-3 minutes.
- Make the Sauce: Whisk soy sauce, oyster sauce, cornstarch, and water in a bowl.
- Combine Everything: Return beef to pan with the sauce, add noodles, and toss to mix.
- Final Touches: Sprinkle with sesame seeds and green onions before serving.
Notes
Serve garnished with extra sesame seeds and green onions, perfect with pickled vegetables or dumplings.
- Prep Time: 15 minutes
- Cook Time: 30 minutes
- Category: Main Course
- Method: Stir-frying
- Cuisine: Chinese
Nutrition
- Serving Size: 1 serving
- Calories: 450
- Sugar: 4g
- Sodium: 800mg
- Fat: 20g
- Saturated Fat: 4g
- Unsaturated Fat: 14g
- Trans Fat: 0g
- Carbohydrates: 50g
- Fiber: 3g
- Protein: 25g
- Cholesterol: 60mg
Keywords: Beef Lo Mein, Broccoli Lo Mein, Comfort Food

Healthy Korean Fried Chicken
A Crispy, Healthy Twist on Korean Fried Chicken
Welcome back to my cozy kitchen, dear foodies! Today, we’re diving into one of my all-time favorite dishes that brings a zing of flavor and a delightful crunch to the table: Healthy Korean Fried Chicken. Now, before you start imagining heavy batter and deep frying, let me reassure you — this isn’t your typical oil-soaked feast! We’re giving this classic dish a vibrant, health-conscious makeover while keeping that unmistakable umami flavor intact.
Korean Fried Chicken (or KFC for short, but we’ll stick to Korean Fried Chicken to avoid confusion with the other KFC) is beloved for its crispy exterior and juicy meat, often coated in a sticky, spicy sauce that dances on your taste buds. I remember the first time I tried it at a small food truck in the heart of Seoul. The sun was setting, the streets were bustling, and every bite felt like a warm hug on a chilly evening. The crunch was unlike anything I’d ever experienced! Since then, I’ve made it my mission to recreate that nostalgia right here at home, blending authentic traditions with healthier alternatives.
So, roll up those sleeves and let’s get cooking! Whether you’re whipping this up for a cozy night in or impressing guests at your next gathering, this dish is bound to be a showstopper. Get ready for tons of juicy flavor without the heavy guilt — your taste buds and your waistline will thank you!
Personal Story
One of my most cherished food memories is the time I traveled to Seoul with my best friend, Mia. We were on a culinary adventure, determined to taste every dish we could find. After a day of exploring ancient temples and vibrant markets, we stumbled upon a food stall selling Korean Fried Chicken. The aroma wafting through the air was simply irresistible. We ordered a couple of portions — one spicy and one sweet — and found a little corner to dig in.
The moment we took our first bites, it was like fireworks in our mouths! The crunch, the spice, the sweet glaze bursting with flavor—it was everything we had hoped for and more. We laughed, relished every morsel, and made a pact to recreate that magic at home. That journey sparked my love for Korean cuisine and solidified my belief that food isn’t just about nourishment; it’s about connection, memories, and joy.
Now, I’m excited to bring that vibrant experience to you all with a twist — making it healthier without sacrificing any of that finger-licking goodness!
Ingredients
Here’s what you’ll need to make this delectable Healthy Korean Fried Chicken:
For Chicken Marinade:
-
Chicken thighs (boneless, skinless): 1.5 lbs
- Chef’s Tip: Thighs are juicy and forgiving compared to chicken breasts. You can substitute with chicken breasts or wings if you prefer, but make sure to adjust your cooking time!
-
Soy sauce: ¼ cup
- Substitution: Use coconut aminos for a gluten-free or soy-free version.
-
Rice vinegar: 2 tablespoons
- Insight: Adds a subtle tanginess. If you don’t have it, apple cider vinegar works well too!
-
Garlic (minced): 3 cloves
- Quick Hack: Fresh garlic is best, but powdered garlic can be used in a pinch; just halve the amount.
-
Ginger (grated): 1 tablespoon
- Chef’s Insight: Fresh ginger adds warmth and spice, but ground ginger works in this marinade too!
For Breading:
-
Almond flour: 1 cup
- Substitution: For a nut-free option, use oat flour or breadcrumbs.
-
Cornstarch: ½ cup
- Chef’s Tip: This is key for achieving that ultra-crispy texture! You can use tapioca starch if you’re avoiding corn.
-
Egg (beaten): 1 large
- Insight: Acts as a binder for the breading. If egg-free, try a flaxseed egg (1 tbsp flaxseed meal + 2.5 tbsp water)!
For the Sauce:
-
Korean chili paste (Gochujang): 3 tablespoons
- Substitution: If you find it too spicy, use sriracha or reduce the amount.
-
Honey: 2 tablespoons
- Tip: Swap with maple syrup for a vegan option.
-
Sesame oil: 1 tablespoon
- Insight: Provides a nutty flavor. You can replace it with olive oil in moderation.
-
Sesame seeds: For garnish
- Quick Tip: Use toasted sesame seeds to enhance the flavor!
Step-by-Step Instructions
Now that we have our ingredients prepped, let’s dive into the step-by-step journey of making this delightful dish!
Step 1: Marinate the Chicken
- In a large bowl, combine the soy sauce, rice vinegar, minced garlic, and grated ginger. Add in the chicken thighs, ensuring each piece is well-coated. Cover with plastic wrap or put it in a resealable bag and let it marinate in the fridge for at least 30 minutes. The longer, the better; I usually aim for a couple of hours if time allows! This really lets those flavors soak in.
Step 2: Prepare the Breading Station
- In one shallow dish, prepare the almond flour and cornstarch in equal parts. In another dish, beat the egg. This is where the fun begins! Make sure to set up a little assembly line—marinated chicken first, egg wash second, and then into the flour mixture. Pro tip: Keep one hand for wet (egg) and one for dry (flour) to avoid a gooey mess!
Step 3: Coat the Chicken
- Take each piece of marinated chicken, dip it into the beaten egg, letting the excess drip off, and then dredge it into the almond flour mixture, pressing gently to ensure a good coating. Place the coated chicken on a wire rack to let it rest as you preheat your oven!
Step 4: Bake the Chicken
- Preheat your oven to 425°F (220°C). Line a baking sheet with parchment paper and lightly spray it with cooking oil. This helps in achieving that perfect crisp! Arrange the coated chicken in a single layer, making sure they’re not overcrowded (give them room to breathe and crisp up!). Bake for about 25-30 minutes until the internal temperature reaches 165°F and the chicken is golden brown. Halfway through, flip them for an even bake.
Step 5: Make the Sauce
- While the chicken is baking, let’s whip up the sauce! In a small saucepan, combine the Gochujang, honey, and sesame oil over low heat. Stir gently until everything is well mixed and heated through. You can adjust the sweetness or heat by adding more honey or Gochujang based on your preference.
Step 6: Toss and Serve!
- Once your chicken is out of the oven, place it in a large mixing bowl. Pour the sauce over the hot chicken and toss it gently until every piece is beautifully coated. Get excited; you’re almost there!
Serving Suggestions
For a beautiful presentation, serve the Healthy Korean Fried Chicken on a large platter, garnishing with a sprinkle of sesame seeds and some sliced green onions for a pop of color. Pair it with a side of cucumber salad or steamed broccoli for a fresh crunch. It’s perfect for sharing, but trust me, you’ll want to keep it all to yourself!
Recipe Variations
Get creative with your Healthy Korean Fried Chicken! Here are a few fun variations to consider:
- Spicy Garlic Version: Add minced garlic to the sauce for an extra punch; perfect for garlic lovers!
- Sweet and Sour Twist: Mix in a little pineapple juice with the sauce for a sweet, tangy kick.
- Vegetarian Option: Use cauliflower or tofu as a substitute for chicken, following the same marinade and breading methods for a delightful veggie dish.
- Make It a Bowl: Serve the chicken over cooked rice or quinoa, topped with pickled veggies for a complete meal.
Chef’s Notes
As with any recipe, this Healthy Korean Fried Chicken has evolved over time in my kitchen. The first attempt turned out a bit too soggy, but with practice, I learned the importance of letting the chicken rest after breading and ensuring it’s fully dry before baking. I also experimented with different flours and spices until I landed on this winning combination. Honestly, I can’t remember how many batches I made, but every “failed” attempt was a delicious lesson! Cooking should be playful and experimenting is half the fun.
FAQs and Troubleshooting
Q1: Why is my chicken not crispy?
A: Ensure you’ve set your oven to the right temperature and gave the breadcrumbs a chance to stick by not overcrowding the pan. If they seem soggy, try baking for a little longer!
Q2: Can I make this ahead of time?
A: Absolutely! You can marinate the chicken the night before or make the sauce ahead of time. Just reheat the sauce before adding it to your chicken!
Q3: What if I don’t have Gochujang?
A: No worries! You can use sriracha or even a mix of chili powder and a little sugar as an alternative.
Q4: How can I store leftovers?
A: Store any leftover chicken in an airtight container in the fridge for up to three days. Reheat in the oven to maintain that crispy texture!
Nutritional Info (Optional)
Though the precise nutritional breakdown can depend on specific ingredients used, one serving of this Healthy Korean Fried Chicken may include:
- Calories: ~250
- Protein: ~25g
- Carbohydrates: ~15g
- Fat: ~10g
- Fiber: ~3g
So there you have it—a heartwarming adventure into the world of Healthy Korean Fried Chicken that’s just waiting for you to recreate in your kitchen. I can’t wait to hear your stories, so let me know how yours turns out! Happy cooking, friends!
Print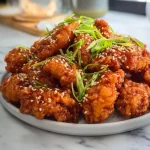
Healthy Korean Fried Chicken
- Total Time: 1 hour
- Yield: 4 servings 1x
- Diet: Gluten-Free, Dairy-Free
Description
A healthy twist on the classic Korean Fried Chicken, offering a crispy exterior and juicy meat without the guilt.
Ingredients
- 1.5 lbs boneless, skinless chicken thighs
- ¼ cup soy sauce
- 2 tablespoons rice vinegar
- 3 cloves garlic, minced
- 1 tablespoon ginger, grated
- 1 cup almond flour
- ½ cup cornstarch
- 1 large egg, beaten
- 3 tablespoons Korean chili paste (Gochujang)
- 2 tablespoons honey
- 1 tablespoon sesame oil
- Sesame seeds for garnish
Instructions
- Marinate the chicken: In a large bowl, combine the soy sauce, rice vinegar, minced garlic, and grated ginger. Add the chicken thighs, ensuring each piece is coated. Cover and let marinate for at least 30 minutes.
- Prepare the breading station: In one dish, mix almond flour and cornstarch. In another, beat the egg. Set up an assembly line.
- Coat the chicken: Dip each piece into the beaten egg, letting excess drip off, then dredge in the almond flour mixture. Place on a wire rack.
- Bake the chicken: Preheat oven to 425°F (220°C). Line a baking sheet with parchment and arrange the chicken in a single layer. Bake for 25-30 minutes until golden brown and cooked through.
- Make the sauce: In a small saucepan, combine Gochujang, honey, and sesame oil over low heat, stirring until mixed. Adjust sweetness or heat as needed.
- Toss and serve: Place the baked chicken in a bowl, pour the sauce over, and toss until coated. Garnish with sesame seeds and serve.
Notes
For added flavor, pair with a side of cucumber salad or steamed broccoli.
- Prep Time: 30 minutes
- Cook Time: 30 minutes
- Category: Main Course
- Method: Baking
- Cuisine: Korean
Nutrition
- Serving Size: 1 serving
- Calories: 250
- Sugar: 8g
- Sodium: 800mg
- Fat: 10g
- Saturated Fat: 1g
- Unsaturated Fat: 4g
- Trans Fat: 0g
- Carbohydrates: 15g
- Fiber: 3g
- Protein: 25g
- Cholesterol: 70mg
Keywords: Korean Fried Chicken, Healthy Recipe, Comfort Food, Chicken Dish, Gluten-Free
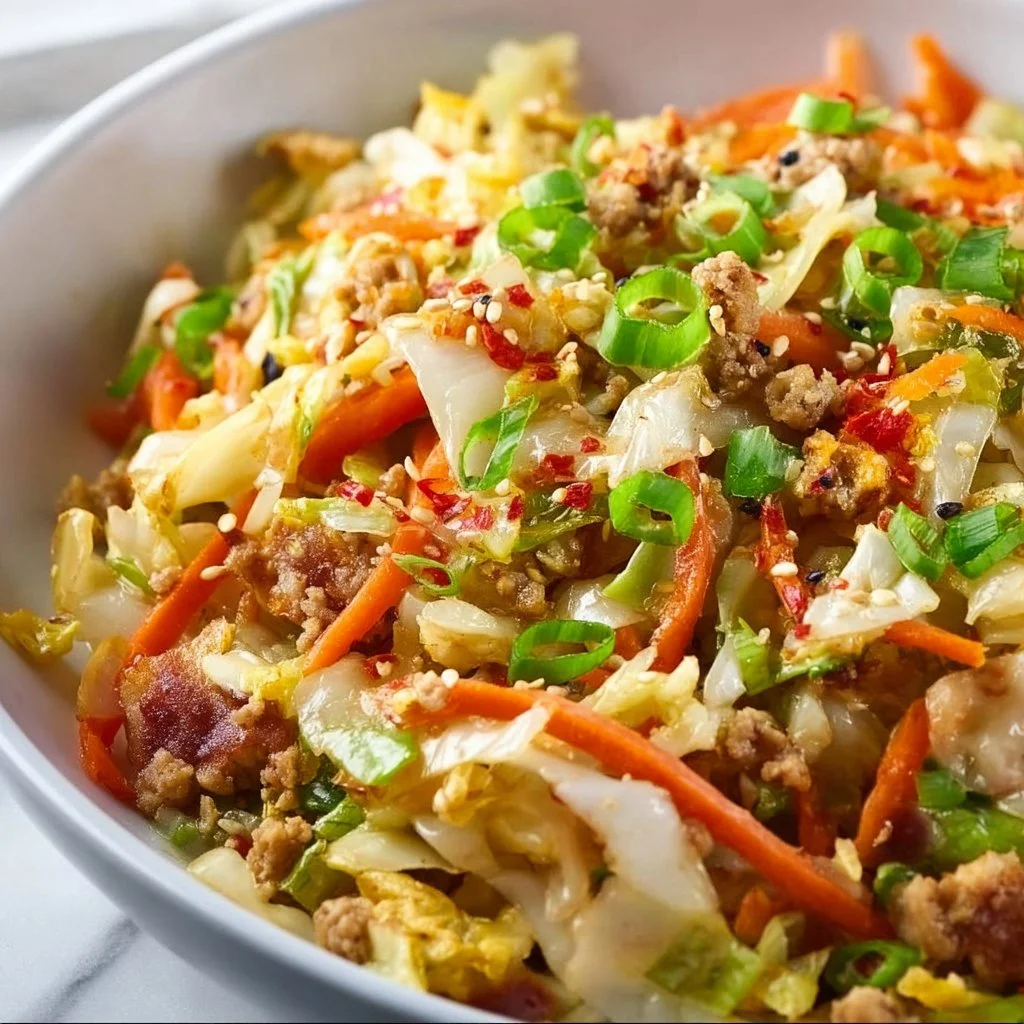
Egg Roll in a Bowl
Egg Roll in a Bowl: A Cozy Delight
Hey there, flavor adventurers! Welcome back to my cozy kitchen. Today, I’m cooking up something that’s a delightful nod to a classic we all love – the egg roll. But instead of deep-frying our way through a kitchen mess, we’re going to create a scrumptious and healthy flavor bomb I like to call Egg Roll in a Bowl. This dish is a perfect mix of cozy and fresh, a bit like wrapping yourself in your favorite blanket on a chilly evening.
Picture this: a vibrant bed of seasoned cabbage, crisp carrots, and more goodies, all topped with a perfectly fried egg or a sprinkle of sesame seeds—yum! Not only does this recipe come together in around 30 minutes, but it’s also a fantastic way to load up on fresh veggies without sacrificing flavor. Plus, you can customize it with your favorite protein or vegan options, making it a versatile meal that’s sure to please everyone at the table.
As someone who finds immense joy in cooking and feeding others, I can’t wait for you to dig into this dish. It’s not just about food; it’s about creating memories, sharing laughter, and gathering around the table with those you love. So roll up your sleeves, grab your apron (or don’t—no judgment here!), and let’s dive into this comforting and delicious recipe that will have you feeling like a pro in your kitchen.
Personal Story
Let me whisk you back for a moment. Growing up, Saturday nights were a feast at my parents’ kitchen. Dad would whip up a batch of homemade egg rolls, their crispy, golden-brown edges practically glowing with deliciousness. The smell of savory pork, ginger, and garlic wafting through the air was pure magic, enticing the whole family to gather around the dining table and share stories.
One particular night, my little brother decided it would be hilarious to dip his egg roll in a dish meant for sweet and sour sauce. The look on my dad’s face—half horror, half amusement—was priceless, and we all burst into laughter. These little moments made those egg rolls so much more than just food; they created a sense of community and warmth. As I grew older, I realized that while egg rolls are delicious, the process of cooking together is what truly binds us. Hence, Egg Roll in a Bowl was born—a simpler way to replicate that dish without the deep-frying fuss, and a new tradition that anyone can whip up.
Ingredients
Let’s get down to the essentials! Here’s what you’ll need for this cozy dish:
-
Ground Pork (or Chicken/Turkey/Tofu):
- The star protein! Ground pork gives you that savory richness, but feel free to substitute with chicken for a leaner option, turkey for a lighter twist, or tofu for a plant-based version.
-
Coleslaw Mix:
- A colorful blend of shredded cabbage and carrots. If you’re feeling adventurous, try using a mix of rainbow carrots or even add shredded Brussels sprouts for a unique twist.
-
Garlic:
- Minced or grated to release those aromatic flavors. Pro tip: fresh garlic is key for depth, but jarred garlic will work if you’re in a pinch.
-
Ginger:
- Freshly grated ginger offers a zing and warmth. If the fresh stuff intimidates you, ground ginger will do, but start with less since it’s more concentrated.
-
Soy Sauce:
- This brings all the umami! If you’re watching your sodium intake or need a gluten-free option, tamari is a great substitute.
-
Sesame Oil:
- Just a drizzle adds a delightful nuttiness. If you can’t find it, a high-quality olive oil will work, but you’ll miss that signature sesame flavor.
-
Green Onions:
- Chopped for garnish and bright flavor. Scallions can also add that fresh crunch, giving a slight kick.
-
Fried Eggs:
- A topping that takes this dish over the top! Serve each bowl with a perfectly fried egg, sunny-side-up or over easy for that gooey goodness.
-
Sesame Seeds (optional):
- These tiny guys add a crunch and an authentic touch. Toast them lightly in a pan to enhance their flavor even more.
Step-by-Step Instructions
Now it’s time to get cookin’! Let’s create this cozy dish that will fill your kitchen with mouthwatering aromas.
1. Prepare Your Ingredients
Start by gathering all your ingredients. This makes the cooking process smoother and more organized. Chop up your garlic, ginger, and green onions; it’s showtime!
2. Heat Up Your Pan
Grab a large skillet or wok and heat it over medium heat. Drizzle about 1 tablespoon of sesame oil into the pan. Wait until the oil shimmers—this is your cue that it’s nicely heated!
3. Sauté the Aromatics
Add your minced garlic and grated ginger to the pan. Sauté them for about 30 seconds until fragrant (but be careful not to burn them!). This step is crucial because it infuses your oil with flavor, setting the stage for the rest of your dish.
4. Cook the Ground Meat
Next, add your ground pork (or chosen protein). Break it apart with a spatula and cook until browned and fully cooked through—about 5-7 minutes. If there’s excess grease, feel free to drain it; we want the tasty bits, not the soggy.
5. Toss in the Cabbage
Once the meat is golden and cooked, toss in the coleslaw mix. Use a spatula or tongs to mix it in with the meat. As the cabbage wilts, we want to retain a bit of crunch, so stir for another 2-3 minutes.
6. Season It Up
Pour in your soy sauce and stir everything together. Allow the flavors to meld for another minute or so. I always recommend tasting at this point—if it’s lacking seasoning, you can sprinkle in a bit more soy sauce or even a dash of salt.
7. Plate it Up!
Spoon generous portions into bowls. This dish is perfect for serving family-style, so don’t be afraid to get in there!
8. Fry Those Eggs
In a separate skillet, add a bit more sesame oil and fry up some eggs—sunny-side-up or however you prefer! Place an egg on top of each bowl of egg roll goodness. The runny yolk will create a luscious sauce that ties everything together.
9. Garnish and Enjoy!
Finish off your masterpiece with sliced green onions and a sprinkle of sesame seeds. Now it’s time to dig in!
Serving Suggestions
This hearty dish is perfect on its own, but if you want to take it up a notch, consider serving it with some steamed jasmine rice or cauliflower rice for a low-carb option. You can also whip up a quick side salad or some pickled vegetables to add a refreshing crunch that complements the rich flavors of the egg roll in a bowl.
Recipe Variations
Now for the fun part—don’t be afraid to get creative! Here are a few twists to inspire you:
-
Spicy Kick: Add a teaspoon of sriracha or chili paste when you mix in the soy sauce for a spicy kick.
-
Veggie-Loaded: Toss in more veggies like bell peppers, snap peas, or even some zucchini ribbons for extra nutrition.
-
Sweet and Savory: Drizzle a touch of hoisin sauce over the top for a sweet twist that pairs beautifully with the savory meat.
-
Low-Carb Alternative: Swap out the coleslaw mix for spiralized zucchini or do a combination for a fun noodle-like texture!
-
Vegan Delight: Use tempeh or a hearty veggie blend in place of meat, and serve with a tofu scramble on top instead of eggs.
Chef’s Notes
In my journey as a home cook, I’ve learned that recipes are living entities; they evolve as our tastes and experiences change. This Egg Roll in a Bowl has been my go-to on busy weeknights, and it’s become a family favorite. Last week, I decided to switch things up and used leftover grilled chicken and some extra veggies in my fridge. Guess what? It was a hit, proving that improvisation can lead to delicious meals!
Also, don’t sweat it if something goes a little off-plan. The kitchen is a place for experimentation; embrace the mishaps and find joy in the process! A good dish can withstand a bit of culinary adventure.
FAQs and Troubleshooting
1. What if I can’t find coleslaw mix?
No problem! You can make your own using finely shredded cabbage and julienned carrots. If you have other veggies like bell peppers or kale, feel free to add those as well.
2. Can I make this dish ahead of time?
Absolutely! You can prepare the egg roll mix ahead of time and store it in the fridge for up to 2 days. Just warm it up and fry your eggs fresh before serving!
3. My dish turned out too salty. What can I do?
If your egg roll in a bowl is overly salty, try adding a splash of a sweet element, like honey or brown sugar, to balance it out. You could also mix in more cabbage to dilute the saltiness.
4. How can I store leftovers?
Store any leftovers in an airtight container in the refrigerator for up to 3 days. When reheating, add a splash of water to keep it moist and flavorful.
Nutritional Info
(Optional but helpful)
- Servings: 4
- Calories: Approximately 350 per serving
- Protein: 25g
- Carbohydrates: 10g
- Fat: 25g
- Fiber: 3g
And there you have it, my friends! A scrumptious and easy-to-make Egg Roll in a Bowl that captures comfort food in a healthy way. I hope you enjoy making and sharing this dish as much as I do. Happy cooking, and may your kitchens be filled with laughter, good food, and lasting memories!
Print
Egg Roll in a Bowl: A Cozy Delight
- Total Time: 45 minutes
- Yield: 4 servings 1x
- Diet: Paleo
Description
A healthy and scrumptious twist on the classic egg roll, packed with fresh veggies and topped with a delicious fried egg.
Ingredients
- 1 lb Ground Pork (or Chicken/Turkey/Tofu)
- 1 bag Coleslaw Mix
- 3 cloves Garlic, minced
- 1 inch Ginger, grated
- 3 tbsp Soy Sauce
- 1 tbsp Sesame Oil
- 3 Green Onions, chopped
- 4 Fried Eggs (for topping)
- 1 tbsp Sesame Seeds (optional)
Instructions
- Prepare your ingredients by chopping garlic, ginger, and green onions.
- Heat a large skillet over medium heat and add sesame oil.
- Sauté the garlic and ginger for 30 seconds until fragrant.
- Cook the ground pork until browned, about 5-7 minutes.
- Toss in the coleslaw mix and stir for another 2-3 minutes until slightly wilted.
- Season with soy sauce, mixing well.
- Plate generous portions into bowls.
- Fry eggs in a separate skillet and place on top of each bowl.
- Garnish with green onions and sesame seeds.
Notes
Feel free to customize with different proteins or extra veggies as desired.
- Prep Time: 15 minutes
- Cook Time: 30 minutes
- Category: Main Course
- Method: Stovetop
- Cuisine: Asian
Nutrition
- Serving Size: 1 serving
- Calories: 350
- Sugar: 5g
- Sodium: 400mg
- Fat: 25g
- Saturated Fat: 6g
- Unsaturated Fat: 10g
- Trans Fat: 0g
- Carbohydrates: 10g
- Fiber: 3g
- Protein: 25g
- Cholesterol: 186mg
Keywords: egg roll, healthy recipe, cozy dish, comfort food, quick meal

Chinese Chicken and Broccoli
Cozy in the Kitchen: My Take on Chinese Chicken and Broccoli
Welcome back to my kitchen, friends! Today, I’m excited to share a dish that holds a special place in my heart—Chinese Chicken and Broccoli. This classic stir-fry, packed with tender chicken, vibrant broccoli, and a mouthwatering sauce, is more than just a meal; it’s a blend of flavors that brings me back to my childhood. The tantalizing aroma fills the kitchen, and before you know it, you have a colorful dish that looks as good as it tastes. The bright greens and succulent chicken pieces also serve as a perfect reminder of how simple ingredients can come together to create something truly unforgettable.
I remember the first time I tasted this dish at a cozy little Chinese restaurant in my hometown. My family would gather around a round table, the lazy Susan spinning with plates of sizzling goodness. As the steam rose and the clatter of chopsticks filled the air, I felt a sense of belonging. It wasn’t just the food; it was the laughter, the shared stories, and the comforting feeling of home. Nowadays, I bring that same joy to my kitchen when I whip up this recipe, and I want to share that experience with you, dear friends.
So, whether you’re a seasoned home chef or just someone looking to spice up your dinner routine, grab your apron, and let’s dive into making this delightful dish. With a few fresh ingredients, a sprinkle of love, and a dash of excitement, you’ll have a meal that can impress anyone. Let’s get cooking!
Personal Story
Ah, the memories of family dinners—those priceless moments filled with laughter and the aroma of delicious food wafting through the air. I can vividly recall weekends spent at my parents’ house, where my mom would often make her version of Chinese Chicken and Broccoli. I’d happily perch on a barstool in our kitchen, watching her chop fresh vegetables and marinate the chicken in a soothing soy sauce blend, her magic touch transforming simple ingredients into a feast.
One specific evening stands out. The sun had set, and the lights were dim to create a cozy ambiance. My parents had invited a couple of their friends over, and I was buzzing with the excitement of being surrounded by adults—who, by the way, always seemed to find my youthful chatter amusing. Just as the laughter reached its peak, my mom’s creation made its grand entrance. The vibrant greens mingled with tender chicken pieces in a glowing, glossy sauce. As I took my first bite, my eyes widened in delight, and I remember thinking, “How could food taste so good?” That moment solidified my love for cooking and inspired me to gather family and friends around a table, sharing meals and memories just like my family did.
Whenever I make this dish, I close my eyes and am transported back to those warm, laughter-filled nights. Join me in celebrating the joy of cooking and the heartwarming experience of sharing meals with those we love!
Ingredients
To make a fantastic Chinese Chicken and Broccoli, you’ll need the following ingredients:
-
Chicken Breast (1 lb): Tender, juicy chicken is the star of this dish. Ideally, use boneless and skinless chicken breasts for ease. If you want a leaner option, turkey breast works well, too!
-
Broccoli (3 cups, cut into florets): Rich in vitamins and packed with crunch, fresh broccoli adds color and nutrition. If you’re not a fan, feel free to substitute with asparagus or snap peas for a delightful crunch!
-
Soy Sauce (½ cup): A staple in Asian cooking, this salty-sweet sauce will infuse your chicken and broccoli with delicious flavor. For a gluten-free alternative, try tamari or coconut aminos.
-
Garlic (3 cloves, minced): Fresh garlic adds a delightful aroma and depth of flavor. If you’re in a pinch, garlic powder can work, but fresh is always best!
-
Ginger (1 tablespoon, minced): The zesty, peppery notes of ginger elevate the dish. If fresh is hard to get, ground ginger can substitute, but start with half the amount.
-
Cornstarch (2 tablespoons): This acts as a thickening agent for the sauce, giving it that silky texture we love! If you prefer, arrowroot powder can also be used.
-
Chicken Broth (½ cup): For a rich flavor, low-sodium chicken broth keeps everything balanced; vegetable broth works just as well for a lighter option.
-
Sesame Oil (1 tablespoon): This oil imparts a lovely nutty flavor to the dish. You can use regular cooking oil, but sesame oil gives it that authentic taste.
-
Green Onions (for garnish): Chopped green onions add a fresh garnish, bringing the dish to life! Feel free to toss in some chopped nuts for an extra crunch if you like.
Step-by-Step Instructions
Ready to bring this dish to life? Let’s jump right into the cooking process!
-
Prepare Your Chicken:
- Start by cutting your chicken breast into bite-sized pieces. This way, they will cook quickly and make for easy eating. Don’t be afraid to get your hands in there; it’s all part of the fun!
Chef Tip: To tenderize the chicken and infuse it with flavor, marinate it in a mixture of soy sauce and minced ginger for at least 20 minutes. This little trick will elevate your dish and keep the chicken moist.
-
Cut Your Broccoli:
- While the chicken is marinating, prepare your broccoli. Rinse and cut it into florets. If you have thicker stems, peel and slice them to add to the stir-fry for extra texture!
-
Heat the Pan:
- In a wok or large skillet, heat your sesame oil over medium-high heat. Make sure it’s hot before adding the chicken. This will ensure a nice sear!
-
Cook the Chicken:
- Add the marinated chicken pieces to the sizzling pan in a single layer. Let them sear undisturbed for a few minutes until they turn golden brown. (The smell is heavenly!) After about 5-7 minutes, stir it up until cooked through.
Pro Tip: If you want to add a bit more depth of flavor, toss in a little of that minced garlic while the chicken is cooking.
-
Add Broccoli for a Sauté:
- Once the chicken is cooked, add the broccoli to the pan, followed by a splash of chicken broth. Cover the pan with a lid to steam the broccoli for about 3 minutes until bright green and crisp-tender.
-
Prepare the Sauce:
- While the chicken and broccoli are cooking, mix together the remaining soy sauce, minced garlic, ginger, cornstarch, and chicken broth in a bowl. This is your sauce, bringing everything together!
-
Combine the Mixtures:
- Once the broccoli is ready, pour the sauce over the chicken and broccoli. Stir well and cook for another 2-3 minutes until the sauce thickens. The vibrant color and aroma will make your taste buds tingle!
-
Final Touches:
- Give your stir-fry a taste. Need more salt? A dash of soy sauce. Want it spicier? Add a few red pepper flakes. Adjusting seasoning is key to personalizing your dish!
-
Plating Time:
- Serve the Chicken and Broccoli hot, garnished with sliced green onions. You can also drizzle a little sesame oil or sprinkle sesame seeds on top for a beautiful presentation.
Serving Suggestions
To serve your delicious Chinese Chicken and Broccoli, I recommend plating it over a bed of fluffy jasmine rice or alongside a mound of steamed rice noodles. You can sprinkle some sesame seeds for an elegant touch. If you’re feeling fancy, serve it in bowls with chopsticks for a delightful dining experience that transports you straight to a cozy Chinese restaurant!
Recipe Variations
Here are a few exciting ways to give this dish your own twist:
-
Spicy Szechuan Style: Add a splash of Szechuan chili oil or a teaspoon of chili paste for a spicy kick.
-
Lemon Zing: Squeeze fresh lemon juice over the stir-fried chicken before serving for a bright, zesty finish.
-
Added Veggies: Consider adding bell peppers, snap peas, or carrots to the mix for more vibrant color and flavor.
-
Teriyaki Twist: Swap out the soy sauce for teriyaki sauce for a sweeter, caramelized flavor that will awaken your taste buds.
-
Tofu Alternative: For a vegetarian option, replace the chicken with cubed firm tofu. Just make sure to press it to remove excess moisture for better texture.
Chef’s Notes
Every recipe carries its own story, and this one is no different. Over time, I’ve adapted it based on what’s seasonal, what ingredients I have on hand, and, of course, what my family enjoys most. There was one occasion I was rummaging through my pantry and decided to add a splash of orange juice to the sauce. Let me tell you, that little addition took this dish to a whole new level—who knew a burst of citrus could harmonize so beautifully with soy sauce?
Cooking should always be an adventure! Don’t be afraid to play around with flavors and ingredients. You’ll discover your signature twist on this recipe before you know it!
FAQs and Troubleshooting
Q: Can I make this dish ahead of time?
A: Absolutely! You can prepare it a day in advance and store it in the refrigerator. Just reheat gently on the stove. While leftovers are fun, remember that the broccoli might lose its vibrant crunch!
Q: My sauce is too thin. What did I do wrong?
A: If your sauce didn’t thicken up, ensure your cornstarch fully dissolved in the liquid before adding it to the pan. Remember, a vigorous stir can help activate that thickening agent!
Q: How do I store leftovers?
A: Place any leftovers in an airtight container and refrigerate for up to three days. Reheat on the stovetop and add a splash of water to keep it saucy!
Q: Can I freeze this dish?
A: While you can freeze chicken and broccoli stir-fry, it’s best to do so before cooking. For cooked versions, the texture might change, particularly with the broccoli. So, enjoy it fresh whenever possible!
Nutritional Info
(Approximate values per serving, assuming 4 servings):
- Calories: 380
- Protein: 30g
- Carbohydrates: 30g
- Fat: 15g
- Fiber: 5g
And voila! There you have it—my cozy take on Chinese Chicken and Broccoli. I hope this recipe inspires you to gather your loved ones around the table and share a meal filled with laughter and love. Happy cooking, friends, and don’t forget to savor each delicious bite! 🍽️
Print
Chinese Chicken and Broccoli
- Total Time: 35 minutes
- Yield: 4 servings 1x
- Diet: Gluten-Free
Description
A classic stir-fry dish featuring tender chicken, vibrant broccoli, and a mouthwatering soy sauce blend, reminiscent of family gatherings.
Ingredients
- 1 lb Chicken Breast, cut into bite-sized pieces
- 3 cups Broccoli, cut into florets
- ½ cup Soy Sauce
- 3 cloves Garlic, minced
- 1 tablespoon Ginger, minced
- 2 tablespoons Cornstarch
- ½ cup Chicken Broth
- 1 tablespoon Sesame Oil
- Green Onions, for garnish
Instructions
- Prepare your chicken by cutting it into bite-sized pieces.
- Marinate the chicken in a mixture of soy sauce and minced ginger for at least 20 minutes.
- Cut your broccoli into florets and prepare the stems for extra texture.
- Heat sesame oil in a wok or large skillet over medium-high heat.
- Cook the marinated chicken pieces until golden brown, about 5-7 minutes.
- Add broccoli and chicken broth to the pan, cover, and steam for about 3 minutes.
- Mix soy sauce, garlic, ginger, cornstarch, and chicken broth to prepare the sauce.
- Combine everything in the pan and cook for another 2-3 minutes until the sauce thickens.
- Serve hot, garnished with sliced green onions.
Notes
Serve over fluffy jasmine rice or alongside steamed rice noodles for a complete meal.
- Prep Time: 20 minutes
- Cook Time: 15 minutes
- Category: Main Course
- Method: Stir-Frying
- Cuisine: Chinese
Nutrition
- Serving Size: 1 serving
- Calories: 380
- Sugar: 5g
- Sodium: 900mg
- Fat: 15g
- Saturated Fat: 2g
- Unsaturated Fat: 10g
- Trans Fat: 0g
- Carbohydrates: 30g
- Fiber: 5g
- Protein: 30g
- Cholesterol: 90mg
Keywords: Chinese food, chicken stir-fry, broccoli recipe, comfort food, easy dinner


