
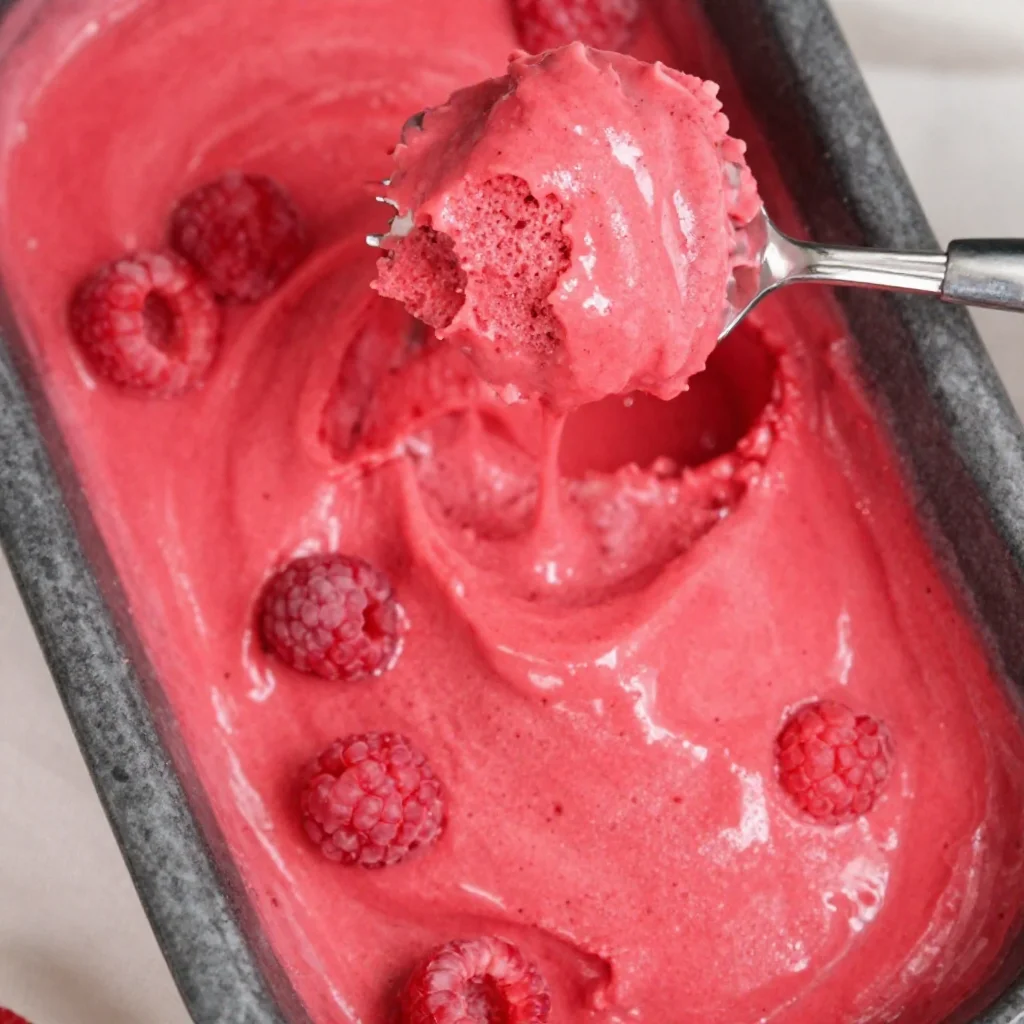
Paleo 5 Minute Raspberry Sorbet
Five-Minute Paleo Raspberry Sorbet: A Sweet, Guilt-Free Indulgence
Welcome to my kitchen! I’m thrilled you’re here because today, we’re diving into a treat that embodies the joy of summer and the simplicity of wholesome ingredients — Paleo 5-Minute Raspberry Sorbet. If you’re like me and find pure bliss in the vibrant taste of fresh berries, then you’re in for a delightful experience. Whether it’s a hot afternoon, a family celebration, or simply a moment when you crave something sweet but still wholesome, this sorbet is your go-to!
The beauty of this recipe is not just in its flavor, but also in its quick prep time. Five minutes, folks! Yes, you heard that right. No ice cream churners, no lengthy freezing times — just fresh, frozen raspberries whipped into a smooth, creamy dessert. Have you got your blender ready? Great! Let’s beat the heat and whip up some bliss in no time.
Making this sorbet takes me back to those lazy summer days when my mom would load us up in the car, and we’d head to the local berry farm. The smell of sun-ripened raspberries filled the air, and the world felt like a canvas of bright colors and laughter. Picking those berries and indulging in their sweetness was a family tradition, and this sorbet, with its vibrant hue and refreshing taste, beautifully captures that nostalgia.
Ingredients
Gather these simple ingredients to make your delicious Raphael raspberry sorbet:
-
Frozen Raspberries: The star of the show! They give the sorbet its vibrant color and tart flavor. You can substitute with any other berry like strawberries or blueberries if you’re in the mood for something different.
-
Banana: A natural sweetener and creaminess booster! Using a ripe banana lends a nice sweetness to the sorbet without the need for added sugars. If you’re not a banana fan, try using a ripe avocado for a creamy texture!
-
Coconut Milk: This adds wonderful richness and creaminess to our sorbet while keeping it dairy-free. For a lighter option, you can use almond milk, though it will alter the texture slightly.
-
Honey or Maple Syrup: Just a touch to balance the tartness of the raspberries. If you’re strictly Paleo, use raw honey; if you prefer vegan options, maple syrup works beautifully.
-
Lemon Juice: A dash of freshness and zing! It enhances the raspberry flavor. You can also use lime juice if you want a little twist.
These ingredients make this sorbet not just delicious but also guilt-free. They all align with the clean, wholesome principles of the Paleo diet, meaning you can indulge without any regret!
Step-by-Step Instructions
Ready to make some sorbet magic? Let’s roll up our sleeves and get started!
-
Prep Your Ingredients: First things first, pull out your frozen raspberries and let them thaw for about 5–10 minutes. This will make blending them much easier. No one wants to battle with a stubborn blender!
-
Blend the Base: In your blender, combine the thawed raspberries, banana, coconut milk, honey or maple syrup, and lemon juice. Keep in mind, the order can matter for how well your blender mixes. Start with the coconut milk — it helps create a smooth base.
-
Pulse Away: Blend on high until smooth and creamy. You may need to scrape down the sides of the blender a couple of times to make sure everything gets incorporated. This will take about 30-45 seconds, making sure you keep an eye on the texture.
-
Taste Test Time!: Scoop a bit out with a spoon and taste it. Adjust the sweetness or acidity by adding a bit more honey or lemon juice as necessary. Remember, this is your sorbet, so make it just how you like it!
-
Freeze to Firm: Once you’re thrilled with the flavor, transfer the mixture into an airtight container and pop it in the freezer for about 1–2 hours to firm up. But don’t worry if it’s still a bit soft — you can dig in as-is!
-
Scoop and Serve: When it’s ready, scoop it into bowls or dessert cups. A sprinkle of fresh mint or a few whole raspberries makes for a beautiful presentation. The vibrant color is sure to impress your guests!
Serving Suggestions
To make your Raspberry Sorbet a showstopper, consider serving it in a chilled glass or alongside a slice of gluten-free cake. You can also serve it over a bed of granola for a delightful textural contrast or place it in fresh, halved coconut shells for that tropical vibe. A sprig of mint or a dusting of shredded coconut elevates that wow factor!
Recipe Variations
Here are some fun variations to keep your sorbet adventures fresh:
-
Mixed Berry Sorbet: Use a combination of frozen raspberries, blueberries, and strawberries for a colorful blend.
-
Chocolate Drizzle: Once scooped, drizzle some melted dark chocolate on top to turn your sorbet into a decadent dessert.
-
Herbal Infusion: Add a couple of fresh basil leaves or a sprig of rosemary while blending for an intriguing herbal note.
-
Nutty Twist: Top with chopped nuts for a crunchy finish. Almonds or pistachios work wonderfully!
-
Citrus Blast: Swap the lemon juice for your favorite citrus to add a zesty twist—think orange or lime!
Chef’s Notes
I have to tell you a little secret: there’s no wrong way to make this sorbet! Over the years, I’ve experimented with various sweeteners, types of berries, and even added spices like cinnamon or vanilla extract for extra depth. This recipe has evolved into a staple in my home, especially during those warm months when the garden blossoms with berries. It never fails to bring smiles to anyone who tries it!
Remember, the best part about creating in the kitchen is the freedom to play with flavors. I’m always drawn back to the fond memories of my mom and those berry-picking adventures that inspire my cooking. Sometimes, you just need a simple recipe to bring back those feelings of warmth, joy, and togetherness.
FAQs and Troubleshooting
-
What if my sorbet is too hard?
If it’s frozen too hard, let it sit out for a few minutes before scooping. A quick pulse in the blender can also restore that creamy texture. -
Can I use fresh raspberries instead of frozen?
Absolutely! Just freeze them for a few hours before making sorbet. Fresh berries will add a vibrant flavor, especially if they’re in season. -
How long can I store my sorbet?
Your raspberry sorbet can last up to 2 weeks in the freezer. Just ensure it’s in an airtight container to avoid freezer burn. -
It didn’t blend smoothly; what went wrong?
This can happen if your raspberries were too frozen. Thaw them slightly beforehand. Also, don’t hesitate to add a little more coconut milk to help blend everything together!
Nutritional Info
While personal dietary needs vary, this Paleo Raspberry Sorbet is naturally low in calories and sugar compared to store-bought options. It’s packed with antioxidants from the raspberries and healthy fats from coconut milk, making it not just delicious but nutritious too!
In conclusion, the next time you crave something sweet, whip up this easy — and oh-so-satisfying — Paleo 5-Minute Raspberry Sorbet. You’ll not only quench your sweet tooth but also create memories reminiscent of summers filled with laughter, sunshine, and, of course, berries! Happy cooking, my fellow foodies!
Print
Five-Minute Paleo Raspberry Sorbet
- Total Time: 120 minutes
- Yield: 4 servings 1x
- Diet: Paleo
Description
A quick and refreshing Paleo-friendly raspberry sorbet that’s perfect for summer cravings.
Ingredients
- 2 cups frozen raspberries
- 1 ripe banana
- 1 cup coconut milk
- 2 tablespoons honey or maple syrup
- 1 tablespoon lemon juice
Instructions
- Prep your ingredients: Pull out your frozen raspberries and let them thaw for about 5–10 minutes.
- Blend the base: In your blender, combine the thawed raspberries, banana, coconut milk, honey or maple syrup, and lemon juice.
- Pulse away: Blend on high until smooth and creamy, scraping down the sides as needed.
- Taste test time!: Scoop a bit out with a spoon and adjust the sweetness or acidity as necessary.
- Freeze to firm: Transfer the mixture into an airtight container and pop it in the freezer for about 1–2 hours.
- Scoop and serve: When ready, scoop into bowls and garnish with fresh mint or raspberries.
Notes
Experiment with different berries and sweeteners to find your favorite variation of this sorbet.
- Prep Time: 5 minutes
- Cook Time: 0 minutes
- Category: Dessert
- Method: Blending
- Cuisine: Paleo
Nutrition
- Serving Size: 1 serving
- Calories: 150
- Sugar: 10g
- Sodium: 10mg
- Fat: 6g
- Saturated Fat: 5g
- Unsaturated Fat: 1g
- Trans Fat: 0g
- Carbohydrates: 22g
- Fiber: 4g
- Protein: 2g
- Cholesterol: 0mg
Keywords: raspberry sorbet, paleo dessert, quick dessert, healthy dessert, summer treat
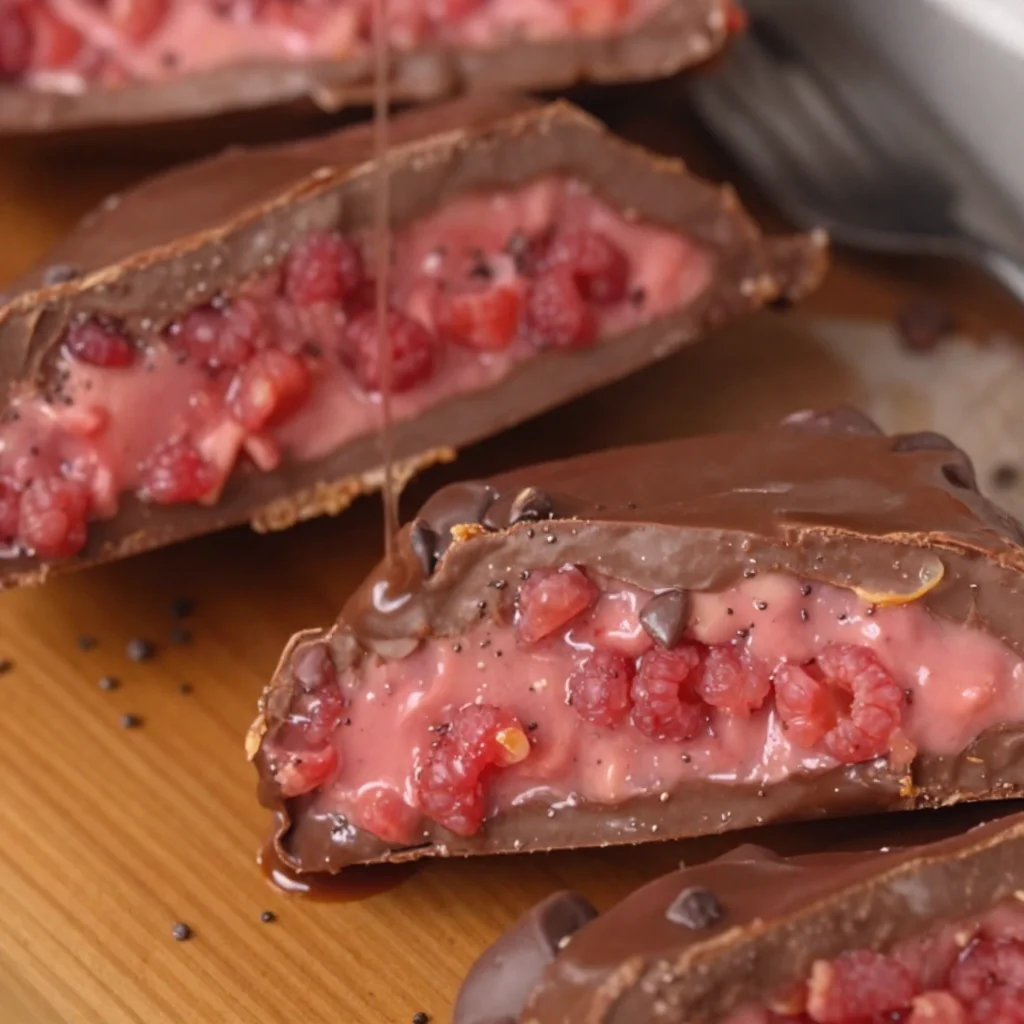
Ingredient No-Bake Chocolate Jam Bites (Busy Weeknights)
Decadent Chocolate Jam Bites Recipe: A Sweet Adventure Awaits!
Welcome to my kitchen, fellow food lovers! Today, we are diving into the rich, indulgent world of chocolate with a treat that will send your taste buds on a delightful journey – my Chocolate Jam Bites. These little gems not only pack a flavorful punch but also bring back so many heartwarming memories of my childhood. Imagine biting into a soft, chocolatey shell to discover a gooey, fruity center. It’s the perfect balance of sweetness and tanginess, sure to satisfy even the most discerning dessert connoisseur.
The Sweet Backstory: A Journey Down Memory Lane
One of my fondest memories revolves around my grandmother’s kitchen. Every Sunday, the warmth of her oven enveloped the house, and the rich aroma of melted chocolate filled the air. She had this magical ability to turn simple ingredients into creations that brought the whole family together. One afternoon, I remember watching her as she delicately folded chocolate into a batter. “A touch of jam, my dear,” she said, her eyes twinkling like the chocolate chips scattered on her counter. She showed me how a little fruity surprise could elevate chocolate desserts into something ethereal.
As I immersed myself in her world of cooking, I learned that food is so much more than just sustenance; it’s a way to weave memories, share stories, and bring joy to others. It’s this spirit that inspired me to recreate those nostalgic Chocolate Jam Bites. With each bite, I hope to inspire friends and family to gather, share stories, and create their own cherished memories around the table. So, let’s don our aprons and embark on this delightful culinary adventure!
Ingredients You’ll Need
To make these scrumptious Chocolate Jam Bites, gather the following ingredients:
-
1 cup all-purpose flour
This creates the structure of your bites. If you’re looking for gluten-free options, you can substitute with almond flour or a gluten-free flour blend. -
1/2 cup unsweetened cocoa powder
Quality cocoa powder enhances the chocolate flavor; I prefer Dutch-processed for its rich taste. If you don’t have cocoa powder, you can use carob powder as a substitute, though the flavor will differ slightly. -
1/2 teaspoon baking powder
This is your leavening agent, helping the bites rise and become light. If you’re out of baking powder, you can create a substitute by combining 1/4 teaspoon baking soda with 1/2 teaspoon vinegar. -
1/4 teaspoon salt
Don’t skip this! Salt enhances the sweetness. Use sea salt for a touch of gourmet flair. -
1/2 cup granulated sugar
For that perfect sweetness. You can use coconut sugar for a lower-glycemic option. -
1/2 cup unsalted butter, melted
Butter brings a rich, creamy flavor. If you’re dairy-free, coconut oil is a great alternative. -
2 large eggs
These add moisture and help bind the ingredients together. For a vegan option, try flax eggs (1 tablespoon ground flaxseed + 2.5 tablespoons water = 1 egg). -
1 teaspoon vanilla extract
Vanilla enhances the overall flavor profile. For a twist, try almond extract instead! -
1/2 cup fruit jam
Choose your favorite! Raspberry, strawberry, or apricot add fantastic fruity flavors to contrast the chocolate.
Step-by-Step Instructions
Now that we have everything ready, let’s get cooking! Here’s how to create these delectable Chocolate Jam Bites, step by step:
-
Preheat the Oven
Preheat your oven to 350°F (175°C). As the oven warms up, it’s the perfect time to prepare your baking pan and ingredients. Trust me, having everything prepped makes the cooking process seamless! -
Grease the Baking Pan
Lightly grease a mini muffin tin with butter or line them with paper liners. This will prevent our delightful bites from sticking. Plus, it makes cleanup a breeze! -
Mix the Dry Ingredients
In a large mixing bowl, combine the flour, cocoa powder, baking powder, and salt. Whisk them together until well-blended. I love using a whisk for this – it’s satisfying to see the dry ingredients come together, creating a lovely cocoa cloud. -
Combine Sweet Ingredients
In another mixing bowl, whisk together the melted butter, granulated sugar, eggs, and vanilla extract until smooth. The velvety mixture is where the magic begins! If you see some bubbles forming, that means the eggs are contributing to a light and airy texture. -
Incorporate Dry to Wet
Gradually add the dry ingredients into the wet mixture, stirring until just combined. Avoid overmixing; we want these bites to stay tender, not tough! -
Fill the Muffin Tin
Spoon a heaping tablespoon of the batter into each muffin cup, filling them about halfway. Here’s a chef hack: you can use a cookie scoop for neat and even portions! -
Add Jam
Use a teaspoon to drop a small dollop of jam directly into the center of each batter-filled cup. The jam will sink into the chocolate as it bakes, creating a delightful surprise! -
Top with Remaining Batter
Add another tablespoon of the batter on top of the jam, covering it completely. This creates a delicious chocolate shell around your fruity filling. -
Bake
Bake for 12-15 minutes, or until a toothpick inserted into the center comes out clean. Keep an eye on them – you want to avoid overbaking, as they should remain moist and fudgy! -
Cool and Enjoy!
Once out of the oven, let your Chocolate Jam Bites cool for a few minutes before transferring them to a wire rack. I’m telling you, the smell wafting through your kitchen is the ultimate reward for your efforts!
Serving Suggestions
Presentation is everything, my friends! To serve these delectable bites, arrange them on a beautiful platter or cake stand. Dust a light sprinkle of powdered sugar over the top for an extra touch of elegance. Pair them with a scoop of vanilla ice cream for the perfect contrast to the rich chocolate or serve with a dollop of whipped cream and fresh berries for a summery vibe. Your dessert table will look irresistible!
Recipe Variations
-
Nutty Delight: Add chopped nuts (like walnuts or hazelnuts) to the batter for added crunch and flavor.
-
Peppermint Chocolate: Stir in a few drops of peppermint extract to the batter for festive holiday vibes.
-
Spicy Chocolate: Mix in a pinch of cayenne pepper or cinnamon for a warm, spicy twist to your chocolate bites.
-
Double Berry: Layer two types of jams, like raspberry and blueberry, for a mixed jam filling surprise.
-
Coconut Chocolate Bites: Toss in shredded coconut to the batter for a tropical flair!
Chef’s Notes
Oh, the times I’ve spent perfecting this recipe! I’ve had my fair share of kitchen adventures, including a recipe that turned into a chocolate tsunami – let’s just say it didn’t end with the desired outcome! Each mistake has taught me something, and now, these Chocolate Jam Bites are a well-loved staple in my home. They’ve evolved from a simple weekend treat into the star of every gathering, reminding us that the best recipes come from the heart and a sprinkle of good humor.
FAQs and Troubleshooting
1. Why did my chocolate bites sink?
This could happen if the batter is too thin or if you didn’t fill the cups enough. Make sure your batter is thick and give each cup sufficient batter to rise and envelop the jam.
2. Can I use frozen jam?
Absolutely! Just thaw it and drain any excess liquid before use, ensuring it won’t affect the batter consistency.
3. How do I know when they’re done baking?
The tops should look firm and slightly springy. A toothpick inserted in the center should come out clean, but a few crumbs are okay!
4. My bites are too dense; what went wrong?
Overmixing can cause a denser texture. Mix until just combined, and ensure your leavening agents (like baking powder) are fresh.
Nutritional Info
While I always focus on enjoying food, if you need nutritional information for these bites, one serving (1 bite) typically has about 150 calories, depending on ingredients like the type of jam used. Remember, enjoying in moderation is key!
Now, you’re ready to create your own Chocolate Jam Bites – a sweet delight that is sure to thrill your taste buds and warm your heart. I can’t wait for you to try them and make your own beautiful memories! Happy baking!
Print
Decadent Chocolate Jam Bites
- Total Time: 30 minutes
- Yield: 12 servings 1x
- Diet: Vegetarian
Description
Indulge in these rich and gooey Chocolate Jam Bites, a delightful treat that balances chocolate with fruity centers.
Ingredients
- 1 cup all-purpose flour
- 1/2 cup unsweetened cocoa powder
- 1/2 teaspoon baking powder
- 1/4 teaspoon salt
- 1/2 cup granulated sugar
- 1/2 cup unsalted butter, melted
- 2 large eggs
- 1 teaspoon vanilla extract
- 1/2 cup fruit jam (e.g., raspberry, strawberry, apricot)
Instructions
- Preheat your oven to 350°F (175°C).
- Grease a mini muffin tin with butter or line with paper liners.
- Mix the flour, cocoa powder, baking powder, and salt in a large bowl.
- Combine melted butter, granulated sugar, eggs, and vanilla in another bowl.
- Incorporate the dry ingredients with the wet mixture until just combined.
- Fill each muffin cup halfway with batter.
- Add a dollop of jam in the center of each cup.
- Top with more batter to cover the jam.
- Bake for 12-15 minutes until a toothpick comes out clean.
- Cool for a few minutes before transferring to a wire rack.
Notes
For gluten-free options, substitute all-purpose flour with almond flour. You can also experiment with different fruit jams!
- Prep Time: 15 minutes
- Cook Time: 15 minutes
- Category: Dessert
- Method: Baking
- Cuisine: Global
Nutrition
- Serving Size: 1 bite
- Calories: 150
- Sugar: 10g
- Sodium: 100mg
- Fat: 8g
- Saturated Fat: 5g
- Unsaturated Fat: 3g
- Trans Fat: 0g
- Carbohydrates: 18g
- Fiber: 2g
- Protein: 2g
- Cholesterol: 30mg
Keywords: chocolate, dessert, jam, sweet treats, baking
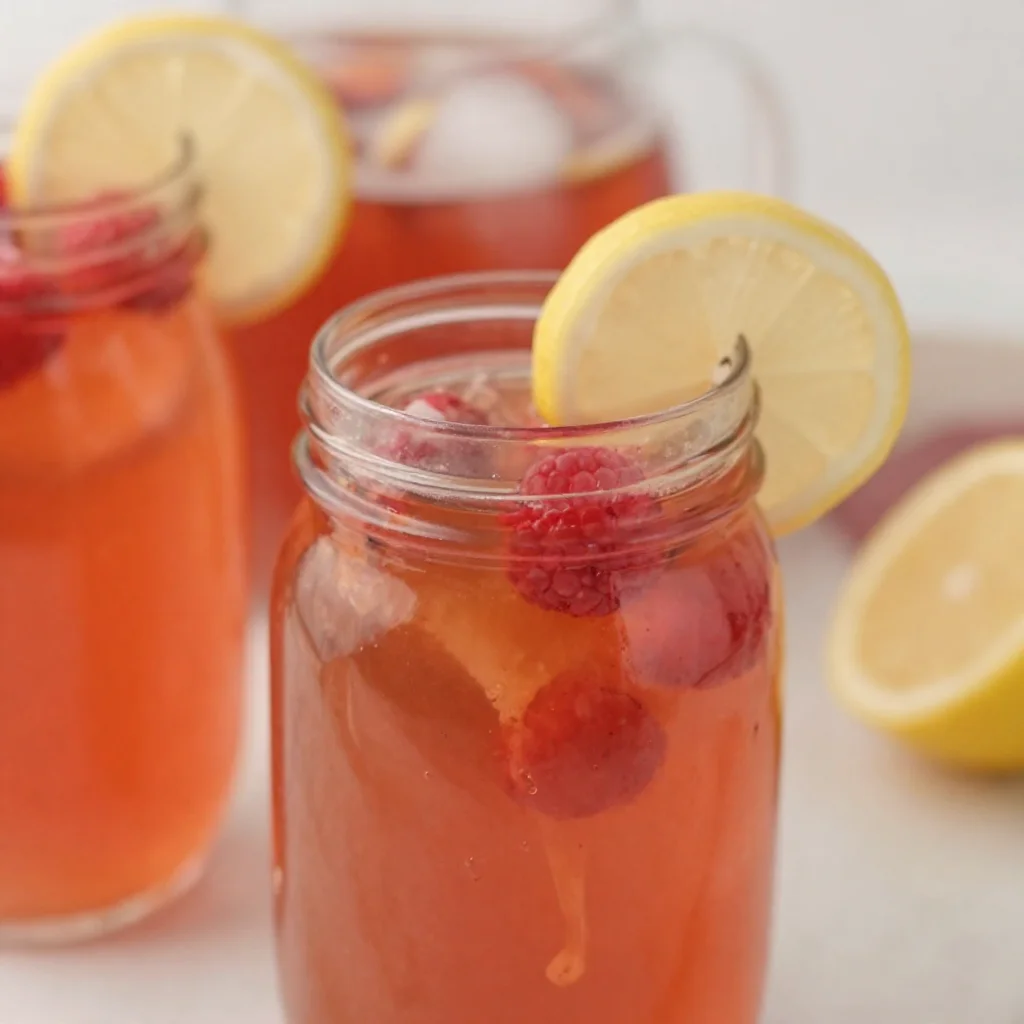
Minute Raspberry Iced Tea for Summer Refreshment
Refreshing Raspberry Iced Tea: A Summer Delight
Welcome to my kitchen! Today, we’re diving into the vibrant world of Raspberry Iced Tea—a refreshing drink that captures the essence of summer in every sip. Imagine yourself lounging in the sun, a gentle breeze fanning your skin, and this lovely, fruity concoction in your hand. Whether you’re hosting a weekend brunch, enjoying a lazy afternoon, or gearing up for a cookout with friends, this iced tea promises to bring joy and refreshment.
You may be wondering why I’m so passionate about Raspberry Iced Tea. Well, it’s not just about the delightful taste; it’s about the memories and the connection it fosters. I remember the first time I sipped this sweet elixir at a summer picnic with my family. My mom used to brew her iced tea on the stove, and we would pop fresh raspberries in just before serving. It was a simple ritual, but it created an atmosphere of warmth, laughter, and love. Those little moments around the table—sharing stories and enjoying homemade treats—are what truly make the experience special.
So let’s get started! This recipe is not only delicious but also easy and fun to make. You don’t need to be a professional chef or have a ton of time on your hands; you just need a little enthusiasm and a few basic ingredients. Ready to create some delicious memories? Let’s jump into the details!
Ingredients
- Black Tea Bags (4-5): Use your favorite brand for this base. If you don’t like black tea, green tea works beautifully too. Adjust the quantity depending on how strong you like your tea!
- Fresh Raspberries (1 cup): Nothing beats fresh raspberries for flavor. If they’re out of season, frozen raspberries will do just fine—just make sure to thaw them before adding.
- Water (4 cups): Filtered water is always the best choice for clarity and taste. You can also experiment by using sparkling water for a fizzy twist!
- Sugar (or Honey) (½ cup): This sweetener balances the tartness of the raspberries. Feel free to adjust it to your liking, or use a sugar substitute for a healthier option.
- Lemon Juice (2 tablespoons): Fresh lemon juice enhances the flavor profile. If you’re in a pinch, bottled lemon juice can work, but fresh is always best.
- Mint Leaves (for garnish): These add an aromatic touch to your drink. You can also muddle a few leaves in the pitcher for an extra minty kick.
Step-by-Step Instructions
-
Prepare the Tea:
- In a saucepan, bring 4 cups of water to a boil. Once boiling, remove it from the heat and add in your black tea bags. Let them steep for about 5-7 minutes, depending on how strong you like your tea.
- Chef’s Tip: If you’re using green tea, steep it for only 3-5 minutes to avoid bitterness.
-
Sweeten the Tea:
- After steeping, remove the tea bags and add your sugar (or honey). Stir until completely dissolved. If you prefer less sweetness, start with half the amount and adjust according to taste.
- Hearty Note: Remember, you can always add more sugar later, but it’s tricky to take it out once it’s in!
-
Incorporate the Raspberries:
- While the tea is still warm, add in the fresh raspberries. For an extra boost of flavor, lightly muddle them with a spoon to release their juices.
- Chef Hack: If you want a brighter red color, blend the raspberries and strain them before adding to the tea.
-
Cool It Down:
- Transfer the tea mixture to a pitcher and refrigerate it until chilled—about 1-2 hours should do the trick. Don’t rush this step; the chilling enhances the flavors.
- Insight: You can also pour the warm tea over ice if you’re in a hurry, though it may dilute the flavors a bit!
-
Add Lemon Juice:
- Once chilled, stir in the fresh lemon juice. Taste and adjust—if you fancy a more fruity note, add more raspberries!
- Flavor Bomb: Feel free to add a pinch of lemon zest for an extra punch of citrusy aroma.
-
Serve:
- Pour the Raspberry Iced Tea over ice and garnish with mint leaves. For an added touch, drop in a few whole raspberries.
- Cheers! Enjoy your refreshing creation!
Serving Suggestions
When it comes to serving your Raspberry Iced Tea, presentation matters! Use clear glassware to showcase the beautiful ruby color of your drink. You can even rim the glasses with sugar for a fun twist or add lemon slices for a pop of color. Pair it with your favorite summer snacks like grilled chicken, fresh fruit platters, or a light salad to create a lovely afternoon gathering.
Recipe Variations
- Herbal Twist: Replace black tea with herbal tea for a caffeine-free version. Mint or chamomile would pair beautifully with raspberries.
- Berry Medley: Mix in a variety of berries, like strawberries or blueberries, for a splash of different flavors.
- Peachy Iced Tea: Swap raspberries for fresh peaches—talk about a summer dream!
- Sparkling Raspberry Iced Tea: Add tonic or soda water instead of plain water for a refreshing fizz.
- Sweetened with Agave: Use agave syrup instead of sugar for a different sweetness that complements the raspberries nicely.
Chef’s Notes
Raspberry Iced Tea has come a long way since my mom’s simple version. Over the years, I’ve experimented with various flavors and garnishes, and I love how versatile it can be. In fact, I once threw a little summer bash and set up a DIY iced tea bar where guests could mix and match different flavors—such a hit! The memories created around that table still warm my heart, much like this iced tea does on a hot day.
FAQs and Troubleshooting
1. What if my tea is too sweet?
If you accidentally added too much sugar, dilute it with more water or tea. Adding more raspberries can also help balance the sweetness!
2. How can I make this recipe ahead of time?
You can make Raspberry Iced Tea a day in advance and store it in the refrigerator. It tastes even better the next day as the flavors meld together.
3. What can I do with leftover tea?
Leftover tea can be frozen into ice cubes to use in future drinks or smoothies. You can also turn it into a flavorful marinade for meats!
4. How do I get rid of bitterness?
If your tea becomes bitter, avoid steeping too long or using overly hot water. Adding a splash of lemon juice can also help cut the bitterness.
Nutritional Info
While specific nutritional information can vary, this Raspberry Iced Tea recipe is generally low in calories if you use less sugar. Each serving (8 oz) should be around 50-100 calories, depending on your sweetener choices. Plus, it’s rich in antioxidants from the tea and raspberries!
So there you have it! A delightful, refreshing Raspberry Iced Tea recipe that’s bound to become a staple in your summer beverage rotation. Don’t forget to share your creations with friends and family; after all, the best memories are made over good food and drinks. Happy sipping, everyone!
Print
Refreshing Raspberry Iced Tea
- Total Time: 120 minutes
- Yield: 4 servings
- Diet: Vegetarian
Description
A delightful, fruity Raspberry Iced Tea perfect for summer gatherings, rich in flavor and memories.
Ingredients
- Black Tea Bags (4-5)
- Fresh Raspberries (1 cup)
- Water (4 cups)
- Sugar (or Honey) (½ cup)
- Lemon Juice (2 tablespoons)
- Mint Leaves (for garnish)
Instructions
- Prepare the Tea: In a saucepan, bring 4 cups of water to a boil. Once boiling, remove it from the heat and add in your black tea bags. Let them steep for about 5-7 minutes.
- Sweeten the Tea: After steeping, remove the tea bags and add your sugar (or honey). Stir until completely dissolved.
- Incorporate the Raspberries: While the tea is still warm, add in the fresh raspberries. Lightly muddle them with a spoon to release their juices.
- Cool It Down: Transfer the tea mixture to a pitcher and refrigerate it until chilled—about 60-120 minutes.
- Add Lemon Juice: Once chilled, stir in the fresh lemon juice. Taste and adjust.
- Serve: Pour the Raspberry Iced Tea over ice and garnish with mint leaves and a few whole raspberries. Cheers!
Notes
For added flair, rim glasses with sugar or add lemon slices. Serve with summer snacks like grilled chicken or fruit platters.
- Prep Time: 15 minutes
- Cook Time: 10 minutes
- Category: Beverage
- Method: Brewing
- Cuisine: American
Nutrition
- Serving Size: 1 cup
- Calories: 75
- Sugar: 12g
- Sodium: 10mg
- Fat: 0g
- Saturated Fat: 0g
- Unsaturated Fat: 0g
- Trans Fat: 0g
- Carbohydrates: 19g
- Fiber: 1g
- Protein: 0g
- Cholesterol: 0mg
Keywords: Raspberry Iced Tea, Summer Beverage, Refreshing Drink
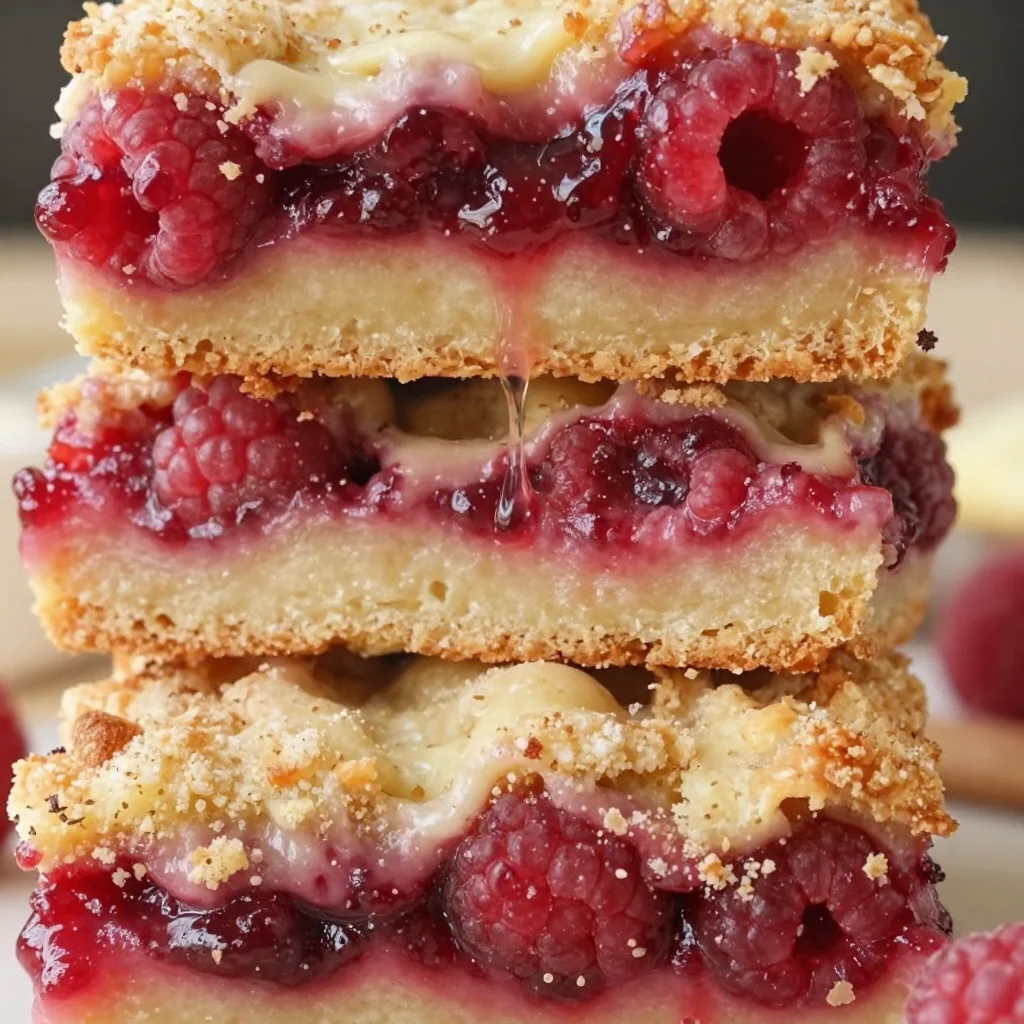
Minute Raspberry Crumb Bars: Easy Weeknight Treats
Raspberry Crumb Bars: A Delicious Slice of Nostalgia
Welcome to my kitchen, dear food lovers! I’m Olivia Bennett, and today we’re diving into the delightful world of Raspberry Crumb Bars. If you’re like me, the mere thought of fresh raspberries nestled in a buttery crumb crust makes your heart flutter. There’s something magical about those sweet-tart little jewels, and when they’re combined with crumbly goodness, you know you’re in for a treat.
Picture this: it’s a sunny afternoon in late summer, the sun filtering through the trees, and the air is sweetened with the scent of ripening berries. As a child, one of my favorite activities was picking raspberries with my grandma in her sprawling garden. She would hand me a small basket, and I’d scamper off, the thrill of the hunt bringing an extra spark to our little adventure. But here’s the kicker: for every handful I picked, I’d sneak a couple into my mouth! Who could resist those deliciously plump berries?
Once we returned home, we’d whip up her famous raspberry crumb bars, the kitchen filled with laughter and the warm aroma of baking. Those bars were the ultimate crowd-pleaser. They were always a perfect balance of crispy and chewy, sweet and tart. They bridged generations, sparking stories and bonding over bites. Now, every time I make them, I’m transported back to that sun-soaked garden, sharing laughter and love with my grandma.
So, whether you’re searching for a cozy dessert to share with friends, a scrumptious snack for yourself, or a nostalgic treat that brings back memories, these Raspberry Crumb Bars are perfect for every occasion. Let’s gather our ingredients, roll up our sleeves, and get baking!
Ingredients
Now, let’s gather our star players for this yummy adventure! Here’s what you’ll need to whip up these delightful Raspberry Crumb Bars:
-
Fresh Raspberries (2 cups)
- The jewel of the recipe! Fresh raspberries give a vibrant, tangy flavor. If you’re not a fan of raspberries, feel free to swap with blueberries, strawberries, or even peaches.
-
All-Purpose Flour (1 ½ cups)
- This is the base for both the crumb crust and topping. If you’re looking for a gluten-free alternative, try using a 1:1 gluten-free baking flour.
-
Granulated Sugar (¾ cup)
- A touch of sweetness! You can use coconut sugar or even honey if you’re aiming for a lower glycemic index.
-
Brown Sugar (¼ cup)
- Adds depth and moisture to your crumb topping. If you’re out, you can substitute with white sugar, but you’ll miss that lovely Carol’s caramel-like flavor.
-
Unsalted Butter (1 cup)
- I love using unsalted butter to control the salt level. Make sure it’s at room temperature for easy mixing. If you’re vegan or dairy-free, you can use coconut oil or a vegan butter alternative.
-
Eggs (1 large)
- Eggs help bind everything together, giving the bars their rich texture. You can replace it with a flax egg (1 tablespoon ground flaxseed + 2.5 tablespoons water), which works surprisingly well!
-
Baking Powder (½ teaspoon)
- This little magic ingredient gives your bars the perfect rise.
-
Salt (½ teaspoon)
- A pinch of salt enhances the sweetness. If you’re using salted butter, feel free to leave this out!
With these simple ingredients, you’ll create a little slice of heaven that’s beautiful, bright, and bursting with flavor. Now, let’s get those aprons on, and I’ll guide you step-by-step through the process!
Step-by-Step Instructions
-
Preheat the Oven
- Start by preheating your oven to 350°F (175°C). This ensures that our bars bake evenly and perfectly crispy right from the get-go.
-
Prepare Your Baking Dish
- Grease a 9×9-inch baking pan with butter or line it with parchment paper for easy removal. I’m a huge fan of parchment; it makes cleaning up a breeze!
-
Make the Crumb Mixture
- In a large mixing bowl, combine 1 ½ cups of flour, ¾ cup of granulated sugar, ¼ cup of brown sugar, ½ teaspoon of baking powder, and ½ teaspoon of salt. Mix well until combined. Don’t worry; a wooden spoon is great for this job.
-
Incorporate the Butter
- Add 1 cup of softened unsalted butter to your dry ingredients. Use your fingers or a pastry cutter to blend until the mixture resembles coarse crumbs. For an extra tip, chill your butter before cutting it in to maintain that perfect crumbly texture!
-
Reserve Some Crumbs
- After creating those lovely crumbs, set aside about 1 cup of this mixture for the topping. This is where the magic happens!
-
Mix in the Eggs
- Add 1 large egg to the remaining crumb mixture and mix until everything is combined. The mixture will be moist but still crumbly, which is exactly what we want!
-
Spread the Base
- Press the crumb mixture firmly into the bottom of your prepared baking dish. Use a spatula to ensure it’s an even layer. If you’re feeling a bit rebellious, add a hint of cinnamon or nutmeg for warmth!
-
Layer the Raspberries
- Gently spread those luscious 2 cups of fresh raspberries over the crumb base. Don’t worry if some burst; that’s just releasing more berry goodness!
-
Sprinkle the Topping
- Break apart the reserved crumb mixture and sprinkle it evenly over the raspberries. Trust me, this layer is what makes these bars irresistible!
-
Bake to Perfection
- Place your baking dish in the preheated oven and bake for about 35-40 minutes or until the top is golden brown and the raspberries are bubbling. Your kitchen will smell like heaven during this time!
-
Cool and Slice
- Once baked, remove the dish from the oven and allow it to cool completely. This will help the bars hold together better when sliced. Patience, my friend! Cooling can take about 30 to 45 minutes, but it will be worth it.
-
Cut and Serve
- Once cool, use a sharp knife to slice into squares. You can dust them with powdered sugar for a pretty touch before serving. Happy munching!
Serving Suggestions
Serve your Raspberry Crumb Bars in charming little dessert plates alongside a scoop of vanilla ice cream or a dollop of whipped cream. They’re delightful as is, but pairing them with a cup of coffee or tea makes for an even cozier experience. If you’re feeling a bit fancy, sprinkle some fresh mint leaves on top for that pop of color and a refreshing touch!
Recipe Variations
Don’t be afraid to mix things up a bit! Here are some creative twists to personalize your Raspberry Crumb Bars:
-
Mixed Berry Medley: Swap the raspberries with a combination of blueberries, blackberries, and strawberries for a colorful summer treat.
-
Nutty Crumb: Add ½ cup of chopped walnuts or almonds to the crumb mixture for an extra crunch and flavor.
-
Zesty Twist: Incorporate lemon or orange zest into the crumb base for a citrusy brightness that complements the berries beautifully.
-
Choco-Dream: Fold in mini chocolate chips for a decadent twist—because who can ever say no to chocolate?
-
Vegan Delight: Substitute all ingredients for their vegan counterparts (like flax eggs and coconut oil) for a guilt-free treat that everyone will love!
Chef’s Notes
Remember, every recipe evolves as we grow in our cooking journeys. When I first made these bars with Grandma, they were a bit more rustic and full of happy accidents—like the time I accidentally doubled the raspberries! Instead of a mishap, it turned out to be a delicious mistake that led to these scrumptious, fruity-infused bars we adore today. Not only did I get a baking lesson, but I learned much more about the joy of experimentation in the kitchen.
And dear friends, always keep your spirit light and enjoy the process! Don’t fret if things don’t go perfectly; sometimes those quirks lead to delightful surprises. After all, that’s what cooking is all about!
FAQs and Troubleshooting
-
Q: Why did my bars crumble apart when sliced?
- A: Make sure to let them cool completely before slicing. Patience is key; the bars need to set so they hold their shape.
-
Q: Can I use frozen raspberries?
- A: Absolutely! Just remember to thaw and drain excess moisture before adding to the crust. They may be a bit softer, but they’ll still taste delicious!
-
Q: How can I tell when the bars are done baking?
- A: Look for a golden brown top and bubbling around the edges. If you gently press down in the center, it should feel firm to the touch.
-
Q: Can I make these in advance?
- A: Yes! These bars store wonderfully in an airtight container for up to 4 days at room temperature, or you can freeze them for up to 3 months. Just thaw in the fridge when you’re ready to enjoy!
Nutritional Info
While I’m all about the joy of cooking and sharing, I know some of you like to keep an eye on numbers. Each Raspberry Crumb Bar (based on 16 servings) has approximately:
- Calories: 190
- Protein: 2g
- Fat: 9g
- Carbohydrates: 29g
- Fiber: 1g
- Sugar: 10g
Feel free to adjust the ingredients to fit your nutritional needs!
And there you have it, my dear culinary companions—a foolproof recipe for Raspberry Crumb Bars that will warm your heart and bring joy to your kitchen! I can’t wait to hear about your baking adventures and the twists you come up with. Happy baking, and remember, the kitchen is always better filled with friends, laughter, and delicious treats!
Print
Raspberry Crumb Bars
- Total Time: 55 minutes
- Yield: 16 servings 1x
- Diet: Vegetarian
Description
Delightful Raspberry Crumb Bars featuring fresh raspberries nestled in a buttery crumb crust, perfect for any occasion.
Ingredients
- 2 cups Fresh Raspberries
- 1 ½ cups All-Purpose Flour
- ¾ cup Granulated Sugar
- ¼ cup Brown Sugar
- 1 cup Unsalted Butter, at room temperature
- 1 large Egg
- ½ teaspoon Baking Powder
- ½ teaspoon Salt
Instructions
- Preheat the oven to 350°F (175°C).
- Grease a 9×9-inch baking pan with butter or line it with parchment paper.
- Combine 1 ½ cups of flour, ¾ cup of granulated sugar, ¼ cup of brown sugar, ½ teaspoon of baking powder, and ½ teaspoon of salt in a large mixing bowl.
- Add 1 cup of softened unsalted butter to the dry ingredients and blend until the mixture resembles coarse crumbs.
- Set aside about 1 cup of crumb mixture for the topping.
- Mix in 1 large egg with the remaining crumb mixture until combined.
- Press the crumb mixture firmly into the bottom of your prepared baking dish.
- Spread 2 cups of fresh raspberries over the crumb base.
- Sprinkle the reserved crumb mixture evenly over the raspberries.
- Bake for about 35-40 minutes or until the top is golden brown and raspberries are bubbling.
- Remove from the oven and allow to cool completely before slicing.
- Cut into squares and dust with powdered sugar before serving.
Notes
These bars are great served warm or at room temperature. Pair with ice cream or whipped cream for an extra treat!
- Prep Time: 15 minutes
- Cook Time: 40 minutes
- Category: Dessert
- Method: Baking
- Cuisine: American
Nutrition
- Serving Size: 1 bar
- Calories: 190
- Sugar: 10g
- Sodium: 200mg
- Fat: 9g
- Saturated Fat: 5g
- Unsaturated Fat: 4g
- Trans Fat: 0g
- Carbohydrates: 29g
- Fiber: 1g
- Protein: 2g
- Cholesterol: 30mg
Keywords: Raspberry, Crumb Bars, Dessert, Sweet, Summer Recipe
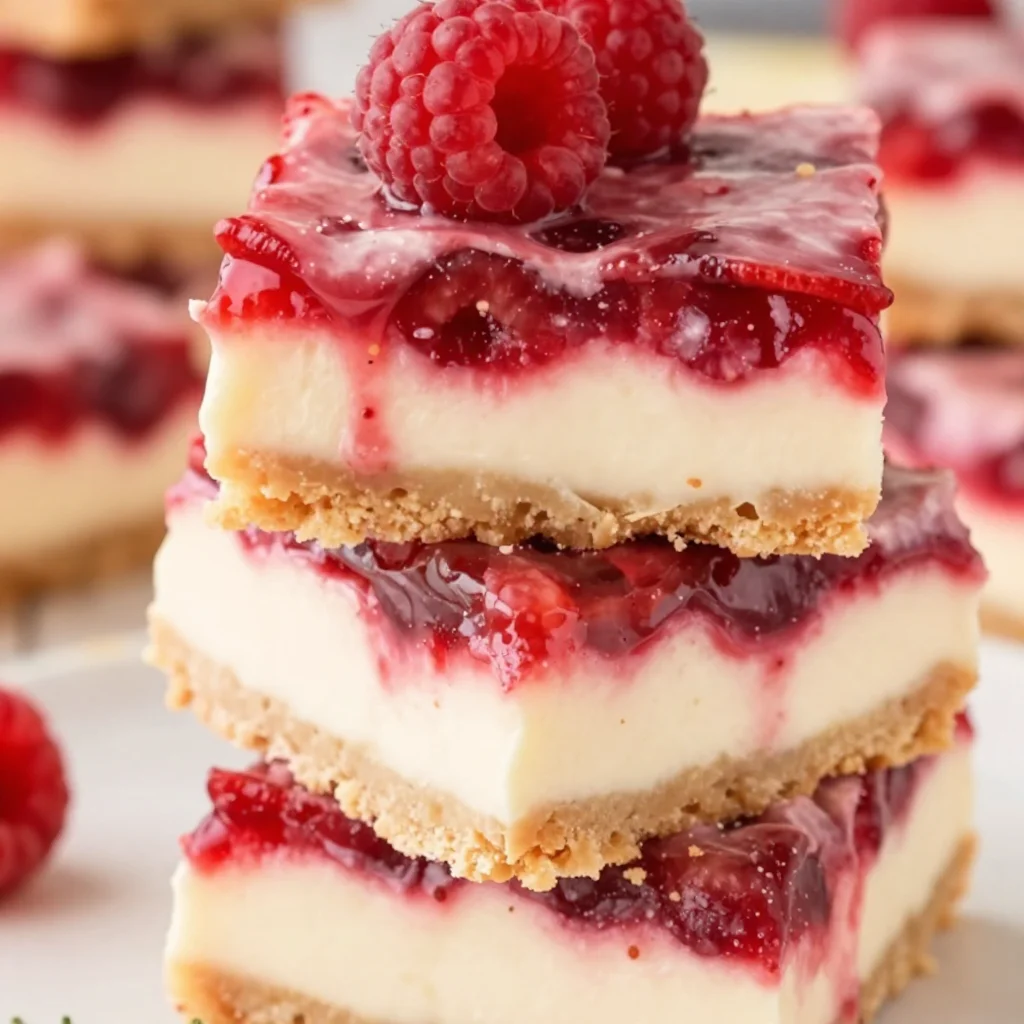
Beginner-Friendly Raspberry Cheesecake Bars: Simple & Creamy
Raspberry Cheesecake Bars: A Sweet Slice of Nostalgia
Welcome, friends! Gather around as we dive into the delightful world of Raspberry Cheesecake Bars. Picture this: you’re in your kitchen, the sun is gently streaming through the window, and the sweet scent of creamy cheesecake mixed with tart, juicy raspberries wafts through the air. It’s a slice of bliss that not only satisfies your sweet tooth but also warms your heart. As someone who believes that food is a way to connect and create memories, these bars hold a special place in my heart.
Growing up, my family had a tradition of gathering every Sunday for a big dinner. We would sit around the table, sharing stories, laughter, and, of course, delicious food. One Sunday, my Aunt Lily surprised us all with her famous raspberry cheesecake bars. They were the highlight of our meal! As we enjoyed the creamy, tangy treats, I saw how one dish could spark joy and bring folks together. It was in that moment I realized that cooking is about so much more than just flavors; it’s about the connections we make and the memories we create.
Now, I’m excited to share this recipe with you! Whether you’re planning a summer picnic, a cozy dinner party, or just a sweet treat for yourself, these Raspberry Cheesecake Bars are sure to impress. So grab your apron, and let’s get cooking!
Personal Story: A Family Tradition
One of my fondest memories of raspberry cheesecake bars goes back to those cherished Sunday dinners at Aunt Lily’s house. She was the quintessential gathering queen, whipping up magical recipes that had everyone lining up for seconds. When she made these bars, it was like a sweet, comforting hug from the inside. The way she would delicately layer the creamy cheesecake filling on top of the buttery crust, and then swirl that vibrant raspberry puree—oh, it was pure artistry!
I remember the anticipation building as we waited for the bars to cool. After dinner, the moment finally arrived: the first slice! As I took my first bite, the rich, creamy cheesecake blended beautifully with that pop of tartness from the raspberries. Each bite danced on my taste buds, leaving me craving more. Now, I often find myself recreating that memory in my own kitchen, hoping to inspire the same joy in my family and friends that Aunt Lily did for us.
Ingredients
Here’s what you’ll need to bring these raspberry cheesecake bars to life:
-
For the Crust:
- 1 ½ cups graham cracker crumbs
- Feel free to substitute with crushed Oreo cookies for a chocolatey twist!
- ½ cup granulated sugar
- For a less sweet crust, reduce sugar to 1/3 cup.
- ½ cup unsalted butter, melted
- Coconut oil can be a great dairy-free alternative here.
- 1 ½ cups graham cracker crumbs
-
For the Cheesecake Filling:
- 16 ounces cream cheese, softened
- Neufchâtel cheese works if you want a lighter option.
- 1 cup granulated sugar
- Replace with coconut sugar for a touch of caramel flavor!
- 1 teaspoon vanilla extract
- Always use pure vanilla for the best aroma and taste.
- 3 large eggs
- Replace with 1 cup of unsweetened applesauce for a vegan version.
- ½ cup sour cream
- Greek yogurt works well to add that creamy texture with less fat.
- 16 ounces cream cheese, softened
-
For the Raspberry Swirl:
- 1 cup fresh raspberries (or frozen, thawed and drained)
- You can substitute half the raspberries with blueberries for a mixed berry treat.
- 2 tablespoons sugar
- Switch to honey or maple syrup if you prefer a more natural sweetener.
- 1 tablespoon lemon juice
- A splash of orange juice can also work wonderfully!
- 1 cup fresh raspberries (or frozen, thawed and drained)
Step-by-Step Instructions
Step 1: Preheat and Prepare the Pan
Begin by preheating your oven to 325°F (160°C). While that’s warming up, grab a 9×13 inch baking pan and line it with parchment paper, leaving some overhang. This will help you lift the bars out later—trust me, it’s a game-changer!
Step 2: Make the Crust
In a medium bowl, mix together the graham cracker crumbs, sugar, and melted butter until it resembles damp sand. If it feels dry, add a touch more melted butter. Press this mixture firmly into the bottom of your prepared baking pan, creating an even layer. Pop it into the oven for 10 minutes until slightly golden.
Step 3: Prepare the Cheesecake Filling
While the crust is baking, let’s whip up that luscious cheesecake filling! In a large mixing bowl, beat the softened cream cheese until smooth. Gradually add in the sugar and beat until fluffy, about 2-3 minutes. Then, mix in the vanilla extract. Now, add the eggs one at a time, mixing well after each addition. Finally, blend in the sour cream until creamy and delicious-looking.
Step 4: Create the Raspberry Swirl
In a small saucepan over medium heat, combine the raspberries, sugar, and lemon juice. Stir gently until the raspberries break down and the mixture becomes syrupy (about 3-5 minutes). If you like chunks, leave some berries whole! Set it aside to cool slightly.
Step 5: Combine and Bake
Pour the cheesecake mixture over the pre-baked crust, spreading it evenly. Now, drizzle the raspberry puree across the top and use a knife or toothpick to swirl it gently—this is where the magic happens! 🎨
Bake in the oven for 45-50 minutes, or until the edges are set but the center still jiggles slightly. Remove from the oven and let it cool at room temperature for about an hour. Then refrigerate for at least 4 hours (or overnight if you can wait!).
Step 6: Serving
Once chilled, lift the cheesecake bars out of the pan using the parchment paper. Cut them into squares, and serve them on a pretty platter. Garnish with fresh raspberries and a dusting of powdered sugar for that elegant touch!
Serving Suggestions
These raspberry cheesecake bars are fantastic on their own, but if you want to elevate your serving game, consider pairing them with a dollop of whipped cream or a scoop of vanilla ice cream. A sprig of mint on the side adds a pop of color and freshness that looks so appealing on the plate. For a brunch or tea party, serve them alongside a cup of iced tea or a sparkling lemonade; they make the perfect refreshing treat!
Recipe Variations
Ready to get creative? Here are some fun variations to try:
- Chocolate Raspberry Cheesecake Bars: Incorporate ½ cup melted dark chocolate into the cheesecake mixture for a rich, decadent twist.
- Lemon Raspberry Bars: Add 1-2 tablespoons of lemon zest to the filling for a zesty kick.
- Nutty Graham Cracker Crust: Use crushed almonds or hazelnuts in the crust for added flavor and crunch.
- Swap the Berries: Try using blackberries, strawberries, or cherries to mix things up!
- Vegan Version: Substitute all dairy ingredients with plant-based alternatives and replace eggs with silken tofu blended until smooth.
Chef’s Notes
Over the years, I’ve experimented with this recipe, tweaking ingredients and adding my little spin. One time, I misjudged my raspberry supply and ended up turning it into a mixed berry cheesecake! That accidental innovation ended up being a total hit at a family gathering. So remember, cooking is all about experimenting and making it your own! If you find you prefer more raspberry flavor, don’t be shy; feel free to add an extra cup of berries to the mix!
FAQs and Troubleshooting
1. Why are my cheesecake bars cracking?
A common issue! This often happens if the filling is overcooked or if it cools too quickly. To avoid this, bake your bars slowly and allow them to cool gradually in the oven with the door cracked open.
2. Can I use frozen raspberries instead of fresh?
Absolutely! Just make sure they’re thawed and well-drained. They may add more liquid, so it’s a good idea to strain them before using.
3. How do I store leftovers?
These bars can be stored in an airtight container in the refrigerator for up to a week. Just make sure to separate layers with parchment paper to prevent sticking!
4. Can I freeze the cheesecake bars?
Yes, you can! Wrap them tightly in plastic wrap and foil before freezing. When you’re ready to enjoy them, thaw them in the refrigerator overnight.
Nutritional Info
While I don’t usually dwell on the numbers too much, it’s helpful to know:
- Calories: Approximately 250 per bar
- Fat: 16g
- Carbohydrates: 25g
- Protein: 4g
These values can vary based on your ingredient choices, so make adjustments as needed!
And there you have it! Raspberry cheesecake bars that are not just a dessert but a tasty tradition and a sweet celebration of life. I hope this recipe inspires you to create your own beautiful memories in the kitchen. Happy baking, friends! 🍰
Print
Raspberry Cheesecake Bars
- Total Time: 4 hours 10 minutes
- Yield: 12 servings 1x
- Diet: Vegetarian
Description
Delicious raspberry cheesecake bars that blend creamy cheesecake with a tart raspberry swirl, perfect for gatherings and sweet treats.
Ingredients
- 1 ½ cups graham cracker crumbs
- ½ cup granulated sugar
- ½ cup unsalted butter, melted
- 16 ounces cream cheese, softened
- 1 cup granulated sugar
- 1 teaspoon vanilla extract
- 3 large eggs
- ½ cup sour cream
- 1 cup fresh raspberries (or frozen, thawed and drained)
- 2 tablespoons sugar
- 1 tablespoon lemon juice
Instructions
- Preheat your oven to 325°F (160°C) and prepare a 9×13 inch baking pan with parchment paper.
- Mix together graham cracker crumbs, sugar, and melted butter in a bowl until it resembles damp sand. Press into the bottom of the baking pan and bake for 10 minutes.
- Beat the softened cream cheese in a large bowl until smooth. Gradually add sugar and beat until fluffy, then mix in vanilla extract, followed by eggs one at a time. Finally, blend in sour cream.
- Combine raspberries, sugar, and lemon juice in a saucepan over medium heat. Stir until syrupy, about 3-5 minutes.
- Pour the cheesecake mixture over the pre-baked crust, drizzle raspberry puree on top and swirl gently with a knife. Bake for 45-50 minutes.
- Cool at room temperature for an hour, then refrigerate for at least 4 hours before cutting into squares and serving.
Notes
For serving, consider adding whipped cream, a scoop of vanilla ice cream, or fresh raspberries on top.
- Prep Time: 20 minutes
- Cook Time: 50 minutes
- Category: Dessert
- Method: Baking
- Cuisine: American
Nutrition
- Serving Size: 1 bar
- Calories: 250
- Sugar: 20g
- Sodium: 350mg
- Fat: 16g
- Saturated Fat: 9g
- Unsaturated Fat: 6g
- Trans Fat: 0g
- Carbohydrates: 25g
- Fiber: 1g
- Protein: 4g
- Cholesterol: 65mg
Keywords: dessert, cheesecake, raspberry, bars, sweet treat
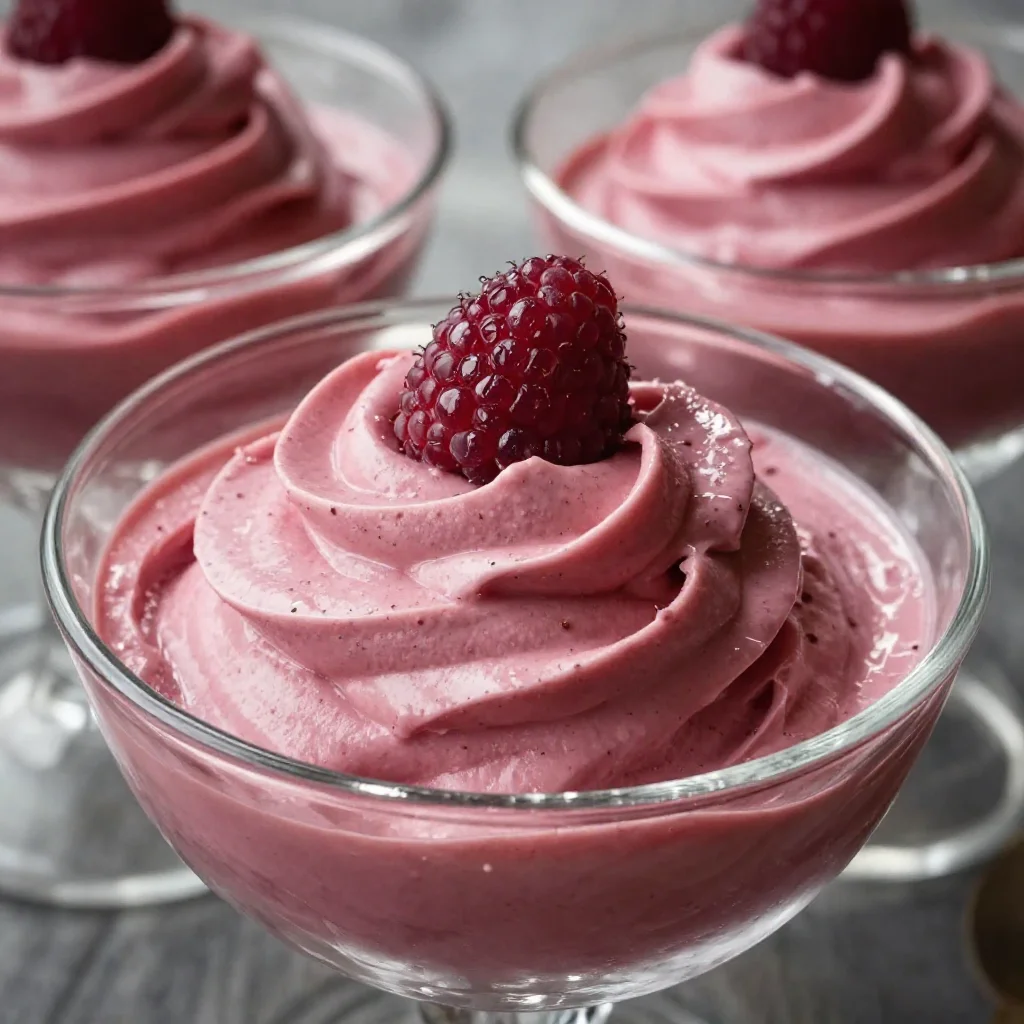
Raspberry Mousse in 15 Minutes: 5-Ingredient Creamy Delight
Raspberry Mousse: An Incredible Ultimate Recipe
Introduction
Hey there, fellow food lovers! If you’re anything like me, the mere mention of raspberry mousse might summon dreams of light, fluffy clouds of sweetness resting elegantly on a plate. Perhaps you can picture a sunlit afternoon gathering with friends, laughter mingling with the aroma of desserts swirling in the air. Well, you’re in the right place! Today, we’re diving into an easy-to-follow, yet absolutely delicious raspberry mousse recipe that will not only wow your taste buds but also impress your loved ones.
Raspberry mousse holds a special place in my heart—like many of my kitchen adventures, it’s steeped in nostalgia and cozy moments. I remember the first time I made this delight as a young cook. My mom and I spent an entire Saturday afternoon in the kitchen, battling the heat wave and an overabundance of berries from the garden. With sticky fingers and laughter, we whipped up a batch that ended up being the star of the family barbecue later that evening. Watching my cousins take their first bites, their eyes widening with delight—it was priceless!
So, let’s recreate some of that magic together! Whether you’re planning a romantic dinner, a chic brunch, or simply a night of self-pampering, this raspberry mousse recipe is here to elevate your culinary repertoire. Trust me, it’s fancy enough to look great on any holiday table, but simple enough for any night of the week. Let’s get those mixing bowls ready!
Personal Story
As I mentioned, my love for raspberry mousse began in the warm embrace of my family’s kitchen. One steamy summer, we found ourselves with a garden bursting with fresh, ripe raspberries. I can still see my mom meticulously picking the juiciest ones, her fingers stained with berry juice, while I eagerly waited with a bowl at the ready.
It was during this berry bonanza that we decided to throw together a raspberry mousse, a recipe my mom claimed was "the easiest yet most delightful dessert" she had up her sleeve. We spent hours whisking and folding, chatting about everything from school to her childhood memories. The best part? As the mousse chilled in the fridge, we took turns sneaking spoonfuls instead of waiting for the final presentation. Each spoonful was a burst of flavor that reminded me how wonderful it is to create something together. That day not only sparked my love for cooking but also created an everlasting bond through food and laughter.
Ingredients
Now that we’ve set the mood, let’s talk about what you’ll need to whip up this raspberry mousse. Here’s your shopping list:
-
Fresh Raspberries (2 cups): The star of the show! Look for vibrant, plump berries for the best flavor. If they’re out of season, frozen berries work too—just thaw and drain the excess liquid.
-
Sugar (1/2 cup): This will sweeten the puree. Feel free to adjust based on your taste—agave or honey work as fantastic substitutes if you want a natural sweetener.
-
Heavy Cream (1 1/2 cups): This adds richness and creaminess to the mousse. Keep it cold for optimal whipping. If you’re looking for a lighter option, whipped coconut cream is a great alternative.
-
Vanilla Extract (1 teaspoon): Adds a warm, aromatic note to the mousse. Homemade vanilla extract elevates the flavor, but store-bought is perfectly fine!
-
Gelatin Powder (1 tablespoon): This helps the mousse firm up beautifully. If you prefer a vegetarian option, try using agar-agar instead! Just follow the package instructions for usage.
-
Water (2 tablespoons): Needed for blooming the gelatin. Keep it warm so it dissolves easily.
Step-by-Step Instructions
Now comes the fun part! Let’s whip up this raspberry mousse step by step. Grab your mixing bowls and let’s get started!
-
Prepare the Raspberries:
- Wash the fresh raspberries gently and place them in a blender or food processor. Aim for about 2 cups (you can adjust this based on how raspberry-flavored you want your mousse).
- Add the sugar to the raspberries and blend until smooth. You can leave tiny seeds if you like a bit of texture; otherwise, feel free to strain the puree through a sieve to achieve a silky-smooth consistency.
- Chef Tip: Reserve a few whole raspberries for garnish later—they’ll add a pop of color to your final presentation!
-
Bloom the Gelatin:
- In a small bowl, sprinkle gelatin over the warm water and let it stand for about 5 minutes until it swells up, creating a “bloom.”
- Glad to have this step out of the way? I always keep some gelatin handy—it’s a secret weapon for so many desserts!
-
Combine the Raspberry Puree and Gelatin:
- Place the bloomed gelatin in the microwave for about 10 seconds just to slightly heat it (make sure it’s warm enough to dissolve but not bubbling hot).
- Stir the gelatin into the raspberry puree until completely dissolved. This is where the magic happens!
-
Whip the Cream:
- In a medium mixing bowl, pour in the heavy cream and add the vanilla extract. Using an electric mixer, whisk on medium speed until soft peaks form. You’re looking for a frothy, pillowy cloud, not a butter!
- Chef Tip: Keep your mixing bowl and beaters chilled for easier whipping!
-
Fold It All Together:
- Gradually add the raspberry mixture into the whipped cream. Use a folding motion—gently lift and turn the cream, combining them without deflating the air you’ve whipped in. Aim for a beautiful swirly texture that still shows off those lovely pink hues.
- If you want deeper flavors, consider folding in a bit of lemon zest for brightness!
-
Chill the Mousse:
- Once everything is mixed, scoop the mousse into serving glasses or bowls, leaving some room at the top for garnishing later. Cover them with plastic wrap and pop them into the fridge for at least 4 hours (or overnight best) to set.
- Chef Tip: This is where you can take a breather—go catch up on your favorite show while your mousse works its magic!
Serving Suggestions
When you’re ready to serve, bring out those beautiful glasses brimming with raspberry goodness. To really wow your guests, you can top each mousse with a dollop of whipped cream (a little more never hurt, right?), some whole raspberries, and a sprinkle of mint leaves for an elegant touch. Drizzle a bit of raspberry sauce or chocolate sauce over the top, and you’re ready to dig in!
Recipe Variations
Feeling adventurous? Here are a few creative variations to try:
- Chocolate Raspberry Mousse: Fold in some melted dark chocolate into the mousse for a rich twist that balances sweet-tart goodness.
- Mint Infusion: Add a few finely chopped mint leaves or a drop of mint extract to the raspberry puree for a refreshing hint.
- Bourbon Raspberry Mousse: Add a tablespoon of bourbon to the raspberry puree for an adult-only twist that complements the sweet tartness perfectly.
- Vegan Raspberry Mousse: Substitute heavy cream with whipped coconut cream and gelatin with agar-agar to create a delightful plant-based version.
Chef’s Notes
This raspberry mousse holds a treasure trove of memories for me, evolving over the years from my mom’s original recipe to my own playful adaptation. Every time I make it, I’m reminded of those sweet summer afternoons full of raspberries and laughter. It’s not just a dessert; it’s a connection to my roots, but it also seamlessly fits into any occasion—be it a family gathering or a cozy dessert for one. Oh, and don’t let those berries go to waste—switch it up with different fruits as the seasons change!
FAQs and Troubleshooting
-
Why is my mousse not setting?
- Make sure your gelatin is properly bloomed and dissolved before folding it into the mixture. If it’s too warm when added, it might not set properly!
-
Can I use other berries?
- Absolutely! Strawberries, blueberries, or mixed berries can be a fantastic substitute for raspberries. Just remember that sweetness and acidity might vary.
-
How can I get the mousse to look pretty in the serving glass?
- For a layered look, alternate spoonfuls of raspberry mousse and whipped cream into the serving glasses before chilling—it’ll give a beautiful visual contrast once set!
-
What if I want a less sweet mousse?
- Simply reduce the amount of sugar in the raspberry puree. The natural tartness of the berries will shine through beautifully!
Nutritional Info
(Optional) Each serving of raspberry mousse contains approximately:
- Calories: 250
- Fat: 18g
- Carbohydrates: 24g
- Protein: 2g
And there you have it! An incredible raspberry mousse recipe filled with flavor, texture, and heart. I hope you enjoy creating this delicious dish as much as I do. Remember, the kitchen is your playground—don’t be afraid to get messy and have fun! Happy cooking, my fellow food enthusiasts!
Print
Raspberry Mousse
- Total Time: 240 minutes
- Yield: 4 servings
- Diet: Vegetarian
Description
An effortless yet delightful raspberry mousse that will impress your loved ones and elevate your culinary repertoire.
Ingredients
- Fresh Raspberries, 2 cups
- Sugar, 1/2 cup
- Heavy Cream, 1 1/2 cups
- Vanilla Extract, 1 teaspoon
- Gelatin Powder, 1 tablespoon
- Water, 2 tablespoons
Instructions
- Prepare the Raspberries: Wash and place in a blender with sugar; blend until smooth.
- Bloom the Gelatin: Sprinkle gelatin over warm water and let it stand for 5 minutes.
- Combine the Raspberry Puree and Gelatin: Heat the bloomed gelatin, then stir it into the raspberry puree.
- Whip the Cream: Beat heavy cream with vanilla extract until soft peaks form.
- Fold It All Together: Gently combine the raspberry mixture with the whipped cream.
- Chill the Mousse: Scoop into glasses, cover, and refrigerate for at least 4 hours.
Notes
Serve with whipped cream, whole raspberries, and mint for an elegant touch. Consider variations like chocolate or vegan options.
- Prep Time: 15 minutes
- Cook Time: 0 minutes
- Category: Dessert
- Method: Chilling
- Cuisine: American
Nutrition
- Serving Size: 1 serving
- Calories: 250
- Sugar: 22g
- Sodium: 30mg
- Fat: 18g
- Saturated Fat: 11g
- Unsaturated Fat: 7g
- Trans Fat: 0g
- Carbohydrates: 24g
- Fiber: 2g
- Protein: 2g
- Cholesterol: 70mg
Keywords: raspberry mousse, dessert, easy recipe, summer treat, mousse recipe
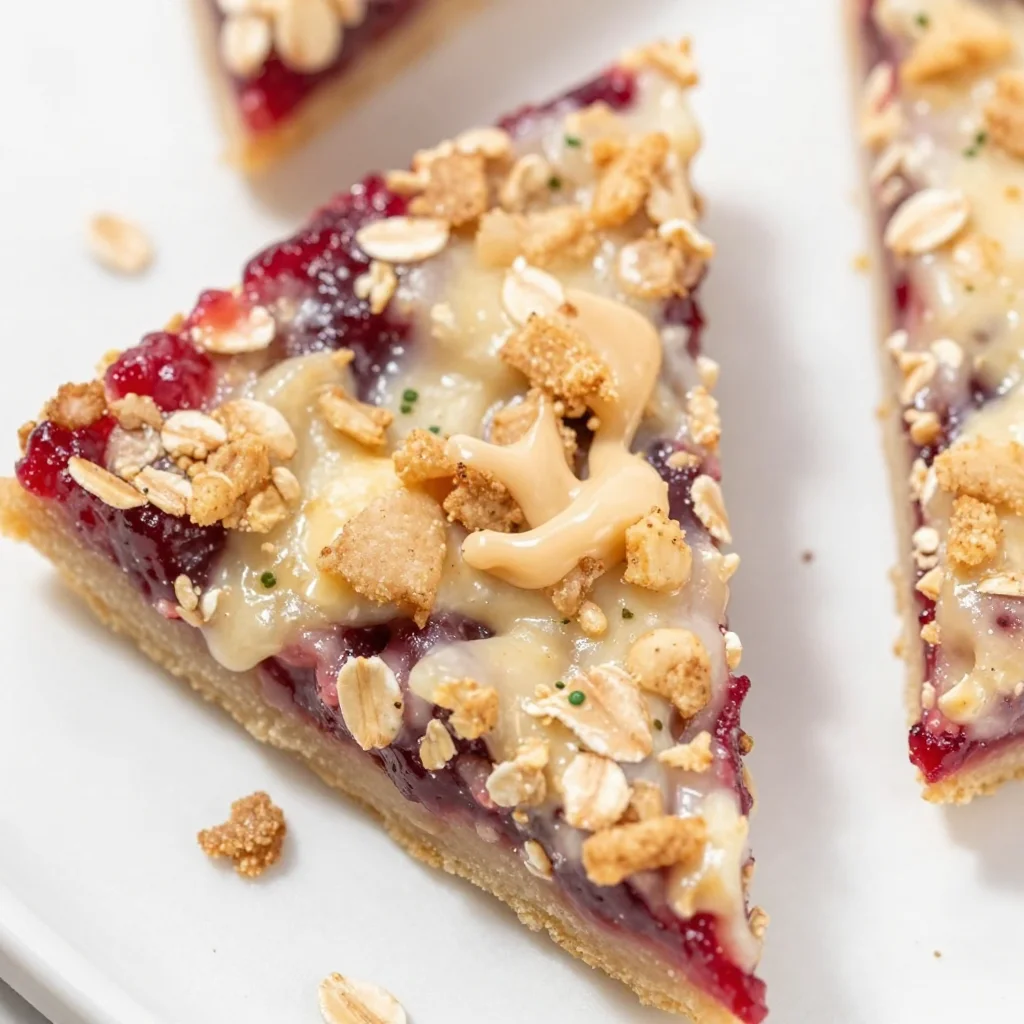
Ingredient Raspberry Oatmeal Bars: Quick & Beginner-Friendly
The Easiest Raspberry Oatmeal Bars: A Sweet Adventure in Every Bite!
Welcome to my cozy corner of the internet, where all things delicious and delightful come together! Today, I am thrilled to share a recipe that’s close to my heart and guaranteed to bring a smile to your face. These Easiest Raspberry Oatmeal Bars are not just scrumptious; they’re a blast from the past—packed with nostalgia, flavor, and the charm of home cooking. Whether you’re whipping them up for breakfast, snacking, or dessert, they’re perfect any time of day.
Picture this: the sun is shining through your kitchen window, the smell of baked oats fills the air, and you’re about to dig into the ultimate treat. These bars are a delightful combination of chewy oatmeal, sweet-tart raspberries, and a hint of cinnamon that makes them so irresistibly good. You won’t need hours in the kitchen or fancy equipment. With just a few simple ingredients and a bit of love, you’ll create a batch of oatmeal bars that everyone will rave about!
Now, let me take you back to where it all began. I vividly remember the summer afternoons spent at my grandmother’s house, surrounded by the enticing scent of her delicious baking. One of my favorite memories is the moment when she pulled a pan of her signature oatmeal bars from the oven, golden and bubbling with fresh fruits. I loved the way her kitchen felt; it was warm and inviting, just like these bars! We would devour those treats together while sharing stories and laughter, creating lasting bonds over a simple snack.
Fast forward to today, and I’ve decided to put my own twist on those nostalgic treats. My Easiest Raspberry Oatmeal Bars embody that warmth and joy. Trust me, once you try them, you’ll want to make them over and over again. So, let’s get cooking and make some magical memories in your kitchen!
What You’ll Need: Ingredients
Before we dive into the cooking process, let me lay out the ingredients for these delicious bars. Each component is simple, accessible, and adds its own unique touch.
-
Old-Fashioned Oats (2 cups): These are the backbone of your bars, giving them that lovely chewy texture. You can substitute quick oats if you prefer, but I find the old-fashioned oats create a heartier bar.
-
All-Purpose Flour (1 cup): This helps to bind everything together. If you’re gluten-free, feel free to swap this with almond flour or a gluten-free blend.
-
Brown Sugar (½ cup): For that rich sweetness and a hint of caramel flavor. If you’re looking to cut down on sugar, coconut sugar works well as a substitute.
-
Baking Powder (1 teaspoon): This helps your bars rise and become fluffy rather than dense.
-
Cinnamon (1 teaspoon): A warm spice that enhances the flavors of the oats and raspberries. If cinnamon isn’t your thing, try nutmeg or leave it out altogether.
-
Salt (½ teaspoon): Just a pinch to balance the sweetness.
-
Unsalted Butter (½ cup, melted): Adds richness and helps with the texture. Coconut oil is a great vegan alternative here.
-
Fresh Raspberries (1 cup): The stars of the show! You can swap these with blueberries, strawberries, or even apples if you like.
-
Egg (1 large): Binds everything together. For a vegan option, replace it with a flaxseed egg (1 tablespoon ground flaxseed mix with 3 tablespoons water).
Step-by-Step Instructions
Alright, let’s get to the fun part! Here’s how to bring these Easiest Raspberry Oatmeal Bars to life:
-
Preheat Your Oven: Start by preheating your oven to 350°F (175°C). This step ensures your bars bake evenly and develop a lovely golden color.
-
Prep Your Pan: Grab an 8×8-inch baking pan and line it with parchment paper for easy removal. You could also grease it lightly with butter or oil to prevent sticking.
-
Mix the Dry Ingredients: In a large bowl, combine the old-fashioned oats, flour, brown sugar, baking powder, cinnamon, and salt. Use a whisk to mix them well. This ensures that the baking powder is evenly distributed, which is key to even rising.
-
Incorporate the Wet Ingredients: In a separate bowl, mix the melted butter and egg. If you’re going vegan, make sure you whisk together the flaxseed and water thoroughly before adding. Pour this mixture into the dry ingredients and combine gently. It should be crumbly but hold together when you squeeze it.
-
Fold in the Raspberries: Gently fold in your fresh raspberries, being careful not to break them up too much. You want to maintain those lovely whole berries throughout your bars!
-
Spread the Mixture: Transfer half of the oatmeal mixture into the prepared pan, pressing it down to form an even layer. This base layer is crucial as it will hold all the delicious filling.
-
Add the Topping: Sprinkle the remaining mixture over the top of the raspberries. The texture should be crumbly and add a beautiful, crunchy top to your bars.
-
Bake: Pop the pan in the preheated oven and bake for 25-30 minutes, or until the top is golden and a toothpick inserted into the center comes out clean.
-
Cool and Slice: Allow your oatmeal bars to cool completely in the pan on a wire rack. This step is vital! If you can be patient, cutting them too soon may result in a lovely crumble instead of neat bars. Once cool, slice into squares or rectangles.
-
Enjoy!: Serve your bars warm, or store them in an airtight container at room temperature for up to a week! They also freeze beautifully if you want to enjoy them later.
Serving Suggestions
When it comes to serving your Easiest Raspberry Oatmeal Bars, simplicity is key! You can plate them up plainly, but for an added touch, consider drizzling them with a little warm honey or adding a dollop of yogurt. Pairing them with a cup of tea or coffee creates the perfect afternoon snack, and they’re great for sharing at brunch or a picnic!
Recipe Variations
Now that you’ve mastered the classic version, let’s talk about how you can give these bars your own spin!
-
Nutty Boost: Add ½ cup of chopped nuts (like almonds, walnuts, or pecans) for added crunch and healthy fats.
-
Chocolate Lovers: Stir in some dark chocolate chips or cacao nibs for a delicious chocolate raspberry combo.
-
Seasonal Swaps: In place of raspberries, use seasonal fruits like peaches, apples, or even cranberries for a fall twist.
-
Spice it Up: Mix in different spices like cardamom or ginger for a unique flavor profile.
-
Vegan Delight: Substitute eggs with flaxseed eggs and use maple syrup instead of brown sugar to make it completely plant-based.
Chef’s Notes
These Easiest Raspberry Oatmeal Bars have become a staple in my kitchen. I’ve experimented with so many variations over the years! One time, I had a batch that didn’t set properly because I was too impatient to let them cool down. Instead of tossing them out, I crumbled the bars over my morning yogurt, and it turned into an accidental breakfast favorite! It was the perfect example of how one little mistake can lead to something delightful.
Cooking is all about enjoying the process and embracing those little imperfections, right?
FAQs and Troubleshooting
1. Why did my bars crumble apart?
If your bars are crumbling, they may not have cooled completely before slicing. Make sure you let them cool in the pan entirely for better slicing. Also, check that you used the right proportions of wet to dry ingredients.
2. Can I use frozen raspberries?
Absolutely! If you’re using frozen raspberries, there’s no need to thaw them beforehand. Just be aware that they might create a bit more liquid, but that just makes them more moist and delicious!
3. How do I store these bars?
Store your oatmeal bars in an airtight container at room temperature for up to a week. If you’d like to keep them longer, freeze them in individual portions, and pull one out whenever you need a sweet treat!
4. Can I double the recipe?
Yes, feel free to double the recipe! Just use a larger baking dish (like a 9×13-inch pan) and extend the baking time slightly, checking for doneness.
Nutritional Info (Optional)
Each bar (based on 12 servings):
- Calories: 180
- Protein: 3g
- Carbohydrates: 29g
- Dietary Fiber: 3g
- Sugars: 8g
- Fat: 7g
With these Easiest Raspberry Oatmeal Bars, you’re all set to create a wholesome, delightful treat that brings joy to your kitchen and to the ones you love. Happy baking, friends! Enjoy every sweet moment! 🍓✨
Print
Easiest Raspberry Oatmeal Bars
- Total Time: 40 minutes
- Yield: 12 servings
- Diet: Vegetarian
Description
Deliciously chewy oatmeal bars packed with sweet-tart raspberries and a hint of cinnamon, perfect for breakfast or as a snack.
Ingredients
- Old-Fashioned Oats (2 cups)
- All-Purpose Flour (1 cup)
- Brown Sugar (½ cup)
- Baking Powder (1 teaspoon)
- Cinnamon (1 teaspoon)
- Salt (½ teaspoon)
- Unsalted Butter (½ cup, melted)
- Fresh Raspberries (1 cup)
- Egg (1 large)
Instructions
- Preheat your oven to 350°F (175°C).
- Prep an 8×8-inch baking pan by lining it with parchment paper.
- Mix the dry ingredients: oats, flour, brown sugar, baking powder, cinnamon, and salt in a bowl.
- Incorporate the wet ingredients: melted butter and egg (or flaxseed egg).
- Fold in the fresh raspberries gently.
- Spread half of the mixture into the prepared pan and press down.
- Add the remaining mixture as a topping.
- Bake for 25-30 minutes, until golden and a toothpick comes out clean.
- Cool completely on a wire rack before slicing.
- Enjoy warm or store in an airtight container for up to a week.
Notes
For a vegan option, substitute butter with coconut oil and egg with a flaxseed egg. These bars can be customized with nuts or chocolate chips.
- Prep Time: 10 minutes
- Cook Time: 30 minutes
- Category: Snack
- Method: Baking
- Cuisine: American
Nutrition
- Serving Size: 1 bar
- Calories: 180
- Sugar: 8g
- Sodium: 50mg
- Fat: 7g
- Saturated Fat: 4g
- Unsaturated Fat: 3g
- Trans Fat: 0g
- Carbohydrates: 29g
- Fiber: 3g
- Protein: 3g
- Cholesterol: 30mg
Keywords: raspberry, oatmeal, bars, dessert, snack
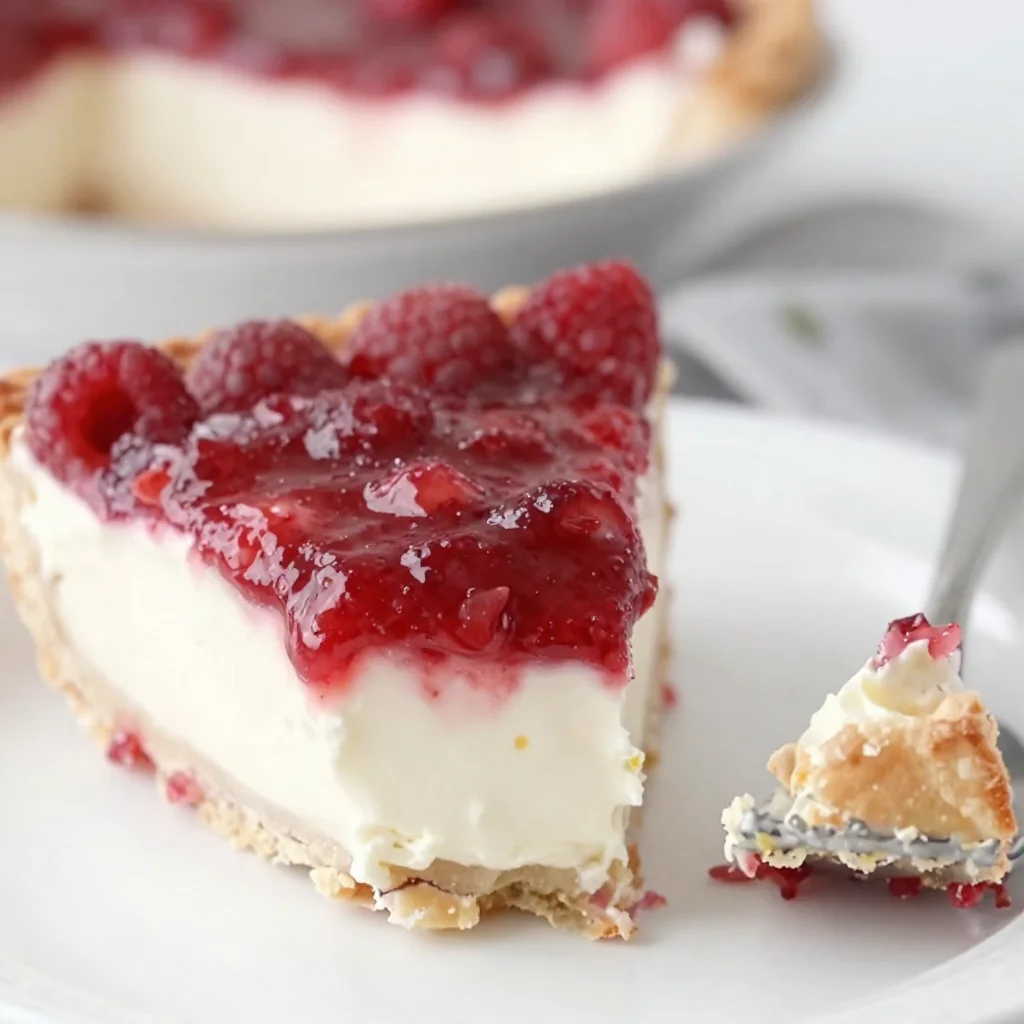
Ingredient Raspberry Cream Pie (No-Bake) – Quick Treat
The Ultimate Raspberry Cream Pie Recipe: A Slice of Sweet Nostalgia
Welcome to my kitchen, dear friends! I’m Olivia Bennett, and I’m thrilled to have you here to whip up something absolutely delightful — a luscious Raspberry Cream Pie. This pie is not just a treat for the taste buds, but a heartfelt connection to the many joyful moments spent with family, friends, and the irresistible fragrance of fresh raspberries wafting through the air.
Imagine this: a sunny afternoon, laughter echoing through the kitchen, and the vibrant colors of freshly picked raspberries turning into delicious pie magic. That’s the essence of what we’re crafting today. Raspberry season always brings back the nostalgic memories of summer days spent with my grandmother in her cozy, bustling kitchen. She had this magical ability to turn basic ingredients into something extraordinary, and I could feel the love in every spoonful.
The best part about this Raspberry Cream Pie is its simplicity. With the balance of sweet, tangy raspberries and a rich, creamy filling, it’s a dessert that brings smiles and memories in every slice. Perfect for family gatherings, holidays, or just a little “me-time,” this pie brings joy with every bite.
So, grab your apron and let’s dive into this sweet adventure together! Whether you’re a seasoned pro or just starting your culinary journey, I promise you’ll find confidence in this recipe. Let’s make some delicious memories together!
A Slice of Memory Lane
As a kid, I spent countless afternoons at my grandmother’s farmhouse, tucked away in a quiet little corner of the countryside. She had a small garden bursting with life, and during the summer, the raspberry bushes were my favorite. I remember the thrill of sneaking berries straight from the vine—sweet, juicy, and oh-so-satisfying.
One summer, I decided I wanted to impress her by making something special. Armed with nothing but my optimism and a few basic skills, I gave my best shot at creating a dessert. The result? A rather lopsided Raspberry Cream Pie filled with a mix of berries, cream, and a sprinkle of love. My grandmother took one look at it, beamed, and declared it the best pie she ever tasted. It didn’t matter that it was far from perfect; it was made with the purest of intentions and a whole lot of heart.
That summer inspired me to always experiment in the kitchen and to bring my own twist to classic recipes. Today, I carry that spirit through every dish I create, and this Raspberry Cream Pie is a celebration of those sweet, carefree days spent learning and laughing alongside my grandmother.
Ingredients You’ll Need
Here’s what you’ll need to create this dreamy Raspberry Cream Pie. Each ingredient plays a crucial role, so let’s make sure we’re all set before we start our culinary adventure!
-
1 pre-made graham cracker crust
- A quick and easy base that adds a delightful crunch! You can also make your own; just blend some graham crackers, sugar, and melted butter together.
-
2 cups fresh raspberries
- The star of the show! Use ripe, plump raspberries for a sweet flavor. If they’re out of season, frozen raspberries can be a good substitute, just make sure to thaw and drain excess liquid.
-
1 cup heavy whipping cream
- This makes the pie wonderfully creamy! For a lighter option, you could use whipped coconut cream if you’re going dairy-free.
-
½ cup powdered sugar
- Sweetening the deal! It dissolves easily, giving your filling that perfect sweetness without the graininess.
-
1 ½ teaspoons vanilla extract
- Adds depth and enhances the flavors. Use pure vanilla extract for the best results; it’s worth the splurge!
-
2 tablespoons lemon juice
- A splash of acidity to balance the sweetness. Freshly squeezed lemon juice works best, but bottled will do in a pinch.
-
1 tablespoon cornstarch
- This helps thicken the filling, ensuring every slice holds its shape. You can substitute it with arrowroot powder if you’re looking for a gluten-free option.
Get everything ready, and trust me, you’re going to create something special!
Step-by-Step Instructions
Let’s roll up those sleeves and start creating this delightful Raspberry Cream Pie!
-
Prepare the Crust
- If you’re using a pre-made graham cracker crust, simply remove it from the packaging and set it aside. If making your own, mix 1 ½ cups of crushed graham crackers with ½ cup melted butter and ¼ cup sugar until well combined. Press the mixture firmly into a 9-inch pie pan. Bake at 350°F (175°C) for about 8-10 minutes or until golden. Let it cool completely!
-
Prepare the Raspberry Filling
- In a medium bowl, combine the fresh raspberries (reserve a handful for garnishing), lemon juice, and cornstarch. Gently toss to coat; this step will enhance the flavor and help thicken the filling. Set aside for a while.
-
Whip the Cream
- In a large mixing bowl, add the heavy whipping cream, powdered sugar, and vanilla extract. With an electric mixer, whip the cream on medium speed until soft peaks form—this usually takes about 2-3 minutes. Keep an eye on it; over-whipping can lead to butter!
-
Combine the Mixtures
- Carefully fold the raspberry mixture into the whipped cream using a spatula—be gentle to keep that airy texture! It’s here that you want to blend just until incorporated; don’t worry about making it perfectly uniform; swirls of raspberry make it even more beautiful!
-
Fill the Crust
- Pour the raspberry cream mixture into the prepared graham cracker crust, smoothing the top with a spatula. Pop it into the refrigerator and let it chill for at least 2-3 hours (or overnight for best results). This step is crucial for setting the pie, so be patient!
-
Garnish and Serve
- Once set, bring out the pie, and top it with the reserved fresh raspberries. You can also sprinkle a little extra powdered sugar for a beautiful touch. Slice, serve, and enjoy the compliments!
Serving Suggestions
For a delightful serving experience, try placing each slice on a charming dessert plate. Pair it with a dollop of whipped cream or a scoop of vanilla ice cream for an extra touch of indulgence. A sprig of mint adds a lovely pop of color and freshness! You can even consider a colorful fruit salad on the side for a refreshing contrast. Get creative with your presentation, and let each slice shine!
Recipe Variations
Here are a few creative twists to try:
- Mixed Berry Cream Pie: Swap out some of the raspberries for blueberries or blackberries for a delicious berry blend.
- Citrus Zing: Add a bit of orange or lime zest to the cream filling for a vibrant, zesty flavor boost.
- Chocolate Raspberry Cream Pie: Drizzle or fold in some melted dark chocolate for a decadent twist!
- Vegan Alternative: Use coconut cream and a vegan chocolate crust to make it completely plant-based.
- Nutty Crust: Substitute part of the graham cracker crust with crushed almonds or pecans for a crunchy texture and deeper flavor.
Chef’s Notes
This Raspberry Cream Pie has been a staple in my collection for years, and it never fails to impress! I remember making it for a potluck once and nearly losing my pie in the car because I was so anxious on the way. All was well when I arrived, but the true test was hearing everyone rave about it—talk about a proud moment!
Over the years, I’ve tweaked the recipe here and there, but the heart remains the same. Cooking is all about evolution, and it’s a beautiful thing to see a recipe grow with the seasons and with your own experiences.
FAQs and Troubleshooting
1. Can I use frozen raspberries instead of fresh?
Absolutely! Just make sure to thaw them and drain excess liquid before mixing them with the cream.
2. What if my cream doesn’t whip up?
If your cream isn’t whipping, try chilling your mixing bowl and beaters in the fridge for a few minutes before starting again. Ensure the cream is cold, as this helps in achieving those luscious peaks!
3. My filling is too runny; what did I do wrong?
If the mixture didn’t set, it may be due to not using enough cornstarch or using overripe berries that released too much juice. If this happens, try adding a bit more cornstarch, mixed with some water, and gently heating it to thicken before folding it into the cream.
4. How long can I store leftover pie?
You can keep leftovers in the fridge for up to 2-3 days, but keep in mind that the crust may get a bit soggy as time passes.
Nutritional Info
While I typically focus on flavors rather than numbers, here’s a quick breakdown for a typical slice (1/8 of a 9-inch pie):
- Calories: ~280
- Fat: 18g
- Carbohydrates: 27g
- Protein: 3g
This pie is a lovely treat, so enjoy it in moderation as part of a balanced diet!
So that’s it, my dear kitchen enthusiasts! I hope you’ve enjoyed this Raspberry Cream Pie adventure as much as I do. Remember, cooking is about the love you put into it, the moments shared, and the memories created; savor every second in your kitchen! Happy baking, and may your creations always bring joy!
Print
The Ultimate Raspberry Cream Pie
- Total Time: 180 minutes
- Yield: 8 servings 1x
- Diet: Vegetarian
Description
A luscious Raspberry Cream Pie that connects joyful moments with family through its sweet and tangy flavors.
Ingredients
- 1 pre-made graham cracker crust
- 2 cups fresh raspberries
- 1 cup heavy whipping cream
- ½ cup powdered sugar
- 1 ½ teaspoons vanilla extract
- 2 tablespoons lemon juice
- 1 tablespoon cornstarch
Instructions
- Prepare the Crust: If using a pre-made graham cracker crust, remove it from the packaging and set aside. If making your own, mix 1 ½ cups of crushed graham crackers with ½ cup melted butter and ¼ cup sugar until well combined. Press the mixture firmly into a 9-inch pie pan. Bake at 350°F (175°C) for about 8-10 minutes or until golden. Let it cool completely!
- Prepare the Raspberry Filling: In a medium bowl, combine the fresh raspberries (reserve a handful for garnishing), lemon juice, and cornstarch. Gently toss to coat; set aside.
- Whip the Cream: In a large mixing bowl, add the heavy whipping cream, powdered sugar, and vanilla extract. Whip the cream on medium speed until soft peaks form, about 2-3 minutes.
- Combine the Mixtures: Carefully fold the raspberry mixture into the whipped cream using a spatula until just incorporated.
- Fill the Crust: Pour the raspberry cream mixture into the prepared graham cracker crust, smoothing the top. Chill for at least 2-3 hours or overnight for best results.
- Garnish and Serve: Top with reserved fresh raspberries and sprinkle with extra powdered sugar. Slice, serve, and enjoy!
Notes
For an extra touch, serve with whipped cream or vanilla ice cream.
- Prep Time: 20 minutes
- Cook Time: 10 minutes
- Category: Dessert
- Method: Chilling
- Cuisine: American
Nutrition
- Serving Size: 1 slice
- Calories: 280
- Sugar: 20g
- Sodium: 50mg
- Fat: 18g
- Saturated Fat: 10g
- Unsaturated Fat: 6g
- Trans Fat: 0g
- Carbohydrates: 27g
- Fiber: 2g
- Protein: 3g
- Cholesterol: 50mg
Keywords: raspberry pie, cream pie, dessert recipe, summer dessert, easy pie recipe
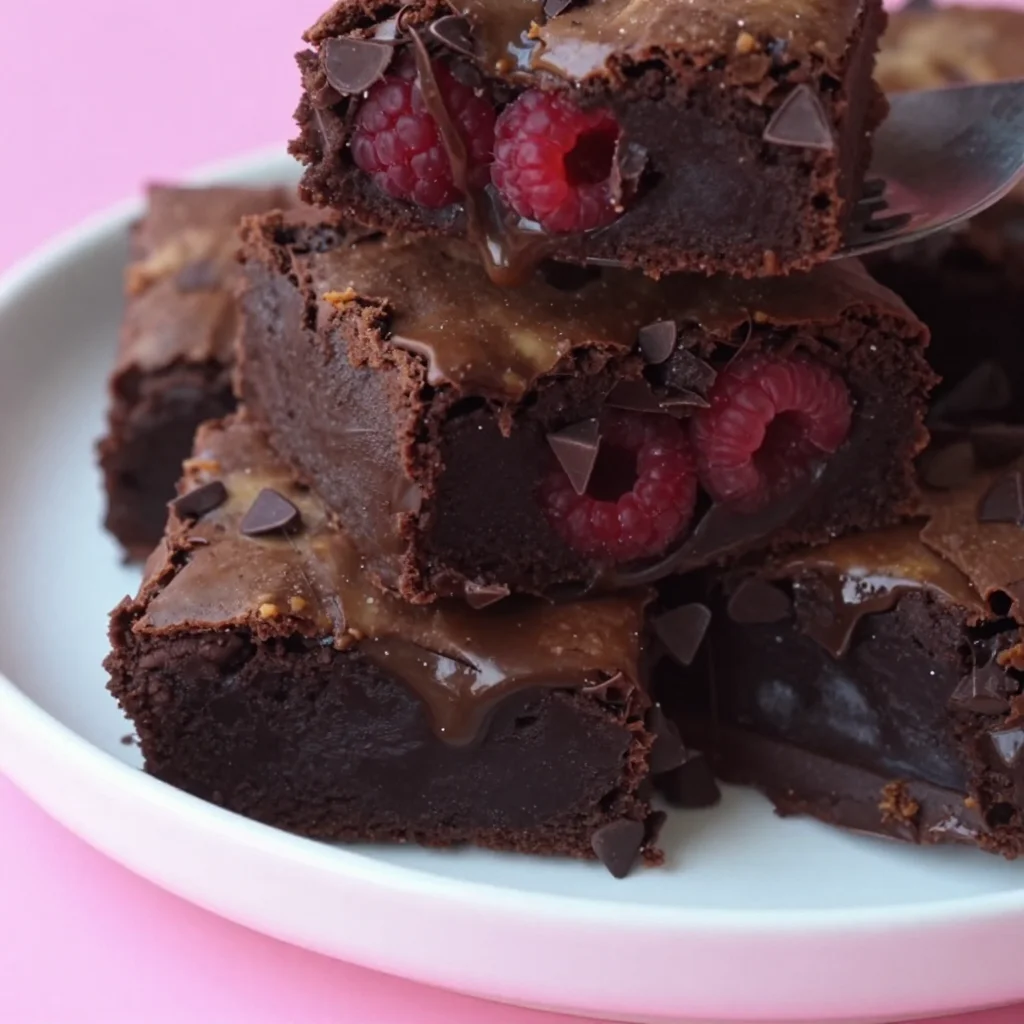
Raspberry Chocolate Brownies: Gooey, 30-Minute Bowl Recipe
Raspberry Chocolate Brownies: A Match Made in Heaven
Welcome, fellow foodies! Today, we’re diving into the delicious world of desserts with a recipe that is truly special—Raspberry Chocolate Brownies! Picture this: a rich, fudgy brownie infused with dark chocolate and swirled with tart, juicy raspberries. It’s a flavor explosion that’s not just a feast for the taste buds but also for the eyes! Honestly, these brownies are the perfect dessert for any occasion, whether you’re celebrating a birthday, indulging after dinner, or just treating yourself on a cozy weekend.
Raspberry and chocolate have always been a perfect pairing in my kitchen. There’s something magical about the sweetness of chocolate blending so beautifully with the tanginess of fresh raspberries. They create a symphony of flavors that takes your palate on a delightful journey. If you can relate to the joy of biting into a warm brownie and discovering the sweet burst of raspberry flavor, you’re going to love this recipe.
You’ll find that this brownie recipe invites creativity and personal touch. Whether you’re a baking newbie or a seasoned pro, whipping up these brownies doesn’t require fancy skills—just some basic ingredients, a bit of love, and a pinch of excitement! So grab your apron, and let’s bring some joy to your kitchen with these luscious Raspberry Chocolate Brownies!
A Sweet Trip Down Memory Lane
I can still remember the first time I made brownies on my own. I was about 12 years old and eager to impress my family with my newfound culinary skills. The kitchen smelled like heaven that day, with chocolate melting in the microwave and the warmth of cookies on the countertop. My mom had just come home with a container of fresh raspberries, and I thought, "Why not?"
I chopped those little gems up and folded them into the brownie batter, thinking that it would be a delightful twist to the classic recipe. I remember the joy on my family’s faces when they tried my creation. Those brownies were a hit! We shared them with neighbors, friends, and even took a batch to a potluck. Every crumb vanished, leaving behind glowing compliments that fueled my passion for baking.
Fast forward to today, and I still find that same magic whenever I make Raspberry Chocolate Brownies. This recipe embodies nostalgia and joy, and I can’t wait for you to create your unique memories in the kitchen!
Ingredients You’ll Need
-
Dark Chocolate (60-70% cocoa): The heart of our brownies! Dark chocolate brings a deep, rich flavor. If you prefer a sweeter taste, feel free to use semi-sweet chocolate or even milk chocolate.
-
Unsalted Butter: Adds moisture and richness. You can substitute with coconut oil or vegetable oil for a dairy-free option.
-
Granulated Sugar: Sweetens the brownies! Brown sugar can be used for a hint of caramel flavor, or coconut sugar for a healthier twist.
-
Large Eggs: Essential for binding the ingredients together. If you need a vegan option, use flaxseed or chia eggs (1 tablespoon ground flaxseed or chia mixed with 3 tablespoons of water per egg).
-
All-Purpose Flour: This gives the brownies structure. Gluten-free flour blends work well, too, for those avoiding gluten.
-
Fresh Raspberries: The star of the show! Use frozen raspberries if fresh ones aren’t available, just be sure to adjust your baking time as they may introduce extra moisture.
-
Vanilla Extract: A hint of vanilla enhances the chocolate flavor. You can substitute with almond extract for a different twist.
-
Salt: Just a pinch enhances all the flavors and balances the sweetness.
Step-by-Step Instructions
Step 1: Melt the Chocolate and Butter
Begin by preheating your oven to 350°F (175°C). Grab a medium saucepan and add the chopped dark chocolate and unsalted butter. Place it over low heat, stirring gently until melted and smooth. This can also be done using a microwave—just heat in short bursts of 20 seconds, stirring in between.
Chef Tip: Don’t overheat the chocolate; it’ll become grainy. Aim for a glossy consistency!
Step 2: Mix the Sugar and Eggs
In a large mixing bowl, whisk together the granulated sugar and eggs. You want to incorporate air into the mixture for a lighter texture. Keep whisking until it’s pale and fluffy (about 2-3 minutes).
Step 3: Combine Chocolate and Sugar Mix
Once your chocolate and butter mix is smooth, pour it into the bowl with your sugar and egg mixture. Stir gently until combined, but be careful not to over-mix!
Step 4: Add Dry Ingredients
In a separate bowl, combine all-purpose flour and salt. Gradually add this dry mix into your wet ingredients. Fold gently until you see no more flour streaks. Over-mixing can lead to tough brownies, and we want them to be ultra-fudgy and soft!
Step 5: Fold in the Raspberries
Now for the fun part! Gently fold in the fresh raspberries. If you’re using frozen raspberries, add them in straight from the freezer. This will help prevent them from breaking down too much in the batter.
Chef Hack: Reserve a few raspberries to place on top for that gorgeous, bakery-style look!
Step 6: Pour into the Baking Pan
Line an 8×8 inch baking pan with parchment paper for easy removal, and pour the brownie batter into the pan. Level it out with a spatula and sprinkle those reserved raspberries on top.
Step 7: Bake to Perfection
Pop the brownies into the preheated oven and bake for about 25-30 minutes. They should look set on the edges but still slightly gooey in the middle. You can check for doneness by inserting a toothpick—it should come out with a few moist crumbs.
Step 8: Cool and Serve
Once they’re done, remove the brownies from the oven and let them cool in the pan for about 15 minutes. Then, lift them out by the parchment paper and cool completely on a wire rack.
Serving Suggestion: Cut into squares and dust with powdered sugar for an elegant presentation. Serve them warm with a scoop of vanilla ice cream or a dollop of whipped cream for a truly decadent treat!
Recipe Variations
- Nutty Surprise: Add a half-cup of chopped walnuts or almonds for a delightful crunch.
- Minty Fresh: Incorporate a few drops of peppermint extract to give an exciting twist when serving during the holidays!
- Spicy Kick: Add a pinch of cayenne pepper or chili powder to the batter for a surprising heat that pairs beautifully with chocolate.
- Cream Cheese Swirl: For a tangy twist, prepare a simple cream cheese mixture and swirl it into the batter before baking.
- Double Berry Delight: Toss in some chopped strawberries along with the raspberries for a vibrant berry mix!
Chef’s Notes
These Raspberry Chocolate Brownies have come a long way since my early baking days. Every time I make them, I’m reminded of my family’s smiles and that sense of accomplishment that comes from feeding loved ones. I’ve experimented over the years with different ingredients, such as switching out the dark chocolate for blondie bases or exploring seasonal fruit varieties.
Whenever I have extra brownie batter, I pour it into muffin tins, creating brownie bites that bake up perfectly! They’re a wonderful solution for when you can’t decide between brownies or cake.
FAQs and Troubleshooting
Q1: Why are my brownies too cakey?
To achieve that fudgy texture, make sure not to overmix the batter, and avoid baking them for too long. They should be slightly under-baked in the center!
Q2: Can I use frozen raspberries?
Absolutely! Just be aware that they may release more moisture, so you might need to adjust the baking time slightly.
Q3: The brownies are crumbling—what went wrong?
This could be due to overbaking or not enough fat added to the recipe. Make sure you’re following the measurements precisely and keep an eye on them while baking.
Q4: How do I store leftover brownies?
Store them in an airtight container at room temperature for up to 4 days or in the fridge for a week. You can also freeze them for up to three months—just make sure they’re wrapped tightly!
Nutritional Info
(Per Brownie – approx. 1/16 of the batch)
- Calories: 180
- Protein: 3g
- Carbohydrates: 25g
- Fat: 8g
- Fiber: 2g
- Sugar: 12g
And there you have it—your guide to making delectable Raspberry Chocolate Brownies! May your baking adventures bring you joy and delicious moments shared with loved ones. Enjoy every bite, and remember, the kitchen is where love and flavors come together! Happy baking!
Print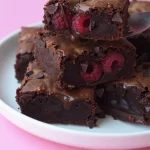
Raspberry Chocolate Brownies
- Total Time: 45 minutes
- Yield: 16 servings 1x
- Diet: Vegetarian
Description
Rich, fudgy brownies infused with dark chocolate and swirled with tart raspberries, perfect for any occasion.
Ingredients
- 8 oz Dark Chocolate (60-70% cocoa)
- 1/2 cup Unsalted Butter
- 1 cup Granulated Sugar
- 3 Large Eggs
- 1 cup All-Purpose Flour
- 1 cup Fresh Raspberries
- 1 tsp Vanilla Extract
- 1/4 tsp Salt
Instructions
- Preheat your oven to 350°F (175°C). In a medium saucepan, add the chopped dark chocolate and unsalted butter over low heat. Stir until melted and smooth.
- Whisk together the granulated sugar and eggs in a large mixing bowl until pale and fluffy.
- Add the melted chocolate and butter mixture to the sugar and egg mixture. Stir until combined.
- Combine all-purpose flour and salt in a separate bowl, then gradually add it to the wet ingredients while folding gently.
- Fold in the fresh raspberries gently.
- Pour the brownie batter into a lined 8×8 inch baking pan and level it out.
- Bake for about 25-30 minutes, or until set on the edges but still slightly gooey in the center.
- Cool for about 15 minutes, then lift out and cool completely on a wire rack.
Notes
For a nutty surprise, add chopped walnuts or almonds. You can also experiment with flavors like mint or a cream cheese swirl.
- Prep Time: 15 minutes
- Cook Time: 30 minutes
- Category: Dessert
- Method: Baking
- Cuisine: American
Nutrition
- Serving Size: 1 brownie
- Calories: 180
- Sugar: 12g
- Sodium: 100mg
- Fat: 8g
- Saturated Fat: 5g
- Unsaturated Fat: 2g
- Trans Fat: 0g
- Carbohydrates: 25g
- Fiber: 2g
- Protein: 3g
- Cholesterol: 70mg
Keywords: brownies, dessert, chocolate, raspberries, baking
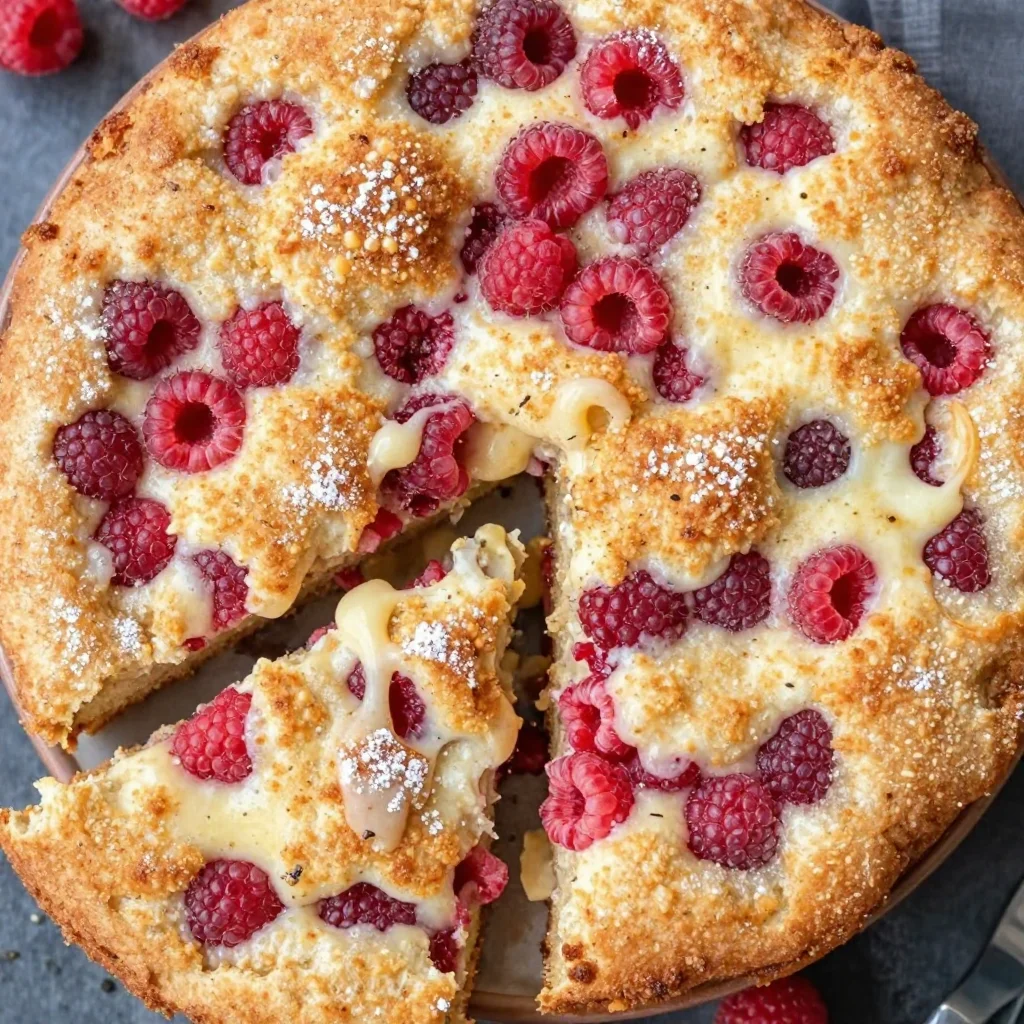
Beginner-Friendly Raspberry Coffee Cake in 30 Minutes
Raspberry Coffee Cake: A Sweet Slice of Nostalgia
Welcome to my kitchen! Today, we’re diving into a recipe that’s not only a personal favorite of mine but also a delightful treat that’s perfect for any occasion—Raspberry Coffee Cake! Imagine a warm slice fresh out of the oven, the sweet scent of raspberries mingling with a hint of vanilla, all while the coffee brews its rich aroma in the background. This cake isn’t just dessert; it’s an experience, a moment to share with loved ones, and a slice of happiness in our busy lives.
I love making this coffee cake for brunches, cozy afternoon get-togethers, or even as a delightful ending to dinner with friends. The balance of tart raspberries and sweet, buttery cake creates a symphony of flavors that makes it hard not to go back for seconds (or thirds!). Plus, what’s better than sharing a homemade treat that warms the soul?
You don’t need to be a master chef to whip up this beautiful, delicious cake. With simple ingredients and straightforward steps, you’ll feel like a baking rockstar in no time. Let’s get started on this delightful journey through flavor, nostalgia, and a whole lot of love!
A Sweet Memory
Ah, raspberry coffee cake! This dish always brings back memories of my childhood, spending lazy Sunday mornings in the kitchen with my grandmother. She was a kitchen magician, transforming the simplest ingredients into scrumptious treats that my family still talks about today. I was her little sous chef, standing on a stool with a wooden spoon in one hand and a bowl of fresh-picked raspberries in the other.
We would pick the juiciest berries from the garden, their vibrant red color promising sweetness. I’ll never forget the moment we poured the batter into the pan, scattering the raspberries joyfully on top. It was more than just a baking session; it was a lesson in love, patience, and the joy of creating something together. My grandmother taught me that cooking is an adventure—one that should be shared and savored.
Today, as I whip up this Raspberry Coffee Cake, I can still hear her laughter and feel her guiding hand in the process. It’s more than just a recipe; it’s a way to connect with my past and create new memories in the present.
Ingredients
Here’s what you’ll need for this scrumptious Raspberry Coffee Cake:
-
2 cups all-purpose flour
The base of our cake! If you need a gluten-free option, feel free to substitute with a 1:1 gluten-free flour blend. -
1 cup granulated sugar
This adds just the right amount of sweetness. For a healthier twist, use coconut sugar, which has a lovely caramel flavor. -
1 tablespoon baking powder
This is our leavening agent that’ll make the cake rise beautifully. Make sure it’s fresh for the best results! -
1/2 teaspoon salt
Just a pinch enhances all the flavors in the cake. -
1/2 cup unsalted butter, softened
Butter makes everything better! You can swap this with vegetable oil if you want a lighter texture. -
2 large eggs
Eggs add richness and moisture. For a vegan alternative, use flax eggs (1 tablespoon of flaxseeds mixed with 2.5 tablespoons of water per egg, let sit until gelatinous). -
1 teaspoon vanilla extract
This little gem adds warmth and depth. Feel free to use almond extract for a unique flavor twist! -
3/4 cup milk
Whole milk works best for a moist crumb, but feel free to use any plant-based milk if you’re dairy-free. -
2 cups fresh or frozen raspberries
Fresh raspberries are the star here! If using frozen, make sure to toss them in a little flour to prevent sinking. -
1 teaspoon lemon zest
This adds a zesty brightness! If you’re in a pinch, use pre-made lemon juice—just a few drops will do.
Step-by-Step Instructions
-
Preheat the Oven
Begin by preheating your oven to 350°F (175°C). Prep your 9-inch round cake pan by greasing it or lining it with parchment paper for easy removal. -
Mix the Dry Ingredients
In a medium bowl, whisk together the flour, sugar, baking powder, and salt. This is the foundation of your cake, and whisking helps to aerate the flour, making for a lighter texture. -
Cream the Butter and Sugar
In a large mixing bowl, beat the softened butter with the sugar until light and fluffy. This step is crucial as it incorporates air, giving your cake the desired rise. An electric mixer works wonders here! -
Incorporate the Eggs and Vanilla
Add the eggs, one at a time, beating well after each addition. Stir in the vanilla extract to create that cozy aroma. Don’t skip this step! It connects all the flavors beautifully. -
Combine the Mixtures
Gradually add the dry ingredients to the wet mixture, alternating with the milk. Start and end with the flour mixture to keep the batter smooth. Don’t overmix; just stir until everything is combined! -
Fold in the Raspberries
Gently fold in the raspberries, being careful not to crush them. This is where you get that delicious burst of flavor in every bite. Resist the urge to overmix; those beautiful berries need to stay whole! -
Transfer to Pan and Bake
Pour the batter into the prepared cake pan, smoothing out the top. Pop it in the oven and bake for 40-45 minutes or until a toothpick inserted in the center comes out clean. You want that delicious aroma wafting through your kitchen! -
Cool and Serve
Once baked, let the cake cool in the pan for about 10 minutes before transferring it to a wire rack to cool completely. It’s incredibly tempting, but resist the urge to cut into it while it’s hot!
Serving Suggestions
Once your Raspberry Coffee Cake has cooled, it’s time to serve it up! Plate individual slices on pretty dessert plates, dust them with confectioners’ sugar, and maybe even add a dollop of freshly whipped cream or a scoop of vanilla ice cream on the side. A sprinkle of extra berries on top adds a beautiful pop of color and elevates the presentation—perfect for impressing guests or just treating yourself!
Recipe Variations
Feeling adventurous? Here are some fun twists to try with your Raspberry Coffee Cake:
-
Berry Mix-Up: Swap out raspberries for blueberries, blackberries, or even a mixed berry blend for a different fruity flavor.
-
Nutty Delight: Stir in 1/2 cup of walnuts or pecans for some crunch and depth.
-
Citrus Burst: Add in the zest of an orange or lime for a vibrant citrusy twist.
-
Swirl It Up: Create a cream cheese or streusel swirl by mixing softened cream cheese with a bit of sugar and cinnamon, then swirling it through the batter before baking.
-
Spice It Up: Incorporate a teaspoon of cinnamon or even a pinch of nutmeg into the batter for a warm, spiced flavor profile.
Chef’s Notes
As I pour my heart into this recipe, I can’t help but think about how it has evolved over the years. Initially, I was all about just the cake itself, but I quickly learned the beauty of adding different fruits and spices to elevate it further. The joy of baking is that it can be both a science and an art!
When I bake this coffee cake now, it often takes me back to those sweet mornings with my grandmother. Her laughter lingers in my memory like the smell of baked goods wafting through the house. Every slice tells a story, and each time I share it, I feel her spirit in the room, uniting friends and family once again.
FAQs and Troubleshooting
Q: My cake sank in the middle. What did I do wrong?
A: A sinking cake is often due to underbaking. Ensure it’s fully cooked through, and always have your oven temperature calibrated. If you find your cakes frequently sink, consider investing in an oven thermometer!
Q: Can I use frozen raspberries?
A: Absolutely! Just toss them in a bit of flour before folding into the batter to prevent them from sinking. They will add a lovely burst of flavor to your cake!
Q: How do I know when my cake is done?
A: The cake should be golden brown and a toothpick inserted in the center should come out clean or with just a few crumbs attached.
Q: Can I make this recipe ahead of time?
A: Yes! The cake can be made a day in advance. Just store it covered at room temperature. It also freezes well—just wrap it tightly and it’ll be a delicious treat ready to thaw when you need it.
Nutritional Info (Optional)
While I believe in enjoying every bite of our favorite treats, knowing the caloric content can be beneficial. A slice of Raspberry Coffee Cake (based on 12 servings) contains approximately 275 calories, 10g fat, 40g carbohydrates, and 3g protein. Enjoy your treats in moderation, and indulge in flavor without guilt!
Thank you for joining me in my kitchen today! I hope you feel inspired to bake this heartfelt Raspberry Coffee Cake! Whether you’re sharing it with friends or indulging all by yourself (no judgment here!), it’s sure to create memorable moments. Happy baking, my foodie friends!
Print
Raspberry Coffee Cake
- Total Time: 60 minutes
- Yield: 12 servings 1x
- Diet: Vegetarian
Description
A delightful Raspberry Coffee Cake perfect for brunches, cozy get-togethers, or as a sweet ending to dinner.
Ingredients
- 2 cups all-purpose flour
- 1 cup granulated sugar
- 1 tablespoon baking powder
- 1/2 teaspoon salt
- 1/2 cup unsalted butter, softened
- 2 large eggs
- 1 teaspoon vanilla extract
- 3/4 cup milk
- 2 cups fresh or frozen raspberries
- 1 teaspoon lemon zest
Instructions
- Preheat the oven to 350°F (175°C) and prep your 9-inch round cake pan.
- Mix the flour, sugar, baking powder, and salt in a medium bowl.
- Cream the softened butter with the sugar until light and fluffy.
- Incorporate the eggs one at a time, beating well after each addition, and stir in the vanilla extract.
- Combine the dry ingredients with the wet mixture, alternating with the milk.
- Fold in the raspberries gently to avoid crushing them.
- Transfer the batter to the prepared cake pan and bake for 40-45 minutes.
- Cool the cake in the pan for about 10 minutes before transferring it to a wire rack.
Notes
Serve with a dusting of confectioners’ sugar and a dollop of whipped cream or a scoop of vanilla ice cream for extra indulgence.
- Prep Time: 15 minutes
- Cook Time: 45 minutes
- Category: Dessert
- Method: Baking
- Cuisine: American
Nutrition
- Serving Size: 1 slice
- Calories: 275
- Sugar: 23g
- Sodium: 200mg
- Fat: 10g
- Saturated Fat: 6g
- Unsaturated Fat: 4g
- Trans Fat: 0g
- Carbohydrates: 40g
- Fiber: 2g
- Protein: 3g
- Cholesterol: 40mg
Keywords: raspberry coffee cake, brunch dessert, easy cake recipe, baking




