
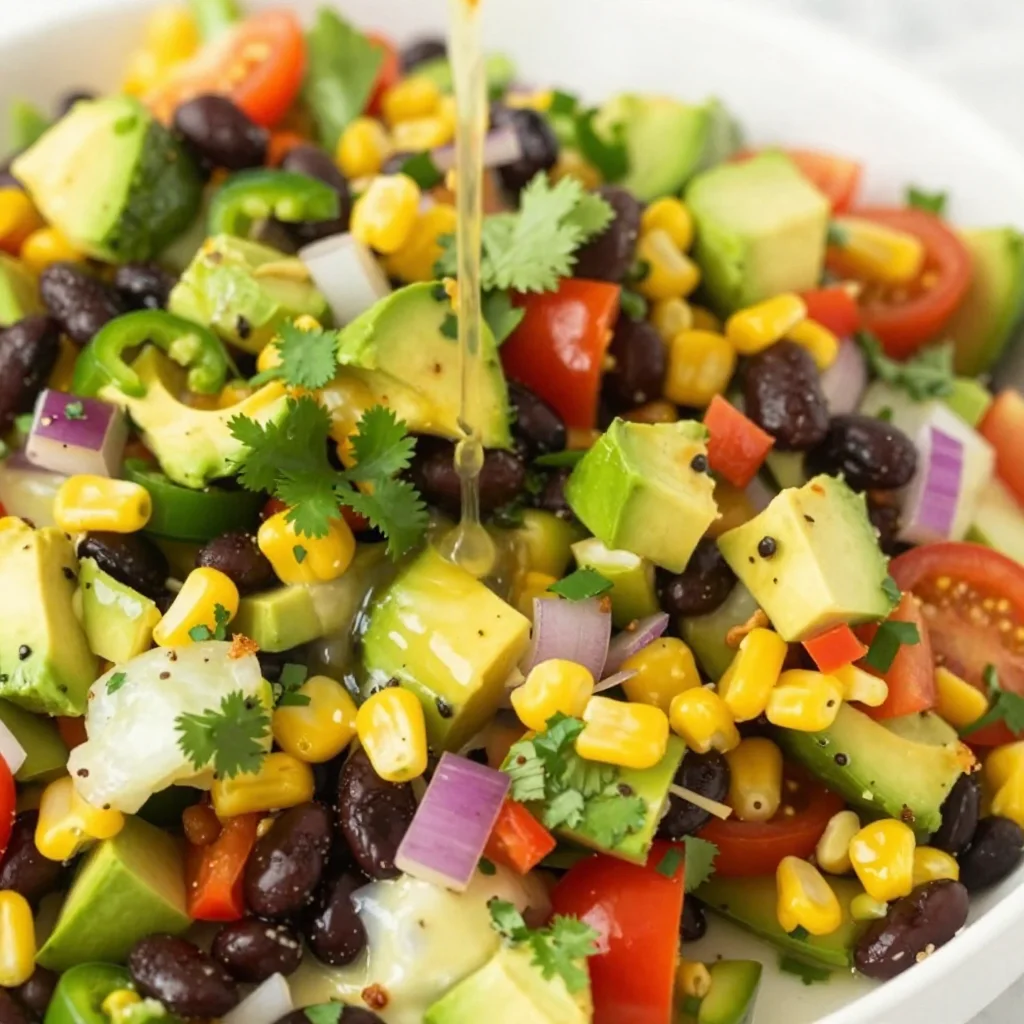
Cowboy Caviar
Cowboy Caviar: A Flavorful Fiesta in a Bowl
Welcome to my kitchen, fellow food enthusiasts! Today, we’re diving into a dish that’s not just a treat for the taste buds but an invitation to gather, laugh, and celebrate the joy of good food. If you’ve never experienced Cowboy Caviar, get ready for a game-changer! This vibrant, colorful dish is packed with flavors, textures, and a whole lot of love, making it perfect for parties, potlucks, or even a cozy night in.
Just imagine this: a warm summer evening, the sun setting, friends gathered around the table, chips in hand, and a big bowl of Cowboy Caviar sitting in the middle, waiting to be devoured. The first crunch of a tortilla chip dipped into that zesty mix of black beans, corn, tomatoes, and spices is pure euphoria. It’s more than just a snack; it’s a celebration!
Cowboy Caviar has its roots in Texas, where it’s often served at gatherings and festivities—like a flavorful little fiesta in a bowl. But it isn’t just Texas pride that makes this dish shine; it’s the way it brings everyone together. The lively colors and fresh ingredients make it not only delicious but also visually stunning. Plus, it’s super easy to whip up, which means more time for chatting and enjoying each other’s company rather than slaving in the kitchen.
So, gather your friends, have your favorite playlist ready, and let’s get cooking! I can’t wait to share this delightful recipe that will undoubtedly make its way into your go-to cooking repertoire.
A Taste of Home: My Cowboy Caviar Memory
Cowboy Caviar holds a special place in my heart, and it’s more than just a beloved recipe—it’s a bridge to cherished memories. One summer weekend, I remember gathering at my Grandma Edna’s house, where each of us would bring a dish for our annual family cookout. Grandma was famous for her dreamy pot roast and homemade pies, but it was her Cowboy Caviar that had everyone lining up.
The moment we walked in, the warmth of the kitchen enveloped us, filled with the sound of laughter and the smell of spices wafting through the air. I still vividly remember Grandma’s infectious laughter as she passed around the bowl, encouraging us to dig in. There’s something magical about the way certain dishes can invoke feelings of nostalgia and comfort, isn’t there? That Cowboy Caviar was a burst of colors and flavors so vibrant that it felt like a party in your mouth!
Years may have passed, but the images of Grandma smiling with her apron on, surrounded by family with chips in hand, remain etched in my memory. It’s those moments that inspire me to recreate this dish. I love sharing it with my friends and my little ones now, making sure they understand just how special food can be in bringing people together.
Ingredients
Here’s what you’ll need to create your own Cowboy Caviar masterpiece. Each of these ingredients contributes something unique, and I’ve included some tips on substitutions and insights to guide you along the way.
-
1 can (15 oz) black beans: Rinsed and drained. Black beans are not only hearty but also packed with protein. You can swap these for pinto beans or chickpeas if you prefer.
-
1 can (15 oz) corn kernels: Rinsed and drained. If you have fresh corn on the cob, feel free to use that as it brings a lovely crunch.
-
1 cup cherry tomatoes: Halved. These little gems add a sweet burst of flavor; grape tomatoes work too if that’s what you have on hand.
-
1 red bell pepper: Diced. Sweet and crunchy, but any color of bell pepper will work, or you could use jalapeños for some heat!
-
1 avocado: Diced. Creamy and luscious, avocados add a nice richness. If you want less fat, you can skip it or use a scoop of Greek yogurt.
-
1/4 red onion: Finely chopped. It gives a great zing! Soak the chopped onion in cold water for 10 minutes to mellow the flavor if you’re sensitive to raw onions.
-
1/4 cup fresh cilantro: Chopped. This herb brings brightness, but if you’re not a fan, parsley makes a good alternative.
-
2 tablespoons olive oil: For richness. A splash of lime or lemon juice can replace some of the oil—and add brightness too!
-
1-2 limes: Juiced. Fresh lime juice is essential for that zesty kick; you can also use lemon if limes are unavailable.
-
1 teaspoon garlic powder: For an extra layer of flavor. If you prefer fresh garlic, one minced clove will do the job!
-
1 teaspoon chili powder: For a touch of heat. You can amp up the spice with smoked paprika or cayenne.
-
Salt and pepper: To taste. Always essential in bringing out the flavors!
Make sure to prep your ingredients before getting started; it makes the cooking process so much smoother.
Step-By-Step Instructions
Ready to bring this dish to life? Grab your ingredients, put on your favorite tunes, and let’s get started!
-
Prep Your Ingredients: Start by rinsing and draining your black beans and corn. Next, chop your tomatoes, bell peppers, onion, and cilantro. Get everything ready to go—this step will make the rest of the cooking process effortless!
-
Mix It Up in a Large Bowl: In a large mixing bowl, combine the black beans, corn, cherry tomatoes, diced bell pepper, avocado, red onion, and cilantro. Just put all those colorful ingredients in there—you might even feel like an artist creating a masterpiece!
-
Prepare the Dressing: In a small bowl, whisk together the olive oil, lime juice, garlic powder, cumin, chili powder, salt, and pepper. This dressing is what brings everything together, so taste it and adjust the seasonings as needed. A little extra lime never hurts!
-
Combine Everything: Pour the dressing over the bean and veggie mixture, tossing everything gently to coat. Avoid mashing the avocado—you want those lovely chunks to shine!
-
Let It Chill: If you have the time, cover your bowl with plastic wrap and let it chill in the fridge for at least 30 minutes. This allows the flavors to mingle and marry, intensifying that Cowboy Caviar goodness. Trust me, it’s worth the wait!
-
Taste Before Serving: Right before serving, take a quick taste test. If it needs more lime, salt, or chili, adjust it now!
-
Serve: Scoop your Cowboy Caviar into a stunning serving bowl, and don’t forget to have a stack of tortilla chips ready for dipping!
Serving Suggestions
This Cowboy Caviar is incredibly versatile when it comes to serving. You can serve it up in a beautiful bowl with a heaping pile of tortilla chips on the side for casual enjoyment. For a more refined presentation, place it in individual cups or small bowls as an appetizer. It also works wonderfully as a topping for grilled fish or chicken, or even spooned onto a bed of greens for a vibrant salad! Don’t forget to garnish with additional cilantro or lime wedges for that extra pop!
Recipe Variations
Feeling creative? Here are some fun variations to put your own spin on this timeless recipe!
-
Spicy Cowboy Caviar: Add diced jalapeños or a dash of hot sauce for an extra kick!
-
Tropical Twist: Mix in some diced mango or pineapple for a sweet surprise.
-
Quinoa Cowboy Caviar: Toss in cooked quinoa for added protein and a heartier texture.
-
Mediterranean Style: Substitute the black beans with chickpeas, add in feta cheese, and a dash of oregano for a Mediterranean flair.
-
Vegan Creaminess: Swap out the avocado for cashew cream to keep it creamy while remaining plant-based.
Chef’s Notes
Cowboy Caviar has evolved over time in my kitchen. I love experimenting with different beans and vegetables based on what’s in season. Sometimes I throw in roasted corn for added sweetness or toss in a few radishes for an extra crunch! Food should always be fun, and cooking is about creating dishes that fit your style and taste.
A little funny story: the first time I made Cowboy Caviar for a BBQ, I was so eager to impress that I accidentally used salt instead of sugar in the dressing. Let’s just say my friends will never let me live that day down! But they loved the new spin, so sometimes even "mistakes" can turn into memorable moments.
FAQs and Troubleshooting
1. Can I make it ahead of time?
Absolutely! Cowboy Caviar tastes even better the next day after sitting in the fridge, so feel free to prep it a day in advance. Just remember to stir gently before serving to redistribute the dressing.
2. How long will it last in the fridge?
If stored in an airtight container, it will last about 3-5 days in the refrigerator. Just keep an eye on the avocado to ensure it doesn’t brown too much!
3. What do I do if it’s too salty?
If you find your Cowboy Caviar has become too salty, adding diced tomatoes or a bit more corn can help balance it out.
4. Can I freeze it?
While it’s not ideal to freeze, you can freeze the bean mixture (without the avocado) for later use. Just let it thaw in the fridge, and add fresh ingredients before serving.
Nutritional Info
(If you’re counting, here’s a brief overview!)
- Serving Size: 1/2 cup
- Calories: Approximately 150-200
- Protein: 6-8g
- Fiber: 5-7g
- Fat: 5-7g
Cowboy Caviar is not only a treat for your taste buds but also a nutritious option packed with fiber and protein.
Now that you have the recipe under your belt, I can’t wait to hear how it goes! Grab those chips and invite your friends over for a flavor explosion that’ll have everyone raving! Happy cooking, and may your kitchen always be filled with warmth and loved ones.
Print
Cowboy Caviar
- Total Time: 45 minutes
- Yield: 4 servings 1x
- Diet: Vegan
Description
A vibrant and flavorful bean and veggie dip perfect for parties and gatherings.
Ingredients
- 1 can (15 oz) black beans, rinsed and drained
- 1 can (15 oz) corn kernels, rinsed and drained
- 1 cup cherry tomatoes, halved
- 1 red bell pepper, diced
- 1 avocado, diced
- 1/4 red onion, finely chopped
- 1/4 cup fresh cilantro, chopped
- 2 tablespoons olive oil
- 1–2 limes, juiced
- 1 teaspoon garlic powder
- 1 teaspoon chili powder
- Salt and pepper, to taste
Instructions
- Prep your ingredients: Rinse and drain the beans and corn. Chop tomatoes, bell peppers, onion, and cilantro.
- Mix it up in a large bowl: Combine beans, corn, tomatoes, bell pepper, avocado, onion, and cilantro in a bowl.
- Prepare the dressing: Whisk olive oil, lime juice, garlic powder, chili powder, salt, and pepper in a small bowl.
- Combine everything: Pour dressing over the mixture and toss gently to coat.
- Let it chill: Cover and refrigerate for at least 30 minutes to allow flavors to meld.
- Taste before serving and adjust seasonings as needed.
- Serve: Enjoy with tortilla chips.
Notes
Can be made ahead of time, and it tastes even better the next day.
- Prep Time: 15 minutes
- Cook Time: 0 minutes
- Category: Appetizer
- Method: Mixing
- Cuisine: Tex-Mex
Nutrition
- Serving Size: 1/2 cup
- Calories: 175
- Sugar: 3g
- Sodium: 150mg
- Fat: 7g
- Saturated Fat: 1g
- Unsaturated Fat: 6g
- Trans Fat: 0g
- Carbohydrates: 25g
- Fiber: 6g
- Protein: 8g
- Cholesterol: 0mg
Keywords: Cowboy Caviar, Tex-Mex dip, bean salad, party appetizer
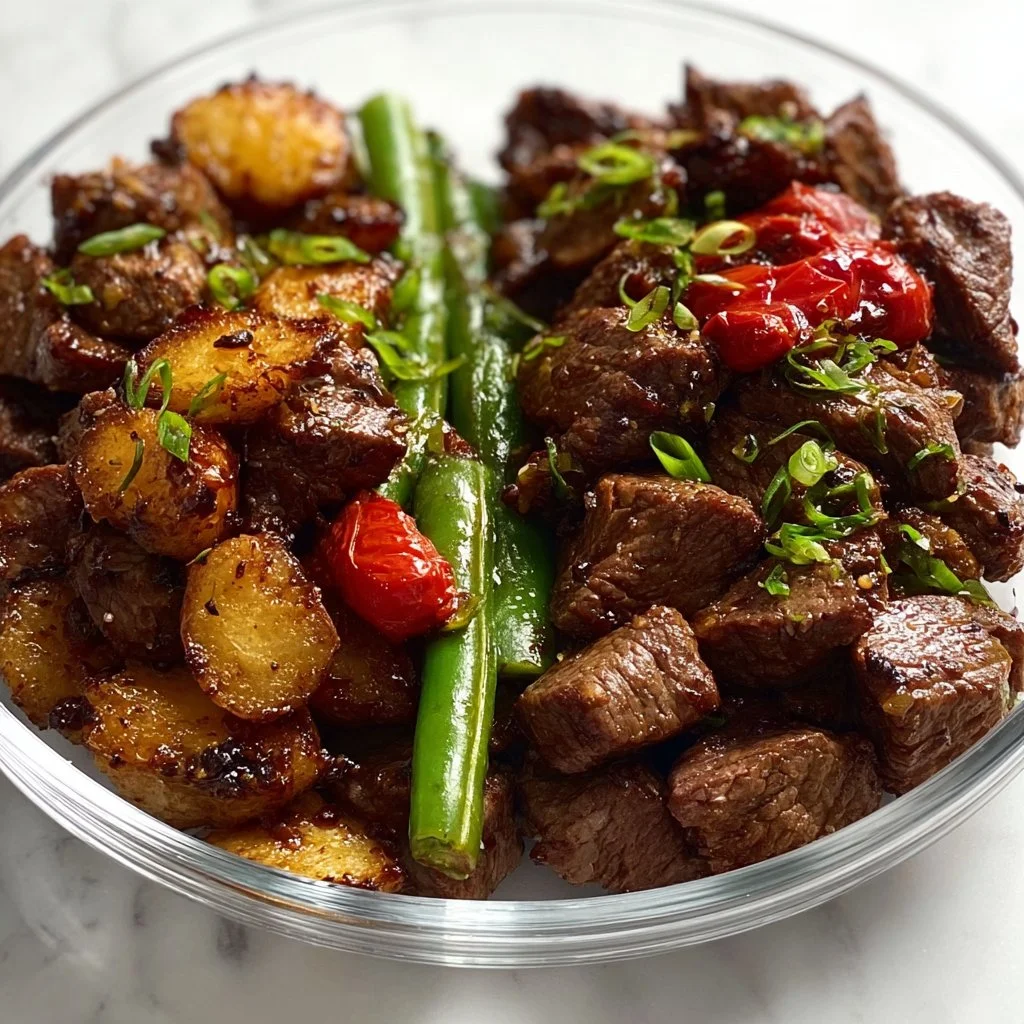
Garlic Balsamic Steak Bites
Garlic Balsamic Steak Bites: A Savory Sensation
Hey there, fellow food lovers! Welcome back to my cozy corner of the kitchen. Today, I am super excited to share a recipe that has not only stolen the hearts of my friends and family but also created unforgettable memories around the dining table: Garlic Balsamic Steak Bites.
Imagine this: it’s a Friday evening, and you’re gathering with your best pals for a casual get-together. You’ve got your favorite playlist thrumming in the background, and the aroma of sizzling steak wafts through the air, mingling with a drizzle of tangy balsamic vinegar and garlic. As you pop these juicy bites of steak into your mouth, a delightful explosion of flavors greets you, and laughs erupt around the table. Yep, that’s the magic of these Garlic Balsamic Steak Bites in action!
This recipe is the perfect blend of savory goodness and comforting nostalgia. It’s become a staple not just for gatherings but also for cozy dinners at home—because sometimes, it’s nice to treat yourself to something special without spending all day in the kitchen. Whether you’re a seasoned home cook or just beginning your culinary adventure, you’ll find that these little gems are simple to whip up and impossible to resist!
So grab your apron (prepare for some delightful messiness!) and let’s dive into making these irresistible bites. Trust me, your taste buds are going to thank you, and your friends will certainly be coming back for seconds!
Personal Story
Ah, the memories! I still remember the first time I shared these steak bites with my best friends during a game night. We had spent hours strategizing over board games (which ended up in friendly arguments), but I couldn’t wait to introduce them to my latest cooking experiment—Garlic Balsamic Steak Bites!
As I pulled them out of the oven, my friends’ eyes lit up. The glorious scent had everyone buzzing. We gathered around the table, and I served the steak bites skewered with toothpicks, allowing us to dive right in. The laughter, the teasing, and the competitive spirit of the game melted away the stress of the week. Every bite elicited moans of delight, and I knew I had struck gold!
Since that night, these steak bites have been a staple at every gathering. They’ve sparked countless conversations, laughter, and memories that I hold dear. So whether it’s a casual game night or an elegant dinner party, these bites have a special place in my kitchen and my heart.
Ingredients
Here’s what you’ll need to create your Garlic Balsamic Steak Bites:
-
Steak – About 1 pound of sirloin or flank steak works wonders here. These cuts are tender and flavorful. If you prefer a leaner option, you can substitute with tenderloin.
-
Garlic – 3-4 cloves of fresh garlic make this dish sing! If you’re in a pinch, garlic powder can work (about 1 teaspoon for a milder flavor), but fresh is always best for that punch.
-
Balsamic Vinegar – ½ cup – This tangy, rich vinegar brings depth to the dish. If you want something sweeter, try balsamic glaze as a substitute, but note that you may want to reduce the cooking time slightly.
-
Olive Oil – 2 tablespoons not only helps to marinate but also adds richness. You could swap with avocado oil for a different flavor profile.
-
Soy Sauce – 2 tablespoons delivers a savory umami kick! If you need a gluten-free option, try tamari instead.
-
Honey – 1 tablespoon for a hint of sweetness to balance the acidity in the vinegar. Maple syrup can be a great vegan alternative.
-
Crushed Red Pepper Flakes – Optional, but they give a lovely touch of heat! If you’re not a fan of spice, feel free to skip it.
-
Salt and Pepper – Essential for seasoning! Always taste as you go for the best results.
Not only are these ingredients easy to find, but you can also mix and match some of them based on what you have. Cooking should be fun and adjustable to your taste!
Step-by-Step Instructions
Ready to create some culinary magic? Here’s how you can whip up these Garlic Balsamic Steak Bites in just a few easy steps:
-
Marinate the Steak: Begin by cutting the steak into bite-sized cubes (about 1-inch squares). In a bowl, mix the minced garlic, balsamic vinegar, olive oil, soy sauce, honey, and crushed red pepper flakes. Toss in the steak cubes and mix until they’re evenly coated. Let them marinate for at least 30 minutes, though if you can do it for a few hours or overnight in the fridge, you’ll really maximize those flavors!
-
Preheat Your Grill or Skillet: If you’re using a grill, preheat it to medium-high heat. If you’re cooking on a skillet, heat about a tablespoon of olive oil over medium-high heat until shimmering.
-
Skewer the Steak: After marination, it’s time to assemble! If you’re using wooden skewers, remember to soak them in water for about 30 minutes to prevent burning. Thread the marinated steak cubes onto the skewers, leaving a bit of space between each piece to ensure even cooking.
-
Cook the Steak: Place the skewers on the grill, or the steak pieces in the skillet. Grill or sear for about 2-3 minutes on each side for a perfect medium-rare finish, adjusting the time if you prefer it more well-done. The key is to keep an eye on them, as overcooking can lead to tough bites!
-
Rest the Steak: Once they’re cooked to your liking, transfer the skewers to a plate and let them rest for about 5 minutes. Resting allows the juices to redistribute, resulting in juicy bites.
-
Serve and Enjoy: You can drizzle with extra balsamic glaze or sprinkle with fresh herbs like parsley for a pop of color before serving. Quick tip: always serve them warm; the flavors are at their best right off the grill or skillet!
And voilà! You now have delicious Garlic Balsamic Steak Bites ready to enjoy. Serve them up on a beautiful platter and watch your guests swoon!
Serving Suggestions
When it comes to serving your Garlic Balsamic Steak Bites, those beautifully skewered morsels can be presented in a variety of ways! I love to arrange them on a rustic wooden board with small bowls of dipping sauces, like a chimichurri or a creamy garlic mayo. They make a stunning and inviting centerpiece for a gathering.
Alternately, you can serve them atop a fresh arugula salad, tossing in cherry tomatoes and drizzling with a bit of balsamic glaze for an extra zing. Trust me, this will create a vibrant and appealing dish that’s sure to impress!
Recipe Variations
Feeling adventurous? Here are some fun twists to customize your Garlic Balsamic Steak Bites:
-
Add Veggies: Toss in some bell peppers or onions with the steak when marinating, then skewer them together for a more colorful and hearty bite.
-
Spiced Up: Add some Worcestershire sauce for an even bolder flavor. Or experiment with different spices like smoked paprika or Cajun seasoning!
-
Herbed Delight: Before serving, sprinkle fresh herbs like rosemary or thyme for an aromatic touch.
-
Sweet Twist: Swap the honey for brown sugar to give the marinade a deeper caramel flavor.
-
Make It a Skewers Platter: Turn these steak bites into a mixed skewer platter by alternating pieces of steak with chunks of grilled shrimp or chicken for a surf-and-turf experience!
Chef’s Notes
Ah, the joy of cooking! This recipe has evolved from a simple idea in my kitchen to a full-fledged fan favorite. Initially, I whipped these up for a cozy family dinner, and over the years, they have become a staple for BBQs and celebrations.
Funny enough, I once attempted to make these during a dinner party, and I accidentally grabbed red wine vinegar instead of balsamic—oh boy! The flavor was totally off! But instead of despair, we rolled with it, creating a whole new dish, and ended up laughing till our bellies hurt. Lessons learned in the kitchen are often the most memorable!
In the years since, I’ve refined the recipe to get just the right balance of sweet and tangy, making sure they are always a crowd-pleaser. So trust me when I say, you can’t go wrong with these bites!
FAQs and Troubleshooting
Q: What if my steak bites turn out tough?
A: The key here is to not overcook the meat! Always watch your cooking times, and remember that steak can continue cooking even after being removed from heat due to residual heat transfer.
Q: Can I use a different type of meat?
A: Absolutely! Chicken, pork, or even firm tofu for a vegetarian option can work beautifully with this marinade. Just adjust your cooking time accordingly based on the protein you choose!
Q: Can I prepare these in advance?
A: Definitely! You can marinate the steak ahead of time and then grill them just before serving. However, cooking them fresh will always ensure maximum juiciness.
Q: How do I store leftovers?
A: If you somehow have leftovers (which is rare!), store them in an airtight container in the refrigerator for up to 3 days. Reheat gently on the stove or in the oven to maintain tenderness.
Nutritional Info
(per serving, assuming 8 servings total)
- Calories: 150
- Protein: 20g
- Carbohydrates: 5g
- Fat: 7g
- Fiber: 0g
In the end, these Garlic Balsamic Steak Bites are more than just a delicious dish; they are a vessel of memories, laughter, and all the good vibes! Eating should be a joyful experience, so I hope these bites bring you as much happiness as they have for me. Now, gather your loved ones, pour yourself a drink, and enjoy the delicious journey of cooking together!
Happy cooking! 🌟
Print
Garlic Balsamic Steak Bites
- Total Time: 25 minutes
- Yield: 4 servings 1x
- Diet: Gluten-Free
Description
A savory blend of tender steak marinated in garlic and balsamic vinegar, grilled to perfection for an unforgettable flavor experience.
Ingredients
- 1 pound sirloin or flank steak, cut into bite-sized cubes
- 3–4 cloves garlic, minced
- ½ cup balsamic vinegar
- 2 tablespoons olive oil
- 2 tablespoons soy sauce
- 1 tablespoon honey
- ½ teaspoon crushed red pepper flakes (optional)
- Salt and pepper, to taste
Instructions
- Marinate the steak: In a bowl, mix garlic, balsamic vinegar, olive oil, soy sauce, honey, and red pepper flakes. Toss steak cubes in marinade and let sit for at least 30 minutes.
- Preheat your grill or skillet to medium-high heat.
- Skewer the steak cubes onto skewers, making sure to leave space between pieces.
- Cook the skewers on the grill or in the skillet for 2-3 minutes on each side for medium-rare.
- Rest the steak for about 5 minutes before serving.
- Serve warm, potentially drizzled with balsamic glaze or sprinkled with fresh herbs.
Notes
For best flavor, marinate the steak overnight. Serve alongside dipping sauces or fresh salad.
- Prep Time: 15 minutes
- Cook Time: 10 minutes
- Category: Appetizer
- Method: Grilling
- Cuisine: American
Nutrition
- Serving Size: 1 serving
- Calories: 150
- Sugar: 7g
- Sodium: 600mg
- Fat: 7g
- Saturated Fat: 2g
- Unsaturated Fat: 3g
- Trans Fat: 0g
- Carbohydrates: 5g
- Fiber: 0g
- Protein: 20g
- Cholesterol: 70mg
Keywords: steak bites, appetizer, grilling, balsamic vinegar, garlic
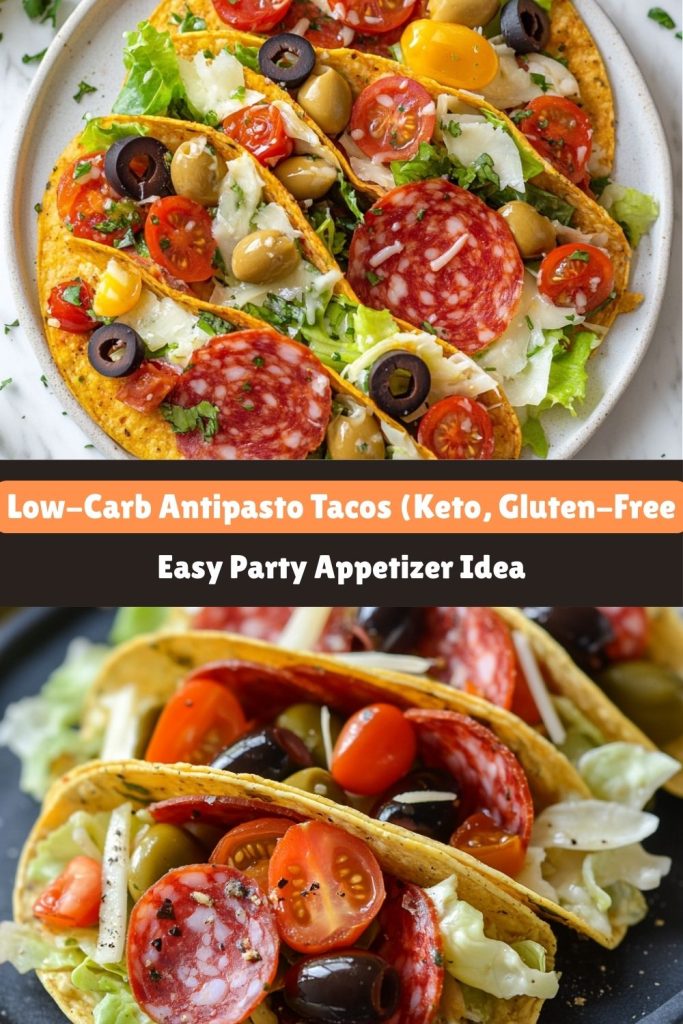
Low-Carb Antipasto Tacos
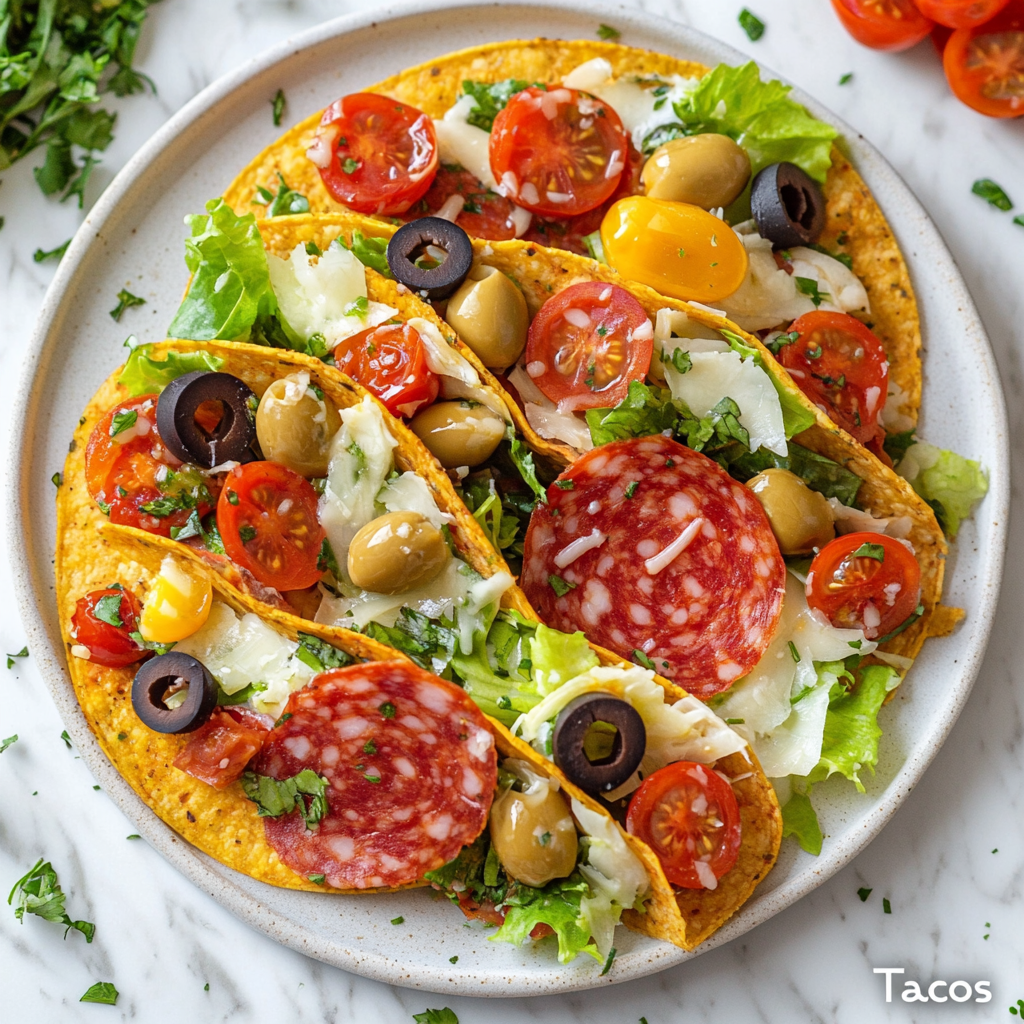
Low-Carb Antipasto Tacos: When Italy Hijacks Taco Night
Hey foodie friends! Chef here, ready to spill the marinara… er, beans… about my latest kitchen obsession. Picture this: It’s Friday night, your crew’s screaming for tacos, but your keto bestie’s side-eyeing the tortillas like they just insulted their Nonna. Enter the Low-Carb Antipasto Taco – your golden ticket to being the snack hero we all deserve.
These aren’t just “healthy hacks.” They’re flavor grenades, folks. One bite and you’ll forget tortillas ever existed. Imagine crispy salami shells cradling marinated artichokes, peppery mozzarella, juicy cherry tomatoes, briny olives, and that tangy snap from pepperoncini. It’s like your favorite charcuterie board took a yoga class, found its center, and folded itself into taco form. Bliss. Folded. Into. Bliss.
I’ve been road-testing these bad boys literally everywhere – from my niece’s soccer games (shoutout to the soccer moms who demanded the recipe before the second half even started) to my buddy’s “I swear I’m keto this time” BBQ. The verdict? Zero leftovers. Every. Single. Time. People don’t just eat them – they inhale them.
The Salami Epiphany: A Deli Counter Love Story
Let me take you back to 2019. There I was – 22, broke, and working the midnight shift at Tony’s Trattoria. We were down a line cook, the fryer broke mid-service, and a table of hangry firefighters were barking for something “crunchy and meaty, STAT.” The anxiety? Palpable. The adrenaline? Spiked. My culinary degree? Nowhere to be found.
Then – like divine intervention – I spotted it: Tony’s nonna’s stash of finocchiona salami tucked behind the olives. I grabbed a few slices, slapped them under the broiler, and boom – crispy meat cups were born. I tossed in leftover antipasto salad, hit it with a balsamic drizzle that would make Botticelli weep, and sent them out.
Five minutes later? The firefighters were raving, the server wanted to marry me, and I officially had my first kitchen “mic drop” moment. Now? These tacos are my edible business card. Made them for my now-wife on our first date. She still says she married me for the salami shells – and honestly, I don’t blame her.
What You’ll Need to Make Low-Carb Antipasto Tacos
Before we dive into the build, let’s break down your lineup. You can mix and match a bit, but the magic is in the balance of textures and tang:
-
Large salami slices (Genoa or hard salami): Your edible taco shell. Look for ones around 4” in diameter. Genoa gives a smoother chew, while hard salami crisps up a bit more. Pro tip: Go thick enough to hold fillings, but thin enough to crisp.
-
Shredded lettuce: Iceberg brings crunch and classic taco vibes. Want to go gourmet? Toss in a little radicchio or baby arugula for color and a slight bitterness that offsets the richness.
-
Marinated artichokes: Chop them roughly – you want texture. Oil-packed ones are worth the extra pennies. They add a briny punch that pairs beautifully with cured meat.
-
Black olives: Sliced black olives are fine, but if you’ve got Kalamatas or Castelvetranos on hand, your taste buds will thank you.
-
Cherry tomatoes: Halve or quarter these juicy gems to avoid taco blowouts. Bonus points if you slow-roast them for added umami.
-
Mozzarella pearls: Creamy, mild, and poppable. Or go full luxury with torn burrata. Vegan? Marinated tofu cubes soak up flavor like champs.
-
Pepperoncini: That garlic-kissed tang brings the whole bite alive. Banana peppers work too, but pepperoncini are the secret weapon here.
-
Olive oil + red wine vinegar: Classic Italian dressing, no sugar needed. Go 1:1 ratio. No vinegar? Lemon juice gives bright acidity and pairs great with olives.
-
Italian seasoning or fresh herbs: Basil, oregano, parsley – sprinkle them like you mean it. Fresh herbs bring the wow.
How to Make Low-Carb Antipasto Tacos
This is where the party starts. You’re about 10 minutes from taco glory.
Step 1: The Shell Game
Lay your salami slices flat on a paper towel-lined baking sheet. This absorbs excess grease and keeps things crisp. Want that perfect taco “snap”? Bake at 400°F for 3-4 minutes – just until they start to curl at the edges.
Let them cool slightly, then carefully fold them into taco shapes. If they resist, toothpicks are your best friend. Just warn your guests – no one wants a surprise piercing mid-bite.
Step 2: The Taco Fill Hierarchy
This is serious business. There’s a science to not ending up with soggy shells or sad lettuce. Here’s your ideal build order:
-
Lettuce first – creates a moisture barrier.
-
Artichokes, olives, and tomatoes – tuck them in the center to contain juice.
-
Mozzarella – press it into the center.
-
Pepperoncini – layer thin slices on top for zing.
PRO TIP: Let the shells cool fully before assembling if you baked them. Hot salami + cheese = unintentional melt.
Step 3: Dress to Impress
Drizzle your oil + vinegar combo with the confidence of a Renaissance painter. Think Pollock meets pasta salad. Then sprinkle Italian seasoning or fresh herbs generously. Want to get extra? Lemon zest on top brightens everything.
Plating Your Low-Carb Antipasto Tacos
The magic of these tacos? They flex. Dress them down for a casual lunch, or glam them up for a chic dinner party.
-
Casual Mode: Lay them flat on a wooden board, charcuterie-style. Add a ramekin of extra dressing, scatter some basil leaves and lemon wedges around for color.
-
Fancy Mode: Prop them up in a deviled egg tray (yes, really). It keeps them upright and photogenic. Bonus points for edible flowers or microgreens.
Serving a crowd? Let guests build their own taco bar. They’ll love the control, and you’ll love not being the taco cop.
Mix It Up! Variations That Slay
These Low-Carb Antipasto Tacos are a vibe all on their own—but if you’re the type who treats a recipe as a suggestion (hi, same), then buckle up. Here are some remix ideas that’ll take your taco game from awesome to whoa-is-that-legal? levels of delicious:
Mediterranean Twist
Swap the salami shells for grilled eggplant or zucchini ribbons. Add crumbled feta, a dollop of tzatziki, and maybe some fresh mint or dill for that cool, creamy balance. It’s basically like your favorite Greek platter had a street food makeover.
Meat Lover’s Mania
Because sometimes more is more. Add crispy pancetta bits, prosciutto shreds, or even a sliver of capicola inside the taco for extra savory oomph. You’ll want to nap after, but it’ll be a nap of victory.
Spicy Devil Edition
Mix Calabrian chili paste or crushed red pepper flakes into your olive oil and vinegar drizzle for a fiery kick. Bonus: Top with spicy giardiniera or jalapeño slices if you’re feeling dangerous.
Breakfast-for-Dinner Delight
Toss in scrambled eggs, crumbled bacon, avocado slices, and a few cherry tomatoes. Drizzle with a dash of hot sauce or hollandaise if you dare. Yes, it’s breakfast. Yes, it’s still low-carb. Yes, you’re winning at life.
Cheese Bomb
Melt provolone or fontina inside the salami shell during the crisping phase for a gooey, golden surprise. Cheese lovers, this one’s your love language.
Confessions of a Salami Addict
Okay, time for a kitchen confession. I once tried to make heart-shaped salami shells for Valentine’s Day. Thought it’d be romantic. Spoiler: They looked like something that belonged on a different kind of website. Lesson learned – stick to circles.
Over the years, here’s what else I’ve learned:
-
Let guests build their own. Everyone loves a DIY moment – plus, no soggy tacos sitting out too long.
-
Always make double. These go fast. Like, vanishes-before-you-sit-down fast.
-
Toothpicks = taco tamers. For the stubborn shells that won’t stay folded.
-
Baking racks > pans. Want a crispier shell? Bake salami slices on a wire rack over a sheet tray. Better airflow = crunchier bite.
Reader Rescue Squad: Your Top Taco FAQs
Q: Salami gets greasy – help!
A: Blot slices before and after baking. Want crisp without the drip? Use a wire rack when baking and let them cool fully before filling.
Q: Can I prep these ahead?
A: Yes – but keep components separate. Assemble within 2 hours of serving to keep that texture just right. You can bake the shells and store them in an airtight container for 24 hours, no problem.
Q: What if I’m vegetarian or vegan?
A: Totally doable. For veggie shells, use grilled zucchini or eggplant slices. For vegan fillings, go with marinated tofu cubes, dairy-free mozzarella, olives, tomatoes, and a punchy vinaigrette. Everyone gets tacos. Everyone wins.
Q: What wine goes with these?
A: Glad you asked. A chilled Pinot Grigio cuts through the richness. Prefer reds? A light Chianti or Lambrusco adds an earthy kick. Mocktail vibes? Try sparkling lemon water with a basil leaf. Sophisticated and refreshing.
Nutritional Facts (per 2 tacos)
-
Calories: 320
-
Total Fat: 26g
-
Cholesterol: 45mg
-
Sodium: 880mg
-
Total Carbohydrates: 5g
-
Protein: 15g
Note: Nutritional values are estimates and may vary based on ingredient brands and portion sizes. For stricter tracking (especially keto or low-sodium), adjust quantities and check product labels.
Final Bite: A Taco for the Ages
So there you have it – the Low-Carb Antipasto Taco in all its crispy, savory glory. Whether you’re feeding a keto crowd, trying to jazz up taco night, or just looking for something fun and fast to whip up on a lazy afternoon, these little beauties have your back.


