
Cowboy Caviar
Cowboy Caviar: A Flavorful Fiesta in a Bowl
Welcome to my kitchen, fellow food enthusiasts! Today, we’re diving into a dish that’s not just a treat for the taste buds but an invitation to gather, laugh, and celebrate the joy of good food. If you’ve never experienced Cowboy Caviar, get ready for a game-changer! This vibrant, colorful dish is packed with flavors, textures, and a whole lot of love, making it perfect for parties, potlucks, or even a cozy night in.
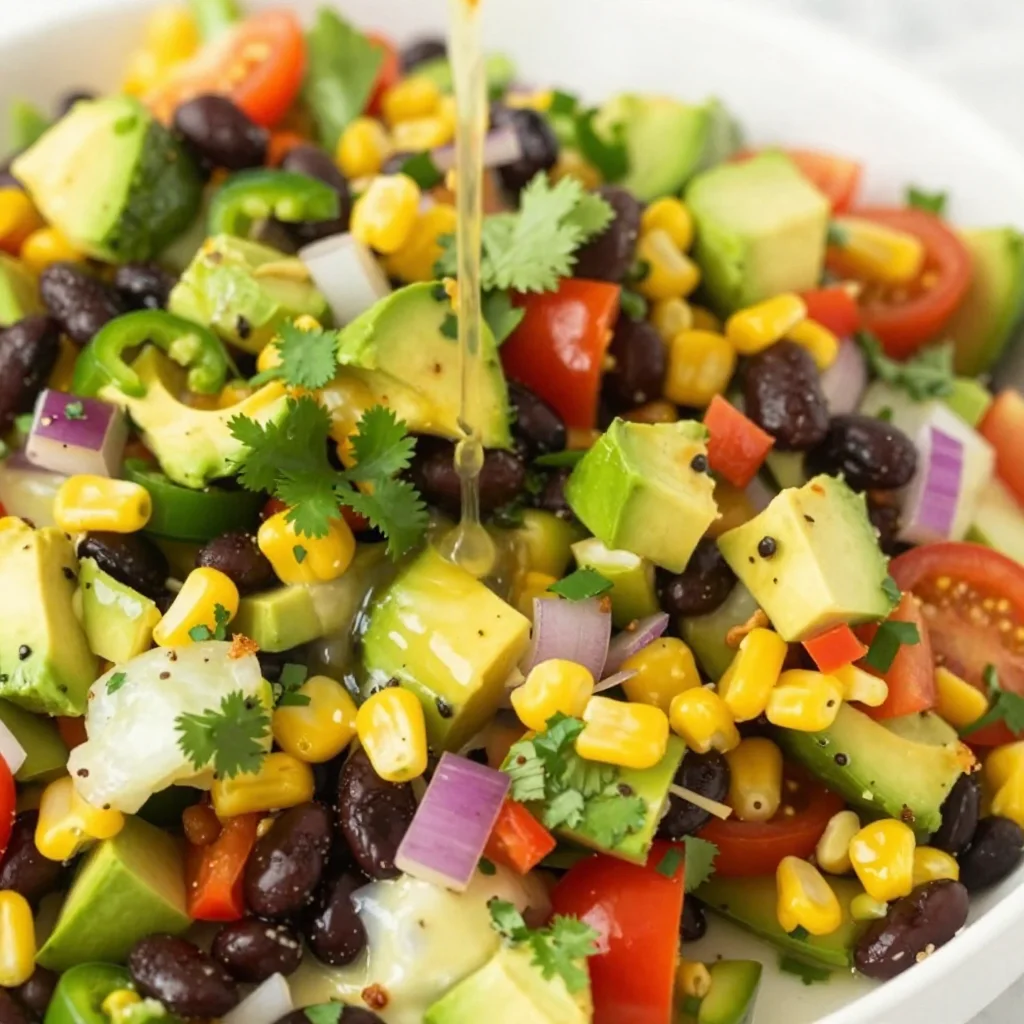
Just imagine this: a warm summer evening, the sun setting, friends gathered around the table, chips in hand, and a big bowl of Cowboy Caviar sitting in the middle, waiting to be devoured. The first crunch of a tortilla chip dipped into that zesty mix of black beans, corn, tomatoes, and spices is pure euphoria. It’s more than just a snack; it’s a celebration!
Cowboy Caviar has its roots in Texas, where it’s often served at gatherings and festivities—like a flavorful little fiesta in a bowl. But it isn’t just Texas pride that makes this dish shine; it’s the way it brings everyone together. The lively colors and fresh ingredients make it not only delicious but also visually stunning. Plus, it’s super easy to whip up, which means more time for chatting and enjoying each other’s company rather than slaving in the kitchen.
So, gather your friends, have your favorite playlist ready, and let’s get cooking! I can’t wait to share this delightful recipe that will undoubtedly make its way into your go-to cooking repertoire.
A Taste of Home: My Cowboy Caviar Memory
Cowboy Caviar holds a special place in my heart, and it’s more than just a beloved recipe—it’s a bridge to cherished memories. One summer weekend, I remember gathering at my Grandma Edna’s house, where each of us would bring a dish for our annual family cookout. Grandma was famous for her dreamy pot roast and homemade pies, but it was her Cowboy Caviar that had everyone lining up.
The moment we walked in, the warmth of the kitchen enveloped us, filled with the sound of laughter and the smell of spices wafting through the air. I still vividly remember Grandma’s infectious laughter as she passed around the bowl, encouraging us to dig in. There’s something magical about the way certain dishes can invoke feelings of nostalgia and comfort, isn’t there? That Cowboy Caviar was a burst of colors and flavors so vibrant that it felt like a party in your mouth!
Years may have passed, but the images of Grandma smiling with her apron on, surrounded by family with chips in hand, remain etched in my memory. It’s those moments that inspire me to recreate this dish. I love sharing it with my friends and my little ones now, making sure they understand just how special food can be in bringing people together.
Ingredients
Here’s what you’ll need to create your own Cowboy Caviar masterpiece. Each of these ingredients contributes something unique, and I’ve included some tips on substitutions and insights to guide you along the way.
-
1 can (15 oz) black beans: Rinsed and drained. Black beans are not only hearty but also packed with protein. You can swap these for pinto beans or chickpeas if you prefer.
-
1 can (15 oz) corn kernels: Rinsed and drained. If you have fresh corn on the cob, feel free to use that as it brings a lovely crunch.
-
1 cup cherry tomatoes: Halved. These little gems add a sweet burst of flavor; grape tomatoes work too if that’s what you have on hand.
-
1 red bell pepper: Diced. Sweet and crunchy, but any color of bell pepper will work, or you could use jalapeños for some heat!
-
1 avocado: Diced. Creamy and luscious, avocados add a nice richness. If you want less fat, you can skip it or use a scoop of Greek yogurt.
-
1/4 red onion: Finely chopped. It gives a great zing! Soak the chopped onion in cold water for 10 minutes to mellow the flavor if you’re sensitive to raw onions.
-
1/4 cup fresh cilantro: Chopped. This herb brings brightness, but if you’re not a fan, parsley makes a good alternative.
-
2 tablespoons olive oil: For richness. A splash of lime or lemon juice can replace some of the oil—and add brightness too!
-
1-2 limes: Juiced. Fresh lime juice is essential for that zesty kick; you can also use lemon if limes are unavailable.
-
1 teaspoon garlic powder: For an extra layer of flavor. If you prefer fresh garlic, one minced clove will do the job!
-
1 teaspoon chili powder: For a touch of heat. You can amp up the spice with smoked paprika or cayenne.
-
Salt and pepper: To taste. Always essential in bringing out the flavors!
Make sure to prep your ingredients before getting started; it makes the cooking process so much smoother.
Step-By-Step Instructions
Ready to bring this dish to life? Grab your ingredients, put on your favorite tunes, and let’s get started!
-
Prep Your Ingredients: Start by rinsing and draining your black beans and corn. Next, chop your tomatoes, bell peppers, onion, and cilantro. Get everything ready to go—this step will make the rest of the cooking process effortless!
-
Mix It Up in a Large Bowl: In a large mixing bowl, combine the black beans, corn, cherry tomatoes, diced bell pepper, avocado, red onion, and cilantro. Just put all those colorful ingredients in there—you might even feel like an artist creating a masterpiece!
-
Prepare the Dressing: In a small bowl, whisk together the olive oil, lime juice, garlic powder, cumin, chili powder, salt, and pepper. This dressing is what brings everything together, so taste it and adjust the seasonings as needed. A little extra lime never hurts!
-
Combine Everything: Pour the dressing over the bean and veggie mixture, tossing everything gently to coat. Avoid mashing the avocado—you want those lovely chunks to shine!
-
Let It Chill: If you have the time, cover your bowl with plastic wrap and let it chill in the fridge for at least 30 minutes. This allows the flavors to mingle and marry, intensifying that Cowboy Caviar goodness. Trust me, it’s worth the wait!
-
Taste Before Serving: Right before serving, take a quick taste test. If it needs more lime, salt, or chili, adjust it now!
-
Serve: Scoop your Cowboy Caviar into a stunning serving bowl, and don’t forget to have a stack of tortilla chips ready for dipping!
Serving Suggestions
This Cowboy Caviar is incredibly versatile when it comes to serving. You can serve it up in a beautiful bowl with a heaping pile of tortilla chips on the side for casual enjoyment. For a more refined presentation, place it in individual cups or small bowls as an appetizer. It also works wonderfully as a topping for grilled fish or chicken, or even spooned onto a bed of greens for a vibrant salad! Don’t forget to garnish with additional cilantro or lime wedges for that extra pop!
Recipe Variations
Feeling creative? Here are some fun variations to put your own spin on this timeless recipe!
-
Spicy Cowboy Caviar: Add diced jalapeños or a dash of hot sauce for an extra kick!
-
Tropical Twist: Mix in some diced mango or pineapple for a sweet surprise.
-
Quinoa Cowboy Caviar: Toss in cooked quinoa for added protein and a heartier texture.
-
Mediterranean Style: Substitute the black beans with chickpeas, add in feta cheese, and a dash of oregano for a Mediterranean flair.
-
Vegan Creaminess: Swap out the avocado for cashew cream to keep it creamy while remaining plant-based.
Chef’s Notes
Cowboy Caviar has evolved over time in my kitchen. I love experimenting with different beans and vegetables based on what’s in season. Sometimes I throw in roasted corn for added sweetness or toss in a few radishes for an extra crunch! Food should always be fun, and cooking is about creating dishes that fit your style and taste.
A little funny story: the first time I made Cowboy Caviar for a BBQ, I was so eager to impress that I accidentally used salt instead of sugar in the dressing. Let’s just say my friends will never let me live that day down! But they loved the new spin, so sometimes even "mistakes" can turn into memorable moments.
FAQs and Troubleshooting
1. Can I make it ahead of time?
Absolutely! Cowboy Caviar tastes even better the next day after sitting in the fridge, so feel free to prep it a day in advance. Just remember to stir gently before serving to redistribute the dressing.
2. How long will it last in the fridge?
If stored in an airtight container, it will last about 3-5 days in the refrigerator. Just keep an eye on the avocado to ensure it doesn’t brown too much!
3. What do I do if it’s too salty?
If you find your Cowboy Caviar has become too salty, adding diced tomatoes or a bit more corn can help balance it out.
4. Can I freeze it?
While it’s not ideal to freeze, you can freeze the bean mixture (without the avocado) for later use. Just let it thaw in the fridge, and add fresh ingredients before serving.
Nutritional Info
(If you’re counting, here’s a brief overview!)
- Serving Size: 1/2 cup
- Calories: Approximately 150-200
- Protein: 6-8g
- Fiber: 5-7g
- Fat: 5-7g
Cowboy Caviar is not only a treat for your taste buds but also a nutritious option packed with fiber and protein.
Now that you have the recipe under your belt, I can’t wait to hear how it goes! Grab those chips and invite your friends over for a flavor explosion that’ll have everyone raving! Happy cooking, and may your kitchen always be filled with warmth and loved ones.
Print
Cowboy Caviar
- Total Time: 45 minutes
- Yield: 4 servings 1x
- Diet: Vegan
Description
A vibrant and flavorful bean and veggie dip perfect for parties and gatherings.
Ingredients
- 1 can (15 oz) black beans, rinsed and drained
- 1 can (15 oz) corn kernels, rinsed and drained
- 1 cup cherry tomatoes, halved
- 1 red bell pepper, diced
- 1 avocado, diced
- 1/4 red onion, finely chopped
- 1/4 cup fresh cilantro, chopped
- 2 tablespoons olive oil
- 1–2 limes, juiced
- 1 teaspoon garlic powder
- 1 teaspoon chili powder
- Salt and pepper, to taste
Instructions
- Prep your ingredients: Rinse and drain the beans and corn. Chop tomatoes, bell peppers, onion, and cilantro.
- Mix it up in a large bowl: Combine beans, corn, tomatoes, bell pepper, avocado, onion, and cilantro in a bowl.
- Prepare the dressing: Whisk olive oil, lime juice, garlic powder, chili powder, salt, and pepper in a small bowl.
- Combine everything: Pour dressing over the mixture and toss gently to coat.
- Let it chill: Cover and refrigerate for at least 30 minutes to allow flavors to meld.
- Taste before serving and adjust seasonings as needed.
- Serve: Enjoy with tortilla chips.
Notes
Can be made ahead of time, and it tastes even better the next day.
- Prep Time: 15 minutes
- Cook Time: 0 minutes
- Category: Appetizer
- Method: Mixing
- Cuisine: Tex-Mex
Nutrition
- Serving Size: 1/2 cup
- Calories: 175
- Sugar: 3g
- Sodium: 150mg
- Fat: 7g
- Saturated Fat: 1g
- Unsaturated Fat: 6g
- Trans Fat: 0g
- Carbohydrates: 25g
- Fiber: 6g
- Protein: 8g
- Cholesterol: 0mg
Keywords: Cowboy Caviar, Tex-Mex dip, bean salad, party appetizer
Chipotle Ranch Grilled Chicken Burrito
Chipotle Ranch Grilled Chicken Burrito: A Flavorful Adventure
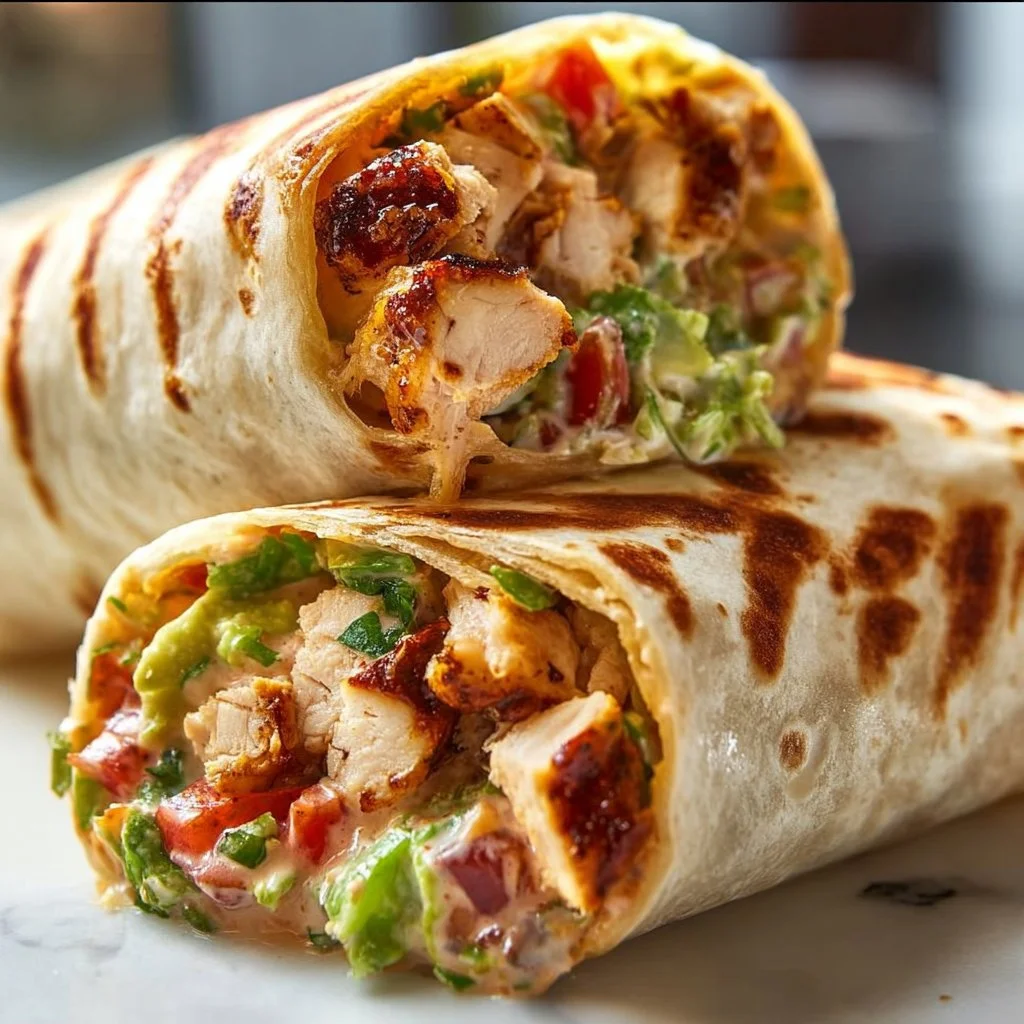
Welcome to my cozy kitchen, friends! Today, we’re diving into a recipe that perfectly encapsulates my culinary philosophy: simple ingredients that come together to create something truly mouthwatering. Allow me to introduce you to the Chipotle Ranch Grilled Chicken Burrito — a dish that’s not only bursting with flavor but is also an absolute crowd-pleaser. Whether you’re looking for a quick weeknight dinner or something delicious to impress your friends at a weekend gathering, this burrito ticks all the boxes!
Now let me tell you, the burrito has its roots in the vibrant streets of Mexico, where food not only nourishes the body but also brings people together. Every bite is infused with love, culture, and history. And while I adore traditional recipes, I am all about adding my own twist to keep things exciting in the kitchen. That’s where the zesty Chipotle Ranch dressing comes into play. The combination of smoky chipotle peppers and creamy ranch is as delightful as it sounds — trust me!
Imagine for a moment that you’re at a sunny picnic, enjoying a perfectly grilled burrito bursting with juicy chicken, fresh veggies, and that amazing chipotle ranch drizzled all over. Does that image make you feel warm and fuzzy inside? It does for me every single time! So roll up your sleeves, grab your favorite apron (don’t worry, my aprons are always messy too), and let’s embark on this culinary adventure together!
Personal Story
The first time I made burritos was a lazy Sunday afternoon during my college years. It was one of those rare weekends where I wasn’t swamped with assignments, and my friends decided to come over for a little get-together. We raided the fridge, which was more like a pantry than anything — leftover grilled chicken from dinner, a few wilted veggies, and some tortillas that had somehow managed to survive the week.
As we started mixing things up, someone suggested adding ranch dressing to the chicken. I laughed at the thought, but in the spirit of culinary experimentation, we went for it, tossing in some chipotle seasoning for good measure. The interesting blend of textures and flavors turned out to be something special — that homemade burrito was a revelation!
Fast forward to today, I’ve perfected my recipe, honed my skills, and added layers of flavor, but that initial burst of inspiration still reminds me that sometimes, the best dishes emerge from teamwork, a little creativity, and the willingness to throw caution to the wind. And now, I’m thrilled to share this delightful recipe with you!
Ingredients
For our Chipotle Ranch Grilled Chicken Burrito, here are the key ingredients you’ll need:
-
Chicken Breasts:
- Preferably boneless, skinless. You can substitute with thighs for a juicier flavor or use grilled tofu for a vegetarian twist.
-
Tortillas:
- I like using large flour tortillas for their flexibility, but corn tortillas are fantastic too! Just be aware that they may crack if not warmed properly.
-
Chipotle Ranch Dressing:
- You can buy this pre-made, but I encourage you to try your hand at making your own (recipe coming soon!). Use yogurt or sour cream for a creamy texture.
-
Shredded Lettuce:
- A crisp, fresh choice! Rinse and dry thoroughly. Substitute with spinach or arugula for a peppery bite.
-
Diced Tomatoes:
- Fresh is best! But you could easily swap in canned diced tomatoes if you’re in a pinch. Just drain them first!
-
Shredded Cheese:
- A blend of cheddar and Monterey Jack is a classic choice. Consider pepper jack for an extra kick!
-
Sliced Avocado:
- The creaminess balances out the spice. If you’re looking for a swap, try Greek yogurt or guacamole.
-
Black Beans (optional):
- Adds fiber and protein. If you want to keep things lighter, feel free to skip them or use pinto beans instead.
Remember, cooking is about making the ingredients work for you! Don’t be afraid to mix and match as per your taste.
Step-by-Step Instructions
Ready to grill? Let’s get cooking! Follow these steps to create your Chipotle Ranch Grilled Chicken Burrito.
-
Marinate the Chicken:
- In a bowl, mix together your chipotle ranch dressing with a squeeze of lime juice, salt, and pepper. Soak the chicken in this mixture for at least 30 minutes. If you’re short on time, even 10 minutes will amp up the flavor! This step infuses the chicken with a zesty kick.
-
Grill the Chicken:
- Preheat your grill or grill pan over medium-high heat. Once heated, place the marinated chicken on the grill and cook for about 6-7 minutes on each side, or until the internal temperature reaches 165°F (75°C). A little grill char adds to the flavor, so don’t skip this step!
-
Rest the Chicken:
- Once done, remove the chicken from the grill and let it rest for 5 minutes. This keeps the juices inside for a succulent bite! During this time, I like to contemplate which flavors will dance together in my burrito.
-
Prepare the Fillings:
- While the chicken is resting, prepare your veggies. Slice your avocado, dice the tomatoes, and chop the lettuce. Layout everything you want to stuff into your burrito — it’s like setting the stage for a beautiful culinary performance!
-
Shred the Chicken:
- Once the chicken has rested, slice it into bite-sized pieces or shred it using a fork. Mix it back up with any remaining chipotle ranch so those flavors can meld!
-
Assemble the Burrito:
- Take a tortilla and add a generous spoonful of the chicken, followed by your layer of shredded lettuce, tomatoes, black beans (if using), cheese, and avocado. Don’t overstuff; instead, think about how you’ll roll it without making a mess (and trust me, even now, I still have burrito-folding fails sometimes!).
-
Roll It Up:
- Fold in the sides of the tortilla first, then roll it from the bottom up while tucking everything inside. You’re building a beautiful burrito burrito here, folks!
-
Grill it Again (Optional):
- If you’d like a warm, crispy exterior, pop the assembled burrito back onto the grill or a non-stick skillet for about 2-3 minutes on each side until golden brown. This adds an extra layer of flavor — yum!
Serving Suggestions
Your burrito is now ready to take center stage! You can serve it on a wooden cutting board, slice it in half for a fun presentation, and drizzle a little extra chipotle ranch on top, just to be extra indulgent. A side of tortilla chips and some fresh salsa would be a fantastic accompaniment!
Recipe Variations
Let’s keep the burrito fun rolling with some creative twists:
-
Breakfast Burrito: Replace chicken with scrambled eggs, and add some sautéed bell peppers and onions for a delightful start to your day!
-
Vegetarian Option: Skip the chicken entirely and load up on grilled veggies (think zucchini, peppers, and corn!) along with black beans for a hearty meal.
-
Spicy Kick: Add some diced jalapeños either in the filling or as a garnish for those who crave a kick!
-
Tropical Twist: Add freshly diced pineapple for a sweet balance, or drizzle with some chili mango sauce for a flavor explosion!
Chef’s Notes
Every recipe I create has my heart layered into it. This Chipotle Ranch Grilled Chicken Burrito has come a long way since that lazy college day! Through trial and error, I’ve honed the marinating techniques and learned that a little resting time goes a long way. Also, I promise you can’t go wrong with the chipotle ranch dressing — it’s like a secret weapon in my kitchen!
FAQs and Troubleshooting
1. What if my tortillas tear while rolling?
It happens to the best of us! Be sure to warm them slightly before filling; this makes them more pliable. If they tear, embrace the mess and call it a deconstructed burrito!
2. Can I make it ahead of time?
Absolutely! You can marinate the chicken ahead, and prep your fillings. Assemble right before serving for the best texture and taste.
3. How spicy is the chipotle ranch dressing?
That really depends on your taste buds! You can adjust the chipotle content for more or less heat. I recommend starting with a small amount and adjusting to your preference.
4. What’s a good side dish to serve?
A simple corn salad or Mexican-style rice complements this burrito so well. You can also whip up a refreshing slaw for a nice crunch!
Nutritional Info
Note: Nutritional values may vary based on specific ingredients and portion sizes. Always check the packaging for the most accurate information.
- Serving Size: 1 burrito
- Calories: 450
- Protein: 30g
- Carbohydrates: 50g
- Fat: 15g
And there you have it — a hearty, flavorful Chipotle Ranch Grilled Chicken Burrito that’s sure to impress! I can’t wait to hear how yours turns out! Whether it becomes a family favorite or a fun weeknight meal, I hope it brings as much joy to your kitchen as it does to mine. Happy cooking, and until next time, keep it cozy!
Print
Chipotle Ranch Grilled Chicken Burrito
- Total Time: 45 minutes
- Yield: 4 servings
- Diet: Paleo
Description
A flavorful burrito filled with grilled chicken, fresh veggies, and zesty chipotle ranch dressing, perfect for any occasion.
Ingredients
- Chicken Breasts (boneless, skinless)
- Tortillas (large flour or corn)
- Chipotle Ranch Dressing
- Shredded Lettuce
- Diced Tomatoes
- Shredded Cheese (cheddar and Monterey Jack)
- Sliced Avocado
- Black Beans (optional)
Instructions
- Marinate the chicken in chipotle ranch dressing with lime juice, salt, and pepper for at least 30 minutes.
- Grill the marinated chicken for 6-7 minutes on each side until fully cooked.
- Rest the chicken for 5 minutes after grilling.
- Prepare the fillings: slice avocado, dice tomatoes, and chop lettuce.
- Shred the chicken and mix it with remaining chipotle ranch dressing.
- Assemble the burrito with chicken, lettuce, tomatoes, beans, cheese, and avocado.
- Roll the tortilla and optionally grill the assembled burrito for 2-3 minutes on each side until golden brown.
Notes
Warm tortillas before filling to prevent tearing. Can be made ahead by marinating chicken and prepping fillings in advance.
- Prep Time: 15 minutes
- Cook Time: 30 minutes
- Category: Main Course
- Method: Grilling
- Cuisine: Mexican
Nutrition
- Serving Size: 1 burrito
- Calories: 450
- Sugar: 3g
- Sodium: 600mg
- Fat: 15g
- Saturated Fat: 6g
- Unsaturated Fat: 7g
- Trans Fat: 0g
- Carbohydrates: 50g
- Fiber: 7g
- Protein: 30g
- Cholesterol: 90mg
Keywords: burrito, grilled chicken, chipotle, ranch dressing, Mexican food


