
Cowboy Caviar
Cowboy Caviar: The Ultimate Celebration of Flavor and Community
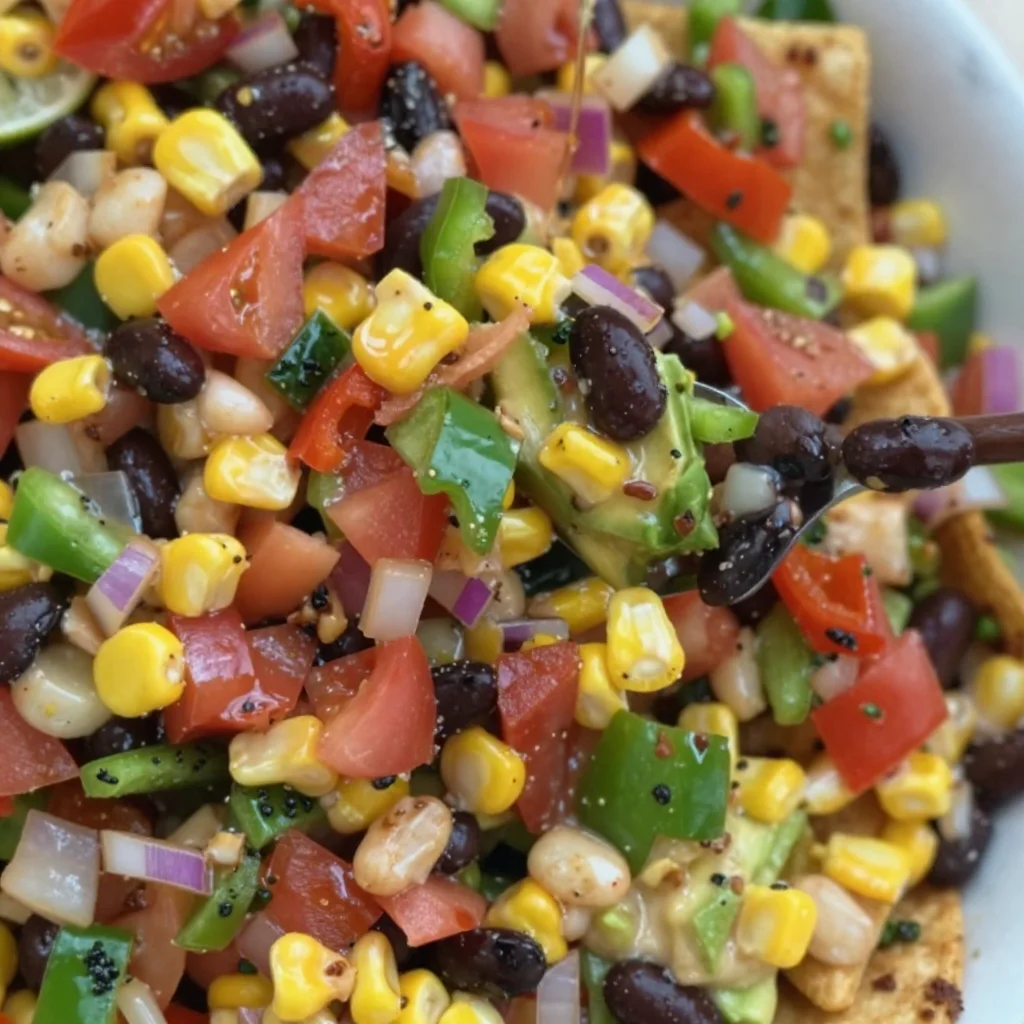
Welcome to my kitchen! If you’ve landed here, you’re probably searching for a fun and flavorful recipe that’ll bring smiles to your family and friends. Well, you’re in for a treat because today, we’re making one of my all-time favorites: Cowboy Caviar! This vibrant, colorful dish isn’t just a feast for the eyes—it’s a harmony of flavors that you can enjoy as a dip, a salad, or even as a filling for tacos.
Cowboy Caviar is essentially a party on a plate, bursting with fresh veggies, beans, and a zesty dressing that will have everyone coming back for more. It’s perfect for those sunny days when you want to serve something refreshing and light or for any gathering where you want to impress without spending hours slaving in the kitchen. Plus, it’s an incredible way to celebrate the bounty of seasonal produce.
Now, you might be wondering why it’s called “Cowboy Caviar.” Well, let me take you back to my childhood. In our family, gatherings meant good food, laughter, and lots of storytelling. My grandmother would whip up a big batch of what she called “cowboy salad” during our summer cookouts, and it was always the hit of the party. We’d dip crispy tortilla chips into that colorful mixture, and every bite felt like a taste of sunshine. Fast forward to today, and we’re still sharing those moments with new flavors and twists, but the nostalgia remains.
So roll up your sleeves and let’s dive into this delightful Cowboy Caviar recipe that’ll have you feeling like a culinary rockstar.
Personal Story
One of my favorite memories involves my childhood friend, Emma. Each summer, we would spend countless afternoons in our backyard, soaking up the sun and devouring whatever delicious concoctions we could whip up. Emma’s mom would always make her famous “cowboy salad,” and it instantly became our favorite. It seemed like magic how such simple ingredients transformed into a vibrant mix of flavor and texture. We could never get enough of those crispy tortilla chips paired with the colorful medley of black beans, corn, and tomatoes.
One day, we decided to host our own backyard barbecue and surprise her mom by recreating that cowboy salad. Armed with a garden full of ripe tomatoes, fresh herbs, and a couple of cans from the pantry, we set to work. The kitchen was filled with laughter and our slightly off-pitched renditions of our favorite songs. By the time we were done, we realized it wasn’t just about the food—it was about the memories we were making together. That’s why this Cowboy Caviar holds a special place in my heart; it symbolizes the joy of cooking together and sharing food with the people we love.
Ingredients
Let’s get all our ingredients ready! Here’s what you’ll need to create this delicious Cowboy Caviar:
-
Black Beans: One can, drained and rinsed. If you prefer, you can use pinto beans or chickpeas for a different texture. They’re packed with protein and fiber, making this dish healthy, too!
-
Corn: One cup of frozen corn (thawed) or fresh corn cut off the cob. The sweetness from the corn really enhances the flavor profile of this dish. If you’re a fan of spicy, try grilling the corn before adding it for a smoky kick!
-
Cherry Tomatoes: About one cup, halved. These bright little gems add juiciness. You can substitute grape tomatoes or even diced regular tomatoes if that’s what you’ve got.
-
Red Onion: One small, finely chopped. For a milder flavor, soak it in cold water for 10 minutes before chopping. This will mellow its sharpness a bit.
-
Green Bell Pepper: One medium-sized, diced. It adds crunch and freshness. Feel free to swap it with a yellow or orange bell pepper for a sweeter flavor or even jalapeño for some heat!
-
Cilantro: A small bunch, roughly chopped. This herb is essential for that fresh flavor! If you’re not a fan of cilantro, parsley can serve as a great substitute.
-
Lime Juice: Freshly squeezed from one lime. The acidity brightens the whole dish. Not a lime fan? A splash of red wine vinegar works nicely, too.
-
Olive Oil: Two tablespoons for the dressing. It helps bring everything together. You can also use avocado oil for a milder taste.
-
Taco Seasoning: About one to two teaspoons depending on your spice preference. You can make your own mix or use a store-bought option. To decrease sodium, use a homemade spice blend with cumin, paprika, and chili powder.
-
Salt & Pepper: To taste. These basic seasonings elevate the flavors—don’t skip them!
Step-by-Step Instructions
Now that we have everything gathered, let’s turn those ingredients into a vibrant Cowboy Caviar!
-
Rinse and Drain: Start by rinsing the black beans under cold water in a fine-mesh sieve. Draining them well helps to avoid a watery mixture!
Tip: If you’re using dried beans, soak and cook them the night before for a fresh, homemade taste!
-
Prepare the Corn: If using fresh corn, slice it off the cob and boil it briefly (about 2-3 minutes) to retain its sweetness and crunch. If you’re using frozen, just toss it in a bowl to thaw.
-
Chop the Veggies: Dice the cherry tomatoes, red onion, and green bell pepper into bite-sized pieces. Feel free to go big or small, depending on your preference!
Chef Hack: Keeping the pieces consistent in size not only makes it visually appealing but also ensures a balanced bite each time you dig in.
-
Mix It All Together: In a large mixing bowl, combine the rinsed black beans, corn, halved cherry tomatoes, and chopped veggies. Use a spatula or wooden spoon to combine—this is where you can get creative!
-
Make the Dressing: In a separate small bowl, whisk together the lime juice, olive oil, taco seasoning, salt, and pepper. Taste as you go to balance it out according to your liking.
Chef Tip: Adding a bit of honey or agave can help cut the acidity if you prefer a touch of sweetness.
-
Dress the Caviar: Pour the dressing over the cowboy caviar mixture and toss gently to coat everything evenly.
-
Chill: For the best flavor, let your Cowboy Caviar sit in the refrigerator for at least 30 minutes. This resting time allows the flavors to mingle and develop.
Personal Note: I often make this a day ahead of time! It’s one of those recipes that gets better with each passing hour.
-
Serve: When you’re ready to serve, give it a final toss and send it to the table with crispy tortilla chips, or layer it as a topping for tacos or burritos!
Serving Suggestions
Whether you’re hosting a big get-together or enjoying a cozy movie night at home, Cowboy Caviar can stand on its own or play a role in various meals! Serve it in a beautiful bowl with tortilla chips surrounding it for that party vibe. You can also scoop it onto greens for a refreshing salad or pile it high in burritos. It’s versatile, colorful, and just downright delicious!
Recipe Variations
Feeling adventurous? Here are a few tasty twists you can try with your Cowboy Caviar:
- Avocado Addition: Dice a ripe avocado and gently fold it into your mixture for a creamy texture that adds richness.
- Spicy Cowboy Caviar: Toss in diced jalapeños or a pinch of cayenne pepper for heat.
- Grain Bowls: Serve the caviar over quinoa or rice for a hearty and satisfying meal.
- Mediterranean Twist: Swap out corn for diced cucumber and add feta cheese and kalamata olives for a refreshing Mediterranean vibe.
- Sweet and Spicy: For a unique flavor profile, drizzle some honey over it before serving to balance out the heat and add sweetness.
Chef’s Notes
This recipe is always evolving in my kitchen! I’ve experimented with different beans, veggies, and spice levels over the years. One of my funniest memories was when I mistakenly added a spoonful of cayenne pepper instead of chili powder—let’s just say it turned into a fiery adventure! The key takeaway is to have fun and make it your own. Food is a reflection of our tastes and experiences, so feel free to add elements that resonate with you.
FAQs and Troubleshooting
Q: How long can I store Cowboy Caviar?
A: You can store it in an airtight container in the refrigerator for up to 3 days. However, the sooner you eat it, the better it tastes!
Q: What if my Cowboy Caviar is too soupy?
A: If you find it too liquidy after mixing, try adding more beans or corn to absorb the extra moisture. You can also drain some liquid before serving.
Q: Can I make this recipe ahead of time?
A: Absolutely! I recommend making it a few hours in advance or even the night before. Just wait to add any avocado until right before serving to prevent browning.
Q: Is it possible to turn this into a main dish?
A: Totally! Serve it over a bed of greens or grains like quinoa or brown rice. You can even add grilled chicken or shrimp for a protein-packed meal.
Nutritional Info
Per Serving (based on 10 servings): Approximately 130 calories, 5g protein, 20g carbohydrates, 4g fat, 3g fiber. Keep in mind that the caloric count can change based on any added ingredients or variations.
Cowboy Caviar is more than just a recipe; it’s a way to gather people and create memories. So, throw on your apron, bring the energy, and let’s celebrate good food and great company. Happy cooking, friends!
Print
Cowboy Caviar
- Total Time: 20 minutes
- Yield: 10 servings 1x
- Diet: Vegetarian
Description
A vibrant and flavorful dish bursting with fresh veggies, beans, and a zesty dressing, perfect for a dip, salad, or filling for tacos.
Ingredients
- 1 can Black Beans, drained and rinsed
- 1 cup Corn, frozen (thawed) or fresh
- 1 cup Cherry Tomatoes, halved
- 1 small Red Onion, finely chopped
- 1 medium Green Bell Pepper, diced
- 1 small bunch Cilantro, roughly chopped
- Juice of 1 Lime, freshly squeezed
- 2 tablespoons Olive Oil
- 1 to 2 teaspoons Taco Seasoning
- Salt & Pepper, to taste
Instructions
- Rinse the black beans under cold water in a fine-mesh sieve.
- Prepare the corn by slicing it off the cob and boiling it briefly if using fresh.
- Chop the cherry tomatoes, red onion, and green bell pepper into bite-sized pieces.
- Mix the rinsed black beans, corn, halved cherry tomatoes, and chopped veggies in a large bowl.
- Make the dressing by whisking together lime juice, olive oil, taco seasoning, salt, and pepper in a separate bowl.
- Dress the cowboy caviar mixture and toss gently to coat.
- Chill for at least 30 minutes in the refrigerator.
- Serve with crispy tortilla chips or use as a topping for tacos or burritos.
Notes
This dish can be made ahead of time; it tastes better after sitting for a few hours or overnight.
- Prep Time: 15 minutes
- Cook Time: 5 minutes
- Category: Appetizer
- Method: Mixing
- Cuisine: American
Nutrition
- Serving Size: 1 serving
- Calories: 130
- Sugar: 3g
- Sodium: 200mg
- Fat: 4g
- Saturated Fat: 0.5g
- Unsaturated Fat: 3g
- Trans Fat: 0g
- Carbohydrates: 20g
- Fiber: 3g
- Protein: 5g
- Cholesterol: 0mg
Keywords: Cowboy Caviar, Dip, Salad, Tacos, Vegetarian, Easy Recipe, Fresh Veggies
Cowboy Caviar
Cowboy Caviar: A Flavorful Dish that Brings Everyone Together
Welcome to my kitchen, friends! Today, I’m thrilled to share a dish that’s as vibrant and delightful as a sunny afternoon in the great outdoors—Cowboy Caviar. This colorful, flavorful dip not only pops with freshness, but it also boasts the ability to bring people together, which is what cooking is all about, right? If you’ve never experienced Cowboy Caviar, prepare for your taste buds to do a happy dance!
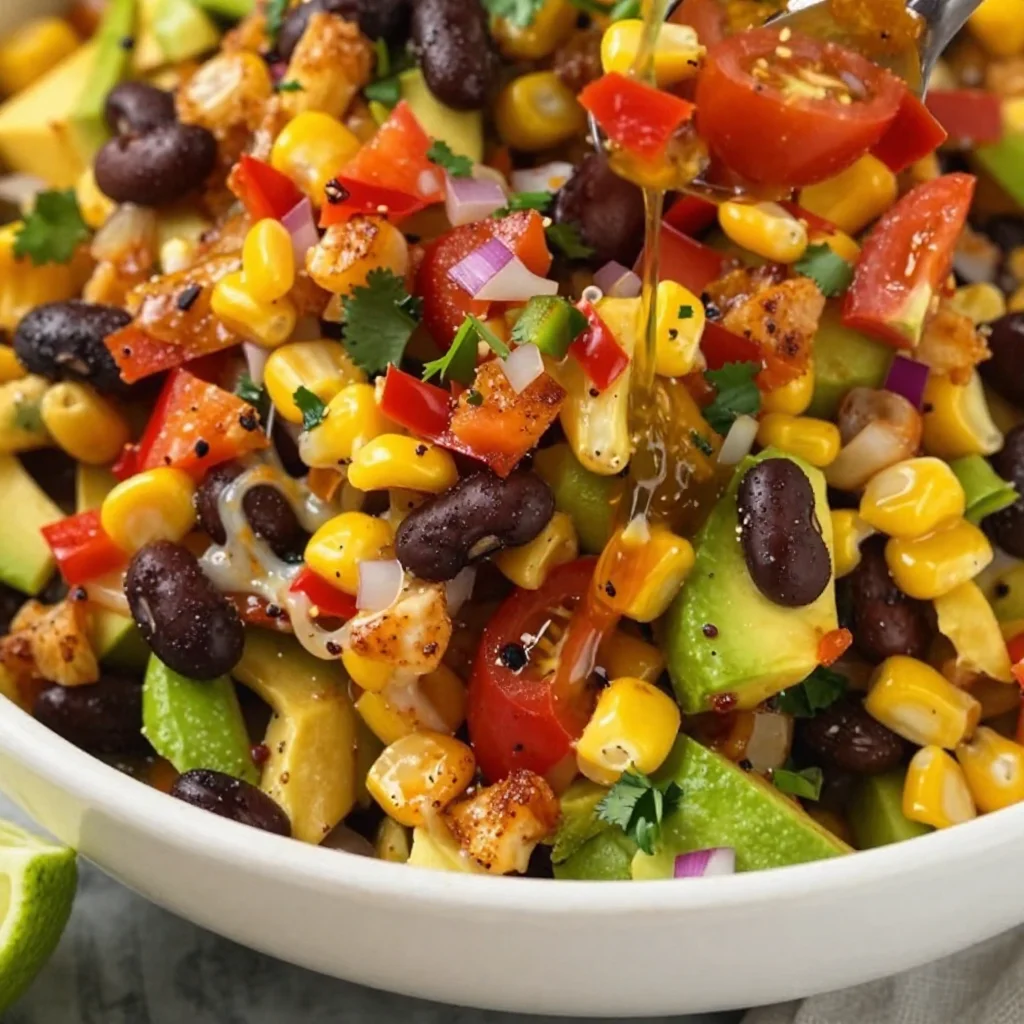
Cowboy Caviar has its roots in Tex-Mex cuisine, traditionally served as a dip or salad, making it the perfect companion for gatherings, game days, or simply as a bright addition to your weeknight meals. Its ingredients are fresh, bold, and full of character—just like its namesake, the cowboy! Trust me, there’s something incredibly satisfying about tossing a bunch of colorful ingredients in a bowl and ending up with a dish that looks so good you almost don’t want to eat it. Almost!
But before we dive into the recipe, let’s take a little stroll down memory lane…
A Personal Story: Memories of Summer Parties
One of my fondest memories involving Cowboy Caviar goes back to my childhood summers spent at my grandparent’s farm in Texas. Each Saturday afternoon, my family would gather in the backyard for a potluck feast, celebrating the weekend. My grandma would whip out her big, old mixing bowl and proceed to create what she dubbed "Texas Salad," which was really Cowboy Caviar before it was even a trend.
The sight of those vibrant, diced ingredients being piled high sent my little heart racing. We would sprinkle tortilla chips around the serving dish and scoop up the colorful mixture, laughter filling the air as we reminisced over family stories. The combination of flavors—crunchy, zesty, and utterly refreshing—left everyone craving more. It was during those sunny days that I learned the true joy of sharing food, and that’s what I aim to evoke whenever I make Cowboy Caviar.
Now, let’s get cooking!
Ingredients
Here’s what you’ll need to make your own Cowboy Caviar:
-
1 can black beans
A pantry staple, black beans add protein and heartiness. You can substitute with pinto beans for a different flavor profile. -
1 can corn
Sweet, crisp corn brings a pop of sunshine. If you prefer fresh, use about 1.5 cups of grilled or boiled corn. -
1 red bell pepper
For sweetness and crunch. Feel free to use yellow or orange peppers for a sweeter twist! -
1 green bell pepper
Adds a fresh, herbaceous note. If you want to amp up the flavor, use jalapeños for a spicy kick instead. -
1/2 red onion
Provides a sharp bite. Soaking it in cold water for 10 minutes can tone down some of the pungency if you prefer a milder taste. -
1 avocado
Creaminess meets freshness here. If you’re looking for a lower-fat option, you can skip it, but I wouldn’t recommend it! -
1 cup cherry tomatoes
Juicy bursts of flavor! If they’re out of season, use canned diced tomatoes (drained) instead. -
1/4 cup fresh cilantro
This herb brings brightness and freshness. If you’re not a fan of cilantro, parsley is a great substitute! -
Juice of 2 limes
The acidity cuts through and ties all the flavors together. Lemon juice works in a pinch, but lime is ideal! -
1 teaspoon chili powder
This adds warmth without overwhelming heat. Adjust the seasoning to your liking—smoked paprika can also be an exciting alternative! -
Salt and pepper, to taste
Essential for rounding out flavors. Don’t skimp on the seasoning—it makes all the difference!
Step-by-Step Instructions
Step 1: Prep Your Ingredients
Start by rinsing and draining the black beans and corn to remove excess sodium. Peek in the pantry while you’re at it; this is a great way to get rid of canned goods nearing their expiry!
Chef Tip: If you’re using fresh corn, steam it for about 5-7 minutes until tender, then cool it down before adding.
Step 2: Dice and Chop
Chop your red and green bell peppers, red onion, and cherry tomatoes into similarly-sized pieces—this ensures visual appeal and an even flavor distribution.
Chef Hack: To easily dice an onion, cut it in half, peel the skin off, then slice it vertically and horizontally before chopping into small pieces. Just be careful not to cry too much!
Step 3: The Avocado Affair
Slice the avocado in half, remove the pit (carefully!), and scoop the flesh into the bowl. Gently chop it into chunks, but not too small; we want those creamy bits to stand out.
Tip: Squeeze a little lime juice on the avocado immediately after cutting to keep it from browning.
Step 4: Toss It All Together
In a big mixing bowl, combine your beans, corn, bell peppers, tomatoes, onions, and cilantro. Pour the lime juice over everything, followed by the chili powder, salt, and pepper.
Insider Tip: Always taste as you go. If it needs more lime or seasoning, add it before serving!
Step 5: Let It Marinate
Give your Cowboy Caviar a gentle toss until everything is combined, and let it sit for at least 15-20 minutes in the fridge. This gives the flavors time to meld together and really shine.
Quick Note: If you’re in a hurry, you can serve it immediately, but trust me—allowing it to marinate enhances the flavor.
Serving Suggestions
Serving Cowboy Caviar is party-ready! Use a large serving bowl and scoop the dip into smaller bowls surrounded by crisp tortilla chips. It’s visually stunning and will have your guests clamoring for the recipe! For a sharp contrast, you could also layer it in a mason jar for a delightful picnic or lunch-on-the-go option.
Recipe Variations
Looking to switch things up? Here are some creative twists:
-
Spicy Cowboy Caviar: Add diced jalapeños or a sprinkle of red pepper flakes for extra heat.
-
Tropical Twist: Incorporate diced mango or pineapple for a sweet and tangy finish.
-
Creamy Version: Mix in a dollop of Greek yogurt or sour cream for a richer texture.
-
Protein-Packed: Add grilled chicken or shrimp for a more substantial dish.
-
Vegan Delight: For a fully plant-based take, include hemp seeds or diced nuts for crunch and protein.
Chef’s Notes
Cowboy Caviar has become a staple in my kitchen. Over the years, I’ve taken liberties with ingredients, sometimes swapping the beans or adding seasonal veggies. One particularly funny experience was attempting to impress friends by adding a bit of garlic. Let’s just say, it turned out to be too garlicky—definitely a “less is more” moment!
Regardless of how we tweak it, the essence of Cowboy Caviar remains the same: it’s about bringing people together to enjoy good food and good company.
FAQs and Troubleshooting
1. How long can I store Cowboy Caviar?
Cowboy Caviar can be stored in an airtight container in the fridge for up to 3 days. However, the avocado may brown, so it’s best to add it fresh.
2. My Cowboy Caviar is too sour—what can I do?
If it’s too tart from the lime, try adding a small pinch of sugar or a drizzle of honey; this will balance out the acidity.
3. Can I make this ahead of time?
Absolutely! Just prepare everything except the avocado and add it the day you serve for best freshness.
4. What if I don’t like beans?
No problem! Skip the beans and increase the veggies or add grains like quinoa or couscous for a hearty texture.
Nutritional Info
While exact values can vary, a serving of Cowboy Caviar (about 1/2 cup) is generally low in calories, rich in fiber, and packed with vitamins. Each serving offers a boost of nutrients from the beans, veggies, and healthy fats from the avocado, making it a guilt-free choice for any gathering!
So there you have it, my delightful friends! Cowboy Caviar—colorful, fresh, and bursting with flavor. I can’t wait for you to make this dish and share your own kitchen stories. Until next time, happy cooking!
Print
Cowboy Caviar
- Total Time: 20 minutes
- Yield: 4 servings 1x
- Diet: Vegetarian
Description
A colorful and vibrant dip that combines black beans, corn, tomatoes, and peppers, perfect for gatherings and celebrations.
Ingredients
- 1 can black beans
- 1 can corn
- 1 red bell pepper
- 1 green bell pepper
- 1/2 red onion
- 1 avocado
- 1 cup cherry tomatoes
- 1/4 cup fresh cilantro
- Juice of 2 limes
- 1 teaspoon chili powder
- Salt and pepper, to taste
Instructions
- Prep your ingredients by rinsing and draining the black beans and corn.
- Dice and chop the red and green bell peppers, red onion, and cherry tomatoes into similarly-sized pieces.
- The avocado affair—slice the avocado, remove the pit, and chop it into chunks while squeezing lime juice on it.
- Toss everything together in a mixing bowl with lime juice, chili powder, salt, and pepper.
- Let it marinate for at least 15-20 minutes in the fridge.
Notes
Serve with tortilla chips or layer in a mason jar for a picnic-friendly option. Add fresh avocado right before serving for best flavor.
- Prep Time: 15 minutes
- Cook Time: 5 minutes
- Category: Appetizer
- Method: Mixing
- Cuisine: Tex-Mex
Nutrition
- Serving Size: 1/2 cup
- Calories: 180
- Sugar: 3g
- Sodium: 300mg
- Fat: 8g
- Saturated Fat: 1g
- Unsaturated Fat: 7g
- Trans Fat: 0g
- Carbohydrates: 22g
- Fiber: 6g
- Protein: 6g
- Cholesterol: 0mg
Keywords: Cowboy Caviar, Tex-Mex, dip, appetizer, vegetarian, party food
Cowboy Caviar
Cowboy Caviar: A Flavorful Journey to the Heart of the Southwest
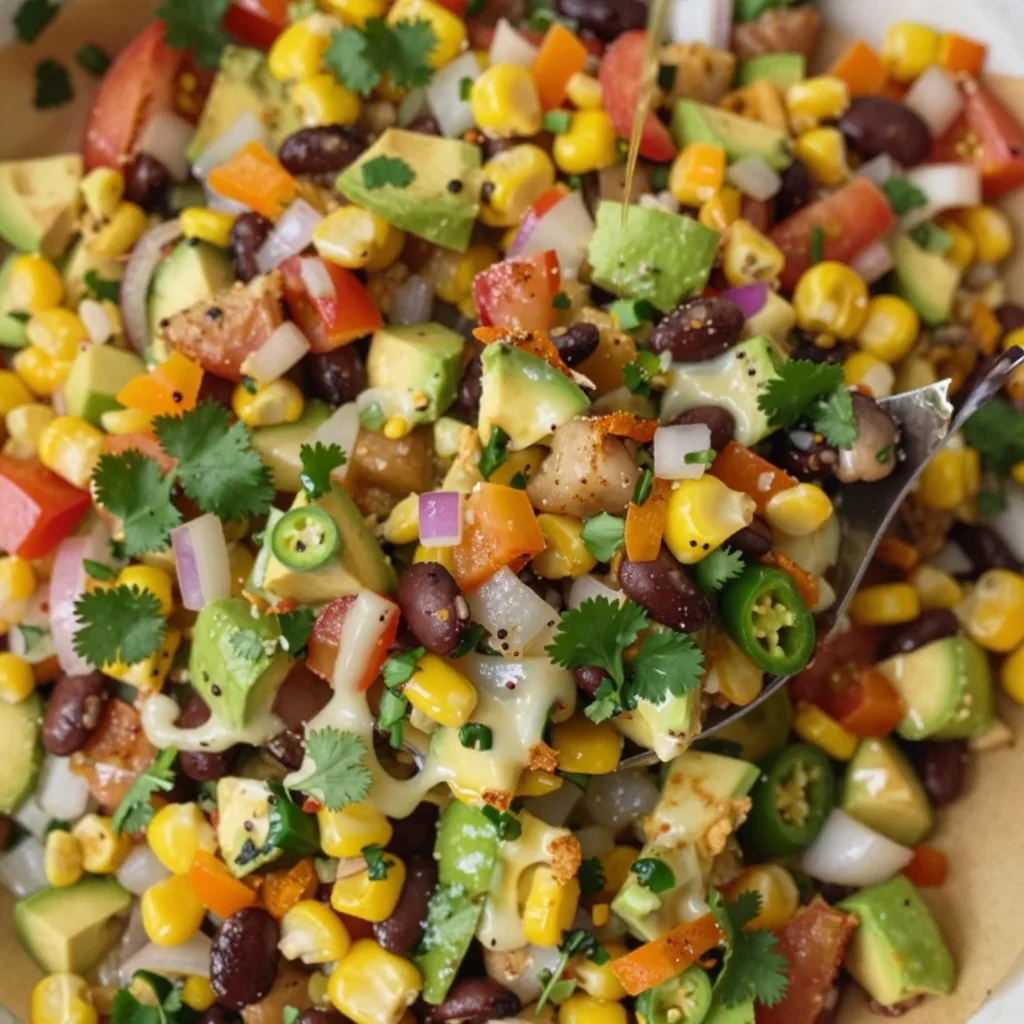
Welcome to my kitchen! Today, we’re diving into a vibrant dish that’s as colorful as a Texas sunset: Cowboy Caviar. Imagine a medley of fresh ingredients coming together in a joyful celebration of flavor, bringing a taste of the Southwest right into your home. This dish is packed with black beans, corn, tomatoes, and peppers, all tossed in a zesty lime vinaigrette, creating a party in your mouth with every single bite. Perfect as a dip, salad, or side dish, cowboy caviar has earned its place as a staple in my kitchen, and I can’t wait to share it with you!
Cowboy caviar isn’t just a recipe; it’s a metaphor for gathering and community. It reminds me of family barbecues and summer picnics, where laughter flows as freely as the drinks. I first stumbled upon this delightful dish at a friend’s get-together years ago. My good friend Carla whipped up a massive bowl of her version, and as I took my first scoop with a tortilla chip, a burst of flavors—sweet, spicy, tangy—exploded in my mouth. It was a revelation! I immediately asked for the recipe, ready to bring my own twist to the dish. These gatherings soon became a summer ritual for us, where we’d experiment with different ingredients and share stories around the table.
It’s this spirit of sharing that inspires me to introduce you to cowboy caviar. Whether you’re hosting a casual barbecue, planning game day snacks, or simply looking for a fresh and nutritious addition to your fridge, this recipe is sure to become a beloved part of your culinary repertoire. Now, let’s roll up our sleeves and get cooking!
Personal Story
I still remember that golden summer afternoon when Carla first introduced me to cowboy caviar. The sun was shining, the kids were running wild, and the air was filled with the delicious aroma of grilling burgers and smoky barbecue. As I dipped my chip into that glorious bowl of cowboy caviar, I felt that comforting warmth of friendship and the joy of food bringing people together. Each crunchy note of bell pepper mixed with the pop of fresh corn and the creaminess of the avocado took me straight to flavor paradise.
Fast forward to today, this dish feels like a warm hug whenever I make it. Whether I’m prepping for a casual family dinner or hosting friends for a festive gathering, cowboy caviar is my go-to crowd-pleaser. The best part? It’s a dish that transcends seasons and occasions. I’ve made it for everything from summer cookouts to cozy fall gatherings, always receiving compliments and requests for the recipe. Now, it’s your turn to create unforgettable memories around this delightful dish!
Ingredients
Here’s what you’ll need to whip up your very own cowboy caviar! Each ingredient adds a unique texture or flavor, and I’ll share some insights along the way:
-
1 can (15 oz) black beans: Rinsed and drained. Black beans are packed with protein and fiber. Feel free to substitute with pinto beans if you prefer a different texture.
-
1 can (15 oz) corn: Rinsed and drained. Whether you use canned sweet corn or frozen corn (thawed), both work wonderfully here!
-
1 cup cherry tomatoes: Halved for sweetness. You can use diced Roma tomatoes in a pinch. Just make sure to remove excess moisture!
-
1 bell pepper (red, yellow, or green): Diced. Choose a color you love! They all bring nice crunch, but red or yellow will add extra sweetness.
-
1 small red onion: Diced finely. If raw onion’s a bit much for you, soak it in cold water for a few minutes before adding to tone down the bite.
-
1 avocado: Diced. For creaminess and healthy fats! If you’re prepping ahead of time, toss it with a bit of lime juice to prevent browning.
-
1-2 jalapeños: Diced, seeds removed (optional). Adjust the heat level to your liking—more seeds mean more spice!
-
1/4 cup cilantro: Chopped. A fresh herb that adds brightness. If cilantro isn’t your thing, try fresh parsley or basil instead.
-
Juice of 2 limes: For tang and zest! Lime juice gives a refreshing kick. You can swap lemon juice if necessary.
-
2 tbsp olive oil: For richness. Feel free to replace it with avocado oil for a different flavor profile!
-
Salt and pepper: To taste. Always start small; you can adjust as you go!
Step-by-Step Instructions
Let’s make this cowboy caviar step by step! Trust me; it’s as easy as it is delicious.
-
Prepare your ingredients: Start by rinsing and draining your black beans and corn. This step is crucial as it keeps the dish from becoming watery. Chop your tomatoes, bell pepper, avocado, and onion to your desired sizes. Pro tip: using a sharp knife makes this process smoother!
-
Mix the veggies: In a large mixing bowl, combine the black beans, corn, tomatoes, bell pepper, red onion, jalapeños, and cilantro. This is where the colors really pop! Mix them gently—nobody wants to mush the avocado.
-
Make the dressing: In a small bowl, whisk together the lime juice, olive oil, salt, and pepper until nicely blended. This mixture brings all your ingredients together, enhancing their natural flavors. Give it a little taste—don’t be shy!
-
Combine everything: Pour your dressing over the veggie mixture and toss gently to combine. Take a moment here to admire how pretty it looks—isn’t it inviting? Let that mixture rest for about 15-20 minutes. This gives it some time to marinate, letting all the flavors mingle, a step you really don’t want to skip!
-
Serve and enjoy: Give it a final stir, adjust any seasonings if necessary, and serve immediately. You can present your cowboy caviar with your favorite tortilla chips, or even as a topping for grilled chicken or fish!
Serving Suggestions
When it comes to plating, keep it casual and fun! Serve cowboy caviar in your favorite bowl or dish and set it right in the center of the table, encouraging guests to dig in with colorful tortilla chips. You can also elevate your presentation by adding a lime wedge or sprig of cilantro for a pop of freshness.
For a heartier meal, consider serving it over a bed of quinoa or alongside grilled meats. The possibilities are endless!
Recipe Variations
Spice things up by trying one of these creative twists:
-
Tropical Cowboy Caviar: Add diced mango or pineapple for a sweet and savory flavor explosion.
-
Mediterranean Twist: Swap black beans for chickpeas and add crumbled feta for a fresh take on this dish.
-
Vegan Option: Leave out the avocado for a lighter version, or add nut-based cheese for creaminess.
-
Spicy Garlic Cowboy Caviar: Mix in minced garlic or a touch of your favorite hot sauce to intensify the heat!
-
Southwestern Flavor Bomb: Toss in diced grilled corn and a pinch of smoked paprika for that extra kick!
Chef’s Notes
Cowboy caviar has evolved in my kitchen over the years. Originally, I followed the traditional recipe, but with time and experimentation, I found so many fun ways to tweak it to my taste. Each version is simply a reflection of the flavors I’m craving or the season’s produce. I often find myself revisiting it after a long day, excited to whip up a batch for dinner or as a last-minute snack for unexpected guests.
And let me share a funny moment from a recent gathering! I forgot to add the avocado during our cookout, and while I was scrambling to get it in, my friend jokingly started calling it “cowboy caviar minus the magic.” Well, the guests loved it just the same, proving that great flavors come from the heart, not just the ingredients!
FAQs and Troubleshooting
Here are a few common questions you might have while making cowboy caviar:
-
Can I make it ahead of time?
Absolutely! However, it’s best to add the avocado just before serving to keep it fresh and vibrant. If prepared in advance, store it in the fridge for up to 3 days without the avocado. -
Can I reduce the spice level?
Of course! Simply omit the jalapeños or use a milder pepper, adjusting to your preference as you go. -
What if it becomes too watery?
If you notice excess liquid at the bottom of your bowl, you can strain the mixture before serving. Always be mindful to drain your beans and corn well. -
How can I store leftovers?
Store any leftovers in an airtight container in the refrigerator for 2-3 days. Just know that the avocado may brown a bit, but the flavors will still be delicious!
Nutritional Info
Cowboy caviar is not only bursting with flavor, but it’s also a nutritious option! Here’s a quick breakdown per serving (approx. 1/2 cup):
- Calories: 120
- Protein: 5g
- Carbohydrates: 20g
- Fiber: 7g
- Fat: 4g (from avocado and olive oil)
Cowboy caviar is a dish that not only celebrates the flavors of the Southwest but also fosters connections and creates lasting memories. So, grab your ingredients and toss together this delightful dish. I can’t wait to hear how it brings joy to your table just like it has to mine! Happy cooking, friends!
Print
Cowboy Caviar
- Total Time: 15 minutes
- Yield: 4 servings 1x
- Diet: Vegetarian
Description
A vibrant and flavorful dish from the Southwest, loaded with black beans, corn, tomatoes, and peppers, tossed in a zesty lime vinaigrette.
Ingredients
- 1 can (15 oz) black beans, rinsed and drained
- 1 can (15 oz) corn, rinsed and drained
- 1 cup cherry tomatoes, halved
- 1 bell pepper (red, yellow, or green), diced
- 1 small red onion, diced finely
- 1 avocado, diced
- 1–2 jalapeños, diced, seeds removed (optional)
- 1/4 cup cilantro, chopped
- Juice of 2 limes
- 2 tbsp olive oil
- Salt and pepper, to taste
Instructions
- Prepare your ingredients: Start by rinsing and draining your black beans and corn. Chop your tomatoes, bell pepper, avocado, and onion to your desired sizes.
- Mix the veggies: In a large mixing bowl, combine the black beans, corn, tomatoes, bell pepper, red onion, jalapeños, and cilantro.
- Make the dressing: In a small bowl, whisk together the lime juice, olive oil, salt, and pepper until nicely blended.
- Combine everything: Pour your dressing over the veggie mixture and toss gently to combine. Let it rest for about 15-20 minutes.
- Serve and enjoy: Give it a final stir, adjust any seasonings if necessary, and serve immediately with tortilla chips or as a topping for grilled chicken or fish!
Notes
For best results, add the avocado just before serving to keep it fresh. You can store leftovers in an airtight container for 2-3 days.
- Prep Time: 15 minutes
- Cook Time: 0 minutes
- Category: Appetizer
- Method: Mixing
- Cuisine: Southwestern
Nutrition
- Serving Size: 1 serving
- Calories: 120
- Sugar: 3g
- Sodium: 180mg
- Fat: 4g
- Saturated Fat: 1g
- Unsaturated Fat: 3g
- Trans Fat: 0g
- Carbohydrates: 20g
- Fiber: 7g
- Protein: 5g
- Cholesterol: 0mg
Keywords: Cowboy Caviar, Southwestern Dip, Healthy Appetizer, Vegetarian Salad

Cold Brew Coffee Protein Smoothie
Cold Brew Coffee Protein Smoothie: Your Ultimate Energizing Treat
Welcome back to my kitchen! Today, I can’t wait to share with you a recipe that has won my heart and fills my mornings with radiant energy—my Cold Brew Coffee Protein Smoothie. If you’re someone who loves the rich aroma of coffee but also craves a healthy boost, you’re in for a treat! This smoothie not only provides a delicious way to wake up your senses but also gives you that extra jolt to power through your day. It’s perfect for those busy mornings when you need more than just a cup of coffee.
This delightful drink combines the smooth, bold flavor of cold brew with creamy yogurt, nutty peanut butter, and a hint of banana sweetness. Trust me, it’s a hug in a glass—fuel for your body and soul as you navigate your busy life. So, grab your blender and let’s whip up something fabulous!
A Whirlwind of Cold Brew Memories
Every great recipe comes with a story, and this one is no different! I remember the first time I ever tasted cold brew coffee. I was visiting a quaint little café in my college town, eager to kick my caffeine routine into high gear. The barista recommended the house-made cold brew, served over ice, with a splash of almond milk. I took a sip, and it was like the clouds parted! The coffee was so smooth and rich, without that bitter punch that sometimes comes with traditional brews.
That day, I knew I had stumbled onto something special. Soon enough, I found myself experimenting with cold brew at home, tossing it into different recipes to see how it could elevate flavors. It was during one of those adventurous mornings, blending away in my kitchen, that the idea of a cold brew protein smoothie was born. Little did I know, this would become my go-to breakfast and a staple in my recipe book!
Ingredients
Here’s what you’ll need for your Cold Brew Coffee Protein Smoothie:
-
Cold Brew Coffee (1 cup): A smooth, caffeine-rich coffee that gives this smoothie a delicious base without any bitterness. You can make your own by steeping coarsely ground coffee in cold water overnight, or grab a bottle from your favorite café or store.
-
Greek Yogurt (½ cup): This adds creaminess and protein. It also brings a slight tanginess that balances the sweetness. If you’re looking for a dairy-free option, feel free to swap it with coconut yogurt!
-
Banana (1 ripe): Adds natural sweetness and creaminess. If bananas aren’t your thing, try frozen mango for a tropical twist!
-
Peanut Butter (2 tablespoons): This is my go-to for a nutty flavor and an extra punch of protein! Want to mix it up? Almond butter works just as well, or you can use sunflower seed butter for a nut-free version.
-
Honey or Maple Syrup (1-2 tablespoons): For sweetness! Adjust based on your preference. If you want a low-sugar option, leave this out or use stevia.
-
Ice (1 cup): A smoothie needs to be chilled, and ice helps achieve that perfect texture. If you prefer a creamier consistency, use frozen banana or yogurt instead of ice.
-
Optional Add-ins: A scoop of protein powder, a sprinkle of cinnamon, or a handful of spinach for an extra nutrient boost!
Step-by-Step Instructions
Let’s get blending! Here’s how to make your Cold Brew Coffee Protein Smoothie:
-
Gather Your Ingredients: Line up all your ingredients on the counter. Having everything within reach makes the process smooth and enjoyable—just like your smoothie will be!
-
Add Cold Brew Coffee and Yogurt: Start by pouring 1 cup of cold brew coffee into your blender. Next, add ½ cup of Greek yogurt. These two ingredients create the flavorful base of the smoothie. Using a high-quality cold brew will make a noticeable difference, so don’t hesitate to get the good stuff!
-
Toss in the Banana and Peanut Butter: Peel your banana and break it into chunks before adding it to the blender (it helps with blending!). Now, add 2 tablespoons of peanut butter. Pro tip: if your peanut butter is on the thicker side, you can microwave it for a few seconds to make it easier to blend.
-
Sweeten It Up: Drizzle in honey or maple syrup to add sweetness. Remember, this is adjustable—taste as you go, and make it your own!
-
Ice, Ice Baby: Add 1 cup of ice to the blender. If you’re using fresh banana or yogurt, feel free to add a bit more ice to get that perfect chill.
-
Blend Away: Secure the lid on your blender, and blend on high until everything is smooth. I like to pulse a few times to make sure all the chunks are broken down. You might need to stop and scrape down the sides to get everything blended evenly.
-
Taste Test: Here’s where the magic happens! Taste your smoothie and adjust the sweetness or add a bit more coffee, if needed. You can also add a splash of milk or more ice for a thinner consistency.
-
Pour and Enjoy: Once you’re happy with the flavor and texture, pour the smoothie into your favorite glass. If you feel fancy, top with a sprinkle of cinnamon or some cacao nibs for that extra touch!
Serving Suggestions
Serve this Cold Brew Coffee Protein Smoothie in a tall glass—perhaps your favorite travel mug if you’re in a rush! Add a cute straw (or go for the reusable kind—let’s save the planet, friends!), and if you’re feeling a bit extra, garnish with a slice of banana or a dollop of yogurt on top. Perfect for enjoying on your porch or while heading out the door!
Recipe Variations
Want to put a spin on your smoothie? Here are a few variations to try:
-
Mocha Delight: Add a tablespoon of cocoa powder or chocolate protein powder for a chocolatey twist.
-
Nutty Banana: Swap peanut butter for almond butter and add crushed almonds on top for a nutty crunch.
-
Green Boost: Throw in a handful of spinach or kale for added nutrients. The coffee flavor will balance it out perfectly!
-
Chai Spice: Mix in some ground cinnamon and ginger for a cozy chai-inspired vibe. Uplifting and aromatic!
-
Berry Blast: Add a handful of frozen mixed berries for a fruity kick—deliciously refreshing!
Chef’s Notes
This smoothie has become a ritual of mine, especially during the summer months. I perfected it during a particularly hot week when I needed a way to stay cool while getting my caffeine fix. On a funny note, I once tried to add too many ingredients in one go and ended up with a smoothie explosion that left my kitchen looking like a coffee-flavored Jackson Pollock painting! Lesson learned: less is sometimes more—especially when blending!
Over the years, I’ve adjusted this recipe based on input from friends and taste-testing sessions. I encourage you to make it your own, too!
FAQs and Troubleshooting
-
What if my smoothie is too thick?
If your smoothie is too thick, simply add a splash of milk (dairy or non-dairy) or cold brew to loosen it up and blend again until smooth. -
Can I use regular brewed coffee instead of cold brew?
Yes, you can! Just allow regular brewed coffee to cool completely before adding it to your smoothie. -
How can I make this smoothie vegan?
Use plant-based yogurt and swap the honey for maple syrup or agave nectar to keep it entirely plant-based! -
What if I don’t have a blender?
In a pinch, you can use a whisk to combine the ingredients in a large bowl, but the texture will be different! You can also try an immersion blender.
Nutritional Info
While I do believe in enjoying food without counting every calorie, I know many love to keep an eye on their nutrition. This Cold Brew Coffee Protein Smoothie is packed with protein, healthy fats, and vitamins to kick-start your day. Here’s a quick overview for one serving:
- Calories: Approximately 400
- Protein: 20g
- Carbohydrates: 40g
- Fats: 15g
- Fiber: 5g
There you have it! Your delicious Cold Brew Coffee Protein Smoothie is ready to brighten your mornings. As always, I’d love to hear how your creation turns out. Share your thoughts, favorite variations, or kitchen mishaps in the comments below! Happy blending, my friends!
Print
Cold Brew Coffee Protein Smoothie
- Total Time: 5 minutes
- Yield: 1 serving 1x
- Diet: Vegetarian
Description
A smooth and energizing Cold Brew Coffee Protein Smoothie perfect for busy mornings.
Ingredients
- 1 cup Cold Brew Coffee
- ½ cup Greek Yogurt
- 1 ripe Banana
- 2 tablespoons Peanut Butter
- 1–2 tablespoons Honey or Maple Syrup
- 1 cup Ice
- Optional Add-ins: protein powder, cinnamon, or spinach
Instructions
- Gather Your Ingredients: Line up all your ingredients on the counter.
- Add Cold Brew Coffee and Yogurt: Pour cold brew coffee and Greek yogurt into your blender.
- Toss in the Banana and Peanut Butter: Peel and chunk the banana, then add it along with peanut butter to the blender.
- Sweeten It Up: Drizzle honey or maple syrup into the mix.
- Add Ice: Throw in the ice to chill your smoothie.
- Blend Away: Secure the lid and blend until smooth.
- Taste Test: Adjust flavor and sweetness as desired.
- Pour and Enjoy: Serve in your favorite glass, optionally garnishing with cinnamon or cacao nibs.
Notes
For a dairy-free option, substitute yogurt with coconut yogurt. Adjust sweetness based on preference.
- Prep Time: 5 minutes
- Cook Time: 0 minutes
- Category: Drink
- Method: Blending
- Cuisine: American
Nutrition
- Serving Size: 1 smoothie
- Calories: 400
- Sugar: 18g
- Sodium: 150mg
- Fat: 15g
- Saturated Fat: 3g
- Unsaturated Fat: 8g
- Trans Fat: 0g
- Carbohydrates: 40g
- Fiber: 5g
- Protein: 20g
- Cholesterol: 10mg
Keywords: smoothie, cold brew, coffee, protein, breakfast

Strawberry Banana Smoothie
Strawberry Banana Smoothie: A Deliciously Nourishing Treat
Welcome to my kitchen, my fellow food lovers! Today, we’re diving into a vibrant and refreshing recipe that’s as delightful as a warm sunny day spent with friends—a strawberry banana smoothie! This drink is a staple in my household and has a special place in my heart. Not only is it a quick and easy way to get your daily dose of fruit, but it’s also a burst of nostalgia wrapped in a creamy, frosty glass. So grab your blender, and let’s blend some sunshine together!
A Taste of Nostalgia
I can still remember the first time my mom made a strawberry banana smoothie for me. It was a hot summer afternoon, and I came home from playing outside, parched and ready for something refreshing. I could smell the sweet strawberries before I even reached the kitchen. That fruity aroma wafting through the air made me feel right at home. I watched in wonder as my mom tossed fresh strawberries and ripe bananas into the blender, adding a splash of milk and a dollop of yogurt. The whirring of the blender and the bright pink hue that emerged was nothing short of magic. The first sip was like a mini-vacation for my taste buds, and ever since, I’ve been hooked. Now, as I share this recipe with you, it’s almost like passing down a delicious family tradition that we can all enjoy. So, let’s fire up those blenders!
Ingredients
Here’s what you’ll need for a creamy, dreamy strawberry banana smoothie:
-
2 cups fresh strawberries: The stars of our show! Choose ripe, red strawberries for maximum flavor. You can use frozen if they’re out of season—just remember to adjust the liquid!
-
1 ripe banana: Bananas add natural sweetness and creaminess. If you’re out of bananas, avocado is a great alternative for a similar texture.
-
1 cup plain yogurt: For a creamy base with a little tang. Greek yogurt ups the protein factor, but any yogurt will do, including dairy-free versions!
-
1/2 cup milk: Adjust the creaminess to your liking! Use almond milk, oat milk, or coconut milk for a dairy-free option.
-
1 tablespoon honey or maple syrup (optional): Sweeten to taste! Omit this if your strawberries are sweet enough, or use agave syrup for a vegan twist.
-
Ice cubes: To achieve that frosty consistency! Just a handful will do unless you prefer your smoothie extra icy.
Step-by-Step Instructions
-
Prep your ingredients: Start by washing your strawberries thoroughly. Remove the green tops and slice them in half. As for the banana, peel it and cut it into chunks. Trust me, this makes blending so much easier!
-
Combine ingredients in your blender: Place the halved strawberries, banana chunks, yogurt, and milk into your blender. If you’re adding honey or maple syrup, toss that in now, too!
-
Blend it up: Close your blender with the lid tightly (we don’t want any smoothie explosions, do we?). Start blending on low speed and gradually increase to high. Blend for about 30-60 seconds until smooth and creamy. If your smoothie is too thick, just add a splash more milk!
-
Check the consistency: Stop the blender and take a peek. If you want a thicker smoothie, add some ice and blend again. For a thinner texture, add more milk until it reaches your desired consistency.
-
Taste and adjust: Give it a little taste. If you’d like it sweeter, throw in a bit more honey or syrup and blend briefly to mix.
-
Serve it up: Pour the smoothie into tall glasses, and don’t forget to give it a little swirl for that fancy look! You can also garnish it with a few whole strawberries or banana slices on top for some extra pizazz.
Serving Suggestions
Serve your strawberry banana smoothie in a chilled glass with a colorful straw for that extra flair! It’s perfect for breakfast or as a refreshing snack after a workout. Consider pairing it with a slice of toast topped with peanut butter or some granola on the side for a wholesome meal.
Recipe Variations
Feeling adventurous? Here are a few fun twists to shake up your strawberry banana smoothie:
-
Berry Blast: Add a handful of blueberries or raspberries for an extra antioxidant boost.
-
Green Machine: Toss in a handful of spinach or kale for a vibrant green smoothie—don’t worry, you won’t taste it!
-
Tropical Paradise: Swap half the strawberries for pineapple or mango for a tropical flavor explosion.
-
Peanut Butter Banana: Add a tablespoon of peanut butter for a nutty twist that pairs beautifully with banana.
-
Cocoa Delight: Stir in a tablespoon of cocoa powder for a chocolatey version—perfect for chocolate lovers!
Chef’s Notes
This smoothie recipe has become one of my go-to snacks, evolving over the years as I’ve incorporated seasonal fruits and made it more adventurous. I often reminisce about those summer afternoons spent in my mom’s kitchen. It’s amazing how a simple smoothie can bring back such wonderful memories and create new ones with my friends and family. I love to experiment with whatever fruits I have on hand, and the blender has become my best friend!
FAQs and Troubleshooting
Q: Can I use frozen fruit?
A: Absolutely! Frozen strawberries and bananas work well. Just remember to adjust the milk for your desired consistency!
Q: My smoothie turned out too watery. What did I do wrong?
A: If you used a lot of ice or thin milk, that could be the reason. Next time, try less liquid or more fruit to thicken it up.
Q: Can I make this smoothie ahead of time?
A: While it’s best fresh, you can prep and store the ingredients in the fridge the night before. A quick blend in the morning will bring it back to life!
Q: What else can I add for extra nutrition?
A: Consider adding flaxseeds, chia seeds, or protein powder for an additional health punch!
Nutritional Info
This recipe provides a great balance of carbohydrates, protein, and healthy fats, making it ideal as a meal replacement or snack. Each serving is packed with vitamins, minerals, and antioxidants from the fresh fruit and yogurt, giving you a deliciously nutritious start to your day.
So there you have it, my friends! A simple yet scrumptious strawberry banana smoothie recipe that is bound to be a hit in your kitchen. May it fill your home with delightful aromas and happy memories, just like it has in mine. Happy blending!
Print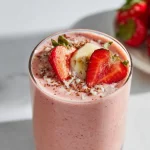
Strawberry Banana Smoothie
- Total Time: 10 minutes
- Yield: 2 servings 1x
- Diet: Vegetarian
Description
A refreshing strawberry banana smoothie that’s quick and easy to prepare, perfect for a nutritious treat.
Ingredients
- 2 cups fresh strawberries
- 1 ripe banana
- 1 cup plain yogurt
- 1/2 cup milk
- 1 tablespoon honey or maple syrup (optional)
- Ice cubes
Instructions
- Prep your ingredients: Start by washing your strawberries thoroughly, removing the green tops, and slicing them in half. Peel and cut the banana into chunks.
- Combine ingredients in your blender: Place strawberries, banana, yogurt, and milk into your blender. Add honey or syrup if desired.
- Blend it up: Tightly close the lid and blend starting on low, gradually increasing to high for about 30-60 seconds until smooth and creamy.
- Check the consistency: Stop the blender and adjust thickness by adding ice or more milk as desired.
- Taste and adjust: Taste your smoothie and add more honey or syrup if you want it sweeter, then blend briefly.
- Serve it up: Pour into tall glasses, garnish with strawberries or banana slices, and enjoy!
Notes
This smoothie can be made with frozen fruits—just adjust milk for desired consistency.
- Prep Time: 10 minutes
- Cook Time: 0 minutes
- Category: Beverage
- Method: Blending
- Cuisine: American
Nutrition
- Serving Size: 1 serving
- Calories: 250
- Sugar: 17g
- Sodium: 70mg
- Fat: 5g
- Saturated Fat: 2g
- Unsaturated Fat: 3g
- Trans Fat: 0g
- Carbohydrates: 45g
- Fiber: 3g
- Protein: 10g
- Cholesterol: 10mg
Keywords: smoothie, strawberry banana, healthy drink, refreshing, quick breakfast

Raspberry Cream Smoothie Recipe
Raspberry Cream Smoothie: A Delightful Burst of Flavor
Welcome to my kitchen, friends! Today, we’re diving into a recipe that feels like a hug in a glass—my delightful Raspberry Cream Smoothie. A smoothie that’s not only bursting with bright, tangy raspberry flavor but also offers a rich creaminess that makes it feel indulgent without any guilt. It’s the perfect breakfast for those busy mornings, an energizing mid-afternoon snack, or even a refreshing dessert that feels like a treat. So, grab your blender and let’s whip up something special together!
A Little Background on My Raspberry Love
Ah, raspberries! I have such fond memories tied to these vibrant, little gems. Growing up, my grandmother had the most incredible raspberry bush in her backyard. During the summer months, it became our little playground, where my cousins and I would make a game of seeing who could gather the most. I remember the sparkle of warm sunlight filtering through the leaves as we rushed to pick the plumpest berries, giggling over who would get the biggest basket. The intoxicating smell of fresh raspberries always drew us in, and we ended up eating more than we ever took home!
One of my favorite treats was my grandmother’s raspberry cream popsicles. She would blend fresh raspberries with sweet cream, freeze them in fun molds, and we would devour them on the porch while watching the fireflies dance in the twilight. This smoothie is inspired by those sunny afternoons filled with laughter and sweet, creamy flavors. Let’s bring a bit of that nostalgia into your kitchen!
Ingredients: What You’ll Need
Here’s what you need to whip up a fantastic Raspberry Cream Smoothie:
-
1 cup fresh or frozen raspberries
Raspberries are the star of the show! If you can, opt for fresh ones when in season for the best flavor. If they’re out of season, frozen is a great option—just make sure they’re unsweetened. -
1 banana
This acts as a natural sweetener while adding creaminess to the smoothie. If you’re not a banana fan, you can swap it for half an avocado for a creamier texture, though it will slightly alter the flavor. -
1/2 cup Greek yogurt
Adding protein and creaminess, Greek yogurt is perfect for texture. If you want a dairy-free version, coconut yogurt works beautifully, but be mindful of the coconut flavor it may impart. -
1/2 cup milk of choice
Use whatever milk you love—almond, oat, or dairy milk all work! This will help blend the smoothie smoothly. Adjust the amount based on your preferred consistency. -
1 tablespoon honey or maple syrup
Sweeten it up! Both options add a lovely touch. If you like your smoothies less sweet, feel free to leave it out or adjust according to taste. -
1/2 teaspoon vanilla extract
This adds an aromatic depth and rounds out the flavors. If you’re feeling adventurous, try adding a dash of almond extract instead for a different twist. -
Ice (optional)
If you prefer a chilled smoothie, especially during hot summer days, add a handful of ice for a frosty finish.
Step-by-Step Instructions: Let’s Blend It Up!
Now that we have our ingredients ready, let’s get blending! This part is where the magic happens, and I know you’re going to love it.
-
Gather Your Ingredients
On your kitchen counter, lay out all your ingredients. Trust me; it helps ease the process and makes you feel like a rockstar chef! -
Add the Raspberries
Start by adding the raspberries into the blender. If you’re using frozen ones, there’s no need to thaw them beforehand, as they’ll blend beautifully with the other ingredients. -
In Go the Banana and Greek Yogurt
Next, peel and chop the banana into a couple of chunks and toss it in. Add the Greek yogurt after the banana—this will help create a creamy texture throughout the smoothie. -
Pour in the Milk
Carefully add your milk of choice. If you want a thicker smoothie, start with half a cup, then add more as needed. Blend judiciously at first until it all starts to combine. -
Sweeten It Up
Drizzle in your honey or maple syrup, and add the vanilla extract. Blend again until it’s all smooth. You want to see the vibrant pink color come through! -
Adjust the Consistency
If your smoothie is too thick, don’t hesitate to add a little more milk or some water. If it’s too thin, throw in a bit more Greek yogurt or a handful of ice and blend once again until everything is well-combined. -
Taste Test!
Here’s a little chef hack: before you pour it into your favorite glass, take a small sip and adjust the sweetness or add a tad more banana if preferred. This is your creation! -
Serve It Up
Pour the luscious smoothie into your favorite glass. Feel free to top with a few whole raspberries, a sprinkle of granola, or even a dollop of whipped cream for an over-the-top treat!
Serving Suggestions: The Final Touch
When it comes to serving this Raspberry Cream Smoothie, presentation matters! I love pouring it into a tall glass to showcase that beautiful, rich pink hue. You can garnish with fresh raspberries or a mint sprig for a pop of color. For extra flair, drizzle some honey over the toppings or sprinkle a handful of crushed nuts or granola on top.
Serve this delicious smoothie chilled, and you will have a refreshing delight that’s ready to impress family and friends!
Recipe Variations: Get Creative!
The beauty of the Raspberry Cream Smoothie is its versatility! Feel free to switch things up with these fun variations:
-
Berry Medley: Swap the raspberries for strawberries, blueberries, or blackberries for a mixed berry smoothie.
-
Peanut Butter Twist: Add a tablespoon of peanut or almond butter for a nutty flavor and added protein.
-
Green Smoothie: Toss in a handful of spinach or kale to sneak in some greens—it’ll be a vitamin powerhouse!
-
Choco-Raspberry Delight: Add a tablespoon of unsweetened cocoa powder for a chocolatey twist that pairs beautifully with raspberries.
-
Vegan Option: Substitute the Greek yogurt for a plant-based yogurt and use almond milk to keep it vegan-friendly.
Chef’s Notes: Embracing the Kitchen Adventure
As I’ve perfected this Raspberry Cream Smoothie over the years, I’ve learned to embrace the messy side of cooking. There were countless trials where I spilled half the blender’s contents everywhere, or I forgot that I had a banana on the counter until it was too brown to use. But that’s what makes the kitchen fun—a little chaos and a lot of deliciousness.
And just like life, cooking isn’t about perfection; it’s about expression and love. This recipe has evolved with me—adding ingredients, taking some away—but it always circles back to that fundamental idea: it’s about creating something that brings joy. So, don’t be afraid to make it your own!
FAQs and Troubleshooting
1. Can I use a different fruit instead of raspberries?
Absolutely! Feel free to swap in your favorite berries or even tropical fruits like mango or pineapple for a whole new flavor profile.
2. Why is my smoothie too thick?
If it’s too thick, simply add a bit more milk or water until you reach your desired consistency. Remember, the type of banana and yogurt can affect thickness too!
3. How can I make it sweeter?
If you find your smoothie isn’t sweet enough, try adding a bit more honey, maple syrup, or even a splash of orange juice for natural sweetness.
4. Can I meal prep this smoothie?
While it’s best enjoyed fresh, you can prep the ingredients ahead of time by freezing the raspberries and banana slices together. Just blend with yogurt and milk when you’re ready!
Nutritional Info (Optional)
A generous serving of this Raspberry Cream Smoothie contains:
- Calories: Approximately 240
- Protein: 9g
- Fat: 4g
- Carbohydrates: 45g
(Final nutritional breakdown may vary based on ingredient choices.)
And there you have it—my delightful Raspberry Cream Smoothie recipe that captures the essence of summer and cozy family memories. I hope you enjoy making it as much as I do! Remember, cooking is an adventure, so have fun, play around with flavors, and share your creations with those you love. Happy blending, friends!
Print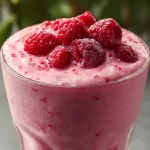
Raspberry Cream Smoothie
- Total Time: 10 minutes
- Yield: 2 servings 1x
- Diet: Vegetarian
Description
A delightful Raspberry Cream Smoothie bursting with tangy raspberry flavor and rich creaminess. Perfect for breakfast, a snack, or a refreshing dessert.
Ingredients
- 1 cup fresh or frozen raspberries
- 1 banana
- 1/2 cup Greek yogurt
- 1/2 cup milk of choice
- 1 tablespoon honey or maple syrup
- 1/2 teaspoon vanilla extract
- Ice (optional)
Instructions
- Gather your ingredients.
- Add the raspberries into the blender.
- In go the banana and Greek yogurt.
- Pour in the milk.
- Sweeten it up with honey or maple syrup and add the vanilla extract.
- Adjust the consistency as needed.
- Taste test!
- Serve it up in your favorite glass.
Notes
Feel free to garnish with whole raspberries, granola, or whipped cream. You can also try variations like adding peanut butter or using a different type of yogurt.
- Prep Time: 10 minutes
- Cook Time: 0 minutes
- Category: Smoothie
- Method: Blending
- Cuisine: American
Nutrition
- Serving Size: 1 serving
- Calories: 240
- Sugar: 20g
- Sodium: 75mg
- Fat: 4g
- Saturated Fat: 2g
- Unsaturated Fat: 2g
- Trans Fat: 0g
- Carbohydrates: 45g
- Fiber: 6g
- Protein: 9g
- Cholesterol: 10mg
Keywords: Raspberry Smoothie, Healthy Smoothie, Breakfast Recipe
Zesty Orange Smoothie Recipe
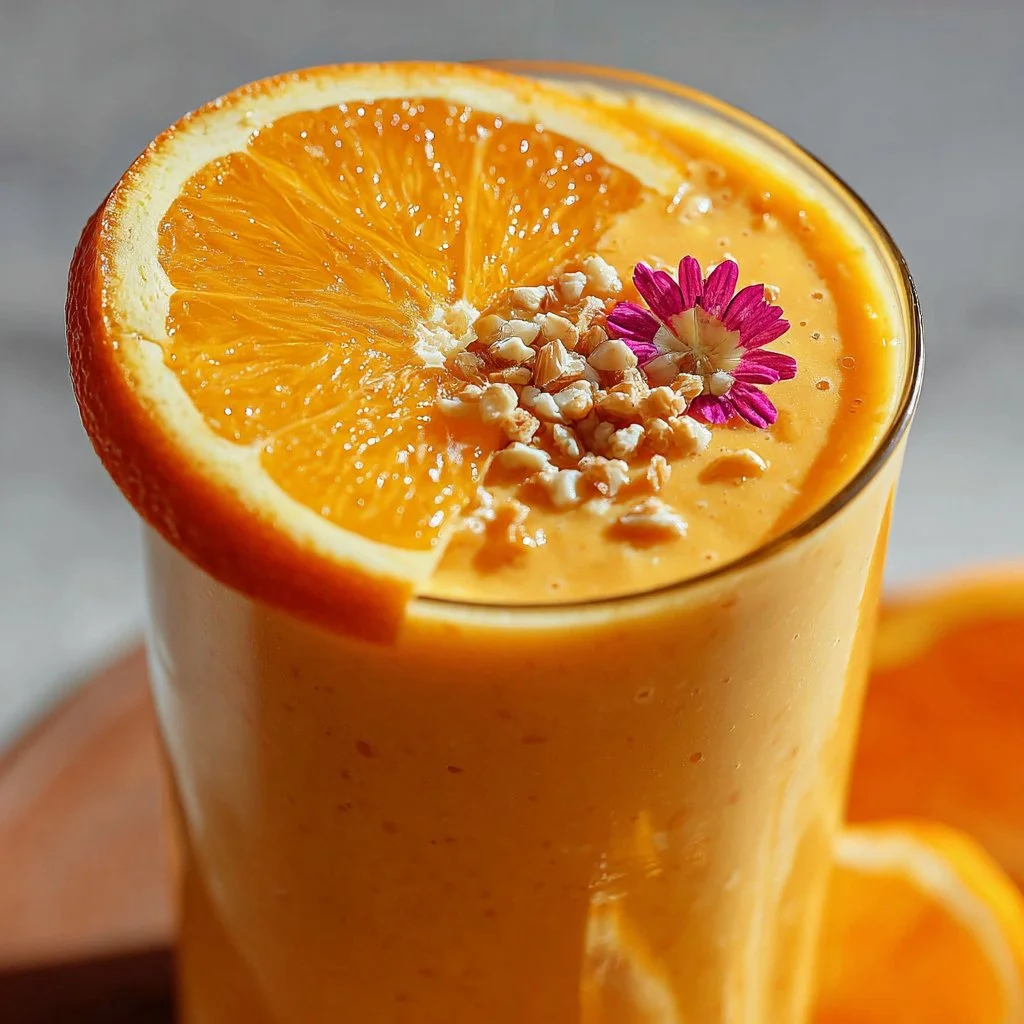
Zesty Orange Smoothie Recipe: Refreshing, Energizing, and Oh-so-Yummy!
Welcome to my kitchen, dear friends! Today, we’re diving into a delightful, healthy treat that’s perfect for any time of the day: the Zesty Orange Smoothie! It’s a vibrant concoction that brings a burst of sunshine into your glass and a pep in your step. Whether you’re looking for a refreshing breakfast, a nutritious snack, or a post-workout pick-me-up, this smoothie has got your back. Let’s blend some happiness together!
Picture this: It’s a bright Saturday morning, and the sun is streaming through your kitchen window. You can smell the sweetness of fresh oranges from the local market you visited just yesterday. You’re feeling adventurous and decide to whip up a smoothie that captures all that citrusy goodness. As you toss in a few ingredients, the blender whirs to life, and soon enough, you’re pouring a beautiful, creamy drink into your favorite glass.
Making a zesty orange smoothie isn’t just about following a recipe; it’s about creating a little slice of joy that fills your day with energy and flavor. It’s also a wonderful way to sneak in some extra fruits and veggies without even noticing! You’ll find that this recipe is not only easy to make but it’s also quite versatile, allowing you to customize it according to your taste and dietary needs. Ready to get started? Let’s go on this flavorful journey together!
A Personal Story: The Love for Citrus
I can’t talk about my love for smoothies without sharing a sweet memory that’s close to my heart. I remember the first time I took a trip to Florida with my family when I was a kid. One sunny afternoon, we visited an orange grove, and there, amidst the blooming citrus trees, I picked my very first orange. The excitement was palpable; it was just so vibrant and bursting with color!
Once we returned home, I had the brilliant idea to make my first-ever smoothie using those fresh oranges. My little hands got busy peeling and blending, and though it was a chaotic mess of juice splattering everywhere, it turned out to be the best smoothie I’d ever tasted! The sweetness of the oranges, combined with the creaminess of yogurt I had in the fridge, created pure bliss in a glass.
That moment ignited my passion for cooking and especially for experimenting with fruit smoothies. Who would’ve thought that a simple day at the grove would kickstart a lifelong love affair with all things delicious? So, when I say that this Zesty Orange Smoothie is more than just a recipe, I mean it! It’s all about memories, love, and a splash of joy – in every sip!
Ingredients
Let’s break down what you’ll need to create this refreshing zesty orange smoothie. Here’s your shopping list, along with some helpful insights for each ingredient:
-
Oranges (2 large, peeled): The stars of the show! Choose juicy, sweet oranges. Valencia or navel oranges work wonderfully. If you don’t have fresh oranges, you can use 100% orange juice, but fresh is best!
-
Banana (1, frozen): This adds natural sweetness and creaminess to the smoothie. Freeze your bananas beforehand for a thicker texture. If you’re not a banana fan, you can substitute with half an avocado for creaminess or a scoop of Greek yogurt.
-
Greek Yogurt (½ cup): Pushes the protein content up and gives the smoothie a velvety finish. You can swap this out for dairy-free yogurt if you’re keeping it plant-based.
-
Spinach or Kale (1 cup, optional): Sneak in a serving of greens without sacrificing flavor! Spinach is milder, while kale has a bit more bite. If you’re not a fan of greens, feel free to leave this out.
-
Honey or Maple Syrup (1-2 tablespoons): Only if you need a bit more sweetness. Adjust based on your taste. If you’re avoiding sugar, you can skip this altogether!
-
Coconut Water or Almond Milk (1 cup): This adds hydration and a subtle flavor. Coconut water is naturally hydrating, while almond milk gives a nutty undertone. If you need it to be thicker, use less liquid.
-
Ice Cubes (optional, about ½ cup): For that icy cold refreshment. Toss in a handful if you’re enjoying the smoothie on a warm day and want a frosty treat.
Step-by-Step Instructions
Let’s make our Zesty Orange Smoothie come to life! Grab your blender, and let’s get started.
-
Prepare the Oranges: Start by peeling your oranges and separating them into segments. You can remove any seeds as you do this. The citrus scent is intoxicating! Make sure to give them a little squeeze over the blender to catch any juice – trust me, every drop of zesty goodness counts.
-
Add the Frozen Banana: Toss in your frozen banana. If you forgot to freeze one, you can use a fresh banana, but your smoothie will be less thick and cool. Don’t worry! It’ll still be delicious.
-
Mix in the Yogurt: Scoop in that creamy Greek yogurt. It’s going to make your smoothie rich and satisfying. It’s like giving your smoothie a hug!
-
Toss in the Greens (if using): If you’re adding spinach or kale, now’s the time! Start with spinach for a milder taste. Blend these greens in well; the goal is to make them virtually disappear!
-
Sweeten It Up: Drizzle in your honey or maple syrup. If you’re a sweet-tooth like me, taste it first. Adjust the sweetness as you like; sometimes, the bananas are sweet enough!
-
Add Your Liquid: Pour in the coconut water or almond milk. This helps everything blend smoothly and gets the right consistency. If you’re feeling adventurous, try adding a splash of vanilla extract at this stage for another layer of flavor!
-
Throw in Some Ice Cubes: If it’s a hot day or you just want a frosty treat, add those ice cubes. Now, secure the lid on your blender and blend on high until you reach a super smooth consistency. You might need to stop it once or twice to scrape down the sides.
-
Taste Test: This is the best part! Before serving, give it a quick taste. Adjust the flavors if needed. Want a bit more zing? A squeeze of lime can amp things up beautifully.
-
Pour and Enjoy: Once you’re satisfied, pour the vibrant smoothie into your favorite glass. You can even top it with a slice of orange as a fancy touch!
Serving Suggestions
To serve your Zesty Orange Smoothie, I love to garnish it with a small slice of orange or a sprinkle of chia seeds for added texture. If you’re feeling fancy, throw in a colorful straw and maybe even a mint leaf as a final touch. This simple garnishing elevates your smoothie from delicious to utterly Instagram-worthy!
Recipe Variations
Now, let’s talk about how you can jazz up your Zesty Orange Smoothie to suit your unique taste preferences:
-
Tropical Twist: Add a small handful of pineapple chunks for a tropical flair! The sweetness from the pineapple complements the orange beautifully.
-
Nutty Delight: Throw in a tablespoon of almond butter or peanut butter for added protein and a nutty flavor. This turns your smoothie into a filling meal!
-
Berry Blast: Add a handful of mixed berries (like strawberries or blueberries) for a berry-infused orange experience. This adds antioxidants and a gorgeous color contrast.
-
Spiced Up: Add a dash of ginger or turmeric for an extra health kick. Both bring unique flavors and tons of health benefits!
-
Choco-Orange Bliss: For a decadent treat, mix in a tablespoon of cocoa powder. The rich chocolate flavors meld wonderfully with the citrus, creating a sweet dessert-style smoothie!
Chef’s Notes
Here’s a little chef insight from my journey of perfecting the Zesty Orange Smoothie: When I first tried making it, I overcomplicated it with too many ingredients, and the flavors got lost. Remember, simplicity is key! You won’t need more than a handful of fresh ingredients to create something magical.
Also, my countertop blender has seen better days (one too many smoothie disasters, I’ll admit!), but it does the job for this recipe. If you have a high-speed blender, feel free to use it for an ultra-smooth finish!
FAQs and Troubleshooting
1. Why is my smoothie too thick?
If your smoothie is thicker than you’d like, simply add a bit more liquid (coconut water or almond milk) and blend again until you reach your desired consistency.
2. Can I make this ahead of time?
Absolutely! You can store your smoothie in an airtight container for up to 24 hours in the fridge. Just give it a good shake or stir before drinking.
3. How do I store leftover smoothie?
If you have leftovers after your smoothie feast, consider pouring it into an ice cube tray. These smoothie cubes can be a quick addition to your next smoothie, or blend them with yogurt for a popsicle treat!
4. My smoothie tastes too sour, how can I fix it?
If your smoothie ends up too sour for your liking, add a bit more banana or honey to balance the tartness. A pinch of lemon can also enhance the overall flavor without making it too sour.
Nutritional Info (Optional)
While I encourage you not to obsess over numbers, here’s a rough nutritional breakdown for one serving of this Zesty Orange Smoothie:
- Calories: ~250-300 (depending on ingredients)
- Protein: ~10g
- Carbohydrates: ~50g
- Healthy Fats: ~3g
- Fiber: ~5g
Ultimately, remember that this smoothie is not just about nutrition but about pleasure! Celebrate the flavors and enjoy every sip.
And there you have it—my Zesty Orange Smoothie recipe! It’s easy, refreshing, and full of bright flavors. I hope you take this recipe to your kitchen and create a little sunshine for yourself. Happy blending!
Print
Zesty Orange Smoothie
- Total Time: 10 minutes
- Yield: 1 serving 1x
- Diet: Vegetarian
Description
A refreshing and energizing smoothie packed with the bright flavors of fresh oranges and creamy yogurt.
Ingredients
- 2 large oranges, peeled
- 1 frozen banana
- ½ cup Greek yogurt
- 1 cup spinach or kale (optional)
- 1–2 tablespoons honey or maple syrup (optional)
- 1 cup coconut water or almond milk
- ½ cup ice cubes (optional)
Instructions
- Prepare the oranges by peeling and separating into segments.
- Add the frozen banana to the blender.
- Mix in the Greek yogurt.
- Toss in the greens if using.
- Sweeten it up with honey or maple syrup if desired.
- Add the coconut water or almond milk.
- Throw in the ice cubes if using.
- Taste and adjust flavors as needed.
- Pour the smoothie into a glass and enjoy!
Notes
For a tropical twist, add pineapple or for a berry blast, toss in mixed berries. Adjust sweetness as per your taste.
- Prep Time: 10 minutes
- Cook Time: 0 minutes
- Category: Beverage
- Method: Blending
- Cuisine: American
Nutrition
- Serving Size: 1 serving
- Calories: 275
- Sugar: 35g
- Sodium: 60mg
- Fat: 3g
- Saturated Fat: 1g
- Unsaturated Fat: 2g
- Trans Fat: 0g
- Carbohydrates: 60g
- Fiber: 6g
- Protein: 10g
- Cholesterol: 5mg
Keywords: smoothie, orange smoothie, healthy drink, breakfast smoothie, refreshing beverage
Orange Dreamsicle Protein Shake Recipe
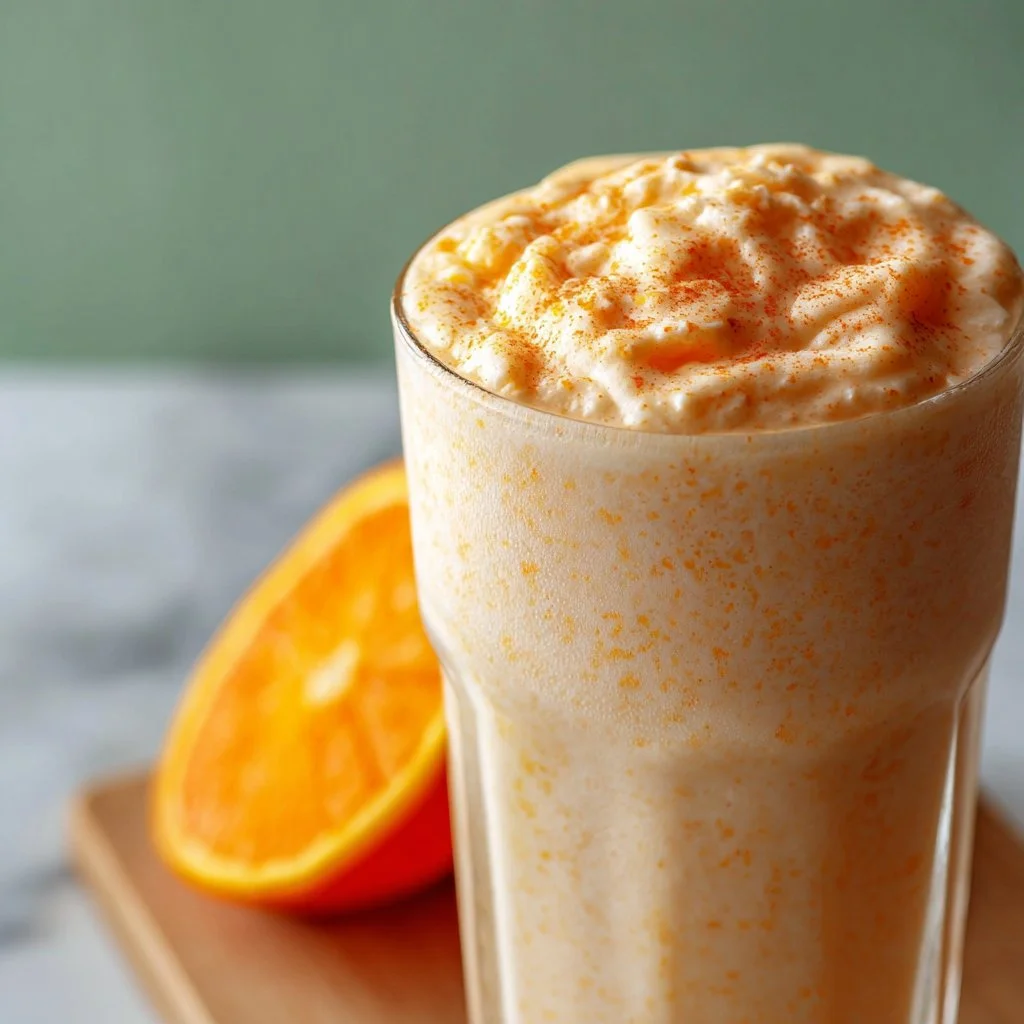
Refreshing Orange Dreamsicle Protein Shake Recipe
Welcome to my kitchen! I’m thrilled you’re here because today we’re whipping up something deliciously delightful: an Orange Dreamsicle Protein Shake. If you’re someone who finds joy in a creamy, dreamy shake that’s both nutritious and satisfying, then you’re in for a treat. This recipe is like a blast from childhood wrapped in a healthy, energizing package—a combination that’s as irresistible as it is nourishing.
Imagine a sunny morning where you take your first sip and are transported to a summer’s day, long ago, where the ice cream truck was a beacon of happiness. This shake reminds me of those carefree moments, where the aroma of freshly zested oranges mingled with the sweetness of vanilla ice cream. As an adult, I still cherish those flavors, and now I get to enjoy them guilt-free! Preparing this shake is not just about making a meal; it’s about celebrating the simple joys of cooking and savoring the little things in life.
Now, the beauty of this Orange Dreamsicle Protein Shake lies not only in its dreamy flavor profile but also in its simplicity. It’s packed with protein to fuel your body and invigorate your spirit. Whether you enjoy it as a post-workout treat or a tasty breakfast substitute, I promise this shake will leave you refreshed and revitalized. So grab your blender and let’s get started on this vibrant culinary adventure!
A Walk Down Memory Lane
I must share a little story that makes this recipe even more special to me. Growing up, my family had a tradition—a summer afternoon sweet treat that always brought us together. Mom would whip up homemade orange popsicles, using fresh oranges from our backyard. I remember those hot days, running around the yard, only to be beckoned by the sugary scent of citrus. The moment those popsicles came out of the molds was pure magic. We’d gather outside, sticky fingers and laughter, indulging in that frozen delight.
Fast forward to my adult years, where I started my journey into cooking and nutrition. I found myself reminiscing about those sunny days, and just like that, the Orange Dreamsicle Protein Shake was born! I wanted to capture the essence of those joy-filled moments in a drink that could be enjoyed any time of the year. Now, whenever I blend this shake at home, it takes me back to those carefree summer afternoons and reminds me of the importance of enjoying simple pleasures.
Ingredients
To create your Orange Dreamsicle Protein Shake, gather the following ingredients:
-
1 large orange (peeled and segmented)
Fresh oranges not only provide a burst of sweet citrus flavor but are also loaded with vitamin C. If you’re in a pinch, you can use frozen orange segments for convenience. -
1 scoop vanilla protein powder
This gives the shake its creamy texture and helps to keep you full. Choose your favorite brand or a plant-based alternative for an extra boost! -
1 cup almond milk (or any milk of choice)
Almond milk is light and nutty, pairing beautifully with the orange flavor. Feel free to substitute with coconut milk or oat milk if you prefer a creamier consistency. -
1/2 banana (fresh or frozen)
Bananas add natural sweetness and a silky texture. If you’re avoiding bananas, try using a bit of avocado for creaminess or even a date! -
1 tablespoon Greek yogurt (optional)
This is optional but adds extra creaminess and a protein boost. For a dairy-free option, use coconut yogurt! -
1 teaspoon vanilla extract
The beloved flavor enhancer that ties everything together. You can enhance it even further with a splash of almond extract for a deeper flavor profile. -
Ice cubes (to taste)
The cooling agent! Adjust the amount based on your desired consistency.
With this lineup, you’re ready to start blending. The balance of flavors in your shake will take you right back to those nostalgic summer days while keeping your nutrition on track.
Step-by-Step Instructions
Now that you have all your ingredients, let’s dive into the creation of your Orange Dreamsicle Protein Shake! Follow these steps closely, and don’t be afraid to put your personal touch on it.
-
Prepare Your Ingredients
Start by peeling your orange and segmenting it. This makes it easier to blend! If you’re using frozen fruit, pop them out of the freezer in advance to allow them to soften slightly. -
Blend the Base
In your blender, add the orange segments first. They’re juicy and will help blend the other ingredients more smoothly. Then toss in the 1/2 banana, vanilla protein powder, and Greek yogurt if you’re using it. Layering this way allows the blender to mix everything seamlessly. -
Add Your Liquids
Pour in 1 cup of almond milk and add the teaspoon of vanilla extract. The liquid will help with the blending process, creating an easy, creamy consistency. Remember, you can always adjust the amount of liquid depending on how thick or thin you prefer your shake. -
Ice, Ice Baby!
Add a handful of ice cubes. I recommend starting with a few and increasing based on how chilled and thick you want your shake. Blend all of this goodness together until it reaches a smooth consistency. -
Taste and Adjust
This is the fun part! Give your shake a taste. Do you want more sweetness? Add a drizzle of honey or maple syrup. If you want more creaminess, a bit more yogurt or banana will do the trick. If it’s too thick, add a splash more almond milk and blend again. -
Pour & Serve
Once everything is blended to perfection, pour your shake into a glass. You can garnish it with an orange slice, a sprinkle of cinnamon, or even a few toasted coconut flakes for added texture.
Serving Suggestions
To serve your Orange Dreamsicle Protein Shake, consider using a tall, clear glass to showcase its vibrant color. You could also add a straw for a fun presentation! If you’re feeling extra fancy, rim the glass with a little sugar or crushed nuts. For an indulgent brunch treat, pair your shake with a light breakfast like avocado toast or overnight oats.
Recipe Variations
Here are a few creative twists to make your shake even more exciting:
- Tropical Dreamsicle: Swap out the orange for mango to create a tropical flavor explosion!
- Green Dreamsicle: Add a handful of spinach or kale for an extra nutrient boost without altering the taste too much.
- Chocolate Orange Delight: Add a scoop of chocolate protein powder instead of vanilla for a deliciously rich shake.
- Nutty Dreamsicle: Incorporate a tablespoon of almond butter for a nutty twist while adding healthy fats.
- Citrus Burst: Combine both orange and lemon for an extra zing!
Chef’s Notes
I love how this recipe has evolved over time! Initially, it was just about recreating that nostalgic orange flavor from my childhood. Still, as I got into nutrition, I found ways to make it not only enjoyable but also a powerhouse of protein. I remember one summer trying to impress my friends with this shake, and they were all blown away—who would’ve thought a healthy shake could taste so good? I can’t help but smile when I see people fall in love with this recipe. Remember, the kitchen is a place for creativity, so feel free to experiment and make it your own!
FAQs and Troubleshooting
Q: Can I make this shake ahead of time?
A: Absolutely! You can prepare the ingredients and store them in the fridge for a day. Just give it a quick blend before serving since the ingredients might settle. If you’re storing it longer, consider freezing the shake in portions and blending again when you’re ready to enjoy!
Q: My shake is too thick; how can I fix it?
A: If you find your shake is too thick, simply add a bit more almond milk (or whichever liquid you’re using). Blend again until you reach your desired consistency.
Q: Can I use other fruits?
A: Yes! Feel free to swap out the orange and banana for other fruits like berries or stone fruits. Just keep in mind that this may change the flavor profile slightly.
Q: Is this shake suitable for meal prep?
A: Yes, but it’s best if consumed fresh. If you have leftover shake, store it in an airtight container in the fridge, but it’s really at its best when enjoyed immediately after blending.
Nutritional Info
While the exact nutritional breakdown will vary based on your ingredient choices, here’s a rough estimate for the Orange Dreamsicle Protein Shake based on the ingredients listed:
- Calories: ~250-300 per serving
- Protein: ~20-25g
- Carbohydrates: ~30-35g
- Fats: ~5-7g
Now you’re all set to indulge in this delightful Orange Dreamsicle Protein Shake! I hope it brings a smile to your face just like it does for me. Get blending, and don’t forget to share your creations with your friends and family. Happy cooking!
Print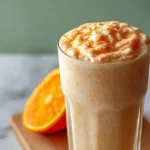
Refreshing Orange Dreamsicle Protein Shake
- Total Time: 10 minutes
- Yield: 1 serving 1x
- Diet: Vegetarian
Description
A creamy and nutritious shake that captures the delightful flavors of orange and vanilla, perfect for a post-workout treat or delicious breakfast.
Ingredients
- 1 large orange (peeled and segmented)
- 1 scoop vanilla protein powder
- 1 cup almond milk (or any milk of choice)
- 1/2 banana (fresh or frozen)
- 1 tablespoon Greek yogurt (optional)
- 1 teaspoon vanilla extract
- Ice cubes (to taste)
Instructions
- Prepare your ingredients by peeling and segmenting the orange.
- Blend the orange segments, banana, vanilla protein powder, and Greek yogurt (if using) in your blender.
- Add the almond milk and vanilla extract to the blender.
- Add your desired amount of ice cubes.
- Taste the shake and adjust sweetness or creaminess as preferred.
- Pour into a glass and serve with optional garnishes.
Notes
Feel free to customize the shake with different fruits or add-ins for added nutrition and flavor!
- Prep Time: 10 minutes
- Cook Time: 0 minutes
- Category: Beverage
- Method: Blending
- Cuisine: American
Nutrition
- Serving Size: 1 serving
- Calories: 300
- Sugar: 20g
- Sodium: 150mg
- Fat: 7g
- Saturated Fat: 1g
- Unsaturated Fat: 6g
- Trans Fat: 0g
- Carbohydrates: 35g
- Fiber: 4g
- Protein: 25g
- Cholesterol: 5mg
Keywords: orange, dreamsicle, protein shake, healthy shake, smoothie, breakfast
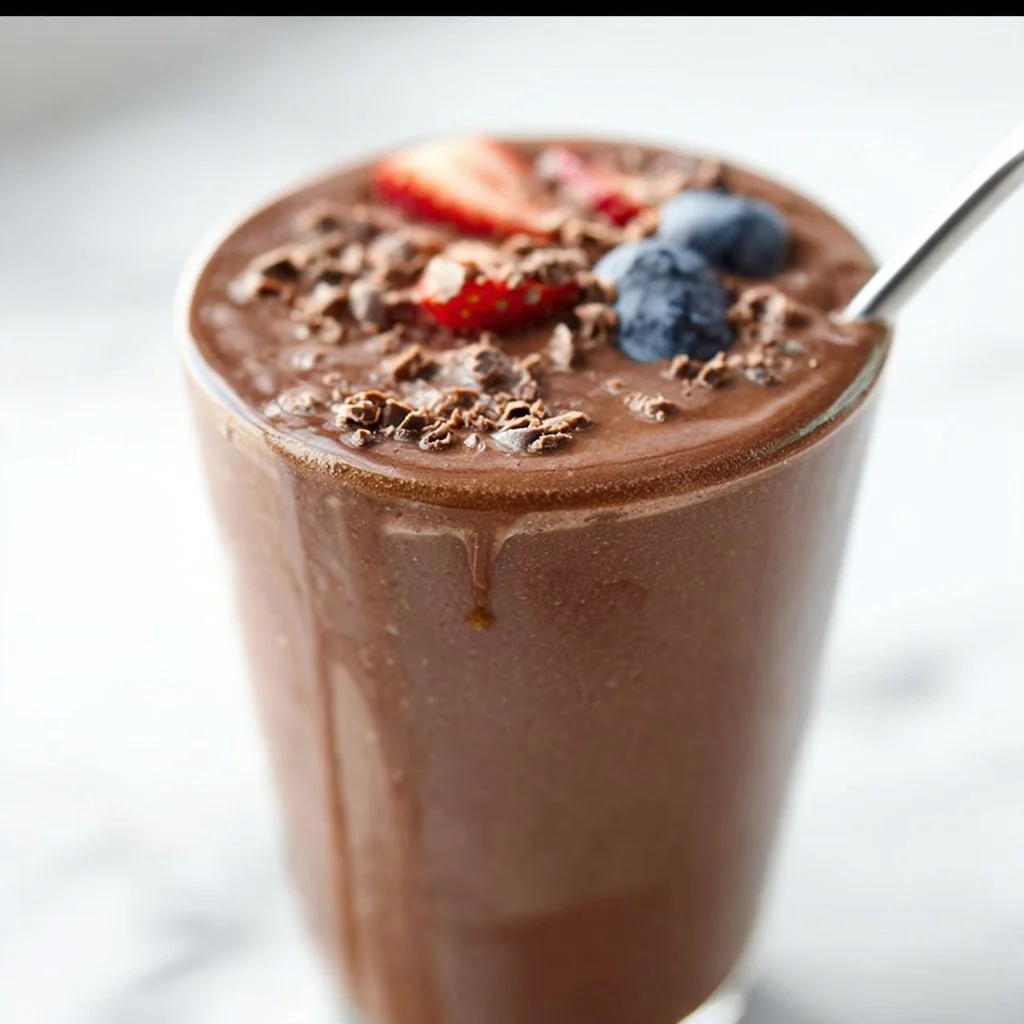
Wake Up Smoothie
Wake Up Smoothie: Your Morning Gamechanger
Welcome to my kitchen! I’m Olivia Bennett, your go-to gal for all things cozy and homemade. Today, I’m excited to share with you one of my absolute favorite recipes that has transformed my mornings: the Wake Up Smoothie. If you’re someone who craves a delicious way to kickstart your day, you’re in for a treat!
Ah, mornings! They can be such a whirlwind, can’t they? Between school runs, work meetings, or simply trying to beat the morning rush, it’s easy to skip breakfast. But let’s face it: those hectic mornings don’t have to mean sacrificing a nourishing start to your day. That’s where the Wake Up Smoothie comes in!
This smoothie is more than just a drink; it’s a burst of energy, a delicious hug in a glass, and a perfect fuel for whatever your day holds. Think vibrant fruits, creamy yogurt, a touch of honey, and a sprinkle of secret ingredients that will have you feeling alive and ready to take on the universe!
What I love most about this smoothie is its versatility. Not only is it packed with goodness, but you can easily customize it to your liking. Whether you’re a berry enthusiast or a green smoothie aficionado, I’ll guide you through everything you need to know to create your own Wake Up Smoothie masterpiece.
So grab your blender, and let’s get ready to blend up some magic!
A Trip Down Memory Lane
Growing up, breakfast was kind of a big deal in my family. My parents believed it was the most important meal of the day, and they set the bar high! I vividly remember Saturday mornings when my mom would whip up fluffy pancakes while my dad brewed fresh coffee. The smell of syrup and warm cinnamon would waft through the house, inviting everyone to the kitchen. But as much as I loved those pancakes, there were days when I wanted something lighter and more refreshing.
One sunny Saturday, while rummaging through the fridge, I came up with my first smoothie—random, right? It was a jumble of leftover fruits, a splash of juice, and a generous dollop of yogurt. I tossed everything into the blender, pushed the button, and voilà! Out came a bright pink concoction that not only tasted divine but was a feast for the eyes as well. My family laughed and challenged me to make a better version the following week.
Fast forward to today, and I’ve perfected my Wake Up Smoothie. Every time I make it, I’m transported back to that carefree moment and reminded that cooking—like life—is all about experimenting, having fun, and sharing love with those around us. Ready to seize the day and create your own memories? Let’s dive into the recipe!
Ingredients: What You’ll Need
Here’s a list of the ingredients you’ll need for the perfect Wake Up Smoothie. Each one has been meticulously chosen to add flavor and nutritional value, so let’s break them down:
-
1 banana: A fantastic source of potassium and natural sweetness. If you’re out of bananas, feel free to swap it out for ½ cup of applesauce or a ripe mango.
-
1 cup frozen mixed berries: Blueberries, raspberries, strawberries—take your pick! These are packed with antioxidants. No frozen berries? Fresh ones work beautifully, just add a handful of ice for chill.
-
½ cup Greek yogurt: This creamy goodness adds protein and probiotics, making your smoothie both delicious and gut-friendly. If you prefer dairy-free, try coconut yogurt!
-
1 tablespoon honey or maple syrup: A natural sweetener that elevates every sip. Use agave syrup or skip it altogether if your fruit is sweet enough.
-
1 cup almond milk (or any milk of your choice): This acts as the base for your smoothie. For a creamier texture, oat milk or full-fat coconut milk are great substitutions.
-
1 tablespoon chia seeds or flaxseeds: These tiny powerhouses add fiber and omega-3 fatty acids. Feel free to skip them if seeds aren’t your thing.
-
Optional: A handful of spinach: Sneak some greens into your smoothie without compromising taste! If you’re not a fan of greens, rest assured, you won’t taste it.
Finding balance in flavors and staying true to what makes your taste buds dance is what it’s all about! Each ingredient plays a critical role, so don’t be shy to mix things up based on what’s in your kitchen.
Step-by-Step Instructions: How to Blend It Up
Now that we’ve gathered our ingredients, let’s get down to the nitty-gritty of smoothie-making. Follow along with these easy steps, and you’ll have your Wake Up Smoothie ready in no time!
-
Prep Your Blender: Start by placing your blender on a flat, stable surface. Trust me; a wobbly blender isn’t going to give you the best outcome!
-
Add the Banana: Peel the banana and break it into chunks. Toss those into the blender first. Bananas act as a fantastic base for smoothies, giving them a creamy texture. Bonus tip: freezing your bananas beforehand adds even more creaminess!
-
Toss in the Berries: Next, add your frozen mixed berries. If you’re using fresh berries, add a handful of ice to keep that refreshing chill.
-
Spoon in the Yogurt: Add your Greek yogurt on top. This ingredient thickens the smoothie and packs in protein. If you’re using coconut yogurt, I suggest using the unsweetened variety to keep it balanced.
-
Pour the Milk: Now, add your milk of choice. To control the thickness of your smoothie, start with less and add more to achieve your desired consistency.
-
Drizzle in Sweetener: Give your smoothie a touch of sweetness by drizzling in honey or maple syrup. Adjust according to your sweetness preference.
-
Add the Seeds: If you’re using chia seeds or flaxseeds, this is the time to add them! They absorb liquid and help create that perfect creamy texture.
-
Sneak in the Greens: If you’re feeling adventurous and adding spinach, toss it in last. Don’t worry; it’ll be virtually undetectable!
-
Blend Away: Secure the blender lid tightly and blend on high speed for about 30-60 seconds. Start with a low speed to break down the ingredients, then increase to high. Blend until the mixture is smooth and creamy. If you notice any stubborn chunks, stop and scrape down the sides, then blend again.
-
Taste and Adjust: Before pouring, give your smoothie a taste. If it needs a sweeter kick, add a little more honey, or if it’s too thick, splash in a bit more milk.
-
Serve it Up: Pour your Wake Up Smoothie into your favorite glass. You’ll see that vibrant color is just ready to brighten your day!
With each of these steps, feel free to add your unique touch. You know your palate best, so don’t ever hesitate to tweak it to your liking!
Serving Suggestions: Presentation is Key
Now that your Wake Up Smoothie is beautifully blended, it’s time for the final flourish! I recommend serving it in a tall glass to show off its vibrant colors. For an extra touch, you can garnish with a few whole berries on top or sprinkle a few chia seeds for a delightful crunch. Additionally, if you want to elevate it further, you can serve it with a slice of your favorite toast or paired with a homemade granola bar on the side.
Is there anything more delightful than a colorful smoothie in the morning? It’s a feast for the eyes and the perfect way to make your breakfast feel special!
Recipe Variations: Get Creative
The Wake Up Smoothie is incredibly versatile, so don’t hesitate to experiment! Here are a few yummy variations to inspire your creativity:
-
Tropical Twist: Swap the mixed berries for a combination of pineapple and mango. Add a splash of coconut water to cement that tropical vibe!
-
Nutty Delight: Toss in a tablespoon of almond or peanut butter for a protein boost and a nutty flavor that pairs beautifully with bananas.
-
Green Machine: Load it up with a cup of kale instead of spinach for an even greener option. It adds nutrients without overpowering the flavor!
-
Chocolate Indulgence: Add a tablespoon of cocoa powder for a chocolatey twist. If you’re feeling decadent, throw in a few chocolate chips or nibs for good measure.
-
Oatmeal Smoothie: Blend in ¼ cup of rolled oats for a more filling smoothie. This will add a lovely texture and keep you satisfied for longer.
Remember, the kitchen is your playground, so feel free to swap out ingredients based on what you like and have on hand!
Chef’s Notes: It’s About the Journey
Making smoothies has been an evolving journey for me. I started with whatever was in my fridge, and over time, I began to experiment more consciously with flavors and nutrients. Having fun in the kitchen is the core joy of cooking. I love trying out different seasonal fruits or a new nut butter just to see what happens.
Oh, and here’s a funny little story: I once tried to cereal-ize my smoothie by adding breakfast cereal right into the blender. Spoiler alert: it was a crunchy disaster! But those moments teach us the most and remind us to embrace the mishaps. Every cooking adventure has a story, and that’s what makes it so special!
FAQs and Troubleshooting
To ensure you have the most successful smoothie experience, I’ve put together some commonly asked questions and troubleshooting tips:
-
Q: My smoothie turned out too thick! What can I do?
A: Don’t worry! Just add a little more milk, splash by splash, until you achieve your desired consistency. -
Q: How can I make my smoothie less sweet?
A: If you find it too sweet, you can add more yogurt or a squeeze of fresh lemon juice to balance it out. -
Q: How long can I store leftovers?
A: While smoothies are best enjoyed fresh, you can store leftovers in the fridge for up to 24 hours. Just be aware that some separation may occur; give it a good shake or stir before drinking. -
Q: Can I prep this smoothie in advance?
A: Absolutely! You can prep the ingredients the night before and stash them in the fridge or freezer. Just dump everything in the blender and blend in the morning!
Your Wake Up Smoothie is all about making mornings easier and tastier. Don’t shy away from adjusting this recipe, engaging in the process, and finding your own twist. Cooking should be fun, after all!
Nutritional Info (per serving, approx.)
- Calories: 250
- Protein: 10g
- Carbohydrates: 45g
- Fiber: 8g
- Sugars: 15g
- Fat: 5g
So there you have it, my friends! With this Wake Up Smoothie in your toolkit, you can start each day with a smile and some delicious fuel. Happy blending, and as always, I can’t wait to see how you make this recipe your own!
Don’t forget to share your smoothie creations with me! Happy cooking!
Print
Wake Up Smoothie
- Total Time: 10 minutes
- Yield: 1 serving 1x
- Diet: Vegetarian
Description
A delicious and energizing smoothie packed with fruits, yogurt, and a touch of honey, perfect for starting your day.
Ingredients
- 1 banana
- 1 cup frozen mixed berries
- ½ cup Greek yogurt
- 1 tablespoon honey or maple syrup
- 1 cup almond milk (or any milk of your choice)
- 1 tablespoon chia seeds or flaxseeds
- Optional: A handful of spinach
Instructions
- Prep your blender: Start by placing your blender on a flat, stable surface.
- Add the banana: Peel the banana and break it into chunks. Toss those into the blender first.
- Toss in the berries: Next, add your frozen mixed berries.
- Spoon in the yogurt: Add your Greek yogurt on top.
- Pour the milk: Now, add your milk of choice.
- Drizzle in sweetener: Add honey or maple syrup.
- Add the seeds: If using chia or flaxseeds, add them now.
- Sneak in the greens: If adding spinach, toss it in last.
- Blend away: Secure the blender lid and blend on high speed for about 30-60 seconds.
- Taste and adjust: Give your smoothie a taste and adjust sweetness or thickness as needed.
- Serve it up: Pour into a glass and enjoy!
Notes
Feel free to customize with your favorite fruits or add-ins!
- Prep Time: 10 minutes
- Cook Time: 0 minutes
- Category: Breakfast
- Method: Blending
- Cuisine: American
Nutrition
- Serving Size: 1 serving
- Calories: 250
- Sugar: 15g
- Sodium: 100mg
- Fat: 5g
- Saturated Fat: 1g
- Unsaturated Fat: 4g
- Trans Fat: 0g
- Carbohydrates: 45g
- Fiber: 8g
- Protein: 10g
- Cholesterol: 5mg
Keywords: smoothie, healthy breakfast, quick breakfast, vegetarian smoothie, fruit smoothie

Iced Mango Lassi Smoothie Bowl
Refreshing Iced Mango Lassi Smoothie Bowl: A Taste of Summer in Every Spoonful
Welcome to my kitchen! I’m so excited to share one of my absolute favorite warm-weather treats with you today: the Iced Mango Lassi Smoothie Bowl. Picture this: it’s a sunny morning, the birds are chirping, and you want something nutritious but also cool and delicious to kick-start your day. This smoothie bowl is bursting with tropical flavors and is as easy to make as it is enjoyable to eat. With its creamy texture and vibrant color, it’s not just a breakfast option—it’s a cheerful, Instagram-worthy experience that will brighten your mood.
Now, what makes this smoothie bowl extra special is that it’s reminiscent of my travels to India. Balmy afternoons spent exploring colorful markets, discovering local eateries, and, of course, indulging in various delectable mango lassis—a refreshing Indian beverage made with yogurt, mango, and a hint of cardamom. The flavor combinations tantalize your taste buds, and it’s such a delight to whip up at home and share with friends and family. Before we dive in, grab your apron and get ready to blend, because this recipe will soon become a staple in your kitchen!
A Sweet Memory with Mango Lassi
Let me take you on a little trip down memory lane. I vividly recall the first time I tasted a real mango lassi at an open-air restaurant in Jaipur, India. The sun was shining, and the heat had a soft hum about it, making the cool lassi feel like a blessing. I watched as it was poured from a clay pot, the yogurty goodness twirling with bright, ripe mangoes. The first sip was like sunshine wrapped in a smooth velvety hug. The tanginess of yogurt paired perfectly with the sweetness of the mango. I remember asking for a second (or maybe a third) serving, and giggling with friends as we enjoyed the moment—nothing beats shared laughter over good food.
This Iced Mango Lassi Smoothie Bowl captures that essence of joy and nostalgia. It’s a celebration of the flavors that brought me happiness and inspired my love for cooking. It reminds me of the evocative connection food has not just to our taste buds but also to our hearts and memories. So, let’s recreate that blissful experience, shall we?
Ingredients
Here’s what you’ll need to make your own Iced Mango Lassi Smoothie Bowl. I’ve included some tips along the way to make substitutions easier:
- Mango: 1 cup of frozen mango chunks. If you can’t find frozen, fresh mango works too—just toss in some ice cubes to cool it down!
- Yogurt: ½ cup plain yogurt (Greek or regular). This is what gives your bowl that creamy consistency, but for a dairy-free option, feel free to use coconut yogurt!
- Milk: ½ cup of milk (dairy or plant-based). Coconut or almond milk will add to that tropical vibe!
- Honey or Maple Syrup: 1–2 tablespoons, depending on your sweetness preferences. For a sugar-free option, consider mashed banana or a drizzle of agave.
- Cardamom: ½ teaspoon ground cardamom. It adds a fragrant warmth, but if you don’t have this on hand, a pinch of cinnamon can also add an interesting twist!
- Lime Juice: 1 tablespoon fresh lime juice. A squeeze of lime brightens the flavors but can be left out if you’re not a fan of tartness.
- Toppings: assorted fruits, granola, shredded coconut, or nuts for that lovely crunch and extra flavor.
Step-by-Step Instructions
Now, let’s get blending! Follow these steps for a creamy and delicious Iced Mango Lassi Smoothie Bowl:
-
Gather Your Ingredients: Start by assembling everything on your kitchen counter. It’s much easier to work when you can see everything you need!
-
Blend the Base: In a high-speed blender, combine the frozen mango chunks, yogurt, milk, honey (or maple syrup), ground cardamom, and lime juice. Blend until smooth and creamy—about 30 seconds should do the trick. If you feel it’s too thick, add a splash more milk to loosen it up!
-
Taste Test: Once blended, take a tiny spoonful to see if it’s sweet and balanced for your palate. This is the fun part—tweaking it to your liking! Add a bit more honey or lime juice if needed, and blend again until it’s just right.
-
Prepare the Bowl: Once you’ve got your creamy mixture, pour it into a bowl. If you’re feeling fancy, use a spatula to create a soft swirl on the surface—your friends will be impressed!
-
Layer the Toppings: Here’s where you can really get creative! Start with a base layer of granola for crunch, then artfully arrange your favorite fruits on top. I love adding slices of fresh mango, berries, and a sprinkle of shredded coconut. Drizzle some honey on top for added sweetness or a touch of sliced almonds for an extra crunch. Let your creativity shine through!
-
Serve Immediately: This bowl is best enjoyed cold and fresh, so dig in right away while it’s still chilled and delightful. I promise you won’t want to share!
Serving Suggestions
Serve your Iced Mango Lassi Smoothie Bowl straight from the bowl, adorned with vibrant colors and textures, and place it on a cheerful table. Pair it with a refreshing herbal tea or a glass of sparkling water with mint, and you’ve got a beautiful summer morning spread!
Recipe Variations
Here are a few fun twists to make this recipe your own:
- Tropical Twist: Add pineapple or banana for a creamy texture and extra sweetness.
- Berry Bonus: Toss in a handful of mixed berries like strawberries or blueberries for a burst of color and antioxidants.
- Nutty Delight: Sprinkle with chia seeds or hemp seeds to amp up the nutrition and add a nice crunch.
- Spice It Up: Experiment with a dash of cinnamon or nutmeg instead of cardamom for a different flavor profile.
- Vegan Version: Swap yogurt with your favorite plant-based yogurt and use maple syrup; it’s deliciously creamy and dairy-free!
Chef’s Notes
As I’ve tested this recipe over the years, it has become a staple in my household, especially during warm months. The best part? Every person who tries it raves about it! I have a good friend who swears by adding a pinch of sea salt to balance out the sweetness, which I initially thought was odd, but she was right! Little tweaks like that can create flavor explosions. So don’t be shy; try adjusting ingredients to suit your taste preferences.
And let me tell you a funny story: one time, I decided to make this on a whimsically hot day but forgot to stock up on mango! A quick rummaging through my fridge led me to frozen peaches. Oh my, it turned into a peach lassi smoothie bowl that was equally delightful—so adaptable!
FAQs and Troubleshooting
-
What if my smoothie bowl is too thick?
If it’s thicker than you’d like, simply add a splash of milk and blend again until you reach your desired consistency. -
Can I use fresh mango instead of frozen?
Absolutely! Just be sure to add a handful of ice cubes when blending to keep it nice and chilled. -
Is there a non-dairy yogurt option?
Yes! Coconut yogurt or almond milk yogurt works perfectly and will still give that creamy texture we love. -
What if I don’t have cardamom?
No worries! Ground cinnamon or even a hint of vanilla extract can act as a great substitute, giving a different but equally delicious flavor.
Nutritional Info
This Iced Mango Lassi Smoothie Bowl is packed with vitamins and healthy fats, making it an excellent choice for breakfast or a refreshing snack. Each bowl will give you a mix of antioxidants, protein from yogurt, and healthy carbohydrates from fruits, leaving you energized and ready to tackle the day!
So, there you have it! I hope this Iced Mango Lassi Smoothie Bowl becomes a beloved part of your kitchen repertoire as it has in mine. Remember, cooking is meant to be fun, so don’t hesitate to experiment, make mistakes, and enjoy the process. Spread the love and let your culinary adventures unfold! HappyCooking! 🥭✨
Print
Iced Mango Lassi Smoothie Bowl
- Total Time: 10 minutes
- Yield: 1 serving 1x
- Diet: Vegetarian
Description
A refreshing smoothie bowl with tropical mango flavors, inspired by traditional Indian mango lassis.
Ingredients
- 1 cup frozen mango chunks
- ½ cup plain yogurt (Greek or regular)
- ½ cup milk (dairy or plant-based)
- 1–2 tablespoons honey or maple syrup
- ½ teaspoon ground cardamom
- 1 tablespoon fresh lime juice
- Assorted fruits, granola, shredded coconut, or nuts for toppings
Instructions
- Gather your ingredients: Start by assembling everything on your kitchen counter.
- Blend the base: In a high-speed blender, combine the frozen mango chunks, yogurt, milk, honey (or maple syrup), ground cardamom, and lime juice. Blend until smooth and creamy—about 30 seconds.
- Taste test: Once blended, take a tiny spoonful to see if it’s sweet and balanced for your palate. Adjust if needed and blend again.
- Prepare the bowl: Pour the creamy mixture into a bowl, creating a soft swirl on the surface.
- Layer the toppings: Start with a base layer of granola, then artfully arrange your favorite fruits on top.
- Serve immediately: Enjoy your bowl while it’s still chilled and delightful.
Notes
Serve with herbal tea or sparkling water for a complete refreshing experience.
- Prep Time: 10 minutes
- Cook Time: 0 minutes
- Category: Breakfast
- Method: Blending
- Cuisine: Indian
Nutrition
- Serving Size: 1 bowl
- Calories: 250
- Sugar: 18g
- Sodium: 70mg
- Fat: 5g
- Saturated Fat: 2g
- Unsaturated Fat: 3g
- Trans Fat: 0g
- Carbohydrates: 45g
- Fiber: 4g
- Protein: 8g
- Cholesterol: 10mg
Keywords: smoothie bowl, mango lassi, summer recipe, healthy breakfast


