
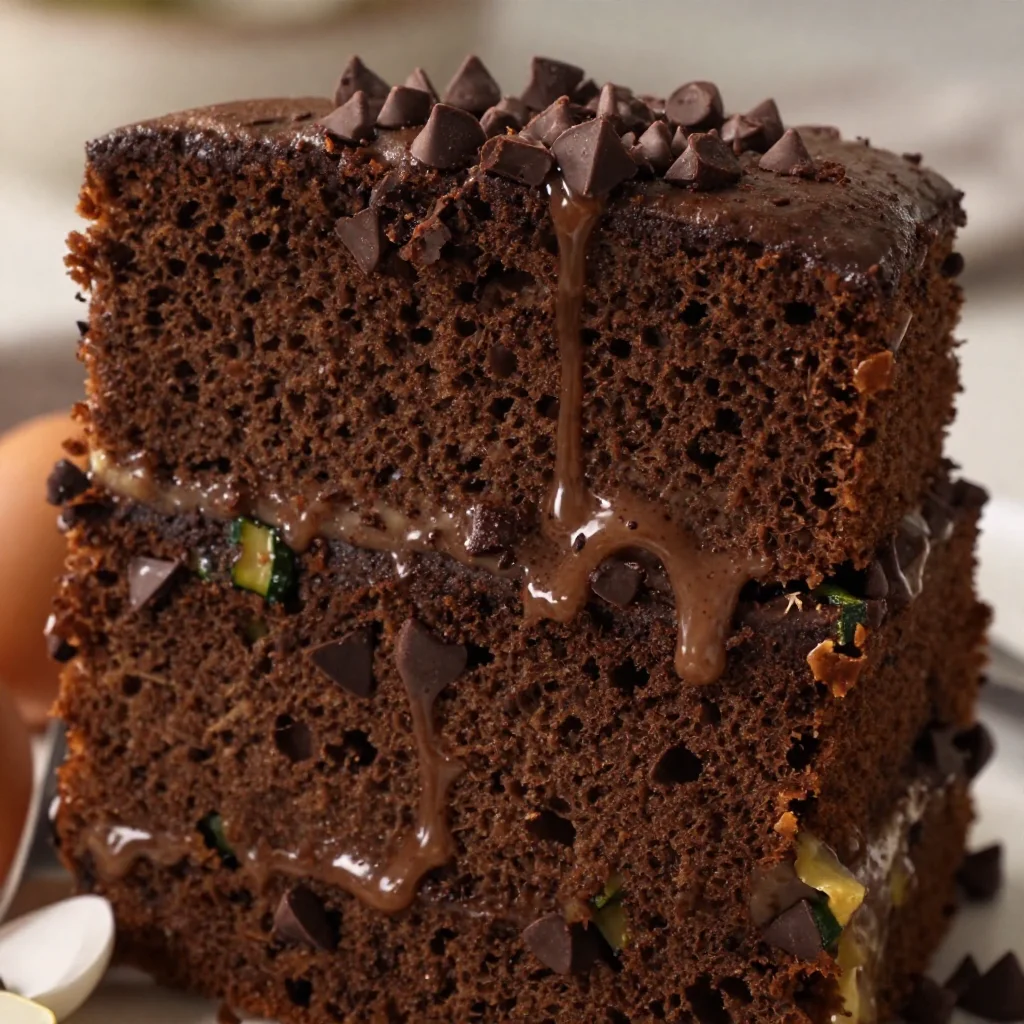
One-Bowl Chocolate Zucchini Cake: Quick, Moist & Easy
Indulge in a Slice of Heaven: Chocolate Zucchini Cake Recipe
Welcome to my cozy kitchen! Today, I’m excited to whisk you away into the delightful world of baking with one of my all-time favorite recipes: Chocolate Zucchini Cake. If you’re a fellow food enthusiast who loves the smell of something sweet wafting through the air, you’re in for a treat. This cake is not only incredibly moist and delicious, but it also sneaks in a good serving of vegetables—yes, you read that right!
Growing up, I always associated baking with warmth and love. I fondly recall afternoons spent in my grandmother’s kitchen, where she transformed the most unsuspecting ingredients into magical desserts. Chocolate Zucchini Cake was one of her signature recipes. I can still picture her dusting cocoa powder on the counter, her laughter filling the room as we prepared to mix the batter. Using zucchini was her clever way of taking advantage of summer harvests. It was our little secret–no one ever guessed there were veggies hiding in our sweet treats!
As we whipped up that rich batter, I remember sneaking tastes and marveling at how the chocolate completely masked the zucchini. Each slice of cake was a celebration at the dinner table, perfect for birthdays, potlucks, or simply as a special afternoon treat. I knew from that moment on that I would have to share this cake with others. It’s not just about feeding your loved ones; it’s about creating memories that linger long after the last bite. So, grab your whisks, and let’s dive into this delightful Chocolate Zucchini Cake together!
The Story Behind the Cake
What makes this recipe extra special for me? It’s not just the rich chocolatey goodness that envelops this cake, but the memories and laughs shared while making it. I remember one summer afternoon when my cousin came over unannounced, and we decided to whip something up. Armed with fresh zucchinis from my garden, we looked at each other and said, “Chocolate Zucchini Cake, it is!”
The kitchen soon filled with laughter, flour, and a few accidental messes—who knew a simple recipe could turn into a cocoa avalanche? We turned on the radio, dancing and singing while mixing ingredients, all the while sneaking spoonfuls of the batter. Finally, once we pulled the cake from the oven, the kitchen filled with a heavenly aroma that drew in my family like moths to a flame.
That day wasn’t just about making cake; it was about creating cherished moments that I still carry with me today. It’s the kind of joy I want to share every time I bake. So, let’s bring that warmth and happiness into your own kitchen together!
Ingredients
Here’s what you’ll need to create this amazing Chocolate Zucchini Cake:
-
1½ cups grated zucchini
A moisture-packed ingredient that adds tenderness, zucchini provides a wonderful texture without overpowering the chocolate flavor. You can substitute with finely grated carrots for a similar moisture effect. -
1½ cups all-purpose flour
The backbone of any cake. If you’re looking for a gluten-free option, you can experiment with almond flour or a 1:1 gluten-free flour blend. -
1 cup granulated sugar
This sweet staple adds to the cake’s fluffiness. You can substitute with coconut sugar for a lower glycemic index, but the cake may alter slightly in color and flavor. -
⅓ cup unsweetened cocoa powder
A key player for that rich chocolate flavor. Opt for Dutch-processed cocoa for a smoother taste, or use carob powder for a caffeine-free alternative. -
½ teaspoon baking powder
This helps the cake rise and ensures a light texture. If you’re out, baking soda works in a pinch, but cut it in half since it’s stronger. -
½ teaspoon baking soda
Another leavening agent that works wonders, especially combined with acid from the zucchinis or cocoa. -
½ teaspoon salt
Balances out the sweetness and enhances flavors. -
½ cup vegetable oil
For moistness and richness. You can substitute with applesauce for a healthier option or melted coconut oil for a delightful twist. -
2 large eggs
Essential for binding the ingredients together. For an egg-free alternative, use ¼ cup unsweetened applesauce per egg. -
1 teaspoon vanilla extract
The aromatic quality of vanilla elevates the entire cake! Feel free to swap with almond extract for a unique flavor. -
½ cup chocolate chips (optional)
Who can resist chocolate chunks in chocolate cake? Dark chocolate or dairy-free chips work perfectly here too!
Step-by-Step Instructions
Now, let’s get to the magic part—making your cake from scratch! Here’s how to do it:
-
Preheat the Oven
Start by preheating your oven to 350°F (175°C). This ensures a perfectly baked cake. While the oven heats up, grab your baking pan—a 9×13-inch pan works wonders—grease it lightly to prevent sticking. -
Prepare the Zucchini
Wash and grate your zucchini. To avoid excess moisture, use a clean kitchen towel to squeeze out any liquid. Trust me; it can make a difference in texture! -
Mix Dry Ingredients
In a large mixing bowl, whisk together the flour, cocoa powder, baking powder, baking soda, and salt until fully combined. This step helps distribute the leavening agents evenly throughout the batter, ensuring a consistent rise. -
Combine Wet Ingredients
In a separate bowl, whisk together the granulated sugar, vegetable oil, eggs, and vanilla extract until smooth and homogenous. That lovely golden color will have you drooling already! -
Combine All Ingredients
Gradually add the wet mixture to the dry ingredients, stirring gently until just combined (be careful not to overmix!). Fold in the grated zucchini until it’s incorporated, followed by the chocolate chips if using. The batter will be thick and luscious—just how we like it! -
Pour and Bake
Pour the batter into your prepared baking pan, smoothing the top with a spatula. Bake for about 35-40 minutes or until a toothpick inserted into the center comes out clean (or with a few moist crumbs). You got this! -
Cool and Serve
Once baked, remove the pan from the oven and let it cool in the pan for about 10 minutes before transferring to a wire rack. This helps prevent sticking. Let it cool completely, and enjoy the heavenly aroma as you wait!
Serving Suggestions
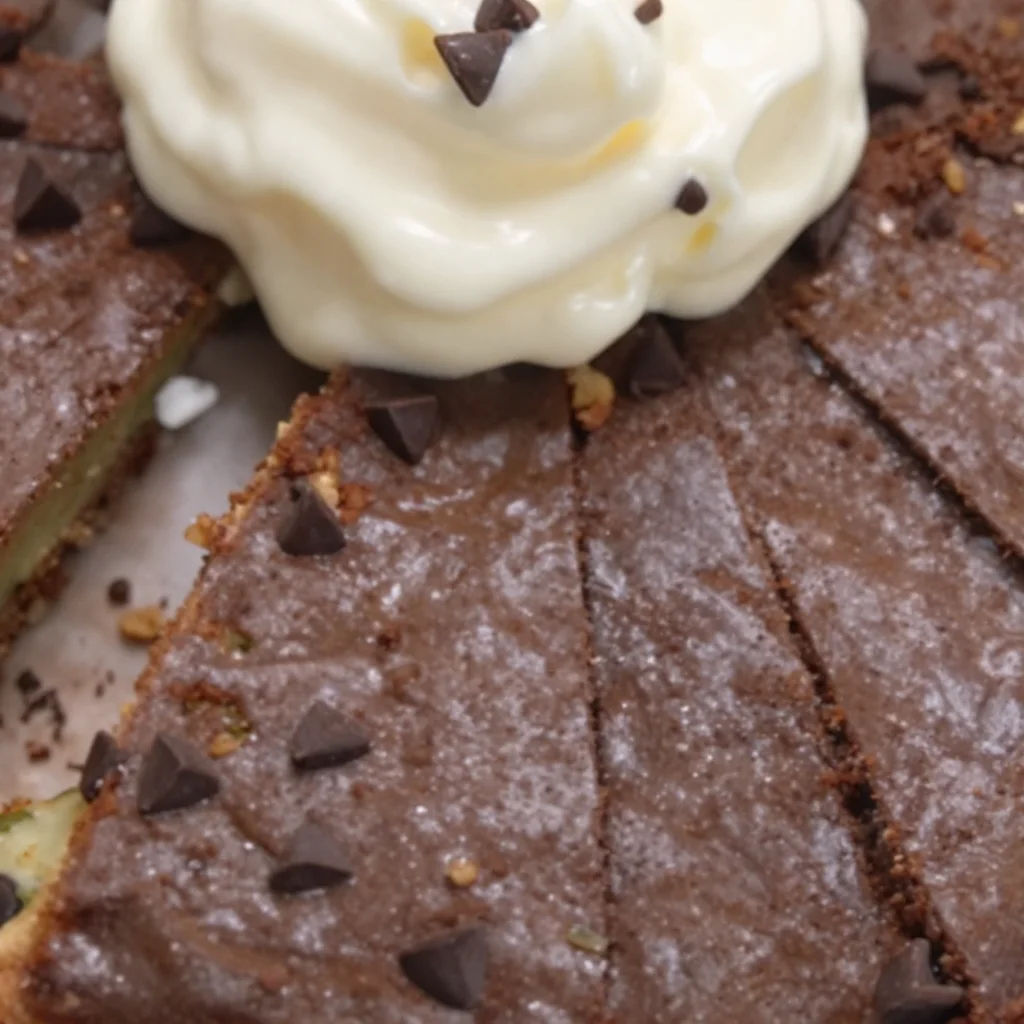
Slice your beautifully baked Chocolate Zucchini Cake and serve with a light dusting of powdered sugar or a dollop of whipped cream for an extra touch of indulgence. You can also pair it with fresh berries for a touch of fruity freshness that balances the richness of the chocolate. It’s perfect for dessert or as a delicious snack with afternoon tea!
Recipe Variations
Feel free to let your creativity shine! Here are some variations to spice things up:
-
Mocha Madness: Mix in a tablespoon of instant coffee granules for a delightful mocha flavor that pairs beautifully with chocolate.
-
Spiced Up: Add a teaspoon of cinnamon or a pinch of nutmeg for a warm, earthy flavor.
-
Nutty Delight: Toss in some chopped walnuts or pecans for an extra crunch that complements the moist cake.
-
Fruity Twist: Add in a half-cup of mashed bananas for a hint of natural sweetness and a different flavor profile.
-
Coconut Flair: Incorporate unsweetened shredded coconut for a tropical feel—just adjust the moisture slightly to maintain the cake’s consistency.
Chef’s Notes
Over the years, I’ve experimented with this Chocolate Zucchini Cake recipe, and it has blossomed into a family favorite that everyone raves about. I vividly remember one time baking it for a friend’s birthday. In my excitement, I grabbed the wrong container and added salt instead of sugar! Let’s just say it was a monumental flop. But as they say, every mistake is a chance to learn. That mishap encouraged me to keep my ingredients organized and labeled!
This cake has become synonymous with celebrations in my home. It’s one of those desserts that never goes left uneaten. In fact, it often gets devoured before I even have time to snap a pic! So, I leave you with a friendly reminder: always have your camera at the ready when you bake this beauty!
FAQs and Troubleshooting
-
Why does my cake turn out dense?
A dense cake can result from overmixing the batter or adding too much zucchini. Remember to mix until just combined, and ensure your grated zucchini is adequately drained. -
How do I store leftovers?
Store in an airtight container at room temperature for up to three days or refrigerate for up to a week. You can also freeze slices for up to three months—perfect for a quick treat! -
Can I make this cake healthier?
Absolutely! Substituting applesauce for oil, using whole wheat flour, or reducing sugar by a third are all great ways to lighten this dessert while keeping the flavor intact. -
Can I make this cake in advance?
Yes! It actually tastes better the next day as the flavors have time to meld. Just ensure it’s stored properly.
With all these tips at your fingertips, you’re all set to bake the perfect Chocolate Zucchini Cake! Embrace the little messes and enjoy the process—we’re all friends in this cozy kitchen of ours. So, gather your loved ones, mix up that batter, and let the memories unfold sweetly and joyfully. Happy baking!
Print
Chocolate Zucchini Cake
- Total Time: 55 minutes
- Yield: 12 servings 1x
- Diet: Vegetarian
Description
A moist and delicious chocolate cake that cleverly incorporates zucchini for added texture and nutrition.
Ingredients
- 1½ cups grated zucchini
- 1½ cups all-purpose flour
- 1 cup granulated sugar
- ⅓ cup unsweetened cocoa powder
- ½ teaspoon baking powder
- ½ teaspoon baking soda
- ½ teaspoon salt
- ½ cup vegetable oil
- 2 large eggs
- 1 teaspoon vanilla extract
- ½ cup chocolate chips (optional)
Instructions
- Preheat the oven to 350°F (175°C) and grease a 9×13-inch baking pan.
- Wash and grate the zucchini, squeezing out excess moisture with a kitchen towel.
- Whisk together flour, cocoa powder, baking powder, baking soda, and salt in a large bowl.
- Combine granulated sugar, vegetable oil, eggs, and vanilla in a separate bowl until smooth.
- Add the wet mixture to dry ingredients, stirring gently until just combined, then fold in zucchini and chocolate chips.
- Pour batter into prepared pan and bake for 35-40 minutes until a toothpick comes out clean.
- Cool in the pan for 10 minutes, then transfer to a wire rack to cool completely.
Notes
Serve with powdered sugar or whipped cream. Variations include adding coffee granules for a mocha flavor or nuts for a crunchy texture.
- Prep Time: 15 minutes
- Cook Time: 40 minutes
- Category: Dessert
- Method: Baking
- Cuisine: American
Nutrition
- Serving Size: 1 slice
- Calories: 350
- Sugar: 20g
- Sodium: 200mg
- Fat: 15g
- Saturated Fat: 2g
- Unsaturated Fat: 10g
- Trans Fat: 0g
- Carbohydrates: 45g
- Fiber: 3g
- Protein: 5g
- Cholesterol: 70mg
Keywords: chocolate cake, zucchini cake, dessert, moist cake, baking
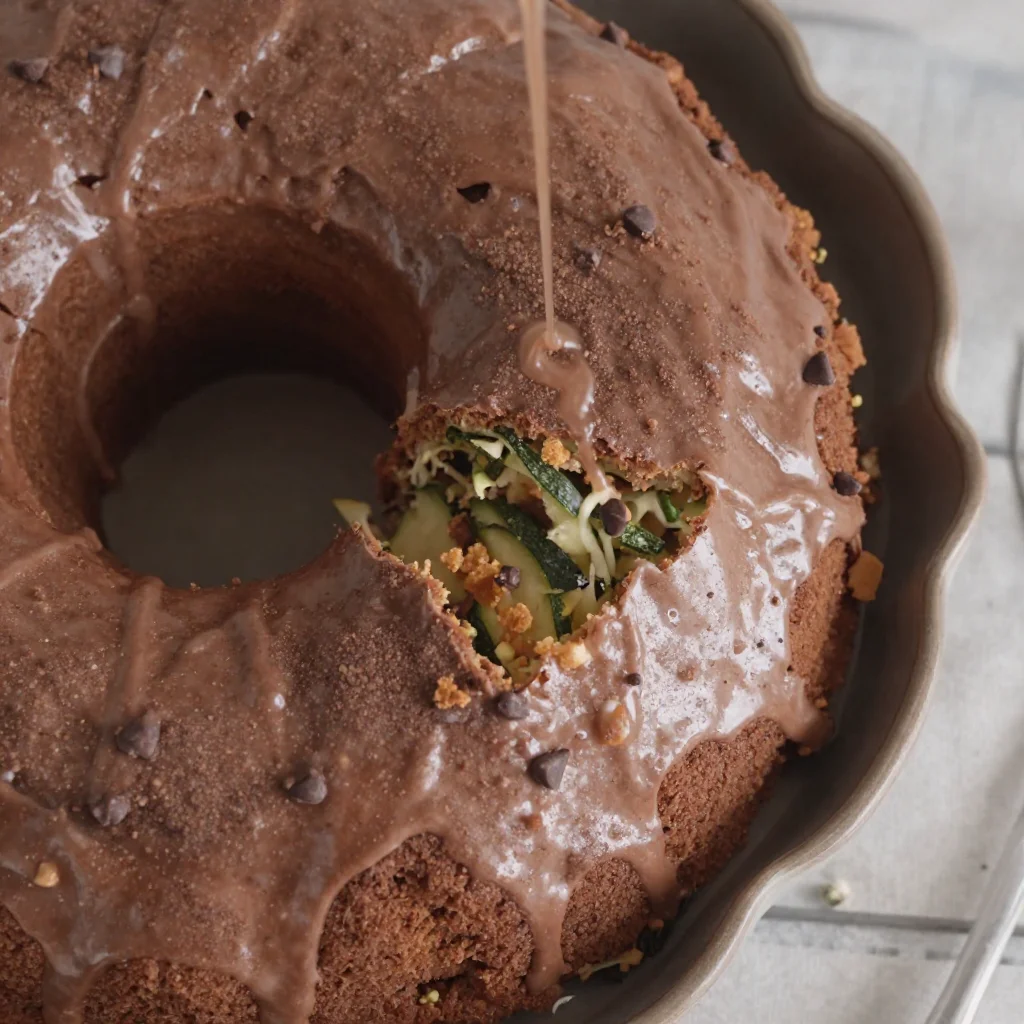
Moist Chocolate Zucchini Bundt Cake (Weeknight-Ready)
The Best Chocolate Zucchini Bundt Cake
Welcome to my cozy little corner of the internet! I’m Olivia Bennett, your friendly neighborhood cooking enthusiast, and today I’m absolutely thrilled to share with you a recipe that embodies everything I love about baking: its ability to bring people together, spark joy, and create delicious memories. We’re diving into the wonders of the Best Chocolate Zucchini Bundt Cake, a delightful treat that perfectly combines rich, chocolatey goodness with the subtle earthiness of fresh zucchini.
Now, I know what you might be thinking, “Zucchini in cake? Really?” But trust me when I say this cake is a game-changer! The zucchini adds moisture and helps create a wonderfully soft texture without overpowering the rich chocolaty flavor. If you’re anything like me, the smell of this cake baking will have you dancing around your kitchen with glee.
Picture this: The warm, inviting aroma of chocolate wafting through your home, making it impossible for anyone to resist asking, “What’s baking?” It’s the perfect cake to whip up on a lazy Sunday afternoon or to impress your friends at a gathering. Let’s roll up our sleeves, preheat the oven, and create something scrumptious that you’ll be proud to share.
A Slice of Nostalgia
Let me take you back a few years. One summer afternoon, as I was rummaging through my parents’ garden, I discovered an abundance of zucchini growing like they were preparing to take over the world. I remembered my mom’s secret recipe for a chocolate zucchini cake that had been a family favorite for as long as I could remember. Every time she made it, our house filled with the sweet aroma of baking chocolate, and we’d eagerly gather around the kitchen to sneak bites of the batter (because who can resist raw chocolate, am I right?).
That cake was more than just a dessert; it was a focal point of laughter, stories, and family bonding. We’d talk about our day, listen to the radio in the background, and enjoy that moist, chocolatey goodness together. It’s the kind of cake that invites second helpings and encourages you to slow down, savor the moment, and share it with those you love.
Inspired by those lazy summer days, I decided to recreate that essence in my Chocolate Zucchini Bundt Cake. The memories of the garden, the smiles around the table, and the best chocolate cake all come together in a delicious marriage of flavors. So, let’s get started on this sweet adventure!
Ingredients
Here’s what you’ll need to make this delightful cake:
-
2 cups grated zucchini: Fresh zucchini is best. You can substitute with yellow squash if you’re in a pinch, but avoid overcooked or mushy zucchini.
-
1 ½ cups all-purpose flour: This is the base of your cake. For a gluten-free option, use a 1:1 gluten-free flour blend.
-
1 cup unsweetened cocoa powder: Use the best quality cocoa for that rich chocolate flavor. If you’re looking for a milder taste, you could opt for Dutch-processed cocoa.
-
1 tsp baking soda: This will give your cake a great lift. If you run out, you can use baking powder instead (just double the amount).
-
1 tsp baking powder: Together with baking soda, this will ensure your cake rises beautifully.
-
½ tsp salt: Enhances the flavors of the chocolate. Don’t skip it!
-
1 cup granulated sugar: For sweetness. You can substitute part of it with coconut sugar or try using agave syrup (reduce liquid content slightly).
-
½ cup brown sugar: Adds moisture and a hint of caramel flavor.
-
¾ cup vegetable oil: For moisture. You can swap it with melted coconut oil or applesauce to reduce fat.
-
3 large eggs: Binding agents that add richness. Can be replaced with flax eggs (1 tablespoon ground flaxseed mixed with 3 tablespoons water per egg).
-
1 tsp vanilla extract: For that warm, comforting flavor. Use real vanilla extract for the best results.
-
1 cup chocolate chips (semi-sweet or dark): Because you can never have too much chocolate! You can substitute with white chocolate or even nuts for a different crunch.
These ingredients combine to create a cake that is not only visually stunning but also ridiculously delicious. Remember, the key to a great cake is fresh, quality ingredients!
Step-by-Step Instructions
Alright, let’s get baking! Follow these detailed steps, and you’ll have a mouthwatering Chocolate Zucchini Bundt Cake ready to impress!
-
Preheat the Oven:
Preheat your oven to 350°F (175°C). Greasing and flouring your bundt pan will ensure that your cake releases smoothly after baking. Trust me, no one wants a cake that gets stuck in the pan! -
Gather Your Ingredients:
Before you dive into mixing, gather all of your ingredients. It makes the process seamless and fun. Plus, you’ll feel like a pro chef! -
Grate the Zucchini:
Using a box grater or food processor, grate your zucchini. There’s no need to peel it; the skin adds lovely flavor and a pop of color. After grating, place the zucchini in a clean kitchen towel and squeeze out the excess moisture. This step is crucial for ensuring your cake isn’t soggy! -
Mix the Dry Ingredients:
In a large bowl, whisk together the flour, cocoa powder, baking soda, baking powder, and salt. This ensures an even distribution of the leaveners and makes for a lighter cake. -
Cream the Sugars and Oil:
In another bowl, beat together the granulated sugar, brown sugar, and vegetable oil until well blended. This will take about 2-3 minutes. It’s a simple step, but it adds air to the mixture, making your cake wonderfully fluffy. -
Add Eggs and Vanilla:
One by one, add the eggs, followed by the vanilla extract, mixing well after each addition. The mixture should resemble a slightly thick batter. -
Combine Everything:
Gradually mix in the dry ingredients to the wet mixture, being careful not to overmix—this is a cake, not a workout! Gently fold in the grated zucchini and chocolate chips. -
Bake:
Pour the cake batter into your prepared bundt pan, smoothing the top with a spatula. Bake for 50-60 minutes, or until a toothpick inserted in the center comes out clean. The smell will be heavenly—trust me! -
Cool:
Once baked, allow the cake to cool in the pan for about 10-15 minutes, then gently invert it onto a wire rack to cool completely. This step is not just for appearance; it also helps develop that signature bundt shape. -
Glaze (Optional):
If you’re feeling a little fancy, whip up a simple glaze with powdered sugar and milk, drizzling it over the cooled cake for a touch of sweetness.
Serving Suggestions
When it comes to serving your Chocolate Zucchini Bundt Cake, presentation is key! A simple dusting of powdered sugar or a drizzle of chocolate ganache can elevate its appearance. Slice it into generous portions and serve it on a rustic wooden board alongside a dollop of whipped cream or a scoop of vanilla ice cream. If you’re feeling extra festive, sprinkle some chopped walnuts or almonds on top for a delightful crunch!
Recipe Variations
Now that you know the classic recipe, let’s explore some creative twists you can take on this delightful cake:
-
Spicy Chocolate Zucchini Cake: Add a pinch of cayenne pepper or cinnamon to the batter for a warm spice note.
-
Zucchini Orange Bundt Cake: Incorporate orange zest for a refreshing citrus twist that brightens the chocolate flavor.
-
Vegan Chocolate Zucchini Cake: Swap out the eggs for flax eggs and use a plant-based oil to make it vegan-friendly.
-
Mint Chocolate Zucchini Cake: Add a few drops of mint extract to the batter for a refreshing minty flavor that pairs beautifully with chocolate.
-
Nutty Chocolate Zucchini Cake: Fold in some chopped nuts like walnuts or pecans for added texture.
Get creative and burst out of the mold—literally!
Chef’s Notes
This recipe has evolved over the years along with my love for baking and flavors. I started out with a traditional chocolate cake recipe but began incorporating zucchini when I discovered its magical moisture-adding abilities. Plus, it’s a sneaky way to boost your vegetable intake—it’s our little secret!
One time, in an attempt to impress my friends at a gathering, I miscalculated the baking powder and ended up with a cake that resembled a delicious pancake (whoops!). But even that mishap led to hearty laughs and memorable moments around the kitchen table. And that’s what baking is all about—embracing the imperfections and enjoying deliciousness!
FAQs and Troubleshooting
Q: The cake didn’t rise as expected! What went wrong?
A: Check that your baking soda and powder are fresh; expired leaveners can lead to a dense cake. Also, make sure you mixed enough air into the batter during the creaming stage.
Q: Can I use frozen zucchini?
A: Absolutely! Just be sure to thaw it, drain excess liquid, and use it as you would fresh zucchini.
Q: My cake is too dry. What can I do to keep it moist in the future?
A: Overbaking can dry out your cake. Make sure to check for doneness a few minutes before the recommended baking time.
Q: Can I make this recipe as cupcakes instead?
A: Definitely! Just adjust the baking time to around 20-25 minutes. Keep an eye on them to avoid overbaking.
Nutritional Info
While I won’t delve too deeply into numbers, it’s worth noting that the zucchini adds fiber and nutrients to your homemade cake, making it a slightly healthier indulgence. Share it, savor it, and feel a little less guilty!
So, there you have it—the perfect recipe for a Chocolate Zucchini Bundt Cake that is not just delicious but packed with memories and joy. Baking is a love language, and I can’t wait for you to share your creations with your loved ones! As always, feel free to reach out if you have any questions or stories to share—let’s keep the conversation delicious! Happy baking, friends!
Print
The Best Chocolate Zucchini Bundt Cake
- Total Time: 75 minutes
- Yield: 12 servings 1x
- Diet: Vegetarian
Description
A delightful cake that combines rich chocolate goodness with the moistness of fresh zucchini, perfect for gatherings or a cozy weekend treat.
Ingredients
- 2 cups grated zucchini
- 1 ½ cups all-purpose flour
- 1 cup unsweetened cocoa powder
- 1 tsp baking soda
- 1 tsp baking powder
- ½ tsp salt
- 1 cup granulated sugar
- ½ cup brown sugar
- ¾ cup vegetable oil
- 3 large eggs
- 1 tsp vanilla extract
- 1 cup chocolate chips (semi-sweet or dark)
Instructions
- Preheat your oven to 350°F (175°C) and grease your bundt pan.
- Gather all of your ingredients.
- Grate the zucchini and squeeze out excess moisture.
- Mix the dry ingredients together in a bowl.
- Cream the sugars and oil until blended.
- Add the eggs and vanilla one by one.
- Combine the dry ingredients with the wet mixture and fold in the zucchini and chocolate chips.
- Bake for 50-60 minutes or until a toothpick comes out clean.
- Cool the cake for 10-15 minutes in the pan before inverting onto a wire rack.
- Glaze (optional) with powdered sugar and milk if desired.
Notes
This cake is great served with whipped cream or ice cream. You can also add nuts for extra texture.
- Prep Time: 15 minutes
- Cook Time: 60 minutes
- Category: Dessert
- Method: Baking
- Cuisine: American
Nutrition
- Serving Size: 1 slice
- Calories: 350
- Sugar: 28g
- Sodium: 400mg
- Fat: 18g
- Saturated Fat: 3g
- Unsaturated Fat: 12g
- Trans Fat: 0g
- Carbohydrates: 50g
- Fiber: 4g
- Protein: 6g
- Cholesterol: 40mg
Keywords: chocolate cake, zucchini cake, bundt cake, dessert recipes, baking
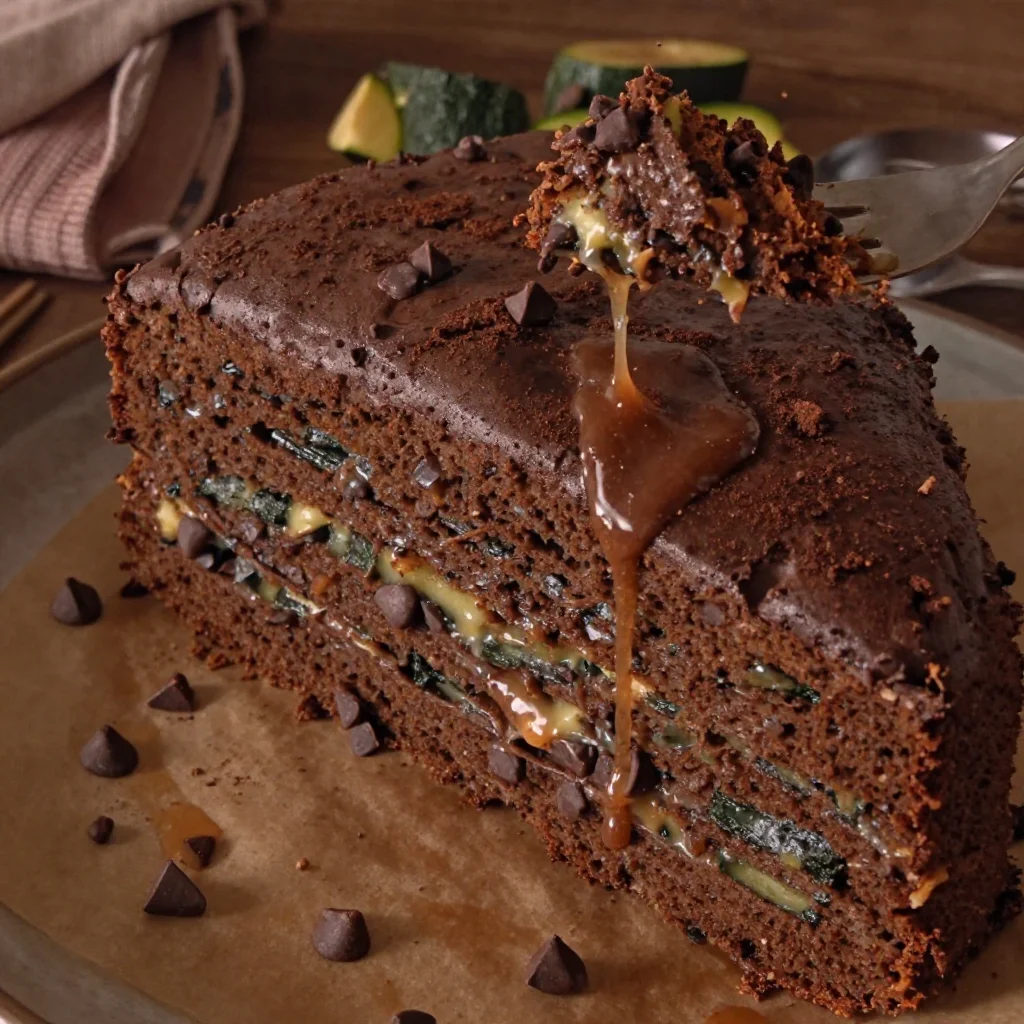
Beginner-Friendly One-Bowl Double-Chocolate Zucchini Cake
Double Chocolate Zucchini Cake: Decadence Meets Wholesome Goodness
Welcome to my cozy kitchen, friends! Today, we’re diving into a delightful recipe that marries indulgence with healthy eating—my Double Chocolate Zucchini Cake! I know, I know; the idea of zucchini in a dessert might raise some eyebrows, but trust me when I say this cake is nothing short of magical. It’s rich, moist, and packed with that deep chocolate flavor that chocolate lovers dream of. Plus, it’s a sneaky way to get some veggies into your dessert, and who doesn’t love that?
There’s something about the combination of chocolate and surprise ingredients that feels like a little culinary adventure. The zucchini adds moisture without altering the flavor, making the cake incredibly tender. And let’s be honest, who wouldn’t feel great about indulging in a slice of cake that also provides a little nutritional boost? I’m all for deliciousness wrapped in a cocoon of health-conscious choices.
This cake is particularly special to me, as it reminds me of family gatherings where my aunt would whip up the most mouthwatering treats—her signature being a rich chocolate cake that always disappeared in mere minutes. Inspired by her creations, I embarked on a mission to create something equally delectable but with a twist. That’s when this Double Chocolate Zucchini Cake came into play. It’s now a staple at birthday parties, potlucks, and even cozy weeknight dinners. Plus, it’s incredibly easy to make—so gather your ingredients, throw on your favorite apron, and let’s get baking!
A Sweet Memory from My Childhood
I remember, as a kid, the aroma of warm chocolate wafting through the house, signaling that something extraordinary was underway in the kitchen. My aunt would host Sunday dinners where dessert was simply a must! One memorable afternoon, I watched in awe as she mixed chocolatey batter in a big bowl. She had a magical touch, and somehow, she could elevate simple ingredients to create the most incredible desserts. We used to sneak spoonfuls of the batter while it was still warm, giggling about how we were “helping” in the kitchen.
Years later, I found myself yearning for those joyful experiences with my loved ones, culminating in my Double Chocolate Zucchini Cake. It evokes the same feelings of love and comfort, making it the perfect centerpiece for any gathering. Not only does it nourish the body with a hidden veggie, but it also satisfies the soul with each decadent bite.
Gather Your Ingredients
Before we kick things off in the kitchen, let’s ensure you have everything you need. Here’s what you’ll require to whip up this delightful cake:
- 1 cup (130g) all-purpose flour: The base of any great cake! For a healthier twist, use whole wheat flour. It’ll give it a nutty flavor and added fiber.
- 1/2 cup (40g) cocoa powder: Unsweetened is the way to go! This is where the deep, rich chocolate flavor comes from. If you’re feeling adventurous, consider using dark cocoa powder for an even bolder taste.
- 1 tsp baking soda: This will give our cake that lovely rise. Baking powder can be used instead if you’re out of baking soda—just use about 1.5 teaspoons.
- 1/2 tsp salt: A pinch to balance the sweetness; trust me, it makes a difference!
- 1/2 cup (120ml) vegetable oil: This provides moisture. You can swap it out for melted coconut oil for a nice tropical twist or even applesauce for a lower-fat option.
- 1 cup (200g) granulated sugar: The sweet stuff! Feel free to substitute with brown sugar for a deeper flavor or coconut sugar for a lower glycemic index.
- 2 large eggs: These will bind everything together. For a vegan version, flax eggs are a fantastic substitute (1 tbsp ground flaxseed + 2.5 tbsp water per egg).
- 1 tsp vanilla extract: Pure vanilla extract takes the flavor up a notch. If you’re in a pinch, use vanilla essence.
- 1 cup (about 250g) grated zucchini: This is our secret ingredient! For best results, use fresh, young zucchini; it’s juicier and more flavorful. If you’re feeling adventurous, you can swap with grated carrots for a delightful twist.
- 1 cup (170g) chocolate chips: Because the more chocolate, the better, right? Go for dark chocolate chips, or even white chocolate for a unique flair!
Step-by-Step Instructions
Now that we’ve rounded up our ingredients, let’s get down to business! Here’s how to make this scrumptious Double Chocolate Zucchini Cake step by step.
-
Prep Your Oven and Pan: Preheat your oven to 350°F (175°C). Grease a 9×9-inch square baking pan, or line it with parchment paper for easy removal.
-
Mix the Dry Ingredients: In a medium bowl, whisk together the flour, cocoa powder, baking soda, and salt. This helps to distribute the leavening agents evenly throughout the flour so you get that perfect rise.
-
Combine Wet Ingredients: In a large bowl, combine the vegetable oil, granulated sugar, eggs, and vanilla extract. Beat this mixture until it’s light and fluffy—about 2 to 3 minutes. This aeration is key to ensuring your cake has that delightful texture!
-
Add Zucchini: Fold in the grated zucchini until well combined. You’ll want to make sure the zucchini is evenly distributed, giving every bite a hint of moisture.
-
Incorporate Dry Ingredients: Gradually add the dry ingredients to the wet mixture. Stir until just combined—don’t overmix! A few lumps are totally fine; this keeps your cake light and airy.
-
Chocolate Time: Gently fold in the chocolate chips (saving a few to sprinkle on top, of course!). This is where the magic happens—the gooey, melted chocolate will create little pockets of happiness!
-
Transfer to Pan: Pour the batter into your prepared baking pan, spreading it evenly. If you saved some chocolate chips, now’s the time to sprinkle them on top for that extra chocolaty goodness!
-
Bake: Place the pan in the preheated oven and bake for 30-35 minutes, or until a toothpick inserted in the center comes out clean or with a few moist crumbs. Be careful not to overbake; that will lead to a dry cake!
-
Cool Down: Once baked, let the cake cool in the pan for about 10 minutes before transferring to a wire rack to cool completely. Patience is key here, but the smells wafting through your kitchen will test your resolve!
Serving Suggestions
When it’s finally time to serve, cut yourself a generous slice and plate it up with a dusting of powdered sugar or a scoop of vanilla ice cream. For a more indulgent experience, drizzle some warm chocolate ganache over the top. Your guests (and you!) will feel like they’ve entered chocolate heaven!
Recipe Variations
Feeling creative? Here are a few fun twists you can try with this recipe:
- Nutty Addition: Fold in 1/2 cup of chopped walnuts or pecans for some delightful crunch and an added layer of flavor.
- Spicy Kick: Add a pinch of cayenne pepper or cinnamon for a hint of warmth and spice that complements the chocolate beautifully.
- Gluten-Free Option: Use a 1:1 gluten-free flour blend to make this a gluten-free treat without sacrificing any flavor or texture.
- Fruity Surprise: Swap out half of the zucchini for mashed ripe bananas for a naturally sweeter flavor and a tender cake.
- Marble Cake: For a fun twist, reserve 1/3 of the batter and mix it with additional cocoa powder, then dollop the chocolate batter into the pan creating a marbled effect before baking.
Chef’s Notes
This Double Chocolate Zucchini Cake is a recipe that is close to my heart, having transformed my childhood memories into something everyone can enjoy. Over time, I’ve played with the recipe to make it my own, and it continues to evolve. I once accidentally forgot to add sugar and ended up with a “healthy option”—it was a hit with those who preferred a less-sweet treat! Since then, I offer a low-sugar version for my health-conscious friends, proving it’s versatile enough to please diverse palates.
FAQs and Troubleshooting
1. Why is my cake dry?
This could be due to overbaking! Keep a close eye on it in the last few minutes, or add a bit more zucchini to increase moisture next time.
2. Can I use frozen zucchini?
Absolutely! Just make sure to thaw and drain it well so it doesn’t add excess moisture to your batter.
3. What if I don’t have eggs?
You can substitute each egg with 1/4 cup of unsweetened applesauce or half a ripe banana. Both options will help bind the ingredients while keeping it moist.
4. Can I make this cake ahead of time?
Yes! This cake holds up well in the fridge and even tastes better the next day once the flavors have had time to mingle. Just be sure to cover it well!
Nutritional Info
While I don’t log my calorie intake meticulously, this delicious cake is packed with beneficial ingredients like zucchini to boost your fiber and nutrient content. Each slice provides a delightful balance of protein, healthy fats, and that essential dose of joy that only chocolate can bring.
So there you have it, my friends! A foolproof recipe for Double Chocolate Zucchini Cake that’s sure to steal the show at your next gathering. With love, warmth, and a sprinkle of creativity, your kitchen will become a haven of culinary delights. Happy baking, and may your cake always be delicious and your spirits ever high!
Print
Double Chocolate Zucchini Cake
- Total Time: 45 minutes
- Yield: 9 servings 1x
- Diet: Vegetarian
Description
This decadent Double Chocolate Zucchini Cake blends indulgence with healthy eating, offering a rich and moist chocolate experience with a secret ingredient.
Ingredients
- 1 cup (130g) all-purpose flour
- 1/2 cup (40g) cocoa powder
- 1 tsp baking soda
- 1/2 tsp salt
- 1/2 cup (120ml) vegetable oil
- 1 cup (200g) granulated sugar
- 2 large eggs
- 1 tsp vanilla extract
- 1 cup (about 250g) grated zucchini
- 1 cup (170g) chocolate chips
Instructions
- Preheat your oven to 350°F (175°C). Grease a 9×9-inch square baking pan, or line it with parchment paper for easy removal.
- Whisk together the flour, cocoa powder, baking soda, and salt in a medium bowl.
- Combine the vegetable oil, granulated sugar, eggs, and vanilla extract in a large bowl. Beat until light and fluffy, about 2 to 3 minutes.
- Fold in the grated zucchini until well combined.
- Gradually add the dry ingredients to the wet mixture and stir until just combined.
- Gently fold in the chocolate chips.
- Pour the batter into the prepared baking pan and sprinkle any reserved chocolate chips on top.
- Bake for 30-35 minutes, or until a toothpick inserted comes out clean with a few moist crumbs.
- Let the cake cool in the pan for about 10 minutes before transferring it to a wire rack to cool completely.
Notes
For additional flavor, consider adding nuts or spices. This recipe can be adapted for gluten-free or vegan diets.
- Prep Time: 15 minutes
- Cook Time: 30 minutes
- Category: Dessert
- Method: Baking
- Cuisine: American
Nutrition
- Serving Size: 1 slice
- Calories: 350
- Sugar: 22g
- Sodium: 400mg
- Fat: 12g
- Saturated Fat: 4g
- Unsaturated Fat: 6g
- Trans Fat: 0g
- Carbohydrates: 45g
- Fiber: 3g
- Protein: 6g
- Cholesterol: 30mg
Keywords: cake, chocolate, zucchini, dessert, baking
Beginner-Friendly One-Bowl Chocolate Zucchini Cake
Chocolate Zucchini Cake: A Slice of Joy
Welcome to my kitchen! Today, we’re diving into a delightful recipe that’s sure to surprise your taste buds and warm your heart: Chocolate Zucchini Cake. This cake is a heavenly blend of rich chocolate flavor and the subtle, moist texture of zucchini. But it’s not just about the flavors; it’s about the memories and stories behind this charming dessert. So, grab your favorite apron, and let’s get cooking!
There’s something magical about baking that brings back fond memories. For me, it takes me back to sweltering summer afternoons spent in my grandmother’s kitchen. She would pull out her big metal bowl and start gratefully packing it with the freshest zucchini from her garden. I remember the rhythmic sound of the grater and the fragrant whispers of vanilla and chocolate filling the air. As a child, I was always enthralled by how she could turn simple vegetables into something so decadent. The combination of chocolate and zucchini was a proud culinary secret she passed down to me, and now, I cherish every chance to share this recipe.
There’s a certain beauty in its explosion of flavor that comes from such an unexpected ingredient. Chocolate Zucchini Cake is perfect for any occasion — whether you want to sneak some veggies into a treat or just indulge in something utterly delicious. So let’s get started on this joy-filled journey together!
Ingredients
To make this luscious Chocolate Zucchini Cake, you’ll need the following ingredients:
-
Zucchini (2 cups, grated): The star of our show! It adds moisture and a subtle texture. If you can’t find zucchini, shredded carrots work beautifully as a substitute.
-
All-purpose flour (1 ¾ cups): This gives our cake structure. For a gluten-free option, almond or oat flour can be used, but make sure your measurements are accurate for the best results.
-
Unsweetened cocoa powder (¾ cup): This is essential for that deep chocolate flavor. Ensure you’re using unsweetened to maintain a nice balance of sweetness.
-
Granulated sugar (1 ½ cups): Sweetness is key! Brown sugar can add a richer flavor, so feel free to swap it in for half of the granulated sugar.
-
Baking soda (1 teaspoon): This helps the cake rise. If you’re out, you can use baking powder, but remember to adjust the amount.
-
Baking powder (½ teaspoon): A helper to our baking soda to ensure a light, fluffy cake.
-
Salt (½ teaspoon): Don’t skip out on this! A pinch of salt helps to balance out the sweetness and enhances the chocolate flavor.
-
Eggs (2 large): They provide moisture and richness. To make this cake vegan, you can use flax eggs (1 tablespoon of flaxseed meal mixed with 2.5 tablespoons of water for each egg).
-
Vegetable oil (1 cup): This keeps the cake moist. For a healthier alternative, you can use unsweetened applesauce or melted coconut oil.
-
Vanilla extract (2 teaspoons): A must-have for flavor! Use pure vanilla extract for the best taste — it makes a world of difference.
-
Chocolate chips (1 cup): For extra chocolatey goodness! You can use semi-sweet, dark, or even white chocolate. If you want to keep it dairy-free, look for vegan chocolate chips.
Step-by-Step Instructions
-
Prepare Your Zucchini: Start by washing your zucchini, then grate it using the large holes of a box grater. You don’t even need to peel it—just grate and go! Once grated, use a clean kitchen towel to squeeze out excess moisture. This step helps to avoid a soggy cake. Set the zucchini aside and pat yourself on the back for getting your veggie fix!
-
Preheat the Oven: Preheat your oven to 350°F (175°C). While your oven works its magic, grease and flour a 9×13-inch baking pan or simply line it with parchment paper for easy serving later.
-
Mix the Dry Ingredients: In a large mixing bowl, sift together the flour, cocoa powder, baking soda, baking powder, and salt. Make sure to whisk these together; a good mix ensures all those leavening agents are evenly distributed, leading to a perfectly fluffy cake.
-
Combine the Wet Ingredients: In a separate bowl, whisk together the sugar and eggs until they’re light and frothy. Then, add your vegetable oil and vanilla extract. If you want to feel fancy, whisk these for an extra minute — it helps to incorporate oxygen, leading to a fluffier texture!
-
Mix It All Together: Slowly pour the wet ingredients into the dry ingredients, stirring gently until combined. Don’t overmix—just mix until you no longer see dry flour. Fold in the grated zucchini and chocolate chips gently. This step is where the magic happens; those chocolate chips will melt slightly in the oven, creating little pockets of joy in each bite!
-
Transfer to the Pan: Pour the batter into your prepared baking pan. Use a spatula to spread it evenly, ensuring a nice level top. It’s okay if it’s a little messy; we love a good, homey vibe!
-
Bake: Place the cake in the preheated oven and bake for 30-35 minutes, or until a toothpick inserted into the center comes out clean. If your kitchen smells amazing, you’re on the right track!
-
Cool and Serve: Once baked, remove it from the oven and let it cool in the pan for about 10 minutes. Then, transfer it to a wire rack to cool completely. This little waiting period can feel like a lifetime, but trust me, the wait is worth it!
Serving Suggestions
Once your cake has cooled, it’s time to indulge! I love serving my Chocolate Zucchini Cake drizzled with a simple chocolate ganache or a dollop of whipped cream on the side. If you want to add a fun twist, sprinkle some chopped nuts or shredded coconut on top. Call your friends over or surprise your family with a slice — they won’t even know there’s zucchini in it!
Recipe Variations
-
Nutty Zucchini Cake: Add chopped walnuts or pecans for a delightful crunch. Just fold them in with the chocolate chips.
-
Mint Chocolate Zucchini Cake: Add a teaspoon of peppermint extract to the batter for a refreshing twist.
-
Spiced Zucchini Cake: Incorporate a teaspoon of cinnamon or a pinch of nutmeg to warm up the flavors for a cozy autumn treat.
-
Frosted Delight: Once cooled, frost it with cream cheese icing for an extra layer of decadence!
Chef’s Notes
You know, when I first started making Chocolate Zucchini Cake, I was skeptical about the whole zucchini thing. It sounded weird to me! But after that first delicious bite, I couldn’t stop sharing it with friends and family. Over the years, my recipe has evolved with various flavor twists and additions, but the core remains the same—keep it simple, and let the ingredients shine. Plus, if it gets to sneak in a veggie or two? That’s a win in my book!
FAQs and Troubleshooting
-
Why does my cake look too wet?: If your cake comes out too moist, you might not have squeezed enough moisture from the zucchini. Next time, be sure to wring it out well!
-
Can I make this ahead of time?: Absolutely! You can bake it a day in advance. Just store it covered at room temperature. If you want to make it even ahead of time, freeze it! Just wrap it tightly in plastic wrap, and it should stay fresh for up to three months.
-
What if I don’t have eggs?: No problem! Flax eggs or applesauce are great substitutes. Just combine 1 tablespoon of flaxseed meal with 2.5 tablespoons of water to create one egg equivalent.
-
How do I store leftovers?: Store your cake in an airtight container at room temperature for up to three days, or refrigerate if you want it to last a bit longer.
Nutritional Info
While the specifics can vary based on the exact ingredients used, on average, a slice of this Chocolate Zucchini Cake (1/12th of the recipe) contains about 250-300 calories, thanks to the added veggies! Plus, it’s a great way to sneak in some nutrients while satisfying that sweet craving.
Now that you’ve got the recipe down, I hope you enjoy making and sharing this delightful Chocolate Zucchini Cake as much as I do! Happy baking, and remember—cooking is all about joy, so don’t stress, and let those flavors shine!
Print
Chocolate Zucchini Cake
- Total Time: 50 minutes
- Yield: 12 servings 1x
- Diet: Vegetarian
Description
A delightful blend of rich chocolate flavor and the subtle, moist texture of zucchini, this cake is perfect for any occasion.
Ingredients
- 2 cups Zucchini, grated
- 1 ¾ cups All-purpose flour
- ¾ cup Unsweetened cocoa powder
- 1 ½ cups Granulated sugar
- 1 teaspoon Baking soda
- ½ teaspoon Baking powder
- ½ teaspoon Salt
- 2 large Eggs
- 1 cup Vegetable oil
- 2 teaspoons Vanilla extract
- 1 cup Chocolate chips
Instructions
- Prepare your zucchini by washing and grating it using a box grater. Squeeze out excess moisture with a kitchen towel.
- Preheat your oven to 350°F (175°C). Grease and flour a 9×13-inch baking pan or line with parchment paper.
- Mix together the flour, cocoa powder, baking soda, baking powder, and salt in a bowl.
- Combine the sugar and eggs in a separate bowl and whisk until light and frothy. Add the vegetable oil and vanilla extract, whisking for an extra minute.
- Mix the wet ingredients into the dry ingredients until just combined. Fold in zucchini and chocolate chips gently.
- Transfer the batter into the prepared baking pan and spread it evenly.
- Bake for 30-35 minutes or until a toothpick inserted into the center comes out clean.
- Cool the cake in the pan for about 10 minutes before transferring to a wire rack to cool completely.
Notes
For an even richer flavor, serve with chocolate ganache or whipped cream. This cake can be made one day in advance and stored at room temperature.
- Prep Time: 15 minutes
- Cook Time: 35 minutes
- Category: Dessert
- Method: Baking
- Cuisine: American
Nutrition
- Serving Size: 1 slice
- Calories: 275
- Sugar: 20g
- Sodium: 200mg
- Fat: 14g
- Saturated Fat: 2g
- Unsaturated Fat: 10g
- Trans Fat: 0g
- Carbohydrates: 38g
- Fiber: 2g
- Protein: 4g
- Cholesterol: 30mg
Keywords: chocolate cake, zucchini cake, dessert, baking, chocolate dessert
One-Bowl Chocolate Zucchini Cake: Easy Weeknight Treat
Chocolate Lover’s Zucchini Cake: A Slice of Heaven
Welcome to my kitchen, fellow food lover! Today, we’re diving into a delightful creation that mixes a little sweetness with a hint of nostalgia — Chocolate Lover’s Zucchini Cake. If you’ve ever tried to sneak some veggies into your desserts (or just found yourself with an abundance of zucchini during summer), this cake is your answer. It’s rich, moist, and utterly chocolatey, making it the perfect treat for kids and adults alike.
Now, you might be wondering why on earth one would add zucchini to a cake — it sounds a bit strange, doesn’t it? But trust me, this magical green vegetable adds moisture, which results in a cake that’s incredibly soft and tender. Plus, the chocolate! Oh, my goodness, the chocolate! It completely masks any veggie flavor and elevates the dish to a level that even the pickiest of eaters will adore.
So, grab a bowl, preheat your oven, and let’s embark on this delightful baking journey together! Just know that baking can be messy, but every speck of flour on your counter tells a story of love and joy in the kitchen. By the end of our time together, you’ll have a decadent chocolate cake that’s not only delicious but also a great conversation starter at your next gathering.
A Taste of Nostalgia: My Zucchini Cake Adventure
Let me take you back to sunny afternoons in my grandmother’s kitchen. On those warm days, her garden was bursting with zucchini, and she was always looking for inventive ways to use her bounty. One afternoon, she pulled out a handwritten recipe from a tattered old notebook — it was for a chocolate zucchini cake. Intrigued, I watched as she transformed a mountain of green squashes into a beautifully rich batter.
I can still picture the way her eyes twinkled when I took the first bite. “You’d never guess there’s zucchini in there!” I exclaimed. And I was right! The chocolate flavor was front and center, leaving no room for the zucchini to make its presence known. That warm, fudgy goodness topped with a sprinkle of powdered sugar changed the way I viewed vegetables forever.
Fast forward to today, and I’m here to pass on that culinary magic. This Chocolate Lover’s Zucchini Cake recipe has morphed into one of my family’s favorites, too. It’s perfect for birthday parties, cozy luncheons, or a sweet end to any meal. So, let’s gather our ingredients and get started!
Ingredients
Here’s what you’ll need for our Chocolate Lover’s Zucchini Cake:
-
2 cups grated zucchini
Fresh zucchini is ideal, but if you’re short on time, pre-packaged grated zucchini can work. Just be sure to remove excess moisture by squeezing it in a clean kitchen towel before adding it to the batter. -
1¾ cups all-purpose flour
This is your base for the cake! If you want a gluten-free version, swap out the flour for a 1:1 gluten-free mix. Just keep in mind that the texture may vary slightly. -
¾ cup unsweetened cocoa powder
Go for high-quality natural cocoa to get that deep chocolate flavor. You can use Dutch-processed cocoa too, but remember it will alter the color and richness slightly. -
1 tsp baking soda
This will help your cake rise! If you only have baking powder on hand, use three times as much and reduce the salt by half. -
1 tsp baking powder
A must! This complements the baking soda for a perfectly fluffy cake. Make sure to check the expiration date for the best results. -
½ tsp salt
A little salt balances out the sweetness beautifully. Don’t skip it! -
1 tsp vanilla extract
Homemade vanilla extract adds depth to your cake. If you’re in a pinch, pure flavored extracts will do too. -
¾ cup vegetable oil
Oil keeps the cake moist and is essential for texture. For a healthier option, you can substitute unsweetened applesauce or Greek yogurt (just use about ½ cup). -
1 cup granulated sugar
Feel free to reduce the sugar slightly if you are going for healthier ingredients—this cake can handle it! -
2 large eggs
These add moisture and help the cake rise beautifully. If you need to go egg-free, try flax eggs (1 tablespoon of flaxseed meal + 2.5 tablespoons water = 1 egg). -
1 cup semi-sweet chocolate chips
Because you can never have enough chocolate! Feel free to swap these for dark chocolate or even white chocolate chips for a unique twist.
With these ingredients at the ready, we’re one step closer to creating a cake that will leave everyone wanting more!
Step-by-Step Instructions
-
Preheat Your Oven: Preheat your oven to 350°F (175°C). This step is crucial, as a hot oven ensures even baking for our cake.
-
Prep the Pan: Grease and flour a 9×13 inch baking pan or line it with parchment paper for easy removal. Your future self will thank you for this when it’s time to serve!
-
Grate the Zucchini: Using a box grater, grate the zucchini into fine shreds. If you’re short on time, you can pulse it in a food processor for a few seconds. Just remember to squeeze out any excess moisture.
-
Mix Dry Ingredients: In a large mixing bowl, combine the flour, cocoa powder, baking soda, baking powder, and salt. Whisk them together until they’re well mixed — this helps distribute the leavening agents evenly throughout the batter.
-
Whisk Wet Ingredients: In a separate bowl, mix together the eggs, sugar, vegetable oil, and vanilla extract. Beat them lightly until they’re combined. The mixture should be slightly frothy, indicating that it’s well-mixed.
-
Combine: Gradually add the wet mixture to the dry mixture, stirring until just combined. Be careful not to overmix — a few lumps are perfectly okay.
-
Fold in Zucchini and Chocolate Chips: Gently fold in the grated zucchini and chocolate chips. You want these ingredients evenly distributed without overworking the batter.
-
Pour into the Pan: Pour the batter into your prepared baking pan, smoothing the top with a spatula.
-
Bake: Bake in your preheated oven for about 30-35 minutes, or until a toothpick inserted into the center comes out clean. Keep an eye on it toward the end to avoid overbaking!
-
Cool and Serve: Once baked, let the cake cool in the pan for about 10-15 minutes, then transfer it to a wire rack to cool completely.
And there you have it, a rich chocolate zucchini cake ready to be enjoyed with friends and family—yum!
Serving Suggestions
For the ultimate serving experience, cut a generous slice and transfer it to a plate. Dust it lightly with powdered sugar for a bit of elegance, or add a dollop of whipped cream on top for a touch of indulgence. You could even pair it with a scoop of vanilla ice cream for a nostalgic sundae spin!
Recipe Variations
-
Spicy Chocolate: Add a pinch of cayenne pepper or ground cinnamon to the batter for a warm, spicy kick.
-
Nutty Delight: Mix in a handful of chopped walnuts or pecans for added crunch.
-
Coconut Bliss: Stir in shredded coconut for a tropical twist that complements the chocolate perfectly.
-
Fruit Fusion: Add ½ cup of mini chocolate chips and ripe bananas into the mix for an extra layer of flavor.
-
Vegan Version: Substitute the eggs with flaxseed eggs and replace the oil with applesauce for a guilt-free treat.
Chef’s Notes
Over the years, this Chocolate Lover’s Zucchini Cake has become a staple in my kitchen, evolving into so many delightful variations. One time, I accidentally added a bit too much cocoa powder and was worried it would taste bitter. It turned out to be the most chocolate-laden cake I’d ever made! The guests couldn’t get enough of its rich flavor, and now I occasionally push the cocoa boundaries just to keep things exciting.
And let’s not even talk about the kitchen disasters — from flour clouds to spilled ingredients, each one is a funny memory! So embrace those little “oops” moments; they’re part of the fun!
FAQs and Troubleshooting
-
Why is my cake dense?
If your cake turns out dense, it could be due to overmixing the batter. Mixing too much develops the gluten in the flour, leading to a heavy texture. Mix until just combined! -
Can I use frozen zucchini?
Absolutely! Just remember to thaw it and drain any excess liquid. Frozen zucchini works great, especially when it’s off-season. -
How do I store leftovers?
Store leftover cake in an airtight container at room temperature for up to 3 days, or in the fridge for about a week. You can also freeze slices for later enjoyment! -
Can I add other flavors?
Of course! You can play around by adding orange zest or almond extract to give the cake a unique twist!
Nutritional Info
While I won’t bore you with numbers, I believe that homemade treats can be enjoyed in moderation. This cake is a delightful balance of ingredients, and when paired with a fresh salad or fruit, it makes a lovely meal!
So, there you have it, my lovely foodies! With every slice of this Chocolate Lover’s Zucchini Cake, you’re embracing flavors, memories, and the pure joy of baking. I hope you find as much happiness making this cake as I do sharing it! Happy Baking!
Print
Chocolate Lover’s Zucchini Cake
- Total Time: 50 minutes
- Yield: 12 servings 1x
- Diet: Vegetarian
Description
A rich, moist, and utterly chocolatey zucchini cake that masks any veggie flavor, perfect for kids and adults alike.
Ingredients
- 2 cups grated zucchini
- 1¾ cups all-purpose flour
- ¾ cup unsweetened cocoa powder
- 1 tsp baking soda
- 1 tsp baking powder
- ½ tsp salt
- 1 tsp vanilla extract
- ¾ cup vegetable oil
- 1 cup granulated sugar
- 2 large eggs
- 1 cup semi-sweet chocolate chips
Instructions
- Preheat your oven to 350°F (175°C).
- Prep the baking pan by greasing and flouring it or lining it with parchment paper.
- Grate the zucchini using a box grater or food processor, then squeeze out excess moisture.
- Mix the dry ingredients: flour, cocoa powder, baking soda, baking powder, and salt in a large bowl.
- Whisk the wet ingredients: eggs, sugar, vegetable oil, and vanilla extract in a separate bowl.
- Combine the wet mixture to the dry mixture, stirring until just combined.
- Fold in the grated zucchini and chocolate chips gently.
- Pour the batter into the prepared baking pan.
- Bake for about 30-35 minutes or until a toothpick inserted in the center comes out clean.
- Cool the cake in the pan for 10-15 minutes, then transfer to a wire rack to cool completely.
Notes
For extra indulgence, dust the cake with powdered sugar or serve with whipped cream or vanilla ice cream.
- Prep Time: 15 minutes
- Cook Time: 35 minutes
- Category: Dessert
- Method: Baking
- Cuisine: American
Nutrition
- Serving Size: 1 slice
- Calories: 350
- Sugar: 20g
- Sodium: 200mg
- Fat: 14g
- Saturated Fat: 2g
- Unsaturated Fat: 10g
- Trans Fat: 0g
- Carbohydrates: 45g
- Fiber: 3g
- Protein: 5g
- Cholesterol: 30mg
Keywords: zucchini cake, chocolate cake, dessert, baking, easy recipes
Double Chocolate Zucchini Cake
Double Chocolate Zucchini Cake: A Delicious Twist on Tradition
Welcome to my kitchen! I’m Olivia Bennett, your fellow flavor enthusiast and kitchen companion extraordinaire. Today, we’re diving into a delightful, double chocolate zucchini cake—a bit of a twist on a classic that will leave you and your loved ones scrambling for seconds (and thirds!). Now, I know what you’re thinking: zucchini? In cake? Trust me; this is a match made in dessert heaven!
Picture this: it’s a warm summer afternoon, and you’ve miraculously run out of ideas on how to use the bounty of garden zucchini. You’ve made noodles, fritters, and even sautéed them with garlic, and yet the zucchini keeps coming! Enter: the double chocolate zucchini cake. This cake not only satisfies your chocolate cravings but also helps you sneak in those veggies we know we should be eating more of. The result is a moist, rich, and oh-so-decadent dessert that might just make your chocolate-loving heart soar.
Besides, who doesn’t love a sweet that packs a punch of fiber? By the time you’re done with this cake, the zucchini will have absorbed all the chocolatey goodness and turned into a flavorful ingredient that practically melts in your mouth. So, grab your apron, preheat that oven, and let’s get this chocolate party started!
A Slice of Nostalgia
I can remember the first time I encountered zucchini cake—it was a hot summer day at my grandmother’s house. She had a wonderful garden bursting with vegetables, and her zucchini, in particular, was legendary. One afternoon, she invited me to help her in the kitchen. I was just a kid, barely old enough to reach the counter, but she handed me a vegetable peeler and said, “Let’s make something special today.”
As we grated the zucchini, the air filled with a warm, earthy aroma. The anticipation of our treat bubbling away in the oven kept me glued to the kitchen counter, and the magic really happened when the rich chocolate aroma filled the air. You’d think I was waiting for Disney’s latest release instead of cake! When it finally came out of the oven—decorated with a swirl of fluffy frosting and a sprinkle of chocolate chips—I thought it was the most beautiful thing I’d ever seen.
That first slice was a revelation—soft, rich, and surprisingly moist! I fell in love, not just with the cake itself but with the whole experience: the laughter, the shared anticipation, and the joy it brought to the dinner table. I carry those memories with me every time I bake this recipe, and I can’t wait to share it with you!
Ingredients
Let’s gather our ingredients for the double chocolate zucchini cake! Here’s what you’ll need:
-
Zucchini (2 cups, grated): The star of the show! Zucchini brings moisture to the cake without overwhelming the flavor. Instead of grating fresh zucchini, you can also use frozen, but make sure to thaw and squeeze out the excess moisture!
-
All-purpose flour (1 ¾ cups): This is your base ingredient. If you want a gluten-free version, try using a gluten-free flour blend or almond flour (the cake will be denser but delicious!).
-
Unsweetened cocoa powder (¾ cup): This gives our cake the rich chocolate flavor. For a more intense chocolate taste, opt for Dutch-processed cocoa or even dark cocoa powder.
-
Baking powder (1 tsp): This is what helps your cake rise. Make sure it’s fresh for maximum lift; it usually lasts about six months.
-
Baking soda (½ tsp): This adds extra leavening power. You can also use a 1:1 ratio of baking powder if you’re out of baking soda, but it may impact the cake’s fluffiness a bit.
-
Salt (½ tsp): Never skip the salt! It enhances all the flavors in the cake, particularly the chocolate.
-
Granulated sugar (1 cup): The sweetness factor! If you want a healthier option, consider using coconut sugar or a sugar substitute that measures 1:1.
-
Brown sugar (½ cup): This adds moisture and depth of flavor—like a warm hug in cake form! You can use all granulated sugar if you’re short on brown sugar.
-
Large eggs (2): These bind the ingredients together and provide structure. For a vegan version, you can substitute flax eggs (1 tablespoon of flaxseed meal mixed with 2.5 tablespoons of water for each egg) or unsweetened applesauce.
-
Vanilla extract (1 tsp): Always reach for the good stuff! If you have it, homemade vanilla will take it to another level.
-
Unsweetened applesauce (½ cup): This keeps the cake moist without added fat. You can also use Greek yogurt for added protein (just be sure it’s plain).
-
Chocolate chips (1 cup): The final touch for that double-chocolate goodness! Use semi-sweet, dark, or even white chocolate chips for a fun variation.
Step-by-Step Instructions
Now that we have all our ingredients ready, let’s get to baking! Follow these steps for the most decadent double chocolate zucchini cake ever:
-
Preheat the Oven: Preheat your oven to 350°F (175°C). Prepare a 9×13 inch baking pan by lightly greasing it with baking spray or butter, or for an added layer of protection, line it with parchment paper.
-
Prepare the Zucchini: Grate the zucchini using a box grater or food processor. For a bit of fun, you can let your little ones help! Just remember to squeeze out the excess moisture using a clean kitchen towel. This step is crucial; too much moisture can lead to a soggy cake.
-
Mix Dry Ingredients: In a large bowl, whisk together the flour, cocoa powder, baking powder, baking soda, and salt. This helps to evenly distribute the leavening agents and prevent any clumps of cocoa, which will give you a beautifully smooth batter.
-
Combine Wet Ingredients: In another bowl, mix the granulated sugar, brown sugar, eggs, and vanilla extract until smooth. Then, add in the applesauce and mix until everything is combined. A whisk works great for this, but you can also use a hand mixer for an even fluffier texture.
-
Combine Wet and Dry: Slowly add the dry ingredient mixture to the wet ingredients, mixing until just combined. Avoid overmixing (unless you want to exercise those arm muscles).
-
Add the Zucchini & Chocolate Chips: Gently fold in the grated zucchini and chocolate chips. This is where the magic begins! The batter will be thick and rich.
-
Pour the Batter: Pour the batter into the prepared baking pan, spreading it out evenly. You could even take a moment to admire your wonderfully chocolatey creation before popping it into the oven.
-
Bake: Bake in the preheated oven for about 30-35 minutes, or until a toothpick inserted into the center comes out clean (a few chocolate crumbs are okay!).
-
Cool Down: Once your cake is baked to perfection, remove it from the oven and allow it to cool in the pan for about 10 minutes. Then, carefully transfer it onto a wire rack to cool completely.
-
Frost (Optional): If you’re feeling adventurous, you can whip up some chocolate frosting or simply dust the cooled cake with powdered sugar. Just be prepared for the "oohs" and "aahs" as you serve it up!
Serving Suggestions
When it comes to serving your double chocolate zucchini cake, I recommend slicing it into generous pieces and placing them on a beautiful cake stand or simply a rustic wooden platter. A little dollop of whipped cream or a scoop of vanilla ice cream can take this dessert from delightful to decadent! Sprinkle with fresh berries for a pop of color and a touch of acidity to balance all that chocolate richness. Trust me, your guests (and your taste buds) will thank you!
Recipe Variations
Feeling a bit creative? Here are a few fun variations to explore:
-
Spiced Chocolate Zucchini Cake: Add a teaspoon of cinnamon and a pinch of nutmeg for warm, cozy spices that complement the chocolate beautifully.
-
Nutty Delight: Fold in some chopped walnuts or pecans for added texture. You can toast them a bit to enhance the nutty flavor!
-
Minty Twist: Add a few drops of peppermint extract to the wet ingredients for a refreshing mint chocolate cake experience—perfect for the holidays!
-
Fruity Rhapsody: Incorporate a cup of mashed bananas or even a handful of dried cherries for an extra flavor dimension.
-
Gluten-Free Magic: Swap out the all-purpose flour for a gluten-free flour blend, and you’ll have a delicious option that everyone can enjoy.
Chef’s Notes
As with any recipe, feel free to experiment. That’s what cooking is all about! The double chocolate zucchini cake has evolved in my kitchen over the years. It started as a way to use up surplus zucchini, and it quickly became a family favorite. My nephew, who once declared that he would never eat vegetables, now requests this cake for his birthday every year! I’m not above bribing children with chocolate to encourage healthy eating, and this cake is proof that you can make veggies fun!
FAQs and Troubleshooting
1. Why did my cake sink in the middle?
This can happen if the cake was underbaked or if there was too much moisture in the batter. Ensure you’re measuring the zucchini properly and baking until a toothpick inserted comes out clean.
2. Can I make this cake in advance?
Absolutely! The flavors often improve after a day. Just keep it covered at room temperature or in the fridge.
3. What if I don’t have eggs?
No problem! You can substitute each egg with one flax egg or a quarter cup of applesauce or yogurt instead.
4. The cake seems too dense. What happened?
Overmixing can cause the gluten to develop too much, which can result in a denser cake. Mix just until everything is combined and watch your cake rise beautifully!
Nutritional Info
This cake isn’t just delicious; it’s also packed with goodness thanks to the zucchini! One slice can contain approximately:
- Calories: 250
- Protein: 3g
- Carbohydrates: 34g
- Dietary Fiber: 2g
- Sugar: 20g
- Fat: 12g
So go ahead and indulge in a slice of chocolatey goodness—you deserve it!
I hope you loved this journey through my kitchen as much as I did! The beauty of this double chocolate zucchini cake is that it perfectly combines flavor, nostalgia, and a hint of creativity—all ingredients for a joyful cooking experience. Grab your apron and a friend, put on your favorite tunes, and let’s bake some memories together! Enjoy every moment and every bite, my foodie friends!
Print
Double Chocolate Zucchini Cake
- Total Time: 50 minutes
- Yield: 8 servings 1x
- Diet: Vegetarian
Description
A delicious twist on tradition, this double chocolate zucchini cake is rich, moist, and perfect for satisfying your chocolate cravings while sneaking in some veggies.
Ingredients
- 2 cups Zucchini, grated
- 1 ¾ cups All-purpose flour
- ¾ cup Unsweetened cocoa powder
- 1 tsp Baking powder
- ½ tsp Baking soda
- ½ tsp Salt
- 1 cup Granulated sugar
- ½ cup Brown sugar
- 2 Large eggs
- 1 tsp Vanilla extract
- ½ cup Unsweetened applesauce
- 1 cup Chocolate chips
Instructions
- Preheat the oven to 350°F (175°C). Prepare a 9×13 inch baking pan by lightly greasing it or lining it with parchment paper.
- Grate the zucchini using a box grater or food processor, and squeeze out the excess moisture.
- Whisk together the flour, cocoa powder, baking powder, baking soda, and salt in a large bowl.
- Mix the granulated sugar, brown sugar, eggs, and vanilla extract in another bowl until smooth. Add in the applesauce and mix until combined.
- Slowly add the dry ingredients to the wet ingredients, mixing until just combined.
- Add the grated zucchini and chocolate chips, gently folding them into the batter.
- Pour the batter into the prepared baking pan, spreading it out evenly.
- Bake for 30-35 minutes or until a toothpick inserted into the center comes out clean.
- Allow the cake to cool in the pan for about 10 minutes, then transfer it to a wire rack to cool completely.
- Frost with chocolate frosting or dust with powdered sugar before serving, if desired.
Notes
Feel free to experiment with different mix-ins, such as nuts or spices, to customize your cake.
- Prep Time: 15 minutes
- Cook Time: 35 minutes
- Category: Dessert
- Method: Baking
- Cuisine: American
Nutrition
- Serving Size: 1 slice
- Calories: 250
- Sugar: 20g
- Sodium: 250mg
- Fat: 12g
- Saturated Fat: 4g
- Unsaturated Fat: 6g
- Trans Fat: 0g
- Carbohydrates: 34g
- Fiber: 2g
- Protein: 3g
- Cholesterol: 30mg
Keywords: chocolate cake, zucchini cake, dessert, baking, easy cake
One-Bowl Chocolate Zucchini Cake (Moist & Foolproof)
Savor the Sweetness: Deciding to Bake a Chocolate Zucchini Cake
Welcome to my cozy corner of the culinary world! Today, I’m excited to share a recipe that’s not only delicious, but also a brilliant way to sneak in those veggies we often overlook. Yes, you guessed it—it’s the delightful Chocolate Zucchini Cake! I mean, who wouldn’t want to indulge in a rich, moist cake that is secretly packed with nutritious zucchini? With its decadent chocolate flavor and fluffy texture, this cake will make you swoon. Plus, it’s ridiculously easy to whip up!
Now, I can almost hear you—“Zucchini in cake? Really?” Trust me on this one! I was a bit skeptical at first, too, but this cake has transformed many a doubting friend into a chocolate-loving zucchini believer! Picture this: warm sunlight pouring through the kitchen window, the aroma of butter and cocoa swirling around, and the sound of laughter as family gathers for a slice… Okay, I’m getting ahead of myself, but you get the vibe!
I specifically started baking this cake in the summertime when zucchinis overflowed in my garden. What a joy it was to harvest those green beauties and turn them into something utterly scrumptious. There’s a sense of magic in using homegrown produce to create heartwarming dishes. This Chocolate Zucchini Cake is perfect for everything from birthdays to unexpected Tuesday afternoon pick-me-ups. So grab your apron, and let’s create something sweet that’ll leave your friends asking for the recipe—because believe me, they will!
A Slice of Nostalgia
I still remember the first time I tasted Chocolate Zucchini Cake. It was at my best friend Sophie’s home during the summer when we were teenagers. Sophie and her mom had this tradition of making this cake whenever zucchini season hit, and every time, it vanished quicker than a magician’s rabbit! The cake was moist and rich, with a frosting that beckoned for just one more bite. Their family would gather, forks in hand, sharing stories and laughter, all while devouring this “mysterious” cake.
Now, I won’t deny that the concept of adding a vegetable to something so delightful as cake was perplexing—but once the first bite hit my palate, I was hooked! I begged Sis to teach me how to make it and, in no time at all, I was baking my first cake. The joy of combining chocolate and hidden veggies felt like a real kitchen adventure. Each time I bake this Chocolate Zucchini Cake now, it takes me back to those sun-drenched afternoons filled with giggles and the sweet sound of shared happiness. Isn’t it nice how food can connect us to such beautiful memories?
Ingredients
Before we dive into the delightful process of cake-making, let’s gather our ingredients. The great part about this recipe is its adaptability! Here’s what you’ll need:
-
2 cups grated zucchini: When you think about zucchinis, they might not scream “cake,” but this moisture-rich veggie gives the cake a luscious texture. You can use fresh zucchini, and if you’re running low on cash, block frozen zucchini works too—just thaw and drain excess moisture.
-
1 ¾ cups all-purpose flour: The backbone of any cake, all-purpose flour delivers the structure needed. If you want a nutty flavor, give whole wheat flour a shot!
-
½ cup unsweetened cocoa powder: This is where the chocolate magic happens! Opt for Dutch-processed cocoa powder for a richer taste. You could also substitute it with carob powder for a caffeine-free twist.
-
1 tsp baking soda: This is your rising agent. If you’re out of baking soda, you can sub it with baking powder (just triple the amount).
-
½ tsp salt: A pinch of salt enhances flavors—don’t skip it! If you’re on a low-sodium diet, you can reduce it a bit without sacrificing taste.
-
1 cup granulated sugar: For that sweet kick! Coconut sugar or brown sugar can be used for a more caramel-like flavor.
-
½ cup vegetable oil: This makes the cake moist and delicious. Try using applesauce for a lower-fat option!
-
2 large eggs: They bind the ingredients together. If you’re egg-free, consider using flax eggs (1 tbsp flaxseed meal + 2.5 tbsp water = 1 egg).
-
1 tsp vanilla extract: A touch of vanilla elevates the overall flavor profile. Feel free to swap in almond extract for a different dimension!
-
1 cup chocolate chips: To pack that chocolate punch! You can choose dark, milk, or even white chocolate chips for a fun twist.
-
Optional frosting ingredients (for cream cheese frosting):
- 8 oz cream cheese, softened: This smooth and creamy goodness makes the frosting irresistible.
- 4 cups powdered sugar: Sweet, creamy, and the perfect pairing with the cake.
- 1 tsp vanilla extract: Depending on how decadent you want to get, you can increase this for that extra flavor hit.
These ingredients are super flexible and allow you to create a cake that feels just right for you!
Step-by-Step Instructions
Let’s get our hands floury! Follow these steps for a Chocolate Zucchini Cake that’ll make your taste buds dance.
-
Preheat the Oven: Start by preheating your oven to 350°F (175°C). This is key for even baking! Get your chosen 9×13 inch baking pan or two 9-inch round cake pans ready by greasing and flouring them to avoid any sticking mishaps.
-
Prep the Zucchini: Grate your zucchini using a box grater or food processor. For an added treat, don’t peel off the skin—it’s packed with nutrients! Once grated, place it in a clean kitchen towel and squeeze excess moisture. A little squeeze can prevent a soggy cake!
-
Mix Dry Ingredients: In a large bowl, whisk together the flour, cocoa powder, baking soda, and salt. This step ensures that everything is evenly distributed. Don’t skip on this! Each whisk of the dry ingredients is one step closer to pure chocolate joy.
-
Mix Wet Ingredients: In another bowl, combine the sugar, vegetable oil, eggs, and vanilla. Use a hand mixer or whip it up with a whisk until creamy. You’re looking for a smooth amalgamation here. It’s during this step that your kitchen starts to fill with a warm, enticing aroma that beckons everyone nearby!
-
Combine Mixtures: Gradually add the dry ingredients to the wet mixture. Don’t overmix—just fold until combined. It should be thick and a little chunky from the zucchini. That’s where the magic is! Tip: If anything feels too dry, gently fold in a tablespoon of milk.
-
Chocolate Chips, Please!: Gently fold in your chocolate chips. They’ll melt into gooey goodness as the cake bakes—seriously, it’s the best part!
-
Bake it Up: Pour the batter into your prepared pan(s) and smooth the top with a spatula. Bake in the preheated oven for about 25–30 minutes for round cakes or 30–35 minutes for a rectangular one. The cake should spring back when you press it lightly in the middle, and a toothpick inserted into the center will come out clean but with a few crumbs.
-
Cooling Time: Allow the cake to cool in the pan for about 10 minutes, then transfer it to a wire rack to cool completely. Patience is a virtue! You want the frosting to stick well, so don’t rush this step.
-
Frosting Bliss: While the cake cools, beat together your softened cream cheese, powdered sugar, and additional vanilla until smooth and fluffy. Once the cake is cool, spread a generous layer over the top.
-
Slice and Serve: Finally, slice a piece, maybe top it with fresh berries or a sprinkle of chocolate shavings, and enjoy the masterpiece you’ve created!
Serving Suggestions
This Chocolate Zucchini Cake is perfect for a laid-back dessert party or a cozy family dinner. Serve it warm for that divine melted chocolate experience, or chill it to enhance the flavors. You can plate it with a dollop of whipped cream or a scoop of vanilla ice cream for an indulgent treat. Also, I love serving it with a fresh fruit salad on the side—it’s a great balance to the rich cake!
Recipe Variations
Here are a few creative twists to keep the Chocolate Zucchini Cake exciting:
-
Spicy Kick: Add a teaspoon of cinnamon or a pinch of cayenne pepper to the dry ingredients for a warm twist!
-
Nutty Delight: Fold in chopped walnuts or pecans for an additional crunch.
-
Citrus Zing: Grate zest from an orange or lemon into the batter for a bright flavor that pairs beautifully with chocolate.
-
Vegan Version: Go for flax or chia eggs, and substitute oil with applesauce to make this recipe plant-based.
-
Gluten-Free: Use a 1:1 gluten-free flour blend for a cake that everyone can enjoy.
Chef’s Notes
I can’t help but chuckle every time I think about the mishaps I’ve encountered while baking this cake. One time, I was mid-bake when the smoke alarm went off—not because of burnt cake, mind you, but because I got a little carried away with the cocoa powder. Let’s just say the whole kitchen looked like a chocolate haven gone rogue! Despite the chaos, those “chocolate snow” moments are what make cooking inspiring (and humorous!).
This recipe has evolved over the years too; it started as a more traditional approach but has become a playground for creativity. I encourage you to play, too! Food should be fun and adventurous, a way to express who you are in the kitchen.
FAQs and Troubleshooting
1. My cake turned out too dry. What happened?
- Overmixing or using too much flour can lead to a dry cake. Try gently folding the ingredients and measuring carefully next time!
2. What if my cake sinks in the middle?
- This could mean it was underbaked or not enough leavening agent was used. It’s crucial to stick to the baking time and keep an eye on it!
3. Can I use fresh zucchini instead of frozen?
- Absolutely! Just make sure to drain the excess moisture after grating.
4. This cake is too sweet for me. What can I do?
- You can reduce the sugar by ¼ cup or balance it out with a touch of salt in the frosting. Chocolate can naturally be bitter; finding the right sweetness is all about what feels good to your taste!
Nutritional Info
While the nutritional specifics can vary based on exact ingredients used, here’s a quick overview to keep in mind:
- Serving Size: 1 slice (approx. 1/12 of the cake)
- Calories: About 250 per slice
- Fat: 12g
- Carbohydrates: 32g
- Protein: 3g
Feel free to adapt this recipe to fit your dietary needs while savoring all its deliciousness!
Thank you for joining me on this sweet journey! Remember, cooking is about the joy of creation, the flavors you love, and the memories you share. Next time you find yourself with a bunch of zucchini, don’t just make the standard stir-fry; whip up this Chocolate Zucchini Cake instead! Happy baking, my friends!
Print
Chocolate Zucchini Cake
- Total Time: 45 minutes
- Yield: 12 servings 1x
- Diet: Vegetarian
Description
A rich and moist cake that cleverly incorporates zucchini for added moisture and nutrition.
Ingredients
- 2 cups grated zucchini
- 1 ¾ cups all-purpose flour
- ½ cup unsweetened cocoa powder
- 1 tsp baking soda
- ½ tsp salt
- 1 cup granulated sugar
- ½ cup vegetable oil
- 2 large eggs
- 1 tsp vanilla extract
- 1 cup chocolate chips
- 8 oz cream cheese, softened (for frosting)
- 4 cups powdered sugar (for frosting)
- 1 tsp vanilla extract (for frosting)
Instructions
- Preheat the Oven: Start by preheating your oven to 350°F (175°C). Grease and flour your 9×13 inch baking pan or two 9-inch round cake pans.
- Prep the Zucchini: Grate your zucchini and squeeze out excess moisture using a kitchen towel.
- Mix Dry Ingredients: In a large bowl, whisk together the flour, cocoa powder, baking soda, and salt.
- Mix Wet Ingredients: In another bowl, combine the sugar, vegetable oil, eggs, and vanilla, mixing until creamy.
- Combine Mixtures: Gradually add the dry ingredients to the wet mixture, folding until just combined.
- Chocolate Chips, Please!: Fold in the chocolate chips.
- Bake it Up: Pour the batter into the prepared pan and bake for 25–30 minutes for round cakes or 30–35 minutes for a rectangular one.
- Cooling Time: Allow the cake to cool in the pan for about 10 minutes before transferring to a wire rack.
- Frosting Bliss: Beat together the cream cheese, powdered sugar, and additional vanilla until smooth, then frost the cooled cake.
- Slice and Serve: Slice the cake and enjoy!
Notes
Serve with fresh berries or ice cream for an indulgent treat. You can add spices or nuts for a unique twist.
- Prep Time: 15 minutes
- Cook Time: 30 minutes
- Category: Dessert
- Method: Baking
- Cuisine: American
Nutrition
- Serving Size: 1 slice
- Calories: 250
- Sugar: 18g
- Sodium: 200mg
- Fat: 12g
- Saturated Fat: 4g
- Unsaturated Fat: 8g
- Trans Fat: 0g
- Carbohydrates: 32g
- Fiber: 2g
- Protein: 3g
- Cholesterol: 30mg
Keywords: Chocolate Zucchini Cake, Dessert, Moist Cake, Baking, Healthy Dessert
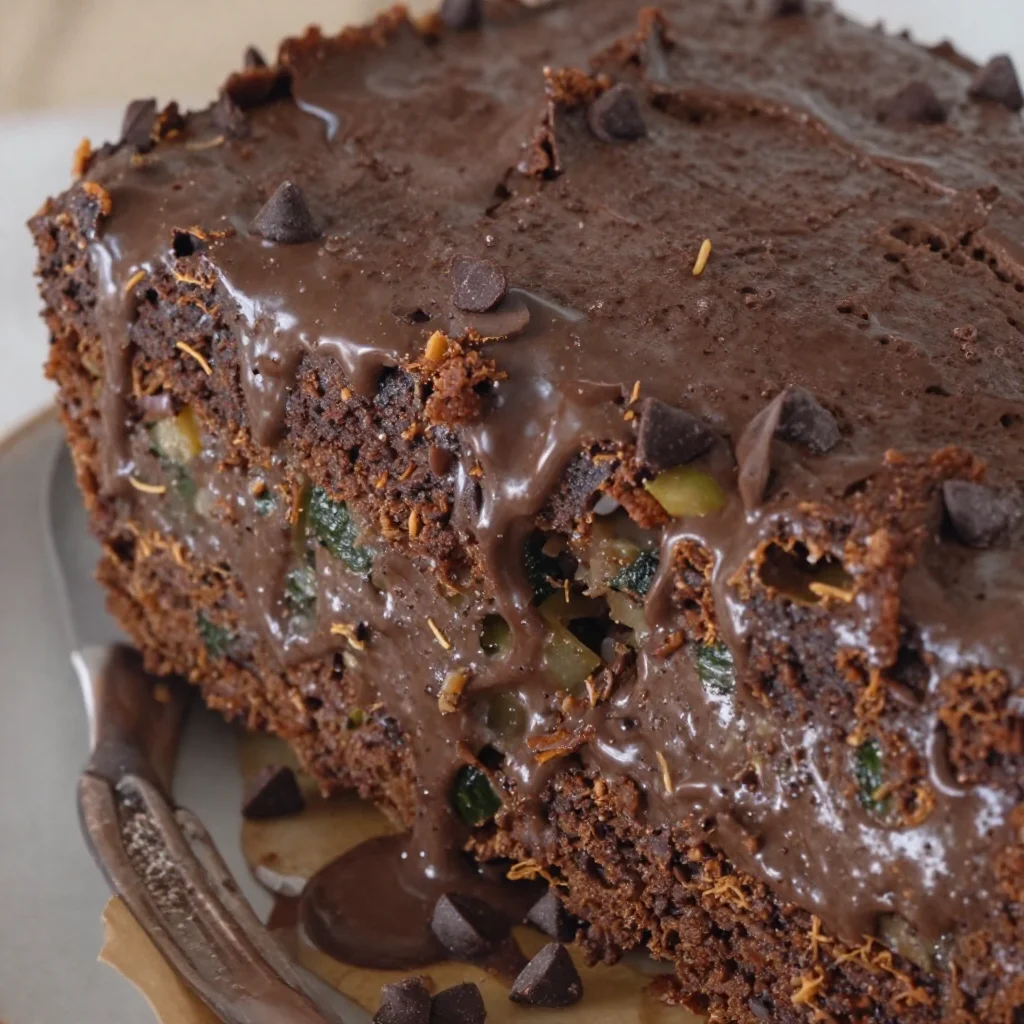
One-Bowl Chocolate Zucchini Loaf: Moist, 30-Min Prep
The Chocolate Zucchini Loaf That Will Make You Believe in Magic
Welcome to my cozy kitchen! I’m Olivia Bennett, your culinary companion on a journey through flavors and nostalgia. Today, we’re diving into the world of Chocolate Zucchini Loaf—a delightful treat that’s as heartwarming as it is delicious. Just imagine this: a moist, fudgy loaf that takes advantage of the garden’s bounty while teasing your sweet tooth. You’ll find that this recipe is not only easy to whip up but also a fantastic way to sneak in some veggies (yes, really!) to satisfy your chocolate cravings.
Baking this loaf is akin to wrapping yourself in a warm blanket on a chilly night. The aromas that fill your kitchen bring back fond memories of family gatherings and lazy afternoons spent enjoying the simple pleasures in life. Have you ever noticed how a single scent can transport you back to a moment in time? For me, the rich smell of chocolate mingling with the earthiness of zucchini is a glorious embodiment of my family’s tradition of cooking and baking together.
I remember a sunny afternoon spent with my grandmother, who was a baker extraordinaire. She would often slide the most decadent chocolate cakes out of the oven, followed closely by her secret obsession with adding hidden veggies to her concoctions. It was during one of those lively kitchen sessions that I first tasted a rich chocolate zucchini bread, and it was love at first bite. The way the chocolate danced with the faintest hint of garden-fresh zucchini always left me speechless. Now, I’m thrilled to share this chocolatey creation with you—just as my grandmother shared with me.
Are you ready to bring the joy of baking into your home? Let’s get our aprons on and dive into this scrumptious adventure!
Ingredients You’ll Need
Here’s what you need to gather to create this heavenly delight:
-
2 cups zucchini, grated
Fresh zucchini adds moisture to the loaf without overpowering the flavor. Use medium-sized zucchini for better texture. If you don’t have zucchini, finely grated carrots could be a wonderful substitute! -
1 cup all-purpose flour
A wholesome base for your loaf. If you prefer, you can use whole wheat flour for a nuttier flavor and extra fiber. -
1 cup cocoa powder
Unsweetened cocoa powder is essential for that deep chocolate flavor. If you’re feeling adventurous, try Dutch-processed cocoa for an even richer taste. -
1 cup sugar
Granulated sugar sweetens and caramelizes the loaf beautifully. You can replace half with brown sugar for additional moisture and flavor depth. -
½ cup vegetable oil
The oil keeps the loaf moist and tender. Feel free to swap this with melted coconut oil or apple sauce for a healthier twist! -
2 large eggs
Eggs help bind the ingredients. For a vegan alternative, try ½ cup of unsweetened applesauce or a flax egg (1 tablespoon of flaxseed meal mixed with 2.5 tablespoons of water). -
1 teaspoon vanilla extract
The vanilla enhances the overall flavor profile and adds warmth. Always choose pure vanilla extract when possible for the best taste. -
1 teaspoon baking soda
Baking soda is crucial for leavening your loaf. Ensure it’s fresh for optimum rise! -
½ teaspoon salt
A pinch of salt brings out all the flavors wonderfully. Don’t skip it! -
1 cup chocolate chips (optional, but encouraged)
Because who doesn’t love a bit of chocolate in every bite? You can use semi-sweet, dark, or even white chocolate chips for a fun twist.
Step-by-Step Instructions
Let’s transform these ingredients into a delectable Chocolate Zucchini Loaf! Follow these steps closely, and trust me, you’ll be left with something remarkable.
-
Preheat Your Oven
Preheat your oven to 350°F (175°C). This is essential for an evenly baked loaf. While the oven warms up, you can prep your ingredients. -
Prepare Your Zucchini
Wash and grate your zucchini using a box grater or a food processor. Don’t peel it; the skin adds lovely color and nutrients! After grating, use a clean kitchen towel to squeeze out excess moisture. This will prevent the loaf from becoming too soggy. -
Mix the Dry Ingredients
In a large mixing bowl, whisk together the flour, cocoa powder, baking soda, and salt. This combines everything evenly, ensuring no clumps of cocoa mishaps later on. A little chef hack? Sift your cocoa powder beforehand for an ultra-smooth result. -
Combine the Wet Ingredients
In a separate bowl, beat the eggs (or your substitute) together. Stir in the sugar, vegetable oil, and vanilla extract until it’s nice and smooth. This should only take a minute or two. -
Join Forces!
Gradually add the wet mixture into the dry mixture, folding gently. Don’t overmix! We want a tender loaf, not rubbery. The secret here is to stir just until combined; a few flour streaks are okay. -
Add the Zucchini and Chocolate Chips
Gently fold in the grated zucchini and chocolate chips. It’s okay if some zucchini chunks are left intact; they’ll provide fantastic pockets of moisture! -
Pour into Loaf Pan
Grease a 9×5-inch loaf pan or line it with parchment paper for easy removal. Pour the batter in and smooth the top with a spatula. Sprinkle a few extra chocolate chips on top if you wish—it’s the “I’m about to amaze you” touch. -
Bake
Place the pan in the preheated oven and bake for 50-60 minutes. You’ll know it’s done when a toothpick inserted in the center comes out clean or with a few moist crumbs (not wet batter). -
Cool Time
Once baked, allow the loaf to cool in the pan for about 10 minutes, then carefully transfer it to a wire rack to cool completely. Smelling its intoxicating aroma while it cools is pure joy!
Serving Suggestions
Once your loaf is fully cooled (and that might take some serious willpower not to dive in early!), slice it into generous pieces. Consider serving it on a pretty platter with a side of whipped cream or a scoop of vanilla ice cream. Fresh berries or a drizzle of chocolate ganache can elevate it to dessert status. I love enjoying a slice alongside a warm cup of coffee or a cozy evening tea, letting the flavors mingle.
Recipe Variations
Feeling experimental? Here are a few creative twists to try with your Chocolate Zucchini Loaf:
-
Nutty Crunch: Fold in chopped walnuts or pecans for a delightful crunch that contrasts beautifully with the soft, moist cake.
-
Spiced Addition: Add a teaspoon of cinnamon or a dash of nutmeg to the dry ingredients for a warm, spicy twist—perfect for autumn!
-
Vegan Delight: Swap eggs with flax eggs, use coconut oil, and replace sugar with maple syrup for a vegan version of this delightful treat.
-
Minty Fresh: Stir in crushed peppermint candies or a splash of peppermint extract to create a refreshing seasonal variation.
-
Bistro Style: Bake as muffins—this reduces the baking time to about 20-25 minutes—great for grab-and-go snacks that are not just your average muffin!
Chef’s Notes
I can’t emphasize how much love I’ve poured into perfecting this recipe over the years. It has become a staple in my household, always met with smiles and a sense of nostalgia. It’s versatile too; I’ve adapted it countless times based on what I had on hand. One fun memory was when my neighbor gifted me a load of zucchini from his garden, and I whipped up a double batch for a community potluck. Everyone raved about it, and I even had a couple of friends ask for the recipe (which I always share, of course!).
FAQs and Troubleshooting
Q: Can I replace the cocoa powder with a different type of flour?
A: Cocoa powder is what gives this loaf its chocolatey goodness! If you simply can’t have cocoa, consider experimenting with a carob powder, but I suggest keeping the ratios similar to maintain texture.
Q: My bread is too dense; what did I do wrong?
A: Density often comes from overmixing the batter. Aim to mix just until the ingredients are combined, and try not to overbake.
Q: How can I tell when the loaf is done?
A: Insert a toothpick into the center; if it comes out clean or with a few moist crumbs, it’s perfect!
Q: Can I freeze this loaf?
A: Yes! This loaf freezes wonderfully. Just wrap slices in plastic wrap and then in foil, or place the whole loaf in an airtight container. It can stay fresh for about 3 months in the freezer.
Nutritional Info
(Note: These values are based on approximately 12 servings per loaf. Please adjust according to your specific measurements.)
- Calories: 250 per slice
- Fat: 12g
- Carbohydrates: 35g
- Fiber: 2g
- Protein: 4g
As you embark on this baking adventure, I hope you discover as much joy in creating this Chocolate Zucchini Loaf as I have. Remember, cooking is all about love—turning the ordinary into something that nourishes both the body and heart! Happy baking, my friends!
Print
Chocolate Zucchini Loaf
- Total Time: 75 minutes
- Yield: 12 servings 1x
- Diet: Vegetarian
Description
A delightful chocolate zucchini loaf that’s moist, fudgy, and sneakily incorporates veggies to satisfy your sweet tooth.
Ingredients
- 2 cups zucchini, grated
- 1 cup all-purpose flour
- 1 cup cocoa powder
- 1 cup sugar
- ½ cup vegetable oil
- 2 large eggs
- 1 teaspoon vanilla extract
- 1 teaspoon baking soda
- ½ teaspoon salt
- 1 cup chocolate chips (optional)
Instructions
- Preheat your oven to 350°F (175°C).
- Prepare your zucchini by washing and grating it, then squeezing out excess moisture.
- Mix the dry ingredients: flour, cocoa powder, baking soda, and salt.
- Combine the wet ingredients: beat the eggs, then stir in sugar, oil, and vanilla extract.
- Join the wet mixture into the dry mixture, folding gently until just combined.
- Add the grated zucchini and chocolate chips, folding gently.
- Pour the batter into a greased 9×5-inch loaf pan and smooth the top.
- Bake for 50-60 minutes until a toothpick comes out clean.
- Cool in the pan for 10 minutes, then transfer to a wire rack to cool completely.
Notes
Serve with whipped cream or vanilla ice cream for an elevated dessert experience. This loaf freezes well for about 3 months.
- Prep Time: 15 minutes
- Cook Time: 60 minutes
- Category: Dessert
- Method: Baking
- Cuisine: American
Nutrition
- Serving Size: 1 slice
- Calories: 250
- Sugar: 20g
- Sodium: 200mg
- Fat: 12g
- Saturated Fat: 3g
- Unsaturated Fat: 7g
- Trans Fat: 0g
- Carbohydrates: 35g
- Fiber: 2g
- Protein: 4g
- Cholesterol: 40mg
Keywords: chocolate bread, zucchini bread, dessert, baking
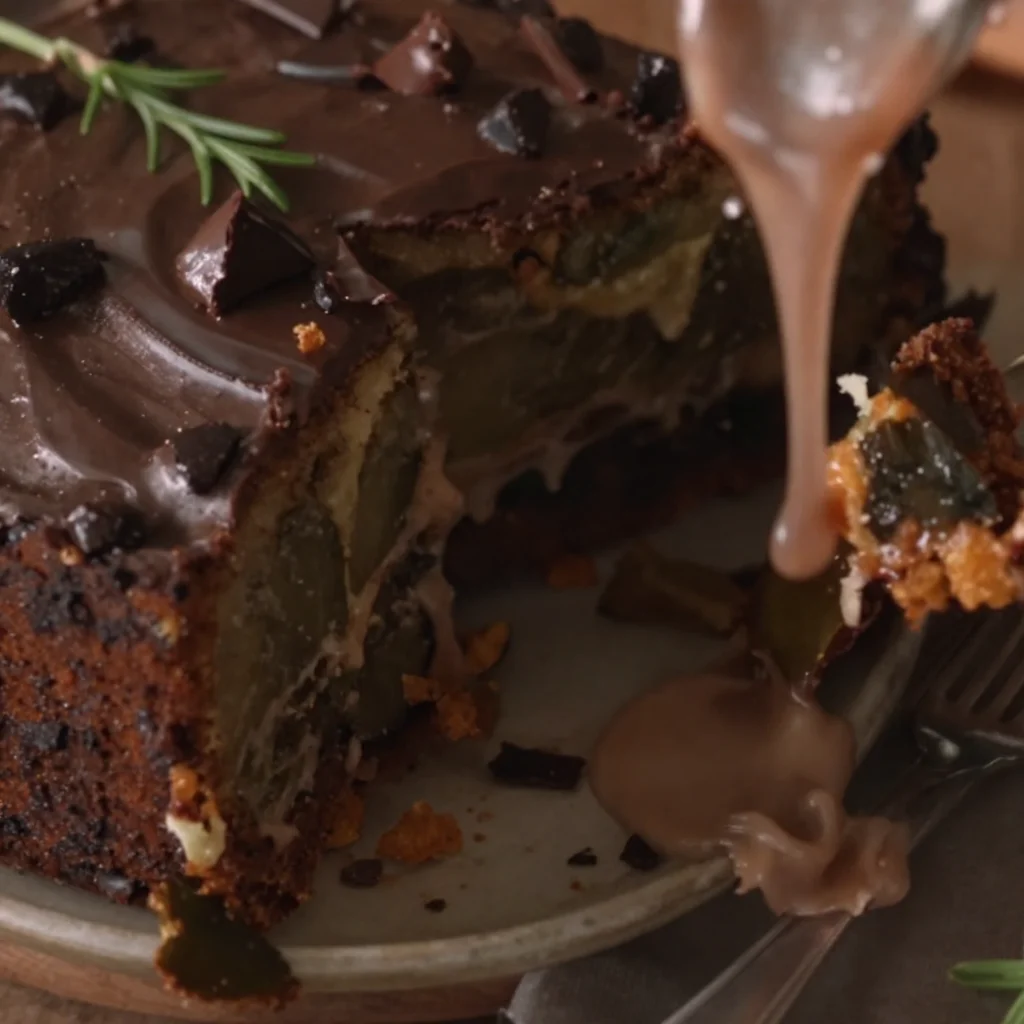
One-Bowl Chocolate Zucchini Cake: Beginner-Friendly Recipe
Chocolate Lover’s Zucchini Cake: A Slice of Sweet Nostalgia
Welcome to my cozy corner of the kitchen! Today, I’m thrilled to share a recipe that not only satisfies your chocolate cravings but also brings a delightful twist to your dessert game — Chocolate Lover’s Zucchini Cake. Now, before you raise an eyebrow at the idea of zucchini in a cake, let me assure you: this is no ordinary vegetable bake. Instead, it’s a rich, moist chocolate masterpiece that cleverly incorporates this humble green delight to create a dessert experience you won’t want to miss!
Have you ever had one of those moments when you tasted something so good that it sparked a flood of happy memories? For me, it was the first time I tasted a chocolate zucchini cake at a summer potluck hosted by my neighbor, Mrs. Jenkins. I was just a kid, and the moment I took a bite, I was captivated. It was soft, fudgy, and utterly chocolaty — who knew you could play hide-and-seek with vegetables in dessert? I bugged Mrs. Jenkins until she shared her secret recipe, and it became a staple in our family gatherings. Over the years, I’ve made my own tweaks and personal touches to her original recipe, but that spirit — combining unexpected ingredients and crafting something delicious — has remained.
So, whether you’re a seasoned baker or just starting your culinary journey, this Chocolate Lover’s Zucchini Cake is for you! It’s effortlessly decadent, making it the perfect treat for parties, casual get-togethers, or a weeknight dessert that says, "You’ve earned this." Plus, it’s a great way to sneak some veggies into your diet, which is a win-win! Let’s dive in!
Personal Story
Thinking back to that summer potluck, I can still picture the warm sunshine, laughter, and the tantalizing aromas wafting through the air. Mrs. Jenkins was known in our neighborhood for her killer baked goods, but I was determined to grab the first slice of her chocolate zucchini cake. I remember asking if it had chocolate frosting, only to have her mischievously grin and say, “You’ll just have to find out!” As I sank my fork into the perfectly moist cake, I was met with an explosion of chocolate flavor that danced on my taste buds. The hint of zucchini was so subtle that I didn’t even notice it was there — all I knew was that I was in dessert heaven!
When I got older and started experimenting in my own kitchen, I returned to that recipe and made it my own. I’ve played with the spices, swapped in different types of chocolate, and even given it a healthier spin while keeping the indulgent chocolate experience intact. Every time I bake this cake, whether for family, friends, or just my own chocolate cravings, I’m reminded of that summer day and how one simple slice of cake can create lasting memories.
Ingredients
Here’s what you’ll need to whip up this Chocolate Lover’s Zucchini Cake, along with some chef insights and substitution tips to help you make this cake your own.
-
2 cups grated zucchini
Fresh zucchini is key for moisture. If you can’t find zucchini, shredded carrots or applesauce can work as a substitute, but adjust the sugar accordingly since carrots are sweeter! -
1 3/4 cups all-purpose flour
This forms the cake’s base. For a gluten-free option, feel free to use a gluten-free flour blend, but you may need to adjust the liquid ratio specifically. -
1 cup unsweetened cocoa powder
Opt for high-quality cocoa for the richest flavor. Dutch-process cocoa can provide a deeper taste, but regular cocoa works just fine if that’s what you have on hand. -
1 1/2 teaspoons baking soda
This will help your cake rise! Make sure it’s fresh for the best results. -
1/2 teaspoon baking powder
A boost to the cake’s fluffiness; don’t skip this! -
1 teaspoon salt
Just a pinch brings out all the flavors. Don’t go overboard, or you’ll have a salty cake! -
1 teaspoon cinnamon (optional)
Adds warmth and depth — this is optional, but I highly recommend it for that cozy flavor! -
1 cup granulated sugar
This balances the bitter cocoa. Brown sugar can also be used for a more caramel-like taste. -
1 cup vegetable oil
Oil keeps the cake moist. You can substitute with melted coconut oil for a hint of tropical flavor, or use applesauce for a healthier twist. -
3 large eggs
Room temperature eggs help everything mix together better. If you’re vegan, a flax egg (1 tbsp flaxseed meal + 2.5 tbsp water) works beautifully! -
2 teaspoons vanilla extract
Vanilla enhances the sweetness of your cake! Use real vanilla for a better taste. -
1 cup semi-sweet or dark chocolate chips
Feel free to swap for white chocolate if that’s your jam! You could also mix in nuts for an extra crunch.
With all these ingredients ready, it’s time to bring our cake to life!
Step-by-Step Instructions
-
Preheat Your Oven
Preheat your oven to 350°F (175°C). This allows the cake to bake evenly and rise beautifully. While the oven is warming up, give your baking pan a light coat of cooking spray or butter it lightly. -
Prepare the Zucchini
Rinse the zucchini, and using a grater, shred it finely. Don’t forget to squeeze out the excess moisture with a clean kitchen towel, as too much liquid can affect the texture of the cake! -
Mix the Dry Ingredients
In a large mixing bowl, whisk together the flour, cocoa powder, baking soda, baking powder, salt, and cinnamon until well combined. This ensures the leavening agents are evenly distributed, resulting in a uniformly baked cake! -
Incorporate the Wet Ingredients
In a separate bowl, beat together the granulated sugar and vegetable oil until combined. Add the eggs one at a time, mixing well after each addition. Then, stir in the vanilla extract. -
Combine Wet and Dry Mixtures
Slowly add the wet mix to the dry ingredients, stirring gently to avoid overmixing. You want to combine until just incorporated. -
Add the Star of the Show
Gently fold in the grated zucchini and chocolate chips. At this stage, feel free to channel your inner pastry chef and give your mixture a final, light stir, just enough to ensure everything is well-integrated — but remember, don’t overdo it! -
Pour the Batter into the Pan
Transfer your batter into the prepared baking pan, smoothing out the top with a spatula. This will help it bake evenly. -
Bake It Up
Bake in the preheated oven for about 30–35 minutes, or until a toothpick inserted into the center comes out clean. If it comes out with a few chocolate crumbs clinging to it, that’s okay! Just know it’ll be slightly fudgier that way, and who doesn’t love a gooey cake? -
Cool and Serve
Once done, let the cake cool in the pan for 10-15 minutes before transferring it to a wire rack to cool completely. Serve it plain, or go ahead and slather on some chocolate frosting or a dusting of powdered sugar to elevate it to “wow” status!
Serving Suggestions
Plating our Chocolate Lover’s Zucchini Cake can be as simple or as extravagant as you want. A classic approach is to cut squares or rectangles and dust with powdered sugar. For a more decadent presentation, you can drizzle chocolate ganache over the top and sprinkle some chopped nuts or chocolate shavings for added flair. Serve it alongside a scoop of vanilla ice cream or a dollop of whipped cream to make every bite an experience!
Recipe Variations
Feeling adventurous? Here are some fun variations to consider:
-
Spicy Chocolate: Add a pinch of cayenne or chili powder for a kick that complements the richness of the chocolate.
-
Nutty Zucchini Cake: Fold in chopped walnuts or pecans for a delightful crunch and added nutrition.
-
Fruit Twist: Incorporate 1/2 cup of mashed banana or applesauce to deepen the flavor and moisture while slightly reducing the sugar.
-
Frosting Options: Swap out the chocolate frosting for a lightly whipped cream cheese frosting for a tangy contrast to the sweetness!
-
Vegan-Friendly: Use flax eggs instead of real eggs, almond milk in place of vegetable oil, and opt for dairy-free chocolate chips!
Chef’s Notes
This Chocolate Lover’s Zucchini Cake is one of my go-to recipes for special occasions, potlucks, and even just a Saturday night in! I promise, your loved ones will never guess that it has zucchini in it. I must confess, there have been times when I’ve tried to sneak in more veggies, only to have them declared “not as good” as the original. It’s truly a testament to how versatile this cake is; you learn the magic of cooking is all about balance.
Over the years, I’ve also discovered that this cake freezes exceptionally well. So, if you ever make a double batch (which I highly recommend!), cool and slice it, wrap pieces in plastic, and store in the freezer for a quick dessert fix later on. Just pop it into the microwave for a few seconds to enjoy it warm!
FAQs and Troubleshooting
-
Why is my cake too dense?
If your cake turns out dense, it’s likely due to overmixing the batter or not incorporating enough air. Ensure you mix gently and combine just until wet and dry ingredients are mixed. -
Can I replace the granulated sugar?
Absolutely! You can use brown sugar or coconut sugar for a softer texture and deeper flavor. Adjust the ratios, depending on your preferred sweetness. -
What if I don’t have zucchini?
You can replace zucchini with shredded carrots, apples, or even beets for a unique flavor profile — just remember to adjust your seasoning for sweetness! -
How do I know when my cake is done?
A clean toothpick inserted in the center should come out with only a few crumbs attached. If it’s wet, pop it back in the oven for a few more minutes and keep an eye on it!
Nutritional Info
(Note: Nutritional values can vary based on ingredients and serving size. Keep this in mind when calculating for dietary needs. For detailed information, consider using a nutrition calculator based on the specific ingredients you choose.)
- Servings: 12
- Calories: Approximately 350 per slice
- Total Fat: 20g
- Saturated Fat: 5g
- Carbohydrates: 42g
- Fiber: 2g
- Sugars: 25g
- Protein: 4g
And there you have it, dear friend — the ultimate recipe for Chocolate Lover’s Zucchini Cake! This delightful dessert marries rich chocolate with a clever veggie twist, making it both a treat and a conversation starter. I hope you enjoy baking this cake as much as I do, and may it bring as many smiles and sweet memories into your home as it has into mine. Happy baking!
Print
Chocolate Lover’s Zucchini Cake
- Total Time: 50 minutes
- Yield: 12 servings 1x
- Diet: Vegetarian
Description
A rich and moist chocolate cake that cleverly incorporates zucchini for a delightful twist, perfect for any occasion.
Ingredients
- 2 cups grated zucchini
- 1 3/4 cups all-purpose flour
- 1 cup unsweetened cocoa powder
- 1 1/2 teaspoons baking soda
- 1/2 teaspoon baking powder
- 1 teaspoon salt
- 1 teaspoon cinnamon (optional)
- 1 cup granulated sugar
- 1 cup vegetable oil
- 3 large eggs
- 2 teaspoons vanilla extract
- 1 cup semi-sweet or dark chocolate chips
Instructions
- Preheat your oven to 350°F (175°C).
- Prepare the zucchini by rinsing and shredding it finely.
- Mix the dry ingredients in a large bowl until well combined.
- Incorporate the wet ingredients in a separate bowl until mixed well.
- Combine the wet and dry mixtures gently.
- Add the grated zucchini and chocolate chips, folding them in.
- Pour the batter into the prepared baking pan.
- Bake for 30–35 minutes until a toothpick inserted comes out clean.
- Cool in the pan for 10-15 minutes before transferring to a wire rack.
Notes
This cake freezes well; wrap slices in plastic for a quick dessert fix. Serve with powdered sugar or chocolate ganache.
- Prep Time: 15 minutes
- Cook Time: 35 minutes
- Category: Dessert
- Method: Baking
- Cuisine: American
Nutrition
- Serving Size: 1 slice
- Calories: 350
- Sugar: 25g
- Sodium: 300mg
- Fat: 20g
- Saturated Fat: 5g
- Unsaturated Fat: 15g
- Trans Fat: 0g
- Carbohydrates: 42g
- Fiber: 2g
- Protein: 4g
- Cholesterol: 30mg
Keywords: chocolate cake, zucchini cake, dessert recipes, baked goods, vegetable desserts
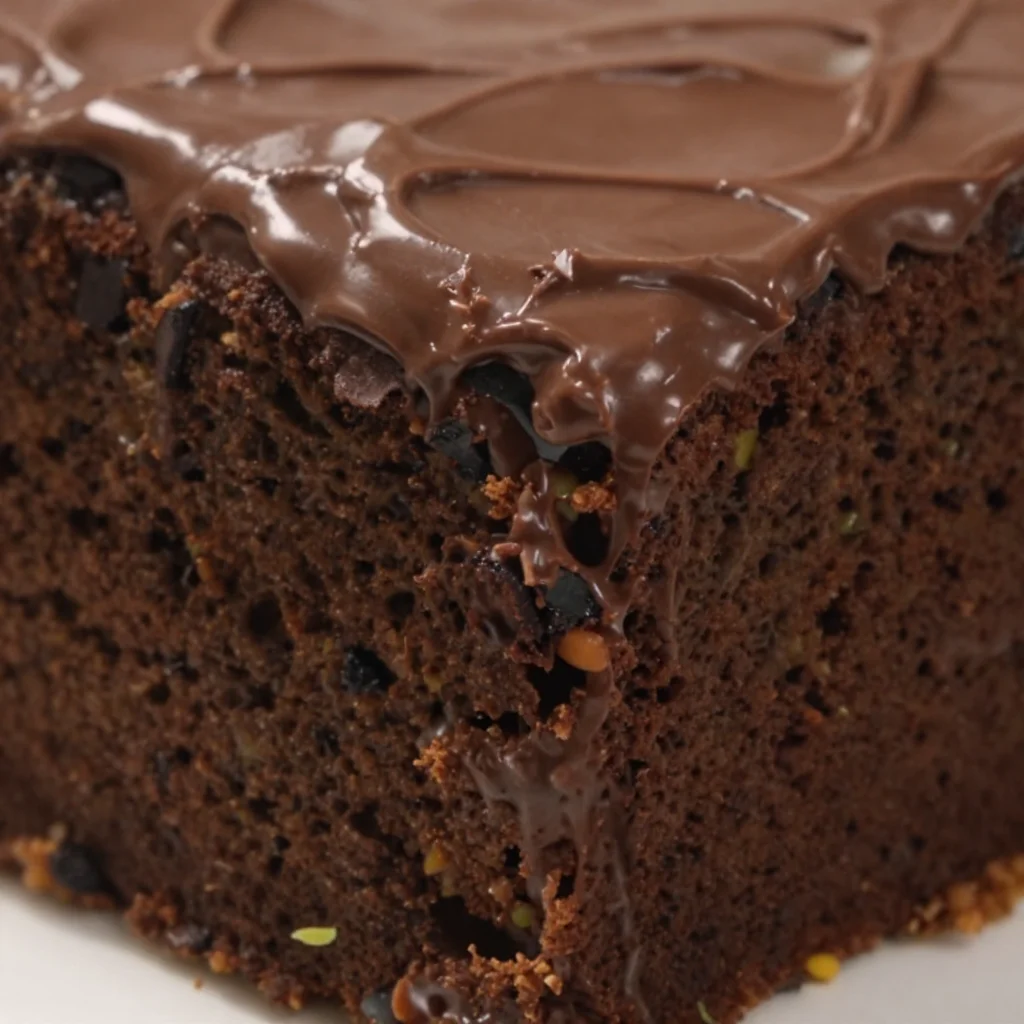
One-Bowl Chocolate Zucchini Cake in 30 Minutes: Moist & Easy
The Joy of Chocolate Zucchini Cake
Welcome back to my cozy corner of the kitchen! Today, we’re diving into a delightful recipe that showcases the magic of unexpected ingredients — Chocolate Zucchini Cake! Yes, you read that right. This cake is moist, rich, and oh-so-decadent, yet it has a secret ingredient that elevates it to a new level of yumminess: zucchini! If you’re skeptical about how the humble green vegetable can contribute to a dessert, fear not! I promise this cake will make you a believer.
A Slice of Nostalgia
As a child, summer meant more than just sunny days and long afternoons spent outside. It meant my grandmother’s garden, overflowing with vibrant vegetables — especially zucchinis! I remember the first time she inspired me to bake with what she called "the garden’s hidden treasure." She handed me a freshly picked zucchini, saying, "You’ll never know it’s in there!" And just like that, my journey with chocolate zucchini cake began. We spent the afternoon sifting flour, adding cocoa, and excitedly waiting for the sweet aroma to fill the kitchen. The cake that emerged was dark, rich, and oh-so-delicious! It quickly became a family favorite, and I cherish those memories every time I whip up a batch.
Ingredients
Let’s gather everything you’ll need to create this dreamy Chocolate Zucchini Cake. And don’t worry if you don’t have a few of these ingredients — I’ve got substitutions tips right here for you!
-
Zucchini: About 2 cups shredded. This veggie adds moisture without overpowering the flavor. If you’re out of zucchini, you can swap in grated carrots for a fun twist.
-
All-Purpose Flour: 1 ¾ cups. This forms the base of the cake. For a gluten-free version, try almond flour or a 1:1 gluten-free flour blend.
-
Unsweetened Cocoa Powder: ¾ cup. This gives our cake its rich chocolate flavor. If you want a milder flavor, you can use Dutch-processed cocoa powder.
-
Granulated Sugar: 2 cups. This sweetens the cake and balances the cocoa’s bitterness. If you’re looking for a healthier alternative, coconut sugar works nicely.
-
Baking Soda: 1 tsp. It helps the cake rise beautifully. Make sure it’s fresh! For a gluten-free version, use baking powder instead.
-
Baking Powder: 1 tsp. Works in tandem with baking soda for a fluffy texture.
-
Salt: ½ tsp. A touch of salt enhances all the flavors. A pinch of sea salt on top before baking can also add a wonderful contrast.
-
Eggs: 2 large. They act as binding agents. If you want an egg-free cake, try using flax eggs (1 tablespoon of ground flaxseed mixed with 2.5 tablespoons of water).
-
Vegetable Oil: ½ cup. Keeps the cake moist. You could also use applesauce for a lighter option or melted coconut oil for added flavor.
-
Vanilla Extract: 2 tsp. A must-have for any great dessert!
You know you’ll create something delicious when you start with great ingredients!
Step-by-Step Instructions
Now, let’s roll up our sleeves and get cooking! Follow these simple steps, and in no time, you’ll have a delectable cake ready to enjoy.
-
Preheat the Oven: Heat your oven to 350°F (175°C). Grease and flour a 9×13 inch baking pan. Prepping your pan is key to ensuring your cake comes out easily.
-
Prepare the Zucchini: Wash and shred your zucchini using a box grater or a food processor. You want your zucchini to be finely shredded to blend seamlessly into the batter. No need to peel it—just grate and go!
-
Combine Dry Ingredients: In a large mixing bowl, whisk together the flour, cocoa powder, baking soda, baking powder, and salt. Make sure there are no flour clumps; a smooth mix means a smoother cake!
-
Cream the Sugar and Wet Ingredients: In a separate bowl, mix your granulated sugar and vegetable oil until well combined. Add in the eggs and vanilla extract, whisking until the mixture is light and fluffy. This step not only combines the ingredients well but also helps with creating a light texture.
-
Mix in the Zucchini: Fold in your shredded zucchini. This may sound odd, but it’s about to get tasty! The zucchini adds moisture and richness, making your cake incredibly soft.
-
Combine the Mixtures: Gradually add the dry ingredients to the wet ingredients, stirring gently until just combined. Be careful not to overmix; a few lumps are perfectly fine. That’s how you’ll achieve that tender crumb we all love!
-
Bake: Pour the batter into your prepared pan and smooth the top with a spatula. Bake in your preheated oven for 25 to 30 minutes or until a toothpick inserted in the center comes out clean.
-
Cool and Serve: Let the cake cool in the pan for about 10 minutes before transferring it to a wire rack. Allow it to cool completely. This would be a great time to make a cup of tea or coffee to enjoy with your cake later!
Serving Suggestions
Once your cake is cooled and ready to go, you can serve it up in style. A light dusting of powdered sugar or a drizzle of chocolate ganache adds that extra touch of elegance. For those who are a bit more indulgent, serve slices with a dollop of whipped cream or a scoop of vanilla ice cream — it’s pure heaven!
Recipe Variations
Here are some creative twists to make this Chocolate Zucchini Cake your own:
-
Chocolate Chip Surprise: Add a cup of semi-sweet chocolate chips to the batter for gooey chocolate pockets throughout.
-
Nutty Delight: Fold in chopped walnuts or pecans for added crunch and flavor.
-
Spiced Up: Add a teaspoon of cinnamon or a pinch of nutmeg for a warm spice kick.
-
Frosting Fun: Try a cream cheese frosting for a tangy contrast that pairs wonderfully with the chocolate.
-
Healthier Swap: Use whole wheat flour instead of all-purpose and reduce the sugar slightly for a healthier version.
Chef’s Notes
This Chocolate Zucchini Cake has evolved over the years in my kitchen. Initially, I followed traditional recipes but soon realized how adaptable this cake could be. From adding extra spices to swapping out sugars, each iteration helped me discover new depths of flavor. Sometimes it’s the imperfections—from a lopsided cake to accidentally burning the edges—that inspire the best stories and lessons in cooking. My last batch didn’t rise quite as much, but it transformed into decadently fudgy chocolate goodness. Remember, the kitchen is about experimenting and having fun!
FAQs and Troubleshooting
-
Why did my cake turn out dense?
Make sure to gently fold the wet and dry mixtures together. Overmixing can create a gummy texture. -
What should I do if I don’t have enough zucchini?
If you find yourself short, grated apples or even mashed bananas can substitute well in moisture and sweetness. -
Can I make this cake ahead of time?
Absolutely! This cake stores wonderfully in an airtight container at room temperature for 2-3 days or in the fridge for up to a week. Just make sure it’s cooled completely before storing. -
Can I freeze it?
Yes! Slice the cake and wrap each piece in plastic wrap, then foil. Freeze for up to 3 months. Just let them thaw at room temperature when you’re ready for a slice!
Nutritional Info
If you’re curious about the nutritional aspects, here’s a quick breakdown (per slice, assuming 12 slices):
- Calories: 210
- Protein: 3g
- Total Fat: 9g
- Saturated Fat: 1g
- Total Carbohydrates: 31g
- Dietary Fiber: 2g
- Sugars: 18g
This Chocolate Zucchini Cake is proof that cooking can be fun, satisfying, and full of surprises. Give this recipe a try and let me know how it goes! Happy baking, and let’s keep the joy of cooking alive!
Print
Chocolate Zucchini Cake
- Total Time: 45 minutes
- Yield: 12 servings 1x
- Diet: Vegetarian
Description
A moist and rich chocolate cake made with shredded zucchini, providing a delightful twist to a classic dessert.
Ingredients
- 2 cups shredded zucchini
- 1 ¾ cups all-purpose flour
- ¾ cup unsweetened cocoa powder
- 2 cups granulated sugar
- 1 tsp baking soda
- 1 tsp baking powder
- ½ tsp salt
- 2 large eggs
- ½ cup vegetable oil
- 2 tsp vanilla extract
Instructions
- Preheat the oven to 350°F (175°C). Grease and flour a 9×13 inch baking pan.
- Prepare the zucchini by washing and shredding it using a box grater or food processor.
- Combine dry ingredients: whisk together flour, cocoa powder, baking soda, baking powder, and salt in a large mixing bowl.
- Cream the sugar and wet ingredients in a separate bowl, mixing granulated sugar and vegetable oil, then whisk in eggs and vanilla.
- Mix in the zucchini until combined.
- Combine the dry and wet mixtures, stirring gently until just combined.
- Bake for 25 to 30 minutes or until a toothpick inserted in the center comes out clean.
- Cool the cake in the pan for about 10 minutes before transferring to a wire rack to cool completely.
Notes
For variations, try adding chocolate chips or nuts to the batter for added texture.
- Prep Time: 15 minutes
- Cook Time: 30 minutes
- Category: Dessert
- Method: Baking
- Cuisine: American
Nutrition
- Serving Size: 1 slice
- Calories: 210
- Sugar: 18g
- Sodium: 200mg
- Fat: 9g
- Saturated Fat: 1g
- Unsaturated Fat: 8g
- Trans Fat: 0g
- Carbohydrates: 31g
- Fiber: 2g
- Protein: 3g
- Cholesterol: 30mg
Keywords: chocolate cake, zucchini cake, dessert, baking




