
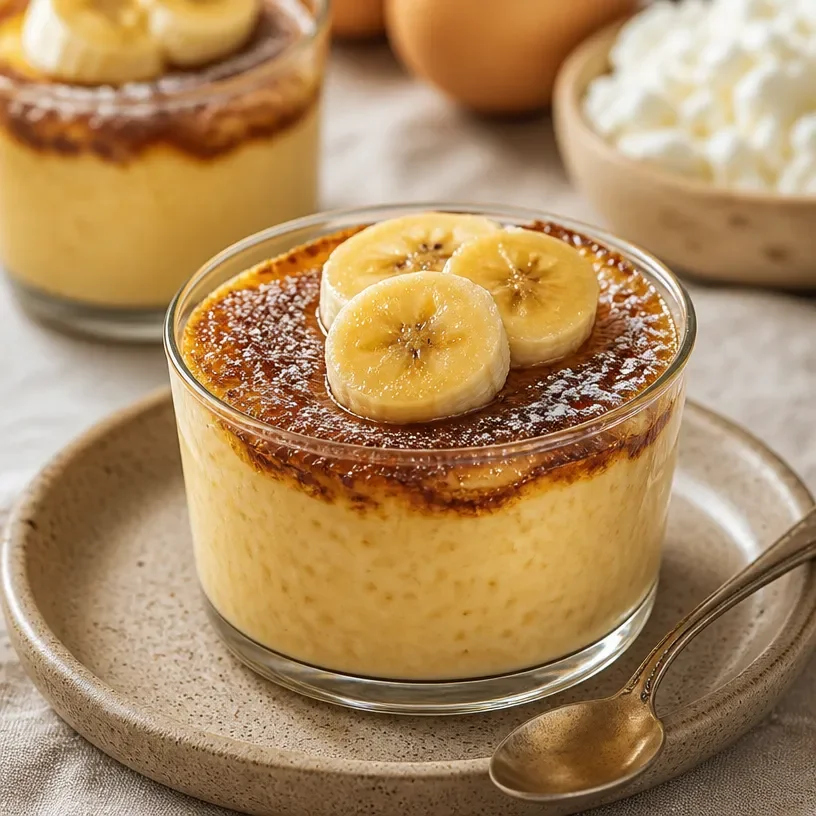
Ingredient High-Protein Banana Cottage Cheese Pudding Cups
Protein Cottage Cheese Banana Pudding Cups
Welcome to my kitchen, dear food lovers! Today, we’re diving into a delightful treat that’s as cozy as it is wholesome: Protein Cottage Cheese Banana Pudding Cups. Now, I know what you might be thinking—cottage cheese in a dessert? Hold your horses! Just hear me out. This recipe transforms simple ingredients into a creamy, dreamy dessert that’s not only guilt-free but loaded with protein to keep your energy high and your cravings at bay.
Picture this: the sun streams through my kitchen window as I blend together luscious bananas and rich cottage cheese for a treat that almost tastes like a banana cream pie but is light and nutritious enough to enjoy any time of day. These pudding cups are perfect for breakfast, an afternoon snack, or even as a light dessert after dinner. Plus, they’re quick and easy to whip up—ideal for busy moms, students, or anyone who loves delicious food without spending hours in the kitchen.
There’s something magical about a dessert that’s easy to prepare yet makes you feel like you’ve just stepped into a gourmet café. These Protein Cottage Cheese Banana Pudding Cups not only satisfy your sweet tooth but also pack a nutritional punch, thanks to the cottage cheese offering a hefty dose of protein. So grab your spoons, pull on that favorite apron, and let’s embark on this flavor journey together!
My Personal Story
Growing up, my grandmother had this incredible knack for turning the simplest of ingredients into something extraordinary. One summer afternoon, while I was visiting her, I stumbled upon her blending cottage cheese with ripe bananas. At first, I was skeptical. Cottage cheese? In dessert? But that first taste was a revelation. It was creamy, sweet, and refreshing! She added a touch of vanilla and a sprinkle of cinnamon, and suddenly, every scoop felt like a warm hug.
That day, we sat at her kitchen table — the sunlight glinting off her tiny collection of spoons — chatting and laughing while enjoying our delightful treat. It was a blissful moment that highlighted how cooking and sharing food can bring people together. Ever since, I’ve carried that memory into my own kitchen, blending rich flavors and recreating my grandmother’s spirit while also putting my own twist on this nostalgic treat. So, when I decided to share this recipe with all of you, it felt like bringing my grandma’s warmth to the digital table!
Ingredients
Here’s what you’ll need to create these delightful Protein Cottage Cheese Banana Pudding Cups:
-
1 cup cottage cheese: This creamy base is rich in protein and provides a smooth texture. For a dairy-free option, try silken tofu.
-
2 ripe bananas: The riper, the better! Overripe bananas are sweeter and more flavorful. If bananas aren’t your thing, substitute with blended mango for a tropical twist.
-
2 tablespoons honey or maple syrup: This adds natural sweetness. You can adjust to taste or omit if you’re watching your sugar intake.
-
1 teaspoon vanilla extract: A dash of vanilla enhances the flavor and adds warmth. Choose pure vanilla extract for the best taste; imitation can work in a pinch too.
-
1/4 teaspoon ground cinnamon: This aromatic spice complements the bananas beautifully. Feel free to swap it for nutmeg or omit if you’re not a fan.
-
Pinch of salt: Just a tiny sprinkle to enhance all the flavors.
-
Optional toppings: Crushed nuts, granola, or dark chocolate chips make great garnishes for added texture and flavor.
By selecting the right ingredients and understanding their roles in this dish, you can effortlessly create a dessert that will impress your friends and family!
Step-by-Step Instructions
Now, let’s get cooking! Here’s how to whip up these Protein Cottage Cheese Banana Pudding Cups step by step:
-
Prepare the Ingredients:
Start by gathering all your ingredients. Having everything at your fingertips makes the process smoother and more enjoyable. Plus, you can toss on your favorite playlist while you’re at it! -
Blend the Base:
In a blender or food processor, combine the cottage cheese, ripe bananas, honey (or maple syrup), vanilla extract, ground cinnamon, and that pinch of salt. Blend on high for about 30 seconds. You want a creamy consistency, with no chunks of banana left. If you want to make it extra creamy, blend a little longer! -
Taste Test:
Now for the fun part—taste the mixture! This is where you can adjust the sweetness if needed. If it’s not sweet enough, a tad more honey or syrup will do the trick. Blend again briefly to incorporate. -
Chill:
Transfer your creamy mixture into small cups or bowls. If you don’t have individual serving cups, a large bowl works just fine! Cover them with plastic wrap or a lid and chill in the refrigerator for at least an hour. This step is crucial—it allows the flavors to meld beautifully. -
Serve and Enjoy:
Once chilled, it’s time to serve! Scoop out the pudding into your fancy dessert cups, and this is where you can really taste the chef within you. Layer it with some crushed nuts, granola, or sprinkle the top with dark chocolate chips. Not only does it make for a beautiful presentation, but it also adds varied textures to each delightful bite. -
Savor the Moment:
Dig in, enjoy each creamy spoonful, and relish the fact that you just made a treat that’s as nourishing as it is delectable!
Serving Suggestions
For serving, I like to layer the pudding in clear glasses or small mason jars. This showcases the lovely creamy texture and any toppings you choose to add. Imagine a beautiful, rustic table set for brunch with these cups perfectly arranged atop with a sprinkle of nuts or colorful fruit. Each cup is not just a dessert; it’s a centerpiece that sparks conversation and brings back memories.
Recipe Variations
Feel free to get creative with this recipe! Here are a few fun twists to consider:
-
Chocolate Lover’s Delight: Add a tablespoon of cocoa powder to the blended mixture for a chocolatey version of this treat. You can also top with chocolate shavings!
-
Peanut Butter Banana: Mix in a tablespoon of natural peanut butter before blending for a nutty flavor and additional protein. This version is a hit among kids!
-
Berry Bliss: Swap out half the banana for berries like strawberries or raspberries. This adds a refreshing zing and a pop of color!
-
Coconut Dream: Fold in some shredded coconut either into the pudding mixture or use it as a topping for a tropical vibe.
Chef’s Notes
This recipe has certainly evolved over time! I started experimenting with different bases before settling on cottage cheese—it’s the secret weapon in the kitchen for lighter options! My friends often chuckle when they see me with my favorite kitchen gadget, the blender, whipping up new creations. One time, I accidentally dropped a banana in the middle of blending, and I ended up with banana pudding on my ceiling! But that little mishap just made for a great laugh and a memorable kitchen story.
FAQs and Troubleshooting
1. Can I use non-dairy alternatives?
Absolutely! Silken tofu or a dairy-free yogurt can be great substitutes for cottage cheese.
2. What if I don’t have ripe bananas?
While ripe bananas bring sweetness and flavor, you can use fresh bananas, though you might want to add a bit more sweetener.
3. How do I make it dairy-free?
As mentioned, swap cottage cheese for silken tofu or a dairy-free yogurt, and you’re set!
4. Can I freeze these cups?
While they can be frozen, the texture may change once thawed. It’s best enjoyed freshly made or stored in the fridge for a few days.
Nutritional Info
This is just an estimate, but each serving of Protein Cottage Cheese Banana Pudding Cups offers:
- Calories: 150
- Protein: 11 grams
- Carbohydrates: 25 grams
- Fat: 3 grams
And there you have it! A delightful, nutritious treat that’s sure to whisk you away to your cozy kitchen moments. I hope you find joy in making and sharing these Protein Cottage Cheese Banana Pudding Cups as much as I do! Happy cooking!
Print
Protein Cottage Cheese Banana Pudding Cups
- Total Time: 70 minutes
- Yield: 4 servings 1x
- Diet: Vegetarian
Description
A creamy, nutritious dessert made with cottage cheese and ripe bananas, perfect for breakfast or a light snack.
Ingredients
- 1 cup cottage cheese
- 2 ripe bananas
- 2 tablespoons honey or maple syrup
- 1 teaspoon vanilla extract
- 1/4 teaspoon ground cinnamon
- Pinch of salt
- Optional toppings: crushed nuts, granola, or dark chocolate chips
Instructions
- Prepare the ingredients by gathering everything you need.
- Blend the cottage cheese, bananas, honey, vanilla extract, cinnamon, and salt in a blender until creamy.
- Taste the mixture and adjust sweetness if necessary.
- Chill the mixture in individual cups or a large bowl in the refrigerator for at least an hour.
- Serve the chilled pudding in dessert cups and add optional toppings if desired.
- Savor each delicious spoonful of your homemade pudding cups!
Notes
Feel free to get creative with the pudding by adding cocoa powder, peanut butter, or berries.
- Prep Time: 10 minutes
- Cook Time: 0 minutes
- Category: Dessert
- Method: Blending
- Cuisine: American
Nutrition
- Serving Size: 1 serving
- Calories: 150
- Sugar: 10g
- Sodium: 200mg
- Fat: 3g
- Saturated Fat: 1g
- Unsaturated Fat: 1g
- Trans Fat: 0g
- Carbohydrates: 25g
- Fiber: 2g
- Protein: 11g
- Cholesterol: 5mg
Keywords: cottage cheese, banana pudding, healthy dessert, protein dessert, easy recipe
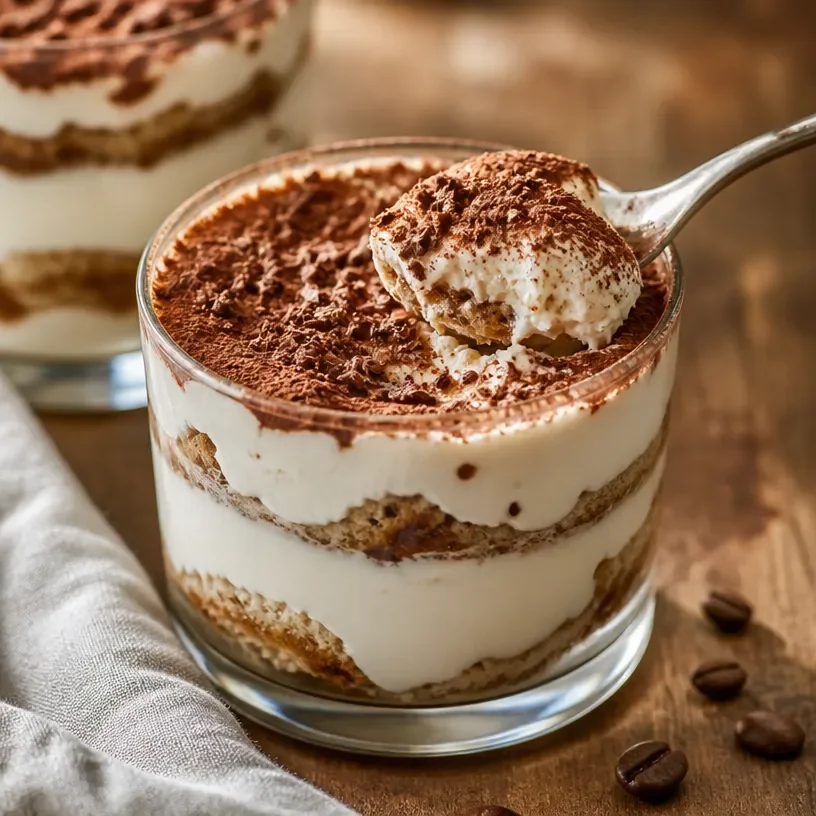
No-Bake High-Protein Cottage Cheese Tiramisu Cups
Protein Cottage Cheese Tiramisu Cups: A Light Twist on an Italian Classic
Welcome, dear friends, to my cozy kitchen! I’m Olivia Bennett, and today I’m absolutely thrilled to share a delightful twist on a classic dessert that will make your heart sing and your taste buds dance. Yes, you guessed it right — we’re diving into the world of Protein Cottage Cheese Tiramisu Cups! This treat takes the beloved Italian dessert and gives it a nutritious spin, perfect for those moments when you want something indulgent that’s also good for you.
Picture this: smooth, creamy layers of cottage cheese mingling with rich espresso, all elegantly layered into cute little cups. It’s the ideal dessert for a family gathering, a romantic dinner, or just a sweet treat after a long day. And the best part? You get to enjoy all that deliciousness without the guilt!
Now, why did I choose cottage cheese, you ask? Well, I adore the way it adds a creamy richness while keeping the protein content high! I came up with this recipe on a whim when I was on a personal quest to create healthier desserts that still retain that classic comfort we all crave. I remember the first time I served these cups to my friends, and the looks on their faces were priceless. They couldn’t believe they were eating cottage cheese!
So grab your mixing bowls, and let’s create something special together.
Bringing Back Tiramisu Memories
Let me take you on a little journey down memory lane. I remember the first time I tasted traditional tiramisu. I was just a kid, accompanying my grandmother during one of her culinary adventures to a charming Italian restaurant in our town. The warm aroma of coffee filled the air, mingling with sweet hints of cocoa and cream. My grandmother ordered tiramisu, and I was smitten at first bite. Every layer told a story — the softness of the mascarpone, the bitterness of the coffee-soaked ladyfingers, and the dusting of cocoa on top.
As we savored each bite, we talked about everything — family, dreams, and the love we shared for cooking. Those moments fueled my passion for food and the joy it brings. Fast forward to today, and I wanted to recreate that memory but with a healthier touch. Enter: Protein Cottage Cheese Tiramisu Cups! It has become a dish that is not only reminiscent of my childhood but also a nod to my journey as a home cook striving to make comfort food a little lighter and brighter.
Ingredients You’ll Need
Here’s what you’ll need to make these delightful Protein Cottage Cheese Tiramisu Cups. Not only are these ingredients simple, but they can also easily be swapped based on what you have on hand!
-
Cottage Cheese (2 cups): Look for a good-quality brand — the creaminess of full-fat or low-fat cottage cheese works best. If you’re not a cottage cheese fan, you can substitute it with Greek yogurt for a low-carb option!
-
Protein Powder (2 scoops): Choose your favorite flavor! Vanilla works wonderfully, but chocolate can add an exciting twist. You can also use a plant-based protein powder if you’re looking for a vegan alternative.
-
Espresso or Strong Coffee (1 cup): Brew a fresh cup for the best flavor. If you’re avoiding caffeine, chicory root coffee or decaf would work great too!
-
Cocoa Powder (1-2 tablespoons): Look for unsweetened cocoa powder for a rich, deep chocolate flavor. You can also use carob powder for a unique taste.
-
Honey or Maple Syrup (to taste): Sweeten to your preference! For a vegan option, stick with maple syrup.
-
Vanilla Extract (1 teaspoon): A dash amplifies the flavor — it’s a must! Or try almond extract for something unique.
-
Milk (1/4 cup): Any milk of your choice will work fine; almond, oat, or regular dairy — just ensure it’s unsweetened if you’re watching those sugar levels.
-
Ladyfingers or Biscuit Crumbs (optional): Traditional tiramisu includes ladyfingers, but to keep things simple and gluten-free, you can use crushed gluten-free cookies or skip this entirely.
-
Chocolate Shavings or Cocoa Powder for Garnish: These are optional but highly suggested for a beautiful finish!
Step-by-Step Instructions
Now, let’s get started on making these heavenly Protein Cottage Cheese Tiramisu Cups! You’ll love how simple and straightforward this recipe is.
-
Prepare Your Coffee: Brew a strong cup of espresso or coffee and let it cool slightly. If you’re like me and can’t wait, you can pop it in the fridge to speed up the process!
-
Mix the Cottage Cheese and Protein Powder: In a medium bowl, combine the cottage cheese and protein powder. You’ll want to whisk it until it’s smooth and creamy. If the mixture seems too thick, add a splash of milk to loosen it. This little tip ensures you’ll have a silky mixture that won’t need a blender!
-
Sweeten Your Mixture: Now’s the time to add honey or maple syrup, along with the vanilla extract. Keep tasting as you mix; this is your creation! You can customize to your ideal sweetness level.
-
Layering Time!: Grab your serving cups (small glasses or ramekins work beautifully). Start by dipping the ladyfingers or cookies in the cooled espresso. Quick dips are key; you want them moist but not soggy! If you’re skipping the biscuits, you can just add a layer of the cottage cheese mixture directly into the cups.
-
Create Your Layers: In each cup, start with a layer of the dipped ladyfingers (or biscuit crumbs), followed by a generous scoop of the cottage cheese mixture. Repeat this process until you fill your cups, ending with the cottage cheese layer on top.
-
Chill Out: Cover the cups with plastic wrap and pop them into the fridge for at least 2 hours, if possible. This will help all the flavors mingle together nicely!
-
Finishing Touch: Just before serving, dust the tops with cocoa powder and add chocolate shavings if you’re feeling extra fancy.
-
Serve and Enjoy!: Dig in and relish each creamy, coffee-flavored bite!
Serving Suggestions
To serve, consider having these cups already chilled in your fridge, ready to impress guests! You can sprinkle a little extra cocoa or a few more chocolate shavings on top for that gourmet touch. For a fun twist, consider serving alongside fresh berries or a dollop of whipped cream for an added texture experience.
Recipe Variations
If you want to switch things up, here are some creative variations:
-
Chocolate Delight: Use chocolate protein powder and layer some finely chopped dark chocolate in between the cottage cheese mixture.
-
Fruit Fiesta: Add a layer of fruit like strawberries or bananas for a fresh twist. They add vibrant color and taste!
-
Nutty Flavor: Fold in some almond or hazelnut extract for a nutty aroma, and use crushed nuts as layers or toppings.
-
Mochaccino Cups: Add a little cocoa powder to the espresso for an extra mocha kick.
-
Vegan Version: Substitute the cottage cheese with vegan cream cheese or blended silken tofu mixed with plant-based protein powder and maple syrup.
Chef’s Notes
The great thing about cooking is making it your own. This dessert has evolved over the years, and I love playing with flavors and textures. I once hosted a brunch where I offered a “build your own tiramisu” bar — complete with different layers and toppings! Guests could create their own unique flavors. It turned out to be such a hit!
And for a funny moment: One time, I accidentally used double the amount of cocoa powder intended, thinking it would intensify the chocolate flavor. Let’s just say it was an explosion of epic chocolate that no one could finish! Every kitchen adventure teaches us a little more — embrace the messy moments!
FAQs and Troubleshooting
-
Can I make this ahead of time?
Yes! These cups are perfect for make-ahead desserts. You can prepare them a day or two in advance. -
What if I can’t find cottage cheese?
If you can’t find it or aren’t a fan, Greek yogurt is a fantastic alternative. It maintains the creaminess and adds a nice tang. -
How can I store leftovers?
Store any leftovers covered in the refrigerator for up to three days. Just be sure they’re kept airtight! -
Is it okay to freeze these cups?
While I wouldn’t recommend freezing them, you can store the components separately and assemble them when you’re ready to enjoy!
Nutritional Info
Each serving of Protein Cottage Cheese Tiramisu Cups (serving size = 1 cup) delivers a balanced taste and nutritional value. You’re looking at approximately:
- Calories: 200
- Protein: 20g
- Carbohydrates: 25g
- Sugar: 8g
- Fat: 5g
(Values may vary based on specific ingredient brands and quantities)
There you have it — a delightful recipe that combines nostalgia with a fresh twist, making it easy to recreate a small piece of Italy at home! Remember that the kitchen is a space of creativity, love, and laughter. So don’t be afraid to mix things up and make this Protein Cottage Cheese Tiramisu Cups your very own. Enjoy the journey, and happy cooking!
Print
Protein Cottage Cheese Tiramisu Cups
- Total Time: 120 minutes
- Yield: 4 servings 1x
- Diet: Healthy
Description
A delightful twist on the classic Italian dessert, this Protein Cottage Cheese Tiramisu Cups recipe combines creamy cottage cheese with rich espresso for a nutritious treat.
Ingredients
- 2 cups Cottage Cheese
- 2 scoops Protein Powder
- 1 cup Espresso or Strong Coffee
- 1–2 tablespoons Cocoa Powder
- Honey or Maple Syrup (to taste)
- 1 teaspoon Vanilla Extract
- 1/4 cup Milk
- Ladyfingers or Biscuit Crumbs (optional)
- Chocolate Shavings or Cocoa Powder for Garnish
Instructions
- Prepare your coffee: Brew a strong cup of espresso or coffee and let it cool slightly.
- Mix the cottage cheese and protein powder in a medium bowl until smooth and creamy.
- Sweeten the mixture with honey or maple syrup and vanilla extract.
- Grab your serving cups and dip ladyfingers in the cooled espresso.
- Create layers in each cup, starting with ladyfingers and continuing with the cottage cheese mixture until filled.
- Chill the cups in the refrigerator for at least 2 hours.
- Dust the tops with cocoa powder and add chocolate shavings before serving.
- Serve and enjoy each creamy, coffee-flavored bite!
Notes
These cups can be made ahead of time and stored in the refrigerator for up to three days. Customize by adding layers of fruit or nuts for a twist.
- Prep Time: 15 minutes
- Cook Time: 5 minutes
- Category: Dessert
- Method: No-Bake
- Cuisine: Italian
Nutrition
- Serving Size: 1 cup
- Calories: 200
- Sugar: 8g
- Sodium: 150mg
- Fat: 5g
- Saturated Fat: 2g
- Unsaturated Fat: 3g
- Trans Fat: 0g
- Carbohydrates: 25g
- Fiber: 2g
- Protein: 20g
- Cholesterol: 10mg
Keywords: tiramisu, dessert, healthy dessert, cottage cheese, protein dessert, no-bake dessert
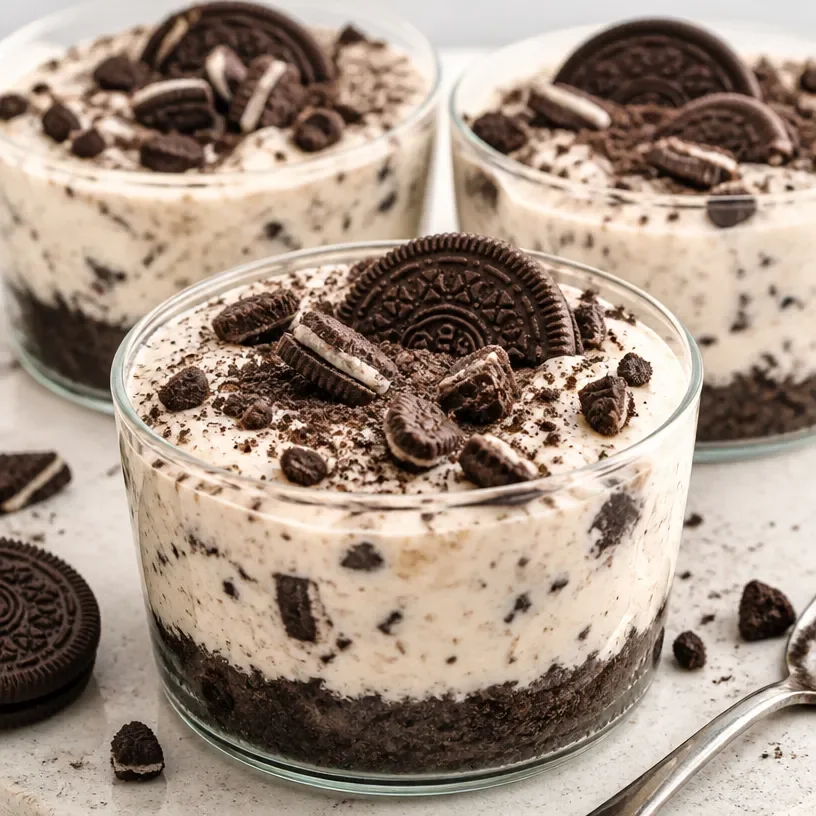
No-Bake Protein Cottage Cheese Oreo Cheesecake Cups
Decadent Protein Cottage Cheese Oreo Cheesecake Cups
Welcome to my cozy corner of the kitchen! Today, I’m thrilled to share with you a recipe that unites two of my greatest loves: cottage cheese and Oreos. Yes, you heard that right! These Protein Cottage Cheese Oreo Cheesecake Cups are going to change your snacking game forever. And trust me, they’re not just for the health enthusiast in your life—they’re delightful enough to charm the most ardent dessert lover.
Imagine this: a creamy, velvety cheesecake filling made with protein-packed cottage cheese, layered elegantly in a cup, and topped with crushed Oreos. These little wonders are not only quick to make but are also an impressive treat for gatherings, lazy afternoons, or even just a late-night snack when the sweet tooth hits!
So let’s roll up our sleeves, pour ourselves a tall glass of milk (or a dairy-free alternative), and dive into making these delightful treats. Trust me; the aroma wafting through your kitchen will draw everyone in like a moth to a flame!
A Special Childhood Memory
Before we dive into the ingredients, let me share a little story. Growing up, dessert time was always an adventure in my home. My mom would whip up cheesecakes for special occasions, but my absolute favorite was the no-bake Oreo cheesecake. I remember standing on a chair to reach the countertop, eagerly waiting to help smash the Oreos, and my mom would let me sneak a few crumbs.
As she folded the filling together, we’d chat about our day, sharing stories and laughing as I haphazardly crushed the cookies, sometimes missing the bowl entirely! Fast forward a few years, and that nostalgic experience of a no-bake cheesecake became my inspiration for these Protein Cottage Cheese Oreo Cheesecake Cups. They make me feel like a kid again, blending the past with a healthier twist. And who wouldn’t want a little trip down memory lane with each delicious bite?
Ingredients
Here’s what you’ll need for these delightful cheesecake cups:
-
1 cup of cottage cheese
A fantastic protein source that adds creaminess without the extra fat of traditional cream cheese. For a smoother texture, use ricotta cheese as a substitute. -
1/2 cup Greek yogurt
Adds a tangy kick while contributing to the creamy texture. You can swap it with sour cream if you prefer a richer flavor. -
1/3 cup honey or maple syrup
For sweetness! Adjust based on your taste. Agave syrup or coconut sugar can also work but might alter the flavor slightly. -
1 teaspoon vanilla extract
This elevates the sweet notes in your filling. Feel free to experiment with almond extract for a different twist. -
10 Oreo cookies
The classic choice for that crunchy texture and rich flavor. Use gluten-free Oreos if you need a gluten-free option! -
1 tablespoon cocoa powder
Enhances the chocolate flavor profile. You can leave this out if you want a classic cheesecake taste. -
1 scoop protein powder (optional)
Adds extra protein, especially if you’re using these as a recovery snack after a workout. Choose your favorite flavor, but vanilla works best.
Step-by-Step Instructions
Now, let’s get cooking! Here’s how to whip up these delightful bites:
-
Crush the Oreo Cookies
Place the Oreo cookies in a ziplock bag and crush them with a rolling pin or your hands. Don’t stress about making them a perfect powder; a mix of fine crumbs and larger chunks adds great texture! -
Prepare the Filling
In a mixing bowl, combine the cottage cheese, Greek yogurt, honey (or maple syrup), vanilla extract, cocoa powder, and protein powder if using. Use a hand mixer or a regular whisk to blend until everything is smooth and creamy. This is where the magic happens! Taste and adjust the sweetness if needed. -
Layer the Cups
Grab your favorite serving cups or mason jars. Start by adding a layer of crushed Oreos at the bottom—about a tablespoon works great. Then, add a generous scoop of the cheesecake filling on top. Repeat the layers until the cups are filled, finishing with a dollop of the cheesecake filling. -
Chill
Cover the cups with plastic wrap and pop them in the fridge for at least an hour. This will allow the flavors to meld beautifully, and the texture will firm up, making them easy to eat. Plus, the waiting makes for even more anticipation! -
Top It Off
Just before serving, sprinkle some extra crushed Oreos on top and maybe a drizzle of melted chocolate for an added flair. If you’re feeling extra fancy, a fresh mint leaf can add a lovely pop of color!
Serving Suggestions
These Protein Cottage Cheese Oreo Cheesecake Cups are perfect for any occasion—breakfast, dessert, or even an afternoon snack. Present them in a clear cup to showcase those stunning layers, and serve them with a side of fresh berries for a pop of sweetness and color. They also pair beautifully with a cup of coffee or a glass of cold milk. And who doesn’t love a little dessert that’s as pleasing to the eyes as it is to the palate?
Recipe Variations
Here are a few fun twists to make this recipe your own:
-
Chocolate Chip Cookie Dough Cups: Swap Oreos for chocolate chip cookies and add mini chocolate chips into the filling for a sweet surprise.
-
Peanut Butter Lovers: Stir in a couple of tablespoons of creamy peanut butter to the filling for a nutty richness.
-
Fruit-Infused Cups: Fold in diced strawberries or blueberries into the cheesecake filling for a burst of freshness.
-
Pumpkin Spice Delight: In the fall, switch the cocoa powder for pumpkin puree and add pumpkin spice for a seasonal twist!
-
Dairy-Free Version: Use dairy-free cream cheese and coconut yogurt to cater to lactose sensitivities.
Chef’s Notes
As I’ve experimented with this recipe over the years, I love knowing how versatile it is. Initially, I shared it with friends as a healthier alternative to traditional cheesecake, and the response was overwhelmingly positive! I even hosted a little dessert party where everyone created their unique versions. Some folks added a swirl of fruit preserves, while others reinvented the flavor profile completely, and it became a fun culinary experiment I often revisit.
And speaking of experiments, I once forgot to add the sugar and didn’t notice until I saw my friend’s face while tasting it. Let’s just say, that’s a memory I won’t forget! The lesson? Always taste as you go!
FAQs and Troubleshooting
1. Can I use regular cream cheese instead of cottage cheese?
Absolutely! But keep in mind that traditional cream cheese will increase the fat content. If you prefer a low-calorie option, stick with the cottage cheese.
2. My cheesecake filling is too runny. What can I do?
If your mixture is too runny, try adding a little extra cottage cheese or a tablespoon of cornstarch to thicken it up. Letting it chill longer can also help!
3. Can I freeze these cheesecake cups?
Yes, you can! Just make sure to cover them tightly with plastic wrap or foil. Thaw them in the fridge when you’re ready to devour.
4. What can I do if I over-sweetened my mixture?
If your filling is too sweet, add a touch more cottage cheese or yogurt to balance out the flavors. A pinch of salt can also help cut through the sweetness!
Nutritional Info
Serving Size: 1 cup
Calories: Approximately 160
Protein: 14g
Fat: 5g
Carbohydrates: 18g
Sugar: 10g
And there you have it! A scrumptiously simple recipe that’s just as fun to make as it is to eat. I hope you enjoy crafting these Protein Cottage Cheese Oreo Cheesecake Cups as much as I do. Happy cooking, and don’t forget to share your creations—I’d love to hear how they turn out!
Print
Protein Cottage Cheese Oreo Cheesecake Cups
- Total Time: 60 minutes
- Yield: 4 servings 1x
- Diet: High Protein
Description
A creamy and protein-packed cheesecake made with cottage cheese and topped with crushed Oreos, perfect for any occasion.
Ingredients
- 1 cup cottage cheese
- 1/2 cup Greek yogurt
- 1/3 cup honey or maple syrup
- 1 teaspoon vanilla extract
- 10 Oreo cookies
- 1 tablespoon cocoa powder
- 1 scoop protein powder (optional)
Instructions
- Crush the Oreo Cookies by placing them in a ziplock bag and crushing them with a rolling pin or hands.
- Prepare the Filling by combining cottage cheese, Greek yogurt, honey, vanilla extract, cocoa powder, and protein powder in a mixing bowl and blending until smooth.
- Layer the Cups with crushed Oreos at the bottom, followed by cheesecake filling, repeating the layers until filled.
- Chill the cups in the fridge for at least an hour.
- Top it off with extra crushed Oreos, a drizzle of melted chocolate, and a mint leaf if desired.
Notes
These cheesecake cups are versatile—experiment with flavors such as peanut butter or fruit for a personal touch.
- Prep Time: 15 minutes
- Cook Time: 0 minutes
- Category: Dessert
- Method: No-Bake
- Cuisine: American
Nutrition
- Serving Size: 1 cup
- Calories: 160
- Sugar: 10g
- Sodium: 200mg
- Fat: 5g
- Saturated Fat: 2g
- Unsaturated Fat: 2g
- Trans Fat: 0g
- Carbohydrates: 18g
- Fiber: 1g
- Protein: 14g
- Cholesterol: 10mg
Keywords: cheesecake, protein, dessert, no-bake, cottage cheese, Oreo
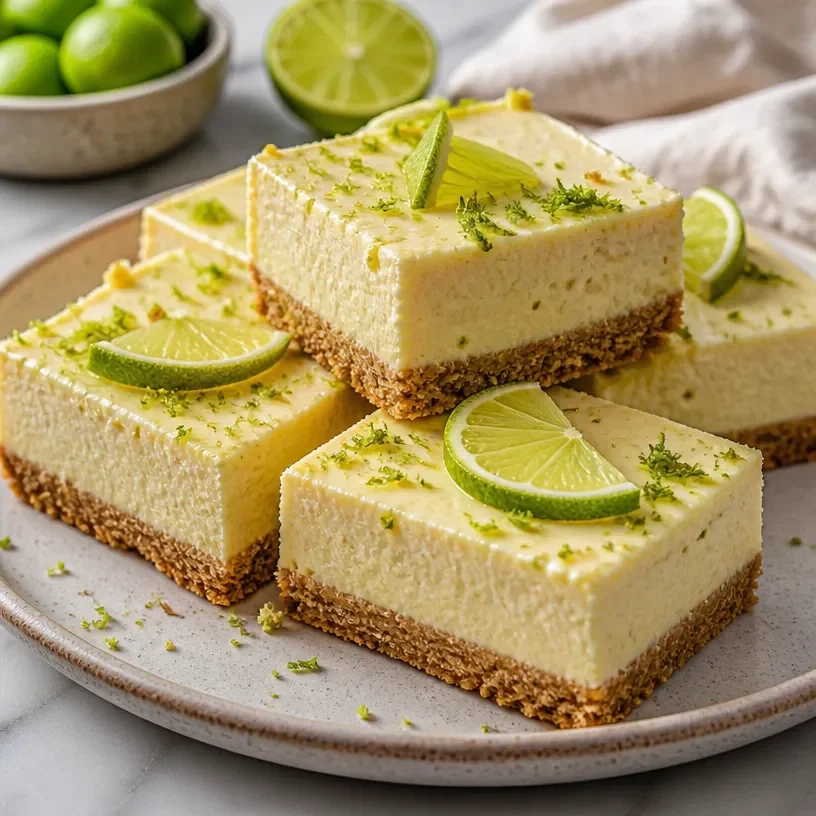
High-Protein Key Lime Pie Bars (Cottage Cheese) No-Bake
Protein Cottage Cheese Key Lime Pie Bars: A Delicious Twist on a Classic!
Welcome to my cozy corner of the kitchen, where I’m so excited to share a little treasure that’s bursting with flavor and nostalgia! If you’re a fan of key lime pie—and who isn’t?—then you’re in for a delightful surprise with my Protein Cottage Cheese Key Lime Pie Bars. These bars maintain all the zippiness of that classic dessert but with a healthy twist that makes them perfect for any time of the day. You’ll want to stash this recipe in your back pocket for those moments when you crave something sweet yet guilt-free.
Key lime pie has always held a special place in my heart. I remember my first taste of it during a family vacation to Florida. The tangy-sweet filling, the buttery crust, and that unmistakable brightness—it’s a flavor combo that embodies sunshine in a slice! I remember sitting at a little beachside café, sharing laughter and stories as we indulged in the creamy goodness. This memory sparked my passion not just for cooking, but for transforming classic recipes into something that fits my healthy lifestyle without sacrificing the joy of flavors.
So, why cottage cheese, you ask? Well, this creamy powerhouse is packed with protein, making it perfect for powering up your energy levels. It’s a great base for those luscious filling layers, and trust me, you won’t even taste it! With just the right balance of sweet and tart, these bars will whisk you away to that sunny beach—I promise you won’t miss the heavy calories. Ready to dive into this deliciousness? Grab your apron, and let’s get started!
Personal Story
One of my fondest family memories is the annual summer picnic we hosted in our backyard. A vibrant gathering of family and friends, filled with laughter, games, and of course, a spectacular spread of food! My mom would whip up a traditional key lime pie, its bright green filling gleaming under the sun, while I helped by zesting limes and stirring the mixtures. I always marveled at how a simple dessert could bring so much joy and good vibes, and I wanted to replicate that magic in a healthier way. Thus, the Protein Cottage Cheese Key Lime Pie Bars were born! They are a blend of nostalgia and innovation, allowing me to bring those family memories back while staying aligned with my health goals.
Now, let me bring that legacy into your kitchen!
Ingredients
Here’s what you’ll need to make these delightful Protein Cottage Cheese Key Lime Pie Bars:
-
Cottage Cheese (2 cups): This creamy base adds protein and a silk-like texture. Opt for low-fat or fat-free varieties to keep it lighter. You can substitute with Greek yogurt for a different flavor profile if desired.
-
Key Lime Juice (1/2 cup): Freshly squeezed key lime juice packs a tangy punch! If you can’t find key limes, regular limes work just as well.
-
Honey or Maple Syrup (1/4 cup): This natural sweetener balances the tartness. Feel free to adjust the quantity based on your sweetness preference, or use a sugar substitute like stevia.
-
Eggs (2 large): Eggs help bind everything together and give a lovely structure to the bars. For a vegan option, you can use flax eggs (1 tbsp flaxseed meal + 2.5 tbsp water per egg).
-
Vanilla Extract (1 tsp): The warm aroma of vanilla elevates the flavors! Don’t skip it.
-
Graham Cracker Crumbs (1 ½ cups): This crumbly crust adds a nostalgic crunch. You can swap with almond flour for a gluten-free version!
-
Melted Coconut Oil (1/3 cup): Provides a lovely richness to the crust. Unsalted butter is a good substitute if desired.
-
Salt (1/4 tsp): Just a pinch enhances all the flavors, bringing everything to life.
These ingredients come together seamlessly to create a delightfully light treat that perfectly balances tart and sweet!
Step-by-Step Instructions
Let’s get to the fun part! Here’s how to whip up these Protein Cottage Cheese Key Lime Pie Bars:
-
Preheat Your Oven: Start by preheating your oven to 350°F (175°C). This step ensures your bars bake evenly while you prepare the rest of the ingredients.
-
Prepare the Crust: In a mixing bowl, combine the graham cracker crumbs, melted coconut oil, and a pinch of salt. Mix until the crumbs are coated well. Transfer this mixture to a greased baking dish (I love using an 8×8-inch dish) and press it down firmly with your hands or a flat surface. This creates a nice, solid base for your bars!
-
Bake the Crust: Place your crust in the preheated oven and bake for about 8-10 minutes, just until it’s golden and fragrant. While waiting, you can clean up your workspace (always a good idea) and grab a glass of water!
-
Blend the Filling: In a food processor or blender, add the cottage cheese, key lime juice, honey or maple syrup, eggs, and vanilla extract. Blend until smooth and creamy. Here’s a little chef tip: if you don’t have a blender, a hand mixer works in a pinch!
-
Pour the Filling: Once your crust is ready and slightly cooled, pour the delicious key lime mixture over the crust, spreading it evenly.
-
Bake Again: Return the pan to the oven for another 20-25 minutes. The filling should be set but still a tad wobbly in the center. This is what gives it that dreamy texture!
-
Cool and Chill: Remove from the oven and let it cool to room temperature. Once cooled, pop it in the fridge for at least 2 hours (or overnight for best results)—this step is crucial for achieving perfect bars!
-
Slice and Serve: Once cooled and set, slice into squares and serve! You can garnish with some fresh lime zest or whipped cream to make it extra special.
Remember, the wait is totally worth it!
Serving Suggestions
When it comes to serving these bars, simplicity is key! I love plating them on a rustic wooden board or white porcelain dish for that gorgeous contrast. A drizzle of honey and a sprinkle of lime zest on top not only adds an elegant touch but enhances the flavor too! They’re perfect for any occasion—whether it’s a cozy dessert after dinner, a picnic treat, or a post-workout snack to refuel.
Recipe Variations
Here are a few fun variations you can try with this recipe:
-
Berry Twist: Add a layer of pureed strawberries or blueberries on top of the filling before baking for a fruity enhancement.
-
Chocolate Chunk: Fold in some dark chocolate chips to the filling before pouring it over the crust—because who says you can’t have chocolate with lime?
-
Nutty Crunch: Mix in some chopped nuts like almonds or pecans into the crust for an extra crunch.
-
Coconut Flake Bar: Add a sprinkle of unsweetened coconut flakes in the filling for a tropical vibe.
-
Spicy Citrus: For a kick, add a pinch of cayenne pepper or chili powder to the filling—trust me, it’s a game-changer!
Feel free to get creative and make this recipe your own!
Chef’s Notes
This recipe has evolved beautifully over the years. It originally started with heavy cream and sugar, but as I leaned towards healthier choices, I replaced those ingredients with cottage cheese and natural sweeteners. It’s been amazing to see how a few simple swaps can yield not only a healthier dish but one that’s just as delicious. The smiles and happy faces I see when sharing these bars remind me why I love cooking so much!
I once had a mishap where I forgot to add the eggs—let’s just say, my first attempt ended up more like key lime pudding than pie! Lesson learned: double-check your ingredient list!
FAQs and Troubleshooting
-
Can I Use Regular Lime Instead of Key Lime?
Absolutely! While key limes offer a unique tang, regular limes work perfectly as well. Just remember to adjust the sweetness if they’re particularly tart. -
How Do I Store Leftovers?
These bars store beautifully in the fridge for up to a week. Make sure you cover them to maintain freshness, or store them in an airtight container! -
What If My Bars Are Too Wobbly After Baking?
If they haven’t set completely after cooling, pop them back in the fridge for a bit longer. This cooling time is key to getting that perfect texture. -
Can I Freeze These Bars?
Yes! They freeze very well. Wrap individual bars in plastic wrap and store in a freezer-safe container for up to three months. Just make sure to thaw in the fridge before serving.
Nutritional Info
Each bar contains approximately:
- Calories: 150
- Protein: 8g
- Carbohydrates: 19g
- Fat: 6g
These protein-packed bars are a guilt-free way to satisfy your sweet tooth!
And there you have it—a delightful recipe for Protein Cottage Cheese Key Lime Pie Bars that’s sure to bring joy to your kitchen. I can’t wait for you to try it, and I’d love to hear your thoughts! What tweaks did you make? Did you try any delicious variations? Keep cooking, sharing, and spreading the joy of food! Enjoy!
Print
Protein Cottage Cheese Key Lime Pie Bars
- Total Time: 50 minutes
- Yield: 12 servings 1x
- Diet: Healthy
Description
A delicious twist on classic key lime pie made healthier with cottage cheese, perfect for any time of the day!
Ingredients
- 2 cups Cottage Cheese (low-fat or fat-free)
- 1/2 cup Key Lime Juice (freshly squeezed)
- 1/4 cup Honey or Maple Syrup
- 2 large Eggs
- 1 tsp Vanilla Extract
- 1 ½ cups Graham Cracker Crumbs
- 1/3 cup Melted Coconut Oil
- 1/4 tsp Salt
Instructions
- Preheat your oven to 350°F (175°C).
- Prepare the crust by combining graham cracker crumbs, melted coconut oil, and salt in a mixing bowl. Transfer to a greased baking dish and press down firmly.
- Bake the crust for about 8-10 minutes until golden and fragrant.
- Blend the filling ingredients in a food processor until smooth and creamy.
- Pour the key lime mixture over the crust.
- Bake again for 20-25 minutes until the filling is set but still a tad wobbly.
- Cool to room temperature, then refrigerate for at least 2 hours before slicing.
- Slice into squares and serve.
Notes
These bars can be customized with fruit layers, chocolate chips, or nutty additions. They store well in the fridge for a week or can be frozen for up to three months.
- Prep Time: 15 minutes
- Cook Time: 35 minutes
- Category: Dessert
- Method: Baking
- Cuisine: American
Nutrition
- Serving Size: 1 bar
- Calories: 150
- Sugar: 8g
- Sodium: 100mg
- Fat: 6g
- Saturated Fat: 4g
- Unsaturated Fat: 2g
- Trans Fat: 0g
- Carbohydrates: 19g
- Fiber: 1g
- Protein: 8g
- Cholesterol: 30mg
Keywords: key lime pie, protein bars, cottage cheese, healthy dessert, guilt-free treat
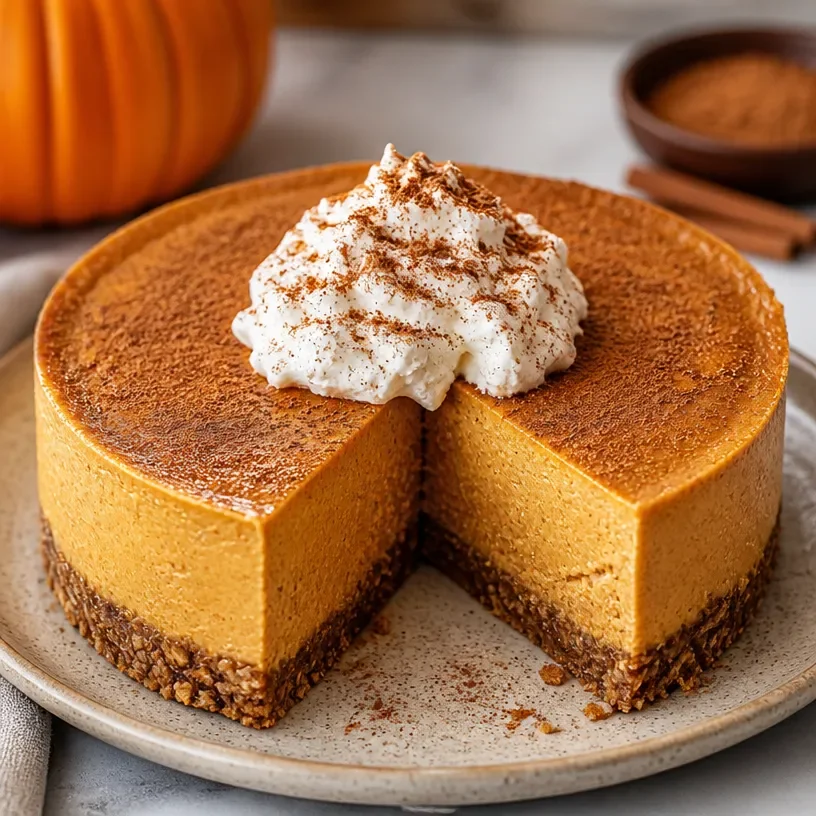
High-Protein Pumpkin Cottage Cheese Cheesecake (No-Bake)
Protein Cottage Cheese Pumpkin Cheesecake: A Cozy Delight
Welcome back to my kitchen, cozy friends! Today, we’re diving into a dish that’s going to warm up your home and put a huge smile on your face. It’s a delightful Protein Cottage Cheese Pumpkin Cheesecake that’s perfect for both dessert lovers and those who want to sneak in a bit of protein. Now, I know cheesecake might sound indulgent, but believe me, this recipe keeps things light while still being utterly scrumptious and satisfying.
As the leaves begin to change and the air turns crisp, there’s something inherently comforting about the scent of pumpkin mixed with warm spices wafting through the kitchen. Today, we’re creating a dessert that merges the traditional flavors of pumpkin pie with the creamy, rich texture of cheesecake, all while packing a protein punch with cottage cheese. What’s not to love?
Imagine gathering around the table, sharing slices of this silky cheesecake, and knowing you’ve created something special. It’s just another reason why I’m passionate about cooking; it brings people together! Plus, with a few simple ingredients and straightforward steps, even if you’re brand new to the kitchen, you’ll find yourself whipping up this gem before you know it.
So, grab your apron, a good playlist, and let’s get cooking!
A Slice of Nostalgia
Before we dive into the nitty-gritty of the recipe, allow me to share a sweet memory that sparked my love for pumpkin desserts. It was during the fall of my college years, and I was hosting my very first Thanksgiving dinner for friends who were away from home. This gathering felt like an adventure; we were all a mix of excitement and nerves as we gathered to learn and share recipes, decorate the space, and create our own little festive experience.
My roommate, Sarah, and I decided to tackle the pumpkin dessert. We knew we wanted something that would not only satisfy our sweet tooth but also remind us of cozy family traditions. After a bit of trial and error in the kitchen (and a fair amount of playful chaos), we ended up creating a version of pumpkin cheesecake, complete with a crunchy graham cracker crust and a creamy filling.
As our friends entered the kitchen, the sweet aroma of pumpkin and spices filled the air, and we could see their faces light up. We spent the evening dining, reminiscing about holidays past, bonding over our culinary creations, and laughing until our sides hurt. That experience ignited a love for cooking in me, a desire to recreate those family traditions in my own way.
That’s the beauty of cooking: it’s as much about the food as it is about the memories we create around it. So, let’s make a cheesecake today that not only tastes amazing but also gives you the chance to create your own cherished moments!
Ingredients
Here’s what you’ll need to create this scrumptious Protein Cottage Cheese Pumpkin Cheesecake:
-
Cottage Cheese (2 cups)
The star of our recipe! Cottage cheese provides a creamy texture and a boost of protein, making this cheesecake a tad healthier than traditional varieties. If you’re looking for a smoother texture, opt for whipped cottage cheese, or blend regular cottage cheese in the mixer! -
Pumpkin Puree (1 cup)
Use canned pumpkin puree for convenience, or make your own by roasting fresh pumpkin. It’s rich in flavors and packed with nutrients, especially beta-carotene. Just be sure to avoid pumpkin pie filling, as it contains added sugar and spices. -
Eggs (3 large)
They provide structure and richness, binding the ingredients together for that perfect cheesecake consistency. For a vegan option, you can try using flaxseed meal or chia seeds mixed with water as an egg substitute. -
Greek Yogurt (1/2 cup)
This adds creaminess and tang, balancing the sweetness of pumpkin. Feel free to use regular yogurt if that’s what you have on hand. Simply swap it 1:1, but Greek yogurt has that extra protein boost! -
Maple Syrup (1/2 cup)
A natural sweetener that complements the pumpkin flavor beautifully. You can also substitute honey or agave syrup if that’s what you prefer. Just keep in mind it will slightly alter the flavor. -
Vanilla Extract (1 tsp)
Pure vanilla extract enhances the overall flavor profile, elevating the cheesecake to new heights. The aroma alone is worth adding! -
Pumpkin Spice (1 tsp)
A must-have! If you don’t have pumpkin spice, a combination of cinnamon, nutmeg, and allspice will do the trick. This warm spice blend is what makes your cheesecake feel like a cozy hug. -
Graham Cracker Crumbs (1.5 cups)
For the crust, these add that irresistible crunch and sweetness. Gluten-free options are available; just replace them with your favorite gluten-free crackers or nut-based crust. -
Butter (1/4 cup, melted)
To bind the crust together, use any unsalted butter. If you’d like, coconut oil is a fantastic substitute, imparting a subtle flavor twist. -
Salt (a pinch)
Enhances all the flavors, ensuring a balanced sweetness. Don’t skip it; it makes a world of difference!
With these ingredients, you’re set to create a cheesecake that not only looks fabulous but also tastes extraordinary! Now, let’s roll up our sleeves and get to the fun part—making it!
Step-by-Step Instructions
-
Prepare the Crust:
Start by preheating your oven to 350°F (175°C). In a mixing bowl, combine the graham cracker crumbs and melted butter until it resembles wet sand. Press this mixture firmly into the bottom of a greased 9-inch springform pan. Remember, this crust is your base, so make it sturdy! Use the back of a measuring cup to help compact it evenly. -
Bake the Crust:
Place the pan in the preheated oven and bake for about 10 minutes. This helps set the crust, giving it a delightful crunch. Keep an eye on it; you don’t want it to get too brown! -
Mix the Filling:
While the crust is baking, in a large mixing bowl, add the cottage cheese and blend it using an immersion blender or food processor until smooth and creamy. This step is crucial; it’ll ensure your cheesecake isn’t lumpy.Once smooth, add the pumpkin puree, Greek yogurt, eggs, maple syrup, vanilla extract, pumpkin spice, and salt. Blend until everything is fully incorporated. Take a moment to taste the filling—yum! Isn’t it delightful? Adjust the sweetness if necessary.
-
Combine with the Crust:
After the crust has cooled slightly, pour the pumpkin filling over the top, spreading it evenly with a spatula. This is where the magic starts to happen; your cheesecake is coming to life! -
Bake the Cheesecake:
Return the springform pan to the oven and bake for 45-55 minutes, or until the edges are set and the center has a slight jiggle. The cheesecake will puff up and might crack slightly as it cools—don’t worry; that’s normal! -
Cool Down:
Once baked, turn off the oven, crack the door open, and let the cheesecake cool in the oven for an hour. This gentle cooling process helps prevent cracks. After an hour, remove it from the oven and chill it in the fridge for at least 4 hours, preferably overnight. Patience is key! -
Slice and Serve:
When you’re ready to serve, run a knife around the edges of the springform pan and carefully remove the sides. Use a sharp knife to cut slices, wiping the blade with a damp cloth in between cuts for clean edges—trust me, it makes a difference!
Serving Suggestions
There’s something about presentation that can elevate dessert! Serve your Protein Cottage Cheese Pumpkin Cheesecake chilled, topped with a dollop of whipped cream and a sprinkle of cinnamon or nutmeg. You might even want to add some candied pecans or walnuts for that extra crunch. Part of the fun is getting creative with your toppings!
If you’re feeling adventurous, drizzle a little extra maple syrup over the top before serving for a sweet finishing touch. Trust me, your guests (or family!) will be raving about this cheesecake for days!
Recipe Variations
-
Chocolate Pumpkin Cheesecake: Add cocoa powder to the filling for a delicious chocolate twist. Substitute half of the cottage cheese with chocolate-flavored protein powder for an extra yummy layer.
-
Nutty Crust: Swap out graham crackers for crushed nuts (almond or pecans) mixed with dates and coconut oil for a grain-free version that adds a unique flavor!
-
No-Bake Version: To make a no-bake cheesecake, use a gelatin or agar-agar alternative to set the filling instead of baking. Make sure you let it chill until firm!
-
Skim or Nonfat Options: Swap full-fat cottage cheese and yogurt for skim or nonfat versions to make it lighter without losing too much creaminess.
-
Spiced it Up: Add some finely grated ginger or cardamom to the filling for an exotic twist that takes the traditional pumpkin flavors to a whole new level.
Chef’s Notes
This recipe has evolved quite a bit over the years! It started as a full-fat cheesecake, and I can distinctly remember sneaking a piece after everyone had gone home and savoring that rich, creamy goodness. Over time, I realized I wanted to create something more balanced that would fit into my healthier lifestyle while still being utterly delicious.
Funny enough, I once forgot to add the eggs in an early version of this recipe. Cue a freak-out moment! It ended up being a super creamy pumpkin pudding instead of a cheesecake. Although it wasn’t what I intended, it became a family favorite that year for topping off pies—we learned to embrace happy accidents in the kitchen!
FAQs and Troubleshooting
1. Why did my cheesecake crack?
Cracking is normal, especially with pumpkin cheesecakes. To prevent this, ensure you don’t overbake your cheesecake, and allow it to cool slowly in the oven. Also, consider placing a pan of water on the oven rack below during baking to create humidity.
2. Can I freeze this cheesecake?
Absolutely! Wrap it tightly in plastic wrap or foil and keep it in the freezer for up to two months. Just be sure to allow it to thaw in the fridge before serving!
3. It’s too sweet! What can I do?
If you find your cheesecake too sweet after mixing the filling, you can balance it out by adding a bit of sour cream or more Greek yogurt to the mix, or consider omitting the maple syrup entirely for a more neutral flavor.
4. How do I store leftovers?
Refrigerate any leftovers in an airtight container for up to a week. Just make sure to keep them covered to maintain freshness!
Nutritional Info
While the nutritional values can vary based on specific ingredient brands and measurements, here’s a rough estimate per slice (based on 12 slices total):
- Calories: 180
- Protein: 10g
- Carbohydrates: 20g
- Fat: 7g
- Fiber: 2g
- Sugar: 8g
With these nutritional insights, you can indulge guilt-free in one of my favorite fall desserts!
And there you have it—your very own Protein Cottage Cheese Pumpkin Cheesecake! I hope you find not just joy in making this delicious dessert but also in sharing it with those you love. Remember, cooking is about the memories we create, the laughter we share, and the flavors that bring us back to the comforts of home. Happy baking, friend!
Print
Protein Cottage Cheese Pumpkin Cheesecake
- Total Time: 75 minutes
- Yield: 12 servings 1x
- Diet: High Protein
Description
A light and delicious pumpkin cheesecake packed with protein from cottage cheese, perfect for dessert lovers.
Ingredients
- 2 cups Cottage Cheese
- 1 cup Pumpkin Puree
- 3 large Eggs
- 1/2 cup Greek Yogurt
- 1/2 cup Maple Syrup
- 1 tsp Vanilla Extract
- 1 tsp Pumpkin Spice
- 1.5 cups Graham Cracker Crumbs
- 1/4 cup Butter, melted
- a pinch Salt
Instructions
- Preheat the oven to 350°F (175°C).
- Combine the graham cracker crumbs and melted butter in a mixing bowl until it resembles wet sand.
- Press the mixture into the bottom of a greased 9-inch springform pan.
- Bake the crust for about 10 minutes.
- Blend the cottage cheese in a large mixing bowl until smooth.
- Add the pumpkin puree, Greek yogurt, eggs, maple syrup, vanilla extract, pumpkin spice, and salt. Blend until fully incorporated.
- Pour the pumpkin filling over the cooled crust.
- Bake for 45-55 minutes, until edges are set and center has a slight jiggle.
- Cool in the oven for an hour, then chill in the fridge for at least 4 hours.
- Slice and serve with toppings as desired.
Notes
Serve chilled and consider topping with whipped cream and nuts for added flavor.
- Prep Time: 20 minutes
- Cook Time: 55 minutes
- Category: Dessert
- Method: Baking
- Cuisine: American
Nutrition
- Serving Size: 1 slice
- Calories: 180
- Sugar: 8g
- Sodium: 200mg
- Fat: 7g
- Saturated Fat: 4g
- Unsaturated Fat: 2g
- Trans Fat: 0g
- Carbohydrates: 20g
- Fiber: 2g
- Protein: 10g
- Cholesterol: 80mg
Keywords: cheesecake, pumpkin cheesecake, protein dessert, fall desserts, holiday recipes
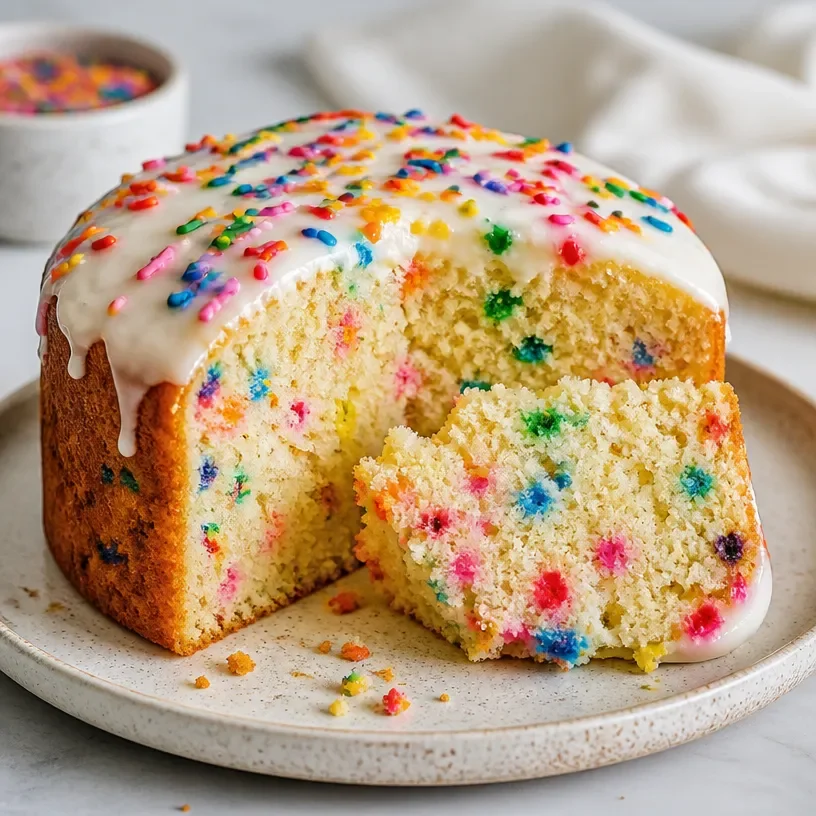
Minute High-Protein Cottage Cheese Funfetti Cake
The Joy of Baking: Protein Cottage Cheese Funfetti Cake
Welcome to my kitchen! I’m so thrilled to have you here today. If you’re new to my little corner of the internet, let me introduce myself. I’m Olivia Bennett — just a passionate home cook tangled up in a love affair with flavors, cozy vibes, and of course, homemade treats. There’s something magical about baking that fills the air with warmth and brings back the sweetest of memories, don’t you think? And that’s exactly what this recipe for Protein Cottage Cheese Funfetti Cake is all about: joy, nostalgia, and maybe just a little bit of sprinkles!
When I think about cake, the first thing that comes to mind is celebration. Birthdays, family get-togethers, or just those days that call for a little extra sweetness. As a kid, my birthday cake of choice was always layered with colorful sprinkles, the type that sparkled like confetti. My mom would bake those cakes from scratch, and as soon as the smell of vanilla hit the air, I’d find myself pacing around the kitchen, waiting with eager hands to help with the frosting. Those moments made cooking feel like magic, like we were crafting happiness from flour and sugar.
Ah, but let’s fast forward to the present! Nowadays, I’m all about making indulgent goodies a touch healthier without sacrificing flavor. Enter the Protein Cottage Cheese Funfetti Cake—a delightful hybrid of nostalgia and nutrition! This cake is not only super moist and bursting with flavor; it also sneaks in some extra protein thanks to cottage cheese. Trust me, it’s a game-changer! It hits the spot whether you want to treat yourself after a long day or impress friends with something unique. So, let’s dive into this fun recipe together!
A Slice of My Childhood
Growing up, weekends meant two things: family gatherings and baking marathons in my mom’s kitchen. I remember one particular birthday party where my mom baked me a rainbow sprinkle cake, complete with layers of fluffy vanilla frosting. As friends and family gathered, we crushed through a piñata, laughter filling the air like sweet melody. But the best part? That first bite of cake—light, moist, and exploding with colors and flavors!
Little did I know then that those cozy kitchen afternoons would pave the way for my culinary passion. Today, I recreate that joyful spirit with my Protein Cottage Cheese Funfetti Cake. It’s a nod to my childhood, perfect for celebrating everything from birthdays to ordinary weeknight dinners. So grab your apron, and let’s whisk up some memories!
Ingredients: What You’ll Need
Here’s a simple list of the ingredients to whip up this delightful cake, complete with a few handy tips and substitutions along the way.
-
Cottage Cheese (1 cup): The star of our show! It not only adds moisture but also ups the protein content. If you’re not a fan of cottage cheese, you can substitute it with Greek yogurt for a similar texture and protein boost.
-
All-Purpose Flour (1 ½ cups): This cake needs a solid foundation. You can swap it for whole wheat flour if you’re looking for more fiber or a gluten-free blend if you’re gluten-sensitive.
-
Granulated Sugar (1 cup): Sweetness is the name of the game! You can use coconut sugar or a sugar substitute if you’re looking for a healthier alternative.
-
Baking Powder (2 tsp): This is what helps our cake rise and become fluffy. Don’t forget to check the expiration date; expired baking powder can lead to a dense cake!
-
Salt (½ tsp): A pinch of salt enhances all the flavors. You can use sea salt or even Himalayan salt for a touch of uniqueness.
-
Eggs (2): They act as a binder for all the ingredients. If you’re vegan or egg-free, try using flax eggs (1 tablespoon of ground flaxseed mixed with 3 tablespoons of water = 1 egg) as a substitute.
-
Vanilla Extract (1 tsp): The essence of warmth and flavor. Feel free to use almond extract for a different twist.
-
Rainbow Sprinkles (½ cup): Because what’s a funfetti cake without sprinkles? You can swap these out for any color-themed sprinkles to suit any occasion!
-
Milk (½ cup): Use any type of milk you prefer—dairy, almond, or oat milk all work beautifully here.
-
Optional Frosting: A simple cream cheese frosting or a light whipped cream complements the cake perfectly.
Step-by-Step Instructions
Alright, let’s roll up our sleeves and get baking! Here’s how we bring this Protein Cottage Cheese Funfetti Cake to life:
Step 1: Preheat the Oven
Preheat your oven to 350°F (175°C). It’s an essential first step to ensure your cake bakes evenly. While it heats, you can prepare your cake batter!
Step 2: Prepare Your Baking Pan
Grease and flour a 9-inch round cake pan—or two if you’re looking for layers! My favorite method is using a bit of butter to grease the pan, then adding a sprinkle of flour. This helps the cake slide out easily once baked.
Step 3: Mix the Dry Ingredients
In a large mixing bowl, whisk together the all-purpose flour, baking powder, and salt. This helps to evenly distribute the leavening agent, ensuring a light cake!
Step 4: Blend the Wet Ingredients
In another bowl, combine the cottage cheese, sugar, eggs, and vanilla extract. If you’re using a blender or food processor, this is the perfect time to blend until the mixture is smooth. The cottage cheese should be undetectable in texture!
Step 5: Combine and Sprinkle
Slowly pour the wet mixture into the dry ingredients and mix until just combined. Be careful not to overmix to keep that fluffy texture. Now’s the fun part—fold in those vibrant rainbow sprinkles!
Step 6: Bake
Pour the batter into your prepared cake pan and smooth the top with a spatula. Bake in your preheated oven for 25–30 minutes, or until a toothpick inserted in the center comes out clean. The delightful smell should start wafting through your kitchen right about now!
Step 7: Cool and Frost
Once baked, allow your cake to cool in the pan for about 10 minutes, then transfer it to a wire rack. This step prevents sogginess. Once cooled, you can frost it with cream cheese frosting or simply sprinkle some powdered sugar on top for an easy finish.
Step 8: Serve
Cut yourself a generous slice and dig in! Don’t forget to snap a picture—this cake is just begging to be ‘grammed.
Serving Suggestions
Serve your Protein Cottage Cheese Funfetti Cake on a colorful plate, perhaps alongside fresh berries or a scoop of vanilla ice cream for that ultimate treat experience. Drizzle with a bit of chocolate sauce or adorn with additional sprinkles for a dedicated dessert table showstopper!
Recipe Variations
Feeling adventurous? Here are a few fun variations to try out:
-
Chocolate Funfetti Cake: Replace a third of the flour with cocoa powder to give your cake a delightful chocolate twist.
-
Mixed Fruit Funfetti: Toss in some finely chopped strawberries or cherries along with your sprinkles for a delicious fruity explosion.
-
Vegan Funfetti Cake: Substitute cottage cheese with a plant-based yogurt and use flax eggs to make your cake completely vegan yet delicious!
-
Zesty Lemon: Add lemon zest for a refreshing citrus zing that pairs beautifully with the sweetness of the cake.
Chef’s Notes
This recipe has evolved over the years from a traditional sprinkles cake into something healthier before my eyes. I remember the first time I tried to swap in cottage cheese—it felt like a dare, but boy did it pay off! Each bite brings me back to those happy childhood moments.
You know what else is hilarious? The first cake I made for my partner used half a cup of salt instead of sugar. Imagine an epic ‘salty surprise’ moment! We learned that day, always read the labels twice!
FAQs and Troubleshooting
Q: Why did my cake sink in the middle?
A: A sinkhole cake usually happens because of overmixing the batter or not baking it long enough. Make sure to gently combine your ingredients and check on your cake a few minutes before the timer!
Q: Can I freeze this cake?
A: Absolutely! You can wrap slices tightly in plastic wrap and store them in an airtight container for up to three months. Just thaw them overnight in the fridge when you’re ready for a treat.
Q: How can I make this cake lower in sugar?
A: You can cut down on sugar by up to a third without affecting the taste too much. Alternatively, try a sugar substitute like monk fruit or erythritol.
Q: I don’t have rainbow sprinkles — now what?
A: No worries! You can use chocolate chips, nuts, or dried fruits for a different texture and flavor.
Nutritional Info
(If applicable, provide details such as calories, fat, protein, etc.)
There you have it, friends! A delightful, wholesome, and delicious Protein Cottage Cheese Funfetti Cake, crafted with love right in your own kitchen. I hope you find as much joy in making and serving this cake as I do. Until next time, happy baking!
Don’t forget to share your cake adventures in the comments below—I love hearing from fellow foodies!
Print
Protein Cottage Cheese Funfetti Cake
- Total Time: 40 minutes
- Yield: 8 servings 1x
- Diet: Vegetarian
Description
A delightful and healthier twist on traditional funfetti cake, loaded with protein from cottage cheese and colorful sprinkles.
Ingredients
- 1 cup Cottage Cheese
- 1 ½ cups All-Purpose Flour
- 1 cup Granulated Sugar
- 2 tsp Baking Powder
- ½ tsp Salt
- 2 Eggs
- 1 tsp Vanilla Extract
- ½ cup Rainbow Sprinkles
- ½ cup Milk
- Optional: Cream Cheese Frosting
Instructions
- Preheat your oven to 350°F (175°C).
- Grease and flour a 9-inch round cake pan.
- Whisk together the all-purpose flour, baking powder, and salt in a bowl.
- Combine cottage cheese, sugar, eggs, and vanilla in another bowl.
- Pour the wet mixture into the dry ingredients and mix until just combined.
- Fold in the rainbow sprinkles.
- Pour the batter into the prepared pan and smooth the top.
- Bake for 25–30 minutes or until a toothpick comes out clean.
- Cool in the pan for 10 minutes, then transfer to a wire rack.
- Frost with cream cheese frosting or powdered sugar if desired.
- Serve and enjoy!
Notes
For a vegan version, substitute cottage cheese with a plant-based yogurt and use flax eggs. You can also experiment with flavors by adding lemon zest or using cocoa powder for a chocolate version.
- Prep Time: 10 minutes
- Cook Time: 30 minutes
- Category: Dessert
- Method: Baking
- Cuisine: American
Nutrition
- Serving Size: 1 slice
- Calories: 300
- Sugar: 20g
- Sodium: 200mg
- Fat: 10g
- Saturated Fat: 4g
- Unsaturated Fat: 6g
- Trans Fat: 0g
- Carbohydrates: 35g
- Fiber: 1g
- Protein: 10g
- Cholesterol: 70mg
Keywords: funfetti, cake, protein, cottage cheese, dessert
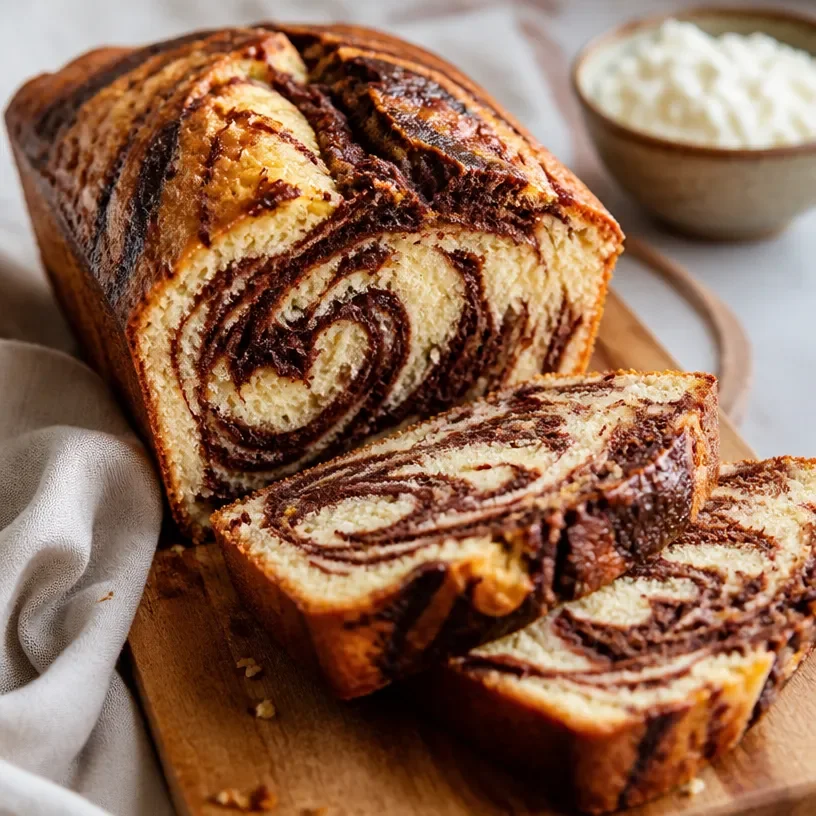
High-Protein Cottage Cheese Marble Cake: Easy 1-Bowl Recipe
The Joy of Baking: Protein Cottage Cheese Marble Cake
Welcome to my kitchen, my fellow food lovers! Today, I am thrilled to take you on a delicious journey of baking that will not only tantalize your taste buds but also fill your home with the warm, comforting aroma of something wonderful coming out of the oven. We’re making a delightful Protein Cottage Cheese Marble Cake!
Marble cake has always had a special place in my heart. It’s the perfect blend of flavors and textures, merging rich chocolate with a light, fluffy vanilla base, creating a dessert that’s as beautiful as it is delicious. But this isn’t just any marble cake; today, we’re adding cottage cheese to the mix to boost the protein content, making this cake not only a treat but a slightly healthier choice too!
Picture this: a rainy afternoon, the sky heavy with clouds, and you’re huddled in the kitchen, mixing together the ingredients for this glorious cake. The moment you swirl that chocolate batter into the vanilla, you’re creating art, and perhaps even a little magic. Each slice unveils a ripple of flavors, enticing your loved ones to gather around the table, savoring each bite while sharing stories and laughter.
So, grab your apron, put on your favorite tunes, and let’s dive into this cozy baking adventure!
A Trip Down Memory Lane
Before we cook up this wonderful cake, let me share a little something from my childhood that makes this recipe even more special. When I was a little girl, my grandmother would often bake marble cake for our family get-togethers. She had this magical ability to whip up desserts that everybody raved about, and her marble cake was the highlight. I remember standing on my tiptoes, eager to help her in the kitchen, my little hands trying to measure out flour as she guided me with her gentle smile.
She was never one for exact measurements—just a sprinkle of this, a dash of that, and her love mixed in. When I got old enough to bake by myself, that recipe became my go-to for birthdays and celebrations. Over the years, I decided to give it a twist by adding cottage cheese, infusing my beloved childhood treat with a protein-packed upgrade, making it perfect for any occasion!
Ingredients You’ll Need
Let’s gather our ingredients! Here’s what you’ll need to whip up this delicious Protein Cottage Cheese Marble Cake:
-
1 ½ cups all-purpose flour
This forms the base of our cake. If you want to make it gluten-free, substitute with almond flour or a gluten-free all-purpose blend. -
1 cup cottage cheese
The star of our show, cottage cheese adds moisture and protein. You can use low-fat or full-fat cottage cheese, depending on your preference. If you want a dairy-free option, try using silken tofu blended until smooth! -
1 cup granulated sugar
Sweetness is key! If you’re looking to cut down on sugar, you can use coconut sugar or a sugar substitute like stevia or monk fruit. -
½ cup unsalted butter, softened
This adds richness! For a dairy-free option, coconut oil or vegan butter works perfectly. -
3 large eggs
They help bind everything together! If you’re vegan, you can use flax eggs (1 tablespoon ground flaxseed mixed with 3 tablespoons water = 1 egg). -
1 teaspoon baking powder
This makes the cake rise, giving it that fluffy texture. -
½ teaspoon baking soda
Another leavening agent that ensures our cake is light and airy. -
½ teaspoon salt
Salt is essential to enhance all the flavors. -
1 teaspoon vanilla extract
It adds depth and warmth to our cake. -
¼ cup cocoa powder
This gives us that rich chocolate layer. Use unsweetened cocoa to balance the sweetness of the cake. -
1 tablespoon milk (dairy or non-dairy)
For adjusting the consistency of the batter if needed.
Make sure to have everything ready before we start baking. It makes the process smoother and more enjoyable—trust me!
Let’s Bake This Cake!
Now that we have all our ingredients ready, it’s time to get down to business! Here’s how we create this Protein Cottage Cheese Marble Cake step by step.
Step 1: Preheat and Prepare
Preheat your oven to 350°F (175°C). Grease and flour a 9-inch round cake pan, or alternatively, line it with parchment paper. This ensures an easy release and a beautiful cake.
Step 2: Mix the Wet Ingredients
In a large mixing bowl, beat the softened butter and sugar together until they’re light and fluffy—about 3-4 minutes. You want to incorporate air into the mixture. Adding cottage cheese at this stage gives a creamy texture, so mix it in thoroughly. Follow with the eggs one at a time, beating well after each addition, and finally, add the vanilla extract.
Chef’s Tip: Make sure your ingredients are at room temperature for the best emulsification. This helps with the texture of your cake!
Step 3: Combine the Dry Ingredients
In another bowl, whisk together the flour, baking powder, baking soda, and salt. Gradually add this dry mixture to the wet ingredients, alternating with the milk, starting and ending with the flour mixture. Combine until just mixed—overmixing can lead to a dense cake.
Step 4: Separate the Batter
Divide the batter evenly into two bowls. In one bowl, sift in the cocoa powder and mix until fully integrated. You’ll have a beautiful chocolate batter and a lovely vanilla batter!
Step 5: Create the Marble Effect
Now comes the fun part! In your prepared cake pan, dollop spoonfuls of vanilla and chocolate batter randomly. Using a knife or a toothpick, gently swirl the batters together to create a marbled effect. Don’t overdo it—less is more for that beautiful swirl!
Step 6: Bake
Pop the cake into your preheated oven and bake for 30-35 minutes, or until a toothpick inserted into the center comes out clean. Keep an eye on it in the last few minutes of baking.
Step 7: Cool and Enjoy
Once baked, remove the cake from the oven and allow it to cool in the pan for about 10 minutes before transferring it to a wire rack to cool completely. Resist the temptation to dig in too soon—letting it cool will give you cleaner slices!
Serving Suggestions
To serve, place the cake on a lovely serving plate and dust with a bit of powdered sugar for a touch of elegance. You could also add fresh berries or a dollop of Greek yogurt on the side for a delightful contrast. It pairs beautifully with a cup of coffee or tea, making it a perfect accompaniment for afternoon gatherings with friends or family.
Recipe Variations
Feeling adventurous? Here are some variations you can try with this Protein Cottage Cheese Marble Cake:
- Nutty Addition: Fold in some chopped walnuts or almonds into the batter for added crunch and flavor.
- Fruit Swirl: Add some pureed strawberries or raspberries into the batter for a fruity marble cake.
- Chocolate Chunk Delight: Mix in dark chocolate chips for a richer chocolate experience.
- Spice it Up: Sprinkle in some cinnamon or nutmeg for a warm, spicy twist.
- Zesty Lemon: Add a tablespoon of lemon zest to the vanilla batter for a refreshing hint of citrus.
Chef’s Notes
As I’ve experimented with this recipe over the years, it has evolved into my go-to cake for any occasion! When I first started experimenting with cottage cheese, I was concerned about the texture, but surprisingly, it came out beautifully! The added protein gives it a unique twist that delights everyone who tries it. And let’s be honest here—one of my favorite things about baking is that it doesn’t always have to look perfect. Embrace the messiness of it all; it’s a sign of a home filled with love, laughter, and, of course, delicious baked goods!
FAQ and Troubleshooting
-
My cake didn’t rise, what did I do wrong?
It’s likely that your baking powder or baking soda is old. Always check the expiration date. Also, make sure to mix the batter just enough; overmixing can result in a dense cake. -
Why did my cake stick to the pan?
Be sure to grease and flour your pan thoroughly before adding the batter. Parchment paper can be a lifesaver in ensuring it releases smoothly. -
Can I freeze this cake?
Absolutely! Allow the cake to cool completely, wrap it tightly in plastic wrap, and then store it in an airtight container. It keeps well for up to three months. Just thaw it in the fridge overnight before serving. -
Is this cake suitable for different diets?
Yes! With simple substitutions, you can easily make it dairy-free, gluten-free, or even vegan. Just use the recommended alternatives in the ingredients list!
Nutritional Info
While I love baking for the joy it brings, I also appreciate the benefits of mindful eating. This Protein Cottage Cheese Marble Cake provides a good dose of protein and essential nutrients, making it a perfect treat to enjoy on special occasions or when you need a pick-me-up!
I hope this recipe brings as much joy to your kitchen as it has to mine. Remember, cooking is all about having fun, experimenting, and sharing. So, have a blast baking away, and I can’t wait to hear how your Protein Cottage Cheese Marble Cake turns out! Happy baking!
Print
Protein Cottage Cheese Marble Cake
- Total Time: 50 minutes
- Yield: 8 servings 1x
- Diet: Vegetarian
Description
A delightful marble cake combining rich chocolate and light vanilla layers, enhanced with protein-packed cottage cheese.
Ingredients
- 1 ½ cups all-purpose flour
- 1 cup cottage cheese
- 1 cup granulated sugar
- ½ cup unsalted butter, softened
- 3 large eggs
- 1 teaspoon baking powder
- ½ teaspoon baking soda
- ½ teaspoon salt
- 1 teaspoon vanilla extract
- ¼ cup cocoa powder
- 1 tablespoon milk (dairy or non-dairy)
Instructions
- Preheat your oven to 350°F (175°C) and grease and flour a 9-inch round cake pan.
- Mix the softened butter and sugar together until light and fluffy, then mix in the cottage cheese, followed by the eggs and vanilla extract.
- Combine the flour, baking powder, baking soda, and salt in another bowl, then gradually add to the wet mixture, alternating with the milk.
- Separate the batter into two bowls, adding cocoa powder to one, mixing well.
- Create the marble effect by dolloping spoonfuls of vanilla and chocolate batter in the prepared pan and swirling together gently.
- Bake for 30-35 minutes, or until a toothpick inserted comes out clean.
- Cool the cake in the pan for 10 minutes before transferring to a wire rack to cool completely.
Notes
For a lighter texture, ensure all ingredients are at room temperature before mixing.
- Prep Time: 15 minutes
- Cook Time: 35 minutes
- Category: Dessert
- Method: Baking
- Cuisine: American
Nutrition
- Serving Size: 1 slice
- Calories: 320
- Sugar: 18g
- Sodium: 270mg
- Fat: 12g
- Saturated Fat: 7g
- Unsaturated Fat: 4g
- Trans Fat: 0g
- Carbohydrates: 45g
- Fiber: 2g
- Protein: 10g
- Cholesterol: 70mg
Keywords: cake, marble cake, protein dessert, cottage cheese cake, baking
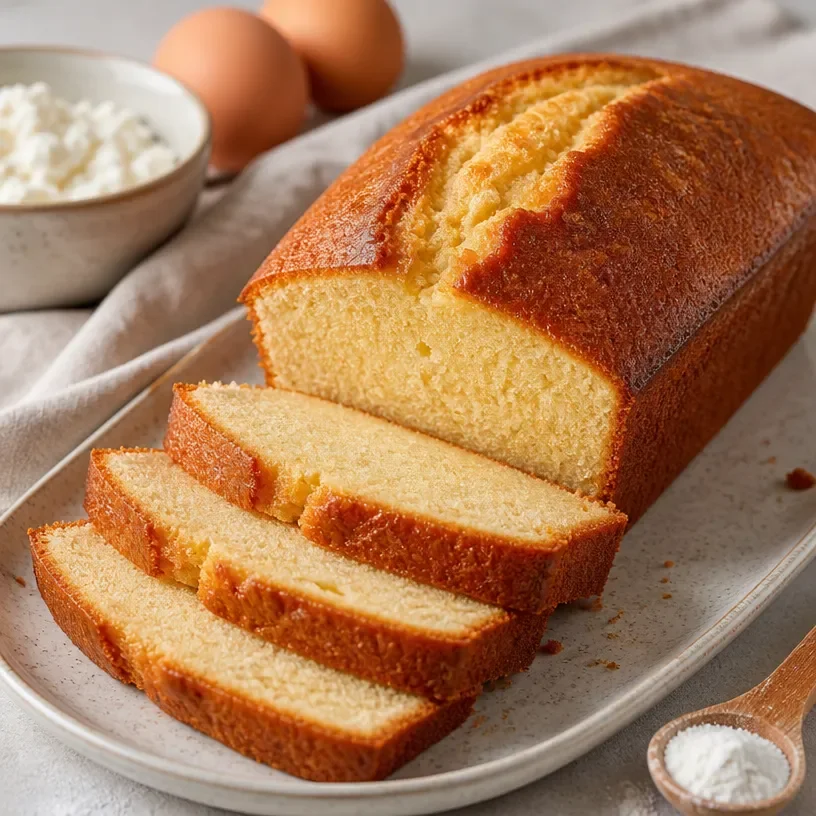
High-Protein Cottage Cheese Vanilla Pound Cake (Meal Prep)
The Ultimate Protein Cottage Cheese Vanilla Pound Cake: A Cozy Baking Adventure
Welcome to my kitchen, my wonderful foodie friends! Today, we’re diving into the delicious world of baking with a recipe that’s simultaneously cozy and nutritious: Protein Cottage Cheese Vanilla Pound Cake. As the scent of vanilla wafts through your home, you’ll feel like you’re wrapped in a warm blanket on a chilly day. This cake is not just any ordinary pound cake; it’s a delightful creation that marries the rich flavors of vanilla with the unique texture of cottage cheese, making it a protein-packed treat you can feel good about.
Let’s Get Personal
I remember the first time I stumbled upon the idea of using cottage cheese in a cake. It was late on a Sunday afternoon, and I was flipping through an old family recipe book I found tucked away in my grandmother’s kitchen. As a child, I loved the smell of cakes baking in her oven, and I could still picture her flour-covered apron as she whipped up delicious delights for our family get-togethers. When I saw that charming little recipe for a cottage cheese cake, curiosity got the best of me. I decided to give it a modern twist, incorporating protein-rich cottage cheese while maintaining the essence of that comforting, nostalgic treat.
With every slice, you’ll experience a little bit of that cozy family legacy—perfect for brunch gatherings, afternoon tea, or even a late-night treat that says, “Yes, you absolutely deserve this!” Now let’s get moving and whip up this delightful dessert together.
Gather Your Ingredients
Here’s what you’ll need to recreate this sweet masterpiece:
-
1 cup cottage cheese
The star of our cake! Cottage cheese adds moisture and richness without all the fat of traditional butter. If you’re looking for a dairy-free alternative, consider using silken tofu as a substitute. It will give you a creamy texture with added protein. -
1 cup granulated sugar
Classic sugar makes the cake sweet and helps with its structure. If you want to cut down on sugar, feel free to use a sugar alternative like erythritol, but be sure to check the conversion ratio—it can vary! -
4 large eggs
Eggs help bind the ingredients together and provide a fluffy texture. For a vegan option, you can use flax eggs; just mix 1 tablespoon of ground flaxseed with 2.5 tablespoons of water for each egg! -
1 teaspoon vanilla extract
Vanilla gives our cake its warm flavor. Make sure to use pure vanilla extract for the best aroma! If you’re feeling adventurous, add in some almond extract for a surprising twist. -
2 cups all-purpose flour
This is the backbone of our cake. You could experiment with whole wheat flour for a healthier twist, though it may alter the texture slightly. If you’re gluten-free, try using almond flour or a gluten-free flour blend. -
1 teaspoon baking powder
This little agent helps our cake rise! If you’re out of baking powder, you can mix 1/4 teaspoon of baking soda with 1/2 teaspoon of vinegar instead. -
1/4 teaspoon salt
Salt enhances the sweetness and balances the flavors. Never skip this one, even in desserts! -
Optional: 1/2 cup chocolate chips or nuts
Add these for texture and extra flavor. Walnuts or pecans work beautifully, or for a chocolate fix, mini chocolate chips add a delightful surprise!
Time to Bake: Step-by-Step Instructions
-
Preheat Your Oven: Start by preheating your oven to 350°F (175°C). This step is crucial because it ensures an evenly baked cake. While that’s warming up, you can prepare your ingredients and tools.
-
Prep Your Baking Pan: Grease and flour a 9×5 inch loaf pan. This might seem tedious, but trust me, it’s essential for ensuring that your cake slides out effortlessly once baked.
-
Mix Cottage Cheese: In a mixing bowl, combine the cottage cheese and granulated sugar. Use a fork or whisk to break down the curds slightly while blending, creating a creamy base. This is one of my favorite parts; you get to feel the creamy goodness!
-
Add in the Eggs and Vanilla: Crack in those lovely eggs and pour in the vanilla extract. Blend everything until smooth—this process makes the eggs integrate fully, giving the cake its signature fluffiness.
-
Sift Your Dry Ingredients: In a separate bowl, whisk together the flour, baking powder, and salt. Instead of just tossing them in, you want to aerate the mixture, which will help the cake rise beautifully.
-
Combine Wet and Dry Ingredients: Gradually add the dry mixture to the wet mixture, stirring gently with a spatula or wooden spoon until just combined. Pro tip: don’t overmix! A few flour streaks are okay here. Over mixing can lead to a dense cake, and we want it to be light and airy!
-
Incorporate Add-Ins: If you’re using chocolate chips or nuts, fold them in gently at this stage. (Fun sidebar: You might want to taste a few chocolate chips just to make sure they are fresh—totally necessary!)
-
Pour and Spread: Transfer your batter to the prepared loaf pan, smoothing the top with your spatula. Aim for even distribution for uniform baking.
-
Bake to Perfection: Place your pan in the oven and bake for 50-60 minutes. Here’s a little chef’s secret: set a timer for 50 minutes and then keep a close eye on it. Poke the cake with a toothpick; if it comes out clean, it’s done. If there’s batter on it, give it a few more minutes.
-
Cool Down: Once baked, let it cool in the pan for 10-15 minutes. Then, gently run a knife around the edges and carefully invert the cake onto a wire rack to cool completely. Resist the urge to slice it too early; the flavors develop as it cools!
Serving Suggestions
Once your Protein Cottage Cheese Vanilla Pound Cake has cooled, slice it into generous pieces. It’s perfect as-is, but for a little surprise, serve it with a dollop of Greek yogurt or a drizzle of honey. Fresh berries on the side add a splash of color and a sweet-tart contrast that takes the experience over the top!
Recipe Variations
Feel like switching it up? Here are a few creative variations to excite your taste buds:
- Zesty Lemon Twist: Swap out the vanilla extract for lemon extract, and add the zest of one lemon for a refreshing citrus flavor.
- Cinnamon Swirl: Add a teaspoon of ground cinnamon to the dry ingredients and swirl in a mixture of cinnamon and a few tablespoons of brown sugar before baking.
- Berry Delight: Incorporate half a cup of fresh or frozen berries into the batter for a fruity flavor. Blueberries or raspberries work great!
- Chocolate Chip Surprise: Add mini chocolate chips into the batter for a chocolaty indulgence that’s perfect for dessert.
- Nutty Banana: Mash in a banana for added moisture and a delicious flavor contrast—that banana-cottage cheese combination is fantastic!
Chef’s Notes
This recipe has come a long way from its humble beginnings! I started making it with regular cottage cheese, but then I experimented and found that different brands can yield different textures. I love using whipped cottage cheese now; it creates an extra fluffy cake. I also added protein powder to the mix for an extra boost, especially for post-workout treats. The beauty of this recipe is how adaptable it is—every baker can make it their own!
FAQs and Troubleshooting
-
Q: My cake turned out dense! What did I do wrong?
A: A dense cake usually means you overmixed the batter. Remember to mix just until combined and avoid overworking the flour! -
Q: Why didn’t my cake rise?
A: Ensure your baking powder is fresh. Expired baking powder won’t give your cake the lift it needs. Also, make sure you’re measuring accurately—too much flour can weigh it down. -
Q: Can I freeze this cake?
A: Absolutely! Wrap slices in plastic wrap and then in foil for an extra layer of protection. It’ll freeze beautifully for up to three months. -
Q: How do I store the leftover cake?
A: Store your cake in an airtight container in the fridge for up to a week. For an even cozier treat, warm up a slice in the microwave for a few seconds!
Nutritional Info (Optional)
While I love sharing the joy of cooking and eating, I know that many health-conscious foodies like to keep an eye on nutrition. Here’s a rough estimate of the nutritional info per slice (about 1/12 of the cake):
- Calories: 180
- Protein: 8g
- Carbohydrates: 22g
- Dietary Fiber: 1g
- Sugars: 10g
- Fats: 6g
(Actual values may vary depending on specific ingredients used.)
Closing Thoughts
There you have it, friends—a delightful Protein Cottage Cheese Vanilla Pound Cake that’s sure to lift your spirits and brighten your day. Remember to savor the little things in the kitchen, like the smells, the laughter, and the satisfaction of creating something special. I’m so excited for you to try this at home! Happy baking, and don’t forget to share your photos and stories; I love seeing your culinary creations!
Print
Protein Cottage Cheese Vanilla Pound Cake
- Total Time: 75 minutes
- Yield: 12 servings 1x
- Diet: Healthy
Description
A delightful and nutritious pound cake that combines the rich flavors of vanilla with the unique texture of cottage cheese, packed with protein.
Ingredients
- 1 cup cottage cheese
- 1 cup granulated sugar
- 4 large eggs
- 1 teaspoon vanilla extract
- 2 cups all-purpose flour
- 1 teaspoon baking powder
- 1/4 teaspoon salt
- Optional: 1/2 cup chocolate chips or nuts
Instructions
- Preheat your oven to 350°F (175°C).
- Grease and flour a 9×5 inch loaf pan.
- Mix cottage cheese and granulated sugar in a mixing bowl.
- Add in the eggs and vanilla extract, blending until smooth.
- Sift together the flour, baking powder, and salt in a separate bowl.
- Combine wet and dry ingredients, mixing gently.
- Incorporate any optional chocolate chips or nuts.
- Pour the batter into the prepared loaf pan.
- Bake for 50-60 minutes, checking with a toothpick.
- Cool in the pan for 10-15 minutes before inverting onto a wire rack.
Notes
For variations, consider adding lemon zest, cinnamon, or fresh berries for a twist on flavor.
- Prep Time: 15 minutes
- Cook Time: 60 minutes
- Category: Dessert
- Method: Baking
- Cuisine: American
Nutrition
- Serving Size: 1 slice
- Calories: 180
- Sugar: 10g
- Sodium: 300mg
- Fat: 6g
- Saturated Fat: 2g
- Unsaturated Fat: 4g
- Trans Fat: 0g
- Carbohydrates: 22g
- Fiber: 1g
- Protein: 8g
- Cholesterol: 60mg
Keywords: pound cake, cottage cheese, vanilla cake, healthy dessert, protein cake
High-Protein Cottage Cheese Donuts: 15-Minute Breakfast Snack
Indulge Guilt-Free: Delicious Protein Cottage Cheese Protein Donuts
Welcome to my kitchen, friends! Today, we’re diving into a sweet treat that not only satisfies your donut cravings but also packs a delightful protein punch. Yes, you heard that right! We’re making Protein Cottage Cheese Donuts that are not just delicious but also nutritious. Picture this: soft and fluffy donuts that taste indulgent and are so easy to whip up—you’ll never look at a regular store-bought donut the same way again.
I can still remember the first time I discovered the magic of protein-packed treats. It was a sunny Saturday morning, and I had a craving for something sweet but also wanted to stick to my healthy lifestyle. That’s when the idea of combining cottage cheese with my favorite donut recipe came into play. The texture of the cottage cheese provides a wonderful moist and fluffy consistency, while the added protein means it’s perfect for starting your day right or as a post-workout snack.
So, whether you’re fueling up for a busy day or treating yourself after an intense workout, these Protein Cottage Cheese Donuts will make you feel like a superstar. Plus, they are simple enough to prepare that you can easily get your family involved. So, roll up your sleeves, throw on that apron, and let’s get to it!
A Nostalgic Memory: The Donut Adventure
Let me take you back to my childhood—a time filled with adventure, creativity, and my mom’s bakery adventures. Every weekend, I would race into the kitchen, excited to help whip up something delicious. One of our favorite activities was donut-making day. I remember standing on a stool, peering into the bubbling oil as we dropped dough into the hot pan. Mom would sprinkle them with sugar while they were still warm, and the whole house would fill with that warm, sugary scent. It was an event, and the best part? The aftermath—friends and family chatting around the table, enjoying our creations.
With these Protein Cottage Cheese Donuts, I wanted to honor those sweet memories while incorporating a twist of health and wellness. They feel just as cozy, but they also fuel our bodies, allowing us to create new memories around the table. Let’s make our way back to the kitchen!
Ingredients
Here’s what you’ll need for these delightful donuts:
-
1 cup cottage cheese
The star of our show! Cottage cheese adds moisture and protein, making the donuts fluffy and satisfying. For a vegan substitute, try using silken tofu or a dairy-free yogurt. -
1/2 cup rolled oats
These serve as the base and add texture. You could use almond flour or a gluten-free flour blend if you’re going gluten-free. -
1/4 cup honey
Nature’s sweetener! Honey keeps the donuts moist and adds natural sweetness. If you’re looking for a vegan alternative, agave syrup works beautifully here. -
2 eggs
Eggs bind all the ingredients together. If you’re looking for an egg-free version, try using flax eggs (1 tablespoon of ground flaxseed mixed with 2.5 tablespoons of water per egg). -
1 teaspoon vanilla extract
This is a must for flavor. Feel free to experiment with almond extract for a different touch! -
1 teaspoon baking powder
This helps the donuts rise and gives them a light, fluffy texture. -
1 teaspoon cinnamon
My secret weapon! Cinnamon not only elevates the flavor but adds a warming touch. -
Pinch of salt
Just a little to enhance all the flavors. -
Optional toppings:
Feel free to get creative! Consider shredded coconut, chopped nuts, or a drizzle of dark chocolate as toppings after baking.
Step-by-Step Instructions
Here we go—let’s whip these delectable donuts up!
-
Preheat your oven:
Start by preheating your oven to 350°F (175°C). Let the anticipation build as you prepare the donut batter! -
Blend the cottage cheese:
In a mixing bowl, use an immersion blender or food processor to blend the cottage cheese until it’s smooth and creamy. This helps to incorporate air into the mixture, creating a fluffy texture. -
Combine wet ingredients:
Add in your honey, eggs, and vanilla extract, and mix until well combined. If you’re using a food processor, you can do this step simultaneously! -
Mix dry ingredients:
In another bowl, combine the rolled oats, baking powder, cinnamon, and salt. Make sure to mix it well, so the baking powder gets evenly distributed. -
Combine wet and dry:
Gently fold the dry ingredients into the wet mixture. You don’t want to over-mix! The batter should be somewhat thick and lumpy. -
Prepare the donut pan:
Lightly grease your donut pan with cooking spray or a bit of coconut oil to ensure easy removal. -
Fill the donut pan:
Scoop the batter into the pan, filling each donut mold about halfway. Don’t worry if it’s not perfectly smooth; the bumps will bake into deliciousness! -
Bake:
Pop the donuts in the preheated oven and bake for 10-12 minutes, or until the edges are slightly golden and a toothpick inserted comes out clean. -
Cool and remove:
Once baked, let them cool in the pan for a few minutes before transferring them to a wire rack to cool completely. If you’re impatient like me, you might find it hard to resist and nibble on one right away!
Serving Suggestions
Now that your Protein Cottage Cheese Donuts are beautifully baked and golden, the fun begins! Plate them up on a whimsical cake stand or simply arrange them on a colorful platter. Dust with a little powdered sugar or drizzle with honey to make them extra inviting. Pair them with a cup of freshly brewed coffee or a calming herbal tea for the perfect breakfast or afternoon snack!
Recipe Variations
Get creative with these tasty donuts! Here are a few variations to consider:
- Chocolate Protein Donuts: Add 1/4 cup of cocoa powder to the dry ingredients for a rich, chocolatey twist.
- Blueberry Bliss: Fold in 1/2 cup of fresh or frozen blueberries to the batter before baking for an extra burst of flavor and antioxidants.
- Nutty Banana: Substitute half of the cottage cheese with mashed bananas for a delicious banana-flavored donut.
- Pumpkin Spice Delights: Replace the cottage cheese with pumpkin puree and add a touch of nutmeg for a seasonal treat.
- Savory Spinach and Feta: Skip the sweet ingredients and mix in fresh spinach and crumbled feta cheese for a delightful savory variation!
Chef’s Notes
These Protein Cottage Cheese Donuts have a special place in my heart. They started as an experiment to incorporate healthier ingredients into a beloved classic, and boy, did they exceed my expectations! The evolution of this recipe reminds me that cooking is all about trying new things and embracing mistakes.
One of my funniest kitchen stories involves a batch that didn’t rise properly because I accidentally grabbed the baking soda instead of baking powder. Let’s just say they were flat but still delicious—and excellent for a laugh!
FAQs and Troubleshooting
1. My donuts came out too dense! What went wrong?
This could be due to overmixing the batter or not enough rising agent. Be sure to fold gently and check the date on your baking powder!
2. Can I use a regular muffin pan instead of a donut pan?
Absolutely! You can make muffin versions of these donuts. Just adjust the baking time to about 15-18 minutes or until a toothpick inserted comes out clean.
3. What’s the best way to store leftovers?
Store these donuts in an airtight container at room temperature for up to 3 days or in the fridge for up to a week. They also freeze beautifully—just pop them in a freezer-safe bag!
4. How can I add more flavor?
Feel free to experiment with spices! Adding nutmeg, pumpkin spice, or even a splash of orange/zest can create delightful flavor notes.
Nutritional Information
While I believe in enjoying food and all its flavors, I know many of you may be curious about nutritional content. Each donut contains approximately:
- Calories: 150
- Protein: 6g
- Carbohydrates: 20g
- Fat: 3g
These figures can vary based on ingredient substitutions, so be sure to adjust based on what you choose!
So there you have it! A heartfelt recipe that brings comfort and joy while keeping your health goals in check. I hope these Protein Cottage Cheese Donuts inspire you to get creative in the kitchen and make beautiful, cozy memories with your loved ones. Whether you choose to indulge in them for breakfast, as a snack, or even dessert, remember: baking is all about happiness, and these donuts are sure to deliver! Happy baking, everyone!
Print
Protein Cottage Cheese Donuts
- Total Time: 22 minutes
- Yield: 12 servings 1x
- Diet: Vegetarian
Description
Delicious and nutritious protein-packed donuts made with cottage cheese, perfect for breakfast or a post-workout snack.
Ingredients
- 1 cup cottage cheese
- 1/2 cup rolled oats
- 1/4 cup honey
- 2 eggs
- 1 teaspoon vanilla extract
- 1 teaspoon baking powder
- 1 teaspoon cinnamon
- Pinch of salt
- Optional toppings: shredded coconut, chopped nuts, dark chocolate
Instructions
- Preheat your oven to 350°F (175°C).
- Blend the cottage cheese until smooth and creamy.
- Combine honey, eggs, and vanilla extract; mix until well combined.
- Mix dry ingredients: oats, baking powder, cinnamon, and salt in another bowl.
- Combine the wet and dry mixtures gently.
- Prepare the donut pan by lightly greasing it.
- Fill the donut pan halfway with batter.
- Bake for 10-12 minutes until golden and a toothpick comes out clean.
- Cool in the pan, then transfer to a wire rack.
Notes
For a vegan option, use silken tofu or dairy-free yogurt. Store leftovers in an airtight container at room temperature for up to 3 days or in the fridge for up to a week.
- Prep Time: 10 minutes
- Cook Time: 12 minutes
- Category: Dessert
- Method: Baking
- Cuisine: American
Nutrition
- Serving Size: 1 donut
- Calories: 150
- Sugar: 10g
- Sodium: 200mg
- Fat: 3g
- Saturated Fat: 1g
- Unsaturated Fat: 2g
- Trans Fat: 0g
- Carbohydrates: 20g
- Fiber: 2g
- Protein: 6g
- Cholesterol: 45mg
Keywords: protein donuts, cottage cheese recipe, healthy dessert

Minute Protein-Packed Cottage Cheese Bagel Bites
Protein Cottage Cheese Bagel Bites: A Wholesome Snack Delight!
Welcome back to my cozy kitchen! If you’re anything like me, you’re always on the lookout for snacks that are not just tasty, but also a bit nourishing. Let’s face it: between hustle and bustle, we all need quick, wholesome bites that fuel our day. Today, I’m super excited to share one of my absolute favorites: Protein Cottage Cheese Bagel Bites! These little gems are simple to whip up, incredibly satisfying, and versatile enough to cater to all taste buds.
Imagine this: You’ve had a long day at work, and your hunger pangs are getting louder than your favorite playlist. You want something that won’t just fill you up but also delights your taste buds. That’s where these bagel bites come into play — perfect for a quick snack or an appetizing addition to your brunch spread! Plus, they’re jam-packed with protein from cottage cheese, a powerhouse ingredient that adds creaminess and a nutritional boost. Are you feeling as excited as I am? Let’s dive in!
A Little Personal Story
Let me take you down memory lane. Growing up, weekends in my house always smelled of freshly baked bagels and homemade spreads. My mom would wake up early, her apron tied carefully around her waist, and immerse herself in the joy of baking. The whole house would fill with the anticipation of those warm bagels — it was pure magic!
I remember one particular Saturday morning when she decided to introduce cottage cheese as a twist for our bagel toppings. With her creative flair, she whipped up a spicy herb cottage cheese spread while listening to her favorite tunes. The combination of flavors and textures was an instant hit! We assembled our bagel bites with all sorts of toppings, each bite a little explosion of flavor that had us giggling and chatting. Those moments taught me not just about food but about connection and joyful times spent in the kitchen. By the way, I still love making these protein-packed wonders whenever I need a reminder of those cozy mornings!
Ingredients
Let’s gather our ingredients! Here’s what you’ll need to create these scrumptious Protein Cottage Cheese Bagel Bites:
- Bagels: You can use mini bagels, whole bagels, or even whole-grain varieties for a nutritious base. Choose your favorite type to suit your taste!
- Cottage Cheese: This is our protein superstar! Opt for low-fat or full-fat; the creamy texture elevates the flavor. If you’re looking for a dairy-free option, try switching to cashew or almond cream cheese.
- Greek Yogurt: A dollop of Greek yogurt adds a tangy flavor and extra protein. You can skip it if you’re going for a pure cottage cheese base or even substitute with sour cream for a different taste.
- Herbs & Spices: Fresh dill, chives, or even a sprinkle of garlic powder will elevate the flavor. Use whatever herbs you love or have on hand — get creative here!
- Vegetables: Cucumber, bell peppers, or cherry tomatoes make refreshing toppings. Feel free to substitute with your favorite veggies, or try pickled ones for added zing.
- Protein Toppings: Think smoked salmon, turkey slices, or even bacon for those wanting a savory punch. For a plant-based alternative, try avocado slices or roasted chickpeas!
With these flavorful components, you’ve got the makings of something really special.
Step-by-Step Instructions
Now that we have our ingredients, let’s jump into the cooking process — it’s going to be simple and fun!
Step 1: Preheat and Prepare
Start by preheating your oven to 350°F (175°C). If you’re using fresh bagels, slice them in half. Toasting them slightly can add a delightful crunch that takes these bites to another level.
Step 2: Mix the Cottage Cheese Spread
In a medium bowl, take about 1 cup of cottage cheese. Add 1/4 cup of Greek yogurt to this and mix well until you achieve a smooth, creamy consistency. This is also a great time to sprinkle in your chosen herbs! If you’re using dried spices instead of fresh herbs, sprinkle about a teaspoon of garlic powder for a bit of zest.
Step 3: Add Flavor and Seasoning
Don’t forget to season your mixture! A generous pinch of salt and pepper can go a long way. Taste as you go; this is one of the most exciting parts of cooking! If you’re feeling adventurous, consider incorporating some hot sauce or lemon juice to brighten things up.
Step 4: Assemble the Bagel Bites
Now it’s time to assemble. Grab your bagel halves and spread a generous dollop of your cottage cheese mixture on each half. Use the back of a spoon to smooth it out evenly, creating a sturdy base for toppings.
Step 5: Top with Veggies and Protein
Slice up your favorite veggies and protein toppings. Place them artfully on top of the cottage cheese spread; I like to make each one a work of art! Mixing colors makes it visually appealing, so don’t hold back on your creations.
Step 6: Bake
Place your bagel bites on a baking sheet and pop them in the oven for about 10-15 minutes, or until everything is heated through and slightly golden on top. The aroma that fills the kitchen will have you counting down the minutes until you can dig in!
Step 7: Serve Warm
Once out of the oven, let them cool for a minute. Serve immediately with any extra toppings or sides like a fresh green salad. Enjoy these warm, and watch them disappear fast!
Serving Suggestions
To serve, place your Protein Cottage Cheese Bagel Bites on a pretty platter, surrounded by fresh cut veggies or a lovely dip like hummus. You can even drizzle a touch of balsamic reduction over the top for extra flair. These bites are great for parties, casual get-togethers, or simply lounging at home with a good book. Add a side of fruit or a green salad for a balanced meal!
Recipe Variations
Looking to put a fun spin on these bagel bites? Here are a few ideas to get your creativity flowing:
- Mediterranean Twist: Swap in feta cheese for cottage cheese, add olives and sun-dried tomatoes, and sprinkle with oregano.
- Sweet Option: Try spreading almond butter or flavored cream cheese instead of cottage cheese, and top with sliced bananas and a drizzle of honey.
- Breakfast Bagel: Top with scrambled eggs and salsa for a hearty breakfast treat!
- Spicy Version: Mix in jalapeños or top with sriracha for heat, perfect for spice lovers.
Chef’s Notes
These bagel bites have a special place in my heart. Remember my mom in the kitchen? Well, I’ve transformed and adapted this recipe throughout the years. When I discovered the power of cottage cheese as a protein source, it became a staple in my recipes — this snack became a regular at family brunches and get-togethers. And guess what? They remain as loved today as they were back then!
Whenever I host friends over, these Protein Cottage Cheese Bagel Bites are always on the table, and the best part? Everyone can customize their toppings to their taste. Plus, the cheerful chaos of everyone assembling their bites adds to the fun!
FAQs and Troubleshooting
Q1: What if I don’t like cottage cheese?
No worries! You can easily swap it out for cream cheese, Greek yogurt, or even herbed ricotta for a different texture.
Q2: Can I make them ahead of time?
Absolutely! You can prepare the cottage cheese spread a day prior and just assemble the night before. Bake them fresh right before serving for the best texture.
Q3: What if my bagels are stale?
If you’re using stale bagels, consider slicing them and toasting them longer to revive some texture. Alternatively, a quick trip under the broiler can help if you don’t want to bake them.
Q4: How can I store leftover bagel bites?
If you have any leftovers, store them in an airtight container in the fridge for up to 2-3 days. You can reheat them in the oven or microwave, though they are best fresh.
Nutritional Info
While the nutritional information can vary based on the toppings and bagel type, each bite is loaded with protein, thanks to the cottage cheese and any added protein toppings. A typical serving can provide:
- Calories: ~150-200 per bite (depends on toppings)
- Protein: ~10-15g
- Carbohydrates: ~15-20g
- Healthy Fats: Varies based on toppings
With a balance of nutrients, these Protein Cottage Cheese Bagel Bites make for an ideal, satisfying snack or light meal!
Thanks for joining me in the kitchen today! I can’t wait for you to try these delicious bagel bites, and I’d love to hear how they turn out for you. Remember, cooking is all about creativity — don’t hesitate to make this recipe your own! Happy cooking, my friends!
Print
Protein Cottage Cheese Bagel Bites
- Total Time: 25 minutes
- Yield: 4 servings 1x
- Diet: Vegetarian
Description
A delightful and nourishing snack made with cottage cheese, bagels, and your choice of toppings.
Ingredients
- Mini bagels or whole bagels
- 1 cup cottage cheese
- 1/4 cup Greek yogurt
- Fresh dill, chives, or garlic powder
- Vegetables like cucumber, bell peppers, or cherry tomatoes
- Protein toppings such as smoked salmon, turkey slices, or bacon
Instructions
- Preheat your oven to 350°F (175°C) and slice bagels in half.
- Mix cottage cheese and Greek yogurt in a bowl until smooth and creamy.
- Add herbs, spices, and seasoning to your mixture; taste to adjust flavors.
- Assemble by spreading the cottage cheese mixture on each bagel half.
- Top with sliced vegetables and protein toppings.
- Bake for 10-15 minutes until heated through and slightly golden.
- Serve warm with extra toppings or a fresh salad.
Notes
These bagel bites are highly customizable based on your flavor preferences. Experiment with different toppings!
- Prep Time: 10 minutes
- Cook Time: 15 minutes
- Category: Snack
- Method: Baking
- Cuisine: American
Nutrition
- Serving Size: 2 bagel bites
- Calories: 200
- Sugar: 3g
- Sodium: 300mg
- Fat: 7g
- Saturated Fat: 3g
- Unsaturated Fat: 4g
- Trans Fat: 0g
- Carbohydrates: 25g
- Fiber: 2g
- Protein: 12g
- Cholesterol: 15mg
Keywords: bagel bites, cottage cheese, healthy snacks, protein snacks, easy recipes




