
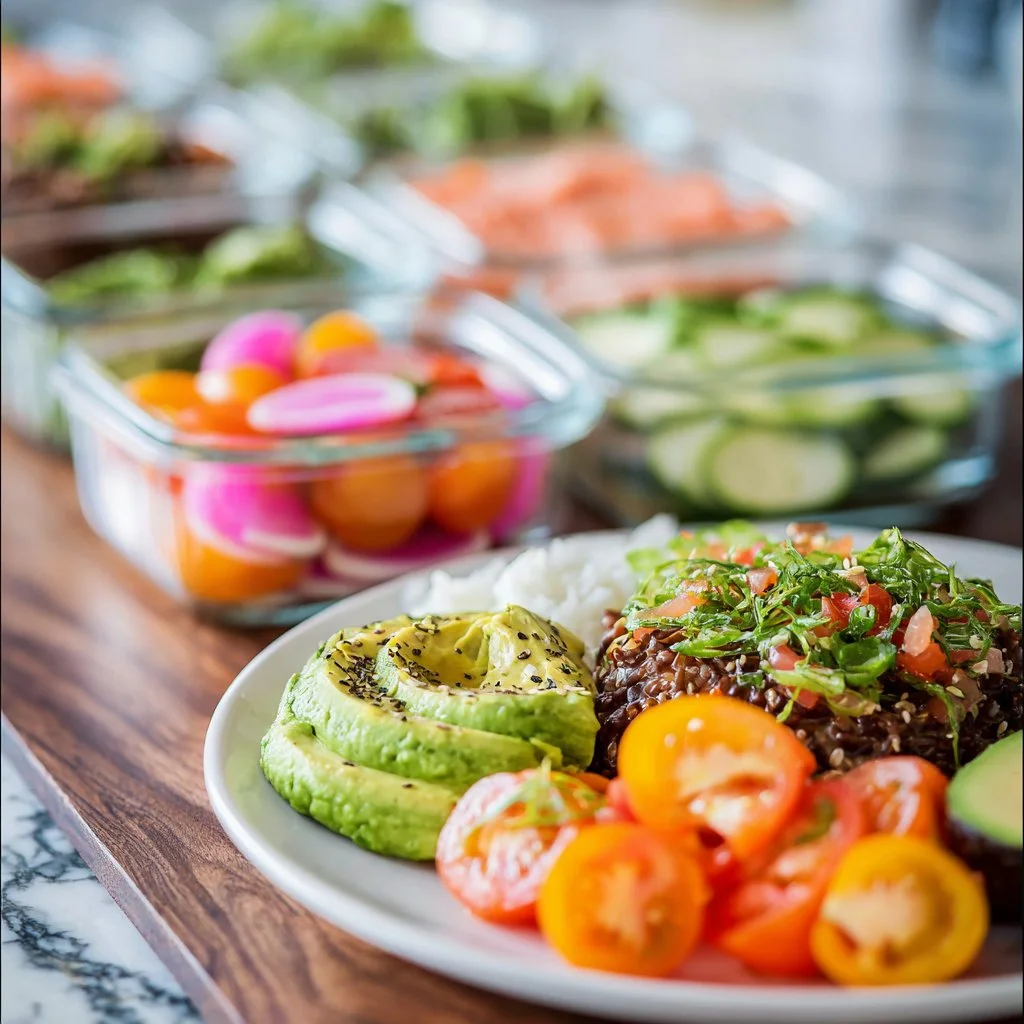
How I Meal Prep for the Week | Get Inspired Everyday!
How I Meal Prep for the Week: Get Inspired Everyday!
Welcome back to my cozy kitchen! Today, we’re diving into a topic I absolutely love: meal prepping! If you’ve ever found yourself scrambling at dinnertime or staring blankly at your fridge, wondering what to whip up, you’re not alone! After countless evenings of “What’s for dinner?” with a side of stress, I decided to take control of my week with meal prep. Not only has it saved my sanity, but it has also transformed the way my family and I enjoy our meals.
Meal prepping can be a game-changer for anyone looking to eat healthily, save time, or simply enjoy a home-cooked meal without the fuss on a busy night. I remember when I first started! I spent an entire Sunday cooking, labeling, and storing everything away, and let me tell you, it felt like running a marathon with a golden ticket at the finish line!
Today, I’ll share with you my step-by-step guide to meal prepping, packed with tips, tricks, and personal stories along the way that hopefully spark your excitement about the whole process. Whether you’re a busy professional, a parent juggling kids and schedules, or just anyone wanting to make life a little easier, meal prepping is for you. So, roll up those sleeves, grab your apron (I have a cute, slightly messy one just for these occasions!), and let’s dive into the world of flavorful meal prep that will inspire your everyday cooking.
Personal Story
Back when I was still navigating the rollercoaster of cooking at home, I made a memorable decision to dedicate my Saturday mornings to meal prepping. One chilly Saturday, I excitedly invited my best friend, Maya, over to embark on this culinary adventure together. We hung out in the kitchen, blasting our favorite playlist and laughing non-stop. The whole house smelled amazing as we roasted veggies, grilled chicken, and whipped up a massive batch of quinoa.
I remember a moment when Maya and I were stirring a bubbling pot of chili together — we had no recipe in front of us! Just a little intuition and a few generous handfuls of spices (more was definitely more that day!). We ended up with an incredible concoction that would become a staple in both our homes.
After our epic cooking session, not only did we stock up our fridges, but we also filled our hearts with joy and laughter. The best part? Each meal turned into a fun reminder of our adventure. Now, meal prepping isn’t just about convenience for me; it’s a way to bond with loved ones, share stories, and enjoy fantastic flavors all week long.
Ingredients
To kick off your meal prep journey, let’s talk about the building blocks you’ll need. Here’s a list of ingredients I recommend, along with some handy tips:
-
Proteins: Chicken Breast, Tofu, or Lentils
- Chicken Breast: Lean, easy to cook, and versatile. If you want to spice things up, try thighs or a whole roast chicken.
- Tofu: A fantastic plant-based protein! Use extra-firm for stir-fries or marinating. Feeling adventurous? Try tempeh as a nutty alternative.
- Lentils: These little legumes cook up quickly and are packed with protein. They can also be easily flavored to match different cuisines.
-
Grains: Quinoa, Brown Rice, or Whole Wheat Pasta
- Quinoa: A protein-rich grain that cooks in about 15 minutes. Plus, it’s gluten-free! For a similar texture, you could swap in couscous.
- Brown Rice: A delightful, nutty flavor and great for hearty meals. Try cauliflower rice as a lower-carb option!
- Whole Wheat Pasta: Great for tossing with veggies and proteins. If you want to up the nutrition, try chickpea or lentil pasta for added flavor and protein.
-
Vegetables: Seasonal Produce (Bell Peppers, Zucchini, Kale)
- Bell Peppers: Colorful, sweet, and great raw or roasted. Swap for any leftover veggies like broccoli or carrots.
- Zucchini: This versatile veggie can be spiralized or simply sautéed. No zucchini? Use eggplant for depth of flavor.
- Kale: A nutritional powerhouse! If it’s too strong for your taste, try baby spinach or arugula as a milder option.
-
Herbs and Spices: Garlic, Cumin, and Fresh Parsley
- Garlic: Adds an aromatic punch that enhances nearly every dish. If you’re out, onion powder can work in a pinch!
- Cumin: This earthy spice is perfect in grains or proteins. Substitutions include coriander or even chili powder for extra heat.
- Fresh Parsley: Brightens up dishes with a fresh finish. Swap in basil or cilantro for different flavor profiles.
Step-by-Step Instructions
Alright, let’s roll up those sleeves and get prepping! Here’s a detailed guide you can follow to create a fantastic meal-prepping experience:
Step 1: Planning Your Menu (30-45 minutes)
First, sit down with a cup of tea, your notepad, and get creative! List out the meals you want to prepare for the week. Aim for variety, but also consider balancing flavors, textures, and cooking times. A warm grain bowl one day, a fresh salad the next, and stir-fried veggies to keep things lively! Write down those ideas, and don’t forget to involve your family; they might inspire a dish you didn’t think of!
Step 2: Grocery Shopping (1-2 hours)
With your menu in hand, it’s time to hit the grocery store! Stick to the perimeter of the store for the freshest produce and proteins. I love getting seasonal veggies because they taste amazing! And don’t forget that cute reusable bag for the planet; it always makes me feel good!
Step 3: Prep Your Space (15-20 minutes)
Get that kitchen ready! Clear the counters, wash your hands, put on an apron, and pull out your utensils. Having a clean, organized space keeps you focused. I love using bowls to classify my prepped ingredients; it makes everything feel tidy!
Step 4: Prepping Your Proteins (30-45 minutes)
Start with proteins, as they often take the longest to cook.
-
Chicken: Season with olive oil, salt, pepper, and your choice of herbs. Bake at 400°F for about 20-25 minutes. Let it cool before cutting into slices for easy storage.
-
Tofu: Press it to get rid of excess moisture and marinade it in soy sauce and ginger. Bake or pan-fry until crispy.
-
Lentils: Rinse and simmer in about 3 cups of water with a bay leaf for 15-20 minutes until tender. Drain any excess water and set aside.
Step 5: Cooking Grains (20-30 minutes)
While proteins are cooking, let’s get those grains going!
- For Quinoa: Rinse and cook with a 2:1 water-to-quinoa ratio; bring to boil and then cover on low for 15 minutes.
–Brown Rice: Use the same water ratio but cook for about 40-45 minutes. - Whole wheat pasta takes about 8-10 minutes; just don’t forget to salt that water!
Step 6: Roasting Those Veggies (20-30 minutes)
While everything is cooking, chop and roast your veggies!
- Preheat your oven to 425°F. Toss your chosen veggies (like bell peppers and zucchini) in olive oil, salt, and pepper, and spread them out on a baking sheet.
- Roast until tender and caramelized, about 20-25 minutes. The smell alone will make you drool!
Step 7: Assembly Time (30 minutes)
With everything ready, it’s time to assemble your meals! Use airtight containers to store your meals, layering your grains on the bottom, followed by protein, and topped with those beautiful roasted veggies. Sprinkle fresh herbs on top for that gorgeous finishing touch!
Step 8: Labels and Storage (10 minutes)
Use labels to mark your meals with dates and meal names. A little organization goes a long way to prevent confusion come mealtime. Store in your fridge for easy access, or freeze any extra portions to keep on hand for later!
Step 9: Enjoy (priceless!)
After all that hard work, enjoy the fruits of your labor! Meal prep is not just about saving time; it’s about celebrating the small victories of cooking and nourishing yourself throughout the week.
Serving Suggestions
When it’s time to eat, simply grab a container, heat it up (or enjoy cold if that’s your jam), and serve it up beautifully. I like to add a sprinkle of nuts, a drizzle of olive oil, or even some avocado for extra creaminess. For a fancy touch, serve on a rustic wooden board or in colorful bowls that brighten your table!
Recipe Variations
-
Flavor Fusion: Change up your proteins — try marinated shrimp for a tropical theme or Moroccan-spiced chickpeas for a plant-based twist.
-
Grain Swap: Substitute quinoa for farro or barley for nutty textures, or go crazy with wild rice.
-
Veggie Adventure: Use seasonal squash in the fall or fresh asparagus in the spring. Adapt based on what’s available!
-
Spiciness Levels: Add some heat with a kick of chili flakes or make it milder with avocado or creamy tahini dressing.
-
Global Inspiration: For an Italian flair, toss grilled veggies and chicken with pesto. For a Mexican vibe, load up with black beans and avocado — the options are endless!
Chef’s Notes
Meal prepping has really blossomed over the years for me! I remember when I first started and made ahem some questionable concoctions — let’s just say that edible doesn’t always mean delicious! But through lots of experimentation, I found my flow. I learned to keep everything flavorful yet simple, and I embraced making mistakes in the kitchen. Each meal now comes with a bit of nostalgia and an ooey-gooey sense of satisfaction. The best part? My family loves it, and that’s what really matters!
FAQs and Troubleshooting
1. What if I don’t have time to meal prep on weekends?
No problem! Start small. Try prepping just your proteins or grains one day during the week.
2. How long can I store my prepped meals?
Most meals last about 4-5 days in the fridge. Anything longer, toss it in the freezer. Just make sure everything cools down before sealing!
3. Can I meal prep breakfast too?
Absolutely! Overnight oats, chia seed puddings, or veggie-packed egg muffins are a fantastic way to get your morning started!
4. I’m stuck in a meal prep rut, any suggestions?
Mix it up! Try new cuisines, ditch what you don’t enjoy, or even switch up your cooking methods (grilling, baking, or stirring for a stir-fry!).
Nutritional Info
While prepping your meals, don’t forget about balance! A well-rounded meal should have proteins, healthy fats, and plenty of veggies. You’ll find that mixing these elements not only fuels your body but also packs flavors that resonate throughout the week.
That’s a wrap, my friends! I hope you feel inspired to tackle your meal prep adventures. Remember, cooking with love and joy is what truly makes a meal special, and I can’t wait to hear how your culinary journey unfolds! Cozy up in your kitchen, savor every moment, and don’t forget to create those memories along the way. Happy cooking! 🍽️✨
Print
Weekly Meal Prep Guide
- Total Time: 165 minutes
- Yield: 6 servings
- Diet: Vegetarian
Description
A comprehensive guide to meal prepping for a week filled with delicious and nutritious meals.
Ingredients
- Chicken Breast
- Tofu
- Lentils
- Quinoa
- Brown Rice
- Whole Wheat Pasta
- Bell Peppers
- Zucchini
- Kale
- Garlic
- Cumin
- Fresh Parsley
Instructions
- Plan your menu by listing meals for the week.
- Shop for ingredients at the grocery store.
- Prep your space by clearing counters and organizing tools.
- Prep your proteins: season and cook chicken, tofu, and lentils.
- Cook your grains like quinoa, brown rice, and whole wheat pasta.
- Roast vegetables until tender and caramelized.
- Assemble meals in containers with grains, protein, and veggies.
- Label meals with dates and names for easy access.
- Enjoy your prepared meals throughout the week.
Notes
Feel free to experiment with different proteins, grains, and vegetables to suit your taste.
- Prep Time: 45 minutes
- Cook Time: 120 minutes
- Category: Meal Prep
- Method: Baking, Roasting, Boiling
- Cuisine: Various
Nutrition
- Serving Size: 1 container
- Calories: 450
- Sugar: 5g
- Sodium: 300mg
- Fat: 10g
- Saturated Fat: 1g
- Unsaturated Fat: 4g
- Trans Fat: 0g
- Carbohydrates: 60g
- Fiber: 8g
- Protein: 25g
- Cholesterol: 60mg
Keywords: meal prep, healthy eating, cooking tips, easy recipes
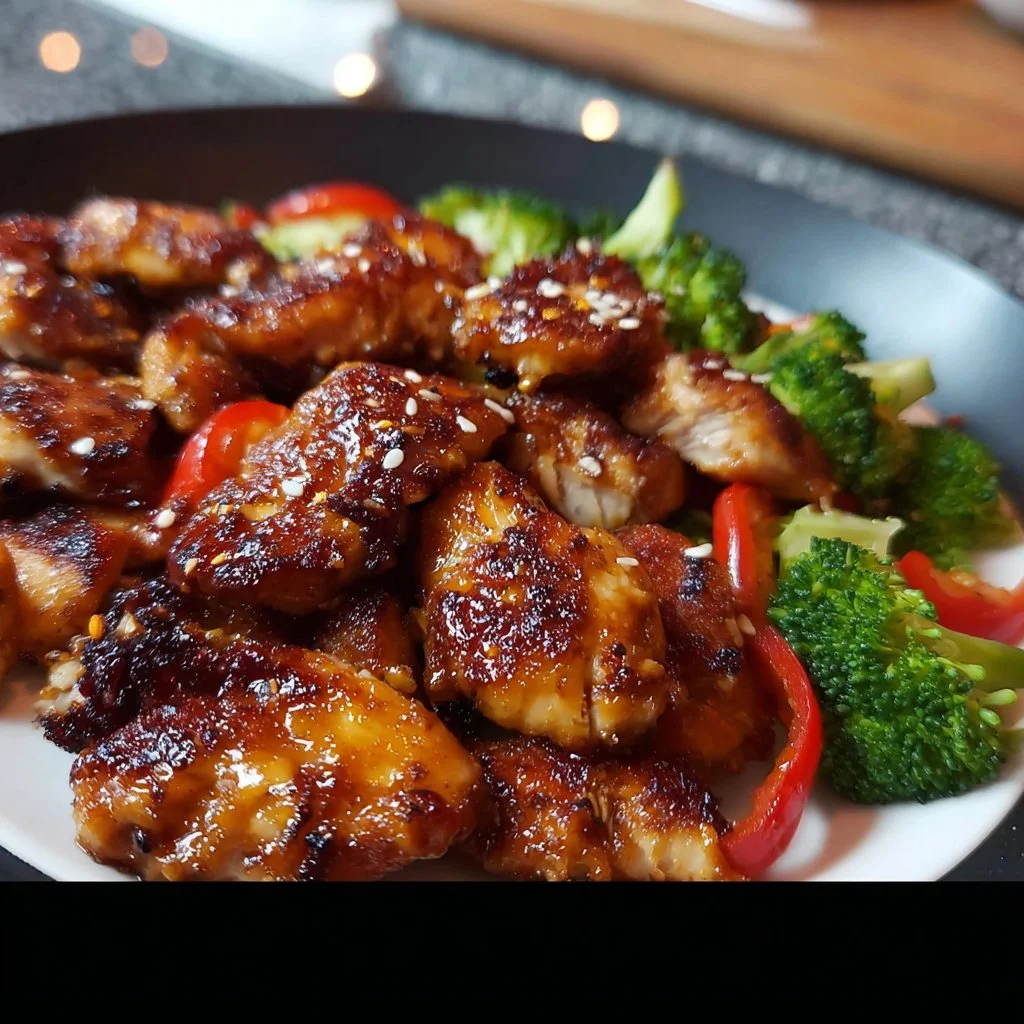
Simple Teriyaki Chicken
Simple Teriyaki Chicken: A Delightful Dish That Brings Everyone Together
Welcome back to my cozy corner of the culinary world! Today, we’re diving into the deliciously savory realm of Simple Teriyaki Chicken. This dish is more than just a meal; it’s a celebration of flavors, made in the comfort of your own kitchen, and perfect for sharing with friends and family. The umami-rich teriyaki sauce dances with tender chicken, creating a harmonious balance that will make your taste buds sing.
Now, I remember the first time I tasted teriyaki chicken. I was at a local Japanese restaurant, and the moment that beautifully grilled chicken hit my mouth, I knew I had discovered something special. It was unbelievably tender, coated in a glossy sauce that was sweet, savory, and just the right amount of sticky. I was hooked! Ever since that magical evening, I’ve been experimenting in my kitchen to recreate that flavor and capture the essence of joy and warmth that comes with a homemade meal.
Today, I want to share my simple take on this classic dish, designed specifically for the busy home cook. With just a handful of ingredients and a little love, you can whip up this teriyaki chicken in under 30 minutes! Whether you’re cooking up a quick weeknight dinner or impressing company at your next gathering, this dish is sure to satisfy. So grab your apron, turn on your favorite playlist, and let’s get cooking—because we’re about to create something truly unforgettable!
Personal Story
One of my favorite memories surrounding teriyaki chicken actually comes from a family gathering years ago. My grandmother, a culinary wizard in her own right, decided to host a backyard barbecue for the whole clan. Everyone brought a dish to share, but I was especially excited about her teriyaki chicken skewers. She marinated chicken thighs in a homemade teriyaki sauce, skewered them with colorful veggies, and grilled them over an open flame. The aroma wafted through the air, captivating all our senses.
As we gathered around the table, laughter and stories flowed just as easily as the food. I remember watching my little cousins dive into those skewers, their faces lighting up with joy at the first bite. That day wasn’t just about the chicken; it was about connection. It reminded me of how food brings people together, sparking conversations and creating lasting memories. It’s that spirit of togetherness that motivates me to share this Simple Teriyaki Chicken recipe with you!
Ingredients
For the Teriyaki Chicken:
-
Chicken Thighs (or Breasts)
- Chicken thighs are known for their juiciness and flavor, making them the ideal choice for this recipe. If you prefer lower-fat options, boneless, skinless chicken breasts will work but may need a bit of extra care to avoid drying out.
-
Soy Sauce
- A key player in the teriyaki sauce, soy sauce adds that bold umami flavor. Opt for low-sodium versions if you’re keeping an eye on salt intake.
-
Honey (or Maple Syrup)
- The sweetness in the sauce comes from honey, but you can easily substitute with pure maple syrup or agave nectar if you’re looking for a vegan alternative.
-
Rice Vinegar
- This ingredient lends a gentle tang to balance the sweetness. If you don’t have it on hand, apple cider vinegar is a great substitute.
-
Garlic (Minced)
- Fresh garlic adds aromatic depth to the sauce. You can use garlic powder in a pinch, but you might miss out on that fragrant freshness.
-
Ginger (Fresh or Ground)
- Fresh ginger is preferable for its bright, zesty flavor. If fresh isn’t available, ground ginger works as a second-best option. Just remember to use less, as it’s more concentrated.
-
Sesame Oil
- A drizzle of sesame oil enhances the profile of this dish with its nutty flavor. If you can’t find it, a little olive oil will do in a pinch, but don’t skip the sesame seeds for garnish!
-
Green Onions (for garnish)
- These add a lovely pop of color and a mild onion flavor. Feel free to swap them for chives or even cilantro for a different touch!
Optional:
- Vegetables for Stir-Fry (Bell Peppers, Broccoli, Snow Peas)
- A colorful medley of veggies can transform your chicken into a complete meal. Feel free to get creative based on what you have in your fridge!
Step-by-Step Instructions
Step 1: Marinate the Chicken
Start by taking your chicken and placing it in a bowl or a resealable plastic bag. In a separate bowl, whisk together the soy sauce, honey, rice vinegar, minced garlic, and fresh ginger. Pour this delicious marinade over the chicken, making sure it’s well-coated. I recommend letting it marinate for at least 15 minutes, but if you have time, 1-2 hours is even better to really let those flavors penetrate the meat. Just remember to keep it in the refrigerator!
Step 2: Prep Your Veggies (Optional)
If you’re adding vegetables, now’s the time to chop them up into bite-sized pieces. Bell peppers, broccoli, and snow peas work beautifully in this dish. Make sure they’re all similar in size to ensure even cooking. This also makes them easier to eat!
Step 3: Cook the Chicken
Heat a non-stick skillet or grill pan over medium-high heat. Once it’s hot, remove the chicken from the marinade (reserve the marinade for later) and add the chicken to the pan. Cook for about 5-7 minutes on each side, or until the chicken is cooked through and has a nice golden-brown color. If using an instant-read thermometer, aim for an internal temperature of 165°F (75°C) for chicken thighs and 160°F (71°C) for breasts.
Chef’s Hack: If you’re grilling, you might want to use skewers for easier flipping and to get those lovely grill marks. Just make sure to soak wooden skewers in water for about 30 minutes beforehand to prevent burning!
Step 4: Make the Teriyaki Sauce
While the chicken is cooking, take the reserved marinade and pour it into a small saucepan. Bring it to a gentle simmer over medium heat, stirring occasionally. This will help thicken it slightly and make it safe to consume. Once it has reduced by about a third, remove it from the heat. You can whisk in a little cornstarch mixed with cold water for extra thickness, if desired.
Step 5: Add the Vegetables
If you’re including vegetables, push the chicken to the side of the pan once it’s almost done, and add them in. Stir-fry the veggies for about 2-3 minutes, just until they’re vibrant and slightly tender.
Tip: You want them to have that gorgeous crunch, so don’t overcook!
Step 6: Glaze the Chicken
Once the chicken and veggies are ready, pour the thickened teriyaki sauce over them in the pan, coating everything evenly. Stir gently to combine, then cook for an additional minute to heat through.
Serving Suggestions
Plating this Simple Teriyaki Chicken is as easy as it is delightful. Serve it over a fluffy bed of white or brown rice—quinoa works beautifully too! Drizzle extra teriyaki sauce on top, and finish it off with a sprinkle of sesame seeds and sliced green onions for that gorgeous pop of color. If you want to impress, consider adding a side of steamed edamame or a fresh cucumber salad drizzled with rice vinegar.
Recipe Variations
-
Pineapple Teriyaki Chicken: Add chunks of fresh pineapple to the marinade or grill them alongside the chicken for a tropical twist.
-
Spicy Teriyaki Chicken: Incorporate sriracha or red pepper flakes into the marinade for a sweet and spicy kick.
-
Vegetarian Version: Substitute chicken with tofu or tempeh for a plant-based alternative. Just be sure to press and marinate them for maximum flavor!
-
Asian Noodles: Serve the teriyaki chicken over stir-fried noodles instead of rice for a different texture and flavor experience.
Chef’s Notes
This recipe has been a staple in my household for years, and I can’t tell you how many silly mishaps have turned into delightful kitchen memories. One time, I completely forgot to add the honey, thinking I was all set! As I tasted the dish, I realized my mistake, and in a panic, I reached for some maple syrup that was sitting on the counter. Surprisingly, it turned into a delicious accident that I’ve kept in my back pocket since! So, remember, in the kitchen, it’s not just about the recipe; it’s about having fun and being flexible.
FAQs and Troubleshooting
1. What can I use instead of soy sauce?
If you’re looking for a gluten-free option or simply want a different flavor, tamari is a great choice. Coconut aminos is another great alternative with a slightly sweeter taste.
2. The chicken is dry; what went wrong?
This can happen if it’s cooked too long or at too high of heat. Always check the chicken’s temperature with a thermometer, and let it rest for a few minutes before slicing to retain its juiciness.
3. Can I make this ahead of time?
Absolutely! Prepare the marinade and marinate the chicken a few hours or overnight. Simply toss it in the skillet when you’re ready to eat. It’ll be even more flavorful!
4. Is teriyaki chicken healthy?
It can be a balanced dish! Pair it with steamed veggies and serve it with whole grain rice to make it a nutritious meal. Just be mindful of the sugar in the sauce if you’re watching your sugar intake.
Nutritional Info (Estimated per serving)
- Calories: 320
- Protein: 28g
- Carbohydrates: 25g
- Fat: 8g
- Sugar: 10g
Conclusion
There you have it, my vibrant and flavorful Simple Teriyaki Chicken! Perfect for both weeknight dinners and special gatherings, this dish is sure to become a new favorite in your home. The aroma, the taste, and the joy of sharing it with loved ones create an experience you won’t want to miss.
So, gather your loved ones around the table and enjoy a warm meal that embodies togetherness and love. Happy cooking, and don’t forget to share your kitchen adventures with me! Bon appétit!
Print
Simple Teriyaki Chicken
- Total Time: 30 minutes
- Yield: 4 servings 1x
- Diet: Gluten-Free, Dairy-Free
Description
A delightful dish that celebrates flavors, bringing tender chicken coated in a savory teriyaki sauce, perfect for sharing with loved ones.
Ingredients
- 4 Chicken Thighs (or Breasts)
- 1/4 cup Soy Sauce
- 3 tbsp Honey (or Maple Syrup)
- 2 tbsp Rice Vinegar
- 3 cloves Garlic (Minced)
- 1 tbsp Ginger (Fresh or Ground)
- 1 tbsp Sesame Oil
- 2 Green Onions (for garnish)
- Optional: Vegetables for Stir-Fry (Bell Peppers, Broccoli, Snow Peas)
Instructions
- Marinate the Chicken: Combine chicken with soy sauce, honey, rice vinegar, garlic, and ginger in a bowl or bag. Marinate for at least 15 minutes in the refrigerator.
- Prep Your Veggies (Optional): Chop vegetables into bite-sized pieces if using.
- Cook the Chicken: Heat a non-stick skillet over medium-high heat and cook chicken for about 5-7 minutes on each side until golden and cooked through.
- Make the Teriyaki Sauce: Simmer reserved marinade in a saucepan until thickened.
- Add the Vegetables: Stir-fry vegetables in the pan for 2-3 minutes until tender.
- Glaze the Chicken: Pour the thickened teriyaki sauce over chicken and vegetables; stir to combine.
Notes
Serve over rice or noodles, and garnish with sesame seeds and green onions for extra flavor.
- Prep Time: 15 minutes
- Cook Time: 15 minutes
- Category: Main Course
- Method: Pan-frying
- Cuisine: Japanese
Nutrition
- Serving Size: 1 serving
- Calories: 320
- Sugar: 10g
- Sodium: 800mg
- Fat: 8g
- Saturated Fat: 1g
- Unsaturated Fat: 5g
- Trans Fat: 0g
- Carbohydrates: 25g
- Fiber: 1g
- Protein: 28g
- Cholesterol: 70mg
Keywords: teriyaki chicken, easy recipes, weeknight dinner, quick meals
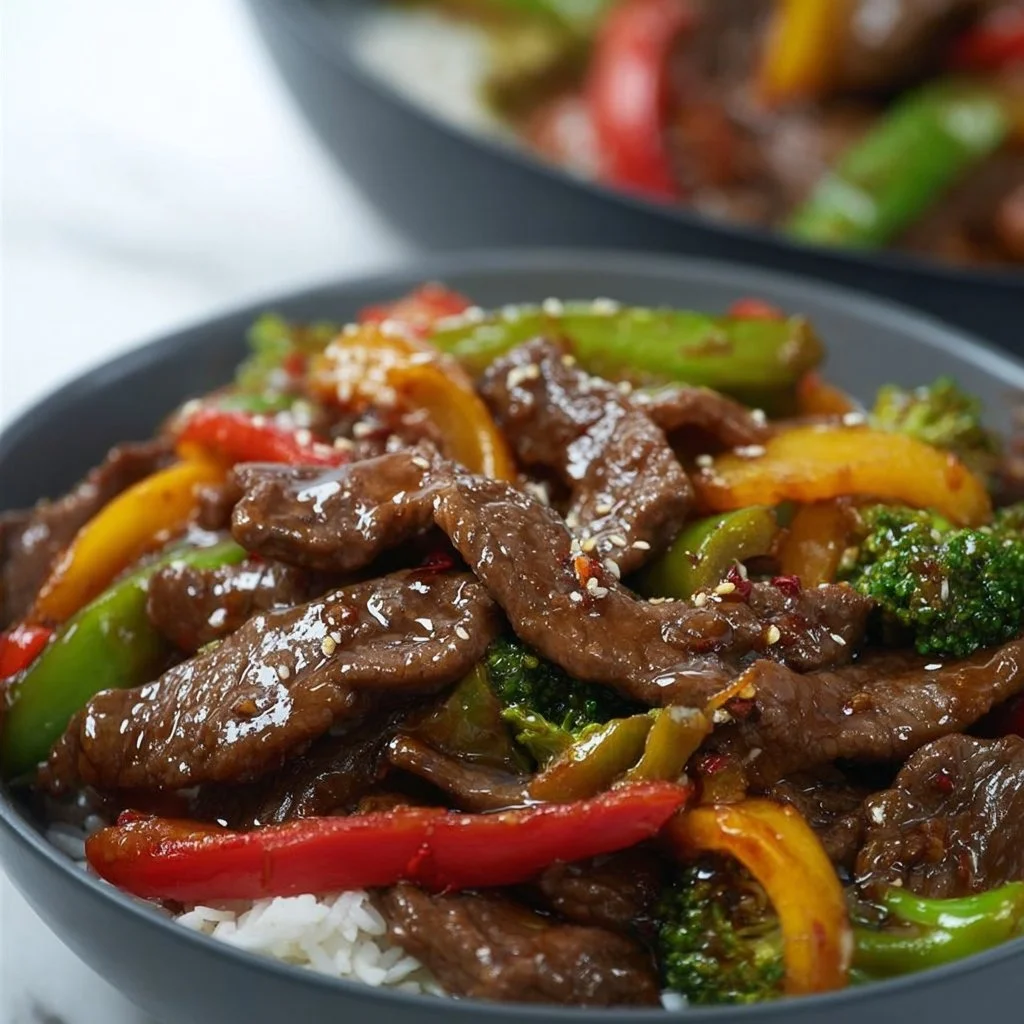
Beef Stir Fry
Beef Stir Fry: A Whirlwind of Flavor and Family
Welcome back to my cozy kitchen, my fellow food enthusiasts! Today, I have a dish that bursts with flavor, color, and a delightful crunch—Beef Stir Fry. This dish is more than just a quick meal; it’s a culinary experience that can whisk you away to far-off markets filled with vibrant vegetables and sizzling sounds.
Picture this: you walk into your kitchen, the promise of a delicious dinner hanging in the air, and your heart starts to race as the tantalizing smell of marinated beef and fresh produce fills the room. Such is the magic of a stir fry! This dish is a treasure trove of flavors and textures. And the best part? It’s quick to whip up, making it perfect for those busy weeknights or laid-back weekend meals with family and friends.
Inspired by my childhood experiences in the kitchen with my mom, who believed that cooking should come from the heart, I’ve crafted a Beef Stir Fry recipe that speaks both to the mind and the taste buds. This recipe is all about throwing in what you love, adding a dash of your personality, and of course, savoring every bite together. So, grab your apron, let’s dive into this colorful journey full of nostalgia, yummy bites, and maybe a mishap or two!
Personal Story
Ah, the memories of my childhood kitchen float back to me every time I make Beef Stir Fry. Picture this: I’m about ten years old, standing on a stool beside my mom, who is effortlessly tossing seasoned beef and vibrant vegetables in a sizzling wok. I could barely contain my excitement as the aroma danced around us, tantalizing my senses.
My mom had this signature dance move while she cooked—a little shimmy here, a quick spin there! She would let me sprinkle the soy sauce, and I always felt like a chef in my own right. The most thrilling part? Watching the beef take on a beautiful brown hue, glistening from the heat, and the veggies turning vibrant as they cooked.
We’d always serve it with fluffy jasmine rice, and as my family gathered around the table, the dishes passed hand to hand, laughter filled the air. It was a simple moment that turned into a cherished tradition. These memories not only shaped my passion for cooking but also instilled a sense of togetherness that I aim to recreate in every meal I prepare.
Ingredients
Gathering fresh, vibrant ingredients is the best part of making a great stir fry! Here’s what you’ll need:
-
Beef (sirloin or flank steak): These cuts are flavorful and tender, perfect for stir-frying. If you’re looking for a leaner option, top round steak works well too. For a budget-friendly swap, try chicken or tofu!
-
Vegetables (bell peppers, broccoli, and snap peas): Colorful veggies not only add nutrients but also brighten up your dish! Feel free to swap in whatever you have on hand, such as zucchini, carrots, or bok choy.
-
Garlic and ginger: These aromatic staples add depth to your stir fry. Fresh is best, but you can also use minced garlic and ginger from a jar if you’re in a pinch!
-
Soy sauce: This savory staple enhances all the flavors. Swap it for tamari if you need a gluten-free option, or coconut aminos for a slightly sweeter taste.
-
Sesame oil: Just a drizzle of this will take your dish to a whole new level of flavor. If you’re avoiding sesame, use olive oil or another neutral oil.
-
Cornstarch: A little bit works wonders as a thickener for your sauce and makes the beef extra tender. If you’re avoiding starches, you can skip this altogether or use arrowroot powder as a substitute.
-
Rice (jasmine or basmati): Fluffy rice is the perfect bed for your stir-fried beef and veggies. Quinoa or cauliflower rice are great alternatives for a lower-carb option!
Step-by-Step Instructions
Alright, let’s get cooking! Follow these steps for a Beef Stir Fry that’ll wow your taste buds:
-
Prep your ingredients: Start by slicing the beef thinly against the grain. This ensures each piece stays tender. If the meat is slightly frozen, it will be easier to cut. While you’re at it, chop your vegetables into bite-sized pieces. This not only makes them easier to eat but also helps them cook evenly.
-
Marinate the beef: In a medium bowl, combine your sliced beef with 2 tablespoons of soy sauce, 1 tablespoon of sesame oil, and a teaspoon of cornstarch. Let this marinate for about 15-20 minutes while you prep the rest of your ingredients. This step is crucial for flavor, so don’t skip it!
-
Heat the wok: Place a large wok or frying pan over medium-high heat and let it get hot. You want the pan sizzling when you add your beef. This helps cook the meat quickly and gives it that beautiful sear!
-
Cook the beef: Add a splash of oil to the hot wok. When it’s shimmering, toss in the marinated beef in a single layer. Sear for just a couple of minutes, stirring occasionally, until browned but not overcooked (it will continue to cook when combined with veggies). Remove the beef and set aside.
Chef’s Tip: Don’t overcrowd the pan! If it gets too crowded, the beef will steam instead of sear. If you’re making a big batch, cook the beef in two rounds.
-
Sauté aromatics: In the same wok, add a bit more oil if needed, then toss in minced garlic and ginger. Stir for about 30 seconds until fragrant—be careful not to let them burn!
-
Add the vegetables: Start with the firmer veggies like broccoli and snap peas, stir-frying for 1-2 minutes. Then, add the bell peppers and whatever other vegetables you’re using. Stir-fry for about 3-4 minutes, just until the veggies are tender-crisp.
-
Combine the beef: Add the beef back to the wok along with the remaining soy sauce (and more cornstarch if you like a thicker sauce). Stir to combine everything, and cook for another minute or two until everything is heated through.
-
Serve: Time to plate! Serve your delicious stir fry over a mound of fluffy rice, drizzle with more sesame oil, and feel free to top it off with some sesame seeds and fresh cilantro for that extra flair.
Chef’s Tip: For a little crunch, add some toasted cashews or peanuts at the end.
Serving Suggestions
For maximum presentation, use a large serving bowl with a bed of your fluffy jasmine rice at the bottom. Heap the colorful stir fry on top, allowing those vibrant veggies to shine. A sprinkle of sesame seeds and a few sprigs of cilantro make for an inviting garnish. Serve it hot, family-style, and watch everyone dig in with excitement!
Recipe Variations
Want to shake things up? Here are a few fun variations you can try:
-
Spicy Beef Stir Fry: Add chili flakes or Szechuan peppercorns for a spicy kick! You could also toss in some sliced jalapeños while sautéing the aromatics.
-
Sweet and Sour Version: Incorporate pineapple or bell peppers with a homemade sweet and sour sauce (mix soy sauce, vinegar, and sugar).
-
Vegetarian Option: Swap beef for tofu or tempeh, using the same marinade for great flavor. Vegetable broth can replace the soy sauce for a lighter taste.
-
Noodle Stir Fry: Add some pre-cooked rice noodles into the mix. Toss them in during the final stages of cooking with a bit more soy sauce.
-
Bonus Ingredients: Throw in fresh herbs like basil or mint at the end for a refreshing punch!
Chef’s Notes
This Beef Stir Fry is a beautiful representation of my cooking ethos—creative, adaptable, and always delicious. Over the years, my recipe has evolved from a simple stir fry to a canvas for flavors and colors. I love experimenting with whatever is fresh in my fridge! One time, I made this dish with a little leftover kimchi, and let me tell you, it was a game-changer.
Cooking is all about having fun, being bold, and letting your kitchen become a playground of flavors. I hope you too create your unique spin on this dish. Remember, the secret ingredient in every meal is love!
FAQs and Troubleshooting
1. Why is my beef tough?
Make sure you’re slicing against the grain of the meat and not overcooking it! Thin slices and quick cooking at high heat keep the beef tender.
2. My stir fry turned out mushy; what happened?
Two things: first, make sure you’re not overcrowding your pan. Also, cooking the veggies at too low a heat can cause them to release too much moisture. Keep that heat high!
3. Can I prep ingredients in advance?
Absolutely! You can slice your vegetables and marinate your beef a few hours ahead of time. Just store everything in airtight containers in the fridge until you’re ready to cook!
4. What can I use if I don’t have soy sauce?
Coconut aminos is a great soy sauce alternative. You could also use Worcestershire sauce or a mix of broth and vinegar, although it will change the flavor slightly.
Nutritional Info
While this dish is rich in flavor, it’s also packed with nutrients. Depending on the specific ingredients used, a typical serving could contain approximately:
- Calories: 400
- Protein: 30g
- Carbohydrates: 50g
- Fiber: 4g
- Fat: 15g
Remember, these are estimates, and the numbers may vary based on substitutions and portion sizes.
Happy cooking, and may your Beef Stir Fry be as delightful as the memories it brings back! Remember to share your creations with your loved ones—there’s nothing better than a meal that brings people together! 🍽️❤️
Print
Beef Stir Fry
- Total Time: 30 minutes
- Yield: 4 servings 1x
- Diet: Gluten-free
Description
A flavorful and colorful Beef Stir Fry that brings together marinated beef and vibrant vegetables for a quick and delicious meal.
Ingredients
- 1 pound beef (sirloin or flank steak), sliced thinly
- 2 cups vegetables (bell peppers, broccoli, snap peas)
- 2 cloves garlic, minced
- 1 tablespoon fresh ginger, minced
- 3 tablespoons soy sauce
- 1 tablespoon sesame oil
- 1 teaspoon cornstarch
- 2 cups jasmine rice, cooked
Instructions
- Prep your ingredients: Slice the beef and chop the vegetables into bite-sized pieces.
- Marinate the beef: Combine sliced beef with soy sauce, sesame oil, and cornstarch, let it marinate for 15-20 minutes.
- Heat the wok: Place a large wok over medium-high heat to get it hot.
- Cook the beef: Add oil to the wok, toss in the marinated beef, and sear until browned. Set aside.
- Sauté aromatics: Add garlic and ginger to the same wok until fragrant.
- Add the vegetables: Stir-fry the broccoli and snap peas first, then add the bell peppers, cooking until tender-crisp.
- Combine the beef back into the wok, adding remaining soy sauce and cooking until heated through.
- Serve: Plate the stir fry over jasmine rice, topped with sesame oil and optional sesame seeds.
Notes
For a crunch, add toasted cashews or peanuts at the end. Customize with your favorite veggies.
- Prep Time: 20 minutes
- Cook Time: 10 minutes
- Category: Main Course
- Method: Stir-frying
- Cuisine: Asian
Nutrition
- Serving Size: 1 serving
- Calories: 400
- Sugar: 4g
- Sodium: 600mg
- Fat: 15g
- Saturated Fat: 3g
- Unsaturated Fat: 10g
- Trans Fat: 0g
- Carbohydrates: 50g
- Fiber: 4g
- Protein: 30g
- Cholesterol: 40mg
Keywords: Beef Stir Fry, Quick Dinner, Stir Fry Recipe, Asian Cuisine, Healthy Meal
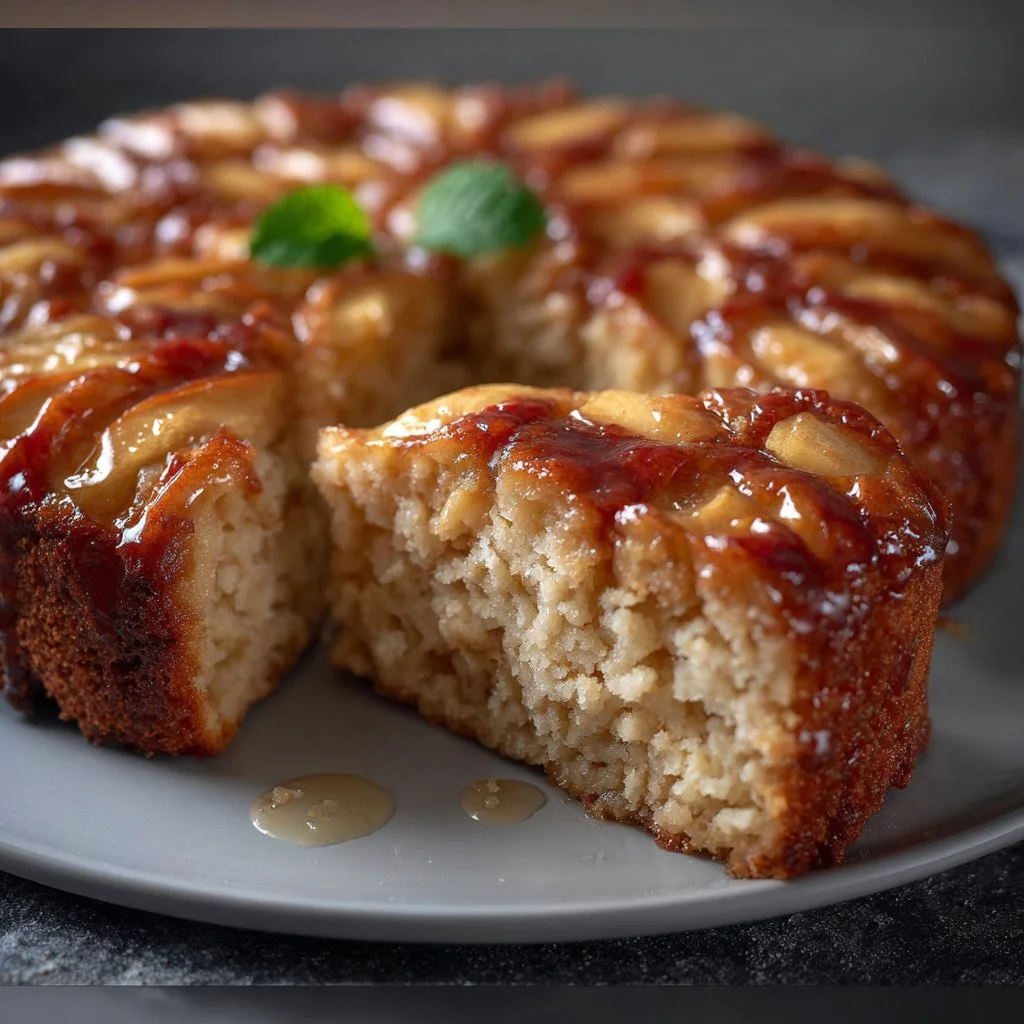
Low Fat Apple Cake
Wholesome and Delicious: Low Fat Apple Cake Recipe
Hey there, fellow food lovers! Welcome back to my cozy kitchen, where the aroma of baked goods fills the air, and every dish tells a story. If you’re anything like me, you know there’s something magical about the combination of apples and cinnamon. It’s a warm, inviting scent that can instantly transport you back to simpler times, maybe a crisp autumn day or a family gathering. Today, I’m excited to share one of my absolute favorite recipes: a Low Fat Apple Cake that’s so delightful, your friends and family will beg for seconds!
This recipe sprouted from a desire to enjoy sweet treats without the heavy guilt that usually follows. I wanted something that lets you savor every bite while still being mindful of our health – that’s the best of both worlds in my book! If you have fond memories of Grandma’s freshly baked apple cake with each slice melting in your mouth, you’re going to love this healthy twist.
Not only is this cake easy to whip up, but it’s also versatile. Perfect for breakfast, a snack paired with coffee, or as dessert after dinner, it truly fits into any occasion. Plus, it’s perfect for impressing guests without keeping you chained to the kitchen for hours. So, grab your apron, and let’s get baking!
Personal Story
I can’t think of apple cake without recalling sunny afternoons in my childhood kitchen, where I would watch my grandma bake. She had this old, battered cookbook filled with handwritten notes and recipes passed down through generations. One of my favorites was her apple cake. I would sit on the counter, swinging my legs as I watched her whisk together ingredients with a smile that could melt the hardest of hearts.
What made that cake so memorable wasn’t just its delicious taste but the process of making it—peeling apples, stirring the batter, and, of course, sneaking spoonfuls of the mix when no one was looking! On crisp fall days, the air would be tinged with the scent of cinnamon and sugar wafting from the oven, and our home felt like the coziest place on earth. That feeling inspired me to come up with this low-fat version. I wanted to pay homage to those beautiful memories while creating something that caters to modern tastes and health needs. Each time I bake this cake, I feel infused with nostalgia and love, making it the ultimate comfort food.
Ingredients
Let’s gather our pantry staples and fresh ingredients to create this beautiful Low Fat Apple Cake. Here’s what you’ll need:
-
2 cups of all-purpose flour
This is the base of our cake! You can substitute with whole wheat flour for a healthier option or gluten-free flour to cater to dietary restrictions. -
3 medium-sized apples (about 3 cups, peeled and chopped)
I recommend using a variety like Granny Smith for tartness and Gala for sweetness. Feel free to swap in pears for a different flavor! -
1 cup of unsweetened applesauce
This is our secret ingredient! It keeps the cake moist and reduces fat. You can also use mashed bananas if you’d like a fruity twist. -
1/2 cup of granulated sugar
This can be adjusted down a bit if you prefer a less sweet cake, or you can substitute with coconut sugar for a more caramel-like flavor. -
1/4 cup of vegetable oil
Using a lighter oil like canola or coconut oil can make this cake even healthier. You can omit it altogether; the cake will still be lovely thanks to the applesauce! -
2 large eggs
Eggs add structure and richness. For a vegan option, replace them with flax eggs (1 tbsp flaxseed meal + 3 tbsp water for each egg). -
1 tsp vanilla extract
This little drizzle adds lovely depth to flavors. Feel free to use almond extract for a different note! -
1 tsp baking powder
This gives our cake that fluffy lift we all love. Ensure it’s fresh for the best results! -
1 tsp baking soda
Together with the baking powder, it helps the cake rise! Again, keeping these ingredients fresh is key. -
1 tsp ground cinnamon
The star of our flavor profile! You can add nutmeg or allspice for a warm, spicy kick. -
1/2 tsp salt
A pinch of salt enhances all the flavors, balancing the sweetness perfectly.
Step-by-Step Instructions
Alright, it’s time to bring this Low Fat Apple Cake to life! Follow these steps for a scrumptious treat:
-
Preheat Your Oven
Preheat your oven to 350°F (175°C). Make sure it’s nice and hot to get that lovely rise. -
Prepare Your Baking Pan
Grab a 9-inch round cake pan or a rectangular one if that’s what you have. Grease it lightly with your oil of choice or line it with parchment paper for easy release. -
Mix the Dry Ingredients
In a medium bowl, whisk together the flour, baking powder, baking soda, cinnamon, and salt. This step ensures even distribution of your leavening agents and spices. -
Combine Wet Ingredients
In a large mixing bowl, combine the applesauce, sugar, oil, eggs, and vanilla extract. Use a hand mixer or whisk until it’s silky and well combined. -
Incorporate the Dry Ingredients
Slowly add the dry mixture into your wet mixture. Stir gently using a spatula or wooden spoon, just until everything is combined. Avoid overmixing, or you’ll end up with a dense cake! -
Fold in the Apples
Gently fold your chopped apples into the batter. This is where the magic happens! You’ll want to make sure they’re evenly distributed so every slice has that delightful fruitiness. -
Pour into the Pan
Transfer the cake batter to your prepared pan. Spread it out evenly with a spatula. Pro tip: You can sprinkle a bit of extra cinnamon sugar on top for a lovely crust! -
Bake to Perfection
Bake in your preheated oven for about 35-40 minutes, or until a toothpick inserted into the center comes out clean. Keep an eye on it toward the end; ovens can vary! -
Cool Down
Once baked, remove it from the oven and let it cool in the pan for about 10 minutes. Then, transfer it to a wire rack to cool completely. -
Serve and Enjoy!
Slice it up and serve it warm or at room temperature. It’s simply divine on its own or with a scoop of low-fat yogurt on the side!
Serving Suggestions
This Low Fat Apple Cake is incredibly versatile! You can serve it simply on a plate with a dusting of powdered sugar, or plate it up elegantly with a dollop of whipped cream or yogurt for an indulgent touch. To make it even more special, serve it warm with a drizzle of homemade caramel sauce or a sprinkle of toasted nuts for added crunch. This cake is sure to become a star on your dessert table!
Recipe Variations
Feeling adventurous? Here are a few variations to spice things up!
-
Caramel Swirl Apple Cake: Before pouring the batter into the pan, layer some store-bought or homemade caramel sauce to create a molten center.
-
Nutty Crumble Topping: Mix chopped walnuts or pecans with melted coconut oil and a sprinkle of cinnamon, then scatter over the batter before baking for a lovely crunchy topping!
-
Pumpkin Spice Twist: Swap out half of the applesauce for pumpkin puree and add a little extra pumpkin spice for a seasonal variation.
-
Dairy-Free Delight: Use non-dairy yogurt instead of regular yogurt for serving, and replace eggs with flax seeds for a vegan cake.
Chef’s Notes
As I’ve baked this Low Fat Apple Cake over the years, I’ve learned a few things. The cooking process is as important as the ingredients! I remember the first time I made it without applesauce – let’s just say it was dense enough to be a doorstop! Since then, I’ve perfected the balance between sweetness and moisture, making it a family favorite.
Every time I bake it, I change things up slightly—sometimes adding a splash of orange juice or zest for a fresh twist. Oh, and I’ve had my share of kitchen antics, including mistaking cayenne pepper for cinnamon (let’s just say that cake didn’t go too far!). That’s the beauty of cooking; it’s the experience, the love, and the laughs that make it all worthwhile!
FAQs and Troubleshooting
1. What if my cake is too dry?
If your cake turns out dry, ensure you’re using enough applesauce. If you’ve added too much flour, it can reduce moisture. Always measure flour correctly by spooning it into the measuring cup and leveling it off.
2. Can I freeze this apple cake?
Absolutely! Wrapping it tightly in plastic wrap and then tinfoil allows you to freeze it for up to 3 months. Let it thaw at room temperature before serving for best results.
3. How do I know when the cake is done?
Check for doneness by inserting a toothpick into the center of the cake. If it comes out clean or with a few moist crumbs (not wet batter), it’s done!
4. Can I use other fruits in this cake?
Yes! Berries, peaches, or pears work wonderfully in this recipe. Just ensure that any fruit you use retains moisture to keep the cake soft and fluffy.
Nutritional Info (Optional)
While I’m not a nutritionist, I can tell you that this Low Fat Apple Cake is a guilt-free treat! With a significant reduction in fat due to applesauce and the use of whole fruits, this cake is a perfect balance of sweetness and healthiness. A single slice contains roughly 150-200 calories (depending on portion size) with minimal fat and a good dose of fiber from the apples.
And there you have it, my delightful Low Fat Apple Cake recipe! I can’t wait for you to try it out! Remember, cooking with love is what makes any dish memorable. Don’t forget to share your baking adventures with me–I love hearing your stories and seeing your delicious creations. Happy baking and bon appétit! 🍏🎂
Print
Low Fat Apple Cake
- Total Time: 55 minutes
- Yield: 8 servings 1x
- Diet: Low Fat
Description
Indulge in a healthy twist on a classic dessert with this Low Fat Apple Cake, combining the sweetness of apples and a hint of cinnamon for a guilt-free treat.
Ingredients
- 2 cups all-purpose flour
- 3 medium-sized apples, peeled and chopped
- 1 cup unsweetened applesauce
- 1/2 cup granulated sugar
- 1/4 cup vegetable oil
- 2 large eggs
- 1 tsp vanilla extract
- 1 tsp baking powder
- 1 tsp baking soda
- 1 tsp ground cinnamon
- 1/2 tsp salt
Instructions
- Preheat your oven to 350°F (175°C).
- Prepare a 9-inch round cake pan by greasing it or lining it with parchment paper.
- Mix together the flour, baking powder, baking soda, cinnamon, and salt in a medium bowl.
- Combine the applesauce, sugar, oil, eggs, and vanilla extract in a large mixing bowl and whisk until well combined.
- Incorporate the dry ingredients into the wet mixture, stirring gently until just combined.
- Fold in the chopped apples until evenly distributed.
- Pour the batter into the prepared pan and spread evenly.
- Bake for about 35-40 minutes, or until a toothpick inserted into the center comes out clean.
- Cool in the pan for 10 minutes, then transfer to a wire rack to cool completely.
- Serve warm or at room temperature.
Notes
Serve with a dusting of powdered sugar or a scoop of low-fat yogurt for an extra treat.
- Prep Time: 15 minutes
- Cook Time: 40 minutes
- Category: Dessert
- Method: Baking
- Cuisine: American
Nutrition
- Serving Size: 1 slice
- Calories: 180
- Sugar: 8g
- Sodium: 250mg
- Fat: 5g
- Saturated Fat: 1g
- Unsaturated Fat: 4g
- Trans Fat: 0g
- Carbohydrates: 30g
- Fiber: 2g
- Protein: 3g
- Cholesterol: 30mg
Keywords: apple cake, low fat, healthy dessert, baking, comfort food
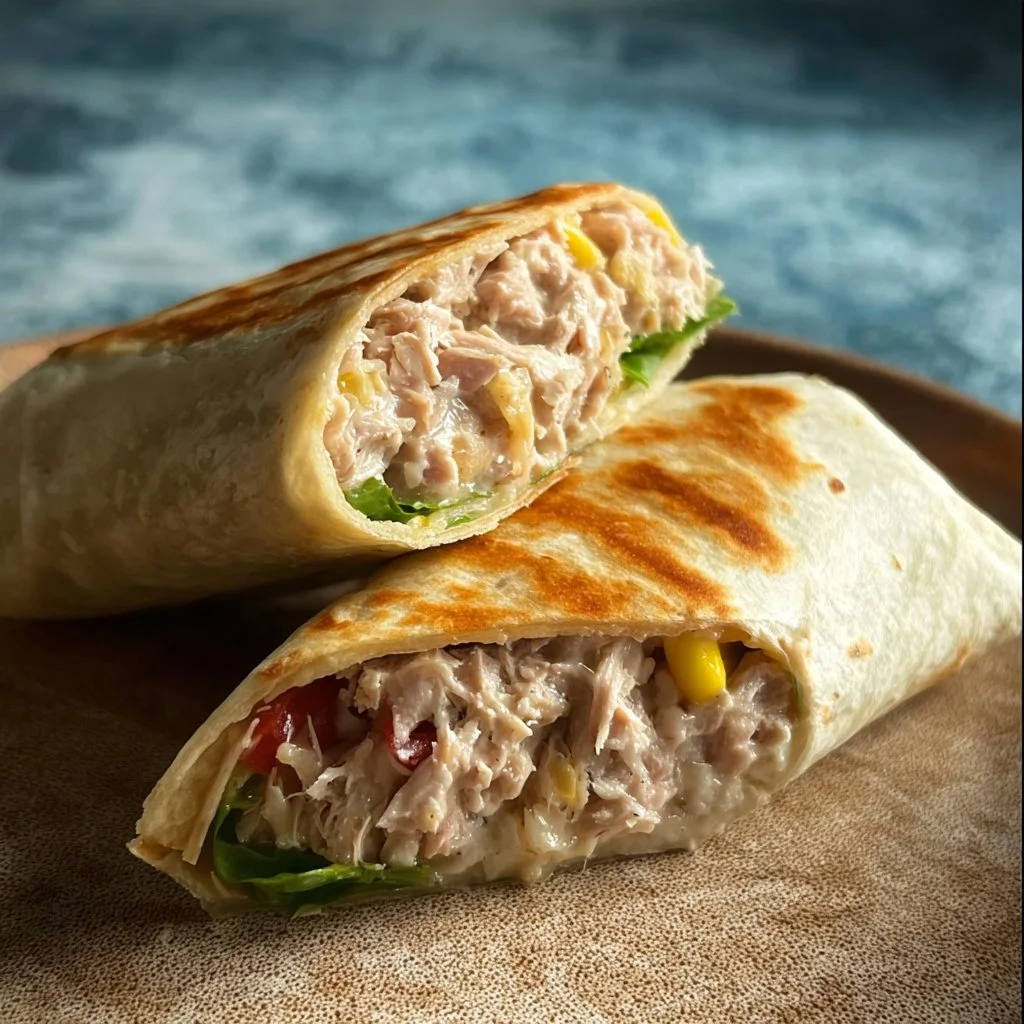
Tuna Melt Wrap
Perfectly Delicious Tuna Melt Wrap: A Cozy Kitchen Classic
Welcome back to my cozy corner of the kitchen! I’m thrilled you’re here, because today I have a delightful dish that is not only super easy to whip up but also brings me heaps of joy and nostalgia: the Tuna Melt Wrap. Picture this: a soft, warm tortilla filled with creamy tuna salad, ooey-gooey melted cheese, and your choice of vibrant toppings, all rolled up and toasted to perfection. It’s comfort food at its finest, and I can’t wait to share it with you!
If you’re like me, food isn’t just about sustenance; it’s about the memories and the stories that come with it. Growing up, I always considered lunch to be the star of the day, a time when tasty meals could light up even the dreariest afternoons. My mom would often make her version of a tuna melt on bread, and my siblings and I would gather around the kitchen table, noses buried in our sandwiches, giggling and swapping stories about our day.
These days, meals like a Tuna Melt Wrap keep that spirit alive. It’s the kind of dish you can throw together with pantry staples while still tasting fresh and satisfying. Plus, it’s incredibly versatile! You can customize it with all sorts of ingredients based on what you have on hand or what flavors tickle your fancy. Flavor-packed, quick to make, and guaranteed to turn any lunch into a special occasion, this wrap serves up comfort, flavor, and a bit of nostalgia—all rolled into one tasty package!
So, grab your apron and let’s dive into making the perfect Tuna Melt Wrap together. I promise you, this is one culinary journey you won’t want to miss!
Personal Story
I’ll never forget the first time I truly fell in love with tuna melts. It was a rainy afternoon, and I was in high school, desperate for something comforting. I am sure I doodled a heart around “tuna melt” in my notebook that day, marking it as my ultimate go-to. My mom, being the superstar chef in my life, whipped up a quick tuna salad with all the right seasonings—creamy mayonnaise, crunchy celery, zesty pickles—and slathered it between two slices of golden-brown bread.
As she pressed it down on the grill, I could feel the anticipation bubbling in my stomach. There was something magical about watching the cheese melt and the bread crisp up to a perfect golden hue. When I took that first bite, my heart soared! The combination of gooey cheese, savory tuna, and a drizzle of hot sauce sent my taste buds into a frenzy.
Fast forward to today, and I’ve taken that timeless flavor combination and wrapped it in a tortilla, making it portable and even more fun to enjoy. Now, every time I make a Tuna Melt Wrap, I’m transported back to that rainy afternoon, reliving those cozy moments and sharing them with friends and family. This dish is more than just a meal—it’s a connection to the joy of cooking together and indulging in something delicious.
Ingredients
Let’s gather our ingredients to make this Tuna Melt Wrap a reality! Here’s what you’ll need (and a few tips to ensure everything turns out fabulous):
-
Canned Tuna (in water or oil):
The star of the show! I prefer tuna packed in water for a lighter taste, but if you want a bit more richness, oil-packed tuna works well too. You can also use canned salmon or chicken as a substitute for a fun twist! -
Mayonnaise:
This creamy dream binds everything together. You can use regular, light, or even vegan mayo if you want to switch things up. If you’re not a mayo fan, a bit of Greek yogurt or avocado can provide that creaminess we love! -
Celery:
Chopped into small pieces for a satisfying crunch. The fresh flavor of celery shines in a tuna melt! If you don’t have celery on hand, chopped pickles or bell peppers can offer a similar crispness. -
Shredded Cheese (Cheddar or Monterey Jack):
Melted cheese is vital for that gooey goodness. I love sharp cheddar for its tangy flavor, but feel free to use any melty cheese you adore, like mozzarella or pepper jack for a spicy kick! -
Tortillas (flour or whole wheat):
These are our wrap’s cozy embrace! Soft flour tortillas are my favorite, but whole wheat or corn tortillas are fantastic choices too. Ensure they’re large enough to hold all the goodness! -
Optional Add-ins:
This is where you can let your creativity shine! Consider adding chopped onions, bell peppers, or even fresh herbs like dill or parsley for an extra flavor boost.
Gather these ingredients, and you’re one step closer to creating a heavenly Tuna Melt Wrap that you’ll crave over and over again!
Step-by-Step Instructions
Now that we have everything lined up, let’s get cooking! Follow these easy steps to prepare your Tuna Melt Wrap:
-
Prepare the Tuna Salad
In a medium-sized bowl, combine your drained canned tuna and mayonnaise. Start with a couple of tablespoons of mayo and then gradually add more to achieve your desired creaminess. Gently fold in the chopped celery (and any optional add-ins you choose) until mixed well. Don’t be afraid to taste along the way—adjust salt, pepper, or even a splash of lemon juice to brighten things up!Chef’s Tip: If you want to add some heat, a dash of Dijon mustard or a sprinkle of red pepper flakes can elevate your tuna salad!
-
Prepare Your Tortillas
On a clean surface, lay out your tortillas. Spread a healthy layer of the tuna salad mixture down the center of each tortilla. Be generous, but make sure there’s enough space on the sides for rolling.Chef’s Tip: For extra flavor, sprinkle a bit of shredded cheese on top of the tuna salad layer before rolling it up!
-
Roll it Up
Carefully fold in the sides of each tortilla and then roll it up from the bottom to the top. Make sure it’s snug but not overstuffed. If thin flour tortillas are tearing, consider using a larger size or double up with two tortillas.Chef’s Hack: If your tortillas are a bit dry or cracking, pop them in the microwave for just 10-15 seconds to warm them up—this makes them more pliable and easier to roll.
-
Toast the Wrap
Heat a non-stick skillet (or a griddle) over medium heat and add a small drizzle of olive oil or a pat of butter. Once it’s hot, place the tuna wrap seam-side down on the skillet. Cook for about 2-3 minutes or until golden and crispy. Gently flip and repeat on the other side.Chef’s Tip: For an even melt-y flavor, you can cover the skillet with a lid while toasting; this helps the cheese melt beautifully without burning the wrap.
-
Slice and Serve
Once the Tuna Melt Wrap is golden on both sides and the cheese is melted, remove it from the skillet and let it sit for a minute before slicing in half. This keeps all the oozy goodness in!
Serving Suggestions
Now, let’s make your Tuna Melt Wrap extra special! Serve your wraps with a side of crispy chips, a light salad, or sliced pickles for that perfect combination of flavors and textures.
For a decorative touch, consider arranging the wraps on a rustic wooden board with your favorite dipping sauces—maybe a zesty yogurt sauce, hot sauce, or even a tangy relish. Garnish with a sprinkle of fresh herbs to entice both the eyes and the palate!
Recipe Variations
Now, let’s explore how you can get creative with this Tuna Melt Wrap recipe:
-
Mediterranean Twist: Incorporate chopped olives, feta cheese, and diced tomatoes into your tuna salad for a Mediterranean vibe.
-
Spicy Sriracha: Craving a kick? Mix in a spoonful of Sriracha or some sliced jalapeños for extra heat!
-
Herby Delight: Add a handful of fresh herbs, like basil or cilantro, to the tuna salad for a refreshing twist.
-
Avocado Lover: Swap out some mayo for mashed avocado to achieve a creamy, rich texture while adding healthy fats.
-
Bacon Bliss: Crumble crispy bacon into the tuna salad for an indulgent flavor bomb!
Feel free to mix and match or come up with your own variations—after all, the kitchen is your playground!
Chef’s Notes
As with any classic dish, this Tuna Melt Wrap has evolved over time. What started as a simple lunch idea has transformed into my go-to meal for gatherings, picnics, or even a cozy dinner at home. I’ve enjoyed experimenting with different ingredients based on the season, from adding roasted veggies in the summer to using warming spices and toppings in the winter.
And let’s be honest, I’ve had my share of "oops" moments too! I once forgot to drain the tuna thoroughly, which turned my wraps into a messy disaster—let’s just say it was not my finest hour! But that’s the beauty of cooking; it’s all about learning, adapting, and having fun along the way.
Remember to embrace the mess—it’s a sign of a good time!
FAQs and Troubleshooting
1. What should I do if the wraps are falling apart?
Make sure your tortillas are fresh and pliable. Warming them slightly in the microwave can help! Additionally, don’t overstuff the wraps so they’re easier to handle.
2. Can I make the tuna salad ahead of time?
Absolutely! You can prepare the tuna salad a day in advance and store it in the fridge. Just give it a good stir before using and adjust any seasonings if necessary.
3. Is it okay to use canned chicken instead of tuna?
Of course! Canned chicken works wonderfully and can yield a different yet satisfying flavor profile. Feel free to get creative!
4. How can I make this dish gluten-free?
Simply swap out the flour tortillas for gluten-free tortillas made from corn or a rice-based alternative. You can also serve the tuna salad over a fresh green salad for a lighter option!
Nutritional Info
While I won’t dive deep into nutritional labeling here, I will say that this Tuna Melt Wrap can be a flavorful source of protein with healthy fats (especially if you add avocado!) and plenty of veggies. It’s balanced and satisfying, ideal for a lunch that powers you through your day!
I hope you enjoy making and sharing this Tuna Melt Wrap recipe as much as I do! Remember, cooking is all about the experience, the fun, and the love you pour into your dishes. So, gather your loved ones, whip up some wraps, and embrace the cozy moments in your kitchen—until next time, happy cooking!
Print
Perfectly Delicious Tuna Melt Wrap
- Total Time: 16 minutes
- Yield: 4 servings 1x
- Diet: Optional Vegetarian
Description
A delightful Tuna Melt Wrap filled with creamy tuna salad, ooey-gooey melted cheese, and customizable toppings.
Ingredients
- 1 can Canned Tuna (in water or oil)
- 2–4 tablespoons Mayonnaise
- 1/2 cup Celery (chopped)
- 1 cup Shredded Cheese (Cheddar or Monterey Jack)
- 4 large Tortillas (flour or whole wheat)
- Optional Add-ins: chopped onions, bell peppers, fresh herbs
Instructions
- Prepare the Tuna Salad: In a medium-sized bowl, combine drained canned tuna and mayonnaise. Fold in chopped celery and any optional add-ins.
- Prepare Your Tortillas: Spread a healthy layer of tuna salad in the center of each tortilla.
- Roll it Up: Fold the sides of each tortilla and roll it snugly from the bottom to the top.
- Toast the Wrap: Heat a non-stick skillet over medium heat with a drizzle of olive oil. Cook the tuna wrap seam-side down for 2-3 minutes until golden.
- Slice and Serve: Remove from skillet, let it sit for a minute, then slice in half and enjoy!
Notes
Feel free to get creative with your toppings and add-ins. Experiment with flavors that you love!
- Prep Time: 10 minutes
- Cook Time: 6 minutes
- Category: Main Course
- Method: Baking
- Cuisine: American
Nutrition
- Serving Size: 1 wrap
- Calories: 400
- Sugar: 2g
- Sodium: 600mg
- Fat: 20g
- Saturated Fat: 8g
- Unsaturated Fat: 10g
- Trans Fat: 0g
- Carbohydrates: 32g
- Fiber: 3g
- Protein: 25g
- Cholesterol: 45mg
Keywords: tuna melt, wrap, easy lunch, comfort food, customizable recipe
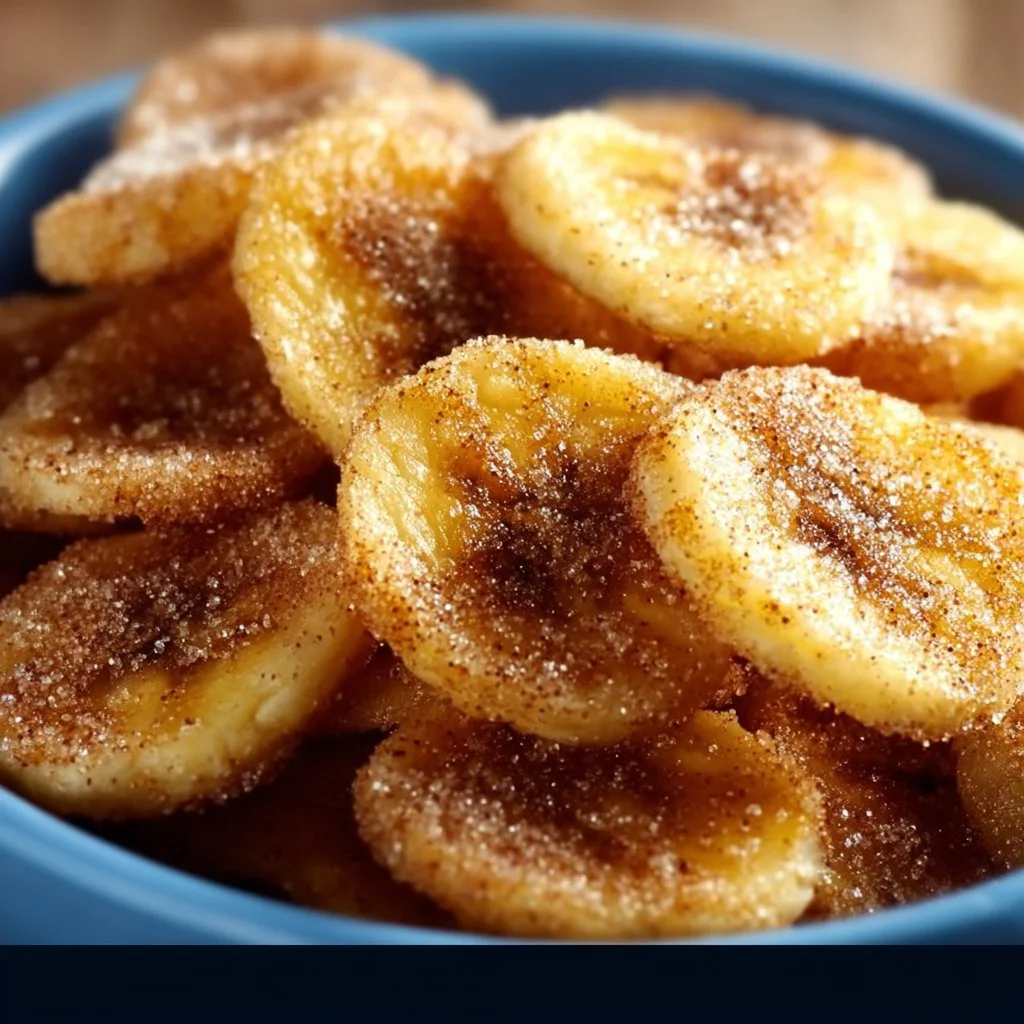
Cinnamon-Sugar Air Fryer Banana Chips
# Cinnamon-Sugar Air Fryer Banana Chips: A Sweet Treat for Every Occasion

## Introduction

Welcome to my cozy little corner of the internet! I’m Olivia Bennett, your friendly, neighborhood kitchen enthusiast ready to share one of my absolute favorite snacks: Cinnamon-Sugar Air Fryer Banana Chips. If you're anything like me—someone who finds pure bliss in the aroma of something delicious wafting through the air—you'll love how quick and easy it is to whip up this delightful treat.

These banana chips are crispy, crunchy, and just the right balance of sweet and spicy. Plus, they’re made right in your air fryer, which means minimal mess and maximum flavor. It’s like a hug for your taste buds! The best part? They’re a healthier alternative to traditional potato chips, so you can enjoy them guilt-free. Whether you're snacking solo or entertaining friends and family, these banana chips are sure to satisfy and spark conversations about your kitchen adventures!

As the seasons change and the days get busier, it’s essential to find those quick yet rewarding recipes to keep us grounded in the kitchen. Making your own snacks has a sense of nostalgia and creativity. Remember when we used to gather around the kitchen table, sharing stories and munching on homemade goodies? That’s the vibe we’re going for! So grab your apron, and let’s dive into the world of air fryer banana chips!

---

## Personal Story

I still remember the first time I made these banana chips. It was a lazy Sunday afternoon, and I had a handful of overripe bananas sitting on the counter—those beauties that definitely weren’t getting eaten raw anymore. I knew I wanted to create something special with them, but I didn’t have hours to spend in the kitchen. That’s when the air fryer came to my rescue!

With a little experimentation and plenty of joy, I sliced those bananas, sprinkled them with cinnamon and sugar, then popped them into the air fryer. I was beyond excited—would they turn out crunchy? Would they taste heavenly? Fast forward to the moment I opened the air fryer, and the sweet aroma enveloped me. The first bite was a revelation! They were perfectly crisp with just the right amount of sweetness, and I found myself daydreaming about all the fun ways I could enjoy them. From that day on, they became a staple in my home, and I couldn’t wait to share the recipe with everyone.

---

## Ingredients

Before we dive into the cooking process, let's gather our ingredients! Here's what you'll need:

- **Bananas**: Choose ripe bananas for the best sweetness and flavor. If you prefer, green bananas will work too; they’ll just be less sweet.
- **Cinnamon**: This warm spice not only adds flavor but also brings a delightful aroma. It's a staple in my spice cabinet, and you can easily swap it out for nutmeg or pumpkin spice if you're looking for a unique twist!
- **Sugar**: I use granulated sugar for that classic sweetness, but feel free to use coconut sugar, brown sugar, or even a sugar substitute if you’re following a particular diet.
- **Oil (optional)**: A light spray of coconut oil or canola oil helps to make the chips crispier, but you can also skip this if you prefer a lighter option.

### Quick Chef Insights
- **Banana Rips**: Look for bananas with a few brown spots; they’re at their sweetest.
- **Cinnamon Variety**: There are two main types of cinnamon: Ceylon (true cinnamon) and Cassia (more common). Ceylon is sweeter and more aromatic, but either will work wonderfully.
- **Sweetness Level**: Adjust the sugar based on your preference. If you're making these for kids, a little extra sweetness goes a long way!

---

## Step-by-Step Instructions

Ready to make some magic happen in your air fryer? Let’s get started with these easy-peasy steps!

### Step 1: Prep the Bananas
Peel your bananas and slice them into even rounds, about 1/4-inch thick. The important thing here is to keep those slices consistent. Thicker slices will be chewy, while thinner ones will crisp up nicely. Trust me; a little uniformity goes a long way!

### Step 2: Season the Slices
In a mixing bowl, combine your banana rounds with cinnamon and sugar. Use a tablespoon of sugar for every teaspoon of cinnamon (but feel free to adjust based on your taste preferences!). Toss gently to ensure all the banana slices are coated. **Chef Hack**: For extra crunch, you can dust some cornstarch along with your sugar and cinnamon mix.

### Step 3: Preheat the Air Fryer
This little gem works best when preheated! Set your air fryer to 350°F (175°C) and let it warm up for about 3 minutes. This step is crucial because it ensures your chips will crisp up perfectly.

### Step 4: Arrange the Bananas
Place your banana slices in the air fryer basket in a single layer. Try not to overcrowd them so they can cook evenly. If you have a small air fryer, you may need to do this in batches.

### Step 5: Air Fry Those Chips
Cook for about 10 to 15 minutes, flipping midway. Keep an eye on them so they don’t burn—yes, I speak from experience! They should come out golden brown and crispy.

**Tip**: Check around the 8-minute mark—every air fryer is a little different.

### Step 6: Cool and Crisp
Once the chips are done, carefully transfer them to a wire rack to cool. They will crisp up even more as they cool down, making it hard to resist sneaking one before they hit the serving platter!

---

## Serving Suggestions

Now that your Cinnamon-Sugar Air Fryer Banana Chips are all done and cooling, here’s how I like to serve them up! Arrange them in a fun, rustic bowl or on a colorful platter—the presentation makes all the difference. Pair them with a scoop of yogurt or serve them alongside a dipping sauce like peanut butter or even a drizzle of chocolate for that decadent feel. Fancy, right?

---

## Recipe Variations

Here are a few fun twists to take your banana chips to the next level:

- **Chocolate-Dipped Bliss**: Melt dark or white chocolate and dip half of the banana chips for an indulgent treat.
- **Nutty Bananas**: Sprinkle finely chopped nuts like almonds or pecans over your banana slices before air-frying. The crunch is phenomenal!
- **Spicy Kick**: Add a pinch of cayenne pepper for a sweet and spicy combination.
- **Coconut Delight**: Toss in some unsweetened shredded coconut for a tropical twist.

---

## Chef’s Notes

As I reflect on my journey of creating the perfect air fryer banana chips, I have to chuckle at my early attempts. The first batch turned out more like little banana pancakes than chips! However, with time and a few happy accidents, these chips became a staple around my home. They’re not just a tasty snack; they’ve transformed into fond memories of laughter and experimentation in the kitchen.

The beauty of cooking is that it’s always evolving. These banana chips are perfect as is, but they can also be the base for countless creative twists. Don’t be afraid to experiment!

---

## FAQs and Troubleshooting

### Q1: Why are my banana chips soggy?
A1: Make sure your banana slices are evenly cut and not too thick. Also, ensure that you're flipping them halfway through to allow even crisping.

### Q2: Can I use frozen bananas?
A2: Yes, but keep in mind that frozen bananas tend to be a bit mushier. Thaw them before slicing and seasoning.

### Q3: How can I store leftover banana chips?
A3: Store in an airtight container at room temperature for up to a week. However, I bet they won’t last that long!

### Q4: My chips browned too quickly. What happened?
A4: Air fryers can vary in temperature. If they brown too fast, try reducing the temperature to 325°F (160°C) and cooking a bit longer.

---

## Nutritional Info

While exact values can vary, here’s a rough estimate per serving (about 1 ounce):

- Calories: 150
- Carbohydrates: 35g
- Fiber: 3g
- Sugars: 12g
- Protein: 1g
- Fat: 0.5g

---

And there you have it! Your very own Cinnamon-Sugar Air Fryer Banana Chips that are perfect for snacking anytime. I hope this recipe inspires you to step into the kitchen and create something delightful! Remember to share your kitchen adventures—tag me on social media, and let’s keep this food community thriving. Happy cooking!

Cinnamon-Sugar Air Fryer Banana Chips
- Total Time: 25 minutes
- Yield: 2 servings 1x
- Diet: Vegan
Description
Crispy, sweet, and a healthier alternative to traditional snacks, these air fryer banana chips bring joy without the guilt.
Ingredients
- 2 ripe bananas
- 1 teaspoon cinnamon
- 1 tablespoon granulated sugar
- A light spray of oil (optional)
Instructions
- Peel your bananas and slice them into even rounds, about 1/4-inch thick.
- Combine your banana rounds with cinnamon and sugar in a mixing bowl.
- Preheat your air fryer to 350°F (175°C) for about 3 minutes.
- Place banana slices in a single layer in the air fryer basket.
- Cook for about 10 to 15 minutes, flipping midway.
- Transfer the chips to a wire rack to cool, allowing them to crisp up.
Notes
For extra crunch, dust some cornstarch along with your sugar and cinnamon mix. Store leftovers in an airtight container at room temperature for up to a week.
- Prep Time: 10 minutes
- Cook Time: 15 minutes
- Category: Snack
- Method: Air Frying
- Cuisine: American
Nutrition
- Serving Size: 1 ounce
- Calories: 150
- Sugar: 12g
- Sodium: 1mg
- Fat: 0.5g
- Saturated Fat: 0g
- Unsaturated Fat: 0g
- Trans Fat: 0g
- Carbohydrates: 35g
- Fiber: 3g
- Protein: 1g
- Cholesterol: 0mg
Keywords: air fryer snacks, banana chips, healthy snacks, cinnamon sugar, easy recipes
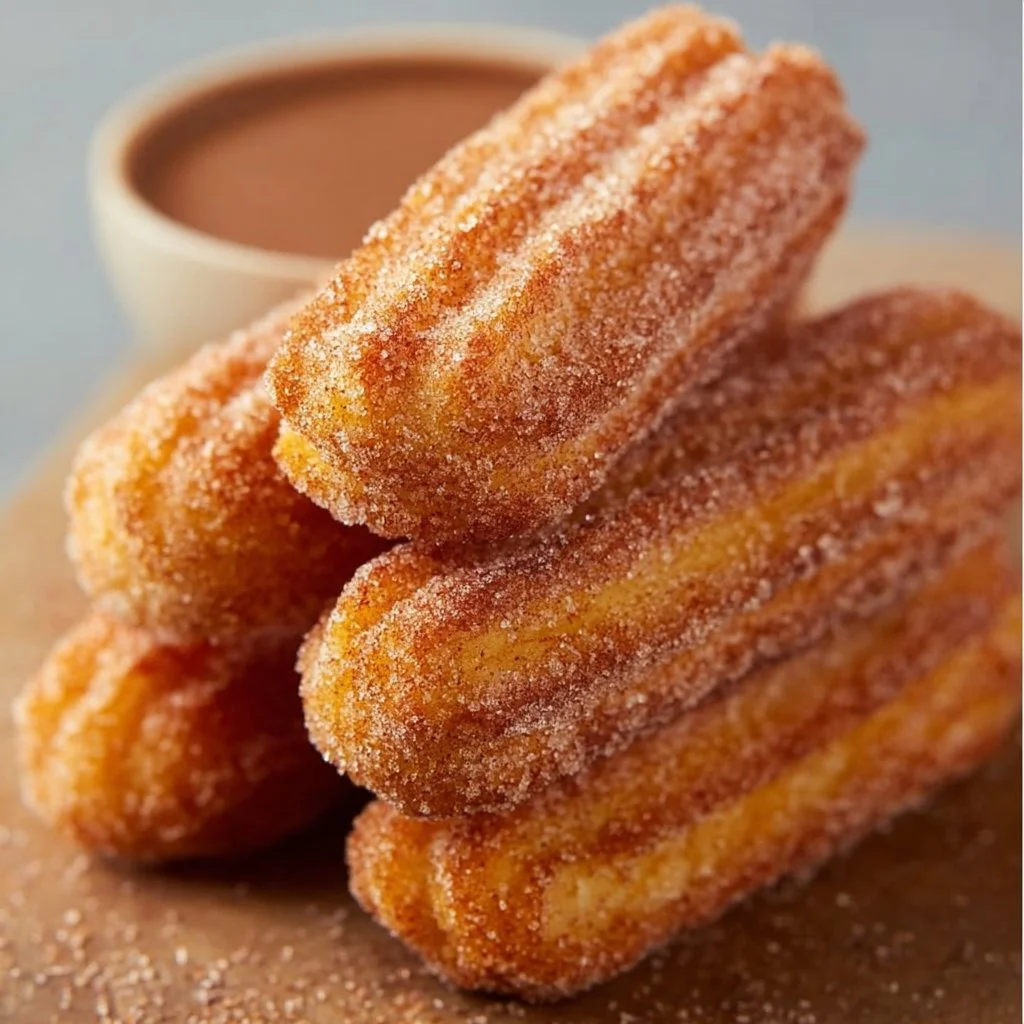
Healthy Baked Churro Bites
Healthy Baked Churro Bites: A Sweet Treat for Your Soul
Welcome to my kitchen friends! Today, I’m excited to share a twist on a classic favorite that’ll make your taste buds dance and surf the sweet wave of nostalgia — Healthy Baked Churro Bites! If you’re anything like me, churros hold a special place in your heart. The sweet aroma wafting through the air at a fair or theme park has the magical ability to spark joy and ignite fond memories. What if I told you that you can whip up this delightful treat at home without the guilt of frying? It’s true!
In this post, I’ll guide you step-by-step through making these irresistible mini churros that are baked, not fried, yet filled with all the cinnamon-sugar goodness you crave. Whether you’re planning a cozy family movie night, a fun brunch with friends, or just want to indulge after a long day, these little bites are perfect. No fancy kitchen gadgets are required, and you might even gain culinary bragging rights among your friends! So, roll up those sleeves, grab your apron—the messy kind we all love—and let’s make some magic!
A Sweet Memory
Let me take you back in time for a moment. I can still vividly remember my first churro experience. It was at a bustling local fair; the sun was setting, and the colorful lights twinkled like stars among the twilight. The sweet and spicy notes of cinnamon caught my attention as I strolled through the food stalls, and there it was—the churro cart!
I bought a warm, sugar-coated churro and took my first bite. The crisp exterior crunched delightfully while the soft, pillowy inside melted in my mouth. It felt like a warm hug on a chilly evening. Ever since that moment, churros have been my guilty pleasure. The idea of turning that cherished treat into a healthier version has been a long-standing dream of mine. With a little creativity and a dash of determination, these Healthy Baked Churro Bites were born!
Ingredients
Here’s what you’ll need to create these scrumptious bites:
-
Whole Wheat Flour
A healthier alternative to all-purpose flour, whole wheat flour gives your churro bites a nutty flavor and adds fiber. If you’re out, you can also use almond flour or coconut flour (but be careful with the measurement, as they differ). -
Baking Powder
This little hero acts as a leavening agent, helping your churro bites rise and become fluffy. Don’t skip this — it’s essential for that light texture! -
Cinnamon
Ah, the magical spice of churros! It brings warmth and sweetness. Opt for Ceylon cinnamon for a more delicate flavor or stick with classic Cassia cinnamon. -
Sea Salt
Just a pinch helps balance out the sweetness and enhances the flavors of the other ingredients. -
Coconut Oil (melted)
Adding healthy fats, coconut oil imparts a subtle tropical flavor. You can swap it for unsalted butter or a plant-based butter if you prefer. -
Honey or Maple Syrup
For natural sweetness, use honey or maple syrup to keep it healthy. If you’re vegan, maple syrup is your best bet. -
Unsweetened Applesauce
This fantastic ingredient adds moisture and sweetness while cutting down on fat. Who knew healthy could taste so good? -
Milk (dairy or plant-based)
Choose whatever type of milk you love—almond, oat, or classic cow’s milk. This helps bind everything together. -
Coconut Sugar
For rolling, coconut sugar adds a lovely caramel-like flavor and is a fantastic natural sweetener.
Step-by-Step Instructions
Now, let’s get to the fun part — cooking! Follow these steps, and I promise you’ll feel like a pro right in your own kitchen.
Preheat and Prep
- Preheat your oven to 350°F (175°C). This warms up your oven as you mix the batter, reducing the waiting time. Line a baking sheet with parchment paper for easy cleanup — yes, I’m all about that mess-free life!
Mix the Dry Ingredients
- In a mixing bowl, combine 1 cup whole wheat flour, 2 teaspoons baking powder, 1 teaspoon cinnamon, and ½ teaspoon sea salt.
- Tip: Whisk these ingredients together to aerate the flour and prevent any lumps. This little step makes a significant difference in the texture of your churro bites!
Combine the Wet Ingredients
- In another bowl, whisk together 1/4 cup melted coconut oil, 1/4 cup honey (or maple syrup), 1/2 cup unsweetened applesauce, and 1/3 cup milk.
- Chef hack: Ensure the coconut oil isn’t too hot when mixing it with the other ingredients, or it might cook the applesauce and create lumps. Mixing using a room-temperature method will yield better results.
Bring it Together
- Slowly pour the wet mixture into the dry ingredients, stirring until just combined.
- Pro tip: Be careful not to overmix! A few lumps are perfectly fine, and overmixing can lead to dense churros instead of fluffy ones.
Shape the Churro Bites
- Scoop the dough into a piping bag or a zip-top bag with a corner snipped off.
- Pipe little bite-sized portions onto the prepared baking sheet, about 1-inch apart. You can also use a cookie scoop if you don’t have piping bags.
Bake Away!
- Bake for about 12-15 minutes or until they’re golden brown.
- Keep a close eye towards the end, as oven temperatures can vary. You’ll know they’re ready when you see a beautiful golden color.
Cinnamon-Sugar Toss
- Meanwhile, prepare the cinnamon-sugar coating by mixing 1/4 cup coconut sugar and 1 tablespoon cinnamon in a bowl.
- After the churro bites come out of the oven, while they’re still warm, roll them in this delightful mix. This is where the magic truly happens, coating your bites in sweet cinnamon bliss!
Serving Suggestions
Plate your crispy baked churro bites in a beautiful basket lined with parchment paper. Drizzle a bit of melted dark chocolate or a dollop of yogurt for dipping on the side. Feel free to serve them warm or at room temperature. However you choose to serve these churros, they are guaranteed to bring comfort and joy to anyone lucky enough to taste them!
Recipe Variations
Looking to get creative? Here are some fun ways to modify this recipe:
- Chocolate Dipped Churros: Melt some dark chocolate and dip the churro bites after rolling them in cinnamon-sugar.
- Stuffed Churros: Add a spoonful of nut butter or fruit preserves inside before baking for an extra surprise.
- Spicy Churros: Add a pinch of cayenne pepper to the cinnamon-sugar mixture for a surprising kick!
- Vegan Option: Swap honey for maple syrup, and use flaxseed meal with water as an egg substitute in the recipe for a purely plant-based treat.
- Gluten-Free: Substitute the whole wheat flour with a gluten-free blend for identical deliciousness.
Chef’s Notes
You know, as a passionate home cook, I’ve had my fair share of kitchen disasters — who hasn’t? I remember the first time I tried to make churros from scratch, and let’s just say it was a hot, sticky mess! But those failed attempts paved the way for this healthier, baked version we enjoy today. So, don’t stress if things don’t go perfectly the first time; that’s part of the fun! Cooking is all about experimenting and evolving.
FAQs and Troubleshooting
1. Why did my churro bites turn out dense?
This could happen due to overmixing the batter or using too much flour. Measure accurately and blend just until combined for light, fluffy bites.
2. Can I store the churro bites for later?
Absolutely! Store any leftovers in an airtight container at room temperature for up to 2 days. For longer storage, pop them in the freezer and reheat them for a quick treat later on.
3. What can I dip my churro bites in?
While cinnamon-sugar is delicious, you can get creative! Try dark chocolate, caramel sauce, whipped cream, or even a creamy yogurt dip for a twist.
4. Can I use a different type of flour?
Yes! You can experiment with gluten-free flour or almond flour. Just remember, adjustments may need to be made to the quantity based on the type of flour.
Nutritional Info
For those of you keeping track, here’s a rough breakdown for one churro bite (based on a dozen servings):
- Calories: 80
- Total Fat: 3g
- Carbohydrates: 12g
- Fiber: 2g
- Sugar: 4g
- Protein: 1g
In conclusion, these Healthy Baked Churro Bites are a sweet, guilt-free indulgence that brings joy to your kitchen without compromising your health goals. I hope you’ve enjoyed this culinary adventure as much as I have! So gather your loved ones, share some laughs, and savor the bites we’ve created together. Get ready to make some unforgettable memories over these sweet treats today—happy baking!
Print
Healthy Baked Churro Bites
- Total Time: 30 minutes
- Yield: 12 servings 1x
- Diet: Vegetarian
Description
A healthier twist on classic churros that are baked instead of fried, bringing sweet nostalgia to your kitchen.
Ingredients
- 1 cup whole wheat flour
- 2 teaspoons baking powder
- 1 teaspoon cinnamon
- ½ teaspoon sea salt
- ¼ cup coconut oil (melted)
- ¼ cup honey or maple syrup
- ½ cup unsweetened applesauce
- ⅓ cup milk (dairy or plant-based)
- ¼ cup coconut sugar (for rolling)
Instructions
- Preheat your oven to 350°F (175°C) and line a baking sheet with parchment paper.
- Combine the dry ingredients: whole wheat flour, baking powder, cinnamon, and sea salt in a mixing bowl.
- Whisk these ingredients to aerate and prevent lumps.
- In another bowl, whisk together melted coconut oil, honey (or maple syrup), applesauce, and milk.
- Pour the wet mixture into the dry ingredients, stirring until just combined.
- Scoop the dough into a piping bag or zip-top bag with a corner snipped off.
- Pipe bite-sized portions onto the prepared baking sheet, keeping them about 1-inch apart.
- Bake for 12-15 minutes until golden brown.
- Mix together the coconut sugar and cinnamon for the coating.
- Roll warm churro bites in the cinnamon-sugar mixture.
Notes
For variations, try chocolate dipping, stuffing with nut butter, or adding spices for heats.
- Prep Time: 15 minutes
- Cook Time: 15 minutes
- Category: Dessert
- Method: Baking
- Cuisine: Mexican
Nutrition
- Serving Size: 1 churro bite
- Calories: 80
- Sugar: 4g
- Sodium: 200mg
- Fat: 3g
- Saturated Fat: 2g
- Unsaturated Fat: 1g
- Trans Fat: 0g
- Carbohydrates: 12g
- Fiber: 2g
- Protein: 1g
- Cholesterol: 0mg
Keywords: baked churros, healthy dessert, cinnamon sugar
Microwave Chocolate Chip Mug Cookie
Microwave Chocolate Chip Mug Cookie: The Ultimate Treat for the Busy Foodie
Hey there, fellow foodies! Welcome back to my cozy kitchen, where the sweet aroma of freshly baked goodies fills the air and the laughter is as rich as the chocolate in the treats we make. Today, I’m excited to share a recipe that not only satisfies your sweet tooth but also fits right into the whirlwind of our hectic lives: the microwave chocolate chip mug cookie. Yes, you heard me right – a cookie you can whip up in just a couple of minutes with simple ingredients you probably already have at home.
This is one of those recipes that is perfect for late-night cravings, unexpected guests, or even just a little self-indulgence after a long day. Imagine this: it’s midnight; you’re in your PJs, browsing through social media, and suddenly the craving hits—something warm, sweet, and oh-so-chocolatey. Instead of reaching for that store-bought snack, you can have a delicious cookie in just a minute or two!
Why a mug cookie, you ask? Well, here’s the beauty of it: the mug acts as both your mixing bowl and your baking dish, which means minimal cleanup (yay for that!). Plus, there’s just something fun and nostalgic about making a personalized treat just for you—it’s like a tiny celebration in a cup. So, roll up those sleeves, grab your favorite mug, and let’s create something sweet together!
Personal Story
You know, one of my most cherished memories in the kitchen revolves around cookies. As a kid, I would hover around my mom, watching her whip up giant batches of chocolate chip cookies every Saturday. The sounds of creaming butter and sugar, the joyful clatter of mixing bowls, and the sweet cocoon of vanilla and chocolate wafting through the house are etched into my heart.
One particular Saturday, I remember wanting to help my mom so badly. She handed me a mug and told me to mix my own little concoction. It became a ritual; I would measure ingredients as best I could, and while my attempts were a tad messy (chocolate chips on the floor, anyone?), the thrill of creating my treat made each week feel like a special occasion.
Fast forward to today, and I’ve tried to recreate those childhood memories. This microwave chocolate chip mug cookie embodies that nostalgia—taking the essence of those carefree weekends and simplifying it for our modern, fast-paced lives. Enjoying a warm cookie right from the microwave is a comforting reminder that sometimes, the simplest things bring us the most joy.
Ingredients
Here’s what you’ll need to make your very own microwave chocolate chip mug cookie:
-
2 tablespoons unsalted butter
- Chef Insight: Butter is where the magic happens! Before adding, melt it slightly in the microwave—this gives the cookie a nice chewiness. If you want to lighten things up, you can substitute with coconut oil.
-
1 tablespoon granulated sugar
- Substitution Tip: If you’re after a less sweet treat, reduce the sugar to 2 teaspoons. Coconut sugar can also be a great alternative for a caramel hint.
-
1 tablespoon brown sugar
- Chef Insight: This adds depth and moisture to your cookie. Dark brown sugar will give you a richer flavor. No brown sugar? Just replace it with more granulated sugar.
-
1/4 teaspoon vanilla extract
- Substitution Tip: Pure vanilla extract offers the best flavor, but vanilla essence will do in a pinch—or even a nut extract like almond if you’re feeling adventurous!
-
1 egg yolk (discard the white or save for another recipe)
- Chef Insight: The yolk adds richness and moisture. If you’re egg-free, 1 tablespoon of applesauce can work as a replacement.
-
4 tablespoons all-purpose flour
- Substitution Tip: For a gluten-free version, try oat flour or almond flour, but keep in mind the texture may differ slightly.
-
1/4 teaspoon baking soda
- Chef Insight: This little magic ingredient acts as a leavening agent, helping to give your cookie a delightful lift. Don’t skip it!
-
2 tablespoons chocolate chips
- Substitution Tip: Use dark, milk, or even white chocolate chips! You can also add a sprinkle of sea salt atop the chocolate chips for a gourmet finish.
Step-by-Step Instructions
Ready to dive into the fun part? Here’s how to make your microwave chocolate chip mug cookie step by step:
-
Melt the Butter: In your favorite microwave-safe mug, place 2 tablespoons of unsalted butter. Heat it in the microwave for about 15-20 seconds, until it’s just melted. Be careful not to overheat; you want it warm, not bubbling!
-
Mix in the Sugars: After the butter has melted, add 1 tablespoon of granulated sugar and 1 tablespoon of brown sugar to the mug. Using a fork or a small whisk, combine the mixture until it’s creamy and smooth. This step is all about incorporating air into the butter, making your cookie lighter.
-
Add Vanilla and Egg Yolk: Stir in 1/4 teaspoon of vanilla extract and the egg yolk. Mix until everything is well combined. I just love the smell of vanilla here—it’s like a hug in a mug!
-
Incorporate the Dry Ingredients: Add 4 tablespoons of all-purpose flour and 1/4 teaspoon baking soda into the mug. Stir gently until just combined; be careful not to overmix. Overmixing can lead to a dense cookie, and we want it divine and soft.
-
Final Touch: Chocolate Chips: Fold in those yummy chocolate chips—but save a few to sprinkle on top to make it look extra delicious. The great thing about this recipe is that you can customize it to your taste, so if you have nuts or dried fruit on hand, feel free to toss them in!
-
Microwave Time: Place the mug in the microwave and heat it on high for about 40 to 60 seconds. Start checking at the 40-second mark. The cookie should look set but slightly gooey in the middle. Remember, microwaves vary, so you may need to adjust the timing slightly.
-
Cool and Enjoy: Let your mug cookie cool for a minute (unless you can’t resist and want to dig in right away!). It will be super hot, so be careful. If you want to take it up a notch, serve it warm with a scoop of ice cream on top. Heaven in a mug!
Serving Suggestions
Serving a mug cookie is an art in itself! You can simply devour it directly from the mug for a cozy and casual experience, or you can get a little fancy. Here’s how:
-
Plating: If you’re feeling extra special, transfer your cookie onto a small plate. Add a scoop of vanilla ice cream or a dollop of whipped cream on top. Drizzle some chocolate sauce or caramel for that gourmet touch.
-
Garnishing: Finish with a sprinkle of sea salt and a few extra chocolate chips on top for presentation and texture—a true treat for the eyes as well as the stomach!
Recipe Variations
Let’s talk about how to keep this recipe fresh and exciting! Here are a few creative twists you can try:
-
Nutty Delight: Add a tablespoon of chopped nuts like walnuts or pecans for a crunchy texture.
-
Double Chocolate: Swap half of the flour for cocoa powder to create a rich chocolate base.
-
Peanut Butter Swirl: Before microwaving, add a spoonful of peanut butter into the center of the dough for a delightful surprise.
-
Seasonal Spice: Mix in a pinch of cinnamon or even pumpkin spice during the fall for a festive flavor.
Chef’s Notes
This microwave chocolate chip mug cookie is a game-changer! It’s one of those recipes that has evolved over the years. Initially, I was skeptical about mug cookies—the idea of baking a real cookie in the microwave seemed too good to be true. But after a few tweaks, I found the perfect balance of texture and flavor.
And here’s a little kitchen story: one time, I decided to whip one of these up for a friend who had stopped by for a chat. I got so excited that I used an oversized mug, doubling the ingredients thinking I’d create a mega cookie! Well, it overflowed in the microwave, and the gooey mess was more laughable than tasty, but hey, I learned!
So, either stick to standard measurements or get adventurous like I did—just be prepared for the consequences!
FAQs and Troubleshooting
-
Why did my mug cookie turn out dry?
- Overcooking is usually the culprit. Make sure to keep an eye on the time and remember that the residual heat will continue to cook your cookie after pulling it out.
-
Can I make this cookie vegan?
- Absolutely! Substitute the butter for coconut oil or vegan butter, use a flax egg (1 tablespoon ground flaxseed mixed with 2.5 tablespoons water), and make sure the chocolate chips are dairy-free.
-
What if my cookie is too gooey?
- If the middle is still raw after the initial cooking time, pop it back in the microwave for an additional 10 seconds. Just be cautious to avoid overdoing it.
-
Can I store leftover cookie dough?
- While this recipe is best enjoyed fresh, you can prepare the dry ingredients ahead of time and store them in a jar. Just add the wet ingredients when you’re ready for a quick treat!
Nutritional Info (Optional)
If you’re curious about the nutritional aspect of your delicious creation, a usual serving of this microwave chocolate chip mug cookie has approximately:
- Calories: 300
- Protein: 4g
- Fat: 16g
- Carbohydrates: 38g
- Sugar: 18g
Adjust the recipe’s ingredients according to your dietary needs for healthier alternatives!
And there you have it, a delightful and quick recipe for a cozy night in or a midday pick-me-up—your new go-to for satisfying sweet cravings. Remember, cooking is all about having fun and experimenting. So go ahead, get creative, and enjoy every crumb of your mug cookie! Happy baking!
Print
Microwave Chocolate Chip Mug Cookie
- Total Time: 6 minutes
- Yield: 1 serving 1x
- Diet: Vegetarian
Description
A quick and easy microwave recipe for a delicious chocolate chip mug cookie that satisfies your sweet cravings in just minutes.
Ingredients
- 2 tablespoons unsalted butter
- 1 tablespoon granulated sugar
- 1 tablespoon brown sugar
- 1/4 teaspoon vanilla extract
- 1 egg yolk
- 4 tablespoons all-purpose flour
- 1/4 teaspoon baking soda
- 2 tablespoons chocolate chips
Instructions
- Melt the butter in a microwave-safe mug for 15-20 seconds.
- Mix in the granulated and brown sugars until creamy.
- Add the vanilla extract and egg yolk, stirring until combined.
- Incorporate the flour and baking soda, mixing gently.
- Fold in the chocolate chips and save a few for topping.
- Microwave on high for 40-60 seconds until set but gooey in the middle.
- Cool for a minute and enjoy!
Notes
Serve warm with ice cream for a delightful treat!
- Prep Time: 5 minutes
- Cook Time: 1 minute
- Category: Dessert
- Method: Microwaving
- Cuisine: American
Nutrition
- Serving Size: 1 cookie
- Calories: 300
- Sugar: 18g
- Sodium: 150mg
- Fat: 16g
- Saturated Fat: 8g
- Unsaturated Fat: 6g
- Trans Fat: 0g
- Carbohydrates: 38g
- Fiber: 1g
- Protein: 4g
- Cholesterol: 30mg
Keywords: mug cookie, chocolate chip, quick dessert, easy recipe, microwave
Chocolate Greek Yogurt Mousse
Indulge in Decadence: Chocolate Greek Yogurt Mousse Recipe
Welcome back to my kitchen, dear foodies! Today, we’re diving into a luscious and incredibly satisfying dessert that combines the rich, creamy goodness of chocolate with the tangy freshness of Greek yogurt: Chocolate Greek Yogurt Mousse. Trust me; this delightful treat will not only satisfy your sweet tooth but also add a dash of sophistication to your dessert table.
Now, I understand that when you think of mousse, you might picture something that requires intricate techniques or fancy equipment. Spoiler alert: that’s not the case here! This mousse is wonderfully simple to make, perfect for both beginners and seasoned chefs who crave a quick yet decadent dessert.
As someone who has spent countless hours in the kitchen (and who has probably eaten their weight in chocolate!), I can assure you that this mousse is a game changer. It’s light, fluffy, and has a deep chocolate flavor that will have everyone coming back for seconds. Plus, with Greek yogurt as a base, it’s a healthier alternative to traditional mousse, meaning you can indulge a little more guilt-free.
So, whether you’re prepping for a dinner party, a cozy night in, or just need a sweet pick-me-up, this Chocolate Greek Yogurt Mousse is your answer. Grab your spatula, let’s create magic in the kitchen!
Personal Story
Let me take you back a few years to a bustling kitchen filled with laughter, chatting, and, yes, the sweet smell of chocolate wafting through the air. It was my best friend Jamie’s birthday, and we decided to host a surprise dinner party to celebrate. We planned every detail, from the appetizers to the entrée, but dessert had us both stumped.
Then, I remembered a recipe I had seen for a chocolate mousse made with yogurt instead of heavy cream. Being the adventurous cooks that we are, we decided to give it a shot. As we mixed and whipped, we giggled like schoolgirls, sneaking spoonfuls of the luscious chocolate mixture.
Little did we know that our improvised dessert would become the star of the evening! Our guests raved about the mousse’s rich texture, and Jamie even declared it the best birthday dessert she’d ever had. That night solidified our love for this recipe, and it’s become a staple at our gatherings ever since.
Now, every time I make this Chocolate Greek Yogurt Mousse, I’m transported back to that joyous night, surrounded by friends and laughter. I hope this recipe brings you as much happiness as it has brought me!
Ingredients
To whip up this delightful mousse, you’ll need the following ingredients:
-
Greek Yogurt (2 cups)
Greek yogurt provides a creamy base that keeps this mousse light yet decadent. If you’re looking for a dairy-free option, try using coconut yogurt for a similar texture and a hint of tropical flavor. -
Semi-sweet Chocolate (1 cup)
Semi-sweet chocolate gives the mousse that luscious, rich flavor. You can substitute with dark chocolate for a more intense taste, but remember that it can be slightly less sweet. -
Cocoa Powder (2 tablespoons)
This adds an extra depth of chocolate flavor and enhances the richness of the dish. For a unique twist, try using a flavored cocoa powder — like dark chocolate or spicy chili chocolate. -
Honey or Maple Syrup (3 tablespoons)
This natural sweetener balances the tang of the yogurt. If you prefer to avoid sweeteners, you can substitute with a few drops of stevia or another sugar alternative to taste. -
Vanilla Extract (1 teaspoon)
A splash of vanilla elevates the flavor, giving the mousse a warm, inviting aroma. You could even toss in a pinch of espresso powder for a mocha twist! -
Salt (a pinch)
Don’t forget this essential ingredient! A tiny pinch of salt brings all the flavors together. If you’re feeling fancy, consider using flaky sea salt to sprinkle on top before serving.
Step-by-Step Instructions
Now that we have our ingredients ready, let’s get started on making this velvety mousse!
Step 1: Melt the Chocolate
Begin by breaking your semi-sweet chocolate into small pieces and placing them in a microwave-safe bowl. Heat in the microwave in 20-second intervals, stirring between each, until the chocolate is smooth and completely melted. Make sure not to overheat; burned chocolate is a sad, sad fate! If you prefer the stovetop, you can melt it in a double boiler instead. Keep it aside to cool slightly.
Step 2: Mix Greek Yogurt and Sweetener
In a large mixing bowl, combine the Greek yogurt and your choice of honey or maple syrup. Use a whisk or electric mixer to blend these two ingredients until smooth and creamy. Taste the mixture and adjust the sweetness as desired — you want it pleasantly sweet, just enough to balance the yogurt’s tang.
Step 3: Incorporate the Chocolate
Once the chocolate has cooled down a bit (safety first, friends!), pour half of it into the Greek yogurt mixture. Use a spatula to gently fold the chocolate into the yogurt until it’s well combined. Then, pour in the rest of the melted chocolate and continue folding until the mixture is a uniform color and texture. Remember, be gentle! You want to keep that airiness in the mousse.
Step 4: Add the Remaining Ingredients
Sprinkle in the cocoa powder, vanilla extract, and that pinch of salt. Continue to fold until everything is combined and silky-smooth. This is the perfect moment to taste your creation again — don’t hold back! Adjust sweetness or flavor if you feel inspired.
Step 5: Chill
Transfer the mousse into individual serving cups or a large bowl if you prefer to scoop your servings. Cover with plastic wrap and refrigerate for at least 1 hour. Chilling helps the mousse set up and enhances the flavors.
Step 6: Serve and Enjoy!
When your mousse is ready, serve it chilled. You can top it with whipped cream, fresh berries, or shaved chocolate for added elegance. Don’t forget to snap that Instagram-worthy photo!
Serving Suggestions
When it comes to serving this Chocolate Greek Yogurt Mousse, presentation is key! A simple yet sophisticated touch is to layer the mousse in clear dessert glasses, allowing the beautiful, creamy layers to be visible. Add a dollop of whipped cream on top, sprinkle with chocolate shavings, and a few fresh raspberries or mint leaves for a splash of color. Voila! You have a stunning dessert that would impress even the toughest critics!
Recipe Variations
Now, let’s make this mousse even more exciting with a few clever twists:
- Nutty Delight: Stir in crushed nuts (like almonds or hazelnuts) for a delightful added crunch.
- Berry Swirl: Before refrigerating, fold in some fresh berry puree to create a beautiful marbled effect.
- Spicy Chocolate: Add a pinch of cayenne pepper or cinnamon for a warm, spicy flavor that’s unexpected and delicious!
- Peanut Butter Chocolate Mousse: Swirl in some natural peanut butter for a creamy, nutty taste that takes it to another level of indulgence.
- Vegan Option: Use a plant-based yogurt and agave syrup instead of honey to make this dessert completely vegan-friendly.
Chef’s Notes
This recipe is one of those delightful creations that evolved with experimentation in my kitchen. The initial idea came from a traditional chocolate mousse recipe loaded with heavy cream and sugar. While I love a classic, I always strive for a balance between indulgence and health. This chocolate mousse struck that magical chord!
One of my favorite kitchen mishaps occurred while perfecting this recipe. I once accidentally grabbed a bottle of balsamic glaze instead of chocolate syrup when sweetening the yogurt. After the shock subsided, I tasted the result and surprisingly loved the tanginess with the chocolate! It’s never a waste of time to play around with ingredients and see what happens.
FAQs and Troubleshooting
Q: My mousse didn’t turn out fluffy. What went wrong?
A: The key to making your mousse fluffy lies in folding the ingredients together gently. Overmixing can result in a dense mousse, so take it easy on that spatula!
Q: Can I make this ahead of time?
A: Absolutely! This mousse actually tastes even better after sitting in the fridge overnight, allowing the flavors to meld beautifully.
Q: What if my mousse is too sweet?
A: No worries! If you find it too sweet, try stirring in a little more Greek yogurt until it reaches your desired taste. The tartness will help balance it out.
Q: Can I freeze the leftovers?
A: While I highly doubt you’ll have any leftovers, if you do, you can freeze the mousse. Just store it in an airtight container for up to a month. Thaw in the fridge before serving!
Nutritional Info
If you are wondering about the nutritional breakdown, here’s a general idea per serving (based on 6 servings):
- Calories: 150
- Protein: 6g
- Carbohydrates: 18g
- Fat: 6g
- Saturated Fat: 3g
- Sugar: 10g
This mousse is a light and satisfying treat that won’t leave you feeling guilty.
So, there you have it, my wonderful food lovers! Your very own Chocolate Greek Yogurt Mousse to whip up and share — or not! After all, it is deliciously tempting. Enjoy making it, savoring it, and, most importantly, sharing it with the people you love. Happy cooking!
Print
Chocolate Greek Yogurt Mousse
- Total Time: 120 minutes
- Yield: 6 servings 1x
- Diet: Vegetarian
Description
A rich and creamy chocolate mousse made healthier with Greek yogurt, perfect for satisfying your sweet tooth guilt-free.
Ingredients
- 2 cups Greek Yogurt
- 1 cup Semi-sweet Chocolate
- 2 tablespoons Cocoa Powder
- 3 tablespoons Honey or Maple Syrup
- 1 teaspoon Vanilla Extract
- a pinch of Salt
Instructions
- Melt the chocolate by breaking it into pieces and microwaving in intervals until smooth.
- Mix Greek yogurt and sweetener until smooth and creamy.
- Incorporate half of the melted chocolate into the yogurt mixture, folding gently.
- Add the remaining chocolate along with cocoa powder, vanilla, and salt, folding until smooth.
- Chill the mousse in serving cups for at least 1 hour.
- Serve chilled and enjoy!
Notes
For a vegan option, use plant-based yogurt and agave syrup instead of honey. Chilling overnight enhances flavor.
- Prep Time: 15 minutes
- Cook Time: 5 minutes
- Category: Dessert
- Method: Chilling
- Cuisine: Mediterranean
Nutrition
- Serving Size: 1 serving
- Calories: 150
- Sugar: 10g
- Sodium: 50mg
- Fat: 6g
- Saturated Fat: 3g
- Unsaturated Fat: 3g
- Trans Fat: 0g
- Carbohydrates: 18g
- Fiber: 1g
- Protein: 6g
- Cholesterol: 5mg
Keywords: chocolate mousse, Greek yogurt dessert, healthy dessert, easy chocolate mousse, fluffy mousse
Greek Yogurt Orange Fluff
Greek Yogurt Orange Fluff: A Dreamy Citrus Delight
Welcome to my kitchen, my lovely food friends! Today, we’re diving into a recipe that combines lightness and sweetness in the most delightful way—my Greek Yogurt Orange Fluff! This recipe is not just a treat for your taste buds but also a fabulous, wholesome dish that elevates any gathering.
Imagine walking into a cozy kitchen, the sun shining in as you spot a beautiful, fluffy dessert waiting to be shared. The aroma of fresh oranges fills the air, and you can’t help but feel that rush of joy that only good food can bring. This dish is perfect for those moments—be it a casual Sunday brunch, a potluck with friends, or a festive family dinner.
With its creamy texture, refreshing citrus flavor, and a touch of sweetness, Greek Yogurt Orange Fluff is a concoction that captures the spirit of all things cozy and homemade. Plus, it’s incredibly versatile! You can serve it as a dessert, a breakfast treat, or even as a snack during the day. Whichever way you slice it, this fluff is bound to be a hit!
So grab your apron (I know mine is probably a little messy already) and let’s get ready to whip up something special together!
A Taste of My Childhood
My love for fluffy desserts goes way back to my childhood. I remember my grandmother’s kitchen, which was the heart of our home. It was always bustling with activity—dough rising, spices dancing through the air, and laughter echoing off the walls. One of my favorite memories is of her preparing a light, fluffy dessert to brighten our family gatherings, especially during the warmer months.
She used to whip up a similar fluffy creation using whipped cream and citrus fruits, and everyone would eagerly gather around the table, waiting to sample her latest masterpiece. Weeks turned into months, and seasons slipped by, but that dessert continued to hold a special place in my heart.
As I grew up and began to experiment in my own kitchen, I wanted to create something just as light and cheerful but with a modern twist. Enter Greek Yogurt! It added a healthy spin while still allowing for that same delightful fluffiness I adored from my grandma’s creations. This Greek Yogurt Orange Fluff is my homage to those memory-filled afternoons spent in the kitchen, and I can’t wait for you to share it with your loved ones, too!
Ingredients
Here’s what you’ll need to make this dreamy, creamy dessert:
-
1 cup Greek yogurt
Look for plain, unsweetened Greek yogurt for the best results! It provides a rich base, packed with protein and a tangy flavor that balances perfectly with the sweetness of oranges. If you prefer a dairy-free option, coconut yogurt works wonderfully too! -
1 cup heavy whipping cream
This adds that luscious fluffiness we love in desserts! Make sure to whip it until soft peaks form—this gives the fluff a light and airy texture. If you’re looking for a lighter option, you can use whipped coconut cream instead. -
1/2 cup powdered sugar
Powdered sugar dissolves beautifully and sweetens the fluff without adding graininess. If you’re watching your sugar intake, feel free to swap it for a natural sweetener like honey or agave syrup, but adjust to taste! -
Zest of 1 large orange
Zesting the orange adds an aromatic brightness to the dish that’s simply irresistible. If you’re out of oranges, lemon zest can create a zesty variation! -
Juice of 1 large orange
Freshly squeezed juice is key! This will infuse your fluff with just the right amount of citrusy goodness. If you don’t have fresh oranges, bottled juice can be a quick alternative, but be sure to select one that’s 100% juice with no added sugars. -
Optional: 1 teaspoon vanilla extract
A touch of vanilla enhances the flavor and adds warmth—like a comfy hug for your taste buds! Use pure vanilla extract for the best taste. If you’re feeling adventurous, experiment with almond or orange extract!
Step-by-Step Instructions
Let’s dive right into creating our Greek Yogurt Orange Fluff masterpiece!
Step 1: Prepare the Base
In a large mixing bowl, combine the Greek yogurt, powdered sugar, orange zest, and orange juice. Mix it up gently until everything is well combined. Take a moment to breathe in the heavenly aroma of fresh oranges—this is what summer dreams are made of!
Step 2: Whip the Cream
In a separate bowl, start whipping the heavy cream with a hand mixer or stand mixer until soft peaks form. You want it light and fluffy—almost like a cloud! This step is crucial for achieving that airy texture we love, so take your time and don’t rush.
Step 3: Fold Together
Once your cream is whipped, it’s time for the magic! Gently fold the whipped cream into your yogurt mixture using a spatula. Start by adding a small amount of whipped cream into the yogurt to lighten it up (this is called tempering). Then, carefully fold in the rest. You want to maintain that fluffy texture, so be gentle!
Step 4: Chill
Pour the combined mixture into your desired serving bowl or individual cups. Cover and refrigerate for at least 2 hours (or, ideally, overnight for the flavors to meld together).
Step 5: Serve and Enjoy
When you’re ready to eat, scoop out a generous serving of that fluffy goodness. You can garnish it with some additional orange zest or a sprig of mint for a pop of color. Now sit down and prepare to enjoy the delightful blend of tangy yogurt and sweet orange flavors!
Chef’s Tips
- Taste and Adjust: Always taste your fluff mixture before chilling. If you desire a little more sweetness, add more powdered sugar or sweetener.
- Be Patient: Allowing the fluff to chill is essential as it helps the flavors develop and the texture to set—your patience will be rewarded!
- Presentation: For an extra touch, consider adding a crunchy topping like crushed nuts or granola just before serving for added texture!
Serving Suggestions
This Greek Yogurt Orange Fluff can be served in various ways! For an elegant presentation, serve it in beautiful glass cups or mason jars to showcase its fluffy layers. Decorate the top with a sprinkle of your favorite nuts, a dollop of orange marmalade, or even a mint leaf for that extra touch of flair. You can also create a fun dessert bar where guests can top their fluff with various fruits, granola, or chocolate shavings!
Recipe Variations
Feeling a little adventurous? Try these creative twists on the classic recipe:
- Berry Blast: Substitute the orange juice with mixed berry puree for a vibrant berry version!
- Coconut Citrus: Add shredded coconut to the fluff for a tropical flair—perfect for summer!
- Chocolate Orange: Mix in some cocoa powder for a chocolatey twist, creating a decadent treat sure to impress.
- Nutty Delight: Replace the orange zest with lemon, and add crushed pistachios for a nutty variation.
- Honey Lavender: Drizzle some honey and add culinary lavender for a unique flavor profile—perfect for a calming dessert!
Chef’s Notes
I love how this recipe has evolved over the years! Initially, I focused on the traditional sweet fluff, but as I experimented with different ingredients and healthier choices, Greek yogurt became my go-to. It offers the same creamy texture without feeling too heavy while packing a nutritional punch. Plus, it’s been a fantastic way to sneak some additional protein into dessert!
One amusing kitchen story sticks with me—when I first attempted this dessert, I accidentally over-whipped my cream, and let me tell you, it turned into butter! While it was a funny mishap, it taught me a valuable lesson about patience and attention in the kitchen. Cooking is all about learning, and I love sharing those little moments with you!
FAQs and Troubleshooting
Q: Can I make this recipe dairy-free?
A: Absolutely! Substituting regular Greek yogurt with coconut yogurt and using whipped coconut cream makes a delicious, dairy-free version.
Q: My fluff is not setting properly. What went wrong?
A: If your fluff isn’t setting, it may be due to insufficient chilling time. Also, make sure you whipped the heavy cream to soft peaks before folding it in—this is key for maintaining that fluffy texture!
Q: Can I use flavored yogurt?
A: While you can, I recommend using plain Greek yogurt to control the sweetness and flavor profile. However, if you find a delicious orange-flavored yogurt, it could work nicely too!
Q: How long can I store the Greek Yogurt Orange Fluff in the fridge?
A: This dessert can be stored in the fridge for about 3 days. Just remember to cover it well to prevent it from absorbing unwanted odors from your fridge!
Nutritional Info
While I typically let you focus on enjoyment and connection with food rather than its numbers, here’s a rough estimate per serving (if this recipe serves 8):
- Calories: 150
- Protein: 6g
- Fat: 7g
- Carbohydrates: 15g
- Sugar: 10g
(Please note that this is an approximation and can vary based on specific ingredients used.)
And there you have it, my friends—a delightful and fluffy Greek Yogurt Orange Fluff that’s bound to impress! Whether you’re enjoying it solo or sharing it with loved ones, I hope it brings as much joy to your kitchen as it has brought to mine. So, roll up those sleeves, have fun, and let’s celebrate the deliciousness of homemade treats! Happy cooking!
Print
Greek Yogurt Orange Fluff
- Total Time: 135 minutes
- Yield: 8 servings 1x
- Diet: Vegetarian
Description
A light and fluffy dessert combining Greek yogurt with refreshing citrus flavors, perfect for any gathering.
Ingredients
- 1 cup Greek yogurt
- 1 cup heavy whipping cream
- 1/2 cup powdered sugar
- Zest of 1 large orange
- Juice of 1 large orange
- Optional: 1 teaspoon vanilla extract
Instructions
- Prepare the Base: In a large mixing bowl, combine the Greek yogurt, powdered sugar, orange zest, and orange juice. Mix it up gently until everything is well combined.
- Whip the Cream: In a separate bowl, start whipping the heavy cream with a hand mixer or stand mixer until soft peaks form.
- Fold Together: Gently fold the whipped cream into your yogurt mixture using a spatula.
- Chill: Pour the combined mixture into your desired serving bowl or individual cups and cover. Refrigerate for at least 120 minutes.
- Serve and Enjoy: Scoop out a generous serving and garnish with additional orange zest or a sprig of mint.
Notes
Allow the fluff to chill adequately for the best texture and flavor. Consider adding crunchy toppings like crushed nuts before serving.
- Prep Time: 15 minutes
- Cook Time: 0 minutes
- Category: Dessert
- Method: Mixing and Chilling
- Cuisine: Mediterranean
Nutrition
- Serving Size: 1 serving
- Calories: 150
- Sugar: 10g
- Sodium: 30mg
- Fat: 7g
- Saturated Fat: 4g
- Unsaturated Fat: 2g
- Trans Fat: 0g
- Carbohydrates: 15g
- Fiber: 0g
- Protein: 6g
- Cholesterol: 30mg
Keywords: Greek Yogurt, Orange, Dessert, Light, Fluff




