
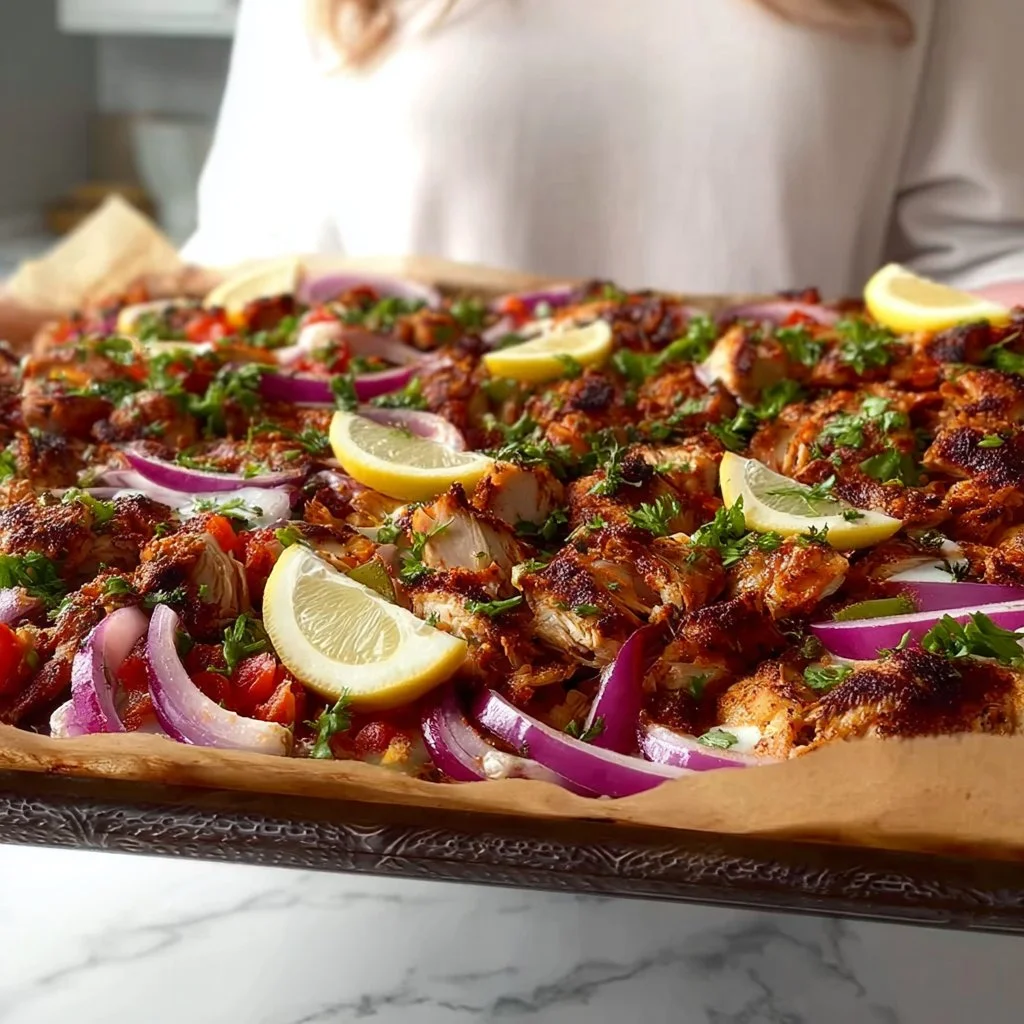
Sheet Pan Chicken Shawarma
Perfectly Easy Sheet Pan Chicken Shawarma: A Flavor-Packed Journey
Welcome back to my kitchen, friends! Today, I’m excited to take you on a delightful culinary adventure with my Sheet Pan Chicken Shawarma. You might be wondering, "What’s the big deal about shawarma?” Well, let me tell you, it’s not just a dish; it’s a whole experience. A medley of spices wraps around marinated chicken, roasted to juicy perfection alongside vibrant veggies, all in one tidy pan. Perfect for busy weeknights or gathering friends around the table, this dish is sure to impress your taste buds and anyone lucky enough to enjoy it with you.
Imagine the warm, aromatic scent of cumin, coriander, and smoked paprika wafting through your home as the chicken roasts. This recipe brings together the complexity of Middle Eastern flavors with the ease of a simple sheet pan dinner. And guess what? You don’t even need to be a master chef to pull it off. Just a few ingredients, a mix of spices, and you’ll have a meal that feels like a restaurant-quality feast right in your kitchen.
As someone who loves creating cozy vibes through food, shawarma holds a special place in my heart. It reflects the joy of cooking as a community, where shared meals bring people together. Whether topped on a fluffy pita, served alongside a crisp salad, or paired with creamy tahini sauce, this dish is versatile and comforting. So roll up your sleeves, grab your apron, and let’s dive into the magic of Sheet Pan Chicken Shawarma — because good food is all about the journey as much as the destination!
Personal Story
I vividly remember the first time I tasted shawarma. I was on a family trip during my college years, roaming the bustling streets of a foreign city filled with tantalizing aromas and lively chatter. A little street vendor caught my eye with flames licking the skewers of marinated meat, beckoning hungry passersby. The first bite of that tender, spiced chicken wrapped in a warm pita was life-changing. I was hooked, and at that moment, I knew I had to recreate this delicious dish back home.
Fast forward a few years, and I’m here in my cozy kitchen, trying to replicate the magic that ignited my love for shawarma. The goal was to harness those authentic flavors without needing a specialty restaurant kitchen. I spent days experimenting with different spice ratios, marinades, and cooking methods. My friends were more than willing to taste-test, and I still chuckle when I recall their faces as I presented my first oven-baked shawarma attempt. It was a joyously messy affair, but their laughter and encouragement made it all worthwhile. That’s the heart of my cooking philosophy: food is meant for sharing, laughter, and love.
Ingredients
For our Sheet Pan Chicken Shawarma, here’s what you’ll need:
- 1.5 lbs chicken thighs: I prefer thighs for their juicy texture that holds up beautifully against the spices. If you’re not a fan, boneless chicken breasts can work, but keep an eye on cooking time since they cook faster.
- 2 tablespoons olive oil: This helps bind the spices to the chicken and encourages that gorgeous golden-brown color. Feel free to use avocado oil if you’re looking for a higher smoke point!
- 3 tablespoons shawarma spice blend: This is where the magic happens! A mix of cumin, paprika, coriander, turmeric, garlic powder, and cinnamon. Don’t have it? You can whip up your own (I’ll share my blend in the variations section) or buy it pre-made from the store.
- 1 teaspoon salt: Essential for flavor enhancement—your chicken needs love too! If you’re watching your sodium, use a low-salt alternative.
- 1 teaspoon black pepper: To add a little kick! Freshly ground is always best, but pre-ground works too.
- 1 red onion, sliced: Adds sweetness when roasted; it’s perfect alongside the chicken. Pick any onion variety, or even sweet onions for a milder flavor.
- 1 bell pepper, sliced (any color): Colorful veggies not only add crunch but elevate the dish’s visual appeal. Zucchini or eggplant would work in a pinch!
- 1 lemon, juiced: Brightens up the entire dish with a zesty finish. Don’t have fresh? Bottled juice will do if necessary.
- Pita bread or rice for serving: Choose your favorite! I love serving mine with fluffy jasmine rice, but you can’t go wrong with warm pita.
Let’s go ahead and get into this scrumptious recipe, shall we?
Step-by-Step Instructions
-
Marinate the Chicken
Start by combining the olive oil, shawarma spice blend, salt, black pepper, and lemon juice in a large bowl. Add in the chicken thighs, making sure they’re thoroughly coated with that aromatic mixture. This might get a little messy, but don’t worry, mess means love! Cover the bowl and let it marinate in the refrigerator for at least 30 minutes, or even overnight if time allows.Tip: Marinating longer allows the flavors to penetrate deeper into the chicken, making each bite even more delicious!
-
Preheat the Oven
While your chicken bathes in those lovely spices, preheat your oven to 425°F (220°C). A hot oven is key to achieving that crispy, caramelized exterior we desire! -
Prepare the Sheet Pan
Grab a large baking sheet and line it with parchment paper for easier cleanup. Spread out the sliced red onions and bell peppers evenly on the pan. This creates a beautiful bed for the chicken to roast atop, adding flavor and nutrition—talk about multitasking! -
Arrange the Chicken
Once marinated, take the chicken out of the fridge and place it on top of the vegetables, ensuring it’s spaced out well. This helps to cook evenly and brown beautifully. You can also drizzle any remaining marinade over the veggies for an extra flavor boost. -
Roast Away!
Slide your sheet pan into the preheated oven and roast for 25-30 minutes, or until the chicken is fully cooked (165°F/75°C) and the edges are just starting to caramelize. Using a meat thermometer ensures that your chicken stays juicy and tender!Chef Hack: Broil for an additional 2-3 minutes if you want an extra crispy finish. Just keep an eye on it to avoid burning!
-
Rest and Slice
Once out of the oven, allow the chicken to rest for about 5 minutes. This step is crucial for keeping those juicy juices locked inside. After resting, slice the chicken into bite-sized pieces. -
Serve It Up!
Plate that glorious chicken and vegetables! If you’ve opted for rice or pita, now’s the time to add that to your serving.Serving Tip: Drizzle tahini sauce or yogurt over the top for extra creaminess and flavor. Fresh parsley or cilantro makes for a beautiful garnish!
Serving Suggestions
For a warm and inviting presentation, place a generous scoop of lemon-infused rice on one side of a large platter. Next, arrange the roasted chicken shawarma and veggies artfully on top. Drizzle with tahini sauce or a dollop of creamy yogurt, and sprinkle with fresh herbs for that extra pop of color. Don’t forget to have warm pita or lettuce wraps on the side for a fun, interactive meal experience!
Recipe Variations
- Spicy Kick: Add a teaspoon of cayenne or chili powder to the spice blend for a fiery version.
- Vegetarian Version: Substitute the chicken with chickpeas or tofu, and use the veggies as-is for a plant-based delight!
- Greek Twist: Toss in some olives and feta cheese right before serving for a Mediterranean flair.
- Herbaceous Harmony: Swap some of the spices for fresh herbs like oregano and mint for an aromatic twist.
- Citrus Love: Use lime juice instead of lemon for a different zest profile!
Chef’s Notes
This recipe has become a cherished staple in my kitchen over the years. The original inspiration came from my many adventures diving into different cuisines, but what truly evolved was how I started treating it as a cozy meal for get-togethers. I love to double the recipe – because who doesn’t appreciate leftovers? The flavors deepen as they sit, making for epic next-day shawarma wraps!
And here’s a funny kitchen story: Once, I decided to impress some friends with an elaborate shawarma party. I forgot to check my spice inventory! I had to improvise with whatever I had on hand, resulting in a strangely exciting adventure! They still talk about that ‘mystery shawarma night.’ Sometimes, the kitchen accidents turn into the most memorable moments!
FAQs and Troubleshooting
-
What can I do if my chicken is dry?
If your chicken turns out dry, it might have been overcooked. Always use a meat thermometer and aim for 165°F (75°C) at the thickest part. Marinating also locks in moisture! -
Can I use bone-in chicken?
Absolutely! Bone-in chicken will enhance flavor, but it may require a longer cooking time. Just be sure to check that it’s fully cooked. -
How do I prevent my veggies from burning?
Cutting your vegetables into larger pieces can help them cook more evenly. You can also add a splash of water to the baking sheet if you notice them browning too quickly. -
Can I freeze leftovers?
Yes! This dish freezes well. Just make sure to store it in airtight containers. When you’re ready to enjoy, defrost in the fridge and reheat in the oven until heated through.
Nutritional Info (if applicable)
Note: Nutritional values are estimates based on the ingredients used and portion sizes included in the recipe.
- Calories: Approximately 400 per serving
- Protein: 34g
- Carbohydrates: 30g
- Fats: 18g
And there you have it! My easy Sheet Pan Chicken Shawarma, bursting with flavor and love. It’s perfect for any day of the week—from cozy family dinners to vibrant get-togethers. I can’t wait for you to give it a try! Let me know how your culinary adventure goes. Happy cooking! 🍽️✨
Print
Perfectly Easy Sheet Pan Chicken Shawarma
- Total Time: 60 minutes
- Yield: 4 servings 1x
- Diet: None
Description
A flavorful and easy-to-make sheet pan chicken shawarma recipe that brings the taste of Middle Eastern cuisine to your home.
Ingredients
- 1.5 lbs chicken thighs
- 2 tablespoons olive oil
- 3 tablespoons shawarma spice blend
- 1 teaspoon salt
- 1 teaspoon black pepper
- 1 red onion, sliced
- 1 bell pepper, sliced (any color)
- 1 lemon, juiced
- Pita bread or rice for serving
Instructions
- Marinate the chicken by combining olive oil, shawarma spice blend, salt, black pepper, and lemon juice in a large bowl. Add chicken thighs and coat well. Cover and marinate for at least 30 minutes.
- Preheat your oven to 425°F (220°C).
- Prepare a large baking sheet by lining it with parchment paper. Spread sliced red onions and bell peppers evenly on the pan.
- Arrange the marinated chicken on top of the vegetables, ensuring it’s spaced out.
- Roast in the oven for 25-30 minutes, or until the chicken reaches 165°F (75°C).
- Rest the chicken for about 5 minutes, then slice into bite-sized pieces.
- Serve with rice or pita, and optionally drizzle with tahini sauce or yogurt.
Notes
For extra flavor, consider drizzling tahini sauce or yogurt over the top. Fresh herbs make a beautiful garnish.
- Prep Time: 30 minutes
- Cook Time: 30 minutes
- Category: Main Course
- Method: Baking
- Cuisine: Middle Eastern
Nutrition
- Serving Size: 1 serving
- Calories: 400
- Sugar: 5g
- Sodium: 600mg
- Fat: 18g
- Saturated Fat: 4g
- Unsaturated Fat: 10g
- Trans Fat: 0g
- Carbohydrates: 30g
- Fiber: 3g
- Protein: 34g
- Cholesterol: 90mg
Keywords: chicken shawarma, sheet pan dinner, Middle Eastern cuisine, easy recipes, family dinner
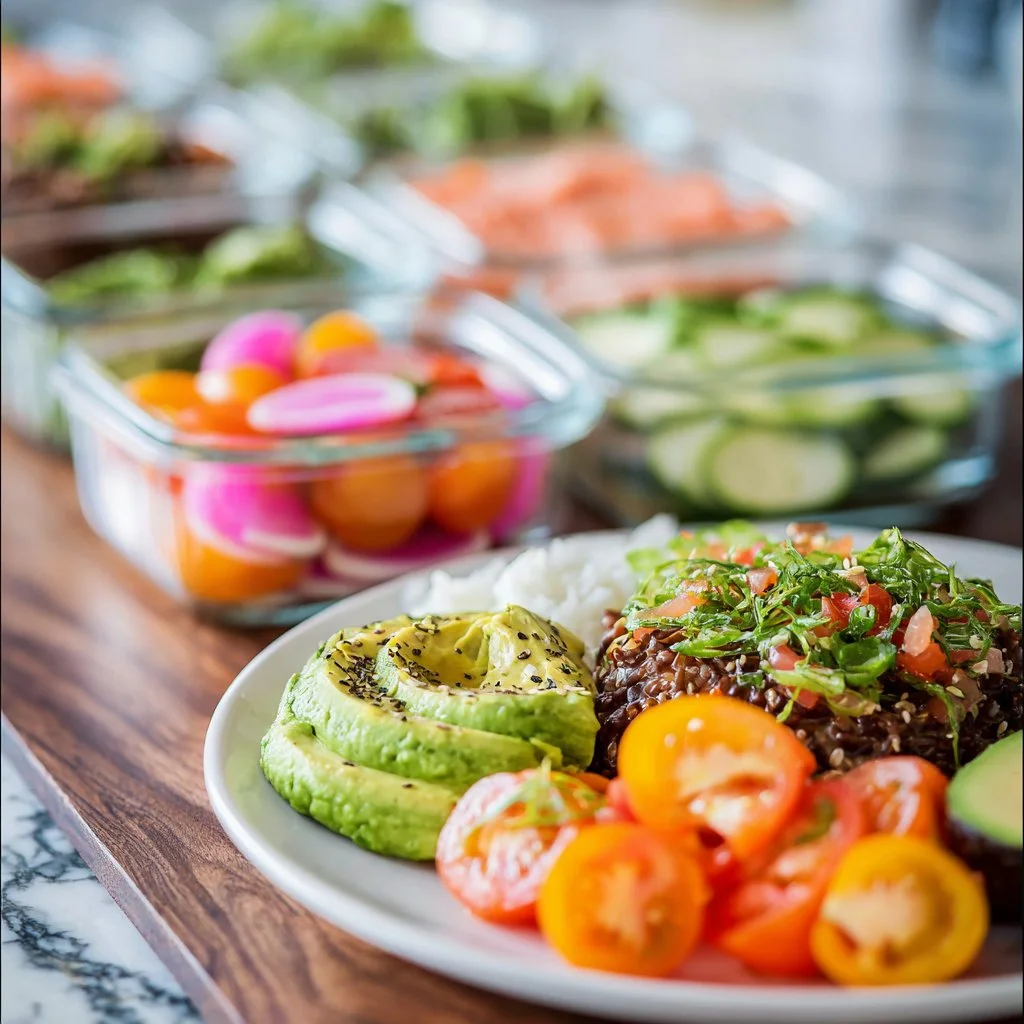
How I Meal Prep for the Week | Get Inspired Everyday!
How I Meal Prep for the Week: Get Inspired Everyday!
Welcome back to my cozy kitchen! Today, we’re diving into a topic I absolutely love: meal prepping! If you’ve ever found yourself scrambling at dinnertime or staring blankly at your fridge, wondering what to whip up, you’re not alone! After countless evenings of “What’s for dinner?” with a side of stress, I decided to take control of my week with meal prep. Not only has it saved my sanity, but it has also transformed the way my family and I enjoy our meals.
Meal prepping can be a game-changer for anyone looking to eat healthily, save time, or simply enjoy a home-cooked meal without the fuss on a busy night. I remember when I first started! I spent an entire Sunday cooking, labeling, and storing everything away, and let me tell you, it felt like running a marathon with a golden ticket at the finish line!
Today, I’ll share with you my step-by-step guide to meal prepping, packed with tips, tricks, and personal stories along the way that hopefully spark your excitement about the whole process. Whether you’re a busy professional, a parent juggling kids and schedules, or just anyone wanting to make life a little easier, meal prepping is for you. So, roll up those sleeves, grab your apron (I have a cute, slightly messy one just for these occasions!), and let’s dive into the world of flavorful meal prep that will inspire your everyday cooking.
Personal Story
Back when I was still navigating the rollercoaster of cooking at home, I made a memorable decision to dedicate my Saturday mornings to meal prepping. One chilly Saturday, I excitedly invited my best friend, Maya, over to embark on this culinary adventure together. We hung out in the kitchen, blasting our favorite playlist and laughing non-stop. The whole house smelled amazing as we roasted veggies, grilled chicken, and whipped up a massive batch of quinoa.
I remember a moment when Maya and I were stirring a bubbling pot of chili together — we had no recipe in front of us! Just a little intuition and a few generous handfuls of spices (more was definitely more that day!). We ended up with an incredible concoction that would become a staple in both our homes.
After our epic cooking session, not only did we stock up our fridges, but we also filled our hearts with joy and laughter. The best part? Each meal turned into a fun reminder of our adventure. Now, meal prepping isn’t just about convenience for me; it’s a way to bond with loved ones, share stories, and enjoy fantastic flavors all week long.
Ingredients
To kick off your meal prep journey, let’s talk about the building blocks you’ll need. Here’s a list of ingredients I recommend, along with some handy tips:
-
Proteins: Chicken Breast, Tofu, or Lentils
- Chicken Breast: Lean, easy to cook, and versatile. If you want to spice things up, try thighs or a whole roast chicken.
- Tofu: A fantastic plant-based protein! Use extra-firm for stir-fries or marinating. Feeling adventurous? Try tempeh as a nutty alternative.
- Lentils: These little legumes cook up quickly and are packed with protein. They can also be easily flavored to match different cuisines.
-
Grains: Quinoa, Brown Rice, or Whole Wheat Pasta
- Quinoa: A protein-rich grain that cooks in about 15 minutes. Plus, it’s gluten-free! For a similar texture, you could swap in couscous.
- Brown Rice: A delightful, nutty flavor and great for hearty meals. Try cauliflower rice as a lower-carb option!
- Whole Wheat Pasta: Great for tossing with veggies and proteins. If you want to up the nutrition, try chickpea or lentil pasta for added flavor and protein.
-
Vegetables: Seasonal Produce (Bell Peppers, Zucchini, Kale)
- Bell Peppers: Colorful, sweet, and great raw or roasted. Swap for any leftover veggies like broccoli or carrots.
- Zucchini: This versatile veggie can be spiralized or simply sautéed. No zucchini? Use eggplant for depth of flavor.
- Kale: A nutritional powerhouse! If it’s too strong for your taste, try baby spinach or arugula as a milder option.
-
Herbs and Spices: Garlic, Cumin, and Fresh Parsley
- Garlic: Adds an aromatic punch that enhances nearly every dish. If you’re out, onion powder can work in a pinch!
- Cumin: This earthy spice is perfect in grains or proteins. Substitutions include coriander or even chili powder for extra heat.
- Fresh Parsley: Brightens up dishes with a fresh finish. Swap in basil or cilantro for different flavor profiles.
Step-by-Step Instructions
Alright, let’s roll up those sleeves and get prepping! Here’s a detailed guide you can follow to create a fantastic meal-prepping experience:
Step 1: Planning Your Menu (30-45 minutes)
First, sit down with a cup of tea, your notepad, and get creative! List out the meals you want to prepare for the week. Aim for variety, but also consider balancing flavors, textures, and cooking times. A warm grain bowl one day, a fresh salad the next, and stir-fried veggies to keep things lively! Write down those ideas, and don’t forget to involve your family; they might inspire a dish you didn’t think of!
Step 2: Grocery Shopping (1-2 hours)
With your menu in hand, it’s time to hit the grocery store! Stick to the perimeter of the store for the freshest produce and proteins. I love getting seasonal veggies because they taste amazing! And don’t forget that cute reusable bag for the planet; it always makes me feel good!
Step 3: Prep Your Space (15-20 minutes)
Get that kitchen ready! Clear the counters, wash your hands, put on an apron, and pull out your utensils. Having a clean, organized space keeps you focused. I love using bowls to classify my prepped ingredients; it makes everything feel tidy!
Step 4: Prepping Your Proteins (30-45 minutes)
Start with proteins, as they often take the longest to cook.
-
Chicken: Season with olive oil, salt, pepper, and your choice of herbs. Bake at 400°F for about 20-25 minutes. Let it cool before cutting into slices for easy storage.
-
Tofu: Press it to get rid of excess moisture and marinade it in soy sauce and ginger. Bake or pan-fry until crispy.
-
Lentils: Rinse and simmer in about 3 cups of water with a bay leaf for 15-20 minutes until tender. Drain any excess water and set aside.
Step 5: Cooking Grains (20-30 minutes)
While proteins are cooking, let’s get those grains going!
- For Quinoa: Rinse and cook with a 2:1 water-to-quinoa ratio; bring to boil and then cover on low for 15 minutes.
–Brown Rice: Use the same water ratio but cook for about 40-45 minutes. - Whole wheat pasta takes about 8-10 minutes; just don’t forget to salt that water!
Step 6: Roasting Those Veggies (20-30 minutes)
While everything is cooking, chop and roast your veggies!
- Preheat your oven to 425°F. Toss your chosen veggies (like bell peppers and zucchini) in olive oil, salt, and pepper, and spread them out on a baking sheet.
- Roast until tender and caramelized, about 20-25 minutes. The smell alone will make you drool!
Step 7: Assembly Time (30 minutes)
With everything ready, it’s time to assemble your meals! Use airtight containers to store your meals, layering your grains on the bottom, followed by protein, and topped with those beautiful roasted veggies. Sprinkle fresh herbs on top for that gorgeous finishing touch!
Step 8: Labels and Storage (10 minutes)
Use labels to mark your meals with dates and meal names. A little organization goes a long way to prevent confusion come mealtime. Store in your fridge for easy access, or freeze any extra portions to keep on hand for later!
Step 9: Enjoy (priceless!)
After all that hard work, enjoy the fruits of your labor! Meal prep is not just about saving time; it’s about celebrating the small victories of cooking and nourishing yourself throughout the week.
Serving Suggestions
When it’s time to eat, simply grab a container, heat it up (or enjoy cold if that’s your jam), and serve it up beautifully. I like to add a sprinkle of nuts, a drizzle of olive oil, or even some avocado for extra creaminess. For a fancy touch, serve on a rustic wooden board or in colorful bowls that brighten your table!
Recipe Variations
-
Flavor Fusion: Change up your proteins — try marinated shrimp for a tropical theme or Moroccan-spiced chickpeas for a plant-based twist.
-
Grain Swap: Substitute quinoa for farro or barley for nutty textures, or go crazy with wild rice.
-
Veggie Adventure: Use seasonal squash in the fall or fresh asparagus in the spring. Adapt based on what’s available!
-
Spiciness Levels: Add some heat with a kick of chili flakes or make it milder with avocado or creamy tahini dressing.
-
Global Inspiration: For an Italian flair, toss grilled veggies and chicken with pesto. For a Mexican vibe, load up with black beans and avocado — the options are endless!
Chef’s Notes
Meal prepping has really blossomed over the years for me! I remember when I first started and made ahem some questionable concoctions — let’s just say that edible doesn’t always mean delicious! But through lots of experimentation, I found my flow. I learned to keep everything flavorful yet simple, and I embraced making mistakes in the kitchen. Each meal now comes with a bit of nostalgia and an ooey-gooey sense of satisfaction. The best part? My family loves it, and that’s what really matters!
FAQs and Troubleshooting
1. What if I don’t have time to meal prep on weekends?
No problem! Start small. Try prepping just your proteins or grains one day during the week.
2. How long can I store my prepped meals?
Most meals last about 4-5 days in the fridge. Anything longer, toss it in the freezer. Just make sure everything cools down before sealing!
3. Can I meal prep breakfast too?
Absolutely! Overnight oats, chia seed puddings, or veggie-packed egg muffins are a fantastic way to get your morning started!
4. I’m stuck in a meal prep rut, any suggestions?
Mix it up! Try new cuisines, ditch what you don’t enjoy, or even switch up your cooking methods (grilling, baking, or stirring for a stir-fry!).
Nutritional Info
While prepping your meals, don’t forget about balance! A well-rounded meal should have proteins, healthy fats, and plenty of veggies. You’ll find that mixing these elements not only fuels your body but also packs flavors that resonate throughout the week.
That’s a wrap, my friends! I hope you feel inspired to tackle your meal prep adventures. Remember, cooking with love and joy is what truly makes a meal special, and I can’t wait to hear how your culinary journey unfolds! Cozy up in your kitchen, savor every moment, and don’t forget to create those memories along the way. Happy cooking! 🍽️✨
Print
Weekly Meal Prep Guide
- Total Time: 165 minutes
- Yield: 6 servings
- Diet: Vegetarian
Description
A comprehensive guide to meal prepping for a week filled with delicious and nutritious meals.
Ingredients
- Chicken Breast
- Tofu
- Lentils
- Quinoa
- Brown Rice
- Whole Wheat Pasta
- Bell Peppers
- Zucchini
- Kale
- Garlic
- Cumin
- Fresh Parsley
Instructions
- Plan your menu by listing meals for the week.
- Shop for ingredients at the grocery store.
- Prep your space by clearing counters and organizing tools.
- Prep your proteins: season and cook chicken, tofu, and lentils.
- Cook your grains like quinoa, brown rice, and whole wheat pasta.
- Roast vegetables until tender and caramelized.
- Assemble meals in containers with grains, protein, and veggies.
- Label meals with dates and names for easy access.
- Enjoy your prepared meals throughout the week.
Notes
Feel free to experiment with different proteins, grains, and vegetables to suit your taste.
- Prep Time: 45 minutes
- Cook Time: 120 minutes
- Category: Meal Prep
- Method: Baking, Roasting, Boiling
- Cuisine: Various
Nutrition
- Serving Size: 1 container
- Calories: 450
- Sugar: 5g
- Sodium: 300mg
- Fat: 10g
- Saturated Fat: 1g
- Unsaturated Fat: 4g
- Trans Fat: 0g
- Carbohydrates: 60g
- Fiber: 8g
- Protein: 25g
- Cholesterol: 60mg
Keywords: meal prep, healthy eating, cooking tips, easy recipes
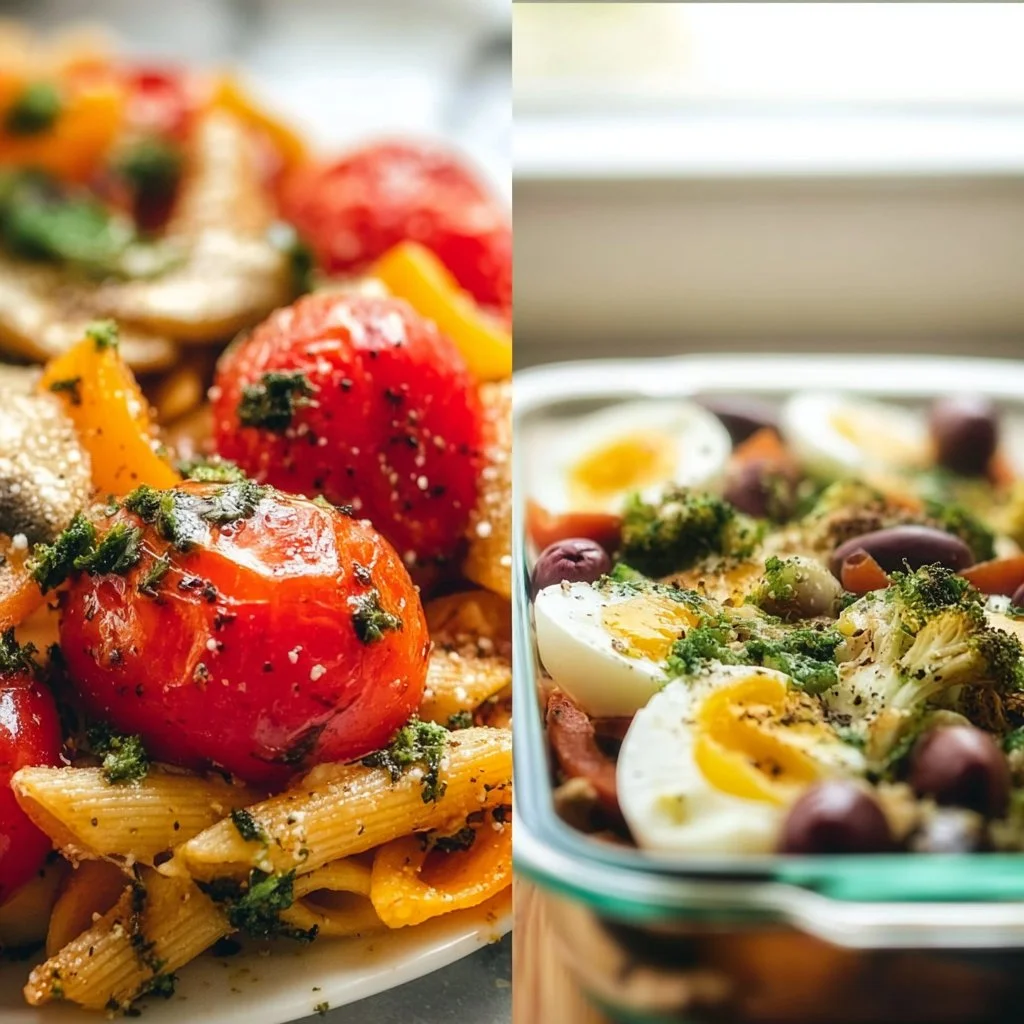
Vegetarian Meal Prep Ideas
Vegetarian Meal Prep Ideas: Simple, Delicious, and Perfectly Organized!
Hey there, food lovers! Welcome back to my cozy kitchen, where the aroma of spice and sweetness mingles in the air, creating a symphony of flavors. Today, we’re diving into one of my all-time favorite topics: vegetarian meal prep ideas! If you’re anything like me, you thrive in the kitchen yet sometimes struggle to keep those weeknight dinners manageable and tasty. No need to worry! I’m here to guide you through the journey of preparing vibrant, scrumptious vegetarian meals that will not only satisfy your belly but also nourish your spirit.
Meal prepping is one of those magical kitchen techniques that can save you time, stress, and maybe a few kitchen mishaps every week. Imagine walking into your kitchen after a long day and being greeted by the comforting sight of colorful containers filled with delicious dishes, all ready to enjoy. The best part? You can prepare these meals in advance, ensuring that you have healthy options available even on the busiest days. Sounds dreamy, right?
In this post, I’m excited to share some of the most vibrant and heartwarming vegetarian meal prep ideas with you. We’ll talk about recipes that are not only kind to your taste buds but also make for beautiful food photos if you feel like showing off. So grab your apron, turn on some tunes, and let’s get to creating some loving meals that will make your week just a bit brighter!
Personal Story
I remember the first time I tried meal prepping. It was during my college days, filled with lectures and late-night study sessions. I’d always dreamed of diving into the culinary arts but found it challenging to balance my studies with my passion for cooking. One Sunday, feeling entirely overwhelmed, I took a deep breath and decided to dedicate a few hours to prepping meals for the week.
I threw together a simple vegetable stir-fry, chickpea salad, and my absolute favorite — creamy pesto pasta (with a generous sprinkle of roasted pine nuts, of course!). The process was chaotic, but oh, was it so rewarding! I spent the evening filling Tupperware containers and felt an overwhelming sense of accomplishment as I placed everything neatly in my fridge. When Monday hit, I popped that pesto pasta into the microwave and felt like a Michelin-star chef as I enjoyed a lunch that was both healthy and delicious.
Looking back, meal prepping not only eased my mid-week stress but also ignited my love for flavors and creativity in the kitchen. That’s why, to this day, I find immense joy in meal prep – it’s not just about convenience; it’s about making cooking a joyful, heart-filled experience!
Ingredients
Here’s a list of ingredients you’ll need for our meal prep ideas, along with some quick tips and substitutions. These items are flexible, so feel free to get creative!
Base Ingredients:
-
Quinoa: A lovely gluten-free grain that’s rich in protein. Substitute with rice, farro, or even cauliflower rice for a lower-carb option.
-
Chickpeas: Packed with protein and fiber, these legumes are perfect for salads or stews. Canned versions save time, or you can use lentils for variety!
-
Fresh Vegetables: Think bell peppers, zucchini, and carrots. These can be swapped for seasonal veggies, whatever your heart desires!
-
Olive Oil: A staple for roasting and dressing your salads. You can substitute with avocado oil or even tahini for a unique flavor twist.
-
Pesto: Store-bought is quick, but homemade is a real treat! Swap for hummus or a yogurt sauce for a creamy base.
-
Nuts/Seeds: I love roasted pine nuts, but almonds, walnuts, or even sunflower seeds will do the trick. They add that perfect crunch.
Seasoning Ingredients:
-
Salt and Pepper: Basic, yet essential for flavor. Experiment with herbs like oregano or thyme instead for a fresh burst of flavor.
-
Lemon Juice: Brightens the flavors! If you’re out, vinegar works well, or try a splash of lime juice for a zesty twist.
-
Dried Herbs: Basil, thyme, or mixed Italian herbs add depth to our meal prep. Fresh is divine if you can get your hands on it!
Step-by-Step Instructions
Alright, let’s roll up those sleeves and get cooking! Here’s a simple step-by-step guide to preparing a couple of our delicious vegetarian meal prep ideas that will make your heart sing.
Step 1: Cook the Quinoa
- Rinse 1 cup of quinoa under cold water until the water runs clear. This removes that pesky bitter flavor!
- In a medium saucepan, combine quinoa with 2 cups of vegetable broth (for extra flavor). Bring it to a boil.
- Once boiling, reduce to a simmer and cover. Cook for about 15 minutes or until the liquid is absorbed.
- Fluff it with a fork once done — the texture should be light and nutty.
Chef Tip: Cooking quinoa in broth instead of water transforms the flavor game. Trust me, your meals will taste gourmet!
Step 2: Roast Your Veggies
- Preheat your oven to 425°F (220°C).
- Chop your favorite vegetables into a uniform size, about 1-inch pieces.
- Toss them in a bowl with olive oil, salt, pepper, and any dried herbs you’re using. I love using garlic powder for that extra zing!
- Spread them out on a baking sheet in a single layer (this ensures crispiness, my friends).
- Roast for 20-25 minutes until they’re golden around the edges and tender.
Chef Hack: Get creative! Toss some cherry tomatoes or sliced zucchini in there too for an added burst of flavor!
Step 3: Prepare the Chickpea Salad
- Drain and rinse 1 can of chickpeas under cold water.
- In a mixing bowl, combine the chickpeas with finely chopped red onion, diced cucumber, and a handful of chopped parsley.
- Dress with olive oil, lemon juice, salt, and pepper, and stir until combined.
- Let it sit for a bit to let the flavors meld beautifully!
Chef Insight: This chickpea salad is not only quick but can be enjoyed as a snack or a lunch side! Bonus points for staying fresh all week.
Step 4: Layer It All Up
- In your meal prep containers, start with a base of quinoa.
- Next, add the delicious roasted veggies on top.
- Then layer that vibrant chickpea salad.
- Top it off with a dollop of your favorite pesto sauce (or hummus for a different flair).
Serving Tip: Keep the ingredients separated for maximum freshness if you plan on enjoying these meals throughout the week!
Serving Suggestions
When it comes to serving these meal-prepped delights, a colorful plate makes all the difference! I love to sprinkle a handful of nuts or seeds on top for added crunch and some fresh herbs for that pop of color. If you have some avocado on hand, a few slices will definitely elevate your bowl game!
You can enjoy this meal either warm or cool, making it incredibly versatile. These meals are perfect for lunch at work or a quick dinner after a long day. Don’t forget to pair it with a refreshing drink – a sparkling water with a slice of lemon is my go-to!
Recipe Variations
Feel free to play around and customize these base recipes to your liking! Here are some fun variations to consider:
-
Spicy Southwest: Add black beans, corn, and diced jalapeños to your quinoa, and use a spicy chipotle dressing to give it a kick!
-
Mediterranean Delight: Swap chickpeas for feta cheese, add olives, and drizzle with a lemon-dill vinaigrette for a refreshing twist.
-
Asian-Style: Incorporate soy sauce or teriyaki sauce with your chopped veggies and toss in some sesame seeds for an added crunch.
-
Homemade Buddha Bowl: Layer your ingredients in a bowl and add a drizzle of tahini or peanut sauce for an indulgent yet nutrient-packed meal.
Chef’s Notes
You know what I love most about meal prepping? The stories that come with each meal! I remember one sunny Saturday I had friends over for brunch, and I had prepped a bunch of colorful containers filled with these meal ideas. We turned an ordinary afternoon into a potluck-style feast, with everyone picking their favorite meals. That’s the magic of cooking – it brings people together!
Over time, I love seeing how this recipe has evolved. I went from simple roasted veggies to incorporating grains, salads, and diverse flavors. Cooking is truly a journey, and every dish tells a story; don’t be afraid to share even your kitchen mishaps, they make the best memories!
FAQs and Troubleshooting
Q1: Why is my quinoa mushy?
A: Overcooking or using too much liquid can result in mushy quinoa. Stick to a 1:2 ratio of quinoa to broth and simmer until all the liquid has absorbed.
Q2: Can I meal prep for more than a week?
A: Ideally, I recommend prepping for up to a week for peak freshness. If you need to go longer, consider freezing portions, and reheat them when you’re ready!
Q3: What can I do if my roasted vegetables are soggy?
A: Soggy veggies can come from overcrowding the baking sheet. Make sure to spread them out evenly for better roasting. A high oven temperature also helps!
Q4: How do I store my meal prep containers?
A: Glass containers are great for storing meals; they maintain freshness and are microwave-safe. Always let your meals cool before sealing to avoid condensation.
Nutritional Info
When it comes to nutrition, these meals are not only filling but also packed with protein, fiber, and numerous vitamins from the fresh veggies. Generally, each serving contains approximately:
- Calories: 400-500
- Protein: 15g
- Fiber: 12g
- Healthy Fats: 10g
Of course, these numbers can vary depending on your specific ingredients and portion sizes, but you’ll be nourishing your body with wholesome goodness.
There you have it, my fellow foodies! A professional yet approachable guide to starting your vegetarian meal prep journey. Remember, cooking is all about love, creativity, and fun — and everyone deserves to eat satisfying, healthy meals. So get in that kitchen, whip up some magic, and enjoy the process! Happy cooking! 🥗💚
Print
Vegetarian Meal Prep Ideas
- Total Time: 55 minutes
- Yield: 4 servings 1x
- Diet: Vegetarian
Description
Discover vibrant and delicious vegetarian meal prep ideas that save time and enhance your weeknight dinners.
Ingredients
- 1 cup Quinoa
- 2 cups Vegetable Broth
- 1 can Chickpeas (drained and rinsed)
- Fresh Vegetables (bell peppers, zucchini, carrots)
- Olive Oil
- Pesto
- Nuts/Seeds (pine nuts, almonds, walnuts)
- Salt and Pepper
- Lemon Juice
- Dried Herbs (basil, thyme)
Instructions
- Rinse 1 cup of quinoa under cold water until clear. In a saucepan, combine quinoa with 2 cups of vegetable broth and bring to a boil. Reduce to a simmer, cover, and cook for 15 minutes.
- Preheat your oven to 425°F (220°C). Chop vegetables and toss with olive oil, salt, pepper, and dried herbs. Spread on a baking sheet and roast for 20-25 minutes.
- Combine the chickpeas with chopped red onion, diced cucumber, and parsley in a bowl. Dress with olive oil, lemon juice, salt, and pepper.
- Layer quinoa, roasted veggies, chickpea salad, and pesto in meal prep containers.
Notes
Enjoy these meals warm or cool, and mix up ingredients to keep things fresh!
- Prep Time: 30 minutes
- Cook Time: 25 minutes
- Category: Meal Prep
- Method: Roasting, Boiling
- Cuisine: Vegetarian
Nutrition
- Serving Size: 1 serving
- Calories: 450
- Sugar: 6g
- Sodium: 350mg
- Fat: 15g
- Saturated Fat: 2g
- Unsaturated Fat: 10g
- Trans Fat: 0g
- Carbohydrates: 55g
- Fiber: 12g
- Protein: 16g
- Cholesterol: 0mg
Keywords: vegetarian, meal prep, quinoa, healthy recipes, easy cooking
Healthy Meal Prep Snack Ideas
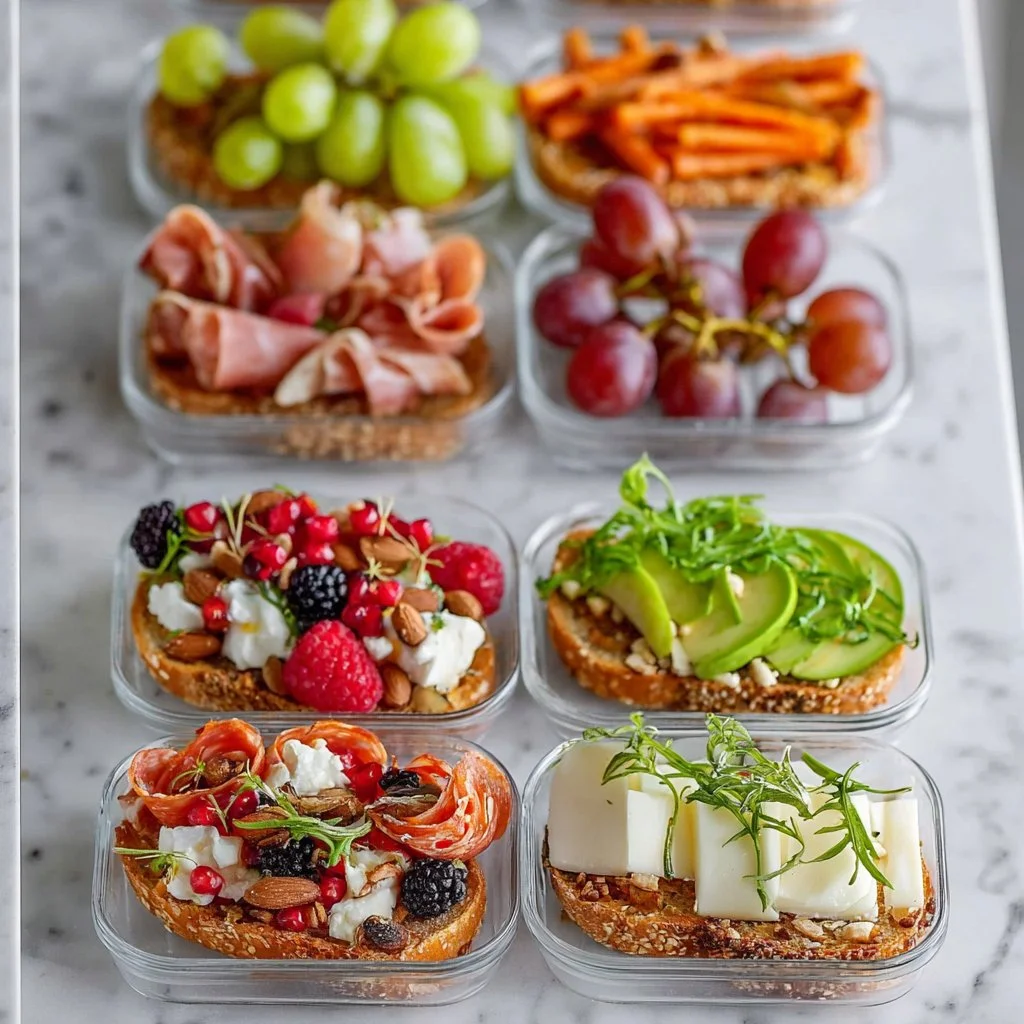
Healthy Meal Prep Snack Ideas for a Wholesome Life
Welcome back, my culinary friends! I’m Olivia Bennett, and I’m here to sprinkle a little joy into your kitchen adventures. If you’re like me and your love for good food is only rivaled by your desire to eat healthy, then you’re in for a treat today! We’re diving into the glorious world of healthy meal prep snack ideas that are as nourishing as they are delicious.
Let’s face it—snacking can sometimes feel like a guilty pleasure, but it doesn’t have to be! With a few healthful ingredients and some creative inspiration, you can whip up snacks that serve as both fuel and fun. Imagine crunching on homemade nut bars or dipping fresh veggies in a dreamy hummus while binge-watching your favorite show. Picture making snack time something to look forward to instead of a last-minute grab of whatever is lying around!
Meal prepping is a game-changer, especially for those of us juggling busy schedules. It allows you to fill your fridge with delicious snacks, so you can say goodbye to reach-for-the-chips moments. The key is to make snacks that not only fulfill your cravings but also provide essential nutrients to keep your energy levels soaring.
In this post, I’ll share my favorite healthy snack ideas that you can prep ahead of time, including tips, tricks, and personal stories to inspire you to get creative in the kitchen. So grab your apron (and maybe a snack!), and let’s get cooking!
Personal Story
Ah, the memories of my childhood kitchen come rushing back when I think about making snacks. I remember my mom whipping up a big batch of energy balls for our post-school treat, which didn’t just satisfy our sweet tooth but also kept us fueled for playtime. She’d let my little fingers roll the mixture into perfect balls, while I couldn’t help but sneak bites of dough along the way. It was a time for laughter, a bit of messiness, and a whole lot of flavor.
Fast forward a couple of decades, and here I am, still whipping up energy balls! I’ve refined the recipe over time, adding new flavors, but the essence remains the same: wholesome ingredients, a sweet kick, and a way to spark joy. Those cherished moments of cooking alongside my mom inspired my passion for creating snacks that are healthy and fun. Now, I’m passing this tradition on to you, hoping to inspire new kitchen adventures for you and loved ones alike.
Ingredients
Let’s gather our friendly ingredients! Here’s what you’ll need to create some scrumptious, healthy meal prep snacks:
-
Oats:
- What They Do: They serve as the base for countless snacks, providing fiber and keeping you full.
- Tip: Use rolled oats for better texture; you can also swap with quinoa flakes for a gluten-free option.
-
Nut Butter (peanut, almond, etc.):
- What They Do: Brings creaminess and healthy fats into the mix—perfect for energy and flavor.
- Tip: You can swap out for sunflower seed butter for a nut-free alternative, perfect for schools.
-
Honey or Maple Syrup:
- What They Do: Acts as a natural sweetener, binding everything together.
- Tip: Use agave syrup for a lower-glycemic option, or skip the sweetener for a no-sugar-added option!
-
Chia Seeds:
- What They Do: These little powerhouses add omega-3s and help to bind ingredients.
- Tip: Flax seeds can be a great substitute and add a nutritional punch too!
-
Dark Chocolate Chips or Dried Fruits:
- What They Do: Adds sweetness and indulgence, because hey, balance is key!
- Tip: Use cacao nibs for a healthier treat or try unsweetened coconut flakes for a tropical twist.
-
Nuts and Seeds:
- What They Do: Provide crunch and protein—and who doesn’t love a good bite?
- Tip: Feel free to use whatever you have on hand—walnuts, pumpkin seeds, or pecans—all work wonders!
Step-by-Step Instructions
Alright, now that we have our delicious ingredients lined up, let’s dive into the fun part—actually making our snacks! I’m excited to share my energy ball recipe that’s perfect for meal prep. Let’s get started:
-
Gather Your Ingredients:
- First thing’s first, measure out 2 cups of oats, ½ cup of nut butter, ½ cup of honey, and a ½ cup of add-ins like chocolate chips or dried fruit.
-
Mix the Base:
- In a large bowl, combine the oats and nut butter. Use a spatula to mix these until they’re well incorporated. You’ll notice it getting sticky—this is where the magic starts. Chef’s Tip: A little arm workout never hurt, but if you’re feeling fancy, use a stand mixer for a quick blend!
-
Add Sweetness:
- Drizzle in that honey (or maple syrup) and mix until combined. This is where you can decide if you want it sweeter—taste a little! Adjust if needed. Chef’s Tip: If it feels too dry, add more nut butter or a splash of plant-based milk.
-
Toss in the Extras:
- Now for the best part: stir in your chia seeds, nuts, and any add-ins like chocolate chips or dried fruits. Make sure everything is evenly distributed. Tip: Use your hands! It’s messy, but it’s part of the fun.
-
Chill Out:
- Once everything’s mixed, cover the bowl and let it chill in the fridge for about 30 minutes. This helps the mixture firm up, making it easier to roll into balls.
-
Roll the Energy Balls:
- After chilling, take out the mixture and roll it into 1-inch balls. They don’t have to be perfect; remember, we’re going for homemade vibes! Chef’s Tip: If they’re sticking to your hands, wet them slightly with water.
-
Store Your Snacks:
- Place the rolled energy balls in an airtight container; they can last in the fridge for up to a week, or you can freeze them for a month. Tip: Label your containers—nothing like a surprise snack from the freezer!
Serving Suggestions
These tasty energy balls can be served as a quick on-the-go snack, a yummy addition to your lunchbox, or even as a light dessert after dinner. For some flair, you can plate them beautifully on a colorful serving dish, dust them with shredded coconut, or even drizzle a little extra dark chocolate on top. Just remember to have fun with it!
Recipe Variations
Here are a few delightful twists you can try to make these snacks uniquely yours:
-
Tropical Bliss: Add chopped pineapple and coconut flakes for a sweet, island-inspired treat.
-
Spicy Chocolate: Mix in a pinch of cinnamon and a dash of cayenne for a zesty chocolate kick.
-
Protein-Packed: Toss in your favorite protein powder to transform these snacks into a post-workout pick-me-up.
-
Oatless Option: Substitute oats with ground nuts for a lower-carb version while packing in extra protein.
-
Fruit and Nut Medley: Get adventurous by using old-school trail mix—just mix in your favorite combinations!
Chef’s Notes
Cooking is all about experimenting! I’ve taken this energy ball recipe and made countless variations over the years. Some may say it’s a simple dish, but to me, it’s a canvas. You can mix in what you have, based on the seasons or cravings, and it will still be delicious. I once added leftover granola to a batch, which turned out surprisingly delightful! These moments in the kitchen are what keep my passion alive.
FAQs and Troubleshooting
Q1: My mixture is too dry; what do I do?
A: If your mixture feels too dry and isn’t coming together, simply add a splash of plant-based milk or an extra tablespoon of nut butter to help it bind.
Q2: Can I make these energy balls nut-free?
A: Absolutely! Use sunflower seed butter or even tahini for a wonderful, nut-free alternative. You can also increase the amount of seeds to keep the protein content high.
Q3: What can I use instead of honey?
A: Maple syrup works great as a vegan alternative! You can also try date syrup if you want to keep it all-natural.
Q4: Can I add fresh fruit?
A: I recommend sticking to dried fruits for this recipe. Fresh fruit might make the mixture mushy due to moisture. Save those for a separate snack!
Nutritional Info
While precise nutritional information can vary based on specific ingredients used, these energy balls generally offer a balanced mix of protein, healthy fats, and carbs. A typical serving (about 2 balls) provides roughly 150 calories, 6g protein, 10g fat, and 15g carbohydrates.
And there you have it! A wholesome journey through the world of healthy meal prep snacks. I hope you feel inspired to get creative in your kitchen. Remember, cooking is about joy and connection—share these snacks with loved ones, and let the good times roll. Happy cooking, everyone!
Print
Healthy Meal Prep Energy Balls
- Total Time: 15 minutes
- Yield: 24 servings 1x
- Diet: Vegetarian
Description
Delicious and nutritious energy balls perfect for meal prep and snacking.
Ingredients
- 2 cups rolled oats
- ½ cup nut butter (peanut, almond, or sunflower seed)
- ½ cup honey or maple syrup
- ½ cup chia seeds
- ½ cup dark chocolate chips or dried fruits
- Nuts and seeds (walnuts, pumpkin seeds, or pecans) to taste
Instructions
- Gather your ingredients.
- Mix the base: combine oats and nut butter in a large bowl.
- Add sweetness by drizzling in honey and mixing until combined.
- Toss in the extras: stir in chia seeds, nuts, and add-ins.
- Chill the mixture in the fridge for about 30 minutes.
- Roll the chilled mixture into 1-inch balls.
- Store the energy balls in an airtight container.
Notes
These energy balls can last in the fridge for up to a week or be frozen for a month.
- Prep Time: 15 minutes
- Cook Time: 0 minutes
- Category: Snack
- Method: No-Cook
- Cuisine: American
Nutrition
- Serving Size: 1 ball
- Calories: 150
- Sugar: 8g
- Sodium: 5mg
- Fat: 10g
- Saturated Fat: 1g
- Unsaturated Fat: 8g
- Trans Fat: 0g
- Carbohydrates: 15g
- Fiber: 3g
- Protein: 6g
- Cholesterol: 0mg
Keywords: energy balls, healthy snacks, meal prep, vegetarian snacks, no-bake snacks
Plant-Based Taco Meal Prep
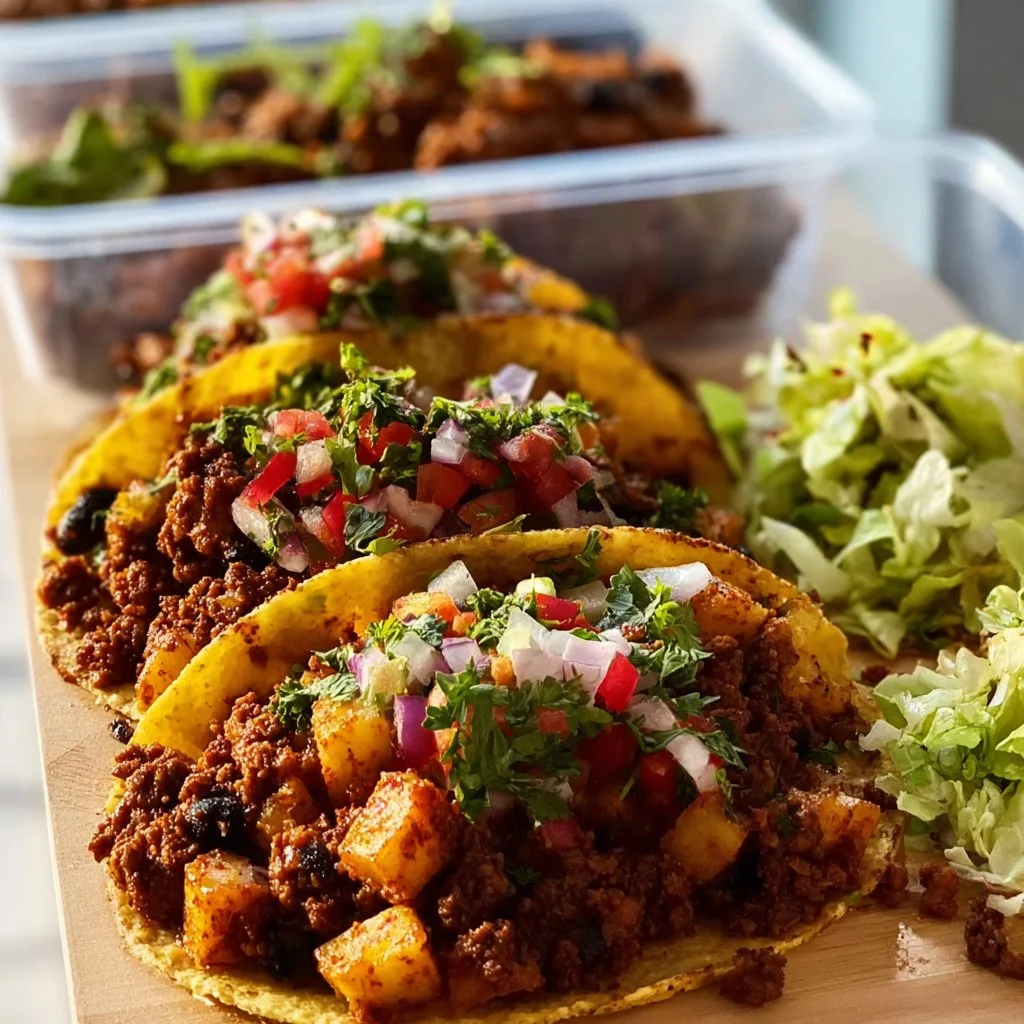
Plant-Based Taco Meal Prep: A Flavorful Adventure in Your Kitchen
Hey there, fellow food lovers! 🌮 If there’s one dish that has the magical ability to bring people together, it’s tacos! Versatile, delicious, and downright fun to eat, tacos hold a special place in my heart (and stomach). Today, I’m thrilled to share with you my ultimate plant-based taco meal prep recipe that not only tantalizes those taste buds but also makes weeknight dinners a breeze.
Picture this: it’s a Sunday afternoon, and the kitchen is filled with the kind of warmth that only comes from something fantastic cooking away. The sun is shining, and the scent of spices fills the air as you chop fresh veggies and prepare tasty fillings. Meal prepping tacos is like throwing a vibrant, colorful party, and trust me when I say, no one can resist the call of a delicious taco!
What I love most about this plant-based taco recipe is how flexible it is. You can tailor it to your taste, customize your toppings, and mix and match for the week ahead. Whether you’re hosting a taco night, packing lunch for your week, or just want some easy meals ready to go, this blog post has got you covered.
So grab your apron, turn up your favorite playlist, and let’s dive into the fabulous world of plant-based taco meal prep! You’ll be amazed at how simple it is to whip up something that feels festive and is loaded with flavor, nutrition, and all the cozy vibes you crave.
Personal Story
I remember the first time I made tacos all by myself. I was about 12 years old, and my mom had taken my younger siblings to the park for an afternoon picnic. I decided it was the perfect opportunity to experiment in the kitchen. I scoured the fridge and found a mix of black beans, corn, and some leftover grilled veggies. Determined to create something delicious, I grabbed a pack of soft corn tortillas and got to work.
With a little sprinkle of cumin and chili powder (okay, a little more than just a sprinkle!), I assembled my first taco masterpiece. I overfilled them, of course—how could I resist? I borrowed my mom’s secret salsa recipe and smothered it all over. When my family returned home, they were met with the intoxicating aroma that filled the house. Let’s just say that everyone devoured my tacos and praised my kitchen prowess.
That experience sparked a lifelong love for tacos and cooking. Today, I hope to inspire you in the same way through this easy, plant-based taco recipe that reminds me of those carefree afternoons in the kitchen. Let’s recreate those vibes and gather our loved ones around a table filled with delicious tacos!
Ingredients
Here’s what you’ll need to whip up our fantastic plant-based tacos:
-
Corn Tortillas
Soft, warm, and gluten-free (if you choose the right brand), corn tortillas are a fantastic base for our tacos. You can also use whole wheat or flour tortillas if you prefer a different texture. -
Canned Black Beans
Packed with protein and fiber, black beans are the star of our filling. If you’re out of black beans, feel free to substitute with kidney beans or lentils for an equally hearty option. -
Fresh Corn
Sweet and crunchy, fresh corn adds texture. Use frozen corn if fresh isn’t available; just thaw it out before seasoning to save time! -
Bell Peppers
Colorful bell peppers bring a burst of flavor! Use a mix of red, yellow, and green for a rainbow effect. If you have other veggies on hand, like zucchini or mushrooms, throw them in for added flavor. -
Avocado (or Guacamole)
Creamy and rich, avocado balances the spices in our filling. If you’re short on avocados, try using cashew cream or store-bought guacamole as a substitute. -
Lime
A squeeze of lime can brighten up any dish! Lemon works in a pinch, but lime really adds that traditional taco zing. -
Fresh Cilantro
This herb is a staple in Mexican cuisine. If cilantro isn’t your thing, feel free to replace it with fresh parsley for a different flavor profile. -
Spices (Cumin, Chili Powder, Garlic Powder)
These spices elevate the taste of our filling. You can always add smoked paprika or a dash of cayenne pepper for some extra heat! -
Your Favorite Toppings
Think lettuce, salsa, sour cream, or whatever else you love! This is the fun part—tailor your toppings!
Step-by-Step Instructions
Now that we’ve gathered all our ingredients, let’s get cooking! Follow these steps for a delightful, plant-based taco experience. 🍽️
Step 1: Prep Your Ingredients
Start by rinsing the canned black beans under cold water in a strainer; this helps reduce sodium levels. Then, chop your bell peppers into bite-sized pieces and slice your avocado. Set aside your favorite toppings to make assembly easier later.
Step 2: Cook The Veggies
In a large skillet, let’s heat about a tablespoon of olive oil over medium heat. Add the bell peppers and sauté for about 3-4 minutes until they’re tender but still bright and vibrant. This is where their sweet flavor begins to emerge! Pro tip: for extra flavor, add a sprinkle of salt as they cook!
Step 3: Add The Black Beans & Corn
Once the peppers are prepped, add your black beans and fresh corn to the skillet. Toss in your spices—cumin, chili powder, and garlic powder. Stir everything together, and let it cook for another 5 minutes or so. Keep an eye on it—this is where the magic truly happens as the flavors meld together. Taste it! A little more spice, maybe? Adjust to your preferences, my friend!
Step 4: Warm The Tortillas
While the filling cooks, grab another skillet and warm your corn tortillas over low heat, covering them with a kitchen towel to keep them warm. If you want them toasty and crispy, pop them in a dry skillet over medium heat for just about 30 seconds on each side. You’ll hear them sizzle—yuuum!
Step 5: Assemble Your Tacos
Now comes the fun part—assembly! Grab a tortilla and spoon a generous amount of the black bean mixture into the center. Add sliced avocado, a squeeze of lime, and top with cilantro. If you’re feeling extra adventurous, ladle on some salsa or sprinkle over a bit of cheese (vegan, of course, if desired). Repeat with as many tacos as you like and keep it casual!
Step 6: Meal Prep Time!
If you’re meal-prepping for the week, pack your taco filling in an airtight container in the fridge. Keep the tortillas separate to ensure they stay fresh and don’t get soggy. This meal will stay tasty for up to 4 days!
Serving Suggestions
To serve these tacos, arrange them on a colorful platter with a variety of toppings in small bowls, making it a DIY taco night for you and your guests. Feel free to throw in some tortilla chips and homemade salsa on the side for an extra treat! Don’t forget some festive napkins and your favorite beverages—because tacos are always more fun with friends!
Recipe Variations
Here are a few creative twists to spice things up:
- Spicy Chickpea Tacos: Swap your black beans for roasted chickpeas and add some hot sauce for a fiery kick!
- Baked Tacos: Stuff your fillings in tortillas and bake them in the oven until they’re golden and crispy for a fun taco twist!
- Breakfast Tacos: Swap the black bean filling for scrambled tofu, jalapeños, and spinach for a delicious breakfast option.
- Sweet Potato Tacos: Roast cubed sweet potatoes with lime and chilies, making them an even heartier filling.
Chef’s Notes
Oh, the memories I’ve made around a taco table! This recipe has evolved through many years of taste testing and experimenting in my kitchen, but the heart of it remains the same—celebrating flavors, cultures, and family. What once began as a complicated shift to a plant-based diet transformed into a joyful celebration of flavors.
And you know what? If things get messy (which they totally will), just embrace it! A little splatter on the counter means you’re having fun, and that, dear friends, is what cooking is all about.
FAQs and Troubleshooting
Q: My black beans turned mushy. What did I do wrong?
A: Overcooking can be the culprit! Make sure to monitor them and add them at the right point in cooking to maintain their texture.
Q: My tortillas keep tearing when I fill them. Any tips?
A: Warm tortillas are more pliable! Also, try not to overfill them. It’s really about balance—just a not-too-thick layer of filling will do!
Q: Can I freeze the filling for later?
A: Absolutely! Just allow it to cool completely, then store it in an airtight container. It will keep in the freezer for about 2 months.
Q: Can I use a different bean source?
A: Yes! If you’re not a black bean fan, pinto beans or lentils work beautifully too. Adapt based on what you love!
Nutritional Info
This plant-based taco meal prep is packed with protein, fiber, and the vibrant nutrients of vegetables, making it a wholesome choice for any meal plan. Each taco can average around 200-250 calories, depending on toppings and portions—perfect for a guilt-free indulgence any night of the week!
And there you have it, my delightful plant-based taco meal prep! 🌱🥑 I hope you find as much joy in preparing and sharing these tacos as I do. May your kitchen always be filled with laughter, flavor, and happy vibes. Happy cooking, and don’t forget to share your taco creations with me!
Print
Plant-Based Taco Meal Prep
- Total Time: 30 minutes
- Yield: 4 servings
- Diet: Vegetarian
Description
A vibrant and customizable plant-based taco meal prep recipe perfect for weeknight dinners or taco nights.
Ingredients
- Corn Tortillas
- Canned Black Beans
- Fresh Corn
- Bell Peppers
- Avocado (or Guacamole)
- Lime
- Fresh Cilantro
- Spices (Cumin, Chili Powder, Garlic Powder)
- Your Favorite Toppings
Instructions
- Prep your ingredients: Rinse black beans and chop bell peppers; set toppings aside.
- Cook the veggies: Sauté bell peppers in olive oil until tender.
- Add black beans and corn to the skillet with spices; cook for 5 more minutes.
- Warm the tortillas in another skillet; cover to keep them warm.
- Assemble your tacos: Fill tortillas with bean mixture, avocado, lime, and cilantro.
- Meal prep: Store filling in an airtight container and tortillas separately.
Notes
Keep the tortillas separate from the filling to avoid sogginess. Tacos can be stored fresh for up to 4 days.
- Prep Time: 15 minutes
- Cook Time: 15 minutes
- Category: Main Course
- Method: Cooking
- Cuisine: Mexican
Nutrition
- Serving Size: 1 taco
- Calories: 250
- Sugar: 3g
- Sodium: 500mg
- Fat: 10g
- Saturated Fat: 1g
- Unsaturated Fat: 6g
- Trans Fat: 0g
- Carbohydrates: 35g
- Fiber: 8g
- Protein: 10g
- Cholesterol: 0mg
Keywords: tacos, plant-based, meal prep, vegetarian, Mexican food
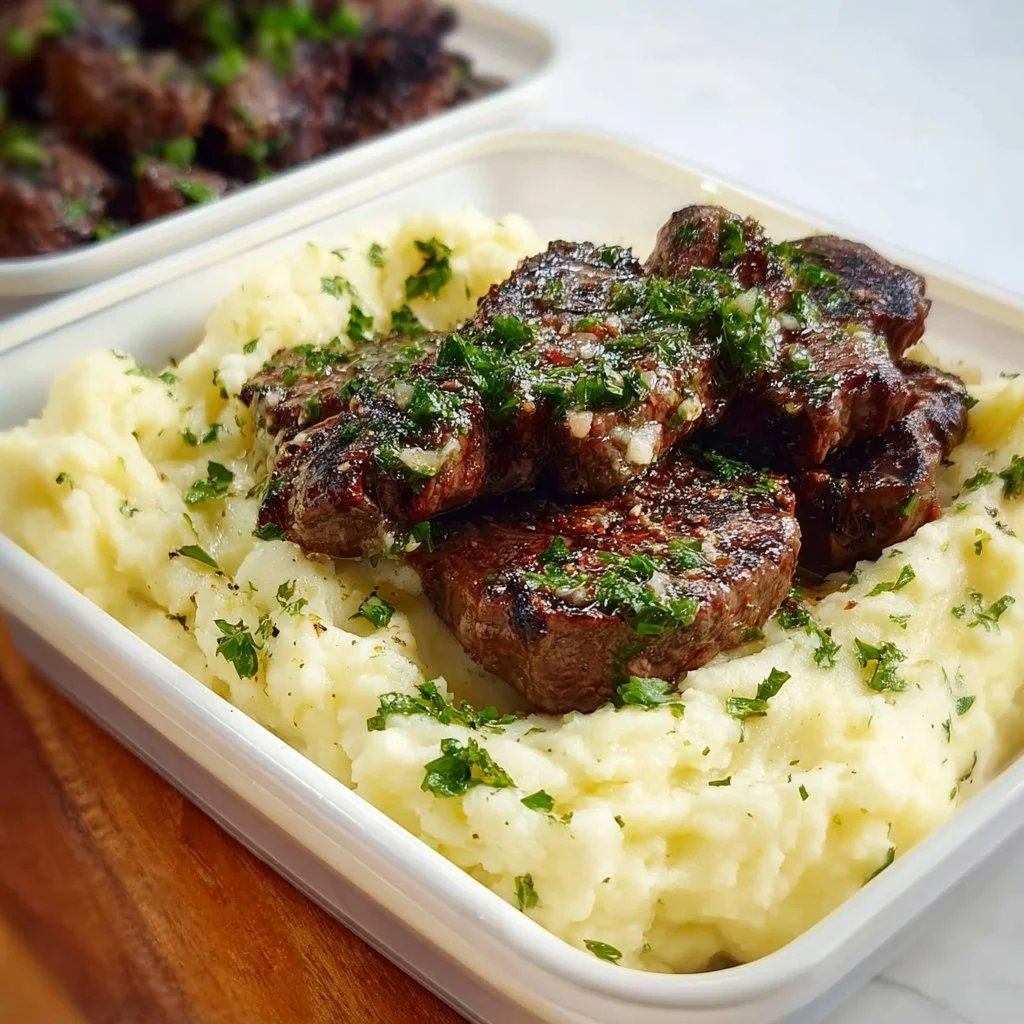
High Protein Low Calorie Garlic Butter Steak & Creamy Mashed Potato Meal Prep
High Protein Low-Calorie Garlic Butter Steak & Creamy Mashed Potato Meal Prep
Welcome back, foodies! I’m so glad you’re here. I can just smell the savory aroma wafting through my kitchen as we dive into today’s delightful meal prep recipe: a high-protein, low-calorie garlic butter steak accompanied by a side of creamy mashed potatoes. Who says you can’t indulge while being mindful of your nutritional goals?
Cooking has always been my love language, and there’s something immensely satisfying about transforming simple ingredients into a meal that not only fuels our bodies but nourishes our souls. Whether you’re prepping for a busy week ahead or looking to impress friends at a dinner party, this dish is bursting with flavors that tell a story. Picture this: juicy, tender steak, bathed in rich garlic butter, with fluffy mashed potatoes so creamy they make you feel like you’re indulging in comfort food heaven!
But wait, we’re not just whipping up a meal; we’re creating an experience. I remember when I first tackled steak and mashed potatoes—my family gathered around the table, and the joy of feeding them was just as fulfilling as the flavors bursting in my mouth. This isn’t just about dinner; it’s about sharing moments, laughter, and love. And trust me, if I can master this dish, so can you!
So roll up those sleeves and grab your apron! We’re embarking on a culinary adventure that will leave your taste buds dancing and your friends begging for seconds. Let’s get started!
Personal Story
I’ll never forget the first time I made steak and mashed potatoes for my family. I was just a teenager, trying to impress my parents while they were out on a Saturday night. I knew I wanted to serve something that screamed “real meal,” so I decided on the classic combo. My dad was a steak lover, and my mom loved anything creamy.
I can picture myself in the kitchen, apron on, a curious mix of confidence and anxiety coursing through me. The sizzle of the steak on the hot skillet was music to my ears, and the smell of garlic wafting up filled my heart with joy. I still remember that moment—my parents came home and were greeted by a feast that filled the whole house with warmth. They were so impressed that they declared me the “Queen of Dinner,” a title I still cherish.
That night wasn’t just about the food; it was about the love shown through a home-cooked meal. It sparked my passion for cooking, and whenever I whip up this garlic butter steak and creamy mashed potatoes, it takes me back to that beautifully chaotic night in the kitchen. It reminds me that cooking is about connection, and that’s what I want to share with you today.
Ingredients
Here’s what you’ll need for our high-protein, low-calorie garlic butter steak and creamy mashed potatoes. Each ingredient contributes to this dish’s flavor profile and nutritional integrity.
For the Steak:
- Steak (Sirloin or Flank): Opt for lean cuts to keep the calories down while still packing in the protein. Sirloin is flavorful and tender, while flank can be marinated for extra zest.
- Garlic: Freshly minced garlic gives that punch of flavor. You can use garlic powder in a pinch but trust me—the fresh stuff is worth it!
- Butter: A tablespoon of unsalted butter adds richness. For a lower calorie option, you can substitute with olive oil.
- Salt & Pepper: Essential for enhancing all the flavors. Feel free to play with spices like paprika or cayenne for an extra kick.
- Fresh Herbs (optional): Rosemary or thyme can elevate the steak’s flavor profile. Use fresh herbs if you have them; dried will also work in a pinch!
For the Mashed Potatoes:
- Potatoes (Yukon Gold or Russet): Yukon Golds provide a creamy texture, while Russets are fluffy. Use whichever you prefer!
- Low-Calorie Cream Cheese: This gives the mashed potatoes that creamy texture without loading up on calories.
- Chicken or Vegetable Broth: Instead of cream, use broth to keep it light but flavorful. You can use homemade or store-bought.
- Salt & Pepper: Again, these basics are key for seasoning your dish right.
- Chives or Green Onions (for garnish): Sprinkle some on top for color and a mild onion flavor!
Substitution Tips:
If you’re looking for some swaps, here are a few ideas:
- For the steak, use chicken breast for a different high-protein approach.
- Swap out the potatoes for cauliflower if you’re looking for a low-carb option; it’ll give you a similar creamy consistency in your mash!
- Instead of butter, try using ghee for a rich flavor with lactose-free benefits.
Step-by-Step Instructions
Alright, let’s get this culinary adventure started with some clear, easy-to-follow steps!
Step 1: Prep the Steak
- Choose Your Cut: Select your steak (sirloin or flank) and allow it to come to room temperature for about 30 minutes.
- Season Generously: Sprinkle both sides of the steak with salt and pepper, along with minced garlic. The idea is to coat it evenly for balanced flavor. Don’t hold back; this is essential for a tasty steak!
Step 2: Make Garlic Butter
- Melt the Butter: In a small skillet over medium heat, melt the unsalted butter. Once it’s just melted, add a clove or two of minced garlic.
- Let it Sizzle: Stir it for about a minute until fragrant, but keep an eye on it; we don’t want it to brown. Once it’s ready, set aside.
Step 3: Cook the Steak
- Heat the Skillet: Use a cast-iron skillet if you have one—it’s perfect for searing! Add a drizzle of olive oil and get it hot.
- Sear the Steak: Once the oil is shimmering, add the steak. For a medium-rare steak, cook for about 4-5 minutes on each side. Remember, don’t move it around too much; we want that beautiful crust to form!
- Baste with Garlic Butter: In the last minute of cooking, spoon the garlic butter over the steak as it finishes cooking. This infuses it with rich flavor and keeps it moist.
Step 4: Prepare the Mashed Potatoes
- Boil the Potatoes: While the steak is cooking, peel and chop your potatoes into equally sized chunks. Toss them in a pot of salted water and bring to a boil. Cook until tender (about 15-20 minutes).
- Mash it Up: Drain the potatoes and return them to the pot. Add in the low-calorie cream cheese and broth, mashing until smooth and creamy. Season with salt and pepper to taste. If you want extra flavor, mix in some minced garlic from the steak for a garlic mashed potato twist!
Step 5: Assemble the Dish
- Slice, Plate, and Garnish: Once the steak is done, let it rest for a few minutes before slicing. This keeps the juices intact. Serve with a generous scoop of creamy mashed potatoes and sprinkle chives or green onions for that fresh finish.
Serving Suggestions
Now that everything is beautifully plated, here’s a lovely way to present your dish: Slice the steak against the grain for maximum tenderness, and serve it atop a generous mound of creamy mashed potatoes. Drizzle any remaining garlic butter from the skillet over the top for that lingering flavor. A sprig of fresh rosemary or thyme on the plate adds a lovely touch!
Recipe Variations
Here are a few fun twists you can try:
- Steak Marinade: Before cooking, marinate your steak in a mixture of soy sauce, honey, and crushed garlic for an Asian-inspired flavor.
- Herbed Mashed Potatoes: Stir in some fresh herbs like dill or parsley for a fresh spin on the classic mashed potatoes.
- Spicy Garlic Butter: Add crushed red pepper flakes to the garlic butter for a spicy kick that pairs beautifully with the steak.
- Cauliflower Mash: Swap those potatoes for steamed cauliflower and blend it with garlic and broth for a lower-carb version that’s just as satisfying.
Chef’s Notes
This recipe is one of those beautiful dishes that keeps evolving in my kitchen. I remember experimenting with different flavors and accompaniments; sometimes I’d toss in sautéed mushrooms or pan-fried asparagus alongside the steak to brighten things up. And let’s not forget the time I mistakenly used too much garlic—it turned into a delightful accident that my friends still talk about!
Cooking is all about experimenting and finding what works for you. So don’t hesitate to play with flavors and ingredients until you create your version of this dish!
FAQs and Troubleshooting
1. What’s the best way to ensure my steak is tender?
Always let your steak rest for 5-10 minutes after cooking. This allows the juices to redistribute, making for a more tender bite.
2. Can I make the mashed potatoes ahead of time?
Absolutely! You can prepare the mashed potatoes in advance. Just keep them in an airtight container in the fridge, and before serving, reheat gently in a pot, adding a splash of broth to restore creaminess.
3. How do I know when my steak is done?
Using a meat thermometer is the most reliable way! For medium-rare, you want an internal temperature of about 135°F (57°C).
4. My mashed potatoes are lumpy; what should I do?
If your potatoes are lumpy, be sure to mash them long enough. If they stubbornly remain lumpy, you can always use a potato ricer or a food mill for a super-smooth consistency.
Nutritional Info (Optional)
While I won’t dive too deep into numbers, this meal packs a protein punch with lean steak and creamy mashed potatoes, all while keeping it low-calorie with smart ingredient choices. Each serving is roughly 300-400 calories based on portion sizes, making it a satisfying yet wholesome option for meal prep!
And there you have it! An inviting high-protein low-calorie garlic butter steak and creamy mashed potato meal prep that will not only fill your belly but also warm your heart. Thank you for being part of this journey in my cozy kitchen! Remember, cooking is about joy, exploration, and sharing love. So go ahead, get your hands messy, and create some delicious memories! Happy cooking!
Print
High Protein Low-Calorie Garlic Butter Steak & Creamy Mashed Potatoes
- Total Time: 55 minutes
- Yield: 4 servings 1x
- Diet: Protein-rich, Low-calorie
Description
A delicious high-protein, low-calorie garlic butter steak served with creamy mashed potatoes, perfect for meal prep.
Ingredients
- Steak (Sirloin or Flank)
- 2 cloves of Garlic, minced
- 1 tbsp Unsalted Butter (or Olive Oil for lighter option)
- Salt & Pepper, to taste
- Fresh Herbs (optional, such as Rosemary or Thyme)
- Potatoes (Yukon Gold or Russet)
- 2 oz Low-Calorie Cream Cheese
- 1 cup Chicken or Vegetable Broth
- Chives or Green Onions, for garnish
Instructions
- Choose your cut: Select your steak and allow it to come to room temperature for about 30 minutes.
- Season generously: Sprinkle both sides of the steak with salt and pepper, along with minced garlic.
- Melt the butter: In a small skillet, melt the unsalted butter and add minced garlic.
- Stir it for about a minute until fragrant.
- Heat the skillet: Use a cast-iron skillet and add a drizzle of olive oil.
- Sear the steak: Cook for about 4-5 minutes on each side for medium-rare.
- Baste with garlic butter: Spoon the garlic butter over the steak in the last minute of cooking.
- Boil the potatoes: Peel and chop your potatoes, then cook until tender.
- Mash it up: Drain the potatoes and mash with cream cheese and broth until smooth.
- Slice the steak: Let it rest before slicing, then serve with mashed potatoes and garnish with chives.
Notes
You can substitute chicken breast for steak or use cauliflower for a low-carb version.
- Prep Time: 30 minutes
- Cook Time: 25 minutes
- Category: Main Course
- Method: Pan-searing and Boiling
- Cuisine: American
Nutrition
- Serving Size: 1 serving
- Calories: 350
- Sugar: 3g
- Sodium: 450mg
- Fat: 15g
- Saturated Fat: 5g
- Unsaturated Fat: 8g
- Trans Fat: 0g
- Carbohydrates: 40g
- Fiber: 4g
- Protein: 28g
- Cholesterol: 80mg
Keywords: steak, mashed potatoes, meal prep, high protein, low calorie
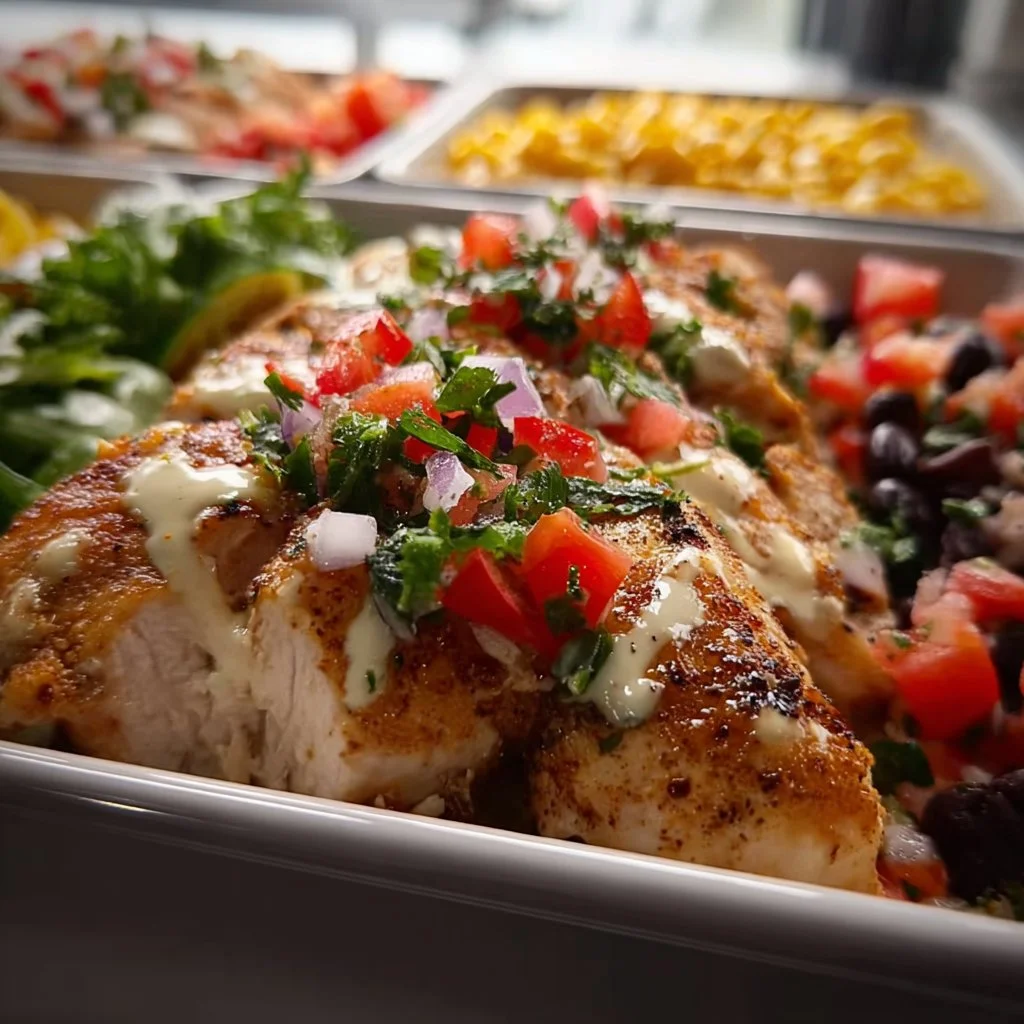
High Protein Chicken Meal Preps
High Protein Chicken Meal Preps: Easy, Delicious, and Nutritious
Hey there, fellow food lovers! Welcome back to my cozy kitchen, where the aroma of home-cooked goodness fills the air. Today, I’m thrilled to share a game-changer for anyone looking to level up their meal prep game—High Protein Chicken Meal Preps! This dish is not only perfect for those busy weekdays but also a delightful way to ensure you’re nourishing your body with all the goodness it deserves.
Meal prepping is more than just a trend. It’s a lifestyle that helps you stay on track with your health and wellness goals. And let’s face it, life can sometimes get a little chaotic—between work, social commitments, and life’s many surprises, cooking every day can feel like an uphill battle. That’s where fabulous meal preps come to save the day! Imagine having delicious, protein-packed chicken ready to go, so you can simply grab and heat whenever hunger strikes. Life just got a whole lot easier!
In this blog post, not only am I going to guide you through creating these satisfying High Protein Chicken Meal Preps, but I’ll also sprinkle in some personal stories and tips that reflect my journey in the kitchen. We’ll explore flavorful combinations, serving suggestions, and creative variations to keep your taste buds dancing. So let’s throw on those aprons, grab your favorite cutting board, and get ready to cook up a storm together!
Personal Story
I’ll never forget the first time I decided to attempt meal prepping. It was a Sunday afternoon, and I had just finished a grueling week of work. All I wanted was to kick back and relax, but I knew Monday was looming, and my usual whirlwind of cooking would be upon me again. As I dug through the fridge, I stumbled across some leftover chicken breasts, veggies that were on the verge of wilting, and a half-empty jar of my mom’s beloved marinade.
I threw everything together, hoping for the best. Little did I know that this mishmash would become my new obsession. Not only were those meal preps a lifesaver during the week, but they also sparked fond memories of my Mom whipping up her famous chicken dishes when I was growing up. The simple act of cutting, marinating, and baking brought me joy beyond just filling my belly. It was a journey into nostalgia, and it inspired me to make meal prepping a regular part of my cooking routine. You know what? I’m excited to pass this love of meal prepping on to you!
Ingredients
Let’s get started with the star of today’s dish, shall we? Here’s what you’ll need to create your High Protein Chicken Meal Preps:
-
Chicken Breasts (boneless, skinless): Choose organic or free-range if you can! Chicken breasts are an excellent source of lean protein. If you want a vegetarian option, try tofu or chickpeas as substitutes.
-
Olive Oil: A baking staple with heart-healthy fats. Avocado oil works great too; it has a higher smoke point, so feel free to use it!
-
Garlic Powder: This adds depth to your chicken without the fuss of fresh garlic. If you prefer fresh, use about two cloves minced instead.
-
Paprika: Gives a beautiful color and a subtle smokiness to the dish! Don’t have paprika on hand? Cumin is a great alternative for an earthy flavor.
-
Italian Seasoning: A blend that usually contains oregano, basil, rosemary, and thyme. You can easily make your own if you have individual dried herbs.
-
Salt and Pepper: Essential for balancing flavors. Make sure to season well; this will elevate your dish from good to absolutely fabulous.
-
Broccoli florets: Packed with vitamins and great for adding color and crunch. If you’re not a fan of broccoli, try bell peppers or green beans instead!
-
Quinoa (or brown rice): A fantastic source of fiber and protein! If you’re looking for a grain-free option, cauli-rice works beautifully too.
-
Lemon juice: Adds brightness and acidity to the dish. You can replace it with apple cider vinegar for a tangy twist.
With all these ingredients at hand, you’re well on your way to creating a delicious meal prep that will fuel your week!
Step-by-Step Instructions
Ready to dive into the cooking process? Here’s a step-by-step guide to crafting your High Protein Chicken Meal Preps:
Step 1: Preheat the Oven
Set your oven to 400°F (200°C). Preheating is crucial for even cooking and crispy chicken—trust me, you don’t want sad, moist pieces when you could have golden brown perfection!
Step 2: Marinate the Chicken
In a large bowl, combine 1 tablespoon of olive oil, 1 teaspoon of garlic powder, 1 teaspoon of paprika, 2 teaspoons of Italian seasoning, salt, and pepper. Mix it all together until it forms a fragrant paste. Coat your chicken breasts in the marinade, making sure they’re evenly covered. Let them marinate for at least 20 minutes (or up to overnight if you want to plan ahead). This step is where the magic happens; the longer it marinates, the more flavors will penetrate the chicken.
Step 3: Prepare the Quinoa
While the chicken is marinating, rinse 1 cup of quinoa under cold water. This helps remove the bitter coating and makes it taste incredible! Combine the rinsed quinoa with 2 cups of water in a medium saucepan. Bring it to a boil, then reduce the heat to a simmer, cover, and let it cook for about 15 minutes, or until all the water has been absorbed and the quinoa is fluffy. If you’re using brown rice, just follow the package instructions!
Step 4: Roast the Chicken and Broccoli
Once the chicken has marinated and the quinoa is cooking, line a baking sheet with parchment paper for easy cleanup. Place the marinated chicken breasts on one side and spread your broccoli florets on the other. Drizzle both with a bit of olive oil and sprinkle with salt and pepper. Roast everything in the oven for about 20-25 minutes or until the chicken reaches an internal temperature of 165°F (75°C). Flip the chicken halfway for that beautiful golden color!
Step 5: Assemble the Meal Prep Containers
Once everything is cooked, it’s time to assemble! In each meal prep container, layer a scoop of quinoa, add a portion of the roasted broccoli, and a delicious chicken breast. If you want to add some zing, drizzle a bit of lemon juice on top before sealing the container.
Step 6: Cool and Store
Let your meals cool completely before sealing the containers with lids. Store them in the fridge where they can keep for up to 4 days. When you’re ready to eat, simply reheat in the microwave for about 2-3 minutes, and you’ll have a healthy, protein-packed meal ready to go!
Serving Suggestions
When it comes to serving, you can jazz things up a bit! Garnish with fresh herbs like parsley or cilantro for a pop of color. If you’re feeling extra indulgent, a sprinkle of feta cheese or a dollop of Greek yogurt can add creaminess and zing to your dish.
Recipe Variations
Want to keep things interesting? Here are a few twists you can try:
- Spicy Kick: Add red pepper flakes or a drizzle of sriracha to the marinade for some heat.
- Asian Flair: Replace paprika with sesame oil and add a splash of soy sauce; serve with edamame instead of broccoli.
- Mediterranean Magic: Use lemon juice instead of olive oil in the marinade and add olives and sun-dried tomatoes to your meal prep.
- Herbaceous Delight: Swap out Italian seasoning for fresh herbs like dill and tarragon, adding an aromatic freshness.
- Curry Infusion: Mix in some curry powder with your marinade and serve with roasted sweet potatoes instead of quinoa.
The possibilities are endless!
Chef’s Notes
This recipe has evolved over the years, mostly due to the many wonderful flavors I’ve encountered on my culinary journey. It’s always fun to embellish the core recipe with seasonal veggies or localized spices I pick up during my travels. Each twist brings a new story and satisfaction to my meal preps.
And here’s a little hack for you: Don’t throw away those chicken bones! They can be used to make a wholesome chicken stock, which is perfect for soups or to cook your grains in next time. Waste not, want not!
FAQs and Troubleshooting
1. What if my chicken seems dry?
If your chicken turns out dry, it’s often due to overcooking. Using a meat thermometer can help ensure you hit that perfect 165°F and keep your chicken juicy.
2. Can I freeze these meal prep containers?
Absolutely! Just be mindful that broccoli may become a bit mushy upon thawing. To avoid this, consider using heartier vegetables like carrots or bell peppers that can withstand freezing.
3. How long does this meal prep last in the fridge?
Your High Protein Chicken Meal Preps can last up to 4 days in the fridge. Beyond that, the quality might not be as delightful. If you’re prepping for a longer week, think about freezing a few!
4. Can I use different proteins?
Yes, you can! Turkey, lean pork, or even fish like salmon would work wonderfully with this marinade. Just be mindful of cooking times, as different proteins require different cooking times to reach that tasty tenderness.
Nutritional Info
(Per serving, based on this recipe giving 4 servings)
- Calories: 450
- Protein: 40g
- Carbohydrates: 45g
- Dietary Fiber: 7g
- Fats: 10g
There you have it, my delightful friends—a nutrition-packed High Protein Chicken Meal Prep recipe that’s as good for the soul as it is for the body. Let’s transform your kitchen into a haven of flavor and fun! Remember, cooking is about the love you put into it. Enjoy and happy cooking!
Print
High Protein Chicken Meal Preps
- Total Time: 45 minutes
- Yield: 4 servings
- Diet: High Protein
Description
Delicious and nutritious high protein chicken meal prep perfect for busy weekdays.
Ingredients
- Chicken Breasts (boneless, skinless)
- Olive Oil
- Garlic Powder
- Paprika
- Italian Seasoning
- Salt and Pepper
- Broccoli florets
- Quinoa (or brown rice)
- Lemon juice
Instructions
- Preheat the oven to 400°F (200°C).
- Marinate the chicken with olive oil, garlic powder, paprika, Italian seasoning, salt, and pepper for at least 20 minutes.
- Prepare the quinoa by rinsing it and cooking with water until fluffy.
- Roast the marinated chicken and broccoli on a baking sheet for 20-25 minutes.
- Assemble each meal prep container with quinoa, broccoli, and a chicken breast.
- Cool the meal prep containers completely before sealing them.
Notes
For serving, garnish with fresh herbs or a sprinkle of feta cheese for added flavor.
- Prep Time: 20 minutes
- Cook Time: 25 minutes
- Category: Meal Prep
- Method: Baking
- Cuisine: American
Nutrition
- Serving Size: 1 serving
- Calories: 450
- Sugar: 3g
- Sodium: 600mg
- Fat: 10g
- Saturated Fat: 1.5g
- Unsaturated Fat: 8g
- Trans Fat: 0g
- Carbohydrates: 45g
- Fiber: 7g
- Protein: 40g
- Cholesterol: 70mg
Keywords: high protein, chicken meal prep, healthy meals, easy recipes
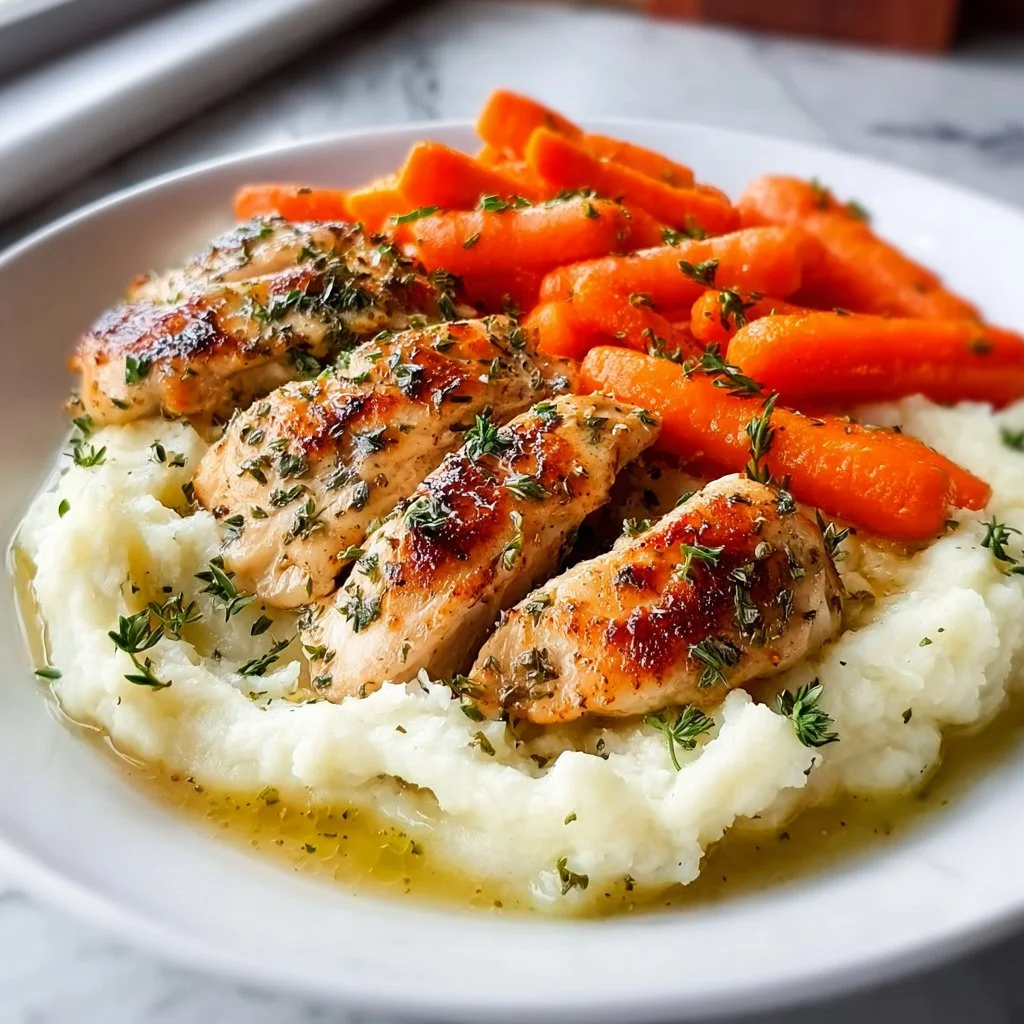
Garlic Herb Chicken with Creamy Mashed Potatoes and Glazed Carrots
Garlic Herb Chicken with Creamy Mashed Potatoes and Glazed Carrots: A Cozy Kitchen Classic
Hey there, fellow foodies! Welcome into my cozy kitchen, where every meal tells a story, and every recipe is a chance to create something delicious. Today, I’m excited to share with you a dish that holds a special place in my heart—Garlic Herb Chicken with Creamy Mashed Potatoes and Glazed Carrots. This delightful trio not only satisfies the taste buds but also brings warmth and comfort to any table.
Let me take you back to the days of my childhood when Sunday dinners were sacred and my family gathered around the table, sharing laughter and heartwarming stories. My mom would whip up her famous roast chicken, seasoned just right, and I can still remember the mouthwatering aroma wafting through the house. As a mischievous little sous chef, I’d often sneak bits of that garlicy goodness when no one was watching, dreaming of one day creating my version. Fast forward a few years, and here I am, joyfully experimenting with flavors and turning simple ingredients into something unforgettable.
This Garlic Herb Chicken with Creamy Mashed Potatoes and Glazed Carrots is not just a meal; it’s a celebration of love, warmth, and home-cooked goodness. The tender chicken infused with fragrant herbs meets silky potatoes, and the sweet, vibrant carrots complete the plate. Whether it’s a cozy weeknight dinner or an inviting Sunday brunch with friends, this dish has got you covered! So, grab your apron, and let’s dive into this culinary adventure together. Trust me, your kitchen is going to smell amazing!
Personal Story
One chilly winter evening, I was reminiscing about my grandmother while thumbing through some old recipe cards she had handwritten. These precious notes were filled with love, sprinkled with flour, and splashed with memories. Among them was her classic garlic herb chicken recipe, which became an inspiration for this very dish. I remember watching her in the kitchen, her hands expertly moving from chopping herbs to basting the chicken, with an infectious laugh that made the whole house feel warm.
The best part? After the meal, we’d gather around the table, sharing stories and enjoying the meal she had poured her heart into. She always believed that food was a way to connect with one another, to share not only flavors but also our lives. I like to think I carry on that legacy, infusing my cooking with love and a sprinkle of nostalgia. This dish brings me back to those unforgettable evenings, and I hope it brings you and your loved ones together just like it did for my family.
Ingredients
Here’s what you’ll need to whip up this fabulous dish:
For the Garlic Herb Chicken:
- 4 boneless, skinless chicken breasts: This versatile protein is tender and cooks up beautifully. If you prefer a different cut, thighs or drumsticks work wonderfully too!
- 4 cloves garlic, minced: Garlic is the star of this show! If fresh garlic isn’t available, use 1 teaspoon of garlic powder per clove.
- 1 tablespoon fresh rosemary, chopped: Rosemary adds a lovely earthy flavor. Dried herbs can be used in a pinch—just remember to use less since they’re more concentrated!
- 1 tablespoon fresh thyme, chopped: Thyme brings a subtle floral note. If you’re out of fresh thyme, substitute with 1 teaspoon dried thyme.
- 2 tablespoons olive oil: This helps keep the chicken juicy. Feel free to swap with melted butter for a richer flavor.
- Salt and pepper to taste: Seasoning is key! Don’t be shy—let your flavors shine.
For the Creamy Mashed Potatoes:
- 2 pounds Yukon Gold potatoes: These are my go-to for creamy mash! If you prefer a lighter version, try using cauliflower instead.
- ½ cup heavy cream: This creates a luscious texture. For a lighter option, use milk or a dairy-free alternative like almond milk.
- 4 tablespoons unsalted butter: Because butter makes everything better! Olive oil or a vegan margarine is a good swap for a dairy-free option.
- Salt and pepper to taste: Essential for flavor enhancement, adjust according to your preference.
For the Glazed Carrots:
- 1 pound baby carrots: Sweet and tender, they cook up beautifully. You can use regular carrots, sliced into matchsticks if preferred.
- 2 tablespoons honey: Adds a delightful sweetness. Maple syrup can work too if you’re avoiding refined sugar.
- 1 tablespoon butter: For a touch of richness. Margarine is a suitable alternative for dairy-free options.
- Salt to taste: Just a pinch will do!
Step-by-Step Instructions
Now, let’s roll up our sleeves and get cooking! Follow my lead, and I promise you’ll create magic in your kitchen.
Step 1: Prepare Your Chicken
- Preheat your oven to 375°F (190°C). Getting that heat going will help us achieve beautifully cooked chicken.
- In a small bowl, mix together minced garlic, chopped rosemary, thyme, olive oil, salt, and pepper. This aromatic blend is where the magic begins!
- Rub the garlic herb mixture all over the chicken breasts, making sure to coat them well. The more herb goodness you can get on there, the better!
Step 2: Sear the Chicken
- Heat a skillet over medium-high heat and add a bit of olive oil.
- Once hot, add the chicken breasts and sear them for 4-5 minutes on each side until they’ve got a lovely golden crust. This step isn’t just for looks; it locks in the juices!
- Transfer the chicken to a baking dish and pop it into the preheated oven for about 20-25 minutes, or until the internal temperature reaches 165°F (74°C). Juicy, perfectly cooked chicken coming right up!
Step 3: Boil the Potatoes
- While the chicken is baking, let’s make those creamy mashed potatoes! Start by peeling and cutting your Yukon Gold potatoes into even-sized chunks.
- Place the potatoes in a large pot, cover with cold water, and sprinkle in a bit of salt. This will help infuse flavor while they boil.
- Bring to a boil over high heat, then reduce to a simmer. Cook for about 15-20 minutes, or until the potatoes are fork-tender.
Step 4: Mash Those Potatoes
- Once tender, drain the potatoes and return them to the pot. Add in the butter, heavy cream, and salt and pepper.
- Using a potato masher, mash until you reach your desired consistency—smooth and creamy or a bit chunky, it’s up to you! I like a combo of both for that homemade touch.
Step 5: Glaze the Carrots
- While mashing, let’s get those carrots ready! In another skillet, melt the butter over medium heat and add in the baby carrots and a pinch of salt.
- Cook for 5-7 minutes, stirring occasionally, until they start to soften. Add in the honey, stirring until the carrots are coated and slightly caramelized.
Step 6: Final Touches
- Once the chicken is done baking, take it out of the oven and let it rest for a few minutes. This gives the juices time to redistribute—no one likes dry chicken!
- Slice the chicken, serve it up on a plate with a generous scoop of creamy mashed potatoes and a side of glazed carrots.
Serving Suggestions
To serve, plate the sliced chicken on a warm plate, alongside a generous mound of fluffy mashed potatoes and vibrant glazed carrots. You can drizzle a bit of the pan juices over the chicken for added flavor and moisture. A sprinkle of fresh herbs on top adds a beautiful touch and a burst of color to your plate!
Recipe Variations
- Spice it Up: Add a pinch of red pepper flakes to the herb mixture for a spicy kick!
- Herb Swap: Play with different herbs like basil or parsley, depending on your flavor preference or what you have on hand.
- Creamy Variations: For a dairy-free version of mashed potatoes, substitute the cream and butter with coconut milk and a dairy-free spread.
- Vegetable Twist: Swap out the glazed carrots for sautéed green beans tossed with almonds for a delightful crunch.
- One-Pan Wonder: Roast everything together on a sheet pan; just arrange the veggies around the chicken for an easy cleanup!
Chef’s Notes
Cooking is all about experimentation! The beauty of this recipe is that it’s versatile. I’ve changed it over time based on what’s in my pantry and the seasons. Sometimes I toss in a hint of lemon juice for brightening flavors or add a touch of Dijon mustard to the chicken marinade for an extra zing. Don’t hesitate to invite your personal flair into the mix!
And here’s a little funny kitchen story: One time during a dinner gathering, I got a bit too enthusiastic with the garlic. I made a garlic herb chicken that could probably ward off vampires! Everyone got a kick out of it, and it resulted in one of those unforgettable meal moments. So remember, cooking should be a joyful experience, full of surprises and laughter!
FAQs and Troubleshooting
-
What if my chicken is dry?
- If your chicken turns out dry, it might be due to overcooking. Always keep an eye on the internal temperature and let it rest before slicing.
-
How do I know when my potatoes are done?
- Potatoes are ready when a fork can easily pierce them. Keep checking to avoid overcooking!
-
Can I make this ahead of time?
- Absolutely! You can prep the chicken and veggies before your gathering. Just reheat them in the oven before serving.
-
What if I don’t have fresh herbs?
- No worries! Dried herbs work well too; just remember to use about a third of what you would if they were fresh.
Nutritional Info
While I’m not a nutritionist, I aim to create home-cooked meals that are both delicious and satisfying. With a focus on whole ingredients, this dish offers a healthy balance of protein, carbs, and veggies—perfect for a wholesome dinner!
And there you have it, friends! A heartwarming recipe for Garlic Herb Chicken with Creamy Mashed Potatoes and Glazed Carrots that will surely delight your senses. I hope you feel inspired to recreate it in your kitchen and make your own delicious memories. Don’t forget to share your culinary triumphs with me; I’d love to hear how it turned out! Happy cooking!
Print
Garlic Herb Chicken with Creamy Mashed Potatoes and Glazed Carrots
- Total Time: 45 minutes
- Yield: 4 servings 1x
- Diet: None
Description
A cozy, heartwarming dish featuring tender garlic herb chicken, creamy mashed potatoes, and sweet glazed carrots.
Ingredients
- 4 boneless, skinless chicken breasts
- 4 cloves garlic, minced
- 1 tablespoon fresh rosemary, chopped
- 1 tablespoon fresh thyme, chopped
- 2 tablespoons olive oil
- Salt and pepper to taste
- 2 pounds Yukon Gold potatoes
- ½ cup heavy cream
- 4 tablespoons unsalted butter
- 1 pound baby carrots
- 2 tablespoons honey
- 1 tablespoon butter
- Salt to taste
Instructions
- Preheat your oven to 375°F (190°C).
- Mix together minced garlic, chopped rosemary, thyme, olive oil, salt, and pepper in a small bowl.
- Rub the mixture all over the chicken breasts.
- Heat a skillet over medium-high heat and add a bit of olive oil.
- Add the chicken breasts and sear them for 4-5 minutes on each side.
- Transfer the chicken to a baking dish and bake for about 20-25 minutes.
- Peel and cut the Yukon Gold potatoes into chunks.
- Place the potatoes in a pot, cover with cold water, and sprinkle in salt.
- Bring to a boil and reduce to a simmer for about 15-20 minutes.
- Drain the potatoes, return them to the pot, and mash with butter, heavy cream, salt, and pepper.
- Melt butter in another skillet and add the baby carrots and salt.
- Cook the carrots for 5-7 minutes, then add honey until caramelized.
- Let the chicken rest for a few minutes before slicing.
- Serve the chicken alongside creamy mashed potatoes and glazed carrots.
Notes
Feel free to modify the herbs based on your preference. This dish can be served for dinner or meal prep for the week.
- Prep Time: 15 minutes
- Cook Time: 30 minutes
- Category: Main Course
- Method: Baking
- Cuisine: American
Nutrition
- Serving Size: 1 serving
- Calories: 450
- Sugar: 10g
- Sodium: 700mg
- Fat: 20g
- Saturated Fat: 10g
- Unsaturated Fat: 6g
- Trans Fat: 0g
- Carbohydrates: 45g
- Fiber: 5g
- Protein: 30g
- Cholesterol: 95mg
Keywords: chicken, mashed potatoes, glazed carrots, comfort food
Tender Pot Roast
Tender Pot Roast: A Cozy Hug on a Plate
Hello, my wonderful culinary adventurers! Welcome back to my kitchen, where every recipe tells a story and every meal is an opportunity to create memories. Today, we’re diving into a dish that feels like a warm embrace on a chilly evening: Tender Pot Roast. This isn’t just any pot roast; it’s the kind that makes your home smell divine and makes everyone feel like they’re gathered around the most inviting table.
Picture yourself walking into your kitchen after a long day, and that rich aroma of beef braising with a medley of vegetables hits you like a comforting blanket. There’s something magical about slow-cooked meals, don’t you think? They remind us to slow down, savor every bite, and relish the experience of sharing good food with great company.
The beauty of a pot roast is in its simplicity. With just a few wholesome ingredients and a bit of love, you can transform an ordinary cut of meat into an extraordinary centerpiece that beckons loved ones from all corners of your home. Plus, it’s the perfect dish for those who might feel daunted by more intricate recipes. Trust me; this dish will have you feeling like a master chef in no time!
So, grab your apron, let’s roll up those sleeves, and get cooking! I’ll be sharing not only the tried-and-true recipe but also a little story that makes this dish even more special to me. Don’t worry; we’ll also explore some creative variations, tips, and all the possible FAQs you might have. Let’s make this pot roast legendary!
Personal Story
Whenever I think about pot roast, I whisk back to Sunday dinners at my grandmother’s house. She was the queen of comfort food, and her pot roast was legendary. Every week, she’d take a tough cut of meat and transform it into the most tender, fall-apart goodness you could ever imagine. I can still hear the sizzle of the skillet as she seared the meat, the garlic and herbs flirtatiously mingling in the air.
I remember sitting at her table, surrounded by my cousins, sharing stories while the pot roast simmered away. The anticipation grew as we all secretly hoped she would serve her signature mashed potatoes as a side. After what felt like hours, we could finally dig in, and oh boy, it was worth the wait! Each bite was packed with flavor, and the gravy? Pure magic!
Those meals were more than just food; they were family memories forged over laughter and love. Now, years later, I strive to replicate that very same love in every pot roast I make. Whenever I whip up this recipe, I feel like I’m honoring my grandmother and sharing that cozy, nostalgic spirit with you.
Ingredients
To make this Tender Pot Roast, you’ll need a handful of ingredients that come together beautifully. Here’s what you’ll need:
-
3-4 lbs Chuck Roast
A wonderfully flavorful cut that becomes tender when slow-cooked. If you can’t find chuck, brisket or round roast are great substitutes. -
2 tablespoons Olive Oil
For searing the meat to create that beautiful crust. If you’re looking for a different flavor, try using avocado oil. -
1 large Onion, diced
A staple in savory dishes, it adds sweetness and depth. You could swap this out for shallots if you want a more delicate flavor. -
4 cloves Garlic, minced
A must-have for that aromatic punch! If fresh garlic isn’t available, feel free to use garlic powder in a pinch. -
4 medium Carrots, chopped
They add sweetness and color. Celery can make a fantastic substitute for a different texture. -
4 Yukon Gold Potatoes, quartered
Creamy and buttery, they soak up all the delicious juices. Russets work well, too, but they might become a bit more fluffy than waxy. -
2 cups Beef Broth
This is the liquid gold of your braise. Homemade is best, but store-bought works perfectly. You can also use vegetable broth for a lighter base. -
1 tablespoon Worcestershire Sauce
A little umami magic that enhances the flavor. Liquid aminos are a great alternative for a gluten-free option. -
1 teaspoon Dried Thyme
An aromatic herb that pairs wonderfully with beef. Fresh thyme works well, too; just use three times the amount. -
1 teaspoon Salt
Essential for flavor. You can cut back or opt for sea salt or Himalayan salt for a different flavor profile. -
½ teaspoon Black Pepper
Adds a kick! Feel free to adjust to your personal taste preference. -
1 Bay Leaf
For that subtle earthy flavor. Just remember to remove it before serving!
Step-by-Step Instructions
Now, let’s get into the fun part — making that pot roast! Follow these steps, and you’ll be on your way to creating a dish that will have your family raving.
Step 1: Sear the Meat
Time to get that skillet hot!
Start by heating up your olive oil in a large, heavy-bottomed pot or Dutch oven over medium-high heat. Pat your chuck roast dry with paper towels (this helps it sear nicely). When the oil shimmers, add the roast and let it brown for about 4-5 minutes on each side. Chef Tip: Resist the urge to move the roast around too much; let it caramelize beautifully. This step is crucial for flavor!
Step 2: Sauté the Aromatics
Once your roast is beautifully browned, remove it from the pot and set it aside. In that same pot, add your diced onion and sauté for about 3-4 minutes until it’s translucent. Toss in the minced garlic and sauté for another minute, just until you smell that amazing aroma wafting through your kitchen. Little Hack: Scrape up any browned bits on the bottom of the pan; that’s flavor heaven!
Step 3: Add the Veggies
Next, drop in those chopped carrots and quartered potatoes, giving them a little stir to coat in the onion and garlic goodness. Sauté for about 3-4 minutes, allowing them to become just a tad tender.
Step 4: Put It All Together
Now, it’s time to invite that roast back to the party! Return it to the pot and add your beef broth, Worcestershire sauce, thyme, salt, pepper, and bay leaf. Bring everything to a gentle simmer. Pro Tip: If you want an even richer flavor, consider adding a splash of red wine!
Step 5: Slow Cook
Cover your pot with a tight-fitting lid and transfer it to a preheated oven at 300°F (150°C). Let it cook for 3-4 hours, or until the meat is super tender and shreds easily with a fork. This is the patience-testing part, but trust me, it’s worth every minute!
Step 6: Check for Doneness
After a good chunk of time has passed, peek inside! The meat should be tender, and the vegetables should have soaked up all those tasty flavors. If you have a meat thermometer, the perfect internal temperature for a pot roast is around 195-205°F (90-96°C) for that melt-in-your-mouth goodness.
Step 7: Serve and Enjoy!
Once it’s all beautifully cooked, carefully remove the pot from the oven. Let the roast rest for about 15-20 minutes before slicing or shredding. This helps the juices redistribute, ensuring a luscious bite every time. Serving Tip: Spoon some of that divine gravy over your meat and veggies for the ultimate flavor explosion.
Serving Suggestions
Nothing beats a plate filled with tender slices of roasty goodness! For a cozy presentation, serve your pot roast with the carrots and potatoes piled high. Drizzle that luscious gravy over the top and sprinkle with fresh herbs for a pop of color. If you want to make it extra special, accompany it with homemade bread to soak up all that savory goodness. Trust me, your family will be fighting for the last bite!
Recipe Variations
- Herbaceous Upgrade: Swap out the dried thyme for fresh rosemary or oregano for a different herby twist.
- Spicy Kick: Add a touch of crushed red pepper flakes or a douse of hot sauce to make things spicy!
- Mushroom Lover: Toss in some diced mushrooms during the sauté step for added umami.
- Cranberry Delight: Add a handful of fresh cranberries to the pot during cooking for a sweet-tart flavor pop.
- Vegetarian Version: Use a hearty plant-based protein like jackfruit or seitan, and swap the beef broth for vegetable broths.
Chef’s Notes
As each pot roast tells a story, mine has evolved over the years. I remember when I first started making it; I’d simply follow my grandmother’s recipe. But with time, I’ve experimented with different seasonings and methods. A favorite memory includes the first time I tried adding red wine to the broth, elevating the flavor to another level!
Another fun kitchen story — I once forgot to add the bay leaf before putting it in the oven. I panicked but decided to let it ride. At the end of the day, it was still a hit! It’s true what they say: cooking is all about finding what resonates with you.
FAQs and Troubleshooting
1. Why is my pot roast tough?
Make sure you’re allowing enough cooking time! Tough cuts of meat need that low and slow treatment to break down the collagen and become tender.
2. Can I make pot roast in a slow cooker?
Absolutely! Sear the meat first in a skillet, then transfer everything to your slow cooker. Cook on low for 8 hours or on high for about 4 hours.
3. How do I store leftovers?
Allow any leftovers to cool completely, then store in an airtight container in the fridge for up to 4 days. It tastes even better the next day!
4. What if I don’t have beef broth?
If you find yourself out of beef broth, vegetable broth or even water with a touch of soy sauce can work as a substitute for moisture and flavor.
Nutritional Info
Serving Size: Approximately 1/4 of pot roast
Calories: 400
Total Fat: 20g
Saturated Fat: 7g
Cholesterol: 90mg
Sodium: 600mg
Total Carbohydrates: 30g
Dietary Fiber: 4g
Sugars: 4g
Protein: 30g
Note: Nutritional info may vary based on ingredient brands and quantities used.
And there you have it — a perfect Tender Pot Roast recipe that will warm not only your belly but also your heart. I hope you enjoy making this dish as much as I do. Remember, it’s all about the journey, and every meal is a chance to create lasting memories with those you love. Happy cooking! 🍽️
Print
Tender Pot Roast
- Total Time: 255 minutes
- Yield: 4 servings 1x
- Diet: None
Description
A cozy, tender pot roast recipe that will warm your heart and home, perfect for family gatherings.
Ingredients
- 3–4 lbs Chuck Roast
- 2 tablespoons Olive Oil
- 1 large Onion, diced
- 4 cloves Garlic, minced
- 4 medium Carrots, chopped
- 4 Yukon Gold Potatoes, quartered
- 2 cups Beef Broth
- 1 tablespoon Worcestershire Sauce
- 1 teaspoon Dried Thyme
- 1 teaspoon Salt
- ½ teaspoon Black Pepper
- 1 Bay Leaf
Instructions
- Sear the Meat: Heat olive oil in a large pot over medium-high heat. Pat the chuck roast dry and brown it for about 4-5 minutes on each side.
- Sauté the Aromatics: Remove the roast, add onion and sauté for 3-4 minutes, then add garlic and sauté for another minute.
- Add the Veggies: Stir in carrots and potatoes, sautéing for 3-4 minutes.
- Put It All Together: Return the roast, add the beef broth, Worcestershire sauce, thyme, salt, pepper, and bay leaf. Bring to a simmer.
- Slow Cook: Cover and transfer to a preheated oven at 300°F (150°C). Cook for 3-4 hours until the meat is tender.
- Check for Doneness: Ensure the meat is tender and vegetables have absorbed flavors; aim for an internal temperature of 195-205°F (90-96°C).
- Serve and Enjoy: Allow the roast to rest for 15-20 minutes before slicing. Serve with gravy.
Notes
For enhanced flavor, consider adding a splash of red wine. Remove the bay leaf before serving.
- Prep Time: 15 minutes
- Cook Time: 240 minutes
- Category: Main Course
- Method: Braising
- Cuisine: American
Nutrition
- Serving Size: 1 serving
- Calories: 400
- Sugar: 4g
- Sodium: 600mg
- Fat: 20g
- Saturated Fat: 7g
- Unsaturated Fat: 0g
- Trans Fat: 0g
- Carbohydrates: 30g
- Fiber: 4g
- Protein: 30g
- Cholesterol: 90mg
Keywords: pot roast, slow cooked beef, comfort food, family dinner, hearty meals
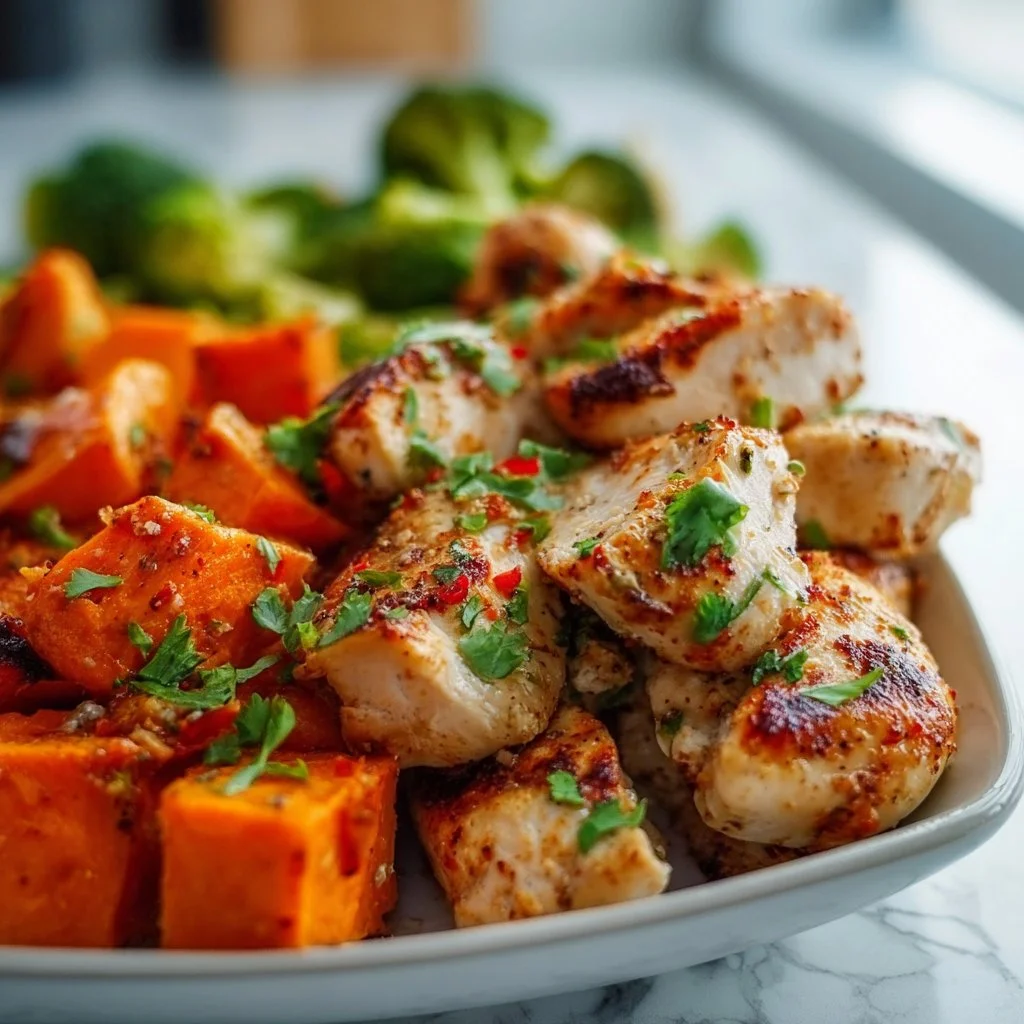
Chicken and Sweet Potato Meal Prep
# The Ultimate Chicken and Sweet Potato Meal Prep: A Cozy Cooking Adventure

## Introduction

Welcome to my cozy kitchen, friends! I’m Olivia Bennett, your guide on this delicious journey of flavor and nostalgia. If you’ve found your way here, it likely means you’re in search of a wonderfully wholesome meal that not only feeds the belly but also warms the soul. Today, we’re all about a delightful Chicken and Sweet Potato Meal Prep that is perfect for busy weekdays, cozy family dinners, and even surprise guests!

Meal prepping is one of my favorite ways to make sure I have home-cooked goodness ready to go when life gets hectic. In the hustle and bustle of our daily lives, there’s something so satisfying about chopping fresh ingredients, roasting them to perfection, and then filling an array of containers with vibrant hues and hearty flavors. The best part? You can whip up this dish in under an hour and have tasty, homemade food at your fingertips all week long.

Now, let’s talk about the stars of this dish—chicken and sweet potatoes! Both are not just nourishing but incredibly versatile. Chicken is a lean source of protein that can be seasoned in countless ways, while sweet potatoes offer a natural sweetness and a treasure trove of vitamins. Together, they create a symphony of flavors and textures that is bound to impress and satisfy. Plus, they play well with various vegetables, spices, and grains, making them a perfect canvas for your culinary creativity.

Believe me, as we dive into this recipe, you’ll discover that meal prepping doesn’t have to be boring or bland. Let’s put on our aprons, turn up the music, and make some magic in the kitchen!

## Personal Story

Ah, sweet potatoes! They remind me of chilly Thanksgiving gatherings at my grandma's house. Every year, she would whip up her famous sweet potato casserole, topped with gooey marshmallows and crushed pecans. The smell alone was enough to bring me running from anywhere in the house, and it made me associate sweet potatoes with home, warmth, and love. That nostalgic flavor has stuck with me through the years, inspiring me to create dishes that not only nourish but remind me of those cozy family moments.

When I started exploring meal prep, I wanted to take that same comforting essence of my grandma's casserole and turn it into something I could enjoy every day, without the sugar overload. And voilà—this Chicken and Sweet Potato Meal Prep was born! It’s packed with nutrients, embodies the warmth of home-cooked meals, and carries that nostalgic feeling, making each bite an ode to family gatherings.

## Ingredients

Here's what you'll need to create our beautiful Chicken and Sweet Potato Meal Prep:

- **2 large chicken breasts**
  Lean proteins that absorb flavors wonderfully! If you're looking for substitutions, try turkey breast, tofu, or chickpeas for a vegetarian twist.

- **2 large sweet potatoes**
  A nutrient powerhouse high in fiber and vitamins. If sweet potatoes aren't available, regular potatoes or butternut squash can work, but adjust cooking times accordingly.

- **1 red bell pepper**
  A pop of color and packed with vitamins! Feel free to swap it out for any seasonal veggie such as zucchini or asparagus for added crunch.

- **1 yellow onion**
  It brings a wonderful sweetness when caramelized. Shallots or leeks can also be used as substitutes for a nuanced flavor.

- **2 cups fresh spinach**
  Packed with iron and vitamin K. You can use kale or arugula instead for a different leafy green experience.

- **3 tablespoons olive oil**
  Healthy fats that enhance flavors during roasting. If you prefer, you can use avocado oil or melted coconut oil.

- **1 teaspoon garlic powder**
  A convenient way to add garlicky goodness. Fresh minced garlic is a great substitute, but reduce the quantity to avoid overwhelming the dish.

- **1 teaspoon smoked paprika**
  Adds a lovely depth of flavor. Regular paprika or chili powder can work, but you might lose that smoky undertone.

- **Salt and pepper to taste**
  Essential seasonings to enhance all flavors! Always taste as you go, adjusting for your personal preference.

## Step-by-Step Instructions

Now, let’s get down to the fun part—cooking!

1. **Preheat the Oven**
   Set your oven to 425°F (220°C). This is the perfect temperature for roasting our sweet potatoes and chicken to golden perfection! A hot oven ensures crispy edges and juicy centers.

2. **Prepare the Chicken**
   While the oven heats, grab your chicken breasts. Pat them dry with a paper towel (this helps with browning), then season both sides generously with salt, pepper, garlic powder, and smoked paprika. I like to massage the spices into the chicken—get in there! This makes such a difference in flavor.

3. **Chop the Veggies**
   Next, peel and cube the sweet potatoes into bite-sized pieces, about 1-inch cubes. Chop the bell pepper and onion too. I love to have a good, sharp knife for this—it cuts down on prep time and makes chopping more enjoyable.

4. **Toss Veggies in Oil**
   In a large mixing bowl, combine your sweet potatoes, bell pepper, and onion with olive oil and a sprinkle of salt and pepper. Toss everything well until they’re evenly coated. This is where the magic starts—oil will help them to roast beautifully!

5. **Bake the Chicken and Veggies**
   On a large parchment-lined baking sheet, spread the seasoned chicken in the center and scatter the sweet potato mixture around it. Bake for about 20 minutes. The goal here is to get that sweet and savory combo happening, and the aromas in your kitchen will be incredible!

6. **Add the Spinach**
   After 20 minutes, carefully remove the baking sheet from the oven. At this point, sprinkle the spinach over the chicken and veggies. It may look like a lot at first, but it will wilt down beautifully! Pop it back in the oven for another 5-10 minutes, until the chicken is fully cooked (internal temperature of 165°F or 75°C) and the sweet potatoes are fork-tender.

7. **Cool and Portion**
   Once cooked, let the dish cool slightly. I like to use this time to dance around the kitchen and appreciate the divine smells! Then, portion everything into your meal prep containers—this recipe usually fills about four to six servings.

## Serving Suggestions

Serving is where you can truly let your creativity shine! I recommend serving your Chicken and Sweet Potato Meal Prep with a generous dollop of Greek yogurt or a splash of balsamic glaze for an extra layer of flavor. And don’t forget to garnish with fresh herbs like parsley or cilantro for that beautiful finishing touch.

## Recipe Variations

Want to mix things up? Here are a few creative twists for your Chicken and Sweet Potato Meal Prep:

1. **Curry Flavors**: Add curry powder to your chicken seasoning and toss in chickpeas for extra protein.
2. **Honey Mustard Glaze**: Brush the chicken with a honey mustard mixture before baking for a sweet-tangy flavor.
3. **Chipotle Kick**: Add chipotle powder to the spices for a smokier, spicier version that packs a punch!
4. **Herb Medley**: Toss in fresh herbs like rosemary, thyme, or sage for a fragrant and earthy experience.
5. **Grain Boost**: Serve over a bed of quinoa or brown rice for added texture and nutrients.

## Chef’s Notes

This Chicken and Sweet Potato Meal Prep recipe has evolved over time—what started as a simple bake has now transformed into a colorful, flavor-packed masterpiece! I once accidentally added too much garlic, making a batch that was utterly delightful but slightly too potent. From that day forward, I learned the importance of moderation!

Cooking should always be about experimenting and finding what you love. Embrace those kitchen mishaps—they often lead to some of the best, most comforting flavors.

## FAQs and Troubleshooting

**1. My chicken turned out dry. What did I do wrong?**
Ensuring your chicken isn’t overcooked is crucial. Use a meat thermometer to check for doneness at 165°F, and consider marinating your chicken beforehand for extra moisture!

**2. Can I use frozen sweet potatoes?**
Absolutely! Just be sure to thaw them before roasting to ensure even cooking.

**3. What if I don’t have a baking sheet?**
No worries! Use any oven-safe dish you have on hand. Just ensure it’s large enough to hold everything without overcrowding.

**4. How long do leftovers last?**
Properly stored in the fridge, your meal prep containers should stay fresh for up to 4 days. Just reheat in the microwave or oven before serving!

## Nutritional Info

Here’s a rough nutritional breakdown for one serving of the Chicken and Sweet Potato Meal Prep:

- Calories: 400
- Protein: 30g
- Carbohydrates: 45g
- Dietary Fiber: 8g
- Fat: 12g

Remember that nutritional values may vary based on ingredient specifics, so feel free to adjust for your dietary needs.

---

And there you have it! My Chicken and Sweet Potato Meal Prep recipe is not just about convenience; it’s about bringing joy and nourishment to your table, harmonizing flavors that evoke warmth and comfort. I hope you love making it as much as I do—and may your kitchen always be filled with love, laughter, and the smell of something delicious baking!
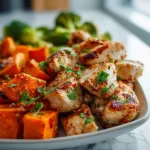
The Ultimate Chicken and Sweet Potato Meal Prep
- Total Time: 45 minutes
- Yield: 4 servings 1x
- Diet: Gluten-Free
Description
A flavorful and wholesome meal prep featuring roasted chicken and sweet potatoes, perfect for busy weekdays and family dinners.
Ingredients
- 2 large chicken breasts
- 2 large sweet potatoes
- 1 red bell pepper
- 1 yellow onion
- 2 cups fresh spinach
- 3 tablespoons olive oil
- 1 teaspoon garlic powder
- 1 teaspoon smoked paprika
- Salt and pepper to taste
Instructions
- Preheat the oven to 425°F (220°C).
- Prepare the chicken by patting it dry and seasoning with salt, pepper, garlic powder, and smoked paprika.
- Chop the sweet potatoes, bell pepper, and onion into bite-sized pieces.
- Toss the veggies with olive oil, salt, and pepper in a mixing bowl.
- Bake the seasoned chicken and veggies on a parchment-lined baking sheet for about 20 minutes.
- Add the spinach and return to the oven for another 5-10 minutes until chicken is cooked through and sweet potatoes are tender.
- Cool slightly before portioning into meal prep containers.
Notes
Serve with a dollop of Greek yogurt or balsamic glaze and garnish with fresh herbs for added flavor.
- Prep Time: 15 minutes
- Cook Time: 30 minutes
- Category: Main Course
- Method: Baking
- Cuisine: American
Nutrition
- Serving Size: 1 serving
- Calories: 400
- Sugar: 5g
- Sodium: 350mg
- Fat: 12g
- Saturated Fat: 2g
- Unsaturated Fat: 8g
- Trans Fat: 0g
- Carbohydrates: 45g
- Fiber: 8g
- Protein: 30g
- Cholesterol: 70mg
Keywords: chicken, sweet potato, meal prep, healthy, wholesome, quick meals




