
Quick Dairy-Free Vegan Desserts for Busy Weeknights
Indulge Guilt-Free: The Ultimate Vegan Chocolate Avocado Mousse
Welcome to my kitchen! Today, I am thrilled to share a recipe that perfectly marries indulgence with health: Vegan Chocolate Avocado Mousse. If you’re anything like me, the mere thought of chocolate invokes a wave of happiness. But what if I told you that you could enjoy a rich, creamy dessert without any dairy or guilt? This mousse not only satisfies your chocolate cravings but also sneaks in some healthy fats and nutrients thanks to the superstar ingredient—avocado!
Imagine cozying up with a silky bowl of chocolate goodness after a long day, knowing it’s nourishing your body while delighting your taste buds. Sounds dreamy, right? This recipe combines simple ingredients to create a dessert that’s not just vegan and dairy-free but also an absolute crowd-pleaser. Whether it’s for a special occasion or a quiet night in, this mousse will have you basking in compliments and well-deserved "Wow!" moments from everyone at the table.
Perhaps you’re thinking, “Avocado in dessert? No way!” Trust me; I had my doubts too until I tried it for the first time at a friend’s dinner party. She served it in tiny elegant cups, and I was skeptical as I took my first bite. To my absolute delight, the rich texture and deep chocolate flavor blew my mind! I couldn’t believe I was indulging in something so decadent yet so nutritious. Ever since that delightful evening, I’ve been whipping up this vegan mousse whenever I want to impress friends or treat myself to something sweet, and now it’s time for you to experience this joy too!
So grab your mixing bowl and get ready to dive into a dessert that will redefine your expectations of healthy sweets. Let’s turn those ripe avocados into a luscious treat that you’ll want to make again and again!
A Taste of Nostalgia
My journey with cooking has always been tied to the warmth of family and friends, particularly the joy of dessert-making together. One memory that stands out was the summer my sister and I teamed up to create our own dessert recipes. We rummaged through our family cookbook, coming across a version of chocolate mousse that sparked our curiosity. However, we weren’t just satisfied with following a recipe. We looked to make an indulgent dessert that also catered to our evolving dietary choices in our teenage years.
That’s when we stumbled upon the idea of incorporating avocados into our chocolate creation. At first, my sister raised an eyebrow, but with a little coaxing and a dash of sibling curiosity, we set to work in the kitchen. The feel of the creamy avocado blending with the chocolate was pure magic, and the moment we dipped the spoon in for a taste, we couldn’t stop smiling. It was beyond what we had imagined. That day, we not only created a delicious dish but also built a cherished memory that I carry with me every time I whip up this fantastic mousse.
Now, I love sharing this recipe with my friends and family, hoping to inspire them to explore cooking with newfound ingredients. It’s amazing how a simple dish can evoke powerful emotions and create lasting bonds.
Ingredients
To create this decadent Vegan Chocolate Avocado Mousse, you will need the following ingredients:
-
Ripe Avocados
The base of our mousse! When choosing avocados, look for ones that are dark purple and have a slight give when squeezed gently. If they’re too firm, leave them at room temperature for a couple of days before using. If you don’t have avocados, you could substitute them with silken tofu for a similar creamy texture. -
Cocoa Powder
Unsweetened cocoa powder adds that rich chocolate flavor. Opt for a high-quality brand, as it makes a difference. If you’re looking for something sweeter, you can swap it with carob powder, but the flavor will shift to a more earthy profile. -
Maple Syrup
This natural sweetener balances the bitterness of the cocoa. Maple syrup has a unique flavor that pairs wonderfully with chocolate, but agave nectar or even honey can serve as alternatives (if not vegan). -
Vanilla Extract
A splash of vanilla enhances the overall flavor, bringing a warm richness to the mousse. If you’re out of vanilla extract, try using almond extract for a different but delicious twist. -
Almond Milk (or any plant-based milk)
This will help achieve the creamy consistency we want in our mousse. You can use soy milk, coconut milk, or even oat milk if you prefer! -
A Pinch of Salt
Trust me, a little salt elevates the sweetness and helps bring out the flavors. If you’re on a sodium-restricted diet, feel free to omit it!
Step-by-Step Instructions
Let’s get cooking! Follow these steps for a delicious Vegan Chocolate Avocado Mousse.
-
Prep Your Avocados
Cut open your ripe avocados and carefully remove the pit. Scoop the flesh into your mixing bowl. This is an excellent time to reflect on the delightful memories tied to cooking with friends and family as you feel the texture of the avocado! -
Blend the Ingredients
Add the cocoa powder, maple syrup, vanilla extract, almond milk, and a pinch of salt to the mixing bowl with the avocados. Use a hand mixer or a food processor for this step. A blender can work too, but be careful not to over-blend—taste as you go! You’ll want a smooth and creamy consistency. -
Taste and Adjust
After blending, taste your mousse. Does it need more sweetness? Add a bit more maple syrup! Too thick? Splash in a little more almond milk until you reach your desired consistency. Remember, this is your mousse, so tailor it to your taste! -
Chill It Out
Once you’re satisfied, transfer the mousse into serving bowls or cups. Cover them with plastic wrap and place them in the fridge for at least 30 minutes. Chilling allows the flavors to meld and gives it the perfect texture—like a chocolatey hug! -
Garnish and Serve
When you’re ready to serve, feel free to get creative with your presentation! Top with fresh berries, crushed nuts, or a dollop of coconut whipped cream for an extra touch of sweetness and elegance. And don’t forget a sprig of mint for that pop of color!
Serving Suggestions
When it comes to serving this Vegan Chocolate Avocado Mousse, think presentation! Layer the mousse into elegant glasses or mason jars for a charming touch. You could also serve it in a small bowl topped with your favorite crunch—like granola or cacao nibs—giving it a delightful bite and contrast in texture.
For an extra treat, consider offering a selection of toppings on the side, such as shredded coconut, mini dark chocolate chips, or fresh berries, allowing everyone to customize their dessert just the way they like it!
Recipe Variations
Want to mix things up? Here are a few creative twists you can try:
- Minty Fresh: Add a drop of peppermint extract to your mousse for a refreshing mint chocolate vibe.
- Spiced Mocha: Stir in a teaspoon of instant coffee granules or espresso powder for a fabulous mocha flavor.
- Nutty Delight: Blend in a tablespoon of almond or peanut butter to enhance the richness.
- Citrus Zing: A hint of orange or lemon zest can brighten the flavor profile beautifully.
- Avocado-Free Option: If you’re not keen on avocados, try this with silken tofu to maintain the creamy texture while adding protein!
Chef’s Notes
This recipe has been a staple in my kitchen for years, but it didn’t start with a perfect outcome! I remember the first time I made it, and the texture was a bit grainy because I didn’t blend it enough—welcome to the learning curve of culinary adventures! Now, I’ve mastered the art of achieving that luscious, silky texture, and this mousse always brings joy, laughter, and satisfaction—just like the many cherished memories of cooking with loved ones.
So don’t hesitate to make this your own! Share your kitchen adventures with me—I’d love to hear how your chocolate mousse journey goes!
FAQs and Troubleshooting
Here are a few common questions and issues you might run into while making this Vegan Chocolate Avocado Mousse:
-
My mousse turned out too thick. What can I do?
If your mousse is too thick, a splash of almond milk will help thin it out! Just blend it again until you reach the desired consistency. -
It tastes too avocado-y for my liking. What did I do wrong?
If you can taste the avocado too strongly, try adding more cocoa powder and sweetener to balance the flavor. Blending well helps achieve that creamy chocolate finish too! -
Can I use overripe avocados?
Sure! As long as they’re not brown inside and have no off-smells, overripe avocados can give you an even creamier mousse. -
How long can I store the mousse?
It will last in the fridge for about 2-3 days. Just make sure to cover it well to prevent it from oxidizing and turning brown.
Nutritional Info
Though I’d usually focus on the enjoyment of cooking, it’s good to know that each serving of this delightful Vegan Chocolate Avocado Mousse is packed with heart-healthy fats from avocados, while also remaining free of dairy and refined sugars. This delightful indulgence keeps everything balanced, providing good energy without the guilty aftermath—perfect for both your palate and your body!
Now, get cooking! I can’t wait for you to take a spoonful of this healthy, delightful, and utterly delicious Vegan Chocolate Avocado Mousse. Happy cooking!
Print
Vegan Chocolate Avocado Mousse
- Total Time: 40 minutes
- Yield: 4 servings 1x
- Diet: Vegan
Description
A rich and creamy dessert made from avocados and cocoa powder, perfect for satisfying chocolate cravings guilt-free.
Ingredients
- 2 ripe avocados
- 1/2 cup unsweetened cocoa powder
- 1/4 cup maple syrup (or agave nectar)
- 1 tsp vanilla extract
- 1/2 cup almond milk (or any plant-based milk)
- A pinch of salt
Instructions
- Prep your avocados by cutting them open and removing the pit. Scoop the flesh into a mixing bowl.
- Blend the cocoa powder, maple syrup, vanilla extract, almond milk, and a pinch of salt with the avocados until smooth.
- Taste the mousse and adjust sweetness or thickness as needed.
- Chill in the fridge for at least 30 minutes to allow flavors to meld.
- Garnish with fresh berries, crushed nuts, or coconut whipped cream before serving.
Notes
For an avocado-free option, substitute the avocados with silken tofu. This mousse can last in the fridge for 2-3 days when covered.
- Prep Time: 10 minutes
- Cook Time: 0 minutes
- Category: Dessert
- Method: No Cook
- Cuisine: Vegan
Nutrition
- Serving Size: 1 serving
- Calories: 250
- Sugar: 12g
- Sodium: 50mg
- Fat: 10g
- Saturated Fat: 1.5g
- Unsaturated Fat: 8g
- Trans Fat: 0g
- Carbohydrates: 34g
- Fiber: 6g
- Protein: 3g
- Cholesterol: 0mg
Keywords: vegan dessert, chocolate mousse, healthy chocolate, avocado mousse, guilt-free dessert
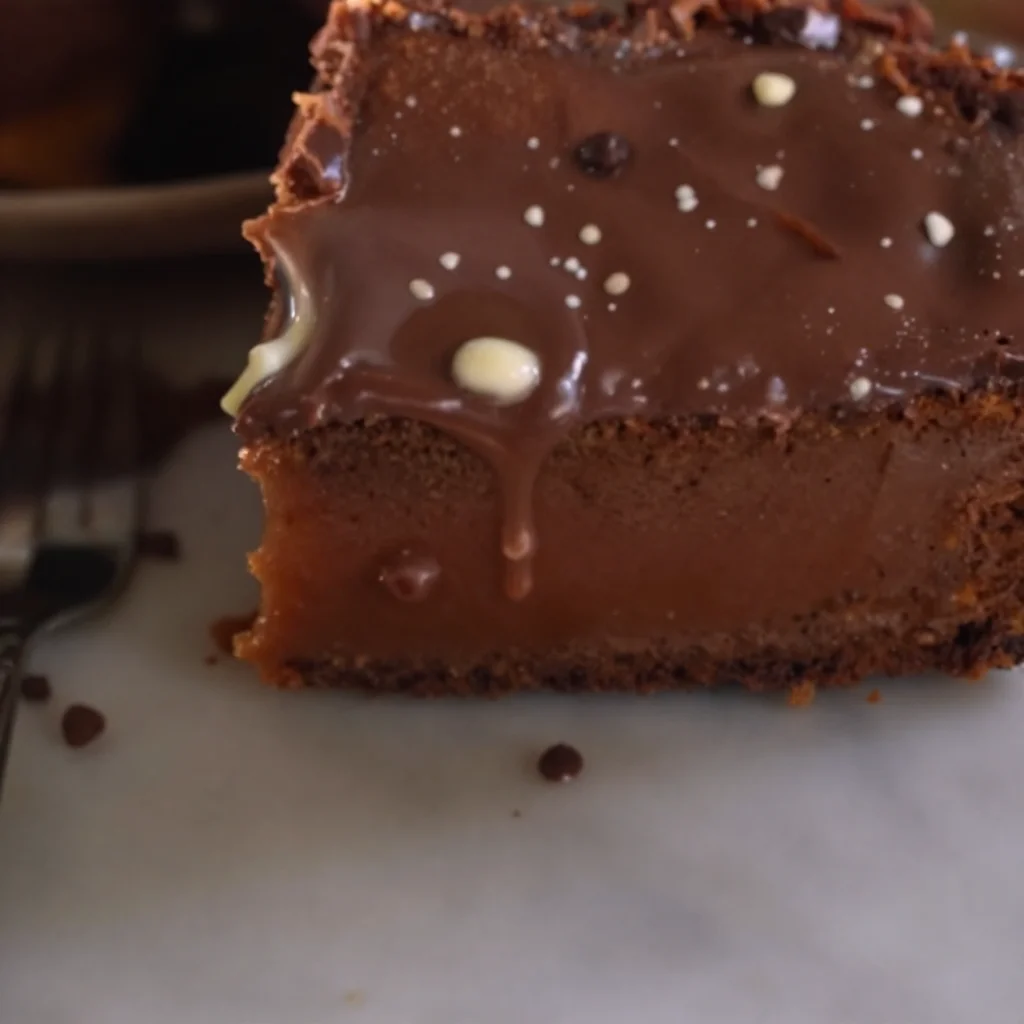
Minute Chocolate Zucchini Cake (One-Bowl Recipe)
The Ultimate Chocolate Zucchini Cake Recipe: A Slice of Heaven!
Welcome to my kitchen! I’m so excited to share one of my absolute favorite recipes with you today: Chocolate Zucchini Cake! If you’re anything like me, you know that the best cakes are the ones that balance rich chocolatey goodness with hidden veggies. Yep, you heard that right! This luscious cake does just that while bringing joy to anyone who takes a bite. Whether you’re hosting a dinner party, celebrating a birthday, or simply treating yourself on a quiet afternoon, this cake will definitely steal the show!
Now, let’s be honest—zucchini in a cake may sound a little quirky at first. But trust me, it adds moisture and a beautiful texture to your cake without a trace of that green wonder lurking beneath the rich cocoa. There’s an added benefit—this cake is a great way to sneak some veggies into your diet without even noticing! It’s perfect for kids and adults alike. I remember the first time I made this cake; my nephews were doubtful when they saw me adding zucchini into the mix, but their faces lit up with delight once they tried a slice (or two!).
Baking this Chocolate Zucchini Cake is not only about creating a delicious dessert; it’s also a journey filled with delightful aromas, joyous moments in the kitchen, and a chance to connect with loved ones over something scrumptious. So, grab your measuring cups and let’s dive into this recipe that’s sweet, moist, and oh-so-satisfying.
A Trip Down Memory Lane
Growing up, my mom was a master of transforming simple ingredients into fantastic meals. One recipe that became a family favorite was her Chocolate Zucchini Cake. I remember the first time she made it; it was during the summer when our garden was overflowing with zucchini. Every time we had an abundance of the veggie, my mom would whip up her beloved cake, and it didn’t take long for us to fall head over heels for it.
One day, I eagerly helped her grate the zucchini, but I kept sneaking bites of the chocolate batter when she wasn’t looking (I mean, who can resist that?). The combination of the rich chocolate and the whisper of cinnamon filled our kitchen with an aroma that was nothing short of heavenly. Once it was out of the oven, I couldn’t help but devour an enormous slice, and I loved that I could justify it because, hey, there were veggies in there, right? Every bite felt like a warm hug, and to this day, that nostalgic memory inspires me to share this cake with everyone I know.
Ingredients: What You’ll Need
Here’s a breakdown of what goes into this delightful Chocolate Zucchini Cake:
-
Zucchini (2 cups, grated): The star ingredient! This veggie adds moisture and makes the cake super tender. You can use green zucchini or even yellow squash if you prefer.
-
Granulated Sugar (1 cup): Sweetness galore! You can swap in brown sugar for a deeper flavor and a bit more moisture.
-
Brown Sugar (1/2 cup): Adds a hint of caramel flavor, but feel free to use all granulated sugar if you want a lighter cake.
-
All-Purpose Flour (1 ½ cups): Standard flour gives the cake its structure. For a gluten-free option, consider using a 1:1 gluten-free flour blend.
-
Unsweetened Cocoa Powder (¾ cup): This is what gives the cake its rich chocolate flavor. Make sure to use unsweetened for the best results!
-
Baking Soda (1 tsp): Helps the cake to rise beautifully. Always check the expiration date—old baking soda can lead to flat cakes!
-
Baking Powder (1 tsp): Works in tandem with baking soda to create that perfect fluffiness.
-
Salt (½ tsp): Just a pinch to enhance all the flavors.
-
Ground Cinnamon (1 tsp): A warm touch of spice marries perfectly with chocolate. If you want to kick it up a notch, try adding a bit of chili powder for heat!
-
Eggs (2 large): Binds everything together! For an egg-free version, substitute with flax eggs (1 tablespoon flaxseed meal mixed with 2.5 tablespoons water per egg).
-
Vegetable Oil (½ cup): Keeps the cake moist and adds richness. Melted coconut oil is a fantastic alternative if you want a hint of tropical flavor.
-
Vanilla Extract (1 tsp): Use pure vanilla extract for an extra flavor boost. Consider experimenting with almond extract for a different twist!
-
Chocolate Chips (optional, ½ cup): Because who doesn’t love a little extra chocolate? Dark, semi-sweet, or even white chocolate chips work beautifully here.
Step-by-Step Instructions
Alright, here we go! Let’s make some chocolate magic together:
-
Preheat the Oven: Start by preheating your oven to 350°F (175°C). This ensures your cake bakes evenly from the moment you put it in!
-
Prepare Your Pans: Grease and flour two 9-inch round cake pans (or a 9×13 rectangular pan if you prefer). You can also line them with parchment paper for easy removal.
-
Grate Your Zucchini: Grab that gorgeous zucchini and give it a good wash. Then, using a box grater or food processor, grate it finely. You don’t even need to peel it; the skin is where the nutrients hide! Pat the grated zucchini with a paper towel to remove some excess moisture (but don’t dry it out completely!).
-
Mix Dry Ingredients: In a large mixing bowl, whisk together the all-purpose flour, cocoa powder, baking soda, baking powder, salt, and cinnamon. This helps combine everything evenly so you don’t get those pesky clumps.
-
Blend Sugars: In another bowl, beat together the granulated sugar, brown sugar, and eggs. Use a hand mixer or a whisk for about two minutes until it’s light and fluffy. This step introduces air into the mixture for a lovely rise!
-
Add the Wet Ingredients: Stir in the vegetable oil and vanilla extract into the sugar-egg mixture. Give it a good mix! The batter should start to look glossy and thick.
-
Combine Wet and Dry: Gradually mix the dry ingredients into the wet ingredients. Use a spatula to gently fold the flour mixture until you can barely see the flour. There’s no need to overmix; lumps are totally okay!
-
Add Zucchini and Chocolate Chips: Now, fold in the grated zucchini and chocolate chips (if using). The batter will be thick and beautifully speckled with green shreds and chocolate bits.
-
Pour and Bake: Divide the batter evenly between your prepared pans (or pour it all into the rectangular pan). Bake in the preheated oven for 25-30 minutes. Keep an eye on them! The cakes are done when a toothpick inserted in the center comes out clean.
-
Cool and Frost: Once baked, let the cakes cool in the pans for about 10 minutes before transferring them to wire racks to cool completely. If you want, frost them with your favorite chocolate frosting or simply dust with powdered sugar for a more rustic look.
Pro Tips:
- Always let the cake cool completely before frosting to avoid melting the frosting off!
- For an added layer of moistness, brush the layers with a simple syrup made from equal parts sugar and water while they’re still warm.
Serving Suggestions
When it comes to serving this decadent Chocolate Zucchini Cake, presentation can elevate the experience. To plate, slice generous pieces and arrange them on a beautiful cake stand or platter. Add a dollop of whipped cream or a scoop of vanilla ice cream on the side for that heavenly touch. Decorate with grated chocolate or fresh berries for an elegant finish. Your friends and family won’t be able to resist a second slice!
Recipe Variations
The beauty of this Chocolate Zucchini Cake is how easily it can adapt to your taste buds or dietary needs! Here are a few fun variations to jazz things up:
- Nutty Delight: Toss in a handful of chopped walnuts or pecans for a crunchy texture.
- Spicy Chocolate: Add a pinch of cayenne or chili powder to the batter for a surprising kick that pairs beautifully with chocolate.
- Gluten-Free Option: Substitute the all-purpose flour with almond flour or a gluten-free baking blend to make it gluten-free.
- Boozy Twist: Drizzle a bit of Baileys or coffee liqueur into the batter for a grown-up dessert!
- Fruit Fusion: Swap out some of the zucchini for grated carrots or even finely chopped apples for an exciting flavor twist.
Chef’s Notes
This Chocolate Zucchini Cake holds a special place in my heart—and my recipe box! Each time I bake it, it brings me back to sunny summer days spent in my mom’s kitchen. Over the years, I’ve played around with different flours and sugars, trying to find the perfect balance that keeps everyone begging for the recipe. I love how the humble zucchini, often dismissed, can transform a simple chocolate cake into something magical. And if you ever find yourself too busy to bake, I’ve whipped this up with just 10 minutes of prep time—so you really can indulge in that sweet chocolate craving anytime!
FAQs and Troubleshooting
-
Why is my cake dense?
If your cake turned out dense, it’s likely due to overmixing the batter. When incorporating dry ingredients, mix only until combined. Also, check your baking powder and soda expiration dates—they can lose potency over time. -
Can I use frozen zucchini?
Absolutely! Just make sure to thaw it and drain off any excess moisture. Frozen zucchini works beautifully in this recipe, especially since the texture will blend seamlessly into the cake. -
How do I store leftovers?
Store any leftover cake in an airtight container at room temperature for 2-3 days. You can also refrigerate it for up to a week. If you want to freeze it, wrap each slice tightly in plastic wrap and place it in a freezer-safe bag. -
Why is my frosting sliding off?
If your frosting slips off the cake, it might be because the cake is still warm, or it may not have cooled properly. Ensure the cake layers are completely cool before frosting them. A chilled cake also helps the frosting stay in place!
Nutritional Info
While I don’t typically dive into the numbers too much, a serving of this cake can roughly provide you with about 300 calories, depending on the frosting and portion size. It also packs in some fiber thanks to the zucchini, making it a tad more nutritious than your average dessert!
Now that you’ve got all the details, it’s time to take to your kitchen and create your very own Chocolate Zucchini Cake! I can’t wait to hear how it turns out. Happy baking, friends!
Print
The Ultimate Chocolate Zucchini Cake
- Total Time: 40 minutes
- Yield: 8 servings 1x
- Diet: Vegetarian
Description
A delightful Chocolate Zucchini Cake that combines rich chocolate flavor with hidden zucchini for a moist and tender dessert.
Ingredients
- 2 cups grated Zucchini
- 1 cup Granulated Sugar
- ½ cup Brown Sugar
- 1½ cups All-Purpose Flour
- ¾ cup Unsweetened Cocoa Powder
- 1 tsp Baking Soda
- 1 tsp Baking Powder
- ½ tsp Salt
- 1 tsp Ground Cinnamon
- 2 large Eggs
- ½ cup Vegetable Oil
- 1 tsp Vanilla Extract
- ½ cup Chocolate Chips (optional)
Instructions
- Preheat the oven to 350°F (175°C).
- Prepare your pans by greasing and flouring two 9-inch round cake pans or a 9×13 rectangular pan.
- Grate the zucchini and pat it with a paper towel to remove some excess moisture.
- Mix dry ingredients in a large mixing bowl: flour, cocoa powder, baking soda, baking powder, salt, and cinnamon.
- Blend sugars and eggs in another bowl until light and fluffy.
- Add the vegetable oil and vanilla extract to the sugar-egg mixture and mix until glossy.
- Combine the dry ingredients with the wet ingredients gently until just incorporated.
- Fold in the grated zucchini and chocolate chips if using.
- Pour the batter into the prepared pans and bake for 25-30 minutes.
- Cool the cakes in the pans for 10 minutes then transfer to wire racks to cool completely.
Notes
For an added layer of moistness, brush the cake layers with simple syrup while still warm.
- Prep Time: 10 minutes
- Cook Time: 30 minutes
- Category: Dessert
- Method: Baking
- Cuisine: American
Nutrition
- Serving Size: 1 slice
- Calories: 300
- Sugar: 25g
- Sodium: 200mg
- Fat: 10g
- Saturated Fat: 1.5g
- Unsaturated Fat: 8.5g
- Trans Fat: 0g
- Carbohydrates: 45g
- Fiber: 3g
- Protein: 5g
- Cholesterol: 50mg
Keywords: chocolate cake, zucchini cake, dessert, baking, moist cake
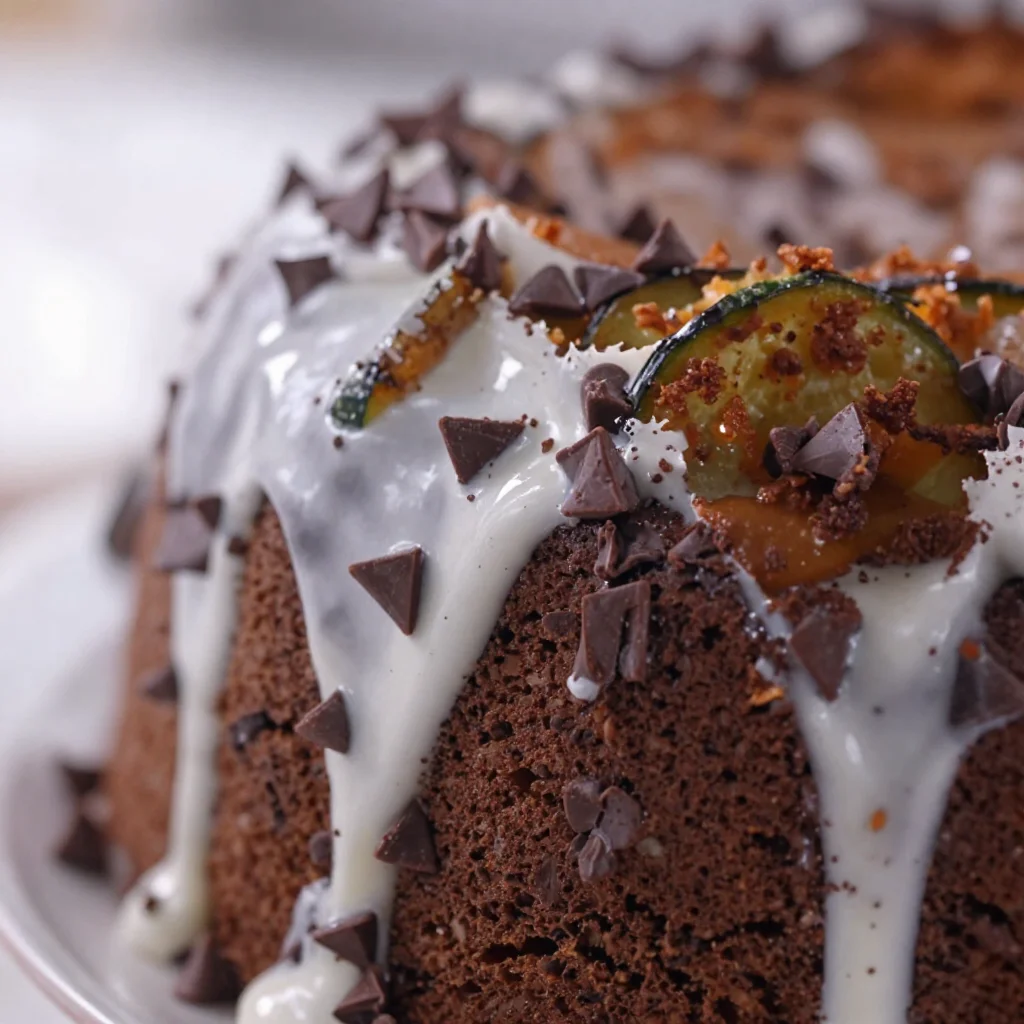
Decadent Chocolate Zucchini Cake: Beginner-Friendly Recipe
Death by Chocolate Zucchini Cake: A Slice of Heaven
Welcome to my kitchen! Today, we’re diving into a dessert that’s going to be the ultimate treat for any chocolate lover out there: Death by Chocolate Zucchini Cake! Before you raise an eyebrow at the idea of zucchini sneaking its way into a chocolate cake, let me assure you — this cake is going to be your new obsession. It’s moist, rich, and just the right amount of chocolatey. And the best part? You won’t even notice there’s zucchini in it!
I remember the first time I made this delectable cake. It was a rainy Saturday afternoon, and I was feeling a bit adventurous. We had a few zucchinis from our garden, and I thought, why not combine them with my all-time favorite ingredient—chocolate? As the cake baked, the kitchen filled with the most intoxicating aroma, and I couldn’t wait to try it. When I finally took that first bite, I was transported to a cocoa wonderland. The zucchini lent a subtle sweetness and moistness, making it a cake like no other. Ever since then, this recipe has been a household staple, always bringing smiles (and forks) to the table.
Now, I’m excited to share it with you! So, let’s grab our aprons and get ready to make this incredible Death by Chocolate Zucchini Cake!
Personal Story
Growing up, my grandmother had a way of making any dish feel special. Her secret? A dash of love and a sprinkle of nostalgia, which worked wonders in the kitchen. One summer, I remember visiting her, and herbs were blooming like crazy in her garden. As we walked through the rows of tomatoes and cucumbers, she suddenly exclaimed, “Olivia, let’s make something chocolatey!” And there it was—the first time I tasted chocolate zucchini cake.
We enthusiastically grated zucchinis and measured out cocoa powder, sharing stories and laughing as the cake came together. I can still hear her voice, urging me to always embrace unconventional ingredients — they can bring a delightful surprise. That day, I learned that magic isn’t just in the recipe, it’s in the love and memories that turn a simple cake into something unforgettable. Since then, this cake has become my go-to for gatherings, instantly creating joy for everyone around the table.
Ingredients
Here’s what you’ll need to bring this chocolatey delight to life:
-
Zucchini (2 cups, grated)
Fresh zucchini adds moisture and a subtle sweetness without being overpowering. If you don’t have zucchini, you could substitute finely grated carrots for a similar texture and flavor! -
All-purpose flour (1 ¾ cups)
This is the backbone of the cake, providing structure. If you’re looking for a gluten-free option, almond flour works remarkably well, but be mindful of the cake’s texture. -
Unsweetened cocoa powder (½ cup)
Use high-quality cocoa powder for the richest chocolate flavor. If you’re feeling adventurous, try dark cocoa powder for an intense taste. -
Granulated sugar (1 cup)
This sweetens the deal! If you prefer a less sugary cake, you can swap half of the sugar for a natural sweetener like coconut sugar or honey (just adjust the liquids accordingly). -
Brown sugar (½ cup)
For a hint of molasses flavor and added moisture. You could also use maple sugar here for a unique twist! -
Baking soda (1 tsp)
Essential for leavening! Make sure it’s fresh for a good rise. -
Baking powder (½ tsp)
This works alongside the baking soda to help your cake rise beautifully. -
Salt (½ tsp)
A pinch of salt enhances the flavors and balances the sweetness. -
Eggs (2 large)
These bring everything together and add richness. For an egg-free option, try using two flax eggs (2 tablespoons of flaxseed meal mixed with 6 tablespoons of water) instead! -
Vegetable oil (½ cup)
The oil keeps the cake moist. You can use melted coconut oil or unsweetened applesauce for a healthier option. -
Vanilla extract (1 tsp)
Pure vanilla extract adds warmth and depth to the flavor. Always opt for pure over artificial! -
Chocolate chips (1 cup, optional)
Because who can resist more chocolate? Use semisweet or dark chocolate chips for an extra gooey texture.
Step-by-Step Instructions
-
Preheat Your Oven
Start by preheating your oven to 350°F (175°C). This step is crucial! A hot oven ensures that your cake rises properly and sets well. -
Prepare the Pan
Grease a 9×13 inch baking pan with non-stick spray or line it with parchment paper. This will prevent your cake from sticking and makes for easier cleanup. Plus, who doesn’t love a clean kitchen? -
Grate the Zucchini
Grate your fresh zucchini using a box grater or a food processor. You don’t need to peel it – the skin adds a lovely color and nutrients! Once grated, squeeze out any excess moisture using a clean kitchen towel. This prevents your cake from being too wet. -
Mix Dry Ingredients
In a large mixing bowl, whisk together the flour, cocoa powder, baking soda, baking powder, and salt. This helps evenly distribute the leavening agents and ensures your cake rises evenly. -
Combine Wet Ingredients
In another bowl, combine the granulated sugar, brown sugar, vegetable oil, eggs, and vanilla extract. Whisk well until everything is fully incorporated and the mixture is slightly frothy. This is where the magic begins, as the sugars and fats combine to create a rich base. -
Combine Wet and Dry Mixtures
Gently fold your wet ingredients into the dry ingredients using a spatula. Be careful not to over-mix! This can lead to tough cake. You want to combine them just until the flour is no longer visible. -
Add Zucchini and Chocolate Chips
Now, fold in the grated zucchini and chocolate chips! This is the exciting part — you can already start to envision how decadent this cake is going to be. Don’t be shy; mix until just combined. -
Pour into the Pan
Pour the batter into the prepared baking pan and use a spatula to smooth the top for an even bake. Don’t worry if the batter looks a little thick; that’s perfectly normal! -
Bake
Place in the oven and bake for 30-35 minutes, or until a toothpick inserted in the center comes out clean. Your kitchen will smell heavenly — a definite winner in the aroma department! -
Cool the Cake
Once baked, remove the cake from the oven and let it cool in the pan for about 15 minutes. Then, transfer the cake to a wire rack to cool completely. Trust me; letting the cake cool will make for a better texture! -
Frost if Desired
If you like (and why wouldn’t you?), frost your cooled cake with a chocolate ganache or your favorite chocolate frosting. For an extra touch, top it with additional chocolate chips or chopped nuts!
Serving Suggestions
When it comes to serving this decadent Death by Chocolate Zucchini Cake, presentation is key! Slice into generous pieces and dust with powdered sugar or drizzle with a rich chocolate ganache. For a delightful contrast, serve it alongside a scoop of vanilla bean ice cream, or fresh berries to add a burst of color and freshness. Your guests will swoon with delight!
Recipe Variations
-
Nutty Addition: Fold in some chopped walnuts or pecans for a crunchy texture that complements the softness of the cake.
-
Spiced Up: Add a teaspoon of cinnamon or espresso powder to enhance the chocolate flavor and give the cake a warm undertone.
-
Vegan Twist: Substitute eggs with flax eggs and use plant-based milk in place of regular milk in your frosting for a vegan-friendly version.
-
Fruit Fusion: Experiment by adding ½ cup of mashed bananas or applesauce in place of part of the oil for a fruity sweetness.
Chef’s Notes
This recipe was born from a beautiful combination of heritage and creativity in the kitchen. I love how quick it is to prepare — perfect for those evenings when you need to whip up something sweet but satisfying. Over the years, I’ve passed on this recipe to friends and family, each adding their twists. I remember my sister once added a hint of peppermint extract for a special holiday treat, and it was a game changer! Ultimately, I find the most joy is in those sweet moments shared around the table — with laughter, stories, and, of course, a bit of cake.
FAQs and Troubleshooting
Q: What if my cake comes out too dry?
A: Overbaking can lead to a dry cake. Make sure to check the cake a few minutes before the recommended time. Insert a toothpick, and if it comes out with a few moist crumbs, it’s done!
Q: Can I make this cake ahead of time?
A: Absolutely! This cake actually tastes better the next day as the flavors meld. Just keep it covered at room temperature.
Q: How do I store leftovers?
A: Store any leftover cake in an airtight container at room temperature for up to three days. It will stay moist and delicious!
Q: My cake didn’t rise, what happened?
A: This could be due to expired baking powder or baking soda. Always check the freshness of your leavening agents before baking to ensure the perfect rise.
Nutritional Info
While I typically steer away from counting calories, for those of you keeping track, a slice typically contains around 250 calories, depending on the ingredients used and portion sizes. It’s a comforting treat, so enjoy every bite!
So, are you ready to bring this delightful Death by Chocolate Zucchini Cake into your kitchen? I can’t wait for you to experience the magic of this recipe! Remember, cooking is all about having fun, being adventurous, and making wonderful memories. Happy baking!
Print
Death by Chocolate Zucchini Cake
- Total Time: 50 minutes
- Yield: 12 servings 1x
- Diet: Vegetarian
Description
A rich and moist chocolate cake that cleverly incorporates zucchini for added sweetness and moisture, perfect for chocolate lovers.
Ingredients
- 2 cups Zucchini, grated
- 1 ¾ cups All-purpose flour
- ½ cup Unsweetened cocoa powder
- 1 cup Granulated sugar
- ½ cup Brown sugar
- 1 tsp Baking soda
- ½ tsp Baking powder
- ½ tsp Salt
- 2 large Eggs
- ½ cup Vegetable oil
- 1 tsp Vanilla extract
- 1 cup Chocolate chips (optional)
Instructions
- Preheat your oven to 350°F (175°C).
- Prepare a 9×13 inch baking pan by greasing it or lining it with parchment paper.
- Grate the fresh zucchini and squeeze out excess moisture.
- Mix the dry ingredients in a large bowl: flour, cocoa powder, baking soda, baking powder, and salt.
- Combine the wet ingredients in another bowl: granulated sugar, brown sugar, vegetable oil, eggs, and vanilla extract.
- Fold the wet mixture into the dry mixture until just combined.
- Add the grated zucchini and chocolate chips to the batter and mix until incorporated.
- Pour the batter into the prepared baking pan, smoothing the top.
- Bake for 30-35 minutes or until a toothpick comes out clean.
- Cool the cake in the pan for 15 minutes, then transfer to a wire rack to cool completely.
- Frost with chocolate ganache or frosting if desired.
Notes
For a healthier option, substitute vegetable oil with applesauce or melted coconut oil. You can also experiment by adding nuts or spices to the batter.
- Prep Time: 15 minutes
- Cook Time: 35 minutes
- Category: Dessert
- Method: Baking
- Cuisine: American
Nutrition
- Serving Size: 1 slice
- Calories: 250
- Sugar: 20g
- Sodium: 200mg
- Fat: 10g
- Saturated Fat: 2g
- Unsaturated Fat: 8g
- Trans Fat: 0g
- Carbohydrates: 35g
- Fiber: 2g
- Protein: 4g
- Cholesterol: 50mg
Keywords: chocolate cake, zucchini cake, dessert, baking, chocolate lover
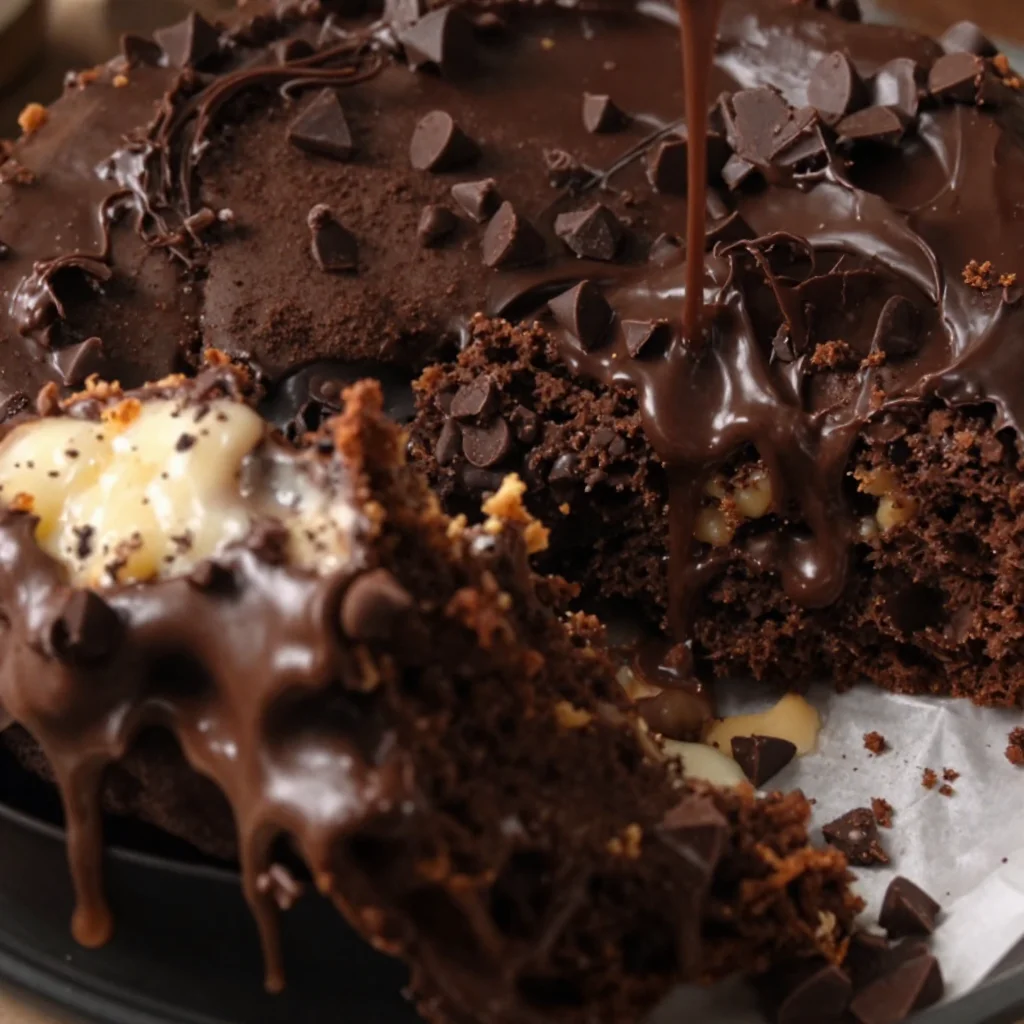
Beginner-friendly fudgy chocolate cake from scratch
The Ultimate Super Rich and Fudgy Chocolate Cake
Welcome to my kitchen! Today we’re diving deep into the world of chocolate—a sweet escape that speaks to all of us. I’m thrilled to share with you my Super Rich and Fudgy Chocolate Cake, a luscious dessert that feels like a warm hug on a plate. This cake is perfect for celebrations, cozy get-togethers, or just because you deserve it! Imagine sinking your fork into a moist, decadent slice filled with intense chocolate flavor. Doesn’t that make your heart sing?
Growing up, chocolate cake was a staple at every family gathering. My mom would whip up her famous recipe for birthdays, holidays, and even the random Tuesday just because. I can still picture her standing over the mixing bowl, her apron dusted with flour, humming a tune while the rich aroma of melting chocolate enveloped our cozy kitchen. This cake was a family favorite, not just for its flavor, but for the memories it created around the dinner table. It was in those sweet moments of laughter and love, sharing a slice of cake with family, that I learned how food can connect us in the most powerful ways.
Now, it’s your turn to create your own memories with this delicious treat! So, let’s get started!
Ingredients
To make the best Super Rich and Fudgy Chocolate Cake, you’ll need the following ingredients:
-
1 ¾ cups all-purpose flour
A must-have in any cake, flour gives structure. If you need a gluten-free option, swap half of it with almond flour for a nutty twist! -
2 cups granulated sugar
Sugar adds sweetness and moisture. For a caramel touch, use brown sugar or try coconut sugar for a healthier alternative. -
¾ cup unsweetened cocoa powder
This is the star of the show! It brings that deep chocolate flavor. Look for Dutch-processed cocoa for a smoother taste, or use raw cacao for health benefits. -
1 ½ teaspoons baking powder
Helps the cake rise. If you’re out of baking powder, you can use baking soda, but double the amount using a bit of vinegar or yogurt for a tender crumb. -
1 teaspoon baking soda
Critical for a fluffy texture. Make sure it’s fresh! A little expired baking soda can leave your cake dense. -
1 teaspoon salt
A pinch of salt enhances the flavors. Kosher salt works well, but sea salt adds a lovely crunch when sprinkled on top! -
2 large eggs
They provide moisture and help bind. For a vegan twist, use flax eggs (1 tablespoon ground flaxseed mixed with 3 tablespoons water per egg). -
1 cup whole milk
Rich buttermilk can be substituted if you want extra richness, or use almond milk for a plant-based version. -
½ cup vegetable oil
Oil keeps the cake moist. Canola oil or melted coconut oil are fantastic alternatives. -
2 teaspoons vanilla extract
Adds depth to flavor. Don’t skip this! Use pure vanilla extract for the best taste. -
1 cup boiling water
Surprised? Adding boiling water helps the cocoa bloom, enhancing the chocolate flavor. You can replace it with brewed coffee for a mocha taste (trust me, it’s magic!).
Step-by-Step Instructions
-
Preheat the Oven: Preheat your oven to 350°F (175°C). Greasing and lining two 9-inch round cake pans with parchment paper will make it easier to remove the cakes later. A quick swipe of non-stick spray or butter works wonders!
-
Mix Dry Ingredients: In a large mixing bowl, combine the flour, sugar, cocoa powder, baking powder, baking soda, and salt. Whisk together until well combined. Pro tip: Sifting the cocoa powder can help eliminate any lumps!
-
Combine Wet Ingredients: In another bowl, whisk together the eggs, milk, oil, and vanilla until smooth and frothy. This step infuses air into your batter, which adds to the fluffiness of the cake.
-
Blend Together: Pour the wet ingredients into the dry ingredients and mix until just combined. Be careful not to overmix; a few lumps are fine. Your stiff batter will loosen up with the next step!
-
Add Boiling Water: Slowly pour in the boiling water and stir. This will thin out your batter, which might look a little strange, but trust me—it’s supposed to be this way! This step is key—it makes for an ultra-moist cake.
-
Bake: Divide the batter evenly between the prepared cake pans. Tap them lightly on the counter to release any air bubbles. Bake for 30-35 minutes or until a toothpick inserted in the center comes out clean.
-
Cool: Let the cakes cool in the pans for about 10 minutes, then transfer them to wire racks to cool completely. This cooling step is essential for making your frosting spreadable!
-
Frost and Serve: Once the cakes have cooled, layer and frost with your favorite chocolate frosting (I’ll share my easy recipe soon). You can also sprinkle some sea salt on top for a sweet-salty contrast.
Serving Suggestions
Serve slices of this decadent cake on a beautiful plate with a scoop of vanilla ice cream on the side. Drizzle a little chocolate sauce or a berry compote over the top for that extra “wow” factor. It’s perfect for impressing guests or indulging on a cozy night in.
Recipe Variations
-
Chocolate Mint Cake: Add a teaspoon of peppermint extract to the batter for a refreshing twist!
-
Espresso Delight: Stir in a tablespoon of instant espresso powder to deepen the chocolate flavor.
-
Nutty Chocolate Cake: Fold in half a cup of chopped nuts (walnuts or pecans) for an added crunch.
-
Fruit-Filled Indulgence: Add in a cup of fresh raspberries or cherries for a fruity contrast.
-
Vegan Variation: Use plant-based milk, flax eggs, and coconut oil to make this cake completely vegan without sacrificing flavor!
Chef’s Notes
This recipe is a cherished hit among friends and family. I’ve evolved it over the years, experimenting with different flours and extracts until I found the perfect balance. One of my funniest kitchen disasters happened when I accidentally swapped the sugar for salt—let’s just say that cake did NOT make it out of the pan! But every baking misstep has taught me so much about the magic happening behind the scenes. That’s the beauty of cooking—you learn, you grow, and you develop a passion that’s truly unique.
FAQs and Troubleshooting
-
Why is my cake dense?
A dense cake can result from overmixing the batter or using old leavening agents. Make sure to mix just until combined and check the expiration dates on your baking powder and soda. -
How do I store the cake?
If you have leftovers (which is rare!), store them in an airtight container at room temperature for 3-4 days. You can also refrigerate it, but bring it to room temperature before serving for the best texture. -
Can I make this cake ahead of time?
Absolutely! You can bake and cool the cake a day in advance. Just keep it tightly wrapped. Frosting can also be made a day in advance and stored in the fridge—just give it a quick whisk before using. -
What can I do if my frosting is too thick?
If your frosting is too thick to spread, you can thin it out by adding a tablespoon of milk or cream. Mix in a little at a time until you get the right consistency.
Nutritional Info
While this cake is a special treat and not necessarily a “health food,” it’s all about balance, right? Each slice (without frosting) typically contains about 350 calories, with a good amount of richness that’s worth every bite.
So there you have it—my Super Rich and Fudgy Chocolate Cake recipe! With every step, I hope you filled your kitchen with warmth and love, just like my mother did. Don’t forget to enjoy the little moments—the laughter, the smells, and the taste of success. Happy baking!
Print
Super Rich and Fudgy Chocolate Cake
- Total Time: 50
- Yield: 8 servings 1x
- Diet: Vegetarian
Description
A luscious chocolate cake that’s moist, decadent, and filled with intense chocolate flavor.
Ingredients
- 1 ¾ cups all-purpose flour
- 2 cups granulated sugar
- ¾ cup unsweetened cocoa powder
- 1 ½ teaspoons baking powder
- 1 teaspoon baking soda
- 1 teaspoon salt
- 2 large eggs
- 1 cup whole milk
- ½ cup vegetable oil
- 2 teaspoons vanilla extract
- 1 cup boiling water
Instructions
- Preheat the Oven: Preheat your oven to 350°F (175°C) and prepare two 9-inch round cake pans.
- Mix Dry Ingredients: In a large bowl, combine the flour, sugar, cocoa powder, baking powder, baking soda, and salt.
- Combine Wet Ingredients: In another bowl, whisk together the eggs, milk, oil, and vanilla.
- Blend Together: Pour the wet ingredients into the dry ingredients and mix until just combined.
- Add Boiling Water: Slowly pour in the boiling water and stir until smooth.
- Bake: Divide the batter between the prepared pans and bake for 30-35 minutes.
- Cool: Let the cakes cool in the pans for 10 minutes before transferring them to wire racks.
- Frost and Serve: Layer and frost with your favorite chocolate frosting.
Notes
For extra flavor variations, consider adding peppermint extract, espresso powder, or fresh fruits.
- Prep Time: 15
- Cook Time: 35
- Category: Dessert
- Method: Baking
- Cuisine: American
Nutrition
- Serving Size: 1 slice
- Calories: 350
- Sugar: 35g
- Sodium: 400mg
- Fat: 12g
- Saturated Fat: 3g
- Unsaturated Fat: 7g
- Trans Fat: 0g
- Carbohydrates: 54g
- Fiber: 3g
- Protein: 6g
- Cholesterol: 40mg
Keywords: chocolate cake, dessert, rich cake, fudgy cake, baking
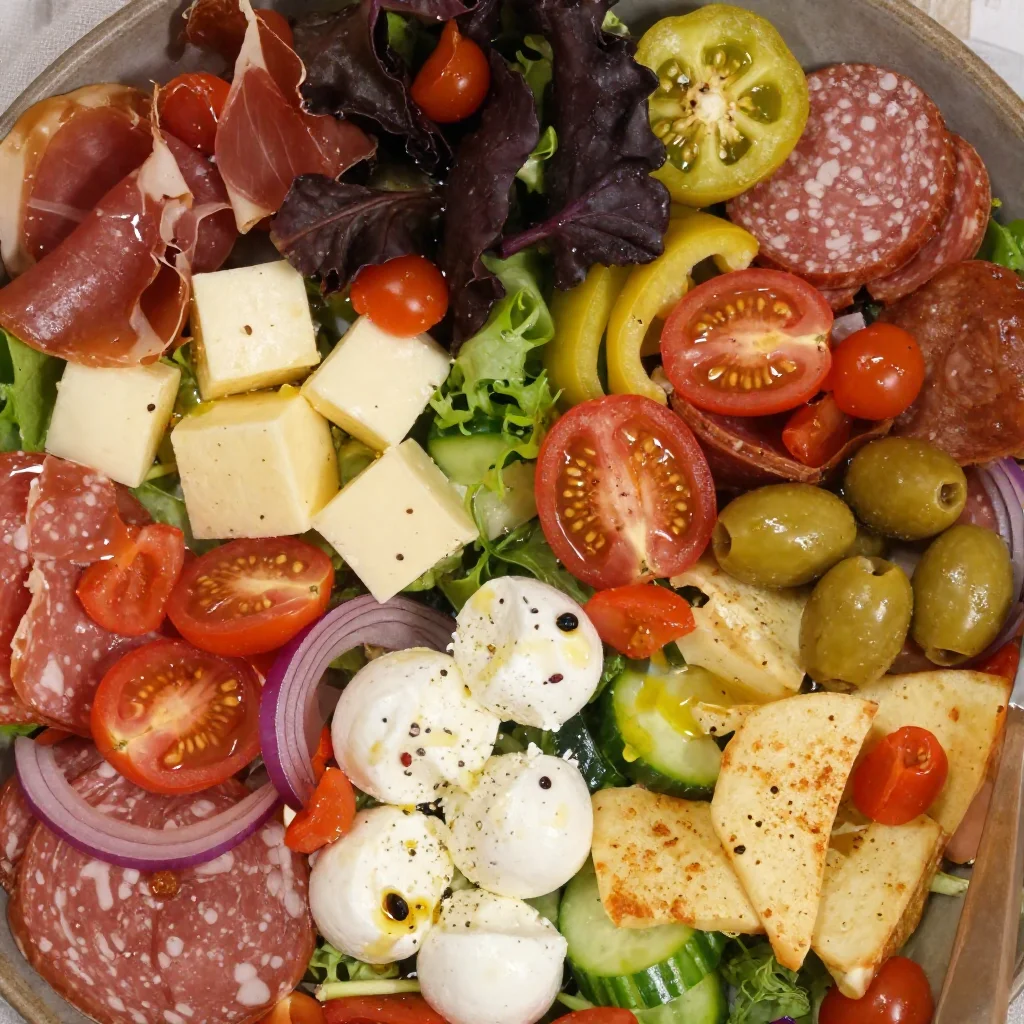
Minute Italian Antipasto Salad for Easy Meal Prep
The Ultimate Italian Antipasto Salad: A Flavorful Journey for the Senses
Welcome to my kitchen, food lovers! Today we’re diving into one of my absolute favorite dishes: the Italian Antipasto Salad. This vibrant medley of colorful ingredients is the perfect starter or light meal that brings a bit of Italy right to your table. As a home cook who thrives on creating meals that spark connection, you can imagine how excited I am to share this recipe with you!
This salad is more than just a collection of ingredients; it’s a celebration of flavors, textures, and those precious moments we share around the dining table. Whether you’re prepping for a casual dinner, a festive holiday gathering, or just craving something fresh and delightful, this Antipasto Salad is sure to impress. Picture crispy greens tossed with marinated olives, savory meats, and creamy cheese—it’s a feast for the eyes as much as the palate!
Now, let’s talk about what makes this dish special. It’s incredibly versatile! You can customize it with your favorite ingredients or whatever you have on hand. There’s no strict rule here; if it makes your taste buds tingle, toss it in! Plus, it’s a fantastic way to use up those leftover odds and ends from your fridge, so let’s get started!
A Salty, Savory Memory
I still remember the first time I had a true Italian antipasto salad. I was in a small, rustic restaurant in Florence, where the air was thick with the alluring aromas of garlic and herbs. I was there with my family; we’d spent the day exploring the cobblestone streets and marvelling at the architecture. When this beautiful salad landed on our table, my heart skipped a beat. Vibrant red tomatoes, lush green basil, and a mix of rich, savory meats danced together, each bite seemingly singing a different note.
My grandmother, who was a fabulous cook herself, encouraged us to try everything. "Taste the colors," she would say, as she handed me a slice of crisp pepperoni along with a smattering of tangy mozzarella. That meal was more than just food—it was a familial bonding experience that cemented my love for the art of cooking and sharing. Now, I aim to recreate that joyous feeling in my own kitchen by making Antipasto Salad a staple at family gatherings.
Ingredients
Gathering your ingredients is half the fun! Here’s what you’ll need for a delightful Antipasto Salad, along with some tips for substitutions and insights:
-
Mixed Greens: A nice blend of arugula, romaine, and spinach works wonderfully. Feel free to use whatever greens you prefer; kale adds an extra crunch!
-
Cherry Tomatoes: These bite-sized gems add sweetness. Substitute with any halved tomatoes, like grape varieties or even sun-dried for a richer taste.
-
Cured Meats: Classic Italian choices like salami and prosciutto bring that savory, umami punch. You can use turkey or chicken slices for a lighter version, or even go vegetarian with marinated artichokes instead.
-
Cheese: Mozzarella pearls or provolone are traditional, but feta adds a tangy twist. If you’re dairy-free, try a vegan cheese!
-
Olives: A mix of green and black olives offers complexity in flavor. If you’re not a fan, capers or pickled veggies can provide a similar zing.
-
Peppers: Roasted bell peppers add sweetness and color. Jarred, pickled peppers can work in a pinch if fresh ones aren’t available.
-
Artichoke Hearts: Marinated or canned artichoke hearts can elevate the flavor profile. For a twist, you could use caponata (a Sicilian eggplant dish) for depth.
-
Olive Oil: A high-quality extra virgin olive oil will make your dressing shine. You can replace it with avocado oil or even flavored oils for an added twist.
-
Balsamic Vinegar: This brings acidity and balances out the flavors. If you want a sweeter dressing, cherry vinegar works beautifully too.
-
Herbs: Fresh basil or oregano is ideal, but dried herbs will work if that’s what you have on hand.
Now that you have your ingredients ready, it’s time to get cooking!
Step-by-Step Instructions
Let’s whip up this scrumptious salad together! Just follow these simple steps, and I promise you’ll be amazed at how easy it is to create this Italian delight.
-
Prep your greens: Start by washing your mixed greens in cold water. Spin them dry in a salad spinner or gently pat them with a towel. This step is crucial; no one likes a soggy salad!
-
Chop your vegetables: Halve the cherry tomatoes and dice the bell peppers into bite-sized pieces. Make sure you make these pieces uniform for even distribution in your salad.
-
Tear that mozzarella: If you’re using mozzarella balls, simply drain them and toss them in. If you’re using larger blocks, chunk them up generously. The cheese should be in pieces that meld into the salad without overpowering it.
-
Prep the meats: Slice your cured meats into strips or bite-sized pieces. Maybe have a little taste along the way—quality control, right?
-
Mix it up: In a large bowl, combine your greens, cherry tomatoes, bell peppers, olives, meat, cheese, and artichokes. Here’s where you get to be an artist, layering those colors beautifully as you go!
-
Dress it right: In a separate small bowl, whisk together olive oil and balsamic vinegar. A ratio of 3:1 (oil to vinegar) is just right for drizzling flavors throughout. Add minced garlic, salt, and pepper to taste. If you want a bit of sweetness, a teaspoon of honey or maple syrup can enhance this dressing beautifully.
-
Toss and serve: Drizzle your dressing over the salad and gently toss everything together. Be gentle, so you keep the integrity of the ingredients. Serve it on a large platter or in bowls, and watch the wow factor rise!
Tips from the Chef:
- Make your dressing in advance so the flavors can meld together.
- This salad is better after sitting for about 30 minutes, letting the ingredients get to know each other.
- If you have any leftovers, they make a fantastic sandwich filler for lunch the next day!
Serving Suggestions
To serve your Italian Antipasto Salad in style, consider plating it on a large wooden board or a colorful ceramic dish to make the colors pop! Drizzle a bit more olive oil over the top and sprinkle some fresh herbs right before serving for that final touch. Pair this salad with crusty bread, and you’ve got a meal that’s ready to impress!
Recipe Variations
If you feel adventurous, here are some creative twists you might consider:
-
Mediterranean Twist: Swap out the meats for grilled veggies like zucchini and eggplant, and use feta cheese for a Greek vibe.
-
Spicy Kick: Add sliced jalapeños or crushed red pepper flakes to the dressing to bring heat to the party.
-
Citrus Zing: Use citrus juice like lemon or lime instead of balsamic vinegar for a bright, zesty dressing.
-
Whole-Grain Goodness: Add chickpeas or quinoa to amp up the protein and make this salad even more filling.
-
Seasonal Surprise: Incorporate seasonal ingredients, like roasted butternut squash in fall or fresh peas in spring, to keep the salad exciting throughout the year.
Chef’s Notes
This recipe has evolved over the years—and isn’t that the beauty of cooking? I started with a more traditional approach, but I’ve learned to adapt based on what’s fresh and available. I once tried adding grilled chicken and was surprised at how well it paired! Now, I recreate this salad at all sorts of events, and each time, it turns out a bit differently based on new inspirations. Cooking is about experimentation, and this dish speaks to that!
One funny memory comes to mind when I decided to go a bit fancy and use truffle oil instead of olive oil. Let’s just say, that was a little too intense! Cooking is definitely a learning process, and that’s what keeps it fun!
FAQs and Troubleshooting
-
What if I don’t have all the ingredients?
Don’t fret! This recipe is about flexibility. Use whatever you have—be it different greens, meats, or cheeses. This is a salad that embraces creativity! -
Can I make it ahead of time?
Yes! It holds up well for a day in advance. Just keep the dressing separate until ready to serve, as it can make the greens wilt if left too long. -
How do I store leftovers?
Place leftovers in an airtight container in the fridge. Consume within 2 days for the freshest taste! -
Why is my salad soggy?
This could be from too much dressing or not drying your greens fully. Give those greens a good spin or pat them dry!
Nutritional Info
This dish is packed with vitamins and nutrients from the veggies, healthy fats from olive oil, and protein from the cheese and meat, making it both satisfying and nutritious. Each serving boasts a mix of vitamins A, C, and K, along with healthy fats, offering a delightful balance to your diet!
So there you have it—the ultimate Italian Antipasto Salad to brighten your table and warm your heart. Enjoy creating memories as you savor this dish, and remember, cooking is as much about connecting with others as it is about flavor. Happy cooking, friends!
Print
Italian Antipasto Salad
- Total Time: 15 minutes
- Yield: 4 servings
- Diet: Vegetarian
Description
A vibrant medley of colorful ingredients, perfect for a starter or light meal, bringing the flavors of Italy to your table.
Ingredients
- Mixed Greens (arugula, romaine, spinach)
- Cherry Tomatoes (halved)
- Cured Meats (salami, prosciutto)
- Cheese (mozzarella pearls or provolone)
- Olives (mix of green and black)
- Peppers (roasted bell peppers)
- Artichoke Hearts (marinated or canned)
- Olive Oil (extra virgin)
- Balsamic Vinegar
- Fresh Herbs (basil or oregano)
Instructions
- Prep your greens: Wash the mixed greens in cold water and spin them dry.
- Chop your vegetables: Halve the cherry tomatoes and dice the bell peppers into bite-sized pieces.
- Tear that mozzarella: Drain and toss in mozzarella balls or chunk larger blocks.
- Prep the meats: Slice your cured meats into strips or bite-sized pieces.
- Mix it up: Combine your greens, cherry tomatoes, bell peppers, olives, meat, cheese, and artichokes in a large bowl.
- Dress it right: Whisk together olive oil and balsamic vinegar, adding garlic, salt, and pepper to taste.
- Toss and serve: Drizzle dressing over the salad, gently toss, and serve.
Notes
Make your dressing in advance to enhance flavors. This salad is better after sitting for about 30 minutes.
- Prep Time: 15 minutes
- Cook Time: 0 minutes
- Category: Salad
- Method: Mixing
- Cuisine: Italian
Nutrition
- Serving Size: 1 serving
- Calories: 350
- Sugar: 5g
- Sodium: 400mg
- Fat: 20g
- Saturated Fat: 6g
- Unsaturated Fat: 12g
- Trans Fat: 0g
- Carbohydrates: 25g
- Fiber: 5g
- Protein: 10g
- Cholesterol: 30mg
Keywords: Antipasto Salad, Italian Salad, Salad Recipe, Healthy Salad
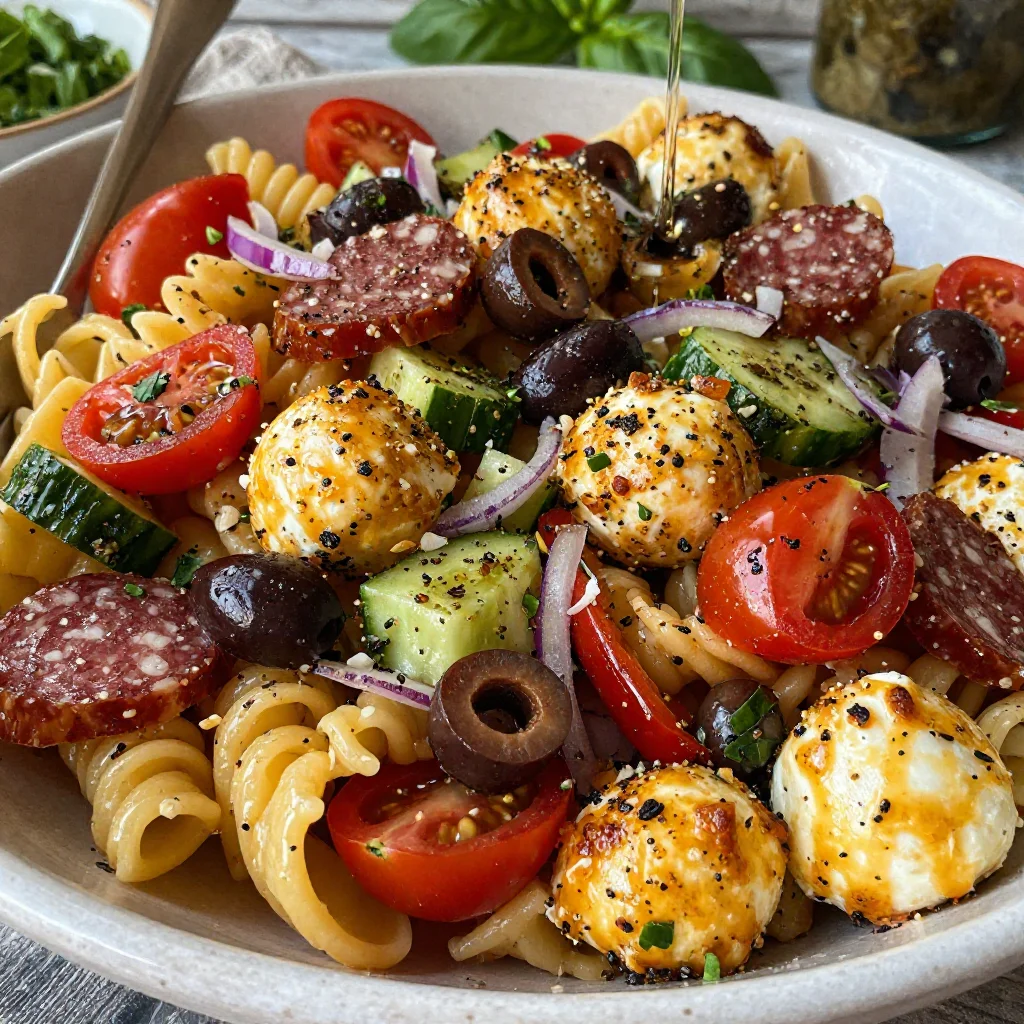
Minute Antipasto Pasta Salad for Weeknight Dinners
The Ultimate Antipasto Pasta Salad: Your Go-To Dish for Any Occasion
Welcome to my kitchen! I’m Olivia Bennett, and if there’s one dish that embodies the spirit of sharing, love, and culinary creativity, it’s an Antipasto Pasta Salad. This vibrant, colorful dish is more than just a salad; it’s a celebration of flavors and textures, a gorgeous medley that captures the essence of convivial meals, and the ultimate showstopper for any gathering—be it a cozy family dinner or a sunny picnic in the park.
Picture this: the sun is shining, friends are gathered around a picnic blanket, and the smell of grilled veggies wafts through the air. Someone brings out a bowl filled to the brim with beautifully cooked pasta, tossed with olives, salami, cheese, and a medley of fresh veggies. You can almost hear the oohs and aahs as people dive in! This Antipasto Pasta Salad not only satisfies hunger but also sparks joy, conversation, and connection.
Today, I’ll share my favorite recipe that’s as easy to whip up as it is to enjoy. Full of old-world charm and modern flair, this salad is perfect for any occasion. So grab your apron, and let’s dive into the masterpiece that is Antipasto Pasta Salad!
A Taste of Nostalgia
Growing up, Sunday dinners at my grandparents’ house were legendary. They were filled with hearty meals, laughter, and, of course, my grandmother’s famous antipasto platter. She used to create beautiful arrangements of cured meats, cheeses, marinated vegetables, and olives. I was in awe of how she could transform simple ingredients into something so magical. I remember sneaking bits of salami and mozzarella while helping her in the kitchen.
One summer, she decided to elevate our traditional antipasto by tossing everything with pasta, and just like that, the Antipasto Pasta Salad was born in our family! It became a staple for every gathering thereafter. This dish evokes memories of warmth, unity, and deliciousness, and now I can’t wait for you to create your own memories around it!
Ingredients You’ll Need
Here’s what you’re going to need for this delightful Antipasto Pasta Salad. Feel free to get creative, and remember: cooking is about personal taste!
-
Pasta (3 cups, uncooked): I love using rotini or penne for their ability to hold onto the dressing and ingredients. Gluten-free pasta works great, too, for a lighter option!
-
Olive oil (½ cup): Extra virgin is my recommended choice for fresh flavor. If you prefer a lighter taste, use a blend or avocado oil.
-
Red wine vinegar (¼ cup): This adds a delicious acidity. You can substitute with balsamic vinegar for a sweeter touch.
-
Cherry tomatoes (1 cup, halved): They pack so much flavor! Feel free to use grape tomatoes if that’s what you have on hand.
-
Mozzarella balls (1 cup): They give that creamy texture. Try using feta or vegan cheese for a different twist.
-
Salami (½ cup, chopped): A classic choice! Use pepperoni or even veggie deli slices for a vegetarian version.
-
Black olives (½ cup, pitted and halved): Their briny flavor complements everything. Green olives or kalamata olives are also great alternatives!
-
Red onion (½ small, finely chopped): This adds a nice crunch. You could swap it for green onions or chives if you prefer a milder flavor.
-
Bell pepper (1 cup, chopped): I love using red or yellow for sweetness, but any color will do.
-
Fresh basil leaves (½ cup, chopped): The aromatic touch every dish needs! Dried basil can substitute in a pinch, but fresh is best.
-
Parmesan cheese (½ cup, grated): A finishing touch that adds depth! If you’re keeping it dairy-free, nutritional yeast can be a tasty swap.
This delightful ensemble of ingredients not only makes this salad explode with flavor but also ensures it’s a feast for the eyes.
Step-by-Step Instructions
Ready to bring this delicious dish to life? Let’s get cooking!
-
Cook the Pasta: In a large pot, bring salted water to a boil. Add your pasta and cook according to package instructions until al dente (typically about 8-10 minutes). Chef’s tip: Don’t forget to reserve about a cup of pasta water before draining; you may need it for the dressing!
-
Prepare the Dressing: In a mixing bowl, combine the olive oil, red wine vinegar, salt, and pepper. Use a whisk to combine until it’s well blended. Chef hack: Add a touch of Italian seasoning or a pinch of red pepper flakes for a little kick!
-
Combine Ingredients: In a large serving bowl, combine the cooked pasta (make sure it’s cooled slightly) with cherry tomatoes, mozzarella balls, salami, olives, red onion, bell pepper, and fresh basil. Pro tip: The longer you let the pasta cool, the better—it prevents the cheese from melting!
-
Toss in the Dressing: Pour the dressing over the mixture and toss well until everything is coated. If the salad seems dry, add some reserved pasta water gradually until you reach your desired creaminess. Tip: This is where you can taste and adjust salt and pepper to your liking!
-
Chill and Serve: Cover your bowl with plastic wrap and let it chill in the fridge for at least 30 minutes. This will allow all those fabulous flavors to meld together. Chef’s note: It can also sit in the fridge for up to 2 days; just remember to give it a good stir before serving!
Serving Suggestions
When it comes to serving your Antipasto Pasta Salad, presentation is key! Serve it in a large, colorful bowl to highlight the vibrant colors of the ingredients. Garnish with extra fresh basil and a sprinkle of Parmesan on top for that finishing touch. If you’re feeling fancy, you can even serve it in individual portions for a more refined touch at a dinner party. Pair this dish with a crisp white wine or a sparkling lemonade to elevate the experience!
Recipe Variations
-
Mediterranean Twist: Swap out the salami for grilled chicken or chickpeas for a protein-packed salad.
-
Vegan Version: Use vegan cheese and add in marinated artichoke hearts for extra flavor.
-
Pesto Perfection: Mix in some pesto instead of dressing for an herby flair!
-
Spicy Kick: Add sliced jalapeños or crushed red pepper flakes to the mix for a heat level that gives your taste buds a thrill!
-
Seasonal Veggies: Feel free to add roasted zucchini, asparagus, or even corn for a seasonal twist.
Chef’s Notes
Over the years, my Antipasto Pasta Salad has evolved immensely. Initially, I simply combined pasta with whatever deli meats I had on hand. Now, I’m all about exploring the wide array of flavors available in different cultures. Every summer, I experiment with seasonal vegetables, and I often involve friends in the process so we can create together.
One hilarious moment stands out: I once tried to impress friends with this salad, but I accidentally used a jar of pickled jalapeños instead of roasted red peppers! Let’s just say, spicy pasta salad was a new experience for everyone! We had a great laugh, and I learned that cooking is part science and part adventure.
FAQs and Troubleshooting
-
What if my pasta is soggy?
If your pasta turned out mushy, avoid cooking it longer next time. Always aim for al dente, as it will continue to cook slightly even after draining. -
Can I make this salad ahead of time?
Absolutely! This salad is even better the next day, as the flavors continue to meld. Just be sure to keep it covered in the fridge. -
What can I add for extra crunch?
If you’re looking for that extra crunch, consider tossing in some roasted pine nuts or croutons right before serving. -
How can I make it gluten-free?
Use gluten-free pasta, and be sure to check your salami and cheese for gluten content. Most brands are safe, but it’s always good to double-check!
Nutritional Info
This Antipasto Pasta Salad is a balanced dish that includes carbohydrates, proteins, healthy fats, and a variety of vitamins. Each serving is approximately 350 calories, high in protein and essential nutrients from various veggies.
And there you have it! Your comprehensive guide to making a delicious and salivating Antipasto Pasta Salad. I can’t wait for you to whip this up and create your own stories at the dinner table. Remember, cooking is all about connection, creativity, and love. Don’t hesitate to share your spins on the recipe or any funny kitchen tales! Happy cooking!
Print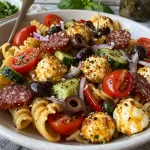
Antipasto Pasta Salad
- Total Time: 45 minutes
- Yield: 4 servings 1x
- Diet: Vegetarian
Description
A vibrant and colorful Antipasto Pasta Salad, perfect for any gathering, filled with pasta, olives, salami, cheese, and fresh veggies.
Ingredients
- 3 cups uncooked pasta (rotini or penne)
- ½ cup olive oil (extra virgin)
- ¼ cup red wine vinegar
- 1 cup cherry tomatoes, halved
- 1 cup mozzarella balls
- ½ cup salami, chopped
- ½ cup black olives, pitted and halved
- ½ small red onion, finely chopped
- 1 cup bell pepper, chopped
- ½ cup fresh basil leaves, chopped
- ½ cup Parmesan cheese, grated
Instructions
- Cook the pasta: In a large pot, bring salted water to a boil. Add your pasta and cook according to package instructions until al dente (typically about 8-10 minutes). Reserve about a cup of pasta water before draining.
- Prepare the dressing: In a mixing bowl, combine the olive oil, red wine vinegar, salt, and pepper. Whisk until well blended.
- Combine ingredients: In a large serving bowl, combine the cooked pasta (cooled slightly) with cherry tomatoes, mozzarella balls, salami, olives, red onion, bell pepper, and fresh basil.
- Toss in the dressing: Pour the dressing over the mixture and toss until everything is coated. If the salad seems dry, gradually add reserved pasta water.
- Chill and serve: Cover the bowl with plastic wrap and let it chill in the fridge for at least 30 minutes to meld flavors.
Notes
For best results, let the salad chill for at least 30 minutes. It can be made up to 2 days in advance. Stir well before serving.
- Prep Time: 15 minutes
- Cook Time: 10 minutes
- Category: Salad
- Method: Mixing
- Cuisine: Italian
Nutrition
- Serving Size: 1 serving
- Calories: 350
- Sugar: 5g
- Sodium: 400mg
- Fat: 12g
- Saturated Fat: 4g
- Unsaturated Fat: 6g
- Trans Fat: 0g
- Carbohydrates: 45g
- Fiber: 3g
- Protein: 15g
- Cholesterol: 30mg
Keywords: Antipasto, Pasta Salad, Italian Salad, Healthy Salad, Picnic Recipe
Antipasto Salad
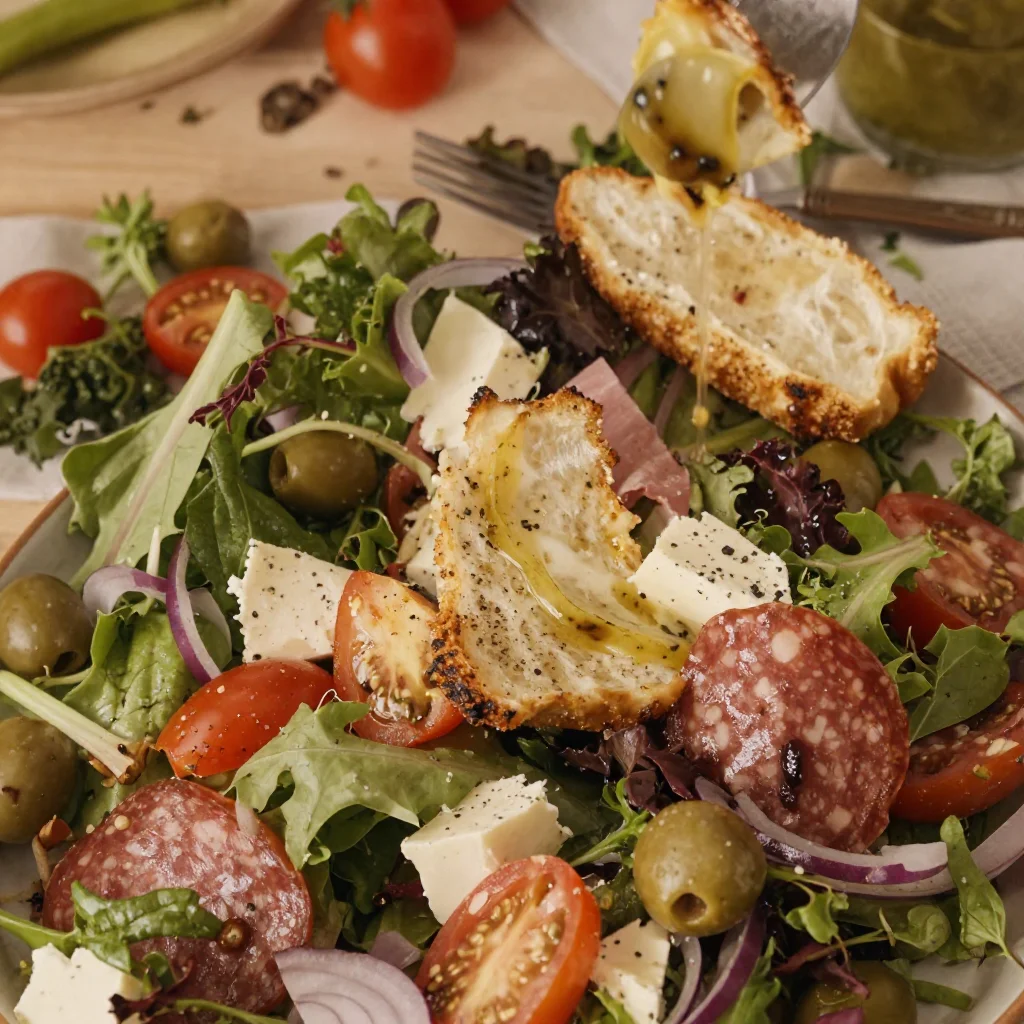
Welcome to My Kitchen: Antipasto Salad Delight
Hey there, fellow food lovers! Welcome to my cozy corner of the internet, where we spin everyday ingredients into warm, delightful meals that tug at the heart and tickle the taste buds. Today, let’s dive into a vibrant and colorful dish that’s as festive as it is tasty: the beloved Antipasto Salad!
Picture this: you’re at a charming Italian restaurant, the aroma of fresh herbs and sizzling garlic wafting through the air. The sun is setting, casting a golden glow over your table as you prepare to share good food and great company with loved ones. That’s the essence of an antipasto salad—it’s not just a dish; it’s a celebration on a plate!
Antipasto translates to "before the meal," and traditionally, it’s a scrumptious platter filled with meats, cheeses, olives, and marinated vegetables that whets the appetite and gets the conversation flowing. But today, we’re taking this classic recipe and turning it into a luscious salad that packs a punch of flavor, color, and joy.
This antipasto salad is perfect for any gathering—whether you’re entertaining friends for game night, prepping a family dinner, or looking for something light yet satisfying for lunch. Trust me when I say, this salad brings together the flavors of Italy and the love of cooking in a way that’s utterly unforgettable.
So, roll up your sleeves, and let’s get started on this culinary adventure. I promise it’ll be fun, flavorful, and maybe just a tad messy!
A Trip Down Memory Lane
Growing up, my mother had this knack for turning simple ingredients into masterpieces. One of my fondest memories is her lively dinner gatherings, where the kitchen buzzed with excitement and the table overflowed with different flavors. Antipasto salad was always a staple, and I can vividly remember helping her assemble it, my eyes wide with wonder as she effortlessly tossed fresh basil, juicy tomatoes, and creamy mozzarella pearls into a bowl.
It was more than just a recipe; it was our shared time together. We would chat, laugh, and bond over the art of cooking. I still recall her gentle nudges, teaching me the importance of quality ingredients and the confidence to trust my palate. Today, every time I prepare this salad, I’m transported back to those cheerful evenings spent with her, where love and food intertwined to create warmth and joy.
Ingredients for Your Antipasto Salad
Let’s gather our ingredients! Here’s what you’ll need to create this delectable antipasto salad:
- Romaine Lettuce: Crisp and refreshing base. For a fun twist, try using kale or mixed greens!
- Cherry Tomatoes: Sweet and juicy. Substitute with any seasonal tomatoes or even artichoke hearts for added flavor.
- Cucumber: Adds crunch and freshness. You can swap in bell peppers for a slightly sweeter kick!
- Red Onion: For a zesty touch! Soaking in cold water for a few minutes reduces the bite if you prefer a milder flavor.
- Kalamata Olives: Briny and delicious. Use green olives if you like a milder taste or pimento for a sweeter note.
- Pepperoni or Salami: Hearty additions for a meaty texture. Turkey pepperoni is a lighter option, or you can use marinated beans for a vegetarian take!
- Mozzarella Balls: Creamy and delightful. Try substituting with feta for a tangy profile.
- Artichoke Hearts: For that classic Italian flavor. Use pickled or grilled if you prefer a mildly acidic bite.
- Fresh Basil: Bright and fragrant. If you can’t find fresh basil, dried Italian herbs will do in a pinch.
Quick Chef Insights:
Always look for high-quality ingredients. Fresh, seasonal produce not only enhances the flavor but also adds life to your salad. Selection might vary depending on availability, so feel free to improvise based on your taste!
Step-by-Step Instructions
Now that we have our ingredients ready, let’s get cooking! Here’s how to whip up this gorgeous antipasto salad:
Step 1: Start with Fresh Greens
Grab a large salad bowl and tear your romaine lettuce into bite-sized pieces. Did you know that tearing lettuce instead of cutting it helps it retain its crispness?
Step 2: Prep the Veggies
Wash your cherry tomatoes and cucumber. Halve the tomatoes and slice the cucumber into thin rounds or half-moons. The more colorful, the better! I always tell my friends, “Eat the rainbow!” Brightly colored veggies not only make your plate look stunning but also provide a variety of nutrients.
Step 3: Add the Aromatics
Slice a small red onion into thin slivers. If the flavor is too sharp for you, soak them in cold water for about ten minutes—this will mellow them out nicely.
Step 4: Layer the Goodies
Now comes the fun part! Layer your veggies in the bowl: start with your lettuce, then add the tomatoes, cucumber, and onion.
Step 5: Incorporate the Proteins
Next, add your pepperoni or salami, followed by the mozzarella balls and artichoke hearts. I like to use a mix of shapes and textures here because it adds visual interest and a delightful crunch.
Step 6: Olives Make Everything Better
Sprinkle your kalamata olives (or green olives) over the top. If you’re a fan of olives—great! If not, feel free to omit them, though I think they bring a lovely saltiness to the mix.
Step 7: Toss the Dressing
Here’s where you can make it your own! Drizzle your favorite vinaigrette—store-bought or homemade—over the salad. My go-to is a classic balsamic vinaigrette, but a lemony olive oil dressing pairs perfectly, too.
Step 8: Toss it All Together!
Gently toss the salad, ensuring that the dressing evenly coats the ingredients. Here’s a little chef hack: use your hands! It’s the best way to mix everything without bruising the delicate vegetables.
Step 9: Garnish and Serve
Finally, tear fresh basil leaves and sprinkle them on top as a finishing touch. You can also add a handful of freshly grated Parmesan cheese for extra flavor if you desire. Serve immediately or let it chill slightly in the fridge to allow the flavors to meld.
Serving Suggestions
To plate your beautiful antipasto salad, use a large, shallow bowl to let the ingredients shine. You can even set out a few small bowls for extra vinaigrette, roasted nuts, or crusty Italian bread on the side. It becomes an interactive food experience, which I love!
Recipe Variations
Want to switch things up? Here are some tasty variations to consider:
- Mediterranean Twist: Add chickpeas, bell peppers, and feta cheese, and swap the dressing for a lemony tahini.
- Spicy Kick: Include sliced jalapeño or pepperoncini for that extra heat!
- Grilled Version: Grill the veggies first for a smokier flavor. Zucchini and asparagus are excellent choices.
- Quinoa Base: Toss some cooked quinoa into the mix to turn this into a heartier meal.
- Vegan or Vegetarian Style: Omit the meats and cheeses, using olives, sun-dried tomatoes, and marinated tofu instead.
Chef’s Notes
I’ve been making this salad for years—it has evolved so much over time! There was a phase where I insisted on including every ingredient I could find in my fridge. While it made for great creativity, I’ve learned that sometimes, simple is better. My mother always used to say, “Less is more!” So, I’ve dialed it back, focusing on what truly pairs well together.
And a funny kitchen story? Well, there was that one time I got so excited about using fresh basil that I inadvertently threw in a whole bunch! Let’s just say, it looked like spaghetti gone wild! But you know what? We laughed it off, and I learned that cooking is all about having a good time—even the mishaps can lead to delicious memories!
FAQs and Troubleshooting
Q1: My salad looks watery. What did I do wrong?
Don’t worry! This can happen if the veggies release too much moisture. To avoid this, you can pat the washed greens and veggies dry with a paper towel before assembling.
Q2: Can I prepare this salad ahead of time?
Absolutely! Just keep the dressing separate until you’re ready to serve to keep everything crisp. You can pre-chop ingredients and store them in the fridge for a day or two as well.
Q3: What if I don’t have some of the ingredients?
No problem! Antipasto salad is incredibly adaptable. Feel free to swap out ingredients for what you have on hand or what’s in season.
Q4: My salad turned out bland. How can I enhance the flavor?
Taste as you go! Add a pinch of salt or sprinkle some crushed red pepper flakes over the salad for a kick. Fresh herbs, like thyme or parsley, can also add vibrancy.
Nutritional Info
While I usually prefer to enjoy my food without dwelling on the numbers, an antipasto salad with a variety of veggies and proteins is a great source of nutrients, including fiber, vitamins, and minerals! Plus, it’s a delightful mix of healthy fats from the olives and proteins from the cheese and meats.
So, there you have it! This Antipasto Salad is not only a feast for the eyes but also a wholesome addition to any meal. I hope you enjoy making and sharing it as much as I do! Happy cooking, and remember: Life is too short to eat bland food!
Print
Antipasto Salad Delight
- Total Time: 15
- Yield: 4 servings 1x
- Diet: Vegetarian
Description
A vibrant and colorful antipasto salad packed with flavors of Italy, featuring fresh vegetables, hearty meats, and creamy cheese.
Ingredients
- 1 head Romaine Lettuce, torn
- 1 cup Cherry Tomatoes, halved
- 1 Cucumber, sliced
- 1 small Red Onion, thinly sliced
- 1/2 cup Kalamata Olives
- 1/2 cup Pepperoni or Salami
- 1 cup Mozzarella Balls
- 1 cup Artichoke Hearts
- Fresh Basil, for garnish
- Your favorite vinaigrette
Instructions
- Start with fresh greens: Tear Romaine Lettuce into bite-sized pieces.
- Prep the veggies: Wash Cherry Tomatoes and Cucumber; halve Tomatoes and slice Cucumber.
- Add the aromatics: Slice Red Onion into thin slivers.
- Layer the goodies: In a large bowl, layer Lettuce, Cherry Tomatoes, Cucumber, and Onion.
- Incorporate the proteins: Add Pepperoni or Salami, followed by Mozzarella Balls and Artichoke Hearts.
- Sprinkle with Kalamata Olives over the top.
- Toss the dressing on top of the salad.
- Toss it all together gently to coat the ingredients with dressing.
- Garnish with fresh Basil leaves and serve immediately.
Notes
This salad is highly adaptable; feel free to substitute ingredients based on availability and personal taste.
- Prep Time: 15
- Category: Salad
- Method: No Cooking Required
- Cuisine: Italian
Nutrition
- Serving Size: 1 serving
- Calories: 350
- Sugar: 5g
- Sodium: 500mg
- Fat: 25g
- Saturated Fat: 10g
- Unsaturated Fat: 15g
- Trans Fat: 0g
- Carbohydrates: 30g
- Fiber: 4g
- Protein: 15g
- Cholesterol: 50mg
Keywords: antipasto salad, Italian salad, fresh salad, easy salad recipe, colorful salad
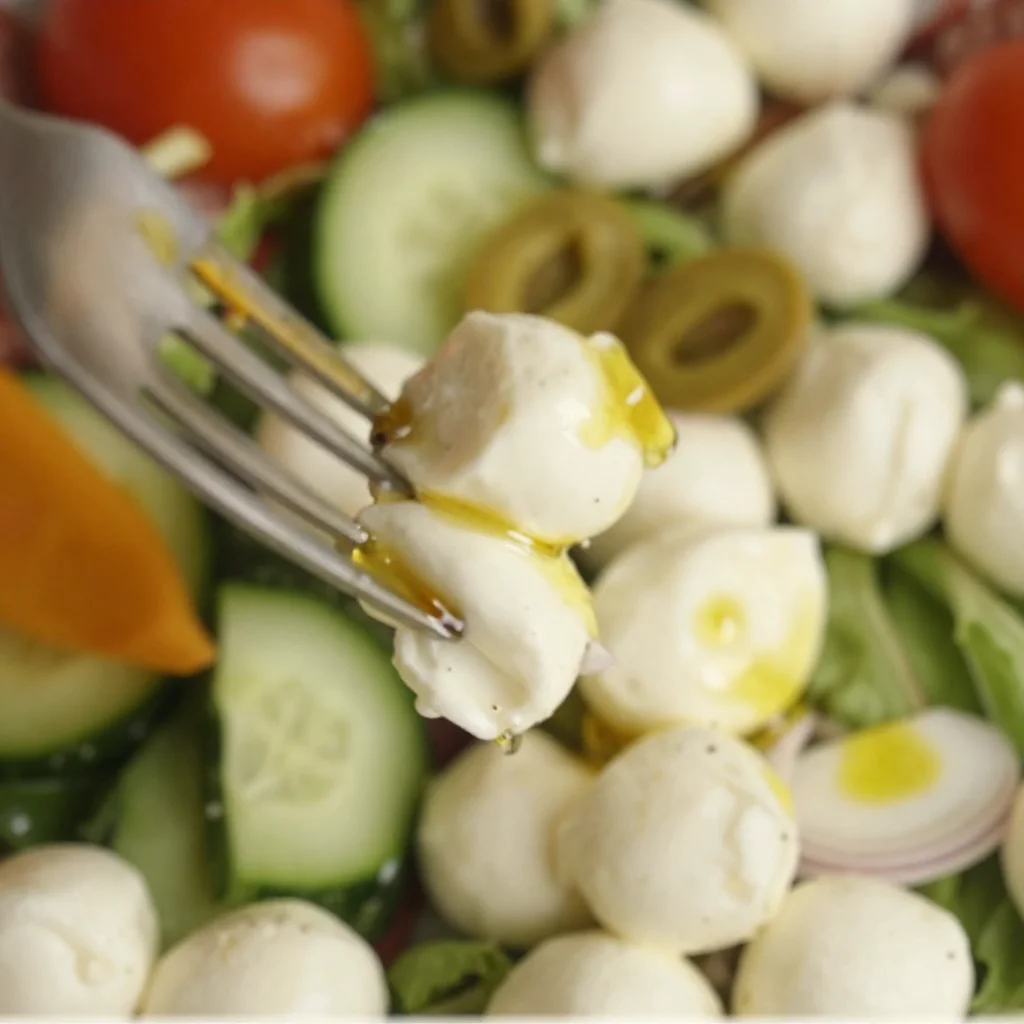
Antipasto Salad
An Irresistible Antipasto Salad Recipe That Brings Joy to Your Table
Welcome, my kitchen-loving friends! Today, we’re exploring the delightful world of antipasto salad, a dish so vibrant and full of flavor that it practically dances off the plate. Picture this: crispy greens, juicy olives, flavorful cured meats, and a bounty of colorful veggies coalescing into a harmonious celebration of taste. Whether you’re preparing for a cozy family meal or throwing together a lively gathering of friends, this antipasto salad is sure to impress and keep everyone coming back for more.
Antipasto salad is not just any salad; it’s like a delicious invitation to indulge in the wonderful variety of flavors found in Italian cuisine. Antipasto, which translates to "before the meal," is typically a spread of appetizers offered before the main course. However, when transformed into a salad, it becomes a hearty, satisfying dish that can take center stage. Plus, it’s bursting with fresh ingredients that nourish the body and soul—all while being incredibly easy to toss together!
In my home, food is more than just sustenance; it’s a language of love. Whenever I prepare this salad, the aromas and colors bring back warm memories of summer picnics with my family, where we would gather on our sun-drenched porch enjoying laughter, stories, and, of course, the best homemade dishes. That’s the spirit I want to encapsulate in this recipe: a blend of comfort, warmth, and vibrancy that makes every bite a joyful experience.
So grab your apron, roll up your sleeves, and let’s channel our inner chefs as we whip up this gorgeous antipasto salad!
A Nostalgic Memory
Growing up, family gatherings were a big deal in my household. I remember my Grandma Rosa’s get-togethers, where the table would overflow with platters of antipasto: marinated artichokes, tangy pepperoncini, olives of every variety, and thinly sliced salami. I would sit cross-legged on the floor, eagerly helping to assemble the vibrant spread. One summer evening, the sun dipped low in the sky, casting a golden hue over our outdoor table, and I discovered the joy of combining all those flavors into a simple salad.
That day, the magic of fresh basil and mozzarella mingling with smoky prosciutto became etched in my memory. I realized how these little moments, filled with laughter and good food, shaped my love for cooking and the desire to bring people together through it. This antipasto salad is a tribute to those cherished summer nights—an ode to the flavors, the joy, and the love shared around the table.
Fresh Ingredients for Your Antipasto Salad
Now, let’s gather our ingredients! This salad is a fiesta of flavors, and each component plays a crucial role. Here’s what you’ll need:
- Mixed Greens (4 cups): Choose a combination of spinach, arugula, and romaine for a refreshing base. If you prefer, you can substitute with kale or spring mix.
- Grape Tomatoes (1 cup, halved): Sweet and juicy, they add a burst of color. Cherry tomatoes work great too; just make sure they’re ripe!
- Cucumbers (1 medium, diced): Crisp and refreshing! You can swap out for radishes or bell peppers for a different crunch.
- Cured Meats (6 oz): Prosciutto, salami, or pepperoni—pick your faves! For a vegetarian option, try marinated tofu or grilled eggplant.
- Cheese (4 oz): Fresh mozzarella, provolone, or feta—each brings a unique flavor. Dairy-free cheese alternatives are a great substitute here.
- Olives (1/2 cup): A mix of black and green olives adds briny goodness. If you’re not a fan, consider using capers for a punchy alternative.
- Roasted Red Peppers (1/2 cup, sliced): Sweet and smoky, these can be jarred or homemade. Fresh bell peppers can work too for that crunch.
- Marinated Artichoke Hearts (1 cup): Tender and flavorful, these are a must! If unavailable, simply add more olives or pickles.
- Fresh Basil (1/4 cup, chopped): The aroma of fresh basil elevates the dish. Dried basil can work in a pinch, but the flavors won’t be the same.
- Balsamic Dressing (1/4 cup): A drizzle to tie it all together; make your own for a personalized touch! Substitute with Italian dressing or a simple olive oil and vinegar mix.
Step-by-Step: Create Your Antipasto Salad
Let’s dive into the process! Follow these easy steps, and you’ll have a stunning antipasto salad to serve in no time.
Step 1: Prepare the Base
Start by washing and drying your mixed greens. Having a dry base is key to maintaining that crispness. Pat them down gently with a clean kitchen towel or use a salad spinner if you have one. You want those greens to shine!
Step 2: Chop and Dice
Next, grab your cutting board! Chop the cucumbers into bite-sized pieces, slice the grape tomatoes in half, and do the same for the roasted red peppers if they’re whole. You want all your ingredients roughly the same size for even distribution in the salad. This step is a great opportunity to unleash your knife skills!
Step 3: Layer on the Delights
In a large mixing bowl, start layering: add in the mixed greens first, followed by the cucumbers, tomatoes, roasted red peppers, and artichoke hearts. As you layer, feel free to give little comments like “Oh my gosh, look at those colors!” It makes the process even more enjoyable.
Step 4: Meat and Cheese, Oh My!
Now for the fun part—meats and cheeses! Tear or slice your cured meats and scatter them on top of the veggies. Crumble or break up your cheese and sprinkle it over the salad. This colorful mix creates a visually appealing dish.
Step 5: Add the Olives and Seasonings
Drizzle the olives over the top, and don’t forget to include that aromatic fresh basil. Toss everything gently. You want an even mix without bruising the greens or smashing the tomatoes. As you mix, imagine all those flavors coming together—it’s pure magic!
Step 6: The Grand Finale—Dress It Up!
Last but not least, drench your salad with balsamic dressing. Start with half and toss, then add more as needed to coat all the ingredients without drowning them. Taste a small bite to see if it needs more seasoning. Sometimes, a pinch of salt, pepper, or even a sprinkle of red pepper flakes amps up the flavor even further.
Step 7: Plate It Up!
Transfer the salad onto a large serving platter or individual bowls. Garnishing with a sprig of basil or a sprinkle of freshly cracked pepper adds an extra touch that makes it feel gourmet!
Serving Suggestions
When it comes to serving this antipasto salad, let your creativity shine! For a rustic touch, serve it in a large wooden salad bowl where guests can help themselves. Pair it with sliced crusty bread or cold, toasted focaccia for a delightful textural contrast. Alternatively, you can portion it into individual bowls for a chic, modern presentation! Add a glass of chilled white wine, and you’ve got a feast that’s sure to impress.
Recipe Variations
Feeling adventurous? Here are some tasty twists you can try:
- Mediterranean Flair: Add chickpeas, feta cheese, and diced red onion for a hearty make-ahead option.
- Grilled Goodness: Incorporate grilled zucchini and eggplant for a smoky flavor, perfect for summer.
- Spicy Kick: Toss in some jalapeños or spicy soppressata for those who love a heat factor in their salads!
- Savory-Sweet Addition: Diced apples or pears offer a delightful sweet crunch that surprisingly complements the savory elements.
- Vegan Delight: Swap the cheese and meats for marinated tempeh and avocado slices, keeping all the amazing flavors intact.
Chef’s Notes
This antipasto salad has gone through many delightful iterations in my kitchen. One afternoon, I decided to host a potluck, and guests brought their favorite items. We ended up with a rainbow of flavors—each person added their own twist with unique ingredients. It turned into an unforgettable feast! Whenever I make this dish now, I reflect on that wonderful day and the community that came together through food.
And let’s get real; my kitchen is often filled with the scent of basil and the laughter of friends. One time, I accidentally added too many olives (hey, who can resist?), and while it was a little salty, we all loved it anyway! Cooking should feel playful, so don’t stress about perfection!
FAQs and Troubleshooting
-
How do I keep my salad fresh if I’m making it in advance?
- Keep the dressing separate until just before serving to avoid soggy greens. Store all salad ingredients in airtight containers in the fridge.
-
What if I can’t find fresh mozzarella?
- No worries! You can use shredded mozzarella or even cottage cheese as a substitute.
-
Can I make this salad ahead of time?
- Absolutely! However, it’s best to add ingredients like tomatoes and cucumbers just before serving to maintain their crunch.
-
What do I do if I have leftover salad?
- Store leftovers in an airtight container and enjoy within a day or two. You can incorporate them into wraps or grain bowls for a quick lunch!
Nutritional Info
This antipasto salad is not only delicious but also packed with nutrients. Each serving is a rich source of vitamins from the vegetables, healthy fats from the olives and cheese, and protein from the meats. To keep it lighter, opt for more veggies and less cheese. Enjoy your salad as a perfect balance of flavors and nutrition!
And there you have it, my flavorful fans! This antipasto salad is more than just a recipe; it’s an experience—an opportunity to connect with loved ones and create new memories right in your kitchen. So embrace the joy of cooking, dive into those flavors, and let your creativity shine! I can’t wait to hear how your antipasto salad turns out; don’t forget to share your stories and fun variations with me! Happy cooking!
Print
Irresistible Antipasto Salad
- Total Time: 15 minutes
- Yield: 4 servings 1x
- Diet: Vegetarian
Description
A vibrant and flavorful antipasto salad packed with crispy greens, juicy olives, and flavorful cured meats, perfect for any gathering.
Ingredients
- 4 cups Mixed Greens (spinach, arugula, and romaine)
- 1 cup Grape Tomatoes (halved)
- 1 medium Cucumber (diced)
- 6 oz Cured Meats (prosciutto, salami, or pepperoni)
- 4 oz Cheese (fresh mozzarella, provolone, or feta)
- 1/2 cup Olives (mixed black and green)
- 1/2 cup Roasted Red Peppers (sliced)
- 1 cup Marinated Artichoke Hearts
- 1/4 cup Fresh Basil (chopped)
- 1/4 cup Balsamic Dressing
Instructions
- Prepare the base by washing and drying your mixed greens.
- Chop the cucumbers, halve the grape tomatoes, and slice the roasted red peppers.
- Layer the mixed greens in a large mixing bowl, followed by cucumbers, tomatoes, roasted red peppers, and artichoke hearts.
- Add the torn or sliced cured meats and crumbled cheese on top.
- Drizzle the olives and fresh basil over the salad, then toss gently.
- Drench the salad with balsamic dressing, tossing to coat without overwhelming the ingredients.
- Transfer the salad to a large serving platter or individual bowls and garnish as desired.
Notes
Keep the dressing separate until serving to maintain salad freshness. Customize ingredients for your taste!
- Prep Time: 15 minutes
- Cook Time: 0 minutes
- Category: Salad
- Method: Mixing
- Cuisine: Italian
Nutrition
- Serving Size: 1 serving
- Calories: 350
- Sugar: 5g
- Sodium: 400mg
- Fat: 12g
- Saturated Fat: 4g
- Unsaturated Fat: 6g
- Trans Fat: 0g
- Carbohydrates: 45g
- Fiber: 3g
- Protein: 15g
- Cholesterol: 30mg
Keywords: antipasto salad, Italian salad, healthy salad, fresh ingredients, summer salad, easy recipe
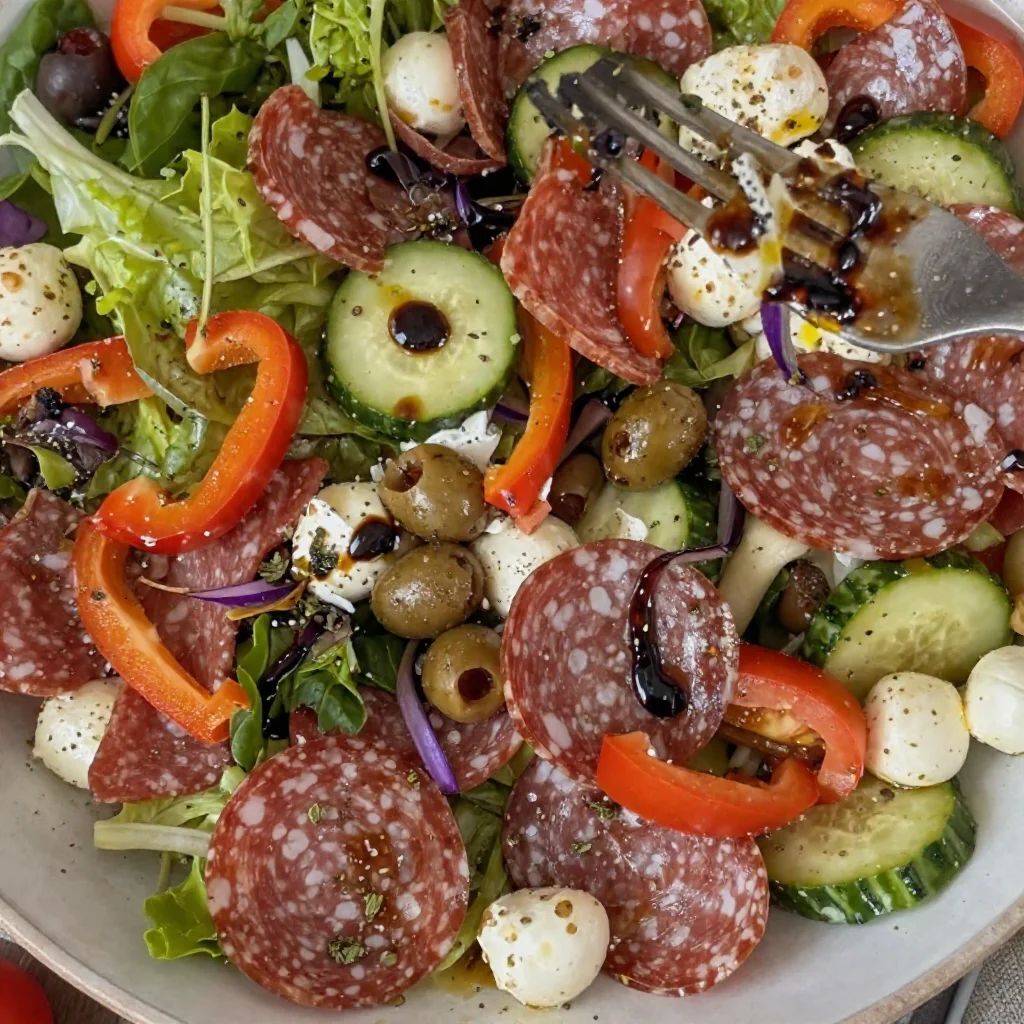
Antipasto Salad
Antipasto Salad: A Symphony of Flavor in a Bowl
Welcome to my cozy corner of culinary magic! Today, I’m beyond excited to share one of my all-time favorite dishes—Antipasto Salad. Now, you might be wondering, “What’s so special about a salad?” But let me tell you, this isn’t just any salad; it’s a vibrant, mouthwatering medley of flavors and textures that brings a fresh twist to your dining table. Think of it as a summer picnic in a bowl or a stylish appetizer that can steal the show at any gathering.
One of the coolest things about this Antipasto Salad is that it’s incredibly versatile. You can customize it to include your favorite ingredients, and it makes for the perfect addition to any meal or occasion. Whether you’re hosting a casual get-together with friends, planning a romantic dinner, or simply craving a colorful, satisfying dish, this salad has you covered.
Picture this: crisp greens, juicy olives, savory salami, rich cheeses, and a symphony of fresh vegetables, all drizzled with a tangy homemade dressing. My mouth is watering just thinking about it! So, grab your chopping board and an apron, and let’s dive into this delicious experience together!
A Taste of Nostalgia
Before we get into the nitty-gritty of preparing this delightful salad, let me take you on a little trip down memory lane. The first time I fell head over heels for antipasto was during a summer family gathering at my Aunt Margherita’s house. Every year, she would throw an Italian feast that felt like a warm hug. Amidst the laughter and the sounds of pasta sizzling away, a large platter of antipasto graced the table— vibrant colors, enticing aromas, and an array of delectable treats.
I remember standing on tiptoes next to the table, trying to reach for the spicy pepperoni and the sharp provolone. As I sampled the goods, my aunt would tell tales of our Italian heritage while encouraging me to mix and match flavors. The joy of discovering new combinations stuck with me. It wasn’t just a dish; it was a celebration of family, culture, and creativity. This Antipasto Salad is my homage to that unforgettable day. It allows me to recreate those feelings of warmth and togetherness, and I’m thrilled to share that sense with all of you!
Ingredients
Let’s gather our ingredients! Here’s what you’ll need to whip up this fabulous Antipasto Salad:
-
Mixed Greens (4 cups)
- Insight: Use a combination of romaine, arugula, and spinach for a variety of flavors. Feel free to swap with any leafy greens you prefer!
-
Cherry Tomatoes (1 cup, halved)
- Substitution Tips: If cherry tomatoes aren’t in season, you can use chopped regular tomatoes. Their juicy sweetness is non-negotiable!
-
Cucumber (1 large, diced)
- Chef Insight: For added crunch, choose English cucumbers, which have fewer seeds and a crisper texture.
-
Olives (½ cup, mixed varieties)
- Insight: Kalamata, green, and black olives add complexity. If you’re a fan of something less salty, try sweet Hungarian pepper or even artichoke hearts!
-
Salami (6 oz, sliced)
- Substitution Tips: Prosciutto or pepperoni work equally well, or make it vegetarian by swapping in marinated mushrooms.
-
Mozzarella Balls (1 cup, halved)
- Chef Insight: Fresh mozzarella brings a creamy texture. You can also use feta for a tangier taste!
-
Roasted Red Peppers (½ cup, sliced)
- Substitution Tips: You can use fresh bell peppers if you prefer a bit of crunch and sweetness.
-
Red Onion (¼ cup, thinly sliced)
- Chef Insight: Soaking the slices in cold water for a few minutes can mellow out their sharpness.
-
Basil (¼ cup, fresh, chopped)
- Insight: Fresh herbs are crucial! If basil isn’t available, try substituting with parsley or even arugula for a peppery kick.
-
Olive Oil (3 tablespoons)
-
Red Wine Vinegar (2 tablespoons)
-
Dried Oregano (1 teaspoon)
-
Salt & Pepper (to taste)
Step-by-Step Instructions
Step 1: Prep Your Greens
Start by washing and thoroughly drying your mixed greens. If you’re like me and love the art of a beautifully arranged salad, take a moment to chop them into bite-sized pieces. Don’t forget a splash of crispiness! If you have a salad spinner, now’s the time to show it off; those greens will thank you later.
Step 2: Dice Your Veggies
Next, grab that cucumber! Chop it into half-moons, then slice your cherry tomatoes in half. Just like that, these ingredients are ready to join the party! These colorful veggies are the backbone of your salad, delivering both flavor and crunch. If you want an even more robust flavor, sprinkle a bit of salt on the tomatoes to enhance their innate sweetness.
Step 3: Prepare the Dressing
Now, let’s make our tangy dressing! In a small bowl or a mason jar, combine the olive oil, red wine vinegar, dried oregano, salt, and pepper. Give it a good whisk or shake until everything is combined! Here’s a chef hack: taste it before you serve! If you want more bite, a splash more of vinegar will do the trick. Adjust based on your preference—it’s your creation, after all!
Step 4: Combine Ingredients
In a large bowl, combine the mixed greens, diced cucumbers, halved cherry tomatoes, and olives. Toss gently to combine. Here’s where you can start visualizing your masterpiece! Once you add the salami, mozzarella, roasted red peppers, and red onion, your salad will start coming together beautifully.
Step 5: Dress It Up!
Now it’s time for the magic! Pour your homemade dressing over the salad—don’t be shy; you want every leaf to be coated! Gently toss until everything is well coated. If you’re feeling fancy, add a few extra sprigs of basil on top for a splash of color.
Step 6: Serve it Up!
Transfer your wonderfully vibrant salad into a large serving bowl or arrange it on plates. You can garnish it with remaining olives or a sprinkle of Parmesan if you’re feeling indulgent. Antipasto Salad is at its best when served fresh, but you can make it ahead of time! Just keep the dressing separate until it’s time to serve, so everything remains crisp.
Serving Suggestions
Antipasto Salad shines when served alongside crusty bread or homemade focaccia. Picture this: a slice of warm bread, a generous scoop of your colorful salad, and a drizzle of that zesty dressing—heavenly! It also complements grilled chicken or seafood beautifully, making it a versatile addition to any meal.
Recipe Variations
- Mediterranean Twist: Add chickpeas and crumbled feta cheese for a heartier, plant-based vibe.
- Cobb-Style: Incorporate hard-boiled eggs and avocado to create a protein-packed version.
- Spicy Kick: Toss in jalapeño slices or a drizzle of hot sauce for an extra zing!
- Sweet and Savory: Include roasted butternut squash and walnuts for a sweeter, seasonal take.
- Family Style: Serve the ingredients deconstructed, allowing everyone to build their perfect salad.
Chef’s Notes
This Antipasto Salad has come a long way from the basic recipes I first encountered. I’ve experimented with countless ingredients over time. One of my most memorable kitchen stories involves a giant jar of sun-dried tomatoes that my friend gifted me; it went into every dish for a week! That experiment ignited my love for bold flavors, and now, I often toss in whatever strikes my fancy!
FAQs and Troubleshooting
Q1: Can I make this salad ahead of time?
Absolutely! You can prep all your ingredients and store them in the fridge for up to a day. Just keep the dressing separate to ensure the greens stay crisp.
Q2: What if I don’t like olives?
No problem! Feel free to omit olives and replace them with something you enjoy, like sliced radishes for crunch or additional veggies, such as artichoke hearts.
Q3: How do I prevent my salad from getting soggy?
For the freshest salad, add the dressing right before you’re ready to serve. Store the salad and dressing separately if prepping in advance!
Q4: Can I add protein?
Definitely! Grilled chicken, shrimp, or even some beans are great options to bulk up this salad for a more filling meal.
Nutritional Info
While nutritional values can vary based on the specific ingredients used, this Antipasto Salad is packed with nutrients, healthy fats, fiber, and protein, making it a well-rounded dish that’s perfect for any meal.
There you have it—a vibrant, delicious, and truly customizable Antipasto Salad that brings a little Italian flair to your kitchen! I hope you enjoy making this recipe as much as I loved sharing it with you. So, roll up your sleeves, throw on that apron, and let’s make some delicious memories in the kitchen together! Happy cooking!
Print
Antipasto Salad
- Total Time: 15 minutes
- Yield: 4 servings 1x
- Diet: Vegetarian
Description
A vibrant, mouthwatering medley of flavors and textures, perfect for any meal or occasion.
Ingredients
- 4 cups Mixed Greens (romaine, arugula, spinach)
- 1 cup Cherry Tomatoes, halved
- 1 large Cucumber, diced
- ½ cup Olives, mixed varieties
- 6 oz Salami, sliced
- 1 cup Mozzarella Balls, halved
- ½ cup Roasted Red Peppers, sliced
- ¼ cup Red Onion, thinly sliced
- ¼ cup Fresh Basil, chopped
- 3 tablespoons Olive Oil
- 2 tablespoons Red Wine Vinegar
- 1 teaspoon Dried Oregano
- Salt & Pepper, to taste
Instructions
- Prep your greens by washing and drying them, then chop into bite-sized pieces.
- Dice your cucumber and halve the cherry tomatoes.
- Prepare the dressing in a small bowl by combining olive oil, red wine vinegar, dried oregano, salt, and pepper.
- Combine the mixed greens, diced cucumber, halved tomatoes, and olives in a large bowl.
- Dress the salad by pouring the dressing over it and gently tossing to combine.
- Serve in a large bowl or on plates, garnished with additional olives or Parmesan if desired.
Notes
Make ahead by preparing all ingredients and storing them, but keep the dressing separate until serving to maintain freshness.
- Prep Time: 15 minutes
- Cook Time: 0 minutes
- Category: Salad
- Method: No-Cook
- Cuisine: Italian
Nutrition
- Serving Size: 1 serving
- Calories: 350
- Sugar: 6g
- Sodium: 900mg
- Fat: 24g
- Saturated Fat: 10g
- Unsaturated Fat: 10g
- Trans Fat: 0g
- Carbohydrates: 20g
- Fiber: 3g
- Protein: 12g
- Cholesterol: 30mg
Keywords: salad, antipasto, Italian, fresh ingredients, summer dish, easy recipe, vegetarian
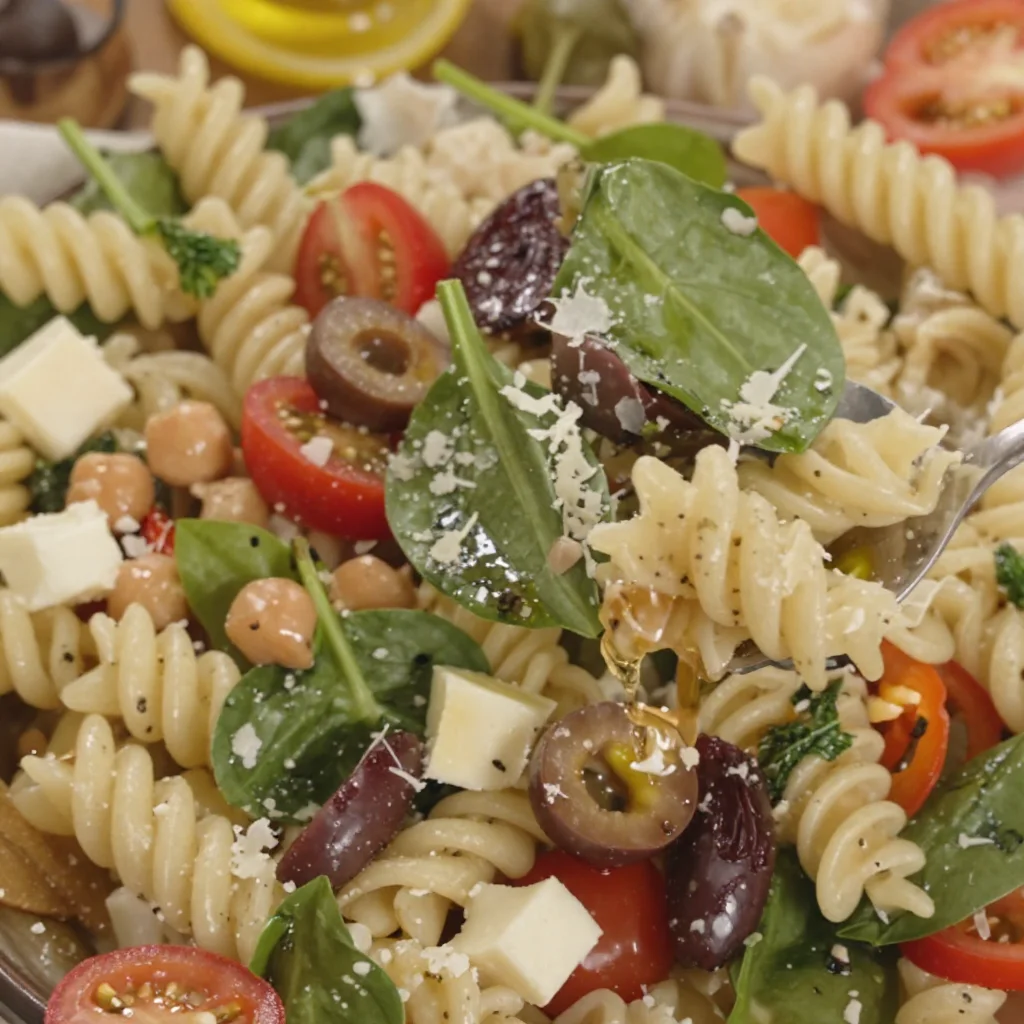
Meal-Prep Italian Pasta Salad: 15-Minute Weeknight Recipe
The Ultimate Italian Pasta Salad: A Flavorful Feast for All
Welcome to my kitchen, my fellow flavor enthusiasts! Today, I’m bubbling over with excitement to share one of my absolute favorite recipes that just screams summertime gatherings, potlucks, or even a cozy weeknight dinner at home. It’s none other than the classic Italian Pasta Salad!
Picture this: it’s a sunny afternoon, and the smell of fresh herbs mingles with the laughter of family and friends gathered around the picnic table. That’s the essence of Italian pasta salad. It’s a dish that brings people together, a mosaic of colors, textures, and tastes that practically dances on your palate. Not only is it incredibly delicious, but it’s also a breeze to prepare, making it perfect for any occasion.
I remember the first time I made this dish for a big family reunion. I was just a teenager, eager to impress my relatives with my culinary skills. I had seen my nonna whip up her version of pasta salad countless times. With a sprinkle of love and a dash of her secret spices, she turned simple ingredients into an elaborate feast. I decided to channel those family vibes, grabbed some ingredients from the pantry, and voilà! Instant hit! Everyone came back for seconds, and I felt like the kitchen rockstar I had always dreamed of being. That’s when I realized that cooking is not just about the food; it’s about the memories we create and the connections we build.
Now, let’s dive into this delightful recipe!
Ingredients
This is where the magic begins! Below are the key ingredients for your Italian Pasta Salad, along with some chef insights to help you along the way:
-
Pasta: 12 ounces of rotini, fusilli, or any pasta of your choice. Feel free to use whole grain for a healthier option. Cooking is about personal preferences, and pasta shapes capture flavors differently.
-
Cherry Tomatoes: 1 pint, halved. Sweet and juicy, they add vibrant color and freshness. Can’t find cherry tomatoes? Substitute with diced regular tomatoes.
-
Cucumber: 1 medium, diced. A crunchy component that balances the dish. If you prefer a Mediterranean flair, you can swap for Kalamata olives.
-
Red Onion: 1 small, finely chopped. This adds a zesty bite. If raw onion isn’t your thing, soak it in cold water for 10 minutes to mellow out the flavor.
-
Bell Peppers: 1 each of red, yellow, and green, diced. A colorful addition that makes the salad pop! Use roasted bell peppers for a smoky twist.
-
Black Olives: 1/2 cup, sliced. They bring a briny dimension to the salad. For a twist, try green olives or capers.
-
Feta Cheese: 1 cup, crumbled. Creamy and tangy, it elevates the pasta salad. For a dairy-free option, use cashew feta.
-
Fresh Basil: A handful, chopped. Aromatic and fresh, you can substitute dried basil if fresh isn’t available, but go easy—dried is more potent!
-
Olive Oil: 1/3 cup. The heart and soul of the dressing! Use extra virgin for the best flavor.
-
Red Wine Vinegar: 1/4 cup. Adds sharpness and brightness. You can swap it for white wine vinegar or lemon juice if needed.
-
Garlic: 2 cloves, minced. A little goes a long way in enhancing flavors. Substitute with garlic powder if that’s what you have.
-
Italian Seasoning: 1 tablespoon. A blend of herbs that gives that delicious Italian vibe. Or make your own mix using thyme, oregano, and rosemary!
-
Salt and Pepper: To taste. Essential for bringing out the flavors of all the ingredients!
Step-by-Step Instructions
Ready to dig in? Let’s get cooking! Follow these easy steps, and I promise you’ll be feeling like the culinary genius you are.
-
Cook the Pasta: Bring a large pot of salted water to a boil. Add your pasta and cook according to package instructions until al dente, usually around 8-10 minutes. Classic tip: be sure to stir occasionally to prevent sticking! When it’s done, drain it and rinse under cold water to halt the cooking process and keep your pasta firm.
-
Prepare the Vegetables: While your pasta is cooking, wash and chop all the veggies. Dice the cucumbers, halve the cherry tomatoes, chop the bell peppers, and finely slice the red onion. The more colorful your vegetables, the more inviting the salad will be!
-
Mix the Dressing: In a small bowl, whisk together olive oil, red wine vinegar, minced garlic, and Italian seasoning with a pinch of salt and pepper. A little tip: let the dressing sit for a few minutes so the flavors can meld beautifully.
-
Combine Ingredients: In a large mixing bowl, combine the cooled pasta with the chopped vegetables, feta cheese, and black olives. Drizzle the dressing over everything and toss gently to combine. The goal is to coat each ingredient, not to pulverize the delicate veggies!
-
Taste and Adjust: Now comes the fun part! Take a spoonful and taste. This is your masterpiece, so feel free to adjust the seasoning. More salt? Add it! Prefer it tangier? A splash more vinegar, and you’re golden.
-
Chill: Cover the bow with plastic wrap or a lid and let the salad chill in the refrigerator for at least 30 minutes. This allows the flavors to blend and creates that lovely, refreshing experience we crave on warm days.
-
Serve: When you’re ready to serve, give it another gentle toss and garnish with fresh basil on top. Bam! You’ve got a delightful Italian Pasta Salad ready to steal the show!
Serving Suggestions
When it comes to plating your pasta salad, presentation is key! Serve it in a large bowl or arrange it in individual serving cups for a fun touch. Add a sprinkle of extra feta and a basil leaf on top for that restaurant-worthy appearance. Pair it with some crusty Italian bread and a glass of chilled white wine, and you have a meal that looks as wonderful as it tastes.
Recipe Variations
Feeling a little adventurous? Here are a few creative twists to elevate your pasta salad game:
-
Protein Boost: Add diced grilled chicken, shrimp, or chickpeas for an extra protein punch.
-
Pesto Perfection: Swap out half of the dressing for prepared pesto for a rich, herbaceous flavor.
-
Mediterranean Style: Incorporate artichoke hearts, sun-dried tomatoes, and a sprinkle of pine nuts for something a little different.
-
Spicy Kick: Add sliced jalapeños or a dash of red pepper flakes to give your salad a subtle heat.
-
Vegan Delight: Replace the cheese with avocado or a sprinkle of nutritional yeast for a creamy texture without dairy.
Chef’s Notes
Italian Pasta Salad has evolved in my kitchen over the years. What began as a simple recipe from my nonna has morphed into a canvas for creativity. I remember one summer when my friends and I were experimenting with all kinds of ingredients, from pesto to roasted vegetables. The best part is that no two salads ever turn out the same, and they all come with a story or a laugh. Never hesitate to make it your own!
And let’s not forget about the oops moments—like the time I grabbed powdered sugar instead of salt for the dressing. Spoiler: it was not one of my proudest culinary achievements!
FAQs and Troubleshooting
1. My pasta salad is mushy. What happened?
It’s likely that the pasta was overcooked. Always check the cooking time and aim for al dente texture, as it will continue to soften while it chills.
2. Can I make this ahead of time?
Absolutely! Pasta salad is a great make-ahead dish. Just don’t add fresh herbs until you’re ready to serve so they stay vibrant.
3. How long does the salad last in the fridge?
Stored in an airtight container, your pasta salad should be good for 3-5 days in the refrigerator. The flavors will meld together even more deliciously!
4. What if I don’t like olives?
No problem! You can easily leave them out and substitute with capers, or even better, add some roasted bell peppers for a different zing.
And there you have it—my Ultimate Italian Pasta Salad recipe that’s not only easy to whip up but also bursting with flavor. I hope this dish brings as much joy to your table as it has to mine. So grab those ingredients and let’s create something unforgettable together! Happy cooking!
Print
Ultimate Italian Pasta Salad
- Total Time: 40 minutes
- Yield: 6 servings 1x
- Diet: Vegetarian
Description
A vibrant and delicious Italian Pasta Salad perfect for summer gatherings and weeknight dinners.
Ingredients
- 12 ounces rotini or fusilli pasta
- 1 pint cherry tomatoes, halved
- 1 medium cucumber, diced
- 1 small red onion, finely chopped
- 1 each red, yellow, and green bell pepper, diced
- 1/2 cup black olives, sliced
- 1 cup feta cheese, crumbled
- A handful of fresh basil, chopped
- 1/3 cup olive oil
- 1/4 cup red wine vinegar
- 2 cloves garlic, minced
- 1 tablespoon Italian seasoning
- Salt and pepper, to taste
Instructions
- Cook the pasta: Bring a large pot of salted water to a boil, add your pasta, and cook according to package instructions until al dente, about 8-10 minutes. Drain and rinse under cold water.
- Prepare the vegetables: Wash and chop all the veggies including cucumbers, cherry tomatoes, bell peppers, and red onion.
- Mix the dressing: In a small bowl, whisk together olive oil, red wine vinegar, minced garlic, and Italian seasoning with a pinch of salt and pepper.
- Combine ingredients: In a large mixing bowl, combine the cooled pasta, chopped vegetables, feta cheese, and black olives, and drizzle the dressing over everything.
- Taste and adjust: Take a spoonful and taste it, adjusting seasoning as needed.
- Chill: Cover the bowl with plastic wrap and let the salad chill in the refrigerator for at least 30 minutes.
- Serve: Toss the salad gently before serving and garnish with fresh basil on top.
Notes
Serve in a large bowl or individual cups, and pair with crusty Italian bread for a complete meal.
- Prep Time: 20 minutes
- Cook Time: 10 minutes
- Category: Salad
- Method: Mixing
- Cuisine: Italian
Nutrition
- Serving Size: 1 serving
- Calories: 320
- Sugar: 4g
- Sodium: 550mg
- Fat: 24g
- Saturated Fat: 8g
- Unsaturated Fat: 12g
- Trans Fat: 0g
- Carbohydrates: 30g
- Fiber: 4g
- Protein: 8g
- Cholesterol: 30mg
Keywords: pasta salad, Italian pasta, summer salad, vegetarian dish




