
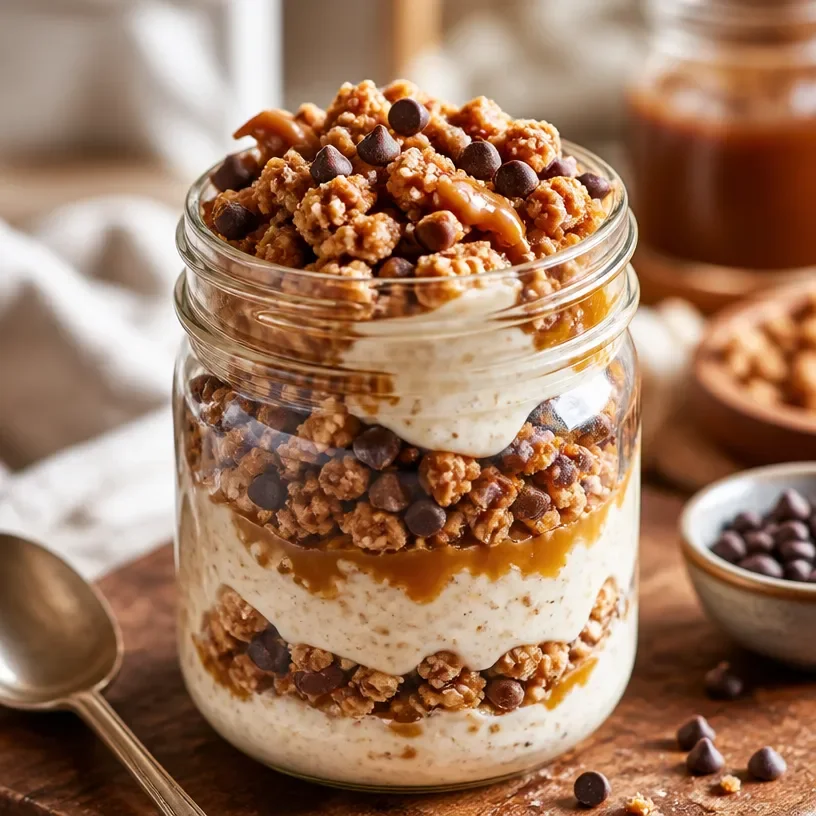
Protein Brown Butter Cookies: Make-Ahead Jar Snacks
The Ultimate Protein Brown Butter Cookie Jar Recipe: Cozy Comfort in Every Bite!
Welcome to my kitchen, my fellow food enthusiasts! I’m so excited you’ve decided to spend some time here with me today. From the moment I started this blog, my goal was to inspire you to embrace the joy of cooking with all its delicious possibilities. And what better way to do that than with a comforting, indulgent recipe that packs a punch of flavor while still keeping your nutritional goals in check?
Today, I’m sharing a recipe that has quickly become one of my go-to favorites: Protein Brown Butter Cookie Jar! Yes, you read that correctly—a cookie jar filled with the delightful aromas of freshly baked cookies, but with a healthier twist that won’t leave you feeling guilty about enjoying a sweet treat. These cookies are made with brown butter for that nutty, caramelized flavor that will make your taste buds dance. Plus, they’re protein-packed to give you that extra boost you need whether you’re heading to the gym or simply powering through your day.
Picture this: a rainy afternoon spent in the comfort of your warm kitchen, the scent of browning butter wafting through the air. Your favorite tunes softly playing in the background. Kids (or even your fur babies) eagerly waiting for hot cookies straight from the oven. It’s moments like these that create lasting memories, and I’m thrilled to help you turn your kitchen into a cozy haven with my Protein Brown Butter Cookie Jar.
So grab your apron, and let’s dive into this delightful recipe that’s perfect for sharing (or for enjoying all by yourself—no judgment here)!
A Delicious Memory: The Origin of My Brown Butter Cookies
I still remember the first time I experimented with brown butter. It was a sunny Sunday, and I had invited some friends over for brunch. I decided to whip up a batch of cookies to accompany the homemade mimosas I was serving. As the butter turned from golden to a rich, deep brown, I was captivated by the nutty aroma that filled my kitchen. Little did I know, that would set off a cookie-making adventure that would become a staple in my home!
The cookies emerged from the oven, perfectly crisp on the edges and chewy in the center. The first bite was mind-blowing; my friends couldn’t get enough! As laughter filled the room, we indulged in those brown butter cookies while sharing stories and making memories. From that day on, I knew I had created something special.
Fast forward to now, and I’ve perfected this recipe by adding protein to the mix, making these cookies not only a tasty treat but also a source of energizing goodness. Every time I whip up a batch, I’m transported back to that sunny Sunday surrounded by friends, laughter, and, of course, cookies!
Ingredients You’ll Need
Here’s a quick rundown of everything you’ll need to make your Protein Brown Butter Cookie Jar:
Ingredients:
- 1 cup unsalted butter
- Chef Insight: Unsalted butter allows you to control the sweetness and saltiness in your cookies; brown it to add depth of flavor!
- 1 cup brown sugar
- Substitution Tip: You can use coconut sugar for a lower glycemic index alternative without sacrificing flavor.
- 1/2 cup granulated sugar
- Quick Insight: Mixing sugars adds a nice balance of sweetness and texture to your cookies.
- 2 large eggs
- Substitution Tip: For a vegan option, try using flax eggs (1 tablespoon of flaxseed meal mixed with 2.5 tablespoons of water per egg).
- 1 teaspoon vanilla extract
- Pro Tip: Use pure vanilla extract for the best flavor; it makes a world of difference!
- 2 cups all-purpose flour
- Substitution Tip: Whole wheat flour can be used for a wholesome twist that still maintains the cookie texture.
- 1 teaspoon baking soda
- Chef Insight: This leavening agent ensures your cookies rise perfectly while keeping them chewy.
- 1/2 teaspoon salt
- Quick Insight: A touch of salt enhances all the flavors; don’t skip this ingredient!
- 1 cup protein powder (vanilla or chocolate)
- Substitution Tip: If you prefer plant-based protein, pea protein works wonderfully as well.
- 1 cup chocolate chips (dark, milk, or your favorite variety)
- Pro Tip: A mix of chocolate chips and nuts adds a delightful crunch to each cookie.
Step-by-Step Instructions
Ready to bake? Let’s get to it! Here are the detailed steps to make your delicious Protein Brown Butter Cookies:
Step 1: Brown the Butter
Start by placing your unsalted butter in a saucepan over medium heat. Stir it occasionally, and watch closely as it begins to foam. After a few minutes, the foam will subside, and you’ll notice the butter turning a beautiful golden brown color with a nutty aroma. This step is crucial—it’s where the magic begins! Once browned, remove it from heat and let it cool slightly.
Step 2: Mix the Sugars
In a large mixing bowl, combine the browned butter (you can pour it in while it’s still warm) with brown sugar and granulated sugar. Whisk together until it’s well combined and the mixture is smooth. This will create a rich, caramel-like base for your cookies.
Step 3: Add the Eggs and Vanilla
Crack the eggs into your sugar mixture, and add the vanilla extract. Whisk until everything is nicely incorporated. You want to see a nice glossy texture—this means delicious cookies await!
Step 4: Combine the Dry Ingredients
In a separate bowl, whisk together the all-purpose flour, baking soda, protein powder, and salt. Gradually add the dry mixture to the wet ingredients, stirring until just combined. Be careful not to overmix; we want those cookies tender!
Step 5: Fold in the Chocolate Chips
Now comes the fun part—fold in your chocolate chips! This is where you can get creative. If you want extra sweetness and crunch, throw in some chopped nuts or even a handful of dried fruit!
Step 6: Chill the Dough
Cover the dough with plastic wrap and chill it in the refrigerator for at least 30 minutes. Chilling helps flavors meld and improves the cookies’ texture, resulting in a chewier bite.
Step 7: Preheat and Prepare
Preheat your oven to 350°F (175°C) and line a baking sheet with parchment paper. This is a chef’s best friend—no sticky mess when it’s time to remove the cookies.
Step 8: Scoop and Bake
Once your dough is chilled, use a cookie scoop or a tablespoon to portion your cookie dough onto the prepared baking sheet, leaving some space between each cookie (they’ll spread out a bit). Bake them in the preheated oven for 10-12 minutes or until the edges are golden brown and the centers look slightly soft.
Step 9: Cool and Enjoy
Let the cookies cool on the baking sheet for about 5 minutes before transferring them to a wire rack to cool completely. This allows the cookies to firm up and makes snacking on them easier.
And there you have it—a batch of Protein Brown Butter Cookies that are ready to be devoured! Just try to resist the temptation to eat them all at once—though I won’t judge if you do!
Serving Suggestions
For an extra touch of coziness, serve these cookies warm with a glass of cold milk or a cup of herbal tea. If you’re feeling adventurous, add a scoop of vanilla ice cream on top for a mouthwatering cookie sundae. Place your cookies in a pretty jar on your kitchen counter, and watch them disappear as family and friends gather around!
Recipe Variations
Here are a few creative twists you can try with this recipe for a fun change:
- Nutty Protein Cookies: Add in 1/2 cup of chopped walnuts or pecans for a delicious crunch.
- Coconut Delight: Incorporate 1/2 cup of shredded coconut for a tropical flair that pairs beautifully with chocolate.
- Oatmeal Chocolate Chip Protein Cookies: Swap out 1 cup of flour for 1 cup of rolled oats to give your cookies a wholesome chewiness.
- Peanut Butter Swirls: Before baking, create swirls of your favorite nut butter on top of the cookie dough for an irresistible flavor combo.
- Spice It Up: Add a teaspoon of cinnamon or pumpkin spice for a warm, comforting flavor that’s perfect for autumn.
Chef’s Notes
This recipe has evolved over time as I’ve experimented with different ingredients and flavor profiles. I remember a time when I tried to sneak in some zucchini for extra moisture—it didn’t quite work as intended, but it sure made for a hilarious kitchen story!
What I love most about these Protein Brown Butter Cookies is their versatility. They’re delightful as is, but you can also tailor them to fit your own preferences, making each batch unique. Plus, they’re a wonderful way to share deliciousness with others—nothing says love quite like a homemade gift!
FAQs and Troubleshooting
Q: My cookies turned out too dry. What went wrong?
A: This could be due to overbaking or too much flour. Next time, make sure to measure your flour correctly (scooping can compact it!).
Q: Can I substitute the protein powder?
A: Absolutely! You can swap it out for a different flavor of protein powder or omit it entirely. Just adjust the flour ratio slightly for the perfect texture.
Q: How long can I store these cookies?
A: They can be stored in an airtight container at room temperature for about a week—if they last that long! You can also freeze them for up to three months.
Q: Can I make these cookies gluten-free?
A: You bet! Substitute all-purpose flour with a gluten-free flour blend, and you’ll have a delicious cookie without the gluten.
Nutritional Info
While I don’t usually share the nutritional breakdown, I will say this: these cookies strike a lovely balance between indulgence and nutrition, packing protein into every bite while still satisfying that sweet craving. Plus, customizing them means you can adapt the recipe to fit your dietary needs!
Final Thoughts
So there you have it—my cherished Protein Brown Butter Cookie Jar recipe that brings a sense of warmth and joy into the kitchen with every bite. I hope you enjoy making these cookies as much as I do, and I’d love to hear about your own kitchen adventures! Share your stories, twists, and variations with me, and let’s celebrate the magic of cooking together. Happy baking!
Print
Protein Brown Butter Cookie Jar
- Total Time: 45 minutes
- Yield: 24 cookies 1x
- Diet: Vegetarian
Description
Indulgent protein-packed cookies made with brown butter for a nutty, caramelized flavor.
Ingredients
- 1 cup unsalted butter
- 1 cup brown sugar
- 1/2 cup granulated sugar
- 2 large eggs
- 1 teaspoon vanilla extract
- 2 cups all-purpose flour
- 1 teaspoon baking soda
- 1/2 teaspoon salt
- 1 cup protein powder (vanilla or chocolate)
- 1 cup chocolate chips (dark, milk, or your favorite variety)
Instructions
- Brown the butter in a saucepan over medium heat until golden brown with a nutty aroma.
- Mix the browned butter with brown sugar and granulated sugar until smooth.
- Add the eggs and vanilla extract, whisking until incorporated.
- Combine the flour, baking soda, protein powder, and salt in another bowl, then gradually add to the wet ingredients.
- Fold in the chocolate chips.
- Chill the dough in the refrigerator for at least 30 minutes.
- Preheat the oven to 350°F (175°C) and line a baking sheet with parchment paper.
- Scoop the cookie dough onto the baking sheet, spacing them apart.
- Bake for 10-12 minutes or until edges are golden brown.
- Cool on the baking sheet for 5 minutes, then transfer to a wire rack.
Notes
For extra flavor, try adding nuts or dried fruit. Store in an airtight container for up to a week.
- Prep Time: 15 minutes
- Cook Time: 12 minutes
- Category: Dessert
- Method: Baking
- Cuisine: American
Nutrition
- Serving Size: 1 cookie
- Calories: 150
- Sugar: 10g
- Sodium: 100mg
- Fat: 7g
- Saturated Fat: 4g
- Unsaturated Fat: 2g
- Trans Fat: 0g
- Carbohydrates: 18g
- Fiber: 1g
- Protein: 3g
- Cholesterol: 30mg
Keywords: brown butter cookies, protein cookies, dessert, baking, healthy cookies
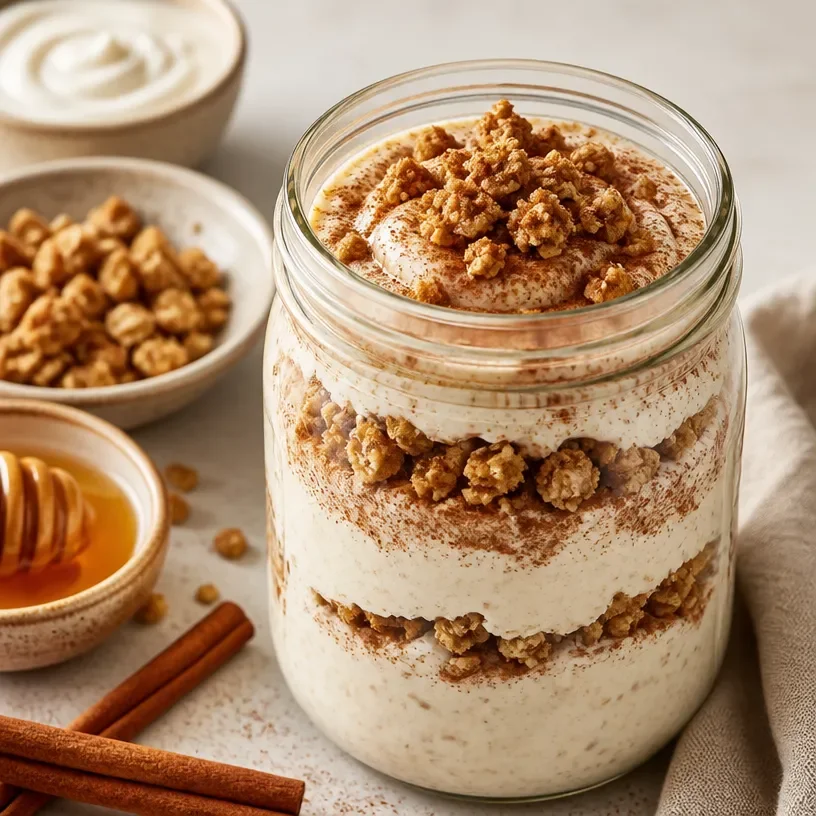
Protein Snickerdoodle Jar: No-Bake Snack for Busy Mornings
Protein Snickerdoodle Jar: A Cozy Kitchen Adventure
Welcome to my kitchen, friends! Today, I’m beyond excited to share a scrumptious recipe that beautifully marries health and indulgence — the Protein Snickerdoodle Jar. If the scent of cinnamon and sugar wafting through your home sounds as comforting to you as it does to me, then buckle up! We’re about to embark on a cozy culinary journey, one that not only fills your kitchen with warm aromas but also packs a protein punch to fuel your day.
Now, I know what you might be thinking — "Olivia, how can I enjoy my favorite cookie flavors without undoing all my hard work?" Trust me, I get it. But here’s the good news: these delightful protein-packed snickerdoodles are everything you crave without the guilt! We’re taking the classic snickerdoodle’s warm, buttery, and cinnamon-kissed goodness and turning it into a fabulous jar that you can whip up quickly, making it easier than ever to enjoy a treat that’s as wholesome as it is delicious.
Picture yourself at the end of a long day, feeling a little worn out, yet craving a sweet finish. You reach for your Protein Snickerdoodle Jar, scoop out a portion, and feel a wave of cozy nostalgia wash over you. Trust me, it’s like having a hug in a jar, and I can’t wait for you to experience it!
Now, grab your apron, settle in, and let’s dive into this magical recipe that brings back sweet memories while ensuring you feel fabulous as you savor every bite.
Personal Story: The Box of Memories
As a little girl, I spent countless afternoons in my grandmother’s cozy kitchen, where the air was always thick with the scent of her legendary snickerdoodles. She would take special care to teach me about the magic of baking — how simple ingredients could create something extraordinary. “Olivia, sugar and spice make everything nice,” she’d say with a wink while dusting the kitchen counter with flour.
I adored rolling the dough in cinnamon sugar, creating those perfect little cookie shapes. Those snickerdoodles were not just treats; they were tokens of love, shared at family gatherings, after school, or simply on a rainy day. Each bite was filled with memories, laughter, and the pure joy of being with those I cherished.
Fast forward to today, and I still believe that every jar we create in the kitchen can hold a piece of joy and love. By transforming our cherished cookie into a Protein Snickerdoodle Jar, I’m not just honoring my grandmother’s legacy — I’m adding to the tradition, creating a sweet, healthy twist that excites my taste buds and fuels my adventures.
Ingredients
Here’s what you’ll need for our delightful Protein Snickerdoodle Jar:
-
Rolled Oats (1 cup)
- These are the base of our jar, offering whole grains and fiber! You can substitute quick oats in a pinch, but they might alter the texture slightly.
-
Almond Flour (1/2 cup)
- This gluten-free alternative adds wonderful nutty flavors and healthy fats. If you’re in a bind, you can also use coconut flour, but you’ll need to reduce the amount since it absorbs more liquid.
-
Protein Powder (1/2 cup)
- Choose your favorite flavor (vanilla works great!). If you prefer plant-based options, pea or brown rice protein will also fit perfectly!
-
Coconut Sugar (1/4 cup)
- This sweetener is less processed than traditional sugar and has a lovely caramel flavor. Brown sugar can work as a direct substitute, albeit with a richer taste.
-
Ground Cinnamon (2 tsp)
- The star of our snickerdoodle show! Not only does cinnamon taste fabulous, but it’s also filled with antioxidants. Feel free to add a pinch more if you love that cinnamon kick!
-
Baking Soda (1 tsp)
- This is our leavener that helps give the cookies a fluffy texture. Make sure it’s fresh for the best results!
-
Salt (1/2 tsp)
- A must for enhancing all the flavors. If you’re watching your sodium intake, you can cut this down or skip it altogether.
-
Egg (1 large)
- This brings everything together and gives the jar a lovely binder. If you need a vegan option, you can substitute it with a flax egg (1 tbsp ground flaxseed mixed with 2.5 tbsp water).
-
Butter (1/3 cup, melted)
- A classic choice for flavor! If you want a dairy-free version, coconut oil works beautifully.
-
Vanilla Extract (1 tsp)
- A splash of vanilla enhances the sweetness. If you’re out of vanilla, a bit of almond extract can make a delightful alternative!
-
Optional Mix-ins: Chocolate Chips or nuts (1/2 cup)
- Because who doesn’t love a little extra goodness? Semi-sweet chocolate chips are an obvious choice, but feel free to swap in dried fruit for a healthier twist!
This collection of ingredients is not only wholesome but also versatile! Each item is selected with care, ensuring that your Protein Snickerdoodle Jar is the best it can be, both in taste and nutrition.
Step-by-Step Instructions
Let’s bring all those delightful ingredients together and create magic in the kitchen! Here’s how to assemble your Protein Snickerdoodle Jar.
-
Preheat the Oven to 350°F (175°C):
- This is the perfect temperature to ensure your cookies bake evenly and come out perfectly golden!
-
Mix Dry Ingredients:
- In a large bowl, combine the rolled oats, almond flour, protein powder, coconut sugar, ground cinnamon, baking soda, and salt.
- Chef Tip: Whisking your dry ingredients together first ensures even distribution of your leavening agents and spices. This is a simple step that can make a BIG difference in the final result!
-
Blend Wet Ingredients:
- In another bowl, mix the melted butter, egg, and vanilla extract until well combined.
- Kitchen Hack: If your butter solidifies, just pop it in the microwave for a few seconds to re-melt it but be careful not to cook it!
-
Combine Wet and Dry Ingredients:
- Gradually fold the wet mixture into the dry ingredients, stirring until it forms a cohesive dough.
- Pro Tip: A rubber spatula works wonders here for scraping down the sides of the bowl and making sure everything is incorporated evenly.
-
Add Optional Mix-ins:
- If you’re adding chocolate chips or nuts, this is the time! Gently fold them into the dough.
- Personal Touch: I always reserve a few mix-ins to sprinkle on top for that extra pop of flavor and texture!
-
Scoop the Dough:
- Using a tablespoon (or cookie scoop if you have one), portion out the dough onto a lined baking sheet. Space them about an inch apart, as they will spread a little while baking.
- Chef Insight: For uniform cookies, use a scale to weigh your dough balls; they will bake more evenly this way.
-
Bake:
- Place the baking sheet in the preheated oven and bake for about 10-12 minutes, or until they’re slightly golden around the edges.
- Chef’s Hint: Keep an eye on them toward the end—baking times may vary depending on your oven, and we want them to be perfectly chewy!
-
Cool Down:
- Once baked, transfer the cookies to a wire rack to cool. They’ll firm up a bit as they cool, so don’t worry if they seem soft at first!
-
Assemble Your Jar:
- Once completely cooled, layer the cookies in your favorite jar. You could alternate layers with some oats or even a sprinkle of cinnamon sugar for added flair.
- Final Touch: Seal the jar tightly, and you’ve got a delicious treat ready to go!
With these straightforward steps and my cheerful guidance, you should feel empowered and ready to dive into your own cozy kitchen experience. Enjoy the process as much as the end result because this is where the true magic happens!
Serving Suggestions
Now that your Protein Snickerdoodle Jar is ready, let’s talk about serving! You can enjoy these cookies straight from the jar, or if you’re in the mood for something special, try serving them warm with a scoop of your favorite ice cream on the side for a delightful sundae. You can also crumble a cookie over your morning yogurt or oatmeal for a sweet twist to your breakfast.
For a fun presentation, arrange them on a rustic wooden board with fresh fruit or a drizzle of peanut butter for a snack platter that’s sure to impress. Whatever way you choose to serve, these cookies are bound to brighten your day!
Recipe Variations
I love to shake things up in the kitchen, and this recipe is no exception! Here are a few creative twists for your Protein Snickerdoodle Jar:
-
Pumpkin Spice Snickerdoodle: Add 1/2 cup of pumpkin puree and a dash of nutmeg to the dough for a fall-inspired treat that bursts with flavor!
-
Caramel Swirl: Drizzle some sugar-free caramel sauce into the dough before baking, for a gooey, indulgent surprise in every bite.
-
Choco-Cocoa Lovers: Add a couple of tablespoons of unsweetened cocoa powder and semi-sweet chocolate chips for a chocolatey take on snickerdoodles.
-
Nutty Delight: Experiment with different nut butters (like almond or cashew) in place of butter for an added boost of healthy fats and flavor.
-
Add Protein Punch: Mix in some hemp hearts or chia seeds for an extra protein boost without altering the flavor!
Feel free to get creative; the possibilities are endless, and every variation can inspire a new kitchen memory!
Chef’s Notes
It’s funny how recipes evolve, isn’t it? I remember when I first started creating healthier versions of comfort foods. It felt like walking a tightrope — trying to keep the essence of what I loved while making it good for me. But with each iteration, I found joy in transforming old family recipes into something that made my heart sing and my taste buds dance!
The Protein Snickerdoodle Jar has become a cornerstone in my baking repertoire. It’s not just a simple snack; it’s a conversation starter, a gesture of love, and sometimes a late-night fuel for my creative endeavors in the kitchen. If I had a dollar for every time I’ve shared this recipe with friends or family, I could probably fund my next cookbook!
So, grab your jar, share it with loved ones, and create your own stories around this delectable treat!
FAQs and Troubleshooting
Here are some frequently asked questions and potential hiccups that you might encounter when making your Protein Snickerdoodle Jar:
-
Why are my cookies too dry?
- It’s possible that you’ve over-measured your dry ingredients. When measuring flour or oats, spoon it into the measuring cup and level off with a knife for accuracy!
-
Can I freeze the dough?
- Absolutely! You can scoop the cookie dough balls and freeze them on a baking sheet. Once frozen, transfer them into a baggie. When ready to bake, just add a few extra minutes to the baking time!
-
What if my dough is too sticky?
- If your dough seems overly wet or sticky, add a tablespoon of almond flour at a time until it reaches your desired consistency.
-
How can I prevent them from spreading too much?
- Chill the dough in the refrigerator for about 30 minutes before baking, which helps them keep their shape!
Remember, every little step in the cooking process is an opportunity for learning and fun. Don’t stress too much; most mistakes make for great stories in the kitchen!
Nutritional Info
While I believe that enjoying food is more important than counting every calorie, here’s a general nutritional breakdown (per cookie if you make 12 cookies):
- Calories: ~120
- Protein: ~5g
- Fat: ~5g
- Carbohydrates: ~15g
- Fiber: ~2g
- Sugar: ~3g
Note: Nutritional values may vary based on specific ingredients and brands used.
There you have it — a warm, cozy recipe and kitchen adventure all wrapped up in one delightful Protein Snickerdoodle Jar! I hope you feel inspired to create your own and share it with everyone you love. May your baking experience be filled with joy, laughter, and the sweet aroma of cinnamon. Happy cooking! 🍪🧡
Print
Protein Snickerdoodle Jar
- Total Time: 27 minutes
- Yield: 12 cookies 1x
- Diet: Vegetarian
Description
A delightful protein-packed twist on classic snickerdoodles, perfect for a cozy treat that fuels your day.
Ingredients
- 1 cup Rolled Oats
- 1/2 cup Almond Flour
- 1/2 cup Protein Powder
- 1/4 cup Coconut Sugar
- 2 tsp Ground Cinnamon
- 1 tsp Baking Soda
- 1/2 tsp Salt
- 1 large Egg
- 1/3 cup Butter (melted)
- 1 tsp Vanilla Extract
- 1/2 cup Optional Mix-ins (Chocolate Chips or nuts)
Instructions
- Preheat the oven to 350°F (175°C).
- Mix dry ingredients in a large bowl: rolled oats, almond flour, protein powder, coconut sugar, ground cinnamon, baking soda, and salt.
- Blend wet ingredients in another bowl: melted butter, egg, and vanilla extract.
- Combine wet and dry ingredients, stirring until it forms a dough.
- Add optional mix-ins if desired.
- Scoop the dough onto a lined baking sheet, spacing them about an inch apart.
- Bake for about 10-12 minutes or until slightly golden.
- Cool cookies on a wire rack.
- Assemble your jar by layering cookies and optional oats or cinnamon sugar.
Notes
Feel free to experiment with different mix-ins or variations to create your perfect jar.
- Prep Time: 15 minutes
- Cook Time: 12 minutes
- Category: Dessert
- Method: Baking
- Cuisine: American
Nutrition
- Serving Size: 1 cookie
- Calories: 120
- Sugar: 3g
- Sodium: 100mg
- Fat: 5g
- Saturated Fat: 3g
- Unsaturated Fat: 2g
- Trans Fat: 0g
- Carbohydrates: 15g
- Fiber: 2g
- Protein: 5g
- Cholesterol: 30mg
Keywords: snickerdoodle, protein, healthy dessert, cookies, easy recipes
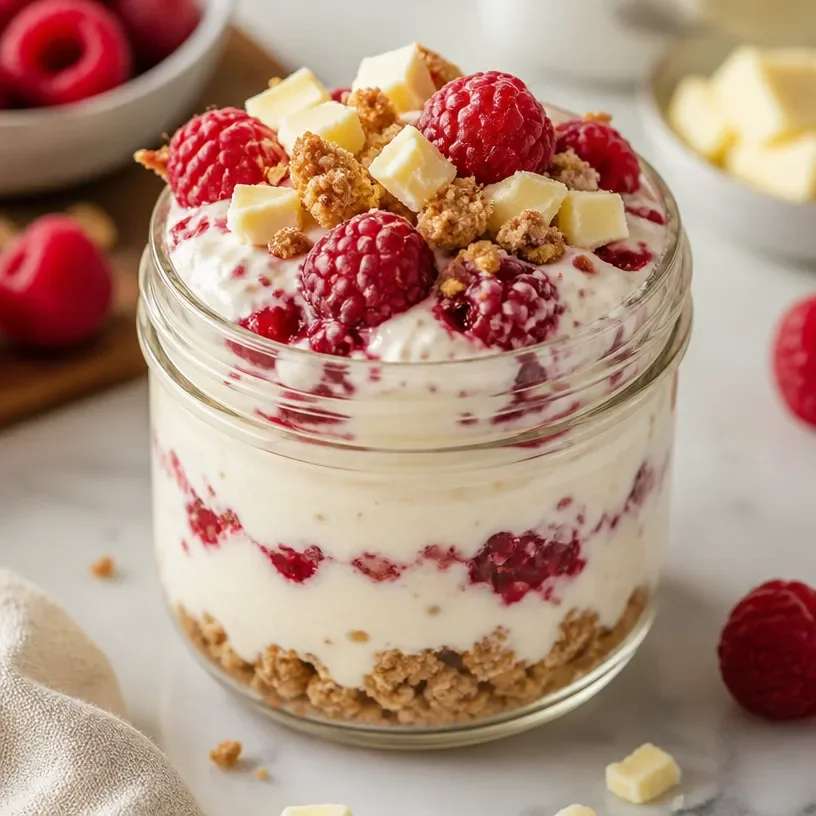
High-Protein White Chocolate Raspberry Jar (No-Bake)
Protein White Chocolate Raspberry Jar: A Deliciously Decadent Treat!
Welcome to my kitchen! I’m so thrilled you’re here, ready to dive into a recipe that not only speaks to my love of flavor but also embodies the joy of quick and cozy cooking. Today, we’re creating something absolutely delightful: the Protein White Chocolate Raspberry Jar. This treat is a perfect blend of sweet and tart, creamy and chunky—a lovely dessert or snack that also packs a protein punch! Whether you’re needing a little pick-me-up after a workout or just craving something sweet, this jar will surely satisfy.
You see, my kitchen is my happy place. It’s where memories are made, and stories are shared over bubbling pots and warm ovens. I fondly remember days spent baking with my grandmother, the aroma of her famous white chocolate raspberry swirl wafting through our home. It wasn’t just about taste; it was about the love infused in every layer. Today, I’m excited to recreate that feeling and share my twist on this classic with a protein-packed version that you’ll feel great about enjoying.
The beauty of the Protein White Chocolate Raspberry Jar is how customizable it is. You can layer it to your heart’s content, bringing together textures and flavors that resonate with you. The white chocolate and tangy raspberries are a match made in heaven, and when you sprinkle in a generous scoop of protein, you get a guilt-free treat that doesn’t compromise on taste. So grab your spoon, put on your favorite playlist, and let’s get started on this delightful journey!
A Sweet Memory: Discovering the Joy of Layers
As a child, I was enchanted by the world of desserts, but it was during one summer visit to my grandmother’s house that I truly fell in love with layered treats. She introduced me to her famous raspberry parfait—a delightful mixture of sweetened cream, fresh raspberries, and bits of white chocolate. It was a sensory experience; each layer was distinct yet harmonious, offering new bites of flavor with each spoonful. I can still hear her laughter as we layered the ingredients in our favorite clear jars, pretending we were fanciful restaurateurs, serving an imaginary crowd.
That summer, I learned more than just a recipe; I absorbed the essence of cooking: the art of blending flavors, the importance of presentation, and the joy of sharing food. It inspired me to create my variation—a Protein White Chocolate Raspberry Jar that brings that same joy with an added nutritional boost. Now, I can indulge without guilt, all while reliving those wonderful memories spent in my grandmother’s kitchen. Let’s recreate those feels together!
Ingredients: What You Need
Here’s a quick look at what you’ll need for a fabulous Protein White Chocolate Raspberry Jar:
-
Greek Yogurt (2 cups)
Why it’s here: Thicker than regular yogurt, Greek yogurt packs protein and creaminess. It also makes the base rich and tangy!
Substitution tip: A dairy-free yogurt made from almond or coconut milk works well for a vegan option! -
Vanilla Protein Powder (1 scoop)
Why it’s here: This adds a boost of protein and a lovely vanilla flavor.
Substitution tip: Feel free to swap this for your favorite protein powder; chocolate flavor would add an exciting twist! -
Raspberries (1 ½ cups)
Why it’s here: Their sweet-tart flavor complements the sweetness of white chocolate beautifully.
Substitution tip: You can use other berries like blackberries or blueberries if raspberries aren’t in season! -
White Chocolate Chips (¾ cup)
Why it’s here: Melting these into your mixture gives a smooth texture and delightful sweetness.
Substitution tip: Dark chocolate can be a great alternative if you fancy a richer, less sweet option! -
Honey or Maple Syrup (2-3 tablespoons)
Why it’s here: It provides a natural sweetness to balance the tartness of the raspberries.
Substitution tip: Agave syrup works well too! -
Granola (½ cup)
Why it’s here: For that extra crunch, granola is perfect for layering.
Substitution tip: Use nuts or seeds if you want to skip the grains! -
Mint Leaves (for garnish)
Why it’s here: A pop of color and fresh flavor to elevate your jar’s presentation!
Chef insight: If you don’t have mint, fresh basil also pairs surprisingly well with raspberries!
Let’s gather these ingredients, channel our inner chefs, and create something to enjoy!
Step-by-Step Instructions: Crafting Your Jar
Step 1: Prepare the Base
In a mixing bowl, combine the Greek yogurt and vanilla protein powder. Use a spatula or whisk to blend them until you have a creamy, smooth texture. This will be the star of your jar!
Chef Tip: If you want your yogurt sweeter, now’s the time to stir in honey or maple syrup until you reach your desired sweetness.
Step 2: Mix in the White Chocolate
Gently fold in the white chocolate chips into your yogurt mix. You want them distributed evenly but don’t over-mix—there’s no need for the chocolate to melt!
Little Hack: If you want melted white chocolate, you can heat it in the microwave in 15-second intervals, stirring in between. Just be careful not to burn it!
Step 3: Prepare the Raspberries
If you’re using fresh raspberries, give them a good rinse and gently pat them dry. If they’re semi-mashed (like mine often are post-handling), that’s totally fine! Just be careful not to pulverize them; we want some chunks!
Chef Insight: Feel free to add a little sugar to the berries to enhance their sweetness, especially if you get tart ones!
Step 4: Layer it Up!
In your glass jars (I like using mason jars for the charming aesthetic), start layering!
-
First Layer: Spoon a generous dollop of the yogurt mixture at the bottom—about 1/4 of the jar.
-
Second Layer: Sprinkle a layer of raspberries (about 1/4 cup or so).
-
Third Layer: Add a couple of tablespoons of granola for that crunch we love.
Repeat the layers until you reach the top, finishing with a dollop of yogurt and a scattering of granola and raspberries.
Step 5: Garnish and Chill
Top your jar with fresh mint leaves before covering with a lid or plastic wrap. Place it in the fridge for at least 30 minutes to firm up. This will allow the flavors to mix beautifully!
Tip: These jars can be made the night before, making them a perfect breakfast grab-and-go option or an awesome post-workout snack!
Serving Suggestions: How to Present Your Creation
When it comes to serving, the Protein White Chocolate Raspberry Jar is all about making that first impression! Serve them straight out of the fridge for a refreshing feel, maybe with a small plate to catch any drips. You can also drizzle a bit more honey or syrup on top for that enticing first bite. These jars are excellent for brunch gatherings or even as gifts; just tie a cute ribbon around them for that extra touch!
Recipe Variations: Get Creative!
Here are some fun ideas to spice up your Protein White Chocolate Raspberry Jar even more:
- Tropical Twist: Replace raspberries with diced pineapple and mango, and use coconut yogurt instead.
- Nutty Delight: Mix almond butter into the yogurt for a unique flavor and extra protein power.
- Chocolate Dreams: Substitute dark chocolate chips for white and toss in some chia seeds for added health benefits.
- Seasonal Flavors: Play with seasonal fruits like strawberries in spring, peaches in summer, and apples in fall for a festive touch!
- Vegan Version: Use plant-based yogurt and flaxseed meal for protein instead of whey powder.
Chef’s Notes: Reflections from the Kitchen
This Protein White Chocolate Raspberry Jar has come a long way since my days of layering in my grandmother’s kitchen. I’ve experimented with different ingredients and flavors over the years, but one thing remains constant: the joy of creation. Cooking is like art—a way to express experiences, emotions, and, of course, love. I once tried to impress a date with a more complicated dessert, and let’s just say, I learned that sticking to what you know is sometimes the best approach!
I hope you enjoy this recipe as much as I do! It’s simple yet oh-so-satisfying, and it brings back those cherished memories with each spoonful.
FAQs and Troubleshooting: Your Cooking Questions Answered
1. Can I make the Protein White Chocolate Raspberry Jar in advance?
Absolutely! They can be prepped the night before and stored in the fridge. They keep well, allowing the flavors to meld beautifully together.
2. What if my layers don’t look as pretty?
Don’t stress! The taste is what counts! If your layers don’t look perfect, you can mix it all up in a bowl and still enjoy the delicious flavor.
3. Can I use frozen raspberries?
Yes, frozen raspberries are a great option! Just let them thaw a bit before layering, and be cautious as they can be more mushy than fresh ones.
4. What should I do if I have leftovers?
Just cover the jars and store them in the fridge. They can usually last 2-3 days, though the granola may lose its crunch over time!
Nutritional Info
While I won’t bore you with every detail, here’s a quick snapshot of what you’re looking at per serving:
- Calories: ~290
- Protein: ~20g
- Carbohydrates: ~40g
- Fats: ~8g
This delicious jar is not only a treat for your taste buds but gives you nourishment and satisfaction!
So there you have it! Your ultimate guide to whipping up a Protein White Chocolate Raspberry Jar that’s sure to impress friends and family alike (and maybe even remind you of days gone by). I can’t wait to hear how yours turns out! Don’t forget to share your creations with me—happy cooking!
Print
Protein White Chocolate Raspberry Jar
- Total Time: 30 minutes
- Yield: 4 servings
- Diet: Vegetarian
Description
A deliciously decadent layered treat combining white chocolate, raspberries, and Greek yogurt, packed with protein for a guilt-free indulgence.
Ingredients
- Greek Yogurt (2 cups)
- Vanilla Protein Powder (1 scoop)
- Raspberries (1 ½ cups)
- White Chocolate Chips (¾ cup)
- Honey or Maple Syrup (2-3 tablespoons)
- Granola (½ cup)
- Mint Leaves (for garnish)
Instructions
- Combine the Greek yogurt and vanilla protein powder until creamy and smooth.
- Fold in the white chocolate chips evenly into the yogurt mix.
- Rinse and pat dry the raspberries; semi-mashed is fine.
- Layer the ingredients in mason jars starting with yogurt, then raspberries, and granola.
- Top with fresh mint leaves, cover, and chill in the fridge for at least 30 minutes.
Notes
Perfect for meal prep and serves as a refreshing post-workout snack. Can be made in advance.
- Prep Time: 15 minutes
- Cook Time: 0 minutes
- Category: Dessert
- Method: No Bake
- Cuisine: American
Nutrition
- Serving Size: 1 serving
- Calories: 290
- Sugar: 15g
- Sodium: 150mg
- Fat: 8g
- Saturated Fat: 4g
- Unsaturated Fat: 3g
- Trans Fat: 0g
- Carbohydrates: 40g
- Fiber: 3g
- Protein: 20g
- Cholesterol: 20mg
Keywords: Protein Dessert, White Chocolate, Raspberry Jar, Healthy Snack, Meal Prep
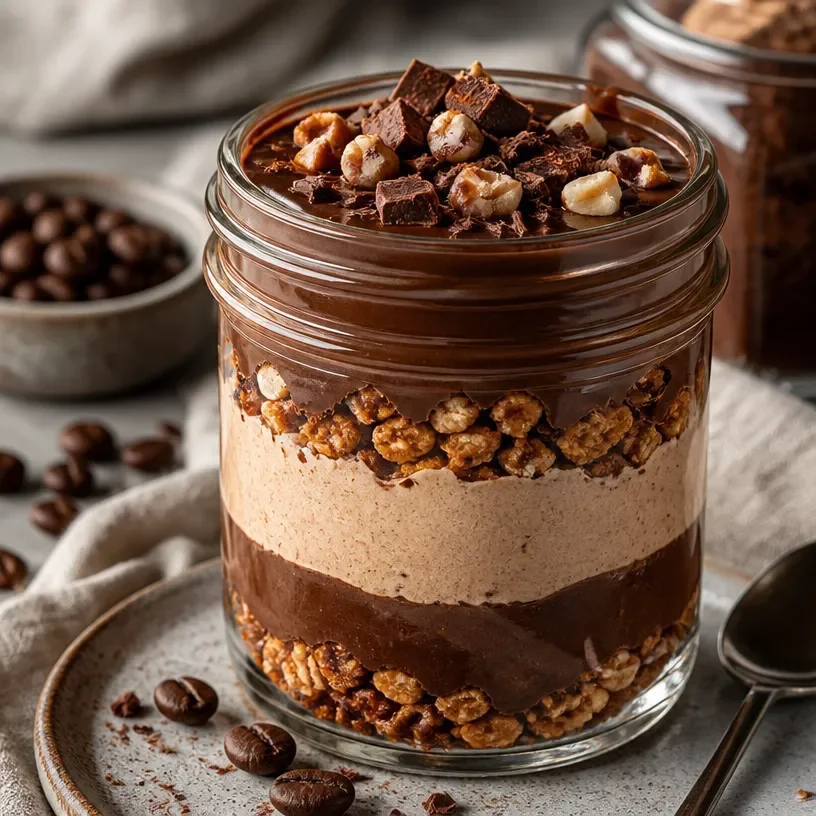
Min No-Bake Protein Mocha Fudge Jar: Grab-N-Go Snack
Protein Mocha Fudge Jar: A Delicious Pick-Me-Up!
Welcome to my cozy corner of the internet! I’m Olivia Bennett, your friendly kitchen guide, and today we’re diving deep into a recipe that will not only satisfy your sweet tooth but also give you a healthy boost! That’s right, we’re making a Protein Mocha Fudge Jar that’s perfect for a midday pick-me-up or as a delightful post-workout treat.
Imagine this: you’re in the midst of a busy day, your energy is waning, and all you can think about is that perfect balance of rich chocolate and robust coffee to push you through. This luscious fudge is not only the answer to your cravings but also packed with protein to keep you feeling energized. Plus, it’s in a jar—how cute is that?!
As we cook together, I’ll share why this recipe brings back memories for me, the sunshine of nostalgia brightening our culinary adventure. The joy of homemade treats is something that connects us all, and I can’t wait for you to experience it through this delightful fudge.
So, grab your apron, and let’s turn simple ingredients into something unforgettable!
A Sweet Trip Down Memory Lane
Whenever I think of chocolate and coffee, a warm rush of nostalgia washes over me. One of my fondest childhood memories is sitting in my grandmother’s kitchen, watching her create delectable desserts that filled the house with mouthwatering aromas. She had a special knack for combining flavors, and her famous mocha fudge was always a highlight during family gatherings.
The air would be thick with the rich scent of chocolate, and I would be perched on a stool, eagerly waiting for a taste—just a tiny morsel of that velvety goodness! It wasn’t just dessert; it was an experience. Grandma would tell stories about her own upbringing in the kitchen, while we licked the spoons and shared giggles. I’ll never forget her twinkling eyes, full of life and love, as she added a hint of espresso to her fudge mixture.
This recipe for Protein Mocha Fudge takes me back to those days. It’s comforting and packed with the flavors that remind me of my grandma, while also being a modern twist for those of us with busy lives. I hope it creates the same warm moments for you and your loved ones!
Gather Your Ingredients
Before we get started, let’s take a look at what you’ll need for this delightful Protein Mocha Fudge Jar:
-
1 cup almond butter
This creamy nut butter provides healthy fats and a smooth texture. If you’re allergic to nuts or prefer a different flavor, try sunflower seed butter for a nut-free option! -
1/2 cup maple syrup
This natural sweetener adds just the right amount of sweetness and a hint of depth to the flavor. You can substitute with agave syrup or honey for a different twist. -
1/4 cup unsweetened cocoa powder
The rich flavor of cocoa powder is essential for that chocolatey experience! You can use carob powder if you prefer a caffeine-free alternative. -
1/2 cup protein powder
This ingredient is the secret ingredient for that protein boost! I personally like whey or plant-based protein powder, so pick your favorite flavor that complements chocolate, like vanilla. -
1 tablespoon espresso powder
Espresso powder elevates the flavor of the fudge; it’s like a coffee hug in every bite! If you don’t have it, brewed coffee or instant coffee granules work well, just adjust the quantity for taste. -
1/4 teaspoon sea salt
A pinch of salt enhances the sweetness and balances flavors beautifully. Don’t skip it! -
Optional toppings:
- Chopped nuts (like walnuts or pistachios)
- Shredded coconut
- Drizzle of dark chocolate
Let’s Get Cooking: Step-by-Step Instructions
Alright, my kitchen buddy, it’s time to roll up our sleeves and get started! Follow these steps, and I promise you’ll be devouring that fudge in no time.
Step 1: Prep Your Workspace
Before we dive in, it’s crucial to have a clean workspace. Gather all your ingredients, utensils, and a mixing bowl. You’ll also need a container or jar to store your fudge—let’s go for something cute and reusable!
Step 2: Mix Together the Base
In a medium-sized bowl, add the almond butter and maple syrup. Mix these two together until they are well combined. You want a smooth consistency, so give it a good stir. A hand mixer can make this step even easier, but a sturdy spoon will work just fine too!
Step 3: Add Cocoa Powder & Protein
Next, sift in the unsweetened cocoa powder and protein powder. Stir until it’s completely combined—this is where the magic starts to happen! If the mixture feels too thick, don’t panic; adding a splash of your choice of non-dairy milk can help reach your desired consistency.
Step 4: Espresso and Salt
Now for that fabulous espresso powder and a touch of sea salt! This is what will make your fudge sing! Mix well, ensuring all ingredients are beautifully incorporated.
Step 5: Taste for Sweetness
Go ahead and taste your mixture! If you like your fudge a bit sweeter, feel free to add a drizzle more of maple syrup. Cooking is all about your personal preference, so make it your own!
Step 6: Prepare Your Jar
Now, transfer your fudge mixture into the jar or container. You can use a spatula to scoop out every last bit of that gooey goodness. Smooth the top out with the spatula, and you can even add toppings like chopped nuts or shredded coconut to create an aesthetically pleasing layer!
Step 7: Chill and Firm Up
Place your jar in the refrigerator for at least 2 hours to allow it to firm up. Trust me; the wait will be worth it! This is a perfect time to clean up your kitchen and maybe whip up another batch!
Step 8: Enjoy!
Once it’s set, dig in! Enjoy your Protein Mocha Fudge straight from the jar, or scoop it out and place it on a pretty plate to share with loved ones.
Serving Suggestions
To serve your Protein Mocha Fudge, you can either present it directly in the jar for a rustic look or scoop it into cute little bowls if you’re hosting a gathering. Drizzle some melted dark chocolate on top for an extra touch of indulgence, and add a sprinkle of sea salt to elevate the flavor. Serve alongside a hot cup of coffee or a chilled glass of almond milk for a delightful pairing!
Recipe Variations
Feeling adventurous? Here are a few creative twists you can try with your Protein Mocha Fudge Jar:
-
Nut Butter Bliss: Swap different nut butters to change the flavor profile—try peanut butter or cashew butter for a different taste adventure.
-
Spicy Fudge: Add a dash of cayenne pepper or cinnamon for a delightful kick. This can elevate your fudge and add a warm, spicy undertone.
-
Fruity Delight: Fold in some dried fruit like cranberries or chopped apricots to add a touch of natural sweetness and chewiness.
-
Mint Mocha: Incorporate a few drops of mint extract for a refreshing mint mocha version—perfect for the holiday season!
-
Vegan Friendly: Use a plant-based protein powder and replace maple syrup with agave or brown rice syrup to make a vegan treat.
Chef’s Notes
This Protein Mocha Fudge Jar is a recipe that has evolved beautifully over time. Initially, I created it to satisfy my sweet-tooth cravings while also fueling my energy levels, but it’s quickly become a favorite among my friends and family! I often find myself making it in large batches to share at potlucks or school events. The smiles I get when they take their first bite are priceless!
One funny kitchen story that comes to mind is when I tried experimenting with different types of protein powder. Let’s just say, not all flavors mix well! The chocolate mint protein powder incident left my friends in stitches, but the fudge was a fun conversation starter.
FAQs and Troubleshooting
Q1: Why did my fudge turn out too crumbly?
A: If your fudge is crumbly, it might be due to using too much protein powder or not enough sweetener. Try mixing in a bit more almond butter or maple syrup to help bind it together.
Q2: Can I freeze the fudge?
A: Absolutely! This fudge freezes well. Just make sure to store it in an airtight container, and it can last for up to three months in the freezer. Just thaw it in the fridge before indulging!
Q3: Can I use a different sweetener?
A: Yes! Feel free to use honey, agave syrup, or even date syrup. Each will bring a unique touch to your fudge, but bear in mind the flavor could change slightly.
Q4: How can I make this fudge richer?
A: To make your fudge even richer, consider adding a tablespoon or two of melted coconut oil or more cocoa powder. Both will enhance the chocolate flavor and creaminess!
Nutritional Info
Here’s a rough breakdown of one serving of your Protein Mocha Fudge Jar (assuming about 12 servings for the entire jar):
- Calories: Approximately 200
- Protein: 6g
- Carbohydrates: 15g
- Fats: 12g
- Fiber: 3g
There you have it, my fellow food lovers! Your Protein Mocha Fudge Jar is ready to be enjoyed, whether as a snack or a dessert. I hope this recipe brings you and your loved ones as much joy as it has brought me. Happy cooking, and might I say, eat with happiness!
Print
Protein Mocha Fudge Jar
- Total Time: 135 minutes
- Yield: 12 servings 1x
- Diet: Vegetarian
Description
A delicious protein-packed mocha fudge that’s perfect for a sweet pick-me-up or post-workout treat.
Ingredients
- 1 cup almond butter
- 1/2 cup maple syrup
- 1/4 cup unsweetened cocoa powder
- 1/2 cup protein powder
- 1 tablespoon espresso powder
- 1/4 teaspoon sea salt
- Optional toppings: chopped nuts, shredded coconut, drizzle of dark chocolate
Instructions
- Prep your workspace.
- Mix together the almond butter and maple syrup in a bowl until smooth.
- Add the cocoa powder and protein powder, stirring until combined.
- Incorporate the espresso powder and sea salt, mixing well.
- Taste for sweetness and adjust with more maple syrup if needed.
- Transfer the mixture into a jar or container and smooth the top.
- Chill in the refrigerator for at least 120 minutes to firm up.
- Enjoy your Protein Mocha Fudge straight from the jar or serve on a plate.
Notes
Store any leftover fudge in an airtight container in the refrigerator for up to one week.
- Prep Time: 15 minutes
- Cook Time: 0 minutes
- Category: Dessert
- Method: No-Bake
- Cuisine: American
Nutrition
- Serving Size: 1 serving
- Calories: 200
- Sugar: 8g
- Sodium: 100mg
- Fat: 12g
- Saturated Fat: 2g
- Unsaturated Fat: 10g
- Trans Fat: 0g
- Carbohydrates: 15g
- Fiber: 3g
- Protein: 6g
- Cholesterol: 0mg
Keywords: protein fudge, mocha fudge, healthy dessert, no-bake treat, gluten-free, snacks
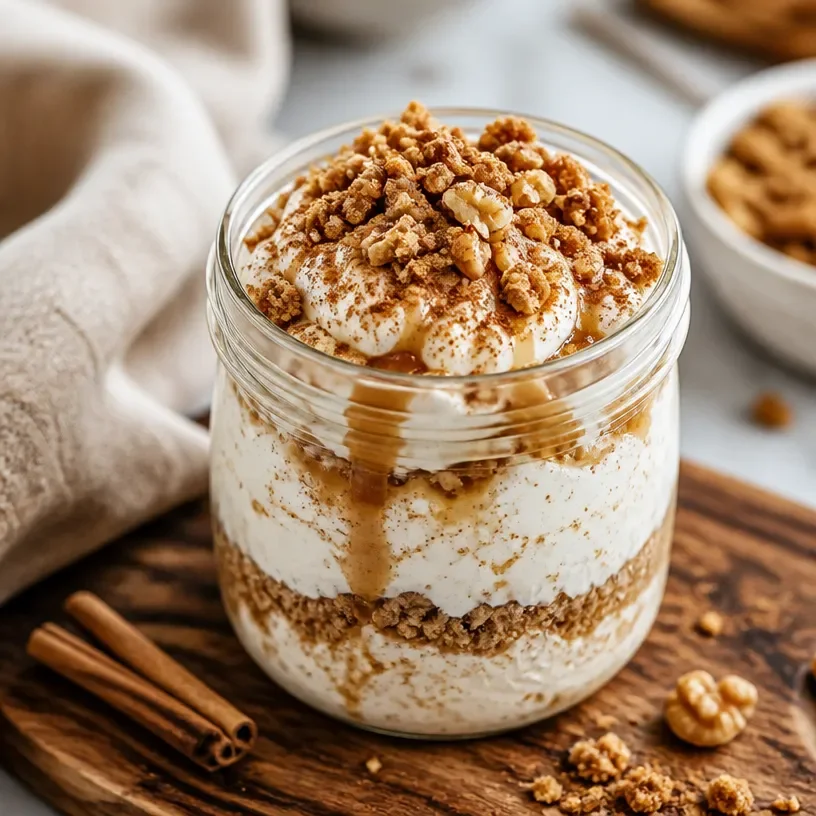
Protein Coffee Cake Jar: 5-Minute Breakfast Meal-Prep
Protein Coffee Cake Jar: A Cozy Culinary Adventure
Welcome to my kitchen, my fellow flavor enthusiasts! I’m Olivia Bennett, and today we’re diving into a cozy yet nutritious treat that combines my love for baking with a healthy twist—Protein Coffee Cake Jars! If the mere thought of rich, spiced coffee cake makes your heart flutter, then you’re in for a delightful journey. Imagine layers of moist coffee cake, swirls of cinnamon, and a touch of protein goodness, all packed into a convenient jar. Whether you’re rushing out the door in the morning or indulging in a guilt-free afternoon snack, these little jars of joy are the perfect solution!
Introduction: Coffee Cake with a Twist
Coffee cake has a soft spot in my heart. Growing up, our kitchen was always filled with the warm scent of freshly baked goods. Mornings were magical; family gathered around the table, laughter flying over mugs of steaming coffee and slices of Mom’s beloved coffee cake. She had a secret ingredient—a touch of love—that made every bite melt in your mouth. However, as an adult, I found myself craving that same warmth but with a modern, health-conscious twist.
Enter the Protein Coffee Cake Jars! This recipe is everything I loved about coffee cake, elevated with protein to fuel our busy days. It’s a meal prep dream! You can make a batch and store them in the fridge, ready to grab and go. Each jar is a celebration of flavor and nostalgia, offering a hearty dose of protein to kickstart your morning or replenish your energy post-workout. Just think of it as a delicious hug in a jar!
Now, grab your apron, and let’s get started on this cozy culinary adventure! I promise, making these Protein Coffee Cake Jars is as much fun as eating them!
Personal Story: A Slice of Nostalgia
Oh, how I fondly remember those chilly autumn mornings! I would wake up to the sound of my mom humming in the kitchen, preparing our breakfast. One of my favorite memories is when she surprised us with her famous coffee cake for our school lunches. We would race to the countertop, fighting over the first slice, not caring about crumbs scattered everywhere. There was something magical about those moments—family gathered over a shared love for food, laughter echoing through the house.
Years later, when I started my health journey, I missed those sweet memories. I wanted to reminisce about that homely comfort but with a nutritious flair. After countless experiments, I crafted this protein-packed version that reminds me of my childhood yet supports my adult lifestyle. It brings that same sense of warmth and togetherness, all while ensuring you can feel good about what you’re eating.
Ingredients: What You’ll Need
Here’s the lineup of ingredients for our Protein Coffee Cake Jars! Each item plays a crucial role in creating this delightful treat.
-
Protein Powder (Vanilla or Chocolate): This is the star of the show! Use a whey or plant-based protein powder to gain that satisfying boost. If you’re not keen on protein powder, you can simply use more flour, but it will alter the nutritional profile.
-
Almond Flour: Adds moisture and a nutty flavor. You can substitute it with oat flour or whole-wheat flour if needed.
-
Coconut Sugar: A lower glycemic index sweetener that adds depth and richness. Brown sugar is a great alternative, but expect a slightly different flavor.
-
Cinnamon: This warm spice brings back memories of cozy kitchens. Feel free to use nutmeg or pumpkin spice for a creative twist!
-
Greek Yogurt: Adds moisture and a protein punch. You can use regular yogurt or even applesauce for a dairy-free alternative.
-
Eggs: For binding and richness. Flax eggs (1 tbsp ground flaxseed + 2.5 tbsp water, let sit to thicken) are a great vegan alternative.
-
Milk (Dairy or Non-Dairy): Keeps the batter smooth. Any milk will do, so choose what you prefer.
-
Baking Powder: Essential for that fluffy texture. Make sure it’s fresh for the best rise!
-
Salt: Just a pinch to enhance all the flavors.
-
Nuts or Chocolate Chips (optional): For that extra crunch and decadence. I love walnuts or dark chocolate, but feel free to leave them out if you want a lighter treat!
Step-by-Step Instructions: Making the Magic Happen
Let’s bring this delicious creation to life! Here’s your step-by-step guide to make these Protein Coffee Cake Jars. Ready? Let’s do this!
-
Preheat Your Oven: Set your oven to 350°F (175°C). Just like the anticipation of that first whiff of coffee in the morning, preheating gets you excited for the magic that’s about to happen!
-
Mix Dry Ingredients: In a large mixing bowl, whisk together the protein powder, almond flour, coconut sugar, cinnamon, baking powder, and salt. This step is essential to ensure that all your dry ingredients incorporate evenly. It also gives you a moment to enjoy the wonderful warm aroma!
-
Combine Wet Ingredients: In another bowl, mix the Greek yogurt, eggs, and milk until it’s smooth and creamy. This is where the magic of moisture happens! The yogurt is going to be your secret weapon for a luscious, cake-like texture.
-
Combine Dry and Wet Mixtures: Gradually add the wet mixture to the dry ingredients, stirring until just combined. Avoid overmixing—this is a common baker’s mistake! A few lumps are okay; they’ll just add to the character of your coffee cake.
-
Prepare Your Jars: Grease your mason jars with a little oil or cooking spray. I find that 8-ounce jars work perfectly for individual servings! You could also use a baking dish if you want a more traditional approach.
-
Layer it Up: Start layering! Fill each jar about halfway with the batter, add a sprinkle of nuts or chocolate chips if you like, and then top with more batter until it’s about three-quarters full. Think of it as creating little flavor-packed layers that’ll surprise you with each bite.
-
Bake: Place the jars on a baking sheet and bake for 20-25 minutes, until the tops are golden brown and a toothpick comes out clean. I know this is the hardest part—your home will smell absolutely divine!
-
Cool and Serve: Once they’re out of the oven, let them cool for a few minutes. These jars can be enjoyed warm or at room temperature, right out of the jar or inverted onto a plate, whichever you prefer!
Serving Suggestions
These delightful Protein Coffee Cake Jars are super versatile! For serving, I love to crown each jar with a dollop of Greek yogurt and a sprinkle of cinnamon. If you want to elevate it even further, drizzle a little maple syrup or honey over the top for that sweet finishing touch. You can serve them straight from the jar for a casual approach, or unmold them onto a plate for a fancier feel—perfect for a brunch gathering!
Recipe Variations
Get creative with these Protein Coffee Cake Jars! Here are a few variations that might tickle your taste buds:
- Pumpkin Spice: Replace half of the yogurt with pure pumpkin puree and add a dash of pumpkin spice for a seasonal twist.
- Blueberry Bliss: Fold in fresh or frozen blueberries for a burst of color and tangy flavor.
- Chocolate Lovers: Use chocolate protein powder and add chocolate chips for an even more decadent treat!
- Nutty Delight: Swap out almond flour for hazelnut flour for a delightful nuttiness.
- Vegan Version: Use flax eggs and a dairy-free yogurt to create an entirely plant-based option!
Chef’s Notes
Every time I make these Protein Coffee Cake Jars, it takes me back to those bustling mornings with my family. I’ll never forget the time I experimented with adding espresso powder for an extra caffeine kick. It didn’t turn out quite as I planned, but it did lead to a hilarious kitchen cleanup session and taught me a valuable lesson: Every misstep is just another opportunity to create something new! These jars can change with the seasons, and I love to switch it up depending on what flavors inspire me.
FAQs and Troubleshooting
-
My coffee cake jars overflowed! What did I do wrong?
This usually means the jars were too full or the baking soda was too potent. Ensure you fill them no more than three-quarters to allow for rising. -
Can I make these ahead of time?
Absolutely! These jars store well in the fridge for up to a week. Just reheat them for a quick breakfast or snack! -
Why is my coffee cake dry?
Overbaking is often the culprit. Keep an eye on them towards the end of baking, and do the toothpick test to check for doneness. -
Can I freeze these jars?
Yes! Just ensure they are entirely cool and store them in the freezer. They make a fantastic meal prep option!
Nutritional Info (Optional)
While the nutritional specifics can change based on ingredient choices, it’s roughly about 200 calories per jar, with a good balance of protein and healthy fats to keep you satisfied!
I hope this recipe brings you as much joy and comfort as it has brought me. Get in your kitchen, put on your favorite tunes, and let’s get baking! Bon appétit! ✨
Print
Protein Coffee Cake Jar
- Total Time: 40 minutes
- Yield: 4 servings 1x
- Diet: High-Protein
Description
Delightful protein-packed coffee cake layered in jars for a cozy and nutritious treat.
Ingredients
- 1 cup Protein Powder (Vanilla or Chocolate)
- 1 cup Almond Flour
- 1/2 cup Coconut Sugar
- 1 tsp Cinnamon
- 1 cup Greek Yogurt
- 2 large Eggs
- 1/2 cup Milk (Dairy or Non-Dairy)
- 1 tsp Baking Powder
- 1/4 tsp Salt
- Nuts or Chocolate Chips (optional)
Instructions
- Preheat your oven to 350°F (175°C).
- Mix dry ingredients in a bowl: protein powder, almond flour, coconut sugar, cinnamon, baking powder, and salt.
- Combine wet ingredients in another bowl: Greek yogurt, eggs, and milk until smooth.
- Combine the wet and dry mixtures together, stirring until just combined.
- Prepare mason jars by greasing them lightly with oil or cooking spray.
- Layer the batter in the jars, filling halfway, adding nuts or chocolate chips if desired.
- Bake for 20-25 minutes until tops are golden and a toothpick comes out clean.
- Cool slightly before serving, enjoy either warm or at room temperature.
Notes
Serve with a dollop of Greek yogurt and a drizzle of maple syrup for added sweetness.
- Prep Time: 15 minutes
- Cook Time: 25 minutes
- Category: Dessert
- Method: Baking
- Cuisine: American
Nutrition
- Serving Size: 1 jar
- Calories: 200
- Sugar: 10g
- Sodium: 200mg
- Fat: 8g
- Saturated Fat: 1g
- Unsaturated Fat: 7g
- Trans Fat: 0g
- Carbohydrates: 20g
- Fiber: 3g
- Protein: 12g
- Cholesterol: 100mg
Keywords: coffee cake, protein, healthy dessert, meal prep, cozy treat
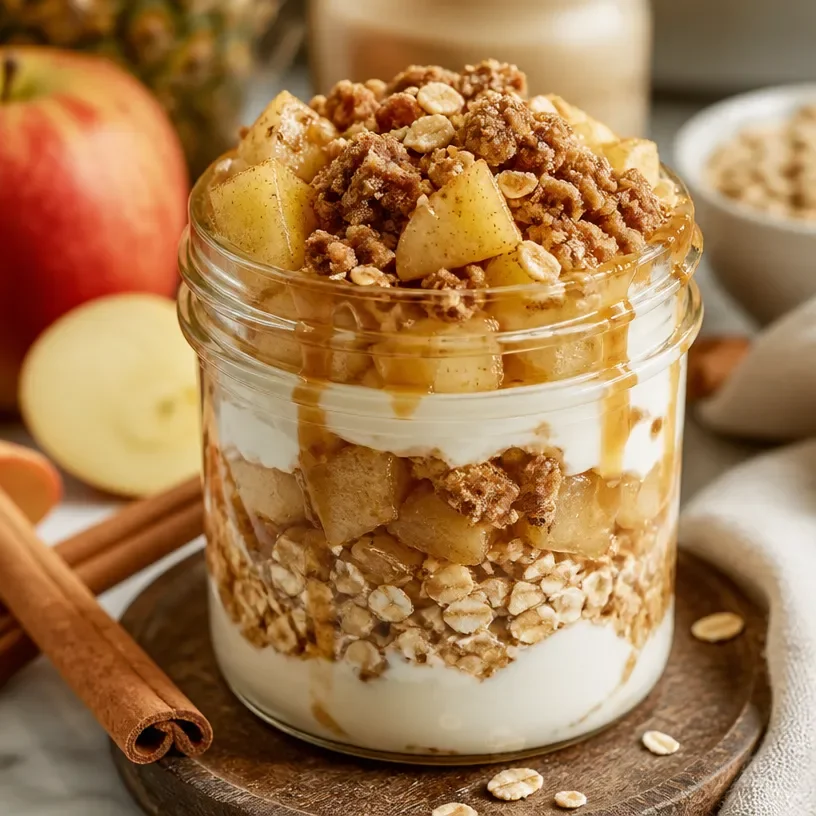
Protein Apple Crisp Jar
Protein Apple Crisp Jar: A Cozy Dessert with a Twist
Welcome to my kitchen! I’m so excited to share one of my all-time favorite recipes with you today: the Protein Apple Crisp Jar. This delightful dessert not only satisfies your sweet tooth but also packs a protein punch—perfect for those cozy nights in or as a make-ahead treat for the week!
Picture this: You’ve just finished a long day, and all you want is something warm and comforting. Maybe you’re snuggled up on the couch with your favorite blanket or gathered around the table with loved ones. The scent of sweet apples, cinnamon, and buttery crisp topping fills the air, creating an inviting atmosphere that welcomes everyone. That’s the essence of my Protein Apple Crisp Jar—it’s not just food; it’s a celebration of flavors and memories that make life beautiful.
I absolutely adore recipes that are as hearty as they are wholesome. Apple crisp is one of those nostalgic desserts that screams comfort—and when you throw in protein, it becomes a deliciously guilt-free indulgence. We all know that autumn brings an abundance of apples, but honestly, any time of year is a good time for this apple crisp. The best part? You can prep it in advance and have it on hand for quick desserts that feel like a big hug in a jar. So grab your spoon, and let’s dive into this cozy treat!
A Taste of Nostalgia
Growing up, my family’s kitchen was always bustling with the joy of cooking and the aroma of freshly baked goods. My mom had a knack for turning everyday ingredients into magical desserts that filled our home with warmth. One fall afternoon, I remember her making a classic apple crisp. As we peeled apples together, I couldn’t wait to taste the sweet filling and the crunchy topping. She would always let me steal bites of the cinnamon-sugar mixture before it even made it into the oven—a little taste of heaven!
That day, as we pulled the crisp out of the oven, the smell was intoxicating. We’d gather around the table, where bowls of creamy vanilla ice cream complemented the warm, gooey apple filling. It was moments like these that cemented my love for cooking and sharing food with those I adore. Now, I’ve swapped in a protein twist to this classic, making it a special treat that still carries the comfort of my roots. It’s amazing how flavors have the power to evoke memories and create new ones in the process!
Ingredients
Let’s gather our ingredients for this Protein Apple Crisp Jar. Here’s what you’ll need to make this deliciously cozy dessert:
-
Apples: A mix of sweet and tart varieties works best (like Honeycrisp and Granny Smith). If you don’t have fresh apples, you can use frozen ones!
-
Oats: Rolled oats create that signature crisp texture. If you’re gluten-free, look for certified gluten-free oats.
-
Protein Powder: Choose your favorite protein powder—whey, plant-based, or whatever you enjoy. You can even use a flavored variety for an extra flavor boost!
-
Brown Sugar or Coconut Sugar: Brown sugar adds depth and richness; coconut sugar is a great alternative if you’re aiming for less processed sweeteners.
-
Cinnamon: This warm spice is essential. Feel free to mix in a pinch of nutmeg for added warmth.
-
Butter or Coconut Oil: This adds richness to the topping and is what makes it all come together. If you’re vegan, coconut oil is a fantastic substitute.
-
Vanilla Extract: A little splash enhances the overall flavor; use pure vanilla for the best results.
-
Salt: Just a pinch brightens up the sweetness and balances the flavors.
These ingredients come together like a big group hug of flavor! They’re simple but impactful, resulting in a dish that turns heads while being surprisingly nutritious.
Step-by-Step Instructions
Now, let’s get started on making this delightful Protein Apple Crisp Jar. Follow these simple steps for a result that will blow your mind!
-
Preheat the Oven: Start by preheating your oven to 350°F (175°C). This is crucial to ensure your apple crisp bakes evenly and gets that beautiful golden brown color we all love.
-
Prep the Apples: Peel, core, and slice your apples into thin wedges. Aim for uniform sizes to promote even cooking. If you’re using a mix of apple varieties, this will add great depth to the flavor!
-
Spice It Up: In a large bowl, toss your sliced apples with a sprinkle of brown sugar (or coconut sugar), a spoonful of cinnamon, and a pinch of salt. Don’t hold back on the spices; they make all the difference.
-
Layer It Up: In your jars, start layering! Begin with a generous scoop of spiced apples at the bottom. Depending on the size of your jars, you might fill them halfway or just below the rim.
-
Prepare the Crisp Topping: In another bowl, combine the rolled oats, protein powder, remaining brown sugar, and cinnamon. Melt your butter (or coconut oil) and mix it in until everything is crumbly. This is where the magic happens!
-
Top It Off: Spoon the crisp topping over the layered apples in each jar. Press it down gently and make sure it’s evenly distributed. This creates that coveted crunchy topping that contrasts beautifully with the soft apples.
-
Bake to Perfection: Place your jars on a baking sheet (to catch any spills) and pop them into the preheated oven. Bake for about 25-30 minutes until the topping is golden brown and the apples are bubbling.
-
Cool Down: Once baked, let your jars cool for a few minutes. The aroma will be irresistible, so be patient! Enjoying hot apple crisp is delightful, but just let it sit for a moment to set.
-
Serve with Love: Top these protein-packed treats with a scoop of your favorite ice cream or dollop of whipped cream if you’re feeling indulgent.
Cooking doesn’t have to be complicated—when you break it down into steps, it becomes a fun and rewarding experience! Each step is an opportunity to savor the process and experiment with flavors.
Serving Suggestions
When it comes to serving, presentation is key! I love to arrange the jars on a rustic wooden board, showcasing each layer of vibrant apple and golden crisp. You can adorn each jar with a sprinkle of cinnamon, a drizzle of honey or maple syrup for added sweetness, or even a few fresh apple slices on the side. A scoop of vanilla ice cream perched atop the warm crisp brings it all together beautifully.
Recipe Variations
Want to switch things up a bit? Here are a few variations to play with your Protein Apple Crisp Jar:
-
Nutty Twist: Add chopped nuts like walnuts or pecans into the crisp topping for added crunch and healthy fats.
-
Berry Bonus: Mix in some fresh or frozen berries with the apple layer for a pop of color and delightful flavor.
-
Spicy Kick: Incorporate a dash of ginger or cardamom for an extra warm and cozy twist.
-
Sweeten It Up: Swap in maple syrup or honey instead of brown sugar for a different kind of sweetness.
-
Fruit Swap: Try this recipe with pears, peaches, or cherries—a delightful way to switch up the flavor profile based on the season!
Chef’s Notes
This recipe has evolved over the years as I’ve learned more about balancing flavors and textures. Initially, I would just make the classic apple crisp, but after experimenting with protein and health-conscious options, I discovered that you can create a delicious dessert that aligns with a balanced lifestyle. It’s funny how cooking allows you to adapt and innovate based on what you have on hand or what season you’re in.
Also, I have to admit… the first time I tried baking in jars, I accidentally overflowed them and ended up with a crispy apple mess in my oven! Now, I always use a baking sheet under my jars as a backup. The little kitchen escapades make the best stories, right?
FAQs and Troubleshooting
Q: Can I make this recipe ahead of time?
Absolutely! You can prepare the jars a day in advance and keep them in the refrigerator until you’re ready to bake. Just add a couple of extra minutes to the baking time if they’re starting cold.
Q: What if my apples turn out mushy?
Using firmer apple varieties and not overbaking will help prevent mushiness. If they do seem soft, fear not! They’ll still taste delicious!
Q: Is it okay to use a different protein powder?
Definitely! You can substitute any protein powder you like—whey, plant-based, or even a flavored option for extra taste.
Q: Can I freeze the assembled jars?
Yes! Layer your ingredients and freeze them before baking. When you’re ready to enjoy, let them thaw in the fridge overnight, then bake as instructed.
Nutritional Info
While the exact nutritional information may vary based on the ingredients you use, each serving generally contains a healthy balance of protein, fiber, and healthy fats. It’s a cozy dessert that won’t sabotage your nutrition goals!
There you have it, folks! The Protein Apple Crisp Jar is not just a dessert; it’s a little piece of comfort that you can whip up anytime—whether you’re treating yourself or sharing with loved ones. I hope this recipe brings as much joy to your kitchen as it does to mine! Now, go on, grab those apples, and let’s make something special together. Happy cooking!
Print
Protein Apple Crisp Jar
- Total Time: 45 minutes
- Yield: 4 servings 1x
- Diet: Vegetarian
Description
A cozy dessert that combines sweet apples, crunchy topping, and a protein twist, perfect for any time of the year.
Ingredients
- 4 medium Apples (a mix of sweet and tart)
- 1 cup Rolled Oats
- 1 scoop Protein Powder
- 1/2 cup Brown Sugar or Coconut Sugar
- 2 tsp Cinnamon
- 1/4 cup Butter or Coconut Oil
- 1 tsp Vanilla Extract
- 1/4 tsp Salt
Instructions
- Preheat the oven to 350°F (175°C).
- Prep the apples by peeling, coring, and slicing them into thin wedges.
- Spice the sliced apples with brown sugar, cinnamon, and salt in a large bowl.
- Layer the spiced apples into jars.
- Prepare the crisp topping by combining oats, protein powder, remaining brown sugar, and cinnamon in a bowl.
- Melt the butter (or coconut oil) and mix it into the oat mixture until crumbly.
- Top each jar with the crisp topping and press down gently.
- Bake for 25-30 minutes until the topping is golden brown and apples are bubbling.
- Cool for a few minutes before serving.
- Serve with a scoop of ice cream or whipped cream.
Notes
Can be made ahead of time and stored in the refrigerator. Adjust baking time if jars are cold.
- Prep Time: 15 minutes
- Cook Time: 30 minutes
- Category: Dessert
- Method: Baking
- Cuisine: American
Nutrition
- Serving Size: 1 jar
- Calories: 350
- Sugar: 22g
- Sodium: 150mg
- Fat: 15g
- Saturated Fat: 6g
- Unsaturated Fat: 8g
- Trans Fat: 0g
- Carbohydrates: 48g
- Fiber: 5g
- Protein: 10g
- Cholesterol: 25mg
Keywords: apple crisp, dessert, healthy dessert, cozy dessert, protein dessert, gluten-free options
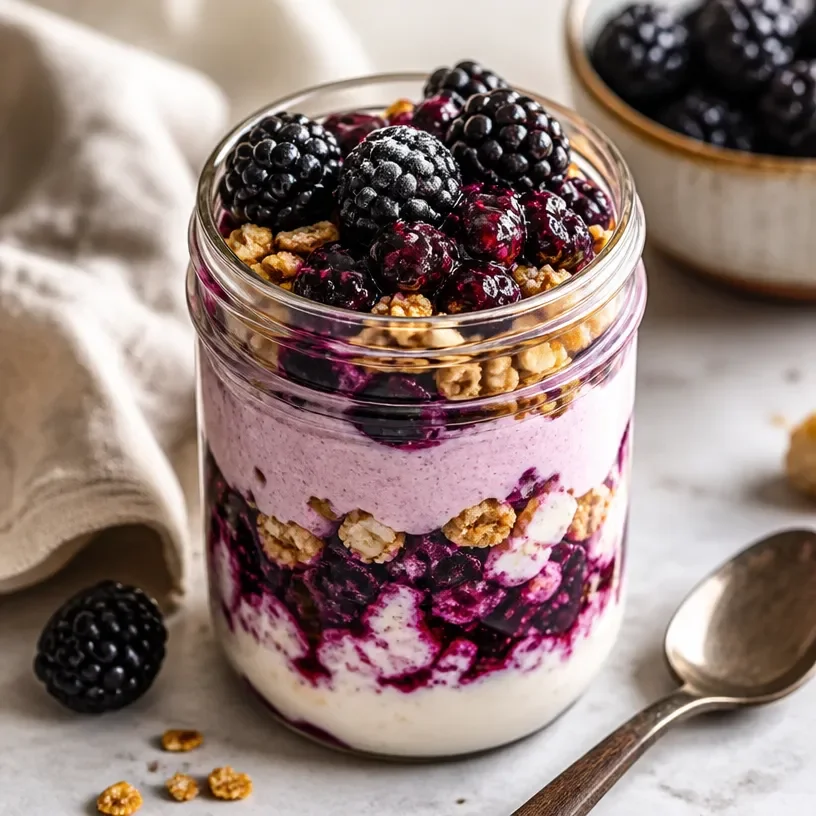
High-Protein Blackberry Cobbler Jar: Easy Meal Prep
Protein Blackberry Cobbler Jar: A Delightful Twist on a Classic Comfort
Welcome to my kitchen, fellow food lovers! I’m Olivia Bennett, and I’m thrilled to have you here. Today, we’re diving into a dish that marries health and indulgence: the Protein Blackberry Cobbler Jar. If you’re anything like me, the scent of sweet, baked blackberries topped with a golden crumble sends you back to sun-drenched summers spent on the back porch, savoring life’s simple pleasures. Let’s recreate that joy together!
This recipe is a creative entry into the world of cobblers, which have been a beloved dessert for centuries. The luscious berries, combined with a protein-packed twist, make it perfect for breakfast, snacks, or a guilt-free dessert. Imagine pulling a perfectly layered jar from the fridge, the warm and inviting smells wrapping around you like a cozy hug. Sounds delightful, right?
Now, don’t worry if you don’t have fancy culinary skills in your arsenal. This delightful dessert can be made by anyone! I promise you; you’ll feel like a star chef in your kitchen without spending hours to perfect it. So, gather your ingredients, put on that favorite apron (yes, even if it’s the one sporting a bit of flour from previous adventures), and let’s create something special together that will spark conversations around your table.
A Walk Down Memory Lane: The Cobbler That Topped the Charts
Let me take you back to my childhood—that unforgettable summer when my grandmother decided to host a ‘Cobbler Competition’ at our family reunion. Relatives from near and far would gather, trays of cobblers dotting the picnic tables, and everyone would taste and vote for their favorites.
Amidst the sea of fruit-filled goodness, my grandmother’s signature blackberry cobbler reigned supreme. It was sweet yet tangy, and oh-so-tender, with the most delightful buttery crumble on top. I still remember the way her laughter filled the air as she recounted each family member’s ‘secret’ cobbler recipe.
Inspired by those sweet memories, I’ve crafted a version that stays true to those nostalgic flavors while reimagining it in a protein-packed jar. This recipe holds within it not just ingredients but a story, a smell, and a memory that brings warmth and joy. Ready to create your own memory? Let’s go!
Ingredients for Protein Blackberry Cobbler Jar
Here’s what you’ll need to craft your delightful Protein Blackberry Cobbler Jar:
-
Fresh Blackberries (2 cups): These gorgeous gems are sweet, juicy, and packed with antioxidants. If fresh blackberries are out of season, feel free to swap them for frozen ones. Just thaw and drain excess liquid.
-
Protein Powder (1 scoop): I recommend a vanilla-flavored protein powder for a sweet, creamy taste. This can easily be substituted with your favorite plant-based protein if you prefer a dairy-free option.
-
Oats (1 cup): Use rolled oats for a chewy texture that holds up well in layering. You can swap oats for gluten-free oats if you have dietary restrictions.
-
Almond Flour (½ cup): It adds a nutty flavor and moisture to the crumble. If you’re nut-free, consider coconut flour or whole wheat flour as alternatives.
-
Maple Syrup (¼ cup): A natural sweetener that adds depth to our layers, but honey or agave syrup can easily step in if preferred.
-
Coconut Oil (¼ cup, melted): This adds healthy fat and a rich flavor to our cobbler topping. Unsalted butter can work too if you’re not concerned about dairy.
-
Cinnamon (1 teaspoon): A warming spice that elevates the overall flavor. Feel free to add nutmeg or cardamom if you’re in the mood for a twist!
-
Salt (a pinch): Just a small dash to balance the sweetness.
-
Greek Yogurt (optional, ½ cup): This is optional for serving but adds creaminess to your dish, great for a protein boost. Non-dairy yogurt works just as well!
Each ingredient brings a little something special to this dish. As you can see, they are versatile and allow for a bit of personal flair and creativity — a true hallmark of a homey atmosphere.
Step-by-Step Instructions
Let’s jump in and make our delightful Protein Blackberry Cobbler Jar. Here’s how to do it:
Step 1: Prepare Your Blackberries
First off, preheat your oven to 350°F (175°C). While it’s warming up, rinse the blackberries under cold water and gently pat them dry. In a mixing bowl, combine the blackberries with a tablespoon of maple syrup and a sprinkle of cinnamon. Gently toss, taking care not to mash those juicy berries just yet. This step is crucial because it allows those sweet flavors to meld together beautifully while they roast, creating a syrupy base for our cobbler.
Step 2: Make the Cobbler Topping
In another bowl, mix together the oats, almond flour, protein powder, melted coconut oil, maple syrup, cinnamon, and salt. Use your hands for this part! It feels satisfying to blend everything together until the mixture resembles wet sand. You want clumps for that delightful crumble texture and the oats will soak up some moisture, giving a pleasant chew.
This is where you can add your personal touch—think about adding chopped nuts or even a handful of chocolate chips if you’re feeling adventurous!
Step 3: Layer the Jar
Now comes the fun part! Grab a mason jar (or any glass jar) and start layering. Begin with a scoop of the blackberry mixture at the bottom, spreading them evenly. Next, add a generous layer of the topping mixture. Alternate layers until you run out, finishing with a topping layer to give it that beautiful golden-brown top when baked. Aim for about three layers of each component for a full, visually appealing jar.
Step 4: Bake It Up
Place your jar (or jars) in the oven and let them bake for about 25-30 minutes, or until the topping turns a lovely golden brown and your kitchen fills with that heavenly aroma. Keep an eye on it to ensure it doesn’t over-brown—every oven is a bit different!
Step 5: Cool and Serve
Once out of the oven, let your Protein Blackberry Cobbler Jars cool for about 10 minutes. This cooling time is crucial—it allows the layers to set a bit more so they don’t spill when you dig in. Serve it warm for a delicious dessert or let it cool down fully for a fantastic breakfast option throughout the week!
Serving Suggestions
Serving your delightful cobbler jar can be as simple or as fancy as you’d like! For a cozy presentation, serve it directly in the jar with a rustic spoon on the side. If you want to go the extra mile, top with a dollop of Greek yogurt and a sprinkle of cinnamon or nuts for added crunch. Fresh mint leaves can also add a beautiful touch. These jars are perfect for individual servings, making them great for brunch gatherings or as meal prep for the week ahead.
Recipe Variations
As with any beloved recipe, there’s always room for creativity! Here are some fun variations you might enjoy:
-
Mixed Berry Cobbler: Swap blackberries for a mix of berries such as strawberries, blueberries, and raspberries for a berry medley experience!
-
Peach Protein Cobbler: In lieu of blackberries, use fresh or canned peaches (drained), which give a summery twist to this dish.
-
Chocolate Chip Cobbler: Fold in some mini chocolate chips into the topping for a rich, indulgent flair.
-
Coconut Delight: Add shredded coconut to the topping for added texture and tropical flavor.
-
Vegan Version: Use flaxseed meal and water as a substitute for protein powder and a dairy-free yogurt topped with coconut cream for a vegan twist.
Chef’s Notes
You know, experimenting in the kitchen often leads to beautiful discoveries. This particular recipe has evolved from my grandmother’s classic to something that feels more aligned with my everyday life. I love the flexibility of it—what I might have on hand or what’s in season can easily transform our creation!
Fun fact: The first time I tried making this recipe, I accidentally added too much coconut oil, resulting in a gooey mishap. But you know what? It turned out to be a frothy, berry smoothie when blended! Sometimes, our kitchen blunders lead to delicious detours—we just have to keep the joy of cooking alive.
FAQs and Troubleshooting
Here are some common questions you might have or issues you might encounter when making this recipe:
-
What if I don’t have protein powder? No problem! You can simply skip it or use a bit more almond flour and oats instead. Your cobbler will be a bit less protein-rich, but still yummy!
-
My cobbler turned out too soggy. What happened? It’s likely there was too much moisture from the berries. Make sure to drain any excess liquid if using frozen blackberries. Baking your cobbler longer than the recommended time is also a good idea.
-
Can I make this ahead of time? Absolutely! You can prepare the layers in advance and store them in the refrigerator. Just be sure to bake right before serving for the best taste and texture.
-
How do I store leftovers? Any leftovers can be sealed in an airtight container in the fridge for up to three days. Enjoy cold or reheat in the microwave for a warm treat!
Nutritional Info
Per serving (1 jar):
- Calories: 310
- Protein: 15g
- Carbohydrates: 45g
- Sugar: 10g
- Fat: 12g
- Fiber: 7g
There you have it—a cozy creation that not only delights the taste buds but fills your kitchen with love and warmth. Thank you for sharing this delicious journey with me, and remember, whether you’re cooking for yourself or for others, let your passion shine through every step of the way! Happy cooking, friends!
Print
Protein Blackberry Cobbler Jar
- Total Time: 45 minutes
- Yield: 4 servings
- Diet: Vegetarian
Description
A creative twist on the classic cobbler, this Protein Blackberry Cobbler Jar is healthy yet indulgent, perfect for breakfast, snacks, or dessert.
Ingredients
- Fresh Blackberries (2 cups)
- Protein Powder (1 scoop)
- Oats (1 cup)
- Almond Flour (½ cup)
- Maple Syrup (¼ cup)
- Coconut Oil (¼ cup, melted)
- Cinnamon (1 teaspoon)
- Salt (a pinch)
- Greek Yogurt (optional, ½ cup)
Instructions
- Preheat your oven to 350°F (175°C). Rinse blackberries and toss with a tablespoon of maple syrup and a sprinkle of cinnamon.
- Mix together oats, almond flour, protein powder, melted coconut oil, maple syrup, cinnamon, and salt until it resembles wet sand.
- Layer the ingredients in a mason jar starting with the blackberry mixture followed by the topping mixture until all components are used.
- Bake in the oven for about 25-30 minutes until the topping turns golden brown.
- Cool for about 10 minutes before serving.
Notes
For a cute presentation, serve directly in the jar with a rustic spoon. Top with Greek yogurt and cinnamon for extra flair.
- Prep Time: 15 minutes
- Cook Time: 30 minutes
- Category: Dessert
- Method: Baking
- Cuisine: American
Nutrition
- Serving Size: 1 serving
- Calories: 310
- Sugar: 10g
- Sodium: 100mg
- Fat: 12g
- Saturated Fat: 8g
- Unsaturated Fat: 4g
- Trans Fat: 0g
- Carbohydrates: 45g
- Fiber: 7g
- Protein: 15g
- Cholesterol: 0mg
Keywords: blackberry cobbler, healthy dessert, protein dessert, baking, summer dessert
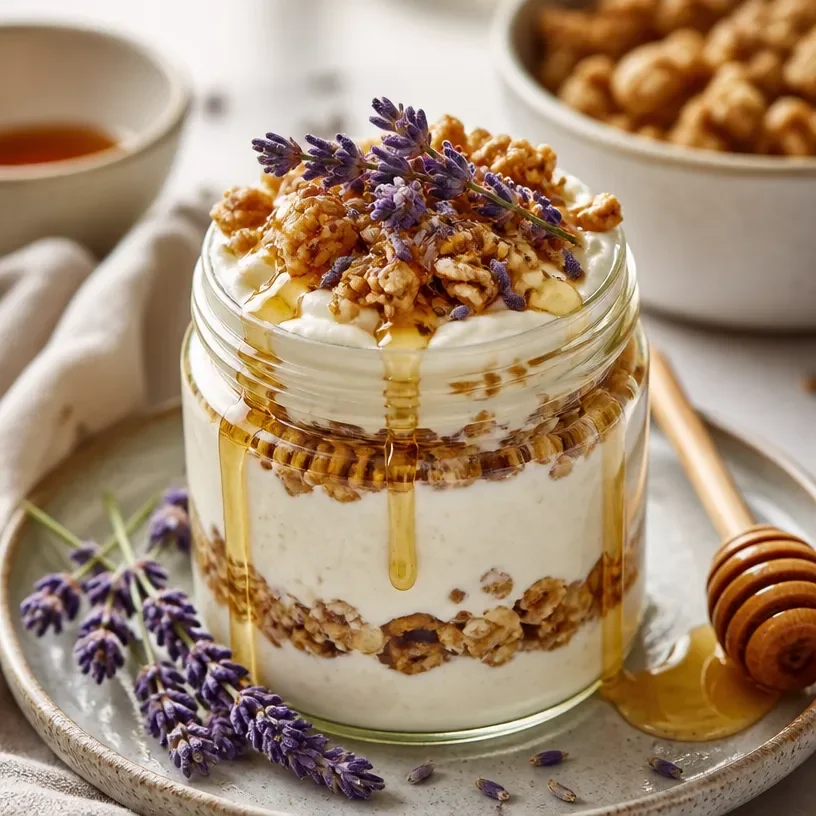
High-Protein Honey Lavender Jar: Quick Meal-Prep Snack
Introducing the Sweet and Savory Delight: Protein Honey Lavender Jar
Hello, fellow food lovers! Welcome back to my kitchen, where today, we’re diving into a dish that’s as delightful as a warm hug on a chilly day: the Protein Honey Lavender Jar. If you’ve ever wanted to indulge in something that’s not only delicious but also nourishing, this is the recipe for you!
Lavender, often associated with relaxation and serenity, is an extraordinary herb that brings a unique twist to our everyday meals. Combining this floral goodness with protein, honey, and a few simple ingredients transforms this dish into a blissful treat. Whether you’re prepping for a busy week ahead or looking for a light snack, the Protein Honey Lavender Jar is as versatile as it is delectable!
As you savor this dish, you’ll find it bursts with flavors that transport you to a sun-drenched field of lavender in Provence. And it’s not just about taste; it’s about creating something uniquely yours that excites your taste buds while nurturing your body. Each spoonful is a delightful reminder of the love and care that goes into home cooking—passed down through generations, creating memories that linger long after the meal is finished.
In this post, I’ll share not only the recipe but also the joy that comes from cooking and the little moments that make our time in the kitchen magical. So, roll up your sleeves, and let’s make some delicious memories together!
A Walk Down Memory Lane: My Lavender Affair
I’ll never forget the first time I encountered lavender in a recipe. It was at my grandmother’s kitchen table, where she’d whip up her famous lavender shortbread cookies that seemed to transport everyone into a blissful state of mind. The aroma of freshly baked cookies filled her cozy kitchen, intermingling with laughter and love. They were not just treats; they were memories embodied in sweetness.
After every bite, I found myself enchanted not merely by the flavor but by the stories shared around that table, where culinary creativity collided with family traditions. It was in those moments that I developed a deep appreciation for the way cooking can bring people together, transcending age and time. Years later, I wanted to recreate that enchantment in a new form, resulting in the Protein Honey Lavender Jar—a blend of nostalgia and modernity, meant for invigorating both body and soul.
Ingredients: Here’s What You’ll Need
Before we jump into the cooking process, let’s gather our ingredients. Here’s what you’ll need for your Protein Honey Lavender Jar:
-
Greek Yogurt (1 cup)
A creamy base that packs protein and probiotics. Substitute with almond yogurt for a dairy-free option or any yogurt of your choice. -
Honey (2 tablespoons)
A natural sweetener that complements lavender beautifully. Maple syrup or agave can be great substitutes if you’re looking for a vegan option. -
Dried Culinary Lavender (1 teaspoons)
High-quality lavender adds a floral note. Always opt for culinary-grade lavender; the others may not be safe to eat. -
Vanilla Extract (1 teaspoon)
This adds a touch of warmth and richness. Feel free to swap it out for a splash of almond extract for a different flavor profile. -
Protein Powder (1 scoop)
Optional, but I love adding this for an extra protein punch! Choose your favorite, whether whey, pea, or hemp protein. -
Chopped Fresh Fruits (½ cup)
Seasonal fresh fruits like berries, peaches, or sliced bananas brighten up the jar. Mix and match based on what’s available! -
Granola or Nuts (¼ cup)
For that satisfying crunch! Use gluten-free granola or nuts if you want a change.
Step-by-Step Instructions: Let’s Cook!
Now that we have our ingredients ready, it’s time to create our delicious Protein Honey Lavender Jar! Follow these simple steps:
-
Prepare the Base:
In a mixing bowl, start by combining the Greek yogurt and honey. Stir until smooth. This mixture serves as a creamy, dreamy foundation for your jar.Tip: If you’re using a plant-based yogurt, make sure it is unsweetened to control the sweetness of the dish.
-
Infuse with Flavor:
Sprinkle in the dried culinary lavender and vanilla extract. Gently fold these ingredients into your yogurt mixture to avoid breaking down the dried flowers too much.Chef Insight: Too much lavender can easily overwhelm the palate, so start with a small amount and adjust to your taste!
-
Add the Protein:
If you’re including protein powder, now is the time to gently fold it in to ensure even distribution without clumping.Little Hack: To prevent clumping, mix the protein powder with a tablespoon of your yogurt before adding it in—trust me, it makes a world of difference!
-
Layering Fun:
In your favorite jar or bowl, create layers starting with the yogurt mixture. Add a layer of chopped fresh fruits, followed by a sprinkle of granola or nuts for crunch. Repeat the layers as desired.Serving Suggestion: A clear jar is ideal to showcase those beautiful layers—everyone will be hungry just by looking at it!
-
Final Touch:
Drizzle a little extra honey on top for sweetness and garnish with a few lavender buds or a slice of lemon for that extra flair.Chef’s Note: It’s all about the presentation. A well-styled jar looks appealing and invites people to dig in!
-
Chill and Serve:
Though you could enjoy it right away, chilling your jars for at least 30 minutes lets the flavors meld beautifully. This dish is perfect for meal prep, making it easy to grab and go.
Serving Suggestions: Make It Beautiful
Presenting food is an art. For a gorgeous presentation, layer your Protein Honey Lavender Jar in clear mason jars or parfait glasses, so the vibrant colors of the fruits and the creamy yogurt are on display. You could also serve this delightful treat alongside a steaming cup of chamomile tea or fresh juice, enhancing the overall experience. Add a small spoon or a sprig of fresh lavender on the side for that extra touch of elegance!
Recipe Variations to Keep Things Exciting
Get your creative juices flowing with these fun twists on the original recipe:
- Berry Bliss: Swap out the fruit with a mixed berry medley for a touch of tartness and sweetness.
- Chocolate Delight: Add a teaspoon of cocoa powder to the yogurt for a chocolatey treat.
- Nutty Banana: Layer in sliced bananas and a handful of walnuts for added texture and flavor.
- Caramel Lavender: Instead of honey, drizzle with lavender-infused caramel for a richer flavor profile.
- Breakfast Parfait: Layer with oatmeal instead of granola for a hearty breakfast option.
Chef’s Notes: A Touch of History
Every recipe carries within it a story worth sharing. The Protein Honey Lavender Jar came about as I explored the health benefits of lavender while trying to create a protein-rich snack. The balancing act between flavors led to an exciting adventure in the kitchen, resulting in a dish that not only feeds the body but warms the heart. Every time I prepare it, I’m reminded of those beautiful afternoons with my grandmother—an homage to her love for creative cooking and the timeless joy it brings.
FAQs and Troubleshooting
Q: My yogurt mixture is too thick; how can I thin it out?
A: Simply add a splash of milk (dairy or non-dairy) to your yogurt until you reach the desired consistency.
Q: Can I use fresh lavender instead of dried?
A: Yes, but be cautious! Fresh lavender is more potent, and you should use it sparingly to prevent bitterness.
Q: How long will the jars stay fresh in the fridge?
A: They will keep in the fridge for about 2-4 days, but they’re best enjoyed fresh.
Q: I don’t like Greek yogurt; what can I use instead?
A: Feel free to switch to any yogurt you prefer! Dairy-free yogurts work wonderfully, too.
Nutritional Info
(Nutritional info can vary depending on specific brands and ingredient choices. Please calculate based on your exact ingredients.)
- Calories: ~250-300 (per serving)
- Protein: ~15g
- Fat: ~6g
- Carbohydrates: ~45g
- Fiber: ~5g
The Protein Honey Lavender Jar is more than just food; it’s an experience waiting to happen. It’s an invitation to gather around the table, share stories, and indulge in something that delights the palate and nourishes the soul. So, roll up those sleeves, let the lavender fields inspire your cooking, and most importantly—enjoy! Happy cooking!
Print
Protein Honey Lavender Jar
- Total Time: 30 minutes
- Yield: 4 servings 1x
- Diet: Vegetarian
Description
A delightful blend of Greek yogurt, honey, and lavender for a nourishing snack.
Ingredients
- 1 cup Greek Yogurt
- 2 tablespoons Honey
- 1 teaspoon Dried Culinary Lavender
- 1 teaspoon Vanilla Extract
- 1 scoop Protein Powder (optional)
- ½ cup Chopped Fresh Fruits
- ¼ cup Granola or Nuts
Instructions
- Prepare the Base: In a mixing bowl, start by combining the Greek yogurt and honey. Stir until smooth.
- Infuse with Flavor: Sprinkle in the dried culinary lavender and vanilla extract. Gently fold these ingredients into your yogurt mixture.
- Add the Protein: If including protein powder, gently fold it in to ensure even distribution.
- Layering Fun: In your favorite jar or bowl, create layers starting with the yogurt mixture, then add chopped fresh fruits and sprinkle granola or nuts. Repeat layers.
- Final Touch: Drizzle a little extra honey on top and garnish with lavender buds or a slice of lemon.
- Chill and Serve: Chill your jars for at least 30 minutes before serving to let flavors meld.
Notes
Chill for at least 30 minutes for optimal flavor melding. Presentation is key, use clear jars to showcase layers.
- Prep Time: 15 minutes
- Cook Time: 0 minutes
- Category: Snack
- Method: No-Cook
- Cuisine: Fusion
Nutrition
- Serving Size: 1 serving
- Calories: 285
- Sugar: 20g
- Sodium: 90mg
- Fat: 6g
- Saturated Fat: 2g
- Unsaturated Fat: 4g
- Trans Fat: 0g
- Carbohydrates: 45g
- Fiber: 5g
- Protein: 15g
- Cholesterol: 10mg
Keywords: protein, lavender, healthy snack, yogurt parfait, meal prep
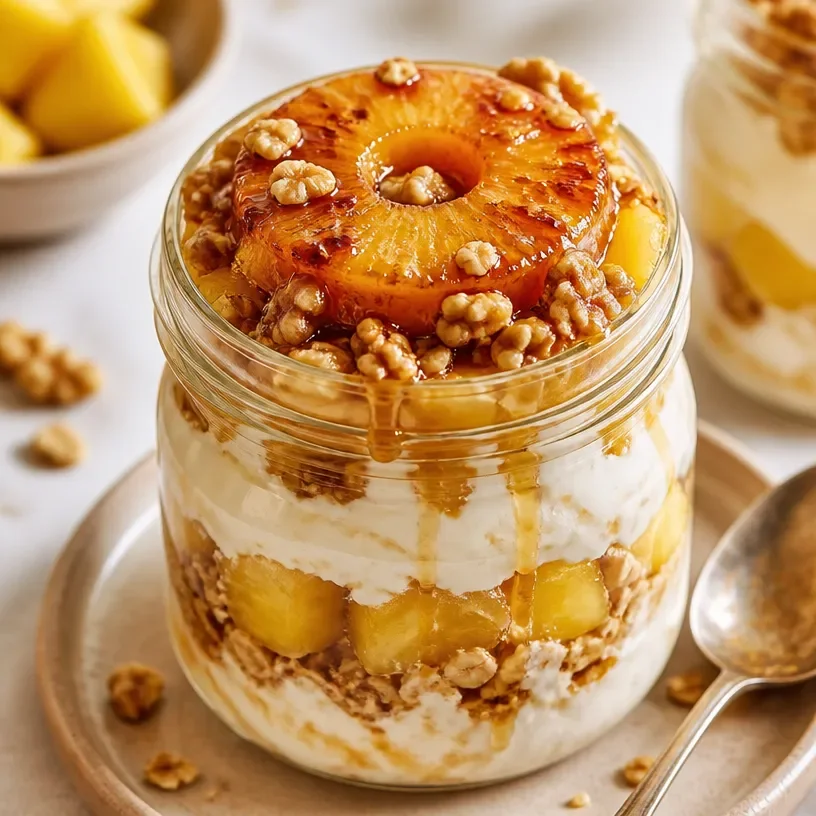
Ingredient Protein Pineapple Upside-Down Cake Jars
A Sweet Twist on Tradition: Protein Pineapple Upside-Down Cake Jars
Welcome to my kitchen, friends! Today, we’re whipping up a delightful treat that’s just as nostalgic as it is modern—a Protein Pineapple Upside-Down Cake Jar! As someone who loves to blend classic flavors with a contemporary twist, this recipe strikes the perfect balance between indulgence and health. If you’re a fan of moist, fruity desserts but also want a protein-packed punch, then you’ve landed in the right spot.
Growing up, my family had a tradition of making pineapple upside-down cake during special celebrations. I can vividly remember my grandmother standing in front of the oven, peering through the glass, her apron dusted with flour and smiles. Each cake emerged with a golden, caramelized pineapple topping—a sweet aroma that filled our home. We’d gather around the dining table, forks at the ready, digging into the delectable layers of cake and fruit, laughter echoing with each bite. This dessert was more than just a treat; it was a way to create memories, bond, and share our love of food.
Fast forward to today, and while I still cherish those childhood memories, I wanted to create a version that aligns with my current lifestyle—a dessert that could double as a snack or a post-workout treat. Enter the Protein Pineapple Upside-Down Cake Jar! This updated version keeps the nostalgia intact while adding a protein boost that won’t make you feel guilty. Plus, with the charming little jars, you can easily make portions for everyone. Let’s get to it!
Personal Story
One of the vivid memories I have associated with pineapple upside-down cake was my first attempt at making it solo. I was around twelve years old, and my mom was busy in the garden, tending to her flowers. Feeling a surge of independence, I decided it was the perfect time to surprise her with a homemade cake. While I followed her handwritten recipe, I accidentally swapped the sugar and salt—whoops! The look on my family’s faces when they tasted my creation was priceless. To this day, we laugh about that salty cake, but it taught me a valuable lesson about paying attention to detail in the kitchen. In essence, cooking is about experimenting, making mistakes, and learning—just like life. So, let’s avoid that salty scenario together and dive into this delicious Protein Pineapple Upside-Down Cake Jar, shall we?
Ingredients
Here’s what you’ll need for your Protein Pineapple Upside-Down Cake Jar:
-
Canned Pineapple Slices
The classic star of the dish, pineapple adds a juicy sweetness to your cake! Opt for canned in juice (not syrup) to keep it healthier. Substitution tips: fresh pineapple works wonderfully if you prefer to go fresh. -
Brown Sugar
This gives that signature caramel flavor when it melts with the pineapple. You can substitute it with coconut sugar for a healthier option. Tip: lightly pack it into your measuring cup for extra richness! -
Unsalted Butter
A must-have for moist, flavorful cake. If you’re watching your dairy intake, try using a vegan butter substitute or unsweetened applesauce. Insight: using room temperature butter helps it blend better with the sugar. -
Self-Rising Flour
This flour already contains baking powder and salt, making it a convenient choice. For a gluten-free option, replace it with oat flour or a gluten-free all-purpose blend. Tip: sift the flour for lightness! -
Protein Powder
The star of our healthy twist! You can use whey protein or your favorite plant-based powder. Insight: flavors like vanilla or coconut work best! -
Eggs
These keep the cake moist and help it rise. For a vegan option, applesauce, mashed bananas, or flax eggs can do the trick! Chef’s tip: make sure they’re at room temperature for better mixing! -
Vanilla Extract
Enhances the overall flavor profile. Use pure extract if possible, or consider almond extract for a nutty twist. -
Cinnamon
A savory addition that complements the sweetness of the pineapple. Feel free to add more if you love that warm spice! -
Greek Yogurt (optional)
This adds protein and moisture to the cake. You can substitute it with any plain yogurt or even silken tofu for a vegan alternative.
Step-by-Step Instructions
Step 1: Prepare the Jars
Before we dive into mixing, let’s set the stage! Preheat your oven to 350°F (175°C). While that’s warming up, grab your cute glass jars—these will be our charming individual servings. Lightly butter the insides of each jar and sprinkle a bit of brown sugar at the bottom. This forms a delightful caramel layer once the cakes bake!
Tip: If you’re lucky enough to have mini cast iron skillets, they could work perfectly for an individual serving too!
Step 2: Arrange the Pineapple
After placing the sugar and butter, lay one pineapple slice on top, or if you’re feeling fancy, cut the slices into smaller pieces and arrange them artfully. You can even throw in some maraschino cherries for an extra nostalgic flair!
Pro tip: Feel free to add a touch of coconut flakes for some tropical vibes.
Step 3: Mix the Batter
In a mixing bowl, cream together the butter and brown sugar until fluffy. This usually takes about 3-5 minutes with an electric mixer. Add in your eggs and vanilla extract, mixing until fully combined.
Chef’s hack: You can always substitute one egg with ¼ cup of Greek yogurt for added moisture!
Step 4: Dry Ingredients Unite!
In another bowl, whisk together the self-rising flour, protein powder, cinnamon, and a pinch of salt. Gradually fold this dry mixture into the wet ingredients. Be careful not to overmix here! You want it all combined but don’t mind a few lumps; they will bake out perfectly.
Note: If your batter feels too thick, mix in a splash of milk (dairy or plant-based) to achieve the desired consistency.
Step 5: Fill the Jars
Now, it’s time to scoop the batter into your prepared jars—about two-thirds full should do (remember, they need room to rise!).
Tip: Using an ice cream scoop can make this part a breeze!
Step 6: Bake Until Perfect
Pop those jars in the oven and bake for about 20–25 minutes or until a toothpick inserted comes out clean. The smell that fills your kitchen during this time will have you tapping your toes in excitement!
Note: Keep an eye on them to avoid overbaking; we want moist, fluffy goodness!
Step 7: Cool and Serve
Once baked, let the jars cool for about 10 minutes. Carefully run a knife around the edge of the cake, then flip it over to reveal the gorgeous caramelized pineapple topping. If the cake doesn’t gently release, give it a nudge with a spoon.
Pro chef tip: Serve warm with a dollop of Greek yogurt or a scoop of your favorite ice cream on top for a wonderful indulgence!
Serving Suggestions
These Protein Pineapple Upside-Down Cake Jars are beautiful on their own, but presentation is key! Serve them directly in the jars for a rustic vibe. You can add a sprig of fresh mint on top for a pop of color. Or, if you want to take it a step further, a drizzle of honey or a sprinkle of toasted coconut will elevate the look and flavor!
Recipe Variations
- Coconut Cream Twist: Mix shredded coconut into both the batter and as a topping for a tropical flair!
- Berry Blend: Swap the pineapple for mixed berries—think blueberries, strawberries, and raspberries for a twist on a classic.
- Spiced Variations: Add nutmeg or cardamom along with the cinnamon for a more complex flavor profile.
- Sugar-Free Option: Use stevia or monk fruit sweetener in place of brown sugar for a lower-calorie treat.
- Nutty Goodness: Toss in some walnut or pecan pieces for added crunch and nutrition.
Chef’s Notes
This recipe has a special place in my heart, not just for its nostalgic flavors but because it represents a journey—a blend of my childhood love for cooking with my current focus on health. The idea of turning a traditional dessert into something more nourishing is a reflection of growth and creativity in the kitchen. Remember, the best part about cooking is making it your own. If you find yourself having too many missed moments with measuring cups or flour dust, know that those are the stories worth telling around the table!
FAQs and Troubleshooting
Q1: My cake is too dense, what went wrong?
A: Dense cakes can occur if the batter is overmixed or if there’s too much flour. Be sure to gently fold the flour into the wet ingredients and measure accurately.
Q2: How can I make these jars ahead of time?
A: You can prepare the batter the night before and store it in the fridge. Fill the jars just before baking for the freshest outcome.
Q3: What if my jars crack in the oven?
A: Make sure you avoid sudden temperature changes—never place a cold jar in a hot oven! Let them come to room temperature to prevent shock.
Q4: How do I store leftovers?
A: These cakes can be stored in an airtight container in the refrigerator for up to three days. Simply reheat them for a quick treat any time!
Nutritional Info
While specific nutritional information will depend on your exact ingredients and measurements, here’s a general rundown of what you can expect:
- Calories: Approximately 180 per serving (1 jar)
- Protein: About 10-15g (depending on the protein powder used)
- Carbs: Roughly 25g
- Fats: Around 6g
Thank you for joining me on this delightful journey into the world of Protein Pineapple Upside-Down Cake Jars! With a touch of nostalgia and a dose of modern creativity, I hope this recipe inspires you to create your own memories in the kitchen. Whether for a brunch with friends or a special treat for yourself, these little jars are sure to bring joy. Happy baking! 🍍✨
Print
Protein Pineapple Upside-Down Cake Jars
- Total Time: 40 minutes
- Yield: 4 servings
- Diet: Gluten-Free, Vegetarian
Description
A delightful and healthy twist on the classic pineapple upside-down cake, these protein-packed cake jars are perfect for a nostalgic treat.
Ingredients
- Canned Pineapple Slices
- Brown Sugar
- Unsalted Butter
- Self-Rising Flour
- Protein Powder
- Eggs
- Vanilla Extract
- Cinnamon
- Greek Yogurt (optional)
Instructions
- Preheat your oven to 350°F (175°C) and butter the insides of glass jars with brown sugar at the bottom.
- Arrange the pineapple slices on top of the butter and sugar in the jars.
- Cream together the butter and brown sugar until fluffy, then add the eggs and vanilla extract.
- Whisk the self-rising flour, protein powder, cinnamon, and salt in another bowl, then fold it into the wet ingredients.
- Scoop the batter into the jars, filling them about two-thirds full.
- Bake for 20-25 minutes, or until a toothpick comes out clean.
- Cool the jars for 10 minutes before flipping them over to serve.
Notes
Serve warm with Greek yogurt or ice cream for an indulgent touch.
- Prep Time: 15 minutes
- Cook Time: 25 minutes
- Category: Dessert
- Method: Baking
- Cuisine: American
Nutrition
- Serving Size: 1 serving
- Calories: 180
- Sugar: 10g
- Sodium: 200mg
- Fat: 6g
- Saturated Fat: 3g
- Unsaturated Fat: 3g
- Trans Fat: 0g
- Carbohydrates: 25g
- Fiber: 2g
- Protein: 15g
- Cholesterol: 30mg
Keywords: pineapple upside-down cake, protein dessert, healthy baking, nostalgic dessert
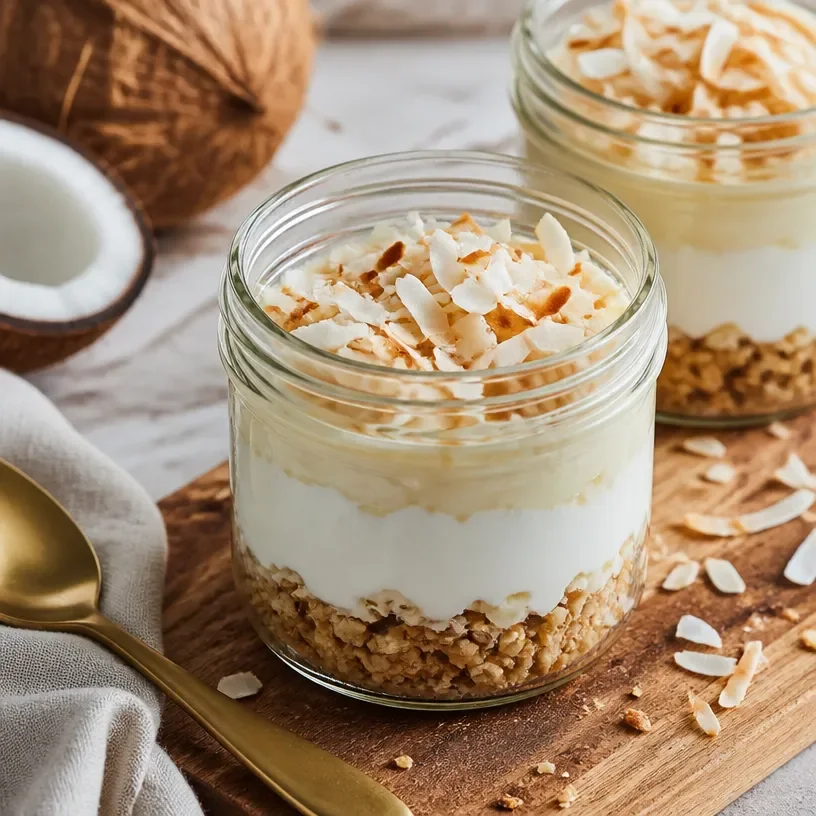
High-Protein Coconut Cream Pie Jars (No-Bake & Quick)
Indulge in a Decadent Protein Coconut Cream Pie Jar
Welcome to my kitchen! I’m Olivia Bennett, your friendly culinary guide on a journey through delightful flavors and cozy moments. Today, we’re diving into a special treat that marries nutrition with deliciousness: the Protein Coconut Cream Pie Jar. Imagine this: a delightful blend of creamy coconut, a hint of vanilla, and a protein-packed punch all layered in a cute jar. It’s the perfect addition to your meal prep lineup or a sweet indulgence to satisfy those dessert cravings while keeping your health goals in check.
You might be wondering, "What makes this pie so special?" Well, it’s not just about the taste (although, trust me, it’s heavenly!). This recipe is all about balance. Packed with protein and rich in healthy fats, this treat allows you to feel good while enjoying something sweet. Whether you’re looking for a post-workout snack, a guilt-free dessert, or simply a delightful way to treat yourself, I guarantee you’ll feel a spark of joy with each spoonful.
Now, picture yourself diving into a jar filled with velvety layers, coconut crunch, and just the right amount of sweetness. If you’re like me and believe that food should be as nourishing for the soul as it is for the body, you’ll want to keep reading. Let’s whip up this delicious Protein Coconut Cream Pie Jar and make some kitchen magic together!
A Sweet Reminder of Home
Growing up, I spent countless afternoons in my grandmother’s kitchen, captivated by the sweet aroma that wafted through the air whenever she baked her famous coconut cream pie. The dishes were always overflowing with laughter, love, and the joyful chatter of family. One specific summer day, I remember her inviting me to join her in whipping up this dessert. It was a sacred ritual, one that flew by as we combined ingredients, whisked them into submission, and bantered over cupcakes filled with frosting just for taste-testing.
Those days weren’t just about baking—they were about connection. As I helped her layer the silky custard into a crust of my childhood dreams, I could feel my heart swell with the simple joy of sharing that moment with her. Even now, every bite of coconut cream pie harks back to that joyful summer, inspiring this Protein Coconut Cream Pie Jar recipe as a modern twist on her beloved creation. It’s my way of bringing some of that nostalgia into my busy life while keeping myself fueled and happy.
Ingredients
Here’s what you’ll need to create this summery pie in a jar:
-
Coconut Milk (1 can, full-fat)
Rich in flavor and healthy fats, coconut milk brings that creamy texture. You can substitute light coconut milk if you’re looking for fewer calories, but it may be a bit thinner. -
Protein Powder (1-2 scoops, vanilla flavored)
This is where the magic happens! Choose your favorite protein powder. Vegan or whey works perfectly here. If you want a plant-based option, a pea protein will do the trick! -
Unsweetened Shredded Coconut (1 cup)
This adds fabulous texture and coconut flavor. If you’re not a fan of shredded coconut, feel free to omit it or swap it for graham cracker crumbs for a bit of crunch. -
Maple Syrup or Honey (to taste)
A touch of natural sweetness brings harmony to our flavors. If you’re looking for a low-sugar option, try a sugar-free syrup to maintain that sweet satisfaction. -
Vanilla Extract (1 teaspoon)
For warmth and depth, don’t skip on this! If you have almond extract on hand, you can use that for a different flavor profile. -
Gelatin or Agar-Agar (1 tablespoon)
This gives our treat stability without compromising texture. If you’re vegetarian or vegan, agar-agar is a great gelatin alternative that works wonderfully! -
Graham Cracker Crust (1-2 cups, crushed)
This is optional, but who can resist a buttery crumb crust? For a gluten-free option, use gluten-free graham crackers or almond flour blended with butter.
Step-by-Step Instructions
Ready to get cooking? Here’s your step-by-step guide to whipping up these delightful jars:
-
Prepare the Base Layer:
Start by mixing your crushed graham crackers with melted butter in a bowl. You want a nice crumbly texture that holds together when pressed into the bottom of your jars. For an even more delightful crunch, add a sprinkle of cinnamon for warmth. -
Blend the Creamy Filling:
In a blender or mixing bowl, combine the coconut milk, protein powder, maple syrup, and vanilla extract. Blend until thoroughly combined and creamy. This is where that beautiful smooth texture comes to life. If you find it too thick, add a tablespoon or two of coconut water or almond milk to loosen it up. -
Add the Gelatin:
If you’re using gelatin, sprinkle it over a few tablespoons of warm water until it blooms (gets all spongy). Then mix it into the coconut mixture until it’s well combined. If using Agar-Agar, follow the package instructions—most need to be heated to activate. -
Layer It Up:
Now for the fun part! Spoon a layer of the graham cracker mixture into the bottom of your jars, packing it down gently. Next, add a layer of the creamy coconut filling followed by a sprinkle of shredded coconut. Repeat these layers until the jars are full, finishing off with a nice dollop of the creamy filling. -
Chill and Set:
Pop your jars in the fridge for at least 2 hours (or overnight, if you can wait). This helps the filling firm up a bit, thanks to the gelatin, creating that perfect creamy consistency.
Serving Suggestions
To serve your Protein Coconut Cream Pie Jar, simply remove it from the fridge, give it a gentle shake, and top with a sprinkle of additional shredded coconut and whipped cream for a touch of indulgence. Feel free to unleash your creativity! You can garnish with fresh berries or a few slices of banana for a delicious twist.
Recipe Variations
Want to mix things up? Here are a few creative variations you can try:
-
Chocolate Coconut Pie Jar:
Add a couple of tablespoons of cocoa powder to the creamy filling for a chocolate twist. You can also use chocolate protein powder! -
Tropical Paradise:
Incorporate some diced pineapple or mango into the layers for a burst of tropical flavor. -
Nutty Surprise:
Fold in some crushed nuts or nut butter into the filling for added texture and protein. -
Spiced Delight:
Add a teaspoon of cinnamon or nutmeg to the crust or filling for a warm, spicy kick. -
Coffee Coconut Layer:
For a caffeine boost, mix a small amount of instant coffee or espresso powder into the filling.
Chef’s Notes
This recipe has evolved over the years as I’ve experimented with various ingredients and textures. My grandmother’s original pie was lovely, with its flaky crust and silky filling, but it didn’t pack much in terms of protein. I love being able to enjoy that same nostalgic flavor while fueling my body with something beneficial. Cooking is all about exploring, so feel free to adapt this recipe to suit your taste preferences—get messy, have fun, and enjoy every bite!
FAQs and Troubleshooting
1. Can I make these jars ahead of time?
Absolutely! In fact, they’re perfect for meal prep. Keep them in the refrigerator for up to a week. Just make sure to till them with whipped cream or toppings when you’re ready to serve!
2. My filling isn’t thickening—what did I do wrong?
Make sure you adequately bloomed your gelatin or followed the instructions for the agar-agar. They both need to dissolve fully to set properly!
3. Is it possible to make this recipe vegan?
Yes! Substitute the gelatin with agar-agar and use plant-based protein powder. You can also swap the honey for agave syrup or another vegan sweetener.
4. How do I store leftovers?
Keep any leftovers in airtight jars in the fridge. Just be aware that the filling may become slightly thicker as it sits.
Nutritional Info
If you’re curious about the nutrition facts, this delightful little jar typically provides:
- Calories: 250-300 per jar (depending on the protein powder and sweeteners used)
- Protein: 20g (varies with your protein powder)
- Carbohydrates: 30g
- Fats: 15g
This Pumpkin Coconut Cream Pie Jar is not only a delicious treat but also a great way to fuel your body and spoil your taste buds. So whip up some fun, stir up some joy, and indulge in this sweet memory from my kitchen to yours! Enjoy every bite!
Print
Protein Coconut Cream Pie Jar
- Total Time: 120 minutes
- Yield: 4 servings
- Diet: Vegetarian
Description
A delightful blend of creamy coconut and protein for a sweet indulgence.
Ingredients
- Coconut Milk (1 can, full-fat)
- Protein Powder (1-2 scoops, vanilla flavored)
- Unsweetened Shredded Coconut (1 cup)
- Maple Syrup or Honey (to taste)
- Vanilla Extract (1 teaspoon)
- Gelatin or Agar-Agar (1 tablespoon)
- Graham Cracker Crust (1-2 cups, crushed, optional)
Instructions
- Prepare the Base Layer: Mix your crushed graham crackers with melted butter in a bowl until crumbly.
- Blend the Creamy Filling: Combine coconut milk, protein powder, maple syrup, and vanilla extract in a blender until creamy.
- Add the Gelatin: If using gelatin, bloom it in warm water, then mix into the coconut mixture. If using agar-agar, follow package instructions.
- Layer It Up: Spoon layers into jars, starting with the graham cracker mixture, followed by the creamy filling and shredded coconut.
- Chill and Set: Refrigerate jars for at least 2 hours or overnight to firm up.
Notes
These jars can be made ahead of time and stored in the refrigerator for up to a week. Top with whipped cream or fresh fruit before serving.
- Prep Time: 15 minutes
- Cook Time: 0 minutes
- Category: Dessert
- Method: Chilling
- Cuisine: American
Nutrition
- Serving Size: 1 jar
- Calories: 250
- Sugar: 8g
- Sodium: 200mg
- Fat: 15g
- Saturated Fat: 12g
- Unsaturated Fat: 3g
- Trans Fat: 0g
- Carbohydrates: 30g
- Fiber: 5g
- Protein: 20g
- Cholesterol: 0mg
Keywords: protein, coconut, dessert, healthy, meal prep




