
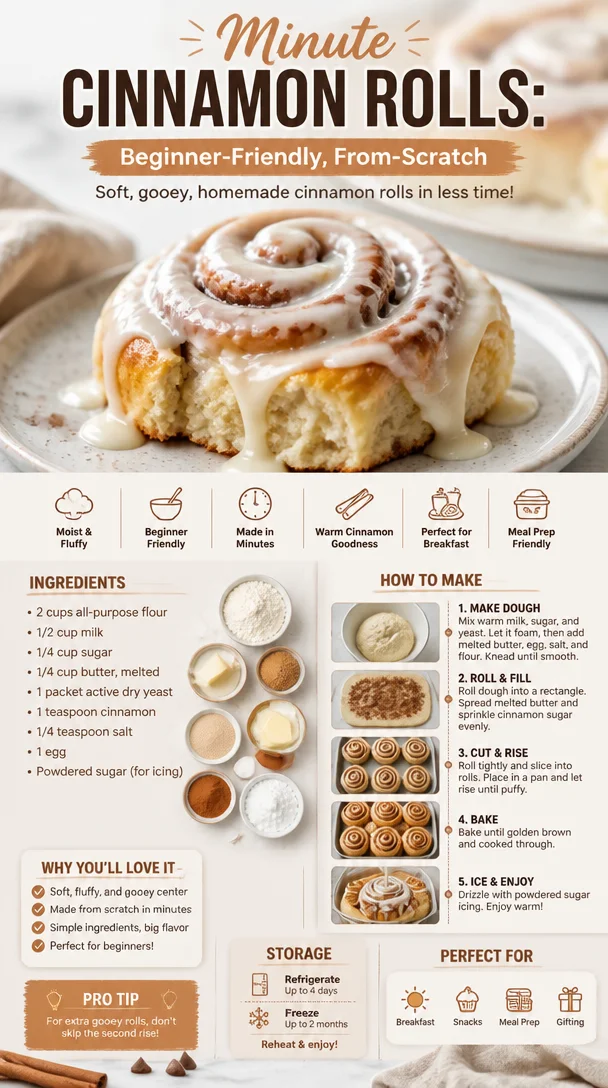
Minute Cinnamon Rolls: Beginner-Friendly, From-Scratch
Easy Homemade Cinnamon Rolls Recipe
Welcome to my cozy kitchen! I’m Olivia Bennett, and today I’m inviting you to roll up your sleeves and indulge in the wonderful world of homemade cinnamon rolls. There’s something magical about the scent of cinnamon wafting through your home as these delightful rolls rise in the oven—warm, gooey, and utterly irresistible. Whether you’re gearing up for a lazy Sunday brunch, a festive holiday gathering, or simply want to treat yourself and your loved ones to a sweet surprise, these cinnamon rolls are bound to steal the show.
There was a time when I thought homemade cinnamon rolls were only for the pros or those with endless time on their hands. But let me tell you a little secret: making cinnamon rolls from scratch is one of the most rewarding kitchen experiences you can have. The joy of transforming simple ingredients into something so scrumptious is unparalleled. I still remember my first attempt at these delightful treats. It was a chilly autumn morning, and I wanted to surprise my family with breakfast. I dusted off my grandma’s recipe, rolled up my sleeves, and got started. The kitchen was filled with the warm, inviting smell of cinnamon and sugar, and when I finally pulled those rolls out of the oven, I felt like a kitchen superhero!
Are you ready to embark on your own cinnamon roll journey? Brace yourself for the fluffiest, most decadent rolls you’ve ever made—the kind that hugs you back with every bite. Let’s dive into the magic!
Ingredients
Here’s what you’ll need to make these heavenly cinnamon rolls:
-
2 ¼ teaspoons active dry yeast: This little powerhouse is what makes your rolls rise! If you don’t have active dry yeast, you can use instant yeast at the same ratio.
-
¾ cup warm milk (about 110°F/43°C): Warm milk activates the yeast. If you’re looking for a dairy-free option, almond milk or oat milk work well too!
-
¼ cup granulated sugar: Sweetness is essential! You can substitute brown sugar for a deeper, caramel-like flavor.
-
1 egg: This binds everything together and adds richness. For an egg substitute, try ¼ cup unsweetened applesauce or a flax egg (1 tablespoon ground flaxseed mixed with 2.5 tablespoons of water).
-
3 ½ to 4 cups all-purpose flour: Flour provides structure. If you want a lighter roll, consider using bread flour instead—it has a higher protein content.
-
½ teaspoon salt: Balances out the sweetness and enhances the flavor of the rolls.
-
⅓ cup unsalted butter, softened: Butter makes everything better! You can swap for coconut oil for a dairy-free version.
Filling
-
½ cup brown sugar, packed: This caramelizes delightfully as the rolls bake. Feel free to use coconut sugar if you prefer a less processed option!
-
2 tablespoons ground cinnamon: The star of our show! Try experimenting with spices like nutmeg or cardamom for a unique spin.
-
¼ cup unsalted butter, softened: This is layered into the rolls for maximum gooeyness!
Frosting (optional but highly recommended)
-
1 cup powdered sugar: This adds a sweet, creamy finish.
-
2 tablespoons unsalted butter, softened: For that rich buttery flavor. Again, coconut oil can work here!
-
1 tablespoon cream cheese, softened: For a tangy kick, but this is optional. You could also use vegan cream cheese!
-
1 teaspoon vanilla extract: The aromatic essence that ties everything together.
-
1-2 tablespoons milk: Adjust the consistency of your frosting.
Step-by-Step Instructions
Ready to get baking? Let’s turn those ingredients into baked bliss!
-
Activate the Yeast: In a small bowl, combine the warm milk and active dry yeast. Add the sugar and whisk gently. Let it sit for about 5–10 minutes until frothy. This means your yeast is alive and ready to work its magic!
-
Mix it Up: In a large mixing bowl, whisk together 2 ½ cups of flour and salt. After your yeast mixture is frothy, add the egg and melted butter to the bowl, mixing until just combined.
-
Knead to Perfection: Gradually add the remaining flour, ½ cup at a time, until your dough comes together. Turn it out onto a floured surface and knead for about 5-7 minutes until smooth and elastic. This is a great arm workout too!
-
Let it Rise: Place the dough in a greased bowl, cover it with a clean cloth, and let it rise in a warm place for about an hour, or until it doubles in size. This is a great time to clean up and prepare the filling!
-
Prepare the Filling: In a small bowl, mix together the brown sugar and cinnamon. Once your dough has risen, punch it down gently (that feels good, right?) and roll it out on a floured surface into a rectangle, about ¼ inch thick.
-
Spread the Butter: Smear the softened butter all over the rolled-out dough, leaving a little border around the edges for easy rolling.
-
Sprinkle and Roll: Evenly sprinkle the cinnamon-sugar mixture over the butter. Starting from one long end, roll the dough tightly into a log. Use a sharp knife to slice the log into 12 equal rolls.
-
Second Rise: Place the rolls in a greased baking dish, cover them again, and let them rise for another 30 minutes. Preheat your oven to 350°F (175°C) while you wait!
-
Bake: Bake the rolls for 25-30 minutes until golden brown. If you want the tops to be extra golden, brush a bit of melted butter on them halfway through baking.
-
Frost: While the rolls are cooling slightly, beat together the frosting ingredients until smooth. Drizzle it generously over the warm rolls and enjoy!
Serving Suggestions
These cinnamon rolls are best enjoyed fresh out of the oven, but they’re just as delicious the next day (if they last that long!). Serve them warm with a side of coffee or hot cocoa for a cozy treat. For an extra special presentation, you might even want to add some chopped nuts or a sprinkle of sea salt on the frosting just before serving.
Recipe Variations
Feeling adventurous? Here are a few scrumptious twists you could try:
-
Chocolate Chip Cinnamon Rolls: Add a handful of chocolate chips to the filling for a sweet surprise in every bite.
-
Maple Pecan Rolls: Swap out the brown sugar for maple sugar and toss in some chopped pecans for added crunch.
-
Vegan Cinnamon Rolls: Use plant-based milk, coconut oil, and vegan cream cheese to create a dairy-free delightful treat.
-
Savory Cinnamon Rolls: Change the filling to include cheese, herbs, and garlic for a unique dinner roll twist!
-
Pumpkin Spice Rolls: Replace ¼ cup of flour with pumpkin puree and add pumpkin pie spice to the filling for a fall-inspired delight!
Chef’s Notes
Cinnamon rolls have a special spot in my heart. I even remember my first baking mishap: I forgot to add the sugar to the dough, and I ended up offering my family “cinnamon rolls” that were more like sad little bread logs. Thankfully, they were so kind and ate them anyway! Over the years, my technique has matured (as have my roll skills), and I’ve mastered the art of sprinkling joy into every roll!
FAQs and Troubleshooting
1. My rolls didn’t rise! What went wrong?
There could be a few reasons. Make sure your yeast is fresh and active—if it doesn’t froth up when mixed with milk, it’s best to start over. The dough’s environment also matters, so it should be warm and draft-free during the rise.
2. The dough was too sticky to handle!
Use additional flour sparingly when kneading the dough. Remember, a slightly sticky dough results in softer rolls, so be mindful not to add too much flour.
3. Can I make these ahead of time?
Absolutely! You can prepare the rolls up to the second rise stage, cover them, and refrigerate overnight. In the morning, let them sit at room temperature for 30 minutes before baking.
4. How do I store leftover rolls?
Seal any unused rolls in an airtight container at room temperature for up to two days. For longer storage, freeze them (unfrosted) for up to three months. Just thaw and reheat before indulging!
Nutritional Info
While indulging in these cinnamon rolls, keep in mind that they are a treat! Each roll is approximately 300 calories, depending on the size and frosting quantity. Enjoy them in moderation alongside a balanced diet.
Happy baking, friends! Remember, the best part of making homemade cinnamon rolls is the love you put into them. So gather your ingredients, let the sweet fragrance fill your home, and enjoy every delicious bite!
Print
Easy Homemade Cinnamon Rolls
- Total Time: 50 minutes
- Yield: 12 servings 1x
- Diet: Vegetarian
Description
Indulge in the delightful world of homemade cinnamon rolls, warm and gooey, perfect for any occasion.
Ingredients
- 2 ¼ teaspoons active dry yeast
- ¾ cup warm milk (about 110°F/43°C)
- ¼ cup granulated sugar
- 1 egg
- 3 ½ to 4 cups all-purpose flour
- ½ teaspoon salt
- ⅓ cup unsalted butter, softened
- ½ cup brown sugar, packed
- 2 tablespoons ground cinnamon
- ¼ cup unsalted butter, softened (for filling)
- 1 cup powdered sugar (for frosting)
- 2 tablespoons unsalted butter, softened (for frosting)
- 1 tablespoon cream cheese, softened (optional for frosting)
- 1 teaspoon vanilla extract
- 1–2 tablespoons milk (for frosting)
Instructions
- Activate the yeast: In a small bowl, combine the warm milk and active dry yeast. Add the sugar and whisk gently. Let it sit for about 5–10 minutes until frothy.
- Mix it up: In a large mixing bowl, whisk together 2 ½ cups of flour and salt. After your yeast mixture is frothy, add the egg and melted butter to the bowl, mixing until just combined.
- Knead to perfection: Gradually add the remaining flour, ½ cup at a time, until your dough comes together. Turn it out onto a floured surface and knead for about 5-7 minutes until smooth and elastic.
- Let it rise: Place the dough in a greased bowl, cover it with a clean cloth, and let it rise in a warm place for about an hour, or until it doubles in size.
- Prepare the filling: In a small bowl, mix together the brown sugar and cinnamon. Roll out the risen dough on a floured surface into a rectangle, about ¼ inch thick.
- Spread the butter: Smear the softened butter all over the rolled-out dough.
- Sprinkle and roll: Evenly sprinkle the cinnamon-sugar mixture over the butter. Roll the dough tightly into a log and slice into 12 equal rolls.
- Second rise: Place the rolls in a greased baking dish, cover them again, and let them rise for another 30 minutes.
- Bake: Bake the rolls at 350°F (175°C) for 25-30 minutes until golden brown.
- Frost: Beat together the frosting ingredients until smooth, drizzle over warm rolls, and enjoy!
Notes
These rolls are best enjoyed fresh, but they can be stored in an airtight container for up to two days or frozen for longer storage.
- Prep Time: 20 minutes
- Cook Time: 30 minutes
- Category: Dessert
- Method: Baking
- Cuisine: American
Nutrition
- Serving Size: 1 roll
- Calories: 300
- Sugar: 20g
- Sodium: 200mg
- Fat: 10g
- Saturated Fat: 5g
- Unsaturated Fat: 5g
- Trans Fat: 0g
- Carbohydrates: 40g
- Fiber: 1g
- Protein: 4g
- Cholesterol: 25mg
Keywords: cinnamon rolls, homemade, dessert, baking
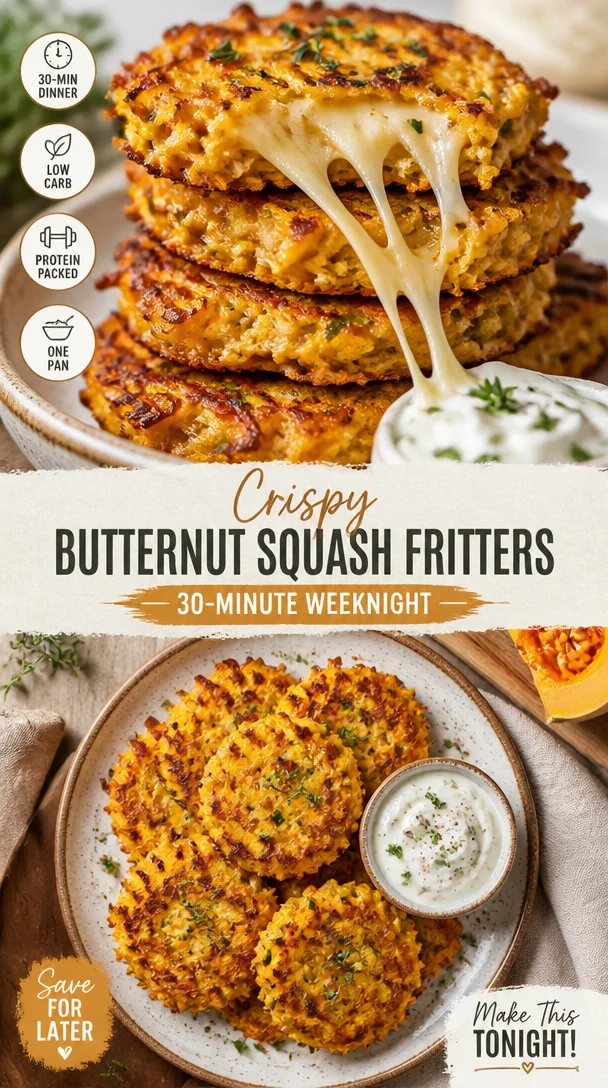
Crispy Butternut Squash Fritters (30-Minute Weeknight)
Butternut Squash Fritters: A Cozy Kitchen Adventure
Welcome to my kitchen! I’m so excited to share this amazing recipe for butternut squash fritters with you. These delightful little bites are not only packed with flavor, but they also embody everything I love about cooking: warmth, creativity, and the joy of sharing with loved ones. Imagine your kitchen filled with the sweet, nutty aroma of roasting butternut squash as you whip up these fritters—sounds wonderful, doesn’t it?
Butternut squash fritters are perfect for any occasion—whether it’s a cozy weeknight dinner, a fun brunch with friends, or a tasty appetizer for your next gathering. They’re crispy on the outside, tender on the inside, and oh-so-satisfying. And the best part? They’re easy to make and require simple, wholesome ingredients.
I’ve had a special place in my heart for fritters ever since my grandmother introduced me to her beloved zucchini fritters back when I was a kid. She’d make them whenever we visited, and I remember the excitement in the kitchen as the batter sizzled in the skillet. Fast forward to today, and my version incorporates the vibrant flavors of butternut squash, making them comforting yet fresh. Let’s dive into this recipe together and create a dish that will surely inspire many joyful bites and cherished memories!
Personal Story: A Taste of Home
Cooking has always been a family affair for me. Growing up, I spent countless hours in the kitchen, learning from my grandmother and sharing laughter over the stove. One of my most vivid memories is of her cooking up a storm, using seasonal veggies from her garden. Whenever autumn rolled around, butternut squash became the star of the show. My grandmother would roast them to sweetness and incorporate them into everything from soups to casseroles.
One chilly October afternoon, we decided to experiment and create fritters. I can still hear her humming softly as we mixed the ingredients and marveled at how easy it was to transform a humble squash into something so special. With every crunchy bite, I felt loved, nourished, and connected to my roots. Those fritters became a family favorite, and I’ve carried that warmth into my own kitchen. Now, I’m thrilled to pass on this recipe to you, hoping it will become a cherished dish in your home, too!
Ingredients
Let’s gather our ingredients! This part is crucial because using the right ingredients makes all the difference. Here’s what you’ll need:
-
Butternut Squash (about 2 cups, peeled and grated)
The star of the dish! Butternut squash is naturally sweet and adds a lovely creaminess to the fritters. If you can’t find butternut squash, any winter squash will work as a substitute—like acorn or even pumpkin. -
All-purpose Flour (½ cup)
This helps bind the fritters together. For a gluten-free option, you can swap this for a blend of almond flour or a gluten-free all-purpose flour mix. -
Eggs (2 large)
The eggs are essential for binding the mixture and giving it a nice fluffy texture. You can replace them with flax eggs (1 tablespoon ground flaxseed mixed with 3 tablespoons of water per egg) for a vegan option. -
Green Onions (4, chopped)
These add a mild onion flavor to the fritters. If you don’t have green onions, feel free to use shallots or regular onions instead—just adjust the amount to avoid overpowering flavors. -
Garlic (2 cloves, minced)
Fresh garlic adds a savory depth. If you’re in a pinch, garlic powder can take its place, though fresh is always the best option! -
Ground Cumin (1 teaspoon)
This warming spice complements the sweetness of the squash beautifully. Want to switch it up? Smoked paprika or chili powder can bring a nice kick instead! -
Salt (½ teaspoon)
Essential for enhancing the flavors. Adjust to taste if you’re watching your sodium intake. -
Pepper (½ teaspoon)
Freshly cracked pepper adds a lovely mild kick. Feel free to amp it up if you enjoy a bit more heat! -
Olive Oil (for frying)
This is key for achieving those crispy edges. You can substitute with avocado oil if desired, which has a higher smoke point.
Now that we’ve got everything lined up, let’s get cooking!
Step-by-Step Instructions
-
Prep the Butternut Squash
Start with peeling the butternut squash carefully (watch those fingers!). Cut it in half lengthwise and scoop out the seeds. Then, grate the flesh using the large holes of a box grater—you’re looking for about 2 cups. If you have a food processor, feel free to use the grater attachment—it’ll save you some time! -
Squeeze Out the Moisture
Place the grated squash in a clean kitchen towel and give it a good twist to squeeze out excess moisture. This helps your fritters achieve that crispy texture! (Trust me; it’s worth the extra effort). -
Mix It All Together
In a large bowl, combine the drained butternut squash, flour, eggs, chopped green onions, minced garlic, ground cumin, salt, and pepper. Stir until everything is well incorporated. The mixture should be thick but hold together; if it feels too wet, you can add a bit more flour. -
Heat the Pan
In a non-stick skillet, heat a tablespoon of olive oil over medium heat. You want the oil hot enough to sizzle when you drop the batter in, but not so hot that it smokes. -
Form the Fritters
Using a tablespoon, scoop the batter and carefully drop it into the skillet, pressing down gently to flatten. Avoid overcrowding the pan—give each fritter some space to breathe! -
Cook Until Golden Brown
Let the fritters cook for about 3-4 minutes on one side until they turn golden brown. Flip them over with a spatula and cook the other side for another 3-4 minutes. You’ll know they’re ready when they’re crispy and beautifully browned. -
Drain and Repeat
Remove the fritters from the skillet and place them on a plate lined with paper towels to absorb excess oil. Add more oil to the pan as needed and repeat the process until all the batter is cooked. -
Serve Warm
As soon as they come off the stovetop, serve them warm with your favorite dipping sauce or a dollop of yogurt for extra creaminess.
Serving Suggestions
These fritters are wonderfully versatile! Plate them on a colorful serving dish and sprinkle with fresh herbs like parsley or cilantro for a pop of color. Consider serving them alongside a zesty dipping sauce—like a lemon garlic aioli—or plain Greek yogurt drizzled with olive oil and a splash of lemon juice. They make a stunning centerpiece for brunch or a tasty side at dinner.
Recipe Variations
-
Cheesy Twist
Add shredded cheese (like feta or cheddar) to the batter for a gooey, indulgent twist! -
Herb Infusion
Fresh herbs like thyme or rosemary can elevate the flavors. Chop them finely and mix them into the batter for an aromatic touch. -
Sweet Heat
Add a pinch of crushed red pepper flakes to the batter if you like a touch of heat. -
Vegan Version
Use flax eggs instead of regular eggs, and try chickpea flour instead of all-purpose flour for a hearty vegan fritter. -
Baked Option
Instead of frying, you can bake them! Preheat your oven to 400°F (200°C), place the fritters on a parchment-lined baking sheet, and lightly spray with cooking oil. Bake for about 20 minutes, flipping halfway through until they’re golden and crispy!
Chef’s Notes
As with any recipe, don’t be afraid to make it your own! This dish has evolved for me over the years, and I love experimenting with new flavors and techniques each time I make it. One day, I might incorporate some diced bell peppers for added color. Another time, I may swap in sweet potatoes instead of butternut squash for a fun twist. Remember, cooking is all about creativity and having fun. If something doesn’t go as planned (trust me, it happens to the best of us!), just laugh it off and try again. That’s the beauty of cooking!
FAQs and Troubleshooting
1. My fritters fell apart while cooking. What did I do wrong?
This could be due to excess moisture in the squash. Make sure to squeeze out as much liquid as possible. If they still seem too wet, add a bit more flour to bind the mixture.
2. Can I make the mixture ahead of time?
Absolutely! You can prepare the batter ahead and store it in the fridge for a few hours. Just give it a good stir before cooking.
3. How do I store leftovers?
You can keep leftover fritters in an airtight container in the fridge for up to three days. To reheat, place them in a skillet over medium heat with a touch of olive oil to crisp them up again.
4. Can I freeze these fritters?
Yes! Once cooked, let them cool completely before placing them in a freezer-safe container. They should last up to three months. To reheat, bake them from frozen in a preheated oven until heated through.
Nutritional Info (if applicable)
While I won’t dive into too many details about calories and macros—because cooking should be a joyful experience, not a stressful one—it’s worth noting that these fritters, packed with nutritious butternut squash, offer plenty of vitamins, fiber, and a taste of the season.
So, there you have it! A cozy recipe for butternut squash fritters that’s sure to bring smiles and warmth to your kitchen. Whether you’re enjoying them during a quiet family dinner or serving them at a lively gathering, I hope this dish fills your home with love and deliciousness. Happy cooking!
Print
Butternut Squash Fritters
- Total Time: 35 minutes
- Yield: 4 servings
- Diet: Vegetarian
Description
Delicious and crispy butternut squash fritters, perfect for any occasion.
Ingredients
- Butternut Squash (about 2 cups, peeled and grated)
- All-purpose Flour (½ cup)
- Eggs (2 large)
- Green Onions (4, chopped)
- Garlic (2 cloves, minced)
- Ground Cumin (1 teaspoon)
- Salt (½ teaspoon)
- Pepper (½ teaspoon)
- Olive Oil (for frying)
Instructions
- Prep the butternut squash by peeling, halving, and grating it.
- Squeeze out the moisture using a kitchen towel.
- Mix together the grated squash, flour, eggs, green onions, garlic, cumin, salt, and pepper in a bowl.
- Heat olive oil in a skillet over medium heat.
- Form fritters by scooping the batter into the skillet and flattening gently.
- Cook until golden brown, about 3-4 minutes on each side.
- Drain on paper towels and repeat cooking with the remaining batter.
- Serve warm with your favorite dipping sauce or yogurt.
Notes
Adjust seasoning and enjoy these fritters warm. For a baked option, preheat to 400°F (200°C) and bake for 20 minutes.
- Prep Time: 15 minutes
- Cook Time: 20 minutes
- Category: Appetizer
- Method: Frying
- Cuisine: American
Nutrition
- Serving Size: 1 fritter
- Calories: 250
- Sugar: 3g
- Sodium: 300mg
- Fat: 10g
- Saturated Fat: 1g
- Unsaturated Fat: 8g
- Trans Fat: 0g
- Carbohydrates: 34g
- Fiber: 4g
- Protein: 6g
- Cholesterol: 70mg
Keywords: butternut squash, fritters, vegetarian recipe, cozy cooking, easy appetizers
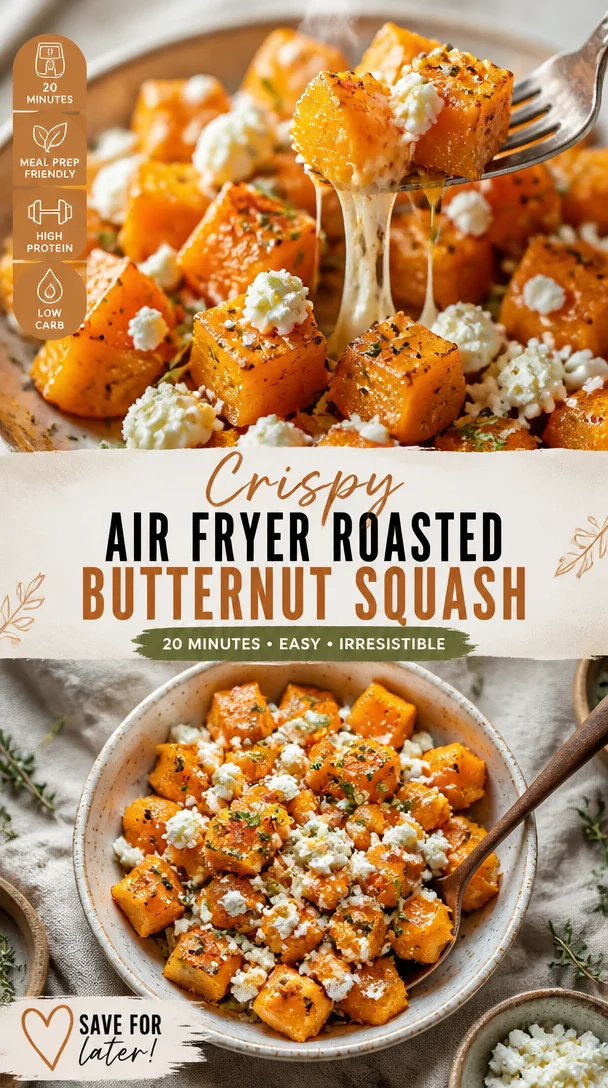
Crispy Air Fryer Roasted Butternut Squash in 20 Minutes
Air Fryer Roasted Butternut Squash: A Cozy Delight
Welcome back to my kitchen, my dear reader! Today, we’re diving into a dish that perfectly captures the essence of cozy cooking: Air Fryer Roasted Butternut Squash. If you’ve ever had a moment in the kitchen where the aroma of something warm and sweet fills the air, you know just how comforting it can be. The sweet, nutty flavor and buttery texture of roasted butternut squash warm not just your belly but your heart too.
Now, I know what some of you might be thinking: “But Olivia, I can just toss squash in the oven. Why the air fryer?” Let me tell you, my friends, this kitchen gadget is a game-changer! With the air fryer, you’ll get that golden, caramelized crunch on the outside while keeping the tender goodness inside. Plus, it’s faster and uses less oil than traditional frying or roasting methods, making it a perfect option for weeknight dinners or last-minute gatherings.
Before we jump into the recipe, let me set the scene for you. Picture this: it’s a chilly autumn afternoon, leaves are swirling in the wind, and the smell of something delicious fills your home. You pull out a beautiful butternut squash, a vibrant orange canvas waiting to be transformed. As you peel and chop it, you’re hit with a flashback — your grandmother’s kitchen, where she would whip up comforting autumn dishes that made everyone feel at home. It’s a food memory, simple yet profound, and it reminds us of why we cook: to create connections, to savor flavors, and to bring warmth to our lives.
So, let’s embrace that nostalgia and turn our butternut squash into something truly unforgettable! Grab your apron (don’t worry, messy hands are the hallmark of a good cook), and let’s get started on this delicious journey together.
Personal Story
Ah, butternut squash! Whenever I think about it, my mind wanders back to family gatherings during the holidays. My grandmother, the undisputed queen of the kitchen, would always feature this delightful squash in her seasonal repertoire. I can almost hear her chuckling as she’d ask for my help in peeling and slicing; she insisted it was her secret weapon for impressing guests.
I remember one year when I decided to surprise her by making my very own butternut squash dish. I borrowed her recipe, attempting to put my spin on it with spices I had learned about. Let’s just say my enthusiasm got the better of me, and I may have gone a bit overboard with the cinnamon! My grandmother adored the effort, though; we both ended up in stitches as we tasted my concoction. It wasn’t perfect — but it was ours. That experience taught me a valuable lesson: it’s not just about the food; it’s about the love, the laughter, and the stories that unfold in the kitchen.
Ingredients
Here’s everything you’ll need to roast your butternut squash to perfection in the air fryer:
-
Butternut Squash: The star of the show! Make sure to choose a firm squash without blemishes. If you’re short on time, pre-cut squash can work too, but fresh is always best!
-
Olive Oil: A light drizzle will help the squash caramelize. Avocado oil can be a great substitute for a high smoke point and buttery flavor.
-
Salt: Just a pinch enhances the natural flavors. Feel free to use sea salt or kosher salt based on your preference.
-
Black Pepper: Freshly cracked produces the best flavor. For a little kick, consider swapping in red pepper flakes.
-
Garlic Powder: This adds a savory depth. You can use fresh minced garlic, but I love the instant flavor boost that powder gives.
-
Paprika: For a hint of smokiness! Try smoked paprika for an extra punch.
-
Maple Syrup (optional): If you want to amplify that sweetness, a touch of pure maple syrup is heavenly.
-
Fresh Herbs (optional): Rosemary or thyme can elevate your dish. Just toss some in at the end for vibrant flavor.
With these ingredients, you’ll create a delightful dish that’s not only healthy but packed with flavor. And remember, cooking is about personal flair! If you have herbs or spices you love, sprinkle them in and make it your own.
Step-by-Step Instructions
Ready to transform that squash into something magical? Let’s break this down step-by-step:
-
Prep Your Squash: Start by washing your butternut squash. Once clean, carefully cut off both ends — this gives it stability when slicing. With a sharp vegetable peeler, peel off the skin in long strokes. You might feel like a master chef at this point!
-
Cut it Up: Next, slice the squash in half lengthwise, scoop out the seeds with a spoon (you can roast those later for a crunchy snack), and chop it into bite-sized cubes. Aim for uniform pieces so they cook evenly.
-
Season it Right: In a large mixing bowl, toss the cubed squash with olive oil, salt, black pepper, garlic powder, and paprika. If you’re adding maple syrup, drizzle it in now. Use your hands to ensure each piece is thoroughly coated — this is the fun part!
-
Preheat Your Air Fryer: While you’re mixing, preheat your air fryer to 375°F (190°C). This will help your squash start crisping up right away.
-
Air Fry to Perfection: Place the seasoned squash in the air fryer basket in a single layer, making sure there’s some space between the cubes for that all-important air circulation. (If your air fryer is small, you might need to do this in batches.)
-
Cooking Time: Air fry for about 15-20 minutes, shaking the basket halfway through the cooking time. This helps to get every side golden and slightly crispy. Keep an eye on it during the last few minutes — you want that perfect caramelization!
-
Finishing Touches: Once the squash is tender and golden brown, remove it from the air fryer. Toss it with fresh herbs if desired or a final drizzle of maple syrup for that sweet touch.
And just like that, you’ve created something extraordinary! It’s so satisfying to pull out beautifully roasted butternut squash.
Serving Suggestions
Let’s talk plating! For a cozy night in, serve your air-fried butternut squash on a rustic wooden board alongside a warm grain salad or simply with a bowl of your favorite soup. If you’re feeling fancy, sprinkle some feta or goat cheese on top, along with extra herbs for a gourmet touch.
For gatherings, arrange the squash on a beautiful serving platter and accompany it with dips like tahini or yogurt sauce. Trust me; your guests will be raving about it long after the last piece is snatched up!
Recipe Variations
Now, let’s shake things up! Here are a few creative twists you can try with this air fryer roasted butternut squash:
-
Spicy Maple: Add a pinch of cayenne alongside the maple syrup for a sweet and spicy kick!
-
Curry Flavor: Swap out the paprika for curry powder for an exotic twist. A touch of coconut oil can also add a nice flavor!
-
Sweet & Savory: Toss in some dried cranberries or raisins halfway through cooking for a burst of sweetness that pairs beautifully with the squash.
-
Mediterranean Style: Use olive oil, lemon zest, and some za’atar seasoning for a vibrant, herbaceous flavor profile.
-
Nutty Crunch: After cooking, sprinkle chopped pecans or walnuts over the top for added texture and flavor.
Chef’s Notes
Oh my goodness, let me share a funny story from my kitchen adventures! The first time I attempted this dish was, let’s just say, a learning experience. I was so excited and distracted by the enticing smell of roasting squash that I forgot a key step — the seasoning! It wasn’t until I took that first bite that I realized I’d forgotten to add the salt and pepper. The flavor was like a blank canvas! Lesson learned: always read the recipe twice before starting! Now, I keep my spices within arm’s reach, just a little reminder as I cook.
This recipe has evolved over the years. Initially, it started as a winter dish, but now I find myself roasting butternut squash all year round. It’s a versatile secret weapon for adding flavor and color to any meal.
FAQs and Troubleshooting
-
Why isn’t my squash getting crispy?
- If your squash is soggy instead of crispy, it might be due to overcrowding the air fryer basket. Make sure the pieces are in a single layer and not stacked on top of each other.
-
Can I use frozen butternut squash?
- Absolutely! Just be aware that the cooking time might vary. Start at a lower temperature and adjust accordingly until tender.
-
How do I know when the squash is done?
- You want the squash to be fork-tender and caramelized on the edges. A good rule of thumb is to test a piece with a fork after about 15 minutes.
-
Can I prepare this in advance?
- Certainly! Roasted butternut squash can be stored in the fridge for up to 3 days. Just reheat in the air fryer for a few minutes before serving to regain that lovely texture!
Nutritional Info
While this recipe isn’t labeled as “healthy” or “indulgent,” butternut squash is indeed a nutritional powerhouse. It’s low in calories yet rich in vitamins A and C, and it’s packed with fiber. If you’re curious about exact nutritional info, feel free to use a calorie-counting app based on the quantities you use — but honestly, it’s more about enjoying the deliciousness and the memories created along the way!
So there you have it, my friends! A simple, cozy dish that embraces the essence of home cooking. May your air fryer be an extension of your love for flavor, and may every bite remind you of warmth, laughter, and cherished moments in the kitchen. I hope you’ll give this roasted butternut squash a try, and if you do, let me know your thoughts! Happy cooking! 🍂💛
Print
Air Fryer Roasted Butternut Squash
- Total Time: 35 minutes
- Yield: 4 servings 1x
- Diet: Vegetarian
Description
A cozy dish that features sweet, nutty butternut squash roasted to perfection in an air fryer.
Ingredients
- 1 Butternut Squash
- 2 tablespoons Olive Oil
- 1/2 teaspoon Salt
- 1/4 teaspoon Black Pepper
- 1 teaspoon Garlic Powder
- 1 teaspoon Paprika
- 1 tablespoon Maple Syrup (optional)
- Fresh Herbs (optional)
Instructions
- Prep your squash: Start by washing your butternut squash. Cut off both ends, then peel off the skin.
- Cut it up: Slice the squash in half lengthwise, scoop out the seeds, and chop it into bite-sized cubes.
- Season it right: Toss the cubed squash with olive oil, salt, black pepper, garlic powder, and paprika. Add maple syrup if desired.
- Preheat your air fryer to 375°F (190°C).
- Air fry the squash: Place the seasoned squash in the air fryer basket in a single layer.
- Cook for about 15-20 minutes, shaking the basket halfway through.
- Finishing touches: Once tender and golden brown, remove from the air fryer and toss with fresh herbs if desired.
Notes
For a cozy night, serve with a warm grain salad or soup. Sprinkling feta or goat cheese adds a gourmet touch.
- Prep Time: 15 minutes
- Cook Time: 20 minutes
- Category: Side Dish
- Method: Air Frying
- Cuisine: American
Nutrition
- Serving Size: 1 serving
- Calories: 150
- Sugar: 7g
- Sodium: 200mg
- Fat: 7g
- Saturated Fat: 1g
- Unsaturated Fat: 5g
- Trans Fat: 0g
- Carbohydrates: 22g
- Fiber: 3g
- Protein: 2g
- Cholesterol: 0mg
Keywords: butternut squash, air fryer, roasted vegetables, healthy recipes, fall recipes
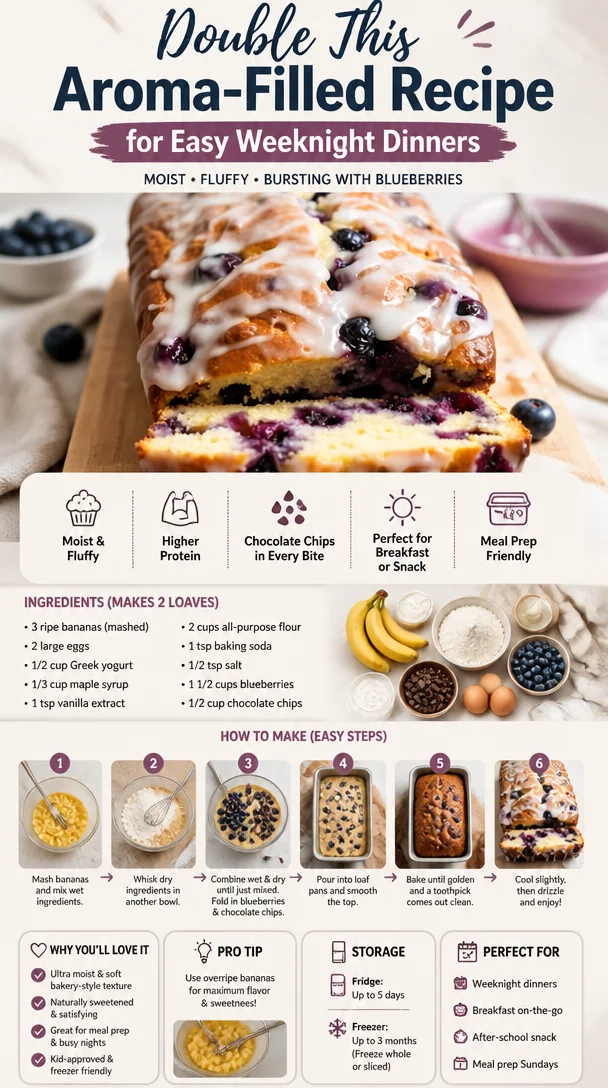
Double This Aroma-Filled Recipe for Easy Weeknight Dinners
When the House Smells Divine: My All-Time Favorite Cozy Bake
Welcome back to my kitchen, fellow flavor fanatics! Today, I’m beyond excited to share a recipe that brings back floods of nostalgia and makes my house smell like a warm hug on a chilly day. You know those recipes that are so comforting and aromatic that they instantly transport you back to simpler times? For me, that recipe is none other than the timeless and delicious Cinnamon Apple Crisp. Seriously, the aroma wafting through your home will have everyone wandering in, asking what’s cooking and getting those taste buds tingling. Trust me, you’ll want to double the recipe, because this dish is so heartwarming, you’ll have everyone coming back for seconds (and thirds!).
As I take you through this delightful journey of baking, remember, there’s no need for fancy skills here, just a cozy aproned heart ready to whip something special. Whether you’re prepping for a family gathering, cozying up on a rainy afternoon, or simply surprising yourself with a homemade treat, I’ve got you covered!
A Cozy Memory in Every Bite
Growing up, my grandmother’s kitchen was a magical place. It was always filled with rich scents, laughter, and the occasional playful flour fight! One of the most vivid memories I have is when she and I would bake our favorite Cinnamon Apple Crisp together. The sheer joy of peeling apples, the sweet sound of crumbling oats and butter, and the inevitable sprinkling of cinnamon — it was heavenly.
I remember the anticipation as we layered the apples in the baking dish, each piece coated with love and a sprinkle of brown sugar. There was a special moment when we slid the dish into the oven; we’d lean in and catch that first whiff of cinnamon mingling with the tartness of apples. It was an invitation for the entire family to gather and share stories around the table. Every time I make it, I’m transported back to those heartwarming evenings, and I can’t help but smile as I pull the bubbling, golden crisp from the oven.
Let’s Talk Ingredients
Now, let’s dive into what you’ll need for this divine creation! Here’s your shopping list:
-
5-6 medium apples (Granny Smith or Honeycrisp)
Use a mix for a balanced tartness and sweetness! No apples? Pears make for a fabulous swap! -
1 cup brown sugar
This adds a caramelly richness. You can substitute with coconut sugar for a lower glycemic index. -
1 cup rolled oats
Choose gluten-free oats if needed! They’re the hearty soul of our crisp — crunchy and delicious. -
1/2 cup all-purpose flour
Substitute with almond flour for a gluten-free option; just remember it packs a denser punch. -
1 teaspoon ground cinnamon
The star spice! Cardamom or nutmeg can make intriguing alternatives for a unique twist. -
1/2 cup cold unsalted butter
Cut this into small cubes to mix in easily! For a dairy-free version, coconut oil works wonders when chilled. -
A pinch of salt
Enhances all flavors. You can also use sea salt for a little extra flair! -
1 teaspoon vanilla extract
Always use pure for depth of flavor. I often sneak a little extra in my recipe for good measure!
Step-by-Step Instructions
Now that we’ve gathered all our goodies, let’s get baking!
-
Preheat Your Oven
Set that beautiful oven to 350°F (175°C). This ensures your crisp will bake to bubbly perfection. -
Prep the Apples
Peel, core, and slice your apples evenly. You want them about 1/4 inch thick for even cooking. A mix of tart and sweet varieties adds fantastic flavor, so feel free to get creative! -
Toss with Sugar and Spice
In a large bowl, combine the sliced apples with 1/2 cup brown sugar, 1 teaspoon ground cinnamon, and a pinch of salt. Toss well until everything is evenly coated. The sweetness will balance the tart, and trust me, this step infuses it with next-level goodness. -
Layer the Apples
Transfer your apple mixture into a greased 9×13 inch baking dish. Make sure to spread them out evenly to allow for proper cooking. Get all that delicious goodness into one happy little layer! -
Mix Up the Crisp Topping
In another bowl, combine 1 cup rolled oats, 1/2 cup all-purpose flour, and the remaining 1/2 cup brown sugar. Cut in your 1/2 cup cold unsalted butter with a pastry cutter or your fingers until it resembles coarse crumbs. It’s messy but oh-so-fun (let those chef fingers work!). It should feel grainy and ready to crumble over the apples. -
Top and Bake
Evenly spread the oat mixture over the apples. Pop it in that preheated oven for 40-45 minutes, or until the top is golden brown and you can see the apples bubbling beneath! Oh, the smells! -
Cool a Bit, If You Can
Let it cool for at least 10-15 minutes before diving in. This step helps it set up beautifully. I know, I know—it’s hard to wait, but trust me!
Serving Suggestions
Serve your warm Cinnamon Apple Crisp with a generous scoop of vanilla ice cream or a dollop of freshly whipped cream. It creates a delightful contrast between the warm crisp and the cold, creamy topping. You can even sprinkle a bit of cinnamon on top for that extra touch of coziness.
Recipe Variations
Feeling adventurous? Here are a few variations to make this recipe your own:
- Nutty Delight: Add chopped pecans or walnuts to the oat mixture for a satisfying crunch.
- Berry Bliss: Toss in some fresh or frozen berries along with the apples for a delightful berry-apple medley.
- Citrusy Zing: Incorporate the zest of one lemon or orange into your apples for a fresh zing!
- Spice it Up: Experiment with ginger or allspice for a warming depth.
Chef’s Notes
This Cinnamon Apple Crisp recipe has been a favorite in my family for generations. Over the years, I’ve adapted it based on what I’ve had on hand or seasonal ingredients. There was one Thanksgiving when I was so excited to share it that I accidentally used salt instead of sugar in the crisp topping. Let’s just say the taste testers were less than impressed! But every failure taught me something invaluable. Remember, cooking is all about experimenting and learning to tweak things as you go. Don’t be afraid to make it your own!
FAQs and Troubleshooting
-
Why is my crisp soggy?
Ensure your apple slices are balanced in moisture levels. Different varieties release different amounts of juice. Too much liquid might be due to overly ripe apples, so aim for firm ones. -
Can I store leftovers?
Absolutely! Cover your crisp with foil and store it in the fridge for up to 3 days. Reheat in the oven for the best results! -
How do I keep the top from burning?
If your topping is golden but the apples aren’t soft, cover it with foil for the last 15 minutes to prevent over-browning while the apples continue cooking. -
Can I freeze it?
Yes! Assemble and freeze before baking. When ready, bake from frozen, adding 15-20 minutes of baking time.
Nutritional Info
While I believe in indulging in moderation, here’s a general breakdown per serving:
- Calories: ~280
- Fat: 10g
- Carbohydrates: 45g
- Protein: 2g
This delicious Cinnamon Apple Crisp ticks all the boxes for a comforting dessert, and I promise, the delightful smell will keep you smiling long after the last bite. So what are you waiting for? Head to your kitchen and whip up some cozy goodness! Every spoonful is bound to hold a heartwarming story. Enjoy every moment of it, dear friend!
Print
Cinnamon Apple Crisp
- Total Time: 60 minutes
- Yield: 8 servings 1x
- Diet: Vegetarian
Description
A heartwarming dessert that combines the tartness of apples with a sweet, crunchy topping.
Ingredients
- 5–6 medium apples (Granny Smith or Honeycrisp)
- 1 cup brown sugar
- 1 cup rolled oats
- 1/2 cup all-purpose flour
- 1 teaspoon ground cinnamon
- 1/2 cup cold unsalted butter
- A pinch of salt
- 1 teaspoon vanilla extract
Instructions
- Preheat Your Oven: Set that beautiful oven to 350°F (175°C).
- Prep the Apples: Peel, core, and slice your apples evenly.
- Toss with Sugar and Spice: In a large bowl, combine the sliced apples with brown sugar and cinnamon.
- Layer the Apples: Transfer your apple mixture into a greased baking dish.
- Mix Up the Crisp Topping: In another bowl, combine oats, flour, and brown sugar, then cut in the butter.
- Top and Bake: Evenly spread the oat mixture over the apples and bake for 40-45 minutes.
- Cool a Bit, If You Can: Let it cool for at least 10-15 minutes before serving.
Notes
Serve with vanilla ice cream or whipped cream for a delicious contrast.
- Prep Time: 15 minutes
- Cook Time: 45 minutes
- Category: Dessert
- Method: Baking
- Cuisine: American
Nutrition
- Serving Size: 1 serving
- Calories: 280
- Sugar: 15g
- Sodium: 200mg
- Fat: 10g
- Saturated Fat: 6g
- Unsaturated Fat: 4g
- Trans Fat: 0g
- Carbohydrates: 45g
- Fiber: 4g
- Protein: 2g
- Cholesterol: 30mg
Keywords: Cinnamon Apple Crisp, apple dessert, baking, cozy recipes, comfort food
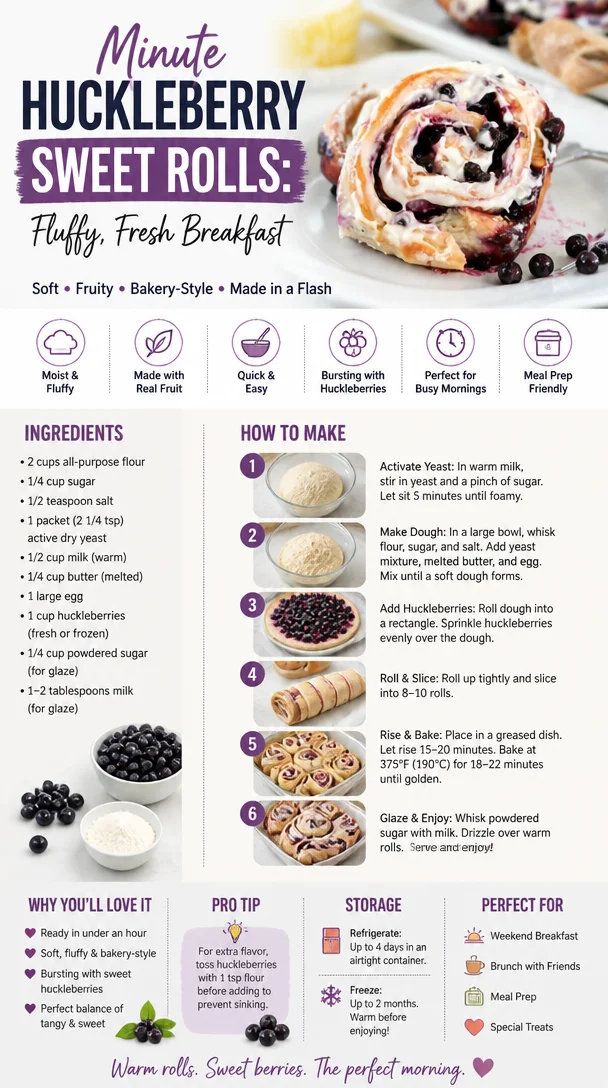
Minute Huckleberry Sweet Rolls: Fluffy, Fresh Breakfast
Huckleberry Sweet Rolls: A Cozy Adventure in Every Bite
Welcome back to my kitchen, dear friends! Today, I’m absolutely thrilled to take you on an exciting flavorful journey with my beloved Huckleberry Sweet Rolls. They might just be the sweetest and coziest addition to your baking repertoire. Imagine fluffy rolls, dripping with fresh huckleberry goodness, each one promising a comforting hug wrapped in dough. Are you drooling yet? I know I am!
Now, if you’ve been following my blog, you know I have a deep passion for creating dishes that not only fill your belly but also warm your heart. Huckleberries remind me of carefree summer days spent hiking in the mountains, the juicy, tart berries staining our fingers as we picked them fresh from the bushes. Those were some magical moments, and each bite of these rolls captures that nostalgia.
Baking these luscious Huckleberry Sweet Rolls is not just about the sweet reward at the end; it’s about the process, the creativity, and above all, the enjoyment of sharing with the people you love. So, if you’re ready to make magic in your kitchen and create aromas that will have everyone wandering in to see what’s cooking, let’s jump right in!
A Sweet Memory in Every Bite
Growing up, my family had a tradition of picking huckleberries every summer in the nearby mountains. My siblings and I would race to see who could fill their buckets up the fastest, with the promise of sweet rewards waiting at home. One year, my grandmother decided to turn our harvest into sweet rolls. I remember the kitchen filled with laughter, flour dusting our noses, and that incredible smell of dough rising.
As we waited for the rolls to bake, the anticipation was almost unbearable. I can still hear my grandma’s gentle voice, teaching me how to knead the dough just right, the sense of community in the kitchen wrapping around us like a warm blanket. Those rolls were the highlight of every summer get-together, served fresh and warm with a drizzle of glaze. To this day, they’re a cherished family tradition that I’ve carried into my adult life, finding joy in recreating those beautiful moments with my loved ones.
Ingredients
To whip up these delightful Huckleberry Sweet Rolls, you’ll need the following ingredients:
-
All-purpose flour
The backbone of any good roll! All-purpose flour works beautifully, but feel free to use bread flour for a chewier texture. -
Active dry yeast
This little magic maker is responsible for making your rolls fluffy. If you want a quicker rise, instant yeast works wonders, too! -
Sugar
A mix of granulated and brown sugar not only sweetens but adds a nice depth of flavor and helps with browning. -
Salt
A pinch of salt is crucial! It enhances the sweetness and balances all the flavors, making it a necessity in any baked good. -
Milk
Whole milk is my go-to, but any milk will do. For a dairy-free version, try almond or oat milk; just ensure it’s unsweetened. -
Butter
We use unsalted butter for optimal control of flavor, and don’t skip melting it—those rolls need all that love! -
Eggs
Eggs help bind everything together and add richness. If you’re going egg-free, you can substitute with flax or chia eggs—just mix 1 tablespoon of ground flaxseed or chia seeds with 2.5 tablespoons of water for each egg. -
Huckleberries
Fresh, frozen, or dried will work! If huckleberries aren’t available, blueberries make a fantastic substitute and will still give you those delightful sweet bursts. -
Powdered sugar
To make a simple glaze to drizzle over the rolls at the end. Feel free to add a splash of vanilla for extra flavor!
Let’s not forget the love and energy you’ll pour into your creation — that’s the vital ingredient that makes everything taste better!
Step-by-Step Instructions
1. Prepare the Dough
In a small bowl, combine 1 cup of warm milk (around 110°F) with 2 tablespoons of sugar and your yeast. Let it sit for 5-10 minutes until it’s bubbly and foamy. This bubbling is your yeast coming to life — it’s like a party in a bowl!
2. Mix the Dry Ingredients
In a large mixing bowl, whisk together 4 cups of all-purpose flour, 1 teaspoon of salt, and the remaining 2 tablespoons of sugar. When you combine them, envision all the deliciousness that’s going to happen next.
3. Combine Wet and Dry
Once your yeast is ready, pour it into the flour mix along with 1 melted stick of butter and 2 beaten eggs. Use a spatula or wooden spoon to combine everything together until it forms a shaggy dough.
4. Knead the Dough
Transfer the dough onto a floured surface and knead for about 8-10 minutes until it’s smooth and elastic. This is where you can let out any frustrations! If you find the dough too sticky, sprinkle on little bits of flour — but be careful not to over-flour.
5. First Rise
Place the dough into a greased bowl, cover it with a kitchen towel, and let it rise in a warm spot for an hour or until it doubles in size. While it’s rising, think about all the scrumptious things you can do with huckleberries — maybe even grab a few for snacking!
6. Prepare the Filling
While the dough is rising, mix together 1 cup of huckleberries, 1/2 cup of brown sugar, and a sprinkling of cinnamon in a bowl for the filling. The sweetness of the sugar complements the tartness of the huckleberries beautifully.
7. Roll It Out
Once the dough has risen, punch it down to release the air. Roll the dough out into a rectangle about 1/4 inch thick. Think of this as your canvas for the flavor masterpiece!
8. Spread the Filling
Spread melted butter over the rolled-out dough, then sprinkle the huckleberry mixture across the top. You want to cover every inch to guarantee each bite is bursting with flavor!
9. Roll and Slice
Starting from the long edge, roll the dough tightly into a log. Pinch the seam to seal it, then slice the log into 12 equal pieces. Place them cut-side up in a greased baking dish, leaving space between them to rise again.
10. Second Rise
Cover the rolls with a kitchen towel and let them rise for another 30-40 minutes until they puff up beautifully. It’s like watching a magic trick unfold right in your kitchen!
11. Bake
Preheat your oven to 350°F (175°C). When they’re all fluffy and cozy, pop those rolls into the oven and bake for 20-25 minutes or until golden brown. Your kitchen is about to fill with that indescribable smell of baking that makes you want to dance!
12. Glaze and Serve!
While the rolls are baking, whip up the glaze by combining 1 cup of powdered sugar and 2 tablespoons of milk. Drizzle it over the warm rolls once they come out of the oven for that extra touch of sweetness that makes them irresistible!
Serving Suggestions
To serve these delightful Huckleberry Sweet Rolls, I recommend plating them on a beautiful serving dish, drizzling extra glaze on top, and garnishing with a few fresh huckleberries or mint leaves. Not only does this make for a stunning presentation, but it also invites everyone to dig in and enjoy a cozy treat. Perfect for breakfast, brunch, or as an afternoon snack with a cup of tea!
Recipe Variations
- Mixed Berry Sweet Rolls: Add a mix of blueberries, raspberries, or blackberries for a berry medley twist!
- Vegan Sweet Rolls: Swap out milk for almond milk, butter for coconut oil, and use flax eggs to make these rolls completely dairy-free.
- Spiced Sweet Rolls: Incorporate some nutmeg or cardamom in the filling for a warming, spiced flavor.
- Chocolate-Huckleberry Rolls: Add chocolate chips to the filling for a decadent treat that combines huckleberries and rich chocolate.
- Savory Version: Try using cream cheese and herbs for a savory roll, perfect for brunch or as a side dish!
Chef’s Notes
Oh, where do I even begin? Baking these Huckleberry Sweet Rolls brings back so many beautiful memories. My grandma always insisted on letting the dough rise in the sun through our kitchen window — it truly felt like we were bringing the warmth of the summer into our hearts! The recipe has evolved with each passing year, and I love experimenting with new flavors and techniques, but the nostalgia remains the same.
I once got a bit too adventurous and tried adding lemon zest to the filling; let me tell you, it was oddly refreshing, but nothing beats the classic huckleberry flavor! Don’t be afraid to embrace your creativity, as every kitchen mistake can lead to something unexpectedly wonderful!
FAQs and Troubleshooting
1. My dough isn’t rising. What did I do wrong?
If your dough isn’t rising, it might be due to inactive yeast. Make sure your yeast is fresh and the liquid was warm, not hot. If you’re unsure, do the “float test” with a little sugar and warm water before starting.
2. Why did my sweet rolls come out dense?
If your rolls are dense, it may be due to overworking the dough or using too much flour. Remember to avoid adding too much flour during kneading; it should be soft and slightly tacky.
3. Can I make the rolls ahead of time?
Absolutely! You can prepare the rolls, place them unbaked in the refrigerator overnight, and then bake them fresh in the morning. Just allow them to come to room temperature before baking.
4. How can I store leftovers?
Store leftover rolls in an airtight container at room temperature for 2-3 days. If you want to keep them longer, pop them in the freezer. Just be sure to wrap them tightly to prevent freezer burn!
Nutritional Info
(Sample nutritional info per roll—adjust based on your specific ingredients)
- Calories: 220
- Total Fat: 9g
- Saturated Fat: 5g
- Cholesterol: 40mg
- Sodium: 150mg
- Carbohydrates: 31g
- Fiber: 2g
- Sugars: 7g
- Protein: 3g
And there you have it, friends! A warm, hearty, and delightful recipe for Huckleberry Sweet Rolls that are sure to steal your heart. They are more than just a recipe; they’re an opportunity to create cherished memories and share love through food. So, gather your loved ones, roll up those sleeves, and let’s bake something beautiful together! Happy cooking!
Print
Huckleberry Sweet Rolls
- Total Time: 70 minutes
- Yield: 12 servings 1x
- Diet: Vegetarian
Description
Fluffy rolls filled with fresh huckleberries, perfect for breakfast or a cozy snack.
Ingredients
- 4 cups all-purpose flour
- 2 tablespoons active dry yeast
- 2 tablespoons granulated sugar
- 1/2 cup brown sugar
- 1 teaspoon salt
- 1 cup whole milk
- 1 stick unsalted butter, melted
- 2 large eggs
- 1 cup huckleberries (fresh, frozen, or dried)
- 1 cup powdered sugar (for glaze)
- 2 tablespoons milk (for glaze)
Instructions
- Prepare the Dough: In a small bowl, combine warm milk with 2 tablespoons of sugar and yeast. Let it sit for 5-10 minutes until bubbly.
- Mix the Dry Ingredients: In a large bowl, whisk together flour, salt, and remaining sugar.
- Combine Wet and Dry: Once yeast is ready, pour it into the flour mix along with melted butter and beaten eggs. Mix until shaggy dough forms.
- Knead the Dough: Transfer dough onto a floured surface, knead for 8-10 minutes until smooth and elastic.
- First Rise: Place dough in a greased bowl, cover, and let it rise for an hour until doubled in size.
- Prepare the Filling: Mix huckleberries, brown sugar, and cinnamon in a bowl.
- Roll It Out: Punch down the dough and roll it out to a rectangle about 1/4 inch thick.
- Spread the Filling: Spread melted butter over the dough, top with huckleberry mixture.
- Roll and Slice: Roll tightly from the long edge, slice into 12 pieces, and place cut-side up in a greased dish.
- Second Rise: Cover rolls and let them rise for another 30-40 minutes.
- Bake: Preheat oven to 350°F (175°C). Bake rolls for 20-25 minutes until golden brown.
- Glaze and Serve: Mix powdered sugar and milk for glaze and drizzle over warm rolls.
Notes
For a vegan option, substitute milk with almond milk and butter with coconut oil.
- Prep Time: 20 minutes
- Cook Time: 25 minutes
- Category: Dessert
- Method: Baking
- Cuisine: American
Nutrition
- Serving Size: 1 roll
- Calories: 220
- Sugar: 7g
- Sodium: 150mg
- Fat: 9g
- Saturated Fat: 5g
- Unsaturated Fat: 4g
- Trans Fat: 0g
- Carbohydrates: 31g
- Fiber: 2g
- Protein: 3g
- Cholesterol: 40mg
Keywords: sweet rolls, huckleberry, dessert, baking, breakfast
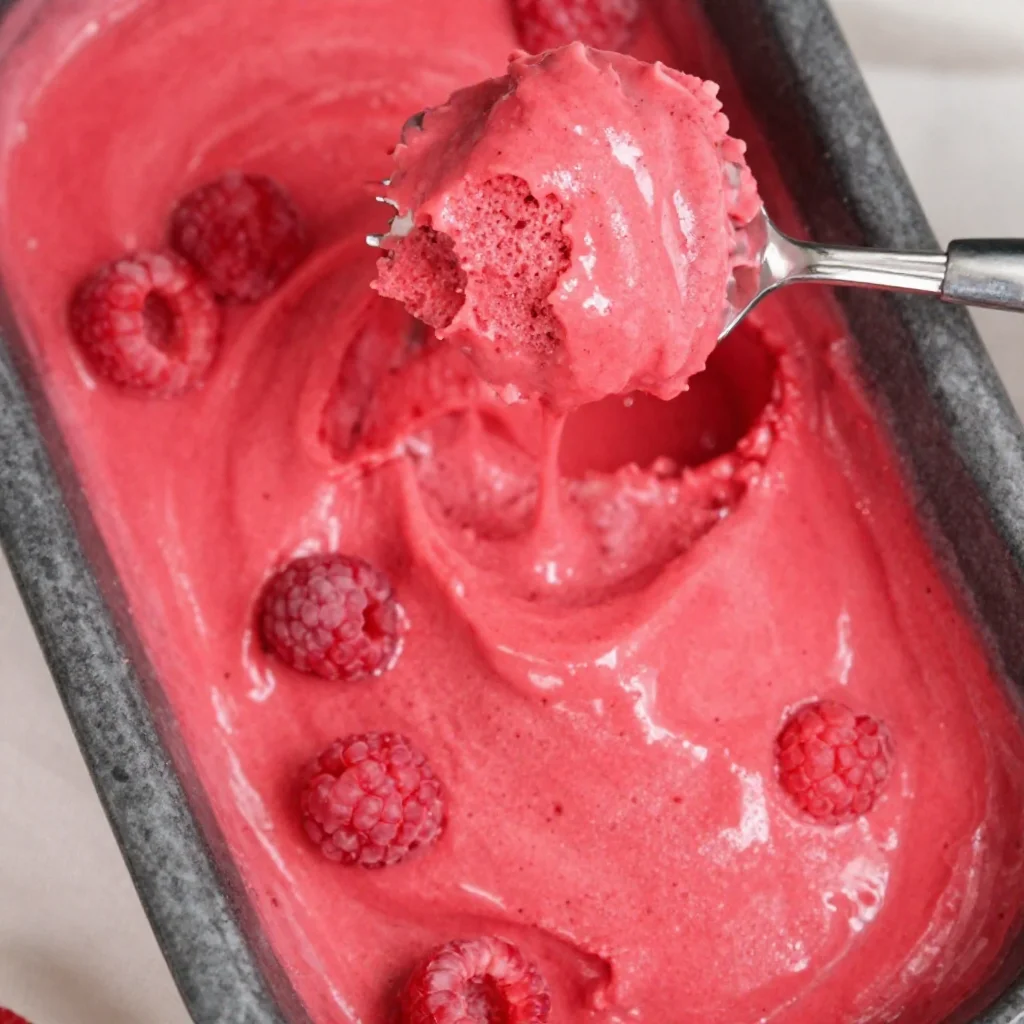
Paleo 5 Minute Raspberry Sorbet
Five-Minute Paleo Raspberry Sorbet: A Sweet, Guilt-Free Indulgence
Welcome to my kitchen! I’m thrilled you’re here because today, we’re diving into a treat that embodies the joy of summer and the simplicity of wholesome ingredients — Paleo 5-Minute Raspberry Sorbet. If you’re like me and find pure bliss in the vibrant taste of fresh berries, then you’re in for a delightful experience. Whether it’s a hot afternoon, a family celebration, or simply a moment when you crave something sweet but still wholesome, this sorbet is your go-to!
The beauty of this recipe is not just in its flavor, but also in its quick prep time. Five minutes, folks! Yes, you heard that right. No ice cream churners, no lengthy freezing times — just fresh, frozen raspberries whipped into a smooth, creamy dessert. Have you got your blender ready? Great! Let’s beat the heat and whip up some bliss in no time.
Making this sorbet takes me back to those lazy summer days when my mom would load us up in the car, and we’d head to the local berry farm. The smell of sun-ripened raspberries filled the air, and the world felt like a canvas of bright colors and laughter. Picking those berries and indulging in their sweetness was a family tradition, and this sorbet, with its vibrant hue and refreshing taste, beautifully captures that nostalgia.
Ingredients
Gather these simple ingredients to make your delicious Raphael raspberry sorbet:
-
Frozen Raspberries: The star of the show! They give the sorbet its vibrant color and tart flavor. You can substitute with any other berry like strawberries or blueberries if you’re in the mood for something different.
-
Banana: A natural sweetener and creaminess booster! Using a ripe banana lends a nice sweetness to the sorbet without the need for added sugars. If you’re not a banana fan, try using a ripe avocado for a creamy texture!
-
Coconut Milk: This adds wonderful richness and creaminess to our sorbet while keeping it dairy-free. For a lighter option, you can use almond milk, though it will alter the texture slightly.
-
Honey or Maple Syrup: Just a touch to balance the tartness of the raspberries. If you’re strictly Paleo, use raw honey; if you prefer vegan options, maple syrup works beautifully.
-
Lemon Juice: A dash of freshness and zing! It enhances the raspberry flavor. You can also use lime juice if you want a little twist.
These ingredients make this sorbet not just delicious but also guilt-free. They all align with the clean, wholesome principles of the Paleo diet, meaning you can indulge without any regret!
Step-by-Step Instructions
Ready to make some sorbet magic? Let’s roll up our sleeves and get started!
-
Prep Your Ingredients: First things first, pull out your frozen raspberries and let them thaw for about 5–10 minutes. This will make blending them much easier. No one wants to battle with a stubborn blender!
-
Blend the Base: In your blender, combine the thawed raspberries, banana, coconut milk, honey or maple syrup, and lemon juice. Keep in mind, the order can matter for how well your blender mixes. Start with the coconut milk — it helps create a smooth base.
-
Pulse Away: Blend on high until smooth and creamy. You may need to scrape down the sides of the blender a couple of times to make sure everything gets incorporated. This will take about 30-45 seconds, making sure you keep an eye on the texture.
-
Taste Test Time!: Scoop a bit out with a spoon and taste it. Adjust the sweetness or acidity by adding a bit more honey or lemon juice as necessary. Remember, this is your sorbet, so make it just how you like it!
-
Freeze to Firm: Once you’re thrilled with the flavor, transfer the mixture into an airtight container and pop it in the freezer for about 1–2 hours to firm up. But don’t worry if it’s still a bit soft — you can dig in as-is!
-
Scoop and Serve: When it’s ready, scoop it into bowls or dessert cups. A sprinkle of fresh mint or a few whole raspberries makes for a beautiful presentation. The vibrant color is sure to impress your guests!
Serving Suggestions
To make your Raspberry Sorbet a showstopper, consider serving it in a chilled glass or alongside a slice of gluten-free cake. You can also serve it over a bed of granola for a delightful textural contrast or place it in fresh, halved coconut shells for that tropical vibe. A sprig of mint or a dusting of shredded coconut elevates that wow factor!
Recipe Variations
Here are some fun variations to keep your sorbet adventures fresh:
-
Mixed Berry Sorbet: Use a combination of frozen raspberries, blueberries, and strawberries for a colorful blend.
-
Chocolate Drizzle: Once scooped, drizzle some melted dark chocolate on top to turn your sorbet into a decadent dessert.
-
Herbal Infusion: Add a couple of fresh basil leaves or a sprig of rosemary while blending for an intriguing herbal note.
-
Nutty Twist: Top with chopped nuts for a crunchy finish. Almonds or pistachios work wonderfully!
-
Citrus Blast: Swap the lemon juice for your favorite citrus to add a zesty twist—think orange or lime!
Chef’s Notes
I have to tell you a little secret: there’s no wrong way to make this sorbet! Over the years, I’ve experimented with various sweeteners, types of berries, and even added spices like cinnamon or vanilla extract for extra depth. This recipe has evolved into a staple in my home, especially during those warm months when the garden blossoms with berries. It never fails to bring smiles to anyone who tries it!
Remember, the best part about creating in the kitchen is the freedom to play with flavors. I’m always drawn back to the fond memories of my mom and those berry-picking adventures that inspire my cooking. Sometimes, you just need a simple recipe to bring back those feelings of warmth, joy, and togetherness.
FAQs and Troubleshooting
-
What if my sorbet is too hard?
If it’s frozen too hard, let it sit out for a few minutes before scooping. A quick pulse in the blender can also restore that creamy texture. -
Can I use fresh raspberries instead of frozen?
Absolutely! Just freeze them for a few hours before making sorbet. Fresh berries will add a vibrant flavor, especially if they’re in season. -
How long can I store my sorbet?
Your raspberry sorbet can last up to 2 weeks in the freezer. Just ensure it’s in an airtight container to avoid freezer burn. -
It didn’t blend smoothly; what went wrong?
This can happen if your raspberries were too frozen. Thaw them slightly beforehand. Also, don’t hesitate to add a little more coconut milk to help blend everything together!
Nutritional Info
While personal dietary needs vary, this Paleo Raspberry Sorbet is naturally low in calories and sugar compared to store-bought options. It’s packed with antioxidants from the raspberries and healthy fats from coconut milk, making it not just delicious but nutritious too!
In conclusion, the next time you crave something sweet, whip up this easy — and oh-so-satisfying — Paleo 5-Minute Raspberry Sorbet. You’ll not only quench your sweet tooth but also create memories reminiscent of summers filled with laughter, sunshine, and, of course, berries! Happy cooking, my fellow foodies!
Print
Five-Minute Paleo Raspberry Sorbet
- Total Time: 120 minutes
- Yield: 4 servings 1x
- Diet: Paleo
Description
A quick and refreshing Paleo-friendly raspberry sorbet that’s perfect for summer cravings.
Ingredients
- 2 cups frozen raspberries
- 1 ripe banana
- 1 cup coconut milk
- 2 tablespoons honey or maple syrup
- 1 tablespoon lemon juice
Instructions
- Prep your ingredients: Pull out your frozen raspberries and let them thaw for about 5–10 minutes.
- Blend the base: In your blender, combine the thawed raspberries, banana, coconut milk, honey or maple syrup, and lemon juice.
- Pulse away: Blend on high until smooth and creamy, scraping down the sides as needed.
- Taste test time!: Scoop a bit out with a spoon and adjust the sweetness or acidity as necessary.
- Freeze to firm: Transfer the mixture into an airtight container and pop it in the freezer for about 1–2 hours.
- Scoop and serve: When ready, scoop into bowls and garnish with fresh mint or raspberries.
Notes
Experiment with different berries and sweeteners to find your favorite variation of this sorbet.
- Prep Time: 5 minutes
- Cook Time: 0 minutes
- Category: Dessert
- Method: Blending
- Cuisine: Paleo
Nutrition
- Serving Size: 1 serving
- Calories: 150
- Sugar: 10g
- Sodium: 10mg
- Fat: 6g
- Saturated Fat: 5g
- Unsaturated Fat: 1g
- Trans Fat: 0g
- Carbohydrates: 22g
- Fiber: 4g
- Protein: 2g
- Cholesterol: 0mg
Keywords: raspberry sorbet, paleo dessert, quick dessert, healthy dessert, summer treat
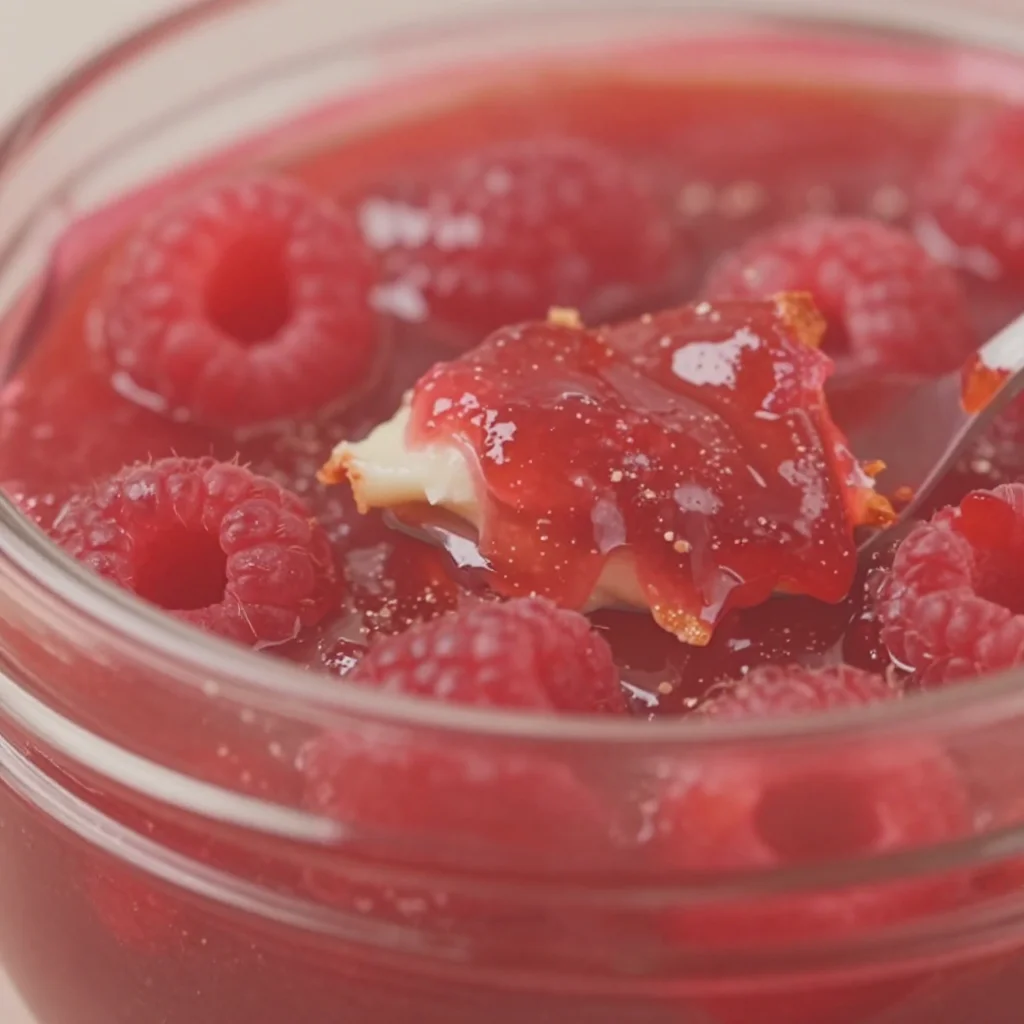
Easy 10 Minute Raspberry Jam
The Sweet Simplicity of Homemade Raspberry Jam in Just 10 Minutes
Welcome to another delightful adventure in my kitchen! Today, we’re diving into a treat that feels like summer in a jar: homemade raspberry jam. You might be thinking, "Making jam sounds complicated!" but trust me—I’m here to show you how easy it can be, especially when you’ve got just 10 minutes to spare. Picture this: a sunny morning, warm toast on the table, and the vibrant, tangy flavor of raspberry jam brightening every bite. Could anything be better?
Jams and preserves have a beautiful history, often wrapping us in nostalgia and warmth with every spoonful. I remember as a child, visiting my grandmother’s farmhouse in the countryside where she would walk me through her garden, collecting fresh fruit. Her raspberry bushes sprawled like a wild canvas, full of plump, juicy berries just begging to be picked. The sweet smell of berries merging with her laughter and stories felt like magic in the air. Once we returned to the kitchen with our colorful haul, we spent hours cooking, chatting, and creating a delicious mess. The aroma of bubbling fruit on the stove filled the air as she poured her heart into each jar, transforming simple ingredients into something extraordinary.
Raspberry jam is the perfect way to recreate those cherished memories and share them with your loved ones. Whether you’re slathering it on warm buttered toast, dolloping it on your morning yogurt, or using it as a filling for a delightful pastry, this jam is sure to become an essential in your kitchen. Plus, it’s a sensational way to preserve that burst of summer sweetness for cooler months ahead. Ready to create some kitchen magic? Let’s get started!
Ingredients for Easy 10-Minute Raspberry Jam
-
Fresh Raspberries (2 cups): The star of our jam! You can use fresh or frozen raspberries, but fresh always gives a vibrant flavor. If you don’t have raspberries on hand, feel free to substitute them with strawberries or blackberries for a delicious twist.
-
Granulated Sugar (1 cup): Sugar not only enhances the sweetness but also helps with the preservation of the jam. If you’re looking to cut down on sugar, coconut sugar or honey can be used, but be aware they might alter the taste slightly.
-
Fresh Lemon Juice (2 tablespoons): This brightens up the flavor and acts as a natural preservative. If you don’t have fresh lemons, bottled lemon juice works too, but I always prefer the taste of fresh whenever possible.
-
Pectin (1 tablespoon): A natural thickening agent that helps achieve that perfect jam texture. If you prefer a more rustic jam, you can skip this ingredient and simply mash the raspberries to retain a chunkier feel.
-
Pinch of Salt: Just a tiny touch to balance the sweetness and elevate the overall flavor of the jam!
Step-by-Step Instructions to Make Your Raspberry Jam
-
Prep Your Ingredients: Wash those beautiful raspberries gently under cold water, then pat them dry with a kitchen towel. This ensures they retain their lovely texture. If you’re using frozen ones, let them defrost and drain any excess water.
-
Mashing the Raspberries: In a mixing bowl, take your fresh raspberries and use a potato masher or the back of a fork to mash them slightly. Leave some chunks for texture! This is also the perfect time to taste a little bit—just remember that the sugar will make it sweeter soon!
-
Cook the Jam Mixture: Transfer those delightful mashed berries into a saucepan over medium heat. Stir in the sugar and lemon juice, making sure it all combines beautifully. Heat this mixture, stirring occasionally. You want to keep an eye on it so the sugar dissolves fully—this takes about 3-4 minutes. That lovely smell is about to waft through your kitchen!
-
Add the Pectin and Salt: Once the mixture is bubbling gently, stir in the pectin and a pinch of salt. This combo is what helps our jam thicken and creates that wonderful glossy finish. Allow the jam to simmer for another 2-3 minutes, stirring frequently.
-
Check the Consistency: To test if your jam is ready, drop a spoonful onto a plate that you’ve chilled in the freezer for a minute. Let it sit for 30 seconds, then run your finger through the middle. If the line holds, you’re good to go! If it’s still too runny, simmer for another minute or so.
-
Cool and Store: Remove the pan from heat and let the jam cool for about 10-15 minutes in the saucepan. Then, pour the jam into sterilized jars (this is crucial for preserving!). Make sure to leave a little space at the top of the jars. Allow the jars to cool completely before sealing them with lids.
And there you have it! In less than 10 minutes, you’ve created a fantastic homemade raspberry jam that captures all the magic of summer.
Serving Suggestions
Serving your homemade raspberry jam is a delightful experience! Spread it generously on warm toast or buttery croissants for breakfast. It pairs wonderfully with creamy cheeses for a savory-sweet snack. You can also swirl it into your morning yogurt or use it as a filling for cakes, tarts, or pastries. For a special touch, consider presenting it in a cute jar as a thoughtful gift for friends or family. Trust me; they’ll love you for it!
Recipe Variations
- Spicy Raspberry Jam: Add a pinch of crushed red pepper flakes or a splash of jalapeño juice for a sweet and spicy twist!
- Vanilla Raspberry Jam: Stir in a splash of vanilla extract along with the lemon juice for a delightful aromatic experience.
- Herbal Infusion: Toss in a few sprigs of fresh mint or thyme while simmering for a fragrant, herby version.
- Citrus Medley Jam: Mix in some zest from an orange or lime for a refreshing citrus vibe that brightens up the flavor.
- Chia Seed Jam: For a healthier alternative, replace the pectin with 2 tablespoons of chia seeds. They add fiber and create a beautiful texture!
Chef’s Notes
Every time I make this raspberry jam, I’m transported back to those sunny afternoons with my grandmother. It’s fascinating how something as simple as fruit, sugar, and a little love can become a cherished memory. Over the years, I’ve refined this recipe, always making little adjustments to evoke that familiar flavor of childhood. Cooking is about evolution and creativity—don’t be afraid to make it your own!
One time, I even tried to make peach jam with leftover raspberries; oh, what a lovely disaster that was! The kitchen was a complete mess, but the taste? An unexpected hit! Remember, cooking might get messy, but it’s the best kind of fun—embrace it!
FAQs and Troubleshooting
1. My jam is too runny! What did I do wrong?
It’s likely that it either didn’t cook for long enough or there wasn’t enough pectin. Just simmer it a bit longer and test it like we discussed!
2. Can I use frozen raspberries?
Absolutely! Just thaw them and drain any excess liquid, as they can be a bit more watery than fresh.
3. How long can I store my jam?
In a sealed jar, this jam should last up to a month in the fridge. For longer preservation, consider water-bath canning techniques!
4. Can I double the recipe?
Yes, but be mindful of cooking it in batches. Doubling the quantities might require you to extend the cooking time to get the right consistency.
Nutritional Info (per tablespoon)
- Calories: 36
- Total Fat: 0g
- Saturated Fat: 0g
- Sugars: 9g
- Protein: 0g
- Carbohydrates: 9g
So, there you have it—a delightful journey into the world of homemade raspberry jam! I hope this recipe inspires you to create your own kitchen magic. Remember, the best flavor comes from sharing with friends and family. Happy cooking, and enjoy every sweet moment!
Print
Easy 10-Minute Raspberry Jam
- Total Time: 10 minutes
- Yield: 1 jar 1x
- Diet: Vegetarian
Description
A quick and delightful recipe for homemade raspberry jam that’s perfect for preserving summer sweetness in just 10 minutes.
Ingredients
- 2 cups Fresh Raspberries
- 1 cup Granulated Sugar
- 2 tablespoons Fresh Lemon Juice
- 1 tablespoon Pectin
- Pinch of Salt
Instructions
- Prep Your Ingredients: Wash those beautiful raspberries gently under cold water, then pat them dry with a kitchen towel.
- Mashing the Raspberries: In a mixing bowl, take your fresh raspberries and use a potato masher or the back of a fork to mash them slightly.
- Cook the Jam Mixture: Transfer those delightful mashed berries into a saucepan over medium heat, stir in the sugar and lemon juice.
- Add the Pectin and Salt: Once the mixture is bubbling gently, stir in the pectin and a pinch of salt.
- Check the Consistency: Drop a spoonful onto a plate that you’ve chilled in the freezer for a minute.
- Cool and Store: Remove the pan from heat and let the jam cool for about 10-15 minutes in the saucepan.
Notes
This jam can last up to a month in the fridge. For longer preservation, consider water-bath canning techniques.
- Prep Time: 5 minutes
- Cook Time: 5 minutes
- Category: Condiments
- Method: Cooking
- Cuisine: American
Nutrition
- Serving Size: 1 tablespoon
- Calories: 36
- Sugar: 9g
- Sodium: 0mg
- Fat: 0g
- Saturated Fat: 0g
- Unsaturated Fat: 0g
- Trans Fat: 0g
- Carbohydrates: 9g
- Fiber: 0g
- Protein: 0g
- Cholesterol: 0mg
Keywords: raspberry jam, homemade jam, summer recipe
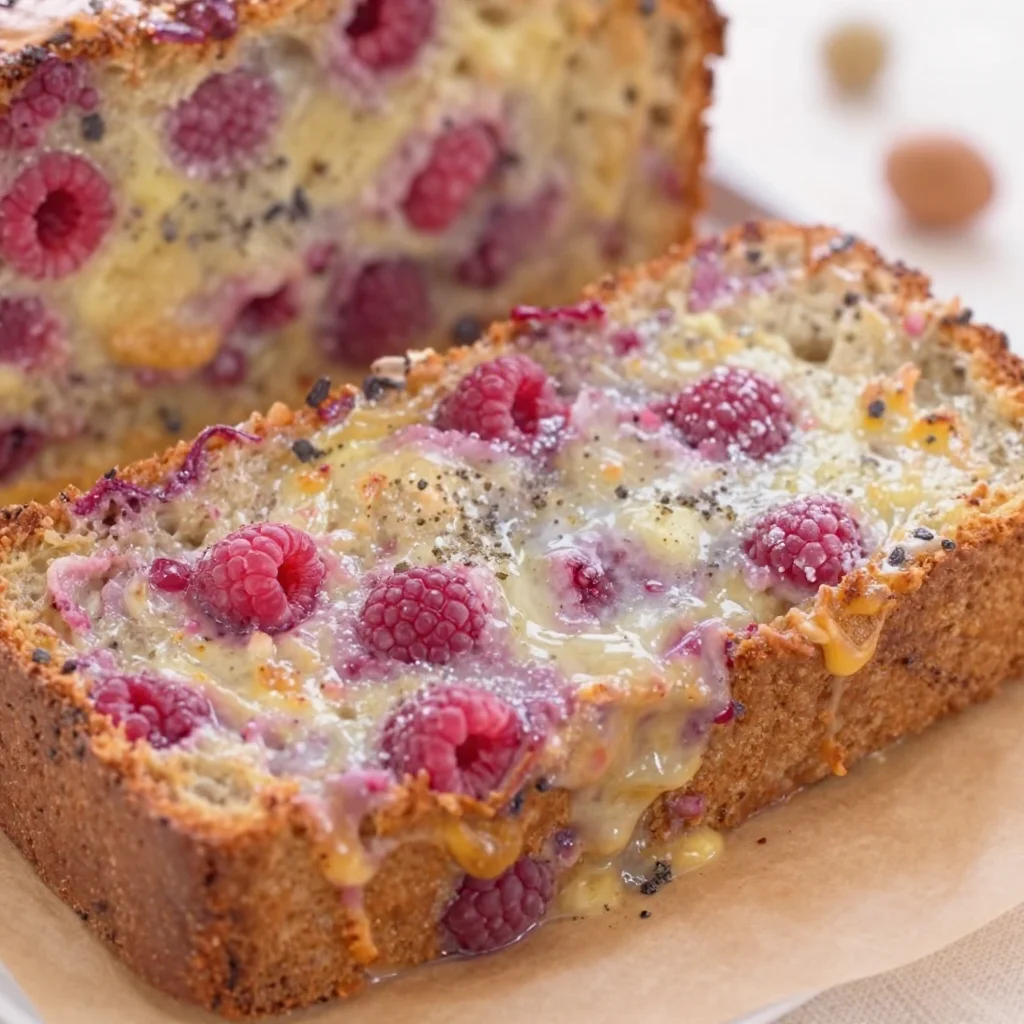
Easy Raspberry Bread for Busy Weeknights (20-Min Prep)
The Best Raspberry Bread: A Sweet Slice of Nostalgia
Welcome to my kitchen, foodies! Today, I want to share a recipe that’s close to my heart—the Best Raspberry Bread. If you’ve ever stepped into a café and been greeted by the tantalizing aroma of baked goods, you know exactly how that scents can brighten your day. This delightful bread brings that cozy vibe straight into your home, and I can promise you, it’s as rewarding to bake as it is to eat!
Baking has always been my therapy. The act of mixing flour, sugar, and fresh fruit transports me to memories of my childhood, where Saturdays were reserved for baking marathons with my mom. We’d whip up this luscious raspberry bread, filling our small kitchen with the sweet aroma of berries and vanilla. As we pulled the warm loaves from the oven, we’d share stories, giggles, and a few flour fights—just the kind of chaos that makes a kitchen feel alive! Each slice revealed warm pink-hued ribbons dotted with juicy raspberries, creating a cheerful centerpiece for our weekend breakfasts. This raspberry bread became more than just a recipe for us; it was our love language, our way of forming lasting memories with family and friends.
So, let’s dive into this wonderful world of raspberry bread together! Whether you’re treating yourself to a leisurely brunch or surprising your loved ones with a gift from your kitchen, this recipe is bound to spark joy. Grab your apron, and let’s bake some magic!
Ingredients
Here’s what you’ll need to bring this homemade delight to life:
-
1 ½ cups all-purpose flour
- This is the backbone of our bread. For a gluten-free option, you can substitute with a 1:1 gluten-free flour blend.
-
1 cup granulated sugar
- Sweetness is key here! You can use coconut sugar or monk fruit sweetener for a lower-carb alternative.
-
½ teaspoon baking powder
- This little leavening magic will give your bread a lovely rise. Baking soda can be used, but adjust the quantity to about ⅓ teaspoon if switching.
-
½ teaspoon baking soda
- This works in tandem with baking powder to create a fluffy texture. Make sure it’s fresh for the best results!
-
¼ teaspoon salt
- Enhances the flavors and balances the sweetness. Don’t skip it!
-
2 large eggs
- They provide moisture and act as a binding agent. For a vegan alternative, use flax eggs (1 tablespoon of ground flaxseed mixed with 2.5 tablespoons of water).
-
½ cup unsalted butter, melted
- Adds richness and that delightful buttery flavor. You can use margarine or coconut oil for a dairy-free option.
-
½ cup buttermilk
- This adds moisture and a touch of tang. If you don’t have buttermilk, mix ½ cup of milk with a splash of vinegar or lemon juice and let it sit for a few minutes!
-
1 cup fresh raspberries
- The star of our dish! Frozen berries work too—just make sure to thaw and drain them so they don’t add excess moisture.
-
1 teaspoon vanilla extract
- A must-have for depth of flavor. You can use almond extract for a unique twist!
Feel free to adapt these ingredients based on availability or dietary preferences. Cooking is all about making it your own!
Step-by-Step Instructions
Now that we have our ingredients, let’s get cooking!
Step 1: Preheat Your Oven
First things first, preheat your oven to 350°F (175°C). Preheating ensures even baking, so this step is critical. While it’s heating up, you can prepare your baking pan.
Step 2: Prepare the Baking Pan
Grease a 9×5-inch loaf pan with butter or non-stick spray. If you want an extra layer of protection from sticking, you can line the bottom with parchment paper too.
Step 3: Mix Dry Ingredients
In a medium bowl, whisk together the flour, sugar, baking powder, baking soda, and salt. This step is crucial for evenly distributing the leavening agents and ensuring consistent rise throughout the loaf.
Tip: Always sift your flour before measuring it out. This will help keep your bread light and fluffy!
Step 4: Combine Wet Ingredients
In a large bowl, beat the eggs. Stir in the melted butter, buttermilk, and vanilla extract until everything is well combined. It should look creamy and slightly frothy.
Step 5: Combine Wet and Dry Mixtures
Slowly add the dry ingredients to the wet mixture, stirring gently but swiftly. Mix just until combined; a few lumps are perfectly okay. Overmixing will lead to a dense loaf!
Step 6: Fold in the Raspberries
Gently fold in the fresh raspberries. If you’re using frozen berries, be gentle to avoid turning the batter pink!
Tip: Dust the raspberries with a bit of flour before folding them in. This can help prevent them from sinking to the bottom during baking.
Step 7: Pour into the Pan
Transfer the bright pink batter into your prepared loaf pan. Smooth the top with a spatula to make it look nice and presentable!
Step 8: Bake
Pop that beauty into the preheated oven and let it bake for 55–65 minutes. About halfway, you can rotate the pan for even baking, but this isn’t strictly necessary.
Step 9: Check for Doneness
Check for doneness by inserting a toothpick into the center of the loaf. If it comes out clean or with a few moist crumbs, your bread is done!
Step 10: Cool and Serve
Allow the bread to cool in the pan for 10 minutes before transferring it to a wire rack to cool completely. This waiting game is tough, but trust me—it’s worth it! Once cooled, slice it up and prepare for your taste buds to be dazzled.
Serving Suggestions
This raspberry bread is as versatile as it is delicious! Serve it warm with a pat of butter on top, or enjoy it with a drizzle of honey or maple syrup. For an elegant touch, you can pair it with a scoop of vanilla ice cream or whipped cream. Whether for breakfast, brunch, or dessert, it’s sure to steal the spotlight!
Recipe Variations
- Chocolate Chip Raspberry Bread: Add a cup of dark chocolate chips for a delightful sweetness.
- Nut Lover’s Raspberry Bread: Fold in chopped walnuts or pecans for a crunchy texture.
- Lemon Raspberry Bread: Add a tablespoon of lemon zest and a touch of lemon juice for a refreshing twist.
- Coconut Raspberry Bread: Incorporate shredded coconut for a tropical flair.
Feel free to get creative! Food is all about personal taste, so don’t hesitate to experiment with flavors that speak to your soul.
Chef’s Notes
This raspberry bread has been through various transformations in my kitchen over the years. The first time I made it, I actually forgot to add the sugar (don’t ask how!). Instead of a sweet treat, I ended up with a rather bland loaf. But that unfortunate mishap led to some of my favorite kitchen memories as I tried to salvage the situation with plenty of spreadable goodness on top!
Now, this recipe is one I keep close! It’s the perfect canvas for other flavors, and every time I make it, it fills my kitchen with that nostalgic aroma that I fell in love with as a child.
FAQs and Troubleshooting
1. My bread is too dense. What went wrong?
Overmixing the batter or not measuring your ingredients accurately can cause density. Make sure to fold gently and measure carefully!
2. Why did my raspberries sink to the bottom?
This can happen if the berries are too wet. Dredging them in flour before adding them to the batter can help prevent sinking.
3. Can I use frozen raspberries and if so, how do I prepare them?
Absolutely! Just let them thaw and drain any excess moisture before folding them into the batter to ensure the right texture.
4. What can I do if my bread sticks to the pan?
Make sure to grease your loaf pan well and consider lining the bottom with parchment paper. If it does stick, you can use a butter knife to gently loosen the sides!
Nutritional Info
While I believe in enjoying treats like this bread in moderation, here’s a rough idea of the nutritional content per slice if you slice the loaf into 12 pieces:
- Calories: 190
- Fat: 7g
- Carbohydrates: 29g
- Protein: 3g
- Fiber: 1g
- Sugars: 10g
Note that values may vary based on specific ingredients used.
And there you have it: the Best Raspberry Bread, straight from my heart to yours! Baking shouldn’t be intimidating; it should be fun and filled with love. Share a slice with someone you adore, and you just might spark joy in their day, too! Happy baking, friends!
Print
The Best Raspberry Bread
- Total Time: 75 minutes
- Yield: 12 servings 1x
- Diet: Vegetarian
Description
A delightful raspberry bread that evokes nostalgia and warmth, perfect for any brunch or dessert.
Ingredients
- 1 ½ cups all-purpose flour
- 1 cup granulated sugar
- ½ teaspoon baking powder
- ½ teaspoon baking soda
- ¼ teaspoon salt
- 2 large eggs
- ½ cup unsalted butter, melted
- ½ cup buttermilk
- 1 cup fresh raspberries
- 1 teaspoon vanilla extract
Instructions
- Preheat your oven to 350°F (175°C).
- Grease a 9×5-inch loaf pan with butter or non-stick spray.
- In a medium bowl, whisk together the flour, sugar, baking powder, baking soda, and salt.
- In a large bowl, beat the eggs. Stir in the melted butter, buttermilk, and vanilla extract until well combined.
- Slowly add the dry ingredients to the wet mixture, stirring gently but swiftly until just combined.
- Gently fold in the fresh raspberries.
- Transfer the batter into your prepared loaf pan and smooth the top with a spatula.
- Pop the pan into the preheated oven and let it bake for 55–65 minutes.
- Check for doneness by inserting a toothpick into the center of the loaf.
- Allow the bread to cool in the pan for 10 minutes before transferring it to a wire rack.
Notes
For a gluten-free option, substitute all-purpose flour with a gluten-free blend. Variations include adding chocolate chips or nuts for different flavors.
- Prep Time: 15 minutes
- Cook Time: 60 minutes
- Category: Dessert
- Method: Baking
- Cuisine: American
Nutrition
- Serving Size: 1 slice
- Calories: 190
- Sugar: 10g
- Sodium: 200mg
- Fat: 7g
- Saturated Fat: 4g
- Unsaturated Fat: 2g
- Trans Fat: 0g
- Carbohydrates: 29g
- Fiber: 1g
- Protein: 3g
- Cholesterol: 60mg
Keywords: raspberry bread, dessert, baking, sweet bread, brunch
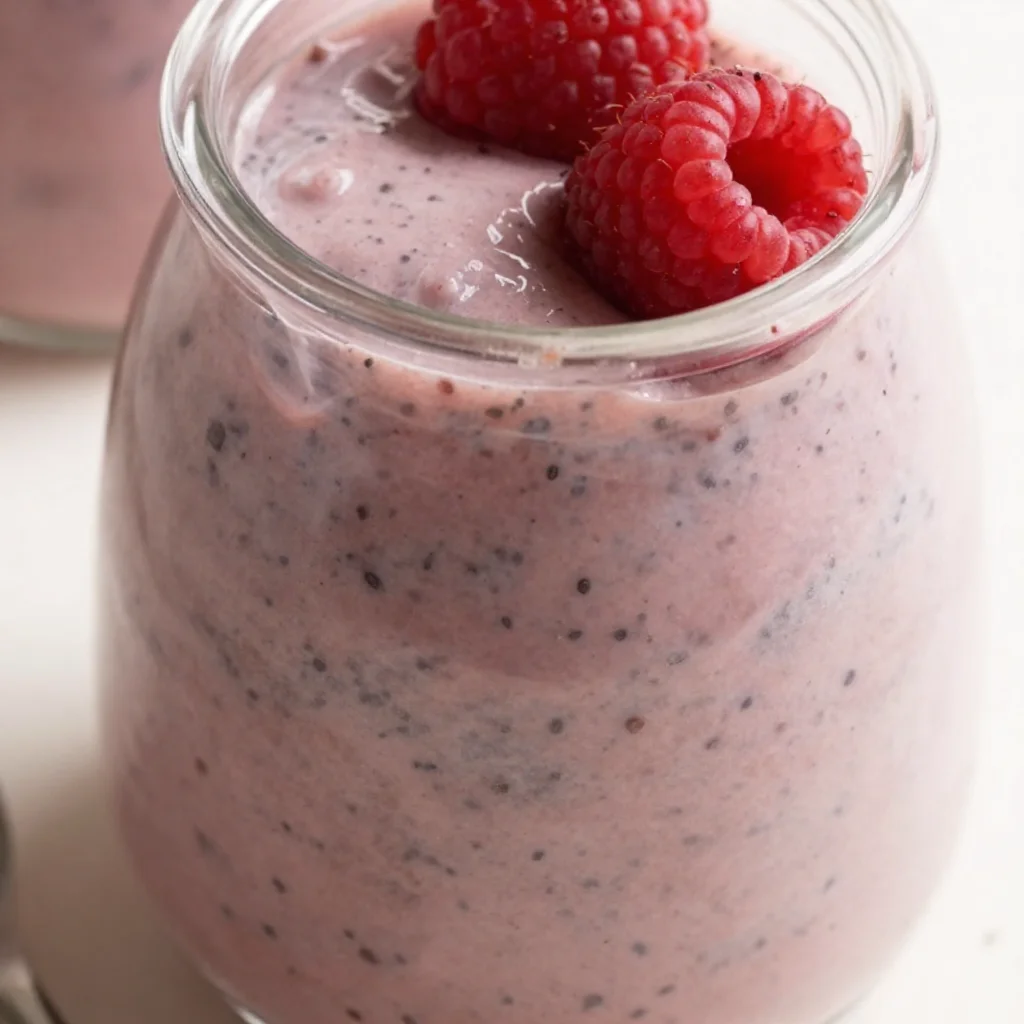
Ingredient Raspberry Chia Pudding: Quick, Creamy Breakfast
5 Ingredient Raspberry Chia Pudding: A Delightful, Fruity Adventure!
Welcome to my kitchen once again, fellow food lovers! Today, I’m thrilled to share with you one of my absolute favorite recipes that fits snugly into the realm of quick, healthy, and oh-so-delicious — Raspberry Chia Pudding! This vibrant treat is not only luscious and decadent but also incredibly easy to whip up. Perfect for breakfast, an afternoon snack, or even dessert, this pudding shines with its fruity freshness and creamy texture.
Now, I know what you might be thinking — “Chia pudding? Does it really taste good?” Oh yes, my friend! This dish is like a little sweet hug in a bowl. It’s bursting with the tartness of ripe raspberries, the nuttiness of chia seeds, and a lovely creaminess that makes it feel indulgent, even though it’s made with whole foods. Plus, with just five ingredients, you’ll be amazed at how simple it is to put together.
As a home cook, I love recipes that let me get creative while still being approachable. This chia pudding is all about experimenting with flavors while keeping the base super simple. So grab your apron, and let’s dive into this delightful and healthful recipe!
A Walk Down Memory Lane
Growing up, I spent countless weekends at my grandmother’s house, and every Saturday morning was special. The kitchen would fill with laughter and the aroma of a pot of tea boiling on the stove. Grandma’s kitchen was a treasure trove of memories, filled with whimsical jars full of dried fruits, nuts, and, yes — chia seeds! Though they weren’t as trendy back then, she used them in a variety of unique dishes.
One particular Saturday stands out in my mind: Grandma decided to put her spin on pudding, which wasn’t the traditional creamy version. I walked into the kitchen to find her mixing something in a bowl, and I could see tiny seeds dancing around in her mixture. “I’m making a special pudding, dear,” she said with a wink. The memory of that fluffy, fruity dessert inspired many of my kitchen adventures today. Every time I prepare chia pudding, I can’t help but feel her spirit guiding my hands. It’s a reminder that cooking isn’t just about food; it’s about family, tradition, and the love we share through our meals.
Ingredients
To make this 5 Ingredient Raspberry Chia Pudding, you will need:
-
Chia Seeds: These tiny powerhouses are rich in omega-3s, fiber, and protein. If you don’t have chia seeds on hand, you can replace them with flaxseeds, but the texture will differ, so keep that in mind.
-
Ripe Raspberries: Fresh or frozen, raspberries bring a tart, juicy brightness to the pudding. If raspberries aren’t available, feel free to swap them for strawberries, blueberries, or mangoes for a different fruity twist.
-
Milk (Dairy or Non-Dairy): Whether you opt for almond milk, coconut milk, or good old cow’s milk, this will help soak the chia seeds, creating that lovely pudding-like texture. Choose your favorite milk for a flavor that you love!
-
Honey or Maple Syrup: Striking the perfect balance of sweetness, the natural sugars in honey or maple syrup elevate the flavors. For a vegan option, stick with maple syrup. Feel free to adjust the sweetness to your taste!
-
Vanilla Extract: Just a splash adds a warm, aromatic depth to your pudding. If you want something more exotic, try a hint of almond extract for a nutty essence.
These five simple ingredients will transform into something that not only looks stunning but tastes even better. Trust me!
Step-by-Step Instructions
-
Combine the Base: In a mixing bowl, add 1 cup of your chosen milk and 1/4 cup of chia seeds. Stir well to ensure the seeds are evenly distributed. This is where the magic begins as it’s crucial to prevent clumping!
-
Add Sweetness and Flavor: Pour in 2 tablespoons of honey (or maple syrup) and 1 teaspoon of vanilla extract. Give it a good stir until everything is well blended. Sweeten to your liking—after all, no one likes a bland pudding!
-
Get Fruity: Now, fold in 1 cup of raspberries. If you’re using frozen raspberries, there’s no need to thaw them, but do gently crush them a bit to release their juices. This way, you’ll get those lovely raspberry swirls throughout the pudding!
-
Whisk It Up: Let’s channel some energy here! Use a whisk or fork to mix everything together thoroughly. You want to break up any clumps of chia seeds while also getting the raspberries and sweetener distributed throughout.
-
Chill Time: Cover your bowl with plastic wrap or transfer it to individual serving containers. Pop it in the fridge for at least 2-3 hours, or even better, overnight! This allows the chia seeds to absorb the liquid and swell, creating that wonderful pudding texture you’re dreaming of.
-
Serve and Enjoy: When you’re ready to dig in, give it a good stir, and if you like, top your chia pudding with extra fresh raspberries, a sprinkle of coconut, or a handful of granola for added texture.
A little chef hack: If you don’t have time to wait, you can enjoy this pudding after only an hour, but it will be thinner in consistency.
Serving Suggestions
To serve, grab your favorite bowls or mason jars to showcase the vibrant colors of the chia pudding! Layer the pudding in the glass and top with a few fresh raspberries, a drizzle of honey, or a sprinkle of nuts for some crunch. This not only makes it look gorgeous but also adds different textures. Invite your family to the kitchen table and serve it with a warm cup of tea or coffee for a delightful breakfast treat!
Recipe Variations
Here are a few fun variations to keep things exciting:
-
Tropical Twist: Swap out the raspberries for mango or pineapple. Add a pinch of coconut flakes on top for a beachy vibe!
-
Chocolate Lovers Unite: Mix in a tablespoon of cocoa powder to the milk before adding the chia seeds for a rich, chocolatey pudding. Top with fresh strawberries for added sweetness.
-
Nutty Delight: Stir in a tablespoon of almond or peanut butter for a creamy, nutty flavor. This adds healthy fats and protein!
-
Berry Medley: Mix it up with whatever berries you have—blueberries, strawberries, or blackberries give you a boost of antioxidants!
-
Cinnamon Spice: Add a sprinkle of cinnamon before serving for a warm, comforting flavor that pairs beautifully with the sweetness of the pudding.
Chef’s Notes
This recipe for Raspberry Chia Pudding has evolved quite a bit since I first started making it. I’ll never forget the first time I served it at a brunch with friends — it was a hit! Now, I like to jazz it up depending on the season. Summer calls for fresh stone fruits, while in the winter, I’ll bring in spices and maybe some roasted nuts. The flexibility of chia pudding makes it my secret weapon for quick, wholesome meals, and I hope it becomes one of your go-to recipes, too!
Oh! And here’s a funny kitchen story: One time, I mistakenly used salt instead of sugar while making my chia pudding. Let’s just say, that was a memorable moment, but hey, we all make mistakes! The important thing is to keep laughing and tasting, and you will always find a way to make things work.
FAQs and Troubleshooting
-
Why did my chia pudding turn out runny?
If your pudding didn’t thicken up, it might be that you didn’t use enough chia seeds or that it needs more time in the fridge. Let it set longer to reach that pudding-like consistency! -
How long can I store chia pudding?
You can keep your chia pudding in the fridge for up to 5 days, so it can be a great meal prep option! Just remember to give it a stir before serving. -
What if I can’t find raspberries?
No worries! You can substitute with any fruit you prefer. Frozen berries work perfectly, and even a fruit purée will do wonders — just remember to adjust the sweetness! -
Can I make the pudding vegan?
Absolutely! Just use plant-based milk and sweeten with maple syrup instead of honey. It’s delicious, and no one will notice the difference!
Nutritional Info
If you’re curious about the nutrition in this yummy pudding:
- Calories: Approximately 150 calories per serving
- Protein: 5g
- Fiber: 10g
- Fat: 4g
So there you have it — a wholesome, satisfying treat that’s as easy as it is delicious! Enjoy every spoonful, and don’t forget to get a little creative in your kitchen. Happy cooking, and until next time, stay cozy!
Print
5 Ingredient Raspberry Chia Pudding
- Total Time: 180 minutes
- Yield: 4 servings 1x
- Diet: Vegan
Description
A quick, healthy, and delightful chia pudding bursting with the fresh tartness of raspberries and the creaminess of chia seeds.
Ingredients
- 1 cup Milk (Dairy or Non-Dairy)
- 1/4 cup Chia Seeds
- 1 cup Ripe Raspberries
- 2 tablespoons Honey or Maple Syrup
- 1 teaspoon Vanilla Extract
Instructions
- Combine the Base: In a mixing bowl, add 1 cup of your chosen milk and 1/4 cup of chia seeds. Stir well to ensure the seeds are evenly distributed.
- Add Sweetness and Flavor: Pour in 2 tablespoons of honey (or maple syrup) and 1 teaspoon of vanilla extract. Stir until well blended.
- Get Fruity: Fold in 1 cup of raspberries, gently crushing them if using frozen.
- Whisk It Up: Mix thoroughly to break up clumps of chia seeds and distribute the raspberries.
- Chill Time: Cover and refrigerate for at least 2-3 hours, or overnight.
- Serve and Enjoy: Stir before serving and top with extra raspberries, coconut, or granola if desired.
Notes
For a quicker serving, allow to chill for at least one hour, though the consistency will be thinner.
- Prep Time: 10 minutes
- Cook Time: 0 minutes
- Category: Dessert
- Method: Refrigeration
- Cuisine: Healthy
Nutrition
- Serving Size: 1 serving
- Calories: 150
- Sugar: 8g
- Sodium: 30mg
- Fat: 4g
- Saturated Fat: 1g
- Unsaturated Fat: 3g
- Trans Fat: 0g
- Carbohydrates: 28g
- Fiber: 10g
- Protein: 5g
- Cholesterol: 0mg
Keywords: chia pudding, raspberry, healthy dessert, vegan, easy recipe
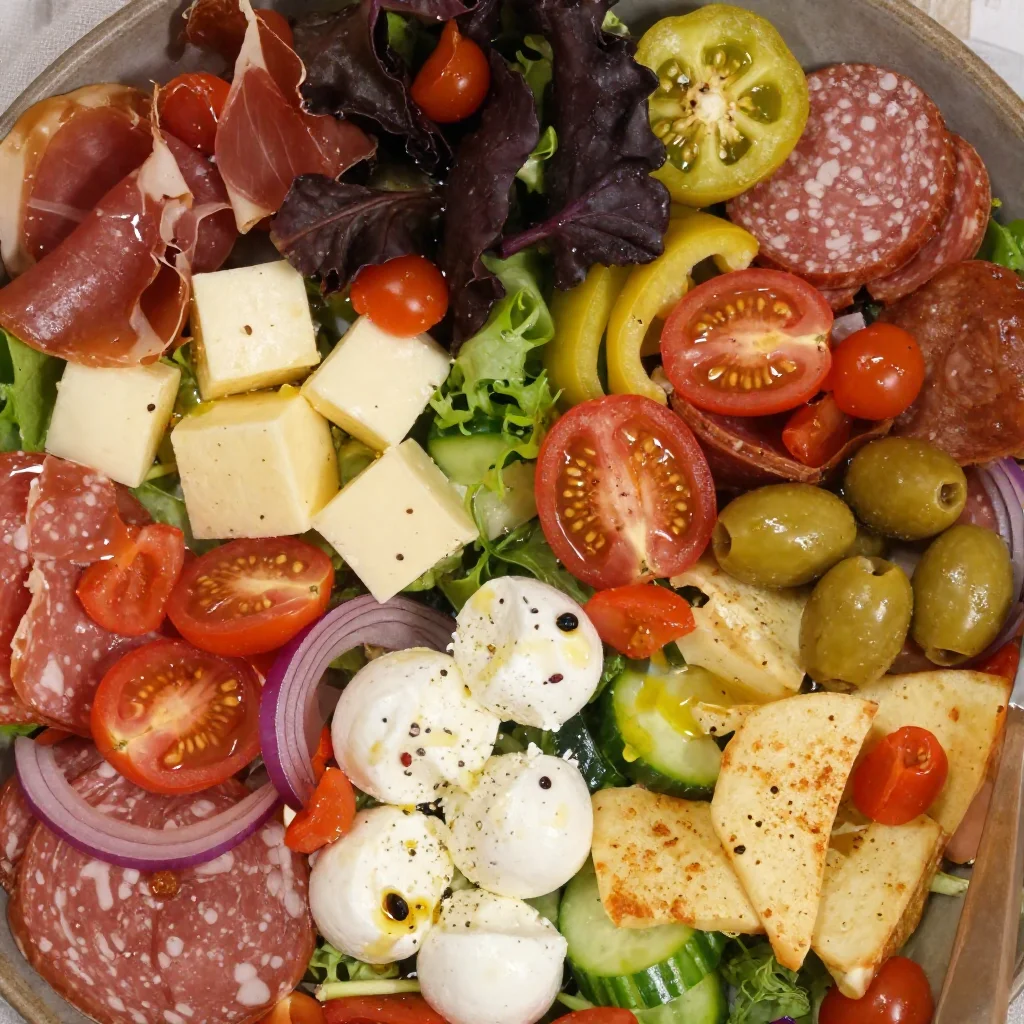
Minute Italian Antipasto Salad for Easy Meal Prep
The Ultimate Italian Antipasto Salad: A Flavorful Journey for the Senses
Welcome to my kitchen, food lovers! Today we’re diving into one of my absolute favorite dishes: the Italian Antipasto Salad. This vibrant medley of colorful ingredients is the perfect starter or light meal that brings a bit of Italy right to your table. As a home cook who thrives on creating meals that spark connection, you can imagine how excited I am to share this recipe with you!
This salad is more than just a collection of ingredients; it’s a celebration of flavors, textures, and those precious moments we share around the dining table. Whether you’re prepping for a casual dinner, a festive holiday gathering, or just craving something fresh and delightful, this Antipasto Salad is sure to impress. Picture crispy greens tossed with marinated olives, savory meats, and creamy cheese—it’s a feast for the eyes as much as the palate!
Now, let’s talk about what makes this dish special. It’s incredibly versatile! You can customize it with your favorite ingredients or whatever you have on hand. There’s no strict rule here; if it makes your taste buds tingle, toss it in! Plus, it’s a fantastic way to use up those leftover odds and ends from your fridge, so let’s get started!
A Salty, Savory Memory
I still remember the first time I had a true Italian antipasto salad. I was in a small, rustic restaurant in Florence, where the air was thick with the alluring aromas of garlic and herbs. I was there with my family; we’d spent the day exploring the cobblestone streets and marvelling at the architecture. When this beautiful salad landed on our table, my heart skipped a beat. Vibrant red tomatoes, lush green basil, and a mix of rich, savory meats danced together, each bite seemingly singing a different note.
My grandmother, who was a fabulous cook herself, encouraged us to try everything. "Taste the colors," she would say, as she handed me a slice of crisp pepperoni along with a smattering of tangy mozzarella. That meal was more than just food—it was a familial bonding experience that cemented my love for the art of cooking and sharing. Now, I aim to recreate that joyous feeling in my own kitchen by making Antipasto Salad a staple at family gatherings.
Ingredients
Gathering your ingredients is half the fun! Here’s what you’ll need for a delightful Antipasto Salad, along with some tips for substitutions and insights:
-
Mixed Greens: A nice blend of arugula, romaine, and spinach works wonderfully. Feel free to use whatever greens you prefer; kale adds an extra crunch!
-
Cherry Tomatoes: These bite-sized gems add sweetness. Substitute with any halved tomatoes, like grape varieties or even sun-dried for a richer taste.
-
Cured Meats: Classic Italian choices like salami and prosciutto bring that savory, umami punch. You can use turkey or chicken slices for a lighter version, or even go vegetarian with marinated artichokes instead.
-
Cheese: Mozzarella pearls or provolone are traditional, but feta adds a tangy twist. If you’re dairy-free, try a vegan cheese!
-
Olives: A mix of green and black olives offers complexity in flavor. If you’re not a fan, capers or pickled veggies can provide a similar zing.
-
Peppers: Roasted bell peppers add sweetness and color. Jarred, pickled peppers can work in a pinch if fresh ones aren’t available.
-
Artichoke Hearts: Marinated or canned artichoke hearts can elevate the flavor profile. For a twist, you could use caponata (a Sicilian eggplant dish) for depth.
-
Olive Oil: A high-quality extra virgin olive oil will make your dressing shine. You can replace it with avocado oil or even flavored oils for an added twist.
-
Balsamic Vinegar: This brings acidity and balances out the flavors. If you want a sweeter dressing, cherry vinegar works beautifully too.
-
Herbs: Fresh basil or oregano is ideal, but dried herbs will work if that’s what you have on hand.
Now that you have your ingredients ready, it’s time to get cooking!
Step-by-Step Instructions
Let’s whip up this scrumptious salad together! Just follow these simple steps, and I promise you’ll be amazed at how easy it is to create this Italian delight.
-
Prep your greens: Start by washing your mixed greens in cold water. Spin them dry in a salad spinner or gently pat them with a towel. This step is crucial; no one likes a soggy salad!
-
Chop your vegetables: Halve the cherry tomatoes and dice the bell peppers into bite-sized pieces. Make sure you make these pieces uniform for even distribution in your salad.
-
Tear that mozzarella: If you’re using mozzarella balls, simply drain them and toss them in. If you’re using larger blocks, chunk them up generously. The cheese should be in pieces that meld into the salad without overpowering it.
-
Prep the meats: Slice your cured meats into strips or bite-sized pieces. Maybe have a little taste along the way—quality control, right?
-
Mix it up: In a large bowl, combine your greens, cherry tomatoes, bell peppers, olives, meat, cheese, and artichokes. Here’s where you get to be an artist, layering those colors beautifully as you go!
-
Dress it right: In a separate small bowl, whisk together olive oil and balsamic vinegar. A ratio of 3:1 (oil to vinegar) is just right for drizzling flavors throughout. Add minced garlic, salt, and pepper to taste. If you want a bit of sweetness, a teaspoon of honey or maple syrup can enhance this dressing beautifully.
-
Toss and serve: Drizzle your dressing over the salad and gently toss everything together. Be gentle, so you keep the integrity of the ingredients. Serve it on a large platter or in bowls, and watch the wow factor rise!
Tips from the Chef:
- Make your dressing in advance so the flavors can meld together.
- This salad is better after sitting for about 30 minutes, letting the ingredients get to know each other.
- If you have any leftovers, they make a fantastic sandwich filler for lunch the next day!
Serving Suggestions
To serve your Italian Antipasto Salad in style, consider plating it on a large wooden board or a colorful ceramic dish to make the colors pop! Drizzle a bit more olive oil over the top and sprinkle some fresh herbs right before serving for that final touch. Pair this salad with crusty bread, and you’ve got a meal that’s ready to impress!
Recipe Variations
If you feel adventurous, here are some creative twists you might consider:
-
Mediterranean Twist: Swap out the meats for grilled veggies like zucchini and eggplant, and use feta cheese for a Greek vibe.
-
Spicy Kick: Add sliced jalapeños or crushed red pepper flakes to the dressing to bring heat to the party.
-
Citrus Zing: Use citrus juice like lemon or lime instead of balsamic vinegar for a bright, zesty dressing.
-
Whole-Grain Goodness: Add chickpeas or quinoa to amp up the protein and make this salad even more filling.
-
Seasonal Surprise: Incorporate seasonal ingredients, like roasted butternut squash in fall or fresh peas in spring, to keep the salad exciting throughout the year.
Chef’s Notes
This recipe has evolved over the years—and isn’t that the beauty of cooking? I started with a more traditional approach, but I’ve learned to adapt based on what’s fresh and available. I once tried adding grilled chicken and was surprised at how well it paired! Now, I recreate this salad at all sorts of events, and each time, it turns out a bit differently based on new inspirations. Cooking is about experimentation, and this dish speaks to that!
One funny memory comes to mind when I decided to go a bit fancy and use truffle oil instead of olive oil. Let’s just say, that was a little too intense! Cooking is definitely a learning process, and that’s what keeps it fun!
FAQs and Troubleshooting
-
What if I don’t have all the ingredients?
Don’t fret! This recipe is about flexibility. Use whatever you have—be it different greens, meats, or cheeses. This is a salad that embraces creativity! -
Can I make it ahead of time?
Yes! It holds up well for a day in advance. Just keep the dressing separate until ready to serve, as it can make the greens wilt if left too long. -
How do I store leftovers?
Place leftovers in an airtight container in the fridge. Consume within 2 days for the freshest taste! -
Why is my salad soggy?
This could be from too much dressing or not drying your greens fully. Give those greens a good spin or pat them dry!
Nutritional Info
This dish is packed with vitamins and nutrients from the veggies, healthy fats from olive oil, and protein from the cheese and meat, making it both satisfying and nutritious. Each serving boasts a mix of vitamins A, C, and K, along with healthy fats, offering a delightful balance to your diet!
So there you have it—the ultimate Italian Antipasto Salad to brighten your table and warm your heart. Enjoy creating memories as you savor this dish, and remember, cooking is as much about connecting with others as it is about flavor. Happy cooking, friends!
Print
Italian Antipasto Salad
- Total Time: 15 minutes
- Yield: 4 servings
- Diet: Vegetarian
Description
A vibrant medley of colorful ingredients, perfect for a starter or light meal, bringing the flavors of Italy to your table.
Ingredients
- Mixed Greens (arugula, romaine, spinach)
- Cherry Tomatoes (halved)
- Cured Meats (salami, prosciutto)
- Cheese (mozzarella pearls or provolone)
- Olives (mix of green and black)
- Peppers (roasted bell peppers)
- Artichoke Hearts (marinated or canned)
- Olive Oil (extra virgin)
- Balsamic Vinegar
- Fresh Herbs (basil or oregano)
Instructions
- Prep your greens: Wash the mixed greens in cold water and spin them dry.
- Chop your vegetables: Halve the cherry tomatoes and dice the bell peppers into bite-sized pieces.
- Tear that mozzarella: Drain and toss in mozzarella balls or chunk larger blocks.
- Prep the meats: Slice your cured meats into strips or bite-sized pieces.
- Mix it up: Combine your greens, cherry tomatoes, bell peppers, olives, meat, cheese, and artichokes in a large bowl.
- Dress it right: Whisk together olive oil and balsamic vinegar, adding garlic, salt, and pepper to taste.
- Toss and serve: Drizzle dressing over the salad, gently toss, and serve.
Notes
Make your dressing in advance to enhance flavors. This salad is better after sitting for about 30 minutes.
- Prep Time: 15 minutes
- Cook Time: 0 minutes
- Category: Salad
- Method: Mixing
- Cuisine: Italian
Nutrition
- Serving Size: 1 serving
- Calories: 350
- Sugar: 5g
- Sodium: 400mg
- Fat: 20g
- Saturated Fat: 6g
- Unsaturated Fat: 12g
- Trans Fat: 0g
- Carbohydrates: 25g
- Fiber: 5g
- Protein: 10g
- Cholesterol: 30mg
Keywords: Antipasto Salad, Italian Salad, Salad Recipe, Healthy Salad




