
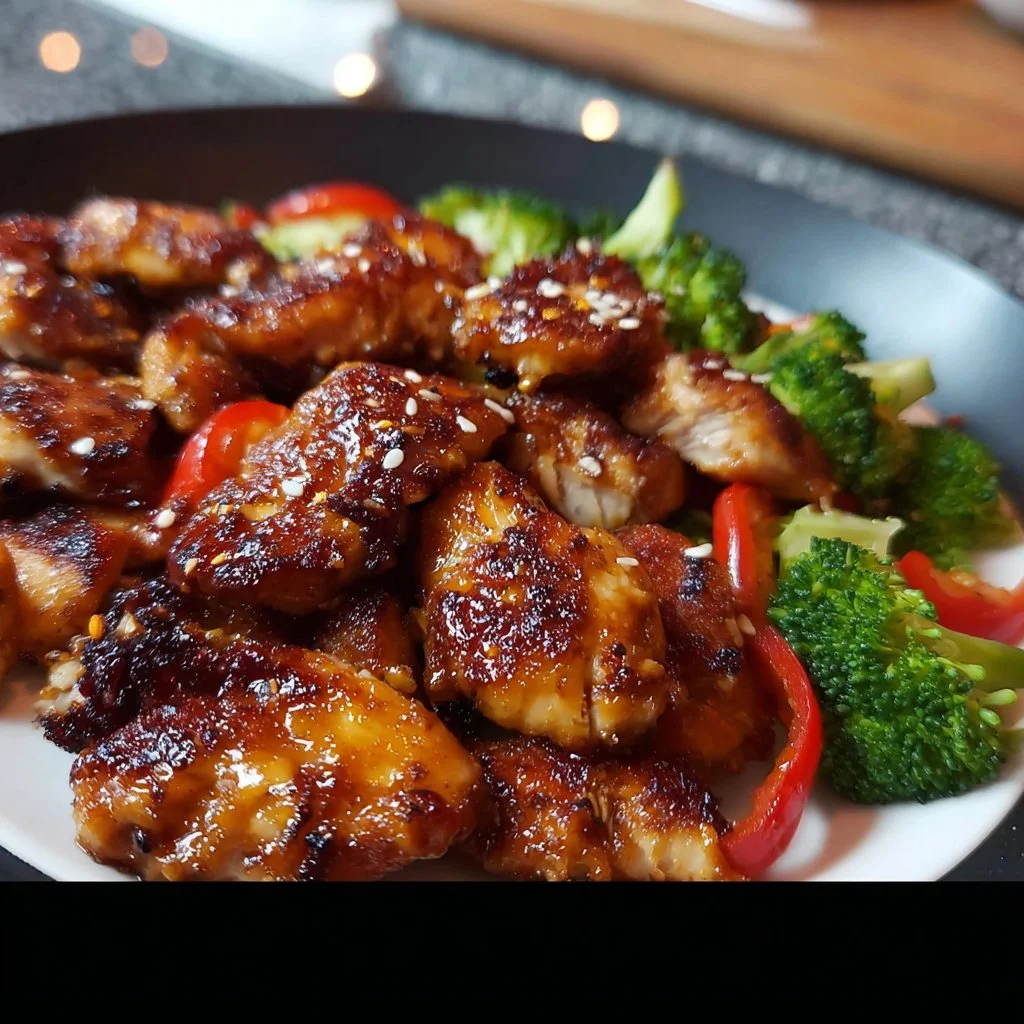
Simple Teriyaki Chicken
Simple Teriyaki Chicken: A Delightful Dish That Brings Everyone Together
Welcome back to my cozy corner of the culinary world! Today, we’re diving into the deliciously savory realm of Simple Teriyaki Chicken. This dish is more than just a meal; it’s a celebration of flavors, made in the comfort of your own kitchen, and perfect for sharing with friends and family. The umami-rich teriyaki sauce dances with tender chicken, creating a harmonious balance that will make your taste buds sing.
Now, I remember the first time I tasted teriyaki chicken. I was at a local Japanese restaurant, and the moment that beautifully grilled chicken hit my mouth, I knew I had discovered something special. It was unbelievably tender, coated in a glossy sauce that was sweet, savory, and just the right amount of sticky. I was hooked! Ever since that magical evening, I’ve been experimenting in my kitchen to recreate that flavor and capture the essence of joy and warmth that comes with a homemade meal.
Today, I want to share my simple take on this classic dish, designed specifically for the busy home cook. With just a handful of ingredients and a little love, you can whip up this teriyaki chicken in under 30 minutes! Whether you’re cooking up a quick weeknight dinner or impressing company at your next gathering, this dish is sure to satisfy. So grab your apron, turn on your favorite playlist, and let’s get cooking—because we’re about to create something truly unforgettable!
Personal Story
One of my favorite memories surrounding teriyaki chicken actually comes from a family gathering years ago. My grandmother, a culinary wizard in her own right, decided to host a backyard barbecue for the whole clan. Everyone brought a dish to share, but I was especially excited about her teriyaki chicken skewers. She marinated chicken thighs in a homemade teriyaki sauce, skewered them with colorful veggies, and grilled them over an open flame. The aroma wafted through the air, captivating all our senses.
As we gathered around the table, laughter and stories flowed just as easily as the food. I remember watching my little cousins dive into those skewers, their faces lighting up with joy at the first bite. That day wasn’t just about the chicken; it was about connection. It reminded me of how food brings people together, sparking conversations and creating lasting memories. It’s that spirit of togetherness that motivates me to share this Simple Teriyaki Chicken recipe with you!
Ingredients
For the Teriyaki Chicken:
-
Chicken Thighs (or Breasts)
- Chicken thighs are known for their juiciness and flavor, making them the ideal choice for this recipe. If you prefer lower-fat options, boneless, skinless chicken breasts will work but may need a bit of extra care to avoid drying out.
-
Soy Sauce
- A key player in the teriyaki sauce, soy sauce adds that bold umami flavor. Opt for low-sodium versions if you’re keeping an eye on salt intake.
-
Honey (or Maple Syrup)
- The sweetness in the sauce comes from honey, but you can easily substitute with pure maple syrup or agave nectar if you’re looking for a vegan alternative.
-
Rice Vinegar
- This ingredient lends a gentle tang to balance the sweetness. If you don’t have it on hand, apple cider vinegar is a great substitute.
-
Garlic (Minced)
- Fresh garlic adds aromatic depth to the sauce. You can use garlic powder in a pinch, but you might miss out on that fragrant freshness.
-
Ginger (Fresh or Ground)
- Fresh ginger is preferable for its bright, zesty flavor. If fresh isn’t available, ground ginger works as a second-best option. Just remember to use less, as it’s more concentrated.
-
Sesame Oil
- A drizzle of sesame oil enhances the profile of this dish with its nutty flavor. If you can’t find it, a little olive oil will do in a pinch, but don’t skip the sesame seeds for garnish!
-
Green Onions (for garnish)
- These add a lovely pop of color and a mild onion flavor. Feel free to swap them for chives or even cilantro for a different touch!
Optional:
- Vegetables for Stir-Fry (Bell Peppers, Broccoli, Snow Peas)
- A colorful medley of veggies can transform your chicken into a complete meal. Feel free to get creative based on what you have in your fridge!
Step-by-Step Instructions
Step 1: Marinate the Chicken
Start by taking your chicken and placing it in a bowl or a resealable plastic bag. In a separate bowl, whisk together the soy sauce, honey, rice vinegar, minced garlic, and fresh ginger. Pour this delicious marinade over the chicken, making sure it’s well-coated. I recommend letting it marinate for at least 15 minutes, but if you have time, 1-2 hours is even better to really let those flavors penetrate the meat. Just remember to keep it in the refrigerator!
Step 2: Prep Your Veggies (Optional)
If you’re adding vegetables, now’s the time to chop them up into bite-sized pieces. Bell peppers, broccoli, and snow peas work beautifully in this dish. Make sure they’re all similar in size to ensure even cooking. This also makes them easier to eat!
Step 3: Cook the Chicken
Heat a non-stick skillet or grill pan over medium-high heat. Once it’s hot, remove the chicken from the marinade (reserve the marinade for later) and add the chicken to the pan. Cook for about 5-7 minutes on each side, or until the chicken is cooked through and has a nice golden-brown color. If using an instant-read thermometer, aim for an internal temperature of 165°F (75°C) for chicken thighs and 160°F (71°C) for breasts.
Chef’s Hack: If you’re grilling, you might want to use skewers for easier flipping and to get those lovely grill marks. Just make sure to soak wooden skewers in water for about 30 minutes beforehand to prevent burning!
Step 4: Make the Teriyaki Sauce
While the chicken is cooking, take the reserved marinade and pour it into a small saucepan. Bring it to a gentle simmer over medium heat, stirring occasionally. This will help thicken it slightly and make it safe to consume. Once it has reduced by about a third, remove it from the heat. You can whisk in a little cornstarch mixed with cold water for extra thickness, if desired.
Step 5: Add the Vegetables
If you’re including vegetables, push the chicken to the side of the pan once it’s almost done, and add them in. Stir-fry the veggies for about 2-3 minutes, just until they’re vibrant and slightly tender.
Tip: You want them to have that gorgeous crunch, so don’t overcook!
Step 6: Glaze the Chicken
Once the chicken and veggies are ready, pour the thickened teriyaki sauce over them in the pan, coating everything evenly. Stir gently to combine, then cook for an additional minute to heat through.
Serving Suggestions
Plating this Simple Teriyaki Chicken is as easy as it is delightful. Serve it over a fluffy bed of white or brown rice—quinoa works beautifully too! Drizzle extra teriyaki sauce on top, and finish it off with a sprinkle of sesame seeds and sliced green onions for that gorgeous pop of color. If you want to impress, consider adding a side of steamed edamame or a fresh cucumber salad drizzled with rice vinegar.
Recipe Variations
-
Pineapple Teriyaki Chicken: Add chunks of fresh pineapple to the marinade or grill them alongside the chicken for a tropical twist.
-
Spicy Teriyaki Chicken: Incorporate sriracha or red pepper flakes into the marinade for a sweet and spicy kick.
-
Vegetarian Version: Substitute chicken with tofu or tempeh for a plant-based alternative. Just be sure to press and marinate them for maximum flavor!
-
Asian Noodles: Serve the teriyaki chicken over stir-fried noodles instead of rice for a different texture and flavor experience.
Chef’s Notes
This recipe has been a staple in my household for years, and I can’t tell you how many silly mishaps have turned into delightful kitchen memories. One time, I completely forgot to add the honey, thinking I was all set! As I tasted the dish, I realized my mistake, and in a panic, I reached for some maple syrup that was sitting on the counter. Surprisingly, it turned into a delicious accident that I’ve kept in my back pocket since! So, remember, in the kitchen, it’s not just about the recipe; it’s about having fun and being flexible.
FAQs and Troubleshooting
1. What can I use instead of soy sauce?
If you’re looking for a gluten-free option or simply want a different flavor, tamari is a great choice. Coconut aminos is another great alternative with a slightly sweeter taste.
2. The chicken is dry; what went wrong?
This can happen if it’s cooked too long or at too high of heat. Always check the chicken’s temperature with a thermometer, and let it rest for a few minutes before slicing to retain its juiciness.
3. Can I make this ahead of time?
Absolutely! Prepare the marinade and marinate the chicken a few hours or overnight. Simply toss it in the skillet when you’re ready to eat. It’ll be even more flavorful!
4. Is teriyaki chicken healthy?
It can be a balanced dish! Pair it with steamed veggies and serve it with whole grain rice to make it a nutritious meal. Just be mindful of the sugar in the sauce if you’re watching your sugar intake.
Nutritional Info (Estimated per serving)
- Calories: 320
- Protein: 28g
- Carbohydrates: 25g
- Fat: 8g
- Sugar: 10g
Conclusion
There you have it, my vibrant and flavorful Simple Teriyaki Chicken! Perfect for both weeknight dinners and special gatherings, this dish is sure to become a new favorite in your home. The aroma, the taste, and the joy of sharing it with loved ones create an experience you won’t want to miss.
So, gather your loved ones around the table and enjoy a warm meal that embodies togetherness and love. Happy cooking, and don’t forget to share your kitchen adventures with me! Bon appétit!
Print
Simple Teriyaki Chicken
- Total Time: 30 minutes
- Yield: 4 servings 1x
- Diet: Gluten-Free, Dairy-Free
Description
A delightful dish that celebrates flavors, bringing tender chicken coated in a savory teriyaki sauce, perfect for sharing with loved ones.
Ingredients
- 4 Chicken Thighs (or Breasts)
- 1/4 cup Soy Sauce
- 3 tbsp Honey (or Maple Syrup)
- 2 tbsp Rice Vinegar
- 3 cloves Garlic (Minced)
- 1 tbsp Ginger (Fresh or Ground)
- 1 tbsp Sesame Oil
- 2 Green Onions (for garnish)
- Optional: Vegetables for Stir-Fry (Bell Peppers, Broccoli, Snow Peas)
Instructions
- Marinate the Chicken: Combine chicken with soy sauce, honey, rice vinegar, garlic, and ginger in a bowl or bag. Marinate for at least 15 minutes in the refrigerator.
- Prep Your Veggies (Optional): Chop vegetables into bite-sized pieces if using.
- Cook the Chicken: Heat a non-stick skillet over medium-high heat and cook chicken for about 5-7 minutes on each side until golden and cooked through.
- Make the Teriyaki Sauce: Simmer reserved marinade in a saucepan until thickened.
- Add the Vegetables: Stir-fry vegetables in the pan for 2-3 minutes until tender.
- Glaze the Chicken: Pour the thickened teriyaki sauce over chicken and vegetables; stir to combine.
Notes
Serve over rice or noodles, and garnish with sesame seeds and green onions for extra flavor.
- Prep Time: 15 minutes
- Cook Time: 15 minutes
- Category: Main Course
- Method: Pan-frying
- Cuisine: Japanese
Nutrition
- Serving Size: 1 serving
- Calories: 320
- Sugar: 10g
- Sodium: 800mg
- Fat: 8g
- Saturated Fat: 1g
- Unsaturated Fat: 5g
- Trans Fat: 0g
- Carbohydrates: 25g
- Fiber: 1g
- Protein: 28g
- Cholesterol: 70mg
Keywords: teriyaki chicken, easy recipes, weeknight dinner, quick meals
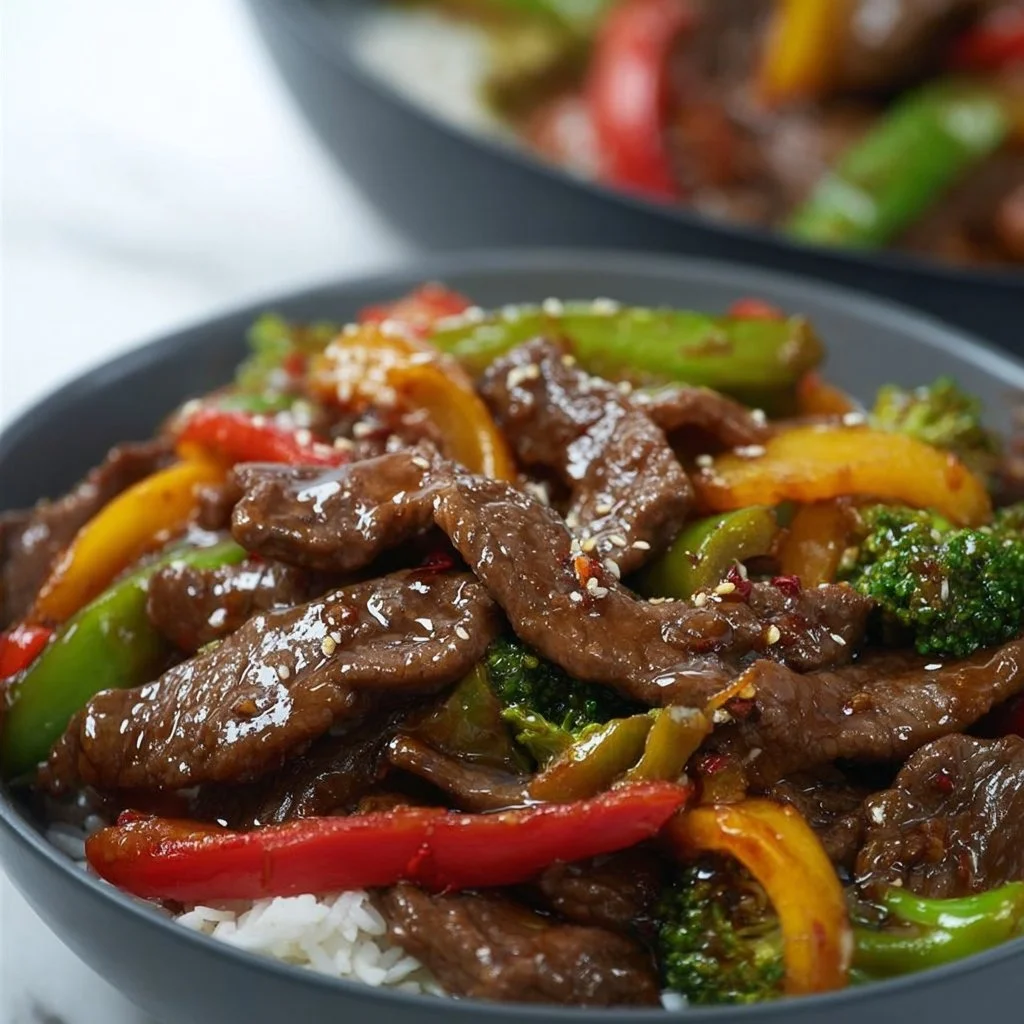
Beef Stir Fry
Beef Stir Fry: A Whirlwind of Flavor and Family
Welcome back to my cozy kitchen, my fellow food enthusiasts! Today, I have a dish that bursts with flavor, color, and a delightful crunch—Beef Stir Fry. This dish is more than just a quick meal; it’s a culinary experience that can whisk you away to far-off markets filled with vibrant vegetables and sizzling sounds.
Picture this: you walk into your kitchen, the promise of a delicious dinner hanging in the air, and your heart starts to race as the tantalizing smell of marinated beef and fresh produce fills the room. Such is the magic of a stir fry! This dish is a treasure trove of flavors and textures. And the best part? It’s quick to whip up, making it perfect for those busy weeknights or laid-back weekend meals with family and friends.
Inspired by my childhood experiences in the kitchen with my mom, who believed that cooking should come from the heart, I’ve crafted a Beef Stir Fry recipe that speaks both to the mind and the taste buds. This recipe is all about throwing in what you love, adding a dash of your personality, and of course, savoring every bite together. So, grab your apron, let’s dive into this colorful journey full of nostalgia, yummy bites, and maybe a mishap or two!
Personal Story
Ah, the memories of my childhood kitchen float back to me every time I make Beef Stir Fry. Picture this: I’m about ten years old, standing on a stool beside my mom, who is effortlessly tossing seasoned beef and vibrant vegetables in a sizzling wok. I could barely contain my excitement as the aroma danced around us, tantalizing my senses.
My mom had this signature dance move while she cooked—a little shimmy here, a quick spin there! She would let me sprinkle the soy sauce, and I always felt like a chef in my own right. The most thrilling part? Watching the beef take on a beautiful brown hue, glistening from the heat, and the veggies turning vibrant as they cooked.
We’d always serve it with fluffy jasmine rice, and as my family gathered around the table, the dishes passed hand to hand, laughter filled the air. It was a simple moment that turned into a cherished tradition. These memories not only shaped my passion for cooking but also instilled a sense of togetherness that I aim to recreate in every meal I prepare.
Ingredients
Gathering fresh, vibrant ingredients is the best part of making a great stir fry! Here’s what you’ll need:
-
Beef (sirloin or flank steak): These cuts are flavorful and tender, perfect for stir-frying. If you’re looking for a leaner option, top round steak works well too. For a budget-friendly swap, try chicken or tofu!
-
Vegetables (bell peppers, broccoli, and snap peas): Colorful veggies not only add nutrients but also brighten up your dish! Feel free to swap in whatever you have on hand, such as zucchini, carrots, or bok choy.
-
Garlic and ginger: These aromatic staples add depth to your stir fry. Fresh is best, but you can also use minced garlic and ginger from a jar if you’re in a pinch!
-
Soy sauce: This savory staple enhances all the flavors. Swap it for tamari if you need a gluten-free option, or coconut aminos for a slightly sweeter taste.
-
Sesame oil: Just a drizzle of this will take your dish to a whole new level of flavor. If you’re avoiding sesame, use olive oil or another neutral oil.
-
Cornstarch: A little bit works wonders as a thickener for your sauce and makes the beef extra tender. If you’re avoiding starches, you can skip this altogether or use arrowroot powder as a substitute.
-
Rice (jasmine or basmati): Fluffy rice is the perfect bed for your stir-fried beef and veggies. Quinoa or cauliflower rice are great alternatives for a lower-carb option!
Step-by-Step Instructions
Alright, let’s get cooking! Follow these steps for a Beef Stir Fry that’ll wow your taste buds:
-
Prep your ingredients: Start by slicing the beef thinly against the grain. This ensures each piece stays tender. If the meat is slightly frozen, it will be easier to cut. While you’re at it, chop your vegetables into bite-sized pieces. This not only makes them easier to eat but also helps them cook evenly.
-
Marinate the beef: In a medium bowl, combine your sliced beef with 2 tablespoons of soy sauce, 1 tablespoon of sesame oil, and a teaspoon of cornstarch. Let this marinate for about 15-20 minutes while you prep the rest of your ingredients. This step is crucial for flavor, so don’t skip it!
-
Heat the wok: Place a large wok or frying pan over medium-high heat and let it get hot. You want the pan sizzling when you add your beef. This helps cook the meat quickly and gives it that beautiful sear!
-
Cook the beef: Add a splash of oil to the hot wok. When it’s shimmering, toss in the marinated beef in a single layer. Sear for just a couple of minutes, stirring occasionally, until browned but not overcooked (it will continue to cook when combined with veggies). Remove the beef and set aside.
Chef’s Tip: Don’t overcrowd the pan! If it gets too crowded, the beef will steam instead of sear. If you’re making a big batch, cook the beef in two rounds.
-
Sauté aromatics: In the same wok, add a bit more oil if needed, then toss in minced garlic and ginger. Stir for about 30 seconds until fragrant—be careful not to let them burn!
-
Add the vegetables: Start with the firmer veggies like broccoli and snap peas, stir-frying for 1-2 minutes. Then, add the bell peppers and whatever other vegetables you’re using. Stir-fry for about 3-4 minutes, just until the veggies are tender-crisp.
-
Combine the beef: Add the beef back to the wok along with the remaining soy sauce (and more cornstarch if you like a thicker sauce). Stir to combine everything, and cook for another minute or two until everything is heated through.
-
Serve: Time to plate! Serve your delicious stir fry over a mound of fluffy rice, drizzle with more sesame oil, and feel free to top it off with some sesame seeds and fresh cilantro for that extra flair.
Chef’s Tip: For a little crunch, add some toasted cashews or peanuts at the end.
Serving Suggestions
For maximum presentation, use a large serving bowl with a bed of your fluffy jasmine rice at the bottom. Heap the colorful stir fry on top, allowing those vibrant veggies to shine. A sprinkle of sesame seeds and a few sprigs of cilantro make for an inviting garnish. Serve it hot, family-style, and watch everyone dig in with excitement!
Recipe Variations
Want to shake things up? Here are a few fun variations you can try:
-
Spicy Beef Stir Fry: Add chili flakes or Szechuan peppercorns for a spicy kick! You could also toss in some sliced jalapeños while sautéing the aromatics.
-
Sweet and Sour Version: Incorporate pineapple or bell peppers with a homemade sweet and sour sauce (mix soy sauce, vinegar, and sugar).
-
Vegetarian Option: Swap beef for tofu or tempeh, using the same marinade for great flavor. Vegetable broth can replace the soy sauce for a lighter taste.
-
Noodle Stir Fry: Add some pre-cooked rice noodles into the mix. Toss them in during the final stages of cooking with a bit more soy sauce.
-
Bonus Ingredients: Throw in fresh herbs like basil or mint at the end for a refreshing punch!
Chef’s Notes
This Beef Stir Fry is a beautiful representation of my cooking ethos—creative, adaptable, and always delicious. Over the years, my recipe has evolved from a simple stir fry to a canvas for flavors and colors. I love experimenting with whatever is fresh in my fridge! One time, I made this dish with a little leftover kimchi, and let me tell you, it was a game-changer.
Cooking is all about having fun, being bold, and letting your kitchen become a playground of flavors. I hope you too create your unique spin on this dish. Remember, the secret ingredient in every meal is love!
FAQs and Troubleshooting
1. Why is my beef tough?
Make sure you’re slicing against the grain of the meat and not overcooking it! Thin slices and quick cooking at high heat keep the beef tender.
2. My stir fry turned out mushy; what happened?
Two things: first, make sure you’re not overcrowding your pan. Also, cooking the veggies at too low a heat can cause them to release too much moisture. Keep that heat high!
3. Can I prep ingredients in advance?
Absolutely! You can slice your vegetables and marinate your beef a few hours ahead of time. Just store everything in airtight containers in the fridge until you’re ready to cook!
4. What can I use if I don’t have soy sauce?
Coconut aminos is a great soy sauce alternative. You could also use Worcestershire sauce or a mix of broth and vinegar, although it will change the flavor slightly.
Nutritional Info
While this dish is rich in flavor, it’s also packed with nutrients. Depending on the specific ingredients used, a typical serving could contain approximately:
- Calories: 400
- Protein: 30g
- Carbohydrates: 50g
- Fiber: 4g
- Fat: 15g
Remember, these are estimates, and the numbers may vary based on substitutions and portion sizes.
Happy cooking, and may your Beef Stir Fry be as delightful as the memories it brings back! Remember to share your creations with your loved ones—there’s nothing better than a meal that brings people together! 🍽️❤️
Print
Beef Stir Fry
- Total Time: 30 minutes
- Yield: 4 servings 1x
- Diet: Gluten-free
Description
A flavorful and colorful Beef Stir Fry that brings together marinated beef and vibrant vegetables for a quick and delicious meal.
Ingredients
- 1 pound beef (sirloin or flank steak), sliced thinly
- 2 cups vegetables (bell peppers, broccoli, snap peas)
- 2 cloves garlic, minced
- 1 tablespoon fresh ginger, minced
- 3 tablespoons soy sauce
- 1 tablespoon sesame oil
- 1 teaspoon cornstarch
- 2 cups jasmine rice, cooked
Instructions
- Prep your ingredients: Slice the beef and chop the vegetables into bite-sized pieces.
- Marinate the beef: Combine sliced beef with soy sauce, sesame oil, and cornstarch, let it marinate for 15-20 minutes.
- Heat the wok: Place a large wok over medium-high heat to get it hot.
- Cook the beef: Add oil to the wok, toss in the marinated beef, and sear until browned. Set aside.
- Sauté aromatics: Add garlic and ginger to the same wok until fragrant.
- Add the vegetables: Stir-fry the broccoli and snap peas first, then add the bell peppers, cooking until tender-crisp.
- Combine the beef back into the wok, adding remaining soy sauce and cooking until heated through.
- Serve: Plate the stir fry over jasmine rice, topped with sesame oil and optional sesame seeds.
Notes
For a crunch, add toasted cashews or peanuts at the end. Customize with your favorite veggies.
- Prep Time: 20 minutes
- Cook Time: 10 minutes
- Category: Main Course
- Method: Stir-frying
- Cuisine: Asian
Nutrition
- Serving Size: 1 serving
- Calories: 400
- Sugar: 4g
- Sodium: 600mg
- Fat: 15g
- Saturated Fat: 3g
- Unsaturated Fat: 10g
- Trans Fat: 0g
- Carbohydrates: 50g
- Fiber: 4g
- Protein: 30g
- Cholesterol: 40mg
Keywords: Beef Stir Fry, Quick Dinner, Stir Fry Recipe, Asian Cuisine, Healthy Meal
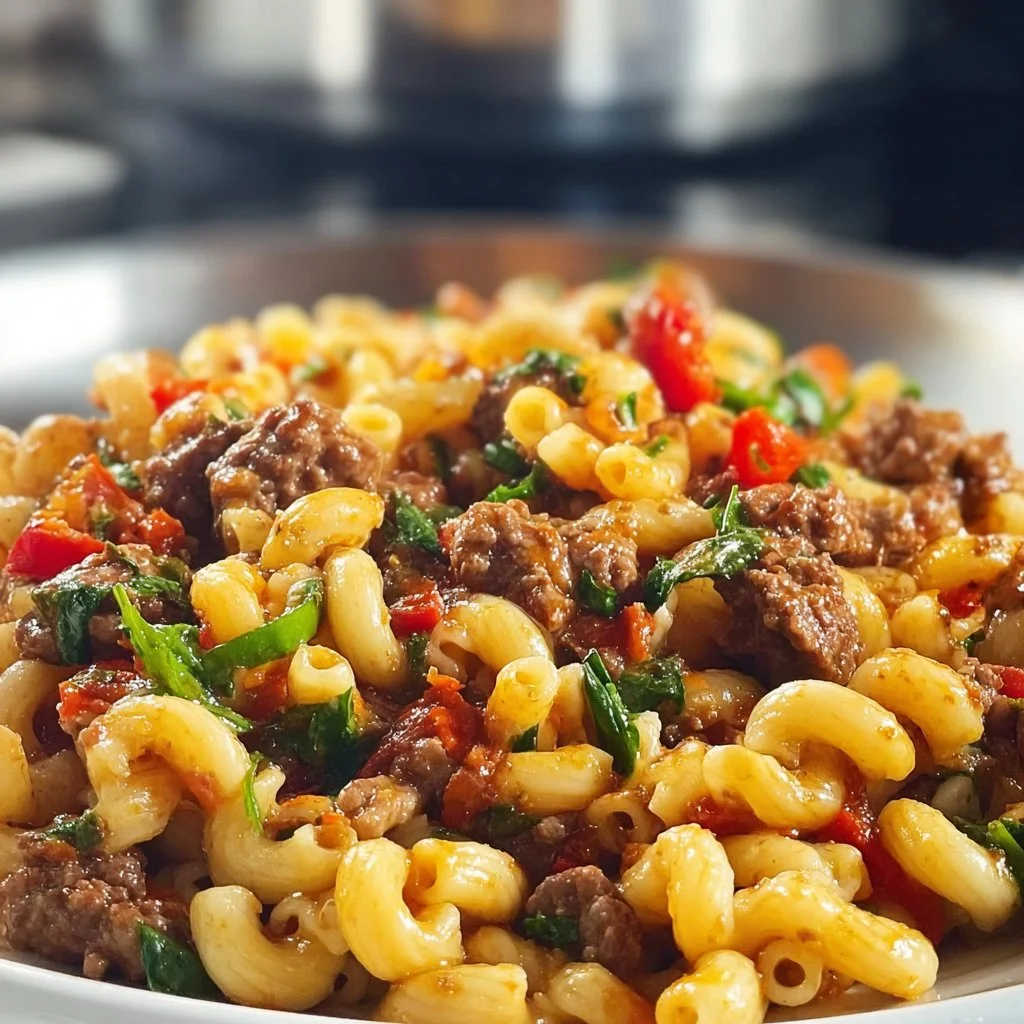
Mac & Beef
# Cozy Mac & Beef: A Perfect Marriage of Comfort Food

## Introduction

Hey there, kitchen enthusiasts! Welcome back to my little corner of the internet where the aroma of delicious food fills the air and every recipe is crafted with love. Today, I am thrilled to share a dish that has always held a special place in my heart: Mac & Beef. If you're like me, when you hear the word "comfort food," your mind might drift to that creamy, cheesy goodness we all adore. But, oh, let me tell you — when you add some savory beef into the mix, you’ve got a meal that goes beyond just comfort; it turns dinner into a warm hug for your soul!

Picture this. You’re rushing home from work, the stress of the day clinging to your shoulders like an unwanted jacket. You walk into your kitchen, and what do you find yourself craving? That’s right — mac and cheese. But let's kick it up a notch (or maybe four!). Combine that gooey goodness with seasoned ground beef, and suddenly you’re not just feeding your hunger; you’re igniting a spark of joy. This dish is not only easy to whip up, but it’s also perfect for family dinners, cozy nights in, or even a potluck where you want to impress without the fuss.

In today’s post, we’ll dive into the *how-tos* of creating this delightful Mac & Beef. I promise you, we’ll keep it light and fun! You don’t need to be a culinary wizard to make something extraordinary. We’ll have a sweet cooking journey filled with tips, anecdotes, and possibly a few laughs along the way. So grab your apron, put on some fun music, and let’s get cooking!

## Personal Story

Ah, Mac & Beef. For me, it’s not just a dish; it’s a flood of memories. I still remember the first time my mom made it for my family. I was about ten years old, and after a long day of school — like every classic movie scene...well, maybe a bit more chaotic. We rushed home, backpacks flying, and our noses filled with the scent of melting cheese and seasoned meat wafting through our cozy little kitchen.

I could hardly contain my excitement! Sitting around the dining table, we eagerly dug into our bowls, and with every spoonful, I felt warmth spreading through me. It wasn’t just the food — it was the laughter, the conversations, and the stories that danced around with us. My mom would share how she learned the recipe from Grandma, who made it for her growing up. I felt like part of a delicious legacy, propelling me into my future adventures in the kitchen.

As the years went by, I tried to recreate that magical meal. Each attempt brought more joy and a sprinkle of nostalgia. Now, I carry that recipe close to my heart, ready to share it with you! Let’s make it together and create some of your own beautiful memories!

## Ingredients

To whip up this delightful dish, here’s what you’ll need:

- **Macaroni Pasta (8 ounces)**
  - This is the classic choice! Feel free to swap it with any pasta shape you love, such as shells, bowties, or even gluten-free options.

- **Ground Beef (1 pound)**
  - Lean ground beef works best! If you're looking for alternatives, ground turkey or even plant-based crumbles could be great substitutes for a lighter option.

- **Cheddar Cheese (2 cups, shredded)**
  - A staple in mac and cheese! Look for sharp cheddar for a bold flavor, or mix in mozzarella for extra creaminess.

- **Milk (1 cup)**
  - Whole milk is preferred for richness, but you can also use almond milk or oat milk if you're dairy-free.

- **Butter (2 tablespoons)**
  - Unsalted butter gives you complete control over seasoning. Margarine can easily replace it if you’re looking for a dairy-free option.

- **All-Purpose Flour (2 tablespoons)**
  - This helps create a roux for your cheese sauce. If you need a gluten-free version, almond flour works in a pinch!

- **Garlic Powder (1 teaspoon)**
  - Adds flavor magic! Fresh minced garlic also works beautifully — about 1-2 cloves should do!

- **Onion Powder (1 teaspoon)**
  - A delightful savory touch! You can use finely chopped onions for more texture.

- **Salt & Pepper (to taste)**
  - Always taste as you go! You can also add some smoked paprika or cayenne pepper for a spicy kick.

- **Breadcrumbs (optional, for topping)**
  - Adds a crunchy layer! You can use panko for extra crispiness or crushed crackers.

With these ingredients, you’re well on your way to creating a dish that feels like home in every bite!

## Step-by-Step Instructions

Alright, let’s get down to the good stuff — cooking! Here’s a step-by-step guide to making the fabulous Mac & Beef.

1. **Boil the Pasta:**
   - Start by bringing a pot of salted water to a boil. Once boiling, add your macaroni and cook according to package instructions until al dente. This usually takes about 7-8 minutes. Remember, we want it slightly undercooked since it will continue to cook in the oven later! Drain and set aside.

2. **Cook the Beef:**
   - In a large skillet over medium heat, add your ground beef. Let it sizzle until browned, about 5-7 minutes. Make sure to break it up with a wooden spoon. This step is where you'll infuse a ton of flavors! Season with a little salt and pepper while it’s cooking for extra depth.

3. **Make the Cheese Sauce:**
   - In a separate saucepan, melt the butter over medium heat. Sprinkle in the flour, and whisk it together to form a roux. Cook this for about 1-2 minutes until it’s golden brown and starts to smell nutty. Gradually add the milk, whisking continuously to avoid lumps. Let it simmer until thickened — about 3-5 minutes.

4. **Add the Cheese:**
   - Once your milk mixture is thick, lower the heat and stir in the shredded cheddar until it’s melty and lovely. (Feel free to sneak a taste or two; I won’t tell!) If it’s too thick, just add a splash more milk!

5. **Combine Everything:**
   - Now, toss in your perfectly cooked macaroni and ground beef into the cheese sauce. Give it a good mix until everything is coated in cheesy goodness!

6. **Transfer and Top:**
   - If you’re using a baking dish, transfer the mixture now. For an extra layer of crunch, sprinkle breadcrumbs on top. It adds such a delightful texture contrast!

7. **Bake:**
   - Preheat your oven to 350°F (175°C) and bake your dish for about 20-25 minutes until bubbly and golden on top. Trust me; this is the moment you’ll want to peek through the oven door!

8. **Serve and Enjoy!**
   - Once out of the oven, let it sit for about 5 minutes — this allows the flavors to settle. Serve warm and watch the smiles light up around the table!

## Serving Suggestions

Now that you’ve got your dish made, how can you serve it up like a pro? I love to scoop generous portions into warm, rustic bowls. Grate a bit of fresh cheese on top for that melty finish. You can also sprinkle some chopped parsley or green onion for a pop of color and freshness — it dazzles! For a complete meal, serve alongside a simple salad or some roasted veggies.

## Recipe Variations

Feeling adventurous? Here are some fun variations to give your Mac & Beef a unique twist:

1. **Spicy Southwest Mac & Beef:**
   - Add diced jalapeños and a sprinkle of taco seasoning to give it that zesty kick!

2. **Creamy Mushroom Blend:**
   - Sauté some garlic and mushrooms in the beef mixture for an umami punch.

3. **Veggie-Packed Delight:**
   - Toss in some steamed broccoli or peas to amp up the nutritional value and color!

4. **BBQ Twist:**
   - Mix a few tablespoons of your favorite barbecue sauce into the beef for a smoky flavor.

5. **Plant-Based Version:**
   - Use lentils or quinoa in place of beef for a filling and nutritious alternative.

## Chef’s Notes

Over the years, I’ve tinkered with this recipe to fit my mood, the seasons, and what I have on hand. Sometimes a swap of cheese can change the game entirely, using Gruyère for a luxurious touch or some feta for an unexpected zing. And let’s not forget about the endless possibilities of toppings! A drizzle of sriracha or a sprinkle of chili flakes can add an extra dimension of flavor. Life is all about experimentation in the kitchen, and those little moments of inspiration have led to countless cherished gatherings with friends and family.

## FAQs and Troubleshooting

**Q: Can I make this dish ahead of time?**
- Absolutely! You can prepare everything up to the baking step. Just cover and refrigerate. When you're ready to bake, allow it to come to room temperature and then pop it in the oven!

**Q: How do I avoid overcooked pasta?**
- Always refer to the package instructions! Remember, the pasta will cook a little more in the oven, so make sure it’s al dente when you drain it.

**Q: What if my cheese sauce is too thick?**
- No worries! Just add a splash more milk, stir it in, and it will loosen up beautifully.

**Q: How do I know when my dish is done baking?**
- Look for bubbly edges, a golden top, and that irresistible aroma filling your kitchen.

## Nutritional Info (Optional)

While comfort food isn’t always meant to be a low-calorie option, this Mac & Beef is packed with protein and carbohydrates to fuel your day. One serving (approx. 1 cup) typically contains:

- Calories: 550
- Protein: 30g
- Carbohydrates: 50g
- Fat: 25g

***Remember, these values can vary greatly depending on ingredient choices, so feel free to adjust according to your dietary needs.***

So, there you have it! My cozy Mac & Beef recipe that brings together nostalgia, flavor, and a whole lot of love. I can’t wait for you to try it out and create your own delicious memories. Happy cooking, and don’t forget to share the love around your dinner table!

Cozy Mac & Beef
- Total Time: 45 minutes
- Yield: 4 servings 1x
- Diet: Omnivore
Description
A hearty and comforting dish combining creamy macaroni and seasoned ground beef, perfect for family dinners or potlucks.
Ingredients
- 8 ounces Macaroni Pasta
- 1 pound Ground Beef
- 2 cups Cheddar Cheese, shredded
- 1 cup Milk
- 2 tablespoons Butter
- 2 tablespoons All-Purpose Flour
- 1 teaspoon Garlic Powder
- 1 teaspoon Onion Powder
- Salt & Pepper, to taste
- Breadcrumbs (optional, for topping)
Instructions
- Boil the Pasta: Start by bringing a pot of salted water to a boil. Once boiling, add your macaroni and cook according to package instructions until al dente, about 7-8 minutes. Drain and set aside.
- Cook the Beef: In a large skillet over medium heat, add your ground beef. Let it sizzle until browned, about 5-7 minutes. Season with salt and pepper.
- Make the Cheese Sauce: In a separate saucepan, melt the butter over medium heat. Sprinkle in the flour, whisk to form a roux, and cook for about 1-2 minutes. Gradually whisk in the milk, and let simmer until thick, about 3-5 minutes.
- Add the Cheese: Stir in the shredded cheddar until melted. If too thick, add more milk.
- Combine Everything: Toss in the cooked macaroni and ground beef into the cheese sauce. Mix well.
- Transfer and Top: Transfer the mixture to a baking dish and sprinkle breadcrumbs on top if using.
- Bake: Preheat the oven to 350°F (175°C) and bake for about 20-25 minutes until bubbly and golden.
- Serve and Enjoy!: Let sit for 5 minutes, then serve warm.
Notes
Feel free to customize with your favorite toppings or mix-ins for a unique twist!
- Prep Time: 15 minutes
- Cook Time: 30 minutes
- Category: Main Course
- Method: Baking
- Cuisine: American
Nutrition
- Serving Size: 1 cup
- Calories: 550
- Sugar: 5g
- Sodium: 700mg
- Fat: 25g
- Saturated Fat: 10g
- Unsaturated Fat: 10g
- Trans Fat: 0g
- Carbohydrates: 50g
- Fiber: 2g
- Protein: 30g
- Cholesterol: 80mg
Keywords: comfort food, mac and cheese, beef casserole, family dinner, easy recipe
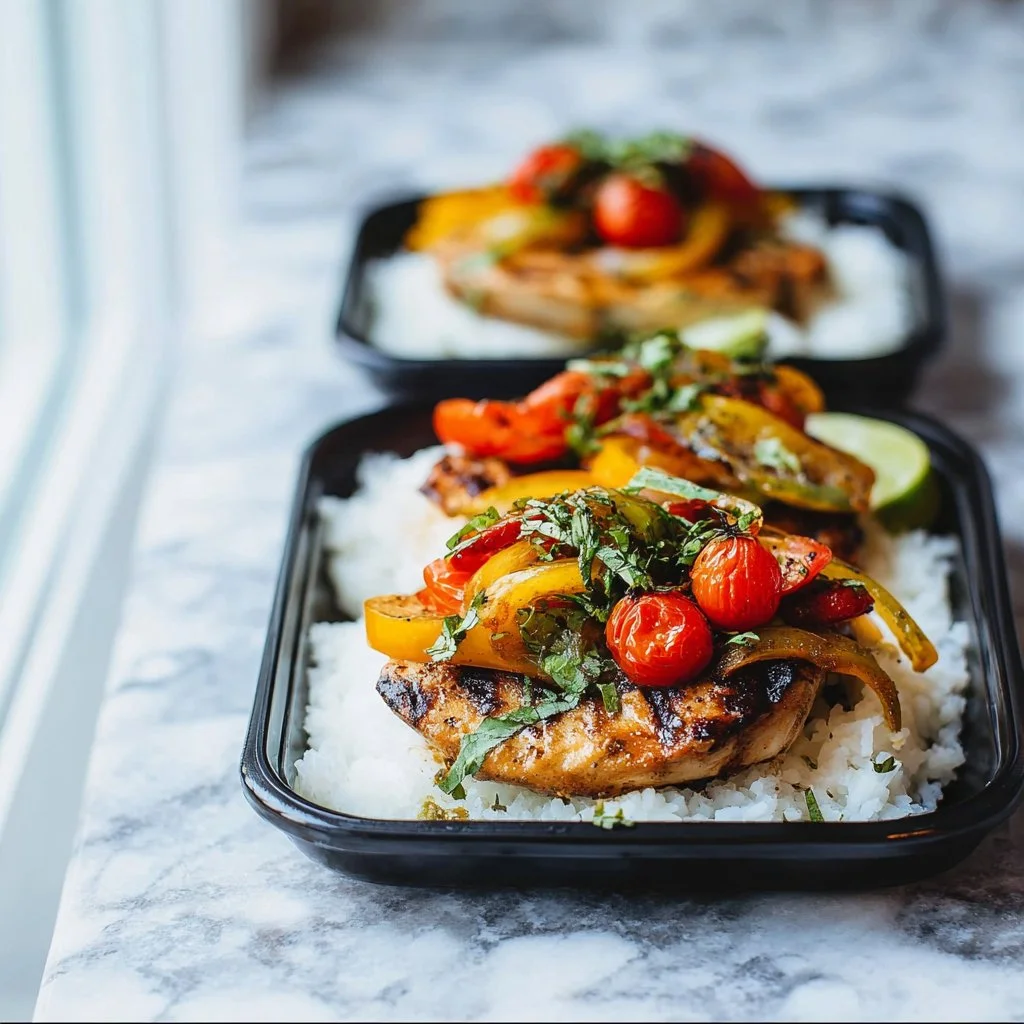
How To Meal Prep On A Budget: 10 Great Recipes To Try
How To Meal Prep On A Budget: 10 Great Recipes To Try
Hello, lovely food enthusiasts! Welcome back to my kitchen! Today, we’re diving headfirst into the wonderful world of meal prep. If you’re like me and find joy in eating delicious food without breaking the bank, you’re in the right place! Meal prepping isn’t just a trend; it’s a lifestyle that can save you time, money, and the hassle of last-minute cooking.
Imagine this: It’s a busy weeknight. You’ve had a long day, and the last thing you want to do is spend hours in the kitchen figuring out what to eat. With meal prep, those worries evaporate like steam off a pot of boiling water. You simply open your fridge—where your meals are neatly stored—and voilà, you’re ready to enjoy a delicious, home-cooked meal!
In this post, I’m going to share 10 budget-friendly recipes that are perfect for meal prepping. Not only are these recipes cost-effective, but they’re also packed with flavor and variety. From hearty grains to vibrant veggies and proteins that will leave your taste buds dancing, we’ve got all bases covered! But first, let me tell you how I got into meal prepping and why it’s become a staple in my kitchen.
Back in my college days, I was juggling classes, part-time jobs, and a budding passion for cooking. Time was scarce, and my budget was pretty tight. Between grabbing quick bites on-the-go and relying on takeout, my wallet (and my waistline) took a hit! That’s when I stumbled upon meal prepping. I started dedicating a couple of hours over the weekend to preparing wholesome meals. Not only did I save money, but I also learned to cook a variety of dishes that I still cherish today.
Now that we’ve set the scene, grab your favorite apron (or a comfortable one, like mine) and let’s get cooking!
Personal Story
One of my most cherished meal prep memories dates back to the summer leading into my last year of college. I scrambled to save up for my dream vacation and had no choice but to stick to a tight grocery budget. I decided to take a Sunday afternoon and dedicate it to meal prepping for the week. With a playlist of my favorite tunes, I transformed my tiny apartment kitchen into a bustling food haven!
I whipped up a large pot of chili, roasted a tray of seasonal veggies, and even made a big batch of quinoa. Each recipe was filled with love, and the aroma that filled my space was nothing short of magical. Friends would pop in during those hours, lured by the delicious smells, and suddenly my apartment turned into a mini cooking class. We laughed, tasted, and shared tips, making that day an unforgettable culinary adventure.
That weekend taught me that meal prepping isn’t just about convenience — it’s about gathering people, sharing good food, and creating memories. So, let’s dive into these 10 fantastic recipes that will make your meal prep not only budget-friendly but also a joy to do!
Ingredients
Here’s a list of ingredients for our 10 budget-friendly meal prep recipes. I’ll also provide quick tips and substitution suggestions to make your cooking experience even smoother!
1. Brown Rice
- Why it’s great: Brown rice is a whole grain that’s filling, nutritious, and super versatile.
- Substitution Tip: Feel free to swap it for quinoa or cauliflower rice if you’re looking for a low-carb option.
2. Canned Beans (Black or Chickpeas)
- Why it’s great: Beans are a fantastic source of protein and fiber.
- Chef Insight: Canned beans save time; just rinse them under cold water to reduce sodium.
3. Seasonal Vegetables (Carrots, Bell Peppers, Broccoli)
- Why they’re great: Using seasonal veggies ensures you save money while prioritizing freshness.
- Substitution Tip: You can switch out these veggies for whatever is on sale that week! Zucchini and spinach are also great alternatives.
4. Chicken Breast or Tofu
- Why it’s great: Both are excellent sources of protein and can easily soak up flavors from spices and marinades.
- Substitution Tip: Swap chicken for turkey or use lentils for a vegetarian protein.
5. Olive Oil
- Why it’s great: A staple in my kitchen! It adds flavor and healthy fats to your meals.
- Substitution Tip: You can use vegetable or canola oil in a pinch.
6. Soy Sauce or Tamari
- Why it’s great: Adds a savory, umami depth to your dishes.
- Substitution Tip: If you’re gluten-free, opt for tamari; coconut aminos work as a great alternative too!
7. Spices (Cumin, Paprika, Garlic Powder)
- Why they’re great: Spices are what give your meals character, so don’t hold back!
- Chef Insight: Store spices in airtight containers to ensure they stay fresh longer!
8. Eggs
- Why they’re great: They’re full of protein and versatile for various recipes.
- Substitution Tip: For egg dishes, you can use flaxseed meal mixed with water as an egg substitute.
9. Whole Wheat Pasta
- Why it’s great: Whole wheat pasta is hearty and nutty, making it a satisfying base for meals.
- Substitution Tip: Zoodles (zucchini noodles) are a fun lower-carb alternative!
10. Fresh Herbs (Basil, Parsley)
- Why they’re great: Fresh herbs brighten up any dish with their vibrant flavors.
- Substitution Tip: If you don’t have fresh herbs, dried herbs can work; just adjust the quantity since dried herbs are more potent!
Step-by-Step Instructions
Let’s roll up our sleeves and get started! Here’s how to create delicious meal prep recipes that make the week ahead much easier.
1. Chili Con Carne
- In a large pot, heat olive oil over medium heat. Add chopped onion and sauté until translucent.
- Tip: Use a wooden spoon to scrape the bottom of the pan to incorporate all the flavorful brown bits!
- Add ground beef (or turkey) and cook until browned.
- Stir in canned tomatoes, drained beans, corn, and spices. Let it simmer for about 30 minutes to lock in flavors.
- Chef Hack: More simmering time means richer flavors!
2. Roasted Vegetable Medley
- Preheat your oven to 425°F (220°C).
- Chop seasonal vegetables into bite-sized pieces. Toss with olive oil, salt, and pepper.
- Spread on a baking sheet and roast for 20-25 minutes, flipping halfway for even cooking.
- Tip: Line your baking sheet with parchment paper for easy cleanup!
3. Brown Rice & Quinoa
- Rinse brown rice in cold water prior to cooking. This helps remove excess starch.
- In a pot, combine rice with twice the amount of water and a pinch of salt. Bring to a boil, then cover and reduce to a simmer for about 45 minutes or until tender.
4. Stir-Fried Chicken or Tofu
- Marinate chicken strips (or cubed tofu) in soy sauce and spices for at least 30 minutes.
- In a wok or skillet over high heat, add olive oil. Stir-fry marinated protein until cooked through.
- Chef Hack: For extra flavor, toss in a tablespoon of peanut butter during the last minute of cooking!
5. Herbed Pasta Salad
- Cook whole wheat pasta according to package instructions; rinse under cold water and drain well.
- In a large mixing bowl, combine cooked pasta with olive oil, chopped herbs, veggies, and other mix-ins.
- Season with salt, pepper, and a splash of lemon juice.
- Tip: This salad is perfect served cold and can last for several days in the fridge!
Serving Suggestions
Once you’re done cooking, it’s time to serve and enjoy! Stack those meals in clear, airtight containers for a colorful display in your fridge. This not only keeps everything fresh but also allows you to see what deliciousness awaits you each day. Pair each meal with a tiny container of your favorite dressing or sauce to sprinkle on when you’re ready to indulge!
Recipe Variations
Here are a few creative twists you can consider for your meal prep dishes:
- Chili with Sweet Potato: Add cubed sweet potatoes to your chili for a sweet and hearty variation.
- Mediterranean Style Pasta Salad: Incorporate olives, feta cheese, and sun-dried tomatoes for a Mediterranean flair.
- Southwest Tofu Bowl: Season tofu with taco spices and serve with brown rice, black beans, and avocado.
- One-Pan Breakfast Scramble: Toss all your favorite breakfast veggies and proteins together in a pan for a satisfying breakfast meal.
- Curried Lentils: Use lentils in place of beans in the chili for an entirely new flavor profile.
Chef’s Notes
I’ve learned so much from meal prepping over the years, and what started as a necessity has turned into a joyful ritual. One thing I absolutely love is how leftovers can surprise you. A chili can morph into a pasta sauce, and roasted veggies become an omelet star! Funny enough, I once mixed up spices for a meal in a hurry and ended up creating my favorite chili that way. Embrace the unexpected in the kitchen; it’s all part of the adventure!
FAQs and Troubleshooting
1. Can I freeze these meals?
Absolutely! Most of these recipes freeze beautifully. Just make sure to double-check for items that might not freeze well, like cooked pasta or delicate veggies.
2. How long can I keep these meal prep recipes in the fridge?
Generally, meals stored in airtight containers can last about 4-5 days. Just trust your nose; if it smells off, toss it!
3. How do I prevent veggies from getting mushy?
Avoid overcooking your veggies during the initial prep, and if reheating, put them in the microwave for short bursts to maintain some crunch.
4. What if I don’t have time to meal prep on the weekend?
No worries! Pick a day during the week where you can set aside 1-2 hours. Even prepping just a couple of meals makes a difference.
Nutritional Info
(Feel free to customize this section based on the recipes you choose to meal prep!)
- Chili Con Carne: Calories – 300, Protein – 24g, Carbs – 35g, Fat – 10g.
- Roasted Vegetables: Calories – 150, Carbs – 30g, Fat – 5g.
- Brown Rice: Calories – 215 per cup, Protein – 5g, Fiber – 3g.
So, there you have it! A cozy guide to meal prepping on a budget, filled with personal stories, tips, and creativity! Remember, the most important ingredient in your kitchen is love, so let your passion shine through every dish. Happy meal prepping, my friends!
Print
10 Budget-Friendly Meal Prep Recipes
- Total Time: 150 minutes
- Yield: 4 servings
- Diet: Vegetarian
Description
Discover how to meal prep delicious and budget-friendly meals for the week ahead.
Ingredients
- Brown Rice
- Canned Beans (Black or Chickpeas)
- Seasonal Vegetables (Carrots, Bell Peppers, Broccoli)
- Chicken Breast or Tofu
- Olive Oil
- Soy Sauce or Tamari
- Spices (Cumin, Paprika, Garlic Powder)
- Eggs
- Whole Wheat Pasta
- Fresh Herbs (Basil, Parsley)
Instructions
- Heat olive oil in a large pot over medium heat. Add chopped onion and sauté until translucent.
- Add ground beef (or turkey) and cook until browned.
- Stir in canned tomatoes, drained beans, corn, and spices. Let it simmer for about 30 minutes.
- Preheat your oven to 425°F (220°C).
- Chop seasonal vegetables, toss with olive oil, salt, and pepper. Spread on a baking sheet and roast for 20-25 minutes.
- Rinse brown rice in cold water prior to cooking.
- Combine rice with twice the amount of water and a pinch of salt. Bring to a boil, then cover and reduce to a simmer for about 45 minutes.
- Marinate chicken strips (or cubed tofu) in soy sauce for at least 30 minutes.
- Add olive oil to a wok or skillet over high heat. Stir-fry marinated protein until cooked through.
- Cook whole wheat pasta according to package instructions, rinse under cold water, and drain well. Combine with olive oil, chopped herbs, veggies, and seasonings.
Notes
You can freeze most of these meals for later. Store in airtight containers.
- Prep Time: 90 minutes
- Cook Time: 60 minutes
- Category: Meal Prep
- Method: Various
- Cuisine: Various
Nutrition
- Serving Size: 1 serving
- Calories: 350
- Sugar: 5g
- Sodium: 400mg
- Fat: 12g
- Saturated Fat: 4g
- Unsaturated Fat: 6g
- Trans Fat: 0g
- Carbohydrates: 45g
- Fiber: 3g
- Protein: 15g
- Cholesterol: 30mg
Keywords: meal prep, budget-friendly, healthy meals, cooking tips, easy recipes
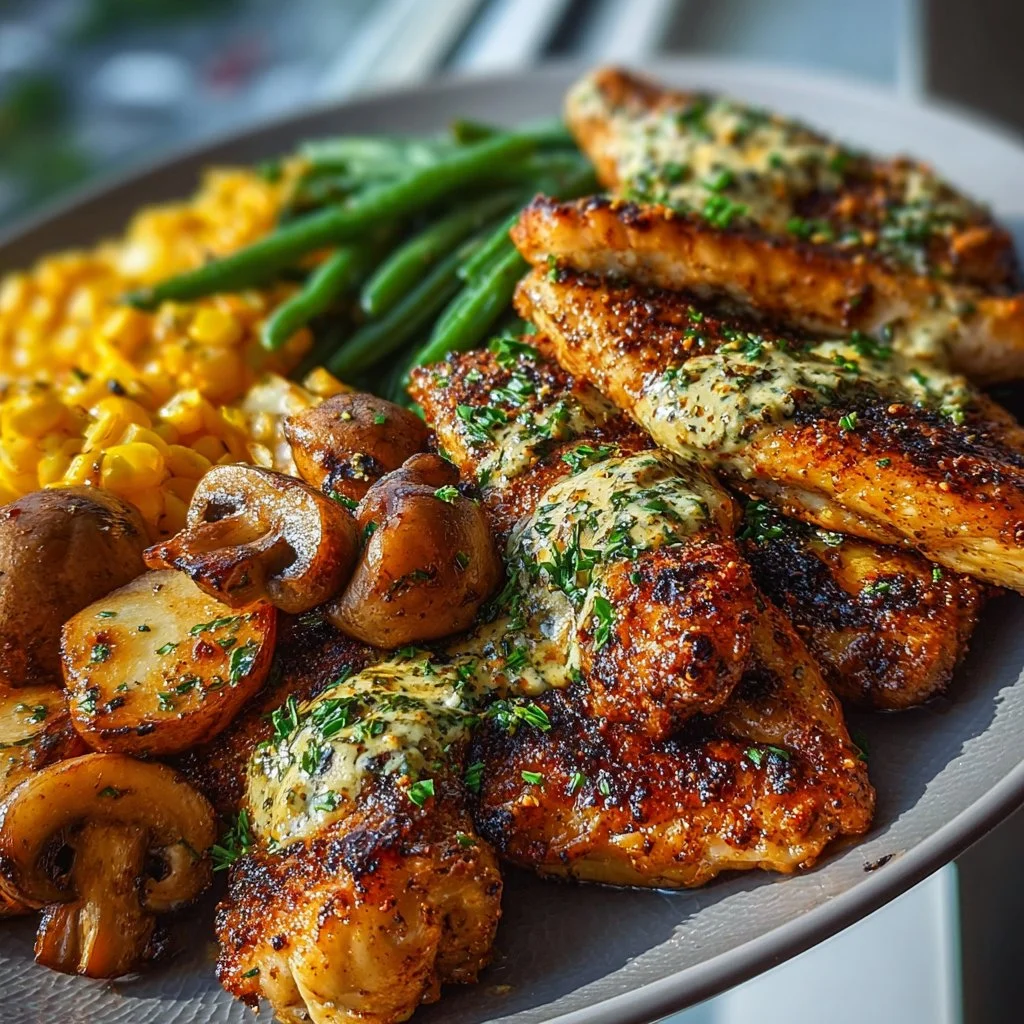
Seasoned Grilled Chicken Wings with Roasted Corn and Sautéed Green Beans
Seasoned Grilled Chicken Wings with Roasted Corn and Sautéed Green Beans
Welcome to my cozy kitchen, food lovers! Today, we’re diving into a dish that screams summer barbecues and family gatherings: Seasoned Grilled Chicken Wings with Roasted Corn and Sautéed Green Beans. Trust me, this recipe is a true crowd-pleaser! Picture this: Your favorite people gathered around, laughter in the air, and the incredible aroma of chicken wings sizzling on the grill. You might even find yourself catching a few drips of barbecue sauce on your shirt—who can resist a good wing, right?
Grilling chicken wings is like hosting a party on your barbecue. The wings transform from simple chicken to flavor-packed bites of joy, especially when they’re marinated in a blend of spices that would make anyone’s mouth water. Pairing them with roasted corn and fresh green beans not only makes this dish feel wholesome, but it also showcases the best of what summer has to offer. You’ll be adding a pop of color and crunch to your table, taking this dish from tasty to next-level delicious.
This meal isn’t just about nourishment—it’s about creating memories! Whether you’re cooking for friends or family, grilling these wings will surely spark smiles and laughter. Energized by a hint of smoke and spices, they’ll be devoured in no time. So, roll up those sleeves, toss on an apron, and let’s cook something magical together!
Personal Story
I still remember the first family barbecue I hosted in my tiny apartment. With a makeshift grill on my balcony and an army of friends ready to feast, I decided to make my go-to chicken wings. I marinated them with an exciting blend of spices that my grandmother had passed down, which instantly transported me to her backyard, where the sun was shining, and the laughter never stopped.
As I flipped those wings over the grill, the wafting aroma attracted not just my friends but the neighbors too! Everyone was intrigued by that delightful scent, and by the end of the evening, I had shared (and highly encouraged) plenty of wing-related stories and plenty of recipes. Spicy, savory, and utterly finger-licking good, those wings became the highlight of the night. Fast forward to today, and I still make those same wings; they’ve become a family tradition, a symbol of the delightful gatherings that bring us all together.
Ingredients
Let’s gather everything you need to whip up these delicious chicken wings. Don’t worry; you might even have some of this on hand already!
Chicken Wings
- 2 pounds chicken wings: The star of the show! Ensure they’re fresh, and if you prefer, you can use drumsticks or thighs as a substitute.
Marinade
- 2 tablespoons olive oil: This helps keep your wings moist and adds a wonderful depth of flavor. You can swap it for avocado oil if you prefer.
- 3 cloves garlic, minced: For that lovely aromatic kick! Fresh garlic is best, but you can use garlic powder in a pinch (1 teaspoon).
- 1 tablespoon smoked paprika: It adds that smoky flavor and vibrant color. Regular paprika works too, but it won’t have that charred essence.
- 1 tablespoon onion powder: A great building block of flavor! Don’t have it? Try finely chopped fresh onion or shallots.
- 1 teaspoon chili powder: A little heat to spice things up! If you like it hotter, cayenne pepper can be a great replacement.
- Salt and pepper to taste: Essential for balancing flavors. Try using flaky sea salt for extra crunch.
Side Dishes
- 4 ears of corn, husked: Sweet corn brings so much summer goodness! Frozen corn can work in a pinch; just sauté it instead.
- 1 pound green beans, trimmed: Fresh green beans add crispness. If they’re not available, snap peas or broccoli florets could work nicely.
Fresh Herbs
- Chopped fresh parsley: To sprinkle on top, adding brightness and a gorgeous pop of green. Cilantro can be a fun, zesty alternative!
Step-by-Step Instructions
Now that we have our ingredients, let’s roll up our sleeves and get cooking!
-
Prepare the Marinade:
- In a mixing bowl, combine olive oil, minced garlic, smoked paprika, onion powder, chili powder, salt, and pepper. Stir well until the ingredients are fully blended. This marinade is where the magic begins! Feel free to adjust the spices to suit your taste—if you love heat, go ahead and throw in a bit more chili!
-
Marinate the Wings:
- Place your chicken wings in a large resealable bag or a shallow dish. Pour the marinade over the wings, ensuring they’re all generously coated. Seal the bag (if using) and shake it around to distribute the marinade evenly. Let them marinate for at least 30 minutes; however, if time allows, marinating for a few hours or even overnight will yield fantastic results. It’s like giving the wings a flavor vacation!
-
Prep the Grill:
- Preheat your grill to medium-high heat (around 375°F to 400°F). If you’re using charcoal, prepare one side for direct heat and the other for indirect heat. This will give you the perfect grilling environment!
-
Grill the Chicken Wings:
- Once your grill is hot, place the marinated wings on the grill over direct heat. Cook the wings for about 8 to 10 minutes on each side, turning occasionally to ensure even cooking. You’re looking for a nice char but don’t let them burn! You can move them to indirect heat if they’re getting too brown before cooking through.
-
Roast the Corn:
- As the wings are grilling, toss the husked corn on the grill. Rotate it every few minutes until it’s lightly charred all over, about 10-15 minutes. Roasting corn adds incredible flavor! If using frozen corn, sauté it in a pan with a splash of olive oil for about 6-8 minutes until golden.
-
Sauté the Green Beans:
- While the wings and corn are cooking, heat a splash of olive oil in a skillet over medium heat. Add the trimmed green beans and sauté for 4-5 minutes until they’re bright green and tender-crisp. A pinch of salt and pepper at the end brings out their natural sweetness.
-
Serve it Up:
- Once everything is cooked, gather the wings, corn, and green beans on a large platter. Squeeze some fresh lemon juice over the veggies for a bright finish! Top with fresh parsley for a stunning presentation.
Serving Suggestions
To serve, arrange the wings beautifully on a platter alongside the roasted corn and sautéed green beans. You can use the corn as a side dish by cutting it off the cob and mixing it with a dab of butter, a sprinkle of salt, and some chopped parsley. For an extra touch, provide a few dipping sauces like ranch or BBQ on the side. Your guests will love mixing flavors!
Recipe Variations
Want to switch things up? Here are some creative twists you can consider:
-
Spicy Teriyaki Wings: Swap the marinade for store-bought or homemade teriyaki sauce. Add sesame seeds for crunch!
-
Herbed Lemon Wings: Instead of the spice blend, marinate in lemon juice, olive oil, and a mix of fresh herbs like thyme and rosemary for a lighter flavor.
-
BBQ Glazed Wings: Toss the grilled wings in your favorite barbecue sauce right before they finish cooking for a sticky, sweet experience.
-
Honey Mustard Glazed: Mix equal parts honey and Dijon mustard, brush over the wings before grilling for a sweet and tangy finish.
-
Vegetarian Option: Swap the chicken wings for cauliflower “wings,” marinating and grilling them the same way for a tasty plant-based dish!
Chef’s Notes
As I continue to evolve this recipe, I often think back to that first barbecue and how far it got me. Occasionally, I experiment with different spices or sides. Recently, I found that adding a splash of apple cider vinegar to the marinade gives it a zingy kick! Just remember, cooking should be fun—don’t be afraid to make it your own. Last but not least, you might want to keep a little extra napkin handy for all that finger-licking goodness!
FAQs and Troubleshooting
Q: My wings came out dry; what did I do wrong?
A: Make sure to monitor the cooking time and use a medium-high heat setting. Overcooking is often the culprit of dry wings. Also, marinating longer can help ensure juiciness!
Q: How can I tell when my wings are cooked through?
A: The best way is to use a meat thermometer; the internal temperature should reach 165°F. If you don’t have one, make sure the juices run clear when you pierce the thickest part of a wing.
Q: Can I bake the wings instead of grilling?
A: Absolutely! Preheat your oven to 425°F and place the wings on a baking sheet lined with parchment paper. Bake for about 25-30 minutes, flipping them halfway through for crispy perfection.
Q: What should I do if I’m cooking for a crowd?
A: Just double or triple the amounts! You can also use an oven and a grill simultaneously to save time. Just remember to ensure they’re spaced out enough to cook evenly!
Nutritional Info
(Per serving—about 5 wings with 1/2 ear of corn and 1/4 pound of green beans)
- Calories: 410
- Protein: 28g
- Fat: 24g
- Carbohydrates: 21g
- Fiber: 4g
- Sugar: 2g
And there you have it—my delectable Seasoned Grilled Chicken Wings with Roasted Corn and Sautéed Green Beans! I hope you feel inspired to take a stroll down flavor lane and create your own kitchen magic. Happy cooking!
Print
Seasoned Grilled Chicken Wings with Roasted Corn and Sautéed Green Beans
- Total Time: 60 minutes
- Yield: 4 servings 1x
- Diet: Gluten-Free
Description
A delicious summer dish featuring marinated chicken wings grilled to perfection, served with roasted corn and sautéed green beans.
Ingredients
- 2 pounds chicken wings
- 2 tablespoons olive oil
- 3 cloves garlic, minced
- 1 tablespoon smoked paprika
- 1 tablespoon onion powder
- 1 teaspoon chili powder
- Salt and pepper to taste
- 4 ears of corn, husked
- 1 pound green beans, trimmed
- Chopped fresh parsley, for garnish
Instructions
- Combine olive oil, minced garlic, smoked paprika, onion powder, chili powder, salt, and pepper in a mixing bowl.
- Place chicken wings in a large resealable bag or shallow dish and pour marinade over them.
- Preheat your grill to medium-high heat (375°F to 400°F).
- Grill marinated wings for about 8-10 minutes on each side until charred.
- Roast corn on the grill, rotating every few minutes for about 10-15 minutes.
- Heat olive oil in a skillet and sauté green beans for 4-5 minutes until tender-crisp.
- Serve wings, corn, and green beans on a platter. Garnish with fresh parsley and lemon juice.
Notes
For a spicier version, add more chili powder or try different marinades like teriyaki or honey mustard.
- Prep Time: 30 minutes
- Cook Time: 30 minutes
- Category: Main Course
- Method: Grilling
- Cuisine: American
Nutrition
- Serving Size: 1 serving
- Calories: 410
- Sugar: 2g
- Sodium: 400mg
- Fat: 24g
- Saturated Fat: 4g
- Unsaturated Fat: 20g
- Trans Fat: 0g
- Carbohydrates: 21g
- Fiber: 4g
- Protein: 28g
- Cholesterol: 90mg
Keywords: grilled chicken wings, summer recipes, barbecue, roasted corn, green beans
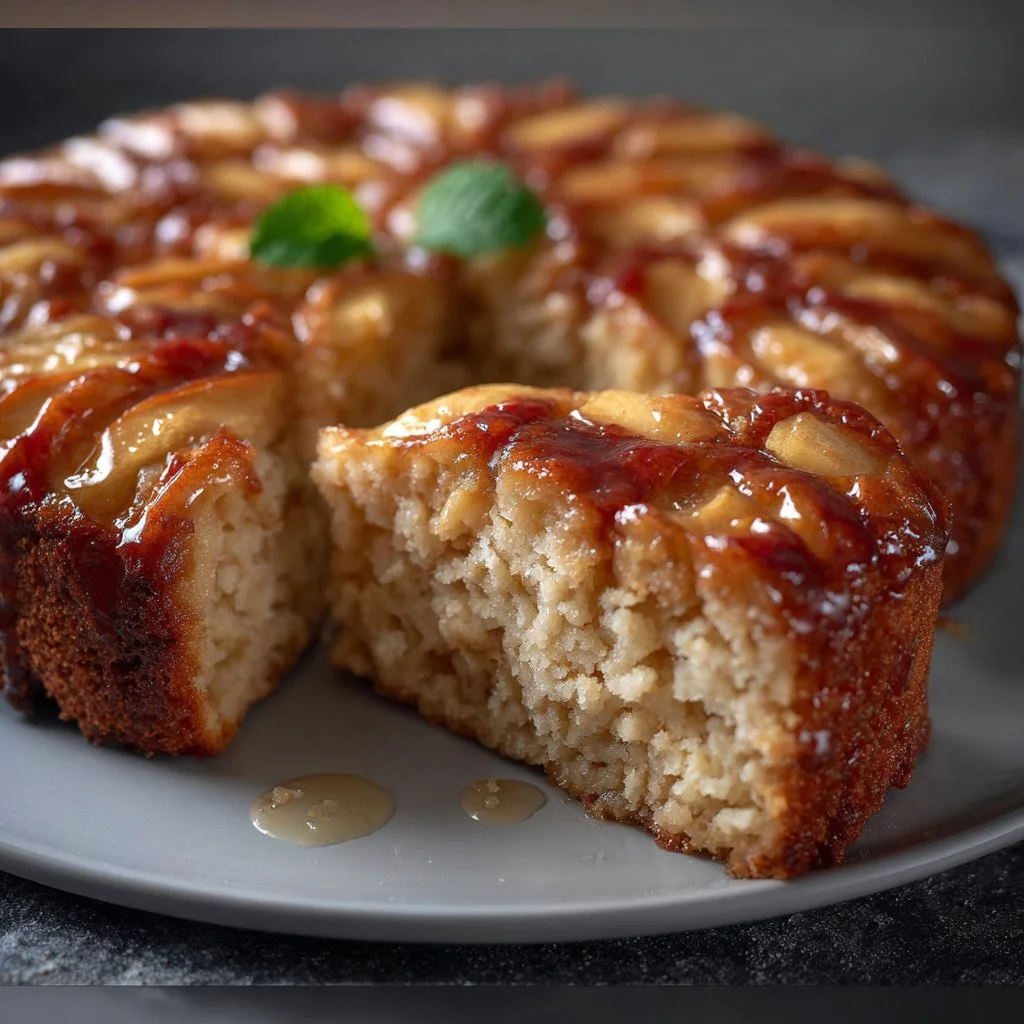
Low Fat Apple Cake
Wholesome and Delicious: Low Fat Apple Cake Recipe
Hey there, fellow food lovers! Welcome back to my cozy kitchen, where the aroma of baked goods fills the air, and every dish tells a story. If you’re anything like me, you know there’s something magical about the combination of apples and cinnamon. It’s a warm, inviting scent that can instantly transport you back to simpler times, maybe a crisp autumn day or a family gathering. Today, I’m excited to share one of my absolute favorite recipes: a Low Fat Apple Cake that’s so delightful, your friends and family will beg for seconds!
This recipe sprouted from a desire to enjoy sweet treats without the heavy guilt that usually follows. I wanted something that lets you savor every bite while still being mindful of our health – that’s the best of both worlds in my book! If you have fond memories of Grandma’s freshly baked apple cake with each slice melting in your mouth, you’re going to love this healthy twist.
Not only is this cake easy to whip up, but it’s also versatile. Perfect for breakfast, a snack paired with coffee, or as dessert after dinner, it truly fits into any occasion. Plus, it’s perfect for impressing guests without keeping you chained to the kitchen for hours. So, grab your apron, and let’s get baking!
Personal Story
I can’t think of apple cake without recalling sunny afternoons in my childhood kitchen, where I would watch my grandma bake. She had this old, battered cookbook filled with handwritten notes and recipes passed down through generations. One of my favorites was her apple cake. I would sit on the counter, swinging my legs as I watched her whisk together ingredients with a smile that could melt the hardest of hearts.
What made that cake so memorable wasn’t just its delicious taste but the process of making it—peeling apples, stirring the batter, and, of course, sneaking spoonfuls of the mix when no one was looking! On crisp fall days, the air would be tinged with the scent of cinnamon and sugar wafting from the oven, and our home felt like the coziest place on earth. That feeling inspired me to come up with this low-fat version. I wanted to pay homage to those beautiful memories while creating something that caters to modern tastes and health needs. Each time I bake this cake, I feel infused with nostalgia and love, making it the ultimate comfort food.
Ingredients
Let’s gather our pantry staples and fresh ingredients to create this beautiful Low Fat Apple Cake. Here’s what you’ll need:
-
2 cups of all-purpose flour
This is the base of our cake! You can substitute with whole wheat flour for a healthier option or gluten-free flour to cater to dietary restrictions. -
3 medium-sized apples (about 3 cups, peeled and chopped)
I recommend using a variety like Granny Smith for tartness and Gala for sweetness. Feel free to swap in pears for a different flavor! -
1 cup of unsweetened applesauce
This is our secret ingredient! It keeps the cake moist and reduces fat. You can also use mashed bananas if you’d like a fruity twist. -
1/2 cup of granulated sugar
This can be adjusted down a bit if you prefer a less sweet cake, or you can substitute with coconut sugar for a more caramel-like flavor. -
1/4 cup of vegetable oil
Using a lighter oil like canola or coconut oil can make this cake even healthier. You can omit it altogether; the cake will still be lovely thanks to the applesauce! -
2 large eggs
Eggs add structure and richness. For a vegan option, replace them with flax eggs (1 tbsp flaxseed meal + 3 tbsp water for each egg). -
1 tsp vanilla extract
This little drizzle adds lovely depth to flavors. Feel free to use almond extract for a different note! -
1 tsp baking powder
This gives our cake that fluffy lift we all love. Ensure it’s fresh for the best results! -
1 tsp baking soda
Together with the baking powder, it helps the cake rise! Again, keeping these ingredients fresh is key. -
1 tsp ground cinnamon
The star of our flavor profile! You can add nutmeg or allspice for a warm, spicy kick. -
1/2 tsp salt
A pinch of salt enhances all the flavors, balancing the sweetness perfectly.
Step-by-Step Instructions
Alright, it’s time to bring this Low Fat Apple Cake to life! Follow these steps for a scrumptious treat:
-
Preheat Your Oven
Preheat your oven to 350°F (175°C). Make sure it’s nice and hot to get that lovely rise. -
Prepare Your Baking Pan
Grab a 9-inch round cake pan or a rectangular one if that’s what you have. Grease it lightly with your oil of choice or line it with parchment paper for easy release. -
Mix the Dry Ingredients
In a medium bowl, whisk together the flour, baking powder, baking soda, cinnamon, and salt. This step ensures even distribution of your leavening agents and spices. -
Combine Wet Ingredients
In a large mixing bowl, combine the applesauce, sugar, oil, eggs, and vanilla extract. Use a hand mixer or whisk until it’s silky and well combined. -
Incorporate the Dry Ingredients
Slowly add the dry mixture into your wet mixture. Stir gently using a spatula or wooden spoon, just until everything is combined. Avoid overmixing, or you’ll end up with a dense cake! -
Fold in the Apples
Gently fold your chopped apples into the batter. This is where the magic happens! You’ll want to make sure they’re evenly distributed so every slice has that delightful fruitiness. -
Pour into the Pan
Transfer the cake batter to your prepared pan. Spread it out evenly with a spatula. Pro tip: You can sprinkle a bit of extra cinnamon sugar on top for a lovely crust! -
Bake to Perfection
Bake in your preheated oven for about 35-40 minutes, or until a toothpick inserted into the center comes out clean. Keep an eye on it toward the end; ovens can vary! -
Cool Down
Once baked, remove it from the oven and let it cool in the pan for about 10 minutes. Then, transfer it to a wire rack to cool completely. -
Serve and Enjoy!
Slice it up and serve it warm or at room temperature. It’s simply divine on its own or with a scoop of low-fat yogurt on the side!
Serving Suggestions
This Low Fat Apple Cake is incredibly versatile! You can serve it simply on a plate with a dusting of powdered sugar, or plate it up elegantly with a dollop of whipped cream or yogurt for an indulgent touch. To make it even more special, serve it warm with a drizzle of homemade caramel sauce or a sprinkle of toasted nuts for added crunch. This cake is sure to become a star on your dessert table!
Recipe Variations
Feeling adventurous? Here are a few variations to spice things up!
-
Caramel Swirl Apple Cake: Before pouring the batter into the pan, layer some store-bought or homemade caramel sauce to create a molten center.
-
Nutty Crumble Topping: Mix chopped walnuts or pecans with melted coconut oil and a sprinkle of cinnamon, then scatter over the batter before baking for a lovely crunchy topping!
-
Pumpkin Spice Twist: Swap out half of the applesauce for pumpkin puree and add a little extra pumpkin spice for a seasonal variation.
-
Dairy-Free Delight: Use non-dairy yogurt instead of regular yogurt for serving, and replace eggs with flax seeds for a vegan cake.
Chef’s Notes
As I’ve baked this Low Fat Apple Cake over the years, I’ve learned a few things. The cooking process is as important as the ingredients! I remember the first time I made it without applesauce – let’s just say it was dense enough to be a doorstop! Since then, I’ve perfected the balance between sweetness and moisture, making it a family favorite.
Every time I bake it, I change things up slightly—sometimes adding a splash of orange juice or zest for a fresh twist. Oh, and I’ve had my share of kitchen antics, including mistaking cayenne pepper for cinnamon (let’s just say that cake didn’t go too far!). That’s the beauty of cooking; it’s the experience, the love, and the laughs that make it all worthwhile!
FAQs and Troubleshooting
1. What if my cake is too dry?
If your cake turns out dry, ensure you’re using enough applesauce. If you’ve added too much flour, it can reduce moisture. Always measure flour correctly by spooning it into the measuring cup and leveling it off.
2. Can I freeze this apple cake?
Absolutely! Wrapping it tightly in plastic wrap and then tinfoil allows you to freeze it for up to 3 months. Let it thaw at room temperature before serving for best results.
3. How do I know when the cake is done?
Check for doneness by inserting a toothpick into the center of the cake. If it comes out clean or with a few moist crumbs (not wet batter), it’s done!
4. Can I use other fruits in this cake?
Yes! Berries, peaches, or pears work wonderfully in this recipe. Just ensure that any fruit you use retains moisture to keep the cake soft and fluffy.
Nutritional Info (Optional)
While I’m not a nutritionist, I can tell you that this Low Fat Apple Cake is a guilt-free treat! With a significant reduction in fat due to applesauce and the use of whole fruits, this cake is a perfect balance of sweetness and healthiness. A single slice contains roughly 150-200 calories (depending on portion size) with minimal fat and a good dose of fiber from the apples.
And there you have it, my delightful Low Fat Apple Cake recipe! I can’t wait for you to try it out! Remember, cooking with love is what makes any dish memorable. Don’t forget to share your baking adventures with me–I love hearing your stories and seeing your delicious creations. Happy baking and bon appétit! 🍏🎂
Print
Low Fat Apple Cake
- Total Time: 55 minutes
- Yield: 8 servings 1x
- Diet: Low Fat
Description
Indulge in a healthy twist on a classic dessert with this Low Fat Apple Cake, combining the sweetness of apples and a hint of cinnamon for a guilt-free treat.
Ingredients
- 2 cups all-purpose flour
- 3 medium-sized apples, peeled and chopped
- 1 cup unsweetened applesauce
- 1/2 cup granulated sugar
- 1/4 cup vegetable oil
- 2 large eggs
- 1 tsp vanilla extract
- 1 tsp baking powder
- 1 tsp baking soda
- 1 tsp ground cinnamon
- 1/2 tsp salt
Instructions
- Preheat your oven to 350°F (175°C).
- Prepare a 9-inch round cake pan by greasing it or lining it with parchment paper.
- Mix together the flour, baking powder, baking soda, cinnamon, and salt in a medium bowl.
- Combine the applesauce, sugar, oil, eggs, and vanilla extract in a large mixing bowl and whisk until well combined.
- Incorporate the dry ingredients into the wet mixture, stirring gently until just combined.
- Fold in the chopped apples until evenly distributed.
- Pour the batter into the prepared pan and spread evenly.
- Bake for about 35-40 minutes, or until a toothpick inserted into the center comes out clean.
- Cool in the pan for 10 minutes, then transfer to a wire rack to cool completely.
- Serve warm or at room temperature.
Notes
Serve with a dusting of powdered sugar or a scoop of low-fat yogurt for an extra treat.
- Prep Time: 15 minutes
- Cook Time: 40 minutes
- Category: Dessert
- Method: Baking
- Cuisine: American
Nutrition
- Serving Size: 1 slice
- Calories: 180
- Sugar: 8g
- Sodium: 250mg
- Fat: 5g
- Saturated Fat: 1g
- Unsaturated Fat: 4g
- Trans Fat: 0g
- Carbohydrates: 30g
- Fiber: 2g
- Protein: 3g
- Cholesterol: 30mg
Keywords: apple cake, low fat, healthy dessert, baking, comfort food
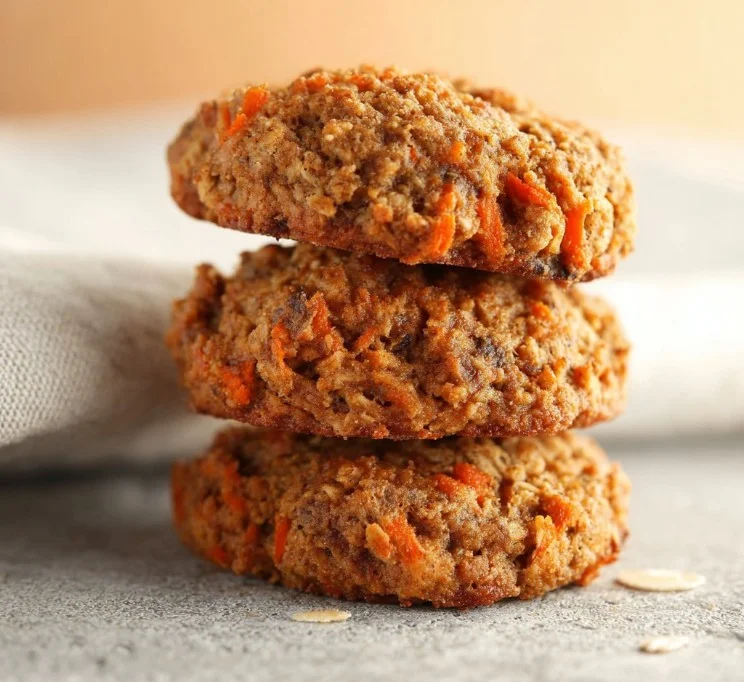
Healthy Carrot Cake Oatmeal Cookies
Healthy Carrot Cake Oatmeal Cookies: The Perfect Blend of Comfort and Wholesome Goodness
Welcome back to my cozy corner of the kitchen! I’m Olivia Bennett, here to whisk you away on a delightful baking adventure. Today, we’re making healthy carrot cake oatmeal cookies—yes, you heard that right! Imagine biting into a soft, chewy cookie infused with the flavors of traditional carrot cake yet packed with wholesome ingredients. These cookies are perfect for breakfast or a sweet snack, and trust me; you won’t be able to stop at just one!
Now, why carrot cake cookies, you might ask? Well, let me take you down memory lane for a moment. Growing up, my grandma had this magical touch in the kitchen. Her carrot cake was a family favorite, gracing every birthday and holiday table. The warm spices mingled beautifully with the sweet, tender carrots, creating a comforting aroma that filled our home. But as much as I adored that classic cake, let’s be real: it isn’t the healthiest treat.
So, I set out to recreate that beloved flavor but in a format that lets me indulge without the guilt. These healthy carrot cake oatmeal cookies are jam-packed with fiber, healthy fats, and naturally sweetened with honey and ripe bananas. They’re not only a healthier alternative, but they also bridge the gap between nostalgic flavors and the need for nutritious food. Whether you’re a health nut or just looking for a delicious treat, this recipe hits all the right notes. Let’s dive in and throw on those aprons—it’s time to bake some magic!
Personal Story
Whenever I think back to my childhood, I can’t help but smile at the memory of those sunny afternoons spent in my grandma’s kitchen. She would often put me in charge of grating carrots while she mixed up the batter for her famous carrot cake. I remember the feel of that wooden box grater, the scent of fresh carrots filling the air, and the gentle laughter we shared over spilled flour and a mischievous cat trying to steal a taste.
Those moments inspired my love for cooking, and the joy of baking with her still warms my heart. It wasn’t just about the cake; it was about the time spent together, the stories we shared, and the sweet sense of accomplishment once we pulled that golden cake from the oven. Recreating her delicious carrot cake in a healthier form is my way of not only honoring those memories but also carrying them into my modern family.
So every time I bake these healthy carrot cake oatmeal cookies, I feel like I’m channeling my grandma’s spirit. I invite you to join me in this delicious tribute to the past while savoring the delightful present. After all, food is best when it brings love and memory to the table!
Ingredients
To whip up these nutritionally charming cookies, gather the following ingredients:
-
Rolled Oats: The star of our cookies! Oats help create a chewy texture and are packed with fiber. For gluten-free options, choose certified gluten-free oats!
-
Whole Wheat Flour: This gives the cookies substance, adding more fiber and nutrients than all-purpose flour. You can substitute with almond flour or oats ground into flour for gluten-free versions.
-
Grated Carrots: Fresh, sweet, and full of vitamins. Grating the carrots ensures they blend well into the dough. If you’re short on time, pre-grated carrots work fine too.
-
Mashed Banana: This acts as a natural sweetener while also providing moisture. You can substitute with unsweetened applesauce if desired.
-
Honey or Maple Syrup: A natural sweetener that enhances the flavor. If you prefer lower sugar, use a sugar alternative like stevia or monk fruit syrup.
-
Cinnamon and Nutmeg: These spices bring warmth and depth, mimicking the flavors found in carrot cake. Feel free to adjust amounts based on your spice preference.
-
Chopped Nuts (like walnuts or pecans): These add a delightful crunch and healthy fats. If you’re nut-free, try using seeds like sunflower or pumpkin.
-
Raisins or Dried Cranberries: For a little sweetness and chewiness, these fruits are optional but highly recommended. You can also use dark chocolate chips, as who wouldn’t want some chocolate with a cookie?
-
Baking Soda & Baking Powder: These leavening agents help your cookies rise and become light and fluffy.
Now that we’ve gathered our ingredients, let’s get those spatulas ready!
Step-by-Step Instructions
1. Preheat the Oven
Start by preheating your oven to 350°F (175°C). This little step ensures an even baking temperature and that your cookies will turn out perfectly golden brown.
2. Prepare Your Baking Sheet
Line a baking sheet with parchment paper. This prevents sticking and makes cleanup a breeze—an essential hack for every home cook!
3. Mix the Dry Ingredients
In a large bowl, combine your rolled oats, whole wheat flour, baking soda, baking powder, cinnamon, nutmeg, and a pinch of salt. Give it a good stir and set aside. This mix is where the magic begins!
4. Mash Those Bananas
In another bowl, mash your ripe bananas until smooth. The riper, the better! Bananas with a few brown spots are perfect for baking as they provide natural sweetness.
5. Combine Wet Ingredients
To the mashed bananas, add honey (or maple syrup) and mix well. Then fold in the grated carrots. You’ll notice how vibrant the mixture becomes; it’s a feast for the eyes!
6. Blend Wet and Dry Ingredients
Create a well in the dry ingredients bowl and pour the banana-carrot mixture right in! Gently stir until just combined. Overmixing can make your cookies tough, so be gentle!
7. Mix in Nuts and Dried Fruits
Now, add in your chopped nuts and raisins/dried cranberries. Feel free to taste test here—nothing like sneaking a few chocolate chips into the batter if that’s your jam!
8. Scoop the Dough
Using a generous tablespoon or cookie scoop, drop heaping mounds of dough onto your prepared baking sheet. Leave some space between each cookie; they will spread slightly while baking.
9. Bake to Perfection
Pop those cookies into the oven and bake for 12-15 minutes, or until they become a light golden brown. Your kitchen will soon be filled with the most delightful aroma!
10. Cool and Enjoy
Once baked, let the cookies cool on the sheet for 5 minutes before transferring them to a wire rack to cool completely. This little wait ensures they firm up nicely without falling apart.
Serving Suggestions
To serve your incredible healthy carrot cake oatmeal cookies, plate them on a colorful dish, maybe with a sprig of mint for a pop of color. Pair them with a warm cup of tea or coffee for a lovely afternoon treat. These cookies are also great for lunchboxes or as a quick breakfast grab-and-go item. Trust me, your friends and family will be begging for more!
Recipe Variations
- Add Coconut Flakes: For a tropical twist, fold in unsweetened shredded coconut.
- Spiced Carrot Cake: Add a dash of ginger or cardamom to amp up the spice profile.
- Vegan Swap: Use flax eggs (1 tablespoon flaxseed meal+ 2.5 tablespoons water) instead of eggs and replace honey with maple syrup to make them vegan-friendly.
- Peanut Butter or Almond Butter: Swapping some of the banana with nut butter can introduce a creamy decadence!
- Chocolate-Dipped Cookies: Drizzle or dip the cooled cookies in melted dark chocolate for a decadent finish.
Chef’s Notes
These healthy carrot cake cookies have evolved significantly since my first attempt. Initially, they were just basic oatmeal cookies. But with all the taste tests and experiments, I finally hit the jackpot with this version!
I recall one baking adventure where I added too much grated carrot—my family was skeptical, but I was determined. I ended up with mini ‘carrot cakes’ that were dense yet delightful! It became a hit after that, proving that sometimes, kitchen mishaps can lead to the best surprises.
FAQs and Troubleshooting
Q: Can I make these cookies gluten-free?
Absolutely! Just substitute the whole wheat flour with a gluten-free flour blend or almond flour. Ensure your oats are certified gluten-free as well.
Q: My cookies turned out dry. What happened?
This could be due to overbaking or too much flour. Make sure you’re measuring your ingredients accurately and adjust the baking time based on your oven, as they can vary.
Q: Can I freeze these cookies?
Yes! These cookies freeze beautifully. Just place them in a single layer on a baking sheet until frozen solid, then transfer to an airtight container separated by parchment paper. Thaw them in the fridge or microwave as needed.
Q: How do I store these cookies?
Store your healthy carrot cake oatmeal cookies in an airtight container at room temperature for 3-4 days or in the fridge for up to a week. They also taste wonderful cold!
Nutritional Info
Each cookie (based on the recipe making 24 cookies) has approximately:
- Calories: 100
- Protein: 2g
- Fat: 2.5g
- Carbohydrates: 17g
- Fiber: 2g
- Sugar: 5g
Now that you have everything you need to whip up these delicious healthy carrot cake oatmeal cookies, it’s time to get back into the kitchen! Let’s celebrate the flavors that bring us joy, indulge in some healthy sweetness, and create lasting memories with those we love. Happy baking, friends! 🍪✨
Print
Healthy Carrot Cake Oatmeal Cookies
- Total Time: 30 minutes
- Yield: 24 cookies 1x
- Diet: Vegetarian
Description
These healthy carrot cake oatmeal cookies are a delicious and nutritious treat, combining the flavors of traditional carrot cake with wholesome ingredients for a guilt-free indulgence.
Ingredients
- 1 cup rolled oats
- 1 cup whole wheat flour
- 1 cup grated carrots
- 2 ripe bananas, mashed
- 1/3 cup honey or maple syrup
- 1 teaspoon cinnamon
- 1/2 teaspoon nutmeg
- 1/2 cup chopped nuts (walnuts or pecans)
- 1/2 cup raisins or dried cranberries
- 1 teaspoon baking soda
- 1 teaspoon baking powder
- Pinch of salt
Instructions
- Preheat the oven to 350°F (175°C).
- Prepare a baking sheet lined with parchment paper.
- Mix the rolled oats, flour, baking soda, baking powder, cinnamon, nutmeg, and salt in a large bowl.
- Mash the ripe bananas until smooth.
- Combine the mashed bananas with honey (or maple syrup) and fold in the grated carrots.
- Blend the banana-carrot mixture with the dry ingredients until just combined.
- Mix in chopped nuts and raisins/dried cranberries.
- Scoop mounds of dough onto the prepared baking sheet, leaving space between each cookie.
- Bake for 12-15 minutes until golden brown.
- Cool on the baking sheet for 5 minutes before transferring to a wire rack.
Notes
These cookies can be made gluten-free by using gluten-free flour and certified gluten-free oats. They can also be frozen for later enjoyment.
- Prep Time: 15 minutes
- Cook Time: 15 minutes
- Category: Snack
- Method: Baking
- Cuisine: American
Nutrition
- Serving Size: 1 cookie
- Calories: 100
- Sugar: 5g
- Sodium: 50mg
- Fat: 2.5g
- Saturated Fat: 0g
- Unsaturated Fat: 2g
- Trans Fat: 0g
- Carbohydrates: 17g
- Fiber: 2g
- Protein: 2g
- Cholesterol: 0mg
Keywords: carrot cake, oatmeal cookies, healthy cookies, vegetarian snacks, wholesome dessert
Blueberry and Oat Crumble Bars
Deliciously Easy Blueberry and Oat Crumble Bars
Hello, my lovely kitchen enthusiasts! Today we’re diving into a recipe that’s as comforting as a hug and as delightful as a sunny afternoon. Whether you’re looking for a sweet surprise for your afternoon tea, a snack to satisfy your mid-day cravings, or a delightful addition to your brunch spread, these Blueberry and Oat Crumble Bars are here to save the day. Trust me; once you sink your teeth into these fabulous treats, you’ll be adding them to your regular baking rotation!
Growing up, my summers were practically synonymous with berry picking. The smell of ripe berries wafting through the air was a signal that heaven was about to unfold in my kitchen. With my trusty apron on and a slight twinkle of mischief in my eye, I would turn our freshly picked blueberries into all sorts of yummy treats, one of which was this incredibly simple yet satisfying blueberry crumble.
What I adore about this recipe is its versatility. It’s perfect for all occasions, whether you’re hosting a garden party or just having a cozy movie night at home—this is what I like to call “comfort food made easy.” So, grab your baking dishes and your favorite mixing bowl, and let’s get ready to whip up some magic with these delightful blueberry and oat crumble bars. You’re going to love them!
Personal Story
Ah, the memories come flooding back as I think about those summer days spent berry picking with my family. We would pile into the car, armed with single-use containers and excitement, ready to scour the nearby farms for the juiciest blueberries. I remember one particular year when I decided to attempt making my own version of a “Blueberry Oat Crumble” after our expedition.
With a basket brimming full of the plumpest blueberries, I dashed into the kitchen like a kid on Christmas morning. My parents were skeptical of my culinary endeavors, but the smell of butter melting and sugar mixing with fresh berries soon drew them in. As I tasted my creation, the divine combination of tart blueberries and buttery oats was a revelation! My family loved it, and it quickly became a summertime ritual in our household.
This simple recipe reminds me of those sunny days and all the love we shared in the kitchen. I can’t wait for you to create your own magical moments with these blueberry and oat crumble bars. Let’s dive right into the ingredients, shall we?
Ingredients
Here’s what you’ll need to create the most scrumptious blueberry and oat crumble bars:
-
2 cups rolled oats
These hearty oats provide the perfect texture for the crumble and are the foundation of the bars. Feel free to swap with quick oats for a softer texture, but avoid steel-cut oats, which will be too chewy. -
1 cup all-purpose flour
Flour holds everything together—some people use whole-wheat flour for a nuttier flavor. You can also try almond flour for a gluten-free option (just adjust the liquid slightly as needed). -
1/2 cup brown sugar
This adds a rich, caramel-like sweetness to the crumble. If you’re out of brown sugar, you can mix white sugar with a dash of molasses for a quick substitute. -
1/2 tsp baking soda
Helps the mixture rise gently, giving the bars a lovely texture. -
1/2 tsp salt
A little pinch of salt enhances the overall flavor of the dish—don’t skip it! -
1/2 cup unsalted butter, melted
Butter adds a rich, creamy flavor to your bars. Sometimes, I even use coconut oil for a lighter taste, which gives a subtle hint of coconut in each bite! -
2 cups fresh blueberries
The star of the show! You can use frozen blueberries, but rinse and dry them well to avoid excess moisture. -
1 tbsp lemon juice
This lifts the flavor of the blueberries and adds a zesty twist. You can adjust this to taste, particularly if your blueberries are extra sweet.
Let’s get cooking!
Step-by-Step Instructions
Step 1: Preheat the oven
Begin by preheating your oven to 350°F (175°C). This step is crucial as it ensures your bars bake evenly. While the oven warms, line an 8×8-inch baking pan with parchment paper, leaving some overhang for easy removal later.
Step 2: Mix Dry Ingredients
In a large bowl, combine your rolled oats, flour, brown sugar, baking soda, and salt. Stir gently with a wooden spoon or spatula until evenly combined. I like to feel the texture of the oats and sugar; it adds a delicious anticipation to the baking process!
Step 3: Add Wet Ingredients
Next, pour in the melted butter, mixing until everything is well-coated and crumbly. At this point, take a moment to appreciate the heavenly aroma wafting up from the mixture—heaven, I tell you! Save about 1 cup of this mixture to sprinkle on top later; it will create a beautiful crumble topping!
Step 4: Prepare the Blueberry Filling
In a separate bowl, gently mix the blueberries with the lemon juice. Be careful not to crush them; we want juicy bursts of fruit in every bite! You can add a tablespoon of sugar if your berries are a bit tart.
Step 5: Assemble the Layers
Now, press half of the oat mixture into the bottom of your prepared baking pan, ensuring it’s compact and even. This forms a sturdy crust that holds everything together.
Step 6: Add Blueberry Filling
Spread the blueberry mixture evenly over the crust. I like to envision how each berry will burst when baked, releasing their juice and mingling with the oats—yum!
Step 7: Top It Off
Now, crumble the reserved oat mixture evenly over the blueberries. It doesn’t need to be perfect; rustic is always better in my kitchen!
Step 8: Bake
Slide the pan into the preheated oven and bake for 25-30 minutes until the top is golden brown and the blueberries are bubbling away cheerfully. You may want to peek occasionally, but resist the urge to keep opening the oven door!
Step 9: Cool and Slice
Once baked, remove the pan from the oven and let it cool for at least 10-15 minutes to set. When cooled slightly, lift the bars using the parchment paper, and slice them into squares or rectangles. Trust me, letting the bars cool a bit before slicing will result in cleaner edges—and no one likes a messy dessert!
Serving Suggestions
Serve these delightful blueberry and oat crumble bars warm, drizzled with a little honey or a dollop of fresh whipped cream if you’re feeling indulgent. They’re also fantastic with a scoop of vanilla ice cream on a hot summer day! For a coffee shop vibe at home, pair it with a cup of coffee or tea, and you’ve got the ultimate cozy treat.
Recipe Variations
Feel free to get creative! Here are some fun variations you might enjoy:
- Swap the Fruit: Use peaches, raspberries, or even chopped strawberries instead of blueberries for a personal twist.
- Nuts and Seeds: Add 1/4 cup of chopped nuts (like almonds or walnuts) in the crumble for extra crunch, or mix in a tablespoon of chia seeds for added nutrition.
- Spices: Add a pinch of cinnamon or nutmeg to the crumble for a warmer flavor profile.
- Sweeteners: Try honey or maple syrup as the sweetener for a different take—just adjust the amount used in the butter mixture slightly.
Chef’s Notes
This recipe has been evolving with me over the years—from simple family gatherings to modern-day brunches with friends. I remember one fateful Fourth of July when I opted to bring these bars to celebrate. After some fierce but friendly competition in the dessert category, it became the star of the potluck!
One tip I always keep in mind is to leave a little room for experimentation. You never know what twist might surprise you, and that’s the beauty of home cooking—it’s all about what feels right to you!
FAQs and Troubleshooting
-
Q: Can I use frozen blueberries?
A: Absolutely! Just be sure to rinse and dry them well to avoid excess moisture in the bars. -
Q: What if my crumble is too dry?
A: Don’t fret! If your crumble mixture seems a bit crumbly, add a splash of water or a little extra melted butter to bind it together. -
Q: How do I store leftovers?
A: Store your crumble bars in an airtight container at room temperature for up to 3 days. You can also freeze them for up to a month—just make sure to wrap them well! -
Q: My bars fell apart when I cut them. Help!
A: This is usually a sign they weren’t cooled enough or that they need a little more time in the oven. Letting them cool properly will help them set!
Nutritional Info
(Approximate per serving, assuming 16 servings)
- Calories: 190
- Protein: 3g
- Carbs: 28g
- Fat: 8g
- Fiber: 3g
- Sugar: 7g
And there you have it, my dearest foodie friends! With just a handful of ingredients and a little love, you can create these scrumptious Blueberry and Oat Crumble Bars that will warm your heart and satisfy your sweet tooth. I hope this recipe inspires you to get creative in your kitchen, just like I did all those years ago. So, what are you waiting for? Gather your ingredients and let’s bake some delicious memories together! Happy cooking!
Print
Deliciously Easy Blueberry and Oat Crumble Bars
- Total Time: 45 minutes
- Yield: 16 servings 1x
- Diet: Vegetarian
Description
These delightful blueberry and oat crumble bars are a comforting treat perfect for any occasion, delivering a burst of juicy blueberries and a rich, buttery oat crumble.
Ingredients
- 2 cups rolled oats
- 1 cup all-purpose flour
- 1/2 cup brown sugar
- 1/2 tsp baking soda
- 1/2 tsp salt
- 1/2 cup unsalted butter, melted
- 2 cups fresh blueberries
- 1 tbsp lemon juice
Instructions
- Preheat the oven to 350°F (175°C) and line an 8×8-inch baking pan with parchment paper.
- Mix the rolled oats, flour, brown sugar, baking soda, and salt in a large bowl until combined.
- Add the melted butter and mix until the mixture is crumbly; reserve 1 cup for topping.
- Prepare the blueberry filling by gently mixing the blueberries with lemon juice.
- Assemble by pressing half of the oat mixture into the bottom of the baking pan.
- Add the blueberry mixture evenly over the crust.
- Top with the reserved oat mixture.
- Bake for 25-30 minutes until golden brown and bubbling.
- Cool for 10-15 minutes before slicing into bars.
Notes
Serve warm with honey or whipped cream, or enjoy with a scoop of vanilla ice cream.
- Prep Time: 15 minutes
- Cook Time: 30 minutes
- Category: Dessert
- Method: Baking
- Cuisine: American
Nutrition
- Serving Size: 1 bar
- Calories: 190
- Sugar: 7g
- Sodium: 200mg
- Fat: 8g
- Saturated Fat: 4g
- Unsaturated Fat: 4g
- Trans Fat: 0g
- Carbohydrates: 28g
- Fiber: 3g
- Protein: 3g
- Cholesterol: 15mg
Keywords: blueberry crumble, oat bars, dessert, healthy snack, baking
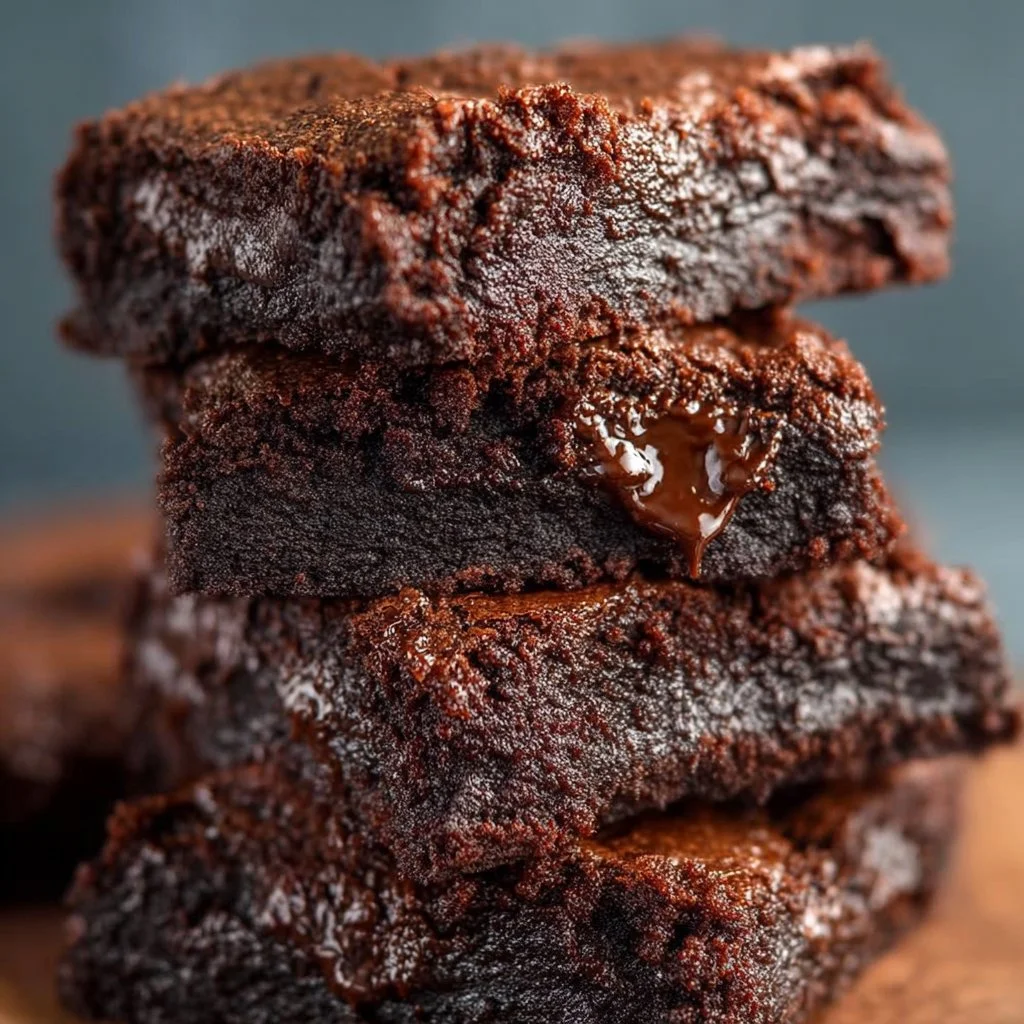
Low Calorie Greek Yogurt Brownies
Indulge in Guilt-Free Delight: Low-Calorie Greek Yogurt Brownies
Hey there, fellow food lovers! I’m Olivia Bennett, and today, I’m inviting you into my cozy kitchen to whip up something that’s as delicious as it is guilt-free: Low-Calorie Greek Yogurt Brownies! I mean, who doesn’t love a rich, fudgy brownie? But what if I told you that you could indulge without the usual calorie splurge? Sounds too good to be true, right? But trust me, these brownies are here to reshape your dessert experience!
Picture this: It’s a rainy afternoon, the kind that begs for something sweet. The smell of cocoa fills the air as you mix up a bowl of ingredients that promise chocolaty bliss. We all have those days where a box of brownies can just whisk away the blues, but often those decadent treats come with a hefty price tag on our waistlines and energy levels. Enter Greek yogurt—our hero ingredient! Not only does it add delightful moisture and texture, but it also dials down the calories while keeping the flavor cranked up to eleven!
Whether you’re baking for your family, friends, or that special someone who loves chocolate as much as you do, these brownies will bring everyone together. They are perfect for any occasion, from cozy movie nights to summertime picnics, and they’re super easy to make, even for beginner bakers. So, roll up those sleeves, preheat that oven, and let’s dive into our delicious journey of Low-Calorie Greek Yogurt Brownies!
Personal Story
I can’t help but smile when I think about the first time I created these Greek Yogurt brownies. It was a chilly winter evening, and my best friend Sarah had dropped by for a girl’s night. We had a crazy week and decided to indulge in a bake-off challenge! But with both of us trying to eat healthier, we needed a recipe that wouldn’t derail our efforts. So, we put on our creative hats and started experimenting.
The kitchen was a whirl of laughter, flour, and enthusiastic tasting spoons as we swapped ideas and flavors. After a bit of trial (and a few “oops” moments—yikes!) we emerged victorious with a batch of brownies that were rich, fudgy, and totally satisfying. Each bite was a reminder that we didn’t have to sacrifice flavor for health, and that evening bonded us even more. Those brownies became a staple at our gatherings, and every time I bake these, they bring back those warm, nostalgic memories of friendship, laughter, and a shared love for sweet treats.
Ingredients
Here’s what you’ll need to bring these Low-Calorie Greek Yogurt Brownies to life:
-
1 cup unsweetened cocoa powder: This is the heart of your brownies! Using unsweetened cocoa ensures rich flavor without adding too much sugar. If you want, you can use Dutch-processed cocoa for a smoother taste.
-
1 cup whole wheat flour: A wonderful alternative to all-purpose flour that adds fiber and nutrients. You can substitute it with almond flour for a gluten-free version, but you might need to adjust the liquid slightly.
-
1 cup Greek yogurt (plain, non-fat): The magic ingredient that keeps these brownies moist and delicious while cutting down on fat. You can swap it with regular yogurt, but I recommend sticking with Greek for that creamy texture.
-
1/2 cup honey or maple syrup: Both sweeteners provide natural sweetness while keeping calories low. Honey will give a richer taste, whereas maple syrup adds a slight caramel flavor—choose according to your preference!
-
2 large eggs: Essential for binding and moisture. If you’re looking for a vegan option, you can replace each egg with a 1/4 cup of unsweetened applesauce.
-
1 teaspoon vanilla extract: A must for enhancing flavors! Always use pure vanilla extract for the best taste. If you’re running low, a pinch of almond extract can add a lovely touch.
-
1/2 teaspoon baking powder: This helps your brownies rise just a bit. If you’re using self-rising flour instead of whole wheat, you can omit this ingredient.
-
1/4 teaspoon sea salt: A tad of salt enhances all the flavors. If you like a touch of sweetness, try adding a sprinkle of flaky sea salt on top of the brownies before baking!
Step-by-Step Instructions
Let’s roll up our sleeves and get cooking! Here’s a detailed guide to making your Low-Calorie Greek Yogurt Brownies:
-
Preheat the Oven: Set that oven to 350°F (175°C). This is a crucial first step because a preheated oven ensures even baking. The brownies will rise perfectly and get that nice outer crust.
-
Prepare Your Pan: Grab an 8×8-inch baking dish and line it with parchment paper. Trust me, this will help you lift the brownies out later and ensure they don’t stick. A little cooking spray on the pan also goes a long way!
-
Mix the Wet Ingredients: In a large mixing bowl, whisk together the Greek yogurt, eggs, honey (or maple syrup), and vanilla extract until smooth. This is such a great chance to channel your inner chef! Feel free to sing while you mix—it makes everything more fun!
-
Combine Dry Ingredients: In another bowl, sift together the cocoa powder, whole wheat flour, baking powder, and salt. Sifting the cocoa powder helps to avoid lumps and ensures an even distribution of the dry ingredients. Plus, it’s a great workout for your arms!
-
Combine Wet and Dry: Gradually add the dry mixture into the wet mixture, folding it gently. Use a spatula to combine—don’t overmix, but make sure no dry pockets are left behind. You want the batter to be thick and luscious!
-
Fold in Chocolate Chips (Optional): If you’re feeling indulgent, fold in about a half cup of dark chocolate chips. These add lovely melty pockets of chocolate, taking your brownies to the next level. Just be mindful of your sweet tooth!
-
Pour into Prepared Pan: Transfer the brownie batter into your lined baking dish, smoothing the top with your spatula. You can even tap the pan gently on the counter to release any air bubbles.
-
Bake: Slide your brownies into the preheated oven and bake for about 20-25 minutes. The edges will start to pull away from the pan, and a toothpick inserted into the center should come out with a few moist crumbs—not completely clean. Remember, they’ll continue to cook slightly after you take them out!
-
Cool and Slice: Allow the brownies to cool in the pan for about 10-15 minutes. Use the parchment paper to lift them out and transfer them to a wire rack. Let them cool completely before slicing. I know, waiting is the hardest part, but it’s worth it!
-
Enjoy! Now it’s time to enjoy your heavenly Greek yogurt brownies! Serve them as is or with a dollop of Greek yogurt on top for added creaminess.
Serving Suggestions
As you slice into these fudgy beauties, consider serving them warm with a scoop of vanilla Greek yogurt or a sprinkle of crushed nuts for a delightful contrast in texture. You can also pair them with a rich berry compote to add a fresh burst of flavor. And if you want to make it like a dessert sundae — layer a slice of brownie with a scoop of your favorite ice cream. Yum!
Recipe Variations
Here are a few fun ideas to change things up:
- Nutty Brownies: Stir in chopped walnuts or pecans for that added crunch and healthy fats.
- Mint Chocolate Brownies: Add a drop of peppermint extract to the batter to make delicious mint-flavored brownies perfect for the holidays.
- Peanut Butter Swirl: Add a dollop of natural peanut butter and swirl it through the batter before baking for a PB & chocolate combination that’s simply irresistible.
- Spicy Kick: Toss in a pinch of cayenne pepper or chili powder for a surprising kick that complements the chocolate beautifully.
- Fruit Fusion: Fold in fresh raspberries or chopped strawberries right before baking for a fruity twist!
Chef’s Notes
As with any recipe, these Greek Yogurt Brownies have seen their fair share of evolution. The original recipe started as just your classic brownie, but over the years, I’ve had my fair share of mishaps and successes (like the time I accidently used baking soda instead of baking powder. Oh boy, was that a fluffy disaster!). Each time I made tweaks, I learned something new about balancing flavors and textures. Now, these brownies are a staple in my home, showing that healthy doesn’t have to be boring.
Here’s a fun fact: I like to double the batch and freeze half for those late-night chocolate cravings. Just wrap them well in plastic wrap, and they’ll last up to three months. When you need a treat, pop them in the microwave for a few seconds, and you’re golden!
FAQs and Troubleshooting
1. Can I use other flours instead of whole wheat?
Absolutely! You can experiment with almond flour or coconut flour, but keep in mind that the texture might change slightly. Coconut flour absorbs more moisture, so adjust the wet ingredients accordingly!
2. The brownies turned out too dry; where did I go wrong?
Overbaking is usually the culprit! Make sure to adjust the baking time based on your oven and check the brownies a few minutes earlier. Remember, they’ll continue to cook even after they’re out of the oven!
3. What’s a good substitute for honey?
You can use agave syrup, maple syrup, or even a sugar substitute like Stevia if you’re looking to further lower the calories. Just keep in mind that this might slightly alter the flavor.
4. How can I tell when my brownies are done?
Check for moist crumbs on your toothpick when inserted into the center—this is your sign for fudgy perfection. If it comes out clean, they might be overdone, unless you love a cakey brownie!
Nutritional Info
Per brownie (based on 16 servings):
- Calories: ~90
- Protein: 4g
- Fat: 3g
- Carbohydrates: 14g
- Fiber: 2g
- Sugar: 6g (depending on sweetener)
And there you have it—heavenly Low-Calorie Greek Yogurt Brownies that are sure to impress without the guilt! I hope you enjoyed this little journey through my kitchen, and I can’t wait for you to try these out. Remember, cooking is all about having fun and experimenting! Happy baking, my friends! 🍫💖
Print
Low-Calorie Greek Yogurt Brownies
- Total Time: 40 minutes
- Yield: 16 servings 1x
- Diet: Vegetarian
Description
Indulge in these guilt-free brownies made with Greek yogurt for a moist and delicious treat without the calorie splurge.
Ingredients
- 1 cup unsweetened cocoa powder
- 1 cup whole wheat flour
- 1 cup Greek yogurt (plain, non-fat)
- 1/2 cup honey or maple syrup
- 2 large eggs
- 1 teaspoon vanilla extract
- 1/2 teaspoon baking powder
- 1/4 teaspoon sea salt
Instructions
- Preheat the oven to 350°F (175°C).
- Prepare your 8×8-inch baking dish with parchment paper.
- Mix the wet ingredients: Greek yogurt, eggs, honey (or maple syrup), and vanilla extract in a large bowl.
- Combine the dry ingredients: sift together cocoa powder, whole wheat flour, baking powder, and salt in another bowl.
- Combine the wet and dry mixtures, folding gently until no dry pockets remain.
- Fold in chocolate chips if using.
- Pour the batter into the prepared pan, smoothing the top.
- Bake for 20-25 minutes until edges pull away and a toothpick comes out with a few moist crumbs.
- Cool in the pan for 10-15 minutes, then transfer to a wire rack.
- Enjoy as is or with a dollop of Greek yogurt on top!
Notes
Consider serving with vanilla Greek yogurt or crushed nuts. These brownies can also be frozen for late-night cravings!
- Prep Time: 15 minutes
- Cook Time: 25 minutes
- Category: Dessert
- Method: Baking
- Cuisine: American
Nutrition
- Serving Size: 1 brownie
- Calories: 90
- Sugar: 6g
- Sodium: 50mg
- Fat: 3g
- Saturated Fat: 1g
- Unsaturated Fat: 2g
- Trans Fat: 0g
- Carbohydrates: 14g
- Fiber: 2g
- Protein: 4g
- Cholesterol: 50mg
Keywords: brownies, low-calorie, healthy dessert, Greek yogurt, baking
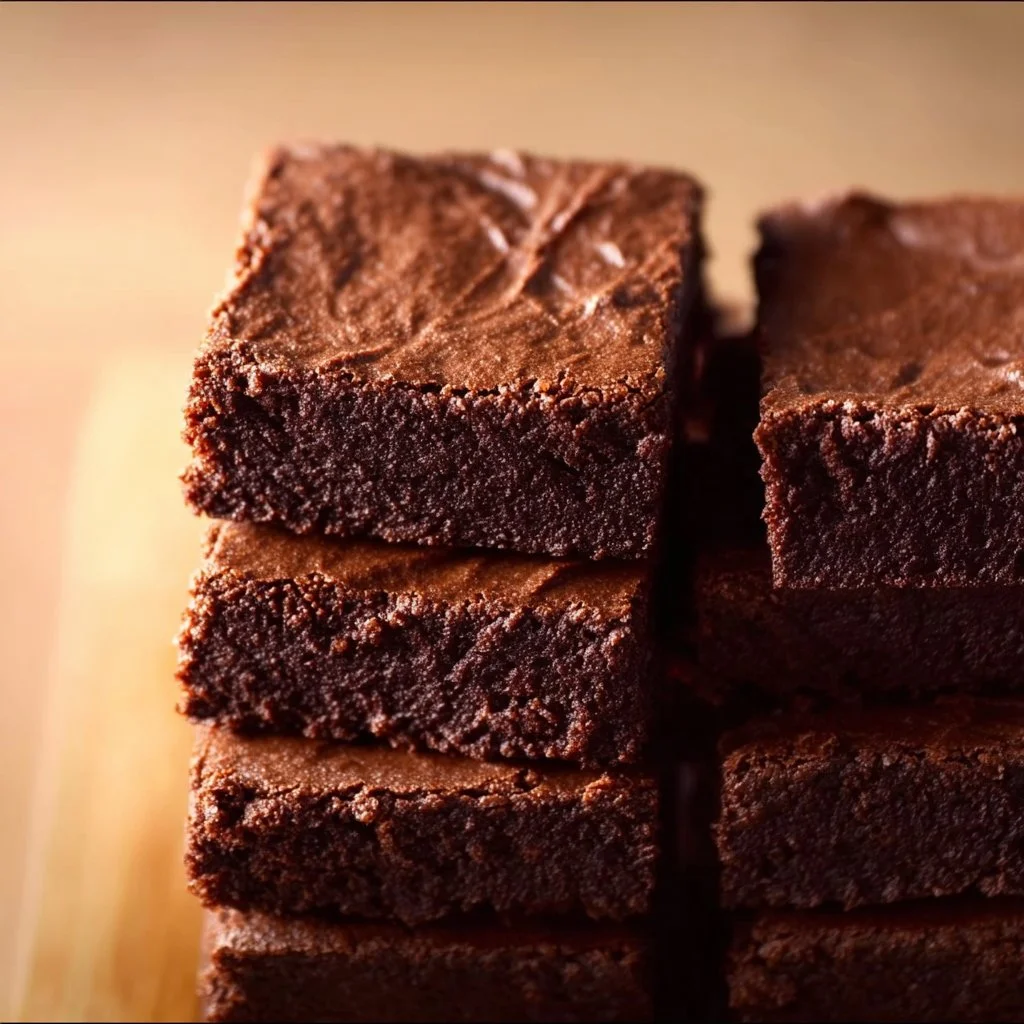
Healthy Brownies
The Ultimate Healthy Brownies Recipe: Sweet Decadence with a Nourishing Twist
Welcome to my kitchen! I’m thrilled you’re here to dive into the world of healthy brownies with me. Now, I know what you’re thinking: “Healthy brownies? Really?” But let me tell you, these little squares of goodness are about to change your perspective on treats forever! Light, fudgy, and with a depth of flavor that will delight your taste buds without the guilt, this recipe is sure to become a staple in your kitchen.
Imagine this: you walk into your home after a long day, the smell of something delicious beckoning you from the kitchen. You approach the counter, and there it is—a batch of warm, healthy brownies waiting for you. Just the thought of it brings a smile to my face.
My journey with healthy baking started years ago when I first tried to make some adjustments to my family’s classic brownie recipe. Armed with a few substitutions, I hit the kitchen with an enthusiasm I couldn’t contain. The outcome was surprising and more delicious than I’d imagined! These brownies are not only fudgy and natural-tasting; they also bring a comforting nostalgia that makes me feel right back at home, sharing laughter with my loved ones over sweet treats!
So, let’s roll up our sleeves, grab those mixing bowls, and turn simple, wholesome ingredients into something magnificent. Ready to indulge? Let’s get started!
A Sweet Memory: The Day I Discovered Healthy Baking
Growing up, brownies were a staple in our household. I’d watch my mom whip up a batch, filling our home with that unmistakable chocolate aroma. One day, she decided to experiment with a healthier version, and I was skeptical. “Mom, brownies are supposed to be rich and gooey! What are you doing?” But the fierce love for her baked goods (and the sugar rush) kept me intrigued.
The kitchen was swathed in flour clouds as she expertly swapped out the all-purpose flour for whole wheat and butter for avocado. I admit, I initially raised an eyebrow at the green fruit being included in such a beloved dessert. But when we pulled them out of the oven, the kitchen transformed into a chocolate paradise! We took our first bite, and there it was—a rich, fudgy flavor that made us forget any preconceptions. Those brownies turned into our go-to recipe, resulting in laughter, midnight snacks, and countless memories.
With my mom as my inspiration, I’ve taken that recipe a step further, enhancing it with even healthier ingredients. Trust me, the journey from my childhood kitchen to the present has certainly paved the way for this healthy brownie recipe you’re about to embrace!
Ingredients: Wholesome Goodness in Every Bite
-
Black Beans (1 cup, pureed)
- These are the star of the show! Packed with protein and fiber, black beans create a rich texture without adding any “bean” flavor. Need an alternative? Try chickpeas for a different twist!
-
Oats (1 cup, blended into flour)
- Use rolled oats; blending them into oat flour adds great texture and keeps the recipe gluten-free. No oats at home? Almond flour works beautifully as well.
-
Cacao Powder (1/3 cup)
- For that deep chocolatey flavor we all crave! Cacao powder is less processed than cocoa powder, offering health benefits and antioxidants. Can’t find it? Unsweetened cocoa powder is a solid substitute.
-
Maple Syrup (1/2 cup)
- The perfect natural sweetener! It lends moisture while avoiding refined sugars. Honey or agave syrup can be used in equal measures if desired.
-
Avocado (1 ripe, mashed)
- It not only adds creaminess but also healthy fats to the brownies. If avocados aren’t on hand, unsweetened applesauce is an excellent alternative.
-
Vanilla Extract (2 tsp)
- Essential for rounding out flavors. On a pinch? A teaspoon of almond extract can provide a lovely twist.
-
Baking Powder (1 tsp)
- Helps with rising, making your brownies light and fluffy. Baking soda can be swapped in, but cut down to 1/2 tsp since it’s stronger.
-
Dark Chocolate Chips (1/2 cup)
- They add luscious pockets of chocolate. For a dairy-free version, look for vegan chocolate chips. You could also throw in some chopped nuts for added crunch!
These simple yet impactful ingredients will create brownies bursting with flavor, and they’ll still be nourishing. Whether it’s an after-dinner treat or a quick snack, you won’t want to miss this!
Step-by-Step Instructions: Let’s Make Magic Happen!
Step 1: Preheat Your Oven
Preheat your oven to 350°F (175°C). This ensures our brownies bake evenly from the start.
Step 2: Prepare the Baking Dish
Grease an 8×8-inch baking dish or line it with parchment paper. Lining the pan allows for easy removal after baking—because who wants crumbled brownies?
Step 3: Blend the Black Beans
Drain and rinse black beans thoroughly if canned, then place them in a food processor or blender. Blend until smooth and creamy; you should have about one cup. This will act as your base, providing moisture and protein!
Step 4: Mix It Up!
In a large mixing bowl, combine the pureed black beans, mashed avocado, and maple syrup. Stir until well-combined. Make sure there are no avocado lumps, or our brownies might look a bit weird!
Step 5: Add the Dry Ingredients
Next, blend the rolled oats until they reach a fine flour-like consistency. Add this oat flour, cacao powder, and baking powder to the wet mixture. Use a spatula to fold everything together gently until well mixed. Pro tip: Don’t over mix; a few lumps are perfectly fine, as they’ll bake out.
Step 6: Stir in the Chocolate Chips
Add in those dark chocolate chips (or their alternatives), stirring until evenly distributed through the batter. Seriously, this is where the magic happens!
Step 7: Pour and Spread
Pour the batter into your prepared baking dish, spreading it evenly with a spatula. The batter will be thicker than you expect, which is good—thicker batter means fudgier brownies!
Step 8: Bake Time!
Place the dish in the preheated oven and bake for about 20-25 minutes or until set. You want the edges to look firm and the center to remain slightly soft (it will continue to cook slightly after removing). A toothpick inserted in the center should come out with a few moist crumbs but not wet batter.
Step 9: Cool and Slice
Allow the brownies to cool in the pan for at least 10 minutes before transferring them to a wire rack. After about 30 minutes of cooling, slice them into squares or rectangles as desired.
Step 10: Enjoy!
Serve warm, or store them in an airtight container for up to 5 days (if they last that long!). You can enjoy them straight-up, top them with a dollop of Greek yogurt, or scoop some ice cream on top. You do you!
Serving Suggestions: Plating with Style
For an elegant touch, serve these brownies on a rustic wooden board or a white porcelain dish. Drizzle a little melted dark chocolate or a dusting of powdered sugar on top for visual appeal. Pair them with fresh berries and a dollop of Greek yogurt for an irresistible dessert platter. Delicious and pretty; your friends will be asking for seconds!
Recipe Variations: Get Creative!
- Nutty Brownies: Stir in some walnuts or pecans for a crunch!
- Mint Chocolate Brownies: Add a few drops of mint extract for a refreshing twist.
- Fruit and Nut Swirl: Combine chopped dried cherries or cranberries for a delightful contrast.
- Spiced Cocoa: Add a pinch of cinnamon and chili powder for a subtle heat and warmth.
- Protein-Packed: Mix in a scoop of your favorite protein powder to make these brownies a post-workout treat.
Chef’s Notes: A Little Reflection
This recipe has undergone countless changes over time. I remember the first time I made these with my mom — we just winged it, with no real measurements! Over the years, I’ve honed it to perfection. A fun thing about those childhood memories? I once swapped salt for sugar in my very first batch and didn’t realize until I had served them to my cousins. The reactions were priceless! In the end, those mistakes taught me what truly made a recipe shine: love, laughter, and a sprinkle of patience.
FAQs and Troubleshooting: Just in Case
Q1: Why are my brownies too dry?
If they turned out dry, they might have been overcooked. Make sure to check for doneness a little earlier than the suggested time.
Q2: Can I use a different type of sweetener?
Absolutely! Coconut sugar or even monk fruit sweetener can be great substitutes, though quantities may vary.
Q3: My brownies are too gooey in the middle; what happened?
If they seem undercooked, they might need a few more minutes in the oven. Remember, since they cool and continue to set afterward, a slight jiggle in the center is okay!
Q4: How do I store leftovers?
Store your brownies in an airtight container at room temperature for up to five days. For longer storage, refrigerate them or freeze for up to three months!
Nutritional Info (Optional): A Guilt-Free Treat
- Serving Size: 1 brownie (based on 16 servings)
- Calories: Approximately 100
- Protein: 3g
- Fiber: 4g
- Sugar: 8g
- Healthy Fats: 4g
- Gluten-Free: Yes
And there you have it! A delicious, hearty, and healthy brownie recipe perfect for any occasion. Whether you’re treating yourself or impressing guests, these brownies are bound to bring smiles and happy bellies. Thanks for joining me today in this kitchen adventure. Don’t forget to come back for more delightful treats, and happy baking! 🌟
Print
Ultimate Healthy Brownies
- Total Time: 40 minutes
- Yield: 16 servings 1x
- Diet: Gluten-Free, Vegetarian
Description
These healthy brownies are fudgy and delicious, made with wholesome ingredients like black beans and avocado for a guilt-free treat.
Ingredients
- 1 cup Black Beans, pureed
- 1 cup Oats, blended into flour
- 1/3 cup Cacao Powder
- 1/2 cup Maple Syrup
- 1 ripe Avocado, mashed
- 2 tsp Vanilla Extract
- 1 tsp Baking Powder
- 1/2 cup Dark Chocolate Chips
Instructions
- Preheat your oven to 350°F (175°C).
- Prepare an 8×8-inch baking dish by greasing or lining with parchment paper.
- Blend the black beans until smooth and creamy.
- Mix the pureed black beans, mashed avocado, and maple syrup in a large bowl.
- Add the blended oat flour, cacao powder, and baking powder to the wet mixture.
- Stir in the dark chocolate chips until evenly distributed.
- Pour the batter into the prepared baking dish.
- Bake for 20-25 minutes or until set.
- Cool in the pan for at least 10 minutes before transferring to a wire rack.
- Enjoy warm or store in an airtight container for up to 5 days.
Notes
Serve warm with Greek yogurt or ice cream for an added treat.
- Prep Time: 15 minutes
- Cook Time: 25 minutes
- Category: Dessert
- Method: Baking
- Cuisine: American
Nutrition
- Serving Size: 1 brownie
- Calories: 100
- Sugar: 8g
- Sodium: 50mg
- Fat: 4g
- Saturated Fat: 1g
- Unsaturated Fat: 3g
- Trans Fat: 0g
- Carbohydrates: 15g
- Fiber: 4g
- Protein: 3g
- Cholesterol: 0mg
Keywords: healthy brownies, gluten-free dessert, guilt-free treat, chocolate, baking




