
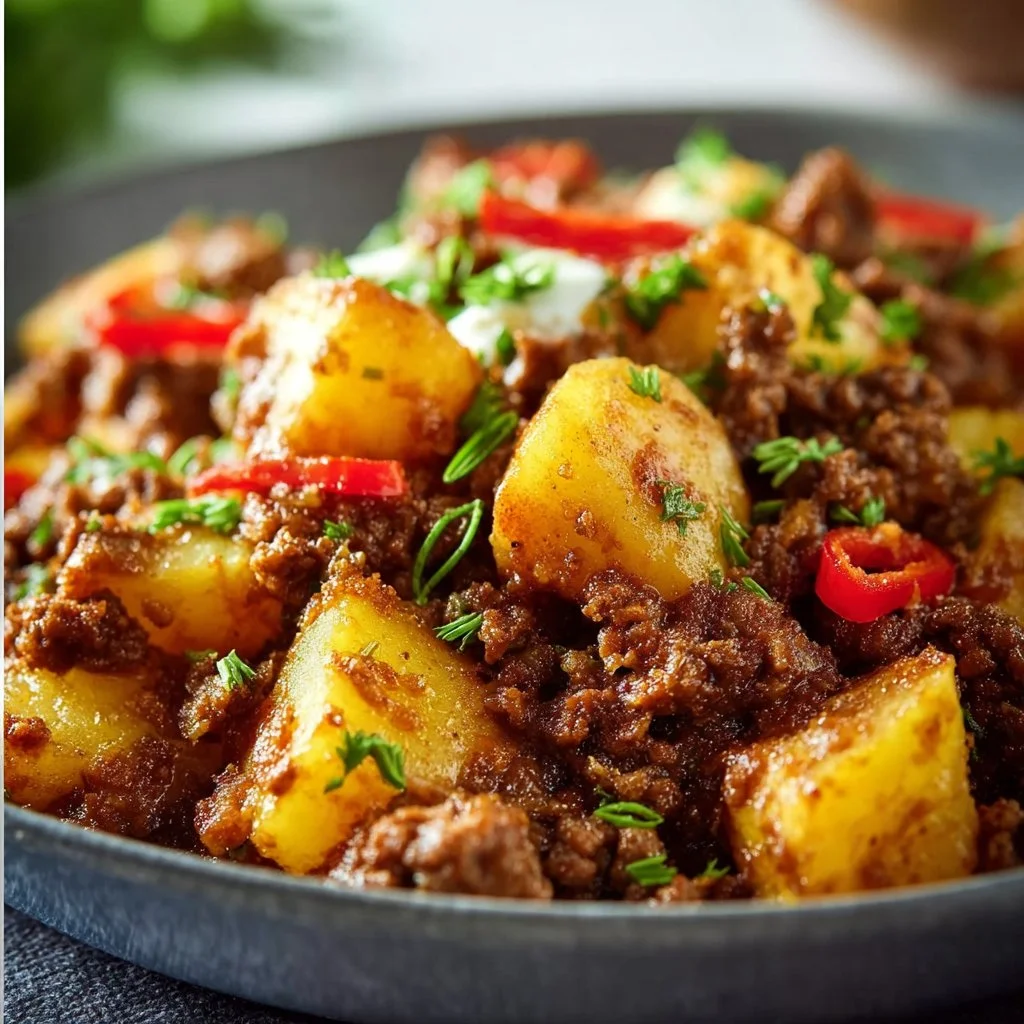
Hearty Ground Beef and Potatoes
Hearty Ground Beef and Potatoes: A Comforting Classic
Welcome to my cozy corner of the internet! I’m so glad you’ve stopped by. Today, I’m thrilled to share a delightful recipe for Hearty Ground Beef and Potatoes. Just saying the name evokes warm memories of family dinners, laughter echoing off the kitchen walls, and that unmistakable aroma wafting through the house—a signal that something delicious is on the way!
This dish is not just about satisfying your stomach; it’s about bringing people together, creating connections, and cherishing moments that become lifelong memories. Whether it’s a chilly evening or a busy weeknight, this hearty recipe is the best friend you didn’t even know you needed. Who doesn’t love the combination of savory ground beef paired with tender potatoes? It’s comfort food at its finest!
I can still remember the very first time I made this dish—clad in my mismatched apron (who cares about matching, right?), I was a little nervous but also brimming with excitement. The sizzle of the beef hitting the skillet and the steamy aroma rising filled my kitchen with pure magic. Fast forward to today, I’ve made this dish countless times, sharing it with friends, family, and anyone who just needed a little love in the form of food.
So grab your apron, roll up those sleeves, and let’s embark on this culinary adventure together. With simple steps and a sprinkling of love, you’ll create a dish that not only fills bellies but warms hearts.
Personal Story
As a child, I spent countless weekends at my grandparents’ house where the kitchen was always bustling with activity. My grandmother would whip up a big pot of her famous beef and potato stew each Sunday. The whole family would gather around the table, sharing stories about our week while eagerly awaiting that first taste.
I can still see the way her eyes sparkled as she served us, and the sounds of laughter and clattering silverware filled the room. It wasn’t just a meal; it was a bond, a tradition, an expression of love. I remember being so fascinated watching her cook, my tiny hands desperately trying to help while she gently guided me with her ever-patient demeanor.
Years later, I found myself recreating her recipe, often calling her for advice because let’s be honest, it’s hard to match a grandmother’s love! With each simmering pot and browning beef, I was not only making a meal; I was celebrating a legacy, holding onto those warm memories that meant everything to me.
Now I’m here to pass on that same love to you, hoping that every bite of this Hearty Ground Beef and Potatoes dish reminds you of joy, comfort, and the magic that happens around the dinner table.
Ingredients
Here’s what you’ll need to make this mouthwatering dish:
-
Ground Beef (1 lb)
- Use lean or extra-lean ground beef for a healthier option. If you’re looking for a lighter choice, ground turkey or chicken work well too!
-
Potatoes (3-4 medium-sized)
- A classic choice! Yukon Gold or Russets are perfect for this dish, as they’re fluffy and absorb the flavors beautifully. If you want to add a fun twist, try sweet potatoes!
-
Onion (1 medium, diced)
- Onions add flavor and sweetness. Yellow onions are a staple, but red onions can add a nice bite. You can even skip them if you’re not a fan!
-
Garlic (2-3 cloves, minced)
- Because everything’s better with garlic! Fresh minced garlic adds depth, but you can use garlic powder in a pinch.
-
Beef Broth (1 cup)
- Homemade is best, but store-bought works too! Vegetable broth can be used for a vegetarian twist.
-
Carrots (2, diced)
- Carrots add a pop of color and sweetness. Feel free to swap in any favorite veggies, like peas or green beans!
-
Celery (1 stalk, diced)
- For extra crunch! If you’re not a fan of celery, you can skip it or substitute it with bell peppers.
-
Olive Oil (2 tablespoons)
- Perfect for sautéing. You can also use butter, which adds a lovely richness!
-
Seasonings: Salt, Pepper, Thyme, and Paprika
- Basic but essential! Fresh herbs can add extra flair. Add red pepper flakes for a kick!
Step-by-Step Instructions
Alright, let’s dive into the cooking magic. Here’s how to whip up this comforting dish step-by-step:
-
Prepare Your Ingredients:
- First, gather all your ingredients and give them a quick wash and chop. There’s nothing worse than realizing halfway through cooking that you forgot to dice the onions!
-
Sauté the Vegetables:
- In a large skillet or Dutch oven, heat your olive oil over medium heat. Add in the diced onions and sauté for about 3-4 minutes, until they become translucent. Add the minced garlic and stir it in for another minute, letting that wonderful aroma fill your kitchen.
-
Brown the Ground Beef:
- Push the onions to one side of the skillet and add your ground beef. Break it up with a spatula as it cooks, about 5-7 minutes. You want it nicely browned! Don’t forget to season with salt, pepper, and a sprinkle of paprika while it’s cooking.
-
Add the Vegetables:
- Once the beef is cooked through, mix in the carrots, celery, and any other vegetables you choose to include. Stir everything together for a couple of minutes, letting the flavors mingle.
-
Deglaze the Pan:
- Pour in your beef broth, scraping the bottom of the pan to get all those tasty brown bits mixed in. This adds depth and richness to your dish.
-
Add the Potatoes:
- Now, toss in the diced potatoes. They’ll absorb all those flavors as they cook! Make sure to cover the pot and let it simmer over low heat for about 25-30 minutes. Check occasionally, giving it a good stir to prevent sticking.
-
Taste and Adjust:
- After about 25 minutes, taste your dish. This is the best part! You might want to add a bit more salt, pepper, or thyme to suit your preferences.
-
Serve:
- Once everything is tender, and the broth has thickened a bit, your Hearty Ground Beef and Potatoes are ready! If you fancy a garnish, sprinkle some fresh parsley on top before serving.
-
Clean Up:
- While everyone digs in, take a moment to appreciate the glorious mess in your kitchen—it’s part of the fun!
Serving Suggestions
This Hearty Ground Beef and Potatoes dish looks beautiful when served right from the pot. For a more elegant presentation, use a deep bowl, and garnish with freshly chopped parsley or even a sprinkle of cheese for added richness. Pair it with crusty bread or homemade biscuits to soak up every last drop of that delicious broth; trust me, it’s a game-changer!
Recipe Variations
If you’re feeling adventurous or need to cater to different dietary needs, here are a few fun twists:
- Swap Proteins: Use ground turkey, chicken, or even a plant-based meat substitute if you’re looking for vegetarian options.
- Herb It Up: Experiment with different herbs like rosemary, oregano, or even a pinch of fresh basil for a fragrant twist!
- Cheesy Delight: Add a handful of cheese such as cheddar or mozzarella in the last few minutes of cooking for a gooey, cheesy finish.
- Spicy Kick: If you love heat, add some diced jalapeños or a splash of hot sauce to really spice things up.
- One-Pot Wonder: Throw in some frozen veggies (like peas or corn) toward the end for added nutrition.
Chef’s Notes
This Hearty Ground Beef and Potatoes recipe has evolved a bit over the years. I started with my grandmother’s basic version, but along the way, I played around with spices, vegetable additions, and cooking methods. I’ve even made it in a slow cooker when I wanted a hands-free approach!
One of my favorite memories was when I decided to cook it for a surprise family gathering. Little did I know that one of my cousins was avoiding gluten. It was an honest mistake, but I learned to adapt quickly — that’s when I started experimenting with different broths and adding more veggies. In the end, it became a favorite for all my family to enjoy, gluten-free or not!
FAQs and Troubleshooting
1. Why is my dish too watery?
- If you find that your dish is too watery, try simmering it uncovered for a bit longer to allow the liquid to evaporate and thicken.
2. How can I make it gluten-free?
- Always check your beef broth for gluten content or opt for homemade broth. All other ingredients listed are gluten-free as long as they don’t have any additives.
3. Can I add other vegetables?
- Absolutely! Feel free to throw in some frozen peas, bell peppers, or even mushrooms, which can add delicious earthiness to the mix.
4. What do I do if my potatoes are still firm?
- If your potatoes aren’t cooking through, simply cover the pot again and let them simmer for a bit longer — patience is a virtue in cooking!
Nutritional Information
(Per serving – approximated)
- Calories: 380
- Protein: 27g
- Carbohydrates: 45g
- Fat: 12g
- Fiber: 5g
And there you have it, my dear food-loving friends! This Hearty Ground Beef and Potatoes recipe is more than just a meal; it’s a dish steeped in memories, shared stories, and love. So, gather your loved ones around the table; this dish is ready to fill not just bellies, but hearts too. Happy cooking and enjoy!
Print
Hearty Ground Beef and Potatoes
- Total Time: 45 minutes
- Yield: 4 servings 1x
- Diet: None
Description
A comforting classic that brings together savory ground beef and tender potatoes for a warm family meal.
Ingredients
- 1 lb Ground Beef (lean or extra-lean)
- 3–4 medium Potatoes (Yukon Gold or Russets)
- 1 medium Onion (diced)
- 2–3 cloves Garlic (minced)
- 1 cup Beef Broth
- 2 Carrots (diced)
- 1 stalk Celery (diced)
- 2 tablespoons Olive Oil
- Seasonings: Salt, Pepper, Thyme, and Paprika
Instructions
- Prepare your ingredients: Gather all your ingredients and give them a quick wash and chop.
- Sauté the vegetables: Heat olive oil in a large skillet or Dutch oven, add diced onions and sauté for 3-4 minutes. Add minced garlic and stir for another minute.
- Brown the ground beef: Push onions aside, add ground beef, and cook for 5-7 minutes until browned, seasoning with salt, pepper, and paprika.
- Add the vegetables: Mix in the diced carrots, celery, and any other vegetables, stirring together for a couple of minutes.
- Deglaze the pan: Pour in beef broth, scraping the bottom of the pan to mix in the flavorful bits.
- Add the potatoes: Toss in diced potatoes, cover, and let simmer over low heat for about 25-30 minutes.
- Taste and adjust: After 25 minutes, taste and adjust seasonings to your preference.
- Serve: Once everything is tender, serve the dish with a garnish of fresh parsley.
- Clean up: Enjoy your meal and appreciate the mess!
Notes
For added richness, sprinkle some cheese on top during the last minutes of cooking, or use crusty bread for soaking up the broth.
- Prep Time: 15 minutes
- Cook Time: 30 minutes
- Category: Main Course
- Method: Stovetop
- Cuisine: American
Nutrition
- Serving Size: 1 serving
- Calories: 380
- Sugar: 3g
- Sodium: 600mg
- Fat: 12g
- Saturated Fat: 4g
- Unsaturated Fat: 6g
- Trans Fat: 0g
- Carbohydrates: 45g
- Fiber: 5g
- Protein: 27g
- Cholesterol: 70mg
Keywords: beef, comfort food, potatoes, family dinner, hearty meal
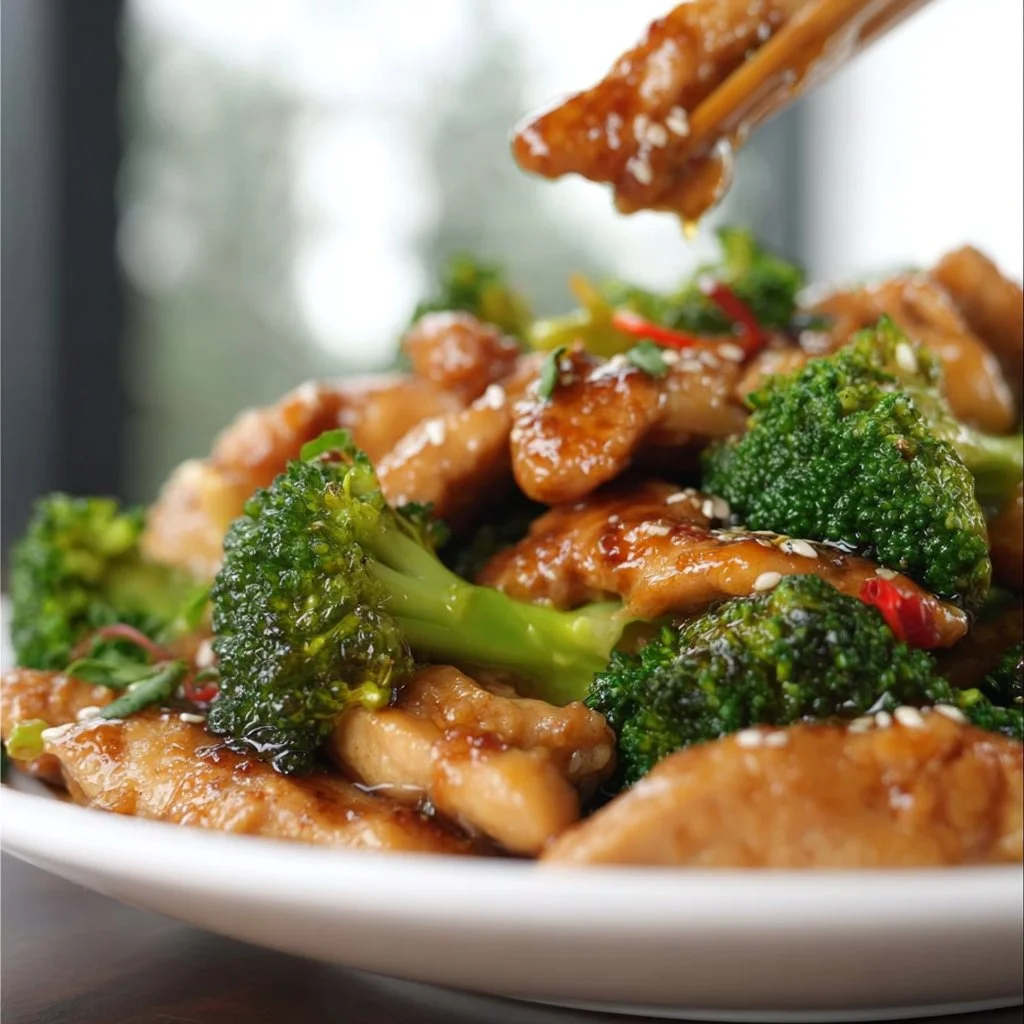
Chinese Chicken and Broccoli
Cozy in the Kitchen: My Take on Chinese Chicken and Broccoli
Welcome back to my kitchen, friends! Today, I’m excited to share a dish that holds a special place in my heart—Chinese Chicken and Broccoli. This classic stir-fry, packed with tender chicken, vibrant broccoli, and a mouthwatering sauce, is more than just a meal; it’s a blend of flavors that brings me back to my childhood. The tantalizing aroma fills the kitchen, and before you know it, you have a colorful dish that looks as good as it tastes. The bright greens and succulent chicken pieces also serve as a perfect reminder of how simple ingredients can come together to create something truly unforgettable.
I remember the first time I tasted this dish at a cozy little Chinese restaurant in my hometown. My family would gather around a round table, the lazy Susan spinning with plates of sizzling goodness. As the steam rose and the clatter of chopsticks filled the air, I felt a sense of belonging. It wasn’t just the food; it was the laughter, the shared stories, and the comforting feeling of home. Nowadays, I bring that same joy to my kitchen when I whip up this recipe, and I want to share that experience with you, dear friends.
So, whether you’re a seasoned home chef or just someone looking to spice up your dinner routine, grab your apron, and let’s dive into making this delightful dish. With a few fresh ingredients, a sprinkle of love, and a dash of excitement, you’ll have a meal that can impress anyone. Let’s get cooking!
Personal Story
Ah, the memories of family dinners—those priceless moments filled with laughter and the aroma of delicious food wafting through the air. I can vividly recall weekends spent at my parents’ house, where my mom would often make her version of Chinese Chicken and Broccoli. I’d happily perch on a barstool in our kitchen, watching her chop fresh vegetables and marinate the chicken in a soothing soy sauce blend, her magic touch transforming simple ingredients into a feast.
One specific evening stands out. The sun had set, and the lights were dim to create a cozy ambiance. My parents had invited a couple of their friends over, and I was buzzing with the excitement of being surrounded by adults—who, by the way, always seemed to find my youthful chatter amusing. Just as the laughter reached its peak, my mom’s creation made its grand entrance. The vibrant greens mingled with tender chicken pieces in a glowing, glossy sauce. As I took my first bite, my eyes widened in delight, and I remember thinking, “How could food taste so good?” That moment solidified my love for cooking and inspired me to gather family and friends around a table, sharing meals and memories just like my family did.
Whenever I make this dish, I close my eyes and am transported back to those warm, laughter-filled nights. Join me in celebrating the joy of cooking and the heartwarming experience of sharing meals with those we love!
Ingredients
To make a fantastic Chinese Chicken and Broccoli, you’ll need the following ingredients:
-
Chicken Breast (1 lb): Tender, juicy chicken is the star of this dish. Ideally, use boneless and skinless chicken breasts for ease. If you want a leaner option, turkey breast works well, too!
-
Broccoli (3 cups, cut into florets): Rich in vitamins and packed with crunch, fresh broccoli adds color and nutrition. If you’re not a fan, feel free to substitute with asparagus or snap peas for a delightful crunch!
-
Soy Sauce (½ cup): A staple in Asian cooking, this salty-sweet sauce will infuse your chicken and broccoli with delicious flavor. For a gluten-free alternative, try tamari or coconut aminos.
-
Garlic (3 cloves, minced): Fresh garlic adds a delightful aroma and depth of flavor. If you’re in a pinch, garlic powder can work, but fresh is always best!
-
Ginger (1 tablespoon, minced): The zesty, peppery notes of ginger elevate the dish. If fresh is hard to get, ground ginger can substitute, but start with half the amount.
-
Cornstarch (2 tablespoons): This acts as a thickening agent for the sauce, giving it that silky texture we love! If you prefer, arrowroot powder can also be used.
-
Chicken Broth (½ cup): For a rich flavor, low-sodium chicken broth keeps everything balanced; vegetable broth works just as well for a lighter option.
-
Sesame Oil (1 tablespoon): This oil imparts a lovely nutty flavor to the dish. You can use regular cooking oil, but sesame oil gives it that authentic taste.
-
Green Onions (for garnish): Chopped green onions add a fresh garnish, bringing the dish to life! Feel free to toss in some chopped nuts for an extra crunch if you like.
Step-by-Step Instructions
Ready to bring this dish to life? Let’s jump right into the cooking process!
-
Prepare Your Chicken:
- Start by cutting your chicken breast into bite-sized pieces. This way, they will cook quickly and make for easy eating. Don’t be afraid to get your hands in there; it’s all part of the fun!
Chef Tip: To tenderize the chicken and infuse it with flavor, marinate it in a mixture of soy sauce and minced ginger for at least 20 minutes. This little trick will elevate your dish and keep the chicken moist.
-
Cut Your Broccoli:
- While the chicken is marinating, prepare your broccoli. Rinse and cut it into florets. If you have thicker stems, peel and slice them to add to the stir-fry for extra texture!
-
Heat the Pan:
- In a wok or large skillet, heat your sesame oil over medium-high heat. Make sure it’s hot before adding the chicken. This will ensure a nice sear!
-
Cook the Chicken:
- Add the marinated chicken pieces to the sizzling pan in a single layer. Let them sear undisturbed for a few minutes until they turn golden brown. (The smell is heavenly!) After about 5-7 minutes, stir it up until cooked through.
Pro Tip: If you want to add a bit more depth of flavor, toss in a little of that minced garlic while the chicken is cooking.
-
Add Broccoli for a Sauté:
- Once the chicken is cooked, add the broccoli to the pan, followed by a splash of chicken broth. Cover the pan with a lid to steam the broccoli for about 3 minutes until bright green and crisp-tender.
-
Prepare the Sauce:
- While the chicken and broccoli are cooking, mix together the remaining soy sauce, minced garlic, ginger, cornstarch, and chicken broth in a bowl. This is your sauce, bringing everything together!
-
Combine the Mixtures:
- Once the broccoli is ready, pour the sauce over the chicken and broccoli. Stir well and cook for another 2-3 minutes until the sauce thickens. The vibrant color and aroma will make your taste buds tingle!
-
Final Touches:
- Give your stir-fry a taste. Need more salt? A dash of soy sauce. Want it spicier? Add a few red pepper flakes. Adjusting seasoning is key to personalizing your dish!
-
Plating Time:
- Serve the Chicken and Broccoli hot, garnished with sliced green onions. You can also drizzle a little sesame oil or sprinkle sesame seeds on top for a beautiful presentation.
Serving Suggestions
To serve your delicious Chinese Chicken and Broccoli, I recommend plating it over a bed of fluffy jasmine rice or alongside a mound of steamed rice noodles. You can sprinkle some sesame seeds for an elegant touch. If you’re feeling fancy, serve it in bowls with chopsticks for a delightful dining experience that transports you straight to a cozy Chinese restaurant!
Recipe Variations
Here are a few exciting ways to give this dish your own twist:
-
Spicy Szechuan Style: Add a splash of Szechuan chili oil or a teaspoon of chili paste for a spicy kick.
-
Lemon Zing: Squeeze fresh lemon juice over the stir-fried chicken before serving for a bright, zesty finish.
-
Added Veggies: Consider adding bell peppers, snap peas, or carrots to the mix for more vibrant color and flavor.
-
Teriyaki Twist: Swap out the soy sauce for teriyaki sauce for a sweeter, caramelized flavor that will awaken your taste buds.
-
Tofu Alternative: For a vegetarian option, replace the chicken with cubed firm tofu. Just make sure to press it to remove excess moisture for better texture.
Chef’s Notes
Every recipe carries its own story, and this one is no different. Over time, I’ve adapted it based on what’s seasonal, what ingredients I have on hand, and, of course, what my family enjoys most. There was one occasion I was rummaging through my pantry and decided to add a splash of orange juice to the sauce. Let me tell you, that little addition took this dish to a whole new level—who knew a burst of citrus could harmonize so beautifully with soy sauce?
Cooking should always be an adventure! Don’t be afraid to play around with flavors and ingredients. You’ll discover your signature twist on this recipe before you know it!
FAQs and Troubleshooting
Q: Can I make this dish ahead of time?
A: Absolutely! You can prepare it a day in advance and store it in the refrigerator. Just reheat gently on the stove. While leftovers are fun, remember that the broccoli might lose its vibrant crunch!
Q: My sauce is too thin. What did I do wrong?
A: If your sauce didn’t thicken up, ensure your cornstarch fully dissolved in the liquid before adding it to the pan. Remember, a vigorous stir can help activate that thickening agent!
Q: How do I store leftovers?
A: Place any leftovers in an airtight container and refrigerate for up to three days. Reheat on the stovetop and add a splash of water to keep it saucy!
Q: Can I freeze this dish?
A: While you can freeze chicken and broccoli stir-fry, it’s best to do so before cooking. For cooked versions, the texture might change, particularly with the broccoli. So, enjoy it fresh whenever possible!
Nutritional Info
(Approximate values per serving, assuming 4 servings):
- Calories: 380
- Protein: 30g
- Carbohydrates: 30g
- Fat: 15g
- Fiber: 5g
And voila! There you have it—my cozy take on Chinese Chicken and Broccoli. I hope this recipe inspires you to gather your loved ones around the table and share a meal filled with laughter and love. Happy cooking, friends, and don’t forget to savor each delicious bite! 🍽️
Print
Chinese Chicken and Broccoli
- Total Time: 35 minutes
- Yield: 4 servings 1x
- Diet: Gluten-Free
Description
A classic stir-fry dish featuring tender chicken, vibrant broccoli, and a mouthwatering soy sauce blend, reminiscent of family gatherings.
Ingredients
- 1 lb Chicken Breast, cut into bite-sized pieces
- 3 cups Broccoli, cut into florets
- ½ cup Soy Sauce
- 3 cloves Garlic, minced
- 1 tablespoon Ginger, minced
- 2 tablespoons Cornstarch
- ½ cup Chicken Broth
- 1 tablespoon Sesame Oil
- Green Onions, for garnish
Instructions
- Prepare your chicken by cutting it into bite-sized pieces.
- Marinate the chicken in a mixture of soy sauce and minced ginger for at least 20 minutes.
- Cut your broccoli into florets and prepare the stems for extra texture.
- Heat sesame oil in a wok or large skillet over medium-high heat.
- Cook the marinated chicken pieces until golden brown, about 5-7 minutes.
- Add broccoli and chicken broth to the pan, cover, and steam for about 3 minutes.
- Mix soy sauce, garlic, ginger, cornstarch, and chicken broth to prepare the sauce.
- Combine everything in the pan and cook for another 2-3 minutes until the sauce thickens.
- Serve hot, garnished with sliced green onions.
Notes
Serve over fluffy jasmine rice or alongside steamed rice noodles for a complete meal.
- Prep Time: 20 minutes
- Cook Time: 15 minutes
- Category: Main Course
- Method: Stir-Frying
- Cuisine: Chinese
Nutrition
- Serving Size: 1 serving
- Calories: 380
- Sugar: 5g
- Sodium: 900mg
- Fat: 15g
- Saturated Fat: 2g
- Unsaturated Fat: 10g
- Trans Fat: 0g
- Carbohydrates: 30g
- Fiber: 5g
- Protein: 30g
- Cholesterol: 90mg
Keywords: Chinese food, chicken stir-fry, broccoli recipe, comfort food, easy dinner
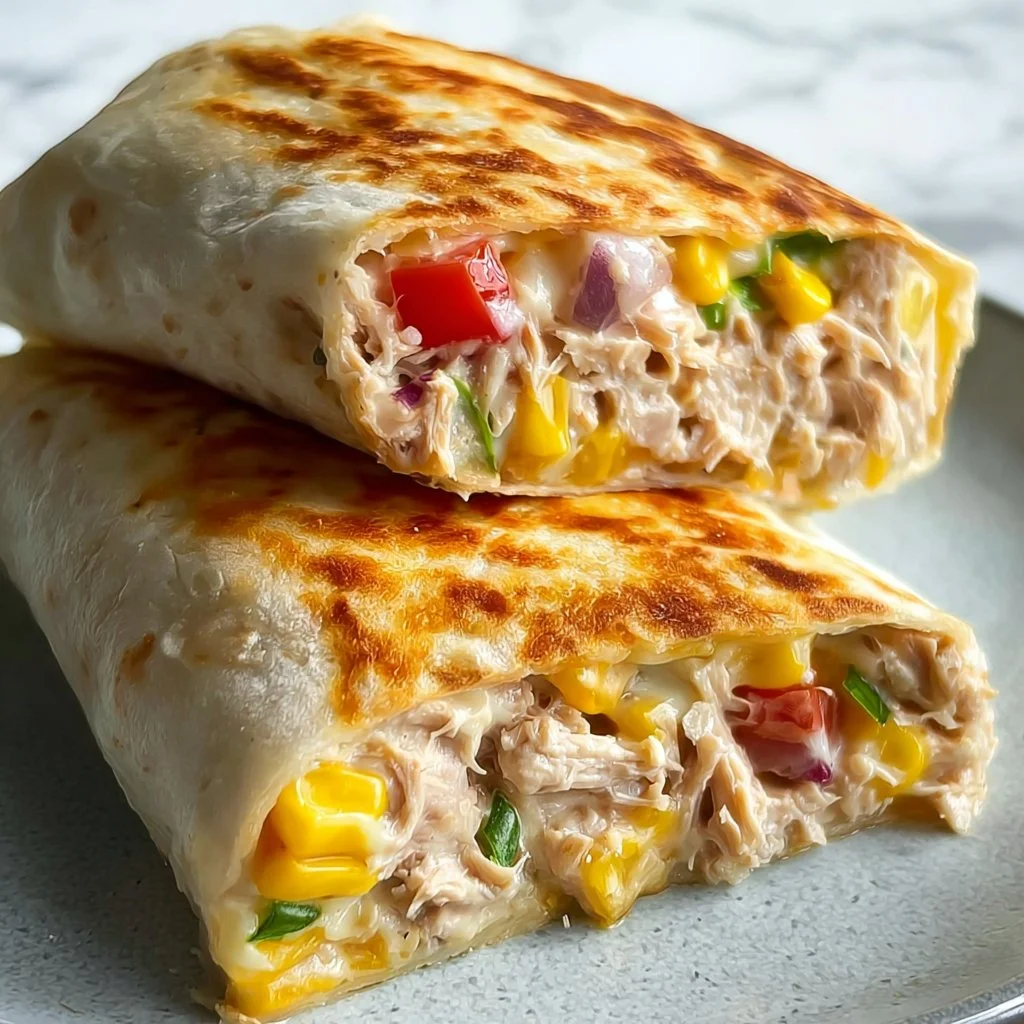
Tuna Melt Wrap
Tuna Melt Wrap: A Cozy Kitchen Favorite
Welcome back to my kitchen! Today, I’m excited to share a comfort food classic with a fun twist—the Tuna Melt Wrap. This delightful dish combines the nostalgic flavors of a traditional tuna melt with the convenience of a wrap, making it a perfect meal for those busy weeknights or laid-back weekends. Trust me—once you take a bite, you’ll be hooked!
There’s something undeniably comforting about a tuna melt. Think back to the times you spent with family, gathered around the table, sharing laughter and stories while indulging in that ooey-gooey cheesy goodness. For many of us, the tuna melt is a nostalgic hug on a plate. But as I dove deeper into my culinary adventures, I thought—why not take that classic and jazz it up? Enter the Tuna Melt Wrap!
This creation offers the same satisfying flavors you adore, but with an easy-to-eat twist. The wrap keeps everything together, minus the fuss of toasting bread. Plus, you can customize it to your heart’s content! Don’t fret if you’re not a master chef; the beauty of this dish lies in its simplicity.
Grab your apron, roll up your sleeves, and let’s make something delicious together.
Personal Story
Growing up, one of my fondest memories was returning home from school to the irresistible aroma wafting through the kitchen. My mom would often whip up her famous tuna melts, complete with crusty bread toasted to golden perfection and liberally doused in melty cheese. I can still picture the scene vividly: my sister and I, our backpacks tossed aside, eagerly waiting at the kitchen table for the first bites. To us, that dish was the pinnacle of comfort food.
One afternoon, she decided to experiment by turning our beloved tuna melt into something new. She carefully rolled up the classic filling in a tortilla and grilled it until golden brown. The first bite was an explosion of flavors—a warm blend of tuna, cheese, and all the fixings—but it felt so much more casual and fun! We dubbed it the “Tuna Melt Wrap,” and it quickly became a family staple.
Now, many years later, I’m excited to pass this easy-to-make, feel-good recipe on to you! This idea has evolved in my kitchen over time, and I can’t wait to share all those delightful twists with you.
Ingredients
Here’s what you’ll need for the Tuna Melt Wrap, along with a quick insight for each ingredient:
-
Canned Tuna: The star of the show! Use any good quality tuna, preferably packed in water for a leaner option. If you prefer, you can substitute with canned salmon or even chickpeas for a vegetarian twist.
-
Mayonnaise: This creamy goodness adds moisture and flavor to our filling. Light mayo works just as well if you’re looking for a slightly healthier option.
-
Cheese: A classic tuna melt calls for sharp cheddar, but feel free to experiment! Provolone, mozzarella, or even pepper jack can add unique flavor profiles.
-
Celery: Chopped celery brings in a satisfying crunch. If you’re not a fan, diced pickles or red onion are great alternatives for that necessary crunch factor.
-
Red Onion: A touch of red onion gives our filling an extra dimension of flavor. You can substitute with green onions for a milder taste.
-
Lettuce Leaves: These will help keep your wrap fresh and add some nice crunch. You can use romaine, spinach, or even arugula for a peppery kick.
-
Tortilla Wraps: Flour tortillas are the most common choice, but whole wheat or corn tortillas can work beautifully as well. For a gluten-free option, use your favorite gluten-free wrap.
-
Butter: This is for grilling the wrap to golden perfection. Olive oil can be used instead for a healthier approach.
Ingredients Summary:
- 1 can of tuna (substitute with canned salmon or chickpeas)
- 2-3 tablespoons mayonnaise (light mayo for a healthier option)
- 1 cup shredded cheese (try cheddar, mozzarella, or pepper jack)
- 1 celery stalk, chopped (diced pickles or red onion can be used instead)
- ¼ cup red onion, finely chopped (substitute with green onions for milder flavor)
- 2-3 lettuce leaves (romaine, spinach, or arugula)
- 2 large flour tortillas (whole wheat or gluten-free wraps are great too)
- 1 tablespoon butter (or olive oil for grilling)
Step-by-Step Instructions
-
Prep Your Tuna Filling: In a mixing bowl, combine one drained can of tuna and two to three tablespoons of mayonnaise. Adjust the amount according to your creaminess preference. Stir until the tuna is evenly coated.
Chef’s tip: For an extra punch of flavor, toss in a squeeze of lemon juice or a splash of Dijon mustard!
-
Add the Crunch: Next, add the chopped celery and red onion to your tuna mixture. Mix well so all those flavors marry beautifully.
Hack: Taste and adjust—feel free to add more onion for bite or even some capers for a briny flair.
-
Time for Cheese: Fold in one cup of shredded cheese into your tuna mixture. This is where the magic happens! Opt for sharp cheddar for a classic taste, or try pepper jack for a spicy twist.
Fun idea: Reserve a little cheese to sprinkle on top before grilling!
-
Build Your Wrap: Lay your tortillas flat, and spoon a generous amount of the tuna filling into the center of each tortilla. Top with a few lettuce leaves—these will keep the wrap fresh and add crunch.
-
Wrap It Up: Fold in the sides of the tortilla, then roll it up tightly from the bottom. Make sure there are no gaps—nobody wants a leaky wrap!
-
Grill Time: Heat a skillet over medium heat and add a tablespoon of butter. Once melted, place your wraps seam-side down in the pan. Cook for about 3-4 minutes until golden brown before carefully flipping and grilling the other side.
Pro tip: If you’re feeling fancy, press down gently with a spatula as they cook for perfectly crispy edges!
-
Slice and Shine: Once both sides are golden and the cheese has melted, remove the wraps from the skillet and let them cool for a minute before slicing them in half.
Chef’s note: Serve them warm—when that cheese starts oozing, it’s a glorious sight!
Serving Suggestions
Once you’ve sliced your Tuna Melt Wraps, you can serve them with a side of salty homemade chips or a fresh green salad for some balance. If you’re feeling generous, whip up a quick dipping sauce like a tangy ranch or a zesty sriracha mayo. Trust me, this combination is bound to impress your family and friends!
Recipe Variations
-
Mediterranean Twist: Add chopped olives and sun-dried tomatoes to the filling for a Mediterranean flair. Feta cheese can be a fun substitute for cheddar.
-
Buffalo Tuna Melt: Mix your tuna with some Buffalo sauce for a spicy kick. Top with crumbled blue cheese for extra flavor!
-
Veggie Delight: Add grated carrots and chopped bell peppers for more color and crunch. A sprinkle of smoked paprika can enhance the flavor!
-
Herbed Up: Incorporate fresh herbs like dill or parsley into the tuna mixture for a refreshing taste.
-
Avocado Tuna Melt: Swap out half of the mayonnaise for mashed avocado for a creamy, healthy spin!
Chef’s Notes
Creating this Tuna Melt Wrap has been one of those serendipitous moments in my culinary journey. What started as a simple craving for a classic tuna melt has transformed into a family favorite. Over time, I’ve experimented with all sorts of ingredients and flavors, and each time, I’m amazed by how versatile this dish can be.
One cooking mishap that stands out was when I accidentally omitted the cheese. Let’s just say that no matter how much I wanted to believe I could salvage it, a tuna-less tuna melt simply doesn’t hit the same! Embrace the spirit of trial and error in the kitchen, and feel free to make this recipe your own. Cooking should be an adventure, not a chore!
FAQs and Troubleshooting
Q1: My wrap fell apart during grilling. What did I do wrong?
- It’s essential to roll your wrap tightly and ensure you pinch the sides closed. If necessary, wrap it in foil while it grills to help hold its shape.
Q2: Can I make the filling ahead of time?
- Absolutely! The tuna filling can be made up to 24 hours in advance. Just keep it stored in an airtight container in the fridge and wrap up your tortillas when you’re ready to enjoy!
Q3: How do I prevent my tortilla from getting soggy?
- Layering a few lettuce leaves directly on the tortilla helps create a barrier, preventing moisture from the filling from soaking through.
Q4: Can I freeze the Tuna Melt Wraps?
- While it’s possible to freeze them, I recommend preparing them fresh for the best flavor and texture. If you do freeze them, wrap them tightly in plastic wrap and then place them in a freezer bag.
Nutritional Info
While the nutritional info will vary depending on the specific brands and quantities of ingredients you use, approximately one Tuna Melt Wrap (without any sides) could be around 400-500 calories, depending on the cheese and mayo. Packed with protein from the tuna and healthy fats, it’s a satisfying meal that won’t leave you feeling sluggish!
And there you have it—your very own Tuna Melt Wrap! I hope this recipe brings the same warmth and joy to your kitchen as it has in mine. Be sure to reach out and let me know how your wraps turned out or if you discovered any exciting variations. Happy cooking, my friends! 🍽️
Print
Tuna Melt Wrap
- Total Time: 18 minutes
- Yield: 2 servings 1x
- Diet: Pescatarian
Description
A comforting twist on the classic tuna melt, rolled up in a delicious wrap for easy eating.
Ingredients
- 1 can of tuna (substitute with canned salmon or chickpeas)
- 2–3 tablespoons mayonnaise (light mayo for a healthier option)
- 1 cup shredded cheese (try cheddar, mozzarella, or pepper jack)
- 1 celery stalk, chopped (diced pickles or red onion can be used instead)
- ¼ cup red onion, finely chopped (substitute with green onions for milder flavor)
- 2–3 lettuce leaves (romaine, spinach, or arugula)
- 2 large flour tortillas (whole wheat or gluten-free wraps are great too)
- 1 tablespoon butter (or olive oil for grilling)
Instructions
- Prep your tuna filling: In a mixing bowl, combine one drained can of tuna and two to three tablespoons of mayonnaise. Stir until evenly coated.
- Add the chopped celery and red onion to your tuna mixture. Mix well.
- Fold in one cup of shredded cheese into your tuna mixture.
- Lay your tortillas flat, and spoon a generous amount of the tuna filling into the center of each tortilla. Top with lettuce leaves.
- Fold in the sides of the tortilla, then roll it up tightly from the bottom.
- Heat a skillet over medium heat and add a tablespoon of butter. Place wraps seam-side down in the pan. Cook for about 3-4 minutes until golden brown before flipping and grilling the other side.
- Remove the wraps from the skillet and let them cool for a minute before slicing them in half.
Notes
Serve with homemade chips or a fresh salad. Dipping sauces like ranch or sriracha mayo complement the wraps perfectly.
- Prep Time: 10 minutes
- Cook Time: 8 minutes
- Category: Main Course
- Method: Grilling
- Cuisine: American
Nutrition
- Serving Size: 1 wrap
- Calories: 450
- Sugar: 3g
- Sodium: 600mg
- Fat: 18g
- Saturated Fat: 7g
- Unsaturated Fat: 9g
- Trans Fat: 0g
- Carbohydrates: 44g
- Fiber: 3g
- Protein: 25g
- Cholesterol: 40mg
Keywords: tuna melt, wrap, comfort food, easy recipe, family favorite
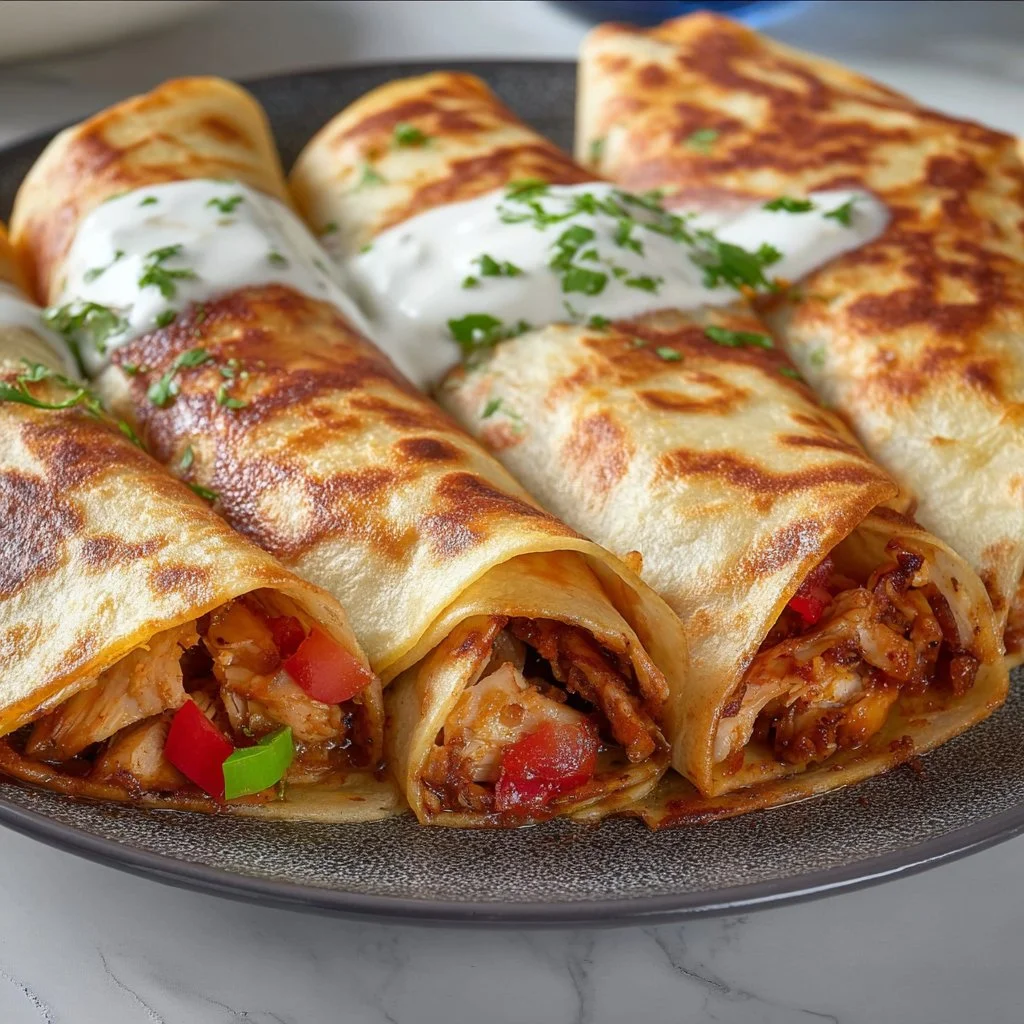
Chicken Crepes Shawarma
Indulge in Flavor: Chicken Crepes Shawarma Recipe
Hey there, fellow food lover! Welcome back to my cozy kitchen where delicious ideas simmer, and delightful aromas waft through the air. Today, we’re diving into a dish that marries my love for savory flavors with the comforting touch of homemade warmth: Chicken Crepes Shawarma. Just the thought of tender, marinated chicken wrapped in soft, buttery crepes makes my heart flutter and my stomach rumble!
You might be asking, "What’s so special about chicken crepes and shawarma?" Well, let me tell you — this dish is a dream come true for anyone who loves the bold and aromatic spices of Middle Eastern cuisine, yet craves the comforting satisfaction of a classic crepe. Imagine your taste buds being taken on a little vacation, where spices dance and flavors harmonize in each bite.
But what really makes this meal shine for me is the way it brings people together. Whether it’s a family gathering, a cozy evening with friends, or just a solo night in to treat yourself, these crepes are the perfect vessel for sharing stories, laughter, and, of course, scrumptious bites. So, grab your apron and an adventurous spirit, and let’s get cooking with this all-time favorite!
Personal Story
Growing up, I always had a love affair with my family’s kitchen. I remember one winter evening when my mom decided to surprise us with a Middle Eastern feast. The delicious smell of spices simmering on the stovetop filled our home as we gathered around the table, buzzing with anticipation. My mom had perfected her shawarma recipe over the years, and that night, she decided to take it a step further by serving it in freshly made crepes.
Our laughter echoed as we filled our crepes with tender chicken, fresh veggies, and tangy sauces, creating our own little wraps. It was more than just a meal; it was a moment of connection, an experience where cooking became part of our family ritual. That night sparked my passion for blending cultures, experimenting with flavors, and making food that creates lasting memories. So trust me when I say that with this Chicken Crepes Shawarma recipe, you’re not just making a meal; you’re crafting memories to savor!
Ingredients
Let’s gather our goodies! Here’s what you need to create Chicken Crepes Shawarma:
For the Chicken Shawarma:
- 1 lb boneless, skinless chicken thighs: Juicy and flavorful, chicken thighs hold up well against spices. If you prefer, swap them for chicken breasts, but remember to adjust cooking times for juiciness.
- 2 tablespoons olive oil: A lovely addition for flavor and moisture. Feel free to substitute with avocado oil for a different taste or for a higher smoke point.
- 3 cloves garlic, minced: Garlic brings a robust flavor. If you’re in a pinch, garlic powder will work, but fresh really packs a punch!
- 1 teaspoon ground cumin: Adds a warm earthiness. Try coriander for a citrusy twist, or smoked paprika for a unique flavor profile.
- 1 teaspoon ground cinnamon: It may sound unconventional, but it adds warmth! You can replace it with nutmeg for a slightly different flavor.
- 1 tablespoon ground turmeric: Celebrated for its vibrant color and health benefits, you can substitute with curry powder for a more complex flavor.
- 1 teaspoon cayenne pepper: For spice lovers, this adds heat! Reduce or omit if you prefer something milder.
- Salt and black pepper, to taste: Essential for balancing flavors; don’t shy away from seasoning well.
For the Crepes:
- 1 cup all-purpose flour: The base of our crepes! You can use whole wheat flour for a healthier twist.
- 2 large eggs: These provide structure and richness. For a vegan option, use flax eggs (1 tablespoon of flaxseed meal mixed with 2.5 tablespoons of water per egg).
- 1.5 cups milk: Whole milk lends creaminess, but any milk (dairy or plant-based) works just fine.
- 1 tablespoon melted butter or oil: This keeps the crepes from sticking. If you want to keep it dairy-free, use coconut oil or canola oil.
For the Toppings:
- Lettuce, shredded: Adds fresh crunch! Spinach or arugula can also be fun alternatives.
- Tomatoes, diced: Juicy and fresh. Feel free to include cucumbers or bell peppers for crunch.
- Cucumber, sliced: For a refreshing bite. You can also opt for pickled cucumbers for a tangy flair.
- Tahini sauce or garlic yogurt sauce: For creaminess and flavor, these sauces make the dish sing! A drizzle of hot sauce wouldn’t hurt either.
Step-by-Step Instructions
1. Marinate the Chicken
Let’s start with that mouthwatering chicken! In a mixing bowl, combine the olive oil, minced garlic, cumin, cinnamon, turmeric, cayenne pepper, salt, and black pepper. Whisk until well blended, then add the chicken thighs. Toss them until each piece is well coated and let it marinate for at least 30 minutes — the longer, the better! If you can let it sit in the fridge overnight, do it; the flavors intensify as it soaks up all that deliciousness.
2. Prepare the Crepe Batter
While the chicken is marinating, let’s whip up those crepes! In another bowl, whisk together the all-purpose flour, eggs, and milk. Keep whisking until you have a smooth batter. If it feels too thick, just add a splash more milk. Let the batter sit for about 10-15 minutes — this helps the gluten relax, and your crepes will turn out all the more tender!
3. Cook the Chicken
Heat a skillet over medium-high heat. Once hot, add the marinated chicken thighs. Cook for about 6-7 minutes on each side, or until they are fully cooked and nicely browned. If you have a meat thermometer handy, the internal temperature should reach 165°F (75°C). Remove the chicken from the skillet and allow it to rest for a few minutes before slicing it into thin strips.
4. Make the Crepes
In the same skillet (don’t wash it, you want those flavors!), reduce the heat to medium-low. Brush the skillet with a bit of oil or melted butter, then pour a ladleful of crepe batter. Swirl the pan to spread the batter evenly. Cook for about 2-3 minutes, or until the edges start to lift and the bottom is lightly browned. Flip and cook for an additional 1-2 minutes. Repeat this with the remaining batter, stacking the cooked crepes on a plate.
5. Assemble Your Crepes
Now comes the fun part! Take a crepe and layer your sliced chicken down the center. Top it with shredded lettuce, diced tomatoes, cucumber slices, and a generous drizzle of tahini sauce or garlic yogurt sauce.
6. Roll It Up
Fold in the sides of the crepe and roll it up tightly, like a cozy little package! You can secure it with a toothpick if you like, or just place the seam side down on a plate.
Serving Suggestions
For a beautiful presentation, serve your Chicken Crepes Shawarma wrapped on a wooden board with small bowls of extra sauces and toppings alongside! Feel free to add a sprinkle of fresh herbs like parsley or cilantro on top for a pop of color. A side of crispy sweet potato fries or a light, refreshing salad would complement these crepes beautifully – it’s all about making it a feast!
Recipe Variations
- Spicy Vegan Option: Replace chicken with marinated grilled tempeh or tofu, and swap the milk in the crepe recipe for a plant-based alternative.
- Add some zest: Incorporate lemon zest into your crepe batter for a burst of freshness!
- Herb-Infused Crepes: Mix in finely chopped fresh herbs (like parsley or chives) into the crepe batter for an aromatic twist.
- Rich & Creamy: Stuff crepes with a simple mixture of ricotta cheese, spinach, and some spices before folding them up.
- Sweet Twist: Dust the cooked crepes with powdered sugar and serve with fruit for a delightful dessert!
Chef’s Notes
This Chicken Crepes Shawarma recipe has evolved over the years, much like my culinary journey. I initially started with simple flavors and techniques, but as I dove deeper into cooking, I discovered that there’s magic in blending them. Every time I make these crepes, I can’t help but smile remembering family gatherings and the joy of sharing good food with loved ones. Pro tip: don’t stress about perfection! The best meals are always made with a pinch of love and a sprinkle of laughter.
FAQs and Troubleshooting
Q1: My crepes are tearing when I flip them. What am I doing wrong?
A: It sounds like your crepe batter might be too thick, or the pan might not be hot enough. Ensure your batter is smooth, and give the skillet a minute to get to the right temperature before pouring in your batter.
Q2: Can I prepare the chicken ahead of time?
A: Absolutely! You can marinate the chicken the night before and even cook it up to a day in advance. Just store it in an airtight container in the fridge and warm it gently before assembling your crepes.
Q3: What if I don’t have all the spices listed?
A: Don’t sweat it! You can experiment with whatever spices you have on hand. A good all-purpose seasoning or even a simple blend of paprika, garlic powder, and black pepper can work wonders.
Q4: Can I freeze the crepes?
A: Yes, you can! Layer your cooled crepes between sheets of parchment paper and store them in a freezer-safe bag for up to three months. Thaw them in the fridge and warm them up in a skillet when you’re ready to use them!
Nutritional Info (if applicable)
This recipe is not only delicious but also packed with protein and flavor! Each serving (1 crepe with chicken and toppings) contains approximately:
- Calories: 320
- Protein: 25g
- Carbohydrates: 30g
- Fat: 10g (varies based on toppings)
So, are you ready to whip up these irresistible Chicken Crepes Shawarma? I can’t wait for you to share in the joy of cooking these flavorful bundles of happiness! Let’s gather our family and friends and create some tasty memories together! Happy cooking, everyone!
Print
Chicken Crepes Shawarma
- Total Time: 60 minutes
- Yield: 4 servings 1x
- Diet: Accepts Meat
Description
A delightful fusion of savory chicken shawarma wrapped in soft, buttery crepes, perfect for gatherings or a cozy night in.
Ingredients
- 1 lb boneless, skinless chicken thighs
- 2 tablespoons olive oil
- 3 cloves garlic, minced
- 1 teaspoon ground cumin
- 1 teaspoon ground cinnamon
- 1 tablespoon ground turmeric
- 1 teaspoon cayenne pepper
- Salt and black pepper, to taste
- 1 cup all-purpose flour
- 2 large eggs
- 1.5 cups milk
- 1 tablespoon melted butter or oil
- Lettuce, shredded
- Tomatoes, diced
- Cucumber, sliced
- Tahini sauce or garlic yogurt sauce
Instructions
- Marinate the Chicken: In a mixing bowl, combine the olive oil, minced garlic, cumin, cinnamon, turmeric, cayenne pepper, salt, and black pepper. Whisk until well blended, then add the chicken thighs. Toss until well coated and let it marinate for at least 30 minutes.
- Prepare the Crepe Batter: In another bowl, whisk together the all-purpose flour, eggs, and milk until smooth. Let the batter sit for about 10-15 minutes.
- Cook the Chicken: Heat a skillet over medium-high heat. Add the marinated chicken thighs and cook for about 6-7 minutes on each side, until fully cooked and browned. Remove and let it rest before slicing.
- Make the Crepes: In the same skillet, reduce heat to medium-low. Brush with oil or melted butter, pour a ladleful of crepe batter, and cook until lightly browned. Repeat with remaining batter.
- Assemble Your Crepes: Take a crepe, layer sliced chicken and toppings, and drizzle with sauce.
- Roll It Up: Fold in the sides and roll up tightly, securing with a toothpick if desired.
Notes
Serve with extra sauces and toppings for a beautiful presentation.
- Prep Time: 30 minutes
- Cook Time: 30 minutes
- Category: Main Course
- Method: Cooking and Baking
- Cuisine: Middle Eastern
Nutrition
- Serving Size: 1 serving
- Calories: 350
- Sugar: 3g
- Sodium: 450mg
- Fat: 12g
- Saturated Fat: 3g
- Unsaturated Fat: 9g
- Trans Fat: 0g
- Carbohydrates: 45g
- Fiber: 2g
- Protein: 25g
- Cholesterol: 100mg
Keywords: Chicken Shawarma, Crepes, Middle Eastern Cuisine, Comfort Food, Easy Dinner
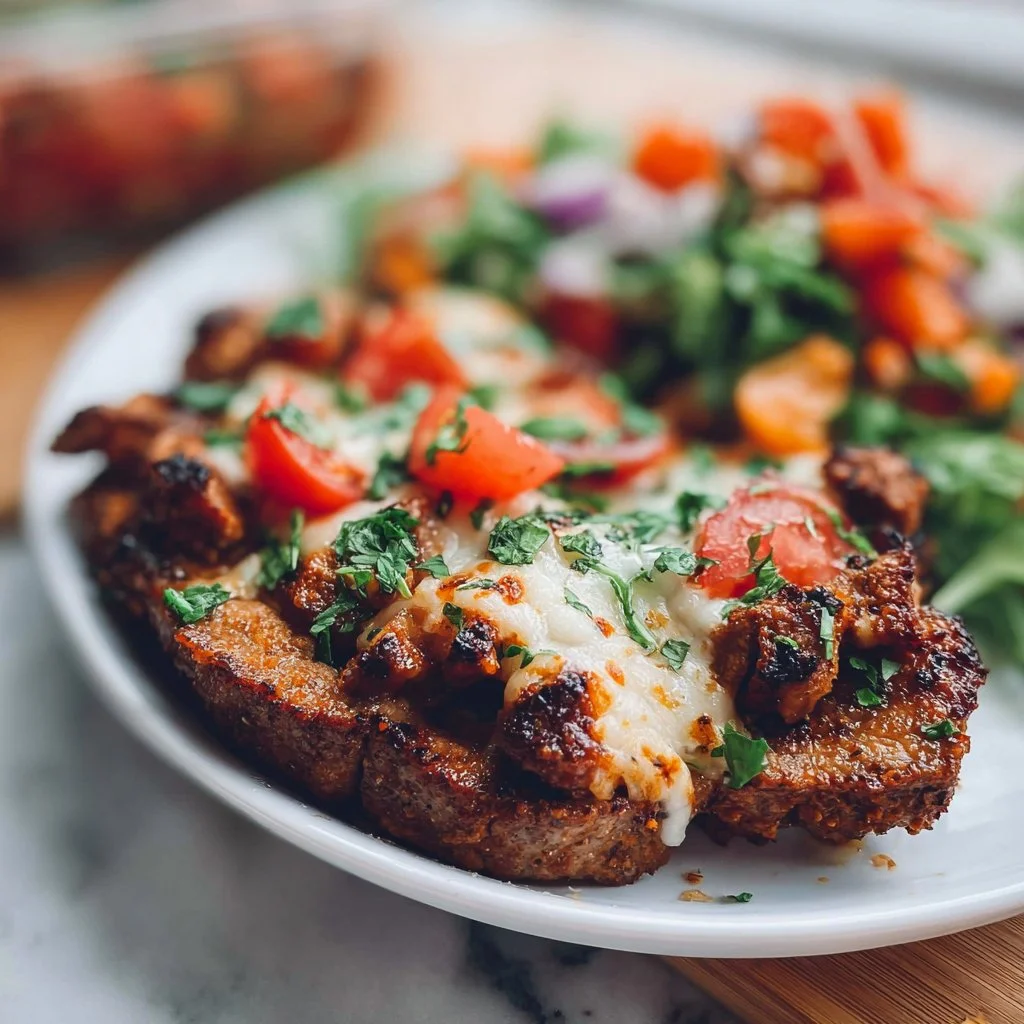
Protein Meal Prep
Ultimate Guide to Protein Meal Prep: Delicious Recipes and Tips to Fuel Your Week
Welcome to my kitchen! I’m so thrilled you’ve decided to join me on this culinary adventure. Today, we’re diving into the world of protein meal prep—a wonderful way to set yourself up for a week of tasty, nourishing meals. Let’s be real, life gets busy, and it’s all too easy to lose sight of healthy eating when you’re juggling work, family, and everything in between. But fear not. With a little planning and some fun recipes, we can keep those cravings at bay and ensure your meals are packed with flavor.
Imagine this: it’s Monday morning, and instead of rushing out the door with only a granola bar in hand, you open your fridge to find beautiful containers filled with mouthwatering, protein-rich meals. Each bite is an explosion of flavor and the simple knowledge that you’ve nourished yourself well. Meal prep is a total game-changer!
In this guide, we’ll explore delicious recipes that are perfect for meal prepping, along with tips, tricks, and personal stories to make this experience enjoyable and stress-free. So grab your apron, and let’s create some magic in the kitchen!
A Personal Story of Meal Prep
I vividly remember my college days when I was juggling classes, part-time jobs, and the relentless quest for a balanced diet. My diet consisted mostly of instant noodles and late-night snacks. One day, out of sheer desperation for something wholesome, I stumbled upon meal prepping. I spent an entire Sunday afternoon in my tiny kitchen, chopping veggies, marinating chicken, and cooking grains. The first week I followed this meal prep plan, I felt like a superhero! No more 3 PM slumps or overpriced takeout!
One recipe in particular stood out: my zesty lemon garlic chicken with quinoa. It was so simple yet packed with flavor, and it felt like a real win. I started sharing my meal prep secrets with friends, and we would often swap containers for lunch. That little ritual created a bond over good food and turned into a cherished part of my weekly routine. Fast forward to today, and I’m here, excited to share these tips and recipes with you!
Ingredients You’ll Need for Protein Meal Prep
For Zesty Lemon Garlic Chicken with Quinoa
-
Chicken Breasts: A lean source of protein that’s incredibly versatile. You can also substitute with turkey, tofu, or chickpeas for a vegetarian option.
-
Quinoa: A gluten-free grain packed with protein and fiber. Feel free to swap it with brown rice, farro, or even cauliflower rice if you’re looking to cut carbs.
-
Olive Oil: Adds richness and aids in cooking. Avocado oil or coconut oil work great here too.
-
Garlic: Fresh garlic provides an aromatic punch. If you’re in a pinch, garlic powder is an acceptable substitute (1/8 tsp = 1 clove).
-
Lemon Juice: Freshly squeezed lemon juice brightens the dish. Lime juice or vinegar can provide the necessary acidity, but nothing beats the freshness of lemon.
-
Spices (Paprika, Oregano, Salt, Pepper): These enhance the flavor profile. Don’t be afraid to get creative—try adding cumin or chili powder for a kick!
For the Veggie Medley
-
Bell Peppers: They come in various colors and add a sweet, crunchy texture. Feel free to swap these for zucchini, asparagus, or broccoli.
-
Red Onion: Adds sweetness and depth. Yellow or white onions can also work well.
-
Spinach: Nutrient-dense and cooks down quickly. If spinach isn’t your thing, try kale or Swiss chard!
Optional Toppings
-
Feta Cheese: For added creaminess and flavor—omit for a dairy-free dish or use nutritional yeast for a cheesy flavor.
-
Chopped Fresh Herbs (Parsley, Cilantro): Brightens up the dish beautifully. Basil or thyme would also be delightful.
Step-by-Step Instructions
Step 1: Marinate the Chicken
-
In a bowl, combine olive oil, minced garlic, lemon juice, paprika, oregano, salt, and pepper. Mix well until combined.
-
Place your chicken breasts in a zip-top bag and add the marinade. Seal it tightly and massage the chicken to fully coat. Allow to marinate for at least 30 minutes (or up to overnight in the fridge for maximum flavor).
Chef’s Tip: The longer the chicken marinates, the juicier and more flavorful it will be. If you’re tight on time, a quick 30 minutes works too!
Step 2: Prepare the Quinoa
-
Rinse 1 cup of quinoa under cold water, then combine with 2 cups of water in a pot.
-
Bring it to a boil, then reduce the heat to low, cover, and simmer for about 15 minutes, or until the water is absorbed and quinoa is fluffy.
Chef’s Insight: To amp up the flavor, cook quinoa in vegetable or chicken broth instead of water!
Step 3: Cook the Chicken
-
Preheat your grill or skillet to medium-high heat. Remove chicken from marinate (discard excess).
-
Grill or cook on each side for about 6-7 minutes until cooked through and juices run clear. The internal temperature should reach 165°F (75°C).
Chef’s Hack: If you’re grilling, don’t flip your chicken too soon! Aim for golden grill marks before turning for that perfect sear.
Step 4: Sauté the Veggie Medley
-
In another pan, heat a little olive oil over medium heat.
-
Add diced bell peppers and red onion, sauté for about 5-7 minutes until they’re tender.
-
Toss in fresh spinach at the end and cook until wilted.
Chef’s Tip: Don’t overcrowd the pan—it can cause your veggies to steam rather than sauté properly. Work in batches if necessary!
Step 5: Assemble Your Meal Prep Containers
-
Start with a scoop of quinoa on the bottom of each container.
-
Next, add sliced chicken on top followed by the sautéed veggies.
-
If you’re adding feta or herbs, sprinkle them on top before sealing containers.
Serving Suggestion: Pack your meal prep within clear containers, so you can see those vibrant colors—it makes everything feel more enticing!
Recipe Variations
-
Mediterranean Twist: Add olives and cherry tomatoes to the veggie medley; swap feta for goat cheese.
-
Asian-Inspired: Use sesame oil instead of olive oil, replace quinoa with brown rice, and add soy sauce, ginger, and sesame seeds for an umami-packed dish.
-
Spicy Mexican Vibe: Season the chicken with chili powder and cumin, and top with avocado and pico de gallo once plated.
-
Vegetarian Option: Replace chicken with marinated tofu or tempeh, follow the same seasoning process, and add kidney beans or black beans for protein.
Chef’s Notes
When I first started meal prepping, I quickly realized that it’s not just about saving time; it’s also a creative outlet! Playing around with flavors, colors, and textures has led to some of my fondest kitchen memories, like hosting friends for a weekly meal prep session. We’d mix and match our container contents and have a blast doing it. Meal prep has grown from just a means to eat well into a social experience that I treasure.
As I’ve expanded my recipe repertoire over the years, I’ve noticed that some of my go-to meals evolve. Ingredients vary with the seasons, and that’s part of the beauty of cooking—it keeps things fresh and exciting!
FAQs and Troubleshooting
1. How long can I store my meal prep in the fridge?
You can store your meal prep in airtight containers for up to 4-5 days in the fridge. After that, it’s time for a freezer detour!
2. Can I freeze these meals?
Absolutely! You can freeze these meals for up to 2-3 months. Just make sure to use freezer-safe containers or bags to prevent freezer burn.
3. Why is my chicken dry?
Overcooking is usually the culprit! Always recommend using a meat thermometer to ensure it’s just cooked through. Also, marinating cuts down on the dryness by keeping the chicken juicy.
4. Can I switch out the proteins?
Totally! Feel free to swap chicken for any protein you prefer—most cook similarly as long as you adjust cooking times. For vegetarian options, keep an eye on your cooking times!
Nutritional Info
While I generally encourage you to focus on enjoying your food, here’s a rough breakdown of what you’re getting with each serving of this meal prep:
- Calories: 400-450 (varies based on portions)
- Protein: 30-35g
- Carbohydrates: 40g
- Fat: 15g
- Fiber: 7-8g
If you follow these steps, not only will you set yourself up for success this week, but you’ll also enjoy every delicious bite along the way. Remember, cooking should be fun, fulfilling, and a bit messy (apron stains are a badge of honor!). So roll up your sleeves, unleash your inner chef, and make this meal prep your best decision yet, right here in your cozy kitchen. Happy cooking, my friends!
Print
Zesty Lemon Garlic Chicken with Quinoa
- Total Time: 55 minutes
- Yield: 4 servings 1x
- Diet: High Protein
Description
A flavorful and protein-packed meal prep recipe featuring marinated chicken breasts served with quinoa and sautéed vegetables.
Ingredients
- 2 Chicken Breasts
- 1 cup Quinoa
- 2 tbsp Olive Oil
- 3 cloves Garlic, minced
- 3 tbsp Lemon Juice
- 1 tsp Paprika
- 1 tsp Oregano
- Salt and Pepper to taste
- 1 Bell Pepper, diced
- 1 Red Onion, diced
- 2 cups Spinach
- Feta Cheese, optional
- Chopped Fresh Herbs, optional
Instructions
- Marinate the Chicken: In a bowl, combine olive oil, minced garlic, lemon juice, paprika, oregano, salt, and pepper. Mix well until combined. Place your chicken breasts in a zip-top bag and add the marinade. Seal it tightly and massage the chicken to fully coat. Allow to marinate for at least 30 minutes (or up to overnight in the fridge for maximum flavor).
- Prepare the Quinoa: Rinse 1 cup of quinoa under cold water, then combine with 2 cups of water in a pot. Bring it to a boil, then reduce the heat to low, cover, and simmer for about 15 minutes, or until the water is absorbed and quinoa is fluffy.
- Cook the Chicken: Preheat your grill or skillet to medium-high heat. Remove chicken from marinade (discard excess). Grill or cook on each side for about 6-7 minutes until cooked through and juices run clear. The internal temperature should reach 165°F (75°C).
- Sauté the Veggie Medley: In another pan, heat a little olive oil over medium heat. Add diced bell peppers and red onion, sauté for about 5-7 minutes until they’re tender. Toss in fresh spinach at the end and cook until wilted.
- Assemble Your Meal Prep Containers: Start with a scoop of quinoa on the bottom of each container. Next, add sliced chicken on top followed by the sautéed veggies. If you’re adding feta or herbs, sprinkle them on top before sealing containers.
Notes
You can store your meal prep in airtight containers for up to 4-5 days in the fridge. Feel free to freeze these meals for up to 2-3 months.
- Prep Time: 30 minutes
- Cook Time: 25 minutes
- Category: Main Course
- Method: Grilling
- Cuisine: Mediterranean
Nutrition
- Serving Size: 1 serving
- Calories: 425
- Sugar: 3g
- Sodium: 300mg
- Fat: 15g
- Saturated Fat: 3g
- Unsaturated Fat: 9g
- Trans Fat: 0g
- Carbohydrates: 45g
- Fiber: 7g
- Protein: 35g
- Cholesterol: 80mg
Keywords: meal prep, chicken, quinoa, healthy, Mediterranean
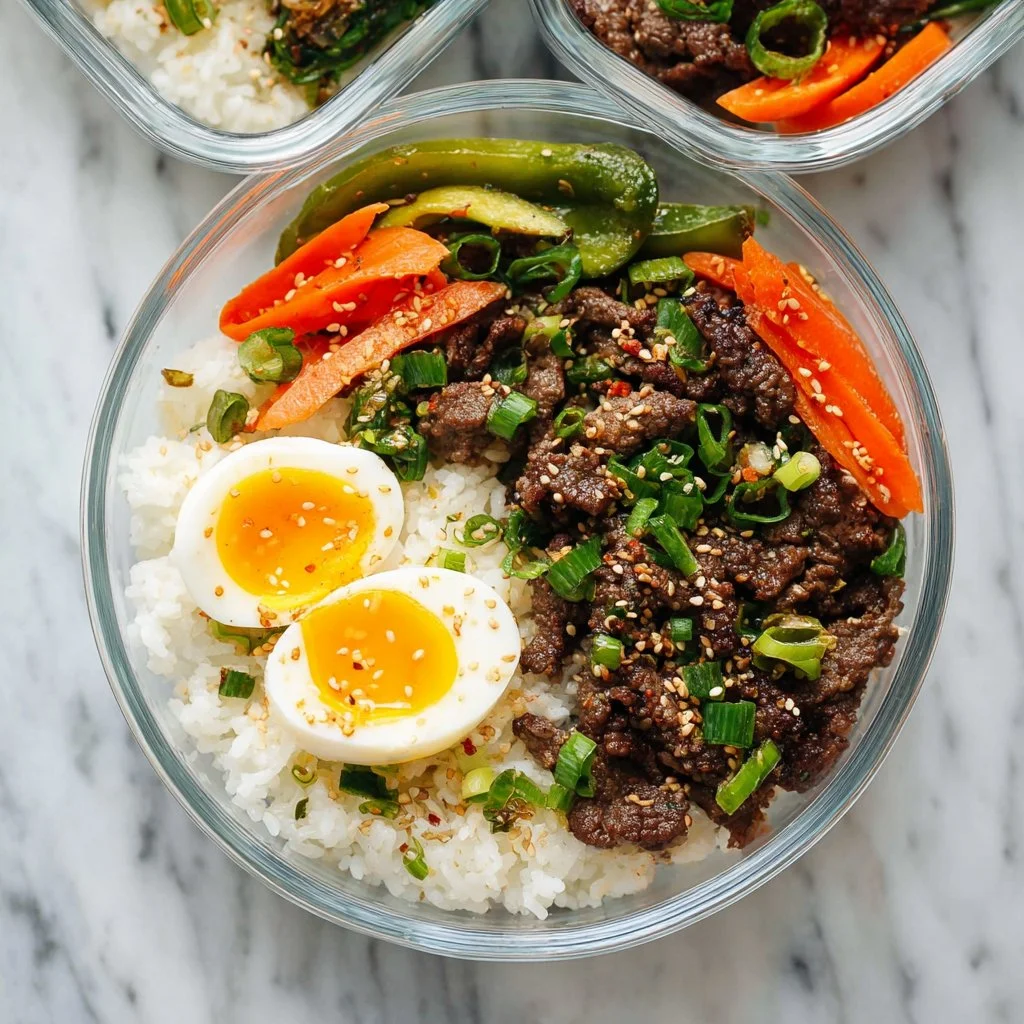
How To Meal Prep – Korean Beef Bowl
How to Meal Prep: Korean Beef Bowl Recipe
Welcome back to my kitchen, foodie friends! Today, we’re diving into the vibrant, savory world of Korean cuisine with a dish that’s not only mouth-watering but also incredibly easy to meal prep: the Korean Beef Bowl! If you’ve ever craved a delightful mix of tender beef, aromatic garlic, and colorful veggies, then you’re in for a treat. As you know, I’m all about simplifying the cooking process while maximizing flavor and comfort, and this recipe does exactly that.
Korean Beef Bowl is one of those dishes that’s perfect for a busy weeknight or when you want to meal prep for the week ahead. With rich flavors and wholesome ingredients, it satisfies cravings without the hassle. Plus, it’s an absolute crowd-pleaser—whether you’re cooking for the family or bringing dishes to share with friends. Trust me; even the pickiest eaters will devour this!
When I first experimented with this recipe years ago, I was inspired by a cozy evening spent sharing dinner with friends after a long week. The atmosphere was warm; our laughter echoed around the room, and the enticing aroma of bulgogi-style beef filled the air. I remember we had it piled high over fluffy rice, topped with crunchy vegetables and a drizzle of spicy sauce—yes, I’m salivating just thinking about it! That night sparked a love affair with Korean flavors, and since then, I’ve adapted it to fit my meal-prepping lifestyle. Join me on this flavorful journey, and let’s get cooking together!
Personal Story
Ah, the memories! I’ll never forget the first time I tasted Korean beef. It was during a summer trip to visiting a friend in Los Angeles, a foodie hotspot that pulled you in with both charm and flavor. We stumbled upon a tiny little restaurant tucked away in a corner—Asian bits swirling around like a whisper inviting us in. The moment the plate arrived, I was entranced! The marinated beef was sweet and savory, the kind of dish that made your heart sing and your tummy dance. From that point on, I knew I had to recreate that experience at home.
Those summer nights spent cooking and enjoying the fruits of our labor with good friends have always inspired my cooking. That experience pushed me to explore the spices, techniques, and flavors that make Korean cuisine so special. And now, I’m excited to bring that energy back into your kitchen! Each bowl of Korean Beef I prepare is a little nod to those carefree days spent around a dinner table filled with laughter and delicious food. I hope to share the same warm vibes with you as we cook this together!
Ingredients
Let’s gather our ingredients! Here’s what you’ll need to whip up these luscious Korean Beef Bowls. I’ve included quick notes on substitutions and tips to help you out.
For the Beef Marinade:
-
1 pound of flank steak or sirloin
Flank steak is perfect for this recipe for its tenderness and flavor. If you’re looking for a substitute, you can use similar cuts like skirt steak or even ground beef for a quicker version. -
3 tablespoons soy sauce
Soy sauce adds that essential umami flavor. For a gluten-free option, try tamari, which delivers a similar taste without the gluten. -
1 tablespoon brown sugar
Brown sugar brings a delightful sweetness and helps caramelize the beef. White sugar works too, but it will lack some of the rich flavor. -
1 teaspoon sesame oil
This adds a nutty depth to the dish. If you’re in a pinch, you can use a mild olive oil, but it won’t have the same rich flavor. -
2 cloves garlic, minced
Garlic opens up the flavor profiles and adds warmth. Feel free to add more if you’re like me and really love garlic! -
1 teaspoon ground ginger
Ginger provides a lovely zing! Fresh ginger also works wonderfully—just make sure to use about one tablespoon of it instead.
For the Toppings & Bowls:
-
2 cups cooked rice (white or brown)
Brown rice adds more nutrients and fiber, while white rice is more traditional. Quinoa or cauliflower rice are great alternatives for low-carb options! -
1 cup shredded carrots
Colorful and crunchy! You can use store-bought coleslaw mix if you want to save some prep time. -
1 cup cucumber, julienned
Cucumber adds crunch and freshness. Zucchini can be used as a substitute if you’re in the mood for something different. -
2 green onions, chopped
These add a burst of flavor! You can also use chives if that’s what you have on hand. -
Sesame seeds for garnish
These add a nutty crunch! If you can’t find them, crushed peanuts or walnuts will introduce a different but welcomed texture.
Optional Sauce:
- Gochujang (Korean chili paste)
For a spicy kick! Adjust according to your heat preference. It’s brilliant for those who love bold flavors.
Step-by-Step Instructions
Alright, let’s get our hands a little messy and create this delicious masterpiece!
Step 1: Marinate the Beef
In a medium-sized bowl, combine the soy sauce, brown sugar, sesame oil, garlic, and ginger. Mix it together until the sugar dissolves. Now, add the sliced flank steak, tossing it to coat evenly. Cover it with plastic wrap and let it marinate in the fridge for at least 30 minutes—this will help tenderize the meat and infuse it with flavor. If you can let it marinate for a few hours, that’s even better! Just try not to let it sit overnight, as it can get too salty.
Step 2: Cook the Rice
While the beef is marinating, prepare your rice. If you’re using white rice, rinse it under cold water until the water runs clear, then follow the package instructions. For brown rice, enlist more patience—it takes longer but is so worth it! And if you’re using quinoa, it usually takes about 15 minutes to cook up fluffy perfection. Once cooked, set it aside, fluff it with a fork, and keep it warm.
Step 3: Sear the Beef
Heat a large skillet over medium-high heat and add a drizzle of cooking oil. Once it’s shimmering, add the marinated beef (discard the excess marinade). Cook for about 3-4 minutes, stirring occasionally until the beef is browned and cooked through. Remember, we want it juicy, not overcooked! If you see some beautiful bits caramelizing, that’s just adding to the flavor!
Step 4: Assemble the Bowls
Now it’s time to layer on the magic! Scoop a generous portion of warm rice into each serving bowl. Top it with your beautifully seared beef, then add your shredded carrots and cucumber on the side. Sprinkle the chopped green onions and sesame seeds on top for that final flourish. You can also serve the gochujang on the side, so everyone can customize their spice level!
Step 5: Enjoy!
Dig in right away and enjoy the fruits of your kitchen labor! You will feel like a culinary rockstar as you watch everyone devour it. Plus, the best part? You’ve just meal-prepped, making it much easier for the week ahead!
Serving Suggestions
For serving, these Korean Beef Bowls shine best when arranged beautifully—think of it as plating for a food photo! Use shallow bowls for that delightful layered look, and consider adding a sprig of cilantro or a slice of lime next to the beef for a pop of color! They’re stunning on their own, but if you’re feeling fancy, serve with a side of crispy kimchi or pickled vegetables to elevate the whole experience.
Recipe Variations
Feeling adventurous? Try these creative twists on the classic Korean Beef Bowl:
- Bowl Bonanza: Swap out the rice for quinoa, leafy greens, or even sweet potato mash for a different base.
- Spicy Upgrade: Add a tablespoon of gochugaru (Korean chili flakes) to the marinade for an extra kick.
- Veggie Delight: Throw in some sautéed bell peppers, broccoli, or snap peas to up the veggie ante!
- Vegan Version: Swap out the beef for sautéed mushrooms or tofu to make it a plant-based bowl.
- Sweet Treat: Give your sauce a twist by adding a tablespoon of pineapple juice for a hint of sweet and tangy flavor.
Chef’s Notes
I’ll let you in on a little secret: this dish is like a hug in a bowl! It’s one that I make whenever I need a little lift or when friends ask me to bring something to share. Over the years, I’ve experimented with different spices and toppings, and it’s amazing how just a few ingredients can create such a comforting dish.
One of my favorite memories in the kitchen comes from inviting a few close friends over for a Korean Beef Bowl night. Everyone brought their toppings—from seaweed sheets to homemade kimchi—and we had a topping bar right in the middle of the table. It turned into a hilarious game of who could create the most outrageous bowl! This recipe has certainly evolved, but it always brings people together, which is what cooking is all about.
FAQs and Troubleshooting
Q1: The beef turned out tough. What happened?
A1: This could be due to overcooking. Flank steak cooks quickly, so try to get it off the heat as soon as it’s browned. Marinading helps tenderize but don’t let it sit too long, or it can become mushy.
Q2: Can I freeze the Korean Beef?
A2: Absolutely! Just let it cool down and store it in an airtight container. It can last about 3 months in the freezer. Thaw in the fridge overnight before reheating for your meals!
Q3: The marinade is too salty for my taste. What can I do?
A3: If you overdo the soy sauce, don’t hesitate to balance it with a dash of honey or a splash of vinegar for brightness. You can also dilute it with some water if you catch it early!
Q4: Can I meal prep this for the week? How long will it last?
A4: Yes! These bowls are perfect for meal prepping. Store in airtight containers in the fridge for up to 4 days. Just assemble them when you’re ready to eat!
Nutritional Info
For a balanced meal, a serving (including rice and toppings) contains roughly:
- Calories: 450
- Protein: 28g
- Carbohydrates: 56g
- Fat: 14g
- Fiber: 3g
(Nutritional information may vary based on specific brands and products used.)
And there you have it! A warm, flavorful Korean Beef Bowl ready to be savored. It’s more than just a meal; it’s a way to connect, share, and create memories in your kitchen. I can’t wait to hear how yours turns out! Try this recipe out, share the love, and see you back here next time in my cozy kitchen! 🍚🥢
Print
Korean Beef Bowl
- Total Time: 25 minutes
- Yield: 4 servings 1x
- Diet: Paleo
Description
A savory and easy-to-meal-prep Korean Beef Bowl featuring tender beef, aromatic garlic, and colorful veggies.
Ingredients
- 1 pound flank steak or sirloin
- 3 tablespoons soy sauce
- 1 tablespoon brown sugar
- 1 teaspoon sesame oil
- 2 cloves garlic, minced
- 1 teaspoon ground ginger
- 2 cups cooked rice (white or brown)
- 1 cup shredded carrots
- 1 cup cucumber, julienned
- 2 green onions, chopped
- Sesame seeds for garnish
- Gochujang (Korean chili paste), optional
Instructions
- Marinate the beef: In a bowl, combine soy sauce, brown sugar, sesame oil, garlic, and ginger. Mix until sugar dissolves, add flank steak, toss to coat, cover, and refrigerate for at least 30 minutes.
- Cook the rice: Prepare rice according to package instructions and keep warm.
- Sear the beef: Heat a skillet over medium-high, add marinated beef, and cook for 3-4 minutes until browned and cooked through.
- Assemble the bowls: Place rice in bowls, top with beef, shredded carrots, and cucumber. Garnish with green onions and sesame seeds, serve gochujang on the side.
- Enjoy! Dig in and savor your meal prep masterpiece!
Notes
Great for meal prepping; store in airtight containers in the fridge for up to 4 days.
- Prep Time: 10 minutes
- Cook Time: 15 minutes
- Category: Main Course
- Method: Searing
- Cuisine: Korean
Nutrition
- Serving Size: 1 bowl
- Calories: 450
- Sugar: 5g
- Sodium: 800mg
- Fat: 14g
- Saturated Fat: 3g
- Unsaturated Fat: 9g
- Trans Fat: 0g
- Carbohydrates: 56g
- Fiber: 3g
- Protein: 28g
- Cholesterol: 70mg
Keywords: Korean Beef, Meal Prep, Easy Recipe, Bowls, Savory Bowl
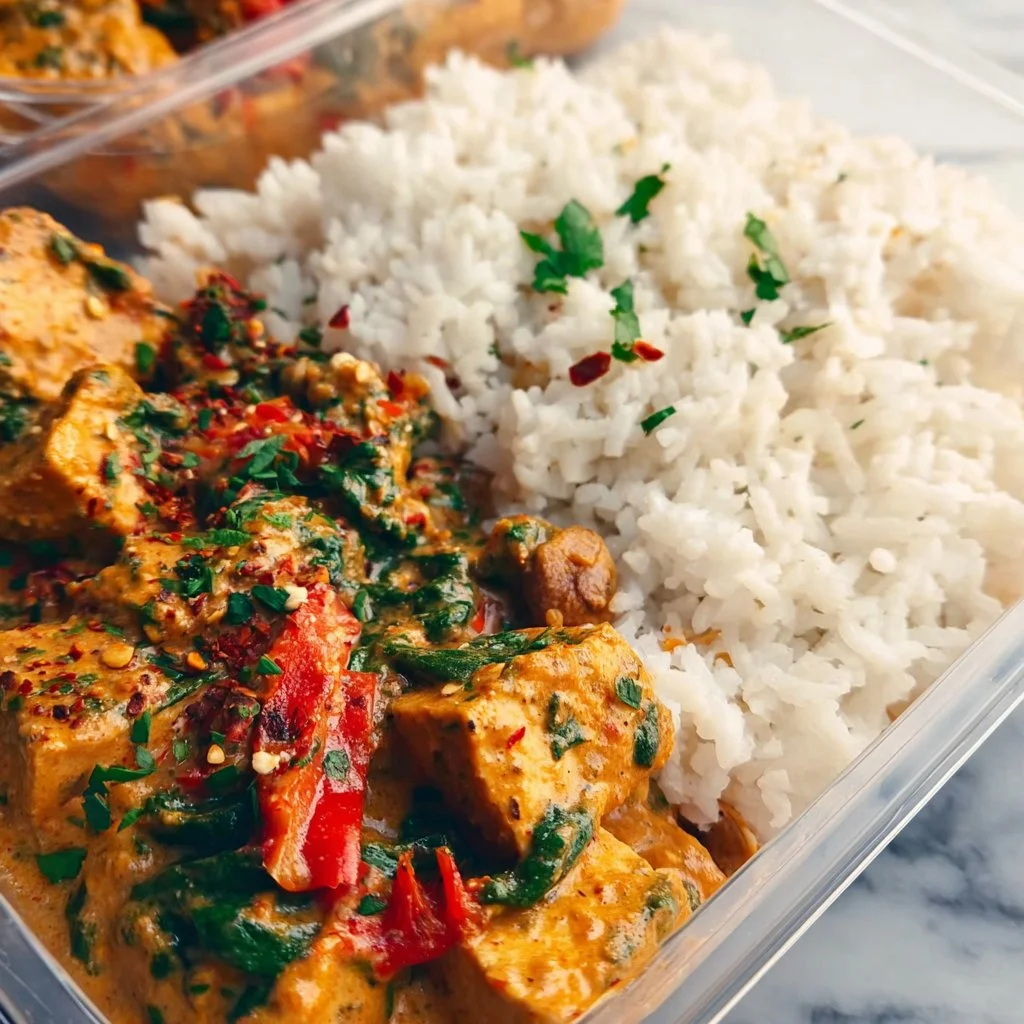
High Protein Vegan Meal Prep with Creamy Tuscan Tofu
High Protein Vegan Meal Prep with Creamy Tuscan Tofu
Welcome to my cozy corner of the kitchen! Today, we’re diving into a dish that’s bursting with flavor, nutrition, and warmth — my Creamy Tuscan Tofu. If you’re anything like me, the mere thought of a plant-based dish that’s not only delicious but brimming with protein gets your culinary heart racing. Whether you’re a seasoned vegan or just looking to incorporate more plant-based meals into your routine, this recipe is here to inspire you.
Let’s be honest: meal prep can sometimes feel like a chore, but it doesn’t have to be! With a big batch of this Creamy Tuscan Tofu on hand, you’ll be able to enjoy scrumptious lunches or dinners throughout the week with minimal effort. This dish is perfect for those busy weekdays when you want something hearty and satisfying without all the fuss. Plus, the vibrant flavors of sun-dried tomatoes, fresh spinach, and a dreamy creamy sauce will make your taste buds sing!
Why did I choose Tuscan flavors for this recipe? Well, I took a trip to Tuscany a few years back, and the rich food culture left an indelible mark on me. There’s just something magical about the combination of sun-dried tomatoes, creamy sauces, and fresh herbs that brings joy. So, I brought that inspiration back to my kitchen, and voilà! Tuscan-style tofu became a weekly staple in my home, and I can’t wait to share it with you.
In addition to being a delight for your palate, creamy Tuscan tofu is packed with plant-based protein, making it perfect for anyone looking to power up their meals. With the versatility of tofu, you can marinate, bake, or sauté this wonderful protein, and it always absorbs the flavors like a champ. So grab your apron (maybe one that’s slightly messy, like mine!) and let’s get cooking!
Personal Story
Let me take you back to a beautiful summer evening a few years ago. I was hosting a small dinner party with some of my closest friends. I wanted to impress them with a vegan option that wasn’t just some sad salad or store-bought hummus. I rummaged through my pantry, and after a bit of creativity, I stumbled upon a bunch of sun-dried tomatoes, fresh spinach, and a block of tofu just begging to be turned into something magical.
As the aroma of roasting garlic filled the air, everyone gathered in my little kitchen, laughing, sipping wine, and waiting with anticipation. When I finally served my Creamy Tuscan Tofu, the smiles on my friends’ faces were priceless. They were amazed that tofu could taste so good and were blown away by the vibrant flavors. That night, we celebrated not just good food, but friendship, laughter, and the beauty of cooking together. Since then, this dish has become a staple in my meal prep routine, and I love whipping it up for gatherings or just for a nourishing dinner solo. It’s a reminder of how cooking can bring us all together.
Ingredients
Let’s gather our ingredients! Here’s what you’ll need for this delightful and high-protein vegan meal. Each ingredient is carefully selected to bring out the best flavors in our creamy Tuscan tofu.
-
Firm Tofu (14 oz)
- Chef Insight: Firm or extra-firm tofu works best here as it holds its shape and absorbs flavors beautifully. If you’re feeling adventurous, try marinating silken tofu for a unique texture!
-
Sun-Dried Tomatoes (1/2 cup, chopped)
- Substitution Tip: If you can’t find sun-dried tomatoes in oil, dried ones work too — just soak them in warm water or broth for 20 minutes before using.
-
Fresh Spinach (2 cups)
- Quick Insight: Spinach adds a nice pop of color and nutrients, but feel free to swap with kale or Swiss chard for a different twist!
-
Coconut Cream (1/2 cup)
- Substitution Tip: Prefer a lower-fat option? Use cashew cream or unsweetened almond milk for a lighter sauce.
-
Garlic (3 cloves, minced)
- Chef Hack: To intensify the flavor, roast the garlic before mincing — it will be sweeter and milder!
-
Nutritional Yeast (1/4 cup)
- Quick Insight: This adds a cheesy flavor without dairy. If you miss that umami kick, sprinkle in some miso paste for a different savory depth.
-
Italian Seasoning (1 tsp)
- Chef Insight: You can easily make your own blend with dried basil, oregano, thyme, and rosemary — fresh herbs are delightful too!
-
Salt & Pepper (to taste)
- Quick Tip: Always taste as you go! Adjusting salt and pepper levels can bring your dish to life.
-
Olive Oil (2 tbsp)
- Substitution Tip: For a different flavor profile, opt for avocado oil or even sesame oil for an Asian twist!
With these ingredients on hand, you’ll be well on your way to creating a nourishing and delightful dish that’s perfect for meal prep.
Step-by-Step Instructions
Now comes the fun part – the cooking! Here’s how to transform your ingredients into a creamy, dreamy culinary delight that you can enjoy all week long.
-
Prepare the Tofu:
- Begin by pressing your firm tofu to remove excess moisture. Wrap it in a clean kitchen towel and place a heavy pan on top for about 15-20 minutes. This will help it absorb all those luscious flavors later on.
Tip: You can skip this step if you’re short on time, but pressed tofu has a firmer texture that’s simply irresistible!
-
Chop the Ingredients:
- While your tofu is pressing, chop up your sun-dried tomatoes and mince the garlic. This is a great time to turn on your favorite tunes or catch up with a friend while cooking!
-
Sauté the Aromatics:
- Heat 1 tablespoon of olive oil in a large skillet over medium heat. Add the minced garlic and sauté for about 1-2 minutes until fragrant. Be careful not to burn it!
Chef Hack: If you’re a garlic lover, feel free to toss in extra cloves — there’s no such thing as too much garlic in my book!
-
Add Sun-Dried Tomatoes:
- Toss in the chopped sun-dried tomatoes and Italian seasoning. Cook for an additional 2-3 minutes, letting those flavors meld together and create a beautiful aroma.
-
Cook the Tofu:
- Slice your pressed tofu into cubes (or crumble it for a different texture) and add them to the skillet. Gently stir to coat the tofu in the flavorful mixture. Cook for about 5-7 minutes, allowing the edges to crisp up a little.
Tip: If you like a crispy texture, consider browning the tofu on both sides before adding the spinach!
-
Add Coconut Cream:
- Reduce the heat to low and pour in the coconut cream. Stir everything together gently, allowing the creamy sauce to envelop the tofu and sun-dried tomatoes.
-
Incorporate Spinach:
- Lastly, add in the fresh spinach, stirring until it wilts down. This should take about 3-4 minutes. The vibrant green will contrast beautifully with the creamy sauce!
Chef Insight: If you want to add even more flavor and nutrition, consider tossing in some additional veggies, like zucchini or bell peppers!
-
Season to Taste:
- Add salt and pepper to your liking. Stir everything together one last time, and voilà! Your creamy Tuscan tofu is ready to serve.
Serving Suggestions
When it comes to plating, less is sometimes more! Serve your creamy Tuscan tofu over a bed of brown rice, quinoa, or whole grain pasta for a hearty meal. Garnish with fresh herbs, a sprinkle of nutritional yeast, or even a squeeze of lemon juice to elevate those flavors further. This dish not only looks stunning, but it’ll also impress your family and friends every single time!
Recipe Variations
Are you feeling creative? Here are a few variations to keep things fun and fresh:
- Greek-Style Tofu: Swap sun-dried tomatoes for olives and add in fresh cucumbers and a vegan tzatziki drizzle.
- Spicy Kick: Add red pepper flakes or diced jalapeños to the sautéed garlic for some heat.
- Cream-free Option: Use roasted peppers and cashew cream for a lower-fat, unique twist.
- Mediterranean Vibes: Toss in capers and artichoke hearts for additional Mediterranean flair.
- Different Proteins: Replace tofu with chickpeas or tempeh for a different protein source that still packs a punch!
Chef’s Notes
This recipe has had its own little evolution over the years! I started with a basic tofu stir-fry, but as I began exploring new flavors and cuisines, the creamy Tuscan version emerged. Now, it’s not only a weekly staple, but it’s also one of my go-to dishes when I want to impress guests!
Every time I serve it, I’m reminded of that wonderful summer evening with friends. Cooking is not just about feeding the body; it’s about nourishing the soul and creating lasting memories around the table. Don’t be surprised if you find yourself experimenting with this dish — the options are endless!
FAQs and Troubleshooting
1. My tofu didn’t crisp up! What went wrong?
- If your tofu isn’t crisping, it might be due to excess moisture. Remember to press it well, and try cooking over medium-high heat. A non-stick skillet can also help!
2. Can I freeze the leftovers?
- Definitely! Creamy Tuscan tofu freezes beautifully. Just store it in an airtight container, and it will last for up to 3 months. When ready to eat, thaw in the fridge and reheat in a skillet.
3. My sauce seems too thick! How can I fix this?
- If your sauce turns out thicker than you wished, add a splash of vegetable broth or water to loosen it up while reheating.
4. What can I serve with this dish?
- Pair it with a fresh salad, roasted vegetables, or over grains like rice, quinoa, or even stuffed inside a wrap for a wholesome meal.
With these tips in mind, you’re all set for a delicious cooking adventure. Got more questions? Drop them in the comments, and I’ll be happy to help!
Nutritional Info
For those mindful of nutrition, here’s a quick breakdown per serving (based on 4 servings):
- Calories: 230
- Protein: 18g
- Carbohydrates: 12g
- Dietary Fiber: 3g
- Fat: 15g
Enjoy this delightful and nourishing high-protein vegan meal that’s warm, creamy, and oh-so-sharing-worthy! Until next time, happy cooking! 🍳❤️
Print
Creamy Tuscan Tofu
- Total Time: 35 minutes
- Yield: 4 servings
- Diet: Vegan, High-Protein
Description
A high-protein vegan meal featuring tofu in a creamy Tuscan sauce with sun-dried tomatoes and fresh spinach.
Ingredients
- Firm Tofu (14 oz)
- Sun-Dried Tomatoes (1/2 cup, chopped)
- Fresh Spinach (2 cups)
- Coconut Cream (1/2 cup)
- Garlic (3 cloves, minced)
- Nutritional Yeast (1/4 cup)
- Italian Seasoning (1 tsp)
- Salt & Pepper (to taste)
- Olive Oil (2 tbsp)
Instructions
- Prepare the tofu by pressing it to remove excess moisture.
- Chop the sun-dried tomatoes and mince the garlic.
- Sauté the garlic in olive oil in a skillet over medium heat.
- Add the chopped sun-dried tomatoes and Italian seasoning, cooking for 2-3 minutes.
- Cook the pressed tofu cubes in the skillet for 5-7 minutes.
- Incorporate the coconut cream and stir gently.
- Add the fresh spinach and stir until wilted.
- Season with salt and pepper to taste.
Notes
Serve over rice or pasta for a complete meal. This dish can be frozen for up to 3 months.
- Prep Time: 20 minutes
- Cook Time: 15 minutes
- Category: Main Course
- Method: Sautéing
- Cuisine: Italian
Nutrition
- Serving Size: 1 serving
- Calories: 230
- Sugar: 4g
- Sodium: 200mg
- Fat: 15g
- Saturated Fat: 12g
- Unsaturated Fat: 3g
- Trans Fat: 0g
- Carbohydrates: 12g
- Fiber: 3g
- Protein: 18g
- Cholesterol: 0mg
Keywords: vegan, meal prep, high-protein, Tuscan tofu, creamy tofu
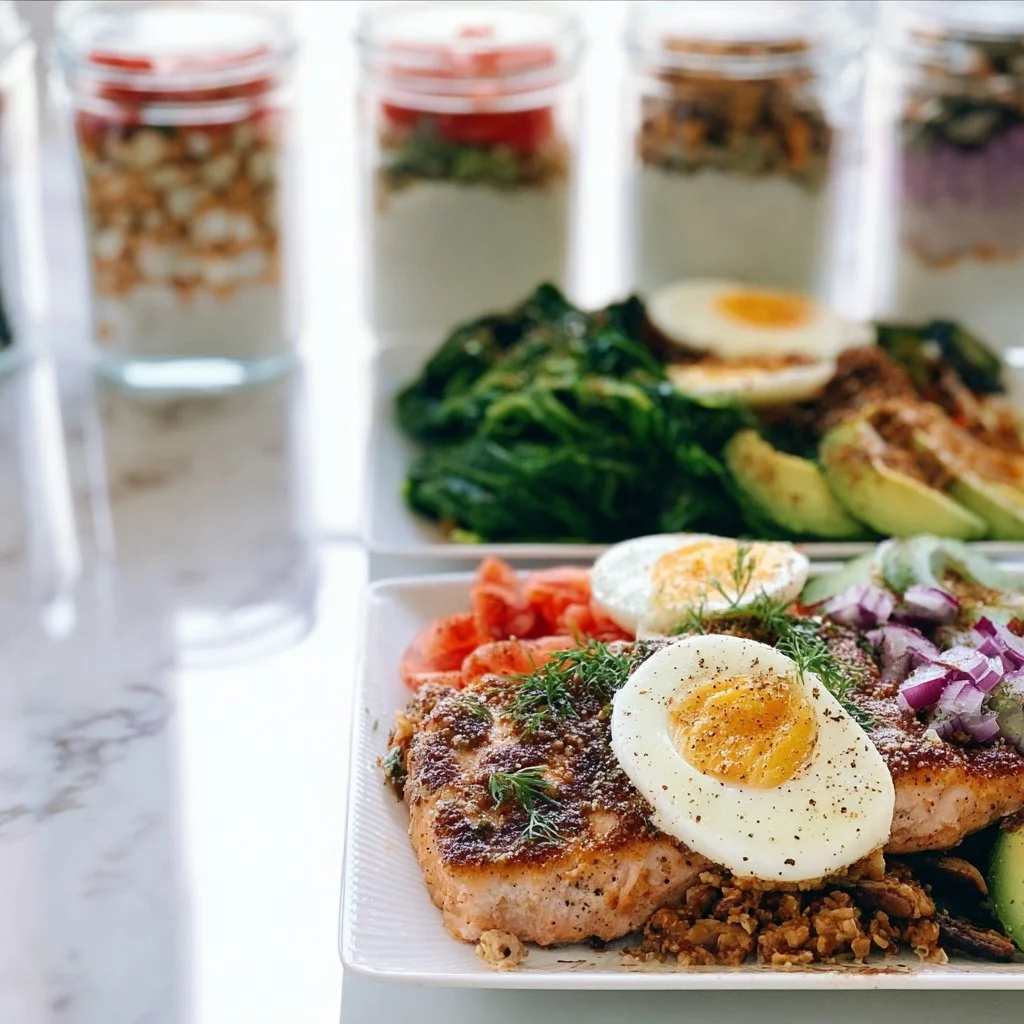
Healthy Meal Prep for the Week – High Protein Meals
# Healthy Meal Prep for the Week: High Protein Meals to Fuel Your Days

## Introduction

Hey there, fellow food lovers! Welcome back to my cozy little corner of the kitchen where flavors dance and hearts are warmed. Today, we're diving into a cooking adventure that’s all about smart, healthy living—I’m talking meal prep! If you're like me and can’t resist the smell of something delicious simmering away or baked to golden perfection, then you’re definitely in for a treat.

Meal prepping doesn't have to feel like a chore. I want you to think of it as your secret weapon that will save you time, money, and most importantly, ensure that you’re nourishing your body with high-quality ingredients throughout the week. Whether you’re a busy professional, a student, or a parent juggling numerous responsibilities, preparing healthy, high-protein meals in advance is the key to keeping your energy up and cravings at bay.

But let’s be real: meal prep can sometimes feel overwhelming. That’s why I’m here to walk you through it step by step! From chicken bowls to hearty grain salads, I’ve got some fantastic recipes with just the right balance of convenience and flavor. Plus, I’ll sprinkle in my favorite tips and tricks to make this whole process smoother. So grab your apron, toss that hair back, and let's make cooking the best part of your week!

## Personal Story

Before we get our hands dirty, let me take you down memory lane to one of my fondest food moments. Picture this: it’s Sunday afternoon, and the sun is pouring in through the kitchen window as my grandmother stirs a huge pot of her famous chili on the stove. There’s laughter, the clinking of silverware, and the tantalizing aroma wrapping around us like a warm hug. She was a master of high-protein meals—she’d crank up the flavor with beans, lean meats, and spices that danced on your taste buds.

While I was slicing onions and bell peppers next to her, she taught me the importance of preparing food in bulk. “Meal prep, Olivia,” she said, “is about more than just saving time. It’s about feeding your soul, connecting with your family, and enjoying good food that lasts.” Those moments of chopping, stirring, and connecting with loved ones shaped my cooking philosophy today. So, as we navigate this meal prep journey together, remember to embrace those little joys, just like my grandmother taught me!

## Ingredients

Here’s a sneak peek at the hearty ingredients we’ll be using in our high-protein meal prep:

- **Chicken Breast**: Packed with lean protein, this versatile superstar can be grilled, baked, or sautéed. If you're looking for alternatives, try turkey breast or even plant-based proteins like tofu or tempeh.

- **Quinoa**: This nutrient-dense grain is a complete protein, meaning it contains all nine essential amino acids. For a gluten-free option, feel free to substitute with brown rice or millet.

- **Black Beans**: A fantastic source of plant-based protein and fiber. If you’re short on time, canned black beans work perfectly—just rinse them!

- **Broccoli**: This veggie is a powerhouse of vitamins, minerals, and antioxidants. You can swap it out for any seasonal vegetables like bell peppers or asparagus, depending on your taste and availability.

- **Greek Yogurt**: Trust me, this stuff is not just for breakfast! Use it as a creamy dressing or dip. If you're dairy-free, a cashew cream or silken tofu could be a fantastic alternative.

- **Avocado**: Full of healthy fats that will keep you satisfied. Don't have one? Try a sprinkle of nuts or seeds for some crunch instead.

- **Spices (Cumin, Paprika, Garlic Powder)**: These guys bring life to your dishes. Feel free to mix things up; try curry powder or chili flakes for a different flavor profile!

Got all your ingredients? Great! Let’s get cooking!

## Step-by-Step Instructions

Now that we have all our ingredients lined up, it’s time to turn them into high-protein meals you can look forward to all week!

1. **Cook the Quinoa**: In a medium-sized pot, add 1 cup of quinoa and 2 cups of water. Bring to a boil, then reduce to a simmer, cover, and cook for about 15 minutes. Fluff it with a fork once done and set it aside. *Tip: Rinse quinoa before cooking to remove bitter saponins!*

2. **Prep the Chicken**: While the quinoa is cooking, season your chicken breasts with olive oil, salt, pepper, garlic powder, and a sprinkle of paprika. Heat a skillet over medium heat. Cook the chicken for about 6-7 minutes on each side until golden brown and cooked through (internal temperature should reach 165°F). *Hack: Let the chicken rest for a few minutes before slicing to keep it juicy!*

3. **Steam the Broccoli**: In a steamer basket over boiling water, add the broccoli florets and steam for about 3-4 minutes until vibrant green and tender-crisp. You can also sauté them in the same skillet after the chicken is done for extra flavor.

4. **Mix the Black Beans**: In a bowl, combine the black beans with a squeeze of lime juice and some chopped cilantro, if you have it. This elevates their flavor and makes them sing!

5. **Assemble the Bowls**: Grab your containers and start layering. Begin with a base of quinoa, add the sliced chicken on top, and then pile on the steamed broccoli and black beans. *Tip: If you’re someone who likes to meal prep in portions, a kitchen scale can help ensure each serving is perfectly balanced.*

6. **Dress it Up**: Add a dollop of Greek yogurt or a few slices of avocado as a creamy addition. You can also pack your favorite salsa or a homemade dressing on the side.

And voila! Do you see how easy that was? You’ve got hearty, high-protein meals ready to go.

## Serving Suggestions

When it comes to plating this dish, keep it simple yet aesthetically pleasing! Use clear meal prep containers so the colors pop. Start with the quinoa layer at the bottom; it provides a great contrast to the vibrant greens of the broccoli and the hearty black beans. Add your chicken on top, and let a dollop of yogurt peek out for a fresh touch. If you're enjoying this meal right after preparation, serve it in a bowl and garnish with extra avocado slices and a sprinkle of chili flakes for an added kick.

## Recipe Variations

Feeling adventurous? Try these delicious twists to mix up your meal prep routine:

1. **Mediterranean Bowl**: Replace chicken with diced salmon and toss in olives, cherry tomatoes, and feta cheese. Drizzle with a lemon tahini dressing!

2. **Spicy Asian Bowl**: Swap quinoa for brown rice, add stir-fried bell peppers and snap peas, and replace yogurt with a spicy sriracha sauce.

3. **Mexican Fiesta Bowl**: Use ground turkey or beef seasoned with taco spices. Top with corn, avocado, and a sprinkle of fresh cilantro!

4. **Vegan Delight**: Switch out chicken for chickpeas or lentils. Use nutritional yeast instead of Greek yogurt for a cheesy flavor.

5. **Breakfast Protein Bowl**: Instead of lunch or dinner, scramble some eggs or tofu and toss in spinach, tomatoes, and black beans for a protein-packed breakfast option!

## Chef’s Notes

This recipe has evolved over the years from a simple meal-prepping trick into the heart of my week. I've learned that meal prep isn't just about the food; it’s about creating moments—those Sunday afternoons spent batch-cooking while listening to my favorite tunes, or those busy weekdays when having a healthy meal on hand saves the day. I still carry those childhood kitchen lessons, and now, as a homage to my grandmother, I try to feed not just my body but my soul, sharing these meals with friends and family whenever I can.

## FAQs and Troubleshooting

**Q: Can I make this meal in advance?**
**A:** Absolutely! These bowls can be stored in the fridge for up to 4 days, making it a great option for busy weeks.

**Q: What if I don’t like chicken?**
**A:** Your options are limitless! Feel free to switch out chicken for turkey, grilled shrimp, or plant-based proteins like tofu or tempeh.

**Q: How do I prevent the quinoa from being mushy?**
**A:** Rinse the quinoa well before cooking and make sure to follow the 2:1 water-to-quinoa ratio strictly. Fluff with a fork after cooking for that perfect texture!

**Q: Can I freeze these meals?**
**A:** Yes! Most components freeze well, though I recommend adding the creamy toppings like Greek yogurt or avocado when you’re ready to eat.

## Nutritional Info

While I won’t bore you with hard numbers, I can share that each serving packs a punch with around 30 grams of protein, plenty of fiber from the quinoa and beans, and healthy fats from the avocado. This makes for a well-rounded meal that fuels your day!

---

There you have it, my friends! Healthy meal prep doesn’t just keep you organized; it’s a celebration of flavors, memories, and health. Remember, cooking should feel good, and I hope this guide inspires you to turn your kitchen into a happy place filled with delicious food. So go ahead—make, share, and enjoy!
High Protein Meal Prep Bowls
- Total Time: 45 minutes
- Yield: 4 servings 1x
- Diet: High Protein, Gluten-Free
Description
A collection of high-protein meal prep bowls perfect for busy weeks, featuring quinoa, chicken, black beans, and vibrant vegetables.
Ingredients
- 1 cup Quinoa
- 2 cups Water
- 4 Chicken Breasts
- 1 cup Black Beans (canned, rinsed)
- 2 cups Broccoli Florets
- 1/2 cup Greek Yogurt
- 1 Avocado
- 1 tsp Cumin
- 1 tsp Paprika
- 1 tsp Garlic Powder
- Salt and Pepper to taste
- Lime Juice
- Cilantro (optional)
Instructions
- Cook the quinoa in a pot with water, bring to a boil, reduce heat, cover, and simmer for about 15 minutes.
- Prep the chicken by seasoning it and cooking for 6-7 minutes on each side in a skillet over medium heat.
- Steam the broccoli in a steamer basket for 3-4 minutes until tender-crisp.
- Mix the black beans with lime juice and cilantro.
- Assemble the bowls with layers of quinoa, sliced chicken, broccoli, and black beans.
- Dress each bowl with Greek yogurt or avocado.
Notes
This meal prep can be stored in the fridge for up to 4 days and components can be frozen for later use.
- Prep Time: 15 minutes
- Cook Time: 30 minutes
- Category: Main Course
- Method: Meal Prep
- Cuisine: Healthy
Nutrition
- Serving Size: 1 serving
- Calories: 400
- Sugar: 3g
- Sodium: 350mg
- Fat: 15g
- Saturated Fat: 4g
- Unsaturated Fat: 8g
- Trans Fat: 0g
- Carbohydrates: 45g
- Fiber: 8g
- Protein: 30g
- Cholesterol: 70mg
Keywords: meal prep, high protein, healthy eating, quinoa bowls, chicken meal prep
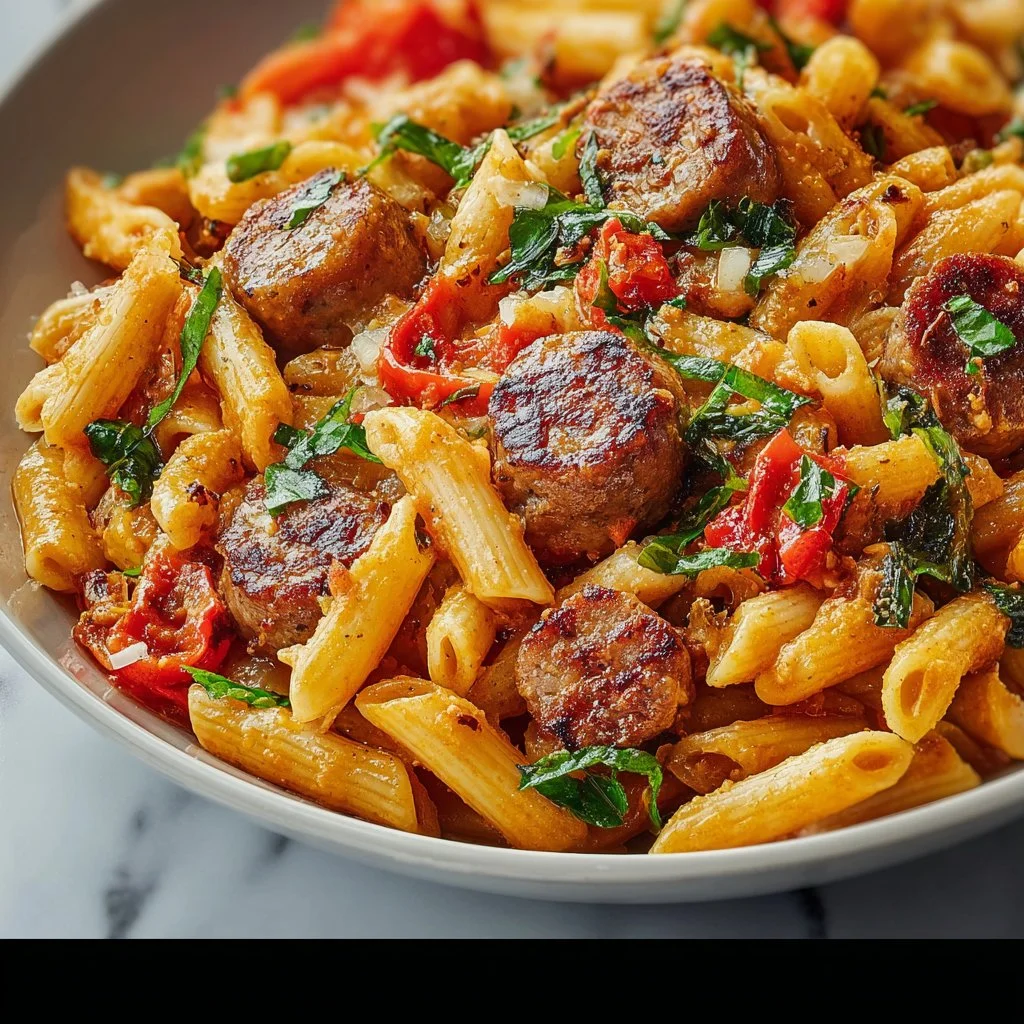
Cajun Sausage Pasta
Cajun Sausage Pasta: A Spicy Twist on Comfort Food
Welcome to my kitchen! Today, we’re diving into a dish that’s bursting with flavor and sure to become a beloved staple in your home: Cajun Sausage Pasta. If you’re anything like me, the smell of spicy sausage mingling with creamy sauce brings a smile to your face and warmth to your heart. This dish is not just a dinner; it’s a celebration of flavors, a joyful reunion of ingredients that come together to create something truly special.
I can still remember the first time I had Cajun sausage pasta. It was in a quaint little restaurant tucked away in the French Quarter of New Orleans, and I was enchanted by the vibrant colors and bold flavors. The pasta danced in a sea of creamy sauce, flecked with spices and herbs that painted a picture of warmth and hospitality. As I savored each bite, I was transported to a place where food isn’t just about sustenance; it’s about bringing people together.
Being a home cook, my mission is to recreate that magic in my own kitchen, and I can’t wait to share my take on it with you. Whether you’re having a cozy night in or planning a gathering with friends, this dish is versatile enough for any occasion. So let’s roll up our sleeves and get cooking!
Personal Story
My love affair with Cajun cuisine began in my childhood kitchen, where my family often gathered around the table to enjoy meals inspired by my grandmother’s New Orleans roots. I remember Saturday afternoons spent in her bustling kitchen, the air thick with the intoxicating aroma of spices and simmering sauces. One particular memory stands out: the time we made a batch of her spicy sausage pasta. The whole family was involved; my cousins and I were tasked with stirring the pot while the adults expertly chopped vegetables.
The laughter and stories shared that day created a warmth that enveloped us all. As we dished out generous portions of pasta, I can still hear the clinking of forks and the chorus of satisfied "mmm’s" that filled the room. That simple but flavorful dish became a symbol of love and togetherness. As I grew up and moved away, I promised myself I would carry that legacy of vibrant, spicy flavors into my own cooking.
Ingredients
Let’s gather our ingredients for this Cajun Sausage Pasta. Here’s what you’ll need, along with some insider tips for each:
-
Pasta (Fusilli or Penne)
- Why: These shapes hold onto the sauce beautifully, capturing every morsel of flavor.
- Substitution Tip: Feel free to use gluten-free pasta or any shape you have on hand!
-
Cajun Sausage (or Andouille Sausage)
- Why: This is where the magic begins! The spices in the sausage elevate the entire dish.
- Substitution Tip: If you prefer leaner meat, chicken or turkey sausage works well too.
-
Bell Peppers (Red and Green)
- Why: They add a pop of color and a sweet crunch to the dish.
- Substitution Tip: Zucchini or mushrooms can be excellent alternatives if you want to switch things up or if you have leftovers in the fridge.
-
Onion
- Why: Aromatic foundations like onion are essential for building flavor.
- Substitution Tip: Shallots also provide a sweeter taste that works well in this dish.
-
Garlic
- Why: Because everything is better with garlic! It adds depth and richness.
- Substitution Tip: Fresh garlic is ideal, but if you’re in a pinch, garlic powder will do.
-
Heavy Cream
- Why: This creates the luscious, creamy sauce that binds everything together.
- Substitution Tip: For a lighter sauce, you can use half-and-half, or for a dairy-free version, coconut cream is a creamy alternative.
-
Cajun Seasoning
- Why: This is what gives our dish its signature kick and depth of flavor.
- Substitution Tip: You can make your own blend using paprika, cayenne pepper, garlic powder, onion powder, and oregano.
-
Parmesan Cheese
- Why: A sprinkle of cheese adds a salty, nutty finish that ties the flavors together.
- Substitution Tip: Nutritional yeast can be used for a dairy-free, cheesy flavor.
-
Fresh Parsley
- Why: For a fresh touch to garnish and brighten the dish.
- Substitution Tip: Basil or chives can also lend a lovely flavor!
Step-by-Step Instructions
Now that we have our ingredients prepped and ready to go, let’s dive into the cooking process! Here’s a step-by-step guide to making your Cajun Sausage Pasta:
-
Cook the Pasta
Bring a large pot of salted water to a boil. Add your pasta of choice and cook according to package instructions, usually about 8-10 minutes for al dente.
Tip from the chef: Remember to reserve a cup of pasta water before draining! It works wonders for adjusting the sauce consistency and adds a bit of flavor. -
Sauté the Sausage
While the pasta cooks, heat a large skillet over medium-high heat. Add your sliced Cajun sausage and cook until browned and crisp, about 5-7 minutes.
Chef hack: Don’t overcrowd the pan! Give each piece room to brown nicely, enhancing the flavor. -
Add the Vegetables
Once the sausage is nicely browned, add the chopped onions, bell peppers, and minced garlic. Sauté for another 5-6 minutes until the veggies are tender and fragrant.
Commentary: The colors of the sautéed veggies make the dish visually appealing and appetizing — it’s like a painting in your pan! -
Create the Sauce
Pour in the heavy cream and sprinkle in your Cajun seasoning. Stir well, allowing the sauce to bubble up and thicken slightly, about 3-4 minutes.
Tip: If the sauce is too thick, gradually add a splash of reserved pasta water until you reach your desired consistency. -
Combine the Pasta and Sauce
Add the drained pasta to the skillet and toss everything together until well-coated with the creamy sauce. Season with salt and pepper to taste.
Chef’s insight: Combine the pasta and sauce off the heat to prevent the sauce from overcooking! -
Finishing Touches
Finally, stir in grated Parmesan cheese until melted and creamy. Spoon the pasta into serving bowls and finish with freshly chopped parsley on top.
Serving tip: A little extra cheese never hurts!
Serving Suggestions
To plate your Cajun Sausage Pasta, scoop a generous amount onto a wide, shallow bowl. Add a sprinkle of extra parsley and Parmesan on top for garnish. Pair it with a fresh garden salad and a crusty piece of garlic bread for a truly divine meal that looks as good as it tastes. Don’t forget a glass of crisp white wine to elevate the experience!
Recipe Variations
This recipe is incredibly versatile! Here are a few fun twists you can try:
- Seafood Cajun Pasta: Swap the sausage for shrimp or a mix of your favorite seafood.
- Vegetarian Delight: Remove the sausage and load up on seasonal veggies like spinach, zucchini, and mushrooms instead.
- Spicy Kick: Add a splash of hot sauce or chili flakes during cooking for an extra layer of heat.
- One-Pot Wonder: Make this a one-pot meal by cooking the pasta directly in the sauce with extra liquid — less mess, more flavor!
Chef’s Notes
This Cajun Sausage Pasta recipe has evolved over time in my kitchen, adapting to seasonal ingredients and personal preferences. I remember the time I accidentally burned the garlic, and instead of starting over, I embraced it and created a roasted garlic version! It was a hit! Embracing those kitchen accidents can lead to some delicious discoveries — don’t be afraid to experiment!
FAQs and Troubleshooting
-
Q: My sauce turned out too thick! What do I do?
A: No worries! Just add small amounts of reserved pasta water until you reach your desired consistency. -
Q: I don’t have Cajun seasoning. Can I still make this?
A: Absolutely! Mix your spices like paprika, cayenne, garlic powder, oregano, and pepper for a DIY Cajun seasoning! -
Q: Can I make this ahead of time?
A: You can prepare the creamy sauce and pasta separately and combine them right before serving to keep everything fresh. -
Q: What can I use instead of heavy cream for a lighter dish?
A: Half-and-half works beautifully, or consider using Greek yogurt for a tangy twist!
Nutritional Info
Note: Nutritional info may vary based on ingredient brands and modifications.
- Calories: 550 per serving
- Protein: 25g
- Carbohydrates: 70g
- Fat: 20g
- Fiber: 3g
So there you have it, my friends! A hearty, comforting, and utterly delicious Cajun Sausage Pasta recipe that’s perfect for any occasion. I hope you find as much joy in making this dish as my family did back in the day.
Remember, cooking is all about having fun, experimenting, and making memories. So, roll up those sleeves, get those spices dancing, and enjoy every flavorful bite. Happy cooking! 🍴✨
Print
Cajun Sausage Pasta
- Total Time: 35 minutes
- Yield: 4 servings 1x
- Diet: Paleo
Description
A flavorful Cajun sausage pasta dish with a creamy sauce, perfect for any occasion.
Ingredients
- 8 oz Pasta (Fusilli or Penne)
- 14 oz Cajun Sausage (or Andouille Sausage), sliced
- 1 Red Bell Pepper, chopped
- 1 Green Bell Pepper, chopped
- 1 Onion, chopped
- 3 cloves Garlic, minced
- 1 cup Heavy Cream
- 2 tbsp Cajun Seasoning
- 1/2 cup Parmesan Cheese, grated
- Fresh Parsley, chopped for garnish
Instructions
- Cook the Pasta: Bring a large pot of salted water to a boil. Add pasta and cook according to package instructions, about 8-10 minutes for al dente.
- Sauté the Sausage: Heat a skillet over medium-high heat. Add sliced sausage and cook until browned, about 5-7 minutes.
- Add the Vegetables: Incorporate chopped onions, bell peppers, and minced garlic. Sauté for 5-6 minutes until veggies are tender.
- Create the Sauce: Pour in heavy cream and sprinkle Cajun seasoning. Stir and let simmer until slightly thickened, about 3-4 minutes.
- Combine the Pasta and Sauce: Toss drained pasta with the sauce. Adjust seasoning with salt and pepper.
- Finishing Touches: Stir in grated Parmesan cheese until melted. Serve garnished with parsley.
Notes
This dish pairs beautifully with garden salad and garlic bread. Experiment with seafood or veggie variations.
- Prep Time: 15 minutes
- Cook Time: 20 minutes
- Category: Main Course
- Method: Sautéing
- Cuisine: Cajun
Nutrition
- Serving Size: 1 serving
- Calories: 550
- Sugar: 5g
- Sodium: 900mg
- Fat: 20g
- Saturated Fat: 10g
- Unsaturated Fat: 6g
- Trans Fat: 0g
- Carbohydrates: 70g
- Fiber: 3g
- Protein: 25g
- Cholesterol: 60mg
Keywords: Cajun, Pasta, Sausage, Creamy, Comfort Food
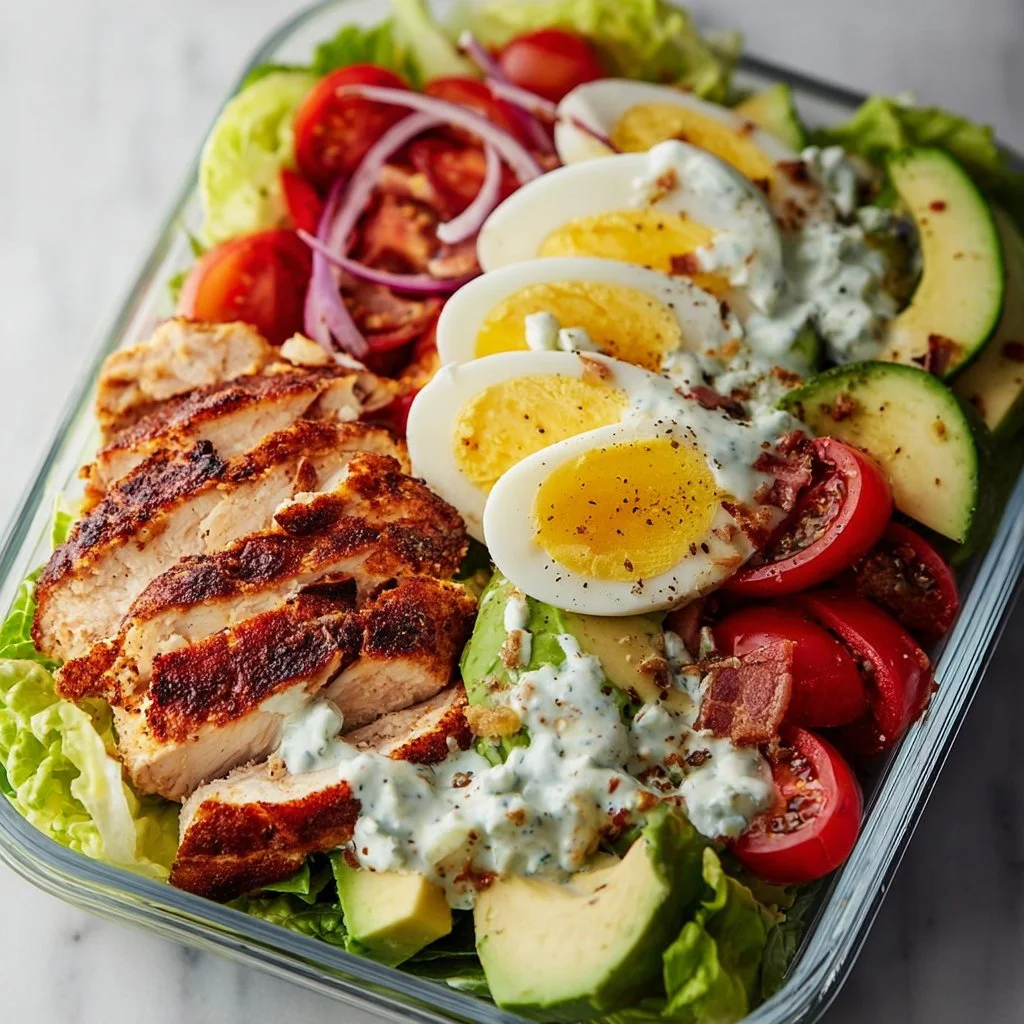
Meal Prep Cobb Salad
A Deliciously Colorful Journey: Meal Prep Cobb Salad
Welcome to my cozy little corner of the internet, fellow food lovers! I’m Olivia Bennett, and I’m thrilled to have you here. Today, we’re diving into a crunchy, colorful world of flavors with a timeless favorite: the Meal Prep Cobb Salad. This dish is not just a salad—it’s a symphony of textures, colors, and tastes that will brighten up your week ahead. Picture fresh greens, crispy bacon, creamy avocado, and a sprinkle of blue cheese all coming together to create something magical. Who doesn’t love a good salad that saves time and brings a burst of flavor?
Now, what I adore about Cobb Salad isn’t just its deliciousness—it’s the memories it sparks. This dish has a way of bringing people together, whether it’s a picnic in the park, a casual dinner with friends, or simply fueling your week with wholesome goodness. So, slip on your apron, and let’s get cooking!
Personal Story: A Family Tradition Rediscovered
Growing up, some of my fondest memories revolve around family dinners and the vibrant patchwork of dishes sprawling across our dining table. My mom was an incredible cook who could turn even the simplest ingredients into something exquisite. One summer evening, I remember her preparing a lavish spread that included her version of a Cobb Salad.
As she sliced the ingredients, the whole kitchen filled with the wafts of crispy bacon, fresh greens, and that unmistakable tang of blue cheese. We gathered around the table, laughter mingling with the melody of cutting boards and serving utensils clinking together. Each forkful was a joyful bite, reminding us of summer barbecues and the togetherness that good food can inspire. That meal turned into a cherished family ritual, with each forkful carrying echoes of laughter and love.
Now, whenever I whip up a Cobb Salad, I’m stirred by those simple, precious moments—a reminder of how food can create not just meals but memories.
Ingredients: What You’ll Need
Here’s a list of ingredients to create your perfect Meal Prep Cobb Salad. Each component plays a pivotal role, contributing to the symphony of flavors. And don’t worry; I’ve included some handy substitution tips to help you adjust according to your pantry!
-
Romaine Lettuce (or Mixed Greens)
- A crunchy, fresh base that provides a crisp texture. You can also swap it with kale for a more nutrient-dense option, or use spinach for a milder flavor.
-
Grilled Chicken Breast
- A lean protein that makes this salad filling. You can replace it with turkey, chickpeas for a vegetarian twist, or even tofu for a plant-based option.
-
Crispy Bacon
- The salty crunch brings a delightful contrast to the fresh ingredients. If bacon isn’t your thing, crispy pancetta or turkey bacon could work well, or even toasted nuts for a crunchy alternative.
-
Hard-Boiled Eggs
- They add creaminess and protein. If you’re short on time, you can use scrambled eggs or omit them for a lighter dish altogether.
-
Avocado
- This creamy fruit adds richness. If you’re short on avocados, consider using a dollop of Greek yogurt or some hummus for a similar creamy texture.
-
Cherry Tomatoes
- Bursting with sweetness, these beauties pop with color. If tomatoes aren’t in season, you can use diced bell peppers or radishes as a substitute.
-
Blue Cheese (or Feta)
- A tangy cheese that complements the salad beautifully. If blue cheese isn’t your favorite, crumbled feta or goat cheese works wonderfully.
-
Cucumber
- For added crunch and freshness. If you’re not keen on cucumbers, consider swapping them with bell peppers or snap peas.
-
Red Onion
- Just a hint of sharpness helps to elevate the flavors. If you want something milder, go for green onions or even omit it altogether.
-
Olive Oil & Vinegar (for dressing)
- A simple mix comes together for a light, zesty dressing. Use your favorite dressing instead—store-bought or homemade!
Step-by-Step Instructions
Now, let’s get into the fun part—the cooking! This Meal Prep Cobb Salad not only assembles quickly but can also be prepped in advance to make your week seamless. Follow along for a delicious adventure!
-
Prep Your Ingredients
- Start by washing your greens. If you’re using romaine lettuce, chop it into bite-sized pieces. For mixed greens, simply tear the leaves and place them in a large salad bowl. Pro Tip: A salad spinner can help those greens dry quickly and prevent sogginess!
-
Grill Your Chicken
- Season your chicken breast with salt, pepper, and a drizzle of olive oil. Heat a grill pan or skillet over medium-high heat. Cook the chicken for about 6-7 minutes on each side until golden brown and cooked through (internal temp shouldn’t exceed 165°F!). Once cooked, let it rest for a few minutes before slicing. Little Chef Hack: While resting the chicken, cover it with foil to keep it warm and juicy.
-
Cook Your Bacon
- In the same skillet (or a separate one if you like), cook your bacon until it’s crispy. This usually takes about 5-7 minutes. Once done, place it on a paper towel to absorb excess grease. Savory alert: Don’t toss that bacon fat! It can be saved to add flavor to future dishes—just be mindful of how much you use.
-
Boil Your Eggs
- Place your eggs in a pot, cover them with cold water, and bring to a boil. Once boiling, turn off the heat and cover. Let them sit for about 10-12 minutes. Afterward, transfer them to an ice bath (or cold water) to stop the cooking process and make peeling easier. Chef Insight: This method makes for perfect hard-boiled eggs!
-
Assemble the Salad
- In a large mixing bowl, combine your romaine base with the sliced grilled chicken, diced avocado, halved cherry tomatoes, chopped cucumbers, crumbled blue cheese, and sliced red onion. Chop the hard-boiled eggs and sprinkle them on top.
-
Prepare Your Dressing
- In a small bowl, whisk together olive oil and your choice of vinegar along with a pinch of salt and pepper. Feel free to add a dash of Dijon mustard for an extra kick! Drizzle the dressing over your salad and mix everything gently to combine. Just a note: Keep the dressing on the side if you’re meal prepping to retain freshness.
-
Pack for Meal Prep
- If meal prepping, use airtight containers and layer the ingredients starting with the dressing at the bottom, followed by your protein, then veggies, and greens on top to prevent wilting. You’ll have a vibrant, fresh salad ready to grab during the week!
Serving Suggestions
Present your gorgeous Cobb Salad in a shallow bowl, arranging the toppings in sections for a colorful display. You can sprinkle some extra blue cheese on top for a pretty finish or garnish with a few slices of lemon for that zesty touch! Pair it with a slice of crusty bread or crispy pita chips for a complete meal that’s both filling and incredibly satisfying.
Recipe Variations
-
Southwestern Cobb Salad: Swap out the blue cheese for queso fresco and add black beans and corn for a southwestern flair. A drizzle of chipotle dressing will enhance the flavor!
-
Mediterranean Cobb Salad: Use feta cheese instead of blue cheese, and toss in some Kalamata olives and diced bell peppers. Add a splash of lemon vinaigrette for freshness.
-
Fruit-Infused Cobb Salad: Toss in some sliced strawberries or mango for a sweet twist and switch to a light balsamic vinaigrette.
-
Vegan Cobb Salad: Substitute the chicken with roasted chickpeas, the bacon with crispy tempeh, and omit eggs and cheese or replace them with avocado and nutritional yeast.
Chef’s Notes
Looking back, my Cobb Salad recipe has evolved over time—it’s like a reflection of my culinary journey. I’ve experimented with countless variations, hunting for that perfect balance of textures and flavors. The things I love most about this salad? It’s versatile! Depending on what’s in season or what’s left in my fridge, it can turn out different every single time. Embrace that freedom! After all, cooking should be fun, not just a chore.
Oh, and a little kitchen humor—once, I thought I could juggle while cooking (what a sight!). Let’s just say the avocado didn’t survive the drop, but we all had a hearty laugh!
FAQs and Troubleshooting
-
Can I make this salad ahead of time?
- Absolutely! If you layer the ingredients correctly in an airtight container, it can last up to 3 days in the fridge. Just remember to keep the dressing separate until you’re ready to eat!
-
What do I do if my eggs crack while boiling?
- No worries! The key is to add a teaspoon of vinegar to the boiling water, which helps coagulate the egg white if it breaks. It won’t be perfect, but at least it won’t make a huge mess!
-
My avocado turned brown! How can I prevent this?
- Oxidation is the culprit here. A sprinkle of lemon juice can help slow down the process. If it happens, just slice off the brown areas—your salad will still taste amazing!
-
Can I use other proteins?
- Definitely! Beyond chicken, think grilled shrimp, fish, or even a hearty bean mix, such as black beans or lentils, for added protein and nutrition.
Nutritional Info (Optional)
While I won’t overload you with too many numbers, a typical serving of this Meal Prep Cobb Salad offers a fantastic balance of protein, healthy fats, and fiber. It’s loaded with vitamins and minerals, keeping your energy levels charged throughout the day!
So there you have it! Your guide to creating the ultimate Meal Prep Cobb Salad. I hope you dive into this colorful world of flavors, just like I have. Remember, cooking is all about enjoying yourself and experimenting! Happy cooking, and may your kitchen always be filled with warmth and joy! 🍳🥗💖
Print
Meal Prep Cobb Salad
- Total Time: 35 minutes
- Yield: 4 servings
- Diet: Gluten-Free
Description
A colorful and crunchy Cobb Salad, perfect for meal prepping and bursting with fresh flavors.
Ingredients
- Romaine Lettuce (or Mixed Greens)
- Grilled Chicken Breast
- Crispy Bacon
- Hard-Boiled Eggs
- Avocado
- Cherry Tomatoes
- Blue Cheese (or Feta)
- Cucumber
- Red Onion
- Olive Oil & Vinegar (for dressing)
Instructions
- Prep Your Ingredients
- Grill Your Chicken
- Cook Your Bacon
- Boil Your Eggs
- Assemble the Salad
- Prepare Your Dressing
- Pack for Meal Prep
Notes
Layer ingredients carefully in airtight containers if meal prepping. Keep dressing separate until ready to serve.
- Prep Time: 15 minutes
- Cook Time: 20 minutes
- Category: Salad
- Method: No Cook & Stovetop
- Cuisine: American
Nutrition
- Serving Size: 1 serving
- Calories: 400
- Sugar: 4g
- Sodium: 600mg
- Fat: 24g
- Saturated Fat: 6g
- Unsaturated Fat: 12g
- Trans Fat: 0g
- Carbohydrates: 12g
- Fiber: 4g
- Protein: 28g
- Cholesterol: 150mg
Keywords: Cobb Salad, Meal Prep, Healthy Recipe, Salad, Fresh Ingredients




