
Welcome to Cozy Comfort: The Ultimate Guide to Homemade Macaroni and Cheese!
Hello, lovely food enthusiasts! Welcome back to my little corner of the internet, where we whip up delicious meals straight from the heart. Today, we are diving into a dish that fills not just our plates, but also our bellies and hearts—homemade macaroni and cheese.
Every time I think of mac and cheese, I’m transported back to my childhood kitchen, where the air was aromatic with the promise of gooey cheese and the sound of bubbling pasta. This dish isn’t just food; it’s a warm embrace on a chilly evening. Believe me, it’s not just comfort food—it’s a classic that finds a way of bringing people together, whether it’s a cozy dinner at home, a family gathering, or a potluck with friends.
In this post, you’re not just getting a recipe but a delightful experience filled with memories, tips, and a few chef secrets to elevate your mac and cheese game. So grab your apron, turn on that stove, and let’s create something absolutely scrumptious together!
Personal Story
Ah, macaroni and cheese! For me, this dish is deeply intertwined with memories of my childhood. I remember weekends spent in the kitchen with my grandmother, her beloved blue apron wrapped around her waist, as she stirred a pot of creamy goodness.
She had a special way of making it—using a blend of cheeses and just a hint of mustard powder for a little zing. While we waited for it to finish baking, we’d sneak bites of the uncooked pasta and steal spoonfuls of melted cheese from the pot. Those moments were about more than food; they were about love, laughter, and the simple joy of sharing a meal.
I’ll never forget the family gatherings where everyone would gather around the table, happily stuffing faces with that creamy delight. You could hear the oohs and aahs with each bite! It’s these memories that inspire my recipe today—a celebration of comfort, flavor, and nostalgia. So, let’s channel that love and create our own macaroni masterpiece!
Ingredients
You’ll Need:
-
Pasta (1 pound of elbow macaroni)
- Tip: Any short pasta works well! Try penne or cavatappi for an exciting twist.
-
Cheese (2 cups shredded sharp cheddar)
- Chef Insight: Don’t be shy about mixing cheeses! Try adding Gruyère for nuttiness or mozzarella for extra ooze.
-
Milk (2 cups whole milk)
- Substitution: If you prefer a lighter option, use skim milk or even almond milk for a dairy-free alternative.
-
Butter (1/2 cup unsalted)
- Quick Tip: The butter adds richness and flavor; feel free to replace half with olive oil for a lighter version.
-
Flour (1/2 cup all-purpose)
- Chef Insight: This is to create a roux! If gluten-free, substitute with cornstarch or brown rice flour.
-
Mustard Powder (1 teaspoon)
- Why: It enhances the cheese flavor—don’t skip this! You can also use a teaspoon of prepared mustard.
-
Salt and Pepper (to taste)
- Tip: Always taste as you go! Season it to your liking—it makes all the difference.
-
Breadcrumbs (1 cup for topping)
- Substitution: Use panko for crunch, or toss in some herbs and melted butter for extra flavor.
Step-by-Step Instructions
Let’s cook up some magic! Here’s how to make the ultimate macaroni and cheese:
Step 1: Boil the Pasta
Begin by bringing a large pot of salted water to a rolling boil. Toss in your elbow macaroni and cook it until al dente, about 6-8 minutes. It’s essential to cook it slightly under because it will continue to cook while baking. Chef Hack: Add a dash of olive oil to the water to prevent sticking!
Step 2: Make the Roux
While the pasta is cooking, grab a large saucepan and melt your butter over medium heat. Once melted, sprinkle in the flour and whisk it together for about 2 minutes; this will create a roux. *Tip: Don’t let it brown! We want a pale color for that creamy sauce!
Step 3: Add Milk
Gradually pour in your milk while continuously whisking. We need to avoid lumps! Continue to whisk it for about 5-7 minutes until it thickens. You’ll know it’s ready when it coats the back of a spoon. Helpful Hint: If it gets too thick, splash in a bit more milk!
Step 4: Cheese Time!
Once thick, reduce the heat to low and add your shredded cheddar and any other cheeses you’re using. Stir until it’s melted and creamy! Extra Tip: Reserve a bit of cheese for the topping—crust is key!
Step 5: Mix Pasta with Cheese Sauce
Drain the pasta and add it to the cheese sauce. Stir it in until every single piece is coated in that cheesy goodness. Yum!
Step 6: Baking Time
Preheat your oven to 350°F (175°C). Transfer the mac and cheese mix into a greased baking dish. Top with the reserved cheese and breadcrumbs. Combo Idea: Add a sprinkle of paprika for an exciting top layer!
Step 7: Bake to Perfection
Pop it in the oven and bake for 20-25 minutes, until the top is golden and bubbly. This is your moment to shine! Ignore any temptations to peek, but if you do, enjoy the glorious aroma wafting through the kitchen!
Step 8: Cool and Enjoy!
Once it’s out of the oven, let it cool for about 5 minutes (if you can wait that long!). Serve it up with love, and enjoy the fruits of your labor—and don’t forget to snap a few pictures for the ‘Gram!
Serving Suggestions
Plate your macaroni and cheese in a rustic serving dish with a sprinkle of fresh parsley on top. Pair it with a light green salad or roasted veggies for a well-rounded meal. A glass of chilled white wine or iced tea complements the creamy goodness beautifully. Don’t forget your favorite side of homemade garlic bread!
Recipe Variations
Feeling adventurous? Here are a few fun twists on the classic mac and cheese:
- Bacon Mac & Cheese: Add crispy, crumbled bacon right before baking for a salty, smoky kick.
- Spicy Mac & Cheese: Toss in some diced jalapeños or a splash of hot sauce for heat!
- Veggie-loaded Mac: Stir in steamed broccoli, peas or spinach for an added nutrition boost and color.
- Buffalo Chicken Mac: Mix in shredded rotisserie chicken and buffalo sauce for a spicy, hearty meal!
- Truffle Mac & Cheese: Drizzle with truffle oil before serving for a gourmet touch.
Chef’s Notes
You know, over the years, my mac and cheese recipe has evolved. I’ve experimented with different cheeses, spices, and toppings. I remember one Thanksgiving where I forgot the breadcrumbs and had to top it with crushed chips (I know, but it was unexpectedly delicious!).
I learned that cooking is about taking chances, like trying new flavors or textures. And whether it’s the nostalgia of my grandmother’s kitchen or the excitement of experimenting at home, macaroni and cheese will always have a special spot in my heart. Remember, cooking is about love, so make sure to pour that into every bite!
FAQs and Troubleshooting
Q: My cheese sauce turned out lumpy, what happened?
A: The most common reason is adding cold milk too quickly! Always whisk vigorously and gradually when incorporating liquids.
Q: Can I make this ahead of time?
A: Absolutely! Prepare everything and store it in the fridge before baking. Just let it sit at room temperature for 30 minutes before baking.
Q: How can I make a lower-calorie version?
A: Swap out heavy cheeses for lighter options like part-skim mozzarella and use whole grain pasta for added fiber.
Q: Can I freeze leftovers?
A: Yes! Just make sure it’s in an airtight container and baked macaroni can be stored in the freezer for up to two months. Reheat in the oven for best results!
Nutritional Info (Optional)
Note: Nutritional values can vary based on specific ingredients used. Always consider your substitutions!
- Calories Per Serving: Approximately 320
- Protein: 17g
- Carbohydrates: 40g
- Fat: 15g
And there you have it! Your guide to creating a comforting, delicious macaroni and cheese that is sure to please. I hope this has inspired you to get cozy in your kitchen. Happy cooking, and I can’t wait to hear about your macaroni adventures!
Print
Ultimate Macaroni and Cheese
- Total Time: 45 minutes
- Yield: 4 servings 1x
- Diet: Vegetarian
Description
A classic homemade macaroni and cheese recipe that’s sure to bring comfort to your table.
Ingredients
- 1 pound elbow macaroni
- 2 cups shredded sharp cheddar cheese
- 2 cups whole milk
- 1/2 cup unsalted butter
- 1/2 cup all-purpose flour
- 1 teaspoon mustard powder
- Salt and pepper to taste
- 1 cup breadcrumbs (for topping)
Instructions
- Boil the Pasta: Begin by bringing a large pot of salted water to a rolling boil. Toss in your elbow macaroni and cook it until al dente, about 6-8 minutes.
- Make the Roux: While the pasta is cooking, melt your butter over medium heat. Sprinkle in the flour and whisk for about 2 minutes.
- Add Milk: Gradually pour in your milk while continuously whisking for about 5-7 minutes until it thickens.
- Cheese Time: Reduce the heat to low and add your shredded cheddar and any other cheeses. Stir until melted and creamy.
- Mix Pasta with Cheese Sauce: Drain the pasta and add it to the cheese sauce, stirring until coated.
- Baking Time: Preheat your oven to 350°F. Transfer the mac and cheese to a greased baking dish. Top with reserved cheese and breadcrumbs.
- Bake to Perfection: Bake for 20-25 minutes until golden and bubbly.
- Cool and Enjoy: Let it cool for about 5 minutes before serving.
Notes
Feel free to experiment with different cheeses or add-ins like bacon or veggies for variety!
- Prep Time: 15 minutes
- Cook Time: 30 minutes
- Category: Main Course
- Method: Baking
- Cuisine: American
Nutrition
- Serving Size: 1 serving
- Calories: 350
- Sugar: 6g
- Sodium: 500mg
- Fat: 15g
- Saturated Fat: 9g
- Unsaturated Fat: 4g
- Trans Fat: 0g
- Carbohydrates: 40g
- Fiber: 2g
- Protein: 17g
- Cholesterol: 50mg
Keywords: macaroni and cheese, comfort food, cheesy pasta
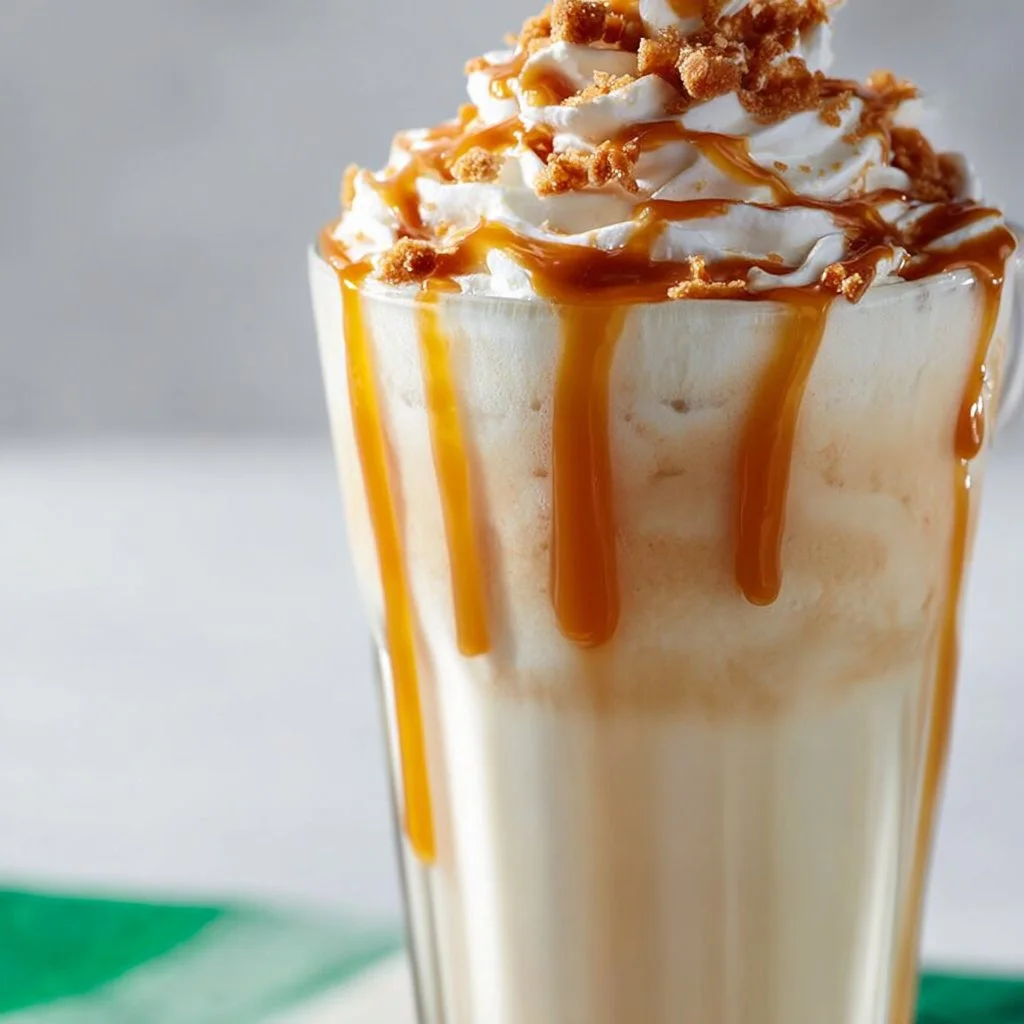
Spiked Caramel Milkshake with Tennessee Whiskey
Indulge in a Spiked Caramel Milkshake with Tennessee Whiskey
Welcome to my cozy corner of the kitchen! I’m Olivia Bennett, and today, we’re diving into the delicious world of milkshakes—specifically, I’ll be guiding you through making a rich and indulgent Spiked Caramel Milkshake with Tennessee Whiskey. If you’re like me and have a penchant for the sweet and boozy, then this delightful treat will make your heart sing.
Imagine this: it’s a sunny afternoon, and you can hear the ice cream truck jingle in the distance. You race outside, filled with excitement and anticipation. This nostalgic feeling of bliss isn’t just for kids; it’s something that can be cherished well into adulthood! There’s something truly special about recreating that joy in the form of a decadent milkshake, and what better way to elevate it than with a splash (or two) of Tennessee whiskey?
This milkshake isn’t just a drink; it’s an experience—rich caramel mixing with creamy ice cream and a kick of whiskey to warm your spirits. It’s perfect for a summer get-together or when you simply need to kick back and treat yourself. So grab your favorite glass, and let’s get started on creating this heavenly concoction together!
A Sweet Memory with a Twist
Growing up, my family had a little tradition of heading to the local diner every Friday night. After a long week filled with school and endless homework, the diner was our haven. One of my fondest memories was the vanilla milkshake that made an appearance every visit. It was thick, creamy, and topped with whipped cream and a cherry. However, it wasn’t until I went to college that I discovered the beauty of adult milkshakes—those incredible creations that combine the nostalgic flavors of childhood with a delightful adult twist.
My friends and I stumbled upon a local bar that offered a “boozy milkshake” many nights out. I remember the first time I tried a whiskey-infused shake; I was taken aback by how expertly the whiskey paired with the caramel and vanilla flavors, creating something truly unforgettable. Fast forward to today, and I find joy in blending those memories with something new, like this Spiked Caramel Milkshake. It reminds me of those carefree nights while also giving me the chance to discuss flavors and cocktails with friends. Isn’t that what food is all about? Creating delicious memories that bring us together!
Ingredients
Here’s what you’ll need to whip up your very own Spiked Caramel Milkshake with Tennessee Whiskey. I’ll give you some tips, too!
-
2 scoops vanilla ice cream
Use the highest quality ice cream you can find! A rich and creamy base is essential for that indulgent texture. If you want to experiment, vanilla bean or caramel ice cream works beautifully too! -
1/2 cup milk
Whole milk will yield a creamier shake, but you can substitute with almond or oat milk for a dairy-free option. Just keep in mind that the flavor will change slightly. -
2 oz Tennessee whiskey
I’m partial to Jack Daniel’s for its smooth flavor. However, if you want more depth, you could try a honey bourbon or rye whiskey for a different kick. -
1/4 cup caramel sauce
You can use store-bought or homemade. If you want an extra touch, add a pinch of sea salt for a salted caramel flavor. -
Whipped cream (for topping)
Because what’s a milkshake without the fluffy topping? Feel free to use whipped coconut cream for a dairy-free option. -
Extra caramel sauce for drizzling
A must for that extra visual appeal (and flavor!). -
Maraschino cherries (for garnish)
A classic nod to childhood milkshakes! You can also use fresh cherries if you’re feeling fancy.
Step-by-Step Instructions
Alright, let’s roll up those sleeves and get mixing! Making this delightful Spiked Caramel Milkshake is as simple as it gets.
Step 1: Gather and Prep
Start by gathering all your ingredients. This is key to a smooth cooking process—nobody wants to be running around the kitchen when they’re ready to blend. Lay out your ice cream, milk, whiskey, and caramel sauce within arm’s reach. If you want to make your whipped cream from scratch, now is a good time to whip that up!
Step 2: Blend it Up!
In a blender, combine the two scoops of vanilla ice cream, milk, whiskey, and caramel sauce. Here’s my favorite chef tip: start with the liquids first! This will ensure everything blends smoothly. Trust me; you don’t want a clingy scoop of ice cream refusing to mix.
Blend until creamy and smooth. If you find your shake is too thick for your preference, feel free to add a splash more milk. If you like it thicker, add a bit more ice cream. Experimenting is half the fun of cooking!
Step 3: Taste Test (Important!)
Before you pour, this is your moment to taste! You might want a little more caramel for sweetness or a touch more whiskey for a kick. This is your creation, so don’t be shy!
Step 4: Serve with Style
Grab your favorite tall glass, and pour in the delicious milkshake. It’s best to tilt the glass slightly as you pour to create that lovely swirl. Now, let’s top it off! Generously add whipped cream on the top—don’t skimp; this is where the fun begins!
Step 5: The Finishing Touches
Drizzle extra caramel sauce over the whipped cream, and add a maraschino cherry on top to complete the classic look. If you’re feeling extra fancy, you can sprinkle some crushed graham crackers or nuts on top for a delightful crunch.
Step 6: Enjoy!
Grab a big straw (or a spoon) and enjoy your Spiked Caramel Milkshake. Share it with friends, sip it slowly, and take a moment to savor the flavors—you deserve it!
Serving Suggestions
This Spiked Caramel Milkshake is best served immediately after blending to enjoy the creamy texture while it lasts. Pair it with a slice of chocolate cake or some buttery popcorn for a movie night that’ll have everyone raving! If you want a full dessert experience, why not serve it alongside caramel brownie bites? Now, that’s a sweet treat combo!
Recipe Variations
Don’t be afraid to get creative! Here are a few ideas for you to mix things up:
- Chocolate Caramel Milkshake: Add a couple of tablespoons of chocolate syrup for a chocolate twist!
- Nutty Caramel Delight: Stir in a spoonful of nut butter for a protein boost and a nutty flavor.
- Coffee Lover’s Shake: Substitute the whiskey with cold brew coffee for a caffeine kick. Yummy!
- Spiced Version: Add a sprinkle of cinnamon or nutmeg for a warm, spiced flavor that’s perfect for cozy nights.
- Vegan Delight: Substitute with coconut or almond milk ice cream and use a vegan caramel sauce for a dairy-free version.
Chef’s Notes
I originally came up with this recipe after a late-night craving hit while reminiscing about those diner milkshakes. You can say I was a little inspired by my surroundings! Over time, I’ve played around with different whiskey brands and flavors, resulting in this perfect combination of sweet and spirited. There’s something magical about caramel and whiskey coming together—like a warm hug on a chilly evening!
Also, don’t feel bad about those extra toppings; life’s too short not to indulge! Trust me; each layer adds to the experience.
FAQs and Troubleshooting
Q: What can I do if my milkshake is too thick?
A: If your milkshake is too thick, simply add more milk, a tablespoon at a time, until you reach your desired consistency.
Q: Can I make this milkshake without alcohol?
A: Absolutely! Just omit the whiskey and perhaps add a dash of vanilla extract for extra flavor!
Q: How can I store leftovers?
A: While these are best enjoyed fresh, you can store leftovers in an airtight container in the freezer for up to an hour. Just give it a quick mix again before serving!
Q: What can I substitute for ice cream?
A: You can use frozen yogurt, dairy-free ice cream, or even a banana for a healthier version. Just keep in mind, the flavor and texture will change a bit.
Nutritional Info (Optional)
*Calories: ~450 (based on standard ingredients, will vary based on substitutions).
*Fat: ~20g
*Carbohydrates: ~60g
*Protein: ~12g
And there you have it! A delightful, indulgent Spiked Caramel Milkshake with Tennessee Whiskey that’s sure to bring back those sweet childhood memories while igniting new ones. Whether you’re enjoying it solo or sharing it with friends, this milkshake is perfect for any occasion. So gather everyone around, give it a try, and embrace the magic of cooking—one delightful sip at a time! Cheers!
Print
Spiked Caramel Milkshake with Tennessee Whiskey
- Total Time: 10 minutes
- Yield: 1 serving 1x
- Diet: Vegetarian
Description
A rich and indulgent milkshake combining creamy vanilla ice cream, warm caramel, and a splash of Tennessee whiskey for an adult twist on a classic treat.
Ingredients
- 2 scoops vanilla ice cream
- 1/2 cup milk
- 2 oz Tennessee whiskey
- 1/4 cup caramel sauce
- Whipped cream (for topping)
- Extra caramel sauce for drizzling
- Maraschino cherries (for garnish)
Instructions
- Gather all your ingredients.
- In a blender, combine the vanilla ice cream, milk, whiskey, and caramel sauce. Blend until creamy and smooth.
- Taste your milkshake and adjust sweetness or whiskey level to your preference.
- Pour the milkshake into a tall glass, tilting it slightly as you pour.
- Add whipped cream generously on top.
- Drizzle extra caramel sauce over the whipped cream and garnish with a maraschino cherry.
- Enjoy your Spiked Caramel Milkshake!
Notes
Feel free to experiment with different ice cream flavors or alcohol types to create your perfect shake.
- Prep Time: 10 minutes
- Cook Time: 0 minutes
- Category: Dessert
- Method: Blending
- Cuisine: American
Nutrition
- Serving Size: 1 serving
- Calories: 450
- Sugar: 60g
- Sodium: 200mg
- Fat: 20g
- Saturated Fat: 10g
- Unsaturated Fat: 8g
- Trans Fat: 0g
- Carbohydrates: 60g
- Fiber: 0g
- Protein: 12g
- Cholesterol: 70mg
Keywords: milkshake, caramel, whiskey, dessert, summer, indulgent
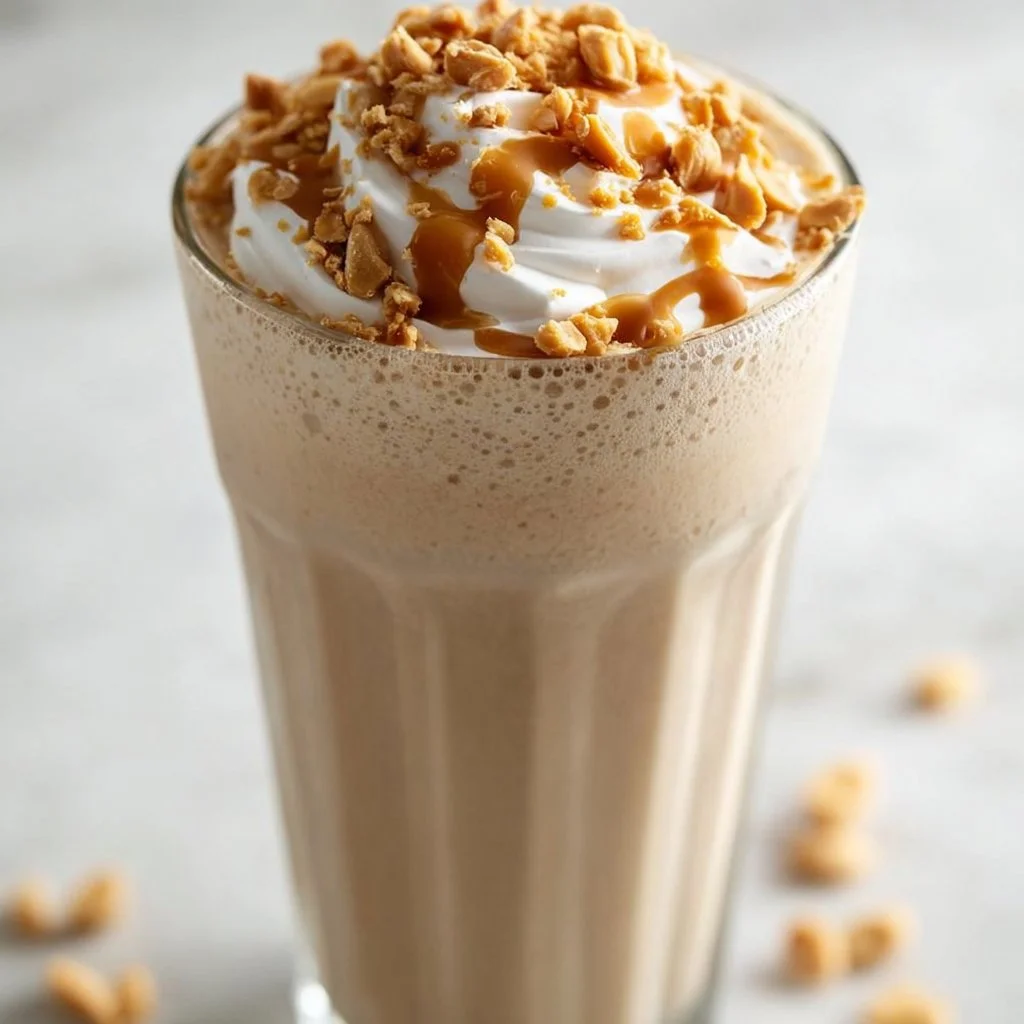
Peanut Butter Milkshake
The Ultimate Peanut Butter Milkshake: A Creamy Dream Come True!
Welcome to my kitchen! If you’re anything like me, you’re someone who can’t resist the rich, nutty aroma of peanut butter wafting through the air. Combine that with the creamy goodness of milk and the sweet kiss of ice cream, and you have a peanut butter milkshake that feels like a warm hug in a glass! Today, I’m excited to share my go-to recipe for this delightful treat, perfect for a hot summer day or just when you need a little pick-me-up.
Imagine standing in your cozy kitchen, the sun shining through the window, and the sounds of laughter filling the air. This isn’t just any ordinary milkshake; it’s a classic that sparks nostalgia and evokes memories of childhood afternoons spent at the local diner, where the milkshakes were thick enough to stand a spoon in.
Peanut butter milkshakes are a celebration of comfort, and they’re very easy to whip up at home. With just a few simple ingredients, you can create something that will impress your friends and family — or just give yourself a special treat after a long day. So, grab your blender (or a trusty mason jar if you’re feeling adventurous), and let’s dive into the deliciousness that is the peanut butter milkshake!
A Nostalgic Journey Through Peanut Butter
Growing up, my weekends were often filled with the delight of baking cookies and indulging in sweet treats. My fondest memories revolve around my late grandmother, who could make the best peanut butter cookies. When she was in the kitchen, it was an aromatic wonderland. I remember standing on a stool, peering over the counter as she mixed ingredients and shared stories about her favorite family recipes.
One day, I caught her making a batch of peanut butter milkshakes for dessert. I’d never seen anyone blend ice cream and peanut butter together before, but I can still recall the pure bliss on her face as she poured thick, creamy goodness into tall glasses. She always topped them off with crushed peanuts and a drizzle of chocolate syrup — and let me tell you, I was in heaven. Every sip was a burst of comfort and happiness.
Now, whenever I make this milkshake, I’m reminded of those beautiful moments and the passion my grandmother had for sharing love through food. It’s a simple drink, but it holds a wealth of love, just like the time spent with family over a delicious meal. And that’s what it’s all about — bringing people together over food that warms the soul!
Ingredients: The Essentials for a Delicious Peanut Butter Milkshake
Before we dive into the preparations, let’s gather our ingredients. Here’s what you’ll need:
-
2 cups vanilla ice cream
- The hero of our milkshake! Use your favorite brand for the creamiest consistency.
-
1 cup milk (whole or almond)
- Whole milk gives a rich texture, but you can swap it for almond milk for a dairy-free option.
-
1/2 cup creamy peanut butter
- Look for natural peanut butter without added sugars. Smooth and creamy works best, but crunchy peanut butter can add some fun texture!
-
2 tablespoons chocolate syrup (optional)
- Who could resist a hint of chocolate? Drizzling some chocolate syrup elevates the flavor and adds visual appeal!
-
Whipped cream for topping
- A must! It adds a fluffy contrast. You can make your own or grab a can from the store for convenience.
-
Crushed peanuts (optional)
- These add a lovely crunch and a fun finishing touch to your milkshake!
Substitution Tips:
- If you’re watching your sugar intake, use a sugar-free ice cream or a healthier alternative for milk and peanut butter.
- Feel free to swap in other flavors of ice cream – chocolate or banana peanut butter shake? Yes, please!
- Experiment with flavor extracts like vanilla or even a pinch of cinnamon for an added twist.
Step-by-Step Instructions: Crafting the Perfect Milkshake
Now that we have everything set, let’s get to blending! Follow these steps for a peanut butter milkshake that’s sure to satisfy:
-
Start with the Ice Cream
Scoop those 2 cups of vanilla ice cream straight into your blender. This is the foundation of your milkshake, so make sure it’s nice and soft — let it sit out for a few minutes if needed. -
Pour in the Milk
Add 1 cup of milk. Depending on your preferred thickness, adjust the milk. Less milk means a thicker shake, and more milk gives you a slightly thinner, sippable delight. -
Add the Peanut Butter
Spoon in your 1/2 cup of creamy peanut butter. This magical ingredient is what gives the shake that sweet, nutty goodness. If you’re a peanut butter lover (like me), feel free to toss in a little extra! -
Blend It Up
Secure the lid on your blender and blend on medium speed for about 30 seconds until your mixture is smooth and creamy. Here’s a little chef hack: Start on lower speed to avoid splatters, and gradually increase to ensure everything combines beautifully. -
Check the Consistency
After blending, stop and give it a taste! This is where you can decide if it’s creamy enough for you. If you want it thicker, add more ice cream. For a thinner shake, add a splash more milk. -
Add Chocolate Syrup (Optional)
If you’re feeling fancy and want to introduce a hint of chocolate, drizzle about 2 tablespoons of chocolate syrup into the blender and give it a quick swirl. You don’t need to blend this completely; some ribbons of chocolate can give you that swirly, café-style finish. -
Serve in Style
Now, pour your shake into tall, chilled glasses. Here’s a pro tip: pre-chill your glasses in the freezer for about 10 minutes before pouring for an extra frosty treat! -
Top and Enjoy
Finish off with a generous dollop of whipped cream on top, a drizzle of chocolate syrup, and a sprinkle of crushed peanuts for that added texture. Grab a straw (or a spoon, no judgment here) and dig in!
Serving Suggestions: Presenting Your Masterpiece
Serving a peanut butter milkshake is all about the presentation! Use tall glasses for that classic diner feel. Feel free to garnish with additional toppings — maybe some chocolate shavings, a cherry on top, or a fun straw that matches your kitchen vibe. If you’re feeling adventurous, serve them alongside some homemade cookies or a slice of your favorite pie for a delightful dessert spread. Trust me, your guests will be impressed!
Recipe Variations: Shake Things Up!
Here are some fun twists to consider for your peanut butter milkshake:
-
Banana Peanut Butter Milkshake: Add 1 ripe banana to the blender for a naturally sweet and creamy twist!
-
Chocolate Peanut Butter Milkshake: Swap in chocolate ice cream for vanilla and add an extra tablespoon of chocolate syrup for that rich chocolatey flavor.
-
Peanut Butter Banana Smoothie: For a healthier option, blend in some spinach for a hidden veggie boost. You can add hemp seeds for protein, too!
-
Nutty Protein Shake: Add a scoop of your favorite protein powder for a post-workout treat. This will keep you energized and fill you up.
-
Dairy-Free Delight: Use coconut milk ice cream and almond milk to create a magical dairy-free version without sacrificing flavor.
Chef’s Notes: Every Milkshake Tells a Story
This recipe has been a staple in my kitchen for years, with little tweaks over time to suit my evolving tastes. One “oops” moment I remember is when I accidentally added too much milk during a late-night milkshake craving. Instead of panicking, I fixed it by adding more ice cream and, voila! A happy accident turned into a new favorite version! So remember, if things don’t quite go as planned in the kitchen, just embrace it. Cooking is all about experimenting and making joyful messes.
FAQs and Troubleshooting: Your Questions Answered
1. Why is my milkshake too thick?
If you find your milkshake too thick, simply add a touch more milk and blend again. Remember, it’s all about finding the perfect consistency that you enjoy!
2. Can I make this dairy-free?
Absolutely! Use dairy-free ice cream and nut milk, such as almond or oat milk, to create a deliciously creamy shake without any dairy.
3. How can I store leftovers?
If you have leftovers (though I doubt it!), store your milkshake in an airtight container for up to 24 hours. However, just keep in mind that the texture might change slightly after freezing, so a quick stir before enjoying again can help.
4. Can I double the recipe?
Yes! This recipe can easily be doubled for parties or gatherings. Just make sure you have a blender large enough to handle the increased volume.
Nutritional Info (Optional)
For a single serving of the classic peanut butter milkshake (using vanilla ice cream and whole milk), you can expect:
- Calories: Approximately 600
- Protein: 15g
- Fat: 25g (primarily from the peanut butter)
- Carbohydrates: 60g
Remember, these can fluctuate based on any variations or substitutions made!
And there you have it — the ultimate peanut butter milkshake, infused with love, memories, and just the right amount of nostalgia. I hope this recipe becomes a beloved addition to your kitchen just as it is in mine. Whether you’re sipping it solo or sharing it with friends, may your days be filled with cozy flavor and sweet memories. Happy blending!
Print
The Ultimate Peanut Butter Milkshake
- Total Time: 5 minutes
- Yield: 2 servings 1x
- Diet: Vegetarian
Description
A creamy peanut butter milkshake that’s perfect for a refreshing treat on a hot day.
Ingredients
- 2 cups vanilla ice cream
- 1 cup milk (whole or almond)
- 1/2 cup creamy peanut butter
- 2 tablespoons chocolate syrup (optional)
- Whipped cream for topping
- Crushed peanuts (optional)
Instructions
- Start with the Ice Cream: Scoop those 2 cups of vanilla ice cream straight into your blender.
- Pour in the Milk: Add 1 cup of milk.
- Add the Peanut Butter: Spoon in your 1/2 cup of creamy peanut butter.
- Blend It Up: Secure the lid on your blender and blend on medium speed for about 30 seconds.
- Check the Consistency: After blending, stop and give it a taste!
- Add Chocolate Syrup (Optional): Drizzle about 2 tablespoons of chocolate syrup into the blender.
- Serve in Style: Pour your shake into tall, chilled glasses.
- Top and Enjoy: Finish off with whipped cream, a drizzle of chocolate, and a sprinkle of crushed peanuts.
Notes
Experiment with other flavors of ice cream and toppings for a unique twist.
- Prep Time: 5 minutes
- Cook Time: 0 minutes
- Category: Dessert
- Method: Blending
- Cuisine: American
Nutrition
- Serving Size: 1 serving
- Calories: 600
- Sugar: 45g
- Sodium: 300mg
- Fat: 25g
- Saturated Fat: 10g
- Unsaturated Fat: 10g
- Trans Fat: 0g
- Carbohydrates: 60g
- Fiber: 3g
- Protein: 15g
- Cholesterol: 60mg
Keywords: peanut butter, milkshake, dessert, creamy, summer treat
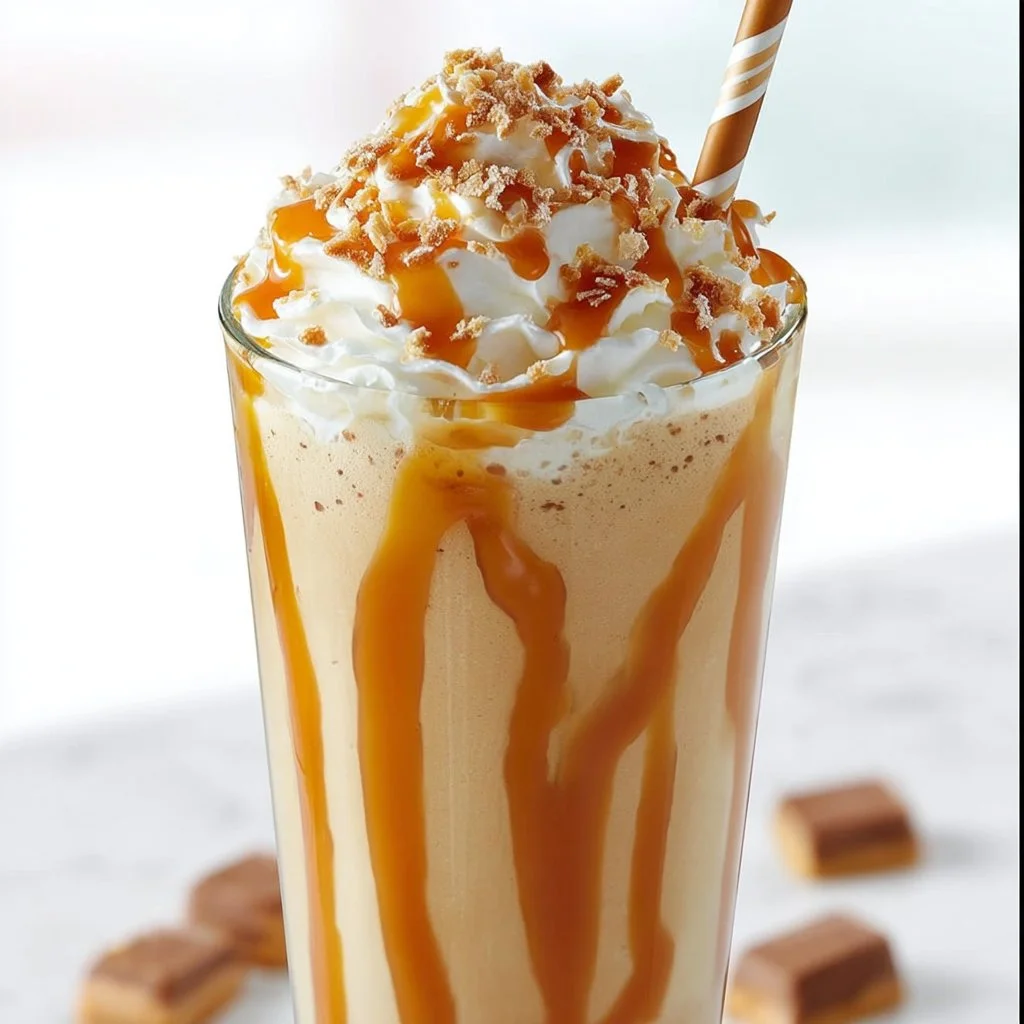
Caramel Shake
The Ultimate Caramel Shake Recipe: A Sweet Journey to Flavorful Bliss
Hello, fellow food lovers! Welcome back to my cozy kitchen, where the aroma of something delicious is always in the air, and today, we’re diving headfirst into one of my all-time favorites—the Caramel Shake! If you’re anything like me, the mention of caramel brings a sparkle to your eye and a craving to your soul. This shake isn’t just a drink; it’s a delightful experience that whisks you away to sweet nostalgia.
I can still remember the summer days of my childhood spent at the local diner, where I would order a caramel shake—sipping it slowly while stealing bites of my mom’s fries. The way that creamy, sweet caramel blended seamlessly with the cold ice cream to create pure bliss is a memory that has stuck with me through the years. Now, I’m excited to share that joy with you!
The beauty of a caramel shake is its simplicity. With just a handful of ingredients—most of which you likely have at home, you can customize it to your heart’s desire. So, whether you want it to be rich and decadent or lighter with a twist, trust me, once you get the hang of this shake, you’ll want to whip it up again and again. Are you ready to blend up some magic? Let’s get started!
Personal Story
One particularly memorable summer evening, my friends and I decided to host our own mini diner night at home. We cleared out the living room and set up a makeshift diner complete with a jukebox playlist full of 50s hits. While the nostalgic atmosphere was fun, the real star of the night was the caramel shake I had decided to prepare. Armed with a blender and an excessive amount of ice cream, I felt like a mad scientist in my kitchen!
Just as I was about to pour the first shake into tall glasses, my dog, Buttercup, came in, wagging her tail wildly, her big puppy eyes pleading for a taste. I couldn’t resist; after all, why not make it a party? So there we were, my friends sipping their shakes, Buttercup enjoying her own little pet-friendly version, and laughter echoing around the room as we reminisced about our adventures. That shake, rich with sweet caramel, became the backdrop of a friendship that blossomed even sweeter.
So now, every time I blend up a caramel shake, I’m reminded not just of its irresistible flavor but of the joy and memories that great food can bring into our lives. It’s more than just a treat; it’s a celebration!
Ingredients
Here’s what you’ll need to whip up this luscious caramel shake:
-
Vanilla Ice Cream (2 cups): The star of the show! Use high-quality, creamy vanilla ice cream for a rich base. You can substitute with a dairy-free version if you want a lighter shake.
-
Milk (1 cup): Whole milk works wonderfully for a creamy consistency, but feel free to use almond milk or oat milk for a plant-based twist!
-
Caramel Sauce (½ cup): Homemade or store-bought, this is where the magic happens! If you’re feeling adventurous, I highly recommend making your own for that fresh flavor.
-
Whipped Cream (for topping): Because what’s a shake without a fluffy cloud of whipped cream? You can use regular whipped cream or coconut whipped cream for a dairy-free option.
-
Optional Toppings: You can never go wrong with a sprinkle of sea salt, a drizzle of chocolate sauce, or even crushed nuts on top!
Chef Insights:
-
Experiment With Ice Cream: While vanilla is classic, don’t shy away from other flavors like caramel swirl or butter pecan. The more, the merrier!
-
Caramel Sauce Tip: If you have time and the inclination, try making your own caramel sauce at home. The process is straightforward and makes your shake even more indulgent.
Step-by-Step Instructions
Let’s get blending! Here is how to make this dreamy caramel shake, step by step:
Step 1: Gather Your Ingredients
Make sure all your ingredients are ready to go. Nothing halts the creativity like a last-minute dash to the fridge, right?
Step 2: Blend It Up
In your blender, add the vanilla ice cream first, followed by the milk and caramel sauce.
- Tip: Start with less milk, as you can always add more later if you like a thinner shake.
Step 3: Perfect Your Blend
Secure the lid tightly on your blender and blend everything on high until it’s smooth and creamy. You’re looking for that luscious peanut butter consistency!
- Chef Hack: If your shake is too thick, add a splash of milk and blend again. Want it thicker? Just add more ice cream!
Step 4: Taste Test
After blending, let’s do a quick taste test—because who doesn’t want to ensure it’s absolutely perfect? If it’s calling for a little more caramel, now’s the time to add it!
Step 5: Serve It Up
Now the fun begins! Pour your caramel shake into tall glasses. Don’t skimp on that generous helping!
Step 6: Top it Off
Finish with a swirl of whipped cream on top, a drizzle of additional caramel sauce, and your choice of sprinkle toppings.
- Presentation Tips: For an extra touch, rim your glasses with crushed graham crackers or crushed nuts for that added crunch!
Serving Suggestions
Serve your caramel shakes immediately while they’re cold and frosty. Pair them with a stack of chocolate chip cookies or some salty pretzels for a delightful sweet-and-salty contrast. Trust me; your friends will be begging for seconds!
Recipe Variations
Why stop at just one version of this delightful shake when there are so many ways to enjoy it?
-
Salted Caramel Shake: Add a sprinkle of sea salt on top for that perfect sweet-salty mix!
-
Chocolate Caramel Shake: Incorporate some chocolate syrup into the blender for a rich combination; chocolate and caramel are a match made in heaven!
-
Nutty Caramel Shake: Blend in a couple of tablespoons of peanut butter for added creaminess and a nutty flavor.
-
Coffee Caramel Shake: Add a shot of espresso or a tablespoon of instant coffee for a caffeine kick!
-
Healthier Option: Swap the vanilla ice cream for Greek yogurt to create a high-protein, lower-sugar version of the shake.
Chef’s Notes
This caramel shake recipe is one of those noble compositions that allows room for creativity. I find that every time I make it, there’s a little bit of a different twist based on what I have in the pantry or the season. In the warmer months, I might swap in a scoop of coffee-flavored ice cream and chill some cold brew!
And oh, let me tell you a little side story: I once decided to make a giant version of this shake for my friends. Let’s just say that I miscalculated on the amount of ice cream needed, and before I knew it, I had a volcano of caramel shake erupting from my blender. Whoops! But laughter filled the kitchen that day, and let me remind you—when things go wrong, it always makes for a great kitchen story!
FAQs and Troubleshooting
Q: My shake is too thick! What can I do?
A: No problem! Just add a little more milk, one tablespoon at a time, until you reach your desired consistency.
Q: Can I make this shake vegan?
A: Absolutely! Substitute the ice cream for a dairy-free variety and use plant-based milk.
Q: How do I store leftovers?
A: If you have any leftovers (which is rare!), store them in an airtight container in the freezer. Just give it a quick blend again when you’re ready to enjoy!
Q: What toppings do you recommend?
A: I love adding crushed pretzels, chocolate shavings, or even a drizzle of peanut butter! The sky’s the limit—get creative!
Nutritional Info
While I love indulging in a caramel shake, here’s a quick nutritional breakdown for a standard serving (about 1 cup) of our delicious creation:
- Calories: ~450
- Fat: 20g
- Carbohydrates: 60g
- Sugars: 50g
- Protein: 6g
Note: Nutritional values may vary based on the brands and specific ingredients used. Adjust according to your preferences!
Conclusion
So there you have it, friends! A rich, creamy caramel shake that brings all those wonderful memories back while leaving space for new ones to be made. Whether you’re serving it at your next get-together, enjoying it post-dinner, or sipping it while lounging at home, I hope this recipe sparks joy and ignites your creativity in the kitchen.
Now, let’s blend up some smiles and let the sweetness flow! Cheers to good times, great food, and lasting memories. Happy shaking!
Print
The Ultimate Caramel Shake
- Total Time: 10 minutes
- Yield: 2 servings 1x
- Diet: Vegetarian
Description
A rich and creamy caramel shake that brings joy and nostalgia with every sip.
Ingredients
- 2 cups Vanilla Ice Cream
- 1 cup Milk
- ½ cup Caramel Sauce
- Whipped Cream (for topping)
- Optional Toppings: sea salt, chocolate sauce, or crushed nuts
Instructions
- Gather Your Ingredients.
- Blend It Up: Add ice cream, milk, and caramel sauce to your blender.
- Perfect Your Blend: Blend on high until smooth and creamy.
- Taste Test: Adjust caramel according to your preference.
- Serve It Up: Pour into tall glasses.
- Top it Off: Add whipped cream, caramel drizzle, and optional toppings.
Notes
For a healthier option, swap ice cream for Greek yogurt. Experiment with different ice cream flavors for unique variations.
- Prep Time: 10 minutes
- Cook Time: 0 minutes
- Category: Dessert
- Method: Blending
- Cuisine: American
Nutrition
- Serving Size: 1 serving
- Calories: 450
- Sugar: 50g
- Sodium: 150mg
- Fat: 20g
- Saturated Fat: 12g
- Unsaturated Fat: 8g
- Trans Fat: 0g
- Carbohydrates: 60g
- Fiber: 0g
- Protein: 6g
- Cholesterol: 70mg
Keywords: caramel shake, dessert, sweet drink, vanilla ice cream, milkshake
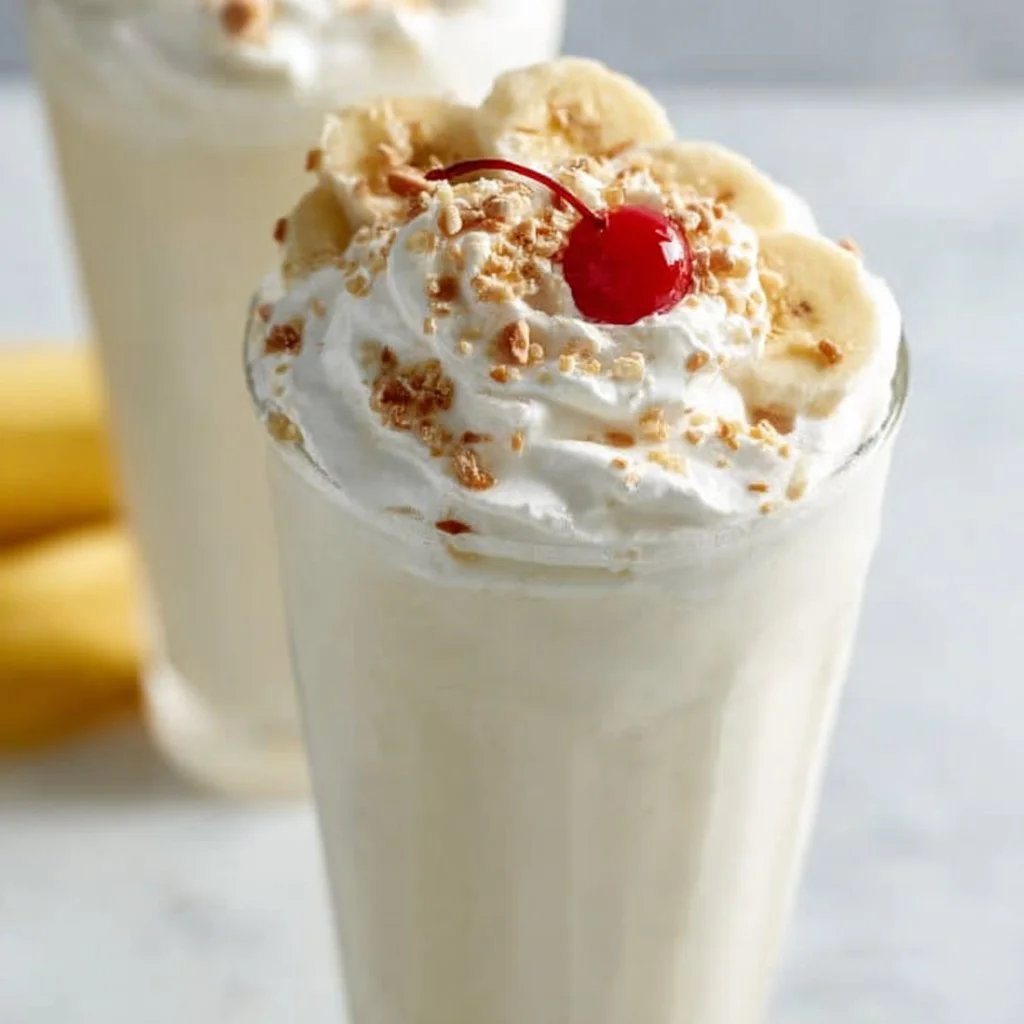
Banana Milkshake
# The Ultimate Banana Milkshake Recipe: A Creamy Delight

## Introduction

Hello there, fellow foodies! Welcome back to my cozy kitchen, where aromas swirl and flavors dance. Today we’re diving into a classic treat that’s as simple as it is delightful: the **banana milkshake**. This creamy concoction is not just a drink; it's a memory, a joy, and sometimes a cure for the ordinary day blues!

I still remember those summer afternoons spent on the porch, sipping cold milkshakes with my family as we watched the clouds drift lazily by. Each slurp was a sweet reminder of carefree days and endless laughter. The best part? Banana milkshakes are not just for hot weather; they’re perfect for any season when you need a little pick-me-up.

Now, you might think that making a milkshake requires some special skills or expensive equipment, but let me tell you, it’s as easy as pie! In fact, it's so quick and fun that I bet you'll do a happy dance in the kitchen once you whip one up. You will need just a few pantry staples and, of course, ripe bananas to create this dreamy, creamy shake that will take you straight back to childhood!

So, grab your blender, and let’s get started on this nostalgic journey of flavors. Trust me; your tastebuds will thank you!

## Personal Story

When I think of banana milkshakes, I instantly flash back to those sweltering summer days when my mom would whip up a big batch for me and my siblings after a long afternoon of running around outside. The kitchen would be filled with the sound of our laughter mixed with the loud whir of the blender—an auditory reminder that something delicious was on its way.

We often had bananas on the counter, and my mom had a vigilant eye for those that were ripening just right. "Too brown, you've got to make the milkshake," she used to say, as if they were crying out to be transformed into something more than just a snack. And boy, was she right! Those milkshakes were like golden sunshine in a glass—thick, creamy, and bursting with flavor.

I can still picture my little hands wrapped around a frosty glass, a generous dollop of whipped cream on top, and a sprinkle of chocolate syrup for that extra treat. With each sip, I felt like the happiest kid in the world, and that feeling, dear friends, is what I want to recreate today. So let’s just jump right into crafting our own banana milkshake magic together!

## Ingredients

Here’s what you'll need to create your own luscious banana milkshake:

- **Ripe Bananas (2 large)**
  *The star of our milkshake! Ripe bananas are sweeter and add the perfect creamy texture. If you don’t have ripe bananas, you can use frozen ones—just skip the ice cream for that batch!*

- **Whole Milk (1 cup)**
  *Adds creaminess to your shake. You can use any milk you prefer—almond, soy, oat, or skim milk work wonderfully too!*

- **Vanilla Ice Cream (2 cups)**
  *This ingredient is essential for that rich and creamy mouthfeel. For a lighter option, try using frozen yogurt; it will still be delicious.*

- **Vanilla Extract (1 teaspoon)**
  *Just a splash enhances the banana flavor and adds a nice aromatic quality. Feel free to swap it for almond extract for a twist!*

- **Honey or Sugar (to taste)**
  *Depends on how sweet you like it! You can also use agave syrup or maple syrup to keep it natural.*

- **Ice (1/2 cup, optional)**
  *If you prefer your shake extra frosty, add some ice. But if you use frozen bananas, you can skip this.*

## Step-by-Step Instructions

Now, let’s get down to the nitty-gritty and make this banana milkshake! Follow along, and I promise you won't mess this up.

1. **Prep Your Bananas**
   Start by peeling those lovely, ripe bananas and breaking them into chunks. This helps them blend more smoothly. Trust me, you want a silky-smooth shake, not a chunky one!

2. **Gather Your Ingredients**
   Measuring out your ingredients ahead of time can make the process smoother. Place your bananas, milk, vanilla ice cream, and vanilla extract ready to go. It’s like setting the stage before the big performance!

3. **Blend It Baby!**
   Pop all your ingredients into the blender. Start on a low speed and gradually increase to high. Mix until smooth and creamy—this should only take about 30 seconds to a minute. If it’s too thick for your liking, add a splash more milk.

4. **Taste Test**
   Here’s where the magic happens! Grab a spoon or a straw and take a little taste. If you want it sweeter—now is the time to add honey or sugar! Blend again for a few seconds. Remember, always taste as you go; it’s how great dishes are born!

5. **Final Blend**
   Give it another quick whirl to ensure everything is perfectly combined. Make sure the texture is just how you like it—smooth with no lumps!

6. **Serve Right Away**
   The banana milkshake is best enjoyed immediately. Grab some tall glasses and pour in that sumptuous shake.

## Serving Suggestions

To serve, you can keep it simple or go all out! Drizzle a bit of chocolate syrup inside the glass before pouring in the milkshake for a fun visual treat. Top it with a generous swirl of whipped cream, a sprinkle of crushed nuts, or even a cherry on top if you’re feeling festive. Serve with colorful straws and enjoy that classic diner vibe right at home!

## Recipe Variations

1. **Chocolate Banana Milkshake**: Add 2 tablespoons of chocolate syrup into the blender for a delicious chocolate twist.

2. **Peanut Butter Banana Milkshake**: A tablespoon of peanut butter adds a rich, nutty flavor—perfect if you love that classic banana and peanut butter pairing!

3. **Dairy-Free Delight**: Use coconut milk and dairy-free ice cream for a creamy vegan version that doesn’t compromise on flavor.

4. **Spiced Banana Shake**: Sprinkle in a pinch of cinnamon or nutmeg for a warm, cozy accent to those banana flavors.

5. **Banana Berry Blast**: Toss in a handful of frozen berries for a fruity explosion that adds a beautiful color!

## Chef’s Notes

Ah, the banana milkshake—a timeless classic! I’ve played around with this recipe over the years, always falling back to the basics but adding my little cardi B twist here and there. One of my kitchen blunders was when I decided to make a milkshake with unripe bananas—you can guess how that turned out! It was like blending up a whole bunch of green nonsense. Lesson learned: always wait for the bananas to ripen.

One of my favorite memories about making banana milkshakes is sharing the results with friends. It became a tradition during movie nights, complete with cozy blankets and laughter. Now, that's what I call sweet bonding time!

## FAQs and Troubleshooting

**Q1: What should I do if my milkshake is too thick?**
If your milkshake is too thick, simply add a little more milk, blend it again, and check the consistency. Go slowly, so it doesn't turn into a thin soup!

**Q2: Can I use frozen bananas for a milkshake?**
Absolutely! Frozen bananas create a wonderfully thick texture and keep your shake extra cold, making them perfect for milkshakes!

**Q3: How can I make it vegan?**
For a vegan version, swap regular milk with plant-based milk like almond or oat milk, and use dairy-free ice cream or frozen bananas.

**Q4: Can I store leftovers?**
Milkshakes are best enjoyed fresh. However, if you have leftovers, pour them into a sealed container and place them in the freezer. Just remember to give them a good stir before enjoying again!

## Nutritional Info (per serving)

- **Calories**: 350
- **Fat**: 10g
- **Carbohydrates**: 62g
- **Protein**: 7g
- **Fiber**: 3g
- **Sugar**: 32g

And there you have it—the ultimate banana milkshake recipe that will bring a smile to your face with every delicious sip. I hope you enjoy crafting this delightful drink as much as I do! Be sure to share your banana milkshake adventures with me. Happy blending!
The Ultimate Banana Milkshake
- Total Time: 5 minutes
- Yield: 2 servings 1x
- Diet: Vegetarian
Description
A creamy and nostalgic banana milkshake recipe that is easy to make and perfect for any season.
Ingredients
- 2 large ripe bananas
- 1 cup whole milk
- 2 cups vanilla ice cream
- 1 teaspoon vanilla extract
- Honey or sugar (to taste)
- 1/2 cup ice (optional)
Instructions
- Prep your bananas by peeling and breaking them into chunks.
- Gather your ingredients and measure them out.
- Blend all ingredients in a blender on low, increasing to high until smooth.
- Taste your shake and adjust sweetness if necessary.
- Final blend to ensure everything is perfectly combined.
- Serve immediately in tall glasses.
Notes
For variations, add chocolate syrup for a chocolate twist or peanut butter for extra flavor.
- Prep Time: 5 minutes
- Cook Time: 0 minutes
- Category: Beverage
- Method: Blending
- Cuisine: American
Nutrition
- Serving Size: 1 serving
- Calories: 350
- Sugar: 32g
- Sodium: 100mg
- Fat: 10g
- Saturated Fat: 5g
- Unsaturated Fat: 5g
- Trans Fat: 0g
- Carbohydrates: 62g
- Fiber: 3g
- Protein: 7g
- Cholesterol: 30mg
Keywords: banana milkshake, creamy shake, summer drink
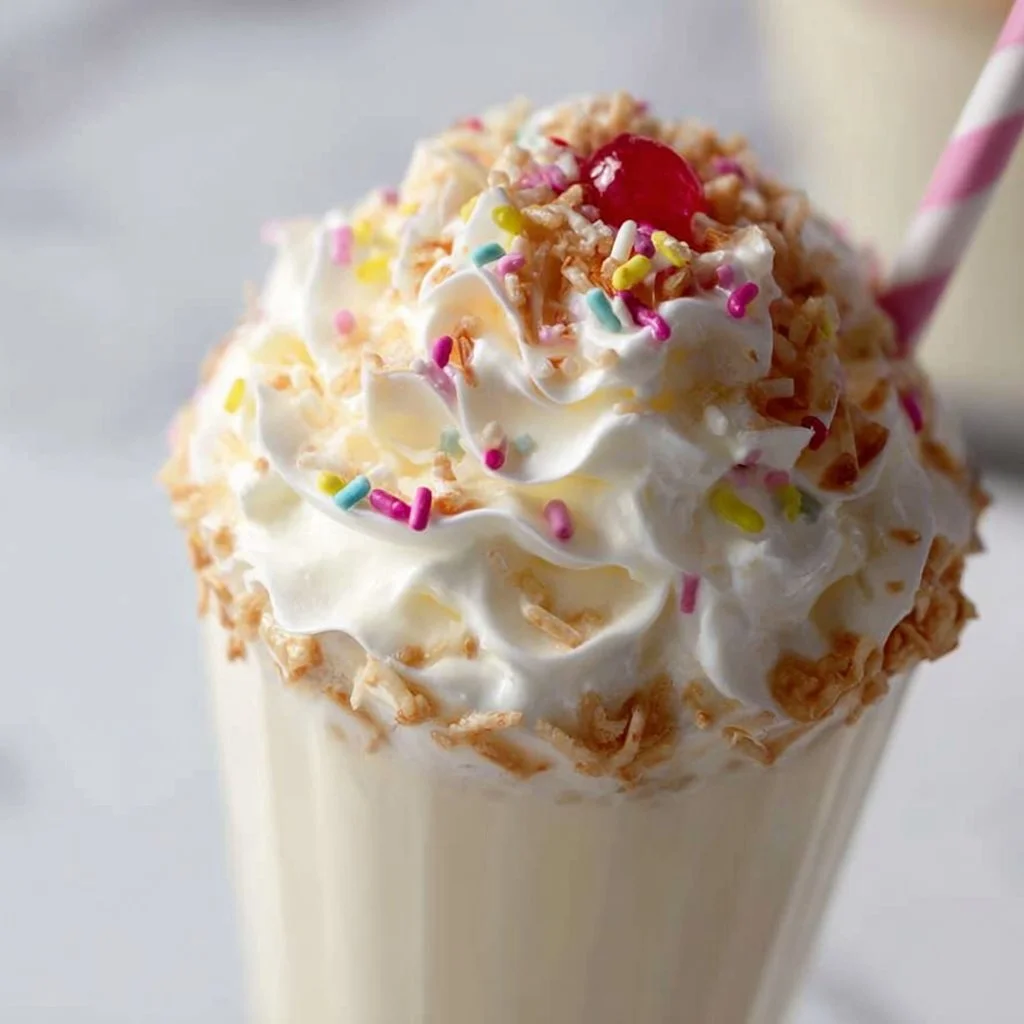
Vanilla Milkshake
Irresistibly Creamy Vanilla Milkshake: A Home Cook’s Delight
Hello, fellow food lovers! Welcome back to my cozy corner of the culinary world. Today, we’re diving into one of the simplest yet most delightful treats you can whip up in your kitchen: the classic vanilla milkshake. There’s something magical about the combination of creamy ice cream, cool milk, and rich vanilla that can transport you right back to those hot summer days of childhood. Remember the joy of hearing the familiar sound of an ice cream truck approaching, and you’d rush outside with a few crumpled bills in hand? Well, this homemade milkshake will rekindle those sweet memories and keep your taste buds singing!
I’ll guide you through crafting the perfect vanilla milkshake from scratch, sharing everything I’ve learned along the way. This isn’t just a recipe; it’s a journey into flavors and nostalgia that celebrates the beauty of simplicity in cooking. So, grab your favorite blender and let’s make some magic happen!
Personal Story
Growing up, Saturday afternoons at my grandparents’ house were a true highlight. After a long week at school, there was nothing better than knowing I’d be ending the week right with my family. My grandmother had a ritual; she’d whip up a batch of thick vanilla milkshakes for us. The kitchen would fill with the joyful sound of blender whirring, and the smell of vanilla would dance through the air. We’d gather around the table, each of us with a tall glass topped off with whipped cream and a cherry, laughing and sharing stories.
Those milkshakes were more than just a treat; they were a tradition, a memory-laden experience that smeared smiles across our faces. It’s these moments that I strive to recreate in my own kitchen, using recipes that foster connection and joy. Making this vanilla milkshake brings back all of those cherished feelings while allowing me to create new memories with my loved ones.
Ingredients
Let’s gather our star players for this delectable vanilla milkshake:
-
Vanilla Ice Cream (2 cups): The base for our milkshake! Always go for high-quality vanilla—real vanilla bean or gourmet ice cream can elevate your shake beyond the ordinary. You can substitute it with dairy-free ice cream if you prefer a vegan option.
-
Milk (1 cup): Whole milk gives the creamiest results, but feel free to use low-fat or plant-based alternatives (like almond, cashew, or oat milk) for lighter options. Just note that the thickness may vary.
-
Vanilla Extract (1 tsp): This enhances the vanilla flavor. Use pure vanilla extract for the best taste. If you’re in a pinch, clear vanilla extract will work too, but it is less flavorful.
-
Whipped Cream (for topping): Nothing says milkshake like a generous dollop of whipped cream! You can buy pre-made or whip some up at home—it’s super easy and much tastier.
-
Maraschino Cherry (for garnish): This is an optional, but classic topping that screams “dessert!”
-
Sprinkles (optional): Because a bit of color makes everything better, right? These aren’t necessary, but they sure do add some fun!
Chef Insight: Don’t be afraid to play around with these ingredients. The beauty of a milkshake lies in its versatility. Adjust milk to ice cream ratio depending on how thick or mild you want it!
Step-by-Step Instructions
Ready to bring this milkshake to life? Let’s get to business!
-
Gather Your Ingredients: It’s always a good idea to have everything within reach. This not only streamlines the process but makes the cooking experience feel effortless.
-
Scoop the Ice Cream: Use a sturdy ice cream scoop to get about 2 cups of vanilla ice cream. If it’s a bit hard, let it sit for a couple of minutes to soften up—this will make blending smoother.
-
Pour in the Milk: Add 1 cup of milk to your blender. If you prefer a thicker milkshake, start with ¾ cup and see how it goes. You can always add more!
-
Add the Vanilla Extract: Pour in 1 teaspoon of pure vanilla extract. This is where the magic happens; it infuses our shake with richness and depth.
-
Blend: Secure the lid tightly on your blender and start on a low speed, gradually increasing it until your mixture is creamy and smooth. This usually takes about 30 seconds to 1 minute, depending on your blender. You want to make sure everything is well combined, but be cautious—over-blending can introduce too much air!
-
Taste Test: Here’s my favorite part! Dip a spoon into your milkshake and give it a taste. If you want a stronger vanilla flavor, feel free to add a splash more extract or a scoop of sugar!
-
Pour and Serve: Grab your favorite tall glasses, and pour the milkshake in, filling them to the rim if you’re feeling indulgent.
-
Top it Off: Add the whipped cream on top like it’s a crown, and finish with a maraschino cherry and sprinkles if you’re feeling extra!
Chef Hack: If you’re worried about messy pouring, use a liquid measuring cup with a spout to transfer your shake into the glasses.
Serving Suggestions
Presenting your vanilla milkshake is all about adding a little flair! Serve them with colorful striped straws, or even place a piece of chocolate or cookie on the side for that extra touch. For a gathering, consider using mason jars—everyone loves a good mason jar moment!
Recipe Variations
-
Chocolate Vanilla Twist: Add 2 tablespoons of chocolate syrup to your blender to create a Chocolate Vanilla Milkshake. You can even blend in some chocolate chips for extra texture!
-
Strawberries and Cream: Throw in half a cup of fresh or frozen strawberries for a delightful strawberry vanilla twist. This not only changes up the flavor but adds a vibrant pink hue!
-
Cookies and Cream: Crush a few Oreo cookies and stir them into the shake before pouring. This is a twist that cookie lovers will not be able to resist!
-
Coffee Kick: For the coffee enthusiasts, try blending in a shot of espresso or a tablespoon of instant coffee granules. The caffeine will give your milkshake a delightful lift!
-
Nutty Vanilla Shake: Add a tablespoon of almond butter or peanut butter for a nutty flavor boost. It pairs beautifully with the vanilla!
Chef’s Notes
This vanilla milkshake recipe has evolved through the years, from a simple combination of just three ingredients made at my grandma’s house to a base I now customize for family and friends. I love how versatile and forgiving milkshakes can be! It’s like a canvas waiting for you to paint your flavor masterpiece.
And let’s not forget—if you have any leftovers (which is rare), you can freeze your milkshake in an ice cube tray and toss them into your morning smoothies for a delicious vanilla kick!
FAQs and Troubleshooting
Q: My milkshake is too thin. What do I do?
A: If you find your milkshake is thinner than you’d like, simply toss in more ice cream and blend again. It’s all about adjusting to your texture preference!
Q: How do I make a thicker milkshake?
A: The secret is to reduce the amount of milk and increase the ice cream. Ice cream is the thickener, so the less milk you use, the creamier your shake will be.
Q: Can I make this dairy-free?
A: Absolutely! Use dairy-free ice cream and a plant-based milk option, like almond or oat milk. You’ll still end up with a delicious milkshake!
Q: How can I store leftovers?
A: If you happen to have any leftovers, pour them into an airtight container and freeze for a future treat. Just blend it with a splash of milk when you’re ready to enjoy it again!
Nutritional Info (if applicable)
For a standard vanilla milkshake made with 2 cups of vanilla ice cream and 1 cup of whole milk, here’s a quick estimate for one serving:
- Calories: Approximately 450-500 calories
- Fat: 18g
- Carbohydrates: 75g
- Protein: 10g
(These values can vary based on specific ingredients used.)
I hope you’re as thrilled as I am to create your very own vanilla milkshake! It’s a beautiful reminder that sometimes, simple pleasures hold the most joy. Whether you’re enjoying it solo or sharing with friends and family, this recipe aims to spark sweetness and fun in every sip. Happy blending, and don’t forget to share those delightful milkshake moments! 🍦✨
Print
Irresistibly Creamy Vanilla Milkshake
- Total Time: 5 minutes
- Yield: 2 servings 1x
- Diet: Vegetarian
Description
A classic vanilla milkshake made with creamy ice cream, cool milk, and rich vanilla, perfect for rekindling childhood memories.
Ingredients
- 2 cups Vanilla Ice Cream
- 1 cup Milk
- 1 tsp Vanilla Extract
- Whipped Cream (for topping)
- Maraschino Cherry (for garnish)
- Sprinkles (optional)
Instructions
- Gather Your Ingredients.
- Scoop the Ice Cream.
- Pour in the Milk.
- Add the Vanilla Extract.
- Blend until creamy and smooth.
- Taste Test.
- Pour and Serve.
- Top it Off.
Notes
Experiment with different toppings or flavors to customize your milkshake experience. You can make it dairy-free by using plant-based ingredients.
- Prep Time: 5 minutes
- Cook Time: 0 minutes
- Category: Dessert
- Method: Blending
- Cuisine: American
Nutrition
- Serving Size: 1 serving
- Calories: 450
- Sugar: 60g
- Sodium: 100mg
- Fat: 18g
- Saturated Fat: 11g
- Unsaturated Fat: 3g
- Trans Fat: 0g
- Carbohydrates: 75g
- Fiber: 0g
- Protein: 10g
- Cholesterol: 70mg
Keywords: milkshake, vanilla, dessert, ice cream, creamy, nostalgic
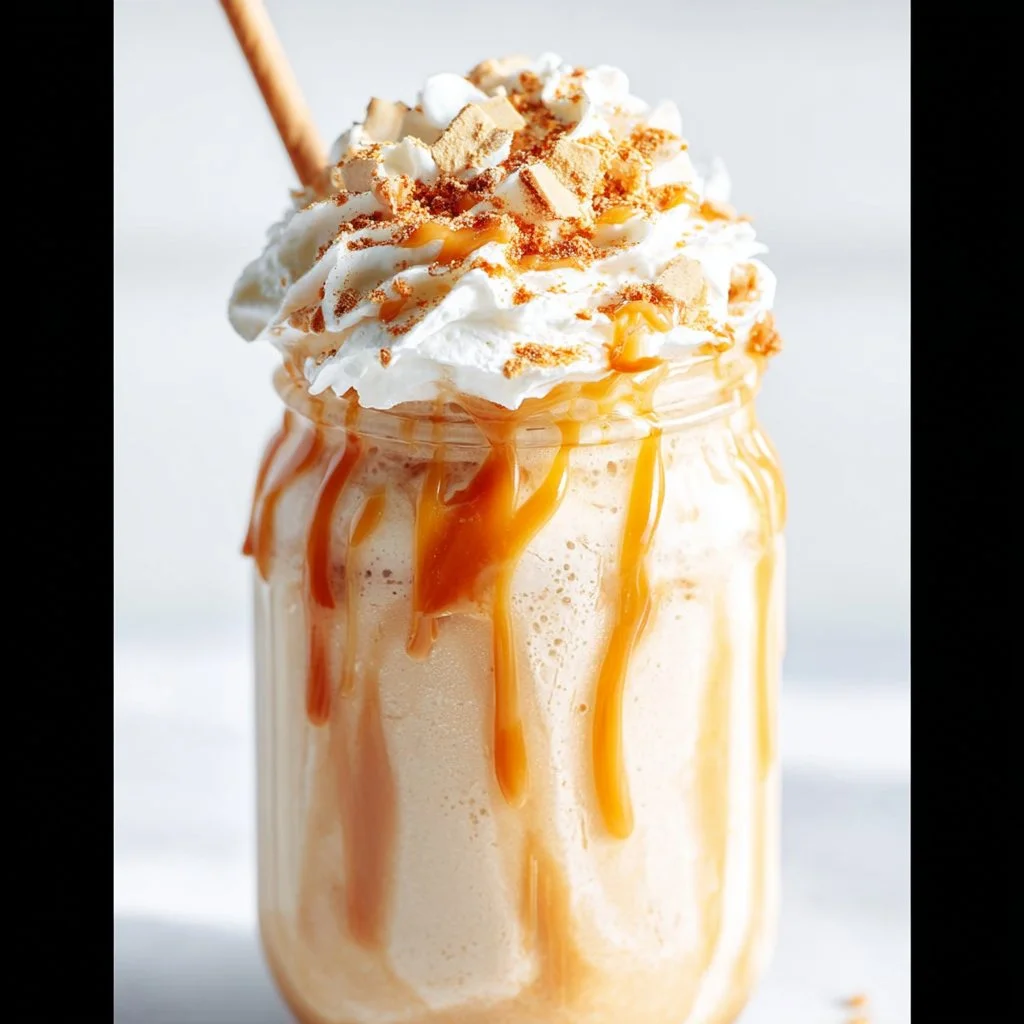
Caramel Biscoff Milkshake
Caramel Biscoff Milkshake: The Sweetest Dream You’ll Sip
Welcome to my cozy corner of the culinary world! I’m so thrilled you’re here to whip up something that’s not just a milkshake but a little taste of heaven in a glass. Today, we’re diving into the world of indulgence with a Caramel Biscoff Milkshake! If you’re a fan of the rich, spiced flavors of Biscoff cookies and the utterly delightful taste of caramel, then get ready to fall in love. This drink is the perfect blend of nostalgia, sweetness, and comfort; it encapsulates everything I adore about cooking and sharing joy through food.
Milkshakes have a special place in my heart. Do you remember those carefree summer afternoons where you’d bike to your favorite diner with friends, the sun shining down as you savored every sip of a fantastical milkshake? Those memories inspired me to recreate that same bliss at home, only I’m adding a twist to it — because who says milkshakes need to be traditional?
The Caramel Biscoff Milkshake bursts with creamy goodness. We’ll blend cool vanilla ice cream with luscious caramel sauce and crumbled Biscoff cookies, providing a flavor explosion that’ll take you back to your happy place in an instant! You could even indulge in it when you need a little pick-me-up or to celebrate that special moment. Follow me as we embark on this sweet journey together, filled with warmth, laughter, and perhaps a few messy moments (don’t worry, that’s all part of the fun!).
Are you ready? Grab your apron, and let’s dive into the irresistible world of the Caramel Biscoff Milkshake!
Personal Story
Ah, Biscoff cookies—these delightful little treats remind me of family trips to Europe when I was a child. My parents would eagerly pack our bags, and we’d chart a course to explore quaint villages, bustling marketplaces, and magnificent pastry shops. I vividly remember the way my taste buds danced when I first tried those buttery, spiced cookies. They were the perfect companion for our evenings spent watching the sunset, paired with sips of warm milk or lavish scoops of ice cream.
Fast forward to today, and Biscoff cookies are still an essential part of my life. Whenever I crave something sweet, I rediscover my love for these cookies while preparing snacks for friends or gatherings. So, it was only natural that I would combine my fond memories with my deep love for milkshakes, creating the ultimate Caramel Biscoff Milkshake to share with you. Every sip carries not just an incredible taste but also the nostalgia and warmth of sharing moments with loved ones—what could be better than that?
Ingredients
Let’s gather your ingredients! Here’s what you’ll need to create this dreamy milkshake, along with some quick tips:
-
Vanilla Ice Cream (4 cups): The foundation of your milkshake! Feel free to substitute with dairy-free ice cream if you’re looking for a non-dairy option. The creaminess is essential for a thick shake.
-
Milk (1 cup): Use whole milk for a richer texture, but feel free to swap in almond milk or oat milk for a lighter, dairy-free choice.
-
Caramel Sauce (½ cup): You can opt for store-bought or homemade caramel sauce! For a fun twist, try using flavored sauces, like salted caramel, to elevate your milkshake even further.
-
Biscoff Cookies (8-10 cookies): These delightful cookies are essential for flavor! However, if you can’t find Biscoff, speculoos cookies or any similar spiced cookies would work too.
-
Whipped Cream (for garnish): Nothing says "fancy milkshake" like a dollop of whipped cream! Use homemade or store-bought, or even coconut whipped cream for a dairy-free alternative.
-
Extra Biscoff Crumbs (for garnish): Just crush some extra cookies to sprinkle on top of your finished milkshake. It adds not only to the aesthetics but also to that irresistible Biscoff flavor!
Step-by-Step Instructions
Now we embark on the best part: creating our delicious milkshake! Here’s how to blend everything together:
-
Blend the Ice Cream and Milk: In a blender, combine your vanilla ice cream and milk. It’s crucial to start with the ice cream first, adding the milk bit by bit until you reach your desired consistency. If you want a thicker shake, hold back a little milk until later. Blend on high until smooth and creamy (about 30 seconds).
Tip: If you’re using frozen ice cream, let it sit at room temperature for a few minutes before blending. This will ensure a creamier consistency!
-
Adding Caramel and Cookies: Now, add in the caramel sauce and Biscoff cookies to the blender. Blend until the cookies have broken down completely, and the mix is nice and thick. You want those delightful bits of cookie throughout, so don’t over-blend!
Chef Hack: If you want a more intense caramel flavor, taste and add more caramel sauce to your liking before blending.
-
Taste & Adjust: After blending, taste your milkshake. Want more sweetness or more caramel flavor? This is your chance to adjust before the final blend!
-
Prepare for Serving: Pour the creamy mixture into tall glasses. To make it even fancier, you can drizzle extra caramel sauce inside the glass before pouring in the milkshake.
Chef Note: For a gorgeous presentation, tilt your glass and spin it gently while pouring the shake to create beautiful caramel swirls!
-
Top It Off: Go ahead and garnish with whipped cream, a drizzle of caramel sauce, and sprinkle those extra Biscoff crumbs on top. Your milkshake should look as good as it tastes!
-
Grab a Spoon!: Serve immediately with a straw or a spoon for that extra scoop of rich goodness!
Serving Suggestions
When it comes to presentation, it’s all about showcasing that deliciousness! My favorite way to serve this Caramel Biscoff Milkshake is in tall glasses with a generous swirl of whipped cream on top, drizzled with caramel sauce, and scattered Biscoff crumbs for that gorgeous finishing touch. Maybe serve it with a side of extra cookies for dipping — who can resist that?
Recipe Variations
Here’s the fun part — let’s get creative with your Caramel Biscoff Milkshake! Here are a few delicious variations:
-
Chocolate Twist: Add a couple of tablespoons of chocolate syrup for a choco-Biscoff flavor explosion.
-
Minty Fresh: Add a few mint leaves or a splash of mint syrup for a refreshing twist on this indulgent milkshake.
-
Nutty Addition: Blend in some peanut butter or Nutella for added flavor and richness!
-
Fruit Fusion: Toss in a banana for a fruity twist — the sweetness pairs beautifully with the Biscoff!
-
Spicy Flare: Want to kick it up a notch? Add a pinch of cinnamon or cayenne pepper. It will give a surprising depth to your milkshake!
Chef’s Notes
This recipe has been a labor of love, evolving with each attempt to find the perfect balance of flavors. The first time I made it, my blender nearly met its match with the cookies, but oh, it was worth it! Learning to balance how much of each ingredient to use was a fun adventure, and there were definitely a few messy spills involved. Now, this Caramel Biscoff Milkshake has evolved into a classic go-to treat in my home. It always brings smiles, and my friends always get excited when they see me prepare it!
Pro Tip:
Don’t forget to keep a few extra cookies on hand for a surprise crunch element. Also, as cookies soften, the shake takes on an even more wonderful texture!
FAQs and Troubleshooting
-
Can I use low-fat ice cream?
Absolutely! You can use low-fat ice cream or frozen yogurt, but keep in mind that the texture may be a bit less creamy. -
The milkshake is too thick! What do I do?
If your milkshake turns out too thick, simply drizzle in a bit more milk and blend again until you reach your desired consistency. -
Do I have to use Biscoff cookies?
No way! If Biscoff cookies are not available, substitute them with any spiced cookie, like speculoos or ginger snaps, for similar flavors. -
Can I make this milkshake in advance?
While it’s best made fresh, you can prepare the ingredients in advance and blend them right before serving. This way, the cookies won’t lose their crunch!
Nutritional Info (Optional)
If you’re keen on tracking your nutrition, here’s a rough breakdown of the Caramel Biscoff Milkshake per serving (estimated):
- Calories: 450
- Protein: 8g
- Carbohydrates: 60g
- Fat: 20g
- Fiber: 2g
(Nutritional values may vary based on specific brands and quantities used.)
So there you have it, my lovely foodie friends! The Caramel Biscoff Milkshake is your next stay-at-home treat that’s delightful for cozy evenings, weekend hangouts, or anytime you want a sweet escape. I hope you enjoy the magic as much as I do while whipping this up! Happy cooking, and cheers to your sweet indulgence! 🍦✨
Print
Caramel Biscoff Milkshake
- Total Time: 10 minutes
- Yield: 2 servings 1x
- Diet: Vegetarian
Description
Indulge in the creamy goodness of a Caramel Biscoff Milkshake, bursting with rich flavors of vanilla ice cream, caramel sauce, and delicious Biscoff cookies.
Ingredients
- 4 cups Vanilla Ice Cream
- 1 cup Milk (whole, almond, or oat)
- ½ cup Caramel Sauce (store-bought or homemade)
- 8–10 Biscoff Cookies
- Whipped Cream (for garnish)
- Extra Biscoff Crumbs (for garnish)
Instructions
- Blend the ice cream and milk in a blender until smooth and creamy.
- Add in the caramel sauce and Biscoff cookies, then blend until the cookies are broken down.
- Taste your milkshake and adjust sweetness or caramel flavor as desired.
- Pour the mixture into tall glasses, optionally drizzling caramel sauce inside the glasses.
- Top with whipped cream, caramel drizzle, and extra Biscoff crumbs for garnish.
- Serve immediately with a straw or spoon.
Notes
Don’t forget to keep a few extra cookies on hand for surprise crunch elements.
- Prep Time: 10 minutes
- Cook Time: 0 minutes
- Category: Dessert
- Method: Blending
- Cuisine: American
Nutrition
- Serving Size: 1 serving
- Calories: 450
- Sugar: 50g
- Sodium: 150mg
- Fat: 20g
- Saturated Fat: 12g
- Unsaturated Fat: 8g
- Trans Fat: 0g
- Carbohydrates: 60g
- Fiber: 2g
- Protein: 8g
- Cholesterol: 60mg
Keywords: milkshake, Biscoff, caramel, dessert, creamy beverage
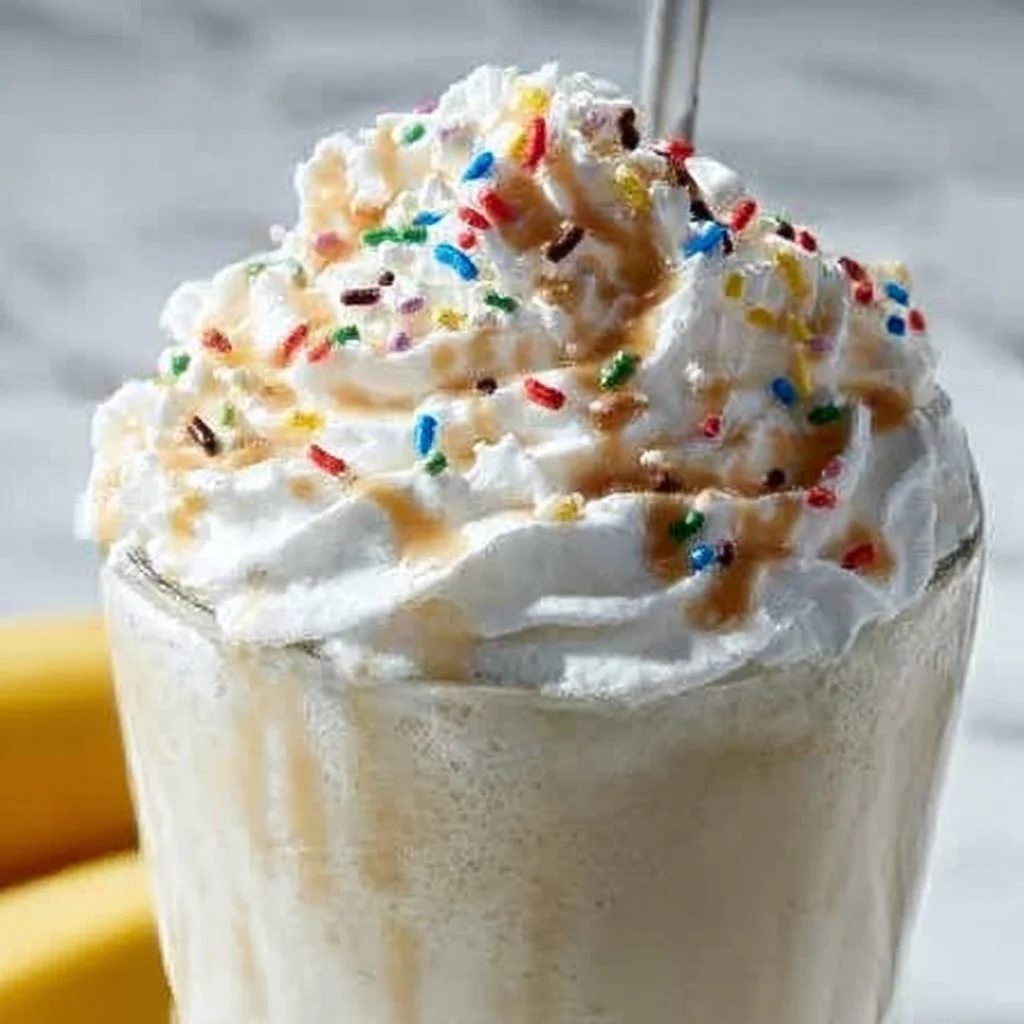
Dairy Queen Banana Milkshake
Dairy Queen Banana Milkshake Recipe: A Cozy, Creamy Delight!
Hey there, fellow food lovers! Welcome back to my kitchen — I’m so glad you’ve joined me today! If you’re anything like me, there’s something about the sweetness of a banana blended with creamy ice cream that just sends your taste buds into orbit. Today, I’m excited to share with you a delightful recipe that captures the essence of one of those cherished childhood treats we all know and love: the legendary Dairy Queen Banana Milkshake!
Ah, the memories of standing in line at Dairy Queen, that enticing aroma of waffle cones wafting through the air, and the joyful anticipation as you watched the friendly staff whip up your favorite milkshake. There’s just something magical about the way a milkshake brings back those sunny, carefree days, filled with laughter and a sprinkle of nostalgia. You can almost taste that creamy, dreamy blend of real bananas, rich ice cream, and a touch of vanilla goodness.
But here’s the thing — you don’t have to dash out to your nearest DQ to satisfy that dairy-filled craving. Nope! I’ve crafted a super easy, delicious banana milkshake recipe that you can whip up right in the comfort of your own home. Grab your blender, dig into those ripe bananas on your counter, and let’s transform those humble ingredients into a delightful treat!
In this blog post, I’ll walk you through every step of the process, share some personal anecdotes, and sprinkle in a few chef tips to ensure you master this creamy concoction. Whether you’re sipping this milkshake after a long day or serving it at a backyard barbecue, trust me — it’s bound to be a crowd-pleaser. Ready to blend? Let’s dive in!
Personal Story
Growing up, my family had a tradition: every Sunday after church, we’d stop by the local Dairy Queen before heading home for the afternoon. My brother always opted for the chocolate fudge sundae, while I eagerly anticipated my favorite banana milkshake. There was something undeniably special about that treat; it wasn’t just a dessert; it was a little bit of joy in a cup!
I remember sitting at our favorite booth, my cheeks smeared with whipped cream as I savored that cold, creamy blend while chatting about my week. The way those flavors danced on my palate — the smoothness of the vanilla ice cream with the sweet, natural flavor of the bananas — was a moment of sheer bliss.
Eventually, as I grew older and began experimenting in my kitchen, I found that making this nostalgic treat at home was not only easy but oh-so-rewarding! It has since turned into one of my go-to recipes for gatherings and quiet evenings alike. Recreating that sensation of joy in a milkshake now feels like a warm hug from my childhood. With that said, let’s gather our ingredients and get blending!
Ingredients
To make the perfect Dairy Queen-style banana milkshake, you’ll need the following ingredients:
-
Ripe Bananas (2 medium)
- Explanation: Bananas that have a few brown spots are perfect because they’re extra sweet and creamy.
- Substitution tips: If you’re not a banana fan (gasp!), try using frozen strawberries or mango for a fruity twist.
-
Vanilla Ice Cream (2 cups)
- Explanation: Using good-quality vanilla ice cream makes a world of difference in flavor.
- Substitution tips: Dairy-free ice cream or frozen yogurt can work if you’re looking for a lighter version.
-
Milk (1/2 cup)
- Explanation: Milk helps create that perfect pourable consistency.
- Substitution tips: Use almond milk or oat milk for a dairy-free version.
-
Vanilla Extract (1 teaspoon)
- Explanation: A splash of vanilla elevates the flavor to delicious new heights.
- Substitution tips: You can omit this if you’re in a pinch, but it really does enhance the banana flavor!
-
Whipped Cream (for serving)
- Explanation: Because what’s a milkshake without a fluffy topping?
- Tip: Feel free to use store-bought or make your own using heavy whipping cream.
-
Optional: A Pinch of Cinnamon
- Explanation: Adding a pinch of cinnamon can introduce a warm spice note that enhances the banana flavor.
Gather these delightful ingredients, and you’re on your way to creating a cool, creamy treat that’s sure to put a smile on your face!
Step-by-Step Instructions
Let’s get to the fun part — blending it all together! Follow these simple steps:
-
Prepare Your Bananas
- Slice your ripe bananas into smaller pieces (about 1-2 inches). This not only makes blending easier but also ensures a smooth consistency. If you like your milkshake extra frosty, you can freeze the banana slices beforehand for a thick delight.
-
Measure Your Ingredients
- In your trusty blender, add the sliced bananas first, followed by the vanilla ice cream. This order typically helps things blend better, especially if you’re using a less powerful blender.
-
Pour in the Milk
- Add 1/2 cup of milk to your blender. You can adjust this later for thickness; start with less if you want a thicker shake.
-
Add Vanilla Extract
- Pour in the teaspoon of vanilla extract to infuse that extra layer of flavor.
-
Blend It Up!
- Secure the blender lid tightly (we don’t want any banana explosions here!). Blend on medium speed until all the ingredients are well-combined and you achieve a smooth and creamy texture—around 30-60 seconds. Stop to scrape down the sides if needed.
-
Check Consistency
- This is the fun part! Stop blending and take a spoon to taste your milkshake. If you prefer it thicker, add a bit more ice cream. For a thinner version, splash in a little more milk.
-
Serve the Shake
- Once you’re happy with the consistency, pour the milkshake into your favorite tall glasses. Don’t be shy — I love to fill mine to the brim!
-
Top with Whipped Cream
- Earn extra style points by generously topping each glass with whipped cream. If you’re feeling fancy, you can drizzle some chocolate syrup on top or even sprinkle a bit of cinnamon for that extra flair.
-
Grab a Straw and Enjoy!
- Now, grab a straw (or a spoon if you prefer) and indulge in your homemade banana milkshake. Sip slowly to relish every delicious drop!
Serving Suggestions
To serve your delectable banana milkshake, choose a tall glass that shows off its lovely swirls of creamy goodness. Add a vibrant straw, perhaps in a fun color, and a generous puff of whipped cream on top. For a charming touch, you might want to garnish with a banana slice or a drizzle of chocolate syrup to make it feel extra special.
Don’t forget, this milkshake pairs perfectly with homemade cookies or a slice of pie, making it a delightful dessert for parties or cozy evenings at home.
Recipe Variations
Want to switch things up a bit? Here are a few creative variations to consider:
-
Chocolate Banana Milkshake: Just add two tablespoons of chocolate syrup or some cocoa powder along with the other ingredients for a delightful chocolatey twist!
-
Peanut Butter Banana Milkshake: Add two tablespoons of creamy peanut butter for a protein boost and a rich, nutty flavor.
-
Nutty Banana Milkshake: Stir in some crushed nuts (like walnuts or almonds) for added texture and nutty flavor.
-
Vegan Option: Swap the vanilla ice cream for a banana-flavored coconut or almond ice cream and use almond milk for a delicious vegan treat.
-
Berry Banana Blend: Throw in a handful of frozen berries (like strawberries or blueberries) for an added fruity burst — yum!
Chef’s Notes
Every time I make this banana milkshake, I think back to those sunny Sundays at Dairy Queen with my family and friends. Whether we were sharing laughs or chatting about life, those moments made the milkshake taste even sweeter.
This recipe has evolved over time in my kitchen. I remember the early days when I attempted to make it, mixing and matching ingredients haphazardly without much success. It’s funny how a simple recipe can turn into something so reliable and beloved!
Every now and then, I’ll experiment with new flavors or toppings, but the classic banana still reigns supreme in my heart. No matter how many twists I try, nothing beats that first sip that reminds me of home.
FAQs and Troubleshooting
1. My milkshake turned out too thick! What should I do?
- If your milkshake is too thick, simply add a little more milk and blend until you reach your desired consistency. You can also add extra banana if you want to keep the flavor strong!
2. Can I use frozen bananas?
- Absolutely! Frozen bananas work great and often create an even thicker texture. Just keep in mind that you may need to adjust your milk amount for blending.
3. What if I don’t have a blender?
- You can use an immersion blender if you have one! Alternatively, mash the bananas well and then mix all the ingredients using a whisk or fork for a chunkier milkshake.
4. How can I prevent the bananas from turning brown?
- To avoid browning, you can squeeze a bit of lemon juice on the banana slices right after cutting them, though this might add a slight tang.
Remember, cooking is all about experimenting and finding what works for you — don’t stress too much, and just enjoy the process!
Nutritional Info (Optional)
While I believe in enjoying delicious treats without guilt, if you’re curious about the nutritional breakdown, here’s a rough estimate for one serving (using the ingredients listed):
- Calories: 400-500
- Protein: 7g
- Fat: 15g
- Carbohydrates: 75g
- Sugars: 65g
Keep in mind that this can vary based on the specific brands you use.
Well, there you have it! A delightful, creamy Dairy Queen-inspired banana milkshake recipe that’s not just delicious but also brings a wave of nostalgia with every sip. Whether it’s a hot summer day or a cozy winter evening, this milkshake is sure to lift your spirits and evoke all those heartwarming memories. So grab your ingredients, invite a friend, and let’s blend some happiness together. Happy cooking, friends! 🍌🥤❤️
Print
Dairy Queen Banana Milkshake
- Total Time: 10 minutes
- Yield: 2 servings 1x
- Diet: Vegetarian
Description
A delightful, creamy banana milkshake inspired by the classic Dairy Queen treat, perfect for any occasion.
Ingredients
- 2 medium ripe bananas
- 2 cups vanilla ice cream
- 1/2 cup milk
- 1 teaspoon vanilla extract
- Whipped cream (for serving)
- A pinch of cinnamon (optional)
Instructions
- Prepare your bananas by slicing them into smaller pieces (about 1-2 inches).
- Measure your ingredients by adding the sliced bananas first into your blender, followed by the vanilla ice cream.
- Pour in the milk, adjusting the quantity for thickness as desired.
- Add the vanilla extract to enhance the flavor.
- Blend on medium speed for 30-60 seconds until smooth and creamy.
- Check the consistency and adjust by adding more ice cream or milk as needed.
- Serve the milkshake in tall glasses, filling them to the brim.
- Top with whipped cream and any optional toppings like chocolate syrup or cinnamon.
- Grab a straw and enjoy your homemade banana milkshake!
Notes
For added flavor variations, consider chocolate syrup, peanut butter, nuts, or using dairy-free alternatives.
- Prep Time: 10 minutes
- Cook Time: 0 minutes
- Category: Dessert
- Method: Blending
- Cuisine: American
Nutrition
- Serving Size: 1 serving
- Calories: 450
- Sugar: 65g
- Sodium: 100mg
- Fat: 15g
- Saturated Fat: 9g
- Unsaturated Fat: 4g
- Trans Fat: 0g
- Carbohydrates: 75g
- Fiber: 3g
- Protein: 7g
- Cholesterol: 50mg
Keywords: banana milkshake, dessert, creamy, Dairy Queen, nostalgic, ice cream
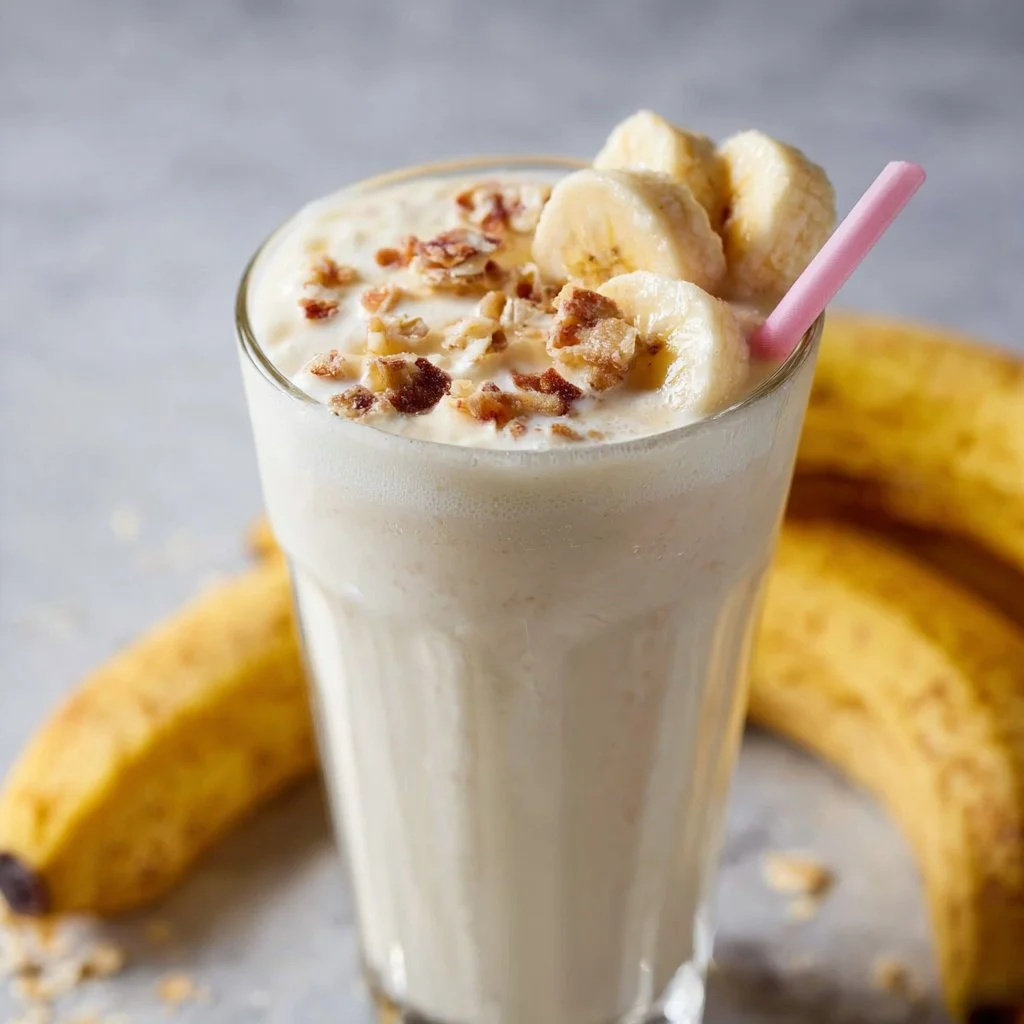
Banana Milkshake Recipe
The Ultimate Banana Milkshake Recipe: Cozy Up with Comfort in a Glass!
Introduction
Hey there, fellow food lovers! Olivia Bennett here, and I’m thrilled to welcome you into my kitchen once again. Today, we’re diving into something that’s not just a treat for your taste buds but also a splash of nostalgia wrapped in creaminess and sweetness—a classic Banana Milkshake. If you’ve ever relished that incredible moment when you take your first sip of a thick and frosty milkshake, you know exactly what I’m talking about!
This creamy delight isn’t just a drink; it’s a doorway to memories. Picture little fairground stands buzzing with excitement, or a summer afternoon spent leisurely by the pool while your friends slurp on rich shakes, laughter ringing in the air. The simple blend of bananas, milk, and a hint of vanilla might seem straightforward, but each ingredient comes together to create a burst of flavor that’s pure bliss!
Creating this Banana Milkshake is an experience meant for everyone, and trust me, it’s so easy that you’ll never want to reach for a pre-made version again! Whether you’re soothing those after-school cravings, impressing friends at a summer barbecue, or pampering yourself after a long day, this milkshake is the perfect answer. So, grab your blender and a couple of ripe bananas, and let’s make some magic happen!
Personal Story
Let me take you back to my childhood. Summers were a treasure trove of joy, with those long, lazy days stretching out like a golden ribbon. My favorite part? Hands down, it was our weekly trips to the local diner with my family. My dad would always order a ginormous burger while my mom would go for her classic club sandwich. But let’s be real, the highlight for me was diving into a huge Banana Milkshake—thick, creamy, and piled high with whipped cream.
I’ll never forget how the flavors melded together—sweet bananas dancing with cool milk and a touch of vanilla. The first sip transported me to cloud nine! And there’s a funny little incident that still gives me a chuckle. One day, a rather ambitious dad nearby tried to impress his kids by ordering a “super-sized” version of the milkshake. Let’s just say, he learned the hard way that some things are created for moderation. The explosion of milkshake was hysterical—splashing all over the table and giggling kids everywhere!
Now, as an adult, whenever I make a banana milkshake, I can still hear the laughter, the clinking of glasses, and the happiness that filled those summer days. It’s not just a drink; it’s a tradition, a memory that I cherish deeply.
Ingredients
Now, let’s get to the good part! Here’s what you’ll need to whip up your fabulous Banana Milkshake:
-
2 Ripe Bananas
- Chef Insight: The riper the banana, the sweeter and more flavorful your shake will be! Overripe bananas are perfect, so don’t toss them out.
-
1 ½ cups Whole Milk (or Milk Alternative)
- Substitution Tip: You can use almond milk, oat milk, or soy milk for a dairy-free option. Choose unsweetened versions to maintain the flavor balance!
-
½ cup Vanilla Ice Cream
- Chef Insight: Using quality ice cream will enhance the richness of your shake. If you’re feeling adventurous, try swapping regular ice cream for coconut milk ice cream for a tropical twist!
-
1 tsp Vanilla Extract
- Chef Insight: A splash of pure vanilla extract adds depth to the flavors and makes each sip more aromatic.
-
Optional: Whipped Cream & Maraschino Cherry for Topping
- Chef Insight: For the ultimate milkshake experience, don’t skip the whipped cream! It’s like giving your milkshake a cozy, cloud-like hug.
Step-by-Step Instructions
Alright, foodies! Ready to blend? Let’s take this step by step.
-
Prepare the Bananas: Start by peeling the ripe bananas. Slice them into smaller pieces for easy blending. This is when it starts smelling heavenly in the kitchen!
-
Add Ingredients to the Blender: Grab your blender and toss in the banana slices. Pour in the whole milk and add the vanilla ice cream. Finally, add that lovely touch of vanilla extract. Blend it all on medium speed until it’s a smooth, creamy mixture. No banana chunks allowed!
-
Check the Consistency: If you prefer a thicker milkshake, you can add a bit more ice cream. For a thinner one, just splash in a little more milk. Blend a little longer until you find your perfect texture!
-
Taste Test: Here’s where the magic happens! Dip a spoon into your blend and give it a taste. Adjust the sweetness with a drizzle of honey or maple syrup if you like it sweeter. Blend briefly to combine.
-
Chill the Glasses: While you’re blending, pop your milkshake glasses in the freezer for a few minutes to chill them down. This little tip takes your presentation up a notch!
-
Pour and Decorate: Once satisfied with your mixture, remove your glasses from the freezer (be careful, they can be chilly!). Pour the banana milkshake into the glasses, filling them generously.
-
Top It Off: Now for the fun part! Add a generous dollop of whipped cream on top, and if you’re feeling fancy, place a maraschino cherry right on top!
-
Serve Immediately: Enjoy your banana milkshake right away while it’s cool and creamy. Trust me, this is not a drink to sit around!
Serving Suggestions
Here’s a little serving suggestion for you! You can serve these luscious milkshakes with a colorful striped straw to make them picture-perfect. They go exceptionally well with a side of crispy homemade fries or a plate of freshly baked cookies for a delightful treat at your next gathering.
Recipe Variations
-
Nutty Banana Milkshake: Add a tablespoon of peanut butter or almond butter to make it nutty and satisfying.
-
Chocolate Banana Milkshake: Sprinkle in some cocoa powder or blend in chocolate ice cream for a delicious chocolatey twist.
-
Tropical Version: Include diced pineapple and a splash of coconut milk for a tropical vacation feel.
-
Berry Banana Milkshake: Blend in a handful of fresh strawberries or blueberries for a fruity explosion.
-
Protein Boost: For a post-workout treat, add a scoop of your favorite protein powder.
Chef’s Notes
This banana milkshake recipe is super flexible! Over the years, it has evolved. I’ve played with flavors, experimenting with nut milks, ice cream brands, and add-ins like chia seeds for a health boost. There’s a particular joy in coming up with new twists—every version tells a story, just like the memories tied to those summer days.
Oh, and I have a funny kitchen anecdote for you! One time, I got a little too adventurous, trying to create a “super banana shake” by adding a blend of spices. Let’s just say, cinnamon and bananas didn’t mix as well as I thought! But hey, we all learn in the kitchen, right?
FAQs and Troubleshooting
-
Q: My milkshake is too thick. What do I do?
A: Don’t worry! Just add a splash of milk and blend again until you reach your desired consistency. -
Q: It tastes too sweet. What can I do?
A: A squeeze of lemon juice can help balance the sweetness. Blend a bit more to mix it in! -
Q: Can I make this recipe ahead of time?
A: While I recommend enjoying it fresh, you can prepare the banana and milk mixture in advance and store it in the fridge. Just give it a good stir before serving! -
Q: How can I store leftovers?
A: If you have some leftover shake, transfer it to an airtight container and store it in the freezer. You can give it a good blend again when you’re ready to drink it!
Nutritional Info
(Optional section depending on your audience)
Calories per serving (approx.): 350
Protein: 8g
Carbohydrates: 55g
Fat: 12g
So there you have it—your complete guide to making an unforgettable Banana Milkshake! I hope this recipe brings you as much joy as it brings to me. Share your creations and let’s spread the banana love! Until next time, happy cooking! 🍌🥤
Print
Ultimate Banana Milkshake
- Total Time: 10 minutes
- Yield: 2 servings 1x
- Diet: Vegetarian
Description
A classic and creamy Banana Milkshake that brings nostalgia and comfort in every sip!
Ingredients
- 2 Ripe Bananas
- 1 ½ cups Whole Milk (or Milk Alternative)
- ½ cup Vanilla Ice Cream
- 1 tsp Vanilla Extract
- Optional: Whipped Cream & Maraschino Cherry for Topping
Instructions
- Prepare the Bananas: Start by peeling the ripe bananas. Slice them into smaller pieces for easy blending.
- Add Ingredients to the Blender: Toss in the banana slices, pour in the whole milk, add the vanilla ice cream, and the vanilla extract. Blend on medium speed until smooth.
- Check the Consistency: Adjust thickness by adding more ice cream or milk as desired. Blend until perfect.
- Taste Test: Dip a spoon into your blend, and adjust sweetness if necessary. Blend briefly to combine.
- Chill the Glasses: Pop your milkshake glasses in the freezer for a few minutes to chill.
- Pour and Decorate: Pour the banana milkshake into the chilled glasses.
- Top It Off: Add whipped cream and a maraschino cherry on top.
- Serve Immediately: Enjoy your milkshake right away!
Notes
Feel free to experiment with flavors! For a protein boost, add a scoop of protein powder.
- Prep Time: 10 minutes
- Cook Time: 0 minutes
- Category: Beverage
- Method: Blending
- Cuisine: American
Nutrition
- Serving Size: 1 serving
- Calories: 350
- Sugar: 30g
- Sodium: 100mg
- Fat: 12g
- Saturated Fat: 6g
- Unsaturated Fat: 3g
- Trans Fat: 0g
- Carbohydrates: 55g
- Fiber: 3g
- Protein: 8g
- Cholesterol: 30mg
Keywords: banana milkshake, creamy drink, summer beverage, nostalgic recipe
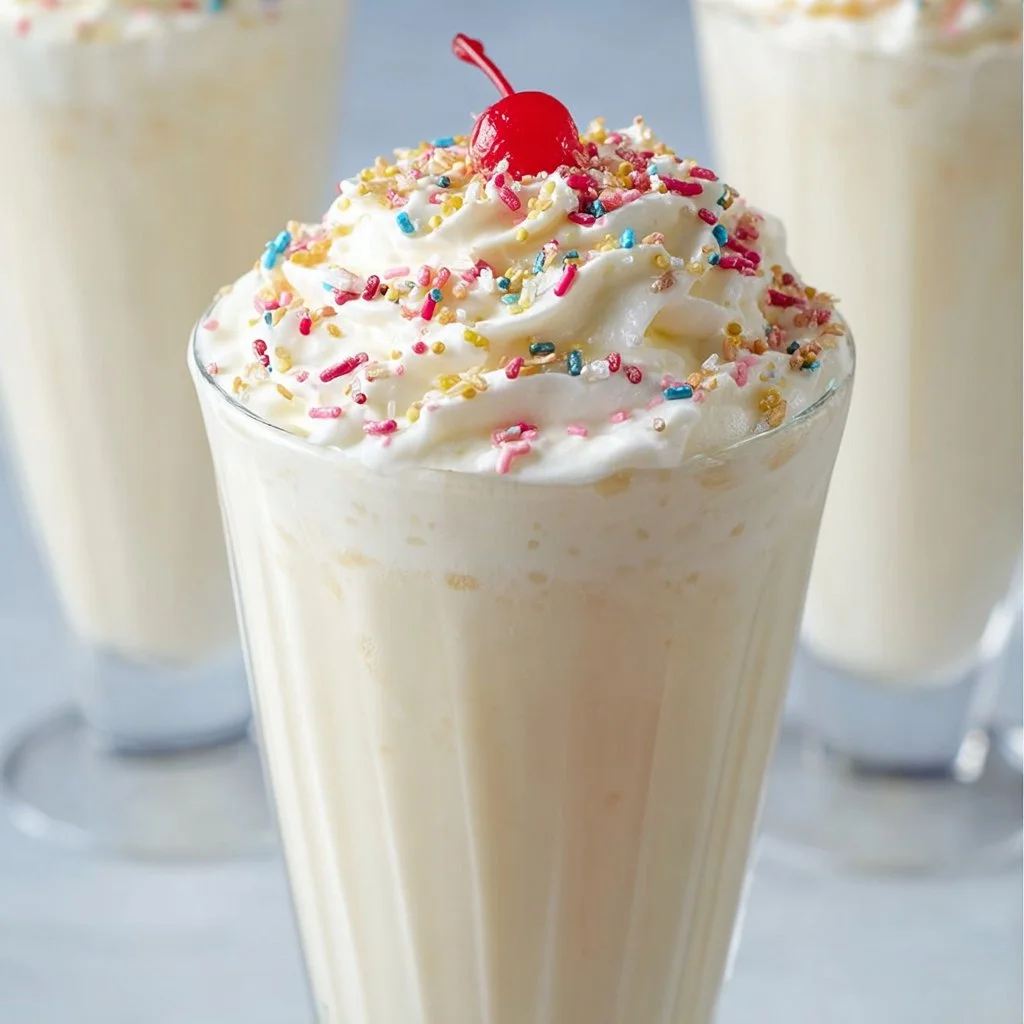
Vanilla Milkshake
The Ultimate Vanilla Milkshake Recipe: A Creamy Escape to Nostalgia
Introduction:
Hey there, fellow food lovers! Welcome back to my cozy corner of the culinary universe. Today, I’m thrilled to share a recipe that’s as dreamy and delightful as a summer breeze—the classic Vanilla Milkshake. Now, I know you might be thinking that a vanilla milkshake is just, well, a vanilla milkshake—but trust me when I say it’s so much more than that! It’s a nostalgic experience, a comforting treat, and the perfect way to unwind after a long day.
Picture this: it’s a hot afternoon, and the sun is streaming through your kitchen window. The ice cream is just waiting to be scooped, and the thought of that frosty, creamy elixir is too enticing to resist. There’s something magical about a vanilla milkshake that transcends age; it brings back memories of childhood summers, lazy weekends, and those fun moments spent hanging out with friends.
Whether you’re whipping one up as a sweet treat for yourself or crafting a whole batch for a family movie night, this milkshake will make your taste buds dance. Its rich, creamy texture paired with the sweet, fragrant notes of vanilla make it an irresistible sip of happiness. Plus, you’ll be the star of the kitchen, and what’s better than that? So grab your blender, and let’s create a luscious vanilla milkshake that will transport us back to those carefree days!
Personal Story:
Growing up, my summers were more often than not defined by ice cream trucks rolling through the neighborhood. The sound of the classic ice cream jingle had an almost magical effect, sending us kids dashing out of our houses, armed with coins and wide smiles. One of my favorite indulgences was the simple vanilla milkshake. My siblings and I would gather around the kitchen table, proudly wielding our tall, frosty glasses, each decorated with a glob of whipped cream, a cherry on top, and perhaps even sprinkles for flair.
I remember sneaking a few spoonfuls of my mom’s homemade vanilla ice cream while she prepared our shakes. The thick, creamy goodness paired with a hint of nostalgia in every sip was something truly special. As we laughed and shared stories about our day—who had the best playground adventures, the funniest moments at the local pool—I realized that vanilla milkshakes were more than just a drink; they were a way to connect with the people I loved. Now, I pass that joy on to you, hoping to inspire you to create those same beautiful memories in your kitchen with the love of your life or your favorite friends!
Ingredients:
Here’s what you’ll need to craft your perfect vanilla milkshake:
-
Vanilla Ice Cream (2 cups)
- The star of the show! Look for good-quality vanilla ice cream with real vanilla beans for the best flavor. For a lighter option, use frozen yogurt or a dairy-free alternative like coconut or almond milk ice cream.
-
Milk (1 cup)
- Whole milk creates a creamier texture, but feel free to use 2%, skim, or even non-dairy milk options like almond, oat, or soy milk for a lighter shake.
-
Pure Vanilla Extract (1 teaspoon)
- This ingredient really amps up the vanilla flavor. If you’re feeling adventurous, try using vanilla bean paste or even steeping whole vanilla beans in your milk for an ultimate flavor experience.
-
Whipped Cream (for topping)
- A nostalgic classic! You can make your own whipped cream for a fresher taste or use store-bought for convenience. Consider adding a pinch of powdered sugar or vanilla extract for extra sweetness and flavor.
-
Maraschino Cherries (for garnish)
- A cherry on top brings back the ice cream parlor vibes! You can swap it out for fresh fruit like strawberries, blueberries, or even chocolate syrup for a fun twist.
-
Sprinkles (optional)
- Because who doesn’t love a bit of color? Feel free to get creative with your toppings—go wild with colors and shapes!
Step-by-Step Instructions:
Now let’s get down to the fun part—making that vanilla milkshake! Follow these steps for a milkshake that will leave you smiling:
-
Prep Your Blender:
- Grab your blender—this is where the magic will happen. Make sure it’s clean and ready to use. If you don’t have a high-powered blender, fear not, just stay patient; the shake might take a bit longer to blend.
-
Add the Ingredients:
- Start by adding the 2 cups of vanilla ice cream to your blender. If it’s slightly softened, it makes blending easier! Now pour in 1 cup of milk. You can start with less milk and add more if you prefer a thinner consistency.
-
Vanilla Extravaganza:
- Add 1 teaspoon of pure vanilla extract. Trust me; this is where the extra zing comes in. It’ll elevate your milkshake from good to absolutely heavenly!
-
Blend, Blend, Blend:
- Blend the ingredients on high until smooth and creamy. You’ll know it’s ready when you see it swirling like a fluffy cloud of happiness in the blender. If it feels too thick, add a splash more milk. If it’s too thin, throw in a scoop more of ice cream!
-
Taste Test:
- Here’s where you have all the power. Taste a small spoonful to see if it meets your vanilla-flavored dreams. If you’re feeling adventurous, you could add a touch more vanilla extract or even a pinch of sugar if your ice cream isn’t sweet enough.
-
Prepare to Serve:
- Pour your creamy creation into tall glasses. I recommend using glasses that make you feel fancy, even if you’re just hanging out in your pajamas. This makes every sip a bit more magical!
-
The Finishing Touch:
- Generously top your milkshake with luscious whipped cream. Don’t shy away; make it sky-high! This is also where you can sprinkle those rainbow sprinkles or add a maraschino cherry on top for that classic touch!
Serving Suggestions:
To serve your milkshakes, put them in chilled glasses to keep them frosty for longer. You can add fun straws to give it that playful vibe! For an extra flair, serve alongside homemade cookies, brownies, or a slice of pie. Nothing like a little indulgence on the side!
Recipe Variations:
Now that you’ve mastered the classic vanilla milkshake, here are some variations to play with:
-
Chocolate Vanilla Shake:
- Drizzle chocolate syrup in the blender and top with chocolate whipped cream for a sweet twist!
-
Strawberry Vanilla Shake:
- Toss in some fresh or frozen strawberries for a fruity and refreshing addition.
-
Coffee Lovers Milkshake:
- Swirl in a shot of espresso or cold brew for a caffeinated kick!
-
Cookie Dough Delight:
- Add chunks of cookie dough into the shake for that extra indulgent texture.
-
Nutty Banana Bark:
- Toss in a ripe banana and some peanut butter for a creamy, nutty flavor.
Chef’s Notes:
Over the years, I’ve had my fair share of milkshake experiments. I once tried adding crushed Oreos, which led to the sweetest accidental discovery—the Oreo milkshake! Using homemade whipped cream adds a freshness that really sets the shake apart and reminds me of those joyful kitchen moments with my family. Life’s too short not to experiment, so don’t hesitate! Play around with flavors and toppings until you find your absolute favorite.
FAQs and Troubleshooting:
-
Why is my milkshake too thick?
- If your shake turns out too thick, you can blend in a little more milk until you reach the desired consistency.
-
Can I make this dairy-free?
- Absolutely! Substitute the ice cream and milk for dairy-free versions, like coconut or almond milk options. They work wonderfully!
-
How can I make my milkshake less sweet?
- If your shake leans too sweet, try adding a bit more milk or a pinch of salt to balance the flavors.
-
Can I store leftover milkshake?
- Milkshakes are best enjoyed fresh due to their creamy texture, but if you have leftovers, you can store them in the freezer. Give them a good blend when you’re ready to enjoy again!
Nutritional Info (optional):
For those keeping an eye on their intake, a typical 12-ounce vanilla milkshake can contain around:
- Calories: 500-600
- Protein: 10g
- Fat: 25g
- Carbohydrates: 70g
Feel free to adjust the ingredients for a healthier version, such as using low-fat ice cream or milk alternatives!
There you have it: your complete guide to creating the ultimate vanilla milkshake! I hope this recipe brings you joy and takes you on a flavor journey back to those carefree days of youth. Happy blending, and cheers to delicious memories—one shake at a time!
Print
The Ultimate Vanilla Milkshake
- Total Time: 10 minutes
- Yield: 2 servings 1x
- Diet: Vegetarian
Description
A nostalgic and creamy vanilla milkshake that brings back childhood memories.
Ingredients
- 2 cups Vanilla Ice Cream
- 1 cup Milk
- 1 teaspoon Pure Vanilla Extract
- Whipped Cream (for topping)
- Maraschino Cherries (for garnish)
- Sprinkles (optional)
Instructions
- Prep your blender: Grab your blender—this is where the magic will happen. Make sure it’s clean and ready to use.
- Add the Ingredients: Start by adding the 2 cups of vanilla ice cream to your blender, followed by 1 cup of milk.
- Add the vanilla extract: Add 1 teaspoon of pure vanilla extract to elevate the flavor.
- Blend: Blend the ingredients on high until smooth and creamy.
- Taste Test: Taste a small spoonful to see if it meets your vanilla-flavored dreams.
- Prepare to Serve: Pour your creamy creation into tall glasses.
- The Finishing Touch: Generously top your milkshake with whipped cream and optional garnishes.
Notes
For variations, try adding chocolate syrup, strawberries, or cookie dough.
- Prep Time: 10 minutes
- Cook Time: 0 minutes
- Category: Beverage
- Method: Blending
- Cuisine: American
Nutrition
- Serving Size: 1 serving
- Calories: 500
- Sugar: 60g
- Sodium: 150mg
- Fat: 25g
- Saturated Fat: 15g
- Unsaturated Fat: 8g
- Trans Fat: 0g
- Carbohydrates: 70g
- Fiber: 0g
- Protein: 10g
- Cholesterol: 80mg
Keywords: vanilla milkshake, dessert, creamy drink, nostalgia, ice cream




