
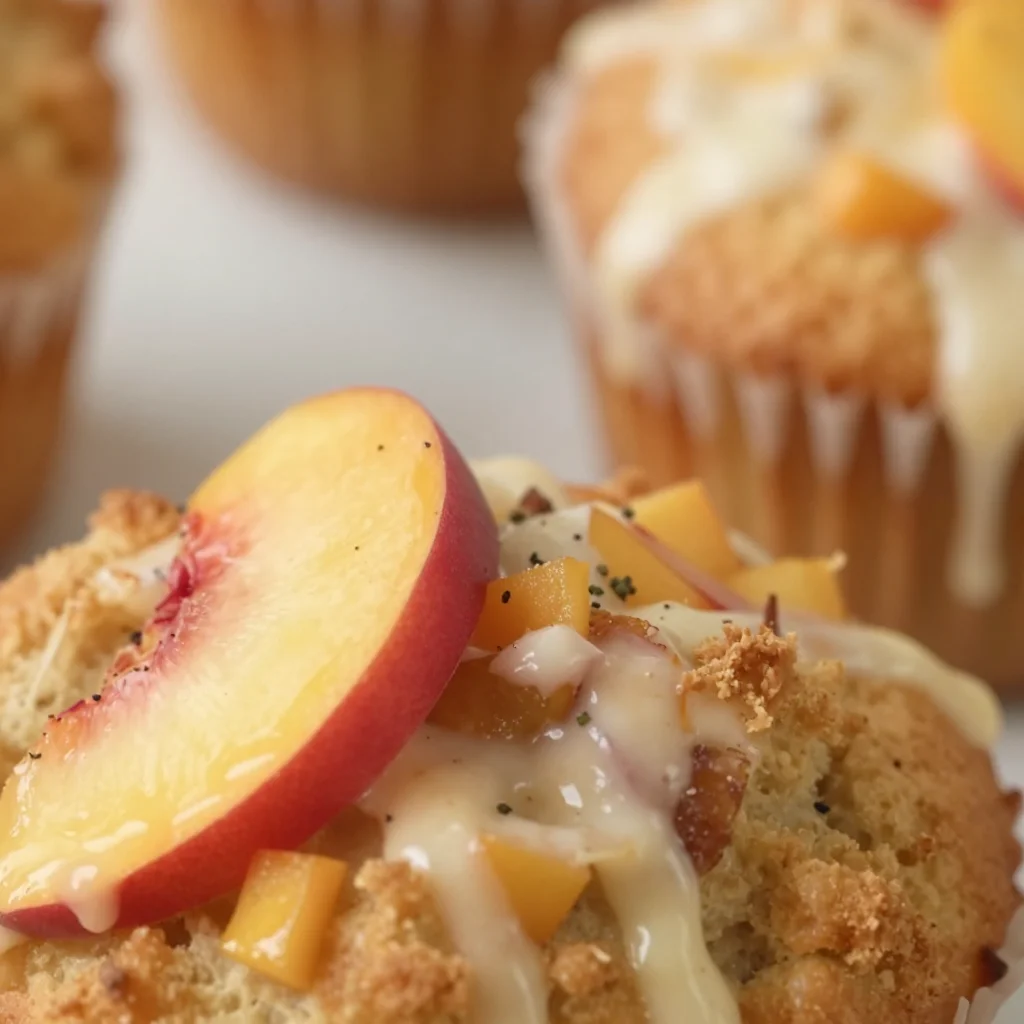
Easy Nectarine Muffins Recipe: Light, Fluffy Summer Treats
The Ultimate Nectarine Muffins Recipe: A Sweet Taste of Summer
Welcome to my cozy corner of the kitchen, where today we’re celebrating one of my absolute favorite fruits: the nectarines! If you’ve ever sunk your teeth into a perfectly ripe nectarine, you know that sweet, juicy bite that embodies summer in its purest form. Nectarines are like little gifts from nature, and I can’t wait to share a recipe with you that turns them into scrumptious muffins, perfect for breakfast, a snack, or even dessert! So grab your apron and get ready to fill your kitchen with that delightful aroma of baking goodness.
A Little Personal Story: The Summer Fruit Stand
Ah, the memories of summer! One of my fondest childhood memories involves crisp, sun-soaked afternoons at our local farmer’s market. I can still hear the lively chatter of vendors and customers, the music of laughter filling the air as kids chase each other around the stands. My favorite stop was the fruit vendor, where the sweet smell of nectarines wafted toward me like a fragrant invitation.
I remember the day my mom let me pick out a basket of nectarines. The vendor, an older gentleman with a twinkle in his eye, shared a secret: "The key to the best nectarines is to let them ripen on your kitchen counter. They become a treasure in your hands." And oh, how wise he was! We took those nectarines home, and my mom and I whipped up our first batch of fruit muffins together. The juice ran down our chins and created a mess that only added to our joy. Those moments turned what could be a simple recipe into a luscious memory, and now I’m so excited to share my own version of nectarines in muffin form with all of you!
Ingredients
Here’s what you’ll need to create these fluffy, delightful nectarines muffins:
-
Fresh nectarines (2 cups diced): The star of the show! Choose ripe but slightly firm nectarines for the best texture. If you can’t find nectarines, peaches make a spectacular substitute.
-
All-purpose flour (2 cups): Essential for structure. You can substitute with whole wheat flour for a heartier muffin.
-
Granulated sugar (¾ cup): This adds sweetness, but consider using coconut sugar or brown sugar for a deeper flavor.
-
Baking powder (2 teaspoons): The rising agent that keeps your muffins fluffy. Make sure it’s fresh for the best lift!
-
Salt (½ teaspoon): A pinch of salt enhances all the flavors. Don’t skip it!
-
Eggs (2 large): These bind the ingredients together. If you’re vegan or egg-free, a flax egg works wonderfully!
-
Milk (¾ cup): Use any milk you like—dairy, almond, oat, or coconut milk all work.
-
Unsalted butter (½ cup, melted): This gives the muffins a rich texture. For a lighter option, try using applesauce instead.
-
Vanilla extract (1 teaspoon): Pure vanilla is the way to go for that lovely aroma and flavor.
-
Cinnamon (½ teaspoon): Just a dash brings a warm, cozy element to every bite.
Step-by-Step Instructions
Now, let’s dive into the fun part—baking these gorgeous muffins!
-
Preheat the Oven: Start by preheating your oven to 350°F (175°C). This ensures that your muffins bake evenly and come out beautifully golden.
-
Prepare the Muffin Tin: Line a standard muffin tin with paper liners or lightly grease it with cooking spray or butter. Trust me, this little step saves you from muffin-sticking heartbreak later!
-
Mix Dry Ingredients: In a large bowl, whisk together your flour, sugar, baking powder, salt, and cinnamon. This helps distribute the leavening agents evenly throughout the batter, which means no muffin should be flatter than the others!
-
Combine Wet Ingredients: In another bowl, beat the eggs, then add the milk, melted butter, and vanilla extract. Whisk until everything is combined smoothly. This mixture should look like sunshine in a bowl—inviting and bright!
-
Combine Mixtures: Slowly pour the wet ingredients into the dry ingredients. Pro Tip: Mix gently! Overmixing leads to tough muffins. Just stir until you see no dry flour—lumps are okay!
-
Fold in Nectarines: Carefully fold in your diced nectarines, ensuring they’re distributed throughout the batter. This adds little pockets of juicy goodness in every bite!
-
Fill the Muffin Tins: Use a scoop or a ladle to fill each muffin cup about ¾ full. Leave some space for them to rise!
-
Bake: Pop the muffin tray in your preheated oven and bake for about 18-20 minutes, or until you see a lovely golden hue and a toothpick inserted into the center comes out clean.
-
Cool: Once baked, allow the muffins to cool in the tin for about 5 minutes, then transfer them to a wire rack. This prevents them from steaming and becoming soggy.
-
Enjoy!: Serve warm with a pat of butter or a drizzle of honey. I dare you not to eat five!
Serving Suggestions
Plating these muffins is as simple as it gets! Arrange them on a cozy plate and sprinkle with a little powdered sugar if you’re feeling fancy. Add a small bowl of fresh nectarines or berries on the side for a beautiful pop of color. Trust me, your brunch guests will be impressed!
Recipe Variations
Why stop at plain nectarines? Here are a few delicious twists you could try:
- Nectarine and Ginger: Add diced ginger for a spicy kick.
- Mixed Berry Nectarine Muffins: Toss in a cup of blueberries or raspberries along with the nectarines for berries’ summery burst.
- Nutty Nectarines: Fold in a handful of chopped walnuts or pecans for added crunch and depth.
- Coconut Nectarine Muffins: Add shredded coconut to the batter for a tropical twist!
- Gluten-Free Option: Use a 1:1 gluten-free flour substitute to keep these muffins accessible to everyone.
Chef’s Notes
Every recipe tells a story! I remember the first time I made these muffins; they quickly became a family favorite. I’ve adapted this recipe over the years, trying different fruits and spices, but the essence has always remained the same: simple, delicious, and filled with love. I often find myself making them for weekend brunches, and I invariably end up sending a batch to my neighbor because, let’s face it, who can resist sharing the joy of freshly baked goodies?
FAQs and Troubleshooting
1. Why are my muffins dense?
If your muffins turn out dense, you might have overmixed the batter. Remember, a few lumps are totally fine!
2. Can I use frozen nectarines?
Absolutely! Just make sure to thaw them completely and pat them dry to remove excess moisture before adding them to the batter.
3. How do I know when my muffins are done?
The best way to check is to insert a toothpick in the center. If it comes out clean or with a few moist crumbs, they are good to go!
4. What should I do with leftover muffins?
If there are any left (I doubt it!), store them in an airtight container at room temperature for a day or two, or freeze them for up to three months. Just reheat them in the oven or microwave when you’re ready to enjoy!
Nutritional Info
(As a general guide, each muffin roughly contains)
- Calories: 180
- Protein: 3g
- Fat: 7g
- Carbohydrates: 26g
- Fiber: 1g
- Sugar: 8g
Let’s savor the amazing flavor of nectarines together in these delightful muffins and make some memorable kitchen stories! Happy baking, my foodie friends! Remember to share your creations and any fun tips you discover along the way. Enjoy!
Print
The Ultimate Nectarine Muffins
- Total Time: 35 minutes
- Yield: 12 servings
- Diet: Vegetarian
Description
These fluffy muffins are filled with sweet nectarines, perfect for breakfast or a snack.
Ingredients
- Fresh nectarines (2 cups diced)
- All-purpose flour (2 cups)
- Granulated sugar (¾ cup)
- Baking powder (2 teaspoons)
- Salt (½ teaspoon)
- Eggs (2 large)
- Milk (¾ cup)
- Unsalted butter (½ cup, melted)
- Vanilla extract (1 teaspoon)
- Cinnamon (½ teaspoon)
Instructions
- Preheat the oven to 350°F (175°C).
- Prepare the muffin tin by lining it with paper liners or greasing it.
- Mix the flour, sugar, baking powder, salt, and cinnamon in a large bowl.
- Combine the eggs, milk, melted butter, and vanilla extract in another bowl.
- Pour the wet ingredients into the dry ingredients, mixing gently until just combined.
- Fold in the diced nectarines.
- Fill each muffin cup about ¾ full.
- Bake for 18-20 minutes or until golden brown.
- Cool in the tin for 5 minutes before transferring to a wire rack.
- Enjoy! Serve warm with butter or honey.
Notes
For a vegan option, substitute eggs with a flax egg and use plant-based milk.
- Prep Time: 15 minutes
- Cook Time: 20 minutes
- Category: Breakfast
- Method: Baking
- Cuisine: American
Nutrition
- Serving Size: 1 muffin
- Calories: 180
- Sugar: 8g
- Sodium: 350mg
- Fat: 7g
- Saturated Fat: 4g
- Unsaturated Fat: 2g
- Trans Fat: 0g
- Carbohydrates: 26g
- Fiber: 1g
- Protein: 3g
- Cholesterol: 30mg
Keywords: nectarine muffins, summer recipes, baking, fruit muffins, easy muffins
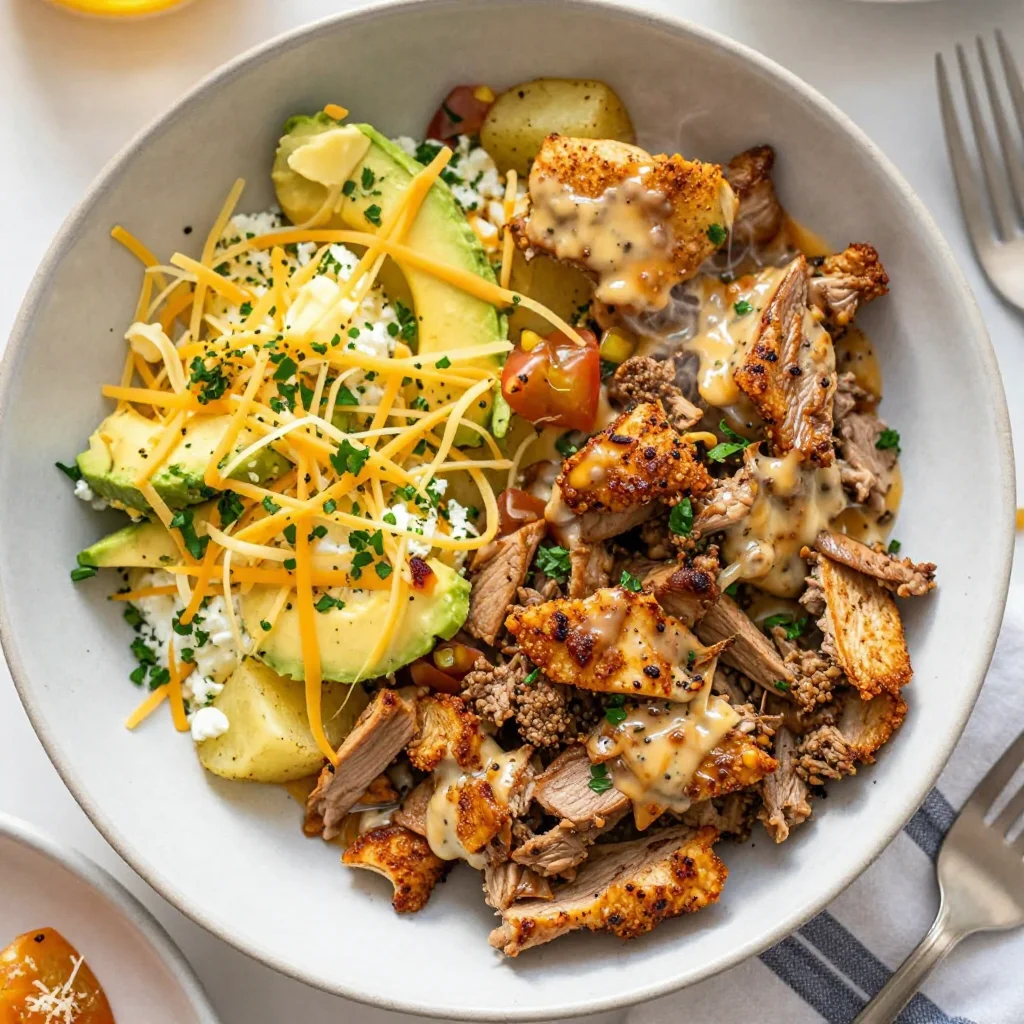
Minute High-Protein Breakfast Bowl for Busy Mornings
Rise and Shine with a High Protein Breakfast Bowl
Welcome to my cozy kitchen, foodies! I’m Olivia Bennett, your trusted guide on this culinary adventure. Today, we’re going to elevate your breakfast game with a delicious and nutritious High Protein Breakfast Bowl that’s as easy to make as it is tasty. Picture this: it’s a beautiful morning, the sun is shining through the kitchen window, and the aroma of fresh ingredients is wafting through the air. What better way to kickstart your day than a breakfast that not only fuels your body but also sparks joy?
Breakfast is often called the most important meal of the day, and for good reason! A hearty breakfast sets the tone, providing us with the energy we need to tackle the day ahead. This High Protein Breakfast Bowl combines wholesome ingredients, vibrant flavors, and plenty of protein to keep you feeling full and satisfied until your next meal. Whether you’re looking to power through your morning workout, have a busy day ahead, or simply want to treat yourself to something special, this bowl has got you covered.
In this recipe, we’ll layer up a delightful mix of eggs, quinoa, fresh vegetables, and a sprinkle of your favorite toppings. The beauty of this dish lies in its versatility. You can easily adapt it to suit your taste preferences or whatever you have on hand in your fridge. Best of all, making this breakfast bowl is a breeze, and I promise you’ll feel like a breakfast superstar by the time you’re done!
So, roll up your sleeves, grab that apron, and let’s dive into the kitchen to whip up a High Protein Breakfast Bowl that will not only fill your belly but also warm your heart!
A Taste of Nostalgia
Let me take you back to my childhood, where mornings were filled with the sound of sizzling eggs and the enticing smell of freshly brewed coffee. One of my favorite memories is waking up to my grandma’s kitchen filled with the warmth of laughter and delicious food. She had a magical ability to turn the simplest of ingredients into a symphony of flavors. Her breakfast bowls were legendary, always crafted with care and love.
We’d gather around the breakfast table as a family, and each bowl was special—topped to perfection with vibrant vegetables, herbs, and an array of spices. I remember how we would dive into them, sharing stories of dreams and plans for the day while adding our own unique touches. Grandma always encouraged creativity, inviting us to explore different flavors and combinations. It’s where my passion for cooking truly ignited, and the joy of sharing meals with loved ones became an essential part of my life.
Now, as I whip up this High Protein Breakfast Bowl, I can almost hear her voice encouraging me to be adventurous with my ingredients. Every bite takes me back to those cherished mornings, that warmth forever inspiring me to create heartwarming dishes to share with you all.
Ingredients
Here are the wholesome ingredients you’ll need to get started on our High Protein Breakfast Bowl:
-
2 Eggs
The stars of our breakfast bowl! Eggs are a fantastic source of protein and healthy fats. You can substitute them with tofu for a vegan option—just scramble it up with your favorite spices for a similar taste! -
1 Cup Cooked Quinoa
Quinoa is not just a trendy grain; it’s a complete protein packed with essential amino acids. You can swap quinoa with brown rice, farro, or even buckwheat if you’re feeling adventurous. -
1/2 Avocado
Creamy and rich, avocados bring healthy fats and a delightful texture. If avocados aren’t your thing or you need a swap, try Greek yogurt for creaminess or a dollop of hummus for added flavor. -
1/2 Cup Cherry Tomatoes (halved)
These little gems add brightness and acidity to the bowl. Feel free to use any seasonal vegetable like bell peppers, spinach, or even roasted sweet potatoes for a different twist! -
Handful of Spinach
Fresh spinach is a nutritional powerhouse, loaded with vitamins and minerals. If spinach isn’t available, kale or arugula would work beautifully as substitutes. -
1 Tablespoon Olive Oil
A splash of olive oil enhances the flavors and adds healthy fats. You could also use avocado oil or coconut oil. -
Salt and Pepper to Taste
Simple seasonings elevate the dish. Experiment with spices like paprika, garlic powder, or even a pinch of chili flakes for a kick! -
Fresh Herbs (optional)
A sprinkle of cilantro, parsley, or chives at the end can add a fresh pop of flavor. Use whatever herbs you love or have on hand!
Now that we’ve gathered our delicious ingredients, let’s get down to the cooking!
Step-by-Step Instructions
-
Cook Your Quinoa
Start by rinsing the quinoa under cold water to remove its natural coating, which can give it a bitter taste. Then, cook it according to package instructions (usually 1 cup of quinoa to 2 cups of water). Bring the water to a boil, then reduce to a simmer and cover until fluffy—about 15 minutes. While the quinoa cooks, you can prepare the rest of your bowl! -
Sauté the Vegetables
In a medium skillet, heat 1 tablespoon of olive oil over medium heat. Once it’s shimmering, add your halved cherry tomatoes and spinach. Sauté them for about 3-4 minutes until the spinach is wilted and the tomatoes are soft and bursting with flavor. This will not only add a yummy texture but also make your kitchen smell fantastic. -
Cook the Eggs
In another non-stick skillet, crack your eggs and cook them sunny-side up or scrambled, depending on your preference! For scrambled eggs, whisk in a pinch of salt and pepper before pouring them into the heated pan. Cook gently until fluffy and soft—remember, a little undercooking is okay since they’ll continue to cook off the heat. Chef tip: If you like a creamier scramble, add a splash of milk or cream while whisking. -
Assemble the Bowl
Once the quinoa is cooked and the veggies are sautéed, it’s assembly time! Start with a hearty scoop of quinoa as the base of your bowl. Next, carefully add the sautéed spinach and tomatoes. Top it off with your perfectly cooked eggs, and don’t forget a slice of creamy avocado! -
Final Touches
Drizzle with a little more olive oil, and season with salt, pepper, and your favorite fresh herbs. If you’re feeling adventurous, go ahead and sprinkle a bit of feta cheese or chili flakes for extra kick!
And voila! Your High Protein Breakfast Bowl is all set to be devoured.
Serving Suggestions
For a lovely presentation, serve your breakfast bowl in wide, shallow bowls to show off all those vibrant colors. You can arrange the eggs, veggies, and avocado artfully, creating a feast for the eyes as well as the belly. Pair it with a cup of herbal tea or freshly brewed coffee to complete this cozy breakfast experience.
Recipe Variations
The beauty of this bowl is its flexibility! Here are some variations to make it uniquely yours:
-
Mediterranean Twist: Incorporate feta cheese, olives, and swap spinach with arugula for an Italian-inspired breakfast. Drizzle with balsamic glaze for a nice zing!
-
Spicy South-of-the-Border: Add black beans, corn, and diced jalapeños. Top with salsa and a dollop of Greek yogurt for zesty vibes.
-
Sweet and Savory: Switch out the eggs for a dollop of Greek yogurt and add fresh berries and a sprinkle of granola for a refreshing twist.
-
Protein Boost: Mix in some cooked chicken or turkey to enhance your protein intake, making it an even more satisfying meal.
-
Vegan Delight: Replace eggs with scrambled tofu, use chickpeas instead of quinoa, and load up on your favorite vegetables for a protein-packed vegan bowl.
Chef’s Notes
I love how this High Protein Breakfast Bowl can easily evolve based on what’s in your pantry or what you’re craving! Over the years, it has become a blank canvas for my kitchen creativity. At first, I stuck to the original recipe, but soon found myself experimenting with different grains and toppings. It’s incredible how a simple meal can tell a thousand stories and adapt to your tastes and lifestyles.
One day, I even had leftovers from a taco night and tossed them in—let’s just say breakfast was a hit! And isn’t that the joy of cooking? Making it your own, one delicious bite at a time!
FAQs and Troubleshooting
-
What if my quinoa turns out mushy?
No worries! Mushy quinoa happens when you overcook it or add too much water. Next time, be sure to measure your water accurately, and try simmering for the recommended time—fluff it up with a fork afterward! -
Can I prepare this breakfast bowl in advance?
Absolutely! You can make the quinoa and sauté the veggies the night before. Just reheat them in the morning, and then quickly cook your eggs for a speedy breakfast! -
What can I use to enhance the flavor?
Experimenting with spices is a game-changer! Aromatic spices like paprika, cumin, or even a dash of nutritional yeast can elevate this dish. Fresh herbs can also make a grand impact—don’t be afraid to experiment! -
How can I make this meal more filling?
If you want to bulk it up, consider adding nuts or seeds, like pumpkin seeds or almonds, for extra protein and crunch! A slice of whole-grain toast on the side can also do the trick for a more satisfying breakfast.
Nutritional Info
While I don’t usually delve too deeply into nutritional breakdowns, a High Protein Breakfast Bowl generally provides a powerhouse of nutrients. Expect a hearty dose of protein, healthy fats, and fiber to keep you feeling satisfied. It’s a meal that nourishes the body and soul!
And there you have it, my lovely foodies! A comprehensive guide to making a High Protein Breakfast Bowl that not only enjoys the flavors of food but also honors the spirit of home cooking. I hope you find joy in creating this bowl and, as always, remember to share it with the ones you love! Happy cooking!
Print
High Protein Breakfast Bowl
- Total Time: 25 minutes
- Yield: 2 servings 1x
- Diet: Vegetarian
Description
Kickstart your day with a delicious High Protein Breakfast Bowl filled with eggs, quinoa, fresh vegetables, and healthy toppings.
Ingredients
- 2 Eggs
- 1 Cup Cooked Quinoa
- 1/2 Avocado
- 1/2 Cup Cherry Tomatoes (halved)
- Handful of Spinach
- 1 Tablespoon Olive Oil
- Salt and Pepper to Taste
- Fresh Herbs (optional)
Instructions
- Cook Your Quinoa: Rinse the quinoa under cold water, cook according to package instructions (1 cup quinoa to 2 cups water), about 15 minutes.
- Sauté the Vegetables: Heat olive oil in a skillet, add cherry tomatoes and spinach, and cook for 3-4 minutes until softened.
- Cook the Eggs: In a non-stick skillet, crack eggs and cook sunny-side up or scrambled until fluffy.
- Assemble the Bowl: Start with quinoa, add sautéed vegetables, top with eggs, and slice of avocado.
- Final Touches: Drizzle with olive oil, season, and add fresh herbs or toppings as desired.
Notes
Feel free to mix and match ingredients based on what’s available in your fridge. This recipe is a canvas for your creativity!
- Prep Time: 10 minutes
- Cook Time: 15 minutes
- Category: Breakfast
- Method: Sautéing
- Cuisine: American
Nutrition
- Serving Size: 1 serving
- Calories: 400
- Sugar: 3g
- Sodium: 500mg
- Fat: 20g
- Saturated Fat: 5g
- Unsaturated Fat: 10g
- Trans Fat: 0g
- Carbohydrates: 45g
- Fiber: 7g
- Protein: 18g
- Cholesterol: 370mg
Keywords: breakfast, high protein, healthy bowl, quinoa, eggs
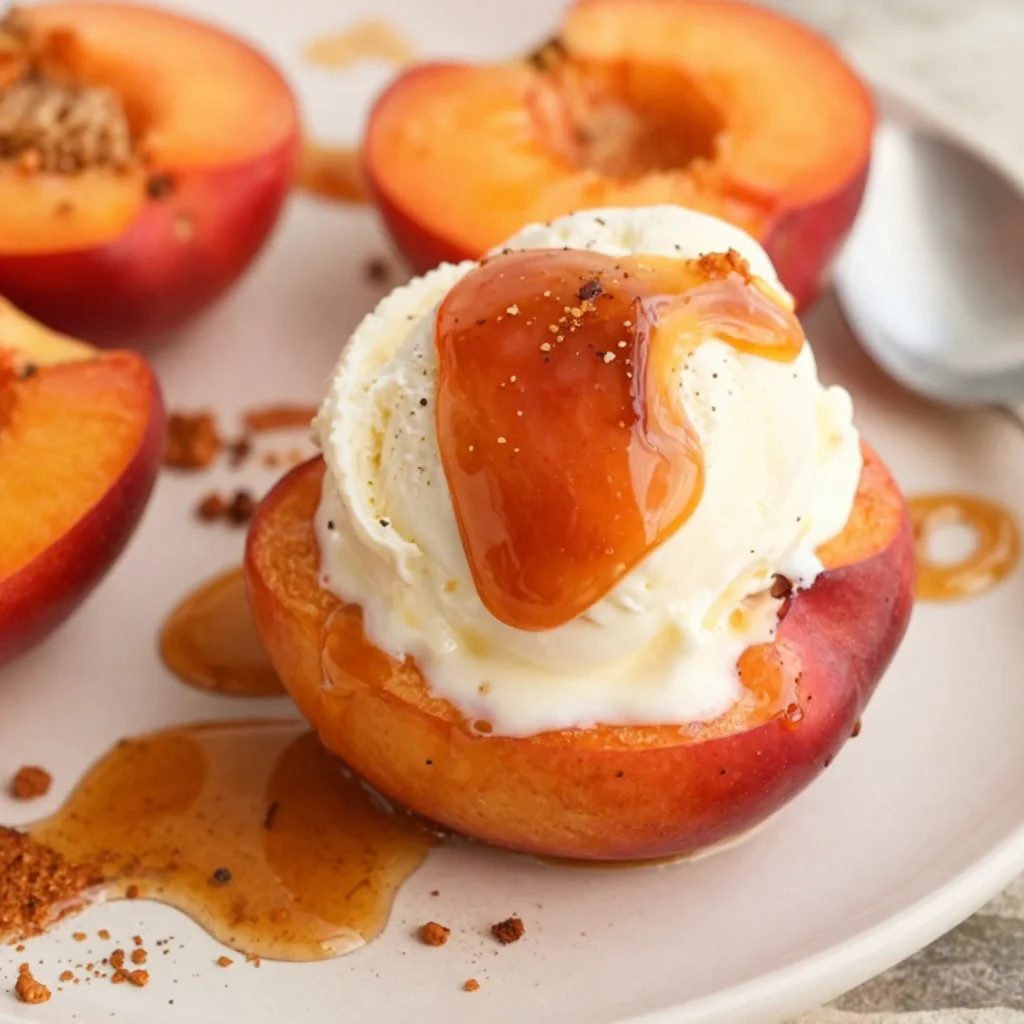
Easy Summer Dessert: Baked Nectarines with Cinnamon Honey Sauce
Baked Nectarines with Cinnamon Honey Sauce
Welcome to the warm, inviting world of my kitchen! I’m Olivia Bennett, your friendly neighborhood home cook and culinary cheerleader. Today, we’re diving into a dish that truly warms not just your palate but your heart: Baked Nectarines with Cinnamon Honey Sauce. If you’re like me and have an affinity for sweet, juicy fruits that feel like a hug in dessert form, then buckle up because we’re about to create an irresistible treat that’s as delightful to make as it is to share!
There’s something incredibly magical about fruits baked to perfection, their natural sweetness magnified and enveloped in the warm embrace of cinnamon and honey. This dessert feels like nostalgia wrapped in a flavor explosion—perfect for cozy nights in or impressing your friends at your next gathering. Trust me; your house will smell like a joy-filled bakery!
So, grab your apron and get ready to transform simple nectarines into a stunning dessert. No fancy equipment or mad chef skills required—just your love for good food and a few easy steps! Let’s do this together, and who knows? You might even discover a new favorite recipe!
A Slice of My Heart
Growing up, my family kitchen was always a bustling hub of activity, filled with laughter, chatter, and the delightful aroma of baked goods. One of my fondest memories revolves around the summers spent in my grandmother’s kitchen, where the bounty of her garden filled baskets beside the windowsill. Every evening, we’d transform her freshly picked fruits into cherished desserts, and nectarines were always the star of the show.
I remember one specific summer afternoon when we decided to bake nectarines together. My grandma imparted her time-tested wisdom, gently explaining that the key was letting the fruits speak for themselves while adding just the right amount of sweet warmth. We served our baked nectarines with homemade whipped cream, and I still recall how the golden, caramelized edges made my heart skip a beat. That summer, we weren’t just cooking; we were creating memories, and those sweet nectarines have held a special place in my heart ever since.
Ingredients
Here’s what you’ll need to create this simply delightful dish:
- Nectarines (4-6 ripe ones): Look for fruit that’s slightly soft to the touch but not mushy. If you can’t find nectarines, peaches work beautifully too!
- Honey (1/4 cup): This adds a natural sweetness. Feel free to swap it with maple syrup or agave for a vegan option.
- Ground cinnamon (1 teaspoon): A warm spice that complements the freshness of nectarines. If you’re feeling adventurous, try adding cardamom for a delightful twist!
- Butter (2 tablespoons): Adds richness to the sauce. You can substitute it with coconut oil or dairy-free margarine for a dairy-free version.
- Lemon juice (1 tablespoon): This brightens the flavors. Alternatively, you could use orange juice for a more citrusy vibe.
- Chopped walnuts or pecans (optional, for garnish): For added texture and flavor. Feel free to sprinkle on some toasted coconut for a tropical twist!
Step-by-Step Instructions
-
Preheat Your Oven:
Start by preheating your oven to 350°F (175°C). This ensures an even bake, allowing the nectarines to caramelize beautifully. -
Prepare the Nectarines:
Wash your nectarines thoroughly. Slice them in half and remove the pits—this is a great time to channel your inner chef! Don’t stress if they split a little; we’re all about that rustic feel here! -
Create the Cinnamon Honey Sauce:
In a small saucepan over low heat, combine the honey, butter, and ground cinnamon. Stir until the butter melts and the mixture is well combined. This delicious concoction is where the magic lies! You’ll notice an intoxicating aroma—don’t simply linger; it’s time to drizzle! -
Bake the Nectarines:
Arrange the halved nectarines in a baking dish, cut side up. Drizzle the warm cinnamon honey sauce generously over each half. Feel free to use a spoon to ensure that each nectarine gets its fair share of goodness. Pop those beauties into the oven and bake for ~25–30 minutes, or until the nectarines are soft and can easily be pierced with a fork. -
Serve Them Up:
Once baked, let them cool for a few minutes. Top with a dollop of whipped cream or a scoop of vanilla ice cream for an indulgent touch. If using nuts, sprinkle them on top for that satisfying crunch.
Savor the moment as you pull those aromatic nectarines from the oven. The golden hue and intoxicating scent will have everyone gathering around your kitchen—consider that a win!
Serving Suggestions
Serving these baked nectarines is a breeze! I love placing the warm nectarines on a beautiful plate—perhaps with a sprinkle of chopped nuts for color and texture. A fresh mint sprig adds a pop of color and a hint of freshness. If you’re feeling fancy, a drizzle of extra honey or a dusting of powdered sugar elevates the presentation. These desserts are perfect for sharing, and they also look stunning on a buffet table at gatherings!
Recipe Variations
Looking to switch things up? Here are a few fun variations you can explore:
- Spice It Up: Add a pinch of nutmeg or a dash of vanilla extract to the honey sauce for a more complex flavor.
- Tropical Twist: Serve with a scoop of coconut ice cream instead of traditional vanilla.
- Berry Magic: Toss in some fresh berries—like blueberries or raspberries—around the nectarines for a burst of flavor and color.
- Nutty Delight: Mix finely chopped almonds or hazelnuts into the cinnamon honey sauce for an extra crunch.
- Frozen Treat: Allow leftovers to cool and freeze them for a refreshing summer dessert later!
Chef’s Notes
This recipe has journeyed with me over the years, evolving as I discovered new flavors and combinations to incorporate. One time, I attempted this with overripe nectarines and—oh boy—what a disaster! They became a mushy mess. But instead of giving up, I turned it into a delicious smoothie that introduced my friends to a whole new level of fruity goodness!
Cooking is all about learning and adapting, and that’s where the real joy comes in. So I encourage you to embrace the little mishaps—each one is a stepping stone to finding your unique culinary voice.
FAQs and Troubleshooting
1. My nectarines are too hard. Can I still bake them?
Yes! If your nectarines are a bit under-ripe, slice them thinner to help them cook faster. Just keep an eye on them in the oven!
2. How do I know when they’ve finished baking?
Baked nectarines should be tender and start to caramelize around the edges. Use a fork to check for tenderness. If it easily pierces the flesh, they’re ready!
3. Can I use frozen nectarines?
Absolutely! Just be sure to thaw them first—no one wants to bake them straight from the freezer. You might need to adjust the baking time since frozen fruit may release more moisture.
4. What if I don’t have honey?
You can substitute with any sweetener you prefer! Maple syrup or agave both work as great alternatives that bring their unique flavors to the dish.
Nutritional Info
While I won’t dive into the nitty-gritty numbers today, I can tell you that baked nectarines are a fabulous source of vitamins A and C, and the honey adds natural sugars and antioxidants. Overall, a refreshing dessert that packs in more than just flavor!
Thank you for joining me today! I hope you feel inspired to whip up these Baked Nectarines with Cinnamon Honey Sauce. Remember, the kitchen is a place for creativity and joy. Let your heart guide your cooking, and the delicious results will follow! Bon appétit!
Print
Baked Nectarines with Cinnamon Honey Sauce
- Total Time: 45 minutes
- Yield: 4 servings 1x
- Diet: Vegetarian
Description
A warm and inviting dessert made from baked nectarines enveloped in cinnamon and honey, perfect for cozy nights or gatherings.
Ingredients
- 4–6 ripe nectarines
- 1/4 cup honey
- 1 teaspoon ground cinnamon
- 2 tablespoons butter
- 1 tablespoon lemon juice
- Chopped walnuts or pecans (optional, for garnish)
Instructions
- Preheat your oven to 350°F (175°C).
- Prepare the nectarines by washing and slicing them in half, removing the pits.
- Create the cinnamon honey sauce by combining honey, butter, and cinnamon in a small saucepan over low heat.
- Bake the nectarines in a baking dish, drizzling the sauce over them, for 25-30 minutes until soft.
- Serve with whipped cream or vanilla ice cream and garnish with nuts if desired.
Notes
For a vegan option, substitute honey with maple syrup or agave. You can enhance the flavor with a pinch of nutmeg or vanilla extract.
- Prep Time: 15 minutes
- Cook Time: 30 minutes
- Category: Dessert
- Method: Baking
- Cuisine: American
Nutrition
- Serving Size: 1 serving
- Calories: 300
- Sugar: 25g
- Sodium: 50mg
- Fat: 10g
- Saturated Fat: 5g
- Unsaturated Fat: 5g
- Trans Fat: 0g
- Carbohydrates: 48g
- Fiber: 3g
- Protein: 2g
- Cholesterol: 15mg
Keywords: nectarines, baked dessert, cinnamon, honey, fruit dessert, easy recipe
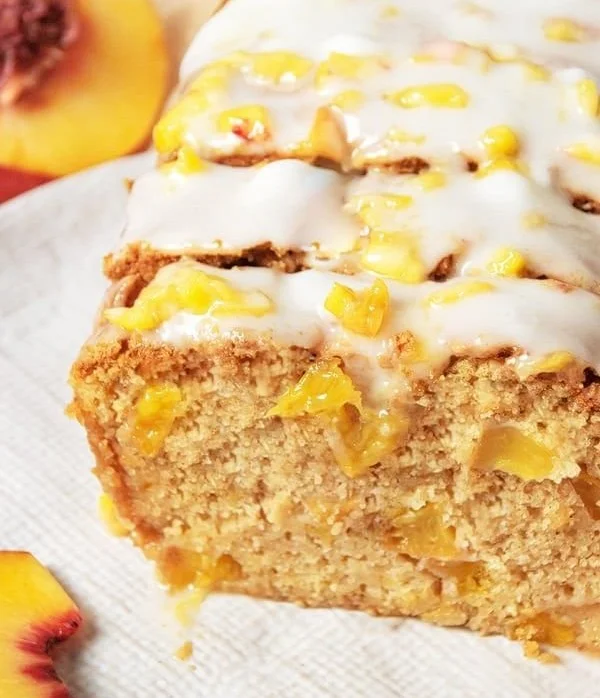
Seasonal Nectarine Bread: Beginner-Friendly Summer Recipe
Homemade Nectarine Bread: A Slice of Summer Magic
Welcome to my kitchen, dear foodies! Today, we’re diving into something truly special: Homemade Nectarine Bread. Now, if you haven’t tasted this delightful creation, let me tell you—it’s like taking a sunny vacation with every bite! There’s something wonderfully comforting about a loaf of bread packed with juicy nectarines that not only fills your kitchen with a heavenly aroma, but also warms your heart.
There’s an almost poetic quality to baking, don’t you think? The way flour, sugar, butter, and fresh fruits come together creates something so much greater than the sum of its parts. Nectarine bread is the lovechild of traditional quick breads, bursting with the essence of seasonal sweetness, perfect for breakfast, brunch, or a cozy afternoon snack.
Every time I whip up a loaf of nectarines, I’m transported back to my grandmother’s kitchen. She used to make a similar fruit bread when the stone fruits were in season, and the memories of her bustling around the kitchen, flour dusting her apron, still make me smile. It was a time filled with laughter, stories, and a whole lot of love—exactly what I hope to recreate with you today.
So grab your mixing bowl and preheat your oven! This is more than just a recipe; it’s an invitation to celebrate the joys of cooking, community, and of course, fabulous food. Let’s get started!
A Sweet Memory in Every Slice
There’s something incredibly nostalgic about baking bread, especially when it’s infused with such vibrant fruits like nectarines. I vividly remember being a child, standing on a stool beside my grandmother as she whisked and stirred in her sunlit kitchen. Her nectarines were always plump and sweet, and I was tasked with the job of peeling and pitting them—a messy chore that came with the promise of tasting the fresh nectarines afterwards, straight from the bowl!
One summer, she decided to surprise us with her specialty nectarines bread. I can still recall the excitement rolling through my stomach as I watched her mix the batter. When it finally came out of the oven, golden brown and drizzled with a sugary glaze, the world seemed to pause for just a moment. The smell wafted through the entire house, drawing us all into the kitchen for a slice of heaven. In that moment, it wasn’t just the bread I loved; it was the memories we created around it—the stories, the laughter, and the feeling of togetherness.
Now, whenever I bake nectarines bread, I try to channel that same warm comfort and joy my grandmother brought to our family kitchen, hoping to create those lasting memories for those I feed today. Let’s fill our kitchens with love as we recreate this beloved recipe together!
Ingredients You’ll Need
-
2 cups ripe nectarines (chopped)
Fresh nectarines are the star of the show here! The juiciness and sweetness they bring is unmatched. If you can’t find nectarines, peaches or apricots offer a lovely substitution. -
1/2 cup unsalted butter (melted)
Butter adds richness and depth to the bread. If you’re looking for a dairy-free option, coconut oil or a plant-based butter would work beautifully! -
1 cup granulated sugar
Sweetness is essential, but you can substitute with brown sugar for a hint of molasses flavor or use coconut sugar for a healthier twist. -
2 large eggs
Eggs act as a binding agent, helping your loaf rise and stay together. For a vegan option, try using flaxseed meal; mix 1 tablespoon of it with 2.5 tablespoons of water and let it sit for a few minutes until it becomes gelatinous. -
1 teaspoon vanilla extract
This simple ingredient elevates the flavor of the bread. Homemade vanilla extract is a real treat if you have it! -
2 cups all-purpose flour
The base of our bread! You can swap out 1 cup for whole wheat flour for added fiber. -
1 teaspoon baking soda
This is the magic leavening agent that helps our bread rise. Make sure it’s fresh for the best results! -
1/2 teaspoon baking powder
Just a little boost to ensure a fluffy texture. -
1/2 teaspoon salt
Salt helps balance the sweetness and enhances the flavors. Don’t skip it! -
1 teaspoon cinnamon (optional)
A sprinkle of cinnamon brings warmth and depth; feel free to add more or mix it up with spices like nutmeg or cardamom!
Step-by-Step Instructions to Nectarine Perfection
Now that we have everything ready, it’s time to jump into the cooking process! Baking is a delightful rhythm of actions, so let’s get into the groove.
-
Preheat Your Oven: Start by preheating your oven to 350°F (175°C). This is crucial for ensuring that your bread bakes evenly.
-
Prepare Your Loaf Pan: Grease a 9×5-inch loaf pan with butter or cooking spray, and set it aside. This helps the bread release easily after baking, which is key for that impressive slice!
-
Chop Your Nectarines: Grab those luscious nectarines! Wash them well, then slice them in half, remove the pits, and chop them into bite-sized pieces. You can leave the skin on for added color and nutrients.
-
Mix Wet Ingredients: In a large mixing bowl, combine the melted butter and sugar, mixing until well combined. This may take a minute or two, but it’s worth it to fully incorporate the sugar! Then, beat in the eggs, followed by the vanilla extract.
-
Combine Dry Ingredients: In another bowl, whisk together the flour, baking soda, baking powder, cinnamon, and salt. If you want a spoonful of flavor, you might want to go for a deeper spice profile with this step. Adjust to your taste!
-
Combine Wet and Dry: Gradually fold the dry ingredients into the wet mixture. Subtlety is key here—mix just until combined. Overmixing can lead to a dense loaf, and we want a light, airy slice!
-
Fold in Nectarines: Gently fold your chopped nectarines into the batter. It’s like tucking them into a cozy bread blanket! Optional: you might reserve a few pieces to sprinkle on top for a beautiful baked finish.
-
Transfer to Loaf Pan: Pour the batter into your greased loaf pan. Smooth the top gently with a spatula to make it even.
-
Bake: Pop the bread into the oven and let it bake for 50–60 minutes or until a toothpick inserted into the center comes out clean. Keep an eye on it; ovens can vary!
-
Cool & Glaze: Once baked, let the bread cool in the pan for about 10 minutes, then carefully transfer it to a wire rack to cool completely. If you’d like a sweet glaze, combine powdered sugar and a bit of milk (or lemon juice) to drizzle over the top once cooled.
Perfect Serving Suggestions
Slice your homemade nectarines bread and serve it warm or at room temperature on a beautiful cake stand to make it pop! You can enjoy it plain, or for a touch of indulgence, slather on some cream cheese or butter. Pair it with a cup of freshly brewed coffee or a refreshing herbal tea—this treat is perfect for breakfast, brunch, or an afternoon pick-me-up!
Recipe Variations to Try
-
Nutty Variation: Toss in some chopped walnuts, pecans, or almonds for a delightful crunch and added nutrition.
-
Chocolate Lovers’ Twist: Add in some chocolate chips for a sweet surprise. Dark chocolate pairs incredibly well with nectarines!
-
Citrus Zing: For a refreshing addition, consider zesting a lemon or orange into the batter. It brightens up the flavors beautifully!
-
Dried Fruit Delight: Substitute some of the nectarines for dried fruits like cranberries or apricots for a different texture and flavor!
-
Gluten-Free Option: Use almond flour or a gluten-free all-purpose blend to make this bread suitable for gluten-sensitive eaters.
Chef’s Notes
This recipe has a special place in my heart because it embodies the spirit of creativity in cooking. It’s evolved over the years—originally, it was a simple way to use overripe nectarines, but it has transformed into a beloved staple in my kitchen. Sometimes, I’ll switch around the spices or the sweeteners based on what I have on hand, and each iteration brings a new layer of joy.
Once, I had a friend over while I was making this, and we accidentally added way too much cinnamon! Instead of tossing it out, we called it “cinnamon explosion bread,” and it turned out to be a hit at our little get-together. So remember, baking is a journey, and sometimes the unexpected can lead to delicious results!
FAQs and Troubleshooting
1. My bread didn’t rise—what happened?
Make sure your baking soda and baking powder are fresh, as their effectiveness diminishes over time. Also, double-check that you didn’t overmix your batter, as that can create a dense loaf.
2. Can I use frozen nectarines?
Absolutely! Just make sure to thaw and drain any excess moisture before adding them to the batter. Frozen fruits can sometimes release more water during baking, so keep that in mind.
3. How do I store leftover nectarines bread?
Wrap it tightly in plastic wrap or aluminum foil and store it at room temperature for up to 3 days. You can also freeze slices for later enjoyment—just let them cool completely, wrap individually, and store them in an airtight container.
4. Can I add other fruits?
Of course! Apples, pears, or even berries can be swapped in, but keep in mind that the amount of moisture they contain might alter the final result. Adjust accordingly and have fun with it!
Nutritional Info
Serving Size: 1 slice (about 50g)
Calories: 180
Total Fat: 7g
Saturated Fat: 4g
Cholesterol: 35mg
Sodium: 150mg
Total Carbohydrates: 25g
Dietary Fiber: 1g
Sugars: 10g
Protein: 2g
Well, dear friends, I hope you enjoyed this journey through the creation of homemade nectarines bread! Remember, cooking is more than just making a meal; it’s about creating memories and enjoying every messy, beautiful moment. I can’t wait to hear your comments, tips, or stories related to this delightful recipe. Let’s bake together and ensure that love remains at the heart of our kitchens! Happy baking!
Print
Homemade Nectarine Bread
- Total Time: 75 minutes
- Yield: 8 servings 1x
- Diet: Vegetarian
Description
A delightful quick bread filled with juicy nectarines, perfect for breakfast or a cozy afternoon snack.
Ingredients
- 2 cups ripe nectarines (chopped)
- 1/2 cup unsalted butter (melted)
- 1 cup granulated sugar
- 2 large eggs
- 1 teaspoon vanilla extract
- 2 cups all-purpose flour
- 1 teaspoon baking soda
- 1/2 teaspoon baking powder
- 1/2 teaspoon salt
- 1 teaspoon cinnamon (optional)
Instructions
- Preheat your oven to 350°F (175°C).
- Grease a 9×5-inch loaf pan with butter or cooking spray.
- Chop your nectarines into bite-sized pieces.
- Combine the melted butter and sugar in a large mixing bowl.
- Beat in the eggs and vanilla extract.
- Whisk together the flour, baking soda, baking powder, cinnamon, and salt in another bowl.
- Fold the dry ingredients into the wet mixture just until combined.
- Gently fold in your chopped nectarines.
- Pour the batter into the greased loaf pan.
- Bake for 50–60 minutes or until a toothpick inserted comes out clean.
- Cool in the pan for 10 minutes before transferring to a wire rack.
- Glaze with powdered sugar and milk or lemon juice if desired.
Notes
For a nutty crunch, consider adding walnuts or pecans. Substitute nectarines with other fruits like peaches or berries for variation.
- Prep Time: 15 minutes
- Cook Time: 60 minutes
- Category: Bread
- Method: Baking
- Cuisine: American
Nutrition
- Serving Size: 1 slice
- Calories: 180
- Sugar: 10g
- Sodium: 150mg
- Fat: 7g
- Saturated Fat: 4g
- Unsaturated Fat: 3g
- Trans Fat: 0g
- Carbohydrates: 25g
- Fiber: 1g
- Protein: 2g
- Cholesterol: 35mg
Keywords: nectarine bread, fruit bread, quick bread, summer baking, homemade bread
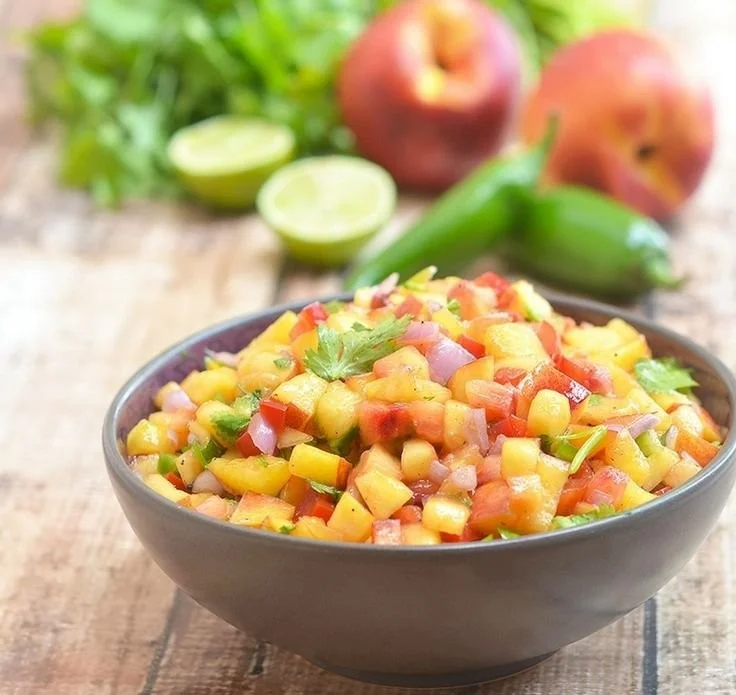
Nectarine Salsa
Nectarine Salsa: A Flavorful Summer Delight
Welcome to my kitchen, friends! I’m so glad you’re here. Today, we’re diving into a vibrant, refreshing dish that really captures the essence of summer: Nectarine Salsa. Picture this: the sun is shining, the grill is sizzling, and the air is filled with the sweet and tangy aromas of fresh ingredients. Nectarines, with their juicy, fragrant nature, are a star in this delightful concoction.
What I love about salsa is that it’s not just a condiment; it’s a celebration of flavors and textures. Whether you’re enjoying a backyard barbecue, hosting a picnic, or simply wanting to elevate your taco night, this Nectarine Salsa will bring smiles to your table. With a perfect balance of sweet, savory, and zesty notes, it’s a fantastic way to highlight seasonal produce and surprise your taste buds!
Now, let’s get our hands a little messy and create something special. You won’t need any fancy tools or hours in the kitchen; just some fresh ingredients and a dash of love!
A Nostalgic Memory
Growing up, summer meant family gatherings at my Aunt Molly’s house. Her backyard was a paradise, adorned with twinkling lights and the sweet scent of flowers. But the highlight of every gathering was her legendary salsa. While she often leaned on traditional ingredients like tomatoes and cilantro, one summer, she let me experiment with peaches and nectarines. I remember slicing the fuzzy fruits on her old wooden table, the juices running down my fingers as we laughed and danced to the music playing in the background.
That batch of nectarines and herbs sparked something magical. It was the perfect blend of textures and flavors, and my family devoured it in no time. I remember my uncle declaring it the "best salsa” he’d ever had, topped off with a crunchy tortilla chip. From that day on, nectarines became my go-to for salsa. They added a twist that made everyone smile. So, let’s recreate that magic today with my Nectarine Salsa recipe!
Ingredients
To whip up this delightful Nectarine Salsa, you’ll need the following ingredients:
-
4 ripe nectarines
Choose nectarines that yield slightly to pressure; they should be fragrant and vibrant in color! If you can’t find nectarines, peaches make a wonderful substitute, too—same flavor, slightly different texture. -
1 small red onion
This adds a bit of crunch and sharpness. If you prefer a milder flavor, try using green onions or shallots instead. -
1 jalapeño pepper (seeded and minced)
This adds just the right amount of heat. If heat isn’t your thing, feel free to omit it or use a green bell pepper for a sweeter version. -
1/4 cup fresh cilantro (chopped)
Cilantro adds a fresh burst of flavor. If you’re not a fan, basil or parsley can also work nicely! -
Juice of 1 lime
The acidity of lime juice brightens all the flavors. Lemon juice can be used in a pinch if you’re out of lime. -
Salt and pepper (to taste)
Don’t forget this! It’s essential to balance the sweetness. A sprinkle of smoked salt can add an interesting twist. -
Optional: 1/2 cup diced tomatoes
For those who want a more traditional salsa vibe, adding tomatoes creates a nice contrast in texture and flavor.
Step-by-Step Instructions
Now that we have our ingredients ready, it’s time to bring this salsa to life!
-
Prep Your Ingredients: Start by washing the nectarines thoroughly. Dry them and then cut them in half to remove the pit. Dice the nectarines into small, bite-sized pieces. You want them to be about the size of a grape—easy to scoop but still substantial enough to enjoy.
-
Dice the Red Onion: Peel your small red onion and chop it into tiny pieces. The finer the chop, the more integrated the flavor will be in the salsa. If you find you’re tearing up a bit while chopping onions, don’t worry; this is a common kitchen occurrence! You could chill the onion before chopping or even cut it under running water to help lessen the tear factor.
-
Mince the Jalapeño: If you’re using jalapeño, cut off the stem and slice it in half lengthwise. Use a spoon to scrape out the seeds (that’s where the heat lives!). Mince the pepper finely, and be sure to wash your hands after handling it—nobody wants jalapeño fingers!
-
Combine Ingredients: In a medium mixing bowl, add your diced nectarines, chopped red onion, minced jalapeño, and freshly chopped cilantro. Give this a gentle mix with a spatula—no need to over-mix, you want those nectarines to hold their integrity!
-
Season: Squeeze the juice of one lime over the mixture, and sprinkle with salt and pepper to taste. Here’s a little chef tip: start with a small amount of salt; you can always add more, but it’s hard to fix an over-salted dish!
-
Taste and Adjust: Before serving, taste your salsa. This is where you can get creative! If you like it a little spicier, throw in more jalapeño. Prefer it sweeter? Add an extra diced nectarine! Mix it up until it’s just right for your palate.
-
Let it Marinate: Allow the salsa to sit at room temperature for about 20-30 minutes. This helps all the flavors marry together beautifully—trust me, it’s worth the wait!
Serving Suggestions
Once your Nectarine Salsa is ready, you can serve it in various ways! I recommend plating it in a charming bowl surrounded by crispy tortilla chips for dipping. You could also use it as a vibrant topping for grilled chicken or fish. Feeling adventurous? Spoon it onto tacos or even a fresh salad for that extra zing. The color and aroma will wow your guests and make your meal feel extra festive!
Recipe Variations
Let your creativity shine with some fabulous variations on this delicious salsa:
-
Roasted Nectarine Salsa: Roast the nectarines briefly on a hot grill for a smoky flavor that adds depth to the salsa.
-
Tropical Twist: Add diced mango or pineapple for a tropical flair that pairs beautifully with everything from chips to grilled shrimp.
-
Mediterranean Style: Incorporate feta cheese and olives for a delicious Mediterranean twist that’s perfect on pita chips.
-
Spicy Kick: Add a dash of cayenne or crushed red pepper flakes for an extra jolt of heat.
-
Cucumber Salsa: Mix in chopped cucumbers for extra crunch and a refreshing finish.
Chef’s Notes
I absolutely love how this recipe has evolved over the years! Initially, I stuck to simple recipes based on what was available. But every summer, as I experiment with different fruits and spices, I find a new twist that makes me fall in love all over again. One memorable time, I added a splash of agave syrup to enhance the sweetness, and it completely changed the game! Cooking is all about exploration and adaptation. So, don’t hesitate to test your ideas; you might stumble upon your next favorite dish!
FAQs and Troubleshooting
1. Why is my salsa too watery?
Sometimes, nectarines can release too much juice, making your salsa watery. To fix this, strain the salsa with a fine mesh sieve or add some diced bell pepper to absorb moisture.
2. How can I store nectarines before using them?
If your nectarines are firm, store them at room temperature until they ripen. Once ripe, you can refrigerate them for a couple of days, but remember, they’re best enjoyed fresh!
3. Can I make this salsa in advance?
Yes! You can prepare the salsa a few hours ahead of time. However, for the best flavor, I recommend mixing in the cilantro and lime juice just before serving to keep things fresh and vibrant.
4. What if I don’t like cilantro?
No problem! Substitute cilantro for chopped mint, parsley, or even a sprinkle of dill, depending on your taste preferences. Each will give your salsa a distinct and fresh twist!
Nutritional Info
While exact nutritional values can vary, a serving of this Nectarine Salsa is typically low in calories, loaded with vitamins, and brimming with healthy ingredients. Feel free to adjust based on your ingredients for the healthiest options!
And there you have it—a delightful recipe for Nectarine Salsa that will brighten your meals and bring a splash of summer to your table year-round. Remember, cooking is all about love, experimentation, and joy. Don’t be afraid to make it your own! Happy cooking, friends!
Print
Nectarine Salsa
- Total Time: 30 minutes
- Yield: 4 servings 1x
- Diet: Vegan
Description
A vibrant and refreshing Nectarine Salsa, perfect for summer gatherings and elevating your meals.
Ingredients
- 4 ripe nectarines, diced
- 1 small red onion, finely chopped
- 1 jalapeño pepper, seeded and minced
- 1/4 cup fresh cilantro, chopped
- Juice of 1 lime
- Salt and pepper, to taste
- Optional: 1/2 cup diced tomatoes
Instructions
- Prep your ingredients by washing the nectarines thoroughly, drying them, and cutting them in half to remove the pit. Dice them into small pieces.
- Dice the small red onion into tiny pieces.
- Mince the jalapeño, removing the seeds to reduce heat if desired.
- Combine the diced nectarines, chopped red onion, minced jalapeño, and cilantro in a medium bowl.
- Season with lime juice, salt, and pepper to taste.
- Taste and adjust seasoning if necessary.
- Let it marinate at room temperature for 20-30 minutes before serving.
Notes
For a more traditional salsa vibe, add diced tomatoes. Experiment with different fruits and spices to find your favorite variation!
- Prep Time: 10 minutes
- Cook Time: 0 minutes
- Category: Side Dish
- Method: No Cook
- Cuisine: Mexican
Nutrition
- Serving Size: 1 serving
- Calories: 80
- Sugar: 8g
- Sodium: 5mg
- Fat: 0g
- Saturated Fat: 0g
- Unsaturated Fat: 0g
- Trans Fat: 0g
- Carbohydrates: 18g
- Fiber: 2g
- Protein: 1g
- Cholesterol: 0mg
Keywords: nectarine, salsa, summer, refreshing, easy recipe
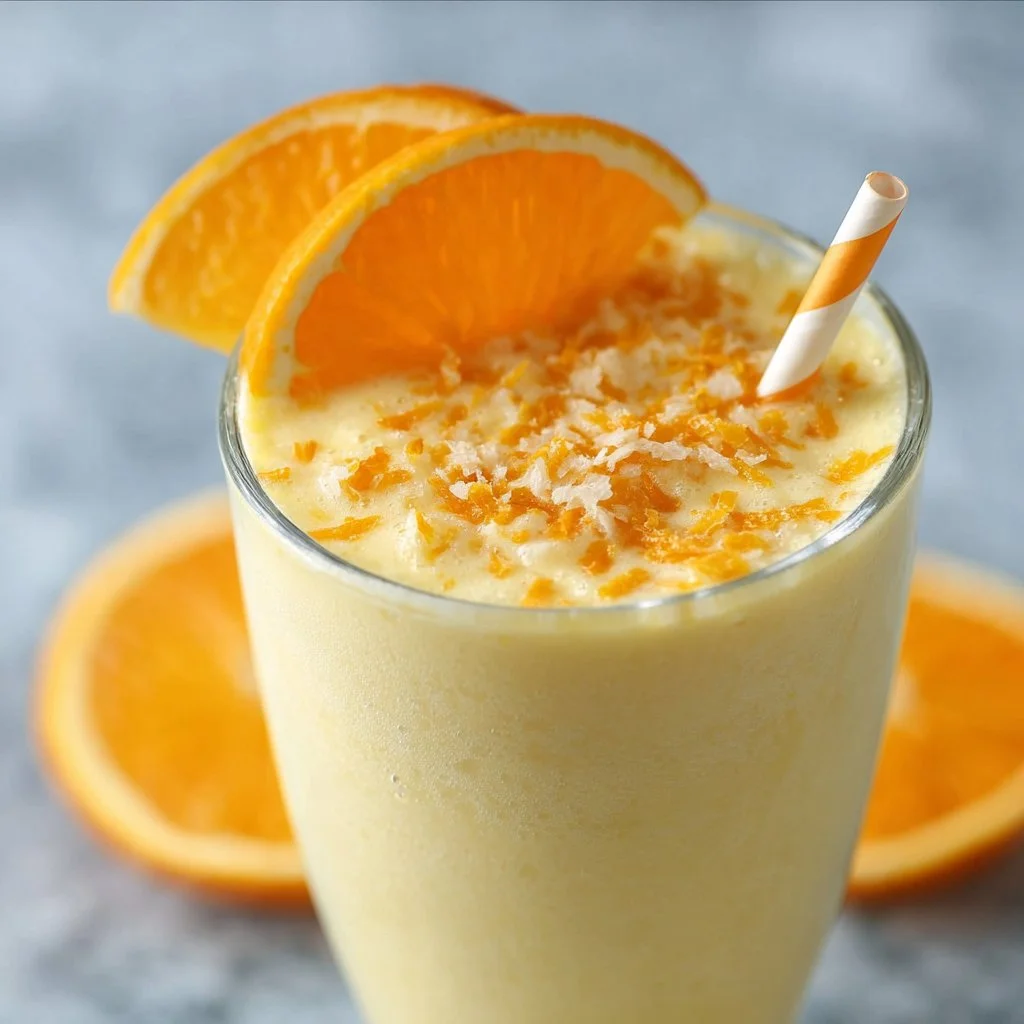
Orange Julius
The Silky Dream of Orange Julius: A Nostalgic Cup of Sunshine
Welcome to my kitchen, my fellow food enthusiasts! Today, we’re diving into a recipe that holds a special place in my heart: the delightful Orange Julius. With its frothy texture and bright citrus flavor, this drink is like a warm hug on a sunny day. Remember those hot summer afternoons when you’d stop by the mall with friends and indulge in this creamy concoction? Oh, the nostalgia is real! Whether you enjoyed it while shopping or lounging by the pool, Orange Julius is a classic that has a way of bringing a smile to your face.
But here’s the thing: making your very own Orange Julius at home has never been easier! No need to scavenge for your nearest mall; you can whip this up in your cozy kitchen, savoring every sip as you reminisce. In today’s post, we’ll not only create a homemade version of this iconic beverage but also explore tips, tricks, and variations that will make your Orange Julius experience even more delightful.
The beauty of this recipe lies in its simplicity. It requires just a few ingredients that you probably already have on hand, and the end result is a refreshingly delicious drink that’s sure to impress your family and friends. Let’s embark on this tangy journey together and create a classic Orange Julius that you’ll want to enjoy year-round!
A Memory of Sunny Days
Growing up, my weekends revolved around my favorite activities: spending time with family and indulging in homemade treats. One particular memory that stands out is our annual summer picnic at the local park. With a packed cooler full of sandwiches, fresh fruit, and those iconic orange drinks—my heart would race with excitement as we set up our blanket in the warmth of the sun.
As a child, I would eagerly await that moment when we’d crack open one of those frosty orange drinks. The first sip was always the best—it was a refreshing explosion of citrus flavor, sweet and creamy, instantly cooling me down. My cousin and I would clink our cups together—a toast to the laughter, warmth, and joy of family gatherings. Many years have passed, but the love for Orange Julius remains, leading me to recreate that mall-inspired magic in my very own kitchen. That taste brings back the carefree days of summer and reminds me how food, in its many forms, is a vessel for cherished memories.
Ingredients: The Essentials for Citrus Bliss
Here’s what you’ll need to whip up your Orange Julius:
-
2 cups of fresh orange juice: The star of the show! Freshly squeezed juice offers a bright, vibrant flavor. If you can’t get fresh oranges, bottled juice is a great alternative—just make sure it’s 100% juice with no added sugar.
-
1 cup of milk: This gives our drink that creamy texture. For a dairy-free version, unsweetened almond milk or coconut milk work beautifully and add a hint of extra flavor.
-
1/2 cup of sugar: Just the right amount to enhance the sweetness of the oranges. You can adjust to taste or substitute with honey, agave syrup, or a sugar alternative like stevia.
-
1 teaspoon of vanilla extract: This adds a lovely depth of flavor. My favorite secret tip? Use pure vanilla extract for the best results, or you can even experiment with almond extract for a different twist!
-
1/4 cup of powdered sugar: This ensures an extra smooth, frothy texture. If you’re watching your sugar intake, you can simply reduce the amount or use a powdered sugar alternative.
-
1 to 2 cups of ice: This makes your Orange Julius chilled and refreshing. For a thicker consistency, add more ice. You can also use frozen orange chunks for an extra frosty effect!
These ingredients combine to create a luscious drink that captures that nostalgic mall experience perfectly. Let’s blend everything together and bring this summer memory back to life!
Step-By-Step Instructions
Now that we have all our ingredients lined up like little soldiers, it’s time to bring them together into a glorious Orange Julius. Here’s how to do it:
-
Juicing the Oranges: Start by juicing your fresh oranges until you have about 2 cups of juice. If you’re using a juicer, great! If not, simply cut the oranges in half and use a hand juicer or even squeeze them manually. Make sure to strain out any seeds. There’s something satisfying about seeing the bright orange juice pour out—it’s like sunshine in a glass!
-
Combine Ingredients in Blender: In a blender, add the freshly squeezed orange juice, milk, sugar, and vanilla extract. Adding the milk helps create that creamy texture we all love. If you’re using any substitutions, like almond or coconut milk, keep in mind that it will slightly shift the flavor profile, but those options can be delicious!
-
Blend Until Smooth: Secure the lid on your blender and pulse on high until the mixture is smooth and creamy—about 30 seconds. You can take a peek to check the consistency. If you want it frothy, blend for another 10-15 seconds. Watch as the ingredients swirl together into a beautiful creamy-orange potion!
-
Add Ice: Now, it’s time to add the ice. Start with 1 cup to keep it refreshing. If you prefer a thicker drink or plan on sharing (or just keeping it all to yourself), add a second cup of ice. Blend again until the mixture reaches your desired consistency—smooth and slushy is what we’re aiming for!
-
Taste and Adjust: Take a quick taste to see if it’s sweet enough for your liking. If you need to boost the flavor, feel free to add a bit more sugar or a touch more vanilla extract. This is your Orange Julius, after all!
-
Serve It Up: Pour your luscious mixture into tall glasses and watch the creamy froth settle at the top—how inviting does that look?
Serving Suggestions
For that mall drink experience, serve your Orange Julius chilled in clear glasses to show off that vibrant color. You can also garnish it with a fresh slice of orange or a sprig of mint for a delightful touch. If you’re feeling fancy, add a straw and a little umbrella—it’s like a mini-vacation in a glass!
This drink is perfect as a refreshing breakfast option, a delightful afternoon snack, or even as a post-workout treat. The possibilities are endless, and it’s sure to please anyone who takes a sip.
Recipe Variations
Feeling adventurous? Here are some delicious variations to consider:
-
Tropical Twist: Add a cup of frozen pineapple or mango for a tropical blend. The fruity flavors complement the orange beautifully!
-
Berry Bliss: Toss in a cup of mixed berries—strawberries, blueberries, or raspberries—for a berry version of the classic Orange Julius. Make sure to adjust the sugar since berries can vary in sweetness.
-
Creamy Coconut: Substitute coconut milk for the regular milk for a coconut-infused Orange Julius. This version is super creamy and just as refreshing!
-
Greener Option: Add a handful of spinach or kale for a healthy boost. You’ll get your nutrients while still enjoying that delicious citrus flavor!
-
Spicy Kick: For those who love a little heat, throw in a pinch of cayenne pepper or some fresh ginger. It adds a unique twist that will surprise and delight!
Chef’s Notes
As with any recipe, there’s always room for creativity and evolution. My love for the Orange Julius has grown over the years, and I find new ways to enjoy it with seasonal ingredients or special twists. Every time I craft this drink, I’m reminded of that summer picnic, where laughter and family were the main ingredients.
The best part? Even after trying different variations, my love for the classic Orange Julius remains. It’s like a comforting old friend that’s always ready to remind you of those sunny days.
If you find yourself with extra Orange Julius in the blender, pour it into an ice cube tray before it melts! Later, use those ice cubes in smoothies, or blend them in with a new batch of Orange Julius for a refreshing encore!
FAQs and Troubleshooting
-
Can I use frozen orange juice instead of fresh?
Yes, you can use frozen orange juice concentrate! Just dilute it with water according to package instructions before adding it to your blender. However, fresh juice provides a vibrant flavor that really makes this drink shine. -
Why is my Orange Julius not frothy, and how can I fix it?
A couple of reasons could cause this: Not using enough ice or not blending long enough. Make sure to blend until you achieve a smooth, frothy consistency. If you’re not happy with it, just add more ice and blend again! -
How can I adjust the sweetness?
Taste is important! Start with less sugar and add until it reaches your desired sweetness. Remember, the natural sugars in the oranges will also come through, providing a lovely balance. -
Can I prepare this drink in advance?
While the freshness of the drink is best enjoyed immediately, you can prepare all the ingredients in the blender before refrigerating and blend just before serving. If you leave the drink sitting, the ice will melt and dilute the flavors.
Enjoy your homemade Orange Julius, my friends! It’s a drink that captures the essence of summer and hearty gatherings, all while being simple to make. Cheers to cozy moments and delicious memories!
Print
Orange Julius
- Total Time: 10 minutes
- Yield: 4 servings 1x
- Diet: Vegetarian
Description
A nostalgic and refreshing homemade Orange Julius drink, perfect for warm sunny days.
Ingredients
- 2 cups of fresh orange juice
- 1 cup of milk (or dairy-free alternative)
- 1/2 cup of sugar
- 1 teaspoon of vanilla extract
- 1/4 cup of powdered sugar
- 1 to 2 cups of ice
Instructions
- Juicing the oranges: Start by juicing your fresh oranges until you have about 2 cups of juice. If you’re using a juicer, great! If not, simply cut the oranges in half and use a hand juicer or even squeeze them manually.
- Combine ingredients in the blender: In a blender, add the freshly squeezed orange juice, milk, sugar, and vanilla extract.
- Blend until smooth: Secure the lid on your blender and pulse on high until the mixture is smooth and creamy—about 30 seconds.
- Add ice: Now, it’s time to add the ice. Start with 1 cup to keep it refreshing.
- Taste and adjust: Take a quick taste to see if it’s sweet enough for your liking.
- Serve it up: Pour your luscious mixture into tall glasses and watch the creamy froth settle at the top.
Notes
For a thicker consistency, add more ice or use frozen orange chunks. Serve chilled in clear glasses or garnish with a fresh slice of orange.
- Prep Time: 10 minutes
- Cook Time: 0 minutes
- Category: Beverage
- Method: Blending
- Cuisine: American
Nutrition
- Serving Size: 1 serving
- Calories: 230
- Sugar: 35g
- Sodium: 100mg
- Fat: 4g
- Saturated Fat: 2g
- Unsaturated Fat: 2g
- Trans Fat: 0g
- Carbohydrates: 50g
- Fiber: 1g
- Protein: 4g
- Cholesterol: 10mg
Keywords: Orange Julius, drink, refreshing, citrus, summer beverage, nostalgia
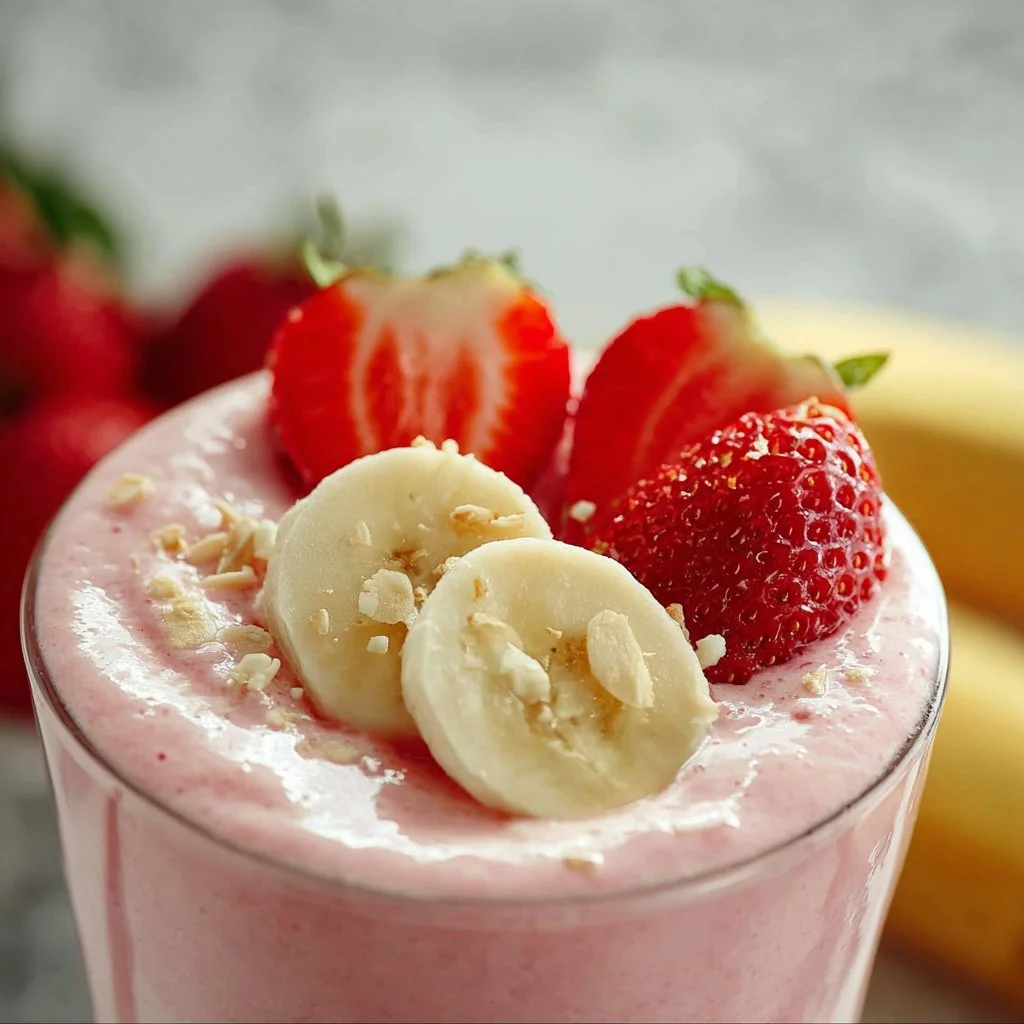
Strawberry Banana Smoothie
Whip Up Some Sunshine: The Ultimate Strawberry Banana Smoothie
Welcome, friends! Today, let’s dive into something that’s not just a treat for your taste buds but also a burst of sunshine in a glass—our delicious Strawberry Banana Smoothie. If you’re like me, you probably can’t resist the sweet, fruity aroma wafting through the air when strawberries and bananas are blended together. It’s like a refreshing hug on a hot summer day or a gentle nudge of nostalgia that might just take you back to simpler times.
Picture this: you wake up on a Saturday morning, sunlight streaming through the kitchen window, the sound of birds chirping outside. As you stretch out in your pajamas, you feel the pull of something sweet and fulfilling. You shuffle over to the blender and pull out some vibrant strawberries and ripe bananas just waiting to be transformed into a creamy, dreamy smoothie. Can you feel the excitement? That’s exactly the kind of joy I want to share with you today.
Smoothies are the ultimate kitchen chameleons, and this Strawberry Banana Smoothie perfectly combines flavor, nutrition, and simplicity. Whether you’re whipping it up as a quick breakfast, a refreshing afternoon snack, or a post-workout pick-me-up, this recipe has got you covered. Plus, it only takes minutes to prepare! So, let’s roll up our sleeves, grab our ingredients, and embark on this fruity adventure together. I promise you’ll have a smile on your face and a satisfied belly in no time!
A Walk Down Memory Lane
Growing up, summer was my favorite season, and a big part of that was the abundance of fresh fruit. Every weekend, my family would head to the local farmer’s market. We’d wander among the colorful stalls lined with ripe strawberries, bananas, and other seasonal delights. It was always a thrill to choose the best-looking produce, and my mom would let us help her pick the juiciest strawberries.
One fateful summer day, we came across a vendor with perfectly ripe strawberries. I still remember the sweet smell that filled the air as we picked out pints. When we got home, my mom decided we would make her famous smoothie recipe. We’d crank up her old blender, giggling as we poured in the ingredients. The sound of the blender whirring, combined with the bright colors of the smoothie, created an atmosphere of pure joy.
As we sipped on our creations, I realized that these simple moments—like enjoying a homemade strawberry banana smoothie—were what made summer special. It wasn’t just about the taste; it was about connections, laughter, and creating memories that would last a lifetime. Now, each time I make this smoothie, I’m reminded of those sweet summer days with my family, and I hope to pass that same joy on to you!
Ingredients
Let’s get to the fun part—gathering our ingredients! Here’s what you’ll need to create this delightful smoothie:
-
Strawberries (2 cups)
Juicy and sweet, strawberries are the star here! Choose fresh, ripe strawberries for the best flavor. If you can’t find any fresh ones, frozen strawberries work perfectly too. -
Banana (1 large)
Bananas add creaminess and natural sweetness to the mix. For a fresher banana flavor, use one that’s slightly underripe. If your bananas are overripe, they work beautifully too—just increase the ice a tad for a cooler smoothie! -
Yogurt (1 cup)
Greek yogurt makes the smoothie thick and adds a dose of protein. You can use regular yogurt if that’s what you have on hand. For a dairy-free option, coconut yogurt or almond yogurt will work wonderfully as substitutes. -
Milk (1 cup)
Whole milk, almond milk, or oat milk—choose your favorite! Each type of milk will slightly change the flavor and texture, so feel free to experiment. If you’re looking to keep it vegan, nut-based milks are fantastic! -
Honey or Maple Syrup (1-2 tablespoons)
Sweeten to your taste! If you prefer a sugar-free option, you can skip this or use a natural sweetener like stevia. -
Ice (1 cup)
Ice is essential for that cold, refreshing texture. You can adjust the amount based on how thick or frosty you like your smoothies!
You might want to grab a few sprigs of fresh mint or some chia seeds for extra flavor and health benefits—but that’s entirely optional!
Step-by-Step Instructions
Ready to blend our fruity concoction? Here’s how to create this Strawberry Banana Smoothie from start to finish:
-
Prepare Your Ingredients
Start by washing your strawberries thoroughly—give them a gentle scrub under running water. Remove the green stems and slice them in half so they blend easier. Peel your banana and break it into smaller chunks. -
Add the Ingredients to the Blender
Toss the strawberries, banana, Greek yogurt, and milk into the blender. Drizzle in honey or maple syrup if you’re using it. Remember this is about your taste, so adjust the sweetness according to your preference! -
Throw in the Ice
Add the ice cubes last. This helps to weigh everything down and keep the blender’s blades moving smoothly. It’s all about creating the perfect vortex! -
Blend, Blend, Blend!
Put the lid on tightly and start blending on a low speed. Gradually increase to high speed for about 30–60 seconds. Keep blending until you reach your desired consistency. If it’s too thick for your liking, you can always add a splash more milk to loosen it up. -
Taste Test
Here’s my favorite part! Take a moment to taste your smoothie before serving. Adjust the sweetness if needed. Add a little more honey or syrup if you like it sweeter! -
Serve it Up
Grab your favorite glass and pour the smoothie in, filling it nearly to the brim. The vibrant pink hue is just begging to be enjoyed. -
Garnish if Desired
For a fancy touch, pop a whole strawberry on the rim of your glass or add a few mint leaves on top. It adds that extra visual appeal, and who doesn’t love a little flair?
Serving Suggestions
Serve your Strawberry Banana Smoothie immediately, as it’s best enjoyed fresh! Whether you’re sipping it alone at home or serving guests, pairing it with a light breakfast, like avocado toast or a veggie omelet, creates a wonderfully balanced meal. You could even serve it in cute mason jars for a picnic vibe!
Recipe Variations
Feeling creative? Here are a few variations to spice up your smoothie:
- Berry Blast: Mix in blueberries or raspberries for an extra fruity kick.
- Nut Butter Swirl: Add a tablespoon of almond or peanut butter for an extra creamy texture and awesome flavor—plus, it’s packed with protein!
- Green Smoothie: Throw in a handful of spinach or kale for a nutrient boost. The fruitiness will mask the greens, making it still delicious!
- Coconut Twist: Use coconut milk and add shredded coconut for a tropical twist.
- Protein Power: Mix in a scoop of your favorite protein powder to enhance the smoothie’s nutrition.
Chef’s Notes
Over the years, I’ve experimented with this recipe so much that it’s become a family staple! Sometimes I even add a scoop of orange juice to introduce a citrusy zing, reminiscent of sunny mornings in my childhood kitchen. And let’s be honest—it’s nearly impossible to make this smoothie without sneaking a lick of the blender—who else is with me on that?
Cooking and creating can be spontaneous, so feel free to adapt this recipe as you like. The kitchen should always be a playground for your creativity!
FAQs and Troubleshooting
Q: My smoothie turned out too thick. What can I do?
A: If your smoothie is thicker than you’d like, just add a splash more milk and blend it again! Adjusting for thickness is part of the fun—every smoothie is unique!
Q: Can I make this smoothie ahead of time?
A: I recommend making it fresh, but if you plan to prepare ahead, you can blend it a few hours in advance and store it in the fridge. Just give it a good shake before enjoying, as some separation may occur.
Q: How can I make this smoothie dairy-free?
A: Easy peasy! Simply swap out the yogurt and milk for their dairy-free alternatives, like almond milk and coconut yogurt.
Q: Can I freeze the smoothie?
A: Absolutely! If you have leftovers, pour them into an ice cube tray or a freezer-safe container. Thaw and blend when you’re ready to enjoy it again.
Nutritional Info
For those of you counting calories or watching your macros, here’s a rough nutritional breakdown per serving of this Strawberry Banana Smoothie:
- Calories: ~250 (depends on specific ingredients used)
- Protein: ~9g
- Fat: ~5g
- Carbohydrates: ~45g
- Fiber: ~4g
(Adjust according to the specific ingredients you choose!)
And that’s a wrap, foodie friends! I’m so excited for you to whip up your own Strawberry Banana Smoothie and savor every sip. Remember, it’s not just about the ingredients; it’s about the love you pour into each blend and the moments you create while sharing it with those you care most about. Enjoy every refreshing mouthful and happy blending!
Print
Ultimate Strawberry Banana Smoothie
- Total Time: 5 minutes
- Yield: 2 servings 1x
- Diet: Vegetarian
Description
A refreshing and nutritious strawberry banana smoothie, perfect for breakfast or a snack.
Ingredients
- 2 cups Strawberries, fresh or frozen
- 1 large Banana, peeled and broken into chunks
- 1 cup Greek Yogurt (or dairy-free alternative)
- 1 cup Milk (whole, almond, or oat)
- 1–2 tablespoons Honey or Maple Syrup
- 1 cup Ice
Instructions
- Prepare your ingredients by washing strawberries and slicing them, and breaking the banana into chunks.
- Add the strawberries, banana, Greek yogurt, and milk to the blender. Drizzle in honey or maple syrup.
- Throw in the ice cubes last to help the blending.
- Blend on low speed, gradually increasing to high for about 30–60 seconds until smooth.
- Taste and adjust sweetness if needed.
- Serve in your favorite glass, garnishing with a strawberry or mint if desired.
Notes
For extra flavor, consider adding chia seeds or mint leaves.
- Prep Time: 5 minutes
- Cook Time: 0 minutes
- Category: Beverage
- Method: Blending
- Cuisine: American
Nutrition
- Serving Size: 1 serving
- Calories: 250
- Sugar: 20g
- Sodium: 100mg
- Fat: 5g
- Saturated Fat: 2g
- Unsaturated Fat: 3g
- Trans Fat: 0g
- Carbohydrates: 45g
- Fiber: 4g
- Protein: 9g
- Cholesterol: 10mg
Keywords: strawberry banana smoothie, healthy smoothie, refreshing drink
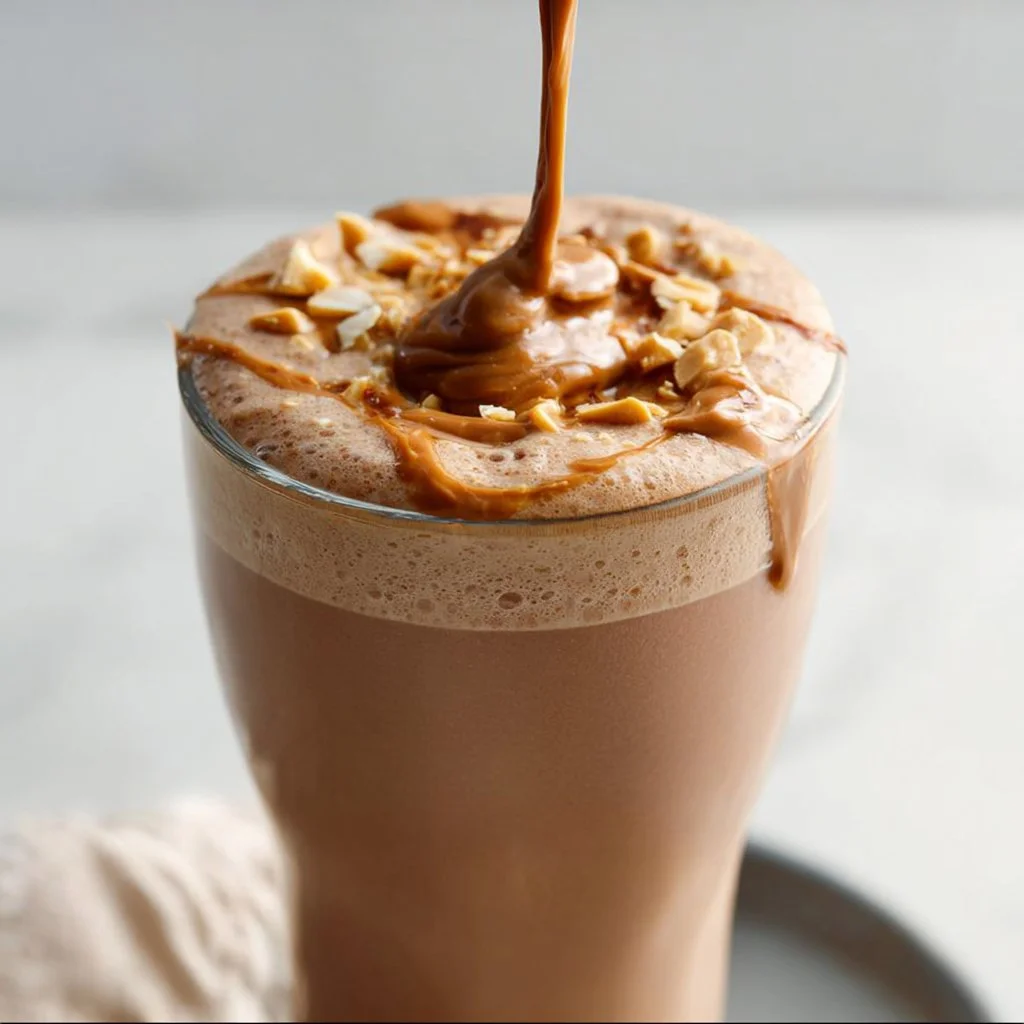
Peanut Butter Coffee Smoothie
The Ultimate Peanut Butter Coffee Smoothie: Your New Go-To Breakfast Treat
Welcome to my kitchen, foodie friends! Today, we’re diving into a recipe that packs a powerful punch and will make your mornings as delightful as a warm hug on a chilly day. If you’re someone who can’t resist the aroma of fresh coffee brewing in the morning and loves the creamy, nutty allure of peanut butter, then you’ve stumbled upon your new favorite breakfast (or snack) — the Peanut Butter Coffee Smoothie!
Why a smoothie, you ask? This delightful blend is everything you want in a quick morning meal: it’s energizing, satisfying, and utterly delicious. Plus, it can be whipped up in minutes, giving you more time to bask in the early morning light or tackle your day. I’m all about recipes that keep it real — easy to make and even easier to enjoy. So grab your blender, and let’s get started!
A Sweet Memory with Every Sip
I’ll never forget the first time I made this smoothie. It was one sunny Saturday morning, and I was feeling adventurous in my little kitchen. I had some leftover coffee from the day before and a nearly empty jar of peanut butter that was just begging to be used. Inspired, I threw together what I thought would be a tasty experiment.
The first sip was a gamechanger — the rich, nutty flavor of peanut butter perfectly complemented the bold coffee and creamy banana. I felt like a kitchen wizard, transforming simple ingredients into liquid gold! The best part? I enjoyed it with my roommates while reminiscing about our college days, when mornings were all about caffeine and carbs.
Fast forward to today, and this smoothie has become a staple in my home. It’s the perfect pick-me-up to kickstart my day or an afternoon stress-buster. I love how it brings back those fun memories each time I blend it up. So here we are, ready to whip up a batch of your own!
Ingredients
Here’s what you’ll need to create your own Peanut Butter Coffee Smoothie:
-
1 cup brewed coffee
Use your favorite roast! Cold brew is great for a chilled smoothie, but regular brewed coffee will do just fine. If you’re not a coffee drinker, try a strong coffee substitute for the same energy boost! -
1 ripe banana
Bananas add natural sweetness and creaminess. If you prefer, you can substitute with half an avocado for a richer texture and healthy fats. Just make sure it’s ripe for better flavor! -
2 tablespoons peanut butter
Use creamy or crunchy, depending on your preference. Natural peanut butter is my go-to since it’s free from added sugars. You can swap it out for almond or cashew butter for a new twist! -
1/2 cup unsweetened almond milk
This keeps your smoothie light and fluffy. You can substitute with any milk of your choice, including oat milk or coconut milk, for a different flavor profile. -
1 tablespoon honey or maple syrup (optional)
If you like your smoothies sweeter, add a drizzle of honey or maple syrup. Agave syrup works too! You can also leave it out if you prefer a less sweet taste. -
1/4 teaspoon vanilla extract
This adds depth of flavor. Feel free to experiment with flavored extracts like hazelnut or even espresso for added richness. -
Ice cubes
Use as much as you like for a thicker smoothie! If you want a creamier texture without watering it down, freeze some banana slices in advance instead.
Step-by-Step Instructions
Let’s blend this beauty together, shall we? Follow these steps, and you’ll be sipping your way to bliss in no time!
-
Prep Your Coffee
Start by brewing a strong cup of coffee. Since we’re making a smoothie, allow it to cool down. If you’re using cold brew, just pull it out of the fridge, and you’re good to go! -
Combine Ingredients in Blender
Toss the following into your blender: the cooled coffee, ripe banana, peanut butter, almond milk, honey (if using), and vanilla extract. This order ensures that the liquids go in first, allowing the blender blades to work their magic more efficiently. -
Add Ice
Next, throw in a handful of ice cubes (about 1 cup). If you’re using frozen banana slices, add those too, but only use ice if you like a thicker texture. -
Blend Until Smooth
Blend everything on high speed for about 30 seconds or until the mixture is creamy and smooth. Make sure to stop and scrape down the sides of the blender if necessary. You want a silky-smooth consistency, so keep blending until you achieve that perfect texture. -
Taste and Adjust
Give your smoothie a quick taste. If you’re after more sweetness, this is the time to add a splash more honey or maple syrup. If it’s too thick, a splash of almond milk will work wonders to adjust the consistency. -
Serve Immediately
Once it’s all blended to perfection, pour your delicious Peanut Butter Coffee Smoothie into your favorite glass or mason jar. Enjoy it right away for the best taste and texture!
Serving Suggestions
For a little flourish, top your smoothie with a sprinkle of crushed nuts, a drizzle of peanut butter, or even some chocolate shavings for those chocolate-peanut butter lovers out there. You can also pop in a fun straw for that extra touch of flair. Perfect for brunch, quick breakfast on the go, or even an afternoon snack!
Recipe Variations
Feeling like a culinary adventure? Here are a few creative twists to customize your Peanut Butter Coffee Smoothie:
- Chocolate Peanut Butter Coffee Smoothie: Add 1 tablespoon of cocoa powder for a deliciously rich chocolatey taste.
- Protein Power Boost: Toss in a scoop of your favorite protein powder for an extra boost of energy.
- Nutty Banana Split: Top your smoothie with sliced strawberries and a dollop of whipped cream for a fun dessert-style treat!
- Green Goddess: Add a handful of spinach or kale for an extra health kick. You won’t taste it thanks to the banana and peanut butter!
- Spicy Kick: A dash of cayenne pepper can add a surprising and delightful heat to your smoothie.
Chef’s Notes
This recipe has come a long way! Initially, I started with a simple banana and peanut butter smoothie, but over time, I added coffee — and boom! It became a breakfast staple in my home. I love when a recipe evolves and tells a story. It’s amazing to think how one impromptu morning in the kitchen can turn into something that’s now shared with friends and family, brightening up their days, too. Plus, the best part? You can customize it to your heart’s content!
FAQs and Troubleshooting
Q: Can I make this ahead of time?
A: Yes! You can prep all the ingredients (except the ice) the night before and keep them in the fridge. Just blend them with ice in the morning, and you’re good to go!
Q: My smoothie turned out too thick. What should I do?
A: If your smoothie is too thick, simply add more almond milk, a little at a time, until you reach your desired consistency!
Q: I don’t have peanut butter. What can I use instead?
A: Almond butter or sunbutter (sunflower seed butter) work beautifully as substitutes and will give you a similar creamy texture.
Q: I don’t like bananas. Can I omit them?
A: While bananas play a key role in sweetness and creaminess, you can substitute with 1/2 an avocado or 1/2 cup of Greek yogurt for that creamy texture without the banana flavor.
Nutritional Info (Optional)
(Note: Nutritional info can vary depending on exact ingredients used and portion sizes)
- Calories: Approximately 300
- Protein: 10g
- Fat: 15g
- Carbohydrates: 30g
- Fiber: 5g
There you have it — your complete guide to making the irresistible Peanut Butter Coffee Smoothie! This delightful drink is more than just a recipe; it’s a reflection of comfort, nostalgia, and creativity in the kitchen. So, what are you waiting for? Let’s whip up a batch and enjoy every delicious sip together! Happy blending!
Print
Peanut Butter Coffee Smoothie
- Total Time: 5 minutes
- Yield: 1 serving 1x
- Diet: Vegan
Description
A delicious and energizing smoothie combining the rich flavors of peanut butter and coffee, perfect for breakfast or a quick snack.
Ingredients
- 1 cup brewed coffee
- 1 ripe banana
- 2 tablespoons peanut butter
- 1/2 cup unsweetened almond milk
- 1 tablespoon honey or maple syrup (optional)
- 1/4 teaspoon vanilla extract
- Ice cubes
Instructions
- Prep your coffee by brewing a strong cup and allowing it to cool. If using cold brew, just take it out from the fridge.
- Combine the cooled coffee, ripe banana, peanut butter, almond milk, honey (if using), and vanilla extract in a blender.
- Add a handful of ice cubes (about 1 cup) or frozen banana slices.
- Blend everything on high speed for about 30 seconds until smooth and creamy.
- Taste and adjust sweetness if necessary by adding more honey and adjust consistency with almond milk if too thick.
- Serve the smoothie immediately in a glass or mason jar.
Notes
For extra flair, top with crushed nuts or a drizzle of peanut butter. This smoothie can be made ahead, just blend with ice in the morning.
- Prep Time: 5 minutes
- Cook Time: 0 minutes
- Category: Breakfast
- Method: Blending
- Cuisine: American
Nutrition
- Serving Size: 1 serving
- Calories: 300
- Sugar: 16g
- Sodium: 90mg
- Fat: 15g
- Saturated Fat: 2.5g
- Unsaturated Fat: 10g
- Trans Fat: 0g
- Carbohydrates: 30g
- Fiber: 5g
- Protein: 10g
- Cholesterol: 0mg
Keywords: smoothie, breakfast, peanut butter, coffee, healthy, vegan
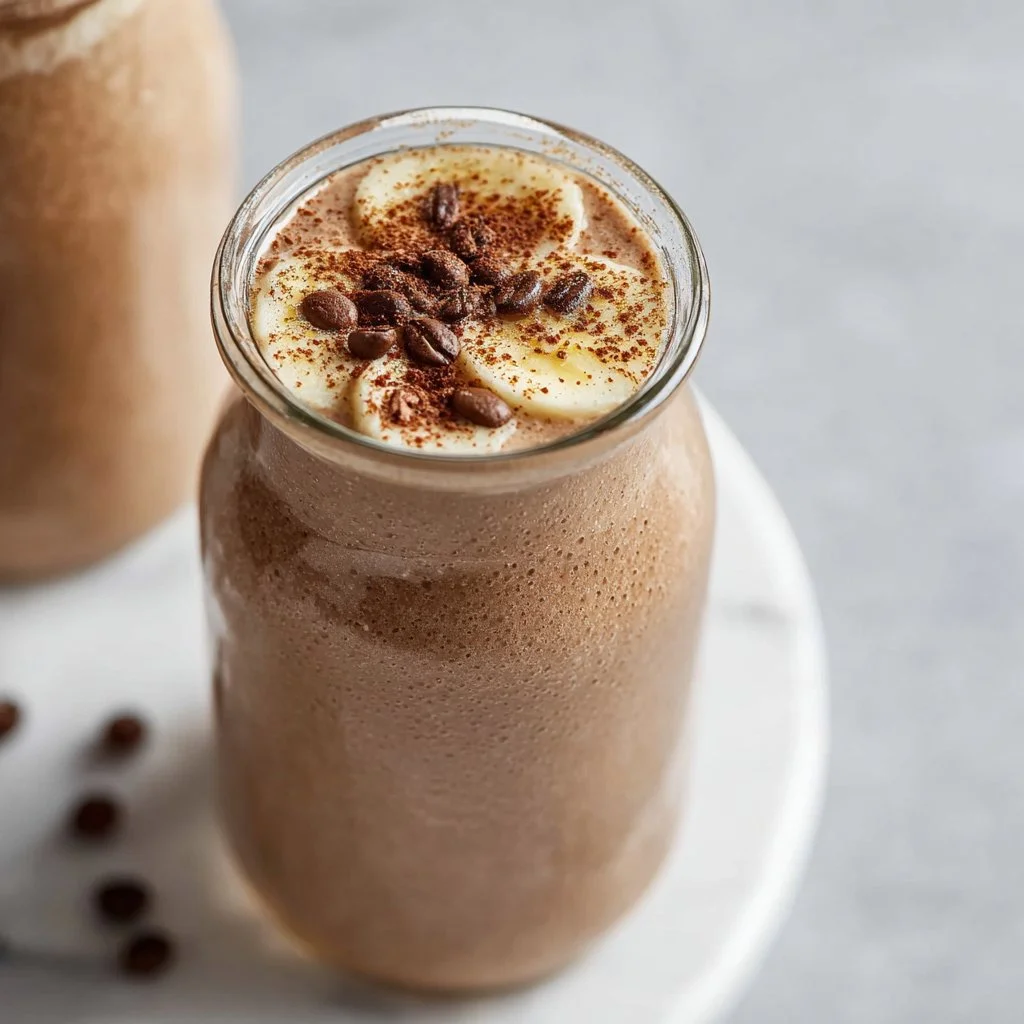
BananaCoffee Smoothie Recipe
Banana Coffee Smoothie Recipe: A Creamy, Flavorful Boost to Your Day
Welcome to my kitchen, friends! I am so excited to share a recipe that’s become a delightful staple in my morning routine: the Banana Coffee Smoothie. Picture this: it’s early morning, the sun is just peeking through your window, and the aroma of freshly brewed coffee fills the air. Nothing beats that, right? Now, imagine blending that comforting cup of joe with the natural sweetness of ripe bananas, creamy yogurt, and a touch of oats for added nutrition. It’s like breakfast in a glass, and it’s perfect for those busy mornings when you need something nutritious yet delicious.
This smoothie is not just a refreshing drink; it’s a true game-changer. When I discovered this combo, I couldn’t believe how effortlessly a morning pick-me-up could be made. It’s rich in flavor, packed with essential nutrients, and incredibly easy to whip up — just toss everything in the blender, and you’re good to go! Plus, it’s completely customizable based on what you love or have on hand. So, let’s dive in and make this amazing Banana Coffee Smoothie together!
A Personal Story: The Birth of the Banana Coffee Smoothie
Let me take you back to a charming little café where my love for coffee and smoothies blossomed. I vividly remember the morning when I stumbled into a new café with my friend Sarah. The chalkboard sign outside advertised a special: a banana coffee smoothie. My curiosity was piqued! I decided to give it a shot, and I’ll never forget that first sip. The creamy texture, the perfect blend of sweet and bold coffee flavor, it transported me straight to smoothie heaven!
As I sipped, I chatted with Sarah about our upcoming plans, and just like that, we both agreed it was a fantastic way to kickstart our day. Fast forward to now, and I’ve adapted that memorable café drink into my own version, adding personal touches while keeping the comforting flavors alive. Now, I share it with friends and family, turning it into a bonding experience one sip at a time.
Ingredients
Here’s what you need for a delicious Banana Coffee Smoothie:
-
Ripe Bananas (2): Bananas add natural sweetness and creaminess. Choose ones that are speckled for that perfect ripe flavor! You can also freeze bananas for an even thicker smoothie.
-
Brewed Coffee (1 cup): Use your favorite brew! It’s the heart of this drink. For a decaf option, simply use decaffeinated coffee. Cold brew works well for a refreshing twist!
-
Greek Yogurt (½ cup): Adds protein and a creamy texture. Feel free to substitute with dairy-free yogurt for a vegan option or swap it for almond milk if you prefer a lighter smoothie.
-
Oats (¼ cup): They provide fiber and help keep you full longer. Quick oats are perfect; if you don’t have oats on hand, you can leave them out or replace them with chia seeds for a different texture.
-
Honey or Maple Syrup (1-2 tbsp): Sweeten to taste! Both options are fantastic, but if you’re looking for no added sugar, you can skip this or add additional banana.
-
Ice Cubes (optional): For an extra refreshing, frosty smoothie, toss in a few ice cubes. If you like a thicker smoothie, you can use frozen bananas instead of ice to avoid watering it down.
Step-by-Step Instructions
Ready to bring this Banana Coffee Smoothie to life? Let’s do it!
-
Prepare Your Coffee: Brew your coffee. I like to make a strong cup to ensure that the coffee flavor shines through against the sweetness of the banana. If you’re making this for breakfast, brewing it the night before and refrigerating it can save time and keep your smoothie refreshingly cool.
-
Gather Ingredients: Next, gather your ripe bananas, Greek yogurt, oats, sweetener, and any other ingredients you’re including. I love having everything laid out because it makes the blending process feel like a fun little culinary dance.
-
The Blend Begins: In your trusty blender, add the ripe bananas and the brewed coffee. Blend them on high until they’re smooth and creamy. This will be your base, and the aroma that wafts up as you blend is sure to get your taste buds singing.
-
Add the Creamy Elements: Now, add in the Greek yogurt and oats. Blend again until everything is well combined. If you want your smoothie thicker, add a little more yogurt or some ice cubes for that frosty goodness.
-
Sweeten to Perfection: At this point, taste your smoothie. Depending on your bananas’ sweetness, you might want to add a drip of honey or maple syrup. Blend again to incorporate the sweetener thoroughly.
-
Final Touch: Once everything is blended to perfection, take a moment to admire the beautiful, creamy texture before pouring it into your favorite glass. Trust me; it’s hard to resist a little taste at this point, so go ahead and sneak a sip!
Serving Suggestions
Now that your Banana Coffee Smoothie is ready, it’s time to serve! I recommend pouring it into a tall glass and garnishing it with a sprinkle of cinnamon for that extra touch. If you’re feeling fancy, top it off with a dollop of whipped cream or a drizzle of chocolate syrup — because who doesn’t love a little indulgence? For a brunch gathering, you can serve it alongside homemade muffins or a light fruit salad to create a balanced meal.
Recipe Variations
Get creative with this banana coffee goodness! Here are a few twists you might enjoy:
- Nutty Banana Boost: Add a tablespoon of almond or peanut butter for a nutty undertone and an extra dose of protein.
- Chocolate Delight: Toss in a tablespoon of cocoa powder or chocolate protein powder for a chocolatey version that’s sure to satisfy any sweet tooth.
- Spiced Upgrade: A pinch of cinnamon or a sprinkle of nutmeg will elevate the flavor profile and give it a cozy vibe.
- Green Goddess: Add a handful of spinach or kale for some greens; they blend in beautifully and pack an extra nutritional punch without altering the flavor greatly.
- Dairy-Free Dream: Use a plant-based yogurt and almond or coconut milk instead of Greek yogurt for a refreshing vegan smoothie.
Chef’s Notes
The Banana Coffee Smoothie has become a favorite in my household, and believe me, it evolves every time I make it. Some days I’ll throw in a handful of chia seeds for added texture, while other mornings, I might skip the sweetener entirely if my bananas are sweet enough. I once made this for a brunch, and my friends couldn’t get enough — they were amazed that coffee could be so versatile.
And here’s a fun fact: I’ve even served this as a dessert! A little whipped cream and a sprinkle of cocoa powder, and my dessert-loving friends were sold. It’s versatile, and I adore how it brings people together. It’s heartwarming to watch friends and family enjoy something you’ve whipped up with love.
FAQs and Troubleshooting
-
Why is my smoothie too thick?
- If your smoothie turns out too thick, simply add a splash of milk or coffee and blend again until you reach your desired consistency.
-
Can I use instant coffee?
- Absolutely! Just mix your instant coffee with water before adding it to the blender. Adjust the amount based on your preferred coffee strength.
-
What if I don’t like bananas?
- You can swap bananas for a cup of berries or mango, but adjust the sweetener since fruits have various sweetness levels.
-
How can I store leftovers?
- Leftover smoothie can be stored in the fridge for 1-2 days, but keep in mind that it may separate. Just give it a good stir or shake before drinking.
Nutritional Info
(Per serving, approximately)
- Calories: 320
- Protein: 12g
- Fat: 3g
- Carbohydrates: 60g
- Fiber: 6g
- Sugar: 24g
Thanks for joining me in the kitchen today! I hope you enjoy this Banana Coffee Smoothie as much as I do. It’s one of those recipes that might just become a cherished part of your morning routine. So grab your blender, and let’s get sipping! Happy cooking!
Print
Banana Coffee Smoothie
- Total Time: 5 minutes
- Yield: 1 serving 1x
- Diet: Vegetarian
Description
A creamy and flavorful smoothie that combines ripe bananas, brewed coffee, and Greek yogurt for a nutritious breakfast in a glass.
Ingredients
- 2 Ripe Bananas
- 1 cup Brewed Coffee
- ½ cup Greek Yogurt
- ¼ cup Oats
- 1–2 tbsp Honey or Maple Syrup
- Ice Cubes (optional)
Instructions
- Prepare your coffee.
- Gather your ingredients.
- The blend begins: add bananas and coffee to the blender.
- Add Greek yogurt and oats.
- Sweeten to perfection.
- Final touch: admire and serve.
Notes
Serve with a sprinkle of cinnamon or a dollop of whipped cream for an extra touch. This smoothie is customizable based on your preferences.
- Prep Time: 5 minutes
- Cook Time: 0 minutes
- Category: Breakfast
- Method: Blending
- Cuisine: American
Nutrition
- Serving Size: 1 serving
- Calories: 320
- Sugar: 24g
- Sodium: 50mg
- Fat: 3g
- Saturated Fat: 1g
- Unsaturated Fat: 2g
- Trans Fat: 0g
- Carbohydrates: 60g
- Fiber: 6g
- Protein: 12g
- Cholesterol: 5mg
Keywords: smoothie, banana, coffee, breakfast, healthy
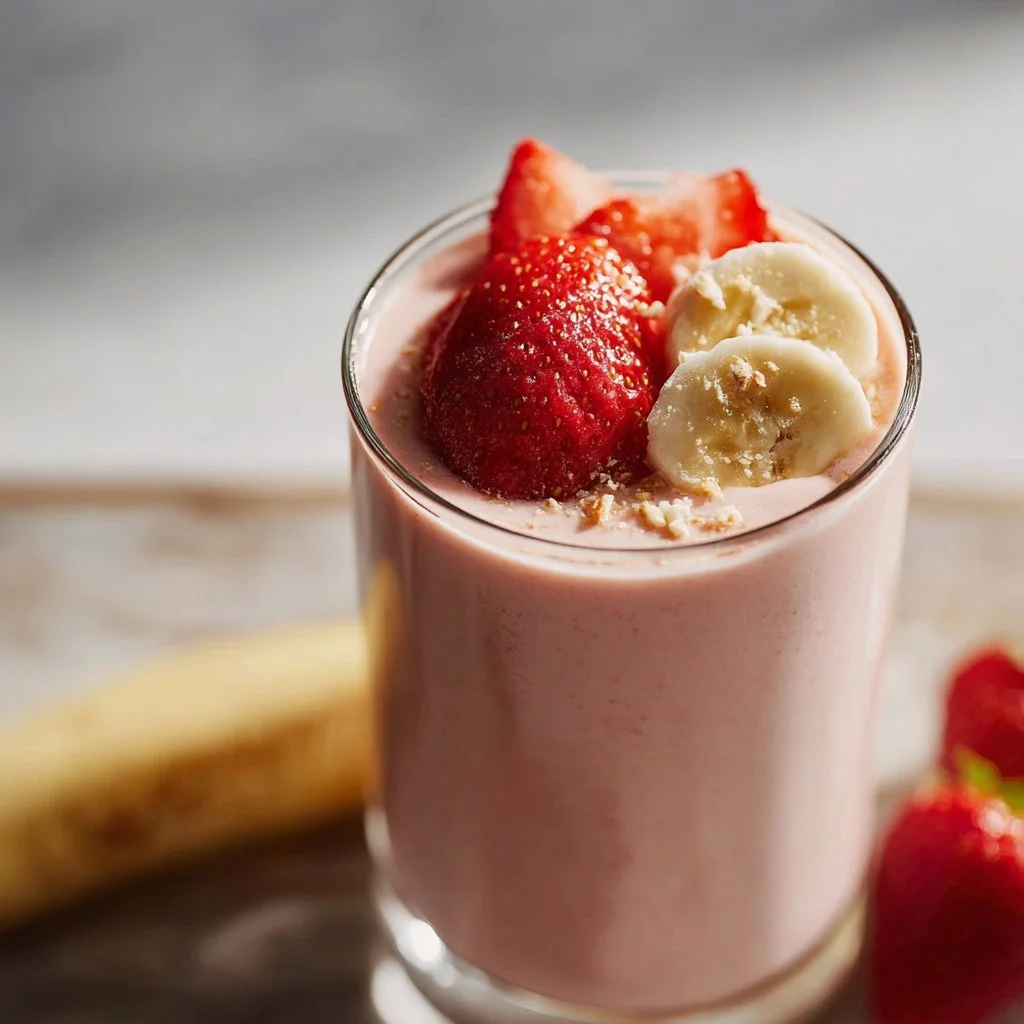
Fresh Strawberry Banana Smoothie – Creamy & Delicious
Fresh Strawberry Banana Smoothie – Creamy & Delicious
Welcome to my kitchen, dear foodies! Today, we’re diving into one of my favorite go-to recipes: the Fresh Strawberry Banana Smoothie. This creamy delight is a fantastic way to kickstart your morning or enjoy as a refreshing afternoon snack. With just a few simple ingredients, you can whip up a wholesome treat that not only tastes incredible but also nourishes your body and brightens your day. Are you ready to blend up some joy? Let’s get started!
A Slice of Nostalgia
Growing up, my kitchen was a constant flurry of activity. My mom had this remarkable talent for turning the ordinary into extraordinary, and it wasn’t uncommon to have a batch of smoothies whirling about in the blender while she juggled a million things at once. One of our family traditions involved Saturday mornings spent lounging in our pajamas, sipping on homemade smoothies while flipping through recipe books, discussing what glorious dishes we’d try next. The strawberry banana smoothie was always a crowd favorite—its vibrant pink hue reflected the sunshine, and the creamy texture made every sip feel indulgent. It wasn’t just about the smoothie; it was a canvas for our laughter and bonding, a celebration of togetherness that I cherish to this day. It brings back warmth and the scent of summer, that perfect reminder that, in life, simple pleasures are often the most delightful.
I can’t wait for you to create your own memories with this recipe, so let’s blend those strawberries and bananas!
Ingredients
Gather these ingredients for a deliciously creamy smoothie:
-
Fresh Strawberries (1 cup)
Strawberries provide sweetness, vibrant color, and a hefty dose of antioxidants. You can use fresh or frozen strawberries depending on the season. If fresh strawberries aren’t available, opt for frozen ones—they’ll make your smoothie extra cold and refreshing! -
Banana (1 ripe)
Bananas offer natural creaminess and a boost of potassium. Look for bananas with a few brown spots; they’re sweeter and perfect for smoothies. No ripe bananas? No worries! You can substitute with a half cup of unsweetened applesauce for a similar texture. -
Greek Yogurt (1/2 cup)
Greek yogurt adds a creamy texture and packs in protein. For a dairy-free option, you can use coconut yogurt or almond yogurt. Just make sure it’s thick to maintain that lush smoothie consistency. -
Almond Milk (1/2 cup)
This nutty milk serves as a lovely base for blending the ingredients. Feel free to switch it out for any milk of your choice—coconut milk, oat milk, or regular cow’s milk all work beautifully. -
Honey or Maple Syrup (1-2 tablespoons, optional)
For those sweet moments! Adjust the sweetness to your liking, but do taste before adding; the fruit often brings enough natural sweetness on its own. Agave syrup or a pitted date can also be good substitutes here. -
Ice Cubes (optional)
If you prefer a chilled smoothie, throw in a handful of ice cubes! This step is especially nice on hot days when you’re craving something refreshing.
Step-by-Step Instructions
Now that we have our ingredients ready, let’s mix it all up into a delightful smoothie!
-
Prep Your Ingredients
Start by washing your fresh strawberries under cool water to remove any dirt or debris. If you’re using frozen strawberries, you can skip this step! Next, peel your banana and slice it into a few chunks; this helps it blend more easily. -
Loading the Blender
In your blender, add the sliced banana first. This helps create a vortex, pulling the other ingredients down for even blending. Next, toss in the fresh strawberries, Greek yogurt, and almond milk. -
Sweeten It Up
If you’re adding honey or maple syrup, do so now. You can always adjust the sweetness later, but starting with a little helps you gauge the flavor. -
Blend It Up!
Secure the blender lid and start blending on low speed for about 30 seconds. Increase to high speed and blend until smooth and creamy, usually around an additional minute. If your smoothie is too thick, add a splash more almond milk until you reach your desired consistency. -
Taste Test
This is where the magic happens! Grab a spoon, dip it into the blender, and taste your creation. If it needs some extra sweetness, this is the perfect time to add more honey or syrup and blend again briefly. -
Add Ice (If Desired)
If you want a colder, frosty smoothie, now is the time to toss in a handful of ice cubes. Blend again until the ice is incorporated, giving your smoothie that refreshing chill. -
Serve and Enjoy!
Pour your creamy strawberry banana smoothie into your favorite glass.
Serving Suggestions
For a little extra flair, consider topping your smoothie with a few slices of fresh strawberries or a sprinkle of granola for that perfect crunch. If you’re feeling adventurous, add a dollop of whipped cream or a swirl of nut butter on top for added richness. A sprig of mint adds a lovely pop of color and aroma. Serve your smoothie immediately with a fun straw for sipping!
Recipe Variations
Feel free to get creative with your smoothie! Here are a few variations to try:
-
Tropical Twist: Swap out the strawberries for pineapple or mango for a juicy tropical vibe. Coconut milk can also enhance that island flavor!
-
Green Goodness: Add a handful of spinach or kale. They blend in beautifully, and you won’t even taste them!
-
Protein Power: Toss in a scoop of your favorite protein powder for a post-workout recovery boost.
-
Nutty Delight: Mix in a tablespoon of almond butter or peanut butter for a rich, nutty flavor and added creaminess.
-
Berry Medley: Substitute strawberries with any mixed berries—blueberries, raspberries, or blackberries for a fun berry explosion!
Chef’s Notes
One thing I love about this strawberry banana smoothie is how customizable it is. Over the years, I’ve played around with different flavors and textures until I found what works best for me. Remember, every ingredient has a purpose: ripe bananas bring creaminess, strawberries add sweetness, and yogurt gives that luxurious texture. If you ever have fruit that’s about to go bad, toss it in the freezer! You can always use it for smoothies, reducing waste while keeping your creations deliciously fresh.
Also, while blending, make sure to scrape down the sides of your blender occasionally so everything incorporates evenly. My early blending adventures often resulted in chunks of banana refusing to go smoothly, which always made for a fun taste test when I found an unblended bit!
FAQs and Troubleshooting
Q: What if my smoothie is too thick?
A: If your smoothie ends up too thick, just add a splash more almond milk and blend again until you reach your desired consistency.
Q: Can I make this smoothie ahead of time?
A: Yes! You can prepare it a few hours ahead and store it in the fridge. Just give it a good shake or stir before drinking, as it might separate a little while sitting.
Q: Can I use frozen fruit?
A: Absolutely! Frozen strawberries and bananas are great alternatives that yield a creamy texture, plus they keep your smoothie nice and cold. You might want to cut back on the ice if you do!
Q: How can I make it vegan?
A: To make this smoothie vegan, simply use a plant-based yogurt and a vegan sweetener like maple syrup or agave.
Nutritional Info
While I typically do not delve deep into nutritional info, it’s always nice to be aware of what we’re enjoying. A serving of this strawberry banana smoothie is roughly:
- Calories: 250
- Protein: 10g
- Healthy Fats: 4g
- Carbohydrates: 45g
- Fiber: 5g
(These values may vary based on the specific brands and ingredients you use.)
Thank you for joining me in my kitchen! I hope you find as much joy in making this Fresh Strawberry Banana Smoothie as I do. Embrace the flavors, have fun experimenting, and remember: the most important ingredient is love. Happy blending!
Print
Fresh Strawberry Banana Smoothie
- Total Time: 10 minutes
- Yield: 2 servings 1x
- Diet: Vegetarian
Description
A creamy and delicious smoothie made with fresh strawberries, ripe bananas, and Greek yogurt, perfect for breakfast or a refreshing snack.
Ingredients
- 1 cup Fresh Strawberries
- 1 ripe Banana
- 1/2 cup Greek Yogurt
- 1/2 cup Almond Milk
- 1–2 tablespoons Honey or Maple Syrup (optional)
- Ice Cubes (optional)
Instructions
- Wash your fresh strawberries under cool water to remove any dirt or debris. If using frozen strawberries, skip this step!
- Peel your banana and slice it into chunks; this helps it blend more easily.
- Add the sliced banana to your blender first.
- Toss in the fresh strawberries, Greek yogurt, and almond milk.
- If adding honey or maple syrup, do so now.
- Blend on low speed for about 30 seconds, then increase to high speed and blend until smooth and creamy, usually around another minute.
- Taste your smoothie and add more sweetener if needed.
- If you want a colder smoothie, add ice and blend again.
- Pour your smoothie into a favorite glass and enjoy!
Notes
For added flair, top your smoothie with fresh strawberries, granola, whipped cream, or nut butter. Customize with different fruits or flavors as desired.
- Prep Time: 10 minutes
- Cook Time: 0 minutes
- Category: Drink
- Method: Blending
- Cuisine: American
Nutrition
- Serving Size: 1 serving
- Calories: 250
- Sugar: 20g
- Sodium: 90mg
- Fat: 4g
- Saturated Fat: 1g
- Unsaturated Fat: 2g
- Trans Fat: 0g
- Carbohydrates: 45g
- Fiber: 5g
- Protein: 10g
- Cholesterol: 5mg
Keywords: smoothie, strawberry banana, refreshing drink, healthy, breakfast




