

Southwest Black Bean & Corn Salad
Southwest Black Bean & Corn Salad
Hello, my fellow food lovers! Welcome back to my cozy kitchen, where the air is always filled with the intoxicating aroma of fresh ingredients and delightful spices. Today, we’re diving into one of my all-time favorite recipes: Southwest Black Bean & Corn Salad! This vibrant, zesty dish celebrates the colors and flavors of the sun-kissed Southwest, and let me tell you, it’s as delicious as it is easy to whip up.
When I think about this black bean and corn salad, I’m reminded of vibrant summer barbecues spent under the warm sunlight, laughter echoing in the air, and friends and family sharing delicious food. It’s a dish that brings people together, whether you’re picnic-ing at the park, hosting a potluck, or just looking for a fresh meal at home. Best of all? It’s packed with healthy ingredients. You don’t have to be a kitchen wizard to create this festivity on a plate—you just need a handful of fresh ingredients and a sprinkle of love!
Now, let’s get our aprons on and roll up our sleeves as we embark on this culinary adventure! You’ll find this recipe not only feeds your stomach but also nourishes your spirit. So gather your amigos, and let’s make this Southwest Black Bean & Corn Salad that is bursting with flavor and made for sharing!
Personal Story
I remember the first time I made this Southwest Black Bean & Corn Salad. It was a sweltering July afternoon, and the air was so thick that it felt like everyone was melting into their lawn chairs. My dear friend Carla and I decided to have an impromptu get-together, inviting some neighbors over. We were eager to escape the heat but desperate to enjoy a meal that didn’t involve turning on the oven.
As I rummaged through my pantry, I stumbled upon some canned black beans and frozen corn. A light bulb went off! I quickly grabbed a handful of colorful bell peppers, cilantro, and lime from my fridge, and voila—we were on our way to making something truly special. I’ll never forget how vibrant that bowl of salad looked on our picnic table, surrounded by colorful produce and the buzzing chatter of friends. Everyone scooped it up with tortilla chips, and we laughed until the sun began to set. That day planted the seed for this dish to become a staple in my kitchen, and I still whip it up as a refreshing side or a vibrant main course whenever friends come over.
It’s funny how some of the best recipes come together in the most unexpected moments, isn’t it? So grab those ingredients, and let’s start creating a memory of our own!
Ingredients
Here’s what you’ll need to create this Southwest Black Bean & Corn Salad:
-
1 can (15 oz) black beans
A protein-packed star of the dish! Choose low-sodium if you prefer; they’re super versatile. If you want a little kick, try using spiced black beans! -
1 can (15 oz) sweet corn
Sweet and delicious, corn adds a pop of color and texture. Fresh or frozen corn works just as well! You could even grill it for an added smoky flavor. -
1 red bell pepper, diced
Speaking of color, here’s a red gem! Sweet, crunchy, and packed with vitamins, diced red bell pepper brings a delightful crunch. You can swap it with yellow or orange bell peppers for a sweeter flavor or even jalapeños for spice! -
1 small red onion, finely chopped
Adding a bit of sharpness, red onions bring depth to this salad. If you find raw onions too overpowering, soak them in cold water for 10 minutes to mellow out the flavor. -
1 cup cherry tomatoes, halved
Juicy and sweet, cherry tomatoes are a must in this recipe! You can substitute them with diced Roma tomatoes if needed, but the bite-sized cherries are just too fun. -
1 avocado, diced
Creamy and rich, avocado adds a wonderful texture. For the freshest taste, wait to add it right before serving to prevent browning. If you’re avoiding avocados, you can swap in crumbled feta cheese for creaminess. -
1/4 cup fresh cilantro, chopped
Here comes the herbal freshness! If you’re not a fan of cilantro, parsley makes a fantastic alternative with a milder flavor. -
Juice of 2 limes
Tart and zesty, lime juice brightens everything up! If you’re feeling adventurous, try lemon juice or even orange juice for a sweeter twist. -
1 teaspoon cumin
Earthy and warm, cumin is the perfect spice to round out the Southwest flavors. If you don’t have cumin on hand, use chili powder for a different but delightful flavor profile. -
Salt and pepper to taste
Always taste as you go! Adjust salt and pepper to your liking for the perfect seasoning.
Step-by-Step Instructions
Now that we’ve gathered our ingredients, it’s time to get cooking! Let’s dive into the steps:
-
Rinse and Drain Beans and Corn:
Start by rinsing the black beans under cold water in a colander. This helps remove excess sodium and any canning liquid. Do the same for the sweet corn. This simple step will also enhance the flavors as you mix everything together. -
Chop Your Veggies:
Get your chopping board ready! Dice the red bell pepper, chop the red onion, halve the cherry tomatoes, and peel and cube the avocado. Try to cut everything around the same size for even bites—’cause who likes a mouthful of just onions, right? -
Time for Tossing:
In a large mixing bowl, combine the black beans, corn, bell pepper, onion, cherry tomatoes, and cilantro. Let’s get messy! Use a wooden spoon or spatula to gently mix all those colorful ingredients together—don’t be too rough, or the avocados will mush up! -
Dress the Salad:
Squeeze the juice of those fresh limes right over the salad. Add the cumin, salt, and pepper. Toss everything together gently again, ensuring the dressing coats all the ingredients. The lime juice keeps everything fresh and zesty! -
Avocado Time:
Now for the star of the show—add your diced avocado! Give it one last gentle toss to incorporate, being careful not to mash the avocado too much. It’s all about achieving those beautiful green morsels! -
Taste Testing:
This is the fun part! Taste your salad and adjust the seasoning if necessary. Need a bit more lime? Go for it! A dash more cumin? Absolutely. Cooking is all about making it your own! -
Chill and Serve:
Once everything is mixed, cover the bowl with plastic wrap or an airtight lid and let it chill in the fridge for at least 30 minutes. This allows all those flavors to meld together beautifully. Just before serving, give it a final toss to redistribute the dressing.
Serving Suggestions
When it comes to serving this salad, there are endless possibilities! For a fun presentation, serve it in a large, colorful bowl that showcases all those beautiful ingredients. I love pairing this salad with tortilla chips for scooping, or serve it alongside grilled chicken or shrimp for a heartier meal. If you’re feeling fancy, drizzle a little extra lime juice and sprinkle some additional cilantro right on top.
Recipe Variations
Here are some creative twists you can try out with this salad:
-
Quinoa Boost:
For a filling, protein-rich alternative, add cooked quinoa to the mix! It adds an extra layer of texture and makes for great leftovers. -
Spicy Kick:
Add diced jalapeños or a dash of hot sauce to amp up the heat. If you’re feeling adventurous, try chipotle peppers for a smoky flavor. -
Cheesy Goodness:
Crumble some feta cheese or sprinkle shredded cheddar cheese on top for a creamy goodness that complements the freshness. -
Tropical Twist:
Swap out the tomatoes for diced mango or pineapple for a sweet and tropical take on this salad! -
Vegan Delight:
For a completely plant-based twist, top it with a dollop of cashew cream or a sprinkle of nutritional yeast for a cheesy flavor.
Chef’s Notes
This Southwest Black Bean & Corn Salad has grown to become not just a recipe but a workshop of creativity in my kitchen! I love how it evolves based on what’s in my fridge or what’s in season. I remember one time I added some roasted red peppers leftover from a fancy dinner party, and it kicked things up a notch! Plus, it’s a great dish to make ahead of time for meal prep—it keeps well for a few days in the fridge and makes a fantastic lunch with or without additional protein.
Funny enough, I once mistook cumin for cinnamon in a hurry and created an entirely different dish! The lesson? Always taste as you go, and don’t be afraid to embrace the mishaps because they often lead to delightful surprises. Cooking should be a joyful journey, not a stressful experience.
FAQs and Troubleshooting
-
Can I make this salad ahead of time?
Absolutely! This salad tastes even better after it rests in the fridge for a day. Just hold off on adding the avocado until right before serving to keep it from browning. -
What can I substitute for lime juice if I don’t have any?
Lemon juice works in a pinch! It’s not as tangy as lime but will still provide that necessary acidity. Another option is apple cider vinegar for a different flavor. -
How can I store leftovers?
Store any leftovers in an airtight container in the refrigerator for up to 3 days. Keep in mind the avocado might brown slightly, but it will still taste fresh! -
Why is my salad watery?
If you find your salad is too watery, it’s usually due to excessive moisture from the tomatoes or canned corn. Make sure to thoroughly rinse and drain those cobs of joy! If needed, try using fresh tomatoes, as they may have less moisture.
Nutritional Info (if applicable)
This salad is not only bursting with flavor but also packed with nutritional benefits. A serving (about 1 cup) provides:
- Approximately 180 calories
- 8g protein
- 15g carbohydrates
- 8g healthy fat from the avocado
- Rich in fiber and vitamins A, K, and C
Conclusion
And there you have it—your guide to creating a dazzling Southwest Black Bean & Corn Salad! I hope this recipe brings joy, flavor, and a little bit of sunshine into your home. Remember, cooking is about expression, discovery, and most importantly—having fun!
So grab those ingredients, let’s get cooking, and create delightful memories together in the kitchen. I can’t wait to see how your salad turns out and hear your kitchen stories! Happy cooking, friends!
Print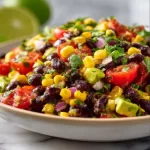
Southwest Black Bean & Corn Salad
- Total Time: 15 minutes
- Yield: 4 servings 1x
- Diet: Vegan
Description
A vibrant and zesty Southwest Black Bean & Corn Salad packed with fresh ingredients and bursting with flavor, perfect for sharing at gatherings or enjoying as a light meal.
Ingredients
- 1 can (15 oz) black beans, rinsed and drained
- 1 can (15 oz) sweet corn, rinsed and drained
- 1 red bell pepper, diced
- 1 small red onion, finely chopped
- 1 cup cherry tomatoes, halved
- 1 avocado, diced
- 1/4 cup fresh cilantro, chopped
- Juice of 2 limes
- 1 teaspoon cumin
- Salt and pepper to taste
Instructions
- Rinse and drain the black beans and corn.
- Chop the red bell pepper, red onion, cherry tomatoes, and avocado.
- Combine the black beans, corn, bell pepper, onion, cherry tomatoes, and cilantro in a large mixing bowl.
- Dress the salad with lime juice, cumin, salt, and pepper, and toss gently.
- Add the diced avocado and toss again carefully.
- Taste and adjust seasoning as desired.
- Chill in the fridge for at least 30 minutes before serving.
Notes
Best served fresh, but can be made ahead of time. Add avocado right before serving to prevent browning.
- Prep Time: 15 minutes
- Cook Time: 0 minutes
- Category: Salad
- Method: Mixing
- Cuisine: Southwestern
Nutrition
- Serving Size: 1 serving
- Calories: 180
- Sugar: 3g
- Sodium: 200mg
- Fat: 8g
- Saturated Fat: 1g
- Unsaturated Fat: 7g
- Trans Fat: 0g
- Carbohydrates: 15g
- Fiber: 5g
- Protein: 8g
- Cholesterol: 0mg
Keywords: salad, black bean salad, corn salad, summer salad, vegan recipe
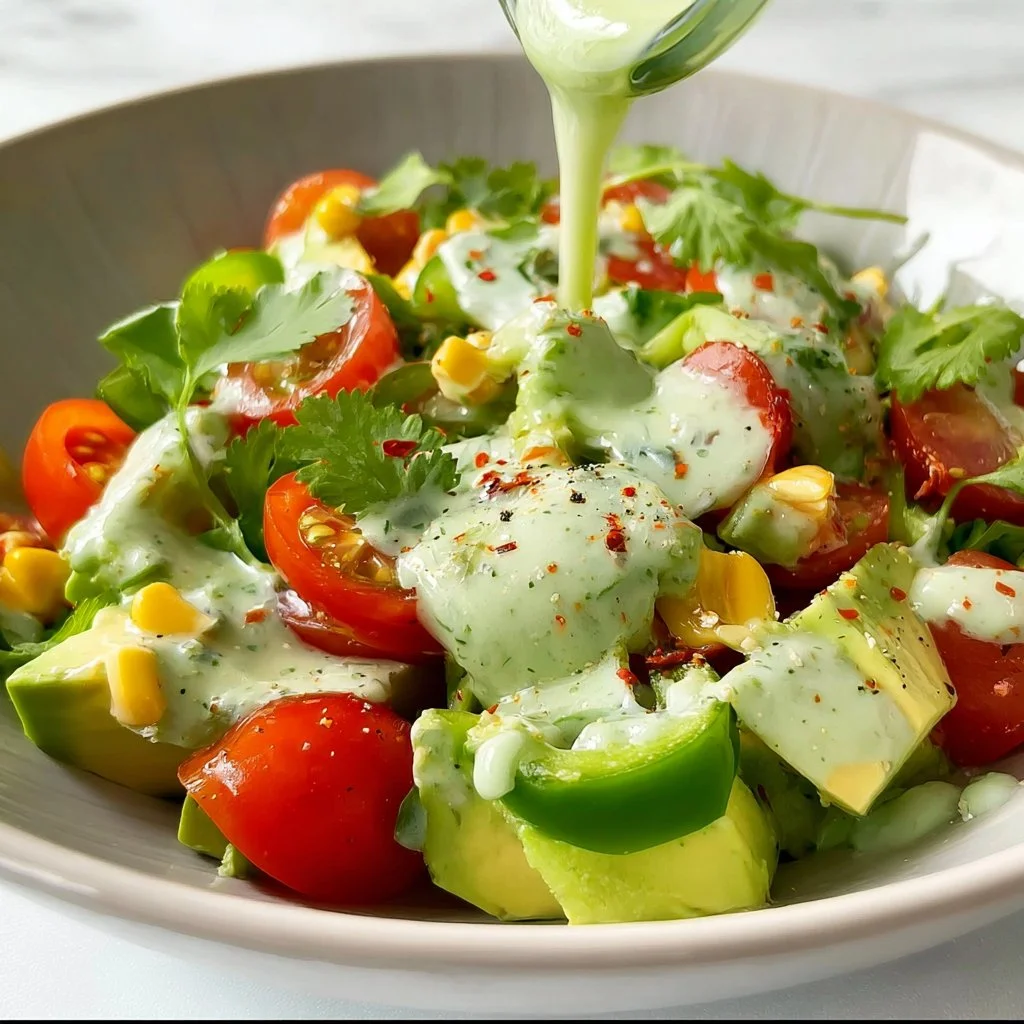
Avocado Salad with Lime Cilantro Dressing
The Creamy, zesty Delight: Avocado Salad with Lime Cilantro Dressing
Welcome, fellow food lovers! Today, I’m thrilled to take you on a culinary adventure that highlights one of my all-time favorite ingredients: the avocado! Known for its creamy texture and incredible health benefits, the avocado is not just your go-to for toast but is the star of a delightful salad that will brighten up any meal. Yes, you guessed it—I’m talking about Avocado Salad with Lime Cilantro Dressing!
Imagine this: you’re hosting a sunny backyard barbecue, laughter bubbling in the air, and the smell of grilled meats tantalizing your senses. Now, add to that scene a vibrant bowl of this avocado salad, glistening under the sunlight. It’s not just a side dish; it’s a centerpiece that invites everyone to dig in and share their memories over lunch. This salad is simple yet phenomenal, combining the creamy richness of ripe avocados with the zesty, aromatic notes of lime and cilantro. It’s fresh, it’s colorful, and most importantly, it’s irresistibly tasty!
This salad is perfect for any occasion: whether you’re spicing up a weekday dinner or preparing for a big feast. Plus, it’s an excellent way to eat your greens while indulging your taste buds—a win-win, if you ask me! By the time we’re done here, you’ll be able to whip this up with more confidence than ever. So grab your apron, and let’s dive into the deliciousness that is Avocado Salad with Lime Cilantro Dressing!
Personal Story
I can’t think of avocado salad without being transported back to my grandmother’s kitchen. Every summer, my family would gather at her house for a backyard cookout. The sun would be shining, kids would be running around, and the air was filled with the mouth-watering aroma of grilled burgers. But the real star of the table was always that gorgeous bowl of avocado salad with the best lime cilantro dressing.
I remember the first time I snuck a taste of that salad. My grandma had just perfected her dressing recipe, and as I dipped my spoon into that creamy green goodness, I felt like I was making a secret culinary discovery. The balance of the tart lime paired with the buttery avocados created a flavor explosion that danced on my taste buds. From then on, every family gathering became synonymous with that salad, sparking endless conversations about flavors, laughter, and our love for food.
Now, every time I make this salad, I feel my grandma’s spirit in the kitchen. It’s as if I’m almost summoned back to those warm summer afternoons, sharing laughs and memories with my loved ones. And today, I invite you to keep that tradition alive as we create this beautiful dish together!
Ingredients
Here’s what you’ll need to whip up your Avocado Salad with Lime Cilantro Dressing:
-
2 ripe avocados
Look for avocados that yield slightly to gentle pressure—these are the perfect ones for a creamy salad. If you can’t find ripe avocados, you can use slightly underripe ones and just add a few minutes to your mashing time when making the dressing! -
1 cup cherry tomatoes, halved
These little gems add a pop of color and sweetness! You can also swap them out for diced red bell pepper for a crisp crunch if you prefer. -
1 small red onion, diced
Red onion brings a mild, sweet flavor that balances the richness of avocados. If you’re looking for a milder taste, soak the diced onions in cold water for about 10 minutes before adding them to the salad. -
1 cup corn (fresh, frozen, or canned)
Corn lends a lovely sweetness and an extra layer of texture. If you’re using frozen corn, just give it a quick boil to soften it up. Canned corn works great too; just make sure to drain it well first! -
½ cup fresh cilantro, chopped
Cilantro adds that zesty herbaceous flavor that really elevates this salad! Fresh parsley can work if you’re not a fan of cilantro. -
Juice of 2 limes
Fresh lime juice is key to bringing all the flavors together. Don’t substitute with bottled lime juice if you can help it; the fresh stuff makes all the difference! -
Salt and pepper to taste
Seasoning is important to balance all those delicious flavors—don’t be shy! -
Optional add-ins:
Feta cheese or cotija cheese for a creamy savory note or jalapeños for an extra kick!
Step-by-Step Instructions
Are you ready to dive in? Let’s get cooking!
Step 1: Prep Your Ingredients
Start by gathering and washing all your fresh veggies. It’s always a good idea to have everything prepped before you dive into the actual cooking! Chop your cherry tomatoes in half, dice your red onion, and chop the cilantro. If you’re using fresh corn, steam or boil it until tender. If you’re using frozen corn, a quick boil works wonders.
Step 2: Cutting the Avocados
Now for the star of the show—your avocados! Cut them in half and carefully remove the pit (you can use a knife for this, but be cautious!). Scoop out the flesh with a spoon and place them in a mixing bowl. Give them a rough chop or slice them into cubes—whatever you fancy!
A little chef hack: To prevent browning, sprinkle some lime juice over your chopped avocado right away. This keeps its vibrant green color!
Step 3: Make the Dressing
In a separate small bowl, mix together the fresh lime juice, chopped cilantro, salt, and pepper. Whisk this until it’s combined. This dressing is the zingy, zesty flavor bomb that will coat your salad beautifully!
Tip: If you like a creamier dressing, feel free to add a dollop of Greek yogurt or some extra virgin olive oil. They both add a subtle richness!
Step 4: Combine
In your large mixing bowl with the avocado, gently fold in the cherry tomatoes, corn, and red onion. Pour the dressing over the top and carefully toss everything together. Be gentle, as you don’t want to mash your lovely avocados too much.
A little caution here: use a soft touch! You want the avocado to be nicely coated without turning into mush. Sidestep any urge to go all-in with mixing; we’re not making guacamole!
Step 5: Season
Now, give your salad a taste. Does it need a bit more salt, a sprinkle of pepper, or maybe another splash of lime juice? Taste buds are your best friend here! Adjust the seasoning to suit your palate.
Step 6: Serve and Enjoy!
Transfer your Avocado Salad to a beautiful serving bowl. You can garnish it with additional cilantro on top or a sprinkle of feta cheese for that creamy crumbliness. Ready to dig in?
Serving Suggestions
This Avocado Salad pairs beautifully with grilled meats or fish! Serve alongside a piece of grilled chicken or fish tacos for a flavor-packed meal. Alternatively, you can plate it on a bed of mixed greens for a wholesome lunch. If you’re feeling adventurous, toss in some tortilla chips for a crunchy twist!
Recipe Variations
Feeling creative? Here are some fun twists you can try:
- Tropical Avocado Salad: Add pineapple or mango chunks for an island-flavored twist.
- Mediterranean Delight: Toss in some olives and chopped cucumbers, plus a drizzle of olive oil for a Mediterranean flair.
- Spicy Kick: Add diced jalapeños or a pinch of cayenne pepper for a zesty heat.
- Protein Boost: For a heartier salad, throw in some cooked quinoa or black beans.
- Dairy-Free Option: Swap feta for nutritional yeast to keep things dairy-free while adding a cheesy flavor!
Chef’s Notes
This recipe has become a staple at my family gatherings, much like it was for my grandmother. Over the years, I’ve played with the recipe, incorporating seasonal ingredients based on what’s fresh and available. One time, I added fresh peaches, and the sweetness was absolutely divine!
Whenever I whip up this salad, I can’t help but smile and think of those sunny days spent with my family. Cooking is all about love, memories, and a sprinkle of creativity, and I hope this recipe brings a bit of joy to your kitchen as well!
FAQs and Troubleshooting
1. My avocados are mushy! How do I avoid that?
- Choose avocados that are ripe but slightly firm. If they yield too much when pressed, they might be overripe.
2. Can I make this salad ahead of time?
- Yes, but it’s best to add the dressing just before serving to keep the avocados looking fresh! If you must make it in advance, store it in an airtight container and drizzle with lime juice to help prevent browning.
3. What if I don’t like cilantro?
- No worries; fresh parsley or even mint can be a refreshing alternative. Feel free to substitute with an herb that you enjoy!
4. How do I store leftovers?
- Store any leftover salad in an airtight container in the refrigerator. Consume within a day for optimal freshness, as avocados can brown quickly.
Nutritional Info (Optional)
- Calories: Approximately 180 per serving (based on 4 servings)
- Protein: 4g
- Carbs: 12g
- Fat: 14g
- Fiber: 7g
Now you’re all set to impress your friends and family with this Avocado Salad with Lime Cilantro Dressing! Each bite is a reminder that cooking should be fun, delicious, and full of love. Enjoy your kitchen adventures, and don’t forget to sprinkle a little laughter in there while you cook! Happy munching!
Print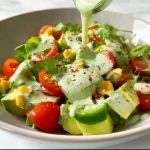
Avocado Salad with Lime Cilantro Dressing
- Total Time: 15 minutes
- Yield: 4 servings 1x
- Diet: Vegetarian
Description
A vibrant avocado salad with a zesty lime cilantro dressing, perfect for any occasion.
Ingredients
- 2 ripe avocados
- 1 cup cherry tomatoes, halved
- 1 small red onion, diced
- 1 cup corn (fresh, frozen, or canned)
- ½ cup fresh cilantro, chopped
- Juice of 2 limes
- Salt and pepper to taste
- Optional: Feta cheese or cotija cheese, jalapeños
Instructions
- Prep Your Ingredients by gathering and washing all your fresh veggies.
- Cutting the Avocados in half and carefully remove the pit.
- Make the Dressing by mixing lime juice, cilantro, salt, and pepper.
- Combine the avocado with cherry tomatoes, corn, and red onion; pour dressing over.
- Season to taste with additional salt, pepper, or lime juice.
- Serve and Enjoy in a beautiful bowl with garnishes.
Notes
For a creamier dressing, add Greek yogurt or olive oil. Can be easily modified with different ingredients.
- Prep Time: 15 minutes
- Cook Time: 0 minutes
- Category: Salad
- Method: Mixing
- Cuisine: Mexican
Nutrition
- Serving Size: 1 serving
- Calories: 180
- Sugar: 2g
- Sodium: 150mg
- Fat: 14g
- Saturated Fat: 2g
- Unsaturated Fat: 8g
- Trans Fat: 0g
- Carbohydrates: 12g
- Fiber: 7g
- Protein: 4g
- Cholesterol: 0mg
Keywords: avocado salad, lime dressing, cilantro recipe, summer salad, healthy recipe

Stuffed Bell Peppers
Cozy Stuffed Bell Peppers: A Flavorful Journey in Every Bite
Hey there, fellow kitchen adventurer! I’m Olivia Bennett, and I’m so excited to have you here in my cozy corner of the culinary world. Today, we’re diving into a dish that warms the heart and feeds the soul: Stuffed Bell Peppers! 🌶️ These vibrant little vessels of flavor are not only delicious but also incredibly versatile, making them a go-to recipe in my home on busy weeknights or when I’m entertaining friends and family.
What’s the magic behind stuffed bell peppers? Just picture it: a juicy bell pepper, bursting with color, cradling a savory filling of rice, meat, and aromatic herbs. When you take that first bite, it’s a delightful explosion of flavors that reminds you of home-cooked meals shared with loved ones. I can practically smell the comforting aroma wafting through the air, inviting everyone to gather around the table.
The best part is that stuffed bell peppers are adaptable and forgiving—perfect for both novice cooks and seasoned chefs alike! You can mix and match ingredients based on what you have on hand or cater them to your dietary preferences. Are you a meat lover? Vegetarian? Gluten-free? I’ve got you covered!
So, tie on your apron (and maybe pour yourself a glass of wine), because we’re about to embark on a flavorful journey that’s sure to inspire joy and creativity in your kitchen. Let’s get those stuffing skills fired up and make some bell peppers that will have your family asking for seconds!
Personal Story
Ah, stuffed bell peppers—they’ve been part of my culinary repertoire for as long as I can remember. I recall one warm summer evening in my childhood home, bustling with laughter and the sounds of sizzling pans. My mom was whipping up her famous stuffed bell peppers as we prepped for a family reunion. The entire kitchen was enveloped in tantalizing aromas—ground beef, spices, and herbs mingling together, while the bell peppers sat expectantly on the counter, their bright colors intensifying my excitement.
As a kid, I loved helping out in the kitchen, even if it meant tearing up from chopping onions or getting a little too enthusiastic with the spice shaker. That evening, I took charge of mixing the filling while my dad turned on the grill for that smoky finish. After assembling the peppers, we popped them into the oven, and I couldn’t wait to dig in!
When the timer finally rang, the bell peppers emerged, golden brown and bubbling, looking like little edible treasures. I remember feeling so proud—we had prepared something together that brought the whole family together at the table. Each bite was a reminder of family love and joy, and even now, I can feel those summer nights in every stuffed pepper I make. Whether it’s the nostalgia of my childhood or the warmth of togetherness, stuffed bell peppers will always hold a special place in my heart—and hopefully in yours, too!
Ingredients
To create our cozy stuffed bell peppers, you’ll need the following ingredients:
-
Bell Peppers:
- Choose vibrant colors like red, yellow, or green! Each has a slightly different flavor profile. Green peppers tend to be more bitter, while red or yellow ones are sweeter. Pro tip: Select peppers that feel heavy for their size with firm skin!
-
Ground Meat (beef, turkey, chicken, or plant-based meat):
- This is the heart of your filling! Substitute with beans or lentils for a vegetarian option. Ground turkey and chicken are lighter alternatives if you’re watching your fat intake.
-
Cooked Rice:
- A common base for your stuffing! Brown or white rice works well. Quinoa or cauliflower rice can be great low-carb substitutes.
-
Onion:
- Adds depth and sweetness. You can substitute with shallots or even leeks for a different flavor twist.
-
Garlic:
- Fresh garlic is ideal, but garlic powder can be a handy substitute if you’re in a pinch.
-
Tomato Sauce:
- This creates a luscious filling with moisture! Use homemade or store-bought, or swap in diced tomatoes for a chunkier texture.
-
Cheese:
- Optional, but who can resist melty cheese? Opt for mozzarella, cheddar, or a vegan cheese alternative.
-
Herbs and Spices:
- The classic combo of Italian seasoning, salt, and pepper cannot be beaten! Get creative with fresh herbs like basil or parsley—or add a touch of cumin for an ethnic twist!
-
Olive Oil:
- Use this to sauté your onions and garlic. It adds richness. Avocado oil or coconut oil can work as substitutes.
Now that we’ve gathered our ingredients, we’re ready to create some stuffed bell pepper magic!
Step-by-Step Instructions
-
Preheat Your Oven:
- Preheat your oven to 375°F (190°C). This is a crucial first step because you want your stuffed peppers to bake evenly and come out sizzling hot!
-
Prepare the Bell Peppers:
- Slice the tops off your bell peppers and remove the seeds. If they don’t stand straight, trim a tiny bit off the bottom—just enough to make them stable! Place the peppers upright in a baking dish, ready to be filled with deliciousness.
-
Sauté the Aromatics:
- In a large skillet, heat a drizzle of olive oil over medium heat. Add chopped onions and sauté until they’re translucent (about 5 minutes). Throw in minced garlic and sauté for an additional minute until fragrant. Chef hack: If you want to elevate the flavor, add a splash of balsamic vinegar to deglaze the skillet—yum!
-
Cook the Meat:
- Add your choice of ground meat to the skillet and season with salt, pepper, and Italian seasoning. Cook until browned, stirring frequently—about 5-7 minutes. Make sure to break up any large chunks. Tip: Using a wooden spoon with a flat edge makes it easier to crumble the meat.
-
Combine the Filling:
- Stir in the cooked rice and tomato sauce until everything is well blended. Let it simmer for about 5 minutes to meld those flavors together. If it gets too thick, add a splash of broth or water to loosen it up.
-
Fill the Peppers:
- Once your filling is ready, generously spoon it into the prepared bell peppers. If you’re adding cheese, feel free to mix it right into the stuffing or sprinkle it on top before baking—either way is delish!
-
Bake:
- Cover the baking dish with foil and bake for 25 minutes. Remove the foil and bake for an additional 10-15 minutes until the peppers are tender and the tops are beautifully browned.
-
Garnish and Serve:
- Once out of the oven, let your stuffed peppers cool for a few minutes. Garnish with fresh herbs or an extra sprinkle of cheese for a lovely finishing touch. Chef note: Pair your peppers with a side salad or some crusty bread to soak up all that delicious sauce!
Serving Suggestions
To serve your stuffed bell peppers, place them upright on a colorful plate, drizzling any extra sauce from the baking dish over the top. You can add a dollop of sour cream or a sprinkle of fresh parsley for that beautiful finishing touch. Set out a side of your favorite green salad for a complete meal, or serve them with roasted vegetables for an extra boost of nutrition. Enjoy every cozy bite!
Recipe Variations
-
Mexican Fiesta: Swap in black beans, corn, and diced tomatoes for the filling, and top with shredded pepper jack cheese. Serve with avocado slices and fresh cilantro.
-
Mediterranean Twist: Use ground lamb or turkey, add feta cheese, olives, and a sprinkle of oregano. Drizzle with tzatziki sauce for added flavor!
-
Vegan Delight: Use lentils or quinoa in place of meat, toss in chopped spinach, chopped walnuts, and spices for a hearty, plant-based meal.
-
Italian Classic: Mix in some Italian sausage for an extra kick, and add chopped mushrooms and zucchini to the filling for more flavor and texture.
-
Breakfast Stuffed Peppers: Swap the meat for scrambled eggs, throw in diced bell peppers, and use breakfast sausage or bacon. Top with shredded cheddar for a delightful breakfast twist!
Chef’s Notes
Stuffed bell peppers are one of those recipes that have totally evolved for me over the years. I started with my mom’s recipe, but the more I cooked, the more I experimented! I’ve added different grains and proteins based on what I had instead of sticking to a strict recipe. The beauty lies in the creativity and freedom you can embrace in the kitchen!
Let’s be honest; there have been times when I’ve accidentally made a filling that’s too spicy or forgot to sauté the onions—oops! But I always remember my key mantra: cooking is about trying, learning, and enjoying the process. Don’t stress if things deviate from ‘the plan’—some of my best culinary adventures have come from those unexpected moments.
FAQs and Troubleshooting
-
Why are my peppers tough?
- If this happens, try roasting your peppers slightly before stuffing them. This will help to soften them more.
-
Can I prep stuffed peppers in advance?
- Absolutely! You can prep the filling and stuff the peppers ahead of time. Just cover and refrigerate until you’re ready to bake.
-
Is there a way to make them lower in calories?
- Yes! Use lean ground turkey or chicken, swap the rice for cauliflower rice, and skip the cheese—these little changes can still deliver delicious flavors!
-
What do I do with extra filling?
- No problem! Bake that extra filling in a small dish alongside your stuffed peppers for a delicious side. The flavors will still meld beautifully.
Nutritional Info (Optional)
For an approximate breakdown per stuffed pepper (with ground beef and rice):
- Calories: 350
- Protein: 22g
- Carbohydrates: 40g
- Fat: 12g
- Fiber: 5g
Remember, nutrition can vary based on the ingredients used! Customize your stuffed peppers to fit your dietary needs and enjoy!
And there you have it! A charming journey into the world of stuffed bell peppers. I hope this recipe inspires you to create something beautiful in your kitchen—from my heart to yours. Happy cooking, and let those bell peppers shine! 🍽️❤️
Print
Cozy Stuffed Bell Peppers
- Total Time: 45 minutes
- Yield: 4 servings 1x
- Diet: Vegetarian or Meat-based options available
Description
A heartwarming recipe for delicious stuffed bell peppers filled with rice, meat, and aromatic herbs, perfect for busy weeknights or entertaining.
Ingredients
- 4 Bell Peppers (red, yellow, or green)
- 1 pound Ground Meat (beef, turkey, chicken, or plant-based meat)
- 1 cup Cooked Rice (brown or white)
- 1 Onion, chopped
- 2 cloves Garlic, minced
- 1 cup Tomato Sauce
- 1 cup Cheese (optional, mozzarella or cheddar)
- 1 tablespoon Italian seasoning
- Salt and pepper to taste
- 2 tablespoons Olive Oil
Instructions
- Preheat your oven to 375°F (190°C).
- Prepare the bell peppers by cutting tops off and removing seeds.
- Sauté the onions in olive oil until translucent, then add minced garlic.
- Cook the ground meat, seasoning with salt, pepper, and Italian seasoning until browned.
- Combine the cooked rice and tomato sauce into the meat mixture.
- Fill the prepared bell peppers with the filling and add cheese if desired.
- Bake covered for 25 minutes, then uncover and bake for an additional 10-15 minutes.
- Garnish with fresh herbs and serve.
Notes
These stuffed bell peppers are customizable; swap ingredients based on your preferences or dietary restrictions. Great served with a side salad or crusty bread.
- Prep Time: 15 minutes
- Cook Time: 30 minutes
- Category: Main Course
- Method: Baking
- Cuisine: Italian
Nutrition
- Serving Size: 1 stuffed bell pepper
- Calories: 350
- Sugar: 5g
- Sodium: 400mg
- Fat: 12g
- Saturated Fat: 4g
- Unsaturated Fat: 6g
- Trans Fat: 0g
- Carbohydrates: 45g
- Fiber: 3g
- Protein: 22g
- Cholesterol: 30mg
Keywords: stuffed bell peppers, comfort food, easy dinner, family meal, Italian recipe
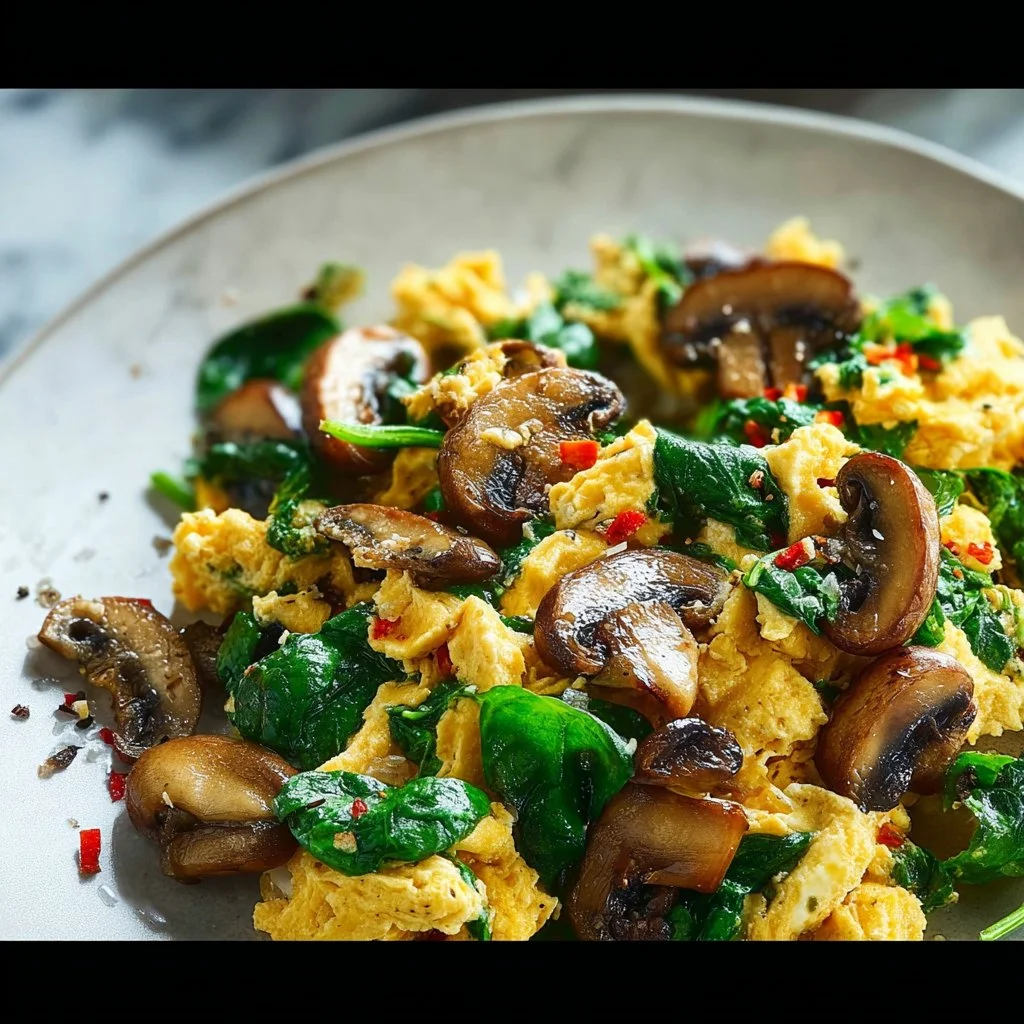
Mushroom Spinach Scrambled Eggs
Deliciously Cozy Mushroom Spinach Scrambled Eggs: A Weekend Breakfast Favorite
Hey there, fellow food enthusiasts! Welcome back to my cozy little corner of the internet where I get to share the heartwarming dishes that I whip up in my kitchen. Today, we’re diving into a breakfast classic — Mushroom Spinach Scrambled Eggs. If you’re anything like me, mornings can often feel rushed, but nothing beats the comfort of a delicious, homemade breakfast that fuels you for the day ahead!
Imagine waking up to the smell of earthy mushrooms sautéing in butter, mixed with vibrant green spinach and fluffy, golden scrambled eggs. Sounds dreamy, right? That’s exactly what I’m talking about! This dish brings together some of the most comforting ingredients, and the best part? It comes together in a matter of minutes, allowing you to savor every last bite and maybe even linger over that cup of coffee a little longer.
What I adore about this recipe is its versatility. Whether you’re cooking for one, throwing together a fancy brunch for friends, or just trying to sneak in some greens, these scrambled eggs have your back! So, let’s not waste any more time — grab your apron, and let’s sprinkle some love and flavor into our morning meal!
Personal Story
Every time I make Mushroom Spinach Scrambled Eggs, I’m transported back to lazy Sunday mornings at my grandmother’s house. The sun would peek through the kitchen window as the aroma of sautéed mushrooms filled the air. Grandma was a culinary wizard, and her love for cooking was infectious. I still remember standing on a little stool, peering over the counter as she expertly cracked eggs into a bowl, whisking them to perfection with a sprinkle of salt and pepper.
Her secret? Always, and I mean always, using fresh ingredients. That meant visiting the local farmer’s market early in the morning to pick up mushrooms so fresh you could still taste the earth in them and vibrant spinach that was practically bursting with nutrients. As she cooked, she’d share little tales from her youth, and those stories mingled with the sizzling sounds in the pan, creating an aromatic symphony.
Now, I carry on that tradition in my kitchen. Whenever I make these scrambled eggs, I’m not just feeding my family; I’m passing on a legacy of love and memories, one delicious bite at a time.
Ingredients
Here’s what you’ll need to whip up these delightful Mushroom Spinach Scrambled Eggs:
-
Fresh Eggs: The star of the show! Opt for high-quality eggs for richer flavor. If you’re looking for a lighter option, feel free to substitute with egg whites or a plant-based egg alternative.
-
Mushrooms: Cremini, button, or shiitake work beautifully. They add a lovely umami depth to the dish. If you find yourself without mushrooms, you could use diced bell peppers or zucchini as a tasty substitute.
-
Fresh Spinach: This leafy green adds color, nutrients, and a hint of earthy flavor. If spinach isn’t your thing, kale or Swiss chard are excellent stand-ins.
-
Butter: For that rich, velvety finish. You can replace it with olive oil or coconut oil if you’re looking for a dairy-free option.
-
Salt and Pepper: Essential for enhancing flavors. Feel free to experiment with other spices like garlic powder or a pinch of chili flakes for some heat.
-
Optional Add-ins: A splash of milk or cream for creamier eggs, grated cheese for an indulgent touch, or herbs like chives or parsley for a fresh finish.
Who knew something so simple could bring so much flavor? The key is using fresh, high-quality ingredients that speak for themselves!
Step-by-Step Instructions
Let’s get started! Here’s how to create the most delicious Mushroom Spinach Scrambled Eggs:
-
Prep Your Ingredients: Start by cleaning your mushrooms and trimming off the stems. Slice them thinly for even cooking. Rinse your spinach under cold water and pat it dry — this will get rid of any grit. Crack 4-6 eggs into a bowl, adding a pinch of salt and pepper, and whisk until the yolks are well combined with the whites.
Chef Tip: If you want the eggs to be super fluffy, add a splash of milk or cream to your whisked eggs — trust me, it makes a difference!
-
Sauté the Mushrooms: In a non-stick skillet, melt 1-2 tablespoons of butter over medium heat. Add the sliced mushrooms and a pinch of salt. Sauté until the mushrooms are golden brown and tender, about 5-7 minutes. This is where the flavor really starts to develop!
Chef Hack: Make sure not to overcrowd the pan with mushrooms; otherwise, they’ll steam instead of sauté. If you have a lot, it’s better to do this in batches.
-
Add Spinach: Toss in your fresh spinach and stir it around until wilted, which should take about 1-2 minutes. The vibrant greens add a fantastic pop of color!
-
Incorporate the Eggs: Pour the whisked eggs directly over the sautéed mushrooms and spinach. Allow them to sit for a few seconds, then gently stir with a wooden spoon or spatula. Keep the motion gentle and slow.
Chef Insight: Cook the eggs over low to medium heat; high temperatures can make them rubbery. Patience is key here for smooth, creamy eggs!
-
Finish Cooking: Continue to stir until the eggs reach your desired doneness. I like mine soft and slightly runny, but feel free to scramble them longer for firmer textures.
-
Add Final Touches: Once done, remove the pan from heat and toss in additional salt and pepper to taste. If you’re using cheese, sprinkle it on while the eggs are still warm so it melts beautifully.
-
Plate and Serve: Transfer the scrambled eggs to plates and garnish with fresh herbs if you like.
And there you have it! A beautiful, hearty breakfast that’s ready to be devoured.
Serving Suggestions
These Mushroom Spinach Scrambled Eggs are delicious on their own but can be elevated in so many ways! Serve them on a slice of crusty, toasted bread or atop a warm, fluffy English muffin for a gourmet feel. Drizzle with a little hot sauce or serve alongside crispy bacon for a hearty breakfast spread. If you want to impress your brunch guests, plate them with sliced avocado and fresh tomato on the side — a feast for the eyes and stomach!
Recipe Variations
-
Cheesy Delight: Stir in some crumbled feta or shredded cheddar for a seriously gooey, indulgent dish.
-
Spicy Twist: Add diced jalapeños or a pinch of cayenne pepper for those of you who like a little heat in the morning!
-
Herb Infusion: Mix in fresh dill, basil, or chives for herbaceous freshness.
-
Meaty Marvel: Brown some crumbled sausage or diced ham before adding the mushrooms for a protein-packed breakfast.
-
Vegan Version: Use plant-based eggs, and sauté with olive oil instead of butter, along with sautéed cherry tomatoes for added flavor!
Chef’s Notes
Oh, the memories tied to breakfast! Over the years, my Mushroom Spinach Scrambled Eggs have evolved from my grandma’s classic recipe. I’ve added my own twist with creamy cheese here, a dash of hot sauce there, and I keep discovering new ingredients from my local farmer’s market that inspire me. I remember one Sunday, aiming for a healthy breakfast for friends, I really went crazy with the toppings — think avocado, feta, and a sprinkle of smoked paprika — we all laughed, but it turned out to be the best breakfast ever!
Cooking is all about experimentation and adapting to what you love. Get creative! You never know what lovely things might come from a little kitchen adventure.
FAQs and Troubleshooting
-
Why are my eggs rubbery?
- Cooking at too high a temperature is usually the culprit. Make sure to keep the heat low and stir gently for a creamy texture.
-
How do I store leftovers?
- If you have any leftover scrambled eggs (though they rarely last in my house!), store them in an airtight container in the fridge for up to 2 days. Reheat low and slow to avoid overcooking.
-
Can I make this dish in advance?
- While scrambled eggs are best fresh, you can prep your mushrooms and spinach in advance. Just store them in separate containers and combine them with the eggs the morning of.
-
What can I do if my spinach is wilted?
- You can still use it! Just give it a rinse and dry it thoroughly before cooking. If it’s too far gone, though, it’s best to toss it. Fresh ingredients make a world of difference!
Nutritional Info (Optional)
Each serving of these Mushroom Spinach Scrambled Eggs is packed with protein and nutrients. They cater to various dietary preferences while being gluten-free, and when made with eggs and spinach, they contain a good amount of vitamins A and D, iron, and essential amino acids. If you’re keeping an eye on calories, using fewer eggs or lightening up with just egg whites can also be a great option.
Thank you for joining me on this delightful journey of culinary comfort! I hope you feel inspired to whip up these Mushroom Spinach Scrambled Eggs and create your own breakfast memories. Happy cooking, friends! 🥚✨
Print
Mushroom Spinach Scrambled Eggs
- Total Time: 15 minutes
- Yield: 2 servings 1x
- Diet: Gluten-Free, Vegetarian
Description
A comforting and delicious breakfast featuring fluffy scrambled eggs with earthy mushrooms and vibrant spinach, perfect for any morning.
Ingredients
- 4–6 Fresh Eggs
- 1 cup Mushrooms, sliced (Cremini, button, or shiitake)
- 2 cups Fresh Spinach, rinsed
- 1–2 tablespoons Butter
- Salt, to taste
- Pepper, to taste
- Optional: Splash of milk or cream
- Optional: Grated cheese
- Optional: Fresh herbs (chives or parsley)
Instructions
- Prep Your Ingredients: Clean mushrooms, slice them, and rinse spinach. Crack eggs into a bowl, add salt and pepper, and whisk.
- Sauté the Mushrooms: Melt butter in a skillet, add sliced mushrooms and salt, and sauté until golden brown, about 5-7 minutes.
- Add Spinach: Toss in spinach and stir until wilted, about 1-2 minutes.
- Incorporate the Eggs: Pour whisked eggs over the mixture and let sit for a few seconds, then gently stir.
- Finish Cooking: Stir until eggs reach desired doneness, keeping the heat low.
- Add Final Touches: Remove from heat and season with additional salt and pepper; add cheese if desired.
- Plate and Serve: Serve eggs on plates and garnish with fresh herbs if desired.
Notes
Feel free to add in your favorite spices or herbs for extra flavor. This dish is versatile for various dietary preferences.
- Prep Time: 5 minutes
- Cook Time: 10 minutes
- Category: Breakfast
- Method: Sautéing
- Cuisine: American
Nutrition
- Serving Size: 1 serving
- Calories: 300
- Sugar: 2g
- Sodium: 400mg
- Fat: 20g
- Saturated Fat: 10g
- Unsaturated Fat: 8g
- Trans Fat: 0g
- Carbohydrates: 5g
- Fiber: 1g
- Protein: 20g
- Cholesterol: 300mg
Keywords: scrambled eggs, breakfast, mushroom, spinach, healthy breakfast, quick meal
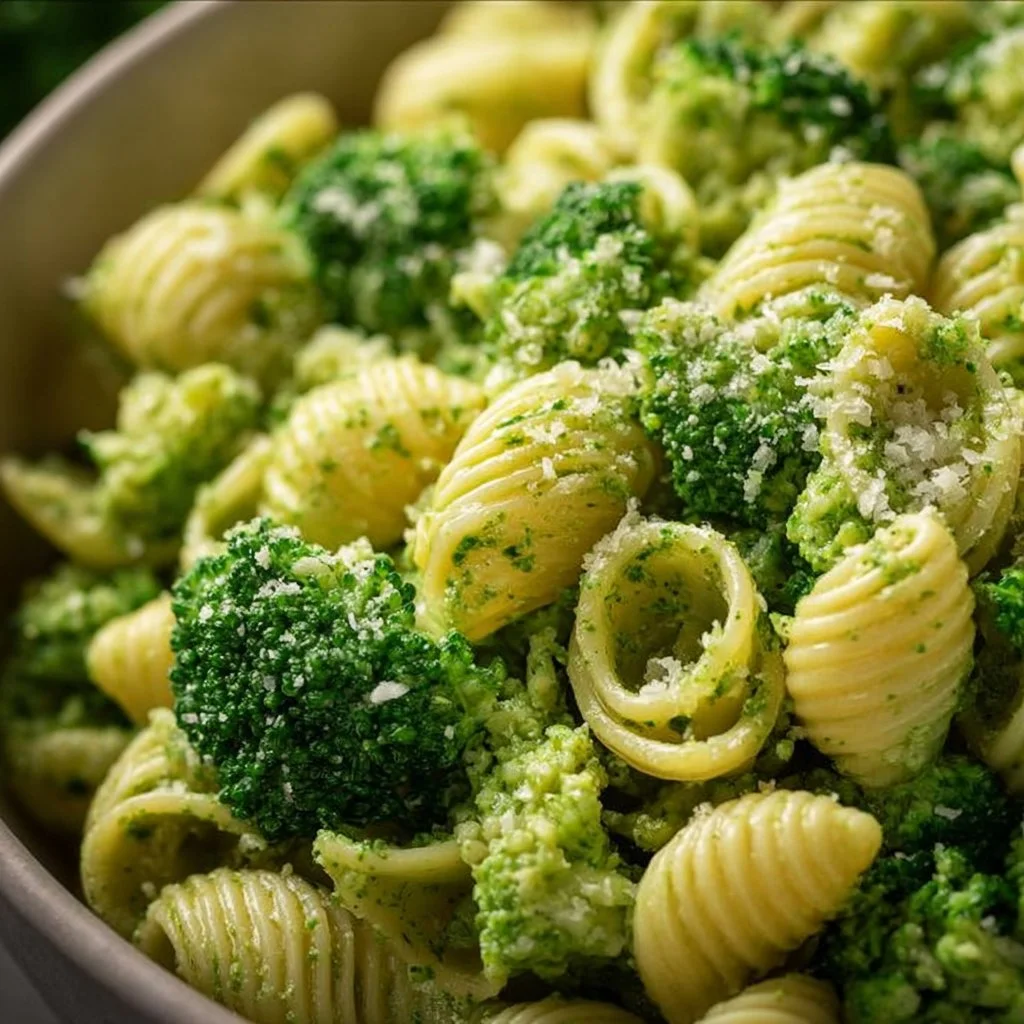
Easy Healthy Broccoli Pasta
Easy Healthy Broccoli Pasta: A Recipe to Savor
Welcome back to my cozy kitchen! Today, I’m excited to share a delightful dish that beautifully balances health and taste—Easy Healthy Broccoli Pasta. This dish is a celebration of fresh ingredients, vibrant flavors, and the simplicity of home-cooking. Picture this: you walk into your kitchen, and the aroma of garlic wafts through the air, mingling with fresh broccoli and al dente pasta—it’s enough to make anyone’s heart skip a beat!
This recipe is not just about feeding yourself; it’s about nourishing your spirit and those you love. Broccoli is the unsung hero of vegetables—packed with nutrients and a proud member of the cruciferous family. When paired with whole grain pasta and a hint of zest, it transforms into a meal that’s both comforting and energizing. Each bite whispers of sunshine (yes, even in the depths of winter!) and carries you through your busy day with ease.
And let’s be honest, who doesn’t love a one-pan wonder? This Easy Healthy Broccoli Pasta comes together in under 30 minutes, giving you more time to kick back, either on your couch or at your dinner table, enjoying the company of family and friends. Whether it’s a casual weeknight dinner or a fun get-together with loved ones, this dish is versatile, delicious, and a great way to get your greens!
With straightforward steps and ingredients you likely already have on hand, cooking becomes an enjoyable experience, rather than a chore. So, grab your apron, and let’s dive into the world of pasta, where broccoli is not just a side dish but a star player in a delightful symphony of flavors!
Personal Story
Whenever I make this Easy Healthy Broccoli Pasta, I’m transported back to Sunday dinners at my grandma’s house. My brothers and I would rush into the kitchen, where the golden light illuminated a table laden with steaming dishes—each plate a testament to her culinary prowess. One of my favorites was her simple broccoli pasta.
She had a magical way of making even the simplest meals feel special—usually by adding a sprinkle of fresh herbs or a dash of lemon zest that made everything come alive. I remember our laughter filling the room as we fought over the last bite of broccoli, trying to outsmart each other for that deliciously garlicky morsel.
Years later, when I first started cooking seriously, I found myself recreating her recipes, trying to infuse them with the same warmth and love. This Easy Healthy Broccoli Pasta reminds me not only of those cherished family gatherings but also of forging my own path in the kitchen. It’s a dish that wraps you in a cozy hug, encouraging you to slow down and enjoy life, one delicious bite at a time.
Ingredients
Here’s what you’ll need for your Easy Healthy Broccoli Pasta:
-
Whole Grain Pasta (12 oz)
- Whole grain options like whole wheat or brown rice pasta offer more fiber and nutrients than traditional pasta. If you’re gluten-free, try chickpea or lentil pasta!
-
Fresh Broccoli (2 cups, chopped)
- Broccoli is rich in vitamins K and C. Choose firm, bright green heads for the best flavor. If you’re short on fresh, frozen broccoli works too; just be sure to thaw and drain it well.
-
Garlic (4 cloves, minced)
- Garlic not only adds flavor but also has numerous health benefits. Fresh is best, but if you’re short on time, pre-minced garlic can save the day.
-
Olive Oil (3 tablespoons)
- A good quality extra virgin olive oil enhances flavor and is full of healthy fats. You can swap it out for avocado oil if you prefer a neutral taste.
-
Lemon Juice (1 tablespoon, freshly squeezed)
- Fresh lemon juice brings brightness to the dish. If you don’t have fresh lemons, bottled juice will do in a pinch—but fresh is always better!
-
Parmesan Cheese (½ cup, grated)
- Parmesan adds a salty, umami-rich flavor that ties everything together. Nutritional yeast is a fantastic dairy-free alternative for a similar flavor profile.
-
Salt and Pepper (to taste)
- Seasoning is personal! Adjust the salt and pepper to your taste—don’t be shy with these kitchen staples!
-
Red Pepper Flakes (optional)
- A sprinkle of red pepper flakes adds a bit of heat. Feel free to leave it out if you prefer a milder dish!
Step-by-Step Instructions
Step 1: Cook the Pasta
-
Boil a large pot of salted water.
- Bring it to a roaring boil before adding your whole grain pasta. The salt helps flavor the pasta.
-
Add the pasta and cook according to package instructions.
- Typically, this should take about 8–12 minutes for whole grain pasta. Stir occasionally to prevent sticking.
-
Reserve some pasta water.
- Before draining the pasta, make sure to scoop out about 1 cup of the starchy cooking water. It will be used later to create a lovely sauce.
-
Drain the pasta and set it aside.
- Remember: don’t rinse the pasta! It’s coated with starch, which helps the sauce cling better.
Step 2: Sauté the Broccoli and Garlic
-
In a large skillet, heat the olive oil over medium heat.
- Wait until it’s shimmering—not smoking—before moving on to the next step.
-
Add minced garlic and sauté for about a minute.
- You want the garlic to turn golden but not burnt, as this will keep its robust flavor intact. Stir often!
-
Toss in the chopped broccoli.
- Cook for about 3–5 minutes, stirring frequently, until the broccoli is vibrant and just tender.
-
Season with salt and pepper.
- This step enhances the broccoli’s natural sweetness; don’t skip it!
Step 3: Combine Pasta and Broccoli
-
Add the drained pasta to the skillet with broccoli and garlic.
- If your skillet isn’t large enough, you could also transfer everything back into the pasta pot.
-
Pour in the reserved pasta water.
- Start with half a cup, and gradually add more if needed. This starchy water helps create a luscious sauce.
-
Add fresh lemon juice and grated Parmesan cheese.
- Toss everything together over low heat. The cheese will melt beautifully, coating the pasta and broccoli.
-
Adjust seasoning to taste.
- This is your final chance to taste and tweak. More salt? More lemon juice? Go for it!
Step 4: Serve and Enjoy!
-
Remove from heat and serve immediately.
- Spoon into bowls, reserving a bit of the grated Parmesan for garnish on top.
-
Top with red pepper flakes if desired.
- This adds a lovely kick for those who enjoy a bit of spice!
-
Pair with a light salad or crusty bread.
- The freshness of a side salad or the heartiness of bread complements this dish beautifully.
Serving Suggestions
To make your Easy Healthy Broccoli Pasta pop visually on the plate, consider adding a handful of fresh basil or parsley just before serving. A sprinkle of lemon zest can elevate it even further, providing a refreshing brightness and an eye-catching finish. Serve it with a side of garlic bread or a light arugula salad for a complete meal. This dish shines best when shared among friends and family, so set the table, pour some sparkling water, and let the conversations flow as freely as the flavors!
Recipe Variations
- Pasta Primavera: Add seasonal vegetables such as bell peppers, cherry tomatoes, or zucchini for a vibrant twist.
- Pesto Addition: Mix in a couple of tablespoons of your favorite pesto for an extra layer of flavor and creaminess.
- Protein Boost: Toss in grilled chicken, shrimp, or chickpeas to make this dish heartier and more filling.
- Vegan Option: Omit the cheese or substitute it with nutritional yeast and use a plant-based pasta.
- Herb Infusion: Swap out broccoli for spinach, kale, or even asparagus depending on what you have on hand!
Chef’s Notes
This Easy Healthy Broccoli Pasta is one of those dishes that feels both comforting and nourishing—a real win-win! It’s evolved over the years; my original version was much simpler, but I always found adding garlic and a splash of lemon juice made it feel festive and special. The beauty of this dish lies in its adaptability; you can swap around ingredients based on what you have or what’s fresh at the market.
And here’s a funny story: one time, I was in a rush to whip this up for dinner and accidentally mistook sugar for salt while seasoning. Let’s just say my family got a rather sweet surprise! Learn from my mistake—double-check your ingredients, and have fun with it! The kitchen should be a place of laughter, learning, and lots of delicious food.
FAQs and Troubleshooting
1. Why is my pasta mushy?
Mushy pasta typically occurs when it’s overcooked. Make sure to watch your cooking times closely and consider sampling a strand a minute or two before the full time is up!
2. Can I store leftovers?
Absolutely! Store any leftovers in an airtight container in the fridge for up to three days. Just reheat it in a skillet with a splash of water to keep it moist.
3. What if my sauce is too thick?
If you find that the dish has become too dry after cooking, just add a bit more reserved pasta water! It’s an easy fix to bring back that creamy consistency.
4. Can I use frozen broccoli?
Definitely! Frozen broccoli can be a great time-saver. Just make sure to thaw and drain it before adding it to the skillet to avoid excess moisture.
5. What side dishes pair well with this pasta?
This broccoli pasta goes wonderfully with a light, refreshing salad or a slice of garlic bread for a comforting touch.
Nutritional Info
While precise nutritional values will depend on your specific ingredients and portion sizes, this Easy Healthy Broccoli Pasta is packed with whole grains, fiber, and essential vitamins. It’s a wholesome dish that’s relatively low in calories but high in nutrients, making it a fantastic choice for anyone looking to eat healthily without sacrificing taste!
So there you have it, my friends—an Easy Healthy Broccoli Pasta that’s perfect for any day of the week. I’m thrilled to share this with you, and I hope it brings as much joy to your kitchen as it has to mine. Happy cooking, and enjoy every delicious bite!
Print
Easy Healthy Broccoli Pasta
- Total Time: 30 minutes
- Yield: 4 servings
- Diet: Vegetarian
Description
A delightful dish that balances health and taste, featuring fresh broccoli and whole grain pasta.
Ingredients
- Whole Grain Pasta (12 oz)
- Fresh Broccoli (2 cups, chopped)
- Garlic (4 cloves, minced)
- Olive Oil (3 tablespoons)
- Lemon Juice (1 tablespoon, freshly squeezed)
- Parmesan Cheese (½ cup, grated)
- Salt and Pepper (to taste)
- Red Pepper Flakes (optional)
Instructions
- Boil a large pot of salted water.
- Add the pasta and cook according to package instructions.
- Reserve some pasta water before draining.
- Drain the pasta and set it aside.
- Heat the olive oil over medium heat in a large skillet.
- Add minced garlic and sauté for about a minute.
- Toss in the chopped broccoli and cook for about 3–5 minutes.
- Season with salt and pepper.
- Add the drained pasta to the skillet with broccoli and garlic.
- Pour in the reserved pasta water.
- Add fresh lemon juice and grated Parmesan cheese.
- Adjust seasoning to taste.
- Remove from heat and serve immediately.
- Top with red pepper flakes if desired.
Notes
Serve with a side salad or garlic bread for a complete meal. You can customize by adding other vegetables or protein.
- Prep Time: 10 minutes
- Cook Time: 20 minutes
- Category: Main Course
- Method: Sautéing
- Cuisine: Italian
Nutrition
- Serving Size: 1 serving
- Calories: 350
- Sugar: 3g
- Sodium: 400mg
- Fat: 12g
- Saturated Fat: 2g
- Unsaturated Fat: 8g
- Trans Fat: 0g
- Carbohydrates: 45g
- Fiber: 6g
- Protein: 15g
- Cholesterol: 10mg
Keywords: broccoli, pasta, healthy cooking, vegetarian recipe, quick meal

Healthy Sweet Potato Hash Browns
Healthy Sweet Potato Hash Browns
Welcome back to my cozy kitchen, food lovers! Today, we’re diving into one of the most comforting and satisfying dishes that I can think of: sweet potato hash browns! If you’ve ever found yourself wanting to recreate that crisp, golden perfection you get at your favorite brunch spot, but in a healthier way, you’re in for a real treat. These hash browns are bursting with flavor, easy to whip up, and packed with nutrients. Plus, they’ll make your home smell absolutely divine!
Sweet potatoes are not just great for savory dishes; they are an exceptionally versatile ingredient that can elevate a simple breakfast to a gourmet experience. Here’s why I’m obsessed with them: they’re not only rich in vitamins A and C, but they also have natural sweetness that pairs beautifully with spices and savory toppings. Whether you’re feeding a crowd on a lazy weekend morning, or simply want a quick yet wholesome side for dinner, these hash browns are ready to take center stage!
Now, let me tell you, making sweet potato hash browns is not just about cooking; it’s about creating a delightful experience. You’ll love hearing the sizzle in the pan, and trust me, the crispy edges will have everyone in the house gathering around the kitchen in no time. As we embark on this culinary adventure together, I promise you’ll feel empowered and excited to cook. So grab your apron, and let’s get started on making these healthy sweet potato hash browns!
Personal Story
Ah, sweet potato hash browns hold a special place in my heart. It all started during those cozy Sunday mornings at my grandmother’s house. You see, every weekend, she would treat us to a hearty breakfast spread featuring her famous hash browns. I can still remember the way her kitchen would fill up with laughter and the aroma of sizzling potatoes blending with the scent of freshly brewed coffee.
Those moments were not just about the food; they were about family, warmth, and connection. As a child, I was always captivated by how she transformed simple ingredients into something magical. Once I learned how to make them myself, I made it a point to tweak her classic recipe over the years, swapping out traditional potatoes for sweet potatoes to give it a healthier twist—even adding kale or spinach on occasion for an extra veggie boost! The feel and flavors of those memories are what inspire each batch of these hash browns in my kitchen today.
Growing up, feeding loved ones has always been a way to show care and create lasting memories. Now, every time I prepare these sweet potato hash browns, I’m reminded of my grandmother and those precious mornings. It’s that nostalgia and love that I hope you’ll also feel as you make this dish.
Ingredients
Here’s what you’ll need to whip up your own batch of heavenly sweet potato hash browns:
-
Sweet Potatoes (2 large)
- The star of the show! Sweet potatoes are packed with vitamins, minerals, and fiber. They add a lovely sweetness and a gorgeous color to your dish. Swap for Yukon gold or mashed potatoes if you’re in a pinch, but trust me, the sweet potatoes really shine here!
-
Onion (1 medium)
- Adds a savory depth to the flavor. Use yellow, white, or even red onions for a sweeter taste. If you’re not an onion fan, try a small amount of garlic powder instead.
-
Garlic (2 cloves, minced)
- For that lovely aromatic kick. You can also use garlic powder, but fresh garlic brings an extra pop!
-
Egg (1 large, optional)
- For binding the mixture and adding protein. If you’re looking for a vegan alternative, a flax egg (1 tablespoon flaxseed meal mixed with 2.5 tablespoons water) or even some mashed banana could work to hold everything together!
-
Olive Oil (2-3 tbsp)
- Perfect for frying to create that crispy exterior. You can substitute with avocado oil for a high smoke point or coconut oil for a subtle sweetness.
-
Salt and Pepper (to taste)
- Essential for seasoning! Feel free to add additional spices like paprika, cumin, or cayenne pepper for a kick.
-
Fresh Herbs (like parsley or cilantro, optional)
- These add a fresh note and brighten up the dish. Dried herbs can work too if fresh isn’t available.
Step-by-Step Instructions
Are you ready to get your hands dirty? Let’s create some crispy, golden, and utterly delicious sweet potato hash browns! Follow these simple steps for the best results:
-
Prep the Sweet Potatoes:
- Start by peeling the sweet potatoes and then grating them using a box grater or a food processor. You want them finely grated, almost like you’d prepare for a slaw. Trust me, the finer the grate, the crispier the hash browns will be!
-
Remove Excess Moisture:
- After grating, place the sweet potatoes in a clean kitchen towel or cheesecloth, twist it up, and wring out as much moisture as you can. This is a crucial step! The more moisture you remove, the crispier the hash browns will turn out.
-
Sauté the Onion and Garlic:
- In a large skillet, heat 1 tablespoon of olive oil over medium heat. Add the chopped onion and sauté until translucent (about 5 minutes). Stir in the minced garlic and sauté for another minute, until fragrant—oh, the smells are heavenly!
-
Mix Ingredients:
- After sautéing, transfer the onion and garlic to a mixing bowl. Add the grated sweet potatoes, beaten egg (if using), salt, and pepper. Mix it all together until it’s well combined. This is where you can also add any spices and herbs you wish. Mix, mix, mix!
-
Cook the Hash Browns:
- In the same skillet, add another tablespoon of olive oil and turn the heat up to medium-high. Once the oil is hot, scoop about a quarter cup of the sweet potato mixture into the skillet, flattening it down with a spatula into a patty shape. Repeat this with the remaining mixture, ensuring not to overcrowd the skillet.
-
Let it Sizzle:
- Allow the hash browns to cook undisturbed for about 4-5 minutes on one side until golden brown and crispy. Resist the urge to flip them too soon; the crust needs time to form!
-
Flip and Finish Cooking:
- Gently flip each hash brown using a spatula, adding a little more oil if necessary. Cook for another 4-5 minutes until that beautiful golden color is achieved.
-
Drain on a Paper Towel:
- Once they’re cooked, transfer the hash browns onto a plate lined with paper towels to absorb any excess oil.
-
Repeat:
- Cook the remaining batter, adding more oil to the skillet as needed. This is a great time to touch-up on other breakfast items—maybe scramble some eggs or prepare some avocado!
-
Serve and Enjoy:
- These delicious hash browns are best served immediately! Act fast, as they tend to lose their crispiness over time.
Serving Suggestions
When it comes time to serve, think about adding a pop of color and flavor to your plate! You can serve these sweet potato hash browns with a fresh dollop of sour cream or Greek yogurt on the side, topped with green onions or chopped herbs. For even more color and nutrition, add sliced avocado or a vibrant homemade salsa. If you’re feeling extra indulgent, a drizzle of sriracha or a sprinkle of feta cheese can take these hash browns over the top!
Recipe Variations
Here are some creative twists to keep your sweet potato hash browns exciting:
-
Add Spinach or Kale: Toss in a handful of chopped greens to amp up the nutrition and flavor.
-
Spicy Sweet Potato Hash: Add diced jalapeños or red pepper flakes for a kick!
-
Herb-Infused: Mix in fresh herbs like thyme or rosemary for an aromatic touch.
-
Cheesy Delight: Fold in some shredded cheese like cheddar or feta before cooking for a cheesy hash brown experience!
-
Breakfast Bowls: Use them as a base for a breakfast bowl, topped with an egg any style, sautéed veggies, or your favorite proteins.
Chef’s Notes
As I reflect on this recipe, I love how it has evolved over time in my kitchen. Initially, it started as a simple comfort food option for my family. But as I began experimenting, I found ways to incorporate healthy ingredients and bold flavors, turning it into a wholesome dish. I remember one time hosting a brunch and accidentally running out of sweet potatoes. In a rush, I mixed in some grated zucchini, and folks, it was a game changer! The variation was a hit and drew attention for its unique texture and flavor.
It’s these happy kitchen accidents that keep me excited as a home cook. Remember, cooking is about having fun and making it your own, so don’t be afraid to let your creativity shine through!
FAQs and Troubleshooting
1. Why are my hash browns soggy?
- If they come out soggy, it’s likely due to excess moisture. Be sure to squeeze out as much liquid as possible after grating the sweet potatoes.
2. Can I make these ahead of time?
- Absolutely! You can prep the mixture ahead and store it in the fridge for up to a day. Just remember to cook them before serving!
3. Are they freezer-friendly?
- Yes! You can freeze the uncooked hash brown patties between layers of parchment paper, then store them in a freezer-safe bag. Just cook them from frozen—add a few extra minutes to the cooking time.
4. What should I do if they fall apart while cooking?
- If your hash browns crumble, try adding an extra egg for binding or lightly pressing them with a spatula while cooking to help them hold together.
Nutritional Info
Note: Nutritional values may vary based on specific ingredients and portion sizes.
- Calories: 200
- Protein: 3g
- Fat: 7g
- Carbohydrates: 34g
- Fiber: 4g
- Sugars: 6g
And there you have it, my dear foodies! This recipe for healthy sweet potato hash browns is sure to brighten up your breakfast table—or any meal for that matter! I hope you feel inspired to get cooking and create amazing memories in your kitchen, just as I did in my grandmother’s. Remember, food is love, and every bite tells a story. Happy cooking!
Print
Healthy Sweet Potato Hash Browns
- Total Time: 35 minutes
- Yield: 4 servings 1x
- Diet: Vegetarian
Description
Delicious and nutritious sweet potato hash browns that are crispy on the outside and soft on the inside. Perfect for breakfast or as a side dish.
Ingredients
- 2 large Sweet Potatoes
- 1 medium Onion
- 2 cloves Garlic, minced
- 1 large Egg (optional)
- 2–3 tbsp Olive Oil
- Salt and Pepper, to taste
- Fresh Herbs (optional)
Instructions
- Prep the sweet potatoes by peeling and grating them.
- Remove excess moisture by wringing them in a towel.
- Sauté the onion in olive oil until translucent, then add garlic.
- Mix the sautéed onion and garlic with grated sweet potatoes, egg, salt, and pepper.
- Cook mixture in the skillet, forming patties and frying until golden brown.
- Flip the patties and cook until the other side is crispy.
- Drain on paper towels before serving.
- Serve immediately with your choice of toppings.
Notes
These hash browns are best served fresh. Consider adding toppings like sour cream, salsa, or avocado for extra flavor.
- Prep Time: 15 minutes
- Cook Time: 20 minutes
- Category: Breakfast
- Method: Frying
- Cuisine: American
Nutrition
- Serving Size: 1 serving
- Calories: 200
- Sugar: 6g
- Sodium: 400mg
- Fat: 7g
- Saturated Fat: 1g
- Unsaturated Fat: 5g
- Trans Fat: 0g
- Carbohydrates: 34g
- Fiber: 4g
- Protein: 3g
- Cholesterol: 70mg
Keywords: sweet potato, hash browns, breakfast, vegetarian, healthy recipes


