
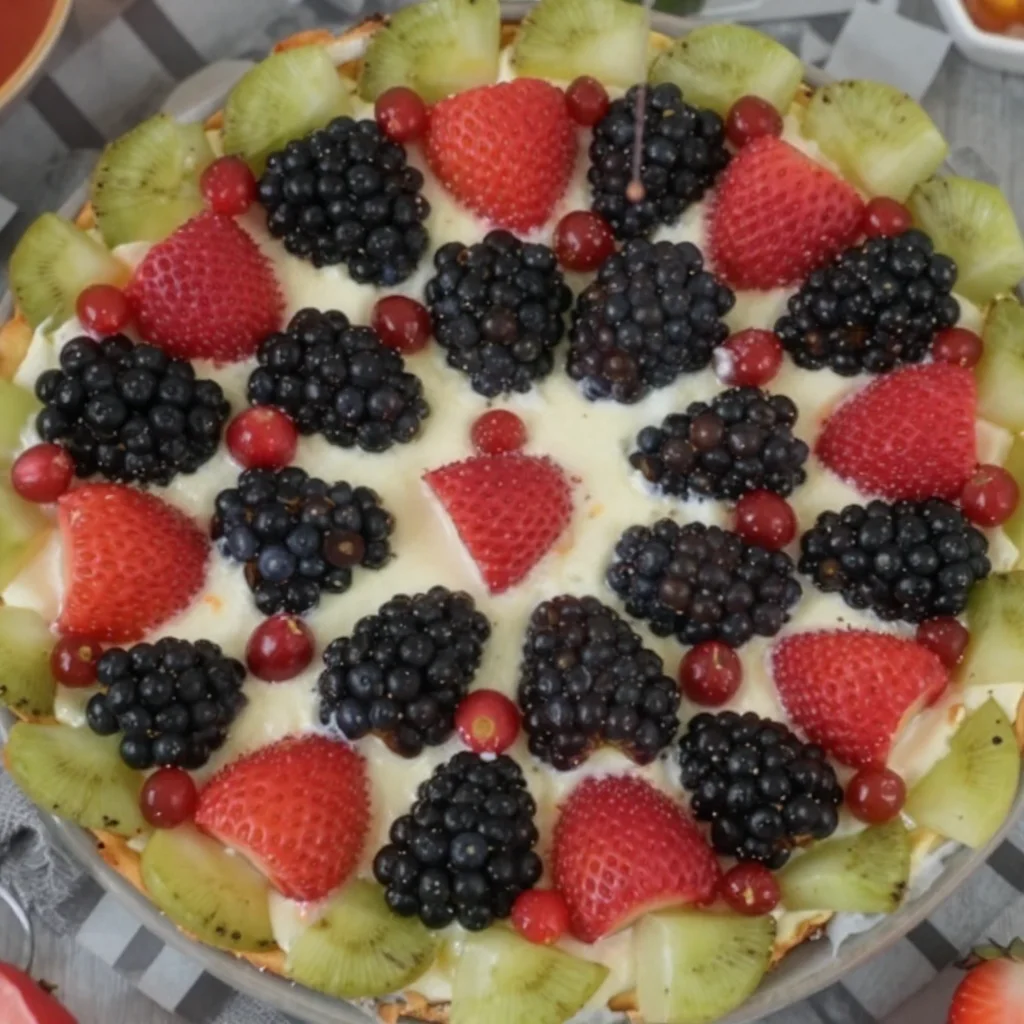
No-Bake Fruit Pizza: 5-Ingredient Weeknight Treats
Homemade Fruit Pizza: A Slice of Joy
Welcome! I’m Olivia Bennett, and today we’re diving into one of my all-time favorite recipes that absolutely screams “summer fun” — Homemade Fruit Pizza! Picture this: a velvety cream cheese frosting, a sweet, buttery cookie crust, and an array of vibrant fruits that will make your taste buds dance. Is your mouth watering yet?
There’s something inherently joyful about fruit pizza. It’s not just a treat; it’s a canvas for creativity, a chance to play with colors, textures, and flavors. Whether you’re hosting a backyard barbecue, celebrating a birthday, or simply craving something sweet and refreshing, fruit pizza fits the bill perfectly. And the best part? It’s incredibly easy to whip up, even if you’re new to the kitchen.
This recipe is all about embracing the seasonal fruits you love. Strawberries, kiwis, blueberries, and mandarin oranges are my go-tos, but feel free to take artistic liberty! So grab your apron (things might get a bit messy, and that’s part of the fun!) and let’s create a delicious masterpiece that will impress everyone at the table.
A Slice of Nostalgia
Growing up, my family had a tradition of hosting summer picnics in our backyard. We’d set up a long table adorned with checkered tablecloths, and the smell of barbecued goodness wafted through the air. My mom would always make her famous fruit pizza, and I fondly remember the anticipation as the creamy frosting and colorful fruits were assembled. It was often the centerpiece of our dessert table.
One particular afternoon, as the sun dipped below the trees, I claimed the last slice for myself, grinning from ear to ear. A burst of juicy strawberries and a hint of tangy kiwi made every bite a delightful explosion of flavor. I’ll never forget my little brother’s exaggerated sigh when he realized I had indulged in the final piece. It became a gentle family rivalry over who could create the most magnificent fruit pizza, and every summer since, it’s been our delicious tradition.
Ingredients
To make your very own fruit pizza, you’ll need the following ingredients:
-
Sugar Cookie Dough
This will be the base of your pizza. You can use store-bought dough for convenience or make your own from scratch for a homemade touch. -
Cream Cheese
Essential for the frosting! Feel free to use reduced-fat cream cheese if you’re looking for a lighter option. It will still be creamy and delicious! -
Powdered Sugar
This adds the necessary sweetness to the cream cheese frosting. If you’re looking to avoid sugar, you can substitute with a sugar alternative like erythritol or stevia. -
Vanilla Extract
A hint of vanilla elevates the flavor of the frosting. Always opt for pure vanilla extract for the best taste — imitation can be a little too harsh. -
Mixed Fresh Fruits
Choose your favorites! I love strawberries, blueberries, kiwis, and mandarin oranges for their vibrant colors and contrasting flavors. Remember, the fresher, the better! -
Lemon Juice (optional)
A squeeze of lemon juice in your frosting can brighten up the flavors. If you’re not a lemon fan, feel free to skip this.
Step-by-Step Instructions
Now, let’s roll up our sleeves and get cooking! Here’s a detailed guide:
-
Prepare the Sugar Cookie Base
Preheat your oven to 350°F (175°C). If you’re using store-bought dough, get it out and ready. If you’re making your own, mix your ingredients until dough forms. Spread the sugar cookie dough onto a parchment-lined baking sheet, shaping it into a large pizza shape — about 12 inches in diameter. Make it slightly thicker for a chewier base or thinner for a crispier finish. Bake for 10-15 minutes until it’s golden brown. Tip: Keep an eye on it — burnt edges are nobody’s friend! -
Cool the Cookie
Once out of the oven, let your cookie base cool completely on a wire rack. Many baking disasters can happen when you try to frost a warm cookie (it just turns into a melty mess, trust me!). -
Make the Cream Cheese Frosting
In a mixing bowl, combine 8 oz of cream cheese and ½ cup of powdered sugar. Blend until smooth and creamy. Add 1 tsp of vanilla extract and mix until incorporated. Chef insight: Taste as you go. If you prefer a sweeter frosting, you can always add a little more powdered sugar! -
Frost Your Cookie
Once your cookie base is completely cool, dollop the cream cheese frosting on top and spread it evenly with a spatula or the back of a spoon. Don’t be shy; the frosting should have a luscious layer—this is what makes it a pizza! -
Add the Fruits
Now for the fun part—adding the fruits! Arrange your mixed fresh fruits over the frosted cookie in an artistic manner. Consider creating sections with different fruits or going for a rainbow pattern. Tip: Start with larger fruits as a base and fill in gaps with smaller ones to create a colorful mosaic. -
Chill and Serve
Once you’re happy with your masterpiece, pop it in the refrigerator for about 30 minutes to set. This makes slicing much easier and gives the flavors a chance to meld.
Serving Suggestions
When it’s time to serve your fruit pizza, slice it into wedges just as you would a regular pizza. I recommend using a sharp knife so you don’t disturb the beautiful fruit arrangement. For a fun presentation, place slices on colorful plates, and serve with a sprig of mint on top. Trust me; it adds a touch of elegance that will impress your guests.
Recipe Variations
Feeling adventurous? Here are some fun variations to try with your fruit pizza:
- Chocolate Drizzle: Melt some dark chocolate and drizzle it over the top for a rich, decadent twist.
- Nut Butter Swirl: Incorporate a layer of almond or peanut butter between the cookie base and frosting for added flavor and a hint of nuttiness.
- Seasonal Spices: Try adding a pinch of cinnamon or nutmeg to your frosting for a warm, cozy flavor.
Chef’s Notes
This fruit pizza recipe has been a staple in my family for years, and it’s always evolving. I remember one summer, I tried using figs and walnuts instead of the traditional fruits. I thought I’d amazed everyone with my gourmet remix, but the kids were having none of it! They wanted their classic fruit pizza, and I quickly learned that sometimes, sticking to the tried-and-true is just as important as experimenting.
In the spirit of family and friends, this fruit pizza has become more than just a dessert — it’s a way to connect, share, and create memories. So, gather around the table, slice up that pizza, and enjoy the smiles from your loved ones!
FAQs and Troubleshooting
Q: My cookie base is too soft. What went wrong?
A: Make sure to let your cookie cool completely before frosting. If it’s still warm, it can make the frosting melt and lead to a soggy base.
Q: Can I make this ahead of time?
A: Absolutely! You can bake the cookie base a day ahead and store it tightly wrapped. Just frost and add the fruit on the day you plan to serve it for optimal freshness.
Q: What if I have leftover frosting?
A: Lucky you! Leftover frosting can be stored in the refrigerator for about a week. Try using it on bagels or as a cake frosting for another sweet treat.
Q: Can I freeze the fruit pizza?
A: Fruit pizza is best enjoyed fresh, but you can freeze the cookie base wrapped tightly in plastic wrap. Just be aware that freezing fresh fruit can affect its texture, so it’s best to add them fresh when you’re ready to serve!
Nutritional Info (Optional)
While I like to think of fruit pizza as a delightful treat filled with fresh produce, it’s always good to keep an eye on the calories if you’re counting them. Depending on your ingredient choices, here’s a rough estimate per slice (based on 12 slices):
- Calories: 200-300
- Protein: 3g
- Carbs: 30g
- Fat: 9g
Conclusion
There you have it—a delightful Homemade Fruit Pizza that’s not just delicious but also an adventure in the kitchen! I hope you enjoy creating this vibrant dish as much as I do. The memories made around a slice of fruit pizza are just as sweet as the dessert itself. So turn on that music, gather your favorite fruits, and embrace your inner chef! Happy cooking, my friends! 🍕✨
Print
Homemade Fruit Pizza
- Total Time: 30 minutes
- Yield: 12 servings 1x
- Diet: Vegetarian
Description
A delightful summer treat featuring a buttery cookie crust, creamy frosting, and a vibrant array of fresh fruits.
Ingredients
- Sugar Cookie Dough
- 8 oz Cream Cheese
- ½ cup Powdered Sugar
- 1 tsp Vanilla Extract
- Mixed Fresh Fruits (strawberries, blueberries, kiwis, mandarin oranges)
- Lemon Juice (optional)
Instructions
- Preheat your oven to 350°F (175°C). Spread the sugar cookie dough onto a parchment-lined baking sheet, shaping it into a large pizza about 12 inches in diameter. Bake for 10-15 minutes until golden brown.
- Cool the cookie base completely on a wire rack.
- Combine 8 oz of cream cheese and ½ cup of powdered sugar in a mixing bowl. Blend until smooth. Add 1 tsp of vanilla extract and mix well.
- Dollop the cream cheese frosting on top of the cool cookie base and spread it evenly.
- Arrange your mixed fresh fruits over the frosted cookie in an artistic manner.
- Chill in the refrigerator for about 30 minutes to set.
- Slice into wedges just like a pizza and serve with a sprig of mint for garnish.
Notes
Feel free to experiment with different fruits or toppings such as chocolate drizzle or nut butter for added flavor.
- Prep Time: 15 minutes
- Cook Time: 15 minutes
- Category: Dessert
- Method: Baking
- Cuisine: American
Nutrition
- Serving Size: 1 slice
- Calories: 250
- Sugar: 12g
- Sodium: 200mg
- Fat: 10g
- Saturated Fat: 4g
- Unsaturated Fat: 4g
- Trans Fat: 0g
- Carbohydrates: 32g
- Fiber: 1g
- Protein: 3g
- Cholesterol: 30mg
Keywords: homemade fruit pizza, summer dessert, fruit dessert, cream cheese frosting, colorful fruits
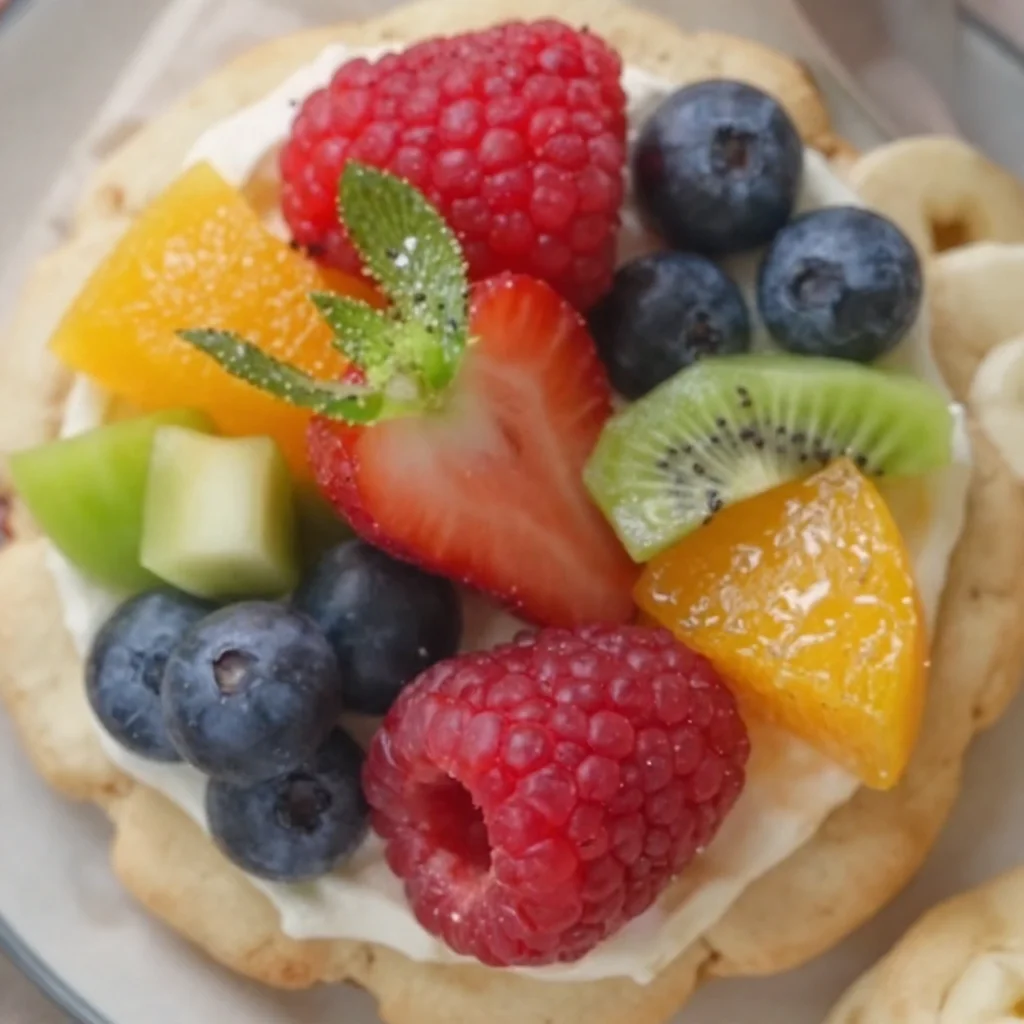
Beginner-Friendly Fruit Pizza Cookies: Quick No-Bake Recipe
Fruit Pizza Cookies: A Sweet Twist on a Classic Treat
Welcome to my kitchen! I’m so excited to share one of my absolute favorite dessert recipes with you today: Fruit Pizza Cookies! Imagine a deliciously soft sugar cookie base, topped with a creamy frosting and a vibrant array of fresh fruits. It’s like a pizza, but dessert-style and packed with flavors that make your taste buds dance. Perfect for summer cookouts, kids’ parties, or just a cozy night in, these cookies are a delightful way to celebrate the joy of cooking and eating together.
A Slice of Nostalgia
Growing up, my family had a tradition of making “pizza” every Friday night. No, not the takeout kind but a fun twist we looked forward to every week! One Friday evening, my mom decided to experiment and made this fabulous dessert that we dubbed “Fruit Pizza.” We gathered in the kitchen, mixing the dough and spreading the frosting, and I can still smell the warm sugar cookies baking in the oven. It was such a bonding experience, one filled with laughter, silly stories, and of course, tasting the fruits—making sure there was a perfect color mix of strawberries, kiwis, and blueberries!
Fast forward to today, and this recipe has become a staple in my home. It not only brings back those cherished memories of family and fun, but it also allows me to create new ones with friends and loved ones. Each time I prepare these cookies, I feel like I’m inviting togetherness just like those Friday nights from my childhood. And whether you’re a young chef or a seasoned pro, I’m here to make sure you feel just as joyful about this dish as I do!
The Ingredients You’ll Need
Here’s what you’ll need to whip up these delightful Fruit Pizza Cookies. Each one comes with a little chef’s insight to help you along the way!
-
Butter (1 cup, softened)
The star of any good cookie! Use unsalted butter for better control of the sweetness. If needed, coconut oil or vegan butter can serve as great dairy-free alternatives. -
Granulated Sugar (1 cup)
For the perfect sweetness and chew! You can swap half with brown sugar for extra depth in flavor. -
Eggs (2 large)
They’re essential for binding and making the cookies nice and fluffy. For a vegan version, try flax eggs—2 tablespoons of ground flaxseed mixed with 6 tablespoons of water, resting for 5 minutes. -
Vanilla Extract (2 teaspoons)
A splash adds warmth and complexity. You can substitute with almond extract for a unique nutty flavor—just use a bit less, as it’s more potent! -
All-Purpose Flour (2 ¾ cups)
The foundation for your cookies! You can use whole wheat flour for a nuttier taste or gluten-free flour for a gluten-free option. -
Baking Soda (1 teaspoon)
Essential for leavening—makes your cookies rise while baking! If you don’t have any, 1 teaspoon of baking powder works too but adjust the baking time slightly. -
Salt (½ teaspoon)
Just a pinch helps enhance the sweetness—don’t skip this! You can use sea salt for a bit of texture. -
Cream Cheese (8 oz, softened)
This will make your frosting creamy and dreamy! For a lighter frosting, consider Greek yogurt instead. -
Powdered Sugar (2 cups)
For smooth, sweet frosting—you can lower the amount for less sweetness, or use agave or honey for a natural sweetener. -
Assorted Fresh Fruits (e.g., strawberries, blueberries, kiwi, bananas)
Fresh is best! Choose your favorites for a colorful topping. The key is to keep it vibrant—you can also include seasonal fruits like peaches or raspberries!
Additional Tips: Always wash your fruits thoroughly, and if you’re prepping ahead of time, consider adding them just before serving to avoid sogginess.
Step-by-Step Instructions
Now that we’ve got all our ingredients ready, let’s dive into making these tasty Fruit Pizza Cookies! Follow my tips along the way for a successful baking experience.
-
Preheat your Oven:
Set your oven to 350°F (175°C). Preheating ensures your cookies bake evenly, giving you that soft, chewy texture we all love! -
Cream the Butter and Sugar:
In a mixing bowl, combine the softened butter and granulated sugar. Beat them together until it’s light and fluffy—this usually takes about 3-5 minutes. This step is crucial; it incorporates air into your cookie dough, making them tender! -
Add the Eggs and Vanilla:
Add in those eggs, one at a time, mixing until fully incorporated. Then, stir in the vanilla extract. You will see the mixture change in texture; it should look creamy and smooth. -
Combine the Dry Ingredients:
In a separate bowl, whisk together the flour, baking soda, and salt. Gradually add this to your wet mixture, about a cup at a time. Mix it until everything is combined, but make sure not to overwork the dough. A little flour fluffing out is totally fine! -
Scoop and Bake:
Using a cookie scoop or tablespoon, drop the cookie dough onto a lined baking sheet. Leave some space between each ball—they will spread! Bake for 8-10 minutes, or until the edges start to turn golden brown. Your kitchen will smell divine, trust me! -
Cooling Time:
Once out of the oven, let the cookies cool on the baking sheet for about 5 minutes before transferring them to a wire rack to cool completely. This helps them firm up while maintaining that chewy center. -
Make the Frosting:
While the cookies are cooling, it’s time to make that dreamy frosting! In a bowl, beat the softened cream cheese and powdered sugar until it’s smooth. If you want a lighter texture, mix in a splash of milk. Taste it—if it’s a little too sweet, add a pinch of salt to balance it out! -
Top with Fruits:
Once your cookies are completely cooled, spread a generous layer of frosting on top of each cookie. Now comes the fun part! Arrange your fresh fruits beautifully on top of the frosting. Get creative—there’s no wrong way to do this!
Serving Suggestions
These Fruit Pizza Cookies are best enjoyed fresh, but they also store well for a few days in an airtight container—if they last that long! For serving, plate them on a vibrant platter or a fun cutting board. You can even drizzle a little honey or chocolate sauce for added flair. Pair them with a nice cold glass of lemonade or iced tea for a delightful summertime treat!
Recipe Variations
-
Chocolate Drizzle: Top your frosted cookies with a drizzle of melted dark chocolate for an indulgent touch!
-
Nutty Crunch: Add chopped nuts, such as pistachios or almonds, on top of the fruit for an added crunch and protein.
-
Graham Cracker Crust Cookies: Incorporate finely crushed graham crackers into the cookie dough for a delightful twist on texture.
-
Yogurt Frosting: Swap out the cream cheese for non-fat Greek yogurt or dairy-free yogurt for a lighter option.
-
Seasonal Variations: Change up the fruit toppings based on the season for a different flavor profile—consider persimmons in the fall or citrus in the winter!
Chef’s Notes
Throughout my cooking journey, this recipe has transformed with every gathering. I love experimenting with seasonal fruits and inventing new combinations to keep things fresh. The joy of sharing these cookies, whether at a birthday party or just a cozy coffee catch-up with the neighbors, makes this recipe timeless. Plus, I’ll always remember the joy on my kids’ faces as they decorate each cookie with their favorite fruits. It’s messy, delightful, and part of what makes cooking fun!
FAQs and Troubleshooting
-
Why are my cookies flat?
This could be due to softened butter that’s too warm or not enough flour. Make sure your butter is softened but not melted, and level your flour when measuring. -
Can I freeze leftover cookies?
Absolutely! Bake the cookies, cool them completely, then place them in an airtight container or bag. They can be frozen for up to three months. Frosting can also be frozen separately! -
How do I prevent soggy cookies?
Make sure cookies are cooled completely before frosting. If you want to make these ahead of time, frost just before serving! -
What can I substitute if I don’t have cream cheese?
Cream cheese adds wonderful flavor and texture, but you can use mascarpone cheese or whipped cream instead for a lighter option.
Nutritional Info
While the nutritional information can vary based on specific ingredients and portion sizes, please note that each cookie generally contains approximately 200 calories. Feel free to adjust ingredients to fit dietary needs or preferences!
There you have it! Making Fruit Pizza Cookies combines the warmth of home cooking with collective joy and creativity. I encourage you to gather your loved ones, crank up your favorite tunes, and get baking. Let’s create delicious memories one cookie at a time! Happy baking! 🍪✨
Print
Fruit Pizza Cookies
- Total Time: 25 minutes
- Yield: 24 cookies 1x
- Diet: Vegetarian
Description
A sweet twist on a classic treat featuring a soft sugar cookie base topped with creamy frosting and vibrant fresh fruits.
Ingredients
- 1 cup unsalted Butter, softened
- 1 cup Granulated Sugar
- 2 large Eggs
- 2 teaspoons Vanilla Extract
- 2 ¾ cups All-Purpose Flour
- 1 teaspoon Baking Soda
- ½ teaspoon Salt
- 8 oz Cream Cheese, softened
- 2 cups Powdered Sugar
- Assorted Fresh Fruits (e.g., strawberries, blueberries, kiwi, bananas)
Instructions
- Preheat your oven to 350°F (175°C).
- Cream the softened butter and granulated sugar in a mixing bowl until light and fluffy.
- Add the eggs, one at a time, mixing until fully incorporated, then stir in the vanilla extract.
- Combine the flour, baking soda, and salt in a separate bowl, then gradually add this to the wet mixture.
- Scoop the cookie dough onto a lined baking sheet, leaving space between each ball.
- Bake for 8-10 minutes, or until the edges start to turn golden brown.
- Cooling the cookies on the baking sheet for about 5 minutes before transferring them to a wire rack.
- Make the frosting by beating together the softened cream cheese and powdered sugar until smooth.
- Top each cooled cookie with frosting and arrange fresh fruits beautifully on top.
Notes
Always wash your fruits thoroughly and consider adding them just before serving to avoid sogginess.
- Prep Time: 15 minutes
- Cook Time: 10 minutes
- Category: Dessert
- Method: Baking
- Cuisine: American
Nutrition
- Serving Size: 1 cookie
- Calories: 200
- Sugar: 20g
- Sodium: 200mg
- Fat: 8g
- Saturated Fat: 4g
- Unsaturated Fat: 3g
- Trans Fat: 0g
- Carbohydrates: 30g
- Fiber: 1g
- Protein: 2g
- Cholesterol: 30mg
Keywords: fruit pizza cookies, dessert recipe, summer treat, cookie recipe, kid-friendly cookies

Minute Low-Calorie Breakfast Sandwiches for Busy Mornings
Low Calorie Breakfast Sandwiches: A Delicious Way to Start Your Day
Welcome to my kitchen, fellow food enthusiast! I’m Olivia Bennett, and today we’re diving into the wonderful world of breakfast sandwiches—those glorious creations that bring comfort and joy to our mornings. If you’re anything like me, the smell of freshly toasted bread and sizzling eggs in the morning is enough to make you want to dance around the kitchen!
Breakfast is often called the most important meal of the day, and rightly so. However, as we kick off our mornings with flair, it’s important to keep things light, fresh, and nourishing. That’s why I’m excited to share my recipe for Low Calorie Breakfast Sandwiches that will leave you feeling satisfied without the guilt! Grab your apron, and let’s get cooking!
A Personal Slice of Breakfast History
As a kid, my mornings were a special time, filled with the sounds of my mom bustling in the kitchen and the smell of something delicious cooking. I remember the way she would whip up breakfast sandwiches for my brother and me before school, using whatever leftovers she had in the fridge. Those sandwiches were an adventure, hiding surprises in every bite—a little cheese here, a slice of avocado there!
One of my favorite memories involves a particularly hilarious morning when my brother accidentally grabbed the jar of mayonnaise instead of the mustard. Let’s just say that his breakfast sandwich turned into a mysterious concoction only a child could appreciate. That day sparked a realization: breakfast sandwiches are not just food; they are love, laughter, and a little bit of chaos. So let’s embrace that spirit as we make our own, healthier, and lighter breakfast sandwiches that will fill our hearts (and stomachs) with happiness!
Ingredients
For our Low Calorie Breakfast Sandwiches, you’ll need the following ingredients:
-
Whole Wheat English Muffins (or any whole grain bread)
A light and wholesome choice that adds fiber to your breakfast. Feel free to swap for gluten-free options if needed! -
Eggs (or egg whites)
The star of our sandwich! Eggs are packed with protein, but for a lower calorie count, you can use egg whites or a cholesterol-free egg substitute. -
Avocado
Creamy and rich, avocados bring healthy fats to the table. If avocados are too expensive or out of season, you can use hummus as a spread instead. -
Spinach (or other greens)
Fresh greens add color and nutrition. You can also substitute with kale or sautéed mushrooms for a twist. -
Low-Fat Cheese (or nutritional yeast)
A sprinkle of cheese adds flavor! If you’re dairy-free, try nutritional yeast for a cheesy taste without the calories. -
Tomato Slices
Juicy and refreshing, tomatoes add a burst of flavor. You could also use roasted red peppers or sliced cucumbers for variety. -
Herbs and Spices (salt, pepper, and optional chili flakes)
Hero ingredients that elevate flavors! Customize your spice levels based on your palate.
Step-by-Step Instructions
Now that we have our ingredients prepped, let’s dive into the cooking process! Follow these steps to create your delicious Low Calorie Breakfast Sandwiches:
-
Preheat your grill or skillet.
A medium heat is perfect for toasting the muffins while cooking the eggs without burning them. Just a couple of minutes will do! -
Toast the English muffins.
Place the muffin halves cut-side down on the grill or skillet. Toast them until they’re golden and crispy (about 3-5 minutes). This creates a sturdy base for your sandwich! -
Cook the eggs.
Whisk your eggs or egg whites in a bowl, adding a pinch of salt and pepper. Pour them into the skillet. Stir gently with a spatula until they’re fluffy and just set. This typically takes around 3 minutes for scrambled eggs. Pro tip: For soft and creamy eggs, remove them from heat just before they look fully cooked; they’ll continue to cook off the heat! -
Assemble the sandwich.
On the bottom half of each toasted muffin, layer the cooked eggs, a slice of avocado, a handful of fresh spinach, a slice of tomato, and a sprinkle of low-fat cheese. Top it with the other muffin half. -
Heat the assembled sandwich (optional).
If you want your cheese melted, you can place the entire sandwich back on the skillet for an additional minute, covered with a lid. This helps create that gooey, dreamy layer of cheese. -
Serve and Enjoy!
Cut your sandwiches in half for a pretty presentation, and serve them immediately. Don’t forget to whisk up a little hot sauce or salsa if you’re feeling adventurous!
Serving Suggestions
These Low Calorie Breakfast Sandwiches are perfect for starting your day off right! Serve them alongside fresh fruit, yogurt, or even a small smoothie for a complete breakfast. They also make for a great snack or light lunch!
Recipe Variations
- Mediterranean Twist: Swap spinach for arugula, add feta cheese, and top with sun-dried tomatoes.
- Southwestern Kick: Mix in diced jalapeños, cilantro, and swap tomatoes for fresh avocado salsa!
- Sweet & Savory: Use a whole grain bagel, layer with almond butter, sliced bananas, and a sprinkle of cinnamon for a sweeter breakfast.
- Vegan Delight: Replace eggs with tofu scramble, and add nutritional yeast for a cheesy flavor without the dairy.
Chef’s Notes
These Low Calorie Breakfast Sandwiches are a staple in my kitchen, and I love how they can adapt to your pantry. Over the years, I’ve experimented with countless fillings, and I can honestly say it never gets boring! I remember the time I hosted a brunch for friends and turned these sandwiches into a DIY station. Everyone could customize their sandwiches, and we laughed and shared while we created delicious combinations—definitely a morning I’ll cherish forever!
FAQs and Troubleshooting
1. How can I ensure my eggs aren’t rubbery?
To avoid rubbery eggs, cook them on low heat and remove them from the pan just before they’re fully set. The residual heat will continue to cook them to perfection.
2. Can I make these sandwiches ahead of time?
Absolutely! You can prepare the ingredients in advance and store them separately. When you’re ready to eat, just assemble and toast!
3. What should I do if I don’t have an English muffin?
No problem! You can use any bread you have on hand—whole grain or sourdough works beautifully. Even a tortilla can become a delicious wrap!
4. How many calories are in one sandwich?
Depending on the specific ingredients you choose, one sandwich can range from 250 to 350 calories, making them a balanced and satisfying breakfast option.
Nutritional Info (Optional)
Although this can vary based on specific ingredients, each sandwich is typically around 300 calories, with 20 grams of protein and high fiber content. These numbers depend on your choices, so feel free to swap ingredients to fit your dietary needs!
Now that you’ve discovered the joy and ease of making Low Calorie Breakfast Sandwiches, you can start embracing those cozy cooking moments in your kitchen. Remember, cooking is all about creativity, and there’s no right or wrong way to enjoy breakfast! Feel free to experiment, share your variations, and of course—make lots of delicious memories along the way. Happy cooking!
Print
Low Calorie Breakfast Sandwiches
- Total Time: 20 minutes
- Yield: 2 servings
- Diet: Vegetarian
Description
Low calorie breakfast sandwiches that are satisfying and nourish your mornings without the guilt.
Ingredients
- Whole Wheat English Muffins (or any whole grain bread)
- Eggs (or egg whites)
- Avocado
- Spinach (or other greens)
- Low-Fat Cheese (or nutritional yeast)
- Tomato Slices
- Herbs and Spices (salt, pepper, and optional chili flakes)
Instructions
- Preheat your grill or skillet.
- Toast the English muffins until golden and crispy (about 3-5 minutes).
- Cook the eggs or egg whites until fluffy, about 3 minutes.
- Assemble the sandwich with eggs, avocado, spinach, tomato, and cheese on the toasted muffin.
- Heat the assembled sandwich on the skillet for an additional minute if you want melted cheese.
- Serve and enjoy immediately!
Notes
These sandwiches can be made ahead of time and customized to fit any dietary preferences. Try swapping the ingredients for variations!
- Prep Time: 10 minutes
- Cook Time: 10 minutes
- Category: Breakfast
- Method: Grilling
- Cuisine: American
Nutrition
- Serving Size: 1 sandwich
- Calories: 300
- Sugar: 2g
- Sodium: 300mg
- Fat: 10g
- Saturated Fat: 2g
- Unsaturated Fat: 8g
- Trans Fat: 0g
- Carbohydrates: 36g
- Fiber: 6g
- Protein: 20g
- Cholesterol: 200mg
Keywords: breakfast, low calorie, sandwich, healthy, quick meal, vegetarian
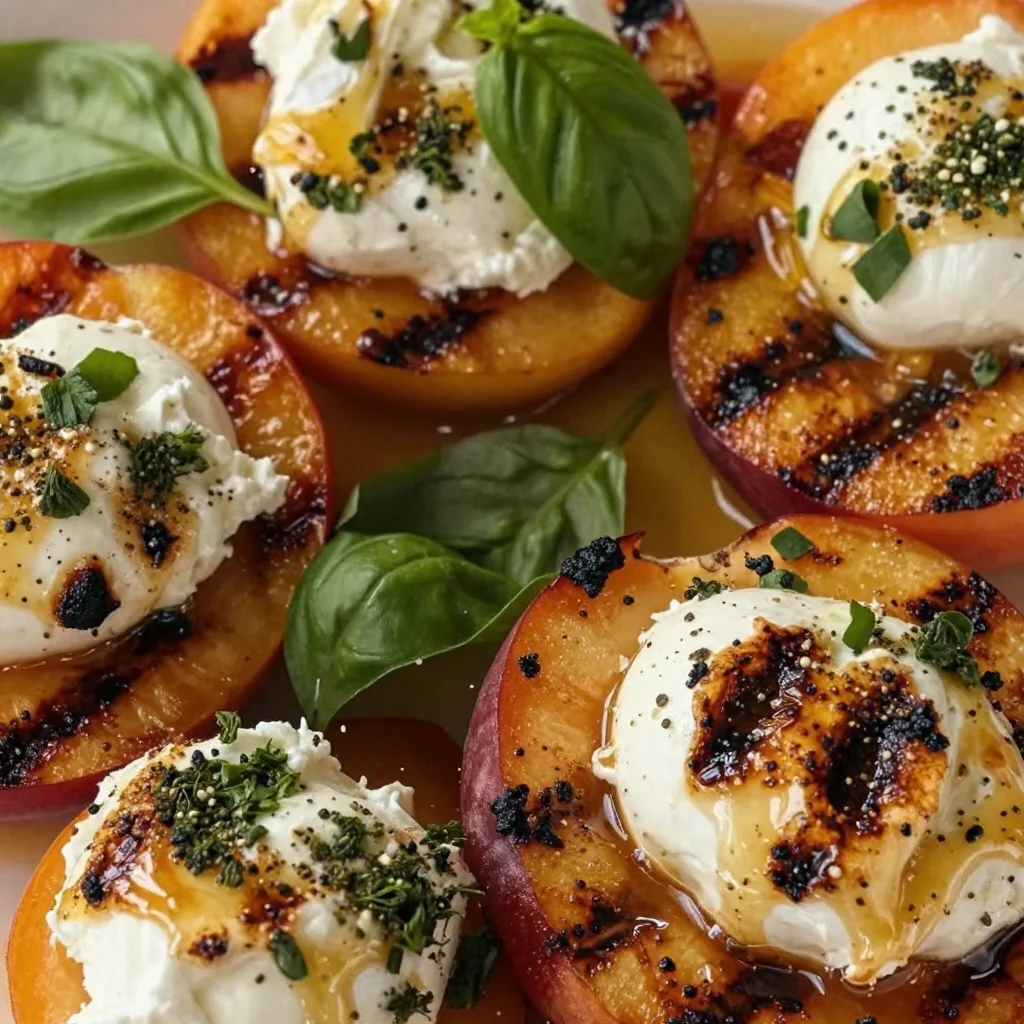
Ingredient Grilled Nectarines with Burrata and Honey
Grilled Nectarines with Burrata and Honey: A Sweet and Savory Delight
Welcome back to my cozy corner of the culinary world! If you’re here, you’re probably like me—someone who believes that every meal can tell a story, and every gathering deserves a sprinkle of magic. Today, I want to share a scrumptious dish that’s perfect for warm summer evenings or any time you want to impress your friends and family without spending hours in the kitchen: Grilled Nectarines with Burrata and Honey. Trust me; this delightful combination of sweet, creamy, and smoky is going to become your new favorite recipe.
Grilled nectarines, with their caramelized edges, are a perfect blend of natural sweetness and tang, especially when paired with the creamy, luscious burrata cheese. Add a drizzle of honey, and you have a dish that’s elegant yet effortlessly simple. This recipe is close to my heart and has a special place in my entertaining repertoire. Think of it as a celebration of summer—a vibrant escape right on your plate.
So, let me take you through the journey of creating this beautiful dish, filled with stories and tips that will not only help you make it perfectly but also inspire you to explore your own culinary creativity. By the end of this post, you’ll be ready to fire up that grill and wow your loved ones!
Personal Story
I can still remember the first time I came across this divine pairing of nectarines and burrata. It was a summer picnic with my best friends in the park. The sun was shining, balloons were floating, and the laughter filled the air as we laid out our colorful blanket. I had just begun to dip my toes into the culinary world, armed with a trusty grill and an adventurous spirit. I decided to toss some stone fruits on the grill, hoping to impress everyone with an easy yet delicious appetizer.
As the nectarines sizzled and caramelized, their sweet aroma wafted up, tempting us all. I paired them with burrata from the local farmer’s market and drizzled it with some golden honey. Watching my friends’ eyes widen with delight as they took their first bites is a memory that still brings a smile to my face.
That moment taught me that food has a profound impact on our emotions and experiences. It’s not just about filling our stomachs but about creating connections and memories that last a lifetime. This dish embodies that spirit of warmth, joy, and love. Now, let’s dive into the details of creating this unforgettable dish together!
Ingredients
Here’s what you’ll need to create this beautiful dish:
-
2 ripe nectarines
Look for ones that are firm yet slightly soft to the touch. If you can’t find nectarines, peaches work beautifully too! -
1 ball of burrata cheese
This creamy delight adds an incredible texture and flavor. If burrata is hard to find, you can substitute with fresh mozzarella, but it won’t have that luscious, creamy interior. -
1-2 tablespoons of honey
Choose a good quality honey for the best flavor. You can also explore flavored honey varieties, like orange blossom or lavender, for a unique twist. -
Fresh basil leaves
These add a fresh, fragrant finish. If you’re not a basil fan, mint could be a refreshing alternative. -
Olive oil (for grilling)
A good drizzle of extra virgin olive oil is essential for grilling. You could also use avocado oil for a neutral flavor. -
Salt and pepper
Just a pinch enhances the flavors of all the ingredients.
This simple yet elegant list proves that beautiful dishes can originate from just a few quality ingredients.
Step-by-Step Instructions
Now that you have everything prepped, let’s get cooking! Follow these easy steps, and you’ll be enjoying this grilled masterpiece in no time.
-
Preheat your grill:
Start by preheating your grill to medium-high heat. If you’re using a charcoal grill, wait for the coals to become ashy. For gas grills, allow it to reach the right temperature for at least 10 minutes. This will ensure a beautiful char on your nectarines. -
Prep the nectarines:
While the grill is heating, wash the nectarines and slice them in half, removing the pit. You want the halves to hold their shape, so a careful slice is key. Drizzle a bit of olive oil over the cut sides and sprinkle with salt and pepper. This will help enhance their natural sweetness while adding flavor. -
Grill the nectarines:
Place the nectarines cut-side down on the hot grill. Let them sit without moving them for about 4-5 minutes or until they get nice grill marks and start to soften. If you’re feeling adventurous, you can give them a little twist halfway through for extra grill marks. Once done, remove them from the grill and let them rest for a couple of minutes—this helps them set. -
Prepare the burrata:
While the nectarines are resting, it’s time to prepare the burrata. Place the burrata cheese on a serving platter and carefully tear it open to expose its creamy center. This makes it easier for your guests to scoop onto their grilled nectarines. -
Plate the dish:
Arrange the grilled nectarines around the burrata, then drizzle with honey, allowing it to cascade over the cheese and fruit. Tear fresh basil leaves and scatter them on top for a pop of color and flavor. The final touch could be another light drizzle of olive oil, which adds a lovely shine to your dish. -
Serve and enjoy:
This dish is best enjoyed fresh off the grill! Present it beautifully at your dining table and watch the smiles and delight unfold when your guests dig in.
Serving Suggestions
Grilled Nectarines with Burrata and Honey can be served on its own as a stunning appetizer, or you can make it a part of a light meal. Consider serving it alongside a fresh arugula salad dressed with lemon vinaigrette or some crusty bread for dipping into the creamy burrata. Use a vibrant platter to elevate the presentation. Adding elements like sliced prosciutto or toasted nuts can also bring interesting textures and flavors to the experience!
Recipe Variations
- Grilled Stone Fruit Medley: Mix it up by adding peaches, apricots, or plums to the grill for a flavor explosion.
- Savory Twist: Replace honey with balsamic glaze for a tangier, more savory spin, which pairs wonderfully with the burrata.
- Herb Infusion: Use fresh thyme or rosemary in place of basil for an earthy note that complements the sweetness of the fruit.
- Nuts for Crunch: Sprinkle toasted pistachios or walnuts on top for extra crunch and a nutty flavor contrast.
- Sweet Heat: Add a pinch of chili flakes to the honey for a delightful spicy kick that balances the sweetness beautifully.
Chef’s Notes
This recipe has evolved alongside my culinary journey. I initially started with simple grilled peaches and burrata, but as my love for seasonal ingredients grew, I discovered nectarines as a stunning alternative that adds unique flavors and textures. Over the years, I’ve had the pleasure of sharing this dish at potlucks, family gatherings, and intimate dinners with friends. Every time someone takes a bite, I can see both surprise and joy; it’s a little culinary magic that keeps me going.
FAQs and Troubleshooting
Can I use canned nectarines instead of fresh?
I wouldn’t recommend it, as canned fruit can become too soft when grilled and won’t develop the same caramelization and flavor. Fresh is best!
What if my nectarines are too firm?
If your nectarines are really firm, you can toss them in a little olive oil and let them sit at room temperature for a day or two to soften. Alternatively, give the grilling a few extra minutes, being careful not to burn them.
How do I store leftovers?
If you have any leftovers (which is rare, but it happens!), store them in an airtight container in the fridge for up to two days. Just know that the burrata will lose some of its creamy texture.
Could I make this dish in advance?
While it’s best enjoyed fresh, you can grill the nectarines ahead of time and assemble just before serving. Store the grilled fruit separately, and then put it together with the burrata and honey just before serving for the best flavor experience.
Nutritional Info
This dish is not only flavorful but also packed with nutrients! Just keep in mind the addition of honey and the serving size of burrata for calorie considerations. It’s a fresh option that works great for those looking to indulge a little while still enjoying a largely plant-based dish.
So there you have it! A simple yet stunning recipe that will leave you and your guests in awe. Try this Grilled Nectarines with Burrata and Honey at your next gathering, and watch as the compliments roll in! Happy cooking, my friends! 🍑🥂
Print
Grilled Nectarines with Burrata and Honey
- Total Time: 20 minutes
- Yield: 4 servings 1x
- Diet: Vegetarian
Description
A delightful combination of grilled nectarines, creamy burrata cheese, and a touch of honey, creating a sweet and savory dish perfect for summer gatherings.
Ingredients
- 2 ripe nectarines
- 1 ball of burrata cheese
- 1–2 tablespoons of honey
- Fresh basil leaves
- Olive oil (for grilling)
- Salt and pepper
Instructions
- Preheat your grill: Start by preheating your grill to medium-high heat.
- Prep the nectarines: Wash the nectarines and slice them in half, removing the pit.
- Grill the nectarines: Place nectarines cut-side down on the hot grill for 4-5 minutes.
- Prepare the burrata: Place the burrata cheese on a serving platter and tear it open.
- Plate the dish: Arrange grilled nectarines around the burrata, drizzle with honey, and scatter fresh basil leaves.
- Serve and enjoy: Best enjoyed fresh off the grill!
Notes
Serve with a fresh arugula salad or crusty bread. This dish is versatile and can have added elements like prosciutto or nuts for extra flavor.
- Prep Time: 10 minutes
- Cook Time: 10 minutes
- Category: Appetizer
- Method: Grilling
- Cuisine: American
Nutrition
- Serving Size: 1 serving
- Calories: 250
- Sugar: 12g
- Sodium: 100mg
- Fat: 15g
- Saturated Fat: 6g
- Unsaturated Fat: 8g
- Trans Fat: 0g
- Carbohydrates: 30g
- Fiber: 2g
- Protein: 7g
- Cholesterol: 25mg
Keywords: Grilled Nectarines, Burrata, Summer Appetizer, Fresh Fruit, Easy Recipe
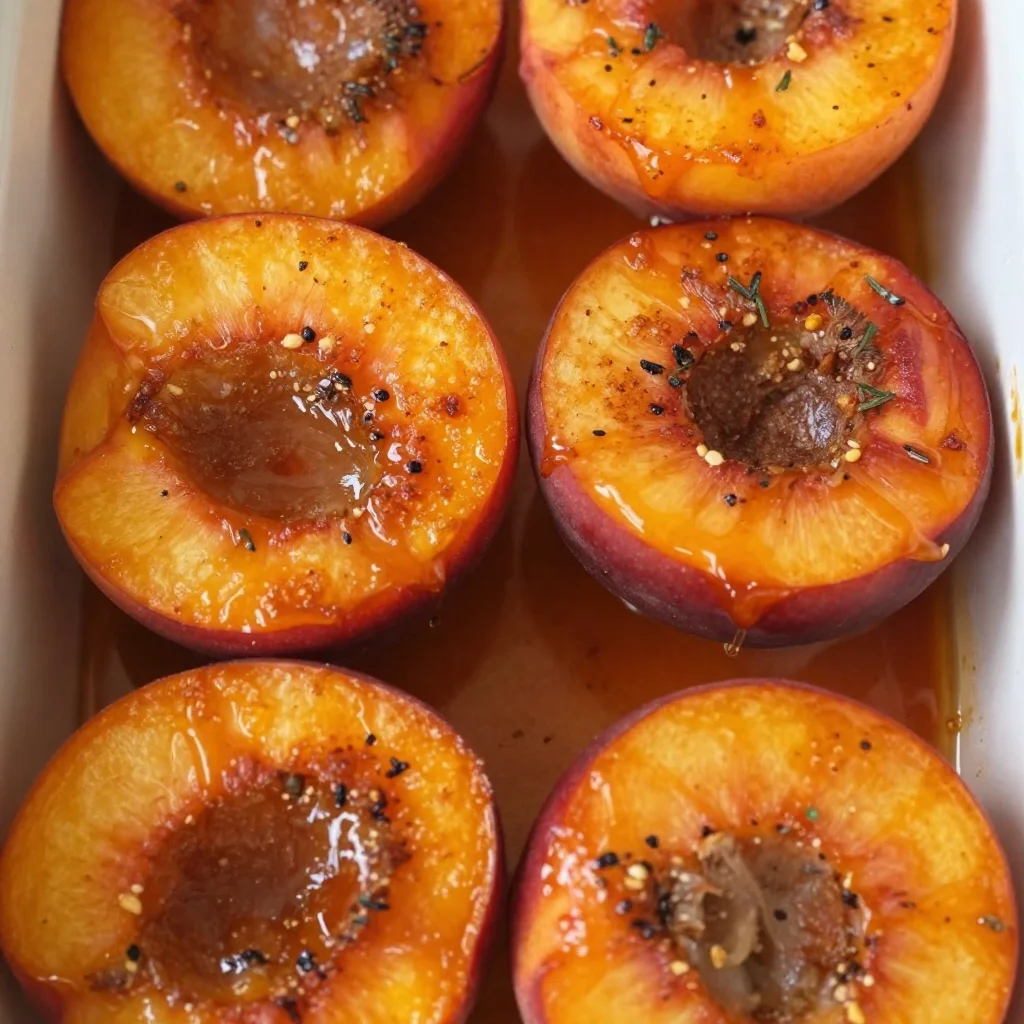
Healthier Summer Dessert: Cinnamon Honey Baked Nectarines
Baked Nectarines with Cinnamon Honey Sauce: A Sweet Simple Delight
Welcome to the sweetest corner of my kitchen, where we embrace the joy of cooking with ingredients that make our hearts sing! Today, we’re diving into a delightful summer dessert that feels like a warm hug on a plate: Baked Nectarines with Cinnamon Honey Sauce. Whether you’re looking for a show-stopping dessert to impress a friend or a cozy evening treat, this recipe has got you covered!
There’s something simply magical about nectarines. Their soft, juicy flesh and fragrant aroma remind me of lazy summer afternoons spent with family, gathered around the dining table, savoring the warmth of the sun and each other’s company. As a child, my summer days were filled with trips to the farmers’ market, where I’d pick up the ripest, juiciest nectarines I could find—each bite bursting with flavor and nostalgia.
This dish is not just about indulging in sweet, caramelized nectarines; it’s about relishing in memories and creating new ones. The combination of warm, baked nectarines drizzled with a luscious cinnamon honey sauce will surely transport you back to sweet moments spent with loved ones. So grab your apron and let’s get baking!
A Taste of Nostalgia
One of my fondest memories revolves around my grandmother’s kitchen, filled with the aromas of her famous desserts. Every summer, without fail, she would host family gatherings that overflowed with love and laughter. One year, she decided to surprise us with baked nectarines drizzled in a cinnamon honey sauce. I still remember the first bite—the soft fruit melting in my mouth, the sweet honey enhancing the nectarines’ natural flavor, and the warm spices wrapping around me like a cozy blanket.
This recipe became a family favorite that carried through generations, representing the essence of family bonding over food. It reminded us that simplicity is often the key to perfection. Now, as I share this cherished recipe with you, I hope you create your own priceless memories and perhaps find the same joy I did back then.
Ingredients
Here’s what you’ll need to whip up these glorious baked nectarines:
- Nectarines (4 ripe ones): Choose nectarines that are slightly soft to the touch for optimal sweetness. You can substitute with peaches if nectarines aren’t available.
- Honey (1/4 cup): A natural sweetener that pairs beautifully with fruits! If you’re looking for a vegan option, maple syrup works wonderfully, too.
- Cinnamon (1 teaspoon): This warm spice adds depth and comfort. If you want to experiment, try using nutmeg for a different flavor profile.
- Vanilla extract (1 teaspoon): Enhances the sweetness and brings a lovely aroma. You can opt for almond extract for a nutty twist.
- Butter (2 tablespoons): Adds richness to the sauce. For a dairy-free option, use coconut oil or vegan butter.
- Chopped nuts (optional, for garnish): Almonds or walnuts add a nice crunch and extra texture. Feel free to leave them out if you’re nut-free.
These ingredients come together to create a symphony of flavors, making your baked nectarines really sing!
Step-by-Step Instructions
Ready to transform your kitchen into a haven of sweet scents? Let’s turn those nectarines into something magical!
-
Preheat Your Oven: Heat your oven to 350°F (175°C). This ensures a perfectly baked nectarines situation.
-
Prepare the Nectarines: Wash the nectarines thoroughly. Cut each one in half, removing the pit carefully. You can also slice them into wedges if you prefer! Place them cut-side up in a baking dish. A bit of spacing is preferable, so they bake evenly.
-
Make the Cinnamon Honey Sauce: In a small saucepan over medium heat, combine the honey, butter, cinnamon, and vanilla extract. Stir gently until the butter melts and the mixture is smooth. If you want extra flavor, let it simmer for a minute or two. Just don’t let it boil!
-
Drizzle and Bake: Pour the warm sauce evenly over the nectarines, making sure each piece is coated with that glorious mixture. Bake for about 20-25 minutes until the nectarines are soft and have absorbed the flavors of the sauce. Pro tip: Keep an eye on them to prevent burning!
-
Broil for Extra Caramelization: If you want a little extra caramelization on top, switch your oven to broil for the last 2-3 minutes. Just watch closely to prevent any charring.
-
Let it Cool: Allow the baked nectarines to cool for a few minutes—this will help the sauce thicken slightly.
There you have it! An easy recipe that transforms simple ingredients into a spectacular dessert. Bonus: the whole process takes less than 45 minutes!
Serving Suggestions
To serve these beauties, simply plate the baked nectarines with a drizzle of the cinnamon honey sauce on top. For an extra touch of indulgence, consider adding a dollop of whipped cream or a scoop of vanilla ice cream—if you’re feeling fancy, a sprinkle of fresh mint can elevate this dessert to gourmet status!
Recipe Variations
- Coconut Bliss: Drizzle your nectarines with coconut cream instead of conventional toppings for a tropical twist.
- Grilled Nectarines: Fire up the grill instead! Slice the nectarines in half, grill them for a few minutes, and then drizzle the sauce over them.
- Berry Medley: Add fresh berries around the nectarines for a burst of color and flavor.
- Savory Twist: Sprinkle in some goat cheese after baking for an adventurous sweet-savory combo.
- Spice It Up: Add a pinch of cayenne pepper to your cinnamon honey sauce. It adds a fun kick!
Chef’s Notes
Oh, don’t get me started on kitchen mishaps! One time, I was in such a tizzy to impress my guests with these baked nectarines that I accidentally left out the vanilla extract. Let’s just say, the flavor wasn’t quite right, and I determined then and there to never skip a step! Over the years, I’ve tweaked this recipe to ensure that it’s just right for every occasion. It’s now a staple in my dessert rotation, and I love how it evolves every summer with different fruits and toppings.
FAQs and Troubleshooting
1. Can I use different fruits?
Absolutely! Peaches, plums, or even apples work beautifully; just adjust cooking time according to the fruit’s ripeness and texture.
2. My sauce isn’t thickening. What did I do wrong?
Sometimes, it may take a little longer to thicken, especially if the heat is too low. Keep it over medium heat until you’ve reached the desired consistency, stirring occasionally.
3. Can I make this in advance?
Definitely! Prepare the nectarines and sauce but bake them just before serving. The warm, fresh aroma is unbeatable!
4. How do I store leftovers?
Store them in an airtight container in the refrigerator for up to three days. Warm them slightly before serving again to rekindle that delightful flavor!
Indulging in baked nectarines topped with cinnamon honey sauce is more than a dessert; it’s an experience that brings comfort, joy, and a touch of nostalgia to the table. So, let’s spark those kitchen adventures! Dive in, get creative, and make it yours—because that’s the most delicious part of cooking. Enjoy every bite, my friend! 🍑✨
Print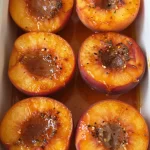
Baked Nectarines with Cinnamon Honey Sauce
- Total Time: 45 minutes
- Yield: 4 servings 1x
- Diet: Vegetarian
Description
A delightful summer dessert featuring warm, baked nectarines drizzled with a luscious cinnamon honey sauce.
Ingredients
- 4 ripe nectarines
- 1/4 cup honey
- 1 teaspoon cinnamon
- 1 teaspoon vanilla extract
- 2 tablespoons butter
- Chopped nuts (optional, for garnish)
Instructions
- Preheat your oven to 350°F (175°C).
- Prepare the nectarines by washing and cutting them in half, removing the pit carefully.
- Make the cinnamon honey sauce by combining honey, butter, cinnamon, and vanilla extract in a small saucepan over medium heat.
- Drizzle the sauce evenly over the nectarines.
- Bake for 20-25 minutes until the nectarines are soft.
- Broil for an additional 2-3 minutes for extra caramelization.
- Let them cool for a few minutes before serving.
Notes
Consider serving with whipped cream or vanilla ice cream for an indulgent treat. Can be made with peaches or other soft fruits.
- Prep Time: 15 minutes
- Cook Time: 30 minutes
- Category: Dessert
- Method: Baking
- Cuisine: American
Nutrition
- Serving Size: 1 serving
- Calories: 220
- Sugar: 30g
- Sodium: 150mg
- Fat: 8g
- Saturated Fat: 5g
- Unsaturated Fat: 3g
- Trans Fat: 0g
- Carbohydrates: 32g
- Fiber: 3g
- Protein: 1g
- Cholesterol: 20mg
Keywords: baked nectarines, dessert, summer recipe, cinnamon honey sauce, simple dessert
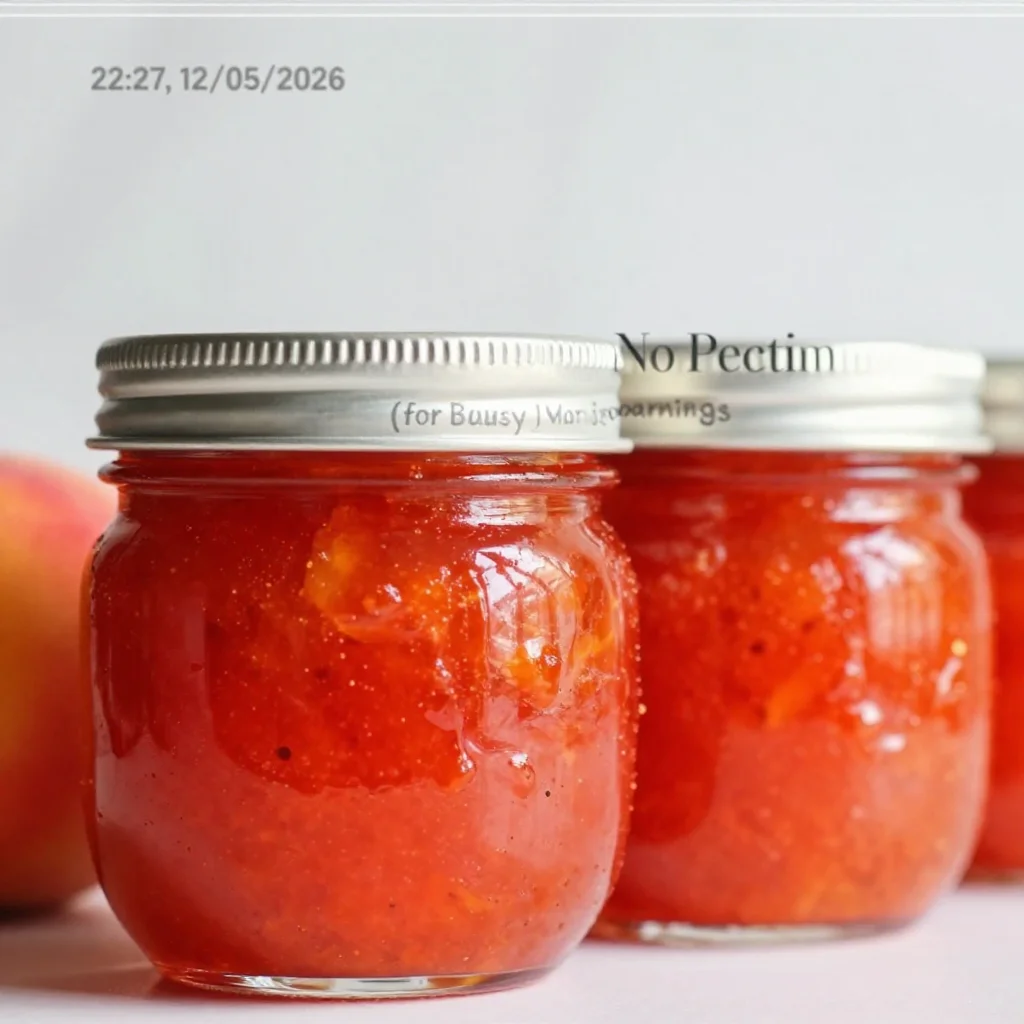
Ingredient Nectarine Jam (No Pectin) for Busy Mornings
3 Ingredient Nectarine Jam Without Pectin: A Sweet Summer Delight
Welcome to my kitchen! If you’re anything like me, the mere thought of juicy nectarines instantly conjures a sense of warmth and nostalgia. There’s a certain bliss that comes from transforming those ripe, sun-kissed fruits into something delicious that can be enjoyed all year round. Today, I’m thrilled to share with you a simple yet utterly delightful recipe for 3 Ingredient Nectarine Jam Without Pectin.
Picture this: it’s a warm summer afternoon, and the sun is gently filtering through the kitchen window. The air is filled with the sweet aroma of nectarines simmering away on the stove, turning into a luscious jam that captures the essence of sunny days. This jam is not just a condiment; it’s a hug in a jar! Just imagine spreading it on warm toast, adding it to yogurt, or even dolloping it over ice cream. What’s not to love?
The beauty of this recipe lies in its simplicity. With just three ingredients, you may initially think it can’t yield that much flavor. But oh, let me assure you, the combination of fresh nectarines, sugar, and lemon juice works magic together! You’ll find yourself not wanting to share it, and trust me, once you taste it, you’ll understand why.
So, whether you’re gearing up for a summer picnic, preparing a cozy brunch, or simply wanting something sweet for your breakfast, this nectar jam will completely elevate your spread. Let’s dive into this delightful journey of making nectar jam together. I promise it will be a fun and rewarding experience!
A Sweet Memory
I can still vividly recall the first time I made jam. I was a wide-eyed teenager, standing in the kitchen beside my grandmother, a true jam-making aficionado. Every summer, she would gather her fresh fruit haul and perform her culinary magic. I remember the colorful array of fruits she’d lay out on the counter, but it was her fragrant nectarine jam that truly stole my heart.
One particular afternoon, as we sliced through plump nectarines, she shared stories of her summer visits to the local orchard, the same place where her mother had taken her as a child. That sense of tradition, blending flavors and stories, felt like an unspoken bond between generations. Watching the nectarines bubble in the pot, gauging the perfect sweetness as we sampled along the way, made it not just cooking, but an enchanting experience filled with laughter and love. Since then, every time I make nectar jam, I’m reminded of those blissful afternoons spent in my grandmother’s kitchen, which makes it even more special.
Ingredients
Gather these ingredients to create your own jar of nectar jam:
-
Fresh Nectarines (about 2 pounds): The star of our jam! Choose ripe nectarines for the best flavor. If you can’t find fresh, you can use frozen nectarines—just thaw them and drain any excess liquid before using.
-
Sugar (1 cup): This helps to sweeten and thicken our jam naturally. If you want to reduce sugar, you might experiment with honey or agave syrup, but those will slightly change the flavor profile.
-
Fresh Lemon Juice (2 tablespoons): The acidity from lemon juice not only brightens the flavor but also helps with the preservation of the jam. If you’re in a pinch, bottled lemon juice will work, but freshly squeezed is always best!
Putting together these simple, fresh ingredients, you’re already on your way to whipping up something extraordinary. Don’t worry; it’s not as complicated as it sounds!
Step-by-Step Instructions
Now let’s get into the cooking! Follow these steps, and you’ll have a batch of delightful nectar jam in no time.
-
Prep the Nectarines: Start by washing your nectarines thoroughly. There’s something lovely about seeing all that sunshine-soaked fruit glistening! Slice them in half, remove the pits, and chop them into small pieces (about 1-inch chunks). Leave the skin on for added texture and vibrant color.
-
Mix Ingredients: In a large, heavy-bottomed pot, combine the chopped nectarines, sugar, and fresh lemon juice. Stir everything together gently to coat the nectarines in the sugar. Let this sit for about 30 minutes to allow the fruit to macerate and release its juices. This step is crucial as it sets the stage for the perfect consistency!
-
Cook the Jam: Place your pot over medium heat and bring the mixture to a gentle simmer. You will start to see the sugar dissolve as the nectarines become soft. Stir occasionally to prevent sticking and ensure even cooking. It will take about 20-30 minutes to reach a thick, jam-like consistency.
Chef’s Tip: To check if your jam has thickened properly, do the "plate test." Scoop a spoonful of jam and place it on a chilled plate. Let it sit for a minute, then run your finger through the middle. If it holds its shape and doesn’t immediately flood back together, it’s perfect!
-
Cool and Store: Once you’re happy with the consistency, remove the pot from the heat. Let the jam cool for about 10-15 minutes before transferring it to clean, sterilized jars. You can store the jam in the refrigerator for up to 3 weeks or process it in a water bath to preserve it for longer.
Congratulations—your very own nectar jam is ready!
Serving Suggestions
This nectar jam is so versatile and can be enjoyed in numerous ways. Spread it on warm toast or croissants for a delicious breakfast treat. It’s also delightful drizzled over pancakes or waffles. For a simple but elegant dessert, spoon it atop vanilla yogurt or ice cream for an indulgent treat. You can even stir it into oatmeal for a little flavor boost.
Recipe Variations
Don’t be afraid to play with flavors! Here are some creative twists to experiment with:
-
Spiced Nectarine Jam: Add a pinch of cinnamon or nutmeg for a warm, spiced flavor.
-
Zesty Citrus: Mix in the zest of an orange for a bright, citrusy kick that complements the nectarines beautifully.
-
Herb-Infused: Experiment with adding some fresh herbs like basil or mint for a delightful twist.
-
Mixed Fruit Jam: Combine nectarines with other summer fruits like peaches, apricots, or berries for a more complex flavor profile.
These variations will make each batch unique, and they can be delightful surprises for your family and friends!
Chef’s Notes
Making nectar jam takes me back to those summers spent with my grandmother. Over the years, I’ve simplified the process to make it more accessible. I initially tried adding pectin, but found that it didn’t need it at all. The natural pectin in the nectarines combined with the sugar and lemon juice yield a wonderfully satisfying consistency. This recipe is all about celebrating the fruit and keeping it as simple and natural as possible.
And trust me, the joy on my family’s faces whenever they taste this jam makes the whole kitchen adventure worthwhile. It may not always be perfect—sometimes it’s too thick, sometimes a bit loose—but that’s all part of the fun!
FAQs and Troubleshooting
1. What if my jam is too runny?
If your jam didn’t set up as you’d hoped, you can return it to the pot and cook it for a little longer until it thickens up. Just remember to stir often to prevent burning!
2. Can I use frozen nectarines?
Absolutely! Frozen nectarines work perfectly for this recipe. Just make sure to thaw them and drain any excess moisture before using.
3. How do I store my jam?
Store your nectar jam in clean, sterilized jars. Keep it in the fridge if you plan to use it within a few weeks. For longer storage, process the jars in a boiling water bath to seal them.
4. Can I reduce the sugar?
You can try reducing the sugar, but keep in mind that it helps with both sweetness and preservation. If you choose to use less, the jam might have a different consistency.
Nutritional Info
Each serving of this delightful nectar jam is not only a sweet treat but also contributes to your daily fruit intake. While I don’t usually calculate exact values, you can expect it to be a low-calorie option compared to many commercial jams, and it’s free from preservatives!
So, there you have it—a delightful, easy, and nostalgic 3-Ingredient Nectarine Jam without pectin! I hope you enjoy making this recipe as much as I do. Happy cooking, and may your kitchen always be filled with love and laughter!
Print
3 Ingredient Nectarine Jam Without Pectin
- Total Time: 45
- Yield: 4 servings
- Diet: Vegetarian
Description
A simple and delightful nectar jam made with fresh nectarines, sugar, and lemon juice, perfect for spreading on toast or drizzling over desserts.
Ingredients
- Fresh Nectarines (about 2 pounds)
- Sugar (1 cup)
- Fresh Lemon Juice (2 tablespoons)
Instructions
- Prep the nectarines: Wash, slice in half, remove the pits, and chop into small pieces, leaving the skin on.
- Mix ingredients: In a large pot, combine nectarines, sugar, and lemon juice. Stir gently and let sit for 30 minutes.
- Cook the jam: Over medium heat, bring to a simmer, stirring occasionally for about 20-30 minutes until thickened.
- Cool and store: Remove from heat, cool for 10-15 minutes, then transfer to sterilized jars.
Notes
For best results, use fresh nectarines. You can experiment with flavors by adding spices or other fruits.
- Prep Time: 15
- Cook Time: 30
- Category: Condiment
- Method: Cooking
- Cuisine: American
Nutrition
- Serving Size: 1 tablespoon
- Calories: 50
- Sugar: 10g
- Sodium: 0mg
- Fat: 0g
- Saturated Fat: 0g
- Unsaturated Fat: 0g
- Trans Fat: 0g
- Carbohydrates: 13g
- Fiber: 1g
- Protein: 0g
- Cholesterol: 0mg
Keywords: nectarine jam, summer recipes, fruit preserves
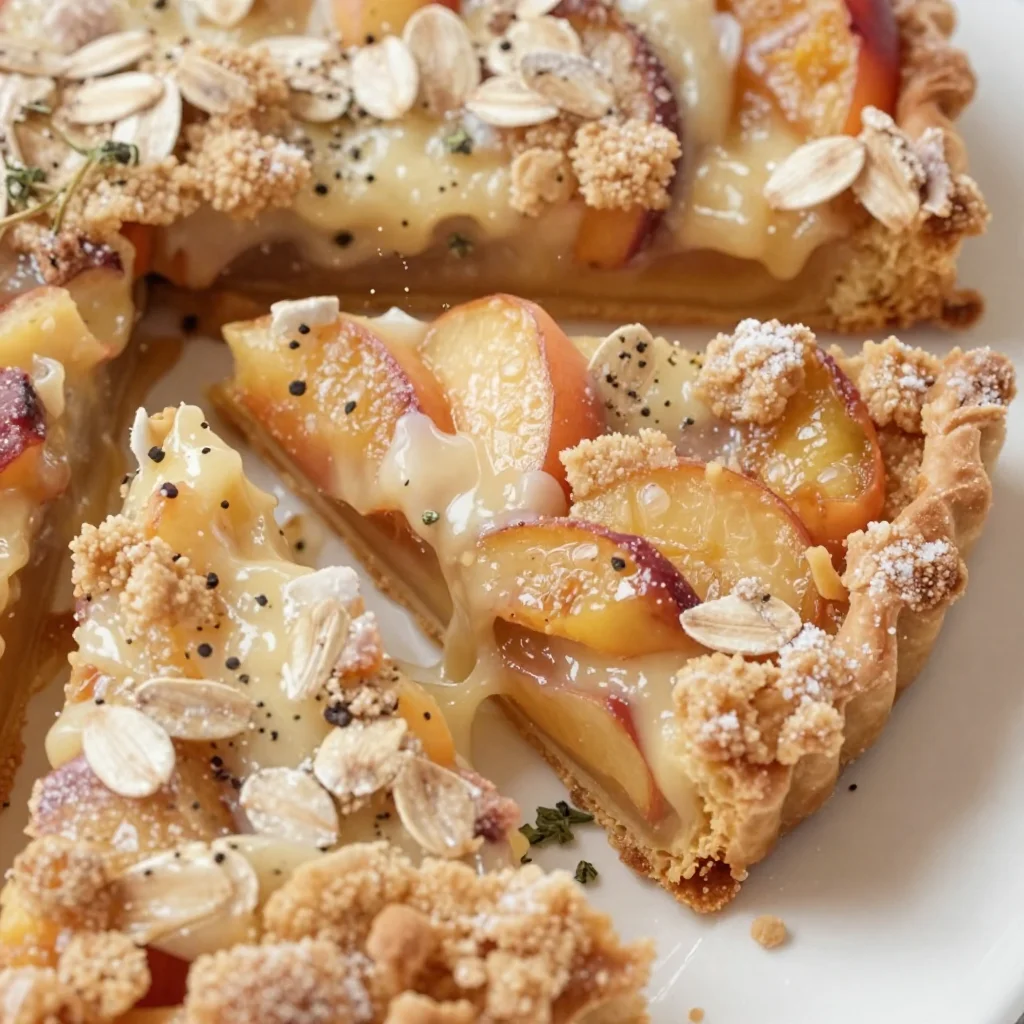
Summer Nectarine Crumb Tart: Quick, Fresh, Crisp & Easy
The Delight of Baking: Nectarine Crumb Tart
Welcome to my cozy kitchen, where the air is positively bursting with the aromas of freshly baked goods! I’m Olivia Bennett, and today, I’m excited to share with you a delightful recipe that has become a cherished staple in my home: the Nectarine Crumb Tart. If you love the sweet taste of summer and the crunch of a perfect crumbly topping, you’re in for a treat. This dessert isn’t just about satisfying your sweet tooth—it’s a celebration of seasons and gatherings, reminiscent of sun-soaked picnics and laughter shared over slices of something delicious.
There’s something inherently comforting about tarts, don’t you think? They evoke memories of afternoon teas, sunny outdoor gatherings, and family traditions passed down through generations. And this Nectarine Crumb Tart? It’s the epitome of those wonderful moments. Imagine biting into a buttery, crumbly crust, followed by juicy, sweet nectarines, all topped with a crisp, cinnamon-spiced crumb. It’s like summer on a plate, and it’s sure to make your kitchen feel like home.
Now, let me take you back to my childhood for just a moment. My grandmother used to make peach tarts every summer when the fruit was at its peak. I remember standing on a stool, peering over the countertop as she rolled out the dough, dusting it lightly with flour. The best part was always the moment she handed me a slice to savor. The smile on her face as she watched me enjoy her creation filled my heart with warmth and love. Fast forward a few years, and I’ve adapted that family recipe into my very own Nectarine Crumb Tart, honoring those sweet memories while creating new ones in my kitchen.
So, grab your apron, and let’s work together to create something magic!
Ingredients
Here’s what you’ll need to whip up this Nectarine Crumb Tart:
For the Tart Crust:
-
1 ½ cups all-purpose flour
A standard in any baking recipe, the flour provides the foundation for our crust. You can substitute it with almond flour for a gluten-free version—it’ll have a delightful nutty flavor! -
½ cup unsalted butter, softened
The secret to a flaky crust! You might use coconut oil as a dairy-free alternative, but I recommend keeping it simple with butter if you can. -
½ cup granulated sugar
Sweetens the crust just enough. If you prefer a more complex flavor, try using brown sugar! -
1 egg yolk
This adds richness to our crust. You can omit it for a vegan option, but keep in mind that the texture might change a bit.
For the Filling:
-
4 ripe nectarines, sliced
The star of the show! Substitute with peaches or plums if nectarines aren’t available. -
¼ cup brown sugar
For a deeper, caramel-like sweetness. Feel free to use maple syrup for a unique twist! -
1 tbsp lemon juice
Balances the sweetness and enhances the fruit’s flavor. Fresh is always best!
For the Crumb Topping:
-
¾ cup all-purpose flour
Just like our pie crust, this helps create that irresistible crumb topping. -
½ cup oats
Adds texture and heartiness. Swap these out for crushed nuts if you’re looking for a gluten-free option. -
½ cup brown sugar
Use this to bring out a lovely caramel flavor in the topping. -
1 tsp cinnamon
A warm spice that complements the nectarines beautifully. You can experiment with nutmeg for a slightly different flavor profile! -
½ cup unsalted butter, melted
Helps bind the crumbs together. If you’re in a pinch, melted coconut oil works as a substitute!
Step-by-Step Instructions
Preheat and Prep
-
Preheat your oven to 350°F (175°C).
Let’s get that oven nice and warm! This will ensure your tart bakes evenly. -
Prepare the tart pan.
Grease a 9-inch tart pan with non-stick spray or butter. This is a crucial step to ensure easy removal after baking, so don’t skip it!
Make the Tart Crust
-
Combine the dry ingredients.
In a mixing bowl, combine 1 ½ cups all-purpose flour and ½ cup granulated sugar. Whisk them together so they’re evenly mixed. -
Add the butter.
Cut in ½ cup of softened unsalted butter using a pastry cutter or your fingers until the mixture resembles coarse crumbs. It’s okay to get a little messy here—embrace it! -
Incorporate the egg yolk.
Add the egg yolk and mix until the dough comes together. It should be slightly crumbly but hold its shape when pressed. -
Press the dough into the pan.
Flatten the dough evenly across the bottom and up the sides of the tart pan. Make sure there are no cracks for a perfect bake! -
Chill the crust.
Pop your tart pan in the fridge for about 30 minutes. This helps prevent it from shrinking while baking.
Prepare the Filling
-
Slice the nectarines.
While the crust chills, slice up those delicious nectarines. Aim for even slices for a beautifully styled tart! -
Mix the filling.
In a bowl, toss the nectarines with ¼ cup brown sugar and 1 tablespoon lemon juice. This will not only sweeten the nectarines but also add a lovely brightness!
Make the Crumb Topping
-
Combine dry ingredients for the topping.
In another bowl, combine ¾ cup flour, ½ cup oats, ½ cup brown sugar, and 1 teaspoon cinnamon. Stir until mixed well. -
Add melted butter.
Pour in ½ cup melted unsalted butter and mix until crumbly—you want it to hold together slightly but remain crumb-like.
Assemble and Bake
-
Spread the filling.
Take your chilled crust out of the fridge and add the sweetened nectarines in an even layer over the crust. -
Top with crumbs.
Evenly sprinkle the crumb topping over the nectarines. It’s okay if some of the filling peeks through; it adds character! -
Bake the tart.
Place the tart in the preheated oven and bake for 40-45 minutes, or until the top is golden and the nectarines are bubbling. The kitchen will smell incredible, trust me! -
Cool and serve.
Once baked, allow the tart to cool for at least 15 minutes before slicing. This will help the filling to set up a tad.
Serving Suggestions
When it comes to serving, I love presenting my Nectarine Crumb Tart warm from the oven with a scoop of vanilla ice cream or a dollop of freshly whipped cream. A light dusting of powdered sugar adds a touch of elegance, and don’t forget a sprig of mint for a pop of color! You can even pair it with a refreshing herbal tea for a delightful afternoon treat.
Recipe Variations
-
Mixed Fruit Tart: This recipe isn’t just limited to nectarines! Use a medley of summer fruits like peaches, plums, and cherries for a colorful twist.
-
Crispy Walnut Crust: Replace the all-purpose flour for the crust with ground walnuts for a gluten-free and nutty base.
-
Spiced Crumb: Add nutmeg or cardamom to the crumb topping for an extra aromatic flavor.
-
Coconut Twist: Swap half the butter in the crust for coconut oil and add shredded coconut to the crumb mixture for a tropical vibe.
-
Savory Option: For a savory turn on this dish, consider using tomatoes and fresh herbs in place of nectarines—perfect for a brunch or light lunch!
Chef’s Notes
This Nectarine Crumb Tart has evolved over the years in my kitchen. Originally inspired by my grandmother’s peach tarts, I started experimenting with different fruits and toppings. One hilarious memory comes to mind when I accidentally used salt instead of sugar in a batch once. Let’s just say, the surprise face of my family was priceless! Their laughter was worth every salty bite! Now, I always double-check my ingredients before diving in. The beauty of this dish lies in its versatility—don’t be afraid to mix things up and make it your own!
FAQs and Troubleshooting
-
Why is my crust soggy?
Make sure you pre-bake the crust according to the recipe—this helps to set it before adding the filling. If your crust is still soggy, it may have needed longer in the oven or lacked chilling time. -
How do I prevent the nectarines from browning?
Tossing the nectarines in lemon juice as specified in the recipe will help prevent browning and enhance flavor! -
My crumb topping isn’t holding together like I wanted. Any tips?
Make sure your butter is melted and well incorporated with the dry ingredients. You want it crumbly yet somewhat compact. If it’s too loose, adding a bit more melted butter can help bind it. -
Can I make this tart ahead of time?
Absolutely! You can make the tart a day in advance; simply reheat it slightly before serving to enjoy that fresh-baked taste!
Nutritional Info
While I typically focus on the joy of cooking rather than strict nutritional guidelines, here’s a little breakdown per serving to help you enjoy this delightful dish guilt-free (approximate values):
- Calories: 260
- Fat: 12g
- Carbohydrates: 36g
- Fiber: 2g
- Sugar: 12g
- Protein: 3g
There you have it: my beloved Nectarine Crumb Tart! Remember, it’s not just about the food; it’s about the memories we create around it. I hope this tart finds its way into your kitchen and your heart, just like it did mine. Happy baking!
Print
Nectarine Crumb Tart
- Total Time: 75 minutes
- Yield: 8 servings 1x
- Diet: Vegetarian
Description
A delightful Nectarine Crumb Tart with a buttery crust and cinnamon-spiced topping, perfect for summery gatherings.
Ingredients
- 1 ½ cups all-purpose flour
- ½ cup unsalted butter, softened
- ½ cup granulated sugar
- 1 egg yolk
- 4 ripe nectarines, sliced
- ¼ cup brown sugar
- 1 tbsp lemon juice
- ¾ cup all-purpose flour (for crumb topping)
- ½ cup oats
- ½ cup brown sugar (for crumb topping)
- 1 tsp cinnamon
- ½ cup unsalted butter, melted (for crumb topping)
Instructions
- Preheat your oven to 350°F (175°C).
- Prepare a 9-inch tart pan by greasing it with non-stick spray or butter.
- Combine 1 ½ cups all-purpose flour and ½ cup granulated sugar in a mixing bowl.
- Add ½ cup softened unsalted butter and cut until the mixture resembles coarse crumbs.
- Incorporate the egg yolk and mix until the dough comes together.
- Press the dough into the bottom and up the sides of the tart pan.
- Chill the crust in the fridge for about 30 minutes.
- Slice the nectarines while the crust chills.
- Mix nectarines with ¼ cup brown sugar and 1 tablespoon lemon juice in a bowl.
- Combine ¾ cup flour, ½ cup oats, ½ cup brown sugar, and 1 teaspoon cinnamon for the crumb topping.
- Add ½ cup melted unsalted butter to the dry ingredients and mix until crumbly.
- Spread the nectarines evenly over the chilled crust.
- Top with the crumb mixture, allowing some filling to peek through.
- Bake the tart for 40-45 minutes until golden and the nectarines are bubbling.
- Cool for at least 15 minutes before slicing.
Notes
Serve warm with vanilla ice cream or whipped cream for a delightful treat.
- Prep Time: 30 minutes
- Cook Time: 45 minutes
- Category: Dessert
- Method: Baking
- Cuisine: American
Nutrition
- Serving Size: 1 slice
- Calories: 260
- Sugar: 12g
- Sodium: 100mg
- Fat: 12g
- Saturated Fat: 7g
- Unsaturated Fat: 5g
- Trans Fat: 0g
- Carbohydrates: 36g
- Fiber: 2g
- Protein: 3g
- Cholesterol: 30mg
Keywords: nectarine tart, crumb tart, summer dessert, baked tart, fruit dessert
Minute Nectarine Salsa: Fresh, Vibrant Summer Flavor
Nectarine Salsa Recipe: Fresh, Vibrant Summer Twist
Welcome to my kitchen, friends! I’m so excited to share one of my all-time favorite summer recipes with you — Nectarine Salsa! This recipe is a burst of sunshine that captures the essence of summer in every juicy bite. Chances are, if you’ve been wandering through your local market, you’ve spotted those plump, fuzzy nectarines just waiting to be taken home. They’re practically begging to be transformed into a delicious, refreshing salsa that you can pair with chips, grilled meats, or even spoon onto a simple salad.
Picture this: You’ve just come home from a hot summer afternoon spent at the park or lounging by the pool. The sun is setting, casting a warm golden glow through your kitchen window. You want to whip up something light and flavorful that perfectly complements the warm weather and brightens up your evening. That’s where this Nectarine Salsa comes into play! It’s vibrant, it’s easy to make, and trust me, it’s a crowd-pleaser.
This salsa isn’t just about the taste — it’s about making memories too. I remember the first time I made this dish: it was a family gathering, and I wanted to bring something fun and unique to the table. With a few simple ingredients, I conjured up this delightful concoction that had everyone asking for more. Picture the smiles and laughter as we enjoyed the salsa with grilled shrimp skewers — the sweet nectarines perfectly balancing the smoky char of the grill. It wasn’t long before everyone was sharing their own stories about summer barbecues and favorite seasonal dishes. That’s the magic of food, right? It brings us together.
Ingredients
Here’s what you’ll need to create your own delicious Nectarine Salsa:
-
Nectarines (4 ripe): These are the star of the show! Look for fruits that are slightly soft to the touch and emit a sweet fragrance. If you can’t find nectarines or want to mix it up, peaches work beautifully too!
-
Red onion (1 small): It adds a crunchy bite and a mild flavor. If red onion is too pungent for your taste, feel free to substitute with sweet onions or shallots.
-
Jalapeño (1, seeded and minced): This ingredient gives your salsa a nice kick! For a milder flavor, use a green bell pepper or skip it altogether, especially if you’re serving kids.
-
Fresh cilantro (1/4 cup, chopped): This herb brings a refreshing brightness to the dish. If you’re not a fan of cilantro, basil is an excellent alternative, providing a different yet delightful flavor.
-
Lime juice (1 lime): Freshly squeezed lime juice enhances the flavors and adds a tangy twist. In a pinch, you can use lemon juice, but lime is really the star here.
-
Salt (to taste): A little sprinkle helps to elevate the flavors — always taste as you go!
-
Black pepper (to taste): Adds a little warmth and complexity. If you like more heat, consider adding a pinch of cayenne pepper instead.
Step-by-Step Instructions
Let’s get cooking! Follow these steps to whip up your vibrant Nectarine Salsa:
-
Prep Your Ingredients: Start by gathering all your ingredients. It’s important to have everything ready to go — that way, you can focus on making your salsa without any interruptions.
-
Chop the Nectarines: Using a sharp knife, dice the nectarines into small pieces, about 1/4 inch. You want them to be bite-sized so you can enjoy that sweet juiciness in each scoop. If you want extra flavor, toss them with a little lime juice as you chop to prevent browning.
-
Dice the Red Onion: Finely chop your red onion, aiming for small pieces to blend seamlessly into the salsa. If you’re concerned about the onion being too strong, soak the diced pieces in cold water for about 10 minutes before mixing; it tones down the sharpness.
-
Mince the Jalapeño: Carefully remove the seeds and the ribs (that’s where most of the heat is). Mince it finely, and add it to the mixing bowl where you’ll combine the ingredients. Remember to wash your hands thoroughly after handling jalapeños, and be cautious to avoid touching your face.
-
Combine the Ingredients: In a large mixing bowl, add the chopped nectarines, red onion, minced jalapeño, and chopped cilantro together. This will be colorful and vibrant!
-
Add Lime Juice and Season: Squeeze the lime juice over the salsa mix and sprinkle in salt and pepper. Mix everything gently but thoroughly with a spatula. Go easy on the mixing—you want to keep the nectarines intact.
-
Taste and Adjust: Here comes the fun part! Grab a chip (or your spoon) and taste your salsa. Adjust the salt, lime juice, or jalapeño according to your preference. Want more zing? Add a touch more lime!
-
Chill Out: Cover your salsa with plastic wrap and let it sit in the refrigerator for at least 30 minutes. This helps all those wonderful flavors meld together, making the salsa even more delicious.
-
Serve with Style: Once your salsa is chilled, it’s time to serve! I love presenting it in a colorful bowl, garnished with a few cilantro leaves and served alongside crispy tortilla chips. Trust me, everyone will be diving in before you can say "Nectarine Salsa!"
Serving Suggestions
Nectarine Salsa is incredibly versatile! Here are a few ways to enjoy it:
- Use it as a vibrant topping for grilled chicken or fish to elevate your protein game.
- Mix it into a fresh green salad for an unexpected twist.
- Serve it with tortilla chips as a delightful appetizer at your summer gatherings.
- Pair it with tacos — it’s a perfect complement to almost any filling!
Recipe Variations
Feel free to get creative with your Nectarine Salsa! Here are a few variations to try:
- Add Avocado: Diced avocado not only adds creaminess, but it also brings a new layer of flavor and texture.
- Mango Salsa: Swap out half of the nectarines for ripe mangoes for a tropical twist to your salsa.
- Spicy Kick: Incorporate some diced habanero or serrano peppers for an extra spicy version that will certainly wake up your taste buds.
- Fruity Zing: Combine nectarines with diced strawberries for a fun, sweet touch that complements savory dishes.
- Smoky Flavor: A pinch of smoked paprika or a splash of chipotle sauce can introduce a delicious smoky dimension to your salsa.
Chef’s Notes
This Nectarine Salsa recipe has evolved over the years in my kitchen. It started as a simple summer snack, but with experimentation, it turned into something so much more! I remember a particular summer BBQ, where a friend of mine added some diced cucumber to the salsa. What a refreshing twist that was! The beautiful thing about this recipe is its adaptability; it invites you to put your own spin on it.
And let’s be honest — there’s nothing quite like standing in the kitchen with your favorite music in the background, the aroma of fresh ingredients surrounding you, and a tasty treat manifesting before your eyes. That’s what cooking is all about!
FAQs and Troubleshooting
1. What if my nectarines aren’t sweet enough?
Not all nectarines are created equal! If your nectarines are a bit tart, consider adding a spoonful of honey or agave syrup to balance the flavors.
2. Can I make this salsa in advance?
Absolutely! Nectarine Salsa can be made a few hours ahead, allowing the flavors to meld beautifully. Just be sure to keep it covered in the fridge!
3. How do I adjust the heat level of my salsa?
If you prefer a milder version, simply reduce the amount of jalapeño you use or omit it entirely. For more heat, switch to spicier peppers or add a pinch of cayenne.
4. Why did my salsa turn brown?
Oxidation can happen with fruits like nectarines and peaches. To prevent browning, always toss your cut fruit with lime juice as soon as you chop them up!
Nutritional Info
While I love sharing mouthwatering recipes, I also believe in balance! Here’s a rough estimate of the nutritional information for a serving of Nectarine Salsa:
- Calories: 50
- Fat: 0.5g
- Carbohydrates: 12g
- Fiber: 2g
- Sugars: 6g
- Protein: 1g
In summary, Nectarine Salsa is not just a dish; it’s a way to connect with others and a way to indulge in the flavors of summer. The next time you find yourself with fresh nectarines, give this recipe a go! I promise you’ll be met with smiles and perhaps even a few requests for a fun kitchen story or two. Happy cooking!
Print
Nectarine Salsa
- Total Time: 45 minutes
- Yield: 4 servings 1x
- Diet: Vegan
Description
A fresh and vibrant salsa that captures the essence of summer with juicy nectarines, perfect for pairing with chips or grilled dishes.
Ingredients
- 4 ripe nectarines, diced
- 1 small red onion, finely chopped
- 1 jalapeño, seeded and minced
- 1/4 cup fresh cilantro, chopped
- Juice of 1 lime
- Salt, to taste
- Black pepper, to taste
Instructions
- Prep your ingredients by gathering everything needed.
- Chop the nectarines into small dice, tossing with lime juice to prevent browning.
- Dice the red onion into small pieces.
- Mince the jalapeño and add it to a mixing bowl.
- Combine the chopped nectarines, red onion, jalapeño, and cilantro.
- Add lime juice, salt, and pepper, mixing gently.
- Taste and adjust seasoning as needed.
- Chill in the refrigerator for at least 30 minutes.
- Serve in a colorful bowl with tortilla chips.
Notes
Feel free to experiment with additional ingredients like avocado or mango for variations.
- Prep Time: 15 minutes
- Cook Time: 0 minutes
- Category: Appetizer
- Method: Mixing
- Cuisine: Mexican
Nutrition
- Serving Size: 1 serving
- Calories: 50
- Sugar: 6g
- Sodium: 50mg
- Fat: 0.5g
- Saturated Fat: 0g
- Unsaturated Fat: 0g
- Trans Fat: 0g
- Carbohydrates: 12g
- Fiber: 2g
- Protein: 1g
- Cholesterol: 0mg
Keywords: nectarine, salsa, summer, vegan, fresh
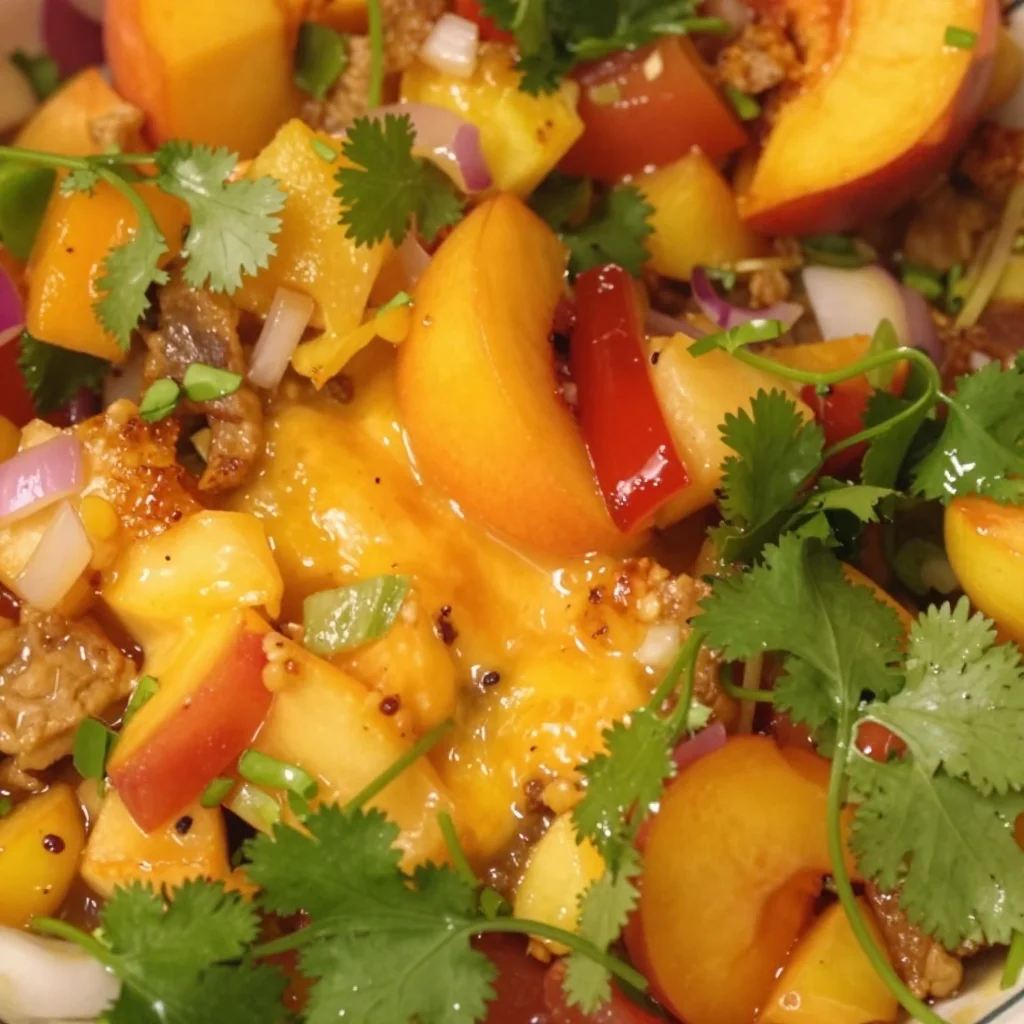
Nectarine Salsa
A Taste of Summer: Nectarine Salsa
Welcome to my kitchen! Today, we’re diving into a vibrant and refreshing recipe that captures the essence of summer — Nectarine Salsa. This dish is a juicy explosion of flavor, and it’s perfect for brightening up your meals and gatherings. Whether you’re hosting a backyard barbecue, enjoying a picnic in the park, or just looking for a zingy topping for your favorite tacos, this salsa is sure to impress. With its delightful blend of sweet, savory, and tangy notes, it’s a celebration of seasonal produce that you won’t want to miss!
Nectarines are like the sun in fruit form — their sweetness and juicy flesh can turn any dish into a fiesta of flavor. I love how versatile nectarines are — you can bake them into desserts, throw them into smoothies, or, of course, toss them into a salsa that will elevate any plate. The best part? Making this salsa is a breeze, and you can whip it up in no time, making it the ultimate last-minute addition to any meal.
In this blog post, I’ll share with you not just the recipe, but the stories, tips, and little secrets that come together to create this dazzling Nectarine Salsa. So put on your apron, grab those nectarines, and let’s get cooking!
A Sassy Summer Memory
Every time I make Nectarine Salsa, I’m transported back to those sun-soaked summer afternoons at my grandmother’s house. Grandma Edith had a way of making even the simplest ingredients shine. I remember one particular summer, when the farmers’ market was bursting with ripe nectarines, and we decided to make a salsa for a family barbecue.
With her apron tied around her waist, Grandma gathered her beloved ingredients: fresh nectarines, vibrant herbs, and a sprinkle of lime juice. It was a family affair; my cousins and I gathered around the kitchen table, chopping and stirring, our laughter echoing against the old tiles. The kitchen smelled incredible, with that sweet scent of nectarines mingling with the crisp aroma of cilantro.
When we finally served the salsa, it was a hit! Everyone around the table scooped it up with tortilla chips and plopped it generously on their tacos. That bright, joyful burst of flavor began a tradition — soul-filling gatherings centered around food and laughter. To this day, I strive to recreate that enchanting moment every time I prepare herbal-infused dishes like this Nectarine Salsa. It’s a memory I’m excited to share with all of you, hoping it inspires many delicious gatherings in your kitchen too!
Ingredients You’ll Need
Here’s what you’ll need to whip up this refreshing Nectarine Salsa:
-
Nectarines (4 ripe)
These juicy fruits are the star of the show. Choose ripe nectarines for optimal sweetness. If you can’t find nectarines, peaches work great too! -
Red Onion (1 small, finely chopped)
Red onions add a lovely crunch and sharpness. If you prefer a milder flavor, you can soak the chopped onion in cold water for a few minutes before adding it to the salsa. -
Cilantro (1/4 cup, chopped)
This herb brings a fresh, zesty note that perfectly complements the sweetness of nectarines. Don’t like cilantro? Try using fresh parsley for a different flavor profile. -
Jalapeño (1, seeded and minced)
For a bit of heat! Adjust the amount based on your spice tolerance. If you’d like to keep it mild, omit the jalapeño or use a bell pepper instead for sweetness without the kick. -
Lime Juice (from 1 lime)
Freshly squeezed lime juice adds essential acidity to balance the sweetness. Key lime juice can make a delightful alternative if you’re feeling adventurous! -
Salt (1/4 teaspoon, or to taste)
A pinch of salt enhances all the flavors. Remember to adjust the amount based on your taste preferences. -
Black Pepper (freshly ground, to taste)
To finish, a few grinds of black pepper add depth and warmth to the salsa. If you enjoy a smoky flavor, try using smoked paprika instead!
Step-by-Step Instructions
-
Chop the Nectarines
Start by washing your nectarines thoroughly to remove any residue. Cut them in half, remove the pit, and dice the flesh into small cubes. Aim for about ¼-inch pieces — this helps the flavors meld together beautifully. Feel free to snack on any excess nectarines; they’re too delicious to resist! -
Prepare the Red Onion
Next, peel your red onion and chop it finely. The key here is to take your time, ensuring the pieces are small enough to blend well with the nectarines. If you find the onion’s flavor too pungent for your taste, remember the soaking trick: submerge the chopped onion in cold water for 10 minutes before using. Drain well before adding it to the salsa. -
Mince the Jalapeño
Put on a pair of kitchen gloves (especially if you’re sensitive to heat) and carefully cut the jalapeño in half. Remove the seeds and membranes for a milder salsa, and then mince the remaining pepper. Adjust based on how spicy you want the salsa to be; you can always add more! -
Chop the Cilantro
Rinse the cilantro under cold water, shake off the excess moisture, and then roughly chop it. You can also use a knife or kitchen scissors; just make sure to remove any thick stems for a better texture. I can’t emphasize enough how cilantro brightens the entire dish! -
Mix it All Together
In a large mixing bowl, combine the diced nectarines, chopped red onion, minced jalapeño, and cilantro. Drizzle the fresh lime juice over the mixture and sprinkle with salt and black pepper. Gently toss everything together using a spatula or a wooden spoon, being careful not to mash the nectarines. -
Taste and Adjust
This is the most enjoyable part! Taste your salsa and see if it needs more lime juice, salt, or jalapeño. Remember, this recipe is all about balancing flavors to suit your personal taste. Don’t hesitate to get creative! -
Chill Before Serving
For the best flavor, let your Nectarine Salsa chill in the refrigerator for at least 30 minutes before serving. This time allows the flavors to marry and intensify—a little salsa magic happens!
Serving Suggestions
Now that your Nectarine Salsa is ready, it’s time to serve it! I love to present it in a beautiful bowl, surrounded by crispy tortilla chips for a fun appetizer. Alternatively, you can serve it over grilled fish or chicken for a refreshing twist. Don’t forget to garnish with a sprig of cilantro, a wedge of lime, or a sprinkle of zesty chili powder for that final touch!
Recipe Variations
Get creative with your Nectarine Salsa! Here are some fun twists to try:
- Tropical Twist: Add diced mango or pineapple for a tropical flair. The sweetness of these fruits pairs beautifully with the nectarines.
- Avocado Bliss: Stir in some diced avocado for extra creaminess and a rich texture.
- Honey Drizzle: A touch of honey can complement the flavors wonderfully, especially if you like a sweeter salsa.
- Smoky Flavor: Add smoked paprika or chipotle for a smoky depth that’s irresistible.
- Herb Swap: Use mint or basil instead of cilantro for a different herbal flavor profile that makes the salsa unique.
Chef’s Notes
Every time I make Nectarine Salsa, I can’t help but chuckle at the time I accidentally grabbed a mini bottle of lemon juice instead of fresh limes. Let’s just say, my salsa had an unexpected twist! But, hey, cooking is all about experimenting and learning from those moments. That’s the beauty of it. Over the years, I’ve refined this recipe, and each version tells a different story based on the ingredients I had on hand — it’s like a delightful adventure every single time!
FAQs and Troubleshooting
1. Can I make Nectarine Salsa ahead of time?
Absolutely! Just be sure to store it in an airtight container in the fridge. It’s best enjoyed within 2 days, as the nectarines can begin to soften and lose their vibrant texture.
2. What if my nectarines aren’t sweet enough?
If you find your nectarines lacking sweetness, you can add a bit of honey or agave syrup to elevate the flavor! Just a teaspoon at a time will help.
3. My salsa turned out too watery, what should I do?
This can sometimes happen if the nectarines were overly ripe. To remedy this, add a bit more chopped onion or some crushed tortilla chips to absorb excess liquid.
4. How can I make this salsa spicier?
For an extra kick, feel free to add more jalapeño or toss in a pinch of cayenne pepper or a dash of hot sauce. Always taste as you go!
Nutritional Info
While I won’t get into specifics here, Nectarine Salsa is generally light and packed with vitamins, especially vitamin C from the fresh fruits and lime juice. It’s a wonderful addition to a balanced diet!
There you have it, lovely readers! A splash of summer sunshine in the form of Nectarine Salsa. I hope this recipe sparks joy and encourages you to create delicious moments in your kitchen. Remember, cooking is about bringing people together and sharing love through food. Happy cooking, and cheers to fresh flavors!
Print
Nectarine Salsa
- Total Time: 15 minutes
- Yield: 4 servings 1x
- Diet: Vegan
Description
A vibrant and refreshing Nectarine Salsa that captures the essence of summer, perfect for tacos or as a standalone dip.
Ingredients
- 4 ripe Nectarines, diced
- 1 small Red Onion, finely chopped
- 1/4 cup Cilantro, chopped
- 1 Jalapeño, seeded and minced
- Juice of 1 Lime
- 1/4 teaspoon Salt, or to taste
- Black Pepper, freshly ground, to taste
Instructions
- Chop the Nectarines, wash them well, halve, pit, and dice them into small cubes.
- Prepare the Red Onion by peeling and chopping it finely.
- Mince the Jalapeño, removing seeds for a milder flavor.
- Chop the Cilantro and remove any thick stems.
- Mix all ingredients in a large bowl and toss gently.
- Taste and adjust flavors as desired.
- Chill in the refrigerator for at least 30 minutes before serving.
Notes
Feel free to customize with additional ingredients like mango, avocado, or smoked paprika.
- Prep Time: 15 minutes
- Cook Time: 0 minutes
- Category: Appetizer
- Method: Mixing
- Cuisine: Mexican
Nutrition
- Serving Size: 1 serving
- Calories: 120
- Sugar: 10g
- Sodium: 200mg
- Fat: 1g
- Saturated Fat: 0g
- Unsaturated Fat: 1g
- Trans Fat: 0g
- Carbohydrates: 28g
- Fiber: 3g
- Protein: 2g
- Cholesterol: 0mg
Keywords: salsa, nectarines, summer recipe, fresh, appetizer
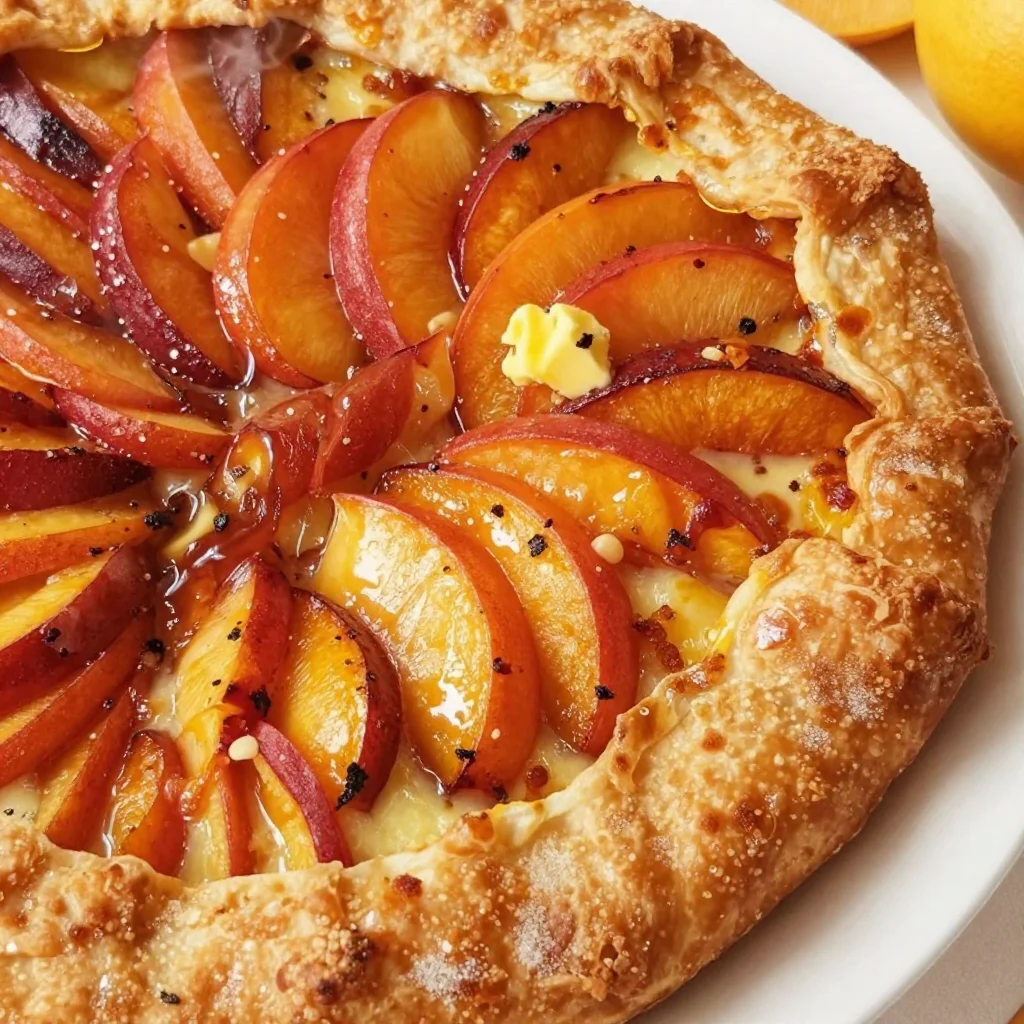
Seasonal Nectarine Galette: Easy Rustic Summer Dessert
Nectarine Galette: A Slice of Summer Bliss
Welcome to my kitchen, food lovers! Today, we’re diving into the world of rustic desserts with a delightful Nectarine Galette. If you’ve never tasted the sweet, sunny richness of ripe nectarines wrapped in a buttery, flaky crust, you’re in for a treat. This dessert is all about celebrating the beautiful bounty of summer, and it’s as simple to make as it is to swoon over.
You might be asking yourself, “What’s a galette?” Well, it’s a fancy French term for a freeform pie that doesn’t require a pie dish or complex crimping. It embodies comfort and ease, much like that worn-in t-shirt you just can’t give up. Perfectly imperfect, it invites creativity, and trust me, no one will mind if your edges are a little rustic—it just adds to the charm!
I started making galettes when I stumbled upon a quaint little bakery in my neighborhood that served an array of these delicious treats. The warm, buttery aroma wafting through the air pulled me in, and let me tell you, after one bite, I was hooked! I’ve been crafting my own versions at home ever since, experimenting with different fruits and flavors. Nectarines became my go-to because of their vibrant juiciness and sweet-tart balance, especially during the summer months when they’re at their prime.
As we embark on this culinary adventure together, not only will I guide you through the steps to make a Nectarine Galette, but I’ll share stories, tips, and secrets that make this dish so special. So, let’s roll up our sleeves and get started on creating something magical that will have your family and friends raving!
A Bit of Nostalgia
One of my fondest memories associated with galettes goes back to a summer visit to my grandmother’s house. Her tiny kitchen was always filled with warmth from the oven and laughter from my family gathered around the table. Every evening, we’d pick fruits from her garden—peaches, plums, and, yes, nectarines! One particular evening, she whipped up a rustic galette, using whatever fruit we had gathered that day. Watching her work brought such a sense of joy; she moved with grace, flicking flour, rolling dough, and spilling sweet nectarines onto the countertop as if creating art.
That galette was a true masterpiece; the sweet filling spilled out ever so slightly, and the golden-brown crust glistened with a hint of sugar. We gathered around the table, forks in hand, ready to dive into that warm, comforting slice of nostalgia. It was more than just dessert; it was a reminder of love woven through the simple act of cooking. Today, I hope to recreate that magic right in your kitchen. Let’s make memories together!
Ingredients
Here’s what you’ll need to create your very own Nectarine Galette:
-
Nectarines (4-5 ripe)
- Choose ripe nectarines that yield slightly when pressed. If you don’t have nectarines, peaches work beautifully as well!
-
Flour (1 ¼ cups)
- All-purpose flour gives the crust its structure. For a gluten-free option, use a 1:1 gluten-free flour blend.
-
Unsalted Butter (½ cup, cold and cubed)
- This is the secret to a flaky crust! Cold butter helps to create that melt-in-your-mouth texture. If you’re dairy-free, try using chilled coconut oil or vegan butter.
-
Sugar (2 tablespoons)
- Sugar not only sweetens the filling but also gives a lovely caramelization on the crust. For a healthier option, use coconut sugar or honey (in the filling only).
-
Salt (¼ teaspoon)
- This enhances the flavors in the crust, balancing the sweetness.
-
Ice Water (3-4 tablespoons)
- Using cold water is key in keeping the butter cold while you work the dough. If you need a bit more moisture, add a splash of lemon juice for flavor.
-
Egg Wash (1 egg mixed with 1 tablespoon water)
- This gives the galette its golden, shiny crust. For a vegan alternative, brush with almond milk.
Step-by-Step Instructions
Let’s roll up our sleeves and get to cooking! Follow these steps to make your dreamy Nectarine Galette.
-
Make the Dough:
- In a mixing bowl, whisk together the flour, sugar, and salt. Add the cold cubed butter and, using your fingers or a pastry cutter, work the butter into the flour until you have a mixture that resembles coarse crumbs. Remember, some chunks of butter are okay!
-
Add Ice Water:
- Slowly add the ice water, one tablespoon at a time, stirring until the dough starts to come together. You want it to hold together without being sticky.
-
Chill the Dough:
- Form the dough into a disc, wrap it in plastic wrap, and refrigerate for at least 30 minutes. This resting time is crucial for developing flavor and making the dough easier to roll out.
-
Prepare the Filling:
- While the dough chills, wash, and slice the nectarines into thin wedges. You can remove the pit easily by cutting around it! Toss the slices with sugar and set aside to let the juices mix.
-
Preheat the Oven:
- Preheat your oven to 400°F (200°C). This will ensure your galette bakes evenly and gets that perfect golden crust.
-
Roll Out the Dough:
- On a floured surface, roll the dough out into a circle about 12 inches wide. Don’t stress if it’s not a perfect circle; remember rustic is the name of the game here! Transfer it to a parchment-lined baking sheet.
-
Assemble the Galette:
- Spoon the nectarines into the center of the dough, leaving about a 2-inch border. Fold the edges of the dough over the nectarines—don’t be afraid of the folds; they’re part of the charm!
-
Apply the Egg Wash:
- Brush the dough with the egg wash to give it that lovely shine. Sprinkle a little sugar on top of the crust for an extra crunchy texture.
-
Bake the Galette:
- Place the galette in your preheated oven and bake for about 30-35 minutes, or until the crust is golden brown and the nectarines are bubbling slightly.
-
Cool and Serve:
- Let your galette cool for about 10-15 minutes on a wire rack. This helps the juices set up a bit so it’s easier to slice.
Serving Suggestions
Your fantastic Nectarine Galette is now ready to serve! For a show-stopping presentation, slice it into wedges and place it on a lovely serving platter. Drizzle a bit of homemade vanilla cream or scoop of vanilla ice cream on top while it’s still warm. You can also dollop some whipped cream on each slice for that extra touch of luxury. Don’t forget a sprig of mint for color!
Recipe Variations
Get creative with these variations to make this galette your own:
- Berry Blend: Add some blueberries or raspberries to the filling for a pop of color and flavor.
- Herb Infusion: Swap out some of the sugar for fresh thyme or rosemary mixed into the filling for a surprising twist.
- Nutty Crunch: Sprinkle some chopped almonds or walnuts on the crust before adding the nectarines for a delightful crunch.
- Spiced Sensation: Add a pinch of cinnamon or nutmeg to the nectarines for a warm, cozy flavor.
Chef’s Notes
Every recipe I create has a little bit of history! Over the years, I’ve learned to adapt my galette based on what’s in season or what I have on hand. I once threw in some leftover apricots and cinnamon; it became an instant favorite among my friends! The beauty of this recipe is in its flexibility—let your imagination run free!
I still remember the first time I made this galette for a gathering. I was so nervous; what if it didn’t turn out? But, much to my delight, everyone loved it! It became our go-to dessert for every summer party thereafter, uniting us over shared moments and laughter.
FAQs and Troubleshooting
1. Why is my galette crust tough?
A tough crust usually means too much flour or overworking the dough. Remember to mix just until combined and use chilled ingredients.
2. My filling looks too liquidy! What should I do?
If your nectarines are very juicy, sprinkle some cornstarch over the fruit before you fold the dough. This helps absorb excess moisture.
3. How can I make it ahead of time?
You can prepare the dough and filling a day in advance. Just store the dough wrapped in the fridge and the fruit in an airtight container.
4. Is it okay to eat leftover galette?
Absolutely! Cover any leftovers tightly and store them in the fridge for up to 3 days. Reheat slices in the oven for a few minutes to restore that lovely crust!
Nutritional Info
(Per serving, approximately)
- Calories: 250
- Total Fat: 12g
- Saturated Fat: 7g
- Cholesterol: 35mg
- Carbohydrates: 32g
- Fiber: 2g
- Sugars: 10g
- Protein: 3g
I hope this Nectarine Galette fills your home with warmth and joy! I’d love to hear how your galette turns out and the stories that emerge from your kitchen. Remember, cooking is all about sharing love and creating memorable moments. Happy Baking!
Print
Nectarine Galette
- Total Time: 50 minutes
- Yield: 8 servings 1x
- Diet: Vegetarian
Description
A delightful, rustic dessert featuring ripe nectarines wrapped in a buttery, flaky crust, perfect for summer.
Ingredients
- 4–5 ripe nectarines
- 1 ¼ cups all-purpose flour
- ½ cup unsalted butter, cold and cubed
- 2 tablespoons sugar
- ¼ teaspoon salt
- 3–4 tablespoons ice water
- 1 egg mixed with 1 tablespoon water (for egg wash)
Instructions
- Make the dough: In a mixing bowl, whisk together the flour, sugar, and salt. Add the cold cubed butter and, using your fingers or a pastry cutter, work the butter into the flour until you have a mixture that resembles coarse crumbs.
- Add ice water: Slowly add the ice water, one tablespoon at a time, stirring until the dough starts to come together.
- Chill the dough: Form the dough into a disc, wrap it in plastic wrap, and refrigerate for at least 30 minutes.
- Prepare the filling: Wash and slice the nectarines into thin wedges. Toss the slices with sugar and set aside.
- Preheat the oven: Preheat your oven to 400°F (200°C).
- Roll out the dough: On a floured surface, roll the dough out into a circle about 12 inches wide and transfer it to a parchment-lined baking sheet.
- Assemble the galette: Spoon the nectarines into the center of the dough, leaving about a 2-inch border. Fold the edges of the dough over the nectarines.
- Apply the egg wash: Brush the dough with the egg wash and sprinkle a little sugar on top.
- Bake the galette: Bake for about 30-35 minutes, or until the crust is golden brown.
- Cool and serve: Let it cool for about 10-15 minutes on a wire rack.
Notes
Serve with vanilla ice cream or whipped cream for an extra touch of luxury.
- Prep Time: 15 minutes
- Cook Time: 35 minutes
- Category: Dessert
- Method: Baking
- Cuisine: French
Nutrition
- Serving Size: 1 slice
- Calories: 250
- Sugar: 10g
- Sodium: 400mg
- Fat: 12g
- Saturated Fat: 7g
- Unsaturated Fat: 5g
- Trans Fat: 0g
- Carbohydrates: 32g
- Fiber: 2g
- Protein: 3g
- Cholesterol: 35mg
Keywords: nectarine, galette, dessert, summer, rustic, pie, baking




