

Dairy Queen Banana Milkshake
Dairy Queen Banana Milkshake Recipe: A Cozy, Creamy Delight!
Hey there, fellow food lovers! Welcome back to my kitchen — I’m so glad you’ve joined me today! If you’re anything like me, there’s something about the sweetness of a banana blended with creamy ice cream that just sends your taste buds into orbit. Today, I’m excited to share with you a delightful recipe that captures the essence of one of those cherished childhood treats we all know and love: the legendary Dairy Queen Banana Milkshake!
Ah, the memories of standing in line at Dairy Queen, that enticing aroma of waffle cones wafting through the air, and the joyful anticipation as you watched the friendly staff whip up your favorite milkshake. There’s just something magical about the way a milkshake brings back those sunny, carefree days, filled with laughter and a sprinkle of nostalgia. You can almost taste that creamy, dreamy blend of real bananas, rich ice cream, and a touch of vanilla goodness.
But here’s the thing — you don’t have to dash out to your nearest DQ to satisfy that dairy-filled craving. Nope! I’ve crafted a super easy, delicious banana milkshake recipe that you can whip up right in the comfort of your own home. Grab your blender, dig into those ripe bananas on your counter, and let’s transform those humble ingredients into a delightful treat!
In this blog post, I’ll walk you through every step of the process, share some personal anecdotes, and sprinkle in a few chef tips to ensure you master this creamy concoction. Whether you’re sipping this milkshake after a long day or serving it at a backyard barbecue, trust me — it’s bound to be a crowd-pleaser. Ready to blend? Let’s dive in!
Personal Story
Growing up, my family had a tradition: every Sunday after church, we’d stop by the local Dairy Queen before heading home for the afternoon. My brother always opted for the chocolate fudge sundae, while I eagerly anticipated my favorite banana milkshake. There was something undeniably special about that treat; it wasn’t just a dessert; it was a little bit of joy in a cup!
I remember sitting at our favorite booth, my cheeks smeared with whipped cream as I savored that cold, creamy blend while chatting about my week. The way those flavors danced on my palate — the smoothness of the vanilla ice cream with the sweet, natural flavor of the bananas — was a moment of sheer bliss.
Eventually, as I grew older and began experimenting in my kitchen, I found that making this nostalgic treat at home was not only easy but oh-so-rewarding! It has since turned into one of my go-to recipes for gatherings and quiet evenings alike. Recreating that sensation of joy in a milkshake now feels like a warm hug from my childhood. With that said, let’s gather our ingredients and get blending!
Ingredients
To make the perfect Dairy Queen-style banana milkshake, you’ll need the following ingredients:
-
Ripe Bananas (2 medium)
- Explanation: Bananas that have a few brown spots are perfect because they’re extra sweet and creamy.
- Substitution tips: If you’re not a banana fan (gasp!), try using frozen strawberries or mango for a fruity twist.
-
Vanilla Ice Cream (2 cups)
- Explanation: Using good-quality vanilla ice cream makes a world of difference in flavor.
- Substitution tips: Dairy-free ice cream or frozen yogurt can work if you’re looking for a lighter version.
-
Milk (1/2 cup)
- Explanation: Milk helps create that perfect pourable consistency.
- Substitution tips: Use almond milk or oat milk for a dairy-free version.
-
Vanilla Extract (1 teaspoon)
- Explanation: A splash of vanilla elevates the flavor to delicious new heights.
- Substitution tips: You can omit this if you’re in a pinch, but it really does enhance the banana flavor!
-
Whipped Cream (for serving)
- Explanation: Because what’s a milkshake without a fluffy topping?
- Tip: Feel free to use store-bought or make your own using heavy whipping cream.
-
Optional: A Pinch of Cinnamon
- Explanation: Adding a pinch of cinnamon can introduce a warm spice note that enhances the banana flavor.
Gather these delightful ingredients, and you’re on your way to creating a cool, creamy treat that’s sure to put a smile on your face!
Step-by-Step Instructions
Let’s get to the fun part — blending it all together! Follow these simple steps:
-
Prepare Your Bananas
- Slice your ripe bananas into smaller pieces (about 1-2 inches). This not only makes blending easier but also ensures a smooth consistency. If you like your milkshake extra frosty, you can freeze the banana slices beforehand for a thick delight.
-
Measure Your Ingredients
- In your trusty blender, add the sliced bananas first, followed by the vanilla ice cream. This order typically helps things blend better, especially if you’re using a less powerful blender.
-
Pour in the Milk
- Add 1/2 cup of milk to your blender. You can adjust this later for thickness; start with less if you want a thicker shake.
-
Add Vanilla Extract
- Pour in the teaspoon of vanilla extract to infuse that extra layer of flavor.
-
Blend It Up!
- Secure the blender lid tightly (we don’t want any banana explosions here!). Blend on medium speed until all the ingredients are well-combined and you achieve a smooth and creamy texture—around 30-60 seconds. Stop to scrape down the sides if needed.
-
Check Consistency
- This is the fun part! Stop blending and take a spoon to taste your milkshake. If you prefer it thicker, add a bit more ice cream. For a thinner version, splash in a little more milk.
-
Serve the Shake
- Once you’re happy with the consistency, pour the milkshake into your favorite tall glasses. Don’t be shy — I love to fill mine to the brim!
-
Top with Whipped Cream
- Earn extra style points by generously topping each glass with whipped cream. If you’re feeling fancy, you can drizzle some chocolate syrup on top or even sprinkle a bit of cinnamon for that extra flair.
-
Grab a Straw and Enjoy!
- Now, grab a straw (or a spoon if you prefer) and indulge in your homemade banana milkshake. Sip slowly to relish every delicious drop!
Serving Suggestions
To serve your delectable banana milkshake, choose a tall glass that shows off its lovely swirls of creamy goodness. Add a vibrant straw, perhaps in a fun color, and a generous puff of whipped cream on top. For a charming touch, you might want to garnish with a banana slice or a drizzle of chocolate syrup to make it feel extra special.
Don’t forget, this milkshake pairs perfectly with homemade cookies or a slice of pie, making it a delightful dessert for parties or cozy evenings at home.
Recipe Variations
Want to switch things up a bit? Here are a few creative variations to consider:
-
Chocolate Banana Milkshake: Just add two tablespoons of chocolate syrup or some cocoa powder along with the other ingredients for a delightful chocolatey twist!
-
Peanut Butter Banana Milkshake: Add two tablespoons of creamy peanut butter for a protein boost and a rich, nutty flavor.
-
Nutty Banana Milkshake: Stir in some crushed nuts (like walnuts or almonds) for added texture and nutty flavor.
-
Vegan Option: Swap the vanilla ice cream for a banana-flavored coconut or almond ice cream and use almond milk for a delicious vegan treat.
-
Berry Banana Blend: Throw in a handful of frozen berries (like strawberries or blueberries) for an added fruity burst — yum!
Chef’s Notes
Every time I make this banana milkshake, I think back to those sunny Sundays at Dairy Queen with my family and friends. Whether we were sharing laughs or chatting about life, those moments made the milkshake taste even sweeter.
This recipe has evolved over time in my kitchen. I remember the early days when I attempted to make it, mixing and matching ingredients haphazardly without much success. It’s funny how a simple recipe can turn into something so reliable and beloved!
Every now and then, I’ll experiment with new flavors or toppings, but the classic banana still reigns supreme in my heart. No matter how many twists I try, nothing beats that first sip that reminds me of home.
FAQs and Troubleshooting
1. My milkshake turned out too thick! What should I do?
- If your milkshake is too thick, simply add a little more milk and blend until you reach your desired consistency. You can also add extra banana if you want to keep the flavor strong!
2. Can I use frozen bananas?
- Absolutely! Frozen bananas work great and often create an even thicker texture. Just keep in mind that you may need to adjust your milk amount for blending.
3. What if I don’t have a blender?
- You can use an immersion blender if you have one! Alternatively, mash the bananas well and then mix all the ingredients using a whisk or fork for a chunkier milkshake.
4. How can I prevent the bananas from turning brown?
- To avoid browning, you can squeeze a bit of lemon juice on the banana slices right after cutting them, though this might add a slight tang.
Remember, cooking is all about experimenting and finding what works for you — don’t stress too much, and just enjoy the process!
Nutritional Info (Optional)
While I believe in enjoying delicious treats without guilt, if you’re curious about the nutritional breakdown, here’s a rough estimate for one serving (using the ingredients listed):
- Calories: 400-500
- Protein: 7g
- Fat: 15g
- Carbohydrates: 75g
- Sugars: 65g
Keep in mind that this can vary based on the specific brands you use.
Well, there you have it! A delightful, creamy Dairy Queen-inspired banana milkshake recipe that’s not just delicious but also brings a wave of nostalgia with every sip. Whether it’s a hot summer day or a cozy winter evening, this milkshake is sure to lift your spirits and evoke all those heartwarming memories. So grab your ingredients, invite a friend, and let’s blend some happiness together. Happy cooking, friends! 🍌🥤❤️
Print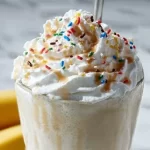
Dairy Queen Banana Milkshake
- Total Time: 10 minutes
- Yield: 2 servings 1x
- Diet: Vegetarian
Description
A delightful, creamy banana milkshake inspired by the classic Dairy Queen treat, perfect for any occasion.
Ingredients
- 2 medium ripe bananas
- 2 cups vanilla ice cream
- 1/2 cup milk
- 1 teaspoon vanilla extract
- Whipped cream (for serving)
- A pinch of cinnamon (optional)
Instructions
- Prepare your bananas by slicing them into smaller pieces (about 1-2 inches).
- Measure your ingredients by adding the sliced bananas first into your blender, followed by the vanilla ice cream.
- Pour in the milk, adjusting the quantity for thickness as desired.
- Add the vanilla extract to enhance the flavor.
- Blend on medium speed for 30-60 seconds until smooth and creamy.
- Check the consistency and adjust by adding more ice cream or milk as needed.
- Serve the milkshake in tall glasses, filling them to the brim.
- Top with whipped cream and any optional toppings like chocolate syrup or cinnamon.
- Grab a straw and enjoy your homemade banana milkshake!
Notes
For added flavor variations, consider chocolate syrup, peanut butter, nuts, or using dairy-free alternatives.
- Prep Time: 10 minutes
- Cook Time: 0 minutes
- Category: Dessert
- Method: Blending
- Cuisine: American
Nutrition
- Serving Size: 1 serving
- Calories: 450
- Sugar: 65g
- Sodium: 100mg
- Fat: 15g
- Saturated Fat: 9g
- Unsaturated Fat: 4g
- Trans Fat: 0g
- Carbohydrates: 75g
- Fiber: 3g
- Protein: 7g
- Cholesterol: 50mg
Keywords: banana milkshake, dessert, creamy, Dairy Queen, nostalgic, ice cream
Ninja Slushie Caramel Milkshake Recipe
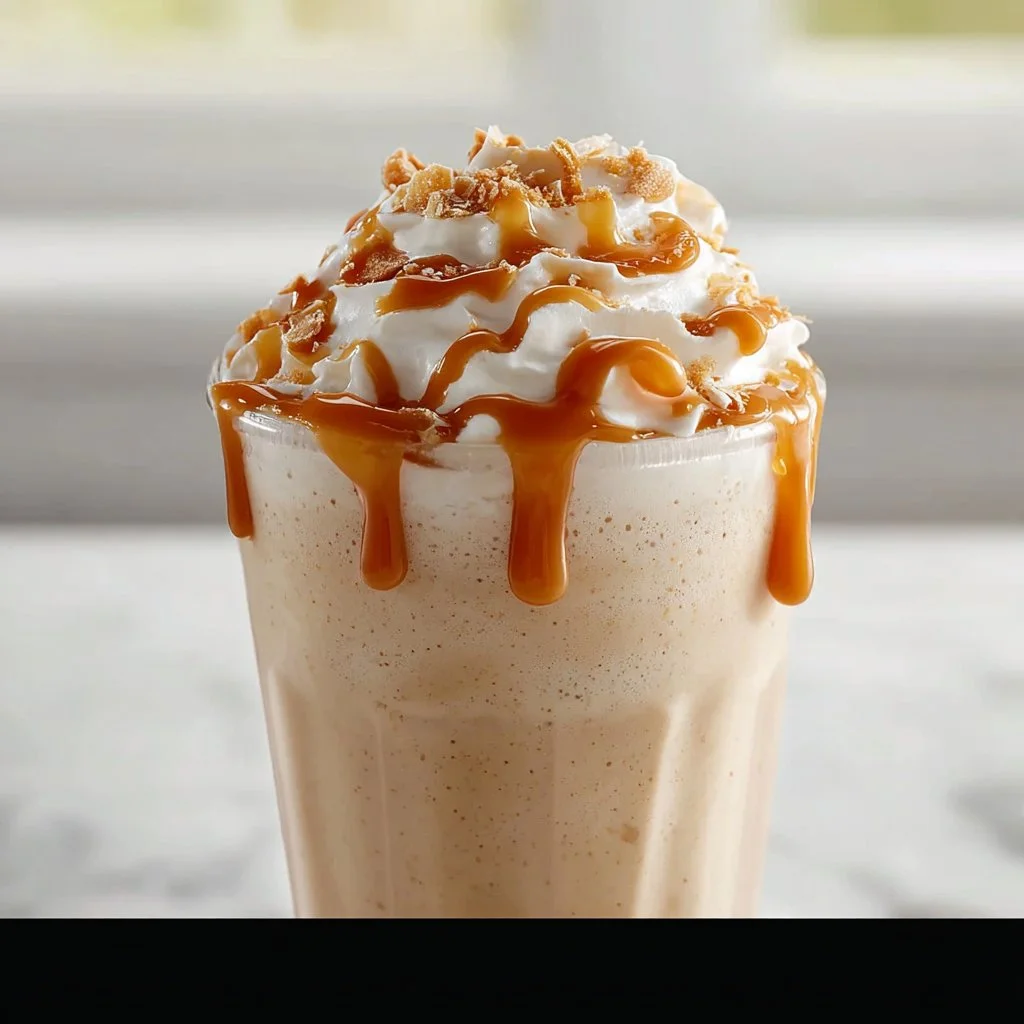
Ninja Slushie Caramel Milkshake Recipe
Welcome to my kitchen! If you’ve ever been on a hot summer day, yearning for a refreshingly sweet treat that perfectly balances indulgence and nostalgia, you’re in for a real treat today. I’m Olivia Bennett, and today we’re diving into the world of delightful milkshakes—not just any milkshakes, but the fabulously fun Ninja Slushie Caramel Milkshake! Think of it as a cool breeze on a hot day, a comforting hug in a cup, and an adventure in flavor all mixed together.
Picture this: it’s a sunny Saturday afternoon, and the kids are running around the yard while the grill sizzles with delicious barbecue. You’re seeking something to cool off with—maybe to share or indulge in solo. That’s when the Ninja Slushie Caramel Milkshake comes into play, transforming simple ingredients into something magical. With the swoosh of a Ninja blender (or any trusty blender), you can create a delightful concoction that mesmerizes taste buds and fills your home with the sweet aroma of caramel.
This isn’t just any milkshake; it’s a fun twist on the classic, enhanced with yummy caramel swirls and frosty goodness that blend together to create an experience you’ll want to revisit over and over again. So, whether it’s a sunny day or an enjoyable night in, let’s whip up something that not only tastes absolutely yummy but also takes us back to warm, fuzzy memories of childhood ice cream trucks and lazy weekends.
Personal Story
Let me tell you about my very first milkshake experience. I was a little girl, and every summer, my family would take a day trip to the beach. Before hitting the sandy shores, we’d always stop at this charming little diner known for its milkshakes. I remember the excitement in my tummy as I gazed at the menu with all its whimsical flavors, but my heart was set on one thing: the creamy caramel milkshake.
The waitress would bring it to our table in this tall, frosty glass, topped with whipped cream and an extra drizzle of caramel that glistened like sunshine. That moment was more than just a drink; it was about the smiles, laughter, and family moments we shared around that table. I can’t help but giggle now thinking about my dad trying to keep the whipped cream from reaching his nose. It’s those simple pleasures and cherished memories that inspire this colorful Ninja Slushie Caramel Milkshake recipe today!
Ingredients
-
Ice Cream:
- Vanilla or Caramel Flavor: A rich vanilla makes a great base, while caramel-flavored ice cream adds an extra punch. Feel free to swap with dairy-free options if you’re looking for a vegan treat—coconut or almond milk ice creams work wonders!
-
Milk:
- Whole or Almond Milk: About 1 cup of whole milk for creaminess, or almond milk for a lighter version. You can adjust the quantity based on your desired thickness.
-
Caramel Sauce:
- Store-bought or Homemade: Look for quality caramel sauce that will delight your taste buds. If you’re feeling adventurous, try your hand at making it from scratch using butter, sugar, and cream for a fun kitchen project!
-
Ice:
- Crushed or Cubed Ice: Use more or less depending on your desired slushie texture. Crushed ice is fantastic for achieving that refreshing slush consistency!
-
Whipped Cream:
- A Must-Have Topping: You can make it fresh or use pre-made. Don’t forget to add an extra drizzle of caramel on top. It’s all about the presentation!
-
Optional Toppings:
- Chocolate Shavings, Nuts, or Sprinkles: Get creative! You can customize your milkshake with these fun toppings for added crunch and flair.
Step-by-Step Instructions
Alright, let’s get our hands a bit messy, shall we? Grab your apron and let’s blend up some magic!
Step 1: Gather Your Ingredients
Start by gathering all your ingredients on your countertop. This will ensure you have everything you need at your fingertips. Nobody enjoys running around the kitchen mid-blend, right?
Step 2: Blend the Base
In your mighty Ninja blender, add about 2 cups of vanilla ice cream, followed by the milk. Start with 1 cup; you can always add more later for thickness. Secure the top and blend until smooth. Pro tip: If your milkshake feels too thick, gradually add a splash of milk until you achieve your desired consistency.
Step 3: Add the Caramel
Now comes the fun part—drizzle about ¼ cup of caramel sauce into the mix while the blender runs. The caramel swirls will infuse a delightful flavor into your milkshake. Note: you may wish to adjust the caramel based on how sweet you prefer your shake.
Step 4: Ice, Ice, Baby!
Toss in about 1-2 cups of ice (depending on how slushy you want it), and blend again for about 30 seconds until crushed and well-combined. This is where the Ninja’s power shines! You should see a luscious, creamy mix taking shape.
Step 5: Taste Test
This is my favorite step! Give your milkshake a taste. If you think it needs a little more caramel or is too thick, go ahead and adjust. It’s all about personal preference here!
Step 6: Serve It Up!
Grab your fanciest glasses (or the fun ones your kids picked out), and pour your Ninja Slushie Caramel Milkshake right in. Make sure you see those delightful layers!
Step 7: Toppings Galore!
Dollop on a whirlwind of whipped cream and drizzle with an extra swirl of caramel. You could even sprinkle chocolate shavings, nuts, or rainbow sprinkles on top for a festive touch. Ta-da!
Serving Suggestions
Present your beautiful milkshake topped with a bright maraschino cherry for an extra pop of color. Hand out colorful straws or even set up a mini milkshake bar with various toppings so everyone can customize their creations. It makes for great conversation and a wonderful way to connect over something sweet!
Recipe Variations
- Nutty Caramel Chocolate: Blend in some chocolate ice cream, and sprinkle chopped nuts on top for that satisfying crunch.
- Salted Caramel: A touch of sea salt can elevate your milkshake game to a whole new level by balancing the sweetness of caramel beautifully.
- Banana-Fudge Delight: Toss in half a ripe banana to add natural sweetness and creaminess, then finish off with a drizzle of fudge.
- Coconut Bliss: Use coconut milk ice cream and top with toasted coconut flakes for a tropical twist.
- Cookie Lover’s Dream: Add crushed cookies to the mix and as topping for a delicious cookie-and-cream-inspired shake.
Chef’s Notes
This Ninja Slushie Caramel Milkshake recipe has come a long way since I first tried making it years ago! I’ve fiddled with different ice cream flavors, caramel types and even experimented with adding seasonal spices like cinnamon or nutmeg to see what fits best. Every time I whip this up, it brings back memories of family trips, friends gathered in my kitchen, and lots of giggles over who can make the tallest whipped cream mountain!
Don’t ever let kitchen messes discourage you—some of the best culinary creations come from those spontaneous moments. Remember to take a look back at your “oops” moments—they often lead to the best stories and smiles!
FAQs and Troubleshooting
-
What if my milkshake is too thin?
Don’t fret! Just add more ice or ice cream and blend it again until you get that creamy thickness you crave. -
Can I make it ahead of time?
While it’s best enjoyed fresh, you can store it in the freezer for a short time. Just remember to let it sit for a bit before serving again to soften it up! -
Can I use a different flavor of ice cream?
Absolutely! The beauty of a milkshake is its versatility. Try experimenting with mint chocolate chip, cookies and cream, or even some fruity flavors for a summer twist. -
What if I don’t have a blender?
No blender? No problem! Consider using a milkshake maker if you have one. Alternatively, mix your ice cream and milk in a large jar with a tight-fitting lid and shake, shake, shake until blended!
Nutritional Info (Optional)
- Serving Size: 1 medium milkshake
- Calories: Approximately 500 calories (depending on ingredients used)
- Total Fat: 25g
- Carbohydrates: 65g
- Sugars: 45g
- Protein: 10g
So there you have it, my fabulous Ninja Slushie Caramel Milkshake recipe! I hope you enjoy making it as much as I do. Embrace the joy of creating something delicious from the heart. Let’s keep cooking, sharing stories, and making cherished memories together. Happy blending! 🍦💕
Print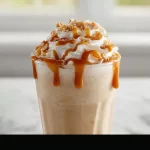
Ninja Slushie Caramel Milkshake
- Total Time: 10 minutes
- Yield: 2 servings 1x
- Diet: Vegetarian
Description
A delightfully refreshing and indulgent milkshake, enhanced with caramel swirls for a nostalgic treat on hot summer days.
Ingredients
- 2 cups Vanilla or Caramel Ice Cream
- 1 cup Whole or Almond Milk
- ¼ cup Caramel Sauce (store-bought or homemade)
- 1–2 cups Crushed or Cubed Ice
- Whipped Cream (for topping)
- Optional Toppings: Chocolate Shavings, Nuts, Sprinkles
Instructions
- Gather your ingredients on your countertop.
- Blend the base by adding ice cream and milk in the blender.
- Add the caramel sauce while blending.
- Toss in the ice and blend until well-combined.
- Taste your milkshake and adjust flavors as desired.
- Serve the milkshake in glasses, showcasing delightful layers.
- Dollop whipped cream and add toppings on top.
Notes
For added flavor, try variations like Nutty Caramel Chocolate or Salted Caramel. Perfect for customizing with your favorite toppings!
- Prep Time: 10 minutes
- Cook Time: 0 minutes
- Category: Dessert
- Method: Blending
- Cuisine: American
Nutrition
- Serving Size: 1 milkshake
- Calories: 500
- Sugar: 45g
- Sodium: 150mg
- Fat: 25g
- Saturated Fat: 15g
- Unsaturated Fat: 7g
- Trans Fat: 0g
- Carbohydrates: 65g
- Fiber: 1g
- Protein: 10g
- Cholesterol: 80mg
Keywords: milkshake, caramel, dessert, summer treat, sweet

Witches Brew Oreo Milkshake
Witches Brew Oreo Milkshake: Spooktacularly Delicious
Hello, fellow food adventures! 🌟 As the leaves start to change and the air turns crisper, there’s one thing on my mind: Halloween treats! I can’t help but get excited about the magic of the season, especially when it comes to food. One of my absolute favorite creations to whip up during this time is the Witches Brew Oreo Milkshake. It’s not just a drink; it’s a delightful experience that brings a little extra charm and a sprinkle of fun to your Halloween festivities.
Imagine this: you gather around with friends and family, laughter fills the room, and suddenly that first sip of creamy, chocolatey goodness hits your taste buds. It’s like diving into a cauldron of sweet nostalgia, with just the right amount of spooky vibes to get everyone in the Halloween spirit. Honestly, what could be better than a milkshake that not only tastes divine but also looks like something straight out of a fun Halloween movie?
In this post, we’re going to blend up this delightful milkshake together. It’s packed with that hauntingly delicious flavor of Oreos, creamy vanilla ice cream, and some surprising ingredients that add flair without breaking the bank or your spirit! So grab your blender, and let’s make your Halloween party unforgettable with this quick and easy recipe.
Personal Story
Ah, memories of Halloween back in the day! As a kid, I was always that one who took Halloween way too seriously—costumes, decorations, and of course, treats galore. One year, my mom decided to host a Halloween party, which meant a lot for an eight-year-old Olivia filled with excitement. She whipped up a delightful mix of snacks, but what stole the show was her special spooky milkshake.
She called it the “Witches Brew,” and it was simply magical! I remember sitting on the couch, clad in my fluffy witch costume, straw in hand, and instantly falling in love with the delicious blend of chocolate, cookies, and creamy goodness. That milkshake quickly turned into the highlight of our celebration, its rich, chocolately essence sparking spontaneous dance parties in our living room as we raised our cups to the air and cheered each time someone took a sip.
Now, every Halloween, I like to carry on that tradition in my own kitchen. I’ve added my twists to the recipe over the years, and now I’m excited to share my version—the Witches Brew Oreo Milkshake! It’s guaranteed to bring the same joy and laughter to your celebrations as it did back then. Let’s dive right into the magical ingredients!
Ingredients
Here’s what you’ll need to create this enchanting concoction:
-
Oreos (1 package)
- Chef Insight: Oreos are the classic cookie choice here, but you can switch it up with any flavored Oreo (like mint or pumpkin spice) for a fun twist!
-
Vanilla Ice Cream (3 cups)
- Substitution Tip: Need a dairy-free option? Use a plant-based vanilla ice cream made from coconut or almond milk!
-
Milk (1 cup)
- Quick Insight: Whole milk gives you that creamy texture, but you can use almond milk or oat milk for a lighter version.
-
Chocolate Syrup (1/4 cup)
- Chef Hack: Consider using a homemade chocolate syrup for that extra special touch—just combine equal parts cocoa powder, sugar, and water and simmer until thick!
-
Whipped Cream (for topping)
- Substitution Tip: For a fun Halloween presentation, consider using green-tinted whipped cream or even flavored whipped cream like marshmallow!
-
Green Food Coloring (optional, for spooky vibes)
- Chef Insight: This is optional, but a few drops can really elevate the witchy aesthetic!
-
Sprinkles or Edible Glitter (for garnish)
- Chef Hack: Go wild with the sprinkles—think Halloween colors like orange and purple for extra flair!
Step-by-Step Instructions
Ready to get blending? Let’s make this Witches Brew Oreo Milkshake step by step!
-
Gather Your Ingredients:
Make sure you have all your ingredients ready to go. Nothing worse than realizing halfway through you’re out of Oreos! -
Crush the Oreos:
In a large zip-top bag, crush your Oreos into smaller pieces. You want chunks, not powder—so swing by with a rolling pin, or just use your hands! This will add that delightful texture to your milkshake.Tip: Save a few cookie pieces for garnishing later—they’ll add that extra yum factor on top!
-
Blend it All Together:
In a blender, combine the vanilla ice cream, milk, chocolate syrup, and about two-thirds of your crushed Oreos.Chef Hack: From experience, it’s often easier to start with the milk and ice cream first, as they create a smooth base. Blend on medium speed until everything is well combined and creamy. Adjust the thickness by adding more milk if it’s too thick or more ice cream for a richer flavor.
-
Add Green Food Coloring (Optional):
If you’re going for that spooky look, this is the time to add your green food coloring. Just a couple of drops will do. Blend again until the color is evenly distributed. -
Pour & Garnish:
Now comes the fun part! Pour the luscious milkshake into tall glasses. Top with a generous dollop of whipped cream, sprinkle on those saved Oreo chunks, and add your Halloween sprinkles or glitter for a dramatic flair.Serving Tip: To make it even more festive, serve with colorful straws or spooky-themed drink stirrers.
-
Enjoy!
Gather your family and friends around, and toast to a delicious Halloween treat! Take a moment to appreciate the delightful blend of flavors before diving in.
Serving Suggestions
This milkshake is fabulous on its own, but feel free to make it a full-on dessert experience! Pair it with Halloween cookies, ghost-shaped cupcakes, or even a platter of chocolate-dipped fruit for a little balance. Each sip will feel like a cozy hug on a chilly October evening!
Recipe Variations
Want to mix things up? Here are some creative twists:
- Minty Witch’s Brew: Use mint-flavored Oreos and a splash of peppermint extract for a fresh mint chocolate taste!
- Peanut Butter Swirl: Add a couple of tablespoons of creamy peanut butter in the blend for a deliciously nutty flavor.
- Pumpkin Spice Surprise: Swap out some vanilla ice cream with pumpkin ice cream or add a few tablespoons of pumpkin puree and pumpkin spice.
- Chocolate Overload: Toss in some chocolate chips for extra chocolate chunks and a rich texture.
- Vegan-Friendly: Make it vegan by choosing plant-based ice cream and almond milk—so everyone can enjoy.
Chef’s Notes
This recipe has been a staple in my kitchen since I can remember! Each time I make it, I find myself reminiscing about that precious Halloween night spent with family and friends. Over the years, I’ve definitely rambled on about my favorite ingredients, trying to perfect that blend of creamy, crunchy, and sugary goodness. One funny episode was when I accidentally dumped in way too much food coloring and ended up with a glowing green concoction that made for great Instagram material—just slightly less appealing for my guests!
It’s all about experimenting, so don’t shy away from putting your spin on this milkshake. After all, cooking should be as fun and whimsical as the holiday itself!
FAQs and Troubleshooting
-
Why is my milkshake too thick?
- No worries! Simply add a little more milk and blend again until you reach your desired consistency.
-
What if I don’t have a blender?
- You can use a milkshake maker or even a whisk to combine the ingredients. It’ll take more elbow grease, but homemade always has a touch of love!
-
Can I make this ahead of time?
- Yes! You can prepare the milkshake mix (minus the whipped cream and garnishes) and store it in the freezer until you’re ready to serve. Just give it a quick blend before pouring!
-
My whipped cream isn’t holding its shape—what did I do wrong?
- Often, this is because the whipped cream wasn’t beaten enough or the cream wasn’t cold enough. Make sure the cream is chilled and whip until stiff peaks form!
Nutritional Info
(Per serving, approximate values):
- Calories: 450
- Protein: 8g
- Carbohydrates: 64g
- Fat: 22g
There you have it—a Halloween treat that’s sure to conjure up nostalgia and delight in every scoop. I hope you find as much joy making and sharing this Witches Brew Oreo Milkshake as I do! So gather those ghouls and goblins, and let the festive fun begin. Happy sipping! 🍬🧙♀️
Print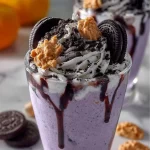
Witches Brew Oreo Milkshake
- Total Time: 15 minutes
- Yield: 4 servings 1x
- Diet: Vegetarian
Description
A spooktacular Oreo milkshake that’s perfect for Halloween gatherings, combining chocolatey creaminess with festive flair.
Ingredients
- 1 package Oreos
- 3 cups vanilla ice cream
- 1 cup milk
- 1/4 cup chocolate syrup
- Whipped cream (for topping)
- Green food coloring (optional)
- Sprinkles or edible glitter (for garnish)
Instructions
- Gather your ingredients.
- Crush the Oreos in a zip-top bag.
- Blend the vanilla ice cream, milk, chocolate syrup, and two-thirds of the crushed Oreos.
- Add green food coloring if desired and blend again.
- Pour into tall glasses and top with whipped cream, saved Oreo chunks, and sprinkles.
- Enjoy with family and friends!
Notes
Feel free to mix and match ingredients for creative variations like mint or pumpkin flavors.
- Prep Time: 15 minutes
- Cook Time: 0 minutes
- Category: Dessert
- Method: Blending
- Cuisine: American
Nutrition
- Serving Size: 1 serving
- Calories: 450
- Sugar: 40g
- Sodium: 150mg
- Fat: 22g
- Saturated Fat: 12g
- Unsaturated Fat: 8g
- Trans Fat: 0g
- Carbohydrates: 64g
- Fiber: 2g
- Protein: 8g
- Cholesterol: 30mg
Keywords: Halloween, milkshake, dessert, Oreo, festive

Banana Milkshake
The Ultimate Banana Milkshake Recipe: A Creamy Adventure Awaits!
Welcome to my kitchen, where we’re about to embark on a delightful journey that’s creamy, dreamy, and oh-so-banana-y! I’m Olivia Bennett, your friendly guide to all things delicious. Today, we’re diving into the world of smoothies with one of my all-time favorites — the classic Banana Milkshake. It’s a drink that’s not only fun to whip up, but it also brings back some sweet memories for me, and I bet it will do the same for you!
Picture this: it’s a sunny Saturday morning, and I’m back at my grandmother’s cozy cottage, the air thick with the sweet scent of ripe bananas. I remember standing on my tiptoes to reach the blender on the kitchen counter, barely able to contain my excitement. Grandma would laugh as she tightened the blender’s lid, reminding me to “stand back, sweetheart — things might get a little bananas!” Her famous banana milkshake was like a golden ticket to a world of flavor — thick, creamy, and topped with a dollop of whipped cream that crowned the glass like royalty. This treat was our breakfast ritual, a little bit of tradition that made those mornings feel extra special.
Banana milkshakes are not just for kids; they are pure nostalgia in a glass! So grab your blender and let’s create a milkshake that’s perfectly chilled, sweetly fruity, and super easy to make. This recipe is sure to bring a smile to your face (and maybe a little dance in the kitchen, too!).
Ingredients
To whip up your banana milkshake, you’ll need a handful of simple ingredients that come together to create a harmonious blend of flavors:
-
Ripe Bananas: Look for bananas with a few brown spots for the sweetest flavor. You can substitute with frozen bananas for an even creamier shake!
-
Milk: Whole milk will give you a rich and creamy texture, but feel free to swap in almond milk, oat milk, or your favorite dairy alternative if you prefer.
-
Vanilla Ice Cream: The magic ingredient that adds indulgence — you can use dairy-free ice cream or frozen yogurt for a lighter touch.
-
Vanilla Extract: A splash of pure vanilla extract enhances the flavor beautifully; choose quality extract for the best taste.
-
Honey or Maple Syrup: This gives a touch of extra sweetness. You can adjust this based on your taste preferences or leave it out if your bananas are perfectly ripe!
-
Optional Toppings: Whipped cream, chocolate syrup, or a sprinkle of cinnamon for the ultimate finish.
Each ingredient has a role to play in making this banana milkshake utterly delicious, so let’s make sure we choose wisely!
Step-by-Step Instructions
Time to get blending! Here’s how to create the perfect banana milkshake:
-
Choose Your Bananas: Start by peeling and slicing 2 ripe bananas. I prefer medium-sized ones; they’re just the right amount of banana flavor. Slicing them allows them to blend smoother.
Tip: If you have overly ripe bananas, don’t toss them! They’re perfect for this recipe, and you can even freeze them to use later—just peel and pop them in a freezer bag.
-
Add the Milk: Pour 1 cup of milk into your blender. If you’re not sure what milk to use, I’m a fan of whole milk for creaminess, but oat milk adds a nice nutty flavor too.
Chef Insight: If you’re using frozen bananas, reduce the amount of milk slightly, as they’ll thicken the shake more than fresh ones.
-
Ice Cream Time!: Scoop in 2 generous scoops of vanilla ice cream. This is where the indulgence happens! Make sure it’s slightly softened for easier blending.
-
Vanilla Extract: Add 1 teaspoon of pure vanilla extract. It’s a simple addition that lifts the flavor to new heights!
-
Sweeten It Up: Drizzle in 1 tablespoon of honey or maple syrup. Taste as you go, and adjust the sweetness to your liking.
-
Blend It Up: Secure the lid on your blender and blend on high until all the ingredients are smooth and creamy. About 30-45 seconds should do it!
Chef Trick: For an extra frothy milkshake, pulse the blender a few times, then give it a good shake before blending again.
-
Taste Test: Grab a spoon and indulge in a quick taste! If you want it thicker, add more ice cream; if it’s too thick, a splash of milk will do the trick.
-
Serve: Pour your beautifully blended banana milkshake into tall glasses, and don’t skimp on the froth!
Tip: For a fun presentation, dip your glasses in chocolate syrup before pouring in the shake for a decadent twist.
Serving Suggestions
Now, it’s time to present your banana milkshake! Top it with a generous swirl of whipped cream, and drizzle with chocolate syrup for that extra touch of decadence. Sprinkle some crushed graham crackers or a dusting of cinnamon on top, and you’ve got a show-stopping treat! You can even add a slice of banana on the rim or a cute paper straw for that perfect Instagram-worthy finish.
Recipe Variations
Here are some fun twists to keep your banana milkshake game fresh:
-
Chocolate Banana Milkshake: Add 2 tablespoons of unsweetened cocoa powder or chocolate syrup for a chocolatey delight.
-
Nutty Banana Milkshake: Toss in a tablespoon of almond butter or peanut butter for a protein-packed treat.
-
Tropical Twist: Add a handful of frozen pineapple chunks for a fruity explosion that will transport you to a beach resort.
-
Spiced Banana Milkshake: Mix in a dash of nutmeg or pumpkin spice for a cozy, autumnal flavor.
-
Vegan Banana Milkshake: Substitute ice cream with a non-dairy version and use almond milk for a vegan-friendly treat!
Chef’s Notes
Banana milkshakes are a go-to for me, not just because they taste incredible, but also because they remind me of sweet moments spent with family. I’ve whipped up this recipe for birthday parties, lazy Sunday afternoons, and even as an after-school snack for my little niece, who absolutely adores them!
Over the years, I’ve tried countless variations, always excited to experiment with new flavors and toppings. Once, on a whim, I added a pinch of cayenne to a batch I made for friends — and let’s just say their surprised faces were priceless! It’s all about finding joy in the kitchen and making these flavors your own.
FAQs and Troubleshooting
-
Why is my milkshake too thin?
If your milkshake is thinner than you’d like, add more ice cream to thicken it up! Alternatively, reduce the amount of milk next time. -
Can I use frozen bananas?
Absolutely! Frozen bananas will make your milkshake extra creamy. Just use a bit less milk for the right consistency! -
What if my milkshake is too thick?
If it’s too thick to blend, just add a little more milk, one splash at a time, until you reach your desired consistency. -
How do I store leftovers?
Drink it up! But if you have to save any, pour it into an airtight container and place it in the freezer. Just blend it again before serving to restore its creamy texture.
Nutritional Info (Optional)
While I love sharing recipes that make our hearts sing, I also think it’s good to know what we’re nourishing our bodies with! A typical banana milkshake made from the ingredients listed above contains approximately:
- Calories: 350-450 (depending on portion size and added ingredients)
- Protein: 8-10g
- Sugar: 30-40g
- Fat: 12-15g
Remember, these figures can vary based on your ingredients and serving sizes.
Now, go ahead and grab those bananas, fire up the blender, and make some incredible memories with your very own banana milkshake! Whether enjoyed solo or shared with friends, this drink never fails to warm my heart. Enjoy, and remember, every sip is a little moment of joy! Happy blending! 🍌🥤
Print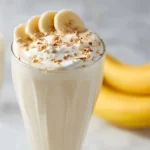
The Ultimate Banana Milkshake
- Total Time: 10 minutes
- Yield: 2 servings 1x
- Diet: Vegetarian
Description
A classic and creamy banana milkshake that brings back sweet memories, perfect for any occasion!
Ingredients
- 2 ripe bananas
- 1 cup whole milk (or almond/oat milk)
- 2 scoops vanilla ice cream (or dairy-free ice cream)
- 1 teaspoon vanilla extract
- 1 tablespoon honey or maple syrup
- Optional toppings: whipped cream, chocolate syrup, cinnamon
Instructions
- Choose your bananas: Peel and slice 2 ripe bananas.
- Add the milk: Pour 1 cup of milk into your blender.
- Scoop in ice cream: Add 2 generous scoops of vanilla ice cream.
- Add vanilla extract: Put in 1 teaspoon of pure vanilla extract.
- Drizzle in honey or maple syrup: Adjust the sweetness to your liking.
- Blend it up: Blend on high until smooth and creamy.
- Taste test: Adjust thickness with more ice cream or milk as needed.
- Serve: Pour into glasses and top with optional toppings.
Notes
For a fun presentation, dip glasses in chocolate syrup before pouring in the shake. Enjoy with a slice of banana on the rim or a cute paper straw!
- Prep Time: 10 minutes
- Cook Time: 0 minutes
- Category: Beverage
- Method: Blending
- Cuisine: American
Nutrition
- Serving Size: 1 serving
- Calories: 400
- Sugar: 30g
- Sodium: 150mg
- Fat: 15g
- Saturated Fat: 8g
- Unsaturated Fat: 5g
- Trans Fat: 0g
- Carbohydrates: 60g
- Fiber: 3g
- Protein: 10g
- Cholesterol: 50mg
Keywords: banana milkshake, creamy drink, easy recipe, smoothie, dessert


