
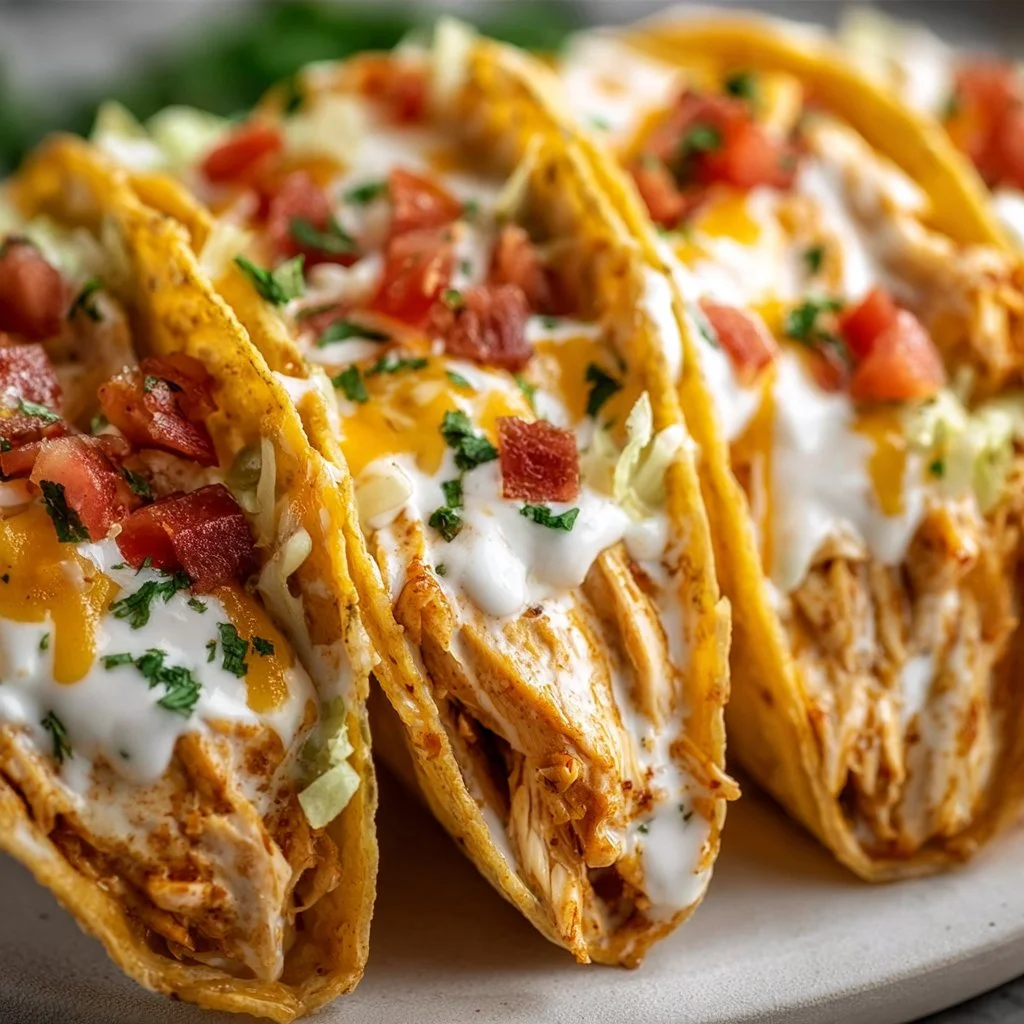
Creamy Cheddar Ranch Chicken Tacos
Creamy Cheddar Ranch Chicken Tacos
Hey there, fellow food lovers! Welcome back to my cozy corner of the kitchen. Today, we’re diving into a recipe that’s been a family fave for years: Creamy Cheddar Ranch Chicken Tacos. Just the thought of these delightful tacos makes my taste buds do a happy dance! Imagine warm tortillas filled with tender, juicy chicken, slathered in a creamy ranch sauce, and topped with melty cheddar cheese. What’s not to love?
These tacos hit all the right notes: they’re quick to make, bursting with flavor, and so adaptable that you can tailor them to fit your mood or dietary needs. Whether you’re whipping up a weeknight dinner or throwing a casual gathering with friends, these tacos will impress even the pickiest eaters. Plus, they come together in no time—perfect for those busy days when you still want something delicious!
In this blog post, I’ll take you step-by-step through the process of creating these dreamy tacos. I’ll also sprinkle in some personal stories and handy cooking tips that I hope will inspire you. So grab your apron (and maybe a glass of wine!), and let’s get cooking!
Personal Story
I still remember the first time I made these creamy cheddar ranch chicken tacos. It was a chilly Friday evening back when my husband, Jake, and I were just starting our journey together. I wanted to impress him with something special but didn’t have a lot of time to spare after a long week. So, I decided to go with something simple yet delicious—a choice that turned out to be a total win!
As the chicken sizzled in the pan, the smell of ranch seasoning mingling with the melting cheese filled our tiny apartment, wrapping us in a warm culinary hug. We laughed and reminisced about our week while I worked swiftly to assemble the tacos. When we finally sat down at the table—tacos piled high, ready to devour—we knew we’d stumbled upon something special. That evening not only filled our bellies but also solidified a sweet memory of togetherness, comfort, and the joy of sharing food with the ones we love. That’s what cooking is all about, isn’t it?
Ingredients
Here’s what you’ll need to create these irresistible tacos:
-
Chicken Breast (1 pound)
- Fresh or frozen works! If using frozen, make sure to thaw it first. You can also swap it out for shredded rotisserie chicken for an even quicker meal.
-
Cream Cheese (4 oz)
- This makes the tacos creamy and indulgent. Feeling dairy-free? Try using vegan cream cheese!
-
Ranch Dressing Mix (1 packet)
- Store-bought works like a charm, but you can also make your own ranch seasoning using dried herbs like dill, parsley, garlic powder, and onion powder.
-
Cheddar Cheese (1 cup, shredded)
- Cheddar adds that classic, comforting flavor. Feel free to experiment with pepper jack for a spicy kick, or go for a dairy-free cheese option if needed.
-
Taco Shells (8–10)
- Whether you like soft flour tortillas or crispy corn taco shells, both will work beautifully. Try grain-free options if that’s your vibe!
-
Toppings:
- Lettuce: Shredded romaine or a fresh spring mix adds a nice crunch.
- Tomatoes: Diced tomatoes or even salsa for an extra flavor boost.
- Avocado: Sliced or smashed avocado lends creaminess.
- Green Onions: Chopped, for a bit of freshness.
Step-by-Step Instructions
Let’s get cooking, shall we? Follow these easy steps to assemble your creamy cheddar ranch chicken tacos.
Step 1: Cook the Chicken
In a frying pan over medium heat, add a drizzle of olive oil. Once it’s hot, toss in 1 pound of diced chicken breast, seasoned with salt and pepper to taste.
Chef Tip: Cook the chicken until it’s no longer pink, about 5-7 minutes. Make sure to stir occasionally! If you want extra flavor, sprinkle in some garlic powder or smoked paprika as it cooks—it makes a world of difference!
Step 2: Add the Cream Cheese and Ranch Mix
Once your chicken is perfectly cooked, lower the heat and add 4 oz of cream cheese and 1 packet of ranch dressing mix directly into the pan.
Chef Hack: For easier mixing, I often cut the cream cheese into small cubes before adding it. This helps it melt faster and blend smoothly with the chicken. Give it a good stir until the chicken is evenly coated.
Step 3: Incorporate Shredded Cheddar
After the cream cheese has melted and created a lovely sauce, mix in 1 cup of shredded cheddar cheese. Stir until the cheese is melted and you have a gooey, creamy mixture.
Hint: Believe me, the aroma at this point will make it hard to resist diving in with a spoon! Keep it on low heat to keep everything nice and warm.
Step 4: Warm the Taco Shells
While the taco filling is coming together, warm up your taco shells. For soft tortillas, simply warm them in a dry skillet for about 15-30 seconds on each side. For crunchy shells, follow package instructions to bake them until nice and crispy.
Step 5: Assemble the Tacos
Now comes the fun part! Grab your taco shells and fill them generously with the creamy chicken mixture.
Tip: Don’t be shy—load them up! Follow with your choice of toppings, like shredded lettuce, diced tomatoes, sliced avocado, and a sprinkle of green onions.
Serving Suggestions
These creamy cheddar ranch chicken tacos are best served fresh! Plate them on a vibrant serving platter alongside a bowl of extra toppings. Set out some tortilla chips with a side of salsa or guacamole for a complete fiesta experience. Don’t forget drinks—try serving them with a refreshing margarita or a crisp iced tea!
Recipe Variations
Feeling adventurous? Here are some fun twists and replacements you can try with this recipe:
- Baja Style: Add some slaw made from shredded cabbage, carrot, and lime juice for that zesty crunch.
- Spicy Kick: Incorporate jalapeños or red pepper flakes into the chicken mixture or use spicy ranch dressing.
- Veggie Version: Substitute the chicken with roasted veggies or black beans for a hearty vegetarian option.
- Crispy Chicken: Try using breaded and fried chicken strips for a crunchy texture!
- Taco Salad: Skip the shells and build a taco salad by layering the chicken mixture over greens, adding all the same toppings.
Chef’s Notes
Over the years, this creamy cheddar ranch chicken taco recipe has become a staple not only in my kitchen but also among my friends and family. It’s a crowd-pleaser, and I love how flexible it is! I’ve added different herbs and spices based on seasonal ingredients, or occasionally thrown in whatever was left in the fridge. Once, I even swapped the ranch dressing for Caesar dressing—an unexpected hit!
And here’s a funny story: One time, I was so focused on preparing these tacos for a dinner party that I accidentally added an entire bottle of ranch dressing instead of the seasoning packet! Let’s just say it was a ranch explosion! But hey, that’s the beauty of cooking—you learn, you laugh, and you create amazing memories along the way.
FAQs and Troubleshooting
Q: What if my chicken is dry?
A: If your chicken turns out dry, it may have been overcooked. Consider adding a splash of chicken broth or some extra cream cheese to moisten it up.
Q: Can I use another protein?
A: Absolutely! Ground turkey, beef, or even shrimp can be delicious alternatives. Just adjust the cooking times accordingly.
Q: How long will leftovers last?
A: Store leftover filling in an airtight container in the fridge for up to three days. Just warm it back up before making fresh tacos!
Q: Can I freeze these tacos?
A: You can freeze the chicken mixture in an airtight container for up to three months. Just defrost and reheat when you’re ready to enjoy!
Nutritional Info
(Keep in mind, nutritional values will vary based on specific ingredients chosen—this is a rough estimate per taco.)
- Calories: 250
- Protein: 25g
- Fat: 14g
- Carbs: 20g
- Fiber: 2g
And there you have it! These Creamy Cheddar Ranch Chicken Tacos are sure to become a staple in your kitchen, just as they are in mine. With their creamy filling, customizable toppings, and easy prep, they’re perfect for any occasion! I can’t wait to hear how yours turn out or if you put your own spin on them. Now go forth and taco about your culinary adventures! Happy cooking!
Print
Creamy Cheddar Ranch Chicken Tacos
- Total Time: 30 minutes
- Yield: 4 servings 1x
- Diet: None
Description
Delicious and creamy chicken tacos filled with ranch flavor and topped with melty cheddar cheese.
Ingredients
- 1 pound Chicken Breast
- 4 oz Cream Cheese
- 1 packet Ranch Dressing Mix
- 1 cup Cheddar Cheese, shredded
- 8–10 Taco Shells
- Shredded Lettuce
- Diced Tomatoes
- Sliced Avocado
- Chopped Green Onions
Instructions
- Cook the Chicken: In a frying pan over medium heat, add a drizzle of olive oil. Once hot, toss in diced chicken breast seasoned with salt and pepper. Cook until no longer pink, about 5-7 minutes.
- Add the Cream Cheese and Ranch Mix: Lower the heat and add cream cheese and ranch dressing mix to the pan.
- Incorporate Shredded Cheddar: Mix in shredded cheddar cheese and stir until melted and gooey.
- Warm the Taco Shells: Warm soft tortillas in a dry skillet or bake crunchy shells according to package instructions.
- Assemble the Tacos: Fill taco shells with the creamy chicken mixture and top with salad, tomatoes, avocado, and onions.
Notes
Customize with your favorite toppings and enjoy fresh!
- Prep Time: 15 minutes
- Cook Time: 15 minutes
- Category: Main Course
- Method: Stovetop
- Cuisine: Mexican
Nutrition
- Serving Size: 1 taco
- Calories: 250
- Sugar: 3g
- Sodium: 600mg
- Fat: 14g
- Saturated Fat: 7g
- Unsaturated Fat: 4g
- Trans Fat: 0g
- Carbohydrates: 20g
- Fiber: 2g
- Protein: 25g
- Cholesterol: 30mg
Keywords: cheddar tacos, ranch chicken, easy tacos, creamy tacos, quick dinner
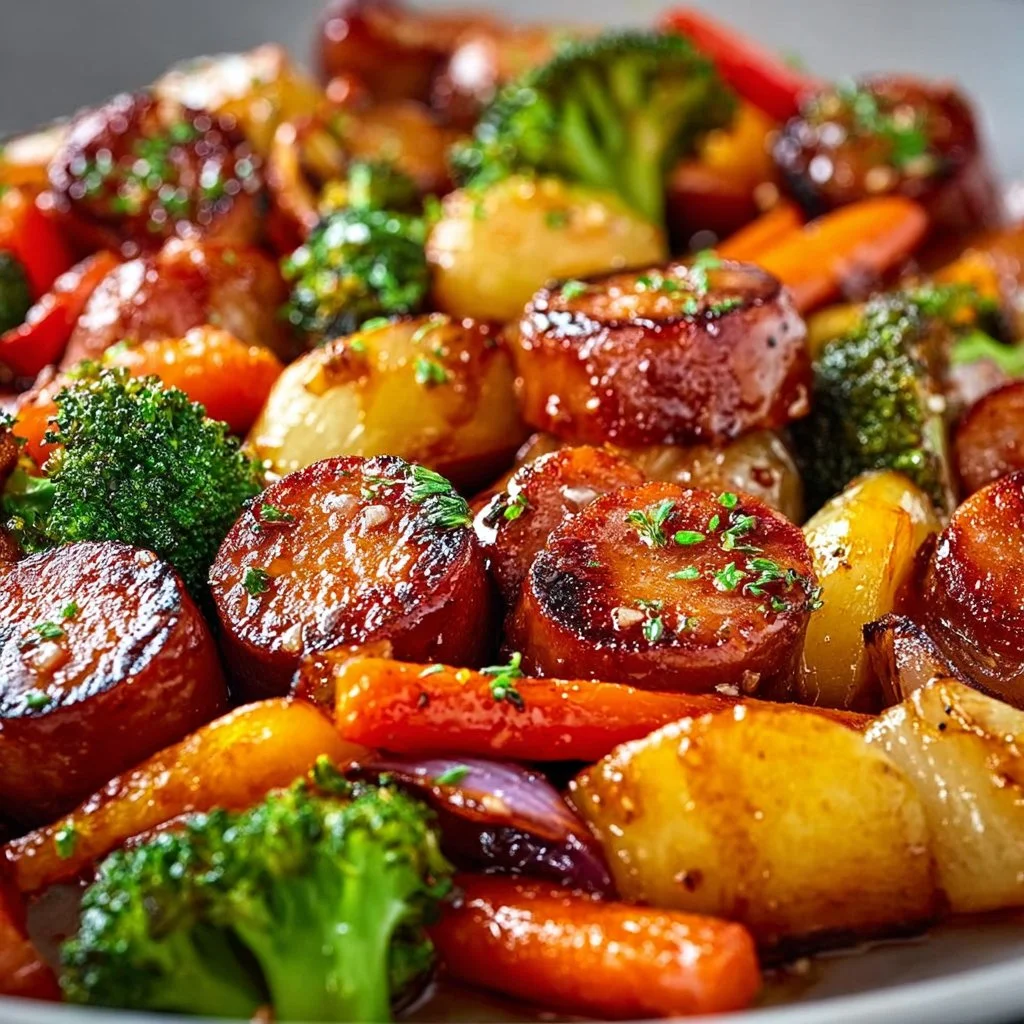
One-Pan Honey Garlic Kielbasa & Veggies: Easy Family Delight
# One-Pan Honey Garlic Kielbasa & Veggies: Easy Family Delight

Welcome to my kitchen! If you're anything like me, the smell of something delicious wafting through the air instantly brightens your day. There's just something magical about the combination of savory and sweet—especially when it’s all nestled in one pan, making cleanup a breeze! Today, I'm sharing one of my family’s all-time favorite weeknight meals: **One-Pan Honey Garlic Kielbasa & Veggies**.

This dish is savory, sweet, and oh-so-comforting, making it perfect for those cozy evenings when you want to whip up something quick yet utterly satisfying. Imagine juicy slices of kielbasa, tossed with vibrant veggies, all simmered in a luscious honey garlic sauce. It not only tastes fantastic but also looks beautiful on the table, bringing everyone together for a heartwarming meal. So, pull up a chair, roll up your sleeves, and let’s get cooking!

## Personal Story

Every time I make this dish, I’m transported back to my childhood kitchen, filled with laughter and the warm aroma of home-cooked meals. My mom used to make sweet and savory dishes, and her honey garlic sauce was always a crowd-pleaser, whether it adorned chicken wings at family gatherings or gave a special twist to simple steamed veggies.

One particular memory stands out: my siblings and I were tasked with setting the table, racing each other to get it done before the food hit the table. When the dish was finally served, it was a beautiful explosion of colors—crimson kielbasa glistening among the bright green broccoli and red bell peppers. We would dive in eagerly, alternating between bursts of texture and flavor. With each bite, we were reminded of the love my mom poured into our meals. That’s a tradition I’ve carried with me into my kitchen, and I’m excited to pass it on to you!

## Ingredients

Here’s what you'll need to make this scrumptious One-Pan Honey Garlic Kielbasa & Veggies:

- **Kielbasa (14 oz)**
  A smoky, pre-cooked sausage that adds robust flavor. You can substitute turkey kielbasa or even smoked tofu for a vegetarian version.

- **Bell Peppers (1 red, 1 yellow)**
  Sweet and vibrant, they add beautiful color to your dish. Feel free to mix and match; any color pepper will perform beautifully.

- **Broccoli Florets (2 cups)**
  A nutritious addition packed with vitamins and minerals. If broccoli isn’t your favorite, consider substituting with green beans or zucchini for a different flair.

- **Carrots (2 medium, sliced)**
  Sweet and crunchy, they balance the savory notes. You can use frozen mixed vegetables if you're short on fresh produce.

- **Red Onion (1 medium, sliced)**
  A hint of sharpness complements the sweetness. If you prefer milder flavors, go for a sweet onion or shallots.

- **Garlic (4 cloves, minced)**
  Nothing beats the aroma of fresh garlic! If you're in a pinch, garlic powder can work, though fresh is best.

- **Honey (1/4 cup)**
  Adds that perfect touch of sweetness. You can swap it for maple syrup or agave for a vegan alternative.

- **Soy Sauce (2 tablespoons)**
  This umami powerhouse elevates the flavors. To make it gluten-free, opt for tamari or coconut aminos.

- **Olive Oil (2 tablespoons)**
  For sautéing; can replace it with avocado oil for higher heat tolerance.

- **Salt & Pepper to taste**
  Classic seasonings that are key to bringing out the flavors in your dish.

## Step-by-Step Instructions

### Step 1: Prep Your Ingredients
Start by slicing the kielbasa into bite-sized pieces, roughly 1/2 to 1-inch thick. Work your way through the veggies—slice the bell peppers and carrots, chop the broccoli into florets, and thinly slice the red onion. Be sure to mince the garlic as well, as this will be the heart of our delightful sauce!

### Step 2: Heat the Pan
In a large skillet or a deep pan over medium heat, drizzle the olive oil and let it warm up. You want it hot enough that it shimmers but not smoking—perfect time to toss in the kielbasa!

### Step 3: Sear the Kielbasa
Add your kielbasa pieces to the pan in a single layer. Allow them to brown nicely for about 5-7 minutes, turning occasionally. This step is crucial because it will give your dish that smoky flavor and irresistible crunch on the outside.

### Step 4: Add the Veggies
Once the kielbasa is beautifully browned, toss in the red onion, bell peppers, carrots, and broccoli. Stir everything around to combine and let them cook together for about 3-4 minutes. The veggies will start to soften just a bit.

### Step 5: Mince Garlic & Mix the Sauce
Stir in the minced garlic and cook for another minute. Its fragrance will fill your kitchen—trust me, it’s hard to beat! Now, in a small bowl, whisk together the honey and soy sauce. Pour this mixture into the pan, ensuring everything is well-coated.

### Step 6: Simmer and Thicken
Let the pan contents simmer for about 5-7 minutes, stirring occasionally until the veggies are tender-crisp and the sauce has thickened slightly. Reduce the heat to medium-low for this step to avoid burning the sauce while allowing the flavors to meld together.

### Step 7: Taste It!
Don’t forget to taste your masterpiece before serving! Adjust the salt and pepper, giving it a good stir.

## Serving Suggestions

For a delightful presentation, serve this honey garlic kielbasa and veggies on a large platter, ensuring the colorful veggies are beautifully displayed. Accompany it with a grain, such as fluffy rice or quinoa, to soak up the delicious sauce. You may also want to sprinkle some sesame seeds or fresh parsley over the top for a pop of color and finishing touch!

## Recipe Variations

1. **Sweet and Spicy**: Add a splash of sriracha or red pepper flakes to the honey garlic sauce for a kick.

2. **Herb-infused**: Toss in fresh herbs like thyme or rosemary for an aromatic twist.

3. **Roasted version**: Instead of sautéing, try roasting everything in the oven for an entirely different texture. Just toss everything together on a baking sheet, drizzle with olive oil, and roast at 425°F for about 30-35 minutes.

4. **Low-carb option**: Substitute the kielbasa with chicken breast or shrimp and add cauliflower rice instead of regular rice for a low-carb delight.

5. **Vegetarian Delight**: Swap kielbasa with grilled tempeh or chickpeas for a plant-based version that’s just as satisfying!

## Chef’s Notes

This recipe has come a long way since I first stumbled upon it years ago. Initially, I cooked it without any real seasoning—can you imagine? It was okay, but it was lacking that ‘wow’ factor. After test runs, addition of honey, garlic, and soy sauce turned it into my family's go-to weeknight meal.

Oh, and don’t get me started on the kitchen disasters along the way—like the time I accidentally knocked over the entire spice rack when trying to get the garlic! Let’s just say, that was a ten-minute cleanup job. And let me tell you, no amount of salt can save a dish that doesn’t have your heart in it!

## FAQs and Troubleshooting

### Q1: Can I use raw kielbasa instead of pre-cooked?
Absolutely! Just cook it a bit longer at the beginning to ensure it’s properly cooked through.

### Q2: What if my sauce is too thick?
If your sauce thickens too much, just add a splash of water or broth until it reaches your desired consistency.

### Q3: Can I make this ahead of time?
Yes, you can prep all the ingredients a day in advance and just sauté everything when you're ready to eat.

### Q4: How can I store leftovers?
Store any leftovers in an airtight container in the fridge for up to three days or freeze them for later. Reheat on the stove to keep that lovely texture!

## Nutritional Info (if applicable)

This recipe generally yields about 4 servings, with each serving roughly containing:
- Calories: 400
- Protein: 20g
- Carbs: 30g
- Fat: 25g

Note: Nutritional values can vary based on specific brands and ingredient types used.

---

There you have it! A wholesome, simple, and unbelievably tasty dish that brings joy and comfort to your table. I can't wait to see how you make it your own. Happy cooking, and remember: the kitchen is always a place for love!

One-Pan Honey Garlic Kielbasa & Veggies
- Total Time: 45 minutes
- Yield: 4 servings 1x
- Diet: Omnivore
Description
A savory and sweet one-pan dish featuring kielbasa and vibrant veggies, simmered in a luscious honey garlic sauce.
Ingredients
- 14 oz Kielbasa
- 1 red Bell Pepper
- 1 yellow Bell Pepper
- 2 cups Broccoli Florets
- 2 medium Carrots, sliced
- 1 medium Red Onion, sliced
- 4 cloves Garlic, minced
- 1/4 cup Honey
- 2 tablespoons Soy Sauce
- 2 tablespoons Olive Oil
- Salt & Pepper to taste
Instructions
- Prep Your Ingredients: Slice the kielbasa into bite-sized pieces, slice the bell peppers and carrots, chop the broccoli into florets, and thinly slice the red onion. Mince the garlic.
- Heat the Pan: In a large skillet over medium heat, drizzle the olive oil and let it warm up.
- Sear the Kielbasa: Add the kielbasa pieces to the pan and brown for about 5-7 minutes.
- Add the Veggies: Toss in the red onion, bell peppers, carrots, and broccoli and cook for about 3-4 minutes.
- Mix the Sauce: Stir in the minced garlic and cook for another minute, then whisk together the honey and soy sauce and pour into the pan.
- Simmer and Thicken: Let the contents simmer for about 5-7 minutes until tender-crisp and the sauce thickens slightly.
- Taste It: Adjust salt and pepper to taste before serving.
Notes
Serve with rice or quinoa to soak up the sauce; you can also garnish with sesame seeds or fresh parsley.
- Prep Time: 15 minutes
- Cook Time: 30 minutes
- Category: Main Course
- Method: Sautéing
- Cuisine: American
Nutrition
- Serving Size: 1 serving
- Calories: 400
- Sugar: 20g
- Sodium: 900mg
- Fat: 25g
- Saturated Fat: 8g
- Unsaturated Fat: 12g
- Trans Fat: 0g
- Carbohydrates: 30g
- Fiber: 3g
- Protein: 20g
- Cholesterol: 60mg
Keywords: kielbasa, one-pan, honey garlic, easy dinner, family meal
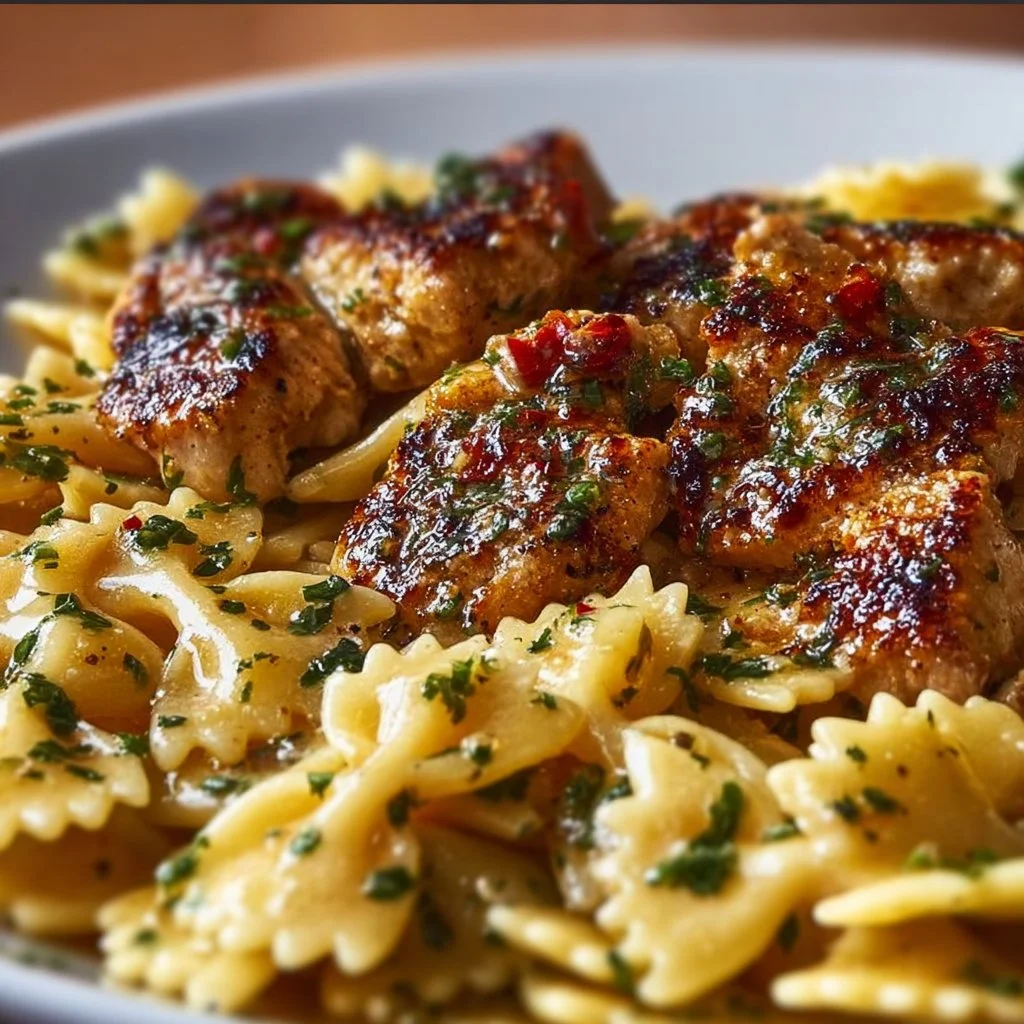
Garlic Butter Chicken and Bowtie Pasta
Garlic Butter Chicken and Bowtie Pasta: A Cozy Culinary Adventure
Hello, fellow food lovers! Welcome back to my cozy corner of the kitchen, where the aroma of garlic and fresh herbs fill the air, and the sizzle of a hot skillet brings a smile to my face. Today, I’m thrilled to share one of my all-time favorite recipes: Garlic Butter Chicken and Bowtie Pasta. This dish captures everything I adore about cooking — it’s simple, packed with flavor, and perfect for gathering those you care about around the dinner table.
Imagine this: a creamy garlic butter sauce enveloping tender chunks of chicken, all tossed with cute bowtie pasta. It’s like a warm hug on a plate! Whether you’re whipping it up for a weeknight dinner or impressing guests at your next gathering, this recipe is guaranteed to be a hit.
As we cook together, I’ll share stories, tips, and maybe even a few kitchen secrets. Cooking should always be fun, so let’s roll up our sleeves, get those aprons on, and dive into some kitchen magic. Ready? Let’s go!
Personal Story
Whenever I think about this dish, I’m transported back to a chilly autumn evening a few years ago when I decided to host a cozy dinner for my closest friends. The leaves were turning golden, and the crisp air was calling for comfort food. I wanted something that felt homely yet felt a bit fancy — that’s when Garlic Butter Chicken and Bowtie Pasta came to mind.
I remember bustling around my tiny kitchen, chatting with my friends while sautéing garlic in a generous amount of butter. The intoxicating smell wafted through the house, and their eyes lit up with anticipation. It not only brought us together over a delicious meal but also sparked laughter and shared memories at the table. Plus, I had a little too much wine, and watching them enjoy the food and each other’s company made it all the more worthwhile. This dish is etched in my memory not just for its taste, but for the warmth of that night spent with people I love.
Ingredients
Here’s what you’ll need for this delightful recipe:
-
Chicken Breasts (1.5 lbs)
- I like using boneless, skinless chicken breasts for a quick-cooking, lean protein. If you’re short on time, rotisserie chicken works in a pinch!
-
Bowtie Pasta (12 oz)
- These little pasta shapes are fun and perfect for holding onto the sauce! You can swap them with any pasta you have on hand—fusilli or penne work great, too!
-
Garlic (6 cloves, minced)
- Fresh garlic is key here, giving that rich, aromatic flavor. If you’re in a bind, garlic powder can substitute, but I promise, nothing beats fresh!
-
Butter (1/2 cup)
- The star of our sauce! I recommend unsalted butter, so you can control the seasoning. If you want a lighter option, use olive oil, though the flavor profile will change a bit.
-
Chicken Broth (1 cup)
- Low-sodium broth is the best for balancing flavors without overpowering saltiness. Homemade broth adds an extra depth, but store-bought works too!
-
Heavy Cream (1/2 cup)
- This adds a luscious creaminess. If you prefer a lighter option, you can use half-and-half, or for a dairy-free version, coconut cream works impressively well!
-
Parmesan Cheese (1/2 cup, grated)
- Always go for the freshly grated! It melts beautifully into the sauce. Nutritional yeast is a fantastic substitute for a vegan twist.
-
Fresh Parsley (for garnish)
- A sprinkle of fresh parsley brightens up the dish. If you’re out, some basil or chives make lovely alternatives.
-
Salt and Pepper to taste
- Essential magic that enhances all the flavors in your dish.
Step-by-Step Instructions
Cooking the Pasta
-
Boil the Water
- Start by bringing a large pot of salted water to a boil. The salt enhances the pasta’s flavor, so don’t skip it!
-
Cook the Bowtie Pasta
- Once boiling, add the bowtie pasta and cook according to package instructions (usually around 10-12 minutes) until al dente. Give it a stir occasionally. This step keeps the pasta from sticking together.
Cooking the Chicken
-
Prepare the Chicken
- While the pasta is cooking, season the chicken breasts with salt and pepper on both sides.
-
Sear the Chicken
- In a large skillet, melt 2 tablespoons of butter over medium-high heat. Once the butter is bubbling, add the chicken breasts. Cook for about 6-7 minutes on each side until golden brown and cooked through. (Pro tip: you can tell it’s done when the internal temperature reaches 165°F!)
-
Let it Rest
- Remove the chicken from the skillet and let it rest on a cutting board for about 5 minutes before slicing. This helps keep it juicy!
Making the Sauce
-
Sauté the Garlic
- In the same skillet, lower the heat to medium and melt the remaining butter. Toss in the minced garlic and sauté for about 1-2 minutes, just until fragrant. Don’t let it brown — burnt garlic is a no-no!
-
Add the Broth
- Pour in the chicken broth, stirring to deglaze the skillet, scraping up all those tasty brown bits. Bring it to a simmer.
-
Stir in the Cream
- Once simmering, reduce the heat to low and add the heavy cream. Stir until everything is well combined and creamy.
-
Add Parmesan
- Toss in the grated Parmesan cheese and mix until melted and the sauce is velvety. Taste and season with more salt and pepper, if needed. I sometimes throw in a pinch of red pepper flakes for an extra kick!
Combining it All
-
Mix Pasta and Chicken
- Drain the pasta (be sure to save a bit of the pasta water in case the sauce needs thinning). Add the pasta to the skillet along with the sliced chicken. Toss everything together until well coated, adding a splash of reserved pasta water if necessary for consistency.
-
Garnish and Serve
- Finally, sprinkle with fresh parsley and serve immediately. That twinkling garnish adds a pop of color and freshness!
Serving Suggestions
To plate this delightful dish, serve it in shallow bowls to showcase the fun shape of the bowtie pasta paired with the savory garlic butter sauce and succulent chicken. A sprinkling of freshly grated Parmesan and parsley on top elevates the presentation to a new level. Pair it with a glass of crisp white wine and some crusty bread for soaking up that delicious sauce — it’s truly a match made in heaven.
Recipe Variations
-
Spicy Garlic Butter Chicken: Add a teaspoon of cayenne pepper or red pepper flakes while sautéing the garlic for a spicy twist.
-
Veggie Delight: Toss in some sautéed veggies like spinach, cherry tomatoes, or broccoli to add color and nutrients.
-
Pesto Twist: Substitute half the butter with pesto for a fresh, herby flavor boost.
-
Mushroom Medley: Include sautéed mushrooms alongside the garlic for an earthy, savory depth to the dish.
-
Lemon Zest: A squeeze of fresh lemon juice or zest just before serving adds a refreshing brightness.
Chef’s Notes
This recipe has evolved over time, with countless tweaks and changes along the way. I once added too much garlic (there’s no such thing as too much garlic, right?), and it turned into a garlic lover’s dream! Each time I make it, I experiment with something new, keeping the base elements intact. The joy of cooking lies in its versatility. I can’t wait to hear how you make it your own, too!
FAQs and Troubleshooting
Q: What can I do if my sauce is too thick?
A: Simply add a splash of reserved pasta water or more chicken broth to thin it out to your desired consistency.
Q: Can I use frozen chicken?
A: If you’re using frozen chicken, make sure to thaw it completely for even cooking!
Q: How can I make this dish ahead of time?
A: You can prepare the chicken and sauce up to a day in advance. Just combine everything before serving and warm gently on the stove.
Q: What should I serve on the side?
A: A simple green salad or steamed vegetables make excellent side dishes, offering a light contrast to this rich meal.
Nutritional Info (Optional)
- Servings: 4
- Calories per serving: Approximately 620
- Protein: 35g
- Carbohydrates: 50g
- Fat: 30g
There you have it, my favorite Garlic Butter Chicken and Bowtie Pasta recipe! I hope you find joy in cooking it as much as I enjoyed sharing it with you. Let’s gather around the table and make some delicious memories together! Happy cooking! 🍽️
Print
Garlic Butter Chicken and Bowtie Pasta
- Total Time: 45 minutes
- Yield: 4 servings 1x
- Diet: Non-Vegetarian
Description
A creamy garlic butter sauce enveloping tender chunks of chicken, tossed with cute bowtie pasta.
Ingredients
- 1.5 lbs Chicken Breasts, boneless and skinless
- 12 oz Bowtie Pasta
- 6 cloves Garlic, minced
- 1/2 cup Butter
- 1 cup Chicken Broth
- 1/2 cup Heavy Cream
- 1/2 cup Parmesan Cheese, grated
- Fresh Parsley, for garnish
- Salt and Pepper to taste
Instructions
- Boil the water in a large pot of salted water.
- Cook the bowtie pasta according to package instructions until al dente.
- Prepare the chicken breasts by seasoning with salt and pepper.
- Sear the chicken in a large skillet with melted butter until golden brown and cooked through.
- Let the chicken rest before slicing.
- Sauté minced garlic in the skillet with remaining butter until fragrant.
- Add the chicken broth and bring to a simmer.
- Stir in the heavy cream and Parmesan cheese until well combined.
- Mix the cooked pasta and chicken in the sauce, coating well.
- Garnish with fresh parsley before serving.
Notes
You can add a pinch of red pepper flakes for a kick or substitute half the butter with pesto for an herby flavor.
- Prep Time: 15 minutes
- Cook Time: 30 minutes
- Category: Main Course
- Method: Sautéing
- Cuisine: Italian
Nutrition
- Serving Size: 1 serving
- Calories: 620
- Sugar: 3g
- Sodium: 800mg
- Fat: 30g
- Saturated Fat: 18g
- Unsaturated Fat: 8g
- Trans Fat: 1g
- Carbohydrates: 50g
- Fiber: 2g
- Protein: 35g
- Cholesterol: 120mg
Keywords: Garlic Butter Chicken, Bowtie Pasta, Cozy Dinner, Comfort Food
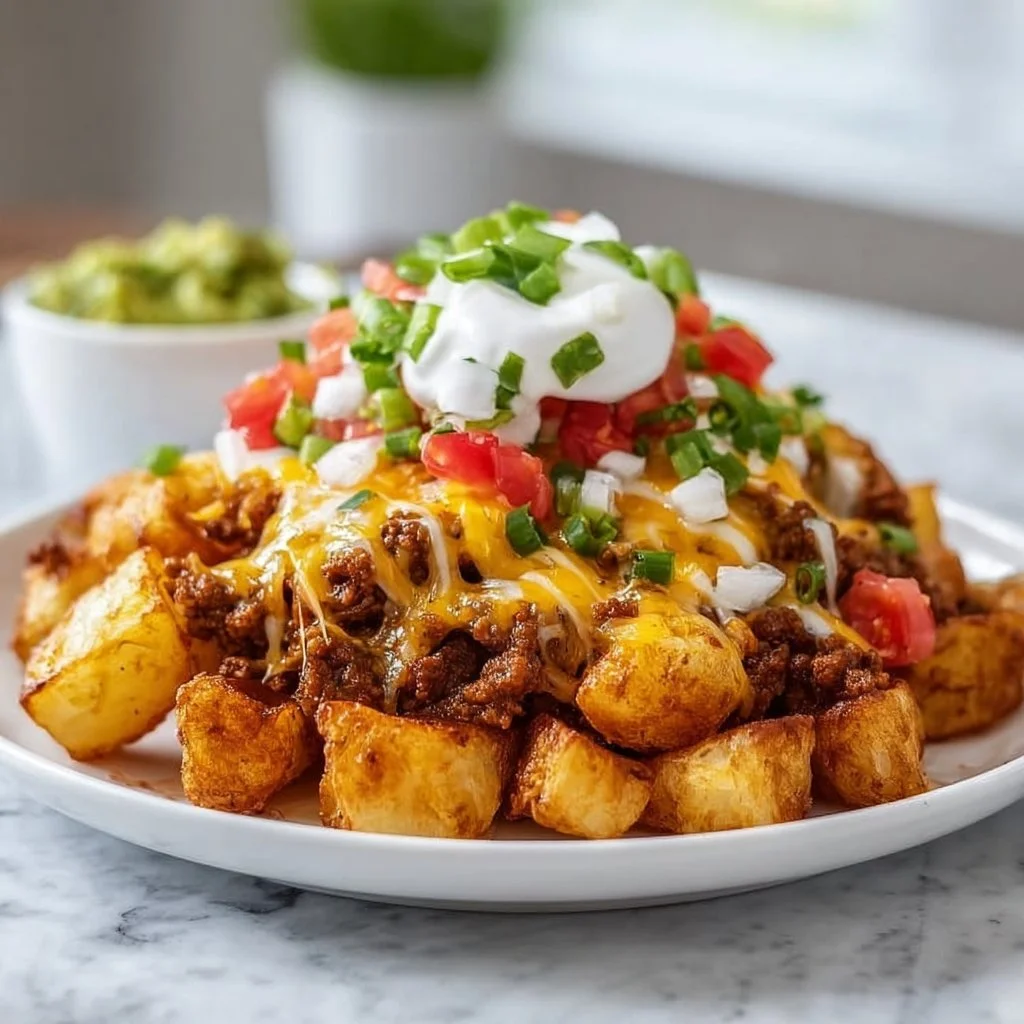
Cheesy Taco Potatoes
Cheesy Taco Potatoes: A Cozy Comfort Dish to Bring Everyone Together
Welcome to my kitchen! Today, we’re diving into a dish that’s close to my heart—Cheesy Taco Potatoes. Picture crispy golden potatoes, smothered in melted cheese, and packed with all the bold, zesty flavors of taco night. It’s a comforting blend that’s sure to bring smiles, laughter, and maybe even a bit of nostalgia to your dinner table. Whether you’re having a casual weeknight meal or hosting friends for game night, these cheesy potatoes will be the star of your spread!
Cheesy Taco Potatoes are more than just a recipe; they’re a celebration of flavors that transform humble ingredients into something spectacular. With pantry staples like potatoes, cheese, and taco seasoning, this dish is simple yet oh-so-satisfying. Plus, it’s versatile enough to please everyone’s taste buds, making it the perfect option for family dinners or gatherings with friends!
A Taste of Nostalgia
Growing up, taco night was always a family favorite. I vividly remember my parents whipping up tacos with all the fixings—ground beef simmering with spices, fresh veggies chopped, and an array of toppings laid out in colorful bowls. But what I looked forward to the most was when we made taco-loaded potatoes. My mom would bake some potatoes until crisp and fluffy and then let us go wild adding our favorite taco toppings. It became a tradition, and those meals were filled with laughter, creativity, and a whole lot of cheese!
To this day, I cherish those memories, and every time I whip up a batch of Cheesy Taco Potatoes, I’m transported back to those joyful evenings around the dinner table. It’s not just a dish; it’s a connection to my roots, and I can’t wait to share it with you!
Ingredients
Here’s what you’ll need to make your own Cheesy Taco Potatoes:
-
Potatoes (Russet or Yukon Gold)
Tip: These starchy varieties are ideal for baking. If you’re in a pinch, sweet potatoes add a lovely twist, too!
-
Ground Beef or Turkey
Chef Insight: Use lean ground meat for a healthier option. You can also substitute with black beans for a vegetarian version!
-
Taco Seasoning
Substitution: Homemade taco seasoning is super easy to whip up with spices like cumin, chili powder, garlic powder, and paprika!
-
Cheddar Cheese
Quick Tip: Experiment with different cheese types—Monterey Jack or Pepper Jack can add a spicy kick!
-
Sour Cream
Substitution: Greek yogurt is a fantastic substitute for a lighter option that still packs that creamy flavor.
-
Chopped Green Onions
Nutritional Bonus: These add a fresh crunch and a burst of color! Feel free to toss in some bell peppers or tomatoes for extra veggies.
-
Corn (canned or frozen)
Chef Advice: Corn adds sweetness and texture. You can swap it for black olives or diced avocados if you prefer!
-
Olive Oil
Tip: A splash of butter will add richness, but olive oil keeps things light and fragrant.
Step-by-Step Instructions
Let’s get cooking! Follow these steps for the yummiest Cheesy Taco Potatoes.
1. Preheat the Oven
Start by preheating your oven to 400°F (200°C). This will ensure that your potatoes have a crispy texture on the outside while remaining fluffy on the inside.
2. Prepare the Potatoes
Wash your potatoes thoroughly, then pierce them a few times with a fork. This will allow steam to escape while they bake. Drizzle with a little olive oil and sprinkle with salt before wrapping them in aluminum foil. This will help them roast evenly and keep them moist.
3. Bake the Potatoes
Pop those bad boys in the preheated oven for about 45-60 minutes or until they’re fork-tender. Pro tip: you can check if they’re done by simply inserting a fork into the center. If it slides in easily, you’re good to go!
4. Cook the Meat
While your potatoes are baking, it’s time to get the taco meat ready. In a skillet, heat a splash of olive oil over medium heat. Add in your ground beef or turkey and cook it until it’s browned. Be sure to break it up with a spatula to ensure even cooking.
Once the meat is fully cooked, add in your taco seasoning with a splash of water. Let it simmer for about 5-7 minutes until the flavors meld beautifully. Ooh, that aroma!
5. Assemble Your Ingredients
Now, it’s assembly time! Once the potatoes are baked, carefully remove them from the oven. When they’re cool enough to handle, slice them open (but don’t cut all the way through!). Gently fluff the insides with a fork.
6. Load It Up
For each potato, start with a generous scoop of the seasoned meat. Follow it up with a handful of corn, a sprinkle of cheese, and a dollop of sour cream. Top with chopped green onions. Can you smell that? Heaven!
7. Back to the Oven
Return the loaded potatoes back to the oven for an additional 10 minutes or until the cheese is perfectly melted and bubbly. Trust me; this step is crucial for that melty goodness!
8. Final Touches
Once your Cheesy Taco Potatoes are out of the oven, let them cool for a minute before serving. You can garnish them with additional toppings like diced tomatoes, jalapeños, or even a drizzle of hot sauce for that extra kick!
Serving Suggestions
Plate these beauties by arranging them on a large platter, sprinkle with chopped cilantro, or keep it casual by serving them in their skins. These potatoes are perfect for sharing and make an impressive centerpiece for any gathering!
Recipe Variations
Feel free to get creative with your Cheesy Taco Potatoes! Here are a few variations to consider:
-
Tex-Mex Loaded Potatoes: Add black beans, corn, and salsa to your meat mixture for a zesty twist.
-
Buffalo Chicken Version: Swap taco meat for buffalo chicken and top with ranch dressing instead of sour cream for a spicy kick!
-
Vegetable Medley: Load your potatoes with sautéed bell peppers, onions, and mushrooms for a flavorful veggie option.
-
Breakfast Style: Top your potatoes with scrambled eggs, avocado, and salsa for a hearty brunch dish.
Chef’s Notes
This recipe has evolved over the years as I’ve played around with flavors and ingredients. My favorite memory is when a friend suggested I try making them with sweet potatoes instead of regular ones. Although initially skeptical, I gave it a shot, and it turned out AMAZING! Who knew they could be so versatile and delicious?
Another tip—sometimes I even whip up a batch and freeze the leftovers. The next time you have a craving for a cheesy fix, just pop them in the oven, and you’re all set!
FAQs and Troubleshooting
1. My potatoes are undercooked—what do I do?
If your potatoes are still hard after the first cook, pop them back in the oven for an additional 10-15 minutes. You can also microwave them for a quick fix, but be sure to check them frequently.
2. How do I prevent my potatoes from getting soggy?
Keeping the skin on while baking helps maintain their integrity. Be sure to only wrap them loosely in aluminum foil—not tightly, as this can trap steam.
3. Can I make this ahead of time?
Absolutely! You can prep everything ahead of time—just assemble your loaded potatoes and store them in the fridge. When you’re ready, just pop them in the oven to heat and melt the cheese.
4. What if I don’t have taco seasoning?
No problem! You can mix up your own with chili powder, cumin, garlic powder, onion powder, and a pinch of salt.
Nutritional Information
While I didn’t calculate exact nutritional values, these Cheesy Taco Potatoes can be a satisfying and hearty meal! Just remember to indulge in portions that fit your dietary needs.
So, there you have it—my delightful take on Cheesy Taco Potatoes. As you whip up this cozy dish, I hope you feel the warmth of those family dinners I cherish so much, and I can’t wait to hear about your own culinary adventures! Happy cooking! 🍽️🤗
Print
Cheesy Taco Potatoes
- Total Time: 75 minutes
- Yield: 4 servings
- Diet: Gluten-Free, Vegetarian (if using beans)
Description
A cozy comfort dish featuring crispy golden potatoes smothered in melted cheese and packed with bold taco flavors.
Ingredients
- Russet or Yukon Gold Potatoes
- Ground Beef or Turkey
- Taco Seasoning
- Cheddar Cheese
- Sour Cream
- Chopped Green Onions
- Corn (canned or frozen)
- Olive Oil
Instructions
- Preheat the oven to 400°F (200°C).
- Prepare the potatoes by washing and piercing them with a fork, drizzling with olive oil, and seasoning with salt.
- Bake the potatoes for 45-60 minutes until fork-tender.
- Cook the meat in a skillet with olive oil until browned; add taco seasoning and a splash of water. Simmer for 5-7 minutes.
- Assemble by removing baked potatoes and fluffing the insides.
- Load each potato with seasoned meat, corn, cheese, and sour cream. Top with green onions.
- Return the loaded potatoes to the oven for an additional 10 minutes to melt the cheese.
- Cool for a minute before serving and garnish with additional toppings if desired.
Notes
Feel free to substitute with black beans for a vegetarian version or try different cheeses for variety.
- Prep Time: 15 minutes
- Cook Time: 60 minutes
- Category: Main Course
- Method: Baking
- Cuisine: Mexican
Nutrition
- Serving Size: 1 potato
- Calories: 350
- Sugar: 5g
- Sodium: 400mg
- Fat: 12g
- Saturated Fat: 4g
- Unsaturated Fat: 6g
- Trans Fat: 0g
- Carbohydrates: 45g
- Fiber: 3g
- Protein: 15g
- Cholesterol: 30mg
Keywords: cheesy potatoes, taco potatoes, comfort food, Mexican cuisine, easy recipes
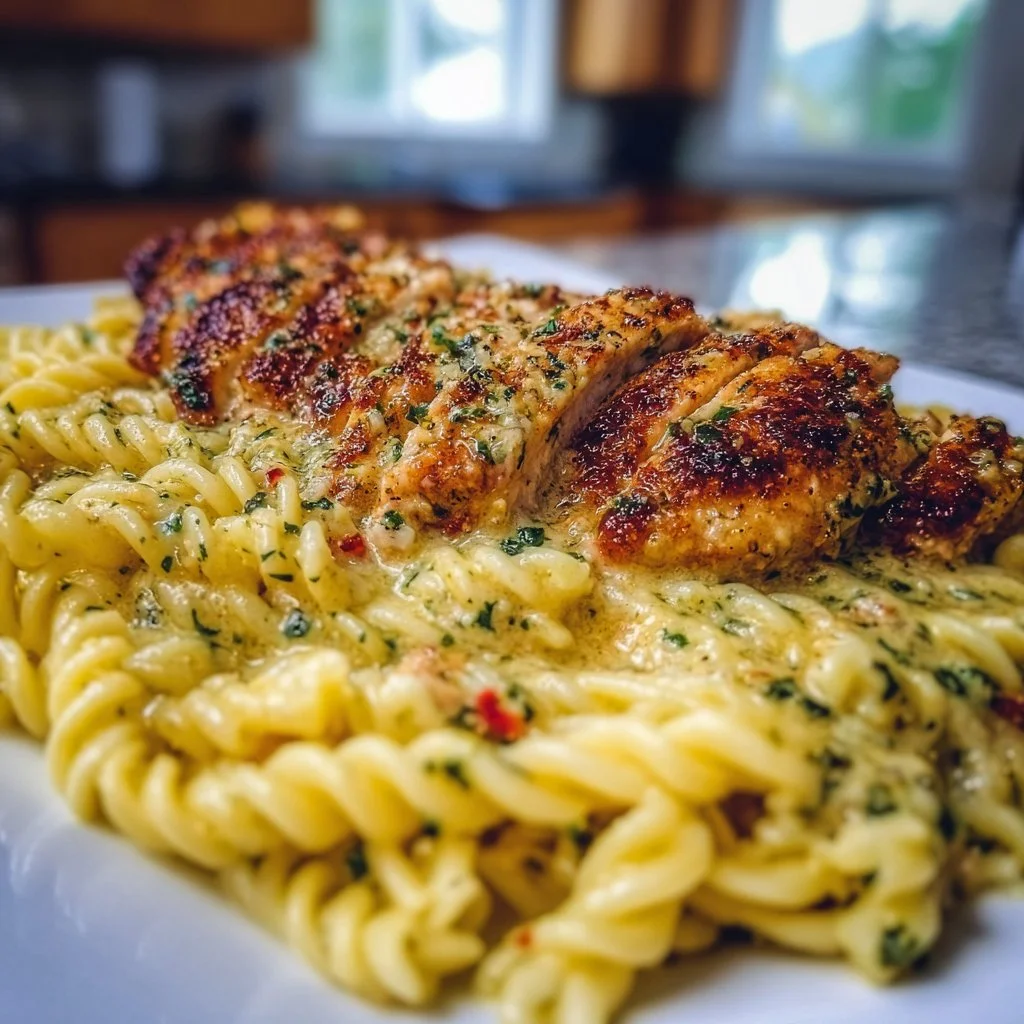
The Ultimate Creamy Garlic Parmesan Chicken Pasta You’ll Crave Every Week
The Ultimate Creamy Garlic Parmesan Chicken Pasta You’ll Crave Every Week
Hey there, fellow food lovers! Are you ready to embark on a culinary journey that will transform ordinary weeknights into something spectacular? Today, we’re diving into the rich, creamy, and utterly delightful world of Creamy Garlic Parmesan Chicken Pasta! This dish is like a warm hug on a plate, with hearty flavors that will make your taste buds dance with joy.
Imagine this: it’s a cozy evening, and the aroma of garlic is wafting through your kitchen as you sauté chicken in a luscious cream sauce. You look up to see your loved ones gathering around the table, their eyes wide with anticipation, and you just know you’ve got something special cooking up! This recipe not only brings comfort but also creates beautiful memories and conversations around the dinner table—a hallmark of any fantastic homemade dish.
Now, I must confess, this recipe holds a special place in my heart. It’s the kind of dish my family requests whenever we have guests over or when they want a little pick-me-up. The beauty of this Creamy Garlic Parmesan Chicken Pasta is its versatility—perfect for an elegant date night or a quick Monday dinner after a long day. Even if you’re a kitchen novice, fear not! With my step-by-step guidance sprinkled throughout this post, you’ll be crafting restaurant-quality meals like a pro in no time!
So, grab your apron, roll up your sleeves, and let’s get started on this culinary adventure that’ll surely become a staple in your home kitchen!
Personal Story
The first time I made Creamy Garlic Parmesan Chicken Pasta, I was a curious teenager with a newfound love for cooking. I remember excitedly flipping through my mom’s old recipe box, a treasure trove of handwritten cards and lovingly stained pages. I stumbled upon a recipe that caught my eye – “Easy Chicken Alfredo.” Armed with a few basic ingredients and an eagerness to impress, I whisked up a creamy sauce that I poured over perfectly cooked pasta.
The moment that first bite hit my palate, I was hooked. It was everything you could hope for: rich, cheesy, with just the right amount of garlicky goodness! Seeing my family gather around the table, seemingly entranced by the aroma, filled me with pride. That night turned into more than just dinner; it sparked a tradition where we’d gather not just to eat but to share stories, laughter, and joy—just the way food was meant to be enjoyed.
Over the years, I’ve adapted the recipe, adding my twists and turns, but the heart of that initial dish always remains. Every time I whip it up, I’m reminded of that magical day when cooking transformed not just a meal but our family dynamics. Grab a seat, because I can promise you, you’ll want to recreate those moments!
Ingredients
For the Chicken and Pasta
- Chicken Breast: About 2 large breasts cut into cubes. You can use thighs for a juicier alternative.
- Pasta: 12 ounces of your choice. Fettuccine or penne work great! Opt for whole wheat or gluten-free for healthier options.
For the Creamy Sauce
- Heavy Cream: 1 cup, the magical ingredient for that luscious creamy texture. Substitute with half-and-half or coconut cream if you prefer a lighter option.
- Garlic: 4-5 cloves, minced. Fresh garlic is best, but pre-minced from a jar works fine in a pinch.
- Parmesan Cheese: 1 cup, freshly grated. Although you can use the pre-grated variety, fresh cheese melts better.
Flavor Boosters
- Butter: 2 tablespoons for richness.
- Olive Oil: 1 tablespoon to cook the chicken without any sticking.
- Italian Seasoning: 1 teaspoon or try a mix of basil, oregano, and thyme.
- Salt and Pepper: To taste, enhancing the flavors beautifully.
Optional Flavor Enhancements
- Red Pepper Flakes: For a spicy kick, sprinkle some in the sauce!
- Fresh Parsley: For garnish, adds a beautiful pop of color and freshness.
Quick Chef Insight
Cooking is all about experimentation! Feel free to customize flavors, using herbs you love or even adding veggies like spinach or mushrooms for an extra boost. Cooking should be a joyous and creative endeavor—don’t be afraid to make it yours!
Step-by-Step Instructions
-
Cook the Pasta:
Start by boiling a large pot of salted water and cook your pasta according to package instructions until al dente. Remember, it’ll cook a bit more after you add it to the sauce. Drain and set aside. A little pasta water can be saved to adjust the sauce later! -
Prepare the Chicken:
In a large skillet, heat the olive oil over medium heat. Add the cubed chicken and season with salt, pepper, and half of the Italian seasoning. Sauté until the chicken is golden brown and cooked through, about 7-9 minutes. Tip: avoid moving the chicken too much in the pan—it’ll build that nice golden crust! Once done, set the chicken aside. -
Craft the Creamy Sauce:
In the same pan, reduce heat to low and melt 2 tablespoons of butter. Add minced garlic and sauté for about 1-2 minutes until fragrant (but not burnt—garlic can turn bitter!). Pour in the heavy cream, stirring to combine, and sprinkle in the remaining Italian seasoning. Bring to a gentle simmer, then stir in the parmesan cheese gradually, allowing it to melt into the cream. -
Combine Pasta and Chicken:
Add your cooked pasta and chicken back into the skillet, tossing everything to coat evenly in that creamy goodness. Don’t forget to adjust the sauce’s consistency with a splash of the reserved pasta water if needed. Chef hack: add a splash at a time to control the thickness! -
Taste and Final Seasoning:
Give your creation a taste and adjust with salt, pepper, or more parmesan if you fancy. If you like some heat, toss in red pepper flakes at this stage. -
Plate It Up:
Serve your Creamy Garlic Parmesan Chicken Pasta piping hot, garnished with freshly chopped parsley (and more parmesan, if desired!).
Serving Suggestions
For that truly Instagram-worthy presentation, serve your Creamy Garlic Parmesan Chicken Pasta in wide, shallow bowls. Twirl the pasta for a beautiful mound and sprinkle a generous amount of freshly chopped parsley and grated parmesan on top. Pair it with crusty garlic bread on the side and a simple mixed salad drizzled with vinaigrette for a well-rounded meal that’ll leave everyone raving!
Recipe Variations
- Mushroom and Spinach Variation: Sauté sliced mushrooms and fresh spinach alongside the garlic for added earthiness and nutrients.
- Lemon Garlic Twist: Add a splash of fresh lemon juice and zest for a refreshing zing that perks up the creaminess.
- Pesto Delight: Stir in a couple of tablespoons of pesto to the sauce for a herby kick.
- Creamy Tomato Version: Mix in some diced tomatoes or tomato paste to create a lovely pink sauce.
- Vegan Option: Swap chicken for chickpeas and use coconut cream with nutritional yeast for a cheesy flavor.
Chef’s Notes
The incredible thing about this recipe is its adaptability! I’ve played with flavors and ingredients over the years, changing things up based on what’s in my pantry, and it always turns out delicious. Honestly, one Thanksgiving, I made a large batch to kick off our feast, and my cousin declared it a “holiday tradition!” From there, it became a beloved favorite at family gatherings.
A funny kitchen moment to note: one time I poured an entire cup of salt instead of sugar (yes, that happened!) while trying to recreate the creamy sauce in a hurry. Let’s just say, not all disasters end up as great stories, but they certainly make for a good laugh!
FAQs and Troubleshooting
-
Why did my sauce break?
- If your sauce separates, it may have overheated. Always keep the heat low when adding cream and cheese, stirring gently to combine.
-
Can I use frozen chicken?
- Yes! Just make sure to cook it thoroughly. Thaw completely before starting if you have time; otherwise, increase the cooking time.
-
My pasta is too sticky. What happened?
- This can occur if you skip the step of rinsing the pasta briefly after draining, especially if they sit too long. Toss with a little olive oil before adding to the sauce to help separate it!
-
How can I make this lighter?
- You can use a lower-fat milk or half-and-half instead of heavy cream, and reduce the amount of cheese to lighten the dish while still holding flavor.
Nutritional Info (Optional)
- Calories per serving: Approximately 600 kcal
- Protein: 35g
- Carbs: 65g
- Fats: 25g
When made with lean chicken and whole wheat pasta, this dish can fit into a balanced diet!
And there you have it! The Ultimate Creamy Garlic Parmesan Chicken Pasta—delicious, comforting, and perfect for any occasion. No matter how you serve it, it’s bound to become a favorite in your home as it has in mine. Happy cooking, my foodie friends! 🍽✨
Print
Ultimate Creamy Garlic Parmesan Chicken Pasta
- Total Time: 45 minutes
- Yield: 4 servings 1x
- Diet: Paleo
Description
Indulge in this rich, creamy, and savory pasta dish, made with garlic, parmesan, and tender chicken, perfect for weeknight dinners or special occasions.
Ingredients
- About 2 large Chicken Breasts, cut into cubes
- 12 ounces Pasta (Fettuccine or penne preferred)
- 1 cup Heavy Cream
- 4–5 cloves Garlic, minced
- 1 cup Parmesan Cheese, freshly grated
- 2 tablespoons Butter
- 1 tablespoon Olive Oil
- 1 teaspoon Italian Seasoning
- Salt, to taste
- Pepper, to taste
- Red Pepper Flakes, optional
- Fresh Parsley, for garnish
Instructions
- Cook the pasta: Boil a large pot of salted water and cook the pasta according to package instructions until al dente. Drain and set aside.
- Prepare the chicken: In a large skillet, heat the olive oil over medium heat. Add the cubed chicken, seasoned with salt, pepper, and half of the Italian seasoning. Sauté until golden brown and cooked through, about 7-9 minutes.
- Craft the creamy sauce: In the same pan, reduce heat to low and melt the butter. Add minced garlic and sauté for 1-2 minutes until fragrant. Pour in the heavy cream and stir to combine. Sprinkle in the remaining Italian seasoning and bring to a gentle simmer. Gradually stir in the parmesan cheese until melted.
- Combine pasta and chicken: Add the cooked pasta and chicken back into the skillet, tossing to coat evenly in the sauce. Adjust the sauce’s consistency with reserved pasta water as needed.
- Taste and final seasoning: Taste the dish and adjust the seasoning with salt, pepper, or more parmesan if desired. Add red pepper flakes for heat, if preferred.
- Plate it up: Serve hot, garnished with fresh parsley and additional parmesan if desired.
Notes
For a lighter version, substitute heavy cream with half-and-half, or use a vegan option with chickpeas and coconut cream.
- Prep Time: 15 minutes
- Cook Time: 30 minutes
- Category: Main Course
- Method: Sautéing
- Cuisine: Italian
Nutrition
- Serving Size: 1 serving
- Calories: 600
- Sugar: 3g
- Sodium: 500mg
- Fat: 25g
- Saturated Fat: 15g
- Unsaturated Fat: 8g
- Trans Fat: 0g
- Carbohydrates: 65g
- Fiber: 3g
- Protein: 35g
- Cholesterol: 80mg
Keywords: creamy pasta, chicken pasta, garlic parmesan pasta, Italian recipe, comfort food
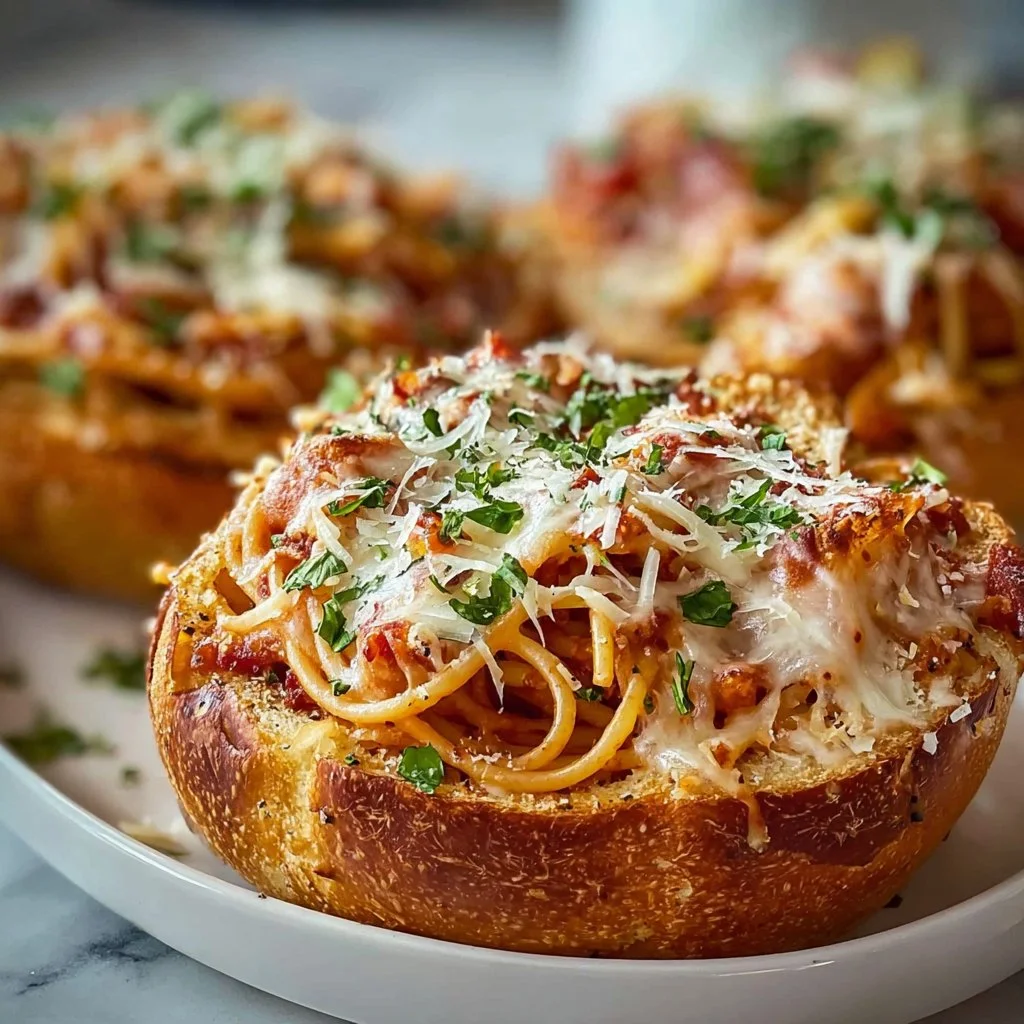
Spaghetti Garlic Bread Bowls
Spaghetti Garlic Bread Bowls: A Cozy Culinary Hug
Welcome back to my kitchen, my fellow foodies! Today, I’m thrilled to share a recipe that marries two of the greatest comfort foods on the planet: pasta and garlic bread. You’re in for a treat with these Spaghetti Garlic Bread Bowls—a delightful innovation that transforms normal spaghetti into a mesmerizing meal experience wrapped in warm, buttery garlic bread.
Picture this: you’re standing in a cozy kitchen, the aroma of toasted bread and roasting garlic filling the air, and a pot of spaghetti bubbling on the stove. Sounds heavenly, right? This dish isn’t just about flavors; it’s about the warmth of home, the joy of cooking, and the memories that come along with it.
This idea sprouted a few autumn evenings ago as I wanted to create a playful and exciting family dinner. My nieces and nephews were over, filled with energy and chaos, so I figured a fun interactive dinner might win me some chef points with them. I envisioned a twirl of spaghetti nestled within a crunchy garlic bread bowl—an edible vessel that would mean fewer dishes. Who doesn’t love that?
As I watched them dive into their creative pasta “bowls,” I realized this dish could easily become a staple in many homes. This recipe is more than just dinner; it’s an invitation to gather around the table, share stories, and savor every delicious bite. So, grab your apron, roll up your sleeves, and let’s get cooking!
Personal Story
Growing up, my Sunday dinners were a time of togetherness, laughter, and, of course, delicious meals. One particularly rainy afternoon, my mom decided to put a twist on our traditional spaghetti and meatballs. With a loaf of slightly stale French bread she had saved, we made garlic bread bowls filled with endless spaghetti and marinara sauce. The kitchen was chaotic: flour flying as I rolled the dough for bread and pots bubbling with sauce everywhere. But amidst all of this, I felt that warm feeling of being together, all of us working in tandem to create something special.
Fast forward to today, and that nostalgic moment has inspired this recipe. It embodies the thrill of creativity, the fun of cooking with loved ones, and the joy of making something new out of the familiar. So, as you attempt this recipe, let every swirl of spaghetti and crunch of garlic bread remind you of those comforting moments shared around the table!
Ingredients
Here’s what you’ll need to create your scrumptious Spaghetti Garlic Bread Bowls:
-
French Bread Loaf: This will form the shell of your garlic bowls. A crusty exterior and fluffy interior work perfectly. If you can’t find French bread, any sturdy loaf can substitute, like ciabatta or sourdough.
-
Spaghetti: Use your favorite spaghetti or substitute with whole wheat or gluten-free options for a healthier twist.
-
Olive Oil: A key flavor component for both the garlic bread and the pasta. You can also use melted butter if you want that classic garlic bread taste.
-
Garlic: Freshly minced garlic infuses the bread with irresistible flavor. If you’re in a pinch, garlic powder can be a quick substitute, but fresh is always best!
-
Parsley: Freshly chopped parsley adds a pop of color and flavor. If you don’t have it, try dried herbs like basil or Italian seasoning.
-
Parmesan Cheese: For that cheesy decadence, freshly grated Parmesan is the way to go! If you’re vegan, nutritional yeast offers a savory alternative.
-
Salt & Pepper: Essential seasonings that bring out the flavors in both the pasta and bread. Feel free to adjust these to your taste!
In this recipe, every ingredient plays its part. Don’t hesitate to get creative with substitutions—we have all been there when that last-minute trip to the store isn’t feasible!
Step-by-Step Instructions
Now that we have our ingredients laid out, let’s dive into the cooking process—your favorite part, right? Here’s how to create these Spaghetti Garlic Bread Bowls step by step:
Step 1: Preheat the Oven
Begin by preheating your oven to 375°F (190°C). This will ensure that our garlic bread is nice and toasty when it’s ready.
Step 2: Prep the Garlic Bread Bowls
- Slice the French bread: Carefully slice your loaf in half lengthwise. Make sure to keep it intact at the bottom—like a little boat!
- Hollow it out: Using your hands or a sharp knife, gently scoop out some of the soft bread from the center to create a little bowl. Don’t take it all out—leave some edges to hold everything in!
Step 3: Make the Garlic Mixture
In a small bowl, mix together:
- 2 tablespoons of olive oil (or melted butter)
- 4 minced garlic cloves
- A pinch of salt and pepper
- Fresh chopped parsley
Stir until combined and fragrant. It’s the moment your kitchen starts smelling divine!
Step 4: Prep the Garlic Bread
Spread the garlic mixture generously onto the cut sides of the bread. Sprinkle a bit of Parmesan cheese on top for added flavor!
Step 5: Bake the Garlic Bread
Place your bread halves on a baking sheet and pop them into your preheated oven for 10-15 minutes, or until the edges are golden and crispy. Keep an eye on them to avoid burning!
Step 6: Cook the Spaghetti
While the garlic bread is baking, bring a pot of salted water to a boil and cook your spaghetti according to package instructions. It’s usually around 8-10 minutes for al dente. Reserve 1/2 cup of pasta water before draining!
Step 7: Create the Sauce
In the same pot you cooked the spaghetti, add a drizzle of olive oil and some more minced garlic. Sauté for about 1 minute before adding in your drained spaghetti.
- Stir in your favorite marinara sauce (I love a homemade version!) and mix well.
- If the sauce seems thick, this is where that reserved pasta water comes in! Add a bit at a time until you reach your desired consistency.
Step 8: Assemble!
Once your garlic bread bowls are out and the spaghetti is perfectly sauced, it’s time for the fun part!
- Fill the bread bowls: Spoon the spaghetti mixture into each garlic bread bowl until it’s overflowing!
- Top with more freshly chopped parsley and a sprinkle of cheese, if you’d like.
Step 9: Serve!
Serve immediately while it’s hot and bubbly! These cheesy, garlicky bowls are perfect for sharing—just don’t forget to grab some napkins!
Serving Suggestions
These Spaghetti Garlic Bread Bowls can easily be the star of your dinner table. I recommend serving them with a fresh garden salad on the side for a nice balance. Pair it with a simple vinaigrette or a classic Caesar dressing to elevate your meal! And of course, a glass of red wine won’t hurt.
Recipe Variations
Want to shake things up? Here are some creative twists to customize your Spaghetti Garlic Bread Bowls:
-
Add Protein: Toss in grilled chicken, shrimp, or meatballs for a heartier meal.
-
Veggie Delight: Incorporate sautéed veggies like bell peppers, spinach, or mushrooms into your sauce for an extra nutrient boost.
-
Cheesy Spin: Experiment with other cheeses! Mozzarella or feta will give it a whole different flavor profile.
-
Herbed Up: Infuse your garlic oil with different herbs like thyme or rosemary for a fragrant lift.
-
Spice it Up: Add a pinch of red pepper flakes to the garlic mixture for a spicy kick.
Chef’s Notes
As I was creating this recipe, I remembered all those antics in the kitchen with my family. One time, my friends and I attempted to stack a mountain of spaghetti in our bread bowls, only to have them collapse spectacularly—what a mess! We laughed until our sides hurt, and it became a running joke every time we made spaghetti.
This dish has evolved from just a fun family recipe into something I love to share with you all. And it keeps evolving! Each time I make it, I think of new creative spins—what will you come up with?
FAQs and Troubleshooting
1. Can I make this dish ahead of time?
Absolutely! You can prepare everything beforehand and simply store your components separately, then bake the bread bowls just before serving.
2. Why is my bread soggy?
A soggy bread bowl can happen if the sauce is too watery or if you let the spaghetti sit in the bowl too long. Ensure your sauce is the right consistency and serve immediately.
3. Can I freeze leftover garlic bread bowls?
While it’s best enjoyed fresh, you can freeze any assembled bowls. Just reheat them in the oven, wrapped in foil, when you’re ready to devour them!
4. How do I prevent the bread from burning?
Keep an eye on your garlic bread bowls while baking. If they start browning too fast, consider lowering the oven temperature slightly!
Nutritional Info
(Per Serving):
- Calories: approx. 400
- Protein: 15g
- Carbohydrates: 60g
- Fiber: 3g
- Total Fat: 12g
Note: Nutritional info may vary based on ingredients used and portion sizes.
I hope you’re as excited as I am to create these Spaghetti Garlic Bread Bowls in your kitchen! Remember, each meal is an opportunity to create memories, so gather your loved ones and prepare for delightful culinary moments. Enjoy every bite, and happy cooking! 🍽️
Print
Spaghetti Garlic Bread Bowls
- Total Time: 45 minutes
- Yield: 4 servings 1x
- Diet: Vegetarian
Description
A delightful innovation that transforms pasta into a mesmerizing meal experience wrapped in warm, buttery garlic bread.
Ingredients
- 1 French Bread Loaf
- 8 oz Spaghetti
- 2 tbsp Olive Oil
- 4 cloves Garlic, minced
- 2 tbsp Fresh Parsley, chopped
- 1/4 cup Parmesan Cheese, grated
- Salt, to taste
- Pepper, to taste
Instructions
- Preheat the oven to 375°F (190°C).
- Slice the French bread in half lengthwise, keeping it intact at the bottom.
- Hollow out some soft bread from the center of each half to create bowls.
- Mix together olive oil, minced garlic, salt, pepper, and parsley in a small bowl until fragrant.
- Spread the garlic mixture onto the cut sides of the bread and sprinkle with Parmesan cheese.
- Bake the bread halves on a baking sheet for 10-15 minutes until golden.
- Cook spaghetti in salted boiling water according to package instructions (about 8-10 minutes).
- Drain spaghetti, reserving 1/2 cup pasta water.
- Sauté more minced garlic in a drizzle of olive oil in the same pot, then add spaghetti and marinara sauce.
- Add reserved pasta water as needed for desired sauce consistency.
- Fill the garlic bread bowls with the spaghetti mixture and top with parsley and cheese.
- Serve immediately while hot and bubbly!
Notes
Feel free to add proteins like chicken or shrimp, or customize with sautéed veggies for a nutritious boost.
- Prep Time: 15 minutes
- Cook Time: 30 minutes
- Category: Main Course
- Method: Baking
- Cuisine: Italian
Nutrition
- Serving Size: 1 serving
- Calories: 400
- Sugar: 4g
- Sodium: 350mg
- Fat: 12g
- Saturated Fat: 4g
- Unsaturated Fat: 6g
- Trans Fat: 0g
- Carbohydrates: 60g
- Fiber: 3g
- Protein: 15g
- Cholesterol: 30mg
Keywords: spaghetti, garlic bread, comfort food, Italian, family dinner
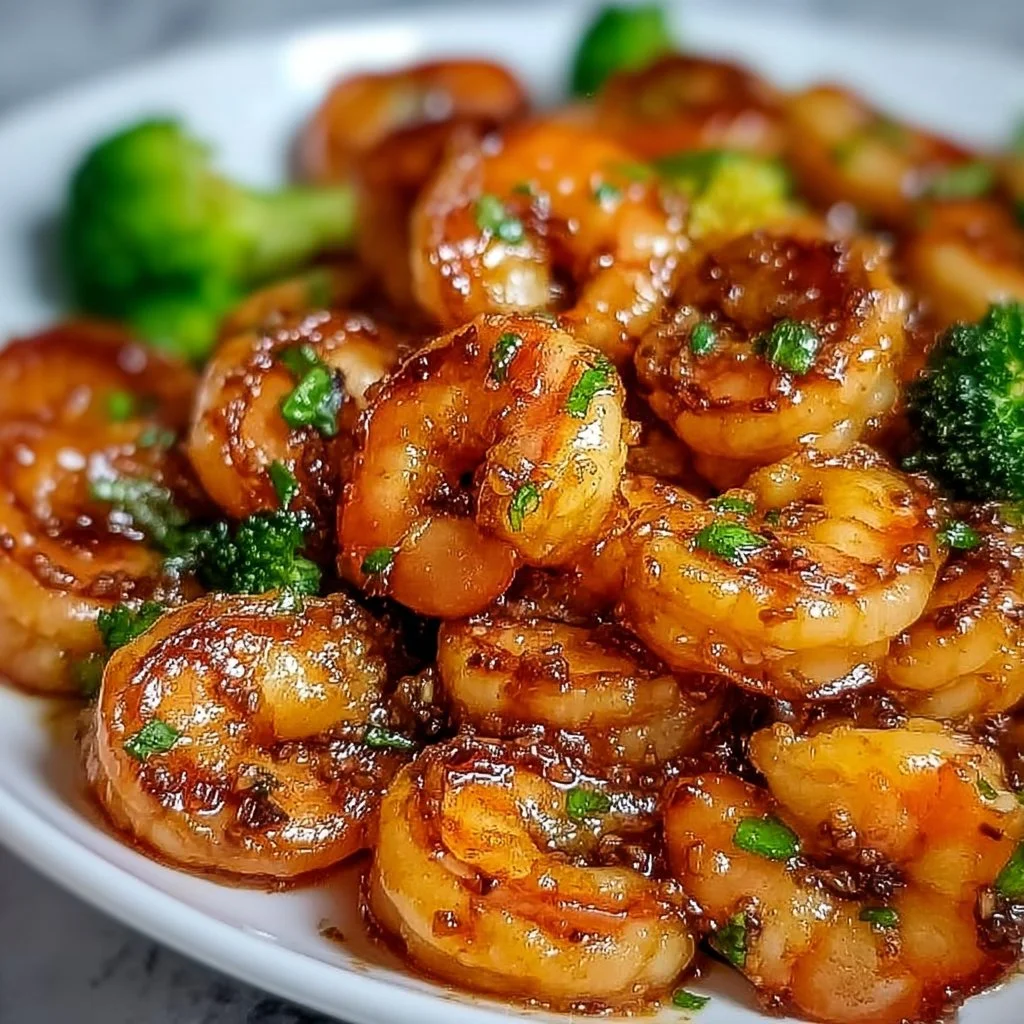
High-Protein Honey Garlic Shrimp
# High-Protein Honey Garlic Shrimp: A Sweet and Savory Celebration

## Introduction

Welcome to my kitchen! Today, we’re diving into a dish that’s not just about fueling our bodies but also about indulging our taste buds—High-Protein Honey Garlic Shrimp. This dish is one of those delightful meals that hit all the right notes. It’s sweet, savory, and absolutely irresistible! Plus, it’s packed with protein, making it an ideal choice for anyone looking to satisfy their hunger while eating something deliciously wholesome.

Imagine the aroma of garlic wafting through your home as you sauté these tender shrimp, coated in a sweet honey garlic glaze. It's a dish that brings together friends and family, igniting chatter and laughter around the dinner table. Whether you're trying to impress guests or just whipping up a quick weeknight meal for yourself, this recipe makes cooking feel special without requiring hours of kitchen prep.

Shrimp is one of those magical ingredients that cooks quickly and easily, perfect for those evenings when you want something yummy but don’t have much time. With just a handful of ingredients, you can create a stunning dish bursting with flavor that’ll make everyone think you’ve been slaving away in the kitchen for hours!

So, grab your apron and let’s get started on this high-protein, sweet, and savory journey. Trust me, your taste buds will thank you!

---

## Personal Story

The first time I made Honey Garlic Shrimp, I was reminiscing about summers spent at my grandmother’s house. Back then, she would take me to the local farmer’s market every Saturday. We'd pick out the freshest ingredients and brainstorm recipe ideas while enjoying samples like tiny cups of honey or freshly caught shrimp. It was a tradition steeped in love and creativity.

One day, we came home with a beautiful batch of shrimp, perfectly pink and waiting to be transformed into something wonderful. After rummaging through her spice cabinet, we decided to make a honey garlic sauce that would become one of our family favorites. I can still hear her laughing as the shrimp danced in the pan, and I’ll never forget how the richness of garlic and sweetness of honey combined to create a sauce that had us licking our plates clean.

Now, whenever I make this dish, I’m transported back in time, surrounded by the joy of sharing good food and better company. My version may have a few tweaks, but the essence and deliciousness remain the same. I’m excited to share this with you, so you can make your own memories around the table!

---

## Ingredients

Here’s what you’ll need for our High-Protein Honey Garlic Shrimp:

- **1 pound large shrimp (peeled and deveined)**
  Shrimp is not only delicious but also an excellent source of high-quality protein, low in calories. If you're not a fan of shrimp, feel free to substitute with chicken breast or firm tofu for a different protein option.

- **4 tablespoons honey**
  Honey brings that irresistible sweetness. It also acts as a natural preservative! If you prefer a vegan option, maple syrup makes a fantastic and tasty alternative.

- **4 cloves garlic (minced)**
  Garlic is the heart of this dish, offering depth and flavor. For convenience, pre-minced garlic is available, but nothing beats the flavor of freshly minced garlic!

- **2 tablespoons soy sauce (or tamari for gluten-free)**
  This adds umami and saltiness that perfectly balances the sweetness of honey. Coconut aminos is a great gluten-free substitute that is also lower in sodium.

- **1 tablespoon olive oil**
  A staple in any kitchen! You can use sesame oil for an extra layer of flavor, as it has a wonderful nutty profile.

- **1/2 teaspoon black pepper**
  Gives a nice kick without overpowering the dish. Feel free to adjust to your spice preference.

- **1/2 teaspoon chili flakes (optional)**
  For those who love spice, a little kick can elevate the dish to the next level. You can skip it altogether if you prefer a milder taste.

- **Chopped green onions (for garnish)**
  These add freshness and a pop of color to the dish. If you don't have green onions, chopped cilantro or parsley works beautifully too.

---

## Step-by-Step Instructions

1. **Prepping the Shrimp**
   Start with your shrimp! If you bought frozen shrimp, make sure to thaw it completely under cold running water or overnight in the fridge. Then, pat them dry with paper towels to remove excess moisture—this helps them get a beautiful sear.

2. **Make the Honey Garlic Sauce**
   In a small bowl, whisk together the honey, minced garlic, soy sauce, olive oil, and chili flakes (if using). This sauce is gonna be the star of the dish, so taste it and adjust to your liking. Add more honey for sweetness or soy sauce for savory!

3. **Cook the Shrimp**
   Heat a large pan over medium-high heat and add a splash of olive oil to coat the pan. Once heated, add the shrimp in a single layer! Give them some space to breathe (and sizzle). Cook the shrimp for about 2-3 minutes on one side until they turn pink and opaque.

4. **Flip and Add Sauce**
   Gently flip the shrimp over to cook for another 1-2 minutes. Just before they’re done, pour in the prepared honey garlic sauce. It’ll bubble and coat the shrimp beautifully—oh, that sweet smell is divine!

5. **Thicken the Sauce**
   Allow the sauce to cook down for a minute or so, ensuring it thickens just enough to cling to the shrimp. Don't overcook them; you want them tender and juicy!

6. **Finish with Black Pepper and Green Onions**
   Remove the pan from heat and give the shrimp a generous sprinkle of black pepper and chopped green onions. These bright flavors will complement the sweetness of the sauce perfectly.

7. **Plate and Serve**
   Serve the shrimp warm, straight from the pan! You can serve it over a bed of fluffy rice, quinoa, or alongside steamed veggies for a complete meal.

---

## Serving Suggestions

To plate your High-Protein Honey Garlic Shrimp, layer a generous scoop of fluffy quinoa or rice on one side of your plate. Then, arrange the shrimp on top, allowing the sauce to drizzle over everything. Garnish with a sprinkle of fresh green onions and, for an extra touch, a few lime wedges on the side. The zesty lime juice when squeezed over the shrimp will brighten all those flavors!

---

## Recipe Variations

- **Citrus Zing**: Add the zest of a lime or lemon to the sauce for a citrusy twist that pairs perfectly with shrimp.

- **Tropical Delight**: Toss in some pineapple chunks towards the end of cooking for a sweet and tangy burst of flavor.

- **Asian Influence**: Enhance the dish with a splash of ginger or sesame oil for an extra layer of depth.

- **Spicy Kick**: Add sliced jalapeños or a dash of Sriracha to the sauce for a fiery version.

- **Mediterranean Fusion**: Replace the honey with balsamic reduction, and serve the shrimp on a bed of couscous mixed with olives and feta.

---

## Chef’s Notes

As with any recipe, feel free to tweak it to your liking. I started making this dish with friends during our reunion dinners, and over time, it evolved. Initially, I followed a stricter recipe, but as I got more comfortable, I started adding my own personal spin. That's the beauty of cooking—experimenting with flavors!

A funny memory I have is when I once mistakenly added way too much garlic. The result? A garlic bomb that had my friends laughing and begging for breath mints! But you know what? It tasted delicious in its own wild way. So don’t be shy—get playful in the kitchen!

---

## FAQs and Troubleshooting

**1. Can I use frozen shrimp?**
Absolutely! Just make sure to fully thaw and dry the shrimp before cooking for the best results.

**2. My shrimp turned rubbery. What did I do wrong?**
Shrimp cook quickly. If they're overcooked, they can become rubbery. Aim for that beautiful pink color and remove them from the heat as soon as they're opaque.

**3. How can I adjust the sweetness if it’s too sweet?**
If it’s too sweet for your taste, add a splash more soy sauce to balance it out and give it that savory kick.

**4. What side dishes pair well with this recipe?**
This dish is lovely with jasmine rice, sautéed greens, or a fresh garden salad. A light, zesty side will balance the richness beautifully!

---

## Nutritional Info (Optional)

**Per Serving (Based on 4 servings)**:
- Calories: 250
- Protein: 30g
- Carbohydrates: 15g
- Fat: 8g

Enjoy your cooking adventure! I can't wait to hear how your High-Protein Honey Garlic Shrimp turns out. Don’t forget to share your kitchen escapades and any fun stories you create while cooking this delightful dish!

High-Protein Honey Garlic Shrimp
- Total Time: 15 minutes
- Yield: 4 servings 1x
- Diet: Paleo
Description
A delightful sweet and savory shrimp dish, packed with protein and flavor, perfect for quick meals or impressing guests.
Ingredients
- 1 pound large shrimp (peeled and deveined)
- 4 tablespoons honey
- 4 cloves garlic (minced)
- 2 tablespoons soy sauce (or tamari for gluten-free)
- 1 tablespoon olive oil
- 1/2 teaspoon black pepper
- 1/2 teaspoon chili flakes (optional)
- Chopped green onions (for garnish)
Instructions
- Start with your shrimp! If you bought frozen shrimp, make sure to thaw it completely under cold running water or overnight in the fridge. Then, pat them dry with paper towels to remove excess moisture.
- In a small bowl, whisk together the honey, minced garlic, soy sauce, olive oil, and chili flakes. Taste it and adjust to your liking.
- Heat a large pan over medium-high heat and add a splash of olive oil. Once heated, add the shrimp in a single layer and cook for about 2-3 minutes on one side until they turn pink and opaque.
- Gently flip the shrimp over and cook for another 1-2 minutes. Just before they’re done, pour in the prepared honey garlic sauce.
- Allow the sauce to cook down for a minute to thicken just enough to cling to the shrimp without overcooking them.
- Remove the pan from heat and sprinkle black pepper and green onions over the shrimp.
- Serve the shrimp warm, over rice or quinoa, and garnish with fresh green onions and lime wedges.
Notes
Feel free to experiment with additional flavors like citrus or spices to customize the dish to your taste.
- Prep Time: 10 minutes
- Cook Time: 5 minutes
- Category: Main Course
- Method: Sautéing
- Cuisine: Asian
Nutrition
- Serving Size: 1 serving
- Calories: 250
- Sugar: 20g
- Sodium: 400mg
- Fat: 8g
- Saturated Fat: 1g
- Unsaturated Fat: 7g
- Trans Fat: 0g
- Carbohydrates: 15g
- Fiber: 0g
- Protein: 30g
- Cholesterol: 200mg
Keywords: shrimp, garlic, honey, protein, quick meal
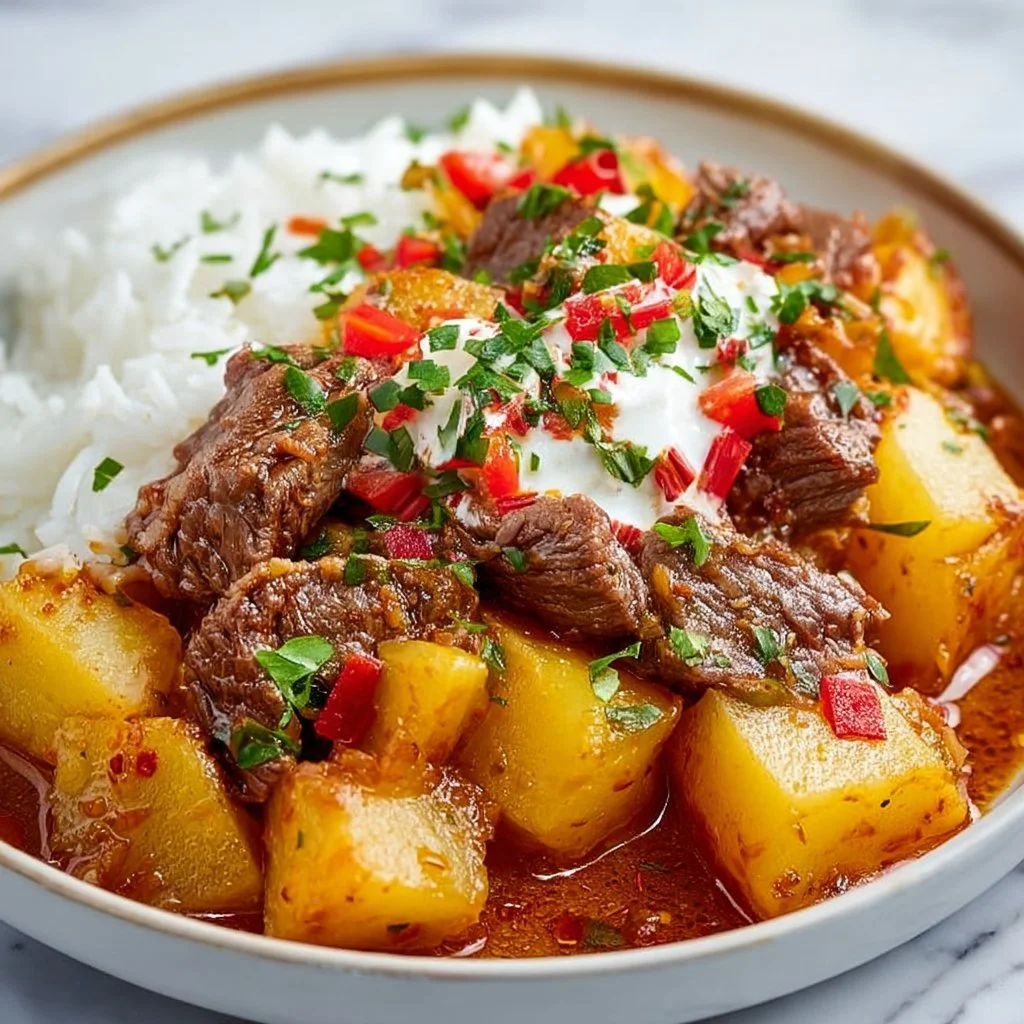
Meat with Potatoes Recipe
Cozy Comfort: Meat and Potatoes Recipe
Welcome back to the kitchen, dear foodies! Today, we’re diving into a dish that’s the heart and soul of cozy meals: the classic meat and potatoes! A meal that warms the heart and fills the belly, meat and potatoes are the ultimate comfort food, perfect for any occasion. Whether you’re coming home after a long day or gathering loved ones for a Sunday feast, this dish never fails to deliver comfort in every bite.
Picture this: the aroma of seasoned meat sizzling in a pan, merging with the earthy scent of roasted potatoes, coaxing everyone into the kitchen. Our ancestors have been cooking up meaty meals served with hearty potatoes for generations. It’s a tradition steeped in love, and while we may tweak flavors here and there, the essence remains unchanged. Today, I want to share with you my favorite take on this classic.
We’ll journey through a simple, yet flavorful recipe that lets the ingredients shine. You’ll learn not only how to cook it but also how to add your own unique twist to this timeless dish. So, roll up those sleeves, tie on that apron, and let’s get started!
Personal Story
Ah, meat and potatoes—where do I begin? Growing up, Sunday dinners at my grandmother’s house were sacred. She would usher us into her cozy kitchen, where the sweet scents of herbs and roasted garlic would dance through the air. The star of the show was always her braised beef with a side of crispy, fluffy potatoes.
One fond memory was when I accidentally knocked her cherished cast-iron skillet off the counter. The clatter that ensued echoed throughout her home, and I braced for an earful. Instead, she burst out laughing and said, “Well, you’ll need to learn to cook properly, or we may all starve!” With a quick flick of her wrist, she passed down countless cooking tips as we prepared that day’s meal together. It was a bonding moment that forged a lifelong love for cooking in me.
Every time I make this dish, I think of her smile and that warm kitchen. It’s not just food; it’s nostalgia served on a plate, inviting everyone to the table. So, let’s create some memories together in our kitchens, shall we?
Ingredients
Let’s gather our ingredients! Here’s what you’ll need for this delightful meat and potatoes dish:
-
2 lbs of beef chuck roast
A great choice for slow cooking, this cut becomes wonderfully tender. If you want to swap it for something leaner, try a sirloin roast, but be cautious as it may not be as forgiving when simmering for long hours. -
4 medium-sized potatoes (Russet or Yukon Gold)
I love Russets for their fluffiness, but Yukon Golds give a buttery flavor. You can also use sweet potatoes for a nutritional boost and a hint of sweetness. -
2 tablespoons of olive oil
It adds richness and helps brown the beef beautifully! You can substitute with vegetable oil, but it won’t impart the same flavor. -
1 large onion, diced
A workhorse in the flavor department! Yellow onions are perfect here, but if you prefer something sweeter, red onions can do the trick. -
4 cloves of garlic, minced
Because you can never have too much garlic! Feel free to dial it back if you’re not a fan—two cloves still pack a punch! -
2 cups beef broth
Enhances the meaty flavor and keeps everything moist. You can utilize chicken broth if beef isn’t available, or vegetable broth for a lighter option. -
1 tablespoon of fresh thyme (or 1 teaspoon dried)
A little herbal goodness goes a long way! If you don’t have thyme, rosemary is a fragrant and delicious alternative. -
Salt and pepper to taste
Essential seasonings that elevate your dish! -
1 tablespoon of Worcestershire sauce
For that umami kick! If you’re out, soy sauce can work as a substitute but will alter the flavor slightly.
Step-by-Step Instructions
Now that we’ve gathered all our ingredients, let’s dive into the cooking process!
-
Prep the Meat: Start by trimming any excess fat off the beef chuck roast. Pat it dry with a paper towel—this step is crucial for a good sear! Season generously with salt and pepper on all sides.
-
Sear the Beef: Heat the olive oil in a large, heavy-bottomed pot or Dutch oven over medium-high heat. Once the oil is shimmering, add the roast. Sear it for about 4-5 minutes on each side until it’s beautiful and browned. Don’t rush this part; a nice crust adds tons of flavor.
-
Remove and Sauté Veggies: Once the meat is seared, remove it from the pot and set it aside. In that same pot, toss in the diced onion and sauté for about 5 minutes until it’s translucent. Scrape up any brown bits stuck to the bottom of the pot—you want all that flavor! Then, add the minced garlic and cook for another minute until fragrant.
-
Add the Broth and Herbs: It’s time to build flavor! Pour in the beef broth, then add the Worcestershire sauce, fresh thyme, and more salt and pepper. Bring it to a simmer, letting all those delicious aromas mingle.
-
Return the Meat: Nestle that glorious seared roast back into the pot. It should be almost fully submerged. If it’s not, feel free to add a splash of water or more broth. Cover it and reduce the heat to low. Simmer for about 3 hours until the meat is fork-tender. Come on, patience is a virtue here!
-
Prep the Potatoes: While the meat simmers, chop your potatoes into equal-sized chunks, around 1-2 inches. This ensures they cook evenly. If you’re using sweet potatoes, keep in mind they cook faster, so adjust cooking time accordingly.
-
Add Potatoes: After 3 hours, carefully remove the roast from the pot (it’ll be tender, so use tongs!). Add the potatoes to the aromatic broth and bring it to a gentle boil. Reduce the heat and let them cook for about 20-25 minutes, until fork-tender.
-
Shred the Meat: Meanwhile, shred the beef into bite-sized pieces. It should fall apart easily! Add it back into the pot with your potatoes, stirring gently to coat them in that divine broth.
-
Taste and Adjust: Give everything a good stir and taste for seasoning. Adjust salt and pepper as needed. If you want to thicken the broth, you can mix a tablespoon of cornstarch with water and add it to the pot, cooking for a few more minutes.
-
Serve Up the Love: Ladle your comforting meat and potatoes into bowls and enjoy it warm. This is a dish meant for sharing!
Serving Suggestions
For a delightful presentation, serve your meat and potatoes in rustic bowls or on sturdy plates. To enhance the flavor, swirl a bit of fresh parsley on top for a pop of color and an added freshness. You can also offer crusty bread on the side for soaking up all those delicious juices. And don’t forget a simple side salad to bring some freshness to the table!
Recipe Variations
-
Herb-Roasted Twist: Add a mixture of rosemary and thyme for an extra level of flavor, giving it an herbaceous aroma that uplifts the dish.
-
Spicy Kick: Incorporate red pepper flakes into the pot for a bit of heat. Spice lovers will appreciate this flavor blast!
-
Mushroom Medley: Add sliced mushrooms when you sauté the onions for an earthy depth that complements the meat beautifully.
-
Vegetarian Version: Substitute the beef for hearty mushrooms like portobellos and use vegetable broth to create a wholesome plant-based version.
-
Creamy Comfort: Stir in a splash of heavy cream just before serving to give it a rich and luxurious twist. You’ll be amazed at how creamy and dreamy it becomes!
Chef’s Notes
This meat and potatoes recipe has been with me for years, evolving with every kitchen adventure. I remember one rainy Sunday when the power went out, and I had to adapt. I cooked it all in a cast-iron skillet over an open flame outside. The fresh air and slight smokiness that developed became an unexpected favorite! While I love this recipe as is, don’t hesitate to experiment—every family meal is an opportunity to create your unique favorite!
FAQs and Troubleshooting
1. My meat turned out tough! What happened?
This usually means that the meat was cooked at too high a temperature or for not long enough. A key component of this dish is low and slow cooking. Always make sure to simmer gently!
2. Can I use chicken or pork instead?
Absolutely! Just adjust the cooking times accordingly—chicken should be cooked until the juices run clear (about 1-1.5 hours), and pork would take a similar time to the beef.
3. How do I store leftovers?
Leftovers can be stored in an airtight container in the fridge for up to 4 days or frozen for up to 3 months. Reheat gently on the stove or in the microwave.
4. My potatoes are mushy—what went wrong?
If your potatoes turn mushy, they may have been overcooked. It’s important to check for doneness with a fork; they should be tender but not falling apart.
Nutritional Info
(Per serving, assuming 6 servings)
- Calories: 400
- Protein: 35g
- Carbohydrates: 45g
- Fat: 15g
- Fiber: 4g
And there you have it—the cheerful journey of creating a delightful meat and potatoes dish to share with family and friends! Cooking isn’t just about the food; it’s about cherishing moments, creating memories, and spreading love through every meal. I can’t wait to hear about your cooking adventures in the comments. Happy cooking, my fellow foodies!
Print
Cozy Comfort: Meat and Potatoes Recipe
- Total Time: 195 minutes
- Yield: 6 servings 1x
- Diet: None
Description
A classic meat and potatoes dish that warms the heart and fills the belly, embracing the essence of cozy meals.
Ingredients
- 2 lbs of beef chuck roast
- 4 medium-sized potatoes (Russet or Yukon Gold)
- 2 tablespoons of olive oil
- 1 large onion, diced
- 4 cloves of garlic, minced
- 2 cups beef broth
- 1 tablespoon of fresh thyme (or 1 teaspoon dried)
- Salt and pepper to taste
- 1 tablespoon of Worcestershire sauce
Instructions
- Prep the meat by trimming any excess fat off the beef chuck roast. Pat it dry with a paper towel, season generously with salt and pepper on all sides.
- Sear the beef by heating olive oil in a large pot over medium-high heat. Add the roast and sear for about 4-5 minutes on each side until browned.
- Remove the meat and set aside. In the same pot, sauté the diced onion for about 5 minutes until translucent. Scrape brown bits from the pot.
- Add the minced garlic and cook for another minute until fragrant.
- Pour in the beef broth, add Worcestershire sauce, thyme, and seasonings. Bring to a simmer.
- Return the seared roast to the pot, cover, and reduce heat to low. Simmer for about 180 minutes until fork-tender.
- Prep the potatoes by chopping them into equal-sized chunks, around 1-2 inches.
- Add the potatoes to the pot after 3 hours, bringing it to a gentle boil and cooking for about 20-25 minutes until fork-tender.
- Shred the beef into bite-sized pieces and add it back into the pot with the potatoes.
- Taste and adjust for seasoning as needed. Optionally thicken the broth using cornstarch mixed with water.
- Serve warm in bowls, enjoying it together with loved ones.
Notes
For added flavor, serve with crusty bread and a side salad. Experiment with variations like adding mushrooms or making a vegetarian version.
- Prep Time: 15 minutes
- Cook Time: 180 minutes
- Category: Main Course
- Method: Braised
- Cuisine: American
Nutrition
- Serving Size: 1 serving
- Calories: 400
- Sugar: 3g
- Sodium: 600mg
- Fat: 15g
- Saturated Fat: 6g
- Unsaturated Fat: 8g
- Trans Fat: 0g
- Carbohydrates: 45g
- Fiber: 4g
- Protein: 35g
- Cholesterol: 100mg
Keywords: meat and potatoes, comfort food, braised beef, hearty meal, family recipe
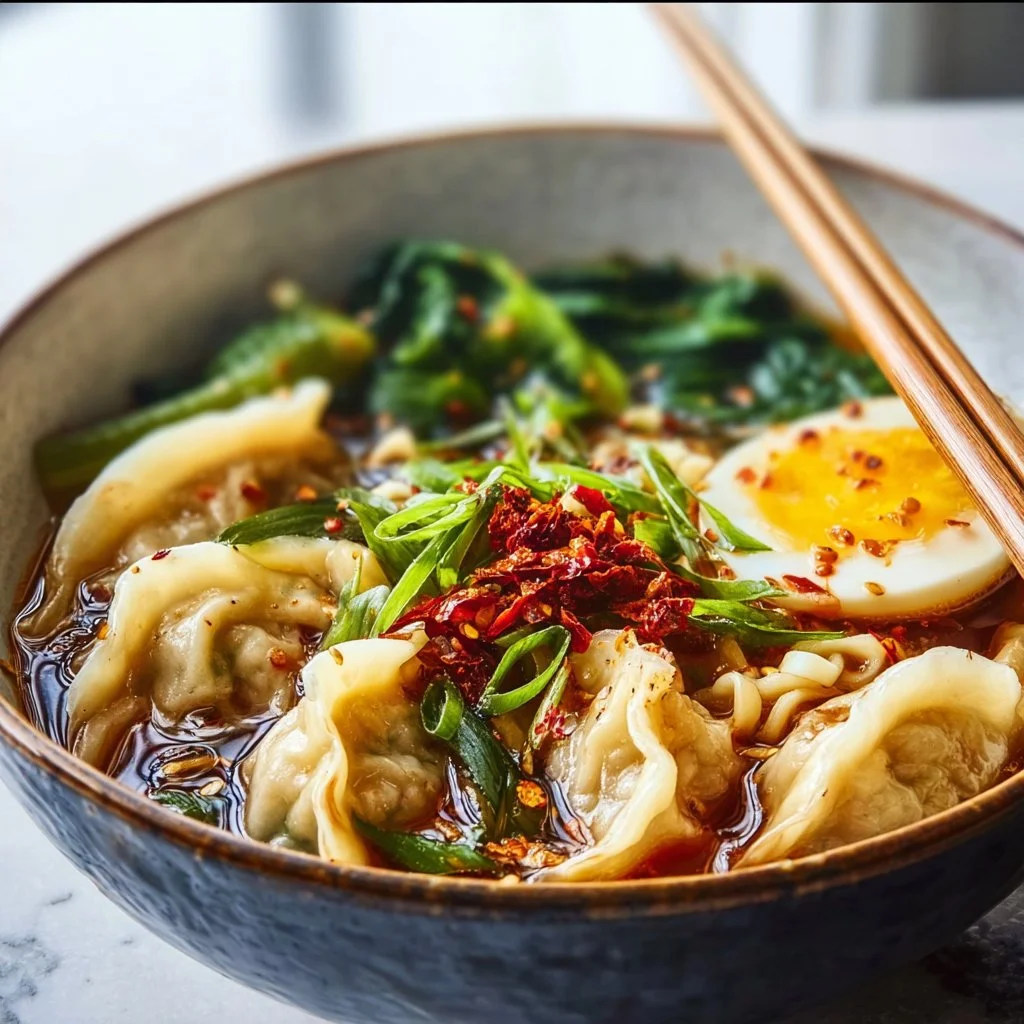
Dumpling Ramen Bowl
The Cozy Dumpling Ramen Bowl: A Heartwarming Hug in a Bowl
Introduction
Welcome to my cozy corner of the kitchen, friends! If there’s one thing I love as much as the smell of fresh bread baking or a pot of simmering soup, it’s the magical transformation of simple ingredients into a dish that warms not just the stomach but also the soul. Today, I’m inviting you to dive with me into the world of Dumpling Ramen Bowls!
Why Dumpling Ramen, you ask? Well, picture this: a steaming bowl loaded with tender noodles, delightful dumplings, and a rich, savory broth that beckons you with its umami goodness. It’s like a warm hug on a chilly day – perfect for Sundays spent lounging around or chilly weeknights after a busy day. This dish embodies everything I stand for in cooking: togetherness, comfort, and a splash of creativity.
One of my fondest memories as a little chef-in-training was my first attempt at making homemade dumplings with my grandma. She had this way of guiding me through each step, sharing stories from her own childhood while we enveloped flavorful fillings in delicate dough. So, when I first added dumplings to my beloved ramen, I felt like I was merging old memories with new adventures – a culinary bridge connecting generations.
In this blog post, I’ll take you through every nook and cranny of making your Dumpling Ramen Bowl, from choosing the right ingredients to serving it up with style. Whether you’re looking to impress your friends at a dinner party or simply want to treat yourself, the journey of this dish is as exhilarating as its flavor! So grab your apron (don’t worry, I’ve got a few stains on mine too) and let’s get cooking!
Personal Story
As I mentioned, dumpling-making holds a special place in my heart, and it goes way back to my childhood days with grandma. I remember one rainy Saturday, the kind that makes you want to snuggle under a blanket and stay indoors. She decided it was the perfect time to teach me the art of dumpling-making.
Flour dust filled the air as I rolled out the dough — it seemed like the universe had conspired to create a masterpiece in our tiny kitchen. The sound of laughter filled the corners of the room as I clumsily attempted to pinch the edges shut while grandma would gently tease me about my ‘unique’ shapes. Despite my amateur attempts, we ended up with a batch of glistening dumplings, ready to be cooked.
After a quick boil, we dropped them into a pot of flavorful broth. The aroma that wafted through the house was a mesmerizing blend of spices and love. We curled up on the couch, bowls in hand, enjoying not just the delicious meal but the warmth of that shared experience. This Dumpling Ramen Bowl is a tribute to that joy—it’s comfort food elevated with delightful memories I cherish.
Ingredients
To make your Dumpling Ramen Bowl, gather the following ingredients:
-
Dumplings (store-bought or homemade):
- Use your favorite variety—pork, chicken, or vegetable. If time allows, try making them from scratch! You can even try wonton wrappers instead of dumpling dough for a fun twist.
-
Ramen Noodles:
- Fresh ramen noodles are dreamy but dried will work just fine too. Cooking time will vary, so follow the package instructions.
-
Broth (chicken, pork, or vegetable):
- A good broth is key! Homemade is best, but store-bought can also save time. Opt for low-sodium varieties for better control over salt levels.
-
Soy Sauce:
- A splash for seasoning! You can use tamari for a gluten-free option or coconut aminos for a sweeter taste.
-
Scallions (green onions):
- They add a fresh, vibrant kick. Substitute with chives for a similar taste, or even fresh parsley for a different vibe.
-
Soft-Boiled Eggs:
- For that creamy richness. If you want a vegan option, consider using marinated tofu instead.
-
Nori (seaweed sheets):
- A classic garnish that adds a lovely umami note. If you can’t find nori, toasted sesame seeds can be a delightful alternative.
-
Vegetables (carrots, bok choy, or mushrooms):
- Feel free to use whatever is in season or on hand! This is a fantastic way to clean out your fridge.
-
Sesame Oil:
- Just a drizzle for a nutty flavor boost! Avocado oil can be a nice substitute if you want a milder taste.
With these ingredients, you’ll be all set to create a bowl of happiness that brings everyone around the table!
Step-by-Step Instructions
-
Cook the Dumplings:
- In a large pot of boiling water or a steamer, gently add your dumplings. If you’re using store-bought, follow the package instructions, but my tip is to cook them until they are floating; this is usually a happy sign they’re done. If you like a crispy bite, pan-fry them after boiling!
-
Prepare the Broth:
- In a separate pot, pour in your choice of broth and bring it to a gentle simmer. Add soy sauce for flavor, adjusting to your taste. I usually start with 1-2 tablespoons and adjust as needed. This is also a great time to throw in some aromatics, like minced garlic or ginger, if you fancy a little more zing.
-
Cook the Ramen Noodles:
- In another pot, cook the ramen according to the package instructions. Fresh noodles usually take just a few minutes, while dried might take a little longer. Keep an eye on them! Overcooking = mush!
-
Soft-Boil the Eggs:
- For the perfect soft-boiled egg, gently place them in boiling water for 6-7 minutes. Once that timer dings, quickly plunge them into an ice bath! This stops the cooking process and makes peeling easier. When they are cool enough, peel them, and marinate in a mixture of soy sauce, vinegar, and a hint of sugar for an extra flavor punch if you have the time!
-
Prepare Your Veggies:
- If you’re using leafy greens like bok choy, give them a quick blanch in the same water you used for the dumplings, just until they’re tender yet still vibrant in color. Carrots can be thinly sliced and added raw for a delightful crunch!
-
Assemble the Bowl:
- Here comes the fun part! In your favorite bowl, layer ramen noodles at the bottom, then ladle in that luscious broth over the top. Add your dumplings, soft-boiled egg (sliced in half for presentation!), and a generous heap of veggies. Garnish with sliced scallions, pieces of nori, and an elegant drizzle of sesame oil.
Ah, the joy of watching a friend’s eyes light up at their first forkful — that’s one of the most rewarding parts of cooking, isn’t it?
Serving Suggestions
For that Instagram-worthy moment, play with color and height! Start with a large, deep bowl. Place the noodles in the center, slightly twirling them for texture. Neatly arrange the dumplings around the noodles, followed by the vibrant veggies. Top with the soft-boiled egg, cut side up, sprinkle more scallions, add a piece of nori, and finish it all off with a sprinkle of sesame seeds. Voilà! Your beautiful Dumpling Ramen Bowl is ready to impress!
Recipe Variations
Here are a few tasty twists to try out!
- Spicy Kick: Add chili oil or a dollop of spicy miso paste to your broth for a fiery version.
- Herbicious Delight: Top the bowl with fresh cilantro or Thai basil for a refreshing herbal touch.
- Zucchini Noodles: Going low-carb? Swap out ramen noodles for spiralized zucchini for a crunchy alternative.
- Creamy Twist: Stir in a splash of coconut milk into the broth for a rich, creamy texture.
- Vegan Version: Replace dumplings with crispy tofu and use vegetable broth alongside mushrooms for depth.
The best part is: don’t hesitate to mix and match according to your taste!
Chef’s Notes
When I first started making this Dumpling Ramen Bowl, I must admit, I wasn’t the most skilled with dumpling formation. I remember one particularly fateful afternoon when I was having a "puff pastry" kind of day (a term I coined for when my dumplings looked more like pillows as opposed to cute little parcels). But you know what? The laughter that came with those culinary mishaps? Priceless!
Over time, I’ve learned that cooking is about fluidity and inspiration, not perfection. Your bowl may look different from mine, but the warmth and love you pour into it will always make it shine. Embrace the mess, savor the flavors, and enjoy every moment spent in the kitchen – that’s the heart of it!
FAQs and Troubleshooting
Q: Can I freeze the dumplings?
A: Absolutely! Freeze them uncooked on a baking sheet, then transfer them to a freezer-safe bag. They’ll keep wonderfully for up to three months. Just drop them in boiling water straight from the freezer when you’re ready to cook them.
Q: What if my broth is too salty?
A: A little sugar or vinegar can help balance salty flavors. Another trick is to add a potato while simmering – it absorbs some saltiness!
Q: How can I make this dish gluten-free?
A: Use gluten-free ramen noodles, tamari instead of soy sauce, and check that your dumplings are gluten-free as well. There are some fantastic options available in stores now!
Q: My dumpling dough keeps tearing, what am I doing wrong?
A: This usually means your dough is either too dry or overworked. Make sure you’re resting it adequately and keeping it covered to avoid drying out.
Nutritional Info (Optional)
(This section can be included if relevant)
Calories per bowl: approximately 600-800 (depending on ingredients used)
Proteins: 25-30g
Carbs: 80-90g
Fats: 15-20g
Make sure to adjust based on variations, and don’t forget that the love you put into your food? That’s the real secret ingredient!
So there you have it, folks! Your very own Dumpling Ramen Bowl, filled with flavors that dance like a gentle waltz across your taste buds. Whether you’re cooking for family, friends, or even just treating yourself — remember that every meal is an opportunity to create memories. Now go on, get cooking, and savor the warm embrace of that delicious bowl! Happy eating!
Print
Dumpling Ramen Bowl
- Total Time: 50 minutes
- Yield: 4 servings
- Diet: Vegetarian
Description
A heartwarming bowl of ramen filled with tender dumplings, fresh vegetables, and a rich broth, perfect for chilly days.
Ingredients
- Dumplings (store-bought or homemade, pork, chicken, or vegetable)
- Ramen Noodles (fresh or dried)
- Broth (chicken, pork, or vegetable)
- Soy Sauce
- Scallions (green onions)
- Soft-Boiled Eggs
- Nori (seaweed sheets)
- Vegetables (carrots, bok choy, or mushrooms)
- Sesame Oil
Instructions
- Cook the dumplings in boiling water or a steamer until they float. Pan-fry for a crispy finish if desired.
- Prepare the broth by simmering your choice of broth and adding soy sauce for flavor.
- Cook the ramen noodles according to package instructions.
- Soft-Boil the eggs by cooking them in boiling water for 6-7 minutes, then plunge into ice water.
- Prepare your veggies by blanching leafy greens or slicing raw carrots.
- Assemble the bowl by layering ramen, broth, dumplings, soft-boiled egg, and veggies. Garnish with scallions, nori, and sesame oil.
Notes
For a spicy version, add chili oil to the broth. Customize with herbs or alternative noodles for dietary preferences.
- Prep Time: 20 minutes
- Cook Time: 30 minutes
- Category: Main Course
- Method: Boiling
- Cuisine: Asian
Nutrition
- Serving Size: 1 bowl
- Calories: 700
- Sugar: 5g
- Sodium: 800mg
- Fat: 15g
- Saturated Fat: 4g
- Unsaturated Fat: 8g
- Trans Fat: 0g
- Carbohydrates: 85g
- Fiber: 4g
- Protein: 30g
- Cholesterol: 70mg
Keywords: ramen, dumplings, comfort food, easy recipe, homemade, Asian cuisine
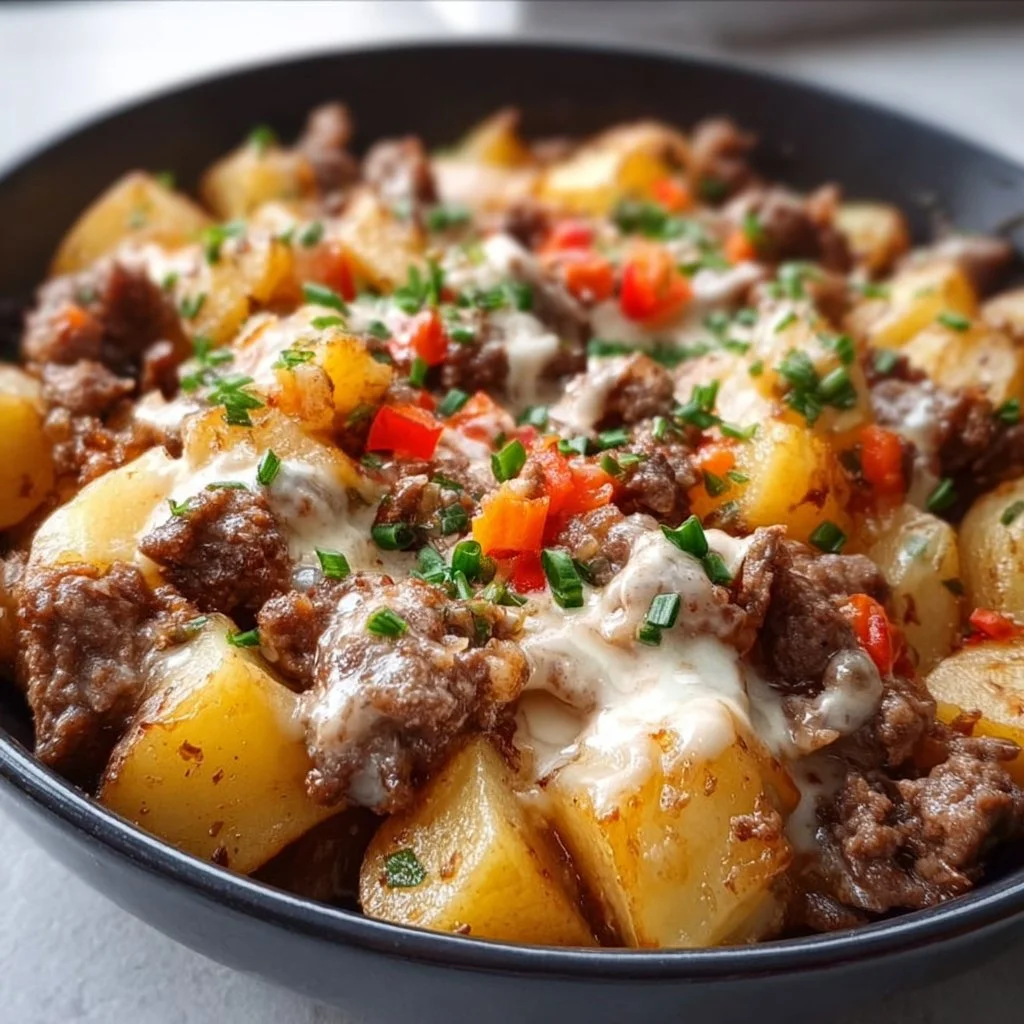
Easy One-Pan Creamy Meat & Potato Skillet (30-Minute Meal)
Easy One-Pan Creamy Meat & Potato Skillet (30-Minute Meal)
Welcome, friends, to my cozy kitchen! Today, we’re diving into a dish that’s all about simplicity, warmth, and comfort—my Easy One-Pan Creamy Meat & Potato Skillet. This delightful recipe is perfect for busy weeknights when you want to whip up something special without spending hours in the kitchen. Trust me, with just one pan and about 30 minutes, you’ll create a creamy, savory masterpiece that will leave your family begging for seconds.
Now, let’s talk about comfort food! There’s something undeniably magical about dishes that are hearty and filling, especially when they come together so effortlessly. Picture this: the sizzling sound of ground meat browning in a hot skillet, the enticing aroma of garlic and onions filling the air, and then the magic of creamy sauce enveloping tender potatoes. Sounds comforting, right?
What I love most about this dish is that it combines basic ingredients, like potatoes and ground meat, into something extraordinary. It’s a meal loaded with flavor and texture, and because it all cooks in one pan, cleanup is a breeze—an absolute win in my book!
Whether you’re cooking for your family, having a cozy dinner with friends, or simply treating yourself, this creamy meat and potato skillet will become your new go-to recipe. So, let’s roll up our sleeves, tie on our aprons, and get cooking together!
Personal Story
I remember the first time I made a dish similar to this creamy meat and potato skillet. It was a chilly autumn evening, and my family had just returned from an afternoon of apple picking. We were all exhausted but still buzzing from the excitement of the day. I wanted to create something warm and comforting that would put smiles on our faces as we gathered around the dinner table.
With just a few ingredients—a pack of ground beef I had on hand, some potatoes, and a couple of staples from my pantry—I ventured into uncharted territory. It was the first time I experimented with making a creamy sauce on the fly, and let me tell you, there were a few “interesting” moments. My mom walked in just as a splash of milk ended up on the floor, but we all laughed it off as my little sous chef giggled behind me.
Against all odds (and a few spills), the end result was divine! My family loved it so much that they asked for seconds and even thirds. That night, I realized that cooking is as much about the process as it is about the end result. It’s about creating memories, sharing stories, and enjoying time spent together. And just like that, the art of creating a one-pan meal became a cherished tradition in our home!
Ingredients
To make this delicious Easy One-Pan Creamy Meat & Potato Skillet, you will need:
-
1 pound ground beef (or turkey/chicken)
Perfect for a filling base! You can also use ground lamb for a unique twist. If you want to keep it lighter, turkey or chicken are great alternatives. -
4 medium russet potatoes
Russets are starchy and fluffy, making them perfect for this dish. If you prefer waxy potatoes, like Yukon Golds, they’ll also work—but they might remain a bit firmer after cooking. -
1 cup onion (diced)
This adds an amazing flavor foundation to your dish! Yellow onions are my go-to, but you can use red onions for a bit of sharper flavor or shallots for a milder taste. -
2 cloves garlic (minced)
Because garlic makes everything better! If fresh garlic isn’t available, garlic powder will suffice—1/4 teaspoon for a quick alternative. -
1 tablespoon olive oil
A dash of oil for cooking the meat and aromatics. You can substitute it with any neutral oil like canola or avocado oil. -
1 cup beef broth (low-sodium)
This keeps the dish flavorful and adds moisture. If you’re aiming for a vegetarian version, vegetable broth works beautifully. -
1 cup heavy cream
The secret to creaminess! For a lighter touch, you can swap it with half-and-half or non-dairy cream alternatives like coconut cream. -
1 teaspoon dried Italian herbs (or fresh, if you have them)
These include basil, oregano, and thyme. Feel free to mix and match based on what you enjoy! -
Salt and pepper to taste
Always essential. You can experiment with spices like smoked paprika or cumin for a different flavor profile. -
Fresh parsley (for garnish)
Adds a lovely pop of color and freshness at the end! If you don’t have parsley on hand, chives or green onions would also be delightful.
Step-by-Step Instructions
Now that we have our ingredients prepped and ready, let’s get cooking! Follow these steps, and you’ll have a mouthwatering meal in no time.
-
Heat the Skillet:
Start by placing a large skillet over medium heat. Add the olive oil and let it heat for about 1-2 minutes until it shimmers but doesn’t smoke. This is your canvas for all the deliciousness to come! -
Sauté the Aromatics:
Toss in the diced onions and cook for about 3-4 minutes until they become translucent and fragrant. Add the minced garlic and continue cooking for 30 seconds, stirring constantly to prevent burning. Oh, that aroma already makes my heart skip a beat! -
Brown the Meat:
Add the ground beef to the skillet, breaking it up with a spatula. Cook for 5-7 minutes until it’s nicely browned and fully cooked, stirring occasionally. This step is crucial; a good browning adds layers of flavor to your dish! -
Prepare the Potatoes:
While your meat is browning, wash and dice your potatoes into bite-sized cubes (about 1-inch). This helps them cook evenly and quickly. Once your meat is browned, stir in the potatoes and season with salt, pepper, and Italian herbs. -
Add the Broth:
Pour in the beef broth, ensuring the potatoes are submerged. Stir everything together, bringing it to a gentle simmer. Cover and reduce the heat to low, cooking for about 10-12 minutes, or until the potatoes are tender. Check occasionally, giving it a gentle stir. Remember, we don’t want to burn the bottom! -
Stir in the Cream:
Once the potatoes are tender, remove the lid and add the heavy cream, stirring to combine and create that luscious sauce. Let it simmer uncovered for another 2-3 minutes to thicken slightly. At this point, your kitchen will smell phenomenal! -
Final Seasoning:
Give the skillet a taste and adjust the seasoning as needed. More salt? A sprinkle of pepper? It’s your call! If you’re feeling adventurous, you can even sprinkle in some grated cheese for an extra gooey experience. -
Garnish and Serve:
Once you’ve achieved creaminess perfection, remove the skillet from the heat. Sprinkle freshly chopped parsley over the top for color and freshness.
And there you have it—a comforting one-pan meal ready to be devoured!
Serving Suggestions
To plate this creamy meat and potato skillet, simply serve it directly from the pan on your dining table! Place some warm, crusty bread next to it for dunking, or serve it alongside a light green salad to balance out the richness. If you’re feeling fancy, you can also serve it in individual bowls, topped with a sprinkle of extra herbs or even a dollop of sour cream for that gourmet touch!
Recipe Variations
-
Cheesy Delight: Stir in a handful of shredded cheese (like cheddar or mozzarella) into the skillet just before serving for an extra cheesy version.
-
Spicy Kick: Add red pepper flakes while cooking the meat for a little heat that takes this dish to another level.
-
Herb Infusions: Switch up the herbs to fresh cilantro and lime for a Southwestern flavor profile, or try rosemary and thyme for more warmth and earthiness.
-
Vegetarian Option: Substitute the ground meat with shredded jackfruit or lentils for a hearty vegetarian take!
-
Sweet and Savory: Add a handful of frozen peas or corn to the skillet before adding the cream for a pop of color and sweetness.
Chef’s Notes
This Easy One-Pan Creamy Meat & Potato Skillet has become a family favorite because it’s not just about the taste; it’s about the memories formed around the table. Over the years, I’ve played around with different seasonings and ingredients, making it my own. The fun part of cooking is experimenting, so don’t hesitate to put your spin on it!
One of my funniest kitchen moments while making this dish happened when I accidentally mistook cinnamon for Italian herbs! Let’s just say, the initial taste test had everyone giggling, but it led to a delicious conversation about flavor pairings. Not every culinary adventure goes as planned, but that’s what keeps cooking fun!
FAQs and Troubleshooting
Q: My potatoes didn’t cook through; they are still hard. What did I do wrong?
A: Make sure to cut the potatoes into relatively small cubes to speed up the cooking process. If you notice they are still firm, simply cover the skillet and let them simmer a few more minutes.
Q: Can I meal prep this dish?
A: Absolutely! This skillet meal can be made ahead of time and stored in the fridge for up to 3 days. Just reheat gently on the stove, adding a splash of broth or cream to revive the sauce.
Q: It turned out too thick; what can I do?
A: If your sauce seems too thick, simply add a bit more beef broth or cream until you reach your desired consistency. A splash of water can also work in a pinch.
Q: Can this dish be frozen?
A: Yes! It freezes well for up to 3 months. Just make sure to let it cool completely before transferring to an airtight container. Reheat slowly on the stove or in the microwave, adding a bit of liquid to restore creaminess.
Nutritional Info (Optional)
While I always encourage enjoying meals in moderation, here are the estimated nutritional values per serving for this Easy One-Pan Creamy Meat & Potato Skillet:
- Calories: 560
- Protein: 28g
- Fat: 32g
- Carbohydrates: 40g
- Fiber: 3g
Feel free to adjust the ingredients and portion sizes according to your preferences!
And there you have it! Thank you for joining me in the kitchen today. I hope this Easy One-Pan Creamy Meat & Potato Skillet inspires you to create delicious moments with the people you love. Let me know how it turns out—it would make my day to hear your story! Happy cooking, and remember: it’s all about the love you pour into your food (and maybe a bit of playful chaos along the way)!
Print
Easy One-Pan Creamy Meat & Potato Skillet
- Total Time: 30 minutes
- Yield: 4 servings 1x
- Diet: Non-Vegetarian
Description
A comforting one-pan meal featuring ground meat, tender potatoes, and a creamy sauce, perfect for busy weeknights.
Ingredients
- 1 pound ground beef (or turkey/chicken)
- 4 medium russet potatoes, diced
- 1 cup onion, diced
- 2 cloves garlic, minced
- 1 tablespoon olive oil
- 1 cup beef broth (low-sodium)
- 1 cup heavy cream
- 1 teaspoon dried Italian herbs
- Salt and pepper to taste
- Fresh parsley (for garnish)
Instructions
- Heat the Skillet: Start by placing a large skillet over medium heat. Add the olive oil and let it heat for about 1-2 minutes until it shimmers but doesn’t smoke.
- Sauté the Aromatics: Toss in the diced onions and cook for about 3-4 minutes until they become translucent. Add minced garlic and continue cooking for 30 seconds.
- Brown the Meat: Add ground beef, breaking it up with a spatula. Cook for 5-7 minutes until browned.
- Prepare the Potatoes: Wash and dice potatoes into 1-inch cubes. Stir in the potatoes and season with salt, pepper, and Italian herbs.
- Add the Broth: Pour in the beef broth, ensuring the potatoes are submerged. Bring to a gentle simmer and cover, reducing heat to low for 10-12 minutes.
- Stir in the Cream: Once potatoes are tender, add heavy cream and let it simmer uncovered for another 2-3 minutes.
- Garnish and Serve: Remove from heat and sprinkle with freshly chopped parsley before serving.
Notes
This dish is perfect for meal prep and can be stored for up to 3 days in the fridge. Reheat gently and add a splash of broth or cream for consistency.
- Prep Time: 10 minutes
- Cook Time: 20 minutes
- Category: Main Course
- Method: Stovetop
- Cuisine: American
Nutrition
- Serving Size: 1 serving
- Calories: 560
- Sugar: 3g
- Sodium: 600mg
- Fat: 32g
- Saturated Fat: 16g
- Unsaturated Fat: 12g
- Trans Fat: 0g
- Carbohydrates: 40g
- Fiber: 3g
- Protein: 28g
- Cholesterol: 70mg
Keywords: one-pan meal, creamy skillet, meat and potatoes, easy dinner, comfort food




