
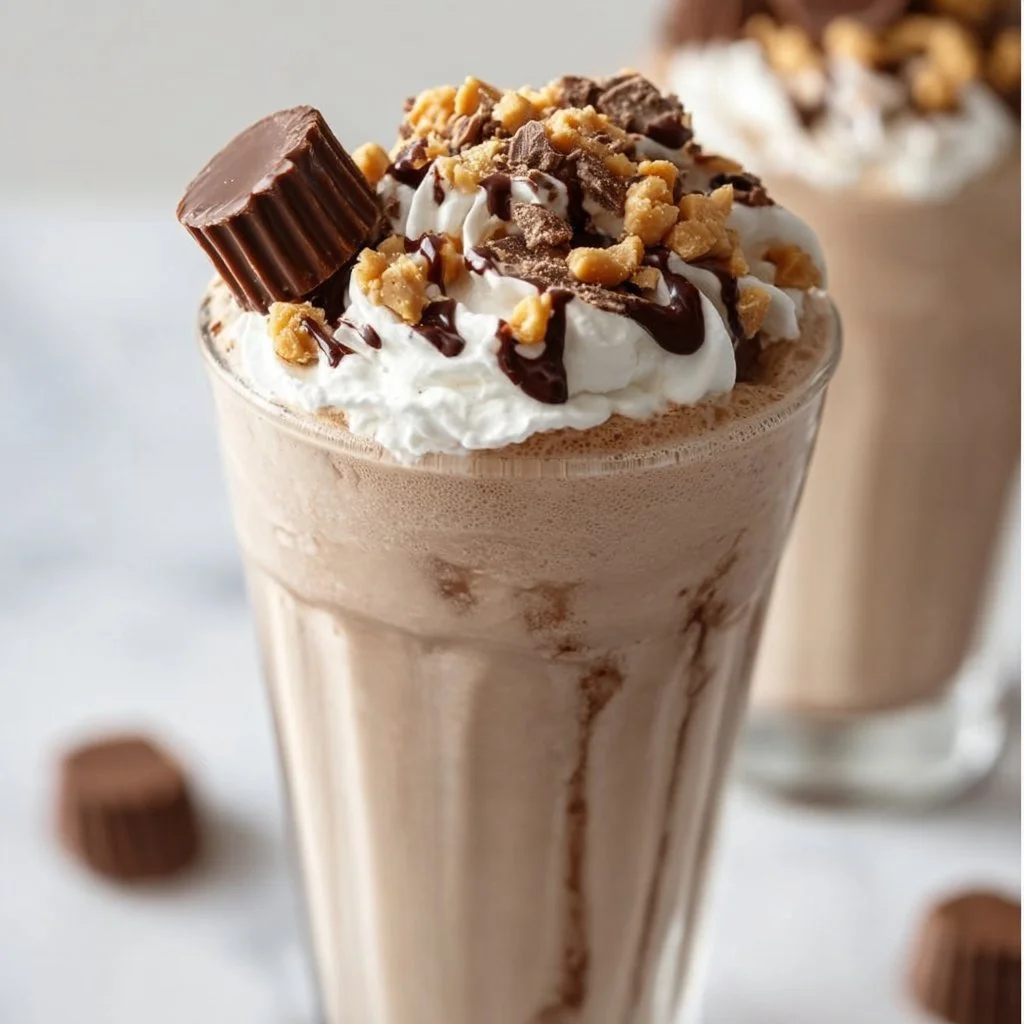
Peanut Butter Cup Milkshake
The Ultimate Peanut Butter Cup Milkshake: A Creamy Dream Come True
Hey there, fellow food enthusiasts! 🎉 I’m Olivia Bennett, your go-to guide for all things delicious and homemade! Today, we’re diving into a sweet treat that takes me straight back to my childhood: the Peanut Butter Cup Milkshake. If you adore the rich flavor of peanut butter mingling with the sweetness of chocolate, this dreamy milkshake is about to become your new favorite indulgence.
Picture this: it’s a hot summer day, and my brothers and I were running around outside, laughter echoing as we played tag on the lawn. Nothing could cool off those sun-kissed moments quite like heading into the kitchen, where my mom would be melting chocolate over low heat. She had a knack for crafting milkshakes that were not just drinks, but blissful experiences that shaped our love for food. One day, she surprised us with what she called a “Peanut Butter Cup” shake, inspired by our beloved candy. I still remember the anticipation as we waited, the kitchen filled with the heavenly scent of creamy peanut butter and rich chocolate. Each sip took us on a delicious ride, leaving us giggling about the peanut butter mustaches we’d inevitably sport.
Fast forward a few years, and I knew I had to recreate that beloved moment. And guess what? I’ve perfected my version, adding a few creative spins to make it even more delightful! This Peanut Butter Cup Milkshake is loaded with flavors that dance together in perfect harmony and promises to transport you back to carefree days while indulging your adult cravings. Whether you’re treating yourself to a midweek pick-me-up or hosting friends for a fun dessert night, this milkshake is sure to impress. So grab your blender and let’s get mixing, shall we?
Personal Story
One afternoon, as I played in the yard, the mouthwatering aroma of chocolate wafting in from the kitchen drew me inside like a magnetic force. Little did I know, my mom was whipping up her famous Peanut Butter Cup Milkshake. My brothers and I huddled at the counter, our eyes wide with excitement as she blended together creamy vanilla ice cream, rich peanut butter, and a generous drizzle of chocolate syrup.
When she handed us those frosty glasses topped with whipped cream, it felt like Christmas! Each sip was pure joy, with the chocolate and peanut butter layers creating a flavor explosion in my mouth. It was our unofficial summer ritual, turning even the most mundane days into something extraordinary. It taught me how food could create memories, spark laughter, and bring people together—all while satiating our sweet tooth. Even now, every time I take a sip of a Peanut Butter Cup Milkshake, I’m reminded of those cherished summer afternoons, laughter echoing while chocolate mustaches were the insignia of our sweet adventures.
Ingredients
Let’s gather our ingredients for this heavenly shake! Here’s what you’ll need:
-
Vanilla Ice Cream: This is the base of your milkshake. Use quality, creamy vanilla for the best flavor. If you want to lighten this up, you can also substitute with frozen yogurt or a dairy-free ice cream!
-
Whole Milk: Adds the perfect creaminess. If you’re looking for a lower-fat option, skim milk works just fine, or try almond milk for a nutty twist!
-
Creamy Peanut Butter: The star ingredient! Smooth peanut butter gives a luscious texture. For a twist, try crunchy peanut butter for added texture, or almond butter for a new flavor.
-
Chocolate Syrup: It adds that rich chocolate flavor we love. You can use store-bought or make your own by mixing cocoa powder with a bit of sugar and water.
-
Reese’s Peanut Butter Cups: Chop these up and add them for that delicious candy crunch. In a pinch, use any other chocolate-peanut butter combination candy.
-
Whipped Cream: For topping! Store-bought is convenient, but homemade is always a classy touch—just whip some heavy cream and sugar until fluffy!
-
Chocolate Shavings (optional): For a gourmet finish! You can make these by shaving a chocolate bar or using mini chocolate chips.
Step-by-Step Instructions
Step 1: Gather Your Ingredients
Before you start, make sure you have all your ingredients measured and ready to go. It helps everything blend together smoothly and quickly—like a pro! 🎉
Step 2: Blend It Up!
Throw the following into your blender:
- 2 cups of vanilla ice cream
- 1 cup of whole milk
- ½ cup of creamy peanut butter
- ¼ cup of chocolate syrup
Blend it on high until everything is perfectly smooth. Chef’s Tip: If your milkshake is too thick, add more milk a tablespoon at a time until desired consistency is reached. If it’s too thin, you can always toss in an extra scoop of ice cream!
Step 3: Add the Crunch
Once your base is beautifully blended, it’s time to fold in the fun part! Add about 1 cup of chopped Reese’s Peanut Butter Cups to the blender, and pulse gently a few times. You want chunks, not mush! This way, you get delightful bites of candy in every sip.
Step 4: Taste Test
Now, this is the most essential step—taste it! Use a spoon and let this luscious concoction pass your lips. Feel free to add a drizzle more of chocolate syrup or peanut butter to elevate it further. Remember, this is your masterpiece!
Step 5: Prep the Glasses
Grab your favorite tall milkshake glasses and drizzle the inside with chocolate syrup for that stunning presentation. You can get creative here! Swirl it around for a marbled effect—your guests will be trying to take pictures before they even take a sip!
Step 6: Pour and Top
Pour your milkshake into the prepared glasses, filling them just to the brim. Go ahead and let some froth spill over—it’s part of the fun! Then, top generously with whipped cream, a sprinkle of chocolate shavings, and maybe even a mini Reese’s on top for good measure!
Step 7: Serve Immediately
Grab some cute straws and get ready to dig in! There’s no waiting around; this milkshake is best enjoyed fresh! Gather around with friends or family and enjoy each sip.
Serving Suggestions
This Peanut Butter Cup Milkshake makes for an irresistibly fun dessert! Serve it alongside hot brownies or a slice of your favorite chocolate cake for a true dessert experience. You can also place the milkshake in a large bowl, add extra toppings (think crushed cookies, sprinkles, or a drizzle of caramel), and hand out spoons for a delightful sharing experience!
Recipe Variations
Feel like mixing things up? Here are some fun twists you could try:
- Banana Peanut Butter Milkshake: Add a ripe banana for a creamy, fruity version that pairs beautifully with chocolate!
- Mint Chocolate Peanut Butter Shake: Add a few drops of peppermint extract for a refreshing green shake.
- Dairy-Free Option: Use coconut milk ice cream and almond milk for a delicious dairy-free version.
- Protein Packed: Add a scoop of your favorite protein powder for a post-workout treat.
- Mocha Peanut Butter Shake: Mix in a tablespoon of instant espresso powder to kick it up a notch with coffee flavor.
Chef’s Notes
Oh, the memories this shake brings back! I’ve experimented a lot over the years with this recipe, from adding different candies to trying out various ice cream bases. I’ve even served this as a sundae at dinner parties, and every time it’s a hit! A funny story: one day during a holiday gathering, I made a huge batch, thinking it would last, but it vanished within ten minutes! This shake has a magical way of making everyone feel like a kid again, and I’ve come to realize the secret sauce is all in sharing it with loved ones.
FAQs and Troubleshooting
1. My milkshake is too thick; what do I do?
Add more milk gradually, blending in between additions until the desired consistency is achieved.
2. What if I don’t have peanut butter?
You can swap in any nut butter or even sun butter for a nut-free option.
3. Can I make this ahead of time?
While best enjoyed fresh, you can make it a few hours in advance, just keep it in the freezer in an airtight container to maintain its thickness.
4. Can I make it lower in sugar?
Absolutely! Use unsweetened almond milk instead of regular milk, and opt for no-added sugar peanut butter or reduce the amount of chocolate syrup in the recipe.
With each delicious sip of this Peanut Butter Cup Milkshake, I hope you feel a connection with those joyful moments and that it inspires laughter and warmth in your kitchen. Happy blending, and may delicious memories abound! 🍦🥳
Print
Ultimate Peanut Butter Cup Milkshake
- Total Time: 10 minutes
- Yield: 4 servings 1x
- Diet: Vegetarian
Description
A delightful milkshake blending creamy peanut butter and rich chocolate, reminiscent of childhood summer days.
Ingredients
- 2 cups Vanilla Ice Cream
- 1 cup Whole Milk
- ½ cup Creamy Peanut Butter
- ¼ cup Chocolate Syrup
- 1 cup Reese’s Peanut Butter Cups, chopped
- Whipped Cream, for topping
- Chocolate Shavings (optional)
Instructions
- Gather your ingredients.
- Blend the vanilla ice cream, whole milk, creamy peanut butter, and chocolate syrup on high until smooth.
- Add the chopped Reese’s Peanut Butter Cups and pulse gently a few times.
- Taste the milkshake and adjust sweetness as desired.
- Prep the glasses by drizzling chocolate syrup inside.
- Pour the milkshake into the glasses and top with whipped cream and chocolate shavings.
- Serve immediately with straws.
Notes
For variations, try adding a banana, mint extract, or protein powder for extra nutrition.
- Prep Time: 10 minutes
- Cook Time: 0 minutes
- Category: Dessert
- Method: Blending
- Cuisine: American
Nutrition
- Serving Size: 1 serving
- Calories: 450
- Sugar: 50g
- Sodium: 200mg
- Fat: 20g
- Saturated Fat: 10g
- Unsaturated Fat: 6g
- Trans Fat: 0g
- Carbohydrates: 60g
- Fiber: 3g
- Protein: 12g
- Cholesterol: 30mg
Keywords: milkshake, peanut butter, chocolate, dessert
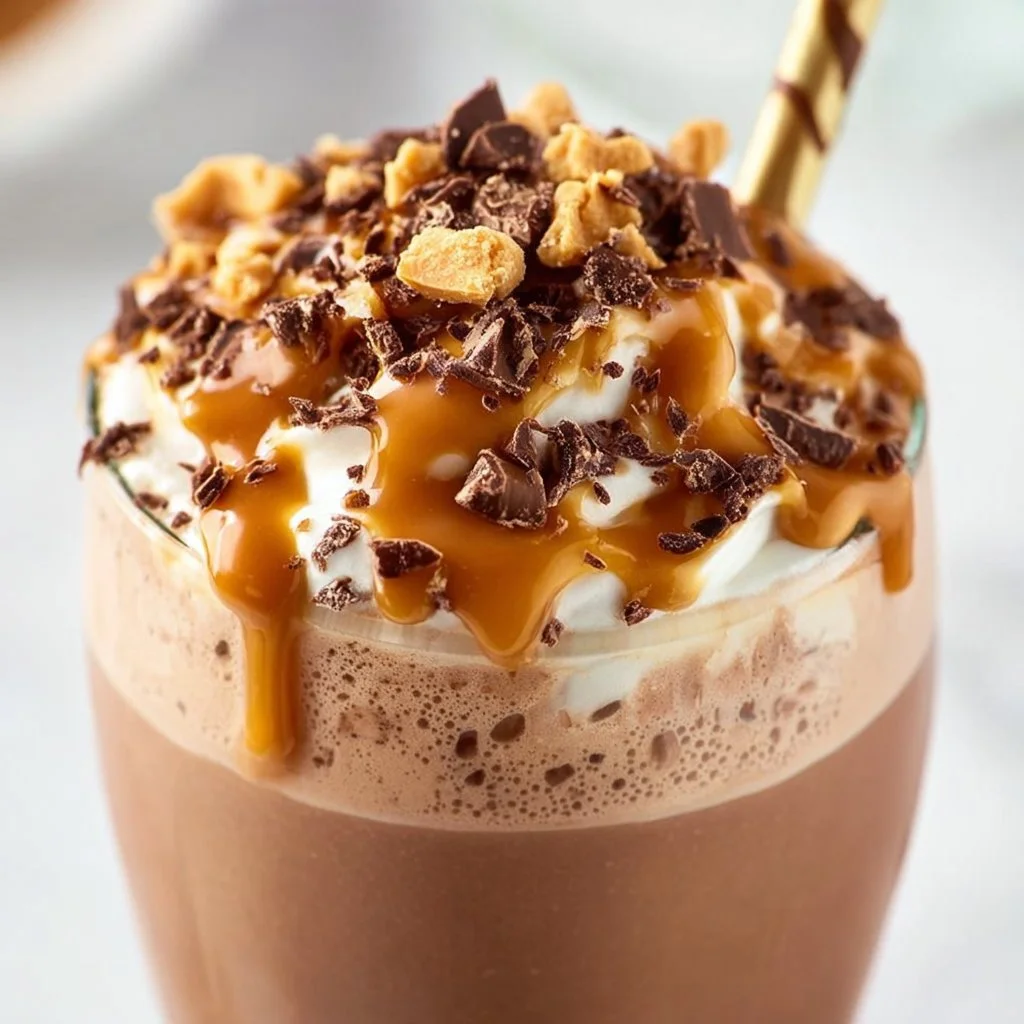
Chocolate Peanut Butter Milkshake Recipe
# The Ultimate Chocolate Peanut Butter Milkshake Recipe

## Introduction

Hey there, fellow foodies! Welcome back to my cozy corner of the internet—my kitchen! Today, I’m excited to take you on a delicious journey as we whip up a decadent **Chocolate Peanut Butter Milkshake**. This treat is the perfect blend of creamy, nutty, and chocolatey goodness that will transport you right back to your childhood. It's one of those recipes that brings joy to both the cook and anyone lucky enough to enjoy it.

I can still remember the first time I savored this delightful concoction. It was a warm summer afternoon, and my best friend Lily and I decided to embark on a mini cooking adventure in her parents' kitchen. We had stolen a couple of ripe bananas and a half-empty jar of peanut butter from the pantry, and after a bit of haphazard mixing, we ended up with something magical. Little did we know we were on the brink of creating a classic treat that would become a staple in our summer hangouts.

Fast-forward to today, and I still get that same rush of happiness whenever I hear the blender whirl and the sweet, nutty aroma fills the air. Whether you’re planning a cozy movie night or searching for a sweet treat to surprise friends, this milkshake is sure to impress. Plus, who doesn’t love a recipe with only a handful of ingredients that comes together in a snap?

So grab your blender and put on your favorite playlist, because it’s time to create a chocolate peanut butter paradise that you won’t be able to resist!

---

## Personal Story

Oh! How can I forget the summer of 2015? I was visiting my grandparents’ house, and they had just renovated their kitchen. My grandma, an incredible cook, always encouraged me to experiment with flavors. One afternoon, we decided it was time for a milkshake extravaganza. After blending up some classic vanilla, we thought, "Why not add some chocolate and peanut butter?" I’ll never forget my grandma's mischievous smile as we poured a splash of chocolate syrup into the mix.

As we blended it all together, the kitchen quickly filled with laughter, and the delicious aroma made our tummies rumble. When we finally poured the milkshake into tall glasses and topped it off with whipped cream and a drizzle of peanut butter, it felt like a masterpiece! We raised our glasses in a toast: “To the best summer ever!”

That first sip was like a burst of happiness, and I knew right then that chocolate and peanut butter were a match made in heaven. Since then, it’s become a celebrated treat in my family, shared during game nights, birthday parties, and just-because moments. I can’t wait for you to create your own sweet memories with this milkshake recipe!

---

## Ingredients

To make our delightful Chocolate Peanut Butter Milkshake, you only need a few simple ingredients. Here's what you’ll need to gather:

- **Vanilla Ice Cream (2 cups)**
  The backbone of our milkshake! You can substitute with dairy-free or low-fat ice cream if you want a lighter version.

- **Milk (1 cup)**
  Whole milk gives a rich flavor and texture, but feel free to use almond, soy, or oat milk for dairy alternatives.

- **Creamy Peanut Butter (1/3 cup)**
  Go for the creamy variety for a smooth blend. If you're feeling adventurous, try crunchy peanut butter for added texture!

- **Chocolate Syrup (1/4 cup)**
  A classic! Use your favorite chocolate syrup or even make your own by melting dark chocolate if you're feeling fancy.

- **Optional Toppings:**
  - **Whipped Cream:** For a luscious finish.
  - **Chocolate Shavings or Chips:** To add a touch of sweetness and garnish.
  - **Sliced Bananas:** A nod to our childhood whimsy and a fun twist!

---

## Step-by-Step Instructions

Let's make this milkshake! Follow my steps closely, and don’t be afraid to channel your inner chef!

1. **Gather Your Ingredients:**
   Gather all your ingredients and tools: a blender, a measuring cup, and a few tall glasses. This part is key—trust me, a well-organized workspace makes a world of difference.

2. **Scoop the Ice Cream:**
   With an ice cream scoop, measure out 2 cups of creamy vanilla ice cream directly into your blender. This is where the magic begins! If it’s too hard to scoop, let it sit at room temperature for a few minutes to soften.

3. **Add the Milk:**
   Pour in 1 cup of milk of your choice. The more milk you add, the thinner your milkshake will be. If you like it thicker, start with 3/4 cup and adjust from there.

4. **Incorporate Peanut Butter:**
   Now for the star of the show! Add 1/3 cup of creamy peanut butter. This is where it gets fun—use a spatula to scrape out every last bit, because we don’t want any peanut goodness left behind!

5. **Add Chocolate Syrup:**
   Drizzle in 1/4 cup of chocolate syrup. Honestly, if you want to channel your inner Willy Wonka, feel free to add more. You do you!

6. **Blend Away!**
   Secure the lid tightly and blend on high until all ingredients are well combined and smooth. Here’s a little tip: if the mix is too thick to blend, add a splash more milk to help it along. If it’s too thin, just toss in another scoop of ice cream!

7. **Taste Test:**
   Once you have a beautifully creamy texture, stop blending and taste! Is it chocolatey enough? Feel free to add more syrup or peanut butter if desired!

8. **Pour and Serve:**
   Grab your tall glasses and pour in your delicious milkshake! Enjoy the swirls of chocolate and peanut butter—how gorgeous is that?

---

## Serving Suggestions

Ready to serve? Top your milkshake with a generous dollop of whipped cream and sprinkle on some chocolate shavings or crushed peanuts for added flair. For a fun twist, insert a colorful straw or a fancy spoon for that extra touch. This milkshake is perfect for a cozy movie night, a casual hangout, or even a mini celebration! Don’t forget to snap a picture for Instagram before diving in!

---

## Recipe Variations

Here are a few fun variations you might want to try out:

1. **Banana Chocolate Peanut Butter Milkshake:**
   Toss in half a ripe banana before blending for a delightful fruit twist—it’s like having a sundae smoothie!

2. **Mint Chocolate Peanut Butter Milkshake:**
   Add a few drops of mint extract for a refreshing minty flavor. Garnish with crushed mint chocolate candies for added flair!

3. **Spicy Chocolate Peanut Butter Milkshake:**
   For the adventurous, add just a pinch of cayenne pepper or a dash of cinnamon. It will surprise everyone with a flavor kick!

4. **Vegan Delight:**
   Substitute dairy milk for almond milk and the ice cream for a coconut-based alternative, making this milkshake creamy and dairy-free.

---

## Chef’s Notes

As with any recipe, you can easily make your **Chocolate Peanut Butter Milkshake** uniquely yours! There have been times when I’ve thrown in leftover crushed cookies or even a scoop of protein powder when I’m feeling active. No two shakes need to be the same!

One sunny weekend, my friends and I had a little milkshake-off. We each made our version using whatever ingredients we could find in the pantry. It was a hilarious mess but resulted in some to-die-for shakes (and a kitchen that needed serious cleaning). I learned that creativity in the kitchen is just as important as following a recipe!

---

## FAQs and Troubleshooting

**1. My milkshake is too thin; how can I thicken it?**
Don’t worry! Simply add an extra scoop of ice cream or blend in a little bit of frozen banana to give it that creamy texture.

**2. Is there a way to make it less sweet?**
Absolutely! Reduce the amount of chocolate syrup, and you can even use dark chocolate options as they usually have less sugar.

**3. What if I don’t have a blender?**
If you don’t have a blender, you can mix the ingredients using a handheld mixer in a large bowl until combined. It’ll take a bit more time, but you’ll still love the end result!

**4. Can it be made ahead of time?**
I recommend making it fresh, as milkshakes are best enjoyed right after blending. However, if you must make it ahead, keep it in the freezer, let it soften a bit before serving, and blend again!

---

## Nutritional Info

(Feel free to include this if applicable)

- **Calories:** Approximately 450 per serving (depending on specific ingredient choices)
- **Fat:** 20g
- **Carbohydrates:** 55g
- **Protein:** 10g

---

There you have it—your guide to making a delicious, sloppy, creamy **Chocolate Peanut Butter Milkshake**! I hope this recipe inspires you to get into your kitchen and whip up something delicious. Remember, cooking is about having fun and creating joyful moments!

Happy blending, and cheers to sweet memories!
The Ultimate Chocolate Peanut Butter Milkshake
- Total Time: 10 minutes
- Yield: 2 servings 1x
- Diet: Vegetarian
Description
A decadent chocolate peanut butter milkshake that combines creamy, nutty, and chocolatey goodness in a quick and easy recipe.
Ingredients
- 2 cups Vanilla Ice Cream
- 1 cup Milk
- 1/3 cup Creamy Peanut Butter
- 1/4 cup Chocolate Syrup
- Optional Toppings: Whipped Cream, Chocolate Shavings or Chips, Sliced Bananas
Instructions
- Gather Your Ingredients: Gather all your ingredients and tools: a blender, a measuring cup, and a few tall glasses.
- Scoop the Ice Cream: Measure out 2 cups of creamy vanilla ice cream directly into your blender.
- Add the Milk: Pour in 1 cup of milk of your choice.
- Incorporate Peanut Butter: Add 1/3 cup of creamy peanut butter.
- Add Chocolate Syrup: Drizzle in 1/4 cup of chocolate syrup.
- Blend Away!: Secure the lid tightly and blend on high until smooth.
- Taste Test: Once creamy, stop blending and taste.
- Pour and Serve: Pour in your milkshake and top with whipped cream and any other garnishes.
Notes
You can easily modify the milkshake with different flavor additions or substitutions for a unique taste.
- Prep Time: 10 minutes
- Cook Time: 0 minutes
- Category: Dessert
- Method: Blending
- Cuisine: American
Nutrition
- Serving Size: 1 serving
- Calories: 450
- Sugar: 40g
- Sodium: 200mg
- Fat: 20g
- Saturated Fat: 10g
- Unsaturated Fat: 8g
- Trans Fat: 0g
- Carbohydrates: 55g
- Fiber: 2g
- Protein: 10g
- Cholesterol: 60mg
Keywords: milkshake, chocolate, peanut butter, dessert, summer treat
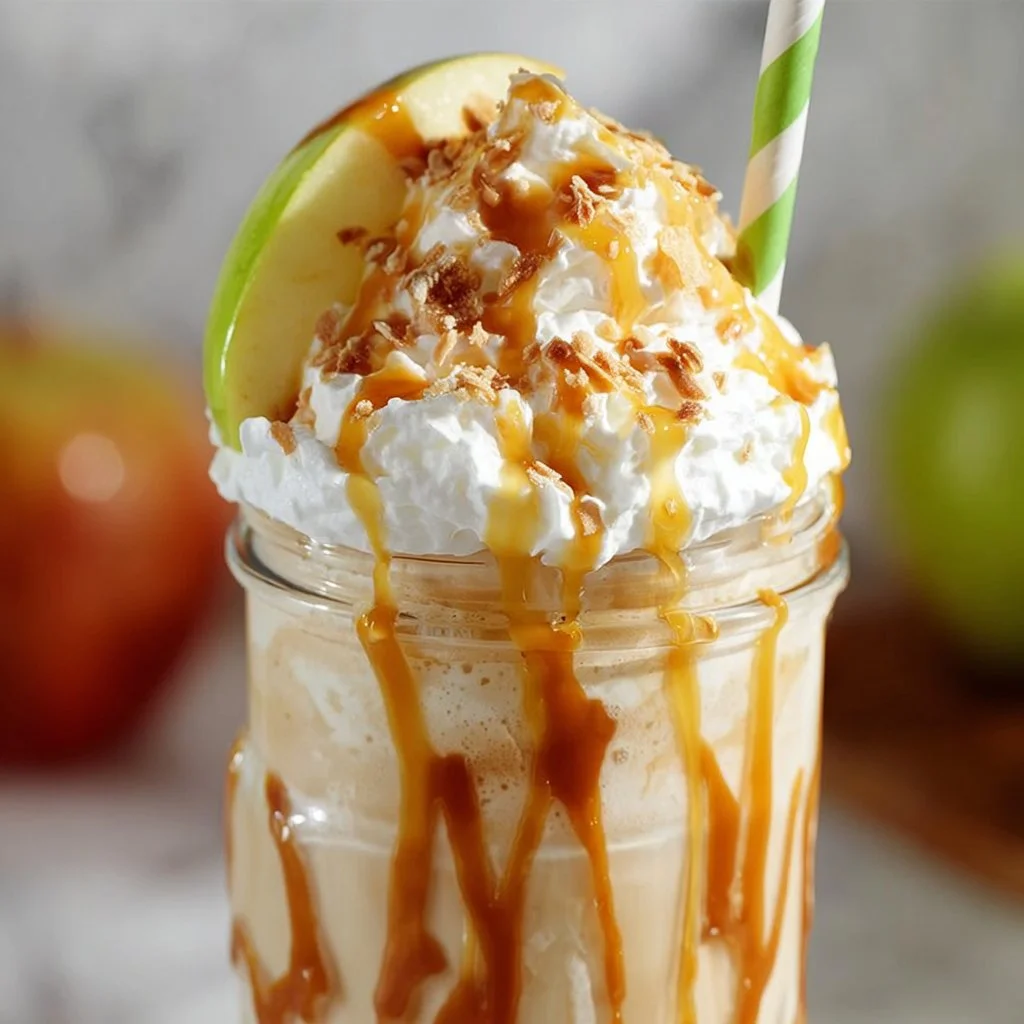
Caramel Apple Milkshake
Caramel Apple Milkshake: A Sweet Taste of Fall
Hello there, fellow food lovers! 🍏🍦 It’s Olivia Bennett here, and today, we’re diving into one of my all-time favorite treats — the Caramel Apple Milkshake! Imagine biting into a crisp, juicy apple drizzled with luscious caramel, but in shake form! This delight takes the essence of autumn and packs it into a glass, making it the perfect beverage to enjoy with friends or family during the cozy fall months, or really any time of the year when that sweet craving hits!
The thing I adore about this milkshake is the nostalgia it brings. Every sip reminds me of those carefree afternoons spent at the county fair, watching apple bobbing contests and enjoying all the caramel-coated goodies the vendors had to offer. This recipe is not only a fun twist on a classic milkshake, but also a fantastic way to make memories in the kitchen. It’s so simple yet delicious, perfect for anyone who wants to whip up something special without spending hours in the kitchen.
Now, whether you’re hunkering down after a long day or hosting a chilled-out movie night, this Caramel Apple Milkshake will surely bring everyone together. Plus, it’s a great opportunity to get creative! You can customize it to fit your tastes or dietary needs while still capturing that sweet caramel apple essence. So, let’s get our ingredients together and create something unforgettable!
Personal Story
Let me take you back to a fall day years ago. I was in high school, bursting with energy and a robust appetite. My friends and I saved up our allowances to hit up the annual apple festival. The sun was shining, leaves were falling, and the tantalizing aroma of baked goods filled the air. We made our first stop at the caramel apple booth, and boy, was it hard to resist! All of us traded bites of caramel apples, laughing and joking as we sweetened the day away.
That festival visit forever left a mark on my heart — not just for the sweets, but for the laughter and love we shared. Fast forward to me in my kitchen, reminiscing about those blissful days, and I decided to take that iconic combination of flavors and turn it into a milkshake! Blending nostalgia with culinary creativity is what it’s all about, isn’t it? Each sip tells a story, and I can’t wait for you to create your own!
Ingredients
Here’s what you’ll need to whip up this delightful treat. Each ingredient is chosen with love to help you create that authentic caramel apple flavor:
-
Vanilla Ice Cream: The base of our milkshake! For a dairy-free option, use coconut or almond milk ice cream instead. The creaminess is the secret to its luxurious texture.
-
Milk: We’re talking about whole milk for extra richness, but feel free to use almond milk, oat milk, or any plant-based milk for a lighter version.
-
Caramel Sauce: A must-have! You can use store-bought or homemade. To make it a bit healthier, try a date-based caramel for a natural sweetener.
-
Apples: Any variety will work, but Granny Smith or Honeycrisp provides the perfect balance of tartness and sweetness. If you want a different flavor profile, try using a flavored apple cider instead for a fruity twist.
-
Cinnamon: Just a pinch enhances the fall flavors! You can also use pumpkin spice if you want to amp up the autumn vibe.
-
Whipped Cream (optional): For that café-style finish, why not? Vegan whipped cream is widely available for a dairy-free version!
Remember, these ingredients can be adjusted based on your taste buds or pantry stock. Let your creativity flow!
Step-by-Step Instructions
Alright, it’s time to get blending! Grab your favorite blender (or immersion blender if you’re fancy), and let’s create something incredible.
-
Gather Your Ingredients: Make sure you have everything prepped and ready. Nothing worse than halfway through and realizing you’re missing a key component!
-
Slice the Apples: Take one or two apples (depending on how apple-y you want your shake) and slice them into small chunks. No need to peel; the skin adds a beautiful texture and nutrients. Bonus chef tip: squeeze a bit of lemon juice on the apple slices to help prevent browning!
-
Blend It Up: In your blender, combine 2 cups of vanilla ice cream, 1 cup of milk, ½ cup of caramel sauce, and the apple chunks. For a boost of flavor, sprinkle in a teaspoon of cinnamon.
-
Start Blending: Set your blender to high speed and blend until the mixture is smooth and creamy. If you prefer a thicker shake, add a bit more ice cream or decrease the milk; if you like it thinner, add more milk.
-
Taste Test Time: Once blended, take a little taste (make sure it’s safe to do so!) and see if you need more caramel or a sprinkle of cinnamon. Adjust according to your taste buds! It’s your masterpiece — make it count!
-
Chill, Baby, Chill: At this point, if you want, throw the milkshake in the freezer for about 10 minutes to thicken it even more. A perfect milkshake is creamy, but there’s something special about getting it extra chilly!
-
Serve: Grab your favorite tall glasses; I recommend a clear glass for that beautiful swirl of colors. Drizzle some caramel along the inside of the glasses before pouring in your milkshake — it’s all about presentation!
-
Top It Off: If you’re feeling fancy, dollop whipped cream generously on top, then drizzle on more caramel sauce, and maybe a sprinkle of cinnamon for good measure. Add some small apple slices for garnish if you want to wow your guests!
And voilà! You’ve made a delicious Caramel Apple Milkshake. How easy was that?
Serving Suggestions
This milkshake is best served immediately while it’s icy and fresh. You can serve it alongside some warm cinnamon donuts for a cozy treat or with a slice of apple pie as a delightful dessert duo! For a fun touch, consider using decorative straws or mixing in mini caramel candies for added texture. Don’t forget to snap a pic before diving in — it’s Instagram-worthy for sure!
Recipe Variations
-
Peanut Butter Lover: Swirl in some creamy peanut butter for a delightful caramel apple peanut butter milkshake!
-
Chocolate Twist: Add a couple of tablespoons of cocoa powder or blend in some chocolate ice cream for a chocolaty caramel apple delight.
-
Nutty Notes: Toss in crushed nuts like pecans or walnuts for a crunchy twist — hello, texture!
-
Spiced-Up Version: Substitute apple pie spice for the cinnamon for a more complex flavor profile, bringing in notes of nutmeg and clove!
-
Healthier Swap: Use Greek yogurt instead of ice cream for a lighter, protein-packed version; just blend in some extra honey to sweeten it up.
Chef’s Notes
This recipe has truly evolved over time! I remember the first time I tried making this milkshake; I ended up with a lumpy, overly sweet disaster — and it was the most fun disaster ever! Through experimentation, I honed in on the perfect balance of flavors and textures. The key is to have fun in the kitchen! Whether you make a mistake or create magic, it’s all part of the process!
Also, if you end up with extra caramel sauce (is there even such a thing?), it’s fantastic drizzled over pancakes, waffles, or even stirred into oatmeal for breakfast! That’s how we sustainably embrace our kitchen adventures with the leftovers!
FAQs and Troubleshooting
How can I make this milkshake vegan?
Simply substitute the milk and ice cream with plant-based alternatives, and ensure your caramel sauce is vegan-friendly!
Can I store leftovers?
While this milkshake is best enjoyed fresh, you can store it in a sealed container in the freezer for a little while. Just give it a good stir or re-blend it if it hardens too much.
My milkshake is too thin; what do I do?
If your shake ends up too runny, simply add a bit more ice cream and re-blend until you reach your desired consistency.
What’s the best apple for a milkshake?
Granny Smith or Honeycrisp apples work best for that perfect balance of sweet and tart! However, feel free to experiment with your favorites!
Nutritional Info
Serving Size: 1 milkshake
Calories: ~500 (depending on ingredients used)
Fat: 22g
Carbohydrates: 58g
Protein: 7g
Sugar: 45g
Note: Nutritional values will vary based on ingredient substitutions.
So, there you have it — a heavenly Caramel Apple Milkshake that’ll make your taste buds dance! I can’t wait for you to try this recipe and make it your own. Remember, cooking (and shake-making!) is all about joy, creativity, and love. Enjoy every sip, and happy cooking! 🍏❤️
Print
Caramel Apple Milkshake
- Total Time: 10 minutes
- Yield: 2 servings 1x
- Diet: Vegetarian
Description
A delightful milkshake capturing the essence of autumn with the flavors of caramel and apple.
Ingredients
- 2 cups vanilla ice cream
- 1 cup whole milk (or plant-based milk)
- ½ cup caramel sauce (store-bought or homemade)
- 1–2 apples (Granny Smith or Honeycrisp)
- 1 teaspoon cinnamon (or pumpkin spice)
- Whipped cream (optional, for topping)
Instructions
- Gather Your Ingredients: Make sure you have everything prepped and ready.
- Slice the Apples: Cut apples into small chunks, keeping the skin on for texture.
- Blend It Up: Combine ice cream, milk, caramel sauce, and apple chunks in the blender.
- Start Blending: Blend until smooth and creamy, adjusting thickness as desired.
- Taste Test Time: Adjust caramel or cinnamon to your preference.
- Chill, Baby, Chill: Optional, chill the milkshake in the freezer for 10 minutes.
- Serve: Pour into glasses and drizzle caramel along the inside before serving.
- Top It Off: Add whipped cream, more caramel, and optional apple slices for garnish.
Notes
This milkshake is best served immediately, but you can store leftovers in the freezer.
- Prep Time: 10 minutes
- Cook Time: 0 minutes
- Category: Beverage
- Method: Blending
- Cuisine: American
Nutrition
- Serving Size: 1 milkshake
- Calories: 500
- Sugar: 45g
- Sodium: 150mg
- Fat: 22g
- Saturated Fat: 14g
- Unsaturated Fat: 8g
- Trans Fat: 0g
- Carbohydrates: 58g
- Fiber: 2g
- Protein: 7g
- Cholesterol: 60mg
Keywords: caramel apple milkshake, fall treat, sweet beverage, dessert, milkshake recipe
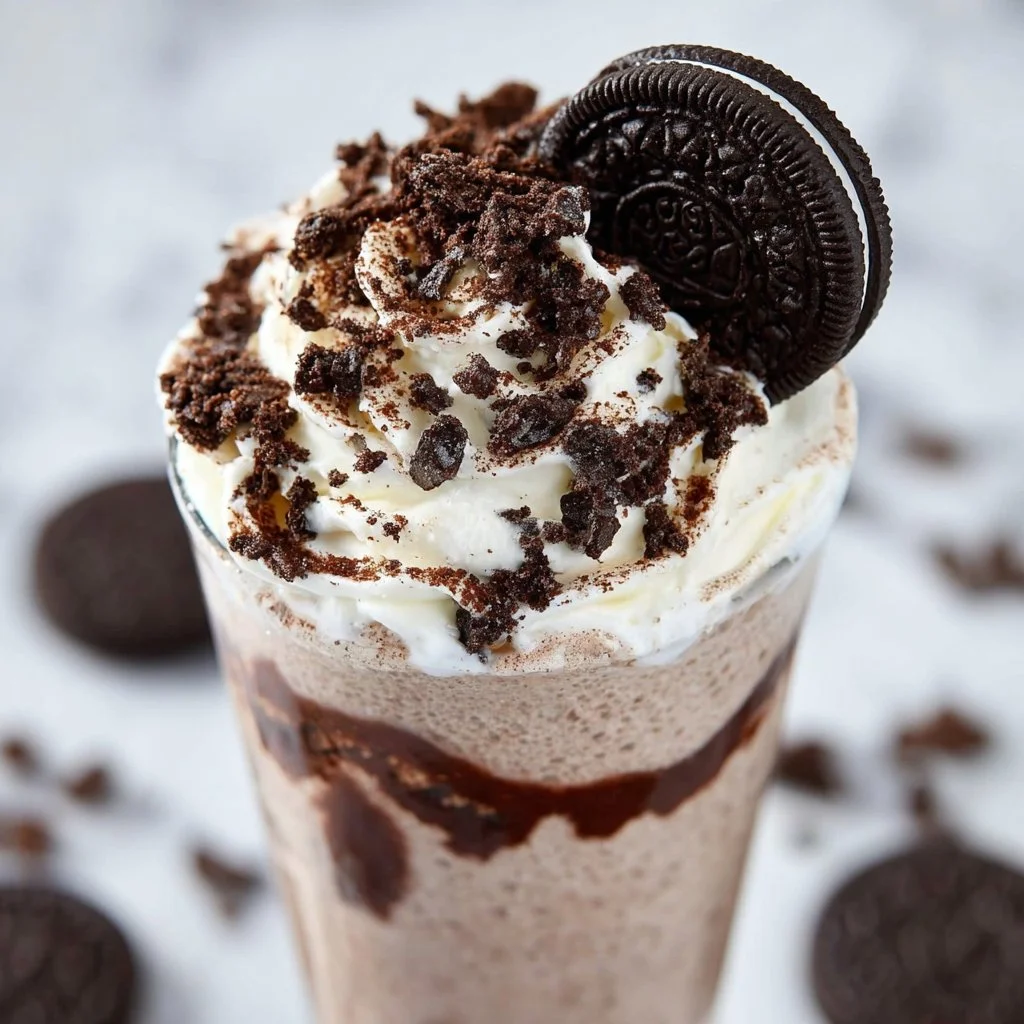
Oreo Milkshake
Whip Up a Delightful Oreo Milkshake: A Sweet Journey into Nostalgia
Hey there, fellow food lovers! Welcome to my cozy corner of the kitchen, where today, we’re diving into a sweet indulgence that’s sure to stir up some fond memories and take our tastebuds on a delicious ride. That’s right; we’re making an Oreo Milkshake! If you’ve ever taken a sip of this creamy, chocolatey goodness, you know it’s not just a drink; it’s a delightful experience packed with nostalgia and comfort.
Picture this: It’s a warm summer day, and the ice cream truck is parked down the street, its jingle echoing through the neighborhood. The excitement builds as you rush outside, clutching your allowance tightly. The moment you lay your eyes on the giant ice cream cones and delicious milkshakes, your eyes light up. Ah, to be a kid again, right? Well, with this Oreo Milkshake recipe, you can channel that joy anytime, anywhere!
This milkshake is the perfect blend of creamy vanilla ice cream, rich chocolate cookies, and velvety milk, all coming together in one glorious glass. You don’t need fancy ingredients or cooking skills to whip this up; just a little enthusiasm and a love for cookies (and who doesn’t love those?). Plus, it’s a fun way to get your little ones involved in the kitchen!
As we go through this delightful journey of creating the perfect Oreo Milkshake, you’ll find tips, tricks, and creative twists that I’ve picked up over the years. So, grab your blender, put on your favorite tunes, and let’s get shaking – it’s time for some deliciousness!
Personal Story
Let me take you back a few years to one of my favorite childhood memories. It was a scorching July afternoon, and my friends and I were gathered for a backyard movie night under the stars. My mom decided to surprise us all with homemade Oreo Milkshakes!
I remember her filling the blender as we gathered around, our excitement bubbling just like the concoction inside. The sound of the blender filled the air, a melody of whirring that meant something delicious was coming our way. When those frosty milkshakes were finally poured into our cups, topped with whipped cream and a single Oreo balancing precariously on top, our eyes lit up with delight.
Sipping on that creamy treat while snuggled in blankets under the stars made that summer night feel magical. Now, years later, every time I blend up an Oreo Milkshake, it transports me back to that joyful evening, filled with laughter, sticky fingers, and endless chatter among friends. That’s the beauty of food—it has a way of connecting us to our happiest moments and the people we cherish most. And today, I’m here to help you create a new memory or two with this delicious treat!
Ingredients
Here’s what you’ll need to create your own scrumptious Oreo Milkshake. Let’s talk ingredients!
-
Oreo Cookies (6-8 cookies)
Classic Oreo cookies are the star of this show! Their chocolatey crunch pairs perfectly with the sweetness of creamy ice cream. Can’t find Oreos? Try any chocolate sandwich cookie you love—it’ll work just as well! -
Vanilla Ice Cream (2 cups)
The creaminess of vanilla ice cream is what gives this shake its luxurious texture. If you’re looking for a lighter option, low-fat or dairy-free ice cream can still give you that delightful creamy feel. -
Milk (1 cup)
Whole milk adds richness to our shake, but you can use any type of milk—almond, oat, or even chocolate milk for an extra flavor punch! -
Whipped Cream (for topping)
A dollop of whipped cream on top not only makes your milkshake look fantastic but also adds a lovely creamy finish. Store-bought is great, or you can whip it up fresh if you’re feeling adventurous! -
Additional Oreos (for garnish)
Crushed or whole, these cookies add a lovely crunchy surprise as you sip on your shake. Plus, they make for a pretty presentation!
Step-by-Step Instructions
Alright, let’s get down to business and whip up this irresistible Oreo Milkshake! Follow these simple steps to enjoy the most delightful treat:
-
Gather Your Ingredients
Prep your workspace by laying out all your ingredients. This helps to make the process smoother and more organized. You’ll want your ice cream slightly softened for easier blending, so dig in and let it sit for a few minutes while you grab your blender. -
Crush the Oreos
Grab 6-8 Oreo cookies and gently break them into pieces. You can crush them in a plastic bag with a rolling pin or by using the blender for a few quick pulses. We want a mix of fine crumbs and larger chunks for that perfect texture! -
Blend It Up!
Pour the crushed cookies into your blender, followed by the vanilla ice cream and milk. Make sure to add the milk gradually—if you like your milkshake thick, start with ¾ cup and add more if needed. Pop the lid on and blend on high until it reaches a smooth and creamy consistency. Pause to scrape down the sides if needed. -
Adjust the Consistency
Check your milkshake’s consistency. Too thick? Add a splash of milk. Too thin? Toss in another scoop of ice cream! Blend until perfectly combined, and you’re almost there! -
Taste Test
Here comes the fun part! Get a straw or a spoon, taste a little, and see if it needs more cookie crumbles or even a pinch of chocolate syrup if you’re feeling extra cheeky. This is the time to personalize your shake based on your unique taste preferences! -
Serve with Style
Pour your Oreo Milkshake into chilled glasses (this keeps it cold for longer). For the ultimate presentation, top with whipped cream, crushed Oreos, and maybe even a drizzle of chocolate syrup. -
Get Ready to Enjoy!
Dive into that glorious shake with a straw or spoon and share it with your favorite people—or keep it all to yourself if you prefer! Get cozy and enjoy every sip.
Serving Suggestions
To present your delightful Oreo Milkshake, serve it in tall, frosty glasses topped with a generous swirl of whipped cream. You can sprinkle some crushed Oreos on top for an eye-catching finish. For a truly decadent treat, consider pairing it with a slice of chocolate cake or some freshly baked cookies on the side. Who said you can’t have dessert with dessert?
Recipe Variations
Want to switch things up? Here are a few creative twists you can try with your Oreo Milkshake:
- Minty Fresh: Add a drop of peppermint extract and use mint Oreos for a refreshing mint chocolate flavor!
- Peanut Butter Bliss: Toss in a couple of spoonfuls of peanut butter for an indulgent and nutty version.
- Chocolate Lovers: Use chocolate ice cream instead of vanilla for an extra chocolatey experience—an absolute must-try for chocolate enthusiasts!
- Extra Crunch: Fold in some crushed nuts or even a few scoops of your favorite brownie bites for extra texture and flavor.
- Dairy-Free Delight: Substitute traditional ingredients with almond milk, cashew ice cream, and vegan Oreos for a delicious dairy-free version that still offers all the satisfaction!
Chef’s Notes
Creating this Oreo Milkshake has been a delightful journey for me over the years. Each time I blend up this treat, I’m reminded of those joyful summer nights with my friends. Sometimes, I play around with flavors and ingredients! Once, I tried mixing in some espresso powder for a coffee-infused Oreo shake, and let me tell you, it was an absolute game changer for those mornings when you need a little extra caffeine. Food truly evolves, just like the memories attached to it.
FAQs and Troubleshooting
1. My milkshake is too thick. What should I do?
If your milkshake ends up thicker than you’d like, simply add a splash more milk and blend again. Start with small amounts until it reaches your desired consistency.
2. Can I use regular milk instead of ice cream?
While milk can add creaminess, it won’t replicate the thickness of ice cream. Stick with ice cream for that perfect shake!
3. What’s a good substitute for vanilla ice cream?
If you’re out of vanilla, any flavor of ice cream will do! Just remember that it will change the final flavor of your shake—try chocolate or cookies and cream for a fun twist.
4. How can I make my Oreo Milkshake healthier?
You can reduce the calories slightly by using low-fat ice cream or yogurt as a base and adding less sugar or cookies than the recipe calls for. It may not be as indulgent, but it’ll still be a tasty treat!
Nutritional Info
(If you want to keep track of the nutritional information for your Oreo Milkshake, here’s a rough estimate per serving:)
- Calories: 500-600
- Protein: 10g
- Carbohydrates: 70g
- Sugars: 55g
- Fat: 25g
(Note: Values may vary based on exact ingredients used.)
So, there you have it! Just a few simple steps to create an Oreo Milkshake that’s bound to become a favorite in your household. Remember to savor the process, enjoy the little moments in the kitchen, and find joy in home-cooked treats. Happy shaking, my fellow foodies! 🍦🥛
Print
Oreo Milkshake
- Total Time: 5 minutes
- Yield: 2 servings 1x
- Diet: Vegetarian
Description
A delightful and creamy Oreo Milkshake that captures the joy of childhood memories.
Ingredients
- 6–8 Oreo Cookies
- 2 cups Vanilla Ice Cream
- 1 cup Milk
- Whipped Cream (for topping)
- Additional Oreos (for garnish)
Instructions
- Gather your ingredients.
- Crush the Oreos.
- Blend it up!
- Adjust the consistency.
- Taste test.
- Serve with style.
- Get ready to enjoy!
Notes
Consider variations like adding mint, peanut butter, or using different ice cream flavors for creative twists.
- Prep Time: 5 minutes
- Cook Time: 0 minutes
- Category: Dessert
- Method: Blending
- Cuisine: American
Nutrition
- Serving Size: 1 serving
- Calories: 550
- Sugar: 55g
- Sodium: 250mg
- Fat: 25g
- Saturated Fat: 15g
- Unsaturated Fat: 5g
- Trans Fat: 0g
- Carbohydrates: 70g
- Fiber: 2g
- Protein: 10g
- Cholesterol: 50mg
Keywords: Oreo, milkshake, dessert, summertime, ice cream
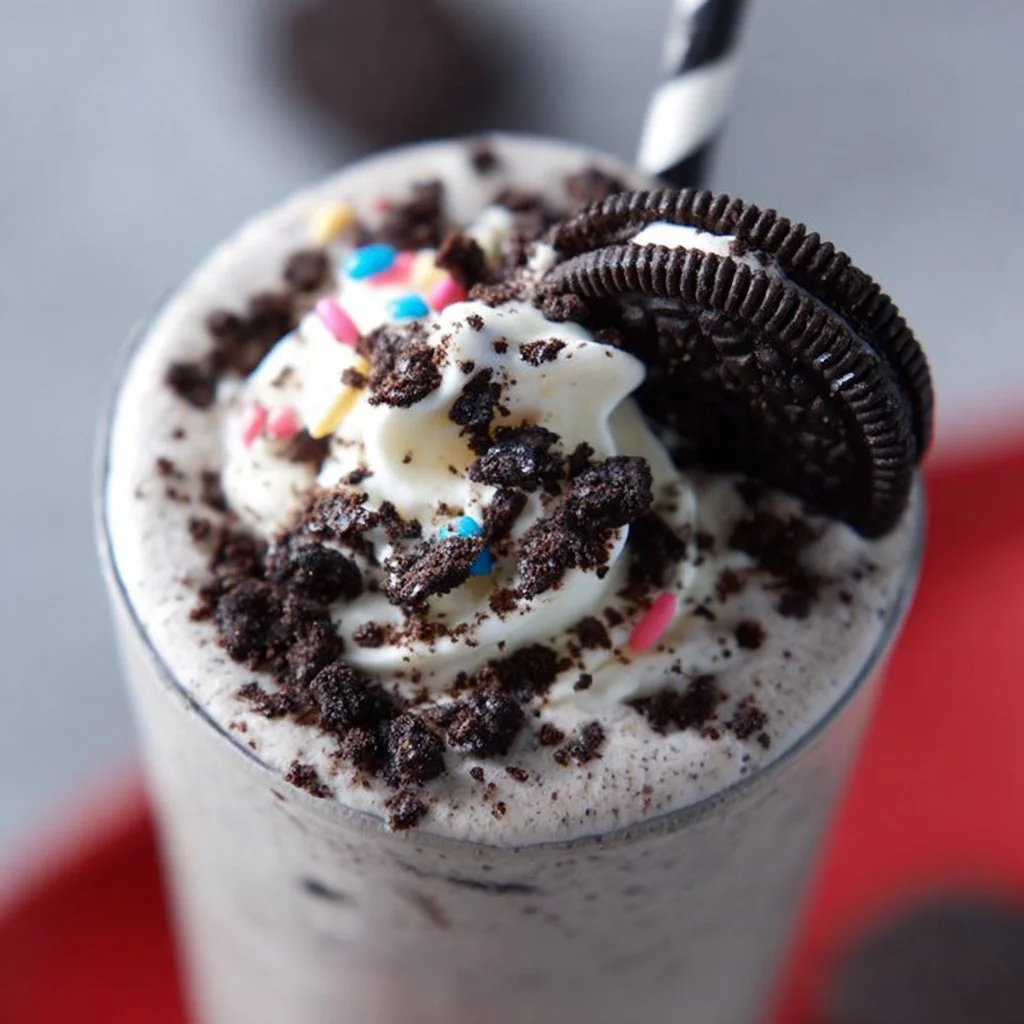
Vegan Oreo Milkshake
Decadent Vegan Oreo Milkshake Recipe: Indulge Without Compromise!
Welcome to my kitchen! Today, we’re diving into a delightfully nostalgic treat that embraces the joy of indulgence without compromising on our values. Yes, I’m talking about the heavenly Vegan Oreo Milkshake! If you know me, you’ll know that I’m all about creating delicious, heartwarming dishes that bring people together and leave you swooning with every sip. This milkshake is not just a recipe; it’s a little piece of happiness in a glass!
Imagine this: a thick, creamy, and utterly delicious milkshake that not only tickles your taste buds but also gives you a delightful blast of nostalgia. Who doesn’t love the classic combo of rich chocolate and creamy vanilla? This milkshake is vegan, plant-based, and incredibly easy to whip up—perfect for a midnight treat, a special occasion, or just because you deserve it!
What I love most about this recipe is how it marries the creamy richness of dairy-free ice cream with the crunchy goodness of Oreos. You can indulge guilt-free, knowing that it’s all made with nourishing, plant-based ingredients. I remember the first time I made this for my friends during a cozy movie night—everyone’s eyes lit up with pure joy as we sipped these delicious shakes while laughing over our favorite comedies. It’s a memory I treasure, and I can’t wait for you to create your own cherished moments with this milkshake!
So, grab your blender, and let’s get mixing!
A Nostalgic Journey: My First Milkshake Memory
I think back to my childhood and those hot summer days spent at the local ice cream parlor with my family. The sound of the blender whirling, the vibrant colors of ice cream displayed behind the counter, and the smell of freshly made waffle cones fill my mind. My favorite treat, without a doubt, was the classic cookies-and-cream milkshake. It was everything a kid could dream of—sweet, creamy, and just so darn good!
Fast forward a few years, and when I transitioned to a plant-based lifestyle, I thought those dreamy shakes were left behind in the past. But one rainy afternoon, while trying to replicate that nostalgia in my kitchen, the Vegan Oreo Milkshake was born! I can’t tell you how often I’ve whipped up batches of this drink since then, feeling just like I did back in that ice cream shop, but with the added bonus of knowing each ingredient is plant-based and healthy.
I knew I’d hit the jackpot when my friends lifted their glasses to toast, reveling in the freedom of enjoying a tasty treat without the guilt. There’s something magical about reimagining a classic dish that not only satisfies our cravings but also makes us feel good inside. Let’s recreate that magic together!
Ingredients for Your Vegan Oreo Milkshake
Before we start blending, let’s gather our ingredients! Here’s what you’ll need to whip up this deliciously dreamy vegan shake. I’ve included some insights and substitution tips for each ingredient so you can customize this divine creation just to your taste.
-
Vegan Vanilla Ice Cream (2 cups): This will be your shake’s base, providing creaminess and sweetness. When in doubt, go for a brand made with coconut or almond milk for a great texture! If you’re avoiding sugar, look for a no-sugar-added variety.
-
Plant-Based Milk (1 cup): Almond milk, coconut milk, soy milk… you name it! Each type lends its unique flavor, so choose one that you love. If you want something ultra-creamy, opt for full-fat coconut milk.
-
Oreo Cookies (4-6 pieces): The star of our show! These classic cookies add that delightful crunch and rich chocolate flavor. If you’re looking for an alternative, there are also various vegan cookie options available, or you could try chocolate sandwich cookies from your favorite health food store.
-
Vegan Whipped Cream (for topping): It’s optional, but let’s be honest—it adds that extra touch! You can usually find this at grocery stores or make your own with coconut cream. No shame in splurging on the beautiful topping!
-
Chocolate Syrup (for drizzling): A splash of indulgence! Drizzle some chocolate syrup inside your glass before pouring in the shake for an extra visual treat. Opt for a dairy-free variety, or make your own using cacao powder, maple syrup, and a touch of water.
-
A pinch of Sea Salt: It enhances all the flavors! If you’re going for a sweet-and-salty twist, don’t skip this step.
Step-by-Step Instructions to Create Your Milkshake
Alright, let’s get down to business! Follow these steps, and you’ll have a luscious Vegan Oreo Milkshake in no time.
-
Prep Your Glasses: Before anything else, for that Instagram-worthy touch, drizzle chocolate syrup inside your serving glasses. Just take a spoon and swirl it around the sides of the glass. This is a fun step that also makes the shake look super inviting!
-
Blend the Base: In your blender, combine the vegan vanilla ice cream and the plant-based milk. The ratio might vary depending on how thick you’d like your shake. For a thicker shake, use less milk; for a slushy consistency, add a bit more!
Chef Tip: If you want a lighter milkshake, you can throw in a banana for natural sweetness and creaminess. Just peel and chop it before blending.
-
Add in the Oreos: Time for the fun part! Toss in the Oreo cookies and blend again until they’re coarsely chopped. You want some bits of cookie to remain for texture, so don’t over-blend!
-
Taste Test: After blending, grab a spoon and taste your mix. Feel free to add more cookies or a touch of sweetener if you desire! You can balance it out with a tiny pinch of sea salt, which enhances the sweet flavors wonderfully.
-
Blend One Last Time: Give it another quick blend to incorporate any additions and get everything smooth and creamy. Then, pour your glorious shake into the prepared glasses.
-
Top It Off: Now, it’s time for that vegan whipped cream! Generously dollop it on top, and add a sprinkle of crushed Oreos for an extra touch. You can go ahead and add a fun straw or a fancy cocktail umbrella to complete the look!
Chef Hack: If you want to make it a full meal replacement, throw in a couple of tablespoons of your favorite nut butter for added protein and flavor!
Serving Suggestions
This Vegan Oreo Milkshake makes for a fantastic treat! Serve it chilled in your drool-worthy drizzled glasses, topped with a crown of whipped cream and more crushed Oreos. It’s a perfect addition to movie nights, summer parties, or a cozy afternoon treat with friends. Pair it with a homemade vegan cookie for the ultimate sweet experience!
Recipe Variations
Feeling adventurous? Here are some creative twists to mix things up with your Vegan Oreo Milkshake:
-
Mint Chocolate Oreo Shake: Add a few drops of peppermint extract for a delightful minty twist.
-
Banana Oreo Shake: Toss in a ripe banana to give it extra creaminess and natural sweetness.
-
Peanut Butter Oreo Shake: A couple of tablespoons of creamy peanut butter take this shake to a whole new level of deliciousness!
-
Mocha Crunch Shake: Brew a shot of espresso and blend it in for a coffee-flavored milkshake; it’s perfect for a delightful pick-me-up!
-
Frozen Berry Oreo Shake: Add a handful of frozen blueberries or strawberries for a fruity twist that’s sure to surprise your taste buds.
Chef’s Notes
This vegan milkshake has come a long way since my first attempt! Originally, I added tons of sugar and thought I needed that to bring out the sweetness, but I soon realized that the Oreos and ice cream already contained plenty of sugary goodness. An important lesson learned in the kitchen!
What I love most is seeing how people customize it—whether it’s a family treat or a cheeky date night dessert, it always brings joy to the table. Plus, every time I make this, it brings me right back to those sunny days at the ice cream parlor, reminding me of the joy in simple pleasures.
FAQs and Troubleshooting
1. Can I make this shake without ice cream?
Absolutely! You can use frozen bananas for a creamy base or make a blend using frozen coconut cream. It should still yield a creamy texture.
2. What if my shake is too thick?
Don’t worry! Just add a little more plant-based milk and blend until you reach your desired consistency.
3. I’m gluten-free. Can I still enjoy this shake?
Yes! Look for gluten-free Oreo varieties or any gluten-free chocolate sandwich cookies as a substitute.
4. How do I store leftover milkshake?
If you have any leftover shake (which is unlikely!), store it in the freezer for about an hour. Give it a quick blend before enjoying it again, as it may become too thick overnight.
Nutritional Info (if applicable)
Serving Size: 1 shake
Calories: Approximately 350-400 per serving, depending on the ingredients used.
Protein: 5-10g (if adding nut butter or using higher protein dairy alternatives).
Fat: 15-20g (healthy fats, of course!).
There you have it! Your very own Vegan Oreo Milkshake that’s rich, creamy, and bound to be a hit. Whip this up, share it with your loved ones, and bask in the joy of good food and great company. Cheers to you and your delicious creations!
Print
Vegan Oreo Milkshake
- Total Time: 10 minutes
- Yield: 2 servings 1x
- Diet: Vegan
Description
A thick, creamy, and utterly delicious vegan milkshake made with rich chocolate Oreo cookies and dairy-free ice cream, perfect for indulgence without compromise.
Ingredients
- 2 cups Vegan Vanilla Ice Cream
- 1 cup Plant-Based Milk (almond, coconut, or soy)
- 4–6 Oreo Cookies
- Vegan Whipped Cream (for topping)
- Chocolate Syrup (for drizzling)
- A pinch of Sea Salt
Instructions
- Prep your glasses by drizzling chocolate syrup inside.
- Blend the vegan vanilla ice cream and the plant-based milk until smooth.
- Add in the Oreo cookies and blend until coarsely chopped.
- Taste the mixture and add more cookies or sweetener if desired.
- Blend one last time to get a smooth and creamy consistency.
- Pour the shake into the prepared glasses.
- Top it off with vegan whipped cream and crushed Oreos.
Notes
For a thicker shake, use less plant-based milk. Try adding a banana or nut butter for additional flavor and nutrition.
- Prep Time: 10 minutes
- Cook Time: 0 minutes
- Category: Dessert
- Method: Blending
- Cuisine: American
Nutrition
- Serving Size: 1 serving
- Calories: 375
- Sugar: 30g
- Sodium: 150mg
- Fat: 20g
- Saturated Fat: 10g
- Unsaturated Fat: 8g
- Trans Fat: 0g
- Carbohydrates: 49g
- Fiber: 2g
- Protein: 5g
- Cholesterol: 0mg
Keywords: vegan milkshake, Oreo shake, dessert, plant-based, indulgent treat
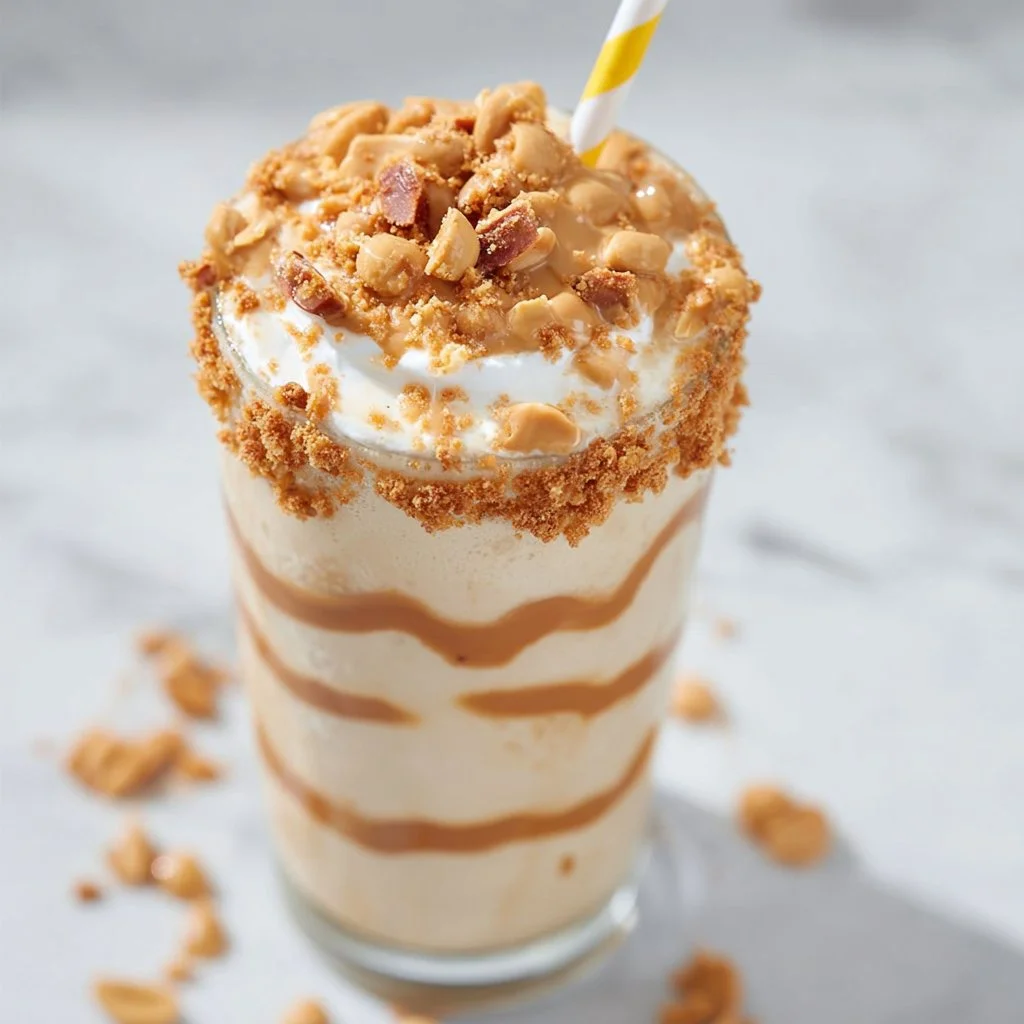
Peanut Butter Milkshake
Peanut Butter Milkshake: A Sweet Hug in a Glass
Welcome, dear friend, to the wonderful world of shakes and flavors! Today, we’re diving into a delightful treat that combines two classic favorites into one creamy, dreamy concoction: the Peanut Butter Milkshake. There’s something absolutely magical about this shake—it’s like a cozy hug on a hot day or a sweet reminder of simpler times spent with family and friends.
Picture this: it’s a balmy summer afternoon, and the sun is casting a warm, golden glow across your kitchen. You’ve just come in from a fun day outdoors, and all you can think about is indulging in something sweet and refreshing. With just a few ingredients (and a dash of love), you’re about to create a drink that takes you straight back to childhood, where joy and laughter bubbled over like the milkshake you’re about to make!
This milkshake hits all the right notes—creamy, nutty, and sweet with just the right amount of richness. It’s perfect for a quick snack, a simple dessert, or even as a fun treat for your next gathering. Plus, it’s a breeze to whip up, so you can satisfy that craving in no time. Trust me, whether you’re a peanut butter lover or just someone looking for a delightful sip, this shake will not disappoint!
In this post, I’ll take you step-by-step through creating this delicious Peanut Butter Milkshake, sharing some fun stories, tips, and even a few creative variations to keep things interesting. So roll up your sleeves, grab those ingredients, and let’s get shaking!
Personal Story
I still remember the first time I had a peanut butter milkshake. I was about seven years old, perched on a barstool at my local diner with my best friend, Lily. It was one of those classic American places with neon lights and checkered tiles, where everything felt like it was draped in nostalgia. We had just finished our cheeseburgers (the ones with all the toppings, of course!) and decided to indulge in a milkshake to top off our meal.
When our shakes arrived, the sight was spectacular—tall, frosty glasses filled to the brim with thick, creamy goodness topped with a generous dollop of whipped cream. I remember watching as the waitress poured a little extra shake into the glass—a surprise I still cherish today! As a curious kid eager to explore flavors, I took my first sip—and my taste buds danced in delight. The creamy richness of the peanut butter mixed with the coldness of the milkshake was heavenly!
From that day on, peanut butter milkshakes became my go-to indulgence, a nostalgic treat that I relished every chance I got. Now, as an adult, I can whip one up anytime I want, and it always brings me back to that sunlit diner, giggling with Lily and savoring simple delights together. That heartfelt memory continues to inspire my passion for cooking, reminding me of the importance of sharing food and love with friends and family.
Ingredients
Let’s gather our ingredients! This Peanut Butter Milkshake is uncomplicated and requires just a handful of pantry staples—a joy for the busy home cook! Here we go:
-
Vanilla Ice Cream (2 cups)
The base of our milkshake! Creamy vanilla provides a wonderful richness. If you’re feeling adventurous, experiment with other flavors like chocolate or caramel. Dairy-free alternatives are also fantastic! -
Milk (1 cup)
Whole milk gives you that creamy texture, but you can swap it for almond milk, oat milk, or any preferred milk alternative if you’re looking for a dairy-free option. -
Peanut Butter (1/2 cup)
The star of our show! Use a natural variety with no added sugar for a more wholesome taste. If you’re allergic or prefer something different, try almond butter or sunflower seed butter for a nut-free option. -
Honey or Sugar (to taste, typically 1-2 tablespoons)
Adds a touch of sweetness to balance the flavors. Feel free to adjust based on your preference, or use maple syrup for a unique twist. -
Whipped Cream (for topping, optional)
It’s not just for decoration; it adds a delightful finish! If dairy-free is your goal, there are excellent coconut cream brands available. -
Chocolate Syrup (for drizzling, optional)
A drizzling of chocolate syrup adds that extra wow factor! If you want an alternate route, consider caramel sauce instead.
Now that you’ve got your ingredients at the ready, let’s dive into the steps to create this sensational shake!
Step-by-Step Instructions
Step 1: Prepare Your Blender
Before we get underway, grab your trusty blender and make sure it’s clean and ready to go! A tip from the kitchen: make sure your blender is on a steady surface to avoid any wobbles while blending. Trust me; there’s nothing worse than a blender making a run for it when you’re just trying to make a delicious shake!
Step 2: Scoop the Ice Cream
Add your two cups of vanilla ice cream to the blender. This is the heart of your milkshake! To make blending easier, allow the ice cream to soften for about 5-10 minutes at room temperature before scooping. You want it to be creamy, not like a brick!
Step 3: Pour the Milk
Next, pour in one cup of milk. If you like a thicker shake, you can dial the milk back a bit. Remember, you can always add more, but it’s tough to thicken it up once it’s blended!
Step 4: Add the Peanut Butter
Now, measure out half a cup of peanut butter and dump it in. Watch out, it might stick to the sides a bit—no worries! It’s all about that delicious flavor. Easy tip: a quick spray of cooking oil on your measuring cup can help it slide right out!
Step 5: Sweeten It Up
Add your honey or sugar to taste. Start small; you can always add more if you like it sweeter! I often adjust this part based on how rich the peanut butter is; sometimes it doesn’t need any extra sweetening!
Step 6: Blend to Perfection
Put the lid on and blend on high until everything is smooth, creamy, and looks like a dream! If you find it’s too thick, just add a splash more milk until it reaches your desired consistency. Take a moment to enjoy that sweet, nutty aroma wafting through your kitchen!
Step 7: Taste Test
Here’s the fun part! Grab a spoon and do a little taste test. Is it perfect? If you think it needs a little something extra, here’s where you can tweak it. More peanut butter? Toss it in! Feeling chocolatey? Maybe stir in a splash of chocolate syrup!
Step 8: Serve it Up
Pour your luscious milkshake into tall glasses. If the foam rises a bit, that’s totally cool! You can always smooth it down with your spoon, or let it flow over like a milkshake fountain.
Step 9: Finish with a Flare
Top it off with whipped cream (if using), and let your artistry shine with some drizzling of chocolate syrup or maybe a sprinkle of crushed peanuts. Feel free to get creative—don’t be shy!
And there you have it—a rich, creamy Peanut Butter Milkshake ready to bring joy and smiles to everyone who experiences it. It’s as simple as that!
Serving Suggestions
Serve your Peanut Butter Milkshake in tall, frosty glasses, and for an extra special touch, why not garnish it with a sprinkle of crushed peanuts or a few chocolate chips? You could even serve alongside a warm chocolate chip cookie for that perfect dunking duo! Whether you’re enjoying this as a quick afternoon treat or making it the star of a dessert party, this drink is sure to bring a smile to every face.
Recipe Variations
- Chocolate Peanut Butter Milkshake: Add a couple of tablespoons of chocolate syrup or blend in some dark cocoa powder for a rich chocolate experience.
- Banana Peanut Butter Milkshake: Toss in one ripe banana for an extra fruity dimension—the creaminess will elevate the shake beautifully.
- Coffee Peanut Butter Milkshake: Blend in a shot of cooled espresso or some coffee for an energizing pick-me-up.
- Healthy Peanut Butter Milkshake: Use unsweetened almond milk, sugar-free peanut butter, and light ice cream for a wholesome version without sacrificing flavor.
Chef’s Notes
As with many recipes, this Peanut Butter Milkshake has evolved over the years. I’ve added oats for a breakfast version, played with flavor combos, and even tried freezing the shake to make creamy sorbet-like treats. The best part? Adapting this shake allows for endless experimentation! And let me tell you: mixing in different ingredients can yield some real kitchen surprises; some of my best discoveries came about when I wasn’t following the rules!
In one delightful twist, I once tried a marshmallow fluff topping instead of whipped cream for a dreamy s’mores-inspired shake, and wow—my friends went wild! The kitchen is a canvas; experiment boldly and create some art!
FAQs and Troubleshooting
Q: What if my shake is too thick?
A: No problem! Just add a bit more milk, a tablespoon at a time, and blend again until it’s just the right consistency. Remember, you want it smooth—just like enjoying your favorite childhood memories!
Q: Can I make this ahead of time?
A: While it’s best fresh, you can blend it and store it in the fridge for about an hour. Just give it a quick stir or a few pulses in the blender before serving to bring it back to life!
Q: How can I make this dairy-free?
A: Simple! Swap out the ice cream for dairy-free ice cream, use almond milk or oat milk in place of regular milk, and pick a nut butter that fits your dietary needs. You’ll have a delicious shake that everyone can enjoy!
Q: Is there a way to cut calories?
A: Absolutely! Use light ice cream or frozen yogurt, almond milk instead of regular milk, and skip the whipped cream or use a lighter version. It’ll still taste wonderful without weighing you down!
Nutritional Info (Optional)
If you’d like to tailor this to your health goals, here’s a rough nutritional breakdown (per serving, based on traditional ingredients):
- Calories: ~400
- Protein: ~12g
- Carbohydrates: ~55g
- Sugars: ~30g
- Fat: ~20g
(Note that this will vary based on specific ingredients used.)
And there you have it! Your very own Peanut Butter Milkshake, bursting with flavor and nostalgia. I hope you find as much joy in making and sipping this delightful treat as I do. Here’s to kitchen adventures and memories made over delicious food! Cheers and happy shaking!
Print
Peanut Butter Milkshake
- Total Time: 10 minutes
- Yield: 2 servings 1x
- Diet: Vegetarian
Description
A creamy and nutty Peanut Butter Milkshake that’s a delightful treat for all ages.
Ingredients
- 2 cups Vanilla Ice Cream
- 1 cup Milk
- 1/2 cup Peanut Butter
- 1–2 tablespoons Honey or Sugar (to taste)
- Whipped Cream (for topping, optional)
- Chocolate Syrup (for drizzling, optional)
Instructions
- Prepare your blender.
- Scoop the ice cream into the blender.
- Pour in the milk.
- Add the peanut butter.
- Sweeten it up with honey or sugar.
- Blend to perfection.
- Taste test and adjust if needed.
- Serve in tall glasses.
- Finish with whipped cream and chocolate syrup.
Notes
Serve with crushed peanuts or alongside chocolate chip cookies for added delight.
- Prep Time: 10 minutes
- Cook Time: 0 minutes
- Category: Dessert
- Method: Blending
- Cuisine: American
Nutrition
- Serving Size: 1 serving
- Calories: 400
- Sugar: 30g
- Sodium: 200mg
- Fat: 20g
- Saturated Fat: 10g
- Unsaturated Fat: 8g
- Trans Fat: 0g
- Carbohydrates: 55g
- Fiber: 2g
- Protein: 12g
- Cholesterol: 50mg
Keywords: milkshake, peanut butter, dessert, summer treat, creamy drink
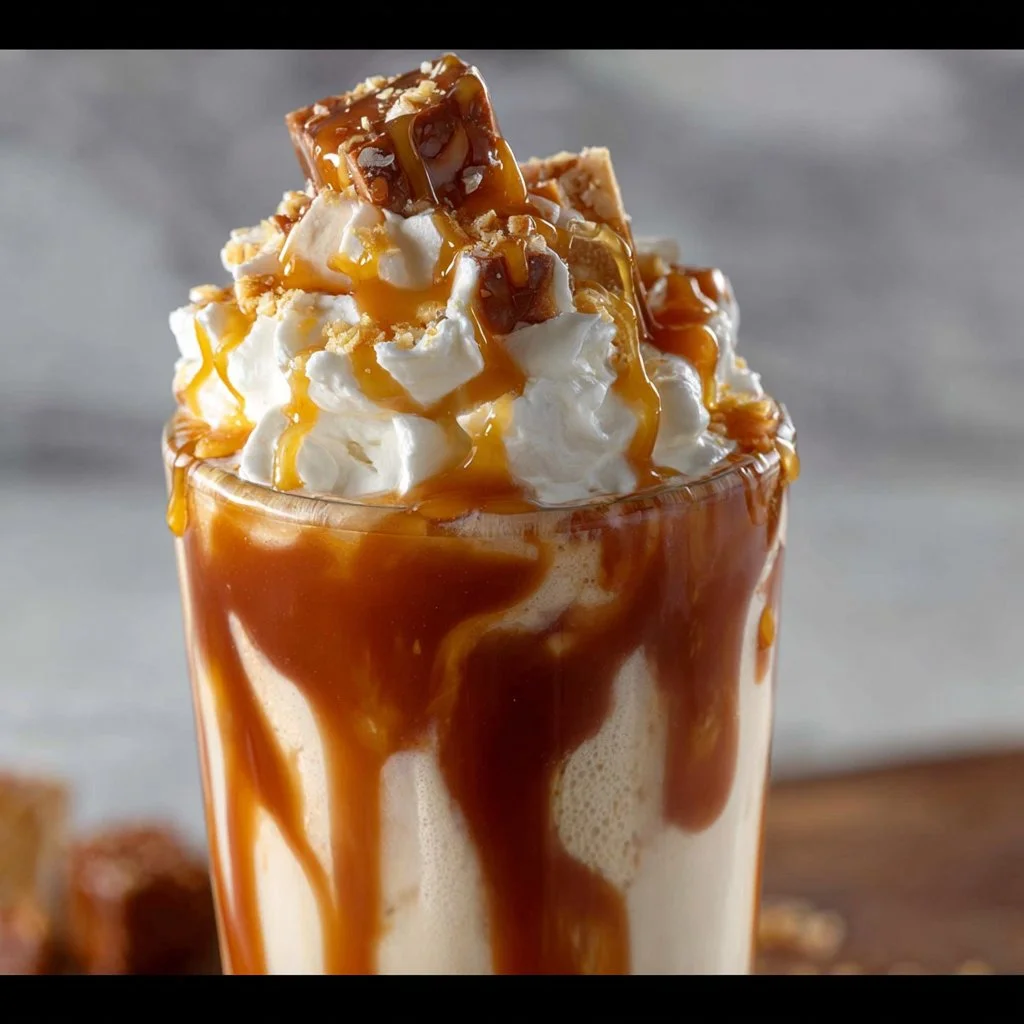
Salted Caramel Milkshake
Salted Caramel Milkshake: A Dreamy Indulgence
Welcome to my kitchen, food lovers! Today, we’re diving into a treat that’s sure to create a heavenly smile on your face and a little dance in your heart. Get ready for the ultimate Salted Caramel Milkshake! This luscious blend of creamy vanilla ice cream, rich caramel sauce, and a touch of salt creates a flavor explosion that makes indulging feel like a party — because let’s be honest, sometimes we all need a sweet escape. So grab your aprons, and let’s whip up a milkshake that’s as memorable as a warm hug on a chilly day.
A Sweet Memory Resurrected
This milkshake isn’t just any ordinary shake for me; it’s a delightful reminder of that unforgettable summer during my college days. One lazy afternoon, my friends and I decided to take a break from our relentless study sessions and do something fun. We ambled our way to a charming little diner, famed for its decadent desserts. The moment we walked in, the aroma of freshly whipped cream and melted caramel danced through the air, sparking a craving that pulled us straight to the milkshake menu.
After some serious deliberation (you know the kind where it feels like time has stopped?), I ordered their famous salted caramel milkshake. You guys, it was bliss in liquid form. That silky sweetness hit all the right notes! Sipping that shake took me to cloud nine, and I can still feel the laughter and chatter swirling around that small diner as we indulged. It was one of those moments that stick with you, and since then, I’ve been on a mission to perfect my own version. So, let’s create some memories together while we blend this delightful concoction!
Ingredients
Here’s what you’ll need to make this sensational Salted Caramel Milkshake, along with some handy insights and substitutions if you’re out of something or looking to mix it up:
-
Vanilla Ice Cream (4 cups)
The star of our show. This creamy goodness gives the milkshake its base. You can substitute it with dairy-free or vegan ice cream if you prefer. -
Whole Milk (1 cup)
Helps to blend the ice cream smoothly, creating that milkshake texture we love. You can swap it with almond milk or oat milk if you’re looking for a lactose-free option. -
Caramel Sauce (1/2 cup)
Go for store-bought for simplicity, but homemade is always a treasured touch! If you don’t have caramel on hand, try using butterscotch sauce. -
Sea Salt (1/2 teaspoon)
This is the magic element that balances the sweetness and brings out the flavors. Use a flaky sea salt for texture—trust me, it makes a difference! -
Whipped Cream (1 cup)
Smooth and fluffy topping for that perfect finish. You can top it with homemade whipped cream or store-bought if you’re in a hurry. -
Chocolate or Caramel Syrup (for drizzling)
Optional, but come on, who could resist? Drizzling a touch of syrup elevates your shake to a whole new level. Use it generously!
Step-by-Step Instructions
Now, let’s get our hands dirty and create this creamy dream! Follow these steps, and I promise you’ll not only enjoy crafting this masterpiece but maybe even dance a little while waiting.
-
Gather Your Ingredients
First things first, gather all your ingredients. This step might seem basic, but believe me, it helps keep things organized, and less mess equals more fun! -
Blend It Up
In a blender, combine 4 cups of vanilla ice cream, 1 cup of whole milk, and 1/2 cup of caramel sauce. This is where the magic starts! Don’t be afraid to dive in with a little enthusiasm. For a super creamy shake, blend on a medium speed until smooth, about 30 to 45 seconds.Chef Tip: If your shake is too thick, add a splash more milk until you reach your desired consistency. Remember, you can always add but can’t take away!
-
Season It Right
Now it’s time to add 1/2 teaspoon of sea salt to the blender. Blend for another 10 seconds to incorporate that delightful saltiness, balancing out that sweet caramel flavor. -
Taste Test!
This part is perhaps the most important step—taste! Isn’t that the best part of cooking? If you want a hint more sweetness, feel free to add a bit more caramel and blend it again. -
Get Ready to Serve
Grab your favorite tall glasses or milkshake mugs— presentation is key! Drizzle a generous amount of chocolate or caramel syrup down the insides of the glass, and then pour in your luscious milkshake. -
Top It Off
Finish it off with a hearty dollop of whipped cream on top. You can go wild here—add as much or little as you like! If you want to get fancy, sprinkle a little extra sea salt on top for that stylish touch. -
Chill and Enjoy!
Grab your favorite straw, and dive right in. And don’t forget to take a moment to admire your creation!
Serving Suggestions
Your Salted Caramel Milkshake will look fabulous just as it is, but here’s a little extra something: pair it with some homemade cookies or a slice of warm chocolate fudge cake for an indulgent treat that’ll make your dessert dreams come true. Guests will rave about this dreamy combination!
Recipe Variations
Now that you know the basic recipe, let’s mix it up a bit! Here are some delicious variations to keep things interesting:
-
Chocolate Salted Caramel Milkshake: Add a couple of tablespoons of cocoa powder or a handful of chocolate chips to your blender for a rich, chocolatey twist.
-
Nutty Caramel Bacon Milkshake: Crumble some crispy bacon on top and swirl in some crushed nuts for a smoky, savory note.
-
Pumpkin Spice Salted Caramel Milkshake: In fall, swap in pumpkin ice cream and add a sprinkle of pumpkin spice to the mix for a seasonal delight.
-
Banana Salted Caramel Shake: Toss in a ripe banana before blending for a fruity flavor that complements the caramel beautifully.
-
Vegan Salted Caramel Shake: Use coconut or almond milk, and a dairy-free ice cream for a plant-based treat that everyone can enjoy!
Chef’s Notes
This Salted Caramel Milkshake has come a long way since that summer in the diner. Over the years, I’ve experimented with various ingredients — different types of ice cream, homemade caramel sauce, and new flavor pairings. It’s beautiful to see how something can evolve from a beloved memory to a staple in my kitchen. I often enjoy making this milkshake when friends come over, and no matter the occasion, it always hits the sweet spot! It’s not just about the flavors; it’s about the laughter and joy that come with sharing good food.
Oh, and a funny story for you! One time, I had a little mishap with the blender while making this shake for a party. I hit the wrong speed, and let’s just say caramel was everywhere. We all shared a good laugh while cleaning up that sticky mess, but the milkshakes still turned out to be a crowd-pleaser, proving that sometimes the mishaps bring the best memories!
FAQs and Troubleshooting
1. My Milkshake is too thick! What should I do?
- Add a splash of milk a tablespoon at a time to dilute it until you reach your desired consistency.
2. How can I store leftover milkshake?
- You can store it in an airtight container in the freezer. Just remember to thaw it slightly before trying to drink it again.
3. How do I make my milkshake even sweeter?
- You can blend in a little more caramel sauce or use flavored syrups, like vanilla or butterscotch, for an added kick!
4. Can I make this the day before?
- Milkshakes are best enjoyed fresh, but if you’re prepping ahead, mix everything and store it in the fridge before blending it fresh to serve.
Nutritional Info
While indulging is the key to enjoying a Salted Caramel Milkshake, keeping in mind nutritional content is always a good idea. An average serving of this milkshake is usually around 600 calories, depending on your ingredient choices. It’s made up mostly of carbohydrates and sugar, with some protein coming from the ice cream and milk. It’s meant to be a treat, so enjoy it occasionally!
There you have it, my delightful food friends! Your homemade Salted Caramel Milkshake awaits! Whether it’s a sunny afternoon or a cozy evening in, treat yourself to this concoction that’s sure to bring warmth and sweet joy. You’ll find that every sip sparks a memory and every batch creates another story. Happy blending, and remember to share the love!
Print
Salted Caramel Milkshake: A Dreamy Indulgence
- Total Time: 10 minutes
- Yield: 4 servings 1x
- Diet: Vegetarian
Description
A luscious blend of creamy vanilla ice cream, rich caramel sauce, and a touch of salt creates a flavor explosion in this delightful milkshake.
Ingredients
- 4 cups Vanilla Ice Cream
- 1 cup Whole Milk
- 1/2 cup Caramel Sauce
- 1/2 teaspoon Sea Salt
- 1 cup Whipped Cream
- Chocolate or Caramel Syrup (for drizzling)
Instructions
- Gather Your Ingredients
- Blend It Up: In a blender, combine the ice cream, milk, and caramel sauce, blending until smooth.
- Season It Right: Add the sea salt and blend for another 10 seconds.
- Taste Test!
- Get Ready to Serve: Drizzle syrup inside the glasses and pour in the milkshake.
- Top It Off: Add whipped cream and extra sea salt for garnish.
- Chill and Enjoy!
Notes
This milkshake pairs well with cookies or a slice of chocolate fudge cake.
- Prep Time: 10 minutes
- Cook Time: 0 minutes
- Category: Dessert
- Method: Blending
- Cuisine: American
Nutrition
- Serving Size: 1 serving
- Calories: 600
- Sugar: 75g
- Sodium: 200mg
- Fat: 20g
- Saturated Fat: 10g
- Unsaturated Fat: 8g
- Trans Fat: 0g
- Carbohydrates: 84g
- Fiber: 0g
- Protein: 10g
- Cholesterol: 50mg
Keywords: milkshake, dessert, salted caramel, ice cream, indulgent treat, sweet drink
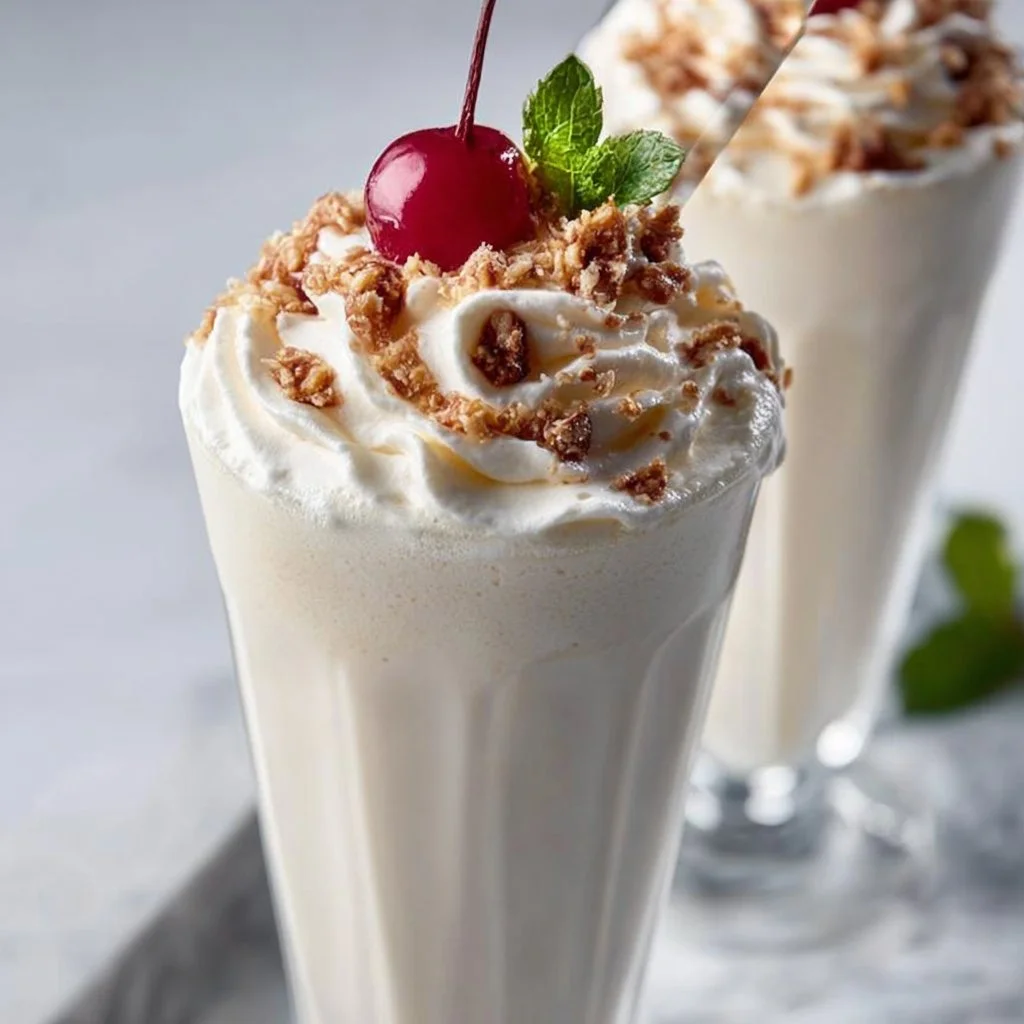
Keto Milkshake
Indulge in Creamy Bliss: The Ultimate Keto Milkshake
Introduction
Hey there, fellow food lover! Welcome back to my cozy corner of the kitchen. Today, we’re diving into a beverage that’s not only fabulously creamy but also aligns beautifully with a keto lifestyle—yes, I’m talking about the ever-tempting Keto Milkshake! Now, if you’ve ever craved a thick and luscious shake but thought that keto meant saying goodbye to such indulgent delights, fear not! This recipe is here to make your taste buds dance without the guilt.
Imagine this: it’s a sunny afternoon, you’ve been busy all day, and all you want is something rich and satisfying to cool you down. You whip up this Keto Milkshake in just a few minutes—it’s not just a drink; it’s a mini celebration of flavor and creativity. Picture yourself curling up on the couch with this dreamy concoction, relishing each sip, and momentarily escaping the hustle and bustle of everyday life. Perfect, right?
But beyond the refreshing taste, making a milkshake at home means you can control every single ingredient—no hidden sugars or mysterious additives. Whether you’re staying true to keto or simply looking to indulge in a treat that won’t sabotage your goals, we’re about to make magic together.
So roll up your sleeves, grab your blender, and let’s create a Keto Milkshake that will have you saying, “I can’t believe this is low-carb!” Trust me, you’ll want to keep this recipe in your back pocket for those moments when you need a delectable pick-me-up. Now, let’s get blending!
Personal Story
Ah, the vivid memories of childhood! One of my favorite nostalgia-fueled moments was our family’s Friday night tradition: homemade milkshake night. My dad would pull out the old-school blender, assembling flavors that seemed almost endless—chocolate, vanilla, strawberry—you name it! I can still hear the whirring sound echoing through our kitchen as he’d call us to come help him.
In those moments, it wasn’t just about the milkshake; it was about the laughter, the mess, and the sweet anticipation of oozing creamy goodness. We’d pile into the living room with our frosty glasses, the sweet aroma wrapping around us in a cozy embrace. And though we were pouring in sugary ice cream back then, I remember feeling exhilarated at how one simple drink could bring our family together every Friday night.
Fast forward to today, and with a little more knowledge about nutritional choices, I’ve reinvented that beloved tradition to fit my keto lifestyle while keeping all that memory-infused joy intact. So today, let’s recreate a bit of that magic, shall we?
Ingredients
Here’s what you’ll need to whip up the ultimate Keto Milkshake. Each ingredient not only contributes to the deliciousness but brings its own unique flair!
-
Heavy Cream: The star of our shake! Heavy cream is rich in fats and low in carbohydrates, making it the perfect keto-friendly base. For a lighter option, you can use coconut cream, but be aware that it will alter the flavor.
-
Unsweetened Almond Milk: This low-calorie milk alternative gives our milkshake a smooth texture. If you prefer, you can substitute with unsweetened coconut milk, though this will impart a more tropical flavor.
-
Sugar-Free Sweetener: I adore using erythritol for sweetness! It provides that sugary flavor without disturbing blood sugar levels. If erythritol isn’t your jam, feel free to try monk fruit sweetener or stevia.
-
Vanilla Extract: A splash of pure vanilla extract enhances flavor, bringing warmth and depth to the shake. If you’re feeling adventurous, try adding almond extract for a different twist!
-
Ice Cubes: These are essential for achieving that frosty consistency we all crave in a milkshake. You can also swap out some of the ice for frozen cauliflower or zucchini for a sneaky veggie boost—don’t worry, you won’t taste it!
-
Optional Toppings: Whipped cream, a sprinkle of cocoa powder, or even sugar-free chocolate chips. These are not just added flair; they help transform the milkshake into a showstopper!
With these simple, wholesome ingredients, you’re well on your way to a sensational keto treat.
Step-by-Step Instructions
Now for the best part—let’s make our Keto Milkshake! Follow these simple steps and enjoy the process:
-
Gather Your Ingredients: Grab all your ingredients and have them measured out and ready to go. It makes the blending process super smooth. Here’s a little chef hack: use room temperature ingredients as much as possible; it helps everything blend more evenly!
-
Add the Base: In the blender, start with 1 cup of heavy cream. This provides that luscious texture that makes the milkshake feel indulgent. If using coconut cream, just remember to blend well to prevent any chunky bits!
-
Mix in the Almond Milk: Pour in 1/2 cup of unsweetened almond milk. Adjust this based on how thick you prefer your shake. The less almond milk you add, the thicker your milkshake will become—so play around until you find your perfect balance.
-
Sweeten It Up: Add in 2–3 tablespoons of your preferred sugar-free sweetener (adjust based on taste). Blend this mixture until it’s fully combined; you may need to scrape down the sides to ensure everything gets incorporated.
-
Vanilla Love: Don’t forget to add 1 teaspoon of pure vanilla extract. This may seem like a small amount, but trust me, it packs a flavor punch! Blend again until smooth.
-
Crush Those Ice Cubes: Toss in about 1-2 cups of ice cubes (or your vegetable alternative). Blend until you have the consistency you like. If it’s too thick, add a splash more almond milk; too thin? Just throw in more ice!
-
Taste Test: Here’s where you can adjust any flavors—want it sweeter? Toss in a bit more sweetener! Want a chocolatey twist? Add some unsweetened cocoa powder. Blend again to mix.
-
Serve It Up: Pour your milkshake into chilled glasses or mason jars for an extra cozy vibe. You might want to drizzle a bit of chocolate sauce down the sides of the glasses—they don’t just look pretty; they’re delicious too!
Serving Suggestions
When it comes to serving your Keto Milkshake, presentation matters! Check out these fun ideas to make your drink delightful:
-
Consider topping your milkshake with a dollop of homemade whipped cream—pure bliss! A sprinkle of cocoa powder or a few sugar-free chocolate chips will add that finishing touch.
-
Serve it alongside a stack of keto-friendly cookies or brownies for an elegant dessert experience.
-
For a fun party twist, create a DIY milkshake bar. Set out various toppings and let everyone build their own masterpiece.
Recipe Variations
Feeling adventurous? Here are some twisty options to keep your Keto Milkshake exciting:
-
Chocolate Peanut Butter Delight: Add 2 tablespoons of unsweetened cocoa powder and 2 tablespoons of sugar-free peanut butter for a rich, decadent flavor.
-
Mint Chocolate Chip: Toss in half a teaspoon of peppermint extract and some sugar-free chocolate chips. It’s like a refreshing treat after a meal!
-
Berry Bliss: Blend in a handful of frozen berries (strawberries or raspberries work well). Just remember to account for added carbs!
-
Mocha Magic: Mix in a shot of espresso or some instant coffee granules for a caffeine boost—the perfect pick-me-up!
Chef’s Notes
As with any recipe, don’t be afraid to make it your own! This Keto Milkshake has evolved as I’ve experimented over the years. I started with the classic flavor, but as I learned more about keto-friendly ingredients, I found all these amazing ways to build upon that initial foundation.
And here’s a funny tidbit: the first time I attempted to recreate a milkshake, I accidentally added too much sweetener, and the blend came out overly sweet! We ended up calling it “the candy melt,” and although it wasn’t what I had intended, it sparked lots of laughs and sweet memories. So, don’t stress if things don’t go perfectly; that’s all part of the cooking adventure!
FAQs and Troubleshooting
Here are a few common questions you might have or pitfalls to avoid:
-
Why is my milkshake too thin?
- If your shake isn’t thick enough, try adding more ice or a bit of frozen fruit. Alternatively, you can reduce the amount of almond milk added next time.
-
Can I use flavored almond milk?
- Absolutely! Just be cautious with added sweeteners and flavors. Make sure it aligns with your keto goals. Some flavored options might have added sugars.
-
What if I don’t have a blender?
- You could use an immersion blender or even a whisk for a less creamy consistency. A well-mixed shake can still be delicious; you just might have to work a little harder!
-
Is it okay to make this ahead of time?
- While it’s best enjoyed fresh, you can store your milkshake in a jar for a couple of hours. Just give it a quick stir or shake before you enjoy it again.
Nutritional Info
When you prepare your Keto Milkshake just right, you can indulge without the high carbs! Here’s an approximate breakdown for one serving based on the ingredients listed:
- Calories: 400
- Fat: 36g
- Carbohydrates: 5g (Net Carbs roughly 3g after fiber)
- Protein: 6g
(Note: Nutritional values will vary depending on the specific ingredients and brands you use.)
There you have it—a Keto Milkshake recipe that’s simple, delightful, and sure to satisfy those cravings! I hope it brings as much joy to your kitchen as it has to mine. Happy blending, my friends!
Print
Ultimate Keto Milkshake
- Total Time: 5 minutes
- Yield: 2 servings 1x
- Diet: Keto
Description
A creamy, low-carb milkshake that indulges your cravings without the guilt, perfect for a keto lifestyle.
Ingredients
- 1 cup Heavy Cream
- 1/2 cup Unsweetened Almond Milk
- 2–3 tablespoons Sugar-Free Sweetener (such as erythritol)
- 1 teaspoon Vanilla Extract
- 1–2 cups Ice Cubes
- Optional Toppings: Whipped cream, cocoa powder, sugar-free chocolate chips
Instructions
- Gather Your Ingredients: Measure out all your ingredients and have them ready to go.
- Add the Base: In the blender, start with 1 cup of heavy cream.
- Mix in the Almond Milk: Pour in 1/2 cup of unsweetened almond milk.
- Sweeten It Up: Add 2–3 tablespoons of sugar-free sweetener and blend until combined.
- Vanilla Love: Add 1 teaspoon of pure vanilla extract and blend again.
- Crush Those Ice Cubes: Toss in 1-2 cups of ice and blend to desired consistency.
- Taste Test: Adjust any flavors like sweetness or add cocoa powder as desired.
- Serve It Up: Pour into chilled glasses and garnish with toppings if desired.
Notes
For a thicker shake, reduce almond milk; for a thinner shake, add more ice or almond milk.
- Prep Time: 5 minutes
- Cook Time: 0 minutes
- Category: Beverage
- Method: Blending
- Cuisine: American
Nutrition
- Serving Size: 1 serving
- Calories: 400
- Sugar: 1g
- Sodium: 150mg
- Fat: 36g
- Saturated Fat: 24g
- Unsaturated Fat: 12g
- Trans Fat: 0g
- Carbohydrates: 5g
- Fiber: 2g
- Protein: 6g
- Cholesterol: 120mg
Keywords: Keto, Milkshake, Low Carb, Dessert, Beverage
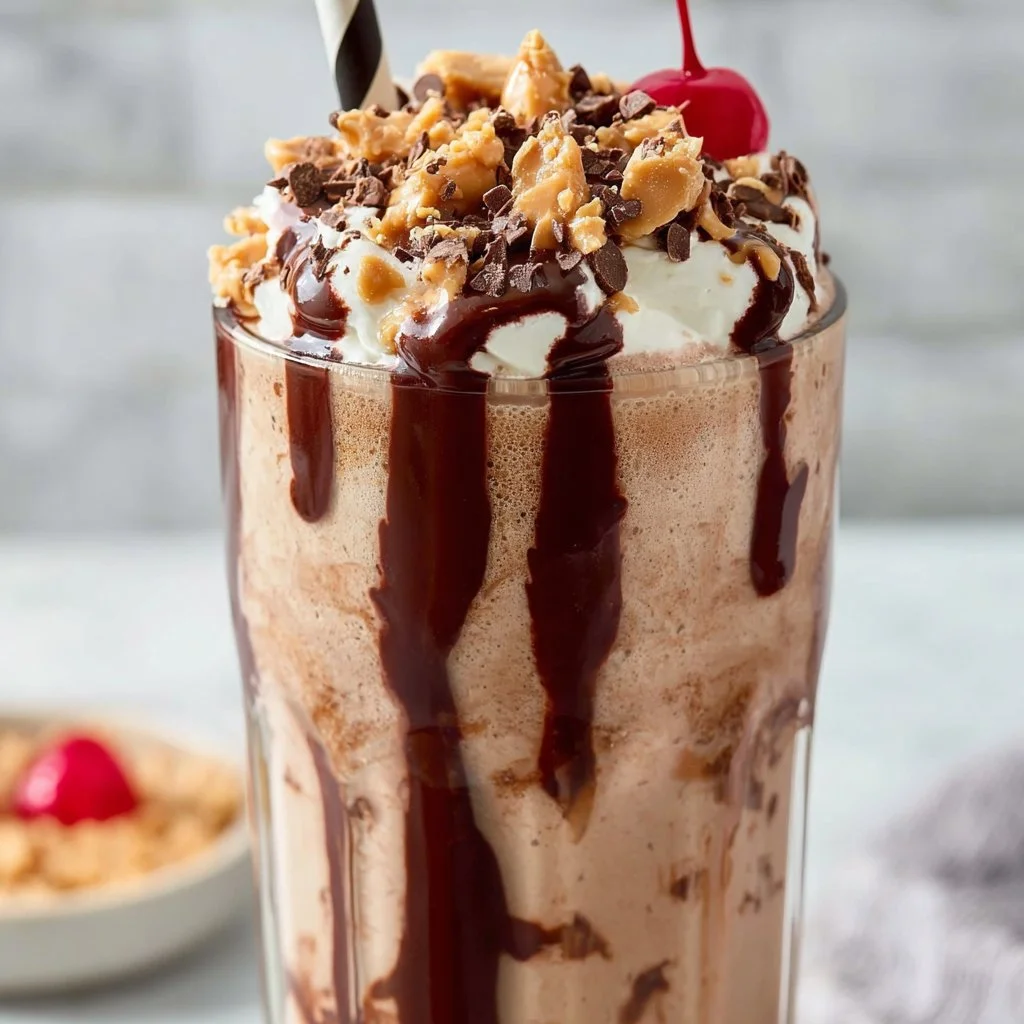
Pin by Scott Trice on Recipes | Chocolate Peanut Butter Shake, Easy Milkshake Recipe, Chocolate Milkshake Recipe
# The Ultimate Chocolate Peanut Butter Shake Recipe: A Creamy Dream Come True

## Introduction

Welcome back to my kitchen, my fellow flavor enthusiasts! Today, we're diving into a world of rich, creamy goodness with a recipe that will have you humming with joy and licking the glass clean – the *Chocolate Peanut Butter Shake*. This delightful concoction is a perfect blend of chocolatey indulgence and nutty, creamy peanut butter that feels like a warm hug on a chilly day. As the blender whirs and the aroma of chocolate fills the air, you'll feel the worries of the day melt away, and the excitement of something delicious on the horizon will take over.

Whether you're making this shake for a quick breakfast pick-me-up, a sweet afternoon treat, or a fun dessert for the kids (trust me, they'll adore you for it!), this recipe is the epitome of simple joy. In just a few minutes, you'll be serving up a shake that rivals any fancy restaurant's creation—all from the comfort of your own kitchen! It's that kind of recipe that actually makes you want to don your apron, roll up your sleeves, and get blending.

When I think about shakes, I’m transported back to my childhood days, when my friends and I would hang out at a local diner after school. There was this one memorable summer when we decided to host our own mini milkshake bar—a counter full of colorful toppings, syrups, and a trusty blender stationed front and center. We’d take turns concocting crazy milkshake flavors from whatever we could find in our fridges and pantries. Those carefree afternoons were nothing short of magical, filled with laughter, delightful messes, and of course, lots of glorious shakes. And that hard-earned wisdom from those days informs this recipe: make it your own!

So, grab your blender and let’s get to work whipping up this *Chocolate Peanut Butter Shake*. I promise that once you get a taste, you’ll never look at milkshakes the same way again!

## Personal Story

One of my favorite memories involving a chocolate peanut butter shake dates back to one summer during my college days. My roommates and I wanted to get together for a fun “staycation” vibe, and we decided to recreate the diner scenes we used to love. We gathered all the ingredients we could think of: chocolate ice cream, peanut butter, milk, and a mountain of whipped cream.

That day turned into a friendly competition—each of us was tasked with creating the ultimate shake. We roamed through the aisles of our local grocery store, arms laden with toppings and goodies. I remember grabbing an extra-large jar of peanut butter, excited about the creamy, nutty richness it would bring to my shake. As we blended, the kitchen filled with the smell of melting chocolate and toasting peanuts. After some initial shake disasters (one blender nearly met its match!), we finally poured our creations into mason jars, piled high with whipped cream and drizzled with chocolate syrup.

To say it was a hit would be an understatement. Laughing over our concoctions, we became instant chefs in our cozy kitchen. That summer, we created an entire milkshake menu, and I have fond memories of cherry-topped shakes, cookie-dough flavors, and the crowning glory—my chocolate peanut butter shake. It's these moments played in small kitchens that turn food into a celebration of life, laughter, and love. Today, I can’t wait for you to experience the joy of that heartfelt shake, right in your own home!

## Ingredients

Now that you’re as excited as I am, let’s gather our ingredients for the *Chocolate Peanut Butter Shake*. Here’s what you’ll need for this creamy masterpiece:

- **2 cups chocolate ice cream**
  - This is the base of our shake! You can use store-bought or homemade—either way, you’ll want it to be rich and luscious. If you’re watching your sugar intake, consider using a low-sugar version.

- **1/2 cup milk**
  - Whole milk gives it a creamy texture, but feel free to swap in almond, oat, or any non-dairy milk for a lighter twist. Just remember to adjust to your preferred thickness!

- **1/4 cup creamy peanut butter**
  - This delightful ingredient brings that velvety nutty flavor that pairs so beautifully with chocolate. If you’re looking for less sugar, look for natural, unsweetened peanut butter.

- **2 tablespoons chocolate syrup**
  - Rich and sweet, this adds an extra layer of chocolate magic. You can easily opt for a homemade version by melting down chocolate or using a sugar-free brand for a healthier option.

- **1/4 cup whipped cream (optional)**
  - Because let's be honest, who doesn’t love a fluffy cloud of whipped cream to top off a milkshake? You can make it fresh with heavy cream or opt for a ready-made version.

- **Chocolate shavings or crushed peanuts for garnish (optional)**
  - Want to add some pizazz to your shake? These toppings offer texture and beauty. You can also use crushed graham crackers or even mini chocolate chips for a delightful crunch.

## Step-by-Step Instructions

Alright, let’s bring this shake to life with some simple, fun steps! Grab your blender, and let’s get mixing.

1. **Prep your blender**: Before diving in, make sure your blender is clean and ready to go. Nothing ruins the shake-making vibe quite like leftover smoothie bits from last weekend!

2. **Add the ice cream and milk**: Start by scooping your chocolate ice cream into the pitcher. This should be about 2 big scoops. Next, pour in the milk—this helps everything blend smoothly. If you prefer a thicker shake, use less milk; for a thinner shake, add a splash more.

   **Chef Hack**: If your ice cream is a bit hard, let it sit at room temperature for about 5–10 minutes to soften before scooping. This will make it much easier to blend!

3. **In goes the peanut butter**: Measure out your peanut butter and add it to the mix. Pro-tip: if you microwave the peanut butter for a few seconds, it’ll pour out easier and mix seamlessly into your shake!

4. **Sweeten the pot with chocolate syrup**: Drizzle in the chocolate syrup—this is where the chocolate magic truly happens! You can go to town with it; I know I tend to sneak in a little extra for good measure.

5. **Blend, baby, blend!**: Secure the lid on your blender and blend on high speed for about 30 seconds, or until you achieve your desired consistency. Don’t forget to pause and scrape down the sides if needed for an even blend.

   **Chef Insight**: If your shake seems too thick, add a splash of milk. If it's too thin, add more ice cream—or heftier dollops of peanut butter for a thick shake!

6. **Taste test!**: Before serving, always give your shake a quick taste. Is it perfect, or does it need a little more chocolate or peanut butter? Adjust according to your cravings!

7. **Pour and garnish**: Once you’re happy with the flavor, pour the shake into your favorite glass—pretend it’s a fancy milkshake glass for that nostalgic touch. Top with whipped cream, drizzled chocolate syrup, and finish with chocolate shavings or crushed peanuts!

8. **Enjoy with a smile**: Don’t forget to take a moment to admire your creation. Grab a straw (or a spoon, I won’t judge!) and dig in.

## Serving Suggestions

Serving up your *Chocolate Peanut Butter Shake* is almost as much fun as making it! To create an inviting and delightful display, try using tall glasses or mason jars to accentuate the layers. Add a generous swirl of whipped cream on top, finish with a drizzle of chocolate syrup, and sprinkle with chocolate shavings or crushed peanuts for added texture. Consider pairing this shake with some freshly baked cookies or a handful of homemade granola bars for a complete treat experience!

## Recipe Variations

1. **Banana Peanut Butter Shake**: Toss in a ripe banana for a deliciously creamy texture and a natural sweetness—perfect for breakfast on the go!

2. **Nutella Twist**: For an extra layer of flavor, substitute half of the peanut butter with Nutella. You’ll be in for a delightful chocolate-hazelnut twist.

3. **Dairy-Free Delight**: Use coconut ice cream and almond milk for a scrumptiously creamy, dairy-free shake. It’s just as delicious!

4. **Protein Boost**: Want to elevate your shake to post-workout status? Add a scoop of chocolate protein powder to give it a nutritional lift without compromising on flavor.

5. **Spicy Chocolate**: For those who like a kick, toss in a pinch of cayenne pepper or ground cinnamon—trust me, it takes the chocolate flavor to the next level!

## Chef’s Notes

Oh, where do I even begin with this shake? Every time I make it, I’m reminded of those fun-filled college days. It’s incredible how a simple combination of ingredients can stir up a flood of memories! In the beginning, I used to rely heavily on store-bought chocolate syrup, but over time, I got adventurous and started making my own from scratch. It really does make a noticeable difference in the depth of flavor.

I’ve found that this *Chocolate Peanut Butter Shake* works great as both a dessert and a snack—the versatility is what makes it a staple in my home. Plus, it’s a wonderful foundation for getting creative. I always encourage my friends and family to put their spin on it. After all, isn’t that what cooking is really about? Creating your own little masterpiece from shared moments and memories in the kitchen.

## FAQs and Troubleshooting

**Q1: My shake turned out too thick! What should I do?**
A: No worries! Just add a splash of milk and give it another quick blend until you reach your desired consistency.

**Q2: Can I make this shake ahead of time?**
A: I recommend serving it fresh, but if you must prepare it in advance, consider blending everything but the milk and storing it in the fridge. When you’re ready to enjoy, just blend in the milk right before serving.

**Q3: What can I do if my shake is too sweet?**
A: You can balance the sweetness by adding a pinch of salt or a splash of unsweetened cocoa powder. Don’t hesitate to experiment!

**Q4: Can I add fruits or other flavors?**
A: Absolutely! Berries add a lovely freshness, or you can mix in other nut butters for a flavor twist. Be adventurous!

## Nutritional Info

While the nutritional info can vary based on specific ingredients used, here's a rough estimate for one serving of the shake (without toppings):

- Calories: 380
- Fat: 20g
- Carbohydrates: 44g
- Protein: 11g
- Sugar: 30g

If you're counting calories or managing dietary preferences, don’t hesitate to adjust the base ingredients to fit your needs!

---

And there you have it, folks! Your very own *Chocolate Peanut Butter Shake* that’s sure to win hearts and palates alike. Remember, cooking is all about having fun and creating memories—just like those sun-soaked summer afternoons of my youth. Now, go forth and shake things up—your delicious adventure awaits!
The Ultimate Chocolate Peanut Butter Shake
- Total Time: 5 minutes
- Yield: 2 servings 1x
- Diet: Vegetarian
Description
A rich and creamy chocolate peanut butter shake that is the perfect indulgence for any time of day.
Ingredients
- 2 cups chocolate ice cream
- 1/2 cup milk
- 1/4 cup creamy peanut butter
- 2 tablespoons chocolate syrup
- 1/4 cup whipped cream (optional)
- Chocolate shavings or crushed peanuts for garnish (optional)
Instructions
- Prep your blender: Make sure your blender is clean and ready.
- Add the ice cream and milk: Scoop chocolate ice cream into the pitcher and pour in the milk.
- In goes the peanut butter: Measure and add peanut butter to the mix.
- Sweeten the pot with chocolate syrup: Drizzle in the chocolate syrup.
- Blend: Secure the lid and blend on high speed for about 30 seconds.
- Taste test: Give the shake a quick taste and adjust flavors as needed.
- Pour and garnish: Pour into a glass, top with whipped cream, and garnish with chocolate shavings or crushed peanuts.
- Enjoy with a smile: Take a moment to admire your creation before digging in.
Notes
Feel free to customize the shake with your favorite toppings or variations.
- Prep Time: 5 minutes
- Cook Time: 0 minutes
- Category: Dessert
- Method: Blending
- Cuisine: American
Nutrition
- Serving Size: 1 serving
- Calories: 380
- Sugar: 30g
- Sodium: 200mg
- Fat: 20g
- Saturated Fat: 10g
- Unsaturated Fat: 7g
- Trans Fat: 0g
- Carbohydrates: 44g
- Fiber: 2g
- Protein: 11g
- Cholesterol: 60mg
Keywords: chocolate shake, peanut butter shake, dessert shake, creamy shake, summer treat
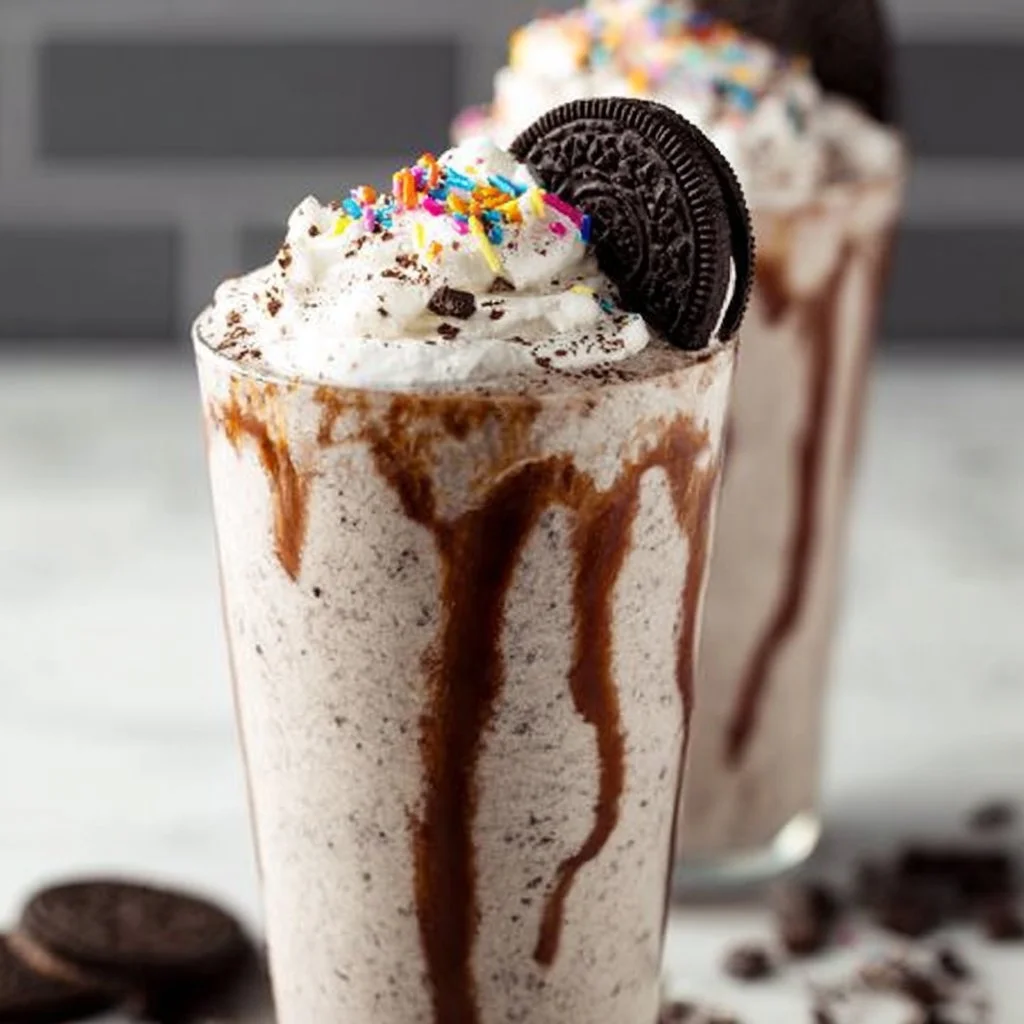
Oreo Milkshake
The Ultimate Oreo Milkshake Recipe: A Deliciously Indulgent Treat!
Ah, the humble milkshake! There’s something about the sound of a blender whirring away, the delightful swirl of ingredients combining, and that moment of anticipation as you pour it into a glass. And if there’s one milkshake that reigns supreme in the world of creamy, dreamy indulgence, it’s the Oreo milkshake! This classic treat isn’t just a drink; it’s a nostalgia-fueled experience that takes you back to carefree summer days spent at the diner, sharing laughs with friends, or enjoying a cozy evening on the couch with a good movie.
In this blog post, we’re diving deep into the world of Oreo milkshakes. I’ll walk you through my favorite recipe, sprinkled with stories, tips, and plenty of friendly advice to make your milkshake-making experience fun and easy! Let’s unlock the secrets to creating a delicious Oreo milkshake that’ll absolutely blow your mind and impress your friends and family.
Personal Story: Memories and Magic
I still remember the first time I tasted an Oreo milkshake. It was a balmy summer evening, and my family had decided to indulge in takeout from our favorite diner. As soon as I took that first sip of the rich, creamy concoction, I felt as if I had discovered pure magic. The blend of rich vanilla ice cream, real milk, and those delightful Oreo cookies created an explosion of flavor that made my taste buds dance with joy.
Years later, I found myself in the kitchen trying to recreate that same deliciousness at home. I was determined to nail the perfect consistency—a balance of creamy ice cream and crunchy cookie bits. After a few failed attempts (let’s just say one batch ended up more like a soup than a shake!), I finally struck gold. The process became a tradition—my friends and I would gather for our mini milkshake parties, experimenting with different toppings, mix-ins, and, of course, other cookies.
Now, each time I make an Oreo milkshake, it brings me back to those fun evenings, laughter, and all the sweet memories associated with it.
Ingredients
Let’s gather our ingredients! Here’s what you’ll need to make a fabulous Oreo milkshake:
-
Oreo cookies (about 6-8)
- These iconic cookies are the stars of our show! You can swap them for any chocolate sandwich cookies you like, but trust me—the classic Oreo flavor is unmatched.
-
Vanilla ice cream (2 cups)
- The creaminess of the vanilla ice cream is essential to achieving that thick milkshake consistency. For a dairy-free option, try coconut or almond milk ice cream.
-
Milk (1 cup)
- Whole milk provides a rich flavor, but feel free to use skim, almond, or oat milk. Adjust the amount for your desired thickness; less milk will yield a thicker shake!
-
Chocolate syrup (2 tablespoons)
- A drizzle of chocolate syrup adds an extra layer of deliciousness. You can substitute with caramel syrup for a fun twist!
-
Whipped cream (for topping)
- Who can resist a dollop of fluffy whipped cream on top? If you’re looking for a lighter option, skip this or use coconut whipped cream!
-
Crushed Oreos (for garnish)
- Using crushed Oreos as a garnish adds a nice touch and gives it that extra crunch. You can even try other crushed cookies or sprinkles!
Each ingredient plays a vital role in creating that oh-so-satisfying Oreo milkshake. If you’re out of something, don’t fret! I’ve shared some substitution tips to spark your culinary creativity.
Step-by-Step Instructions
Now that we have our ingredients, it’s time to make some magic happen! Follow these steps for the ultimate Oreo milkshake:
-
Prep Your Ingredients:
Gather all your ingredients on the counter. If you’re using regular Oreo cookies,, pull out as many as you need—don’t be shy; you may want to add a few more later! -
Blend That Ice Cream:
In a blender, add the vanilla ice cream. Use a spatula to break it up a bit; this will help the blending process go smoother. Throw in the milk, and don’t forget the chocolate syrup for that rich, chocolaty flavor!- Tip: Start with less milk; you can always add more if you want a thinner shake!
-
Crush the Oreos:
Toss in the Oreo cookies (yes, we’re diving in with whole cookies!), and blend on low speed. You want to mix it enough so that you get little cookie bits throughout but not so much that it turns to dust.- Chef Hack: If you want a pretty presentation, reserve some cookie pieces to sprinkle on top later!
-
Check the Consistency:
Give your milkshake a taste test! If it’s too thick, add more milk, one tablespoon at a time, until it reaches your desired consistency. Blend again until fully combined. -
Pour and Top:
Grab your favorite glass (or two), and pour in your milkshake. Take a moment to admire the swirls of cookies and cream. Top it off with whipped cream, a drizzle of chocolate syrup, and a sprinkle of crushed Oreos for that extra flair! -
Enjoy:
Serve with a thick straw or a long spoon, and dive right in! Don’t forget to share—unless you want to keep it all to yourself (I wouldn’t blame you!).
Serving Suggestions
For serving, you can go all out or keep it simple. Here are a couple of my favorite ways to present this irresistible Oreo milkshake:
-
Classic Glass: A tall glass works wonders! Layer the milkshake in the glass and then layer the whipped cream and crushed Oreos on top. Serve with a colorful straw for a nostalgic feel.
-
Milkshake Bar: Set up a fun milkshake station where everyone can customize their shakes with different toppings. Set out whipped cream, sprinkles, extra crushed cookies, or even mini chocolate chips for guests to add their unique twist!
Recipe Variations
Feeling adventurous? Here are a few variations and twists to elevate your Oreo milkshake experience:
-
Mint Oreos: Swap regular Oreos for mint-flavored Oreos for a refreshing twist—think of it as an Oreo meets After Eight experience!
-
Peanut Butter Oreo: Add a couple of tablespoons of peanut butter to the mix for a nutty, indulgent flavor that complements the chocolate cookies perfectly.
-
Pumpkin Spice Oreo: In the fall, use Pumpkin Spice Oreos, and add a sprinkle of cinnamon for a seasonal spin on this classic treat.
-
Coffee Oreo Milkshake: If you’re a coffee lover, toss in a shot of espresso for a delightful caffeinated kick!
-
Vegan Options: Use dairy-free ice cream and almond milk for a creamy, plant-based version—no one will even notice the difference!
Chef’s Notes
Ah, the memories this Oreo milkshake recipe brings! Over the years, I’ve made these shakes for countless family gatherings and movie nights. What started as an experiment in my kitchen has become a staple, with variations that adapt with the seasons. One time, after a particularly long week, I decided to add crushed peppermint candy to the mix, and it turned into a new family favorite!
I love how simple ingredients can come together to elicit such joy. If you ever find yourself with leftover Oreos (is that even possible?), throw them in a milkshake! You can’t go wrong.
FAQs and Troubleshooting
1. My milkshake is too thick! What do I do?
If your milkshake turns out thicker than you’d like, simply add a splash more milk and blend it again until you reach your desired consistency.
2. Can I make this without a blender?
You can certainly mix this in a jar using a milk frother or even a hand mixer if you have one! It may take a bit more elbow grease, but it’s possible!
3. What do I do with leftover milkshake?
Store any leftovers in an airtight container in the freezer for up to a week. You can re-blend it later, but know that the texture may change slightly.
4. Can I use other cookies?
Absolutely! While Oreos are fantastic, feel free to swap them out for any other chocolate sandwich cookies or even different flavors. The key is to create a mix you enjoy!
Nutritional Info
While indulgent treats like this aren’t typically low-calorie, you can definitely enjoy in moderation! A standard serving of this Oreo milkshake packs approximately:
- Calories: 500-600 (depending on ingredients)
- Protein: 10g
- Fat: 25g
- Carbohydrates: 70g
- Sugar: 50g
Keep in mind that using dairy-free ice cream or lower-fat milk options can help reduce calories and fat content!
Now you’re armed with all the secrets to making your very own Oreo milkshake! Whether it’s a treat for yourself or you’re sharing it with friends, this recipe is sure to delight. So grab your ingredients, fire up that blender, and let’s create some cookie-infused memories in the kitchen! Happy shaking!
Print
Ultimate Oreo Milkshake
- Total Time: 10 minutes
- Yield: 2 servings 1x
- Diet: Vegetarian
Description
Indulge in the classic Oreo milkshake that combines rich vanilla ice cream, milk, and crunchy Oreo cookies for a deliciously satisfying treat.
Ingredients
- 6–8 Oreo cookies
- 2 cups vanilla ice cream
- 1 cup milk
- 2 tablespoons chocolate syrup
- Whipped cream (for topping)
- Crushed Oreos (for garnish)
Instructions
- Gather all your ingredients on the counter.
- Add the vanilla ice cream to a blender and break it up slightly.
- Pour in the milk and chocolate syrup.
- Include the Oreo cookies and blend on low speed until combined.
- Taste check the consistency; add more milk if too thick.
- Pour the milkshake into glasses and top with whipped cream and crushed Oreos.
- Serve with a straw or spoon and enjoy!
Notes
For variations, try different cookie flavors or add toppings such as peanut butter or mint.
- Prep Time: 10 minutes
- Cook Time: 0 minutes
- Category: Dessert
- Method: Blending
- Cuisine: American
Nutrition
- Serving Size: 1 serving
- Calories: 600
- Sugar: 50g
- Sodium: 200mg
- Fat: 25g
- Saturated Fat: 15g
- Unsaturated Fat: 8g
- Trans Fat: 0g
- Carbohydrates: 70g
- Fiber: 2g
- Protein: 10g
- Cholesterol: 60mg
Keywords: milkshake, Oreo, dessert, treat, creamy, cookies




