

Beginner-Friendly One-Bowl Old-Fashioned Spice Cake
The Cozy Charm of Old Fashioned Spice Cake
Welcome back to my cozy kitchen, dear food friends! Today, I’m thrilled to dive into a recipe that warms the heart and brings nostalgia to the forefront — the delightful Old Fashioned Spice Cake. This cake is more than just a sweet treat; it’s a fragrant hug on a plate that dances with the richness of spices and invites you to slow down and savor life’s simple pleasures.
Imagine walking into your home, greeted by the comforting aroma of cinnamon, nutmeg, and cloves wafting through the air. It’s like wrapping yourself in a warm blanket on a chilly autumn day! Spice cake has a way of evoking those memories, transporting us back to family gatherings, holiday festivities, and the cozy corners of our grandparents’ kitchens.
Through this blog, I want to share not only the recipe for this beautiful cake but also the stories and warmth that come with it. Whether you’re baking for a special occasion or simply indulging in a treat for yourself, my goal is to empower you to create delicious food with love and joy in your heart. So, grab your apron, and let’s embark on this baking adventure together!
A Slice of Memory
Let me take you back to my childhood for a moment. Picture this: a crisp fall afternoon, leaves painting the yard in vibrant shades of orange and gold. I was barely tall enough to see over the counter of my grandmother’s kitchen when she pulled out her well-worn cookbook. With flour dusting the tabletop and a teasing sprinkle of sugar in the air, she set out to make her famous spice cake.
As she measured out the fragrant spices, I was enchanted by each unique scent filling the room — cinnamon, cloves, and ginger. “These spices are like warm hugs for your taste buds,” she would say, a twinkle in her eye. I would watch intently, soaking in every detail as she mixed the batter, gently folding in love and laughter along with the ingredients.
When the cake finally emerged from the oven, golden and puffed, we waited (impatiently) for it to cool before drenching it in cream cheese frosting. There was nothing quite like that first slice, a harmonious blend of sweetness and spice that ignited our taste buds and our hearts. That beloved cake became a staple at family gatherings, and each bite was a sweet reminder of the love and joy that filled our kitchen. Today, I hope to share that same delicious nostalgia with you!
Ingredients
Before we dive into baking, let’s gather our ingredients. Here’s what you’ll need to create this old-fashioned gem:
-
All-purpose flour (2 cups)
- The backbone of our cake, providing structure. Feel free to use a gluten-free blend if you’re looking for a gluten-free option!
-
Granulated sugar (1 1/2 cups)
- This will sweeten our cake beautifully. For a lower glycemic index, consider coconut sugar as a substitute.
-
Baking soda (2 teaspoons)
- Our leavening agent, ensuring the cake rises. Make sure it’s fresh for maximum effectiveness!
-
Ground cinnamon (2 teaspoons)
- The star of our spice show! Cinnamon adds warmth and sweetness. If you prefer a bolder flavor, try Vietnamese cinnamon.
-
Ground ginger (1 teaspoon)
- Adding a zesty kick, ginger complements the sweetness. You can replace it with ground cardamom for a different spin.
-
Ground nutmeg (1 teaspoon)
- Just a pinch can elevate the flavor profile! Freshly grated nutmeg is always a lovely touch.
-
Ground cloves (1/2 teaspoon)
- The secret ingredient that gives spice cake depth. Use sparingly, as it can overpower other flavors.
-
Salt (1/2 teaspoon)
- Balances the sweetness; don’t skip this! A pinch of sea salt can enhance the overall taste.
-
Unsalted butter (1 cup, softened)
- This will keep our cake moist and rich. If you prefer an oil-based cake, avocado oil works wonders too.
-
Large eggs (2)
- Essential for binding and richness. For a vegan option, you can replace them with flax eggs (1 tablespoon ground flaxseed mixed with 2.5 tablespoons water per egg).
-
Buttermilk (1 cup)
- Adds moisture and tang. No buttermilk? Mix regular milk with a tablespoon of lemon juice or vinegar and let it sit for a few minutes!
-
Vanilla extract (1 teaspoon)
- Pure vanilla gives a lovely backdrop flavor. Homemade vanilla extract? Even better!
These ingredients combined will turn into a cake that is as comforting as a cup of hot cocoa on a chilly night. Now, let’s get our hands doughy and throw this cake together!
Step-by-Step Instructions
1. Preheat Your Oven
Before anything else, let’s get that oven warming up! Preheat it to 350°F (175°C). This ensures your cake begins baking at the right temperature for perfectly moist results.
2. Prepare Your Cake Pans
Grease and flour two 9-inch round cake pans. This is crucial to ensure the cakes release effortlessly once baked. You can use a bit of butter or cooking spray, and a light dusting of flour will do the trick.
3. Combine Dry Ingredients
In a medium-sized bowl, whisk together the flour, baking soda, salt, cinnamon, ginger, nutmeg, and cloves. This simple step ensures that the spices and leaveners are evenly distributed throughout your cake, which harmonizes the flavor.
4. Mix the Butter and Sugar
In a large mixing bowl, beat the softened butter and granulated sugar together until it’s light and fluffy. This process takes about 3-5 minutes using an electric mixer. The lightness from the butter and sugar helps to create a tender cake.
5. Add the Eggs and Vanilla
Next, add the eggs one at a time, mixing well after each addition. Let the yolks create that velvety texture! Add the vanilla extract and blend until combined. The batter should be smooth and fluffy.
6. Alternate Adding Dry Ingredients and Buttermilk
Begin incorporating the dry mixture into the butter-sugar mixture gradually, alternating with the buttermilk. Start with a third of the dry ingredients, mix until just combined, add half of the buttermilk, and continue this process until all ingredients are combined. This keeps the batter nice and airy.
7. Pour into Pans
Once your batter is ready, it’s time to pour it into the greased pans. Divide it evenly for uniform cakes and smooth the tops with a spatula.
8. Bake Until Done
Pop the cake pans into the preheated oven and let them bake for about 25-30 minutes or until a toothpick inserted in the center comes out clean. The aroma filling your kitchen will be irresistible!
9. Cool the Cakes
Once baked, remove the cakes from the oven and allow them to cool in the pans for about 10 minutes. Then, gently invert them onto a wire rack to cool completely. Cooling completely is important if you want to frost your cakes without melting your icing!
10. Frosting Time!
Let’s make it pretty! While the cakes cool, you can whip up a luscious cream cheese frosting to slather on top. It’s simple — beat together 8 oz of softened cream cheese, 1/2 cup of softened butter, 2 cups of powdered sugar, and 1 tsp of vanilla extract. Once everything is mixed and creamy, frost the layers generously and stack them together.
Serving Suggestions
To serve, slice the cake into generous wedges and plate them with a sprinkle of cinnamon or a few candied nuts on top for that extra touch of elegance. A scoop of vanilla ice cream by the side makes for a perfect contrast to the spiced cake! This is also a lovely dessert for any gathering or a cozy night in, where you can just enjoy every single bite.
Recipe Variations
- Nutty Spice Cake: Add chopped walnuts or pecans to the batter for an added crunch.
- Fruity Twist: Fold in raisins or chopped apples for an extra layer of flavor and texture.
- Chocolate Lovers: Mix in cocoa powder for a chocolate-spice cake that’s rich and decadent!
- Glazed Alternative: Instead of frosting, drizzle with a simple glaze made of powdered sugar and milk for a lighter option.
- Vegan Makeover: Substitute eggs with flax eggs and use plant-based butter and milk to make this cake vegan-friendly — still delicious!
Chef’s Notes
This Old Fashioned Spice Cake holds a special place in my heart, and over the years, I’ve seen it evolve. I love experimenting with additional spices or tweaking the recipe depending on what I have in my pantry. My version has changed with each family gathering, sometimes incorporating seasonal fruits or daring new flavor experiments. It’s the perfect canvas for creativity!
And let me tell you, if you accidentally overmix the batter or forget an ingredient, it still comes out delicious in its own right. The beauty of home cooking is that it’s a perfect reflection of love, patience, and a sprinkle of imperfection.
FAQs and Troubleshooting
Q: My cake didn’t rise. What went wrong?
A: This can happen for a couple of reasons — check the freshness of your baking soda and make sure your oven is at the right temperature.
Q: Can I bake this in a single pan?
A: Absolutely! If you prefer a single-layer cake, just adjust the baking time and keep an eye on it; it may need a little longer to bake through.
Q: How do I store leftovers?
A: Store the cooled cake in an airtight container at room temperature for up to 3 days. If frosted, keep it in the fridge!
Q: What can I do if the cake is too dry?
A: If you accidentally overbake it, don’t fret! A drizzle of milk or a sprinkle of flavored simple syrup over the top can help soften each slice and revive some moisture.
Nutritional Info
(Note: Please adjust based on specific ingredients used.)
- Serving Size: 1 slice (1/12 of the cake)
- Calories: Approximately 350
- Fat: 15g
- Carbohydrates: 49g
- Protein: 4g
- Sugars: 28g
And there you have it, my lovely friends! This Old Fashioned Spice Cake celebrates that cozy essence of home baking and nourishes not just your body but your soul, too. Give yourself permission to indulge in the process — let the kitchen be a therapeutic space where you can unite with the magic of flavors. I can’t wait to hear about your cake adventures! Happy baking!
Print
Old Fashioned Spice Cake
- Total Time: 45 minutes
- Yield: 12 servings 1x
- Diet: Vegetarian
Description
A delightful old-fashioned spice cake that warms the heart with its fragrant blend of cinnamon, nutmeg, and cloves, perfect for any occasion.
Ingredients
- 2 cups all-purpose flour
- 1 1/2 cups granulated sugar
- 2 teaspoons baking soda
- 2 teaspoons ground cinnamon
- 1 teaspoon ground ginger
- 1 teaspoon ground nutmeg
- 1/2 teaspoon ground cloves
- 1/2 teaspoon salt
- 1 cup unsalted butter, softened
- 2 large eggs
- 1 cup buttermilk
- 1 teaspoon vanilla extract
Instructions
- Preheat your oven to 350°F (175°C).
- Prepare two 9-inch round cake pans by greasing and flouring them.
- Combine the flour, baking soda, salt, cinnamon, ginger, nutmeg, and cloves in a medium bowl.
- Mix the softened butter and sugar until light and fluffy.
- Add the eggs one at a time and mix in the vanilla extract.
- Alternate adding the dry ingredients and buttermilk to the butter mixture, starting and ending with the dry ingredients.
- Pour the batter evenly into the prepared cake pans.
- Bake for 25-30 minutes or until a toothpick comes out clean.
- Cool the cakes in the pans for 10 minutes before inverting them onto a wire rack.
- Frost with cream cheese frosting once cooled.
Notes
Serve with a sprinkle of cinnamon or a scoop of vanilla ice cream for an extra special touch.
- Prep Time: 15 minutes
- Cook Time: 30 minutes
- Category: Dessert
- Method: Baking
- Cuisine: American
Nutrition
- Serving Size: 1 slice
- Calories: 350
- Sugar: 28g
- Sodium: 300mg
- Fat: 15g
- Saturated Fat: 9g
- Unsaturated Fat: 5g
- Trans Fat: 0g
- Carbohydrates: 49g
- Fiber: 1g
- Protein: 4g
- Cholesterol: 60mg
Keywords: spice cake, old fashioned cake, baking, dessert, autumn recipes
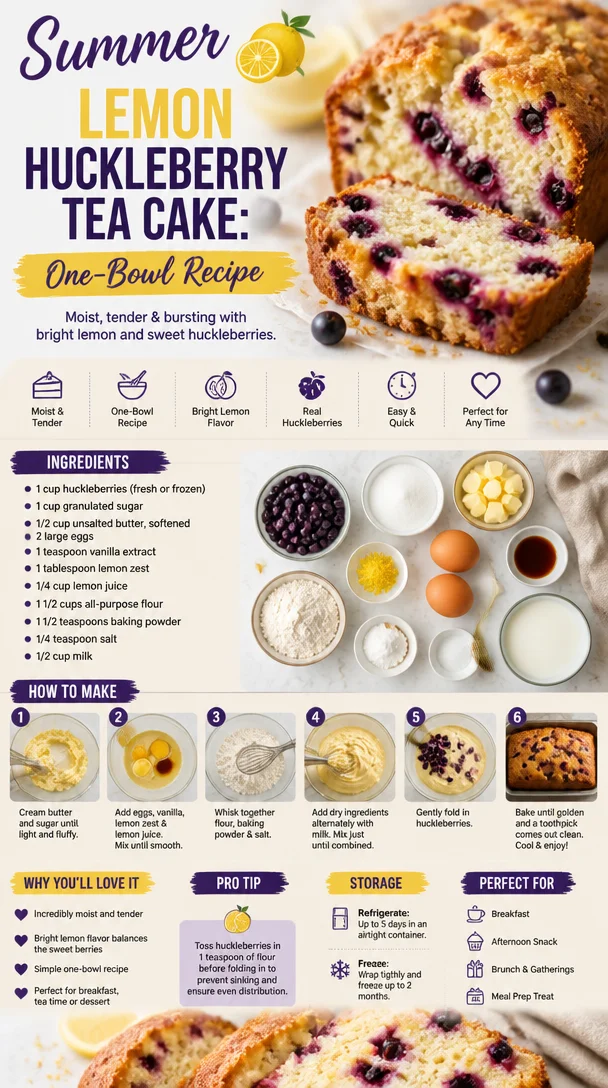
Summer Lemon Huckleberry Tea Cake: One-Bowl Recipe
Lemon Huckleberry Tea Cake: A Slice of Sunshine in Every Bite
Welcome to my kitchen, dear friends! Today, we’re diving into a recipe that feels like the essence of summer captured in a cake: Lemon Huckleberry Tea Cake. Imagine a warm afternoon, the sun dancing through your kitchen window, and the delightful aroma of freshly baked cake surrounding you. It’s a moment that invites laughter, connection, and perhaps a cup of your favorite tea. If huckleberries are in season, you’re in for a real treat, but if you can’t find them, don’t worry—I’ve got you covered with some fantastic substitutions!
Baking this Lemon Huckleberry Tea Cake is not just about following a recipe; it’s about creating a moment—a memory—much like my childhood summers spent at my grandparents’ cabin in the mountains. Those days were filled with picking berries, making lemonade, and, of course, baking with my grandmother, who could whip up a cake in no time flat. Her secret? Love and a zest for life, which I’ve infused into this very recipe.
I still remember the day we baked a cake filled with fresh huckleberries picked right from the lush ravines behind their home. We’d sing off-key as we mixed the batter, and as the cake rose in the oven, it filled the cabin with a sweet, tangy aroma that promised deliciousness. My grandparents would sit with us at the table, their faces lighting up with joy as we shared our creation. That experience inspired this Lemon Huckleberry Tea Cake—a tribute to unconditional love and cherished memories.
Ingredients
Here’s what you’ll need to get started on your Lemon Huckleberry Tea Cake:
-
1 ½ cups all-purpose flour
This is the backbone of your cake. If you want a gluten-free option, feel free to swap in a 1:1 gluten-free baking flour mix. Ensure it’s one with xanthan gum for better structure! -
1 teaspoon baking powder
This helps our cake rise, giving it a light and airy texture. You could use baking soda if you’re out, but remember to adjust the acid in your recipe (a splash of vinegar or lemon juice) to balance it out. -
½ teaspoon baking soda
Just a little extra lift! It works in tandem with the baking powder for that perfectly fluffy cake. -
½ teaspoon salt
Salt enhances all the flavors. Don’t skip it; it’s like the background music to your culinary masterpiece! -
½ cup unsalted butter, softened
Butter gives your cake that rich flavor. If you’re dairy-free, you can swap it with coconut oil, but keep that in mind if you want a hint of coconut in your cake. -
1 cup granulated sugar
Sweetness is essential! You can substitute part of it with honey or maple syrup—reduce the liquid in your recipe slightly if you go this route. -
2 large eggs
These not only add moisture but also bind the ingredients together. For a vegan option, use 1/2 cup of unsweetened applesauce or flax eggs (1 tablespoon ground flaxseed mixed with 2.5 tablespoons of water). -
Zest of one lemon
This is where the magic starts—zest brightens flavors and gives a lovely aroma. If you don’t have lemons, some orange zest could work in a pinch! -
Juice of one lemon (about 2–3 tablespoons)
The tartness balances the sweetness perfectly. If you’ve got limes on hand, feel free to use their juice as a twist! -
1 cup huckleberries (fresh or frozen)
These little gems provide bursts of sweet-tart flavor. If you can’t find huckleberries, blueberries make a delicious substitute! -
1 teaspoon vanilla extract
A must-have for that aromatic depth!
Let’s get mixing!
Step-by-Step Instructions
1. Preheat Your Oven
Begin by preheating your oven to 350°F (175°C). This is super important as it ensures your cake starts cooking as soon as it goes in. Nothing like a perfectly preheated oven to get those baking vibes flowing!
2. Prepare Your Baking Pan
Grease a 9-inch round cake pan or line it with parchment paper to ensure your lovely creation doesn’t stick. I always like to use parchment on the bottom because it makes it so easy to pop the cake out later.
3. Mix the Dry Ingredients
In a medium bowl, whisk together the flour, baking powder, baking soda, and salt. This step ensures that your leavening agents are evenly distributed (no one likes a cake with a random lump of baking powder!).
4. Cream Butter and Sugar
In a large mixing bowl, cream the softened butter and granulated sugar together until you achieve a light and fluffy texture—about 3-4 minutes using an electric mixer. This is where all your hard work pays off, making sure to scrape down the sides of the bowl so everything’s incorporated!
5. Add the Eggs and Flavorings
Next, beat in the eggs one at a time, mixing well after each addition. Then add the lemon zest, lemon juice, and vanilla extract. The batter should now smell divine!
6. Combine the Wet and Dry Ingredients
Gradually add the dry ingredients to the wet mixture, alternating with 1/2 cup of milk (or a dairy-free alternative). Start and end with the dry mix for the best texture. Mix until just combined—overmixing can lead to a dense cake, and nobody wants that!
7. Fold in the Huckleberries
Gently fold in the huckleberries. This is where you introduce those sweet bursts of flavor! If using frozen berries, there’s no need to thaw them—just fold them in gently. The batter may turn a little purple—that’s okay; it’s going to be delicious!
8. Pour and Bake
Pour the batter into your prepared cake pan, smoothing out the top with a spatula. Place in the oven and bake for 25-30 minutes, or until a toothpick inserted into the center comes out clean or with just a few moist crumbs. Keep an eye on it after 25 minutes; ovens can be tricky!
9. Cool and Serve
Once baked, remove the cake from the oven and let it cool in the pan for about 10 minutes before transferring it to a wire rack. Let it cool completely before dusting with powdered sugar or a drizzle of lemon glaze. Oh, that final touch really makes it sing!
Serving Suggestions
Slice your Lemon Huckleberry Tea Cake and serve it with a dollop of freshly whipped cream or a scoop of vanilla ice cream—heavenly! Pair it with a lovely cup of Earl Grey or your favorite herbal tea for an afternoon treat that feels just a bit special. Don’t forget to share with friends; it makes every bite even sweeter!
Recipe Variations
-
Berry Mix: Instead of just huckleberries, combine blueberries, raspberries, and blackberries for a delightful berry medley.
-
Lemon Blueberry: Use blueberries instead of huckleberries; the classic combo is always a crowd-pleaser and beautifully vibrant.
-
Gluten-Free: Substitute all-purpose flour with a gluten-free flour blend and add a pinch of xanthan gum to improve texture.
-
Lemon-Lavender Twist: Add a teaspoon of dried culinary lavender to the batter to create a subtly fragrant cake.
-
Coconut Flavored: Swapping out half of the butter for coconut oil and adding shredded coconut to the batter can elevate the tropical vibes!
Chef’s Notes
Ah, baking—and the countless memories wrapped in those joyful moments! I can’t help but chuckle when I think about those early baking experiments that didn’t go as planned. One time, I accidentally mistook salt for sugar and created a delightfully hilarious kitchen disaster—with some very confused taste testers! But hey, every mishap in the kitchen is a memory in the making!
Over the years, this Lemon Huckleberry Tea Cake has seen many variations. Sometimes I’ve made it with a crumb topping (delicious!), or added a glaze of lemon juice and powdered sugar for an extra sweetness. The beauty of baking is that you can always play—creating something new every time!
FAQs and Troubleshooting
1. Why did my cake sink in the middle?
This can happen if the batter was overmixed or if the oven temperature was too low. Be gentle with your mixing and ensure your oven is properly calibrated!
2. Can I use frozen huckleberries?
Absolutely! Frozen huckleberries work just fine. There’s no need to thaw them, although they may lend a bit more moisture to your batter, which is usually welcome in a cake.
3. How do I know when my cake is done?
Perform the toothpick test—if it comes out clean or with a few moist crumbs clinging, it’s ready!
4. Can I make this ahead of time?
Definitely! The cake keeps well at room temperature for a few days, or you can freeze it wrapped tightly for up to 3 months. Just thaw it in the fridge overnight before serving.
Nutritional Info
The nutrition information for this Lemon Huckleberry Tea Cake varies based on specific ingredients and portion sizes. However, a standard slice (1/12th of the cake) can range from 200-250 calories, with a good source of vitamin C from the lemon. For more exact details, consider using a nutritional calculator with the exact quantities and specific brands of ingredients you use.
I hope you’re as excited to create this delightful cake as I am! Remember, it’s not just about baking; it’s about the joy and warmth you bring into your kitchen. Happy baking, and be sure to share your creations with loved ones—they’ll savor every slice! 🌼
Print
Lemon Huckleberry Tea Cake
- Total Time: 45 minutes
- Yield: 12 servings 1x
- Diet: Vegetarian
Description
A delightful cake capturing the essence of summer with the sweet-tart flavor of huckleberries and a hint of lemon.
Ingredients
- 1 ½ cups all-purpose flour
- 1 teaspoon baking powder
- ½ teaspoon baking soda
- ½ teaspoon salt
- ½ cup unsalted butter, softened
- 1 cup granulated sugar
- 2 large eggs
- Zest of one lemon
- Juice of one lemon (about 2–3 tablespoons)
- 1 cup huckleberries (fresh or frozen)
- 1 teaspoon vanilla extract
Instructions
- Preheat your oven to 350°F (175°C).
- Prepare a 9-inch round cake pan, greasing or lining it with parchment paper.
- Mix the dry ingredients: whisk together the flour, baking powder, baking soda, and salt.
- Cream the butter and sugar together until light and fluffy.
- Add the eggs one at a time, beating well after each addition, then mix in the lemon zest, lemon juice, and vanilla extract.
- Combine the wet and dry ingredients, alternating with milk until just combined.
- Fold in the huckleberries gently.
- Pour the batter into the prepared pan and bake for 25-30 minutes.
- Cool the cake in the pan for 10 minutes, then transfer to a wire rack.
Notes
Tip: Serve the cake with whipped cream or vanilla ice cream. It’s perfect with a cup of tea!
- Prep Time: 15 minutes
- Cook Time: 30 minutes
- Category: Dessert
- Method: Baking
- Cuisine: American
Nutrition
- Serving Size: 1 slice
- Calories: 220
- Sugar: 10g
- Sodium: 300mg
- Fat: 9g
- Saturated Fat: 5g
- Unsaturated Fat: 3g
- Trans Fat: 0g
- Carbohydrates: 30g
- Fiber: 1g
- Protein: 3g
- Cholesterol: 50mg
Keywords: cake, lemon, huckleberry, dessert, summer, baking
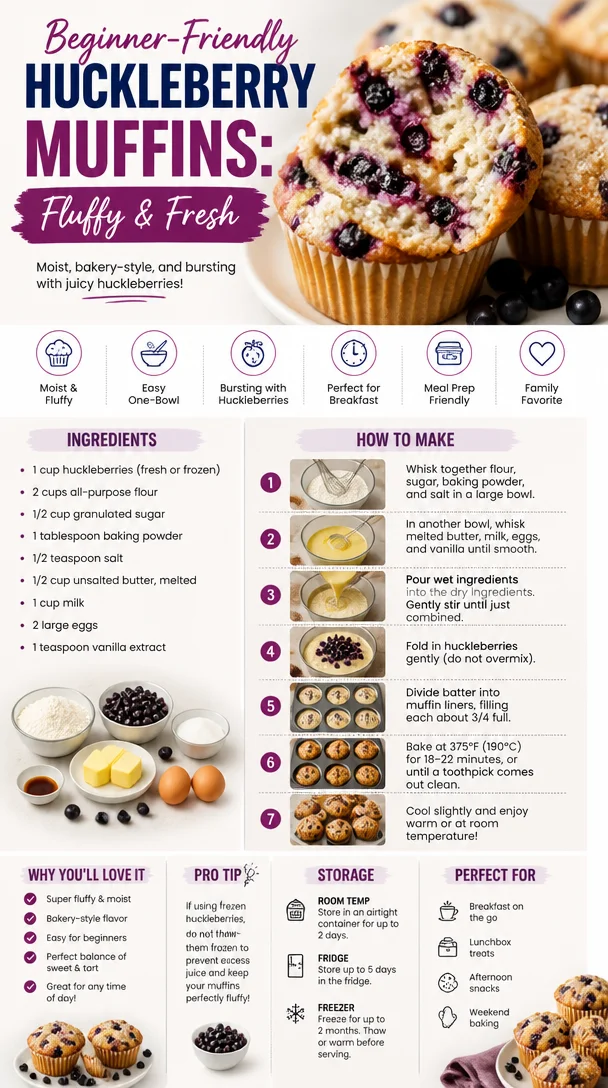
Beginner-Friendly Huckleberry Muffins: Fluffy & Fresh
Huckleberry Muffins: A Taste of Cozy Comfort
Welcome back to my kitchen, food lovers! Today, we’re diving into something absolutely delightful — huckleberry muffins. These little gems are not just baked goods; they’re the essence of a cozy, Sunday morning spent sipping coffee and sharing stories with loved ones. If you’ve never had the pleasure of biting into a warm, fluffy muffin bursting with tangy-sweet huckleberries, you’re in for a real treat!
Huckleberries are these adorable little berries, often found in the wild, that pack a big punch of flavor. Their unique taste lies somewhere between blueberries and cherries, offering that perfect balance of sweet and tart. Whether you are hiking in the mountains, foraging at a local farmer’s market, or simply picking some up from the store, huckleberries bring a special touch to every dish.
But what I truly love about baking huckleberry muffins is the nostalgia that floods back whenever I pull them out of the oven. I remember the first time I made these with my grandma. It was a rainy afternoon, and the smell of butter and sugar wafting through our little kitchen made the whole experience feel magical. We chatted about everything — life, dreams, and of course, her secret tips for making the fluffiest muffins! That’s the beauty of cooking — it’s never just about the food. It’s about the connections, the laughter, and that lovely little nostalgia that warms your heart.
So, whether you’re reminiscing about your childhood or creating new memories, consider inviting huckleberry muffins into your kitchen. Let’s roll up our sleeves and get baking!
Personal Story
I’ll never forget the first summer I went huckleberry picking with my family. We set out on an early Saturday morning, armed with buckets and excitement. The wild bushes were bursting with ripe huckleberries, and the bright sun assisted in turning our picking expedition into a mini-adventure. We laughed and played games, aiming to see who could collect the most berries without munching on too many along the way!
After we returned home, we transformed our haul into what would become a family tradition: huckleberry muffins. My mom’s kitchen danced with warmth and sweet scents, and the table was filled with the chatter of family as we savored those warm muffins slathered in butter. Each bite was a reminder of that sunlit day spent outdoors, an edible memoir of summertime bliss that I cherish to this day. This recipe is my little nod to that beautiful amalgamation of joy, family, and the simple pleasures of life.
Ingredients
Let’s gather our ingredients! Here’s what you need to whip up a batch of these amazing huckleberry muffins:
-
Fresh or Frozen Huckleberries (1 cup): These sweet-tart berries are key! If you can’t find huckleberries, blueberries make a great substitute. Just make sure to adjust the sweetness slightly.
-
All-Purpose Flour (2 cups): The classic baking staple! For a gluten-free option, you can use a 1:1 gluten-free flour blend.
-
Granulated Sugar (¾ cup): This adds sweetness and moisture to the muffins. For a less sugary option, try coconut sugar or maple sugar.
-
Baking Powder (2 teaspoons): This leavening agent will help your muffins rise beautifully! Ensure it’s fresh for the best results.
-
Salt (½ teaspoon): A small but mighty ingredient that enhances all the flavors.
-
Unsalted Butter (½ cup, melted): Butter gives these muffins that rich, comforting flavor. If you’re dairy-free, substitute with coconut oil or a plant-based butter.
-
Milk (¾ cup): Whole milk gives these muffins a moist crumb. Almond milk or any dairy-free alternative works wonderfully too!
-
Egg (1 large): The binding agent! A flax egg (1 tablespoon of flaxseed meal mixed with 2.5 tablespoons of water) can serve as a good vegan substitute.
-
Vanilla Extract (1 teaspoon): Because every good recipe needs a hint of vanilla magic!
Step-by-Step Instructions
Ready to bake? Let’s make some huckleberry muffins! Follow these steps for delightful results:
-
Preheat Your Oven: Set your oven to 375°F (190°C). This will help our muffins rise perfectly. A hot start makes a world of a difference, trust me!
-
Prepare Your Muffin Tin: Grease a 12-cup muffin tin with cooking spray or line it with muffin liners. This will make for easy removal and clean-up later.
-
Mix Dry Ingredients: In a large bowl, combine the flour, sugar, baking powder, and salt. Whisk them together until well combined. This ensures even distribution of the leavening agents, leading to fluffier muffins!
-
Combine Wet Ingredients: In another bowl, whisk together the melted butter, milk, egg, and vanilla extract until everything is blended smoothly. Your butter may clump a bit when mixed with cold milk, but that’s totally fine!
-
Merge the Mixtures: Gradually pour the wet ingredients into the dry, stirring gently until just combined. Don’t overmix — a few lumps are okay! Overmixing can lead to tough muffins, and we want tender bites!
-
Fold in the Huckleberries: Gently fold in the huckleberries, taking care not to mash them. This is the pivotal moment where your mixture transforms into a colorful batter. If using frozen huckleberries, no need to thaw them beforehand.
-
Scoop and Fill: Use a scoop or spoon to divide the batter evenly among the muffin cups, filling each about two-thirds full. This allows room for rising. Princess Muffins come to life in your oven!
-
Bake: Pop those muffins into the preheated oven and bake for about 18-22 minutes, or until the tops are golden and a toothpick inserted into the center comes out clean. Ah, the smell wafting through your kitchen will be heavenly!
-
Cool and Enjoy: Allow the muffins to cool in the tin for about 5 minutes before transferring them to a wire rack to cool completely. If you can resist, I recommend enjoying them fresh out of the oven!
Serving Suggestions
For a beautiful presentation, arrange your huckleberry muffins on a rustic wooden serving platter. Dust them lightly with powdered sugar for a touch of elegance, and serve alongside fresh butter and seasonal fruit for a truly delightful breakfast or brunch spread. Oh, and don’t forget a steaming cup of coffee or herbal tea!
Recipe Variations
Feel free to get creative! Here are a few ideas to switch things up:
- Lemon Zest Huckleberry Muffins: Add zest from one lemon to the batter for a fresh citrus kick.
- Nutty Crunch: Mix in ½ cup of chopped walnuts or pecans for a delightful crunchy texture.
- Coconut Huckleberry Muffins: Substitute half of the flour with coconut flour for a tropical twist.
- Choco-Berry Muffins: Fold in a handful of chocolate chips along with the huckleberries for a decadent treat.
- Gluten-Free Option: Use almond flour or a gluten-free baking mix to cater to gluten-sensitive friends.
Chef’s Notes
These muffins hold a special place in my heart, but they’ve also evolved with each iteration! Originally, my grandma’s recipe called for less butter, but I’ve found that a bit more adds that lovely richness. Plus, my family loves experimenting with different add-ins, so these days, our muffin adventures know no bounds! I often whip up a double batch; they freeze beautifully and make for an effortless breakfast on busy mornings.
Oh, and speaking of kitchen mishaps — once, in my enthusiasm, I mistook baking soda for baking powder and ended up with some curious, albeit edible, huckleberry pancakes! So, always check those labels, my fellow bakers!
FAQs and Troubleshooting
Q1: My muffins are too dry. What went wrong?
A: Overmixing or too much flour can lead to dry muffins. Make sure to measure your flour properly and avoid overworking the batter.
Q2: How can I store leftovers?
A: Once cooled, store your muffins in an airtight container at room temperature for up to 2 days, or freeze them for up to a month. Just thaw at room temperature when you’re ready to indulge!
Q3: What if I can’t find huckleberries?
A: No worries! Blueberries, cranberries, or even diced peaches work well as substitutes. Each will lend its own unique flavor while still keeping the muffin delicious.
Q4: Can I make this recipe vegan?
A: Absolutely! Substitute the egg with a flax egg and use plant-based milk and butter. A little creativity ensures no one feels left out!
Nutritional Info
- Calories: Approximately 200 per muffin
- Protein: 3g
- Fat: 8g
- Carbohydrates: 30g
- Fiber: 1g
- Sugar: 8g
Baking is more than just following a recipe; it’s about enjoyment, exploring flavors, and making memories in the kitchen. I’m so glad to share this huckleberry muffin experience with you! Whether you’re new to baking or a seasoned pro, I hope these muffins fill your kitchen with joy. Happy baking, and don’t forget to savor every bite!
Print
Huckleberry Muffins
- Total Time: 37 minutes
- Yield: 12 muffins 1x
- Diet: Vegetarian
Description
Delightful huckleberry muffins that evoke nostalgia and warmth, perfect for cozy mornings.
Ingredients
- 1 cup Fresh or Frozen Huckleberries
- 2 cups All-Purpose Flour
- ¾ cup Granulated Sugar
- 2 teaspoons Baking Powder
- ½ teaspoon Salt
- ½ cup Unsalted Butter, melted
- ¾ cup Milk
- 1 large Egg
- 1 teaspoon Vanilla Extract
Instructions
- Preheat your oven to 375°F (190°C).
- Prepare a 12-cup muffin tin by greasing or lining with muffin liners.
- Mix the flour, sugar, baking powder, and salt in a large bowl.
- Combine the melted butter, milk, egg, and vanilla in another bowl.
- Merge the wet ingredients into the dry ingredients, stirring gently until just combined.
- Fold in the huckleberries without mashing them.
- Scoop batter into the muffin cups, filling each about two-thirds full.
- Bake for 18-22 minutes or until golden brown and a toothpick comes out clean.
- Cool in the tin for 5 minutes before transferring to a wire rack.
Notes
Dust muffins with powdered sugar for presentation and serve with butter or seasonal fruit.
- Prep Time: 15 minutes
- Cook Time: 22 minutes
- Category: Breakfast
- Method: Baking
- Cuisine: American
Nutrition
- Serving Size: 1 muffin
- Calories: 200
- Sugar: 8g
- Sodium: 200mg
- Fat: 8g
- Saturated Fat: 4g
- Unsaturated Fat: 3g
- Trans Fat: 0g
- Carbohydrates: 30g
- Fiber: 1g
- Protein: 3g
- Cholesterol: 30mg
Keywords: muffins, huckleberry, breakfast, baking, cozy
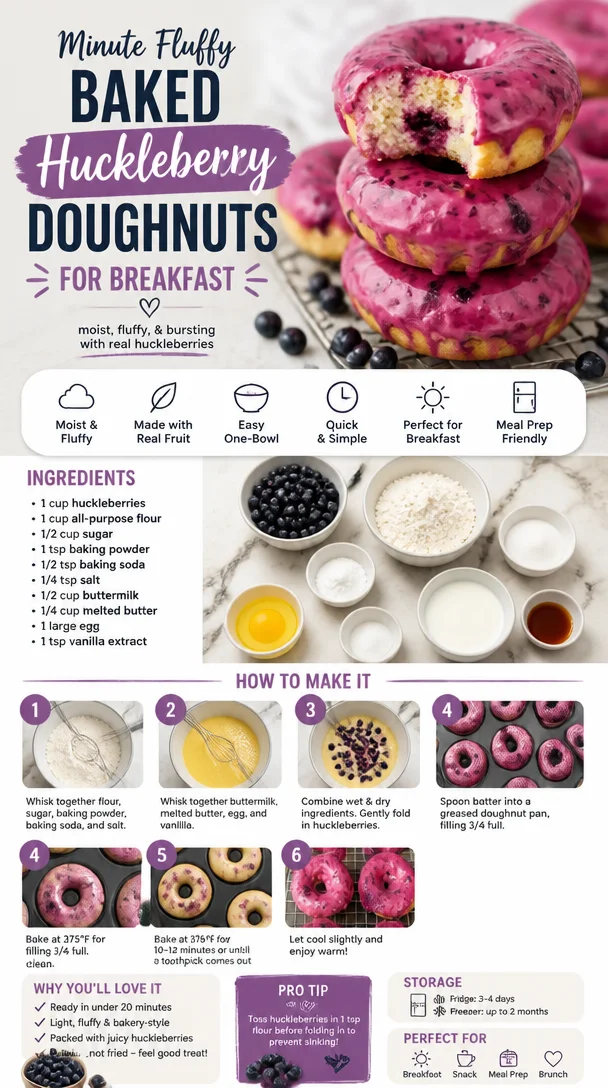
Minute Fluffy Baked Huckleberry Doughnuts for Breakfast
Baked Huckleberry Doughnuts: A Sweet Adventure in the Kitchen
Welcome, fellow foodies! I’m so excited you found your way into my cozy kitchen today. The sweet aroma of baked doughnuts is wafting through the air, and let me tell you, there’s nothing quite like the joy of whipping up a batch of baked huckleberry doughnuts. If you’re new to the world of homemade sweets—or even if you’re a seasoned baker—you’re in for a delightful treat that’ll make your taste buds dance.
As the temperature starts to drop and leaves begin to adorn their stunning fall colors, you may find yourself yearning for something warm and sweet to brighten your day. Baked huckleberry doughnuts are not just a simple treat; they’re a hug in a doughnut form. Trust me when I say there’s a story behind every batch, and I’m thrilled to share mine with you.
When I first tasted huckleberries as a child, I was enchanted. Picture this: my family and I, with baskets in hand, scouring the woods for these little treasures, their deep purple color beckoning us as if they were the jewels of nature. The thrill of foraging, combined with the joy of sharing our finds around the family dinner table, played a pivotal role in my love for cooking and baking. I remember my grandmother insisting that we use only the ripest ones for her famous doughnut recipe, claiming they had a magical way of making everything taste better. It’s with this nostalgia and love that I share these baked huckleberry doughnuts with you today.
Ingredients
Let’s dive into the ingredients that will transform simple kitchen staples into extraordinary baked huckleberry doughnuts. Here’s what you’ll need:
-
1 cup fresh or frozen huckleberries
- If you can’t find huckleberries, blueberries make a great substitute! Feel free to use either fresh or frozen. Just remember, the flavor of huckleberries is uniquely sweet and tangy, a real delight.
-
1 cup all-purpose flour
- This is your doughnut base! You can swap it for a gluten-free blend if needed, but I recommend stick to the classic for the best texture.
-
1/2 cup granulated sugar
- For sweetness! If you’re watching your sugar intake, coconut sugar or a sugar substitute can work, but it may alter the flavor slightly.
-
2 tsp baking powder
- This little hero helps your doughnuts rise to fluffy perfection!
-
1/2 tsp baking soda
- This is your doughnut’s best friend, providing an extra lift.
-
1/4 tsp salt
- Just a pinch to balance the sweetness!
-
1/2 tsp vanilla extract
- A natural flavor enhancer! You can also use almond extract if you want a deeper flavor profile.
-
1/2 cup buttermilk (or milk with a splash of vinegar)
- Buttermilk gives your doughnuts a fluffy texture. If you don’t have it on hand, just add a tablespoon of vinegar to regular milk and let it sit for a few minutes.
-
1/4 cup vegetable oil
- For moisture and richness. You can substitute it with melted coconut oil for a hint of tropical flavor.
-
1 large egg
- This helps bind everything together. If you’re vegan, you can use a flax egg (1 tablespoon ground flaxseed mixed with 2.5 tablespoons water).
Step-by-Step Instructions
Now that you have all your ingredients gathered, let’s get baking! Here’s how to make these beautiful baked huckleberry doughnuts step-by-step:
-
Preheat Your Oven: Start by preheating your oven to 350°F (175°C). This ensures that your doughnuts cook evenly and come out fluffy.
-
Prep the Pan: Grease a doughnut pan with cooking spray or a light coat of oil. This is crucial because we don’t want our delicious doughnuts to stick!
-
Mix the Dry Ingredients: In a large mixing bowl, combine the flour, sugar, baking powder, baking soda, and salt. Give it a good whisk to ensure everything is evenly mixed.
-
Combine the Wet Ingredients: In a separate medium bowl, whisk together the egg, buttermilk, vanilla extract, and vegetable oil until everything is well combined. Here’s a chef tip: don’t overmix; just combine until you see no dry flour!
-
Fold in the Berries: Gently fold the huckleberries into the wet mixture. If you’re using frozen berries, be careful not to crush them too much; we want whole chunks to burst in our doughnuts!
-
Combine Wet and Dry: Pour the wet ingredients into the dry ingredients and fold them together gently. Again, I emphasize being gentle here; overmixing can lead to dense doughnuts!
-
Fill the Pan: Using a piping bag or a spoon, fill each doughnut cavity about halfway. You can also use a Ziploc bag with a corner snipped off if you don’t have a piping bag handy.
-
Bake: Pop those beauties in the oven and bake for 12–15 minutes, or until a toothpick inserted into the center comes out clean. They should be lightly golden on top.
-
Cool Down: Allow the doughnuts to cool in the pan for about 5 minutes before transferring them to a wire rack. This step is crucial to prevent them from becoming soggy!
-
Optional Glaze or Coating: While the doughnuts cool, you can whip up a simple glaze with powdered sugar and milk. Drizzle it over the warm doughnuts for a sweet finish!
Serving Suggestions
Once your baked huckleberry doughnuts have cooled a bit, it’s time to serve! These doughnuts are delicious on their own, but they look especially beautiful when plated on a rustic wooden board, perhaps with a little berry compote or whipped cream on the side. You could even add fresh huckleberries or edible flowers for that Instagram-worthy touch.
Recipe Variations
Love to get creative in the kitchen? Here are a few fun variations to try:
- Lemon Glaze: Add lemon zest to your glaze for a refreshing zing.
- Chocolate Drizzle: Melt some chocolate and drizzle it over the doughnuts for a decadent twist.
- Nutty Topping: Sprinkle chopped nuts on top of the glaze for some added crunch!
- Spiced Doughnuts: Add a pinch of cinnamon or nutmeg to the batter for a warm, spiced flavor.
- Vegan Option: Make a vegan version using a flax egg, almond milk, and coconut oil—delicious and guilt-free!
Chef’s Notes
These baked huckleberry doughnuts hold a special place in my heart (and my recipe box). I’ve made countless batches over the years, each one adapting to the seasons and my mood. One particularly memorable batch was during a family reunion when my aunt pulled out her childhood recipe, and we all improvised together. We ended up with huckleberry doughnuts frosted with a maple glaze that left everyone asking for seconds! Cooking is all about making memories, after all.
FAQs and Troubleshooting
-
Can I use frozen huckleberries?
- Absolutely! Just make sure to fold them in gently to avoid crushing them.
-
What if my doughnuts stick to the pan?
- Ensure the pan is well-greased, and consider letting them cool for a few minutes before trying to remove them.
-
How do I store leftover doughnuts?
- Store them in an airtight container at room temperature for 2–3 days. You can also freeze them for later enjoyment!
-
Why did my doughnuts come out dense?
- Overmixing the batter can lead to denser doughnuts. Aim to mix just until combined for light and fluffy results!
Nutritional Info
While I’m all for indulging every now and then, keeping track of what goes into our treats is always a good idea. Each baked huckleberry doughnut comes in at approximately 180 calories, with 4g of protein and 8g of fat. Don’t forget, they’re chock-full of delicious flavors, and best enjoyed in good company!
There you have it! A delicious journey into the world of baked huckleberry doughnuts. I hope you’ll add this recipe to your baking repertoire and create beautiful memories as you do. Happy baking!
Print
Baked Huckleberry Doughnuts
- Total Time: 30 minutes
- Yield: 12 servings 1x
- Diet: Vegetarian
Description
Indulge in these delightful baked huckleberry doughnuts that are sweet, tangy, and perfect for any occasion.
Ingredients
- 1 cup fresh or frozen huckleberries
- 1 cup all-purpose flour
- 1/2 cup granulated sugar
- 2 tsp baking powder
- 1/2 tsp baking soda
- 1/4 tsp salt
- 1/2 tsp vanilla extract
- 1/2 cup buttermilk (or milk with a splash of vinegar)
- 1/4 cup vegetable oil
- 1 large egg
Instructions
- Preheat your oven to 350°F (175°C).
- Prep the pan by greasing a doughnut pan with cooking spray or oil.
- Mix the dry ingredients in a large mixing bowl: flour, sugar, baking powder, baking soda, and salt.
- Combine the wet ingredients in a medium bowl: egg, buttermilk, vanilla extract, and vegetable oil.
- Fold in the huckleberries gently into the wet mixture.
- Combine the wet and dry ingredients, being careful not to overmix.
- Fill each doughnut cavity about halfway with the batter.
- Bake for 12–15 minutes or until a toothpick comes out clean.
- Cool the doughnuts for 5 minutes in the pan before transferring to a wire rack.
- Optional: Glaze with powdered sugar and milk if desired.
Notes
Store leftover doughnuts in an airtight container at room temperature for 2–3 days. They can also be frozen for later enjoyment.
- Prep Time: 15 minutes
- Cook Time: 15 minutes
- Category: Dessert
- Method: Baking
- Cuisine: American
Nutrition
- Serving Size: 1 doughnut
- Calories: 180
- Sugar: 6g
- Sodium: 150mg
- Fat: 8g
- Saturated Fat: 1g
- Unsaturated Fat: 7g
- Trans Fat: 0g
- Carbohydrates: 25g
- Fiber: 1g
- Protein: 4g
- Cholesterol: 30mg
Keywords: doughnuts, huckleberry, baked dessert, sweet treat
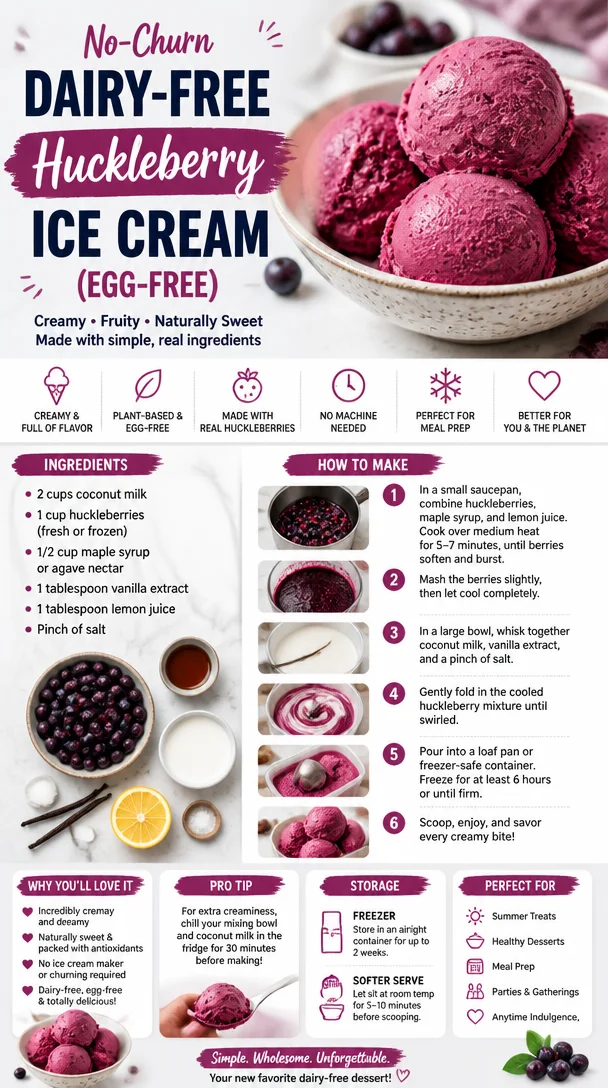
No-Churn Dairy-Free Huckleberry Ice Cream (Egg-Free)
Dairy-Free Huckleberry Ice Cream: A Refreshing Summer Delight
Welcome to my kitchen, my foodie friends! Today, we’re diving into a delightful treat that will make your taste buds sing — Dairy-Free Huckleberry Ice Cream. If you’ve ever tasted the essence of summer cradled within a scoop of cold, creamy goodness, you know how magical ice cream can be. Now, imagine that same delightful experience, but with a twist that embraces a dairy-free lifestyle!
Whether you’re lactose intolerant, following a vegan diet, or simply looking to create something a bit healthier, this easy yet indulgent recipe will help you enjoy the sweet bounty of huckleberries, making it a perfect treat for hot summer days. Picture this: a warm afternoon, a blanket spread out on the grass, and a bowl of this luscious ice cream — doesn’t it sound heavenly?
But before we jump into the recipe, let me share a little personal story that makes this dish even more special.
A Berry Special Memory
Growing up in a small mountain town, huckleberries were more than just a summer fruit — they were an annual adventure! Every year, my family would embark on a huckleberry-picking expedition. Armed with buckets and our best strategies for spotting the ripest berries, we’d scour the bushes, and the excitement was palpable. My grandmother always had the best recipes that highlighted our foraged treasures, but perhaps none was as cherished as her homemade huckleberry ice cream.
I remember the vibrant purple stains left on our fingers and faces from our delicious harvest, and the way my grandma would giggle at our attempts to not sample too many berries before we got home. When we finally churned that ice cream, the sweet, tangy flavor combining with the creamy base was pure bliss. With every scoop, we forged memories, shared stories, and enjoyed each other’s company. It was more than just ice cream; it was a celebration of summer, family, and the wonders of nature.
Now, let’s create that same experience together, in a dairy-free, egg-free way!
Ingredients
To make our Dairy-Free Huckleberry Ice Cream, you’ll need a few simple ingredients. Each one plays a vital role, and I’ll share some tips and insights along the way:
-
Huckleberries (2 cups): Fresh or frozen, these little gems give the ice cream its vibrant color and sweet-tart flavor. If you can’t find huckleberries, you can substitute them with blueberries or blackberries for a similar taste.
-
Coconut Milk (2 cans, full-fat): This is our creamy base that brings richness without the dairy. I always opt for full-fat for that ultra-creamy texture, but you can use light coconut milk if you’re looking to reduce fat.
-
Maple Syrup (1/2 cup): A natural sweetener that adds warmth and depth. You can swap it for agave syrup, honey (if not strictly vegan), or any other sweetener of your choice — just adjust to taste.
-
Vanilla Extract (2 teaspoons): This adds a lovely aromatic note. Go for pure vanilla extract for the best flavor, or try using vanilla bean paste for an extra gourmet touch.
-
Lemon Juice (1 tablespoon): Just a splash to brighten the flavors. Freshly squeezed is always best, but bottled lemon juice works in a pinch.
-
Salt (a pinch): It enhances the flavors beautifully, rounding everything out perfectly. Don’t skip this step!
Step-by-Step Instructions
Now that we’ve gathered our ingredients, let’s roll up our sleeves and make some ice cream magic! Follow these detailed steps to ensure a smooth, creamy outcome.
-
Prepare the Huckleberries:
If you’re using fresh huckleberries, give them a good rinse under cold water and sort through them to remove any stems or leaves. For frozen huckleberries, just toss them in a bowl to thaw slightly while you work on the base. I like to mash a handful with a fork for a more robust flavor in the ice cream, but feel free to keep some whole for that delightful berry surprise in every scoop. -
Blend the Base:
In a blender or food processor, add the full-fat coconut milk, maple syrup, vanilla extract, lemon juice, and a pinch of salt. Blend until everything is perfectly combined and smooth. Taste the mixture and adjust the sweetness if you prefer it a bit sweeter — it’s all about your preference! -
Mix in the Huckleberries:
Once your base is blended smooth, transfer it to a mixing bowl. Gently fold in the mashed and whole huckleberries, being careful not to overmix. This way, you maintain that beautiful swirl of berry throughout without completely breaking them down. -
Chill the Mixture:
Cover your bowl with plastic wrap and refrigerate the mixture for at least an hour. This step allows the flavors to meld wonderfully and ensures the mixture is cold before churning, which leads to a creamier ice cream. -
Churn the Ice Cream:
Now for the fun part! Pour your mixture into an ice cream maker and churn according to the manufacturer’s instructions. It usually takes about 20 to 25 minutes to reach soft-serve consistency. If you don’t have an ice cream maker, don’t fret! You can use a shallow container and stir it every 30 minutes until it reaches a creamy texture — just a little more labor-intensive. -
Freeze to Firm Up:
Once churned to creamy perfection, transfer the ice cream to an airtight freezer-safe container. Press a piece of parchment paper directly on the surface to prevent ice crystals from forming, then seal with a lid. Freeze for at least 4 hours or overnight for a firmer texture.
Serving Suggestions
When it’s time to serve, scoop out generous portions of your huckleberry ice cream into bowls or cones. For an extra special touch, garnish with fresh huckleberries, a drizzle of maple syrup, or a sprinkle of crushed nuts for some crunch. Serve it up on a warm summer evening, and watch the smiles spread!
Recipe Variations
Now, let’s get creative! Here are a few ideas to put a unique spin on your huckleberry ice cream:
-
Berry Bliss: Mix in other berries like strawberries or raspberries for a mixed-berry version.
-
Nuts About Huckleberries: Swirl in some crushed pecans or walnuts for added crunch and flavor.
-
Chocolate Swirls: Melt some dairy-free dark chocolate and drizzle it into the churned ice cream for a deliciously decadent treat.
-
Minty Fresh: Add a sprinkle of fresh mint leaves into the mixture while blending for a refreshing twist.
-
Creamy Avocado: For an even richer texture, add a ripe avocado to the blender with the coconut milk for a hidden veggie boost.
Chef’s Notes
This recipe holds a special place in my heart, and it has evolved over time. Initially, it began as a sweet summer indulgence that I’d make to beat the heat. Now, it’s a family tradition that brings us together, whether during berry-picking escapades or casual backyard gatherings. When I taste that rich creaminess balanced by the tang of huckleberries, it takes me right back to those summer afternoons with my grandma.
One cheeky kitchen story I have to share is the time I accidentally grabbed a can of coconut milk that had been in my pantry for too long. Let’s just say that ice cream was not winning any flavor awards! Lesson learned: always check the expiration date, even on pantry staples!
FAQs and Troubleshooting
Q: Can I make this ice cream without an ice cream maker?
Absolutely! Just follow the stirring method mentioned in step 5. It requires a bit more effort, but it’s entirely possible!
Q: What if my ice cream is too hard after freezing?
If your ice cream is too hard, let it sit at room temperature for about 10 minutes before scooping. That will soften it up, making it much easier to serve.
Q: Can I use other types of milk for this recipe?
While coconut milk gives the best texture and flavor, you can substitute almond milk or oat milk. Just keep in mind that they may not yield the same rich creaminess.
Q: How long can I store this ice cream?
In an airtight container, your huckleberry ice cream can be stored in the freezer for up to 2 weeks. It might become a bit icy over time, so it’s best enjoyed fresh!
Nutritional Info
While I encourage you to enjoy this treat in moderation, here’s a general idea of the nutritional breakdown per serving (based on approximately 10 servings):
- Calories: 180
- Fat: 10g
- Carbohydrates: 22g
- Sugar: 12g
- Protein: 2g
And there you have it — a lovely, creamy, and bright Dairy-Free Huckleberry Ice Cream sure to delight anyone’s palate. It’s perfect for those hot summer days, family gatherings, or a cozy night in. Remember, cooking is all about love and creativity, so don’t hesitate to put your spin on this recipe. Happy scooping!
Print
Dairy-Free Huckleberry Ice Cream
- Total Time: 280 minutes
- Yield: 10 servings 1x
- Diet: Vegan
Description
A refreshing and creamy dairy-free ice cream made with huckleberries, perfect for summer days.
Ingredients
- 2 cups Huckleberries (fresh or frozen)
- 2 cans full-fat Coconut Milk
- 1/2 cup Maple Syrup
- 2 teaspoons Vanilla Extract
- 1 tablespoon Lemon Juice
- a pinch of Salt
Instructions
- Prepare the huckleberries by rinsing and sorting through them.
- Blend the coconut milk, maple syrup, vanilla, lemon juice, and salt until smooth.
- Mix in the huckleberries, folding gently to maintain texture.
- Chill the mixture in the refrigerator for at least an hour.
- Churn the mixture in an ice cream maker according to the manufacturer’s instructions.
- Freeze the churned ice cream in an airtight container for at least 4 hours.
Notes
For variations, consider mixing in other berries, nuts, or chocolate swirls.
- Prep Time: 15 minutes
- Cook Time: 25 minutes
- Category: Dessert
- Method: Churning
- Cuisine: American
Nutrition
- Serving Size: 1 serving
- Calories: 180
- Sugar: 12g
- Sodium: 100mg
- Fat: 10g
- Saturated Fat: 9g
- Unsaturated Fat: 1g
- Trans Fat: 0g
- Carbohydrates: 22g
- Fiber: 2g
- Protein: 2g
- Cholesterol: 0mg
Keywords: dairy-free, huckleberry, ice cream, vegan dessert, summer treat
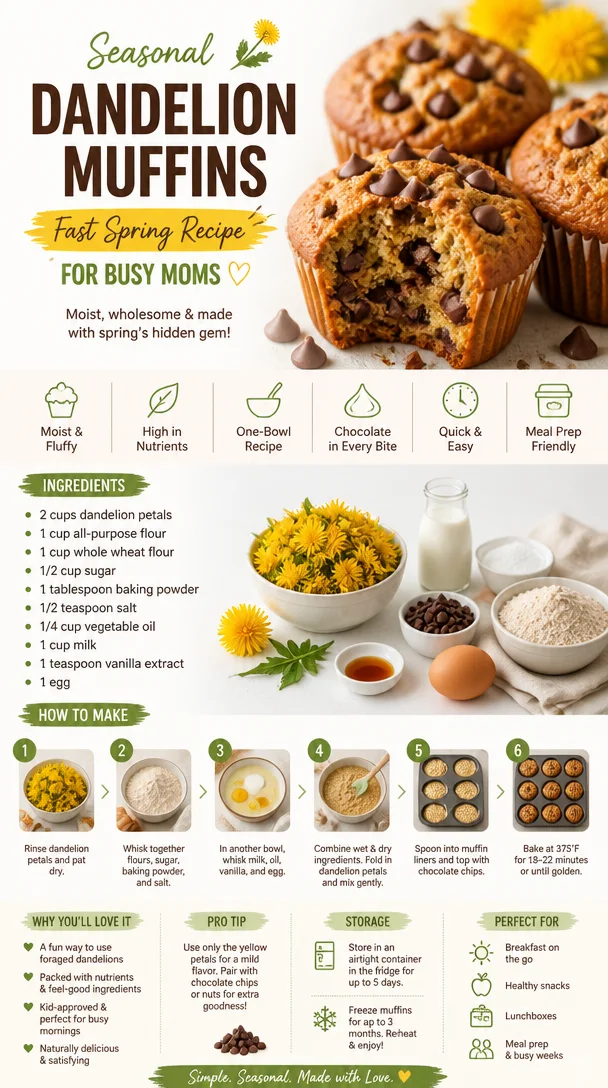
Seasonal Dandelion Muffins: Fast Spring Recipe for Busy Moms
Dandelion Muffins: A Blossoming Delight from My Kitchen to Yours
Welcome to my kitchen, fellow foodies! Today, I’m excited to share one of my favorite springtime recipes: Dandelion Muffins! You might be thinking: “Dandelions? In my muffins?” But trust me, these little golden blooms will add an incredible burst of flavor, a hint of earthiness, and a beautiful touch to your breakfast table. Plus, using edible flowers makes this recipe not only delicious but also a fun way to connect with the seasonal bounty right outside your window.
Speaking of which, let me set the scene. Picture this: A sunny Saturday morning in early April, the birds are chirping, and the air is filled with the joyful promise of warmer days ahead. My kitchen is alive with the smell of something wonderful baking. I can’t help but smile as I sift flour, measure honey, and gather the star of the show—the dandelion petals. As a kid, I remember my grandmother showing me how to pick these sunny little flowers from our backyard. They were lovely in a simple salad, but it was her muffin recipe that stole my heart—and now, I can’t wait to share it with you!
These Dandelion Muffins are not just a great way to celebrate the arrival of spring; they also provide an opportunity to connect with nature and appreciate the simple, beautiful things in life. This recipe is made to be easy, comforting, and fun, making it perfect for both seasoned chefs and new home cooks. So roll up those sleeves, throw on your favorite apron (mine is usually covered in a bit of flour), and let’s get baking!
Personal Story
Let me take you back to those cherished childhood moments spent with my grandmother in her cozy kitchen. Armed with only flour-covered hands and an insatiable curiosity, I would watch her pull off culinary magic. One sunny afternoon, she introduced me to the beauty of dandelions—those cheerful yellow flowers that often get a bad rap! She would guide me as we wandered through her garden, picking them carefully, showing me how they could be transformed into something delicious.
With a twinkle in her eye, she would laugh, proudly proclaiming that those little flowers were like sunshine in the kitchen. We’d mix them into her light and fluffy muffins, and I’d watch as they turned from ordinary to extraordinary! Years later, those muffins still evoke warmth and nostalgia. They remind me that cooking is not just about the food; it’s about the connections we share, the memories we make, and the love we pour into every dish.
Ingredients
Here’s what you’ll need for these delightful Dandelion Muffins:
-
2 cups all-purpose flour: The base of your muffins. For a healthier option, you can use whole wheat or a gluten-free blend!
-
1 cup sugar: Gives sweetness to balance out the slight bitterness of the dandelion petals. Feel free to substitute with coconut sugar or honey if you prefer.
-
1 tablespoon baking powder: This will help your muffins rise beautifully. Always check the expiration date for best results.
-
1/2 teaspoon baking soda: A little addition to help with leavening— plus, it enhances the muffins’ texture.
-
1/2 teaspoon salt: Enhances all the flavors. Don’t skip this important ingredient!
-
1/2 cup unsalted butter, melted: Adds richness and moisture. You can swap this for applesauce or coconut oil for a lighter touch.
-
2 large eggs: Helps bind the ingredients together. For an egg-free alternative, try using flax eggs (1 tablespoon ground flaxseed mixed with 3 tablespoons water).
-
1 cup milk: Your choice of dairy or plant-based milk works well here—almond, oat, or soy milk will do beautifully!
-
1 cup dandelion petals (washed and chopped): The star of the show! Make sure to pick dandelions that haven’t been treated with chemicals, and avoid plants near roadsides or potentially polluted areas.
-
1 teaspoon vanilla extract: A dash of pure vanilla adds warmth and depth to the muffins.
Quick Chef Insight:
When picking dandelions, look for the freshest blossoms—bright yellow and fully open are best for taste, while ensuring they haven’t been exposed to pesticides. Always give them a good rinse before incorporating them into your recipe!
Step-by-Step Instructions
Now that you have all your ingredients ready, let’s dive into the cooking process!
Step 1: Preheat the Oven
Start by preheating your oven to 350°F (175°C). This ensures that your muffins rise perfectly in that toasty warmth.
Step 2: Prepare Your Muffin Pan
Grease a 12-cup muffin tin with cooking spray or line it with muffin liners. This prevents sticking and makes cleanup a breeze!
Step 3: Mix the Dry Ingredients
In a large mixing bowl, combine the all-purpose flour, sugar, baking powder, baking soda, and salt. Use a whisk to blend everything together evenly. This step is key! It aerates the flour, helping your muffins become fluffy and light.
Step 4: Combine the Wet Ingredients
In a separate bowl, whisk together the melted butter, eggs, milk, and vanilla extract until well combined. You want a smooth, uniform mixture— no lumps allowed here, folks!
Step 5: Blend Wet and Dry Ingredients
Pour the wet ingredients into the dry ingredients. Gently fold with a spatula or wooden spoon—this is where you want to be cautious! Overmixing can lead to dense muffins. You’re aiming for a pretty and slightly lumpy batter; a few flour streaks are okay.
Step 6: Add the Dandelion Petals
Now comes the exciting part—add the washed and chopped dandelion petals to your batter! Gently fold them in until they’re evenly distributed. The vibrant yellow petals will add a lovely color and a hint of floral flavor.
Step 7: Fill the Muffin Cups
Using a scoop or a spoon, fill each muffin cup about 3/4 full. This allows room for the muffins to rise without overflowing.
Step 8: Bake
Pop your muffin tray into the oven and let the muffins bake for about 15-20 minutes or until they are golden brown on top and a toothpick inserted into the center comes out clean.
Step 9: Cool & Enjoy!
Once they’re done, take the muffins out of the oven and let them cool in the pan for about 5 minutes. Transfer to a wire rack to cool completely. Trust me, the aroma wafting through your kitchen will have you counting the minutes until you can dig in!
Serving Suggestions
These Dandelion Muffins can be enjoyed warm, straight from the oven, topped with a pat of butter, or served alongside a smear of cream cheese and a drizzle of honey. They’re perfect for breakfast on the go, a delightful snack for your afternoon tea, or a lovely addition to a springtime brunch spread.
Recipe Variations
Feeling a bit adventurous? Here are some fun ways to shake things up:
-
Add Chocolate Chips: Who doesn’t love a surprise burst of chocolate in their muffins? Toss in a handful of semi-sweet or dark chocolate chips!
-
Citrus Zest: Brighten up your muffins with the zest of an orange or lemon added to the batter for that extra zing!
-
Nuts or Seeds: For added crunch, mix in chopped walnuts or sunflower seeds. They will give your muffins a fantastic texture.
-
Herbal Infusion: Try adding a hint of fresh herbs like lavender or mint—these blooms pair well with dandelions and add a sophisticated twist.
Chef’s Notes
These muffins have come a long way in my kitchen! What started as my grandmother’s simple recipe has evolved with my own experiments over the years. I love playing with ingredients based on what’s available and in season. Each batch tells a story and brings back a cherished memory of making them with her.
Oh, and here’s a little kitchen story: One spring, I was so excited to share these with friends that I invited them over for an impromptu brunch. While I was prepping, I accidentally mistook salt for sugar! The gagging faces were priceless—but those muffins brought lots of laughter and good-natured ribbing. It’s a mistake I’ve never made again, and we turned that mishap into a lovely memory!
FAQs and Troubleshooting
1. Why didn’t my muffins rise?
Check if your baking powder and baking soda are still fresh! These leavening agents are key to helping your muffins rise. Stale ingredients can lead to flat muffins.
2. Can I use dried dandelions instead?
Absolutely! If you’re using dried dandelion petals, remember to hydrate them in warm water for about 10 minutes before incorporating them into the batter.
3. How do I store leftover muffins?
Store your muffins in an airtight container at room temperature for up to 3 days. You can also freeze them for longer-lasting enjoyment—simply thaw them at room temperature when you’re ready to munch!
4. What can I do if the muffins end up too dense?
Dense muffins can result from overmixing the batter. Be gentle when combining wet and dry ingredients, and stop mixing once everything is just incorporated.
Nutritional Info (Optional)
Each Dandelion Muffin (without any added toppings) contains approximately:
- Calories: 150
- Carbs: 22g
- Protein: 3g
- Fat: 6g
- Fiber: 1g
- Sugar: 6g
Enjoy these muffins as a moment of seasonal joy and tasty delight! I hope you love making them just as much as I do. Happy baking, and may your kitchen always be filled with warmth and laughter!
Print
Dandelion Muffins
- Total Time: 35 minutes
- Yield: 12 servings 1x
- Diet: Vegetarian
Description
Delightful muffins made with fresh dandelion petals, perfect for springtime breakfasts.
Ingredients
- 2 cups all-purpose flour
- 1 cup sugar
- 1 tablespoon baking powder
- 1/2 teaspoon baking soda
- 1/2 teaspoon salt
- 1/2 cup unsalted butter, melted
- 2 large eggs
- 1 cup milk
- 1 cup dandelion petals (washed and chopped)
- 1 teaspoon vanilla extract
Instructions
- Preheat the oven to 350°F (175°C).
- Prepare a 12-cup muffin tin with cooking spray or liners.
- Mix the flour, sugar, baking powder, baking soda, and salt in a large bowl.
- Combine the melted butter, eggs, milk, and vanilla in a separate bowl.
- Pour the wet ingredients into the dry ingredients and gently fold together.
- Add the washed and chopped dandelion petals, folding them in gently.
- Fill each muffin cup about 3/4 full.
- Bake for 15-20 minutes or until golden brown.
- Cool in the pan for 5 minutes, then transfer to a wire rack.
Notes
For healthier options, substitute whole wheat flour or use applesauce in place of butter.
- Prep Time: 15 minutes
- Cook Time: 20 minutes
- Category: Breakfast
- Method: Baking
- Cuisine: American
Nutrition
- Serving Size: 1 muffin
- Calories: 150
- Sugar: 6g
- Sodium: 190mg
- Fat: 6g
- Saturated Fat: 4g
- Unsaturated Fat: 2g
- Trans Fat: 0g
- Carbohydrates: 22g
- Fiber: 1g
- Protein: 3g
- Cholesterol: 30mg
Keywords: Dandelion Muffins, Spring Recipes, Edible Flowers, Healthy Muffins, Breakfast Ideas
Huckleberry Jam
The Sweet Adventure: Huckleberry Jam Made with Love
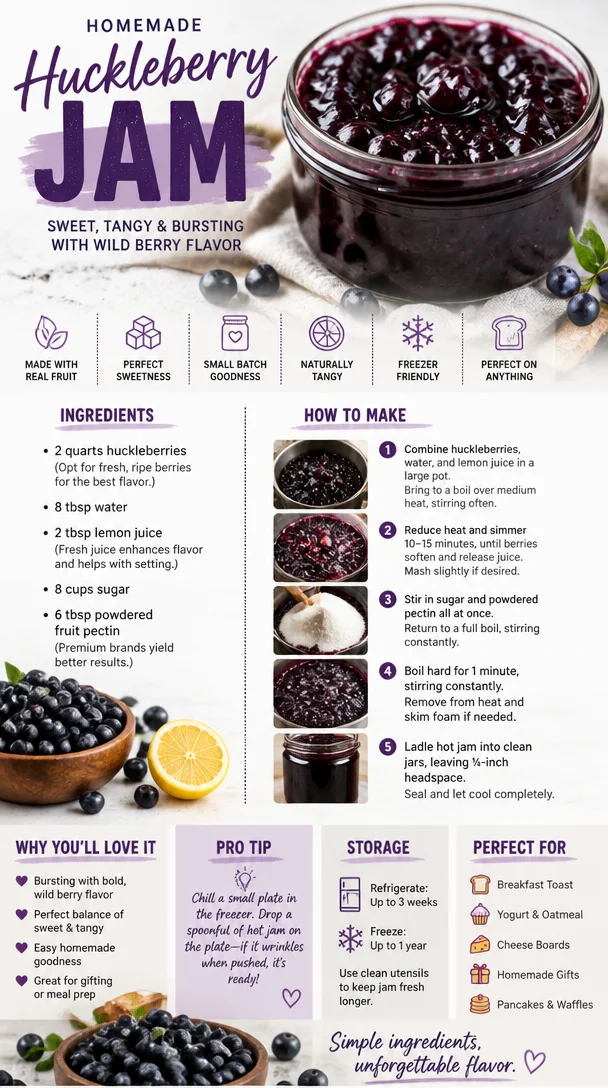
Welcome to my kitchen, fellow food lovers! Today, we’re diving headfirst into a deliciously delightful project that’s all about capturing the essence of summer in a jar: Huckleberry Jam. If you’ve ever had the pleasure of tasting this vibrant, sweet-tart spread, you know it’s a treat that instantly brings a smile to your face. Imagine slathering it on warm toast, dolloping it on yogurt, or using it as a filling for pastries—need I say more? So, roll up your sleeves and let’s embark on this tasty adventure together!
Over the years, I’ve developed quite the affection for huckleberries. These small, jewel-like berries are a special treat, often found in the wild or at local farmers’ markets during the peak of summer. They are reminiscent of blueberries but with a touch of sass in their flavor profile—slightly tangy, sweet, and downright addictive. If you have a soft spot for homemade goodies and a knack for simple, heartfelt cooking, you’re in for a real treat!
This recipe is not just about making a jar of jam; it’s about creating memories, savoring seasonal produce, and connecting with the traditions of homemade preserves. There’s something undeniably satisfying about taking fruit that was picked, either by your own hands or sourced from your favorite vendor, and transforming it into a delectable spread that can brighten up breakfast, elevate desserts, and make any simple snack feel gourmet.
So, grab your favorite apron and let’s get cooking! I promise you’ll be transported back to carefree days spent in the kitchen, with the warm scent of boiling jam filling the air and laughter echoing around you.
A Taste of Nostalgia
One of my fondest memories revolves around my grandmother and her legendary huckleberry jam. Every summer, she’d take my siblings and me on berry-picking excursions in the forest, armed with nothing but a couple of buckets and the thrill of adventure. We’d race to find the juiciest, plumpest berries, and the laughter of our family echoed among the trees. Those were magical moments!
Upon returning home, we’d gather around her bright, sun-drenched kitchen, where scents of sugar, citrus, and sweet berries would mingle as she carefully stirred the bubbling pot. My grandmother was not just a cook; she was a magician—turning foraged fruits into jars full of summer memories! She always had a story to tell while stirring the pot, passing on her wisdom and love for cooking. Little did I know then that these experiences would spark my lifelong passion for crafting my own culinary delights.
Ingredients
Here’s what you’ll need to whip up a delightful batch of huckleberry jam:
-
Fresh Huckleberries (4 cups)
- These beautiful little berries are the star of our show! If you can’t find huckleberries, blueberries work as a substitute, although they might alter the authentic flavor a bit.
-
Granulated Sugar (2 cups)
- This is not just for sweetness; it acts as a preservative to help your jam keep. If you’re looking for a lower-sugar option, consider using a sugar substitute designed for canning.
-
Lemon Juice (1/4 cup)
- Freshly squeezed lemon juice enhances flavor and helps acidity levels, which is essential for good preservation. If you don’t have fresh lemons handy, bottled lemon juice can do the trick, but fresh is always best!
-
Pectin (1 packet or 1.75 oz)
- Pectin is what thickens the jam. If you prefer making a low-sugar jam, you can opt for low-sugar pectin or even experiment with chia seeds as a natural thickener!
-
Water (1/4 cup)
- A little liquid helps to simmer down the berries and sugar into a syrupy goodness. If you prefer, you could use orange juice or another fruit juice to add more flavor.
These ingredients are simple and can be easily swapped based on your preferences or what’s available. The heart of this recipe lies in its flexibility and your creative flair!
Step-by-Step Instructions
Let’s dive into the exciting part—making huckleberry jam! Follow these easy steps to capture the summer essence in a jar:
-
Prepare Your Ingredients:
- Start by thoroughly rinsing your huckleberries under cool running water. Drain them well and remove any stems or leaves. It’s important to have clean berries for the best flavors!
-
Macerate the Berries:
- In a large mixing bowl, combine the huckleberries with 1 cup of sugar. Gently toss them together and let them sit for about 15-30 minutes. This process draws out the juices, which is essential for a delicious jam.
-
Cook the Mixture:
- In a large saucepan over medium heat, pour the macerated huckleberries (and any juices released) along with the lemon juice, water, and the remaining sugar. Stir to combine.
- As the mixture heats, bring it to a boil, stirring often. This is where the magic starts to happen! You’ll notice the berries breaking down and releasing their vibrant color—so beautiful.
-
Add Pectin:
- Once your mixture is bubbling and the sugar has dissolved, sprinkle in the pectin. Stir it constantly for about 2-3 minutes until it’s completely dissolved. This is where we create our gel!
-
Boil:
- Let the mixture reach a rolling boil—this is when the bubbles keep rising even when stirred. Keep it boiling for about 10 minutes. You can use a candy thermometer if you’d like to check for the right temperature (220°F is ideal for canning).
-
Check the Consistency:
- To ensure your jam has the right consistency, drop a spoonful of the hot mixture onto a cold plate and put it in the freezer for a minute. Run your finger through it; if it holds its shape without running too much, you’re good to go!
-
Jar It Up:
- Carefully ladle your hot jam into sterilized jars, leaving about 1/4 inch of headspace. Wipe the rims of the jars with a clean, damp cloth to remove any residue. Secure the lids on tightly.
-
Process for Preservation (optional):
- If you’re planning to store your jam long-term without refrigeration, you can process the jars in a boiling water bath for about 10 minutes. This step ensures your jam stays fresh for months!
-
Chill and Store:
- Allow the jars to cool at room temperature. Once cooled, store them in a cool, dark place. Trust me; the longer you wait to taste your creation, the better the flavors will meld together!
Serving Suggestions
Huckleberry jam is not just for toast! It can add a delightful twist to your meals. Serve it alongside a charcuterie board, drizzle it over a warm cheese like Brie, or pair it with scones and clotted cream for a proper afternoon tea. You can even use it as a filling for cakes, cookies, or pastries, making it a versatile treat for any occasion.
Recipe Variations
Looking to shake things up? Here are a few tasty variations you can try:
-
Huckleberry-Lavender Jam: Add a teaspoon of dried culinary lavender during the cooking process for an aromatic twist.
-
Spiced Huckleberry Jam: Stir in a pinch of cinnamon or nutmeg for a warm, comforting flavor.
-
Huckleberry Citrus Jam: Combine huckleberries with orange or grapefruit zest for a zesty kick.
-
Vegan-Friendly: Swap the granulated sugar for coconut sugar or agave syrup, and use agar-agar instead of pectin for a plant-based version.
-
Huckleberry BBQ Sauce: Blend the final jam into a homemade BBQ sauce by adding some vinegar and spices for a sweet and tangy grilling sauce.
Chef’s Notes
This huckleberry jam recipe has evolved over the years. Initially, I was terrified of making jam! But with each batch, I learned something new and discovered that the process is forgiving and fun. I remember the first time I made a big batch and had friends over—the kitchen was a lively hub of chatter and laughter as we tasted the bubbling mixture. Now, it’s become a beloved tradition, and I love sharing these little jars of joy with family and friends!
FAQs and Troubleshooting
1. Why did my jam not set properly?
- If your jam is runny, it could be that it didn’t reach the right temperature during boiling or that the fruit didn’t have enough natural pectin. Ensure you follow the instructions for boiling and testing for the right consistency.
2. Can I use frozen huckleberries?
- Absolutely! Just ensure they’re completely thawed and drained before using them in the recipe. You might need a little extra pectin since frozen berries tend to release more moisture.
3. How long does homemade huckleberry jam last?
- When properly sealed and canned, your jam can last up to a year in a cool, dark space. Once opened, store it in the fridge and use it within a month.
4. What do I do if my jars didn’t seal?
- Don’t fret! If your jars didn’t seal properly, you can refrigerate the jam and use it quickly or reprocess the jars. Just make sure to use new lids for a second run.
Now that you have all the tips and tricks, you’re ready to whip up a batch of huckleberry jam that’ll impress your friends and family! Happy cooking and remember, the best meals are made with love and shared with those you cherish. Let’s bring a taste of summer to your kitchen today!
Print
Huckleberry Jam Made with Love
- Total Time: 45 minutes
- Yield: 4 servings 1x
- Diet: Vegan
Description
Capture the essence of summer with this delightful huckleberry jam that’s perfect for toasts, pastries, and more.
Ingredients
- 4 cups Fresh Huckleberries
- 2 cups Granulated Sugar
- 1/4 cup Lemon Juice
- 1 packet Pectin (or 1.75 oz)
- 1/4 cup Water
Instructions
- Prepare Your Ingredients: Rinse huckleberries under cool running water, drain, and remove stems.
- Macerate the Berries: Combine huckleberries with 1 cup of sugar in a bowl and let sit for 15-30 minutes.
- Cook the Mixture: In a saucepan, combine macerated huckleberries with lemon juice, water, and remaining sugar; bring to a boil.
- Add Pectin: Sprinkle in pectin and stir constantly until dissolved, about 2-3 minutes.
- Boil: Achieve a rolling boil and keep boiling for about 10 minutes.
- Check the Consistency: Drop a spoonful on a cold plate; if it holds shape, it’s ready.
- Jar It Up: Ladle hot jam into sterilized jars, leaving 1/4 inch headspace, and secure lids tightly.
- Process for Preservation (optional): Process jars in boiling water bath for about 10 minutes.
- Chill and Store: Cool jars at room temperature and store in a cool, dark place.
Notes
For a lower-sugar option, consider a sugar substitute designed for canning. Ensure proper sealing of jars for long-term storage.
- Prep Time: 15 minutes
- Cook Time: 30 minutes
- Category: Preserves
- Method: Canning
- Cuisine: American
Nutrition
- Serving Size: 1 tablespoon
- Calories: 50
- Sugar: 10g
- Sodium: 0mg
- Fat: 0g
- Saturated Fat: 0g
- Unsaturated Fat: 0g
- Trans Fat: 0g
- Carbohydrates: 13g
- Fiber: 0g
- Protein: 0g
- Cholesterol: 0mg
Keywords: huckleberry jam, fruit preserves, summer recipes
Make-Ahead Huckleberry Cinnamon Rolls for Busy Mornings
Huckleberry Cinnamon Rolls: A Cozy Kitchen Adventure
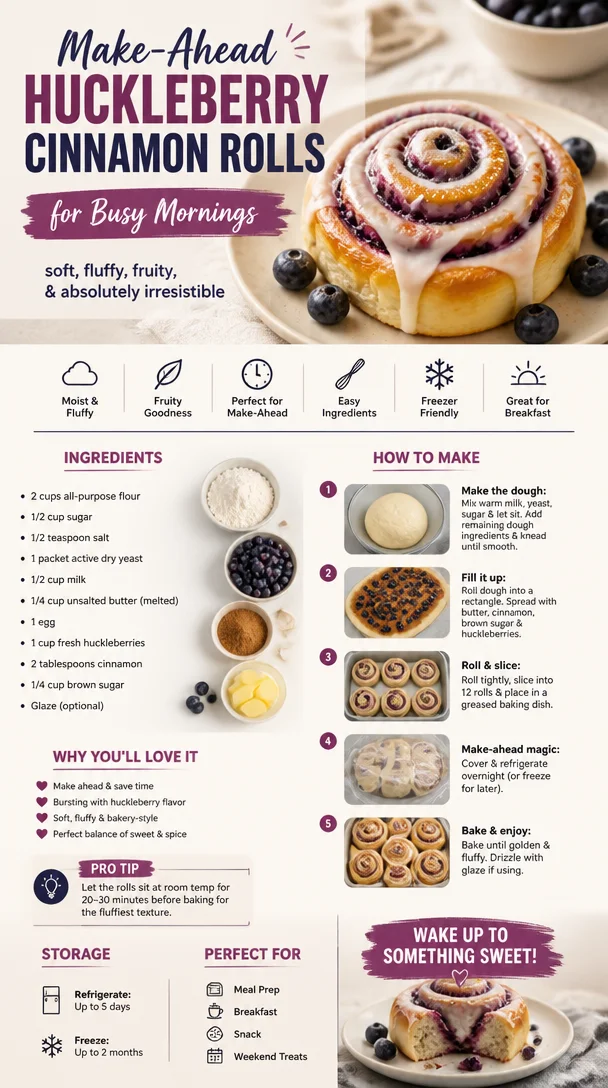
Welcome to my kitchen! Today, I’m beyond excited to share one of my all-time favorite recipes: huckleberry cinnamon rolls. If you’ve never had the pleasure of sinking your teeth into a warm, gooey cinnamon roll loaded with juicy huckleberries, you’re in for a delightful treat. The combination of sweet, fragrant cinnamon with the tartness of huckleberries creates a symphony of flavors that will have you coming back for seconds (and thirds!).
Now, let’s take a step back for a moment. Picture this: It’s a brisk autumn morning, and the air is crisp. You’ve just come in from a lovely hike in the mountains, your pockets filled with little treasures of huckleberries picked fresh from the wild. You head to the kitchen, and the thought of transforming these beautiful berries into a cozy, warm breakfast fills you with anticipation. The smell of cinnamon wafts through the air, drawing in everyone around you like bees to honey.
I’ll never forget the first time I made huckleberry cinnamon rolls. I was hosting a gathering for friends, and I wanted to whip up something special. With just a few basic ingredients and some creativity, I crafted rolls that not only looked stunning but also tasted like a hug in pastry form. The best part? Watching my friends marvel at the sight of those bubbling rolls and then devour them with smiles on their faces. It was a memory etched in my heart, and I hope to inspire you to create your own delicious moments!
So grab your apron, preheat the oven, and let’s roll up our sleeves to make these scrumptious huckleberry cinnamon rolls together!
Ingredients
Here’s what you’ll need to create these delightful treats:
-
2 cups all-purpose flour: The backbone of our dough. If you’re looking for a gluten-free alternative, consider using a 1:1 gluten-free flour blend.
-
1/2 cup granulated sugar: This adds sweetness to the dough and filling. For a healthier option, substitute with coconut sugar or a sugar alternative like stevia.
-
1 teaspoon instant yeast: This magical ingredient helps our rolls rise beautifully. If using active dry yeast, allow it to bloom in warm water before mixing!
-
1/2 teaspoon salt: A pinch of salt enhances all the flavors in your rolls. Don’t skip it!
-
1/2 cup whole milk: This brings moisture and richness to our dough. Almond milk or oat milk are excellent dairy-free substitutes.
-
1 large egg: Adding an egg enriches the dough. For a vegan twist, use a flax egg (1 tablespoon ground flaxseed mixed with 2.5 tablespoons of water).
-
1/4 cup unsalted butter (melted): This creates a tender roll. Coconut oil or vegan butter can be used if you want a non-dairy option.
-
1 cup huckleberries (fresh or frozen): These little gems are the stars of our show! If you can’t find huckleberries, blueberries can step in as a fantastic substitute.
-
1 tablespoon ground cinnamon: This gives that warm, inviting flavor we all love in cinnamon rolls. Feel free to mix it up with some nutmeg for extra spice!
-
1/4 cup brown sugar: For the filling, this provides that rich sweetness and caramel-like flavor. You can also make a cinnamon-sugar blend using white sugar if you’re out of brown.
-
1/2 cup powdered sugar (optional for icing): This adds a sweet finishing touch if you’re feeling fancy!
Step-by-Step Instructions
Now that we’ve gathered our ingredients, let’s dive into the fun part — making those huckleberry cinnamon rolls!
Step 1: Create the Dough
In a large mixing bowl, combine the flour, granulated sugar, instant yeast, and salt. Mix these dry ingredients together, ensuring everything is evenly distributed. It’s so satisfying to see the flour amalgamating with the sugar. The aroma already starts to hint at the cozy dish to come!
In another bowl, whisk together the whole milk, melted butter, and egg until well combined. Gradually pour this mixture into the dry ingredients, stirring until a dough forms. This is early-stage magic!
Step 2: Knead the Dough
Transfer the dough onto a lightly floured surface and knead it for about 5 to 7 minutes. It should become smooth and elastic. If it feels too sticky, don’t be afraid to sprinkle a little more flour as you knead! Think of this as giving your dough a nice, little workout. It deserves it!
Step 3: Let It Rise
Form the dough into a ball and place it in a greased bowl. Cover it with a clean kitchen towel and let it rise in a warm spot for about an hour, or until it’s doubled in size. This is a great time to catch up on your favorite podcast or prep your coffee!
Step 4: Prepare the Filling
While the dough is rising, let’s make our filling! In a small bowl, mix together the brown sugar and ground cinnamon. When the dough has finished rising, roll it out on a floured surface into a rectangle (about 1/4 inch thick). This is where the fun begins!
Step 5: Spread and Sprinkle
Spread the cinnamon-sugar mixture over the rolled-out dough evenly. Then, sprinkle the huckleberries gently across the surface. You want them to be nestled in the filling but not crowded. It’s all about balance, my friends.
Step 6: Roll It Up
Starting from the long edge, carefully roll the dough into a tight log. You may need to apply a little pressure to make sure those huckleberries don’t escape! Once rolled, pinch the seams to seal.
Step 7: Cut the Rolls
With a sharp knife or a bench scraper, slice the rolled dough into 12 equal pieces. Place these charming little spirals in a greased baking dish or on a parchment-lined tray. If you’ve got some extra huckleberries, feel free to toss them on top for decoration.
Step 8: Second Rise
Cover your rolls with that trusty kitchen towel again and let them rise for another half-hour. This is your time to shine — preheat your oven to 350°F (175°C) while you wait!
Step 9: Bake to Perfection
Once the rolls have risen, pop them in the oven and let them bake for 25-30 minutes or until they’re golden brown and your kitchen is filled with aromas that will make everyone’s mouth water. Don’t rush this part; the smells alone are worth waiting for!
Step 10: Icing and Serve
If you’re feeling extra special, you can whip up a simple icing while they cool for about 10 minutes. Just mix powdered sugar with a tablespoon of milk until you reach your desired consistency. Drizzle it over your cinnamon rolls and watch as they transform into a glorious masterpiece.
Serving Suggestions
To serve, I love to place a piping hot cinnamon roll on a cozy plate, drizzle it with icing, and perhaps add a few fresh huckleberries or a sprinkle of cinnamon on top for that final touch. You can even serve them with a dollop of whipped cream or a scoop of vanilla ice cream on the side — it’s the perfect pairing, especially for brunch gatherings!
Recipe Variations
Feeling creative? Here are some variations to switch things up:
- Cream Cheese Filling: Swap the cinnamon filling for a sweet cream cheese filling and place the huckleberries on top for a tangy twist.
- Lemon Zest: Add a tablespoon of lemon zest to brighten up your filling for a refreshing citrus note.
- Nutty Crunch: Mix in some chopped pecans or walnuts with the huckleberries for added texture and flavor.
- Choco-Huckleberry Rolls: Incorporate mini chocolate chips along with the huckleberries for an indulgent treat!
- Gluten-Free: Use a gluten-free flour blend to cater to dietary needs without sacrificing taste.
Chef’s Notes
I must say, the journey of perfecting my huckleberry cinnamon rolls has been nothing short of memorable. I still remember the first batch that turned out a little too flat because I forgot to give the dough a good second rise! But you know what? Those “flat rolls” still tasted amazing, and my friends devoured them anyway. Cooking is all about experimenting and embracing those little kitchen mishaps.
Over time, I’ve tweaked this recipe to adapt to the seasons, using whatever fresh berries are available or even throwing in some seasonal spices. Every time I make them, it feels like a celebration of flavors and memories, and I hope it brings you the same joy!
FAQs and Troubleshooting
-
Why did my cinnamon rolls turn out dense?
Dense rolls can happen if the dough wasn’t kneaded enough or the yeast wasn’t activated properly. Make sure to knead it until it’s smooth and stretchy. -
Can I make these rolls ahead of time?
Absolutely! You can prepare the rolls up to the second rise stage and then refrigerate them overnight. Just let them come to room temperature for about an hour before baking! -
What if I don’t have huckleberries?
No worries! You can easily swap them for blueberries, raspberries, or even cranberries for a tart twist. -
How do I store leftover rolls?
These cinnamon rolls can be stored in an airtight container for up to three days. If they last that long, you can reheat them in the microwave or oven to bring them back to life!
Nutritional Info
These huckleberry cinnamon rolls are a delightful treat and should be enjoyed in moderation. Each roll contains roughly 200-250 calories, depending on your serving size and if you decide to add icing.
So there you have it! I hope you enjoy making these huckleberry cinnamon rolls as much as I do. There’s truly something magical about the way food brings us together, and I can’t wait for you to experience the joy of sharing these warm, loving treats with your family and friends. Happy baking!
Print
Huckleberry Cinnamon Rolls
- Total Time: 1 hour 30 minutes
- Yield: 12 servings 1x
- Diet: Vegetarian
Description
Delicious huckleberry cinnamon rolls filled with sweet cinnamon sugar and fresh berries, perfect for chilly mornings.
Ingredients
- 2 cups all-purpose flour
- 1/2 cup granulated sugar
- 1 teaspoon instant yeast
- 1/2 teaspoon salt
- 1/2 cup whole milk
- 1 large egg
- 1/4 cup unsalted butter (melted)
- 1 cup huckleberries (fresh or frozen)
- 1 tablespoon ground cinnamon
- 1/4 cup brown sugar
- 1/2 cup powdered sugar (optional for icing)
Instructions
- Combine the flour, granulated sugar, instant yeast, and salt in a bowl.
- Whisk together the milk, melted butter, and egg in another bowl.
- Pour the wet mixture into the dry ingredients, stirring until a dough forms.
- Knead the dough on a lightly floured surface for 5 to 7 minutes until smooth and elastic.
- Form the dough into a ball, place it in a greased bowl, cover with a towel, and let it rise for about 1 hour.
- Mix together the brown sugar and ground cinnamon for the filling.
- Roll the dough into a rectangle and spread the cinnamon-sugar mixture over it.
- Sprinkle the huckleberries evenly across the surface.
- Roll the dough tightly from the long edge to form a log.
- Cut the log into 12 equal pieces and place them in a greased baking dish.
- Let the rolls rise for another half-hour while preheating the oven to 350°F (175°C).
- Bake for 25-30 minutes until golden brown and aromatic.
- Mix powdered sugar with a tablespoon of milk for icing, then drizzle it over the rolls once cooled for 10 minutes.
Notes
These rolls can be prepared ahead of time and refrigerated overnight before baking.
- Prep Time: 30 minutes
- Cook Time: 30 minutes
- Category: Breakfast
- Method: Baking
- Cuisine: American
Nutrition
- Serving Size: 1 roll
- Calories: 250
- Sugar: 8g
- Sodium: 100mg
- Fat: 10g
- Saturated Fat: 6g
- Unsaturated Fat: 4g
- Trans Fat: 0g
- Carbohydrates: 37g
- Fiber: 1g
- Protein: 3g
- Cholesterol: 25mg
Keywords: cinnamon rolls, huckleberry, breakfast, baking, dessert
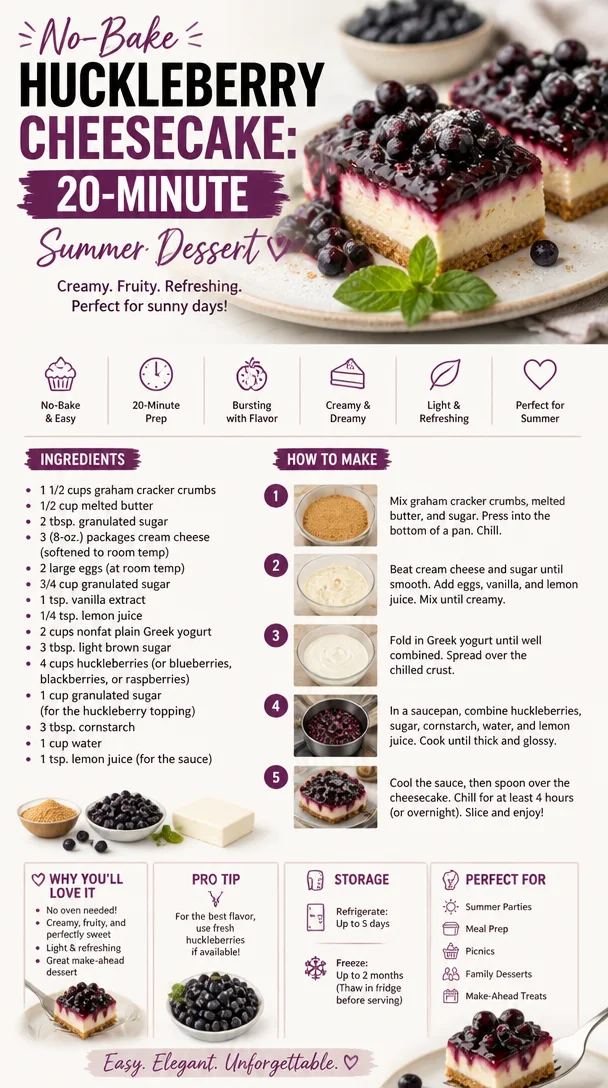
No-Bake Huckleberry Cheesecake: 20-Minute Summer Dessert
Huckleberry Cheesecake: A Slice of Heaven
Welcome to my kitchen! Today, I’m thrilled to share one of my all-time favorite desserts that tastes like a warm hug on a plate — Huckleberry Cheesecake! If you’ve never tried huckleberries, you’re in for a treat. These little gems burst with flavor and are a wonderful complement to the smooth, creamy texture of cheesecake. Imagine the rich, luscious cheesecake perfectly paired with the tartness of huckleberries, creating a delicious symphony of flavors that dances on your palate.
Cheesecake, in general, has a special place in my heart. It’s not just a dessert; it’s a memory-bringer. I often think of family gatherings where my mom would pull a luscious cheesecake from the fridge after a hearty meal, the dessert covered in a bright, fruity sauce. The debates over the best topping always stirred laughter and fun, layering those moments with sweetness that goes far beyond sugar.
Now, let’s be honest — cheesecake can feel intimidating, but here at my kitchen, we believe in keeping things relaxed and enjoyable. With just a few ingredients and steps, you can whip up this stunning dessert that will have your friends and family asking for seconds (and thirds!). Trust me, this Huckleberry Cheesecake will become a favorite in your home, just as it is in mine.
So, grab that apron, and let’s dive into the world of huckleberries and luscious cream cheese!
A Memory to Cherish
Growing up, I spent many summer days exploring the woods near our family cabin. One of my favorite pastimes was foraging huckleberries with my grandmother. She had a knack for spotting the juiciest ones hidden beneath the leaves. We’d fill our little buckets with these purple-blue marvels, laughter echoing through the trees as we shared stories and made memories. Those days were golden — the sun shining, birds chirping, and our baskets overflowing.
Once we returned home, my grandmother would turn our foraged bounty into a variety of treats, from jams to pies. But it was her huckleberry cheesecake that always stole the show. I remember sitting at her kitchen table, waiting impatiently as the cheesecake cooled, the delicious scent enveloping us. When it finally was time to dig in, every bite felt like a piece of summer’s magic. It’s that love for huckleberries and the warmth of those memories that inspired me to create this very recipe, and I can’t wait for you to experience the same joy!
Ingredients
Here’s what you’ll need to create this delectable Huckleberry Cheesecake:
-
For the Crust:
- 1 ½ cups graham cracker crumbs
Graham cracker crumbs form a buttery, crunchy base. If you can’t find them, crushed Oreo cookies or shortbread biscuits work beautifully as a substitute! - ½ cup unsalted butter, melted
Butter adds richness to the crust. Ensure it’s melted to mix well with the crumbs! - ¼ cup granulated sugar
Sugar balances the flavors and adds sweetness to your crust. You can lower the quantity for a less sweet option!
- 1 ½ cups graham cracker crumbs
-
For the Cheesecake Filling:
- 3 (8 oz) packages cream cheese, at room temperature
Cream cheese is key for that luscious, smooth texture. Make sure it’s softened, or you’ll end up with lumps! - 1 cup granulated sugar
This adds the necessary sweetness, but feel free to use sugar substitutes if you’re making it healthier! - 1 teaspoon vanilla extract
Vanilla brings warmth. You can use the seeds from a vanilla bean for a fancy touch! - 3 large eggs
Eggs contribute to the cheesecake’s creaminess. One easy swap is using flax eggs for a vegan version! - 1 cup fresh or frozen huckleberries
Huckleberries are the star! You can substitute blueberries if huckleberries are elusive, but keep an eye on the different sweetness levels!
- 3 (8 oz) packages cream cheese, at room temperature
-
For the Topping:
- 1 cup sour cream
Topping with sour cream adds a lovely tang. Greek yogurt is a wonderful alternative! - ¼ cup powdered sugar
For some sweetness, you can adjust this according to taste. Sift to avoid any lumps in the topping!
- 1 cup sour cream
-
For Garnish:
- Extra huckleberries and mint leaves
Always a great idea to dress up your cheesecake, adding freshness and a pop of color!
- Extra huckleberries and mint leaves
Step-by-Step Instructions
1. Prepping Your Crust
Start by preheating your oven to 350°F (175°C). This will ensure your cheesecake bakes evenly. In a medium bowl, combine the graham cracker crumbs, melted butter, and granulated sugar until everything looks like wet sand. Press the mixture into the bottom of a 9-inch springform pan, creating an even layer. You want it tightly packed, so use the back of a measuring cup or your hands to smooth it out!
Chef Tip: You can also bake the crust for about 10 minutes until slightly golden for a firmer base.
2. Making the Cheesecake Filling
In a large mixing bowl, beat the cream cheese with an electric mixer on medium speed until it’s creamy and smooth (about 2 minutes). Slowly add that cup of granulated sugar and beat until combined—trust me, that’s where the magic begins to happen. Add in the vanilla extract and mix well. Then, add the eggs one at a time, mixing gently after each addition. It’s crucial not to overmix; we want those eggs integrated without introducing too much air, which can result in cracks!
Next, gently fold in the huckleberries with a spatula. This is where you get to see those beautiful, juicy nuggets throughout your cheesecake!
Chef Tip: If you’re using frozen huckleberries, make sure to thaw them and pat them dry to avoid excess moisture.
3. Pour and Bake
Pour the filling into your prepared crust and tap the springform pan lightly on the counter to remove any air bubbles. Bake in the preheated oven for about 55-65 minutes, or until the sides are set while the middle remains slightly jiggly. It will set up as it cools. Your kitchen will smell amazing at this point — get ready for compliments!
Chef Hack: For a water bath, place the springform pan into a larger roasting pan filled with about an inch of hot water. This prevents cracks by evenly cooking the cheesecake.
4. Cooling Time
Once it’s baked, turn off the oven and crack the door open. Let your cheesecake cool slowly in the oven for about an hour. This will help reduce any sudden temperature changes that could cause cracks. After that, refrigerate it for at least 4 hours (or overnight is perfect!).
5. Topping Time
Once it’s firm and chilled, mix the sour cream with the powdered sugar until smooth. Spread that mixture evenly on top of your cheesecake. It adds a beautiful creamy layer that complements the huckleberries perfectly.
6. Garnish and Serve
Decorate your cheesecake with extra huckleberries and fresh mint leaves for that picture-perfect finish. If you’re feeling fancy, you can drizzle a bit of huckleberry syrup (made by simmering the berries with sugar) over the top!
Serving Suggestions
To serve, carefully run a knife around the edge of the springform pan before removing the sides. Slice your cheesecake with a sharp knife dipped in warm water for neat edges. This dessert pairs spectacularly with a cup of coffee or tea, perfect for after dinner or as an afternoon treat! If you really want to impress, serve it alongside homemade whipped cream or a scoop of vanilla ice cream.
Recipe Variations
- Berry Bliss: Swap out huckleberries for strawberries, blackberries, or even mixed berries for a delightful twist.
- Chocolate Lovers: Add ½ cup of cocoa powder to the cream cheese mixture for a chocolatey take on the classic.
- Citrus Burst: Infuse a splash of lemon or orange juice into the filling for a fresh, zesty flavor that beautifully complements the berries.
- Nutty Crunch: Fold in crushed nuts like pecans or walnuts into the crust for an added crunch.
- Vegan Delight: Use vegan cream cheese and aquafaba (chickpea brine) as a replacement for eggs for a plant-based version.
Chef’s Notes
Oh, how many times I’ve made this cheesecake! Each time, it brings back memories of those summer days in the woods, a reminder of the simple joys. The best part? This recipe has evolved over time; sometimes, I’ll sneak in some citrus zest or caramel drizzle, playing with flavors until it feels just right. There’s something magical about creating a dish that warms the heart and draws people together. Trust me, once you’ve made this cheesecake, you’ll find yourself wanting to share the recipe with everyone you know!
FAQs and Troubleshooting
-
Why did my cheesecake crack?
Cracks usually happen due to rapid temperature changes. A water bath can help, as well as allowing it to cool in the oven. -
What if my cheesecake is undercooked?
If it’s jiggly in the center after the suggested baking time, it likely needs a bit longer. Pop it back in the oven for 5-10 minute intervals until set. -
Can I make this cheesecake ahead of time?
Absolutely! This cheesecake can be made up to 2 days in advance. Store in the fridge until you’re ready to serve. -
What are good storage methods?
Cover it tightly with plastic wrap once cooled to avoid a dry texture. It holds well in the refrigerator for about a week or freezes beautifully for up to a month.
Nutritional Info
(Per serving, about 1 slice)
- Calories: 350
- Total Fat: 25g
- Saturated Fat: 15g
- Cholesterol: 85mg
- Sodium: 200mg
- Total Carbohydrates: 30g
- Dietary Fiber: 1g
- Sugars: 20g
- Protein: 6g
So there you have it! A beautiful Huckleberry Cheesecake that’s not only easy to make but also packed with memories and love. Embrace those cozy moments, gather your loved ones, and enjoy every bite of this scrumptious treat! Happy baking!
Print
Huckleberry Cheesecake
- Total Time: 85 minutes
- Yield: 8 servings 1x
- Diet: Vegetarian
Description
A delightful Huckleberry Cheesecake featuring a buttery crust and a creamy filling, topped with a sour cream mixture for a perfect dessert experience.
Ingredients
- 1 ½ cups graham cracker crumbs
- ½ cup unsalted butter, melted
- ¼ cup granulated sugar
- 3 (8 oz) packages cream cheese, at room temperature
- 1 cup granulated sugar
- 1 teaspoon vanilla extract
- 3 large eggs
- 1 cup fresh or frozen huckleberries
- 1 cup sour cream
- ¼ cup powdered sugar
- Extra huckleberries and mint leaves for garnish
Instructions
- Preheat your oven to 350°F (175°C). In a medium bowl, combine graham cracker crumbs, melted butter, and sugar. Press into a 9-inch springform pan.
- Beat cream cheese until smooth, then add sugar, vanilla, and eggs. Mix until integrated, then gently fold in huckleberries.
- Pour the filling into the crust and bake for about 55-65 minutes, until the edges are set and the center is slightly jiggly.
- Allow the cheesecake to cool in the oven with the door cracked for an hour. Refrigerate for at least 4 hours or overnight.
- Mix sour cream and powdered sugar; spread it on top of the chilled cheesecake.
- Garnish with extra huckleberries and mint leaves before serving.
Notes
This cheesecake can be made ahead of time and stored in the fridge for about a week. For variations, consider using other berries or adding chocolate for a twist!
- Prep Time: 20 minutes
- Cook Time: 65 minutes
- Category: Dessert
- Method: Baking
- Cuisine: American
Nutrition
- Serving Size: 1 slice
- Calories: 350
- Sugar: 20g
- Sodium: 200mg
- Fat: 25g
- Saturated Fat: 15g
- Unsaturated Fat: 5g
- Trans Fat: 0g
- Carbohydrates: 30g
- Fiber: 1g
- Protein: 6g
- Cholesterol: 85mg
Keywords: huckleberry, cheesecake, dessert, American, baking
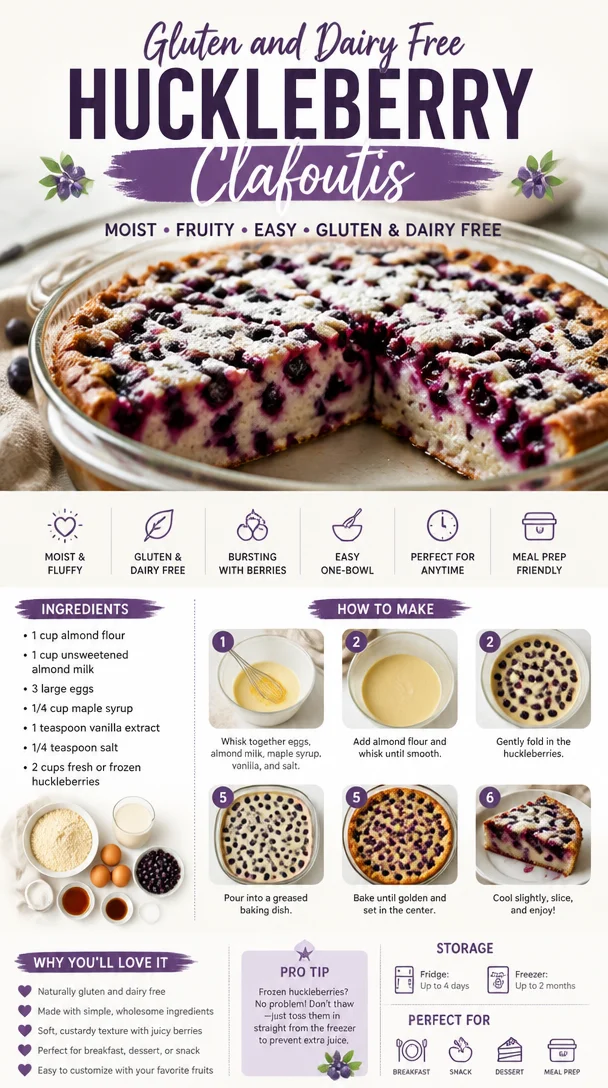
Gluten and Dairy Free Huckleberry Clafoutis
Delight in a Gluten and Dairy Free Huckleberry Clafoutis: A Cozy Kitchen Favorite
Welcome to my kitchen, my fellow food lovers! Today, we’re diving into a heartwarming dessert that’s not just delicious, it’s packed with memories—huckleberry clafoutis! This delightful French dish has been slightly adapted to be gluten and dairy-free without sacrificing flavor or texture. As we explore this recipe together, I guarantee it will transport you to cozy summer evenings, the sweet scent of wild berries wafting through the air, and the warmth of loved ones gathered around a table.
Let’s be honest: life can get pretty hectic, and sometimes all you want is to whip up something that feels like a hug in dessert form. If you’ve never tried clafoutis before, you’re in for a real treat! Originally made with cherries, clafoutis is a baked custard that envelops fruit in a luscious batter. Huckleberries, with their sweet-tart flavor, are the perfect duo for this dish. Whether you’ve picked them fresh from the wild or purchased them at your local farmer’s market, that burst of juicy goodness is sure to make you swoon.
I remember my own first encounter with clafoutis—I was a young home cook, experimenting with whatever fruits I could find in my grandmother’s backyard. One sunny afternoon, we plucked ripe huckleberries from the bushes, creating our own recipe on a whim. The thrill of seeing the batter rise in the oven was exhilarating, and the aroma that filled the kitchen was nothing short of magical. Sharing slices of that clafoutis with my family brought so much joy, solidifying it as a cherished tradition. Now, I want to share this very recipe with you, with a few of my favorite twists to make it gluten and dairy-free!
Ready to gather some ingredients and infuse your kitchen with warmth and love? Let’s get baking!
Personal Story
Growing up, my summers were often spent in the kitchen with my grandma. She had a knack for transforming simple ingredients into delightful desserts that would make our family gatherings extra special. One summer, we set out on a huckleberry-picking adventure, and I’ll always remember the glee of finding those deep purple gems nestled among the green foliage. As we returned home, our baskets brimming with berries, my grandma introduced me to clafoutis for the first time. We adapted her classic recipe to include huckleberries, and from that moment on, it became our go-to dessert. The tangy sweetness of the berries paired with the delicate custard was unlike anything I’d ever tasted. Each bite brought a rush of laughter and a sprinkle of nostalgia.
As I started to embrace a gluten and dairy-free lifestyle, that beloved clafoutis recipe became a kitchen challenge worth tackling. I’m thrilled to share the updated version with you, ensuring that everyone can partake in making memories around the table, relishing every bite of this creamy, fruit-filled dish!
Ingredients
Here’s what you’ll need to create this gluten and dairy-free huckleberry clafoutis:
- Huckleberries (2 cups): These little gems are the stars of the show! If you can’t find fresh huckleberries, blueberries or blackberries make excellent alternatives.
- Almond Milk (1 ½ cups): This nutty beverage substitutes well for cow’s milk. For a creamier clafoutis, you can use coconut milk instead.
- Eggs (3 large): Eggs help bind the clafoutis and give it that luscious custard texture. For a vegan option, substitute with flax eggs (1 tablespoon ground flaxseed mixed with 2.5 tablespoons water).
- Maple Syrup (½ cup): This natural sweetener adds depth and pairs beautifully with the huckleberries. Honey or agave syrup can be used if you prefer.
- Gluten-Free Flour Blend (1 cup): Look for a blend that contains xanthan gum; this ingredient helps achieve the right texture in baked goods. Alternatively, oat flour works nicely, too.
- Vanilla Extract (1 teaspoon): A splash of vanilla elevates the flavor profile. Choose pure vanilla extract for a more robust taste.
- Salt (¼ teaspoon): Just a pinch to enhance the sweetness of the batter.
As a little tip, when selecting your huckleberries, go for plump and firm ones—this ensures a vibrant clafoutis. Get creative with sweetness levels—should you want it to be less sweet, you can easily reduce the maple syrup.
Step-by-Step Instructions
Alright, let’s get our hands into the batter. Follow these steps to create your gluten and dairy-free huckleberry clafoutis:
-
Preheat the Oven: Start by preheating your oven to 350°F (175°C). This ensures a nice even bake. Don’t forget to grease your baking dish—a pie dish works perfectly—preferably with coconut oil or a dairy-free cooking spray to prevent sticking.
-
Prepare the Huckleberries: Rinse your huckleberries gently under cold water and pat them dry with a clean kitchen towel. Then, spread them evenly across the bottom of your greased baking dish. This inner layer of fruit will caramelize beautifully during baking—trust me!
-
Make the Batter: In a mixing bowl, whisk together the almond milk, eggs, and maple syrup until smooth. It’s best to start with the wet ingredients; the flavors meld beautifully. Consider using an electric mixer for a fluffier batter!
-
Add Dry Ingredients: Gradually sift in the gluten-free flour blend and salt. Stir until just combined. This isn’t the time to overmix—keep that batter lumpy for a perfectly textured clafoutis!
-
Incorporate the Vanilla: Once mixed, add the vanilla extract and give it one more gentle stir to combine.
-
Pour the Batter Over the Berries: Carefully pour the batter over the huckleberries in your baking dish. Give it a little jiggle to ensure the batter settles around the berries—this creates that beautiful custard effect!
-
Bake Away: Place your dish in the preheated oven and bake for about 35-40 minutes or until the edges are golden and the middle is set. You can insert a knife into the center to check for doneness—if it comes out clean, you’re good to go!
-
Cool and Serve: Once baked, remove from the oven and let the clafoutis cool for about 10-15 minutes. This will help it firm up a bit.
Just a pro tip—this dish is best enjoyed warm or at room temperature. If you can wait, let the clafoutis sit for a while; the flavors deepen, and the texture improves!
Serving Suggestions
Serving up the clafoutis is all about keeping it simple and cozy. Dust it lightly with powdered sugar for an elegant touch and serve alongside a dollop of dairy-free whipped cream or a scoop of your favorite dairy-free ice cream. Fresh mint leaves can add a bright pop of color and freshness. Check it out—your friends and family will be asking for seconds!
Recipe Variations
Feeling adventurous? Here are some fun twists for your clafoutis:
- Berry Medley: Swap out the huckleberries for a mix of berries like raspberries, strawberries, and blueberries for a colorful bark you can’t resist!
- Citrus Zest: Add some lemon or orange zest to the batter for a refreshing citrus kick—oh-so-good!
- Nutty Flavor: Incorporate ground nuts (like almonds or pecans) into the batter for additional flavor and texture.
- Chocolate Chip Delight: For those with a sweet tooth, sprinkle mini dairy-free chocolate chips on top before baking. Who says clafoutis can’t be decadent?
- Savory Twist: Add some sautéed spinach and sun-dried tomatoes for a savory clafoutis that works wonderfully for brunch or as a light lunch.
The possibilities are endless!
Chef’s Notes
Whenever I make this clafoutis, I can’t help but smile as I remember those sunny afternoons spent with my grandma. The laughter, the shared stories, and the delicious treats—it’s what grounded my love for cooking in the first place. As I adapted the clafoutis to be gluten and dairy-free, I not only kept the essence of the dish alive but also sparked new creativity in the kitchen. It’s proof that beloved recipes can evolve without losing their charm.
I recommend giving this recipe a few trial runs, as clafoutis can vary based on the type of flour you use and how thick or thin you want the batter. The best part? It’s hard to mess this recipe up! Trust your instincts, and feel free to experiment.
FAQs and Troubleshooting
Q: Can I use frozen huckleberries?
A: Absolutely! Just be sure to thaw them completely and pat them dry to reduce excess moisture.
Q: My clafoutis didn’t rise. What went wrong?
A: This could happen if the batter was overmixed or if the baking powder is old. Ensure you mix until just combined, and check the expiration date on your baking powder.
Q: Can I replace almond milk with another type of milk?
A: Yes! Coconut milk or oat milk are excellent alternatives to almond milk. Just keep in mind that it may alter the flavor slightly, so choose one that you love!
Q: How do I store leftovers?
A: Store any uneaten clafoutis in an airtight container in the fridge for up to 3 days. It can be reheated in a warm oven or enjoyed cold—perfect for breakfast!
Nutritional Info
While I didn’t delve too deeply into the nutritional stats, keep in mind that this clafoutis is not only gluten and dairy-free but also a great source of antioxidants from the huckleberries. Depending on your ingredients, you can enjoy this dessert without the heavy guilt, and it’s a wholesome way to treat yourself!
There you have it—your ultimate guide to baking a decadent, gluten and dairy-free huckleberry clafoutis that’s as rich in memories as it is in flavor. So gather your loved ones, roll up those sleeves, and get ready to whip up something wonderful. Happy baking, friends!
Print
Gluten and Dairy Free Huckleberry Clafoutis
- Total Time: 55 minutes
- Yield: 8 servings 1x
- Diet: Gluten-Free, Dairy-Free
Description
A heartwarming gluten and dairy-free dessert featuring huckleberries enveloped in a luscious custard batter.
Ingredients
- 2 cups Huckleberries
- 1 ½ cups Almond Milk
- 3 large Eggs
- ½ cup Maple Syrup
- 1 cup Gluten-Free Flour Blend
- 1 teaspoon Vanilla Extract
- ¼ teaspoon Salt
Instructions
- Preheat the oven to 350°F (175°C) and grease your baking dish.
- Prepare the huckleberries by rinsing them gently and patting them dry.
- Make the batter by whisking together almond milk, eggs, and maple syrup until smooth.
- Add the gluten-free flour blend and salt, stirring until just combined.
- Incorporate the vanilla extract into the mixture.
- Pour the batter over the huckleberries in the baking dish.
- Bake in the oven for about 35-40 minutes until golden and set.
- Cool the clafoutis for 10-15 minutes before serving.
Notes
Best enjoyed warm or at room temperature. Dust with powdered sugar and serve with dairy-free whipped cream.
- Prep Time: 15 minutes
- Cook Time: 40 minutes
- Category: Dessert
- Method: Baking
- Cuisine: French
Nutrition
- Serving Size: 1 serving
- Calories: 275
- Sugar: 10g
- Sodium: 160mg
- Fat: 8g
- Saturated Fat: 0g
- Unsaturated Fat: 8g
- Trans Fat: 0g
- Carbohydrates: 41g
- Fiber: 4g
- Protein: 6g
- Cholesterol: 60mg
Keywords: clafoutis, huckleberry, gluten-free, dairy-free, dessert




