
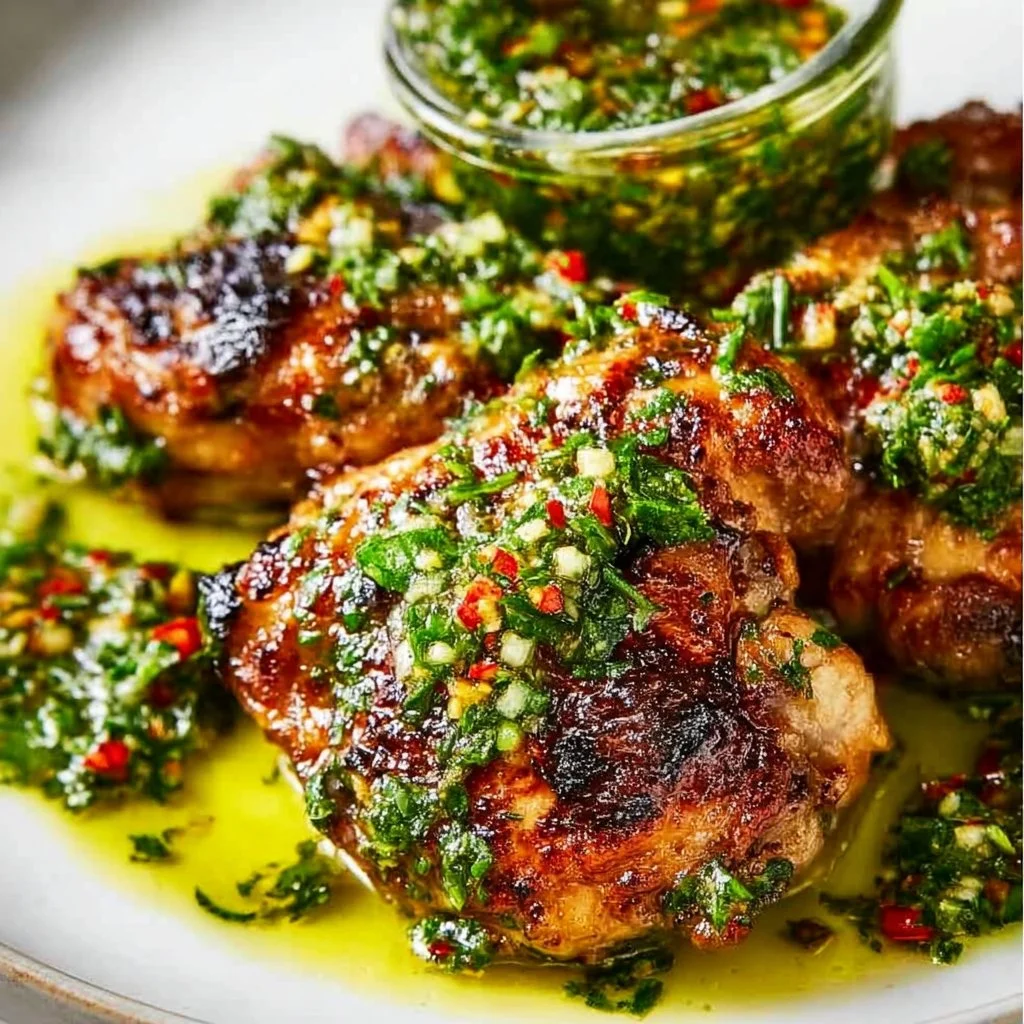
Chimichurri Chicken Thighs
Chimichurri Chicken Thighs: A Flavorful Journey
Hey there, fellow food lovers! Welcome back to my cozy corner of the culinary world where the oven is always warm, and the aroma of delicious flavors fills the air. Today, I’m super excited to share a recipe that’s not just a winner in my home but one that’s sure to spice up your meals — Chimichurri Chicken Thighs! You might be wondering what makes this dish stand out. Well, let me tell you; it’s a vibrant dance between juicy chicken, zesty herbs, and a splash of unforgettable Argentinian flair.
Chimichurri, a sauce born from the sun-soaked landscapes of Argentina, is the real star here! It’s packed with fresh parsley, garlic, and just the right amount of tangy goodness. When paired with succulent, tender chicken thighs, it creates a perfect balance that’s fragrant and downright irresistible. Whether you’re feeding a crew of hungry friends or enjoying a quiet night in, this dish is an absolute showstopper.
Beyond its bold flavors, what I love most about making Chimichurri Chicken Thighs is how quick and easy it is to whip up. Trust me, no fancy-schmancy skills are required here! A little chopping, a little marinating, and before you know it, you’re basking in the sweet glory of a delightful homemade meal that impresses without the stress.
So, grab your apron and let’s dive into the world of Chimichurri Chicken Thighs! This recipe is not just about cooking; it’s about creating joyful memories around the table. Ready? Let’s go!
Personal Story
Whenever I think of Chimichurri Chicken Thighs, my mind drifts back to one summer evening spent with my family in my grandmother’s backyard. The sun was setting, painting the sky with shades of pink and orange, and the air was filled with laughter, the smell of grilled meats, and chimichurri sauce that had been generously drizzled over everything. Grandma had a magic touch with her cooking, and her chimichurri was unmatched.
That evening, we were all gathered around a rustic wooden table, swapping stories while devouring dish after dish, each bite transporting us to the heart of Argentina. Everyone had their own opinion on the best way to enjoy chimichurri: some preferred it drizzle over grilled vegetables, others liked it thick on their steak, while I was loyal to my love for chicken thighs. With each mouthful, I felt the warmth of family and passion for cooking come alive. It was more than just a meal; it was a gathering of hearts and flavors, a feast that sparked joy and connection.
Fast forward to today, and I find myself recreating that magical evening. Every time I make Chimichurri Chicken Thighs, I can almost hear my grandmother’s laughter and feel that summer warmth all over again. So, let’s bring that nostalgia back to life, shall we?
Ingredients
Now that we’ve set the mood, let’s gather our ingredients! Below is a list of what you’ll need to whip up these scrumptious Chimichurri Chicken Thighs, along with some handy insights to make your cooking experience even smoother:
-
Bone-in, skin-on chicken thighs (4 pieces)
These are juicy and flavorful, making for a perfect canvas for our chimichurri marinade. If you prefer a healthier option, boneless, skinless thighs work well too! Just adjust the cooking time slightly. -
Fresh parsley (1 cup, chopped)
This is the heart and soul of the chimichurri! Use flat-leaf parsley for its vibrant flavor. If you’re feeling adventurous, mix in some cilantro for a fresh twist. -
Garlic cloves (4 cloves, minced)
Garlic adds that irresistible punch! Feel free to reduce this amount if you’re not a fan of strong garlic flavors, or even try roasted garlic for a sweeter, milder taste. -
Red wine vinegar (1/3 cup)
This tangy vinegar balances the richness of the chicken beautifully, adding a fragrant zing. If you don’t have red wine vinegar on hand, apple cider vinegar is a great substitute. -
Olive oil (1/3 cup)
A good quality olive oil takes the sauce to another level. You can also use avocado oil for a different flavor profile. Just make sure to keep that bottle in the pantry ready for your next recipe! -
Red pepper flakes (¼ teaspoon, or to taste)
This offers a delightful kick! Adjust the amount based on your spice tolerance — you can always start with less and add more as you taste. -
Kosher salt and freshly ground pepper (to taste)
Don’t skip this! Seasoning enhances every flavor. I suggest using kosher salt for a balanced salinity! -
Lemon juice (from half a lemon)
Add a pop of freshness with this! If you’re in a pinch, bottled lemon juice also works — but fresh is always best!
Step-by-Step Instructions
Alright, time to get down to business! Here’s how to make these magical Chimichurri Chicken Thighs step by step — don’t worry, I’ll guide you through every moment so you can feel like a rockstar in your kitchen!
Step 1: Prepare the Chimichurri Sauce
-
Chop the parsley and garlic:
Start by finely chopping the fresh parsley and mincing the garlic cloves. You want those fresh aromas to come together beautifully! I often use a chef’s knife because it makes the chopping more efficient and fun. Plus, it’s a great way to channel your inner culinary ninja! -
Mix the ingredients:
In a small bowl or a food processor, combine the chopped parsley, minced garlic, red wine vinegar, olive oil, red pepper flakes, and a good pinch of salt and pepper. If you’re using a food processor, pulse until the mixture is well-combined but still slightly chunky. If doing it by hand, just stir well until everything is combined. The colors should be vibrant — just like your cooking spirit! -
Taste and adjust:
Here’s where you add your chef’s magic touch! Give it a taste and adjust for salt, acidity, and spice. If it tastes a little flat, a squeeze of lemon juice can brighten it right up!
Step 2: Marinate the Chicken
-
Prepare the chicken:
Rinse and pat the chicken thighs dry with paper towels. This helps to achieve that perfect crispness when cooking. Then, place the chicken thighs in a large bowl or a resealable bag. -
Add the chimichurri sauce:
Pour half of the chimichurri sauce over the chicken thighs, making sure they’re well-coated. Save the other half for serving — trust me, you’ll want it on the side! Marinate the chicken for at least 30 minutes if you’re in a hurry, or up to overnight in the fridge for maximum flavor.
Step 3: Cook the Chicken
-
Preheat the grill or oven:
If you’re grilling, preheat it to medium-high heat (around 425°F). If you’re baking, preheat your oven to 375°F. Both methods work great, so choose what suits your vibe today! -
Grill or bake the chicken:
On a grill, place the marinated chicken thighs skin-side down. Grill for about 6-8 minutes per side, or until the internal temperature reaches 165°F. If baking, place them in a greased baking dish and bake for about 35-40 minutes. -
Crisp the skin:
If you’re grilling, check back often to avoid flare-ups from the fat! If you’re baking, to create the crispy skin, turn the oven broiler on for the last 5 minutes of cooking — just keep an eye on it to prevent burning!
Step 4: Serve and Enjoy
-
Let it rest:
Once cooked, remove the chicken from the heat and let it rest for about 5-10 minutes. This allows those juices to redistribute and keeps your chicken juicy! -
Plate it up:
Serve those glorious chicken thighs with a generous drizzle of the reserved chimichurri sauce over the top. Adding some roasted veggies or a fresh salad on the side makes for a beautiful presentation!
Serving Suggestions
For a cozy family meal, arrange your Chimichurri Chicken Thighs on a large platter, drizzling the chimichurri sauce all over and garnishing with lemon slices and sprigs of fresh parsley. Serve alongside your favorite sides like roasted garlic potatoes or a vibrant quinoa salad to complement the dish. Don’t forget a glass of red wine or sparkling water to round off the experience. Cheers to good food and great company!
Recipe Variations
-
Grilled Chimichurri Shrimp: Swap out the chicken thighs for succulent shrimp. Marinate for about 15-20 minutes and grill just until pink, for a quick seafood twist!
-
Chimichurri Tofu: For a vegetarian version, use firm tofu. Marinate, grill, and serve with chimichurri — it’s just as tasty!
-
Pasta with Chimichurri Chicken: After preparing the chicken, chop it up and toss it with al dente pasta, a drizzle of olive oil, and a sprinkle of Parmesan for a delectable, hearty meal.
-
Chimichurri Meatballs: Create flavorful meatballs using beef or turkey and bake them, topped with chimichurri sauce for a fun twist on the classic.
Chef’s Notes
As I’ve experimented with this recipe over the years, I’ve discovered the beauty of cooking is its adaptability. The original chimichurri serves beautifully as a marinade, but you can enjoy it in so many ways! I’ll never forget the time I tried to impress a group of friends and accidentally over-marinated the chicken. It was on the saltier side but surprisingly delicious! That’s when I learned the importance of balance in flavors.
Food is meant to be fun and exciting! Don’t hesitate to mix things up according to your cravings. Throw in some nuts or even a hint of honey to the chimichurri for a sweeter touch, and I promise, the results will surprise you.
FAQs and Troubleshooting
1. My chicken turned out dry. What happened?
This could be due to overcooking. Always use a meat thermometer to check the internal temperature (165°F is ideal!). If you’re unsure, err on the side of caution and take it off early; it can always cook a tad more while resting.
2. Can I make the chimichurri sauce in advance?
Absolutely! You can prep the sauce a day ahead and store it in the fridge. Just let it sit at room temperature for a bit before serving, as olive oil can solidify when cold!
3. Is it okay if I don’t have fresh herbs?
While fresh herbs deliver maximum flavor, you can use dried herbs in a pinch! Just remember that dried herbs are more concentrated — a teaspoon per tablespoon of fresh.
4. How long can I store leftover chicken and chimichurri?
If you have leftovers (which might be unlikely, but great if you do!), store them in an airtight container in the fridge for 3-4 days. The chimichurri sauce can last up to a week.
Nutritional Info
Chimichurri Chicken Thighs (per serving, without sides):
- Calories: ~350
- Protein: ~25g
- Fat: ~25g
- Carbohydrates: ~4g
- Fiber: ~1g
So there you have it! A flavorful journey through Chimichurri Chicken Thighs that’s guaranteed to warm your heart and fill your tummy. I hope you enjoy every savory bite as much as I do and make memories that linger long after the last plate is cleared. Happy cooking, and remember to always cook with love!
Print
Chimichurri Chicken Thighs
- Total Time: 55 minutes
- Yield: 4 servings 1x
- Diet: Paleo
Description
Juicy chicken thighs marinated in vibrant chimichurri sauce, embodying the flavors of Argentina.
Ingredients
- 4 bone-in, skin-on chicken thighs
- 1 cup fresh parsley, chopped
- 4 garlic cloves, minced
- 1/3 cup red wine vinegar
- 1/3 cup olive oil
- ¼ teaspoon red pepper flakes (or to taste)
- Kosher salt and freshly ground pepper (to taste)
- Juice from half a lemon
Instructions
- Prepare the Chimichurri Sauce: Chop the parsley and garlic. Mix in a bowl with parsley, minced garlic, red wine vinegar, olive oil, red pepper flakes, and a pinch of salt and pepper. Taste and adjust flavors.
- Marinate the Chicken: Rinse and pat chicken thighs dry. Place in a bowl, pour half of the chimichurri sauce over and marinate, refrigerating for at least 30 minutes or overnight.
- Cook the Chicken: Preheat grill to medium-high (425°F) or oven to 375°F. Grill chicken skin-side down for 6-8 minutes per side until reaching 165°F, or bake for 35-40 minutes. Broil for crisp skin if desired.
- Serve and Enjoy: Let the chicken rest for 5-10 minutes, then drizzle with reserved chimichurri sauce before serving.
Notes
Add roasted vegetables or a fresh salad to your meal for a complete experience. Adjust the chimichurri spice level per your taste.
- Prep Time: 15 minutes
- Cook Time: 40 minutes
- Category: Main Course
- Method: Grilling, Baking
- Cuisine: Argentinian
Nutrition
- Serving Size: 1 chicken thigh
- Calories: 350
- Sugar: 1g
- Sodium: 500mg
- Fat: 25g
- Saturated Fat: 6g
- Unsaturated Fat: 15g
- Trans Fat: 0g
- Carbohydrates: 4g
- Fiber: 1g
- Protein: 25g
- Cholesterol: 100mg
Keywords: chimichurri, chicken thighs, Argentinian, grilling, main course
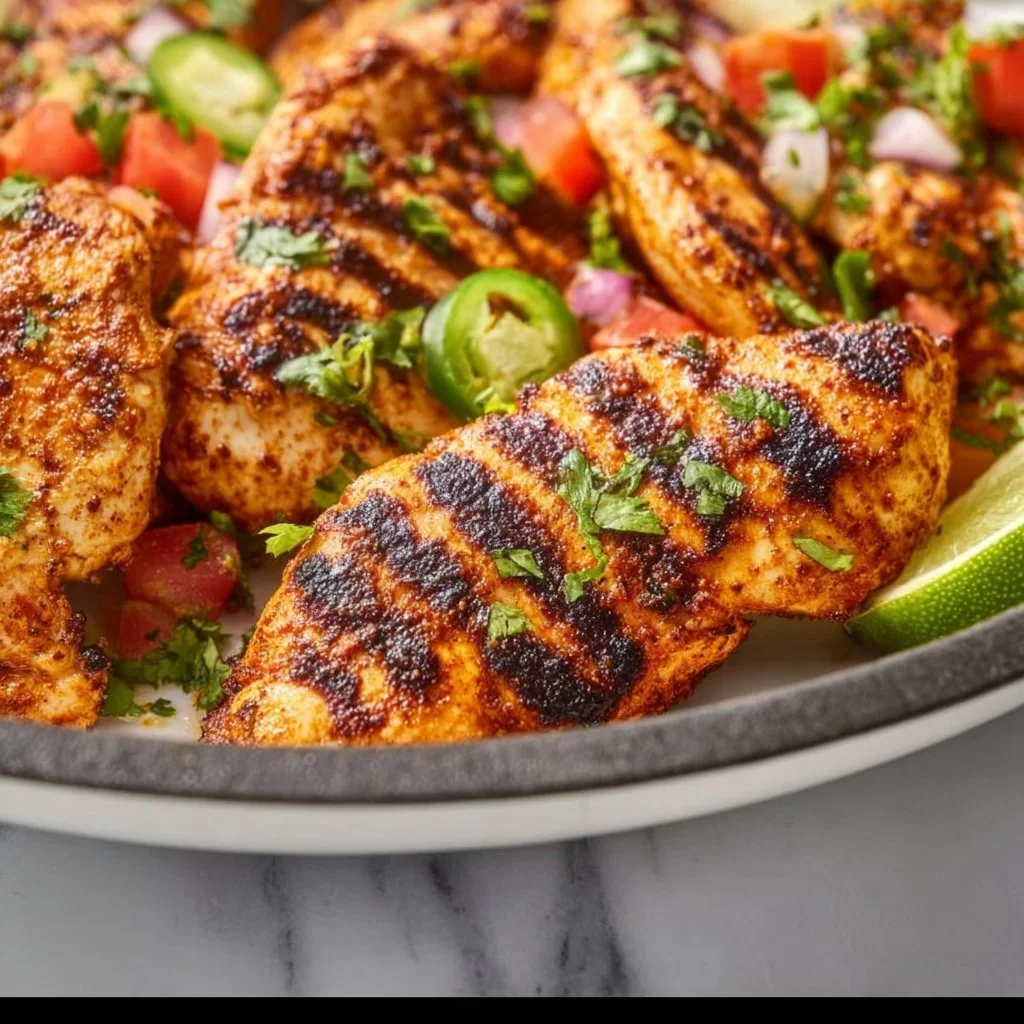
Easy Mexican Chicken Marinade
Easy Mexican Chicken Marinade: Elevate Your Culinary Game!
Hello, beautiful food lovers! Welcome back to my cozy corner of the culinary world—the place where flavor reigns supreme and every meal is a chance to create…and mess up a little! Today, I’m bubbling over with excitement to share with you one of my absolute favorites—a ridiculously simple yet flavorful Easy Mexican Chicken Marinade. Trust me—this recipe is going to become your go-to for weeknight dinners and weekend gatherings alike!
Let’s take a moment to appreciate how a good marinade can transform humble chicken into a fiesta on your plate. And if you’re like me, cooking is not just about fueling your body but also feeding your soul. The right marinade does just that. It hugs your meat, infuses every bite with vibrant flavors, and creates the most mouthwatering dishes.
You might think marinating chicken is a hassle, but I promise you this one is as easy as pie (or should I say, as easy as tacos!). With just a few ingredients—many of which you probably have right in your pantry or fridge—you’ll whip up a marinade that packs a punch. Perfect for grilling in the summer, baking in the winter, or anytime you’re craving that festive Mexican flair.
So, grab your apron (and maybe a little bit of your favorite Mexican playlist), and let’s dive into creating a marinade that will have everyone asking for seconds. It’s all about soaking up those flavors, making memories in the kitchen, and ultimately, bringing people together over a delicious meal. Get ready to be inspired!
Personal Story
Let me take you on a little journey down memory lane. Growing up in my family, food was always at the heart of our gatherings. I can still picture my grandmother bustling around the kitchen, her apron covered in flour, as she prepared her famous chicken for taco night. The aroma of garlic, lime, and spices wafting through the house was simply irresistible!
One summer evening, I vividly remember making her marinade recipe by her side. I was perhaps eight or nine, armed with a tiny whisk and an insatiable curiosity for everything happening around me. As I watched her mix together the ingredients, I felt a magical bond forming—not just with the food, but with my grandmother, as she shared little anecdotes about each ingredient. “Each pinch of spice tells a story, Olivia,” she said with a twinkle in her eye.
That night, we sat around the dinner table, flavors dancing on our tongues and laughter filling the air. That meal was the start of my love affair with cooking, and it sparked a desire in me to recreate those flavors and memories in my own kitchen. I’ve taken that cherished marinade recipe and put my own spin on it to today’s Easy Mexican Chicken Marinade. Here’s hoping it inspires joy and connection in your own home too!
Ingredients
Let’s get this party started with a rundown of the ingredients. These will infuse your chicken with a burst of vibrant flavor:
-
Olive Oil (1/4 cup)
An essential foundation for any marinade, olive oil helps to lock in moisture and flavor. You can substitute with avocado oil for a lighter option or even use neutral oils like canola or grapeseed if you’re looking for something less pronounced. -
Lime Juice (Juice of 2 limes)
Fresh lime juice adds brightness and acidity, which tenderizes the chicken and enhances the overall flavor. If you don’t have limes, lemon juice works beautifully as a substitute. -
Garlic (4 cloves, minced)
Garlic brings a savory punch that’s hard to beat. You can use garlic powder in a pinch (1-2 teaspoons), but I always advocate for fresh garlic when possible! -
Cumin (1 teaspoon)
This warm spice adds that classic Mexican flavor. If you’re not a fan, you can use smoked paprika for a different—but equally wonderful—twist. -
Chili Powder (1 tablespoon)
A mix of heat and flavor! You can adjust the amount based on your heat preferences, or swap it for smoked paprika for a milder taste. -
Oregano (1 teaspoon)
Dried oregano complements the other spices perfectly. Feel free to use fresh oregano if you have it on hand—just double the amount! -
Salt and Pepper (to taste)
Essential for enhancing flavors. Always start with a little and adjust as necessary. -
Cilantro (1/4 cup, chopped) (optional)
A fresh garnish that adds a touch of brightness. If you’re not a cilantro fan, feel free to omit!
With just these simple ingredients, you’ll craft a marinade that opens a world of Mexican-inspired culinary delights!
Step-by-Step Instructions
Alright, let’s dive into the cooking magic! Here’s how to prepare our Easy Mexican Chicken Marinade and get that chicken marinating like a star.
Step 1: Gather Your Ingredients
First things first—let’s gather our beautiful ingredients. Arrange everything on your countertop so it’s easy to access as you work. Trust me, there’s nothing worse than running around the kitchen trying to find a stray garlic clove!
Step 2: Banish the Prep Tasks
Minced garlic might just be the most aromatic task in this process! Grab your garlic cloves and mince them up finely. The more you chop, the more into it you’ll get—aroma and anticipation are rising!
Step 3: Mix the Marinade
In a medium-sized bowl (yes, I like to use bowls that look kind of cute too), combine all your marinade ingredients: olive oil, lime juice, minced garlic, cumin, chili powder, oregano, salt, and pepper. Stir it up until well-mixed. Go ahead, taste it! Need a pinch more salt? Do it! That’s the beauty of cooking at home—you’re in control.
Step 4: Choose Your Chicken
Whether you’re using boneless, skinless chicken breasts, thighs, or even drumsticks, this marinade works wonders on all cuts. I personally love thighs for their juicy flavor. Place your chicken in a resealable plastic bag or a shallow dish—whatever you fancy!
Step 5: Marinate Away!
Pour the marinade over the chicken, making sure every piece is generously coated. Seal the bag or cover the dish with plastic wrap, and let it soak up those beautiful flavors in the refrigerator. Ideal marinating time is about 30 minutes to 4 hours; if you can leave it overnight, do it—your future self will thank you!
Step 6: Get Cooking!
Once your chicken is well-marinated, it’s time to cook! You can grill, bake, or pan-sear it. If grilling, preheat your grill to medium-high and cook chicken for about 6-7 minutes per side until the internal temperature reaches 165°F. If baking, pop it in a preheated oven at 400°F for about 25-30 minutes. No matter how you choose to cook it, those sizzling sounds and amazing aromas will fill your home!
Step 7: Rest and Serve
Once your chicken is beautifully cooked, don’t skimp on resting it for about 5-10 minutes before slicing. This helps the juices redistribute, yielding a juicy, flavorful result. Slice it up, throw it on a plate, and get ready to enjoy!
Serving Suggestions
Let that gorgeous chicken shine on your plate! Slice it up and serve it with warm tortillas, fresh pico de gallo, sliced avocado, and a sprinkle of cilantro on top. This dish pairs nicely with some simple cilantro lime rice and black beans for a complete feast. And let’s not forget those tantalizing margaritas waiting on the side!
Recipe Variations
While this marinade is phenomenal as is, feel free to mix things up a bit! Here are a few fun variations to suit your tastes:
- Spicy Kick: Add a chopped jalapeño or a dash of hot sauce to the marinade for an extra punch.
- Herbaceous Flair: Swap the cilantro for freshly chopped parsley or basil for a different flavor profile.
- Sweetness Overload: Stir in a tablespoon of honey or agave syrup for a sweet twist.
- Tropical Fusion: Add pineapple juice instead of lime juice for a fruity flair.
- Smoky Goodness: Mix in a teaspoon of smoked chipotle pepper powder for a smoky, spicy twist—perfect for grilling!
Chef’s Notes
Oh, how this recipe has evolved over time! What started as my grandmother’s go-to marinade has transformed into my quick weeknight magic. I often experiment with different herbs, spices, and acidity levels to keep things exciting in my kitchen. Plus, this marinade isn’t just limited to chicken: I’ve used it on steak tacos and grilled veggies with outstanding results!
One more funny kitchen story: one time, I thought I’d amp up the marinade with a splash of tequila, just to see what happened. Let’s just say the chicken was quite the party, but we might want to leave that experiment for cocktails!
FAQs and Troubleshooting
Q: Can I marinate overnight?
Absolutely! In fact, it deepens the flavor. Just be mindful not to marinate longer than 24 hours, as the acid can start breaking down the meat too much.
Q: I forgot to marinate! Can I still use the marinade?
Yes! Use it as a sauce while cooking, but make sure you don’t re-use any marinade that’s touched raw chicken unless you boil it first.
Q: What if my chicken is dry?
Chicken can dry out quickly if overcooked. Use a meat thermometer to check for doneness at 165°F. Also, this marinade helps with moisture, so ensure you’re giving it enough time to marinate.
Q: Can I use this marinade for other meats?
Oh, definitely! This marinade is versatile—try it on pork, shrimp, or even hearty veggies like portobello mushrooms!
Nutritional Info (if applicable)
- Calories: 240 (per serving of marinated chicken)
- Protein: 26g
- Fat: 14g
- Carbohydrates: 1g
- Fiber: 0g
And there you have it! Your ultimate guide to creating a delicious, Easy Mexican Chicken Marinade that’s bound to impress. Whether you’re feeding your family on a Tuesday night or hosting friends for taco night, this marinade will elevate any occasion. I hope it sparks joy in your kitchen as it does in mine—happy cooking!
Print
Easy Mexican Chicken Marinade
- Total Time: 40 minutes
- Yield: 4 servings 1x
- Diet: Gluten Free
Description
A simple yet flavorful marinade that transforms chicken into a delicious Mexican dish, perfect for any occasion.
Ingredients
- 1/4 cup Olive Oil
- Juice of 2 Limes
- 4 cloves Garlic, minced
- 1 teaspoon Cumin
- 1 tablespoon Chili Powder
- 1 teaspoon Oregano
- Salt and Pepper to taste
- 1/4 cup Cilantro, chopped (optional)
Instructions
- Gather your ingredients and arrange them on your countertop.
- Banish the prep tasks by mincing the garlic cloves finely.
- Mix all the marinade ingredients in a bowl until well-combined.
- Choose your chicken cut and place in a resealable bag or dish.
- Marinate the chicken by pouring the marinade over it and refrigerate for 30 minutes to 4 hours.
- Get cooking by grilling, baking, or pan-searing the marinated chicken.
- Rest the chicken for 5-10 minutes before serving.
Notes
This marinade is versatile and can be used for pork, shrimp, or vegetables. Experiment with ingredients for different flavors.
- Prep Time: 10 minutes
- Cook Time: 30 minutes
- Category: Main Course
- Method: Marinating
- Cuisine: Mexican
Nutrition
- Serving Size: 1 serving
- Calories: 240
- Sugar: 1g
- Sodium: 300mg
- Fat: 14g
- Saturated Fat: 2g
- Unsaturated Fat: 10g
- Trans Fat: 0g
- Carbohydrates: 1g
- Fiber: 0g
- Protein: 26g
- Cholesterol: 70mg
Keywords: marinade, chicken, Mexican, quick, easy, grilling, weeknight, flavor
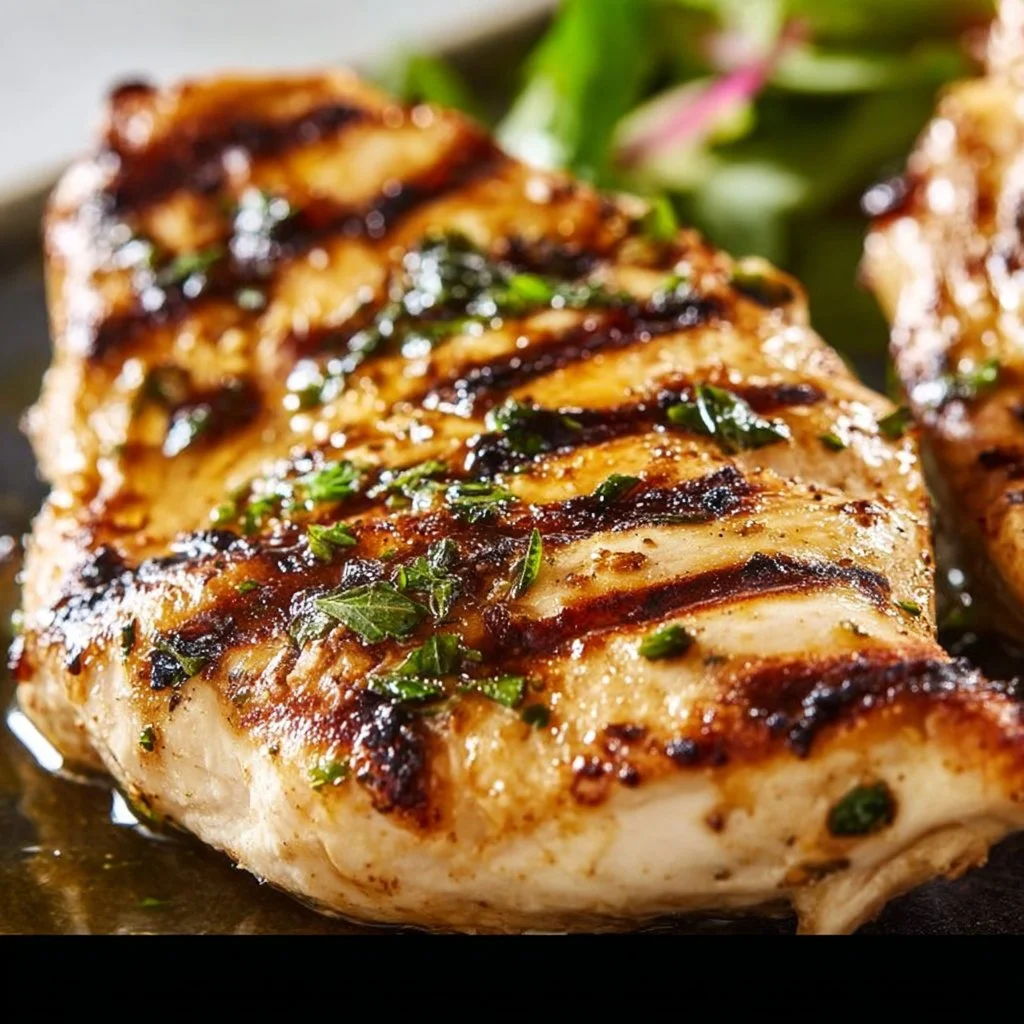
Grilled Chicken Breast
# Grilled Chicken Breast: A Simple Delight to Brighten Your Table

## Introduction

Welcome back to my cozy kitchen, friends! I’m so enthusiastic to share one of my all-time favorite meals with you today: *grilled chicken breast*. There's something utterly satisfying about a perfectly grilled chicken—a juicy interior with a lightly charred, flavorful exterior. Whether it’s sizzling on the grill during a summer barbecue or pan-seared for a weeknight dinner, grilled chicken is like a chameleon; it adapts to any cuisine and flavor profile, ever the avid traveler on your dinner plate!

What I love most about this dish is how customizable it can be. You aren’t just limited to salt and pepper; oh no, my culinary companions! With just a handful of spices, marinades, and techniques, you have the power to transport your taste buds to distant lands—be it Mediterranean, Asian, or good ol’ Southern BBQ.

And let's talk about those magical sharing moments that happen around the grilled chicken. Picture this: warm evenings with laughter ringing out, friends gathered around the grill, plates piled high with vibrant sides, and the tantalizing aroma wafting through the air. I mean, can you smell it? That’s what cooking is all about—uniting people and creating memories that last long after the last bite.

So grab your aprons and let's dive into this delicious adventure! Ready to transform humble chicken breasts into something extraordinary? Let’s do this!

## Personal Story

I remember my very first grilling adventure like it was yesterday. I was in high school, a bit of a culinary novice, when my dad decided it was time for me to step up to the grill while he handled the big boys! We had a beautifully sunny day, the kind that beckons you outside. He showed me the trusty old charcoal grill we had, which smelled faintly of the countless cookouts that preceded my initiation.

With my dad guiding me, we marinated the chicken in olive oil, lemon juice, and a few secret spices. I can still hear his gentle laughter as I fumbled with those tongs for the first time. But the moment those beautiful breast pieces hit the grill, oh boy! The sizzle was music to my ears! The taste—a masterpiece born from the fire—made me realize that I could indeed create joy in the kitchen.

From then on, it became our ritual every summer; we experimented with flavors, swapped recipes, and learned together. Those sunny days at the grill weren’t just about the chicken; they were about connection, laughter, and love being served right alongside our meal.

## Ingredients

To create the best grilled chicken breast, let’s gather our stars of the show! Here’s what you’ll need:

- **Chicken Breasts** (boneless and skinless)
  - Choose organic, free-range if possible for the best flavor and texture. If you prefer, thighs can work in place of breasts for a juicier, richer taste.

- **Olive Oil**
  - A must for marinating and ensuring those grill marks stick! If you don’t have olive oil, melted coconut oil or avocado oil can be great substitutes.

- **Garlic Powder**
  - This adds a lovely depth to your chicken. If you want a fresher note, you could use freshly minced garlic instead—just be cautious, as it can burn faster on the grill.

- **Paprika**
  - This is your secret weapon for color and a hint of smokiness. Smoked paprika packs an extra punch if you’re going for that BBQ vibe!

- **Salt and Pepper**
  - Essential! Sea salt enhances flavors beautifully, while freshly cracked pepper gives a kick. If you’re watching your sodium intake, consider using a lower-sodium sea salt.

- **Herbs (optional)**
  - Fresh or dried thyme, rosemary, or Italian seasoning can elevate your chicken. Feel free to mix and match based on what you have on hand!

- **Lemon Juice**
  - Freshly squeezed lemon juice brings brightness to your marinade. You can substitute it with lime juice for a fun twist.

## Step-by-Step Instructions

Now that we have our ingredients, it’s time for the fun part: cooking! Here’s how to turn those breasts into a grilled masterpiece.

1. **Prep the Chicken:**
   - Begin by trimming any excess fat from your chicken breasts for a cleaner bite. Pat them dry with a paper towel; this ensures better browning when they hit the grill!

2. **Marinate:**
   - In a large bowl, combine ¼ cup olive oil, 1 teaspoon garlic powder, 1 teaspoon paprika, and the juice of one lemon. Whisk those beauties together, then season generously with salt and pepper.
   - Add the chicken breasts, ensuring they're well-coated in the marinade. Cover and let them soak up those flavors for at least 30 minutes in the fridge—ideally, an hour or more if you have time.

3. **Heat the Grill:**
   - Preheat your grill to medium-high heat. This usually takes about 10-15 minutes. If using a charcoal grill, you want to make sure the coals are glowing and covered with ash for perfect temperature to grill.

4. **Grill the Chicken:**
   - Once your grill is hot, lightly oil the grates to prevent sticking. Place the chicken on, spaced apart to allow airflow. Grill for about 6-7 minutes without moving them—this is where those gorgeous grill marks develop.

5. **Flip and Finish:**
   - Using tongs, flip the chicken breasts and grill for another 6-7 minutes on the other side. You’re looking for an internal temperature of 165°F (75°C) for fully cooked chicken, measured with a meat thermometer.

6. **Rest:**
   - Once your chicken is beautifully charred and cooked through, let it rest for about 5 minutes. This little break allows the juices to redistribute so that every bite is succulent and evenly moist.

## Serving Suggestions

Now comes the fun part—serving! Slice your grilled chicken breasts into thick pieces and arrange them on a colorful platter. Pair them with a vibrant, seasonal salad like a cherry tomato and basil caprese or some roasted veggies to compliment that grilled goodness.

Drizzle with a balsamic reduction or serve alongside a zesty yogurt sauce for an added flavor boost. And don’t forget to sprinkle some fresh herbs on top—your chicken deserves the spotlight!

## Recipe Variations

Get ready to mix things up! Here are some creative ways to enjoy your grilled chicken:

- **Mediterranean Twist:** Add oregano and lemon zest to the marinade, and serve with tzatziki sauce for a delightful Greek vibe.

- **Tropical Vibes:** Mix in some pineapple juice and soy sauce for a Hawaiian twist, and add grilled pineapple slices on top before serving.

- **Spicy Kick:** Add chili powder or cayenne pepper to the marinade for heat. You could even glaze the chicken with some sriracha for that extra zing!

- **Honey Mustard Delight:** Swap out the olive oil for equal parts honey and dijon mustard in your marinade for a sweet-and-tangy flavor profile.

- **Herb Medley:** Use a mixture of your favorite fresh herbs; think cilantro, basil, or dill, for a fresher take. These can be thrown directly onto the grill in a foil packet for added smoky flavor.

## Chef's Notes

This grilled chicken recipe has been one of my go-to staples for years, and I continue to adapt it based on the seasons and what’s in my pantry. I remember a time I was experimenting with a new marinade and accidentally added too much salt; a sprinkling of brown sugar helped balance the whole dish. Kitchen blunders can sometimes lead to the most delicious discoveries!

Another thing I love is how versatile this chicken is. It can easily become the star in a salad, wrap, or even atop a comforting grain bowl. If you’re feeling adventurous, try marinating a batch overnight and see how those flavors deepen overnight. You might surprise yourself!

## FAQs and Troubleshooting

**1. My chicken turned out dry. What went wrong?**
   - This is often due to cooking at too high a heat or cooking for too long. Use a meat thermometer, and remember to let it rest before slicing!

**2. How do I know when the chicken is done?**
   - The best way is using a meat thermometer. Once it reaches 165°F (75°C) in the thickest part, it’s good to go!

**3. Can I grill frozen chicken?**
   - It's best to thaw chicken before grilling; frozen chicken cooks unevenly and takes much longer. Always plan ahead!

**4. How can I store leftovers?**
   - Store cooked and cooled chicken in an airtight container in the fridge for up to four days. It also freezes beautifully! Be sure to slice or cube it before freezing for easier use in future meals.

## Nutritional Info (Optional)

**Per serving (4 oz grilled chicken breast):**
- Calories: 165
- Protein: 31g
- Total Fat: 3.5g
- Saturated Fat: 1g
- Carb: 0g
- Fiber: 0g
- Sugar: 0g

Grilled chicken breast is an excellent source of high-quality protein with low fat, making it an ideal choice for a healthy and balanced diet.

---

And there you have it, my friends! A delicious and adaptable grilled chicken breast recipe that’s bound to become a staple in your cooking repertoire. Enjoy bringing family and friends together with the beauty of home-cooked meals. Happy grilling!
Grilled Chicken Breast: A Simple Delight to Brighten Your Table
- Total Time: 30 minutes
- Yield: 4 servings 1x
- Diet: Paleo
Description
A flavorful grilled chicken breast recipe, perfect for summer barbecues or weeknight dinners.
Ingredients
- 4 boneless, skinless chicken breasts
- ¼ cup olive oil (or melted coconut/avocado oil)
- 1 teaspoon garlic powder
- 1 teaspoon paprika (smoked if desired)
- Salt and pepper to taste
- Fresh or dried herbs (optional)
- Juice of 1 lemon (or lime for twist)
Instructions
- Prep the chicken by trimming excess fat and patting dry.
- Marinate by combining olive oil, garlic powder, paprika, lemon juice, salt, and pepper in a bowl.
- Heat the grill to medium-high, about 10-15 minutes.
- Grill the chicken for 6-7 minutes without moving for grill marks.
- Flip the chicken and grill for another 6-7 minutes until it reaches 165°F (75°C).
- Rest for 5 minutes before slicing and serving.
Notes
Marinate for at least 30 minutes, up to overnight for best flavor. Use a meat thermometer for precise cooking.
- Prep Time: 15 minutes
- Cook Time: 15 minutes
- Category: Main Course
- Method: Grilling
- Cuisine: American
Nutrition
- Serving Size: 1 breast
- Calories: 165
- Sugar: 0g
- Sodium: 200mg
- Fat: 3.5g
- Saturated Fat: 1g
- Unsaturated Fat: 2g
- Trans Fat: 0g
- Carbohydrates: 0g
- Fiber: 0g
- Protein: 31g
- Cholesterol: 85mg
Keywords: grilled chicken, chicken breast, easy chicken recipes, summer grilling, healthy meals
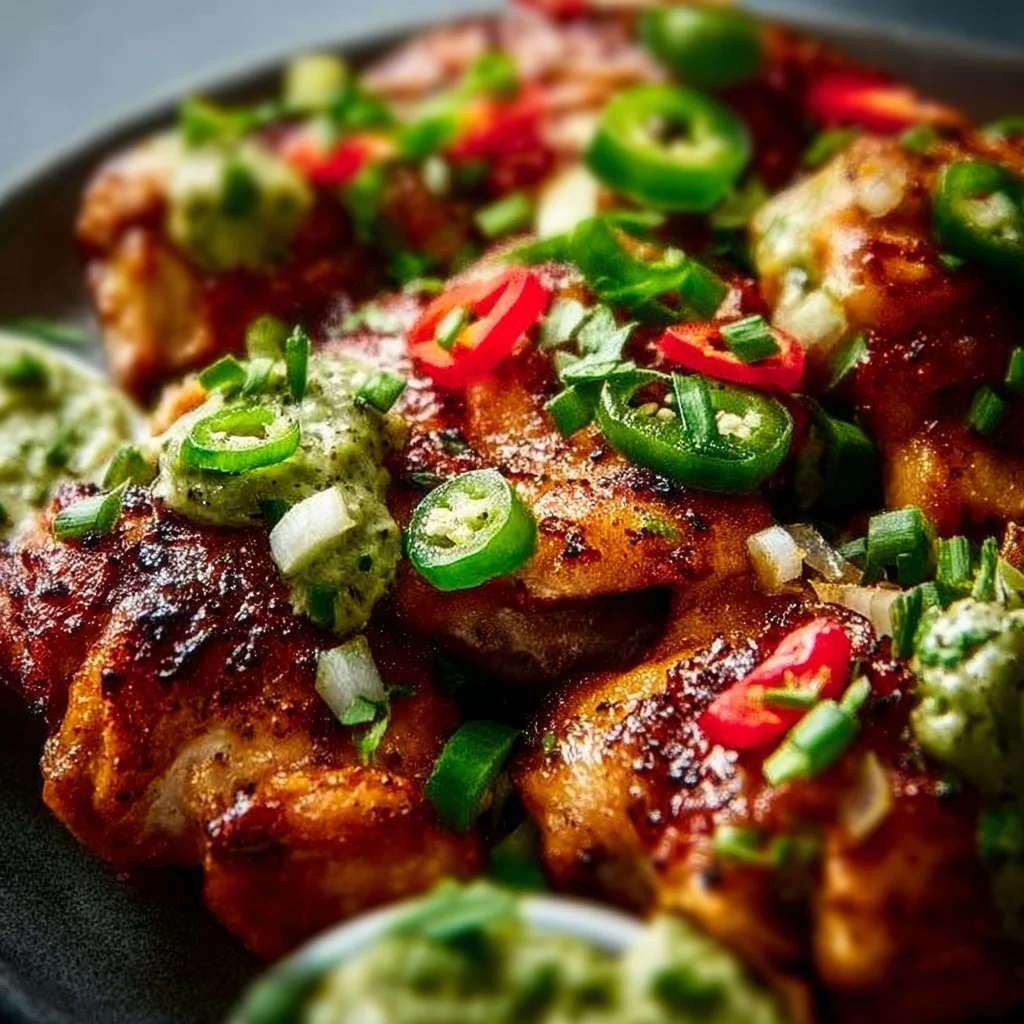
Pin by Sylvia Leonard on jalapenos | Peruvian recipes, Chicken dish recipes, Healthy recipes
Spicy Peruvian Chicken with Jalapeño: A Flavor Explosion in Every Bite
Hello, food lovers! I’m so glad you’ve stopped by my cozy corner of the internet. Today, we’re diving into a vibrant and spicy dish that has nestled itself into my heart: Spicy Peruvian Chicken with Jalapeños. As we journey through the flavors of Peru, you’ll not only savor the taste but also get a sprinkle of stories and kitchen tips along the way.
Now, let me set the scene. Picture me in my sunlit kitchen, the air infused with the irresistible aroma of marinated chicken sizzling in a hot pan. The first bite? Oh, it takes me back to my childhood summer vacations spent at my abuela’s house, where she would cook up a storm, and every meal was a delicious fiesta.
The zing of the jalapeños and the warmth of the spices dance together in perfect harmony, creating a dish that’s not just a meal, but an experience. My goal today is to make sure you can bring that same joy into your kitchen, whether it’s a weeknight dinner or a weekend gathering with friends.
Ready to explore the world of Peruvian flavors? Grab your apron, and let’s turn up the heat!
Personal Story
Growing up, food was always at the center of family gatherings. I vividly remember those hot summer afternoons when my whole family would gather in the backyard, laughter filling the air as we mulled over spicy conversations and even spicier food. My abuela, a culinary wizard, always made her signature dish: Aji de Gallina, a creamy chicken dish with a kick!
One summer, she decided to switch things up by adding jalapeños to her chicken marinade. I watched her chop fresh jalapeños, their vibrant green contrasting against the golden chicken. As that spicy scent filled our backyard, I felt a flutter of excitement knowing something new and wonderful was about to unfold.
When we finally sat down to eat, the first bite was like fireworks in my mouth! The chicken was tender, and the jalapeño added a subtle burn that perfectly complemented the spices. That day, I learned that a little twist in a classic recipe can create unforgettable memories and flavors—and that’s exactly what I want to share with you today!
Ingredients
Here’s what you’ll need to create this spicy masterpiece, along with some chef’s insights to help you navigate each ingredient.
Ingredients List
-
4 chicken thighs (bone-in, skin-on)
Chef Insight: Chicken thighs are juicy and rich in flavor, but you can substitute with breasts if preferred. Just monitor cooking time as breasts may dry out more easily. -
2 tablespoons olive oil
Substitution Tip: Feel free to swap for avocado oil or even coconut oil for a unique flavor twist. -
1 medium onion, finely chopped
Fact: Onions provide a rich base for any dish. If you’re in a pinch, shallots can be a lovely substitute, especially for that nuanced sweetness. -
4 cloves garlic, minced
Quick Chef Hint: To make peeling garlic easy, smash the cloves with the flat side of a knife before mincing! -
2-3 fresh jalapeños, sliced (adjust to taste)
Tip: Want less heat? Remove the seeds before slicing! For a smokier flavor, try adding a roasted jalapeño. -
1 tablespoon cumin
Cooking Wisdom: Cumin gives depth and an earthy quality. If you need a substitute, coriander can bring a bright flavor but change the dish’s profile a bit. -
1 tablespoon paprika (smoked or regular)
Ha! Sometimes we forget, but it adds a great color and flavor. If smoked paprika isn’t on hand, regular works just fine. -
Salt and pepper to taste
Tip: Always season your chicken properly, so the flavors stand out! -
2 cups chicken stock
Tip: Homemade stock is best, but low-sodium store-bought is a decent option within budget constraints. -
1 tablespoon fresh lime juice (about half a lime)
Insider Tip: Fresh lime juice brightens and balances the richness of the chicken. Don’t even think of using bottled! -
Fresh cilantro for garnish
Flavor Note: Cilantro adds a pop of freshness. If you’re in the “cilantro is soap” camp, try parsley or omit it entirely!
Step-by-Step Instructions
Alright, let’s get cooking! Follow these steps, and you’ll be on your way to creating this delicious dish with all the flair of a pro chef.
1. Marinate the Chicken
Start by marinating your chicken thighs in a bowl. Add olive oil, minced garlic, cumin, paprika, salt, and pepper. Toss in sliced jalapeños, ensuring they’re well-coated. Cover with plastic wrap and let it marinate for at least 30 minutes. Chef Hack: If you can, let it sit overnight in the fridge to deepen the flavors!
2. Sear the Chicken
In a large skillet over medium-high heat, add a splash of olive oil. Once hot, place the marinated chicken thighs skin-side down. Searing the chicken first helps lock in those juicy flavors and crisp up the skin! Cook for about 5-7 minutes on each side until golden brown, then set aside.
3. Sauté the Aromatics
In the same skillet, quickly add the chopped onion. Sauté until translucent, about 3-4 minutes. Add more oil if needed; we want those onions sweet and caramelized! Stir in the leftover jalapeños and cook for another minute. This step releases all those fantastic flavors left in the skillet!
4. Bring It All Together
Pour in the chicken stock and scrape the bottom of the pan to deglaze. Return the chicken to the skillet, skin-side up. This helps the meat absorb all that garlicky, spicy goodness as it cooks.
5. Let It Simmer
Reduce the heat to low, cover, and let simmer for 30-40 minutes, or until the chicken reaches an internal temperature of 165°F. Tip: Use a meat thermometer for accuracy (and to show off your cooking skills!).
6. Add the Lime Juice
Once cooked, stir in the fresh lime juice. This adds a zesty brightness that elevates the dish! Turn off the heat and let it rest for a few minutes. Pro Tip: A little rest time lets the juices redistribute, resulting in a supremely tender bite!
Serving Suggestions
Now for the fun part! When it’s time to serve, plate your juicy chicken with the luscious sauce ladled over the top. I love to garnish it with freshly chopped cilantro, which not only adds a pop of color but elevates each bite with its bright flavor. Pair it with fluffy rice or warm tortillas for a complete meal. Your guests (or family) will be clamoring for seconds!
Recipe Variations
Feel adventurous? Here are some fun variations to switch things up!
-
Creamy Jalapeño Sauce: Blend together some sour cream with jalapeños and lime juice, and create a creamy sauce to drizzle on top!
-
Citrus Twist: Add orange zest and juice during the simmering step for a fresh citrusy finish.
-
Vegetarian Delight: Replace chicken with hearty vegetables like eggplant and zucchini, following the same marinating and cooking process for a delightful veggie stack.
-
Spicy Peruvian Tacos: Shred the cooked chicken and serve in warm corn tortillas topped with a fresh slaw and extra jalapeños.
Chef’s Notes
I’ve made this dish countless times, and each time, it evolves just a little. Some days, I even throw in leftover vegetables or a splash of beer for an extra depth of flavor. And let’s not forget my kitchen mishaps—the time I mistook cayenne for paprika, and let’s just say, it was a fiery dinner! Embrace creativity and find joy in the messy, beautiful process of cooking. It’s all part of the journey!
FAQs and Troubleshooting
Q1: My chicken turned out dry—what happened?
A: Overcooking is often the culprit. Remember, bone-in thighs retain moisture better, so keep an eye on cooking time. Always check internal temperature!
Q2: Can I make this dish ahead of time?
A: Absolutely! You can prep and marinate the chicken a day in advance, and simply cook it when you’re ready. Leftovers also reheat wonderfully!
Q3: How can I adjust the spice level?
A: For a milder version, use fewer jalapeños and be cautious with the seeds. You can even skip them altogether if you’re sensitive to spice.
Q4: What’s the best way to store leftovers?
A: Store in an airtight container in the fridge for up to 3 days. It also freezes well; just make sure to reheat gently to keep the chicken from drying out.
Nutritional Info
While I don’t typically dive deeply into nutrition on my blog (let’s be honest, delicious food is my primary focus!), here’s a basic breakdown to guide you:
- Calories: Approximately 350 per serving (without sides)
- Protein: 30g
- Fat: 22g
- Carbohydrates: 6g
- Fiber: 1g
Thank you for joining me on this culinary adventure! I hope you feel inspired to whip up this vibrant, spicy Peruvian chicken dish and create your own memories around the dinner table. Remember, cooking is all about connection, flavor, and most importantly, having fun. Happy cooking!
Print
Spicy Peruvian Chicken with Jalapeño
- Total Time: 70 minutes
- Yield: 4 servings 1x
- Diet: Poultry
Description
A vibrant and spicy dish featuring marinated chicken thighs infused with jalapeños and aromatic spices.
Ingredients
- 4 chicken thighs (bone-in, skin-on)
- 2 tablespoons olive oil
- 1 medium onion, finely chopped
- 4 cloves garlic, minced
- 2–3 fresh jalapeños, sliced (adjust to taste)
- 1 tablespoon cumin
- 1 tablespoon paprika (smoked or regular)
- Salt and pepper to taste
- 2 cups chicken stock
- 1 tablespoon fresh lime juice (about half a lime)
- Fresh cilantro for garnish
Instructions
- Marinate the chicken thighs in a bowl. Add olive oil, minced garlic, cumin, paprika, salt, and pepper. Toss in sliced jalapeños, ensuring they’re well-coated. Cover and let marinate for at least 30 minutes.
- Sear the chicken in a large skillet over medium-high heat with olive oil, skin-side down, until golden brown.
- Sauté chopped onion in the same skillet until translucent, about 3-4 minutes. Add sliced jalapeños and cook for another minute.
- Pour in the chicken stock and deglaze the pan. Return the chicken to the skillet, skin-side up.
- Let simmer on low, covered, for 30-40 minutes, or until chicken reaches 165°F.
- Add fresh lime juice once cooked and let it rest for a few minutes before serving.
Notes
Garnish with fresh cilantro and serve with rice or warm tortillas for a complete meal.
- Prep Time: 30 minutes
- Cook Time: 40 minutes
- Category: Main Course
- Method: Searing and Simmering
- Cuisine: Peruvian
Nutrition
- Serving Size: 1 serving
- Calories: 350
- Sugar: 2g
- Sodium: 600mg
- Fat: 22g
- Saturated Fat: 5g
- Unsaturated Fat: 12g
- Trans Fat: 0g
- Carbohydrates: 6g
- Fiber: 1g
- Protein: 30g
- Cholesterol: 90mg
Keywords: Peruvian chicken, spicy chicken recipe, easy dinner, jalapeño chicken, comfort food
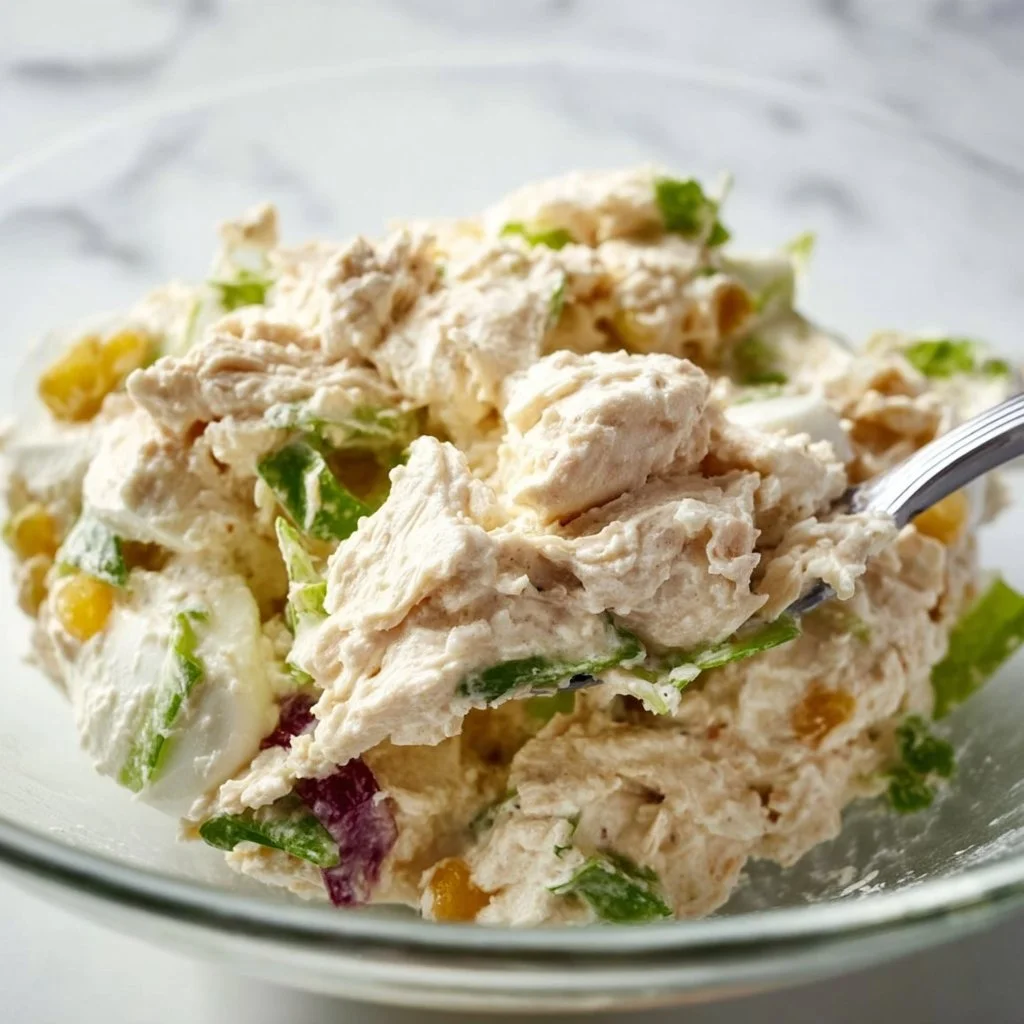
Classic Carol Chicken Salad
Classic Carol Chicken Salad: A Cozy Take on a Timeless Dish
Welcome back to my kitchen, foodie friends! 🌿 Today, we’re diving into the world of nostalgia and comfort with a classic that warms the heart and tantalizes the taste buds: the Classic Carol Chicken Salad!
Now, if you’re like me and hear the word “salad” and immediately shy away, fret not! This isn’t your average garden salad with sad, floppy greens. Oh no! This chicken salad, with its hearty chunks of tender chicken, a medley of colors, and a creamy dressing that hugs every ingredient, is the ultimate crowd-pleaser. It’s the kind of dish that makes you feel like you’ve wrapped yourself in a cozy blanket, even on the busiest of days.
Every bite of this salad whispers tales of summer picnics, potlucks, and family gatherings. Imagine a sun-drenched afternoon, laughter lingering in the air, and you holding a plate of this vibrant, flavorful chicken salad. It’s a dish that speaks to the kitchen’s magic—all it takes is a handful of ingredients and a little creativity!
Whether you’re throwing together a quick lunch or prepping for a big gathering, I promise this Classic Carol Chicken Salad will become a staple in your culinary repertoire. So roll up those sleeves, grab that apron (preferably a messy one!), and let’s get cooking together!
Personal Story
Whenever I make this Classic Carol Chicken Salad, my mind floats back to sunny afternoons spent at my Aunt Carol’s house. You see, Aunt Carol had this infectious passion for cooking—it was her love language. The kitchen would fill with the most delightful aromas, and everyone would gather around the table, sharing stories and laughter, as she served her famous chicken salad with pride.
I’ll never forget the first time I caught a whiff of that creamy goodness; I was instantly hooked! It had the perfect balance of richness from the mayonnaise, a hint of sweetness from the grapes, and crunch from the celery. Uncle Joe would sneak in for a second helping, while the kids would pile their plates high, secretly hoping for leftovers.
To this day, every time I make this dish, I hear Aunt Carol’s hearty laughter and feel that warm embrace of family gatherings. It’s not just a recipe; it’s a cherished memory and a delicious way to connect with loved ones—just as my Aunt Carol did for me. So let’s whip up our own batch and create some fond memories in the kitchen!
Ingredients
To make this delightful Classic Carol Chicken Salad, you’ll need the following ingredients. Each one plays a crucial role in crafting that perfect blend of flavors and textures:
- 2 cups cooked chicken, chopped: Use rotisserie chicken for convenience or poach your own chicken breasts. It’s moist and savory—perfect for salads!
- 1 cup celery, diced: The crunch factor! Celery adds a fresh, crisp bite. If you’re not a fan, try diced cucumbers instead.
- 1 cup grapes, halved: These pop with sweetness! Red grapes are ideal, but green ones work too. Substitute with diced apples if you’re after a different flavor note.
- 1/2 cup walnuts or pecans, chopped: For that earthy crunch! For a nut-free option, toasted sunflower seeds are a great swap.
- 3/4 cup mayonnaise: This creamy element binds everything together. Greek yogurt can work for a lighter version with a tangy twist.
- 1 tbsp Dijon mustard: A touch of tanginess that elevates the entire dish! If you prefer, honey mustard can lend a sweeter flavor.
- Salt and pepper to taste: Essential for bringing all the flavors together. Don’t be shy—taste as you go!
- Fresh herbs (optional): Parsley or dill can add an aromatic freshness that brightens the salad.
Now that we’ve gathered our ingredients, let’s dive into the magic of combining them!
Step-by-Step Instructions
-
Cook the Chicken:
- If using raw chicken, start by poaching or baking your chicken breasts. To poach: place the chicken in a pot, cover it with water, and bring to a gentle simmer. Cook for about 15-20 minutes until fully cooked. Alternatively, bake in a preheated oven at 375°F (190°C) for 25-30 minutes.
- Chef Insight: Poaching with herbs in the water, like thyme or bay leaves, can impart extra flavor to the chicken!
-
Prep the Ingredients:
- While the chicken is cooking, it’s time to dice your celery, halve those sweet grapes, and chop your nuts.
- Tip: To save time, use pre-chopped celery or throw the nuts into a food processor for a quick pulse.
-
Assemble the Dressing:
- In a large bowl, mix the mayo, Dijon mustard, salt, and freshly cracked pepper. Stir until your mixture is creamy and well-combined.
- Chef Hack: If you want a touch of zing, add a splash of apple cider vinegar to the dressing for depth.
-
Combine Everything:
- Once the chicken is cooked and has cooled enough to handle, chop it into bite-sized pieces and add it to the dressing. Then, gently fold in your celery, grapes, and nuts until everything is beautifully coated.
- Tip: Be cautious while mixing; you want to coat everything without turning it to mush!
-
Taste and Adjust:
- Give your salad a taste! Adjust the seasoning with more salt, pepper, or even a squeeze of lemon juice if you like it zesty.
- Chef Insight: Letting the salad sit for about 30 minutes in the fridge allows the flavors to deepen.
Serving Suggestions
When it’s time to serve, this Classic Carol Chicken Salad shines! You can serve it on a bed of crisp lettuce leaves for that elegant touch, in a buttery croissant for a delightful sandwich, or simply in a bowl with a sprinkle of fresh herbs on top. It’s colorful and inviting—perfect for any occasion!
Recipe Variations
Feeling adventurous? Here are a few fun twists you can put on the Classic Carol Chicken Salad:
- Spa Style: Swap out mayo for Greek yogurt and add a squeeze of fresh lemon juice for a lighter version.
- Tropical Vibes: Ditch the grapes for diced pineapple and add shredded coconut for a sweet twist!
- Spicy Kick: Mix in some diced jalapeños or sprinkle in a bit of cayenne for some heat.
- Herb-Infused: Add finely chopped basil or tarragon for an aromatic bouquet of flavor.
- Veggie Delight: Toss in diced bell peppers, shredded carrots, or even a handful of peas for added color and nutrition.
Chef’s Notes
This Classic Carol Chicken Salad has a special place in my heart. Over the years, I’ve played around with the recipe, adding different ingredients during various seasons or based on what’s in my pantry. Once, I experimented with adding apple slices, and it was a hit! The crunch paired beautifully with the creamy dressing.
And let’s not forget the time I might’ve had one too many glasses of wine while making it, resulting in some hilariously messy kitchen antics! I ended up with more salad on my clothes than in the bowl, but that’s the joy of the kitchen—embrace the mess!
FAQs and Troubleshooting
-
What if my chicken is dry?
- Overcooked chicken can become dry and chewy. To avoid this, ensure you monitor the temperature with a meat thermometer or use poaching for gentler cooking.
-
Can I prep this salad in advance?
- Absolutely! This salad keeps well in the fridge for about 2-3 days. However, I suggest keeping the nuts separate until serving for maximum crunch.
-
What’s a good substitute for mayonnaise?
- If you’re looking for alternatives, Greek yogurt or avocado can be excellent substitutes. They provide creaminess while cutting down on calories.
-
How do I know if it’s seasoned correctly?
- The best way to check seasoning is to taste! Start with a little salt and pepper, mix, and taste again to adjust until it’s just right.
Nutritional Info
Per serving (1 cup) – estimated:
- Calories: 350
- Protein: 25g
- Fats: 22g
- Carbohydrates: 15g
- Fiber: 2g
This Classic Carol Chicken Salad is not just a delicious meal; it’s a gateway to creativity and connection in the kitchen. So go ahead, gather your favorite people, and serve up some love with this delightful salad. Happy cooking, dear friends! 🍽️✨
Print
Classic Carol Chicken Salad
- Total Time: 45 minutes
- Yield: 4 servings 1x
- Diet: Gluten-Free
Description
A cozy and vibrant chicken salad that combines tender chicken, sweet grapes, crunchy celery, and a creamy dressing for a delightful dish perfect for any gathering.
Ingredients
- 2 cups cooked chicken, chopped
- 1 cup celery, diced
- 1 cup grapes, halved
- 1/2 cup walnuts or pecans, chopped
- 3/4 cup mayonnaise
- 1 tbsp Dijon mustard
- Salt and pepper to taste
- Fresh herbs (optional)
Instructions
- Cook the chicken: If using raw chicken, poach or bake your chicken breasts until fully cooked.
- Prep the ingredients: Dice celery, halve grapes, and chop nuts.
- Assemble the dressing: Mix mayo, Dijon mustard, salt, and pepper until creamy.
- Combine everything: Add chicken, celery, grapes, and nuts to the dressing and fold until coated.
- Taste and adjust: Season and let sit in the fridge for 30 minutes for flavors to deepen.
Notes
Can be served on lettuce, in a croissant, or plain. Keeps well for 2-3 days in the fridge; keep nuts separate until serving.
- Prep Time: 15 minutes
- Cook Time: 30 minutes
- Category: Salad
- Method: Mixing
- Cuisine: American
Nutrition
- Serving Size: 1 cup
- Calories: 350
- Sugar: 5g
- Sodium: 400mg
- Fat: 22g
- Saturated Fat: 4g
- Unsaturated Fat: 18g
- Trans Fat: 0g
- Carbohydrates: 15g
- Fiber: 2g
- Protein: 25g
- Cholesterol: 60mg
Keywords: chicken salad, summer dish, comfort food, easy recipe
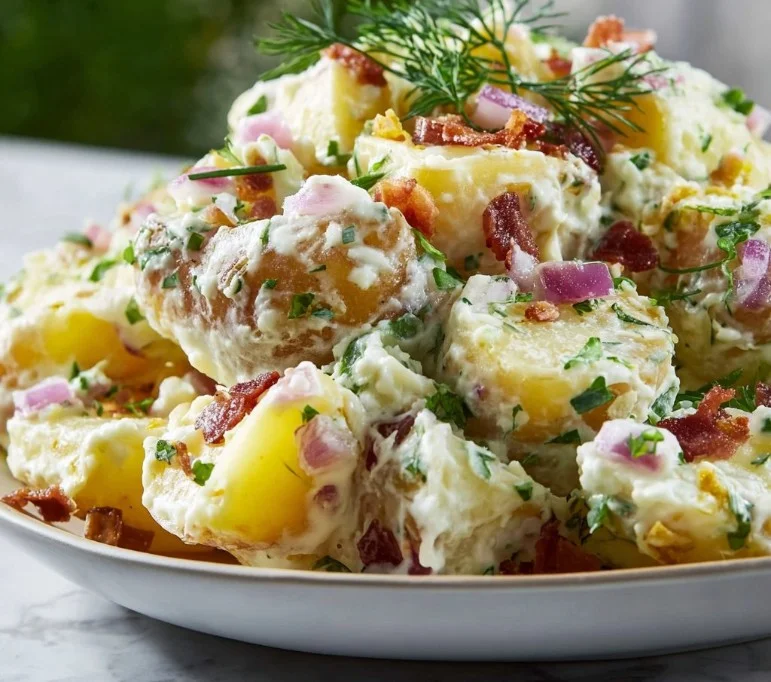
Ina Garten’s Potato Salad
Ina Garten’s Potato Salad: A Heartfelt Recipe for Gatherings
Welcome back, my fellow foodies! Today, we’re diving into one of those quintessential dishes that holds a special place in my heart: Ina Garten’s famous potato salad. You know the one—lush, creamy, and bursting with flavor. Just thinking about it makes my taste buds tingle! This isn’t just any potato salad; it’s a dish that holds memories, laughter, and plenty of comfort.
Whenever I prepare this potato salad, I can’t help but think back to summer barbecues at my grandmother’s house. The warm sun would bathe the backyard in golden light, children giggling and playing while adults gathered around the grill, sharing stories and sipping lemonade. My grandmother’s potato salad always made an appearance, and it was the dish that drew everyone together. Its creamy texture and tangy flavor became a symbol of friendship and joy, and eating it was like taking a bite out of those beautiful memories.
Whether it’s a laid-back picnic in the park or a festive family gathering, this potato salad is sure to steal the spotlight! You’ll find it’s easy to whip up and that’s the beauty of it all—you don’t need to be a culinary expert to create something special. With the right ingredients and a few handy tips, you’ll soon be the star at your next gathering!
So, grab your apron, and let’s embark on this flavorful adventure together. Let’s create not just a dish, but a memory—one that’s sure to resonate with loved ones for years to come.
Personal Story
Ah, potato salad! It’s one of those delightful dishes that can transport me back in time. I remember one summer afternoon when I was a little girl, standing on a stool in my grandmother’s kitchen, trying to sneak a taste of her famous potato salad long before it ever graced the picnic table. She caught me in the act and shared a wink before letting me mix in the last touches—a sprinkle of fresh herbs. The laughter we shared filled the kitchen as splashes of creamy dressing found their way to my fingers!
Those moments were not just about cooking; they were about connection. My grandmother always said the best ingredient in any recipe is love, and with each bite of that potato salad, we felt it. Fast forward to today, and I find myself sharing this beloved recipe with my friends and family, adding my own spin while keeping that essence of comfort intact. It’s not just potato salad; it’s a dish steeped in tradition and nostalgia, one that reminds me of the sunny days spent celebrating life’s little pleasures.
Ingredients
Here’s the rundown of what you’ll need to make this heavenly potato salad:
Ingredients List
-
Yukon Gold Potatoes:
- These starchy beauties are the backbone of this dish, providing a creamy texture when cooked. You can substitute with red potatoes if you prefer a firmer bite.
-
Mayonnaise:
- Rich and creamy, the mayo brings everything together. For a lighter version, use Greek yogurt or a vegan mayo alternative.
-
Dijon Mustard:
- This tangy addition gives depth to the salad. If you’re out of Dijon, you can use yellow mustard, but for a different flavor, try whole grain mustard.
-
Red Onion:
- Chopped finely to add a crunchy bite and a hint of sweetness. If you’re sensitive to the sharp taste, soak them in cold water for a few minutes to mellow the flavor.
-
Celery:
- Adds a fresh crunch and textural contrast. You can easily swap in chopped pickles if you want an extra tang.
-
Hard-Boiled Eggs:
- They bring creaminess and protein to the dish. If you’re looking for an egg-free version, you can omit the eggs entirely or use a chickpea substitute for an extra protein boost.
-
Fresh Dill:
- Nothing brightens up potato salad quite like fresh herbs! Dill adds a vibrant flavor; however, fresh parsley or chives can work well as substitutes if dill isn’t your thing.
-
Salt and Pepper:
- Essential for enhancing the flavors of all the other ingredients; season to your preference!
Step-by-Step Instructions
Ready to dive into the cooking? Here’s a detailed step-by-step guide to creating this amazing potato salad:
-
Boil the Potatoes:
Begin by scrubbing your Yukon Gold potatoes under cold water to remove any dirt. Cut them into bite-sized chunks, leaving the skin on for added flavor and nutrients. Place the chunks in a large pot of salted water, ensuring they are submerged. Bring the water to a boil and then simmer for about 12-15 minutes until tender but not mushy. A great chef hack here: test doneness by piercing a potato chunk with a fork—if it slides off easily, you’re golden! -
Prepare the Dressing:
While the potatoes are cooking, whisk together a creamy dressing in a separate bowl. Combine about 1 cup of mayonnaise, 2 tablespoons of Dijon mustard, salt, and freshly cracked black pepper to taste. This is where you can unleash your creativity while keeping that comforting flavor—add a splash of pickle juice for zing or incorporate a bit of fresh lemon juice for brightness! -
Chop the Veggies:
Get to chopping! Finely dice about half a red onion and two stalks of celery. If you’re feeling adventurous, consider giving them a quick sauté to enhance their flavors. It’s a small step until you realize just how much it adds! -
Hard-Boil the Eggs:
In a small saucepan filled with water, bring it to a rolling boil. Carefully add 3-4 large eggs, reduce the heat to a low simmer, and cook for about 10-12 minutes. Once done, transfer the eggs to a bowl of ice water to stop the cooking process. After a few minutes, peel and chop them up into chunky bits. Don’t worry about keeping them perfectly intact—this is potato salad, after all! -
Combine it All:
Drain the potatoes and let them cool slightly. In a large mixing bowl, add the warm potatoes and gently fold in the dressing. Careful now—you want to keep those potatoes intact! Next, throw in the chopped celery, diced onions, hard-boiled eggs, and a generous handful of freshly chopped dill. -
Taste & Adjust:
Here’s where you really make the recipe your own! Give it a taste and adjust the seasoning with more salt, pepper, or mustard as desired. If it feels a bit too thick, a splash of milk or more dressing can help reach the ideal creaminess. -
Chill Out:
Refrigerate your potato salad for at least an hour before serving. This allows the flavors to meld beautifully. -
Serve & Enjoy:
Scoop the potato salad into a serving bowl, and if you’re feeling fancy, garnish with a sprig of dill or a sprinkle of paprika for color. Trust me, it’s the little touches that make it feel extra special!
Serving Suggestions
This potato salad is delightful on its own, served as a side dish with grilled meats, or even as a light main dish with a fresh salad on the side. To serve, present it in a large, rustic bowl, and encourage guests to help themselves! For an extra touch, consider drizzling a bit of olive oil or a sprinkle of chili flakes on top just before serving; it adds a lovely finishing note.
Recipe Variations
Let’s get those creative juices flowing! Here are some irresistible variations to consider:
- Herbed Potato Salad: Add fresh parsley and basil for a vibrant twist!
- Mediterranean Style: Toss in sun-dried tomatoes, olives, and crumbled feta cheese for a Mediterranean flair.
- Bacon Lovers: Crispy, crumbled bacon adds an extra crunch and savory depth to the dish.
- Spicy Kick: Stir in some chopped jalapeños or a dash of hot sauce for a bold, fiery flavor.
- Vegan Delight: Swap mayo for avocado or a vegan dressing and use chickpeas instead of eggs for protein.
Chef’s Notes
Every time I make this potato salad, I can’t help but smile. I love how the recipe has evolved—just like my cooking! Sometimes, I find myself adding new ingredients based on what I have on hand or my mood that day. There was that one time I accidentally added a sprinkle of curry powder for a unique twist—unexpectedly fantastic! Experimentation is key in the kitchen, and that’s where the magic happens. Remember, cooking should bring you joy and allow your creativity to shine.
FAQs and Troubleshooting
Q1: Why did my potatoes turn mushy?
A: It sounds like they may have been overcooked! Keep a close eye on them while boiling and check for doneness early to avoid mushiness.
Q2: How can I make my potato salad creamier?
A: If it feels a bit dry, mix in a splash of milk or additional mayo until you reach the desired consistency.
Q3: Can I make this potato salad in advance?
A: Absolutely! In fact, it tastes even better after sitting in the fridge for a few hours or overnight as the flavors meld together.
Q4: What can I do if I don’t like mayo?
A: No problem! You can substitute with Greek yogurt, sour cream, or even an avocado for a creamy texture without the mayo!
Nutritional Info
While potato salad isn’t exactly a health food, it can definitely fit into a balanced diet when enjoyed in moderation. The beauty of making it at home is the control over ingredients, so you can make it as rich or light as you desire.
Approximate Nutritional Info (per serving based on 8 servings):
- Calories: 240
- Total Fat: 12 g
- Saturated Fat: 2 g
- Carbohydrates: 30 g
- Fiber: 3 g
- Protein: 6 g
And there you have it—a timeless recipe, overflowing with love and flavor. As you embark on making Ina Garten’s potato salad, may it bring you as much joy as it has brought me over the years. Happy cooking, and remember: every meal shared is a moment cherished!
Print
Ina Garten’s Potato Salad
- Total Time: 50 minutes
- Yield: 8 servings 1x
- Diet: Vegetarian
Description
A creamy and flavorful potato salad that evokes memories of summer barbecues and family gatherings.
Ingredients
- 2 pounds Yukon Gold potatoes
- 1 cup mayonnaise
- 2 tablespoons Dijon mustard
- 1/2 red onion, finely chopped
- 2 stalks celery, chopped
- 3–4 hard-boiled eggs, chopped
- 1/4 cup fresh dill, chopped
- Salt and pepper, to taste
Instructions
- Boil the potatoes: Scrub and cut the Yukon Gold potatoes into bite-sized chunks. Place in a pot of salted water, bring to a boil, and simmer for about 12-15 minutes until tender.
- Prepare the dressing: Whisk together mayonnaise, Dijon mustard, salt, and pepper in a bowl.
- Chop the veggies: Finely dice red onion and celery; consider sautéing for added flavor.
- Hard-Boil the eggs: Boil eggs for 10-12 minutes, then transfer to ice water to cool. Peel and chop.
- Combine it all: Drain potatoes, let cool, and mix with dressing, celery, onions, eggs, and dill.
- Taste & adjust: Season with more salt, pepper, or mustard as desired.
- Chill out: Refrigerate for at least an hour before serving.
- Serve & enjoy: Present in a bowl, garnish if desired.
Notes
Allow flavors to meld by chilling before serving. Adjust ingredients based on personal preference.
- Prep Time: 30 minutes
- Cook Time: 20 minutes
- Category: Side Dish
- Method: Boiling and Mixing
- Cuisine: American
Nutrition
- Serving Size: 1 serving
- Calories: 240
- Sugar: 2g
- Sodium: 400mg
- Fat: 12g
- Saturated Fat: 2g
- Unsaturated Fat: 8g
- Trans Fat: 0g
- Carbohydrates: 30g
- Fiber: 3g
- Protein: 6g
- Cholesterol: 70mg
Keywords: potato salad, side dish, summer recipes, family gatherings, comfort food
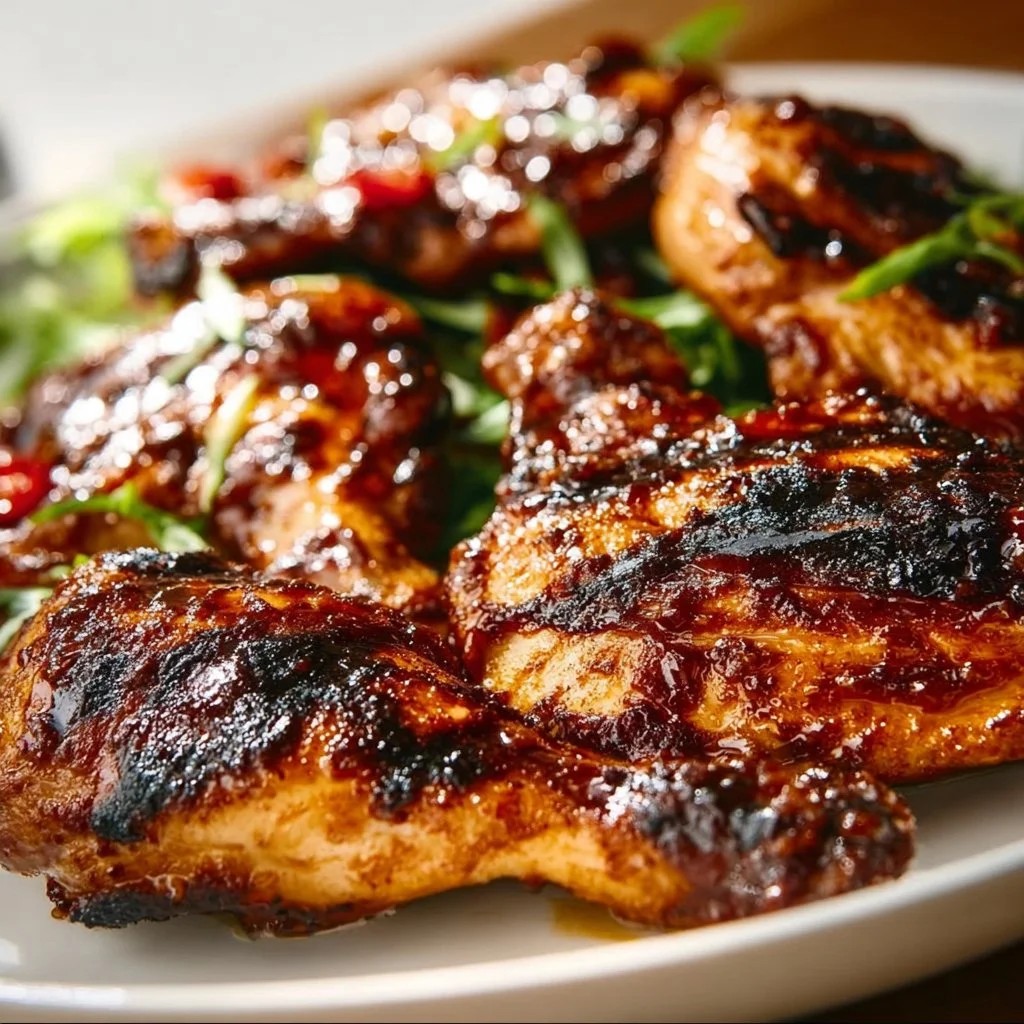
BBQ Chicken
Savory BBQ Chicken: A Recipe That Brings the Heat and the Heart
Hello, fellow food enthusiasts! Welcome back to my cozy kitchen, where the air is always scented with love, warmth, and the irresistible aroma of something delicious simmering away. Today, we’re diving into one of my all-time favorite dishes that perfectly encapsulates summer vibes, backyard gatherings, and heartwarming family dinners: BBQ Chicken! There’s something incredibly satisfying about sizzling chicken slathered in rich, smoky, sweet barbecue sauce, isn’t there?
I can still remember the first time I tasted BBQ chicken as a kid. My family hosted a summer barbecue, and the excitement was palpable. My dad manned the grill, while my mom prepared sides from scratch. The sun was beginning to set, casting a golden hue over everything, and the moment that chicken hit the grill, all of our mouths watered in anticipation. When that first bite hit my taste buds, I was mesmerized. The combination of smoky flavors and juicy chicken was pure magic, sparking my love for cooking and sharing great food with the people I cherish.
In this blog post, I’ll guide you through making BBQ chicken that will leave your guests begging for seconds, or in my family’s case, thirds! We’ll dive into the ingredients, step-by-step instructions, and creative variations that make this dish a family favorite, no matter the season. Grab your apron, and let’s get cooking!
Personal Story
One of my most treasured memories revolves around a family camping trip where BBQ chicken took center stage. Picture this: a lush campsite surrounded by towering pine trees, the tantalizing scent of smoky grilled chicken wafting through the air, and laughter echoing as my family gathered around a long picnic table. My uncle set up the grill as we played tag, and the moment those juicy pieces of chicken came off the fire, we fought over the first bite.
What made that meal so unforgettable wasn’t just the sticky, sweet sauce—it was the laughter, the stories we shared, and the feeling of togetherness as we dug in. My uncle had a secret spice mix that he swore by, and, of course, we still debate whose BBQ chicken reigns supreme to this day! It’s moments like these that remind me of why I love to cook—bringing people together and creating savory memories that last a lifetime.
Ingredients
Here’s what you’ll need to create BBQ chicken that captures all those summer flavors right in your home kitchen:
-
Chicken (bone-in, skin-on): I recommend using chicken thighs or drumsticks for maximum juiciness and flavor. If you prefer a leaner option, boneless chicken breasts will work, but keep an eye on cooking time to avoid dryness.
-
BBQ Sauce: Your favorite store-bought sauce works well, but homemade is always a treat! Look for a sauce that combines sweet, tangy, and smoky elements. And remember, it’s all about personal preference—don’t hesitate to experiment!
-
Olive Oil: A drizzle not only adds flavor but also helps the skin crisp up beautifully while roasting. You could use vegetable oil or melted butter as alternatives.
-
Garlic Powder: This adds depth to your seasoning without any fuss. Fresh garlic would work too, but be cautious not to burn it during grilling!
-
Onion Powder: A must-have for that savory base flavor! If you want to hit it up a notch, consider using shallots for a gentle twist.
-
Paprika: Smoked paprika gives a lovely color and rich flavor. You can swap it out for regular paprika if you prefer less smokiness or even chili powder for a spicier kick.
-
Salt and Pepper: Don’t skimp on seasoning! It can make or break your dish.
Substitution Tips:
Feel free to mix and match ingredients based on your dietary needs or what’s in your pantry! You can even go for a spicy BBQ sauce or add a few pinches of cayenne pepper for heat.
Step-by-Step Instructions
Now that we’ve gathered our ingredients, let’s dive into the step-by-step magic of creating savory BBQ chicken!
Step 1: Prepare the Chicken
Start by preheating your grill (or oven) to medium-high heat (about 375°F to 400°F). While it heats up, pat your chicken pieces dry with paper towels. This ensures a crisp skin! Don’t forget to take a moment to season your chicken generously with salt, pepper, garlic powder, onion powder, and paprika. Rub it all over, getting into those nooks and crannies!
Step 2: Oil Up
Once seasoned, drizzle a bit of olive oil over the chicken to help it crisp up and prevent sticking. You can even brush the oil directly onto the grill grates for added protection.
Step 3: Grill Time
Place your chicken skin-side down on the grill. The sizzle is music to your ears! Grill for about 5-7 minutes until those beautiful grill marks appear. Chef tip: Avoid flipping the chicken too soon; let it develop a good sear!
Step 4: Flip and Sauce
Once you’ve achieved that perfect golden-brown crust, flip the chicken pieces over. Now, it’s time to brush on your BBQ sauce! Use a generous amount and allow it to caramelize for another 5-7 minutes. This creates that delectable glaze we all love.
Step 5: Check for Doneness
To make sure your chicken is cooked through, you can check with a meat thermometer—the internal temperature should hit 165°F. If you don’t have a thermometer handy, simply pierce the thickest part of the chicken; the juices should run clear.
Step 6: Final Coat of Sauce
Before serving, brush on a final layer of BBQ sauce for that extra sticky goodness! If you’re feeling adventurous, toss on a sprinkle of crushed red pepper or fresh herbs for a pop of color.
Step 7: Rest and Serve
Let your chicken rest for about 5-10 minutes before serving. This step allows the juices to redistribute, ensuring each bite is super tender and moist.
Serving Suggestions
To serve, plate the BBQ chicken on a large platter, giving it a beautiful display. You can garnish with fresh parsley or cilantro for some color. Pair it with sides like coleslaw, cornbread, or grilled veggies for a complete meal that screams summer!
Recipe Variations
Feeling adventurous? Here are a few variations to shake things up:
-
Spicy BBQ Chicken: Add cayenne pepper or use a spicy BBQ sauce for a fiery kick.
-
Honey Mustard BBQ Chicken: Mix equal parts honey and yellow mustard with your sauce for a sweet and tangy twist.
-
Herb-Infused BBQ Chicken: Incorporate fresh herbs like rosemary or thyme into your BBQ sauce for added earthy flavors.
-
Tropical BBQ Chicken: Stir in some diced pineapple or mango into your BBQ sauce for a fruity glaze that’s perfect for summer.
-
Smoky Chipotle BBQ Chicken: Add chopped chipotle peppers in adobo sauce to your BBQ sauce for a smoky, spicy flavor profile.
Chef’s Notes
Over the years, this BBQ chicken recipe has become a staple in my kitchen. It started as a simple way to share meals with family, but it has evolved into an easy weeknight dinner or a go-to for gatherings! I love experimenting with regional barbecue styles; sometimes, I’ll infuse Asian flavors with soy sauce and sesame oil or give it a Caribbean flair with jerk seasonings! The possibilities are endless, and that’s what keeps cooking fun.
This dish has also led to some funny kitchen moments. One time, I tried to impress my friends with a BBQ chicken cook-off, and I accidentally left the chicken on the grill too long—smoke filled the air, and what was supposed to be a delicious dinner turned into a comic scene of panicking and waving fans to clear the smoke. Lesson learned: Always set a timer!
FAQs and Troubleshooting
How do I know when my chicken is done?
Use a meat thermometer! An internal temperature of 165°F is key for juicy chicken. If you don’t have one, poke into the thickest part of the chicken—if the juices run clear, you’re golden!
Can I make this BBQ chicken in the oven?
Absolutely! Preheat your oven to 400°F. Place the seasoned chicken on a baking sheet and bake for about 30-35 minutes, basting with BBQ sauce halfway through.
What should I do if my BBQ sauce burns on the grill?
Don’t panic! If you notice burning while cooking, lower the heat. If it gets too charred, you can always scrape off the burnt layer and apply a fresh coat of sauce for another flavor lift!
Can I marinate the chicken beforehand?
Yes! Marinating for a few hours or overnight adds intense flavor. Combine grill seasonings with olive oil and your BBQ sauce, then let the chicken soak up those delicious flavors in the fridge!
Nutritional Info (if applicable)
- Calories: Approx. 250-300 per serving (based on skin-on chicken thighs and BBQ sauce)
- Protein: 25g
- Carbs: 12g
- Fat: 14g
Remember that these values can vary based on the specific ingredients and portion sizes you’re using.
And there you have it, my friends! A heartfelt BBQ chicken recipe that’s sure to become a family favorite. Whether it’s a sunny backyard barbecue or a cozy dinner at home, this dish promises to bring joy and flavor. Don’t hesitate to share your experience in the comments below. I can’t wait to hear your kitchen stories and any tweaks you made to the recipe. Happy cooking! 🍗❤️
Print
Savory BBQ Chicken
- Total Time: 45 minutes
- Yield: 4 servings
- Diet: Paleo
Description
A delightful BBQ chicken recipe that captures the essence of summer gatherings and heartwarming family dinners.
Ingredients
- Chicken (bone-in, skin-on thighs or drumsticks)
- BBQ Sauce (store-bought or homemade)
- Olive Oil
- Garlic Powder
- Onion Powder
- Paprika
- Salt
- Pepper
Instructions
- Prepare the chicken by preheating your grill to medium-high heat and patting the chicken pieces dry.
- Drizzle olive oil over the chicken after seasoning it with salt, pepper, garlic powder, onion powder, and paprika.
- Place your chicken skin-side down on the grill and cook for about 5-7 minutes.
- Flip the pieces over and brush on your BBQ sauce, allowing it to caramelize for another 5-7 minutes.
- Check for doneness using a meat thermometer or by piercing the chicken to see if juices run clear.
- Brush on a final layer of BBQ sauce before serving.
- Let the chicken rest for about 5-10 minutes before plating.
Notes
Feel free to substitute ingredients based on dietary needs and preferences. Experiment with different BBQ sauce flavors for a unique twist.
- Prep Time: 15 minutes
- Cook Time: 30 minutes
- Category: Main Course
- Method: Grilling
- Cuisine: American
Nutrition
- Serving Size: 1 serving
- Calories: 300
- Sugar: 10g
- Sodium: 600mg
- Fat: 14g
- Saturated Fat: 3g
- Unsaturated Fat: 9g
- Trans Fat: 0g
- Carbohydrates: 12g
- Fiber: 0g
- Protein: 25g
- Cholesterol: 90mg
Keywords: BBQ chicken, summer recipe, grilling, family dinner, comfort food
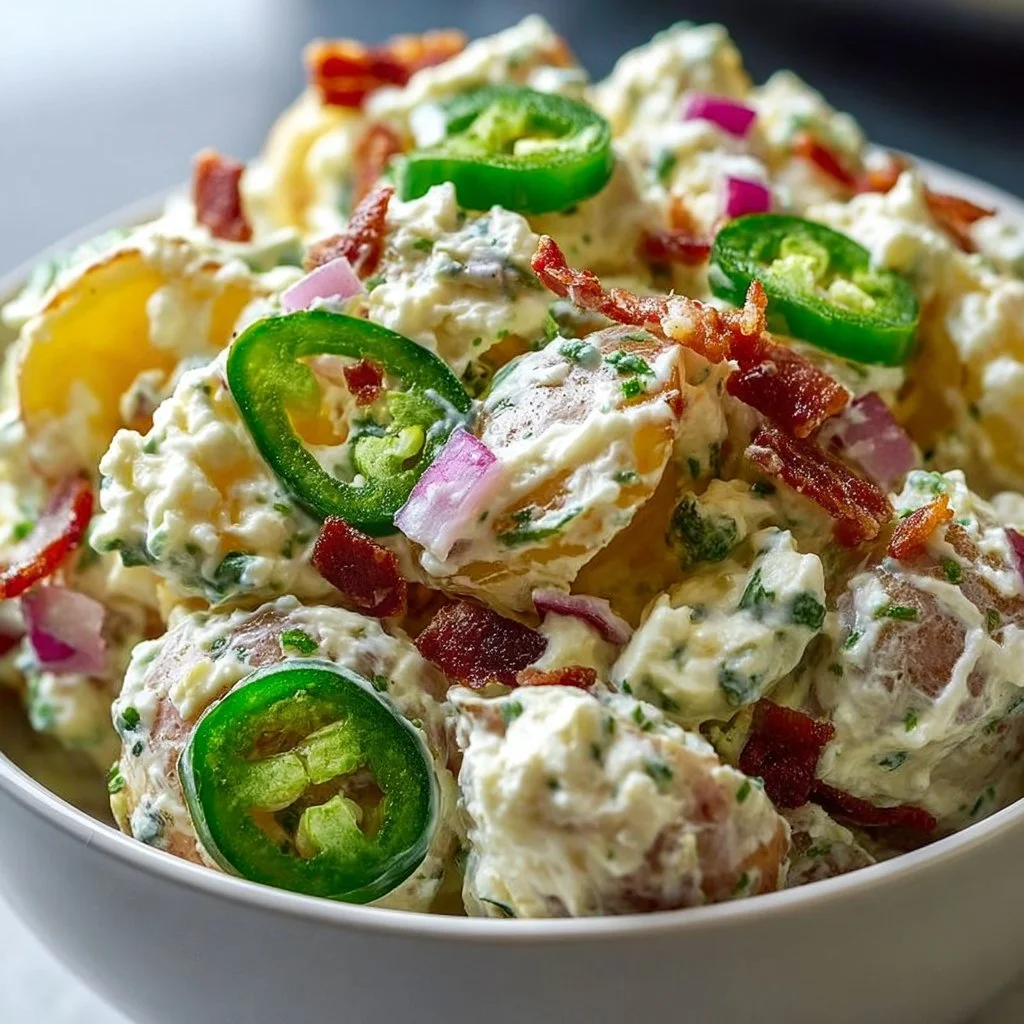
Tasty Jalapeno Potato Salad
Tasty Jalapeño Potato Salad: A Spicy Twist on a Classic
Welcome back to my kitchen, friends! Today, we’re spicing things up with a delightful twist on a classic dish — Jalapeño Potato Salad! You know that classic picnic staple that everyone fights over at summer barbecues? Well, we’re taking it up a notch and infusing it with a zesty, spicy kick that’s sure to become the star of your next gathering.
Imagine this: it’s a warm, sunny afternoon, and the grill is fired up, sending delicious aromas wafting through the air. You’re gathered with family and friends, laughter fills the air, and you can’t wait to unveil your culinary creation. As you serve up this Jalapeño Potato Salad, the vibrant colors of the green jalapeños and fresh herbs dance together, hinting at the exciting flavors that await. I promise you, this dish not only tastes fantastic but also brings a smile to everyone’s face (and their taste buds)!
As someone who thrives on creating meals that spark joy and conversation, I can assure you that this Jalapeño Potato Salad delivers both in spades. It’s creamy, it’s crunchy, and it’s downright delicious — a perfect blend of textures and flavors. Whether you’re hosting a backyard BBQ, a potluck, or just looking to jazz up your dinner table on a weeknight, this salad will fit right in. So roll up your sleeves, grab your apron (preferably one that’s a bit messy, just like mine), and let’s dive into this tasty endeavor together!
Personal Story
As I reminisce about my childhood summers, I can’t help but think about the family picnics we had at the local park. My parents would pack a cooler full of our favorite dishes, and my mom always made her signature potato salad. It was creamy, with just a hint of tanginess that made it utterly irresistible. But it wasn’t until I moved to Texas that I discovered the magic of jalapeños in potato salad.
One glorious afternoon, while visiting a friend’s family barbecue, I tasted a jalapeño version of my mom’s classic salad. Each bite was like an explosion of flavor, combining the comforting, familiar richness of the creamy potatoes with the vibrant heat of fresh jalapeños. It was an unforgettable combination that brought a new level of excitement to that beloved dish! That experience ignited my passion for blending tradition and flavor, and now, blending elements from my childhood with everything I’ve learned in the kitchen over the years is one of my favorite ways to create delicious meals that have a story to tell.
Ingredients
Let’s gather all the delicious ingredients we’ll need to create this fabulous Jalapeño Potato Salad! Here’s what you’ll need:
-
2 pounds of Yukon Gold potatoes
These creamy potatoes hold their shape well and have a buttery flavor that makes them perfect for salads. If you can’t find them, feel free to substitute with red potatoes or even Russet potatoes, though they may be a little less creamy. -
1 cup of mayonnaise
This is the base for your creamy dressing. You could swap this for Greek yogurt for a lighter version or use a vegan mayo for a dairy-free option! -
1 tablespoon of Dijon mustard
Adds a nice zesty tang! If you’re looking for more kick, you could use spicy mustard or even omit it if you prefer a smoother flavor. -
2-3 fresh jalapeños, finely diced
The star of our show! For a milder dish, remove the seeds and membranes; for an extra kick, leave them in. If fresh jalapeños aren’t available, you can use pickled jalapeños for a tangy twist. -
1/2 cup of red onion, finely diced
Adds crunch and sweetness. If you prefer a milder flavor, soak them in cold water for about 10 minutes to soften their bite. -
1/4 cup of fresh cilantro, chopped
Provides a vibrant contrast to the creamy potatoes. If you’re not a cilantro fan, parsley can also work well here! -
Salt and pepper to taste
Enhances all the flavors. Remember, you can always add more to suit your palate! -
1 tablespoon of apple cider vinegar
Gives a lovely tang that complements the creaminess. You may substitute with lemon juice for a fresh twist. -
Optional: 2-3 boiled eggs, chopped
For a heartier salad! You can omit them if you want to keep it lighter or go vegan.
Step-by-Step Instructions
Alright, let’s get down to business! Follow these easy steps, sprinkle in some love, and you’ll have a delicious Jalapeño Potato Salad ready for serving:
1. Boil the Potatoes
- Begin by placing the Yukon Gold potatoes in a large pot and cover them with cold water. Add a generous pinch of salt.
- Bring the water to a boil and then reduce to a simmer. Cook for about 15-20 minutes or until the potatoes are fork-tender but not mushy.
Chef’s Tip: You want them cooked perfectly, so keep an eye on them! If you overcook them, you’ll end up with a potato mush rather than a salad.
2. Cool and Dice
- Once cooked, drain the potatoes and let them cool for a while. Once they’re cool enough to handle, dice them into bite-sized pieces.
Chef Insight: I usually let them cool for about 15 minutes. This way, they’re still warm but not too hot to handle!
3. Prepare the Dressing
- In a bowl, mix together the mayonnaise, Dijon mustard, apple cider vinegar, salt, and pepper. Taste it and adjust seasoning as needed to find your perfect balance of tang and creaminess.
Chef Trick: If you’re looking for a lighter touch, add a splash of pickle juice to brighten it up!
4. Combine Ingredients
- In a large mixing bowl, combine the cooled diced potatoes, finely chopped jalapeños, red onion, and cilantro. Pour the dressing over the top and gently fold everything together until well coated.
Pro Tip: Be gentle when mixing to maintain the integrity of the potatoes; we want them to hold their shape!
5. Chill and Allow Flavors to Meld
- Cover the salad and let it chill in the refrigerator for at least 30 minutes (or up to 2 hours) before serving. This step allows the flavors to develop and mingle beautifully.
Chef’s Insight: Trust me, the wait will be worth it!
6. Final Tasting and Adjustments
- Before serving, give the salad one last taste. Adjust seasoning if necessary, adding more salt, pepper, or even a dash of hot sauce for extra heat if you’re feeling bold!
Here’s your chance to get a little extra creative!
Serving Suggestions
To serve this colorful Jalapeño Potato Salad, scoop it into a beautiful serving bowl and sprinkle a little extra cilantro on top for that finishing touch. You can also serve it alongside grilled meats, burgers, or as a dish at your next potluck!
For an Instagram-worthy presentation, try serving it in individual mason jars, layering the salad for a visually striking dish. How cute is that? Just don’t forget to add a little bit of their adorable charm to your table setting!
Recipe Variations
Feeling adventurous? Here are some fun twists you can try with your Jalapeño Potato Salad:
- Crispy Bacon Addition: Adding crispy, crumbled bacon can bring an irresistible savory crunch!
- Southwestern Twist: Incorporate black beans and corn for a hearty, southwestern-themed salad.
- Creamy Avocado: Add diced avocado for an extra creamy texture and healthy fats.
- Spicy Chipotle: Blend in some chipotle sauce or chopped chipotle peppers to infuse smoky heat.
- Vegan Delight: Swap out the mayo for avocado or a cashew cream for a vegan-friendly alternative!
Chef’s Notes
I love how versatile this Jalapeño Potato Salad is! Over the years, I’ve adapted this recipe many times, experimenting with different types of potatoes or even adding in seasonal veggies. One time, I made it with roasted red peppers and wow—you would think my whole street showed up for dinner!
Oh, and let me tell you about the day I completely forgot to put jalapeños in! I grabbed a bottle of hot sauce at the last minute and mixed it into the dressing. It turned out delicious, but I learned that the method matters just as much as the ingredients!
FAQs and Troubleshooting
Q: Can I make this potato salad ahead of time?
Absolutely! In fact, I recommend making it a day ahead. The flavors meld beautifully after resting in the fridge overnight.
Q: What if my potatoes become mushy?
If you overcook the potatoes, you won’t get that lovely salad texture. To prevent this, test with a fork at 15 minutes. They’re done when a fork can pierce them but they hold their shape.
Q: Can I serve this potato salad warm?
You sure can! While it’s typically served chilled, it can be enjoyed warm as well—especially on a cooler evening. Just keep the dressing simple.
Q: How can I store leftovers?
Store any leftovers in an airtight container in the fridge for up to 3 days. Just give it a gentle stir before serving again, as the ingredients may settle.
Nutritional Info (if applicable)
This Jalapeño Potato Salad is a delightful balance of carbohydrates, fats, and proteins. While specific nutritional values will vary based on your exact ingredients, you can expect roughly 250 calories per serving, with a healthy dose of potassium and vitamins from the potatoes and veggies. Want to lighten it up? Swap mayo for yogurt for a lower-calorie twist!
And there you have it—a delicious, spicy-staffed Jalapeño Potato Salad that’s bound to become a favorite at your table! Don’t forget to share your own twists on this recipe and any kitchen stories you have with friends and family. Happy cooking!
Print
Jalapeño Potato Salad
- Total Time: 40 minutes
- Yield: 6 servings 1x
- Diet: Vegetarian
Description
A delightful twist on a classic dish, this Jalapeño Potato Salad combines creamy Yukon Gold potatoes with zesty jalapeños for a perfect summer side.
Ingredients
- 2 pounds of Yukon Gold potatoes
- 1 cup of mayonnaise
- 1 tablespoon of Dijon mustard
- 2–3 fresh jalapeños, finely diced
- 1/2 cup of red onion, finely diced
- 1/4 cup of fresh cilantro, chopped
- Salt and pepper to taste
- 1 tablespoon of apple cider vinegar
- Optional: 2-3 boiled eggs, chopped
Instructions
- Boil the potatoes by placing them in a large pot and covering with cold water and salt. Bring to a boil, then simmer for 15-20 minutes until fork-tender.
- Cool and dice the potatoes into bite-sized pieces once they are cool enough to handle.
- Prepare the dressing by mixing mayonnaise, Dijon mustard, apple cider vinegar, salt, and pepper in a bowl.
- Combine the cooled potatoes, jalapeños, red onion, and cilantro in a large bowl. Pour the dressing over and fold gently.
- Chill the salad in the refrigerator for at least 30 minutes to meld flavors.
- Final taste and adjust seasoning before serving.
Notes
For a lighter version, substitute mayonnaise with Greek yogurt. Store any leftovers in an airtight container for up to 3 days.
- Prep Time: 20 minutes
- Cook Time: 20 minutes
- Category: Side Dish
- Method: Boiling
- Cuisine: American
Nutrition
- Serving Size: 1 serving
- Calories: 250
- Sugar: 2g
- Sodium: 433mg
- Fat: 18g
- Saturated Fat: 3g
- Unsaturated Fat: 14g
- Trans Fat: 0g
- Carbohydrates: 28g
- Fiber: 3g
- Protein: 4g
- Cholesterol: 30mg
Keywords: potato salad, spicy salad, jalapeño recipe, summer side dish, BBQ recipe
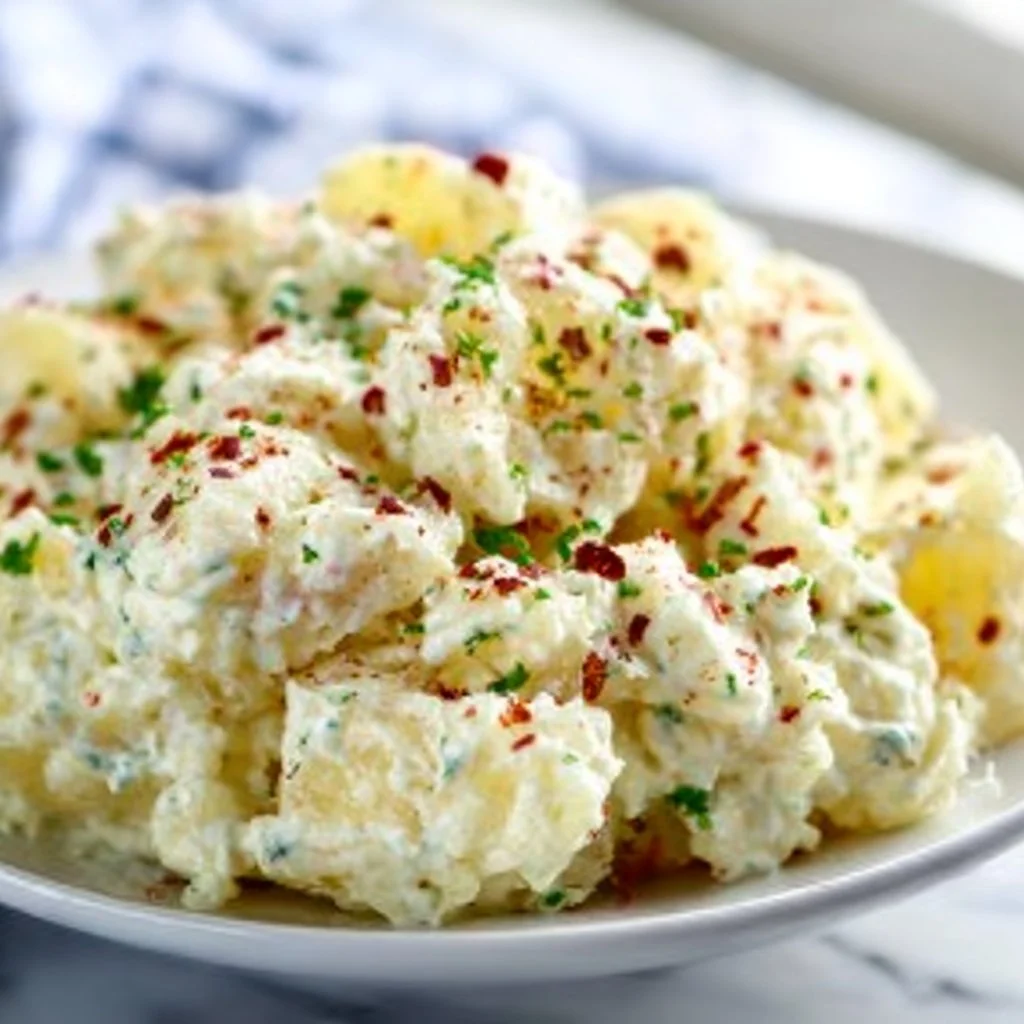
Old-Fashioned Potato Salad
The Ultimate Guide to Old-Fashioned Potato Salad: A Homestyle Classic
Hey there, friend! Welcome to my cozy kitchen, where we’ll embark on a delicious journey into the world of old-fashioned potato salad. This dish is not just a side; it’s a memory maker, a family favorite, and a staple at summer picnics and BBQs!
What is it about potato salad that instantly brings back warm memories? Maybe it was that backyard summer gathering where laughter filled the air, or perhaps it was that potluck you attended with friends, each of you bringing your best dish to share. For me, potato salad has always held a special place in my heart. It’s the dish that has been passed down through generations, evolving yet somehow staying true to its roots.
The best part? Making this classic can be a fantastic way to explore your own kitchen skills, connecting with the heart of home cooking. As we whisk together tangy mustard, creamy mayonnaise, and a bit of crunch from fresh celery, remember this dish is about warmth and togetherness. It’s not just about the ingredients but also about the moments shared around the table.
So, roll up your sleeves, grab your apron (hey, it’s going to get messy!), and let’s dive into the delightful world of old-fashioned potato salad. Together, we’ll turn those simple spuds into a comforting side dish that everyone will love. Are you ready? Let’s get cooking!
Personal Story
Growing up, every summer was marked by my Grandma Ella’s legendary potato salad. No family gathering was complete without her big bowl clinking against the table as we all gathered around, eager for our share. I remember those hot summer days in her backyard, the scent of grill smoke wafting through the air, and laughter mingling with the sound of kids playing tag under the sun.
One particular day stands out: the sun was shining, and the warmth wrapped around us like a cozy blanket. Grandma had an apron tied around her waist, flourished with colorful stains from past culinary adventures. As she deftly handled the potatoes, she would regale us with tales of her childhood, making us feel like part of her story. I loved helping her chop the onions and celery, feeling important with my ‘understudy’ chef status.
When it came time to taste that glorious potato salad for the first time, I could hardly contain my excitement. The creamy texture, combined with the slight tang from vinegar and mustard, was nothing short of magical! It wasn’t just a side — it was an expression of love and care, a tradition that brought us closer together. Now, every time I make potato salad, I channel that nostalgia, sprinkling in a little extra love, just like Grandma used to do.
Ingredients
Here’s what you’ll need to whip up this classic old-fashioned potato salad:
-
Potatoes (2 pounds): We’re using waxy potatoes like Yukon Golds, as they hold their shape well without becoming mushy. If you’re in a pinch, russets will work too, just keep a watchful eye while boiling!
-
Mayonnaise (1 cup): This is where the creaminess comes from! For a lower-fat version, you can use Greek yogurt or a vegan mayo for a dairy-free option.
-
Dijon Mustard (2 tablespoons): Adds a zesty kick that balances the creaminess of the mayo. If Dijon isn’t your thing, yellow mustard can substitute, just note that it has a different flavor.
-
Apple Cider Vinegar (2 tablespoons): This tangy element brightens up the salad. Try white wine vinegar for a milder flavor or even lemon juice for a fresh twist.
-
Celery (1 cup, diced): For that satisfying crunch! In place of celery, feel free to throw in diced pickles for a delightful tang or even radishes for an extra crunch.
-
Red Onion (1/2 cup, finely diced): The sweetness of red onion complements the dish beautifully. If you find red onion a bit too sharp, soak it in water for about 10 minutes to mellow the flavor.
-
Salt and Pepper (to taste): These essential seasonings are your best friends! Taste as you go, adjusting until it feels right.
-
Paprika (for garnish): Not just a garnish, paprika adds a dash of color and an earthy flavor! Consider smoked paprika for a different, deeper flavor profile.
Step-by-Step Instructions
-
Boil the Potatoes: Start by washing your potatoes thoroughly to remove any dirt. Cut them into evenly sized chunks (about 1.5 inches) to ensure they cook uniformly. Place the potatoes in a large pot, fill it with cold water until they’re adequately submerged, and add a generous pinch of salt. Bring this to a boil over medium-high heat and let it boil for about 10-15 minutes or until a fork easily pierces through them. Remember, you want them tender but not falling apart! Skilling in moisture control is crucial for that perfect texture.
-
Prep Your Veggies: While the potatoes are boiling, it’s the perfect time to get your celery and red onion diced. Aim for a fine dice to blend smoothly with the potatoes. Pro tip: if you soak your diced onion in cold water for a bit, it’ll lose some of its sharpness and leave your salad tasting fresher!
-
Mix Your Dressing: In a large mixing bowl, combine mayonnaise, Dijon mustard, and apple cider vinegar. Whisk them together until smooth and creamy. A chef hack: add a pinch of sugar to the dressing to balance out the tang and give it a subtle sweetness.
-
Combine Potatoes and Dressing: Once your potatoes are cooked and drained, let them cool for a bit. You want them warm, not hot, as this allows for better dressing absorption. Carefully fold them into the dressing mixture, being gentle not to mash the potatoes. Don’t get too rough; we want to maintain those lovely chunks!
-
Add Crunchies: Now, it’s time to fold in the celery and onions! Gently mix until everything is combined. Here’s another chef tip: if you want a creamier salad, let it chill in the fridge for about 30 minutes to meld all those glorious flavors!
-
Season and Garnish: Taste your potato salad! Add salt and pepper as needed. A sprinkle of paprika on top will do wonders for a pop of color and flavor.
-
Serve: Spooning it into a serving bowl for those family gatherings or a picnic? You can use a sprinkle of fresh herbs like parsley for a refreshing touch. If you’re taking it to a potluck, you might even want to cover it with plastic wrap and let it chill in the fridge until it’s ready to go!
Serving Suggestions
Old-fashioned potato salad shines best when served chilled or at room temperature. To elevate the presentation, scoop your salad into a beautiful serving bowl and sprinkle with fresh herbs or paprika for a colorful touch. Add in some crunchy pickles or olives on the side for extra flavor, and voilà — you’ve got a joyous centerpiece ready for any gathering!
Recipe Variations
- Bacon Lovers: Add crispy, crumbled bacon for a smoky flavor.
- Herbed Twist: Incorporate fresh dill or chives to infuse more freshness.
- Vegan Delight: Swap out mayo for a thick plant-based yogurt or tahini.
- Spicy Kick: Mix in finely chopped jalapeños or a dash of hot sauce for some heat!
- Mediterranean Flair: Add some chopped olives, sun-dried tomatoes, or feta cheese for a tangy twist.
Chef’s Notes
As I mentioned, potato salad has evolved in my kitchen. Grandma always added a little bit of this or a little bit of that; her “secret ingredient” was love and the memories we created together. It was also about experimenting; every time we made it, there were slight tweaks based on what she had in the pantry or her mood that day. Sometimes it was a dash of garlic powder, other times a spoonful of sweet relish. What I’ve learned over the years is that potato salad is like life — it blossomed with creativity, and any variations make it uniquely yours!
FAQs and Troubleshooting
1. Why did my potato salad turn out mushy?
- This might happen if you overcooked your potatoes. Aim for fork-tender, and make sure they’re even-sized for even cooking.
2. Can I make potato salad ahead of time?
- Absolutely! It’s great as it sits and the flavors meld together. Just be sure to store it in an airtight container in the fridge.
3. How do I fix overly tangy potato salad?
- If the salad tastes too tangy, stir in a spoonful of sugar or even a dollop of sour cream to balance it out.
4. Is it safe to leave potato salad out for a picnic?
- Potato salad shouldn’t be left out for more than 2 hours at room temperature, or 1 hour if it’s surrounded by heat. Always keep it chilled in a cooler if outdoors.
Nutritional Info
(For an approximate serving size of 1 cup)
- Calories: 350
- Total Fat: 22g
- Saturated Fat: 3g
- Cholesterol: 13mg
- Sodium: 420mg
- Total Carbohydrates: 30g
- Dietary Fiber: 3g
- Sugars: 2g
- Protein: 5g
Thank you for joining me on this delicious journey through old-fashioned potato salad! I hope as you create this dish in your own kitchen, you put a little spin on it, just like Grandma did, and make it a cherished recipe that will be passed down for generations to come. Happy cooking!
Print
Old-Fashioned Potato Salad
- Total Time: 30 minutes
- Yield: 8 servings 1x
- Diet: Vegetarian
Description
A classic homestyle potato salad loaded with creamy mayo, Dijon mustard, and crunchy celery, perfect for summer gatherings.
Ingredients
- 2 pounds waxy potatoes (such as Yukon Golds)
- 1 cup mayonnaise
- 2 tablespoons Dijon mustard
- 2 tablespoons apple cider vinegar
- 1 cup celery, diced
- 1/2 cup red onion, finely diced
- Salt and pepper, to taste
- Paprika, for garnish
Instructions
- Boil the potatoes: Wash, cut into chunks, place in a pot with water and salt. Bring to a boil for 10-15 minutes until fork-tender.
- Prep your veggies: Dice the celery and red onion, soaking onion in cold water to reduce sharpness.
- Mix your dressing: Combine mayonnaise, Dijon mustard, and apple cider vinegar in a bowl. Whisk until smooth.
- Combine potatoes and dressing: Fold warm potatoes into dressing carefully.
- Add crunchies: Gently mix in celery and onions.
- Season and garnish: Adjust salt and pepper, sprinkle paprika on top.
- Serve: Spoon into a bowl and enjoy at family gatherings or picnics.
Notes
For a creamier salad, let it chill in the fridge for about 30 minutes before serving. Add fresh herbs or crumbled bacon for variations.
- Prep Time: 15 minutes
- Cook Time: 15 minutes
- Category: Side Dish
- Method: Boiling
- Cuisine: American
Nutrition
- Serving Size: 1 cup
- Calories: 350
- Sugar: 2g
- Sodium: 420mg
- Fat: 22g
- Saturated Fat: 3g
- Unsaturated Fat: 15g
- Trans Fat: 0g
- Carbohydrates: 30g
- Fiber: 3g
- Protein: 5g
- Cholesterol: 13mg
Keywords: potato salad, summer side, classic recipe, picnic food
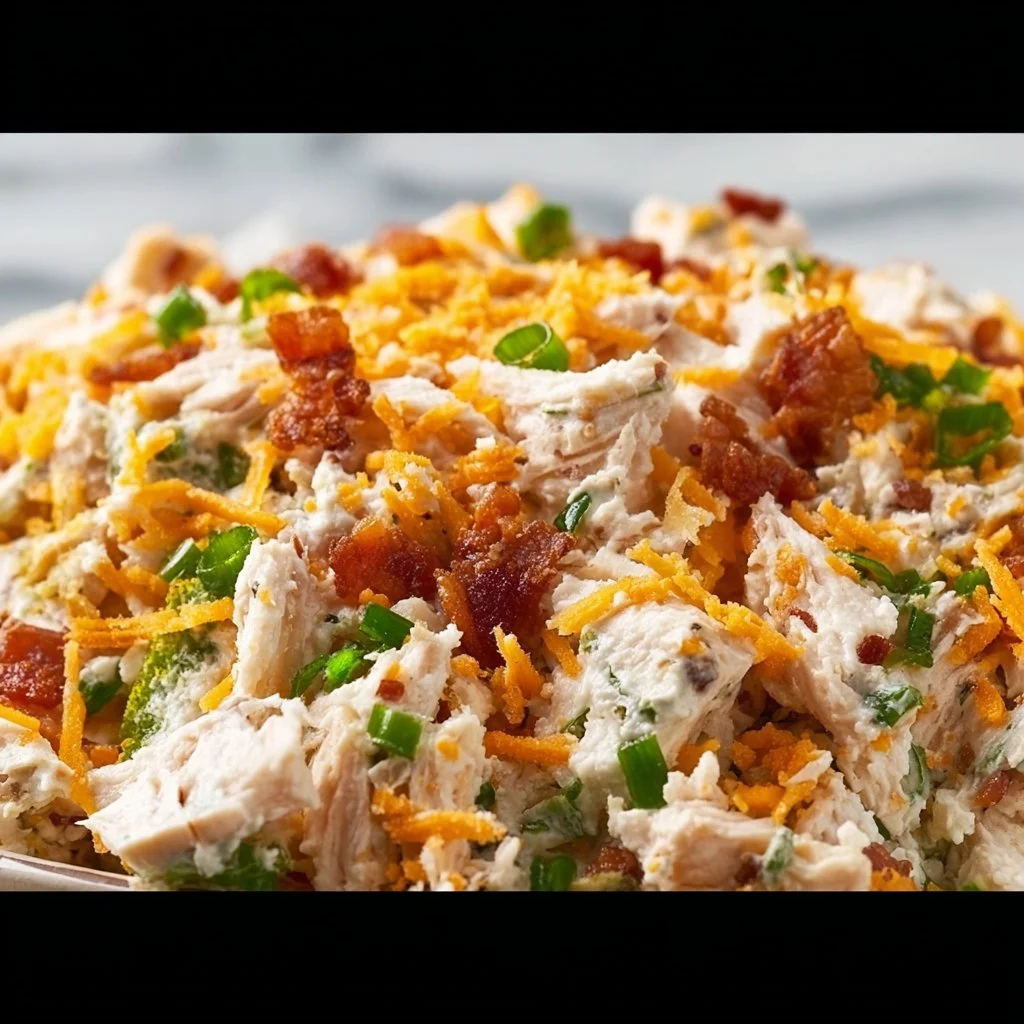
Bacon Ranch Chicken Salad with Cheddar (Low Carb)
Bacon Ranch Chicken Salad with Cheddar (Low Carb)
Welcome to my kitchen! Cooking for loved ones and creating meaningful meals is what feeds my soul, and I’m thrilled to share one of my go-to recipes with you today: Bacon Ranch Chicken Salad with Cheddar! This dish is not just a last-minute afterthought; it’s a flavorful explosion that can elevate any lunch or dinner and keep the low-carb lovers among us happy!
Imagine tender, juicy chicken mixed with rich, crispy bacon, and paired with the zesty flavors of ranch dressing. Top it off with sharp cheddar cheese, and you’ve got yourself a winning combination that even the pickiest eaters will love.
Settle in, grab your apron, and let’s embark on a culinary adventure that promises to warm your heart and tickle your taste buds!
A Fond Kitchen Memory: The Inspiration Behind This Salad
Before diving into the nitty-gritty of this delightful recipe, let me share a little backstory. Growing up, my family had a tradition of hosting summer barbecues that would stretch long into the evening, with the aroma of grilled meat filling the air and laughter echoing all around. My mom would often whip up her famous chicken salad, tossing together whatever was on hand and sprinkling in her magic touch—a touch of ranch seasoning, her secret weapon!
As the years passed, I began to put my spin on her recipe, particularly with the addition of crispy bacon and sharp cheddar cheese. The first time I made it for a casual get-together, friends were asking for seconds before they had even taken a full bite! With every bite, I’m reminded of family gatherings, sunny afternoons, and the heartwarming connection food brings. This recipe resonates not just for its taste but for the memories it creates, and I hope it brings you a sense of joy as you share it with your loved ones.
Ingredients
To make this delicious Bacon Ranch Chicken Salad with Cheddar, gather the following ingredients:
-
Cooked Chicken Breast
Tender and juicy, shredded or cubed chicken is the main star of this salad. Remember: rotisserie chicken is a fantastic shortcut! If you’re looking for a leaner option, opt for skinless chicken breast. -
Bacon
Ah, the crispy goodness that elevates any dish! Cook until golden and crispy. If you’re looking for a lower-fat alternative, turkey bacon works well, albeit with a different crunch. -
Sharp Cheddar Cheese
The bite of the cheddar adds richness to the salad. Feel free to swap it with mozzarella or a dairy-free cheese if you need a different flavor or a vegan option. -
Ranch Dressing
Store-bought or homemade, the creamy goodness is what ties everything together. Making your own ranch dressing with yogurt and herbs makes it even lighter! Look on the internet for countless simple recipes. -
Celery
Crunchy celery adds a refreshing texture. If you’re not a celery fan, diced bell peppers or cucumber can also work great! -
Green Onions
These bring a subtle kick and color to the salad. For a milder flavor, you could use chives instead. -
Salt and Pepper
The basic seasonings that can’t be skipped! Make sure to freshly grind them to enhance the flavors.
Step-by-Step Instructions
Now that we have our ingredients ready, let’s transform them into a summery salad that’s perfect for any occasion!
-
Cook and Prepare the Chicken
- If you’re using raw chicken, start by seasoning it with salt and pepper. Place it in a skillet over medium heat and cook until no longer pink—about 6-8 minutes per side, depending on thickness. Allow it to cool, and then shred or cube the chicken.
- Chef Tip: You can boil the chicken breast for quicker prep! Just ensure it’s thoroughly cooked, and it will shred like a dream.
-
Crisp the Bacon
- In a skillet over medium-high heat, add the chopped bacon. Cook until crispy and golden brown—about 5-7 minutes. Drain on a paper towel for extra crunch.
- Kitchen Hack: Use a baking sheet lined with parchment paper to cook your bacon in the oven for mess-free crispiness!
-
Prepare the Veggies
- While your chicken and bacon are doing their thing, chop the celery and slice the green onions.
- Chef Insight: To keep the colors vibrant, try to cut the veggies just before mixing. It keeps everything fresh and crunchy!
-
Mix It Up
- In a large mixing bowl, combine the chicken, crispy bacon, cheddar cheese, celery, and green onions.
- Pour in your ranch dressing and mix it all together until everything is coated in that creamy goodness.
- Savvy Tip: Adjust the amount of dressing according to your taste. If you’re feeling adventurous, try adding a splash of lemon juice or a teaspoon of Dijon mustard to brighten the flavors!
-
Season to Taste
- Don’t forget to taste! Add any extra salt or pepper as needed.
- Little Secret: A pinch of garlic powder or smoked paprika will add an unexpected depth if you’re craving something a bit more complex.
-
Chill and Serve
- It’s optional, but chilling your salad for at least 30 minutes in the refrigerator lets the flavors meld beautifully.
- Serve it chilled or at room temperature, either on a bed of leafy greens, inside a wrap, or stuffed in a low-carb tortilla!
Serving Suggestions
Presentation is everything! For a delightful plate, serve your Bacon Ranch Chicken Salad on a bed of crisp romaine lettuce or in hollowed-out bell peppers. Sprinkle extra bacon bits and chopped green onions on top for a pop of color and crunch. Pair it with some homemade low-carb crackers or a side of sliced avocado for a complete meal. Don’t forget to pour yourself a refreshing glass of lemonade while you’re at it!
Recipe Variations
Feel free to experiment! Here are a few of my favorite twists:
- Spicy Twist: Add diced jalapeños or a splash of hot sauce for a kick!
- Mediterranean Style: Substitute the ranch dressing with tzatziki for a refreshing take. Toss in olives and sun-dried tomatoes for added flavor.
- Add Fruits: Toss in diced apples or grapes for an unexpected sweetness that contrasts beautifully with the salty bacon.
- Herbaceous Touch: Fresh herbs like dill or parsley can elevate the flavor profile—just sprinkle some in!
- Veggie-Packed Version: Add shredded carrots or diced bell peppers for an extra crunch and colorful presentation.
Chef’s Notes
Over the years, this recipe has become a beloved staple not just for me but for friends and family alike. I remember the first time I brought it to an office potluck; it was devoured within minutes! The best part? This salad holds up beautifully in the fridge, making it perfect for meal prep. Don’t be surprised if you find yourself making double batches—one for now and one for later!
And let me tell you, finding little bits of bacon hidden in the bottom of the bowl is a delightful surprise for everyone.
FAQs and Troubleshooting
1. Can I prep this salad ahead of time?
Absolutely! You can make this salad a day ahead, but I suggest storing the bacon separately until just before you serve. This keeps that glorious crunch intact!
2. How long will the salad last in the fridge?
In an airtight container, this salad stays fresh for about 3 days. Trust me; it tastes even better the next day as the flavors meld!
3. What if my salad turns out too dry?
No stress! Just add a little more ranch dressing or a splash of chicken broth to bring it back to life.
4. What’s the best way to keep the bacon crispy?
Store the bacon separately if you know you’ll have leftovers. When ready to serve, reheat in the microwave for a few seconds or pop it back in the skillet for a quick re-crisping!
Nutritional Info
(If you’re tracking your macros, here’s a quick overview!)
- Serving Size: About 1 cup
- Calories: Approximately 350 kcal
- Protein: 30g
- Fat: 25g
- Carbohydrates: 4g
- Fiber: 1g
Now that you’ve got all the details, it’s time to don your apron and give this recipe a whirl! I can’t wait for you to sit down, take a bite, and hopefully feel a warm wave of nostalgia and happiness—just like I do every time I whip up this delicious Bacon Ranch Chicken Salad with Cheddar. Happy cooking!
Print
Bacon Ranch Chicken Salad with Cheddar
- Total Time: 30 minutes
- Yield: 4 servings
- Diet: Low Carb
Description
A flavorful low-carb salad featuring tender chicken, crispy bacon, and sharp cheddar, all tossed in a creamy ranch dressing.
Ingredients
- Cooked Chicken Breast
- Bacon
- Sharp Cheddar Cheese
- Ranch Dressing
- Celery
- Green Onions
- Salt and Pepper
Instructions
- Cook and prepare the chicken by seasoning with salt and pepper, cooking in a skillet until no longer pink, then cooling and shredding.
- Crisp the bacon in a skillet until golden brown, then drain on a paper towel.
- Prepare the veggies by chopping celery and slicing green onions.
- Mix the chicken, crispy bacon, cheddar cheese, celery, and green onions in a large bowl. Pour in ranch dressing and combine.
- Season to taste with additional salt and pepper.
- Chill the salad in the refrigerator for at least 30 minutes.
- Serve the salad on a bed of leafy greens or in a low-carb tortilla.
Notes
This salad can be made ahead of time, and is best if the bacon is stored separately until serving to keep it crispy.
- Prep Time: 15 minutes
- Cook Time: 15 minutes
- Category: Salad
- Method: Mixing
- Cuisine: American
Nutrition
- Serving Size: 1 cup
- Calories: 350
- Sugar: 1g
- Sodium: 600mg
- Fat: 25g
- Saturated Fat: 10g
- Unsaturated Fat: 10g
- Trans Fat: 0g
- Carbohydrates: 4g
- Fiber: 1g
- Protein: 30g
- Cholesterol: 100mg
Keywords: chicken salad, bacon salad, low carb salad, ranch dressing, easy salad recipe




