
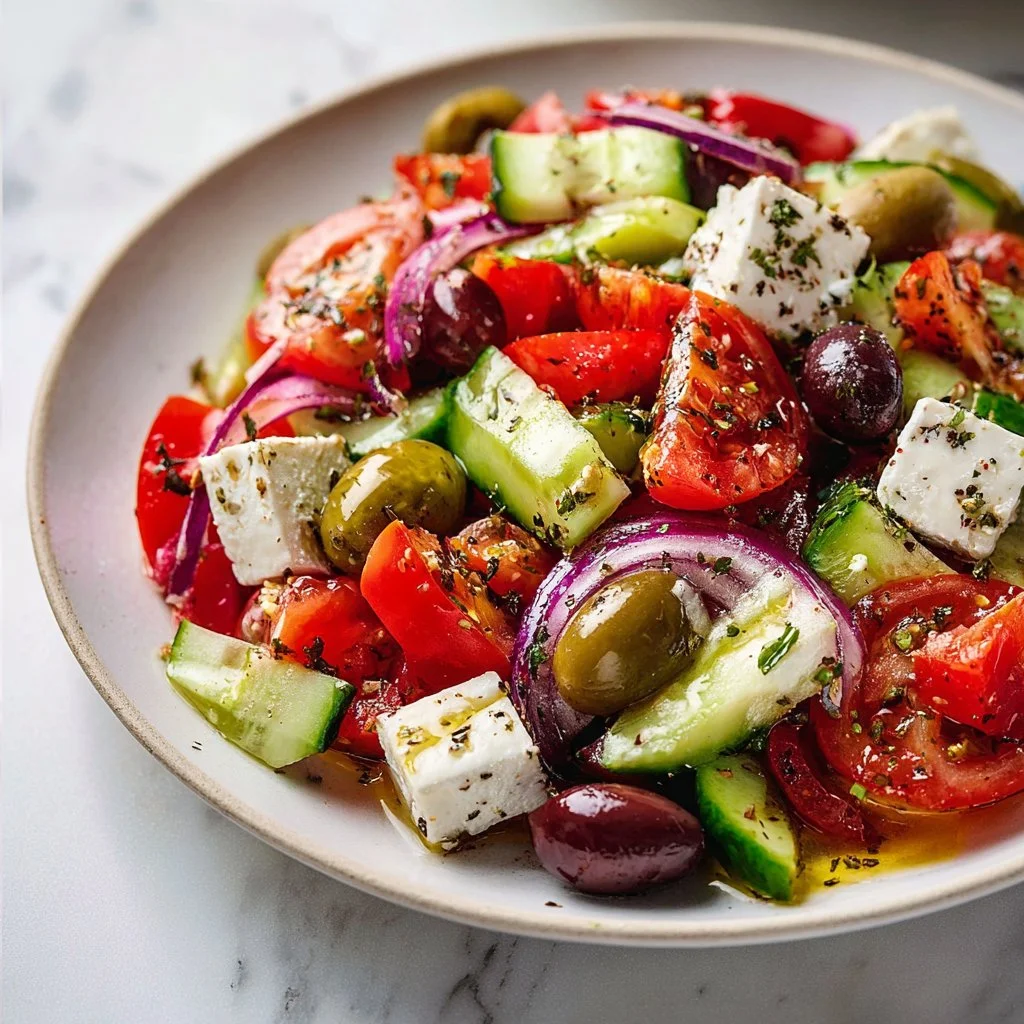
Vegan Greek Salad
Vegan Greek Salad: A Fresh and Flavorful Delight!
Welcome to my kitchen! I’m Olivia Bennett, your friendly neighborhood home cook. Today, we’re diving into a vibrant, refreshing dish that’s perfect for summer picnics, cozy family dinners, or anytime you want a little sunshine on your plate. Say hello to my Vegan Greek Salad!
Imagine walking through a bustling Mediterranean market, surrounded by the intoxicating scents of sun-ripened tomatoes, crunchy cucumbers, and fragrant herbs. That’s the essence of a classic Greek salad, and I’ve put a delightful, plant-based twist on it that’s sure to spark joy at your dining table. This dish isn’t just about eating; it embodies the spirit of togetherness that flavors bring to our lives. Let’s get started crafting this beautiful dish, shall we?
Personal Story: Memories of a Mediterranean Summer
Some of my most cherished childhood memories revolve around summer vacations spent with my family in Greece. I can still remember sitting at a rustic tavern by the sea, the air filled with the sound of waves crashing and laughter ringing in my ears. My cousin Sofia was an aspiring chef at the time, and she’d whip up the most incredible Greek salad from ingredients picked fresh from the family garden. Each bite was a celebration of taste, color, and sunshine, and I couldn’t get enough of how the simple veggies danced together in harmony.
Years later, when I transitioned to a vegan lifestyle, I knew I had to recreate that iconic dish with a little twist. The result? An incredible Vegan Greek Salad that captures all that nostalgia but is full of plant-based goodness. It’s a dish that tells a story—a fusion of flavors and fond memories—and I can’t wait to share it with you!
Ingredients
Let’s gather what you need to make this bright and tasty Vegan Greek Salad. Here’s a handy list of ingredients, along with some tips and insights to guide you.
-
Cucumbers (2): Crisp and cool, cucumbers are the foundation of any great Greek salad. Choose firm, unblemished cucumbers. If you prefer a tangier kick, try pickling them for a few hours!
-
Tomatoes (4): Use juicy, ripe tomatoes—plum or heirloom varieties work wonderfully. If tomatoes aren’t in season, canned whole tomatoes are a solid substitute for that rich flavor.
-
Red Onion (1 small): Thinly sliced, it adds a beautiful bite. If raw onion is too strong for you, soak the slices in cold water for 10-15 minutes to mellow the flavor.
-
Bell Peppers (1): A colorful addition! I love using a mix of red and yellow bell peppers for sweetness. If you want a bit of heat, add a splash of chopped jalapeños.
-
Kalamata Olives (1/2 cup): The star of the show! Their briny flavor takes this salad to a whole new level. If you’re Kalamata-averse (gasp!), try green olives or even chickpeas for texture.
-
Fresh Parsley (1/4 cup): Bright and herbaceous, parsley adds a fresh burst to the salad. Fresh dill or mint can also lend a delightful twist.
-
Olive Oil (3-4 tablespoons): Use good-quality extra virgin olive oil to really tie the salad together. If you’re looking for something lighter, opt for a splash of lemon-infused oil.
-
Red Wine Vinegar (2 tablespoons): This zesty element elevates the dressing. You can swap it for balsamic vinegar, but just be aware that it will change the salad’s color.
-
Dried Oregano (1 teaspoon): A staple in Greek cuisine, oregano adds an aromatic note. Fresh oregano can be substituted for a more intense flavor if you have it on hand.
-
Sea Salt and Pepper: For seasoning. Remember, you can always adjust these to your taste!
Step-by-Step Instructions
Now that we’ve gathered our ingredients, let’s get cooking! Follow these steps to create a mouthwatering Vegan Greek Salad that will have everyone clamoring for seconds.
-
Prep Your Veggies: Begin by washing your cucumbers and tomatoes under cool water. Use a vegetable peeler to remove strips of skin from your cucumbers for added texture. Cut them in half lengthwise, then slice into half-moons. For the tomatoes, core them and cut into bite-sized chunks. Pro tip: If you’re feeling fancy, try using a serrated knife for those tomatoes!
-
Slice and Dice: Finely slice your red onion and bell pepper. Keep those slices thin, as it keeps the flavors balanced. Make sure to use a sharp knife—it saves time and ensures you get clean cuts.
-
Mix and Mingle: In a large mixing bowl, combine the cucumbers, tomatoes, red onion, bell pepper, and Kalamata olives. Gently toss them together—it’s like giving them a little dance!
-
Dress It Up: In a separate small bowl, whisk together the olive oil, red wine vinegar, dried oregano, salt, and pepper. Taste and adjust if needed! A little extra oil can make it richer, while a splash more vinegar offers that zing we love.
-
Incorporate the Dressing: Drizzle this beautiful dressing over your prepared veggies, then gently toss everything until the ingredients are well-coated. Remember to handle the salad with care; you want those beautiful pieces to stay intact!
-
Finishing Touch: Lastly, add in the fresh parsley. Toss gently one final time to combine. Voilà! Your Vegan Greek Salad is ready to shine!
Serving Suggestions
Time to elevate your presentation! Serve your Vegan Greek Salad in a large, shallow bowl, which allows for the colorful vegetables to be the star of the show. Drizzle a bit more olive oil on top for that extra shine and garnish with a sprig of fresh parsley for a pop of color. If you’re feeling adventurous, toss in some baked pita chips for crunch or serve it alongside warm pita bread!
Recipe Variations
What I love about this Vegan Greek Salad is its versatility! Here are a few fun variations:
-
Add More Protein: Toss in some chickpeas, quinoa, or even vegan feta cheese for a heartier dish.
-
Fruit Fusion: Add slices of ripe avocado or even some juicy watermelon for a sweet twist that contrasts beautifully with the savory elements.
-
Spicy Kick: Sprinkle red pepper flakes or diced fresh jalapeños for a kick of heat!
-
Nutty Surprise: Crushed walnuts or sunflower seeds can be a great addition for some crunch and an extra layer of flavor.
-
Mediterranean Twist: Try adding artichoke hearts or roasted red peppers for another layer of Mediterranean flair!
Chef’s Notes
As with any recipe, there’s always room for experimentation! This Vegan Greek Salad has evolved over time as I’ve learned what flavors I truly love. I once tried incorporating roasted veggies into it, and while it was delicious, I found that the freshness of raw ingredients captures that summery vibe I crave. And let’s talk about leftovers! This salad is perfect for meal prep. Just keep the dressing separate until you’re ready to enjoy it to maintain the crispness of the veggies.
FAQs and Troubleshooting
-
Q: Can I make this salad ahead of time?
A: Absolutely! Just keep the dressing separate until you’re ready to serve to prevent sogginess. It’ll stay fresh in the fridge for 2-3 days. -
Q: What if I’m not a fan of olives?
A: No worries at all! You can skip them and replace them with roasted chickpeas for that satisfying bite. -
Q: Can I use different vegetables?
A: Yes, go wild! Feel free to use any fresh veggies you love, like radishes, zucchini, or even salad greens as a base. -
Q: What’s the best way to store leftovers?
A: Store any leftovers in an airtight container in the fridge. Keep the dressing separate for longer freshness.
Nutritional Info (optional)
While the nutritional content can vary depending on the specific ingredients used, a typical serving of this Vegan Greek Salad can provide:
- Calories: Approximately 150 kcal
- Carbohydrates: 10 grams
- Protein: 3 grams
- Fat: 10 grams
This fresh salad is not only rich in vitamins but a wonderful way to get your daily dose of veggies!
And there you have it—my vibrant Vegan Greek Salad recipe that captures the essence of fresh Mediterranean flavors, sprinkled with love and nostalgia. This dish is about more than just the ingredients; it’s about coming together, sharing stories, and creating memories around the table. So grab your friends or family, whip up this delicious salad, and watch it become a staple in your kitchen for years to come! Happy cooking! 🍽️
Print
Vegan Greek Salad
- Total Time: 15 minutes
- Yield: 4 servings 1x
- Diet: Vegan
Description
A vibrant and refreshing vegan twist on the classic Greek salad, perfect for summer picnics and family dinners.
Ingredients
- 2 Cucumbers
- 4 Tomatoes
- 1 small Red Onion
- 1 Bell Pepper
- 1/2 cup Kalamata Olives
- 1/4 cup Fresh Parsley
- 3–4 tablespoons Olive Oil
- 2 tablespoons Red Wine Vinegar
- 1 teaspoon Dried Oregano
- Sea Salt and Pepper to taste
Instructions
- Prep your veggies: Wash cucumbers and tomatoes under cool water, peel cucumbers, cut them in half lengthwise, then slice. Core and cut tomatoes into bite-sized chunks.
- Slice and dice: Finely slice red onion and bell pepper.
- Mix and mingle: In a bowl, combine cucumbers, tomatoes, red onion, bell pepper, and olives. Gently toss.
- Dress it up: In a small bowl, whisk olive oil, vinegar, oregano, salt, and pepper.
- Incorporate the dressing: Drizzle the dressing over veggies, gently toss.
- Finishing touch: Add fresh parsley, toss gently one final time.
Notes
Serve in a large bowl with extra olive oil on top and garnish with fresh parsley. Keep dressing separate if preparing in advance.
- Prep Time: 15 minutes
- Cook Time: 0 minutes
- Category: Salad
- Method: No cooking
- Cuisine: Mediterranean
Nutrition
- Serving Size: 1 serving
- Calories: 150
- Sugar: 4g
- Sodium: 280mg
- Fat: 10g
- Saturated Fat: 1g
- Unsaturated Fat: 9g
- Trans Fat: 0g
- Carbohydrates: 10g
- Fiber: 3g
- Protein: 3g
- Cholesterol: 0mg
Keywords: Vegan, Greek Salad, Mediterranean, Summer Salad, Healthy Recipes
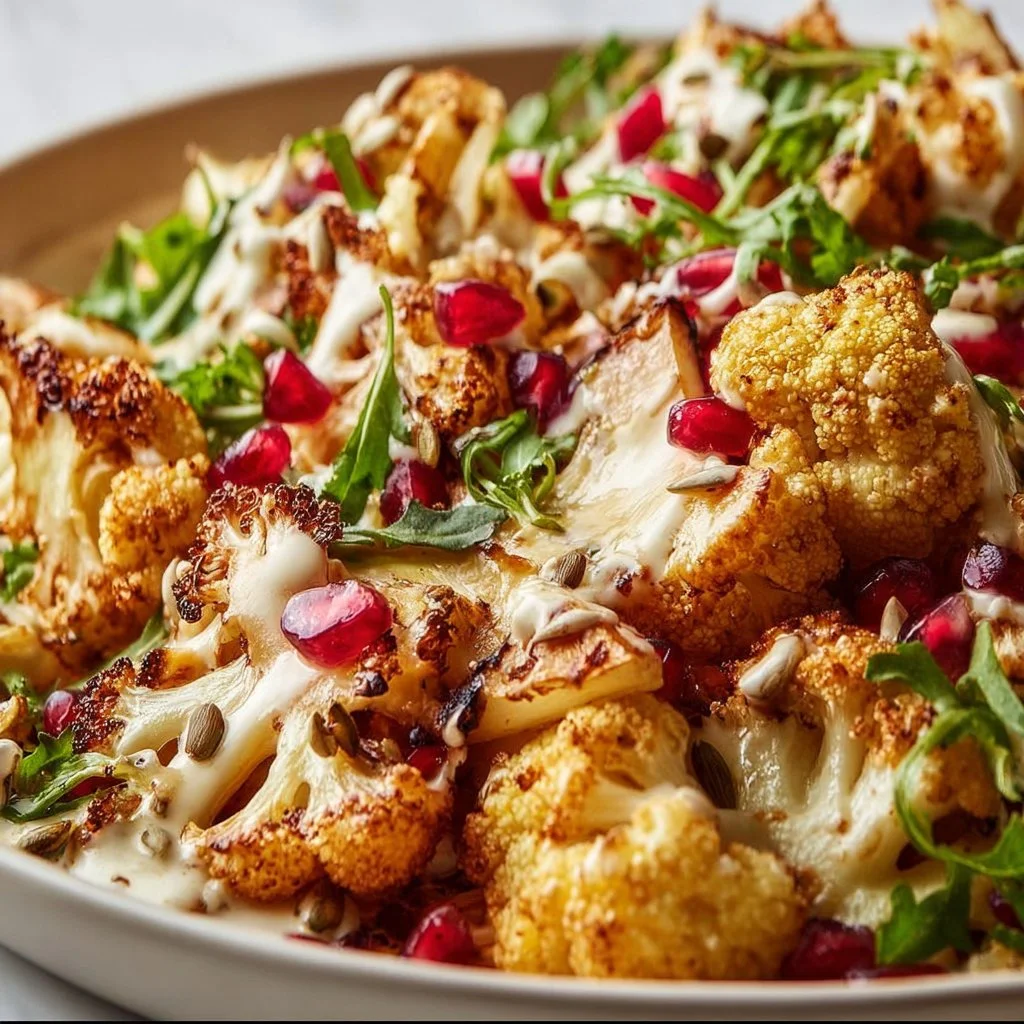
Roasted Cauliflower Tahini Salad
Roasted Cauliflower Tahini Salad: A Flavorful Journey
Hey there, fellow food lovers! Welcome back to my cozy little corner of the internet. I’m thrilled you’ve joined me today because we’re diving into a dish that is not just a salad, but a celebration of flavor and creativity—Roasted Cauliflower Tahini Salad!
Now, you might think salad is a boring side item, but trust me, this one is anything but mundane. We’re talking about golden-brown, caramelized cauliflower kissed by a drizzle of rich tahini, tossed together with vibrant greens, and topped with a burst of fresh herbs. It’s a cozy embrace for your taste buds, cozy enough to make you feel like you’re indulging in comfort food, yet light enough to leave you feeling fantastic and energized.
I remember the first time I experimented with roasted cauliflower—it was a chilly autumn evening, and I was rummaging through my fridge, trying to make something magical out of what was left. The moment that beautiful cauliflower hit the oven, my kitchen filled with that irresistible, nutty aroma, and I knew I was onto something special. It inspired me to pair it with tahini, a creamy, rich sauce that seemed to take the dish to a whole new level. I could hardly wait to dig in!
So grab your apron, and let’s embark on this flavorful journey together. Whether you’re feeding a crowd or treating yourself to a delightful meal, this Roasted Cauliflower Tahini Salad is perfect for all occasions. Ready? Let’s get cooking!
Personal Story
The love I have for roasted cauliflower connects back to my childhood when my grandmother would serve us her famous roasted vegetable medley at every Sunday family dinner. While she had a special way with all the veggies, I was particularly captivated by the cauliflower. Its flavor transformed when caramelized in the oven, and the way it mingled with herbs and seasoning was pure bliss.
One rainy day, while I was at my grandmother’s house, I decided to try my hand at her recipe. I remember every step vividly—huddled over the oven, glasses fogged up from the steam, eagerly waiting for that unmistakable aroma of toasty vegetables. She popped her head around the corner and caught me; rather than offering criticism, she shared stories of her kitchen adventures and taught me some of her best tips.
Those moments shaped my love for cooking and strengthened my belief that food is about more than just nourishment; it’s about connection, tradition, and flavor. That’s why I’m so excited to share this salad with you. Not only does it remind me of those fun culinary explorations with my grandmother, but it also embodies my desire to bring joy and togetherness through food.
Ingredients
Let’s gather our ingredients for this mouthwatering salad! Here’s what you’ll need:
-
Cauliflower (1 medium head)
The star of our show! When roasted, cauliflower takes on a nutty flavor and a caramelly sweetness. You can substitute it with broccoli or Brussels sprouts if you prefer. -
Olive Oil (3 tablespoons)
A good quality extra virgin olive oil gives a lovely richness to the dish. If you’re looking to change it up, avocado oil works just as well. -
Tahini (½ cup)
This creamy sesame paste adds depth and richness. Don’t have tahini? Try using almond butter or Greek yogurt for a different spin! -
Lemon Juice (2 tablespoons)
Freshly squeezed lemon juice brightens everything up! Lime juice works great too if you’re in a pinch. -
Garlic (2 cloves, minced)
Adds a wonderful pungency. You can use garlic powder—about a teaspoon—if you want to keep prep minimal. -
Salt & Pepper (to taste)
Essential for any recipe! Experiment with smoked salt or a pinch of cayenne for added flair. -
Fresh Parsley or Cilantro (1/4 cup, chopped)
Fresh herbs elevate the dish and provide a burst of freshness. If you’re not a fan of these, green onions or mint would be fantastic substitutes. -
Baby Spinach or Mixed Greens (4 cups)
A bed of greens gives this salad a lovely base. Kale or arugula would bring their unique flavors and textures! -
Pumpkin Seeds (½ cup, toasted)
These bring a delightful crunch! Sunflower seeds are also an excellent alternative if you have allergies.
Step-by-Step Instructions
Now that we have our ingredients ready, let’s get to the fun part—cooking! Follow these steps for a Roasted Cauliflower Tahini Salad that will wow your friends and family.
Step 1: Preheat the oven
Start by preheating your oven to 425°F (220°C). Preheating is crucial for that perfectly roasted, caramelized flavor that we’re aiming for.
Step 2: Prepare the cauliflower
While the oven heats, let’s tackle that gorgeous cauliflower. Remove the leaves and stem, then cut it into bite-sized florets. Make sure the pieces are roughly the same size so they cook evenly. You want to achieve that luscious caramelization on each piece!
Pro tip: If you have leftover stalks, don’t toss them! They can be roasted alongside the florets for added flavor and nutrition.
Step 3: Season
In a large bowl, toss your cauliflower florets with olive oil, minced garlic, salt, and pepper. Make sure each piece is well-coated! This step enhances the natural flavors and sets the stage for that delicious roasted taste.
Step 4: Roast
Spread the cauliflower on a lined baking sheet in a single layer. This allows the heat to circulate properly and promotes even cooking. Roast for about 25–30 minutes, or until the florets are golden brown and tender. Halfway through, give them a little stir to ensure they caramelize beautifully on all sides.
Chef hack: If you want even more flavor, sprinkle some smoked paprika or chili powder on the florets just before roasting!
Step 5: Make the tahini dressing
While the cauliflower roasts, let’s prepare the tahini dressing. In a small bowl, combine tahini, lemon juice, a pinch of salt, and a tablespoon of water. Whisk until you achieve a creamy texture. If it’s too thick, add more water a teaspoon at a time until it reaches your desired consistency. This dressing can also be made ahead of time and stored in the fridge for up to a week.
Step 6: Assemble the salad
In a large serving bowl, layer your greens. Once the cauliflower is out of the oven, let it cool for a few minutes before layering it on the bed of greens. Drizzle your tahini dressing generously over everything and sprinkle with fresh herbs and toasted pumpkin seeds for an added crunch.
Step 7: Toss & Serve
Gently toss the salad to combine all those fantastic flavors, and serve immediately. This salad is fantastic warm, but it also makes a great make-ahead option for lunch the next day!
Serving Suggestions
To plate the Roasted Cauliflower Tahini Salad, I love to serve it in large, rustic bowls that highlight the vibrant colors of the ingredients. Add an extra drizzle of tahini on top for presentation, and don’t forget to sprinkle with some extra herbs. Serve alongside crusty bread or grilled chicken for a complete meal that’s sure to impress.
Recipe Variations
-
Spicy Kick: Add a pinch of crushed red pepper flakes or drizzle Sriracha over the salad for a spicy twist!
-
Mediterranean Flair: Toss in some chopped olives and feta cheese for a delightful Mediterranean vibe.
-
Autumn Harvest: Swap in roasted sweet potatoes or butternut squash in place of the cauliflower for a seasonal variation.
-
Nutty Boost: Add some toasted pine nuts alongside pumpkin seeds for an extra layer of crunch and flavor.
-
Vegan Delight: Keep it entirely plant-based, and try using a cashew-based tahini dressing for a creamier, dreamy experience.
Chef’s Notes
Creating this Roasted Cauliflower Tahini Salad truly has been a delightful culinary journey for me. Initially, I hesitated about the tahini dressing, as I wasn’t sure how it would meld with the roasted veggies. However, the first bite changed everything; the nutty notes of tahini combined with the roasted flavor of cauliflower was transformational!
Over the years, I’ve played around with this recipe, adding and swapping ingredients based on seasonal availability. No matter how you customize it, the heart of this salad remains the same: love and connection through cooking and sharing food with those we cherish.
FAQs and Troubleshooting
1. My cauliflower isn’t browning—what gives?
This might be due to overcrowding. Make sure to spread the florets out on the baking sheet in a single layer, allowing them room to roast evenly!
2. How long can I store leftover salad?
You can store the salad in an airtight container in the fridge for 2-3 days. However, I recommend keeping the dressing separate to avoid sogginess.
3. The tahini dressing is too thick—what can I do?
This is a common issue! Simply whisk in a little bit of water, lemon juice, or olive oil a teaspoon at a time until you reach the desired consistency.
4. Can I make this salad ahead of time?
Absolutely! Roast the cauliflower and prepare the dressing in advance; just assemble it right before serving for the freshest taste.
Nutritional Info
While the nutritional content can vary based on your specific ingredients and portion sizes, this Roasted Cauliflower Tahini Salad is generally a low-calorie yet nutrient-dense dish. It’s rich in vitamins, minerals, and healthy fats, making it a fantastic option for a balanced meal.
And there you have it—a recipe that marries nostalgia and innovation, bringing forth a stunning Roasted Cauliflower Tahini Salad. I hope this dish fills your home with echoes of laughter and warmth, just as it does in mine. Happy cooking! 🍽️✨
Print
Roasted Cauliflower Tahini Salad
- Total Time: 45 minutes
- Yield: 4 servings 1x
- Diet: Vegan
Description
A flavorful salad featuring roasted cauliflower, rich tahini, vibrant greens, and fresh herbs, perfect for any occasion.
Ingredients
- 1 medium head Cauliflower
- 3 tablespoons Olive Oil
- ½ cup Tahini
- 2 tablespoons Lemon Juice
- 2 cloves Garlic, minced
- Salt & Pepper, to taste
- ¼ cup Fresh Parsley or Cilantro, chopped
- 4 cups Baby Spinach or Mixed Greens
- ½ cup Pumpkin Seeds, toasted
Instructions
- Preheat the oven to 425°F (220°C).
- Prepare the cauliflower by removing the leaves and stem, and cutting it into bite-sized florets.
- Toss the cauliflower florets with olive oil, minced garlic, salt, and pepper in a large bowl.
- Spread the cauliflower on a lined baking sheet in a single layer and roast for about 25–30 minutes or until golden brown and tender.
- Make the tahini dressing by combining tahini, lemon juice, a pinch of salt, and a tablespoon of water in a small bowl. Whisk until creamy.
- Layer the greens in a large serving bowl, then add the roasted cauliflower on top.
- Drizzle the tahini dressing over the salad and sprinkle with fresh herbs and toasted pumpkin seeds.
- Toss gently to combine and serve immediately.
Notes
This salad can be made ahead; just store the dressing separately to avoid sogginess. Add a pinch of red pepper flakes for a spicy kick!
- Prep Time: 15 minutes
- Cook Time: 30 minutes
- Category: Salad
- Method: Roasting
- Cuisine: Mediterranean
Nutrition
- Serving Size: 1 serving
- Calories: 340
- Sugar: 4g
- Sodium: 320mg
- Fat: 27g
- Saturated Fat: 4g
- Unsaturated Fat: 20g
- Trans Fat: 0g
- Carbohydrates: 24g
- Fiber: 7g
- Protein: 9g
- Cholesterol: 0mg
Keywords: roasted cauliflower, tahini salad, vegan salad, healthy salad, Mediterranean dish
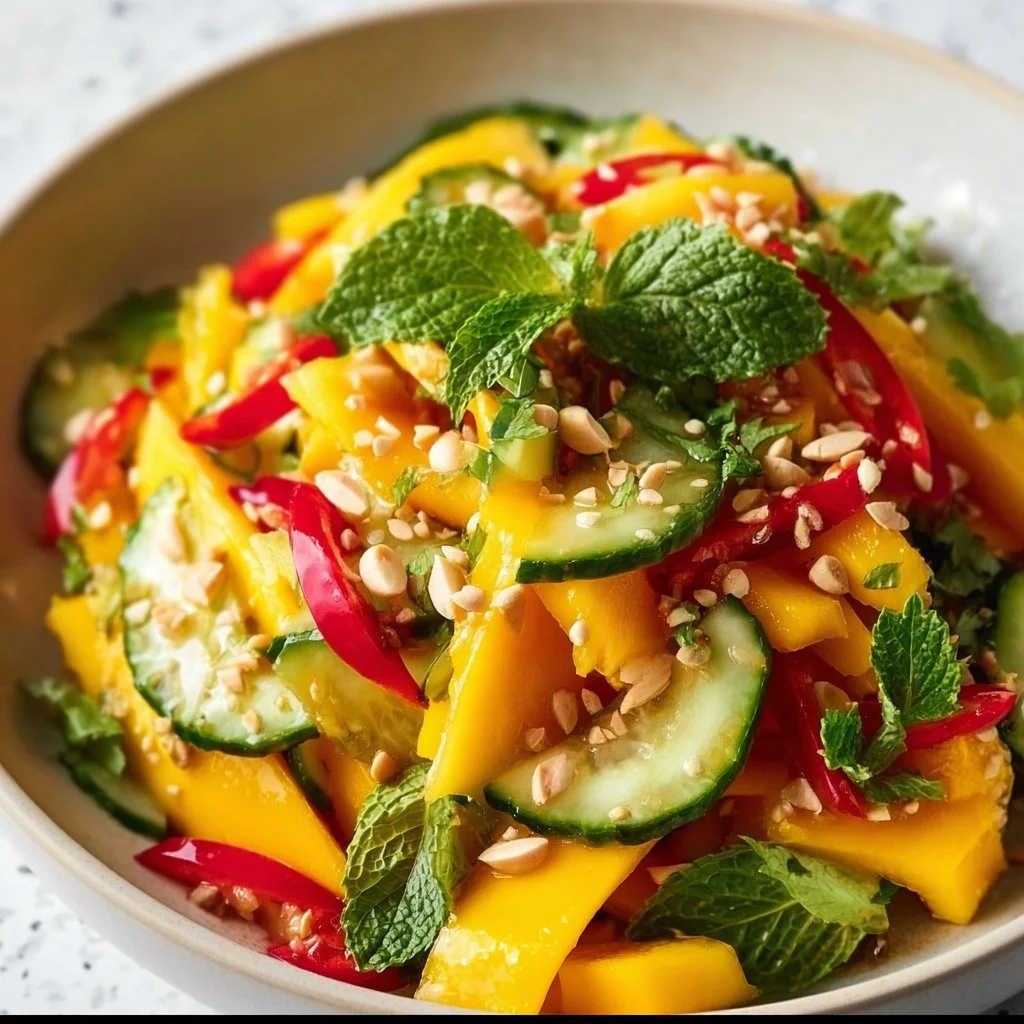
Thai Mango Salad
Thai Mango Salad: A Bright, Fresh Taste of Summer
Welcome back to my kitchen, dear food lovers! Today, we’re diving into a dish that’s as refreshing as a breeze on a hot summer day — Thai Mango Salad. If you’re searching for a recipe that’s bursting with vibrant flavors and textures, you’ve landed in the right spot. This salad is not only a feast for the eyes, but it also brings together the sweet, tangy, and spicy notes that Thai cuisine is famous for.
Imagine sitting outside on a sun-drenched patio, surrounded by friends and family, as the scent of fresh herbs and juicy mango tantalizes your taste buds. That’s the magic of this salad—it’s perfect for those light summer lunches or as a side dish at a gathering. Pair it with grilled chicken or shrimp for a heartier meal, or simply savor it on its own for a refreshing snack.
This recipe is all about ease and accessibility. You don’t need to be a professional chef to recreate this delightful dish; it’s designed to reflect the joy and spontaneity of home cooking. Each ingredient plays a significant role in creating a balance of flavors that leaves you craving more. So, roll up your sleeves and get ready to create a salad that’s as stunning to look at as it is to eat. Let’s uncover the secrets to crafting the perfect Thai Mango Salad!
Personal Story
Reflecting on my culinary journey, I can’t help but think of the summer vacations I spent with my grandparents in their small house near the coast. My grandmother, a master in the kitchen, would whip up the most exquisite Thai-inspired dishes that made my taste buds dance. Thai Mango Salad was one of her summertime staples, and I can still vividly recall the way the kitchen would fill with laughter as we prepped the ingredients together.
One particular day, I remember her peeling a perfectly ripe mango. She handed me the knife with a wink and said, “Cooking is like painting, darling. Every ingredient is a color on your palette.” That day, we filled our salad with the brightest greens, the juiciest mangos, and an array of herbs I had never heard of before. Watching her toss everything together with her effortless flair, I felt inspired to embrace cooking’s creativity.
Every time I make this salad today, I’m transported back to that sunny kitchen filled with love and laughter, which is precisely why I’m excited to share this recipe with you. It’s more than just food; it’s a celebration of togetherness, shared experiences, and the delightful flavors of summer.
Ingredients
Let’s gather our ingredients! This salad is not just about following a recipe; it’s about embracing the unique flavors each ingredient brings. Here’s what you’ll need:
-
2 ripe mangos: Choose mangos that are slightly soft to the touch. They should be yellow with a bit of green. If you can’t find ripe mangos, you can use sliced peaches or nectarines for a similar sweetness.
-
2 cups shredded green cabbage: This provides crunch and body to the salad. If you prefer something lighter, you could substitute it with shredded romaine or spinach.
-
1 cup grated carrots: Carrots add a sweet crunch. If you’re looking for a quick prep, pre-grated carrots work just as well!
-
1/2 cup red bell pepper, thinly sliced: Red bell peppers contribute a vibrant color and sweet flavor. For a bit of heat, consider using thinly sliced jalapeños instead.
-
1/4 cup chopped fresh cilantro: This herb adds a pop of freshness. If you’re not a fan of cilantro, fresh mint or basil can offer a different twist.
-
1/4 cup chopped green onions: Great for a mild onion flavor. Chives or shallots could serve as alternatives.
-
1/4 cup roasted peanuts, roughly chopped: Peanuts bring crunch and saltiness to the dish. For nut-free options, sunflower seeds are a great alternative.
-
For the dressing:
- 3 tablespoons fish sauce: A key component in Thai cuisine, but if you’re vegetarian or vegan, use soy sauce or tamari instead for a similar umami flavor.
- 2 tablespoons lime juice: Fresh lime juice brightens everything up! Lemon juice could be used in a pinch.
- 1 tablespoon sugar: Balances the saltiness and acidity. Honey or agave syrup works as a substitute.
- 1 teaspoon chili flakes: For that Kick! You can adjust the quantity depending on your heat preference; sliced fresh chilies work well here too!
Let’s make sure to grab everything fresh and vibrant because that’s what truly elevates this Thai Mango Salad.
Step-by-Step Instructions
Now, let’s get cooking! The beauty of this salad lies in its simplicity, so follow along with these easy steps:
Step 1: Prepare the Mangos
- Start by peeling the ripe mangos. Use a sharp knife to slice the flesh away from the pit.
- Cut the mango into thin strips or cubes — whichever texture you prefer best!
- Tip: If the mangos are a bit slippery, a peeler can help get the skin off without too much fuss.
Step 2: Chop the Vegetables
- Grab your cabbage and finely shred it with a sharp knife or use a food processor for convenience.
- For the carrots, you can use a box grater to get those fine shreds or just buy pre-grated ones; no judgment!
Step 3: Combine Everything
- In a large mixing bowl, combine the shredded cabbage, grated carrots, sliced bell pepper, chopped cilantro, and green onions.
- Chef Hack: Mixing the veggies in a large bowl helps them toss together better later on. It also allows you to see the beautiful colors you’ll end up with!
Step 4: Make the Dressing
- In a separate bowl, whisk together the fish sauce, lime juice, sugar, and chili flakes until the sugar fully dissolves.
- Note: Taste the dressing and adjust the sweetness or acidity to your liking.
Step 5: Toss it All Together
- Pour the dressing over the salad mix and toss until everything is well combined.
- Pro Tip: I like to let the salad sit for about 10 minutes before serving. This allows the flavors to mingle perfectly — a little magic happens here!
Step 6: Serve It Up!
- Just before serving, sprinkle the chopped peanuts on top for that delicious crunch.
- Plating Tip: You can serve this salad individually in bowls or on a large platter. Either way, it’ll look stunning!
Serving Suggestions
Serve your Thai Mango Salad as a vibrant side dish for grilled meats or alongside a bowl of jasmine rice. It’s also wonderful on its own for a light and refreshing lunch. Make sure to garnish with extra lime wedges and perhaps a few cilantro sprigs — presentation matters just as much as flavor!
Recipe Variations
Feel free to get creative! Here are some fun flavor variations:
- Add Protein: Toss in grilled shrimp, chicken, or tofu for a heartier salad.
- Fruity Twist: Substitute mangos with papaya or add in some pineapple for a tropical twist.
- Spice it Up: Consider adding diced Thai bird chilies for an extra kick of heat.
- Herb Swaps: Use fresh basil or mint instead of cilantro for a different aromatic profile.
- Crunch Factor: Add crispy shallots or fried garlic for an extra layer of texture and flavor.
Chef’s Notes
As a home cook, I’ve learned to adapt recipes based on what’s in season or simply what I have in my kitchen. Every time I make this Thai Mango Salad, I play with the ingredients a bit. Sometimes, I even toss in some leftover grilled chicken or a handful of avocado for creaminess.
One memorable kitchen mishap happened when I decided to make this salad for a potluck dinner. I accidentally mistook salt for sugar in the dressing! Let’s just say, it was a flavorful reminder to double-check my seasoning! Thankfully, my friends were forgiving and we laughed about it together over the actual delicious batch I made later on.
FAQs and Troubleshooting
1. How do I know if my mango is ripe?
Look for mangos that yield slightly to gentle pressure. If they feel hard, give them another day or two to ripen at room temperature.
2. Can I prepare the salad ahead of time?
You can prep the veggies and make the dressing ahead of time, but I recommend tossing everything together just before serving to keep the vegetables crisp.
3. What can I substitute for fish sauce?
Soy sauce or a vegan fish sauce made from mushrooms will work wonderfully if you want a vegetarian option.
4. How do I prevent the salad from getting soggy?
To keep your salad fresh, avoid adding the dressing until you’re ready to serve. You can also serve the salad in a separate bowl and let guests dress their servings.
Nutritional Info
While I’m not a nutritionist, I can tell you that Thai Mango Salad is naturally a healthier option. It’s packed with vitamins from the fresh veggies and mangos and is typically low in calories. The healthy fats from peanuts and the lovely dressing provide balanced flavors without guilt!
So there you have it! A comprehensive guide to making a delicious Thai Mango Salad that will have you reminiscing of sunny days and laughter-filled kitchens. Remember, cooking is all about having fun and experimenting— so get in there and make this dish your own! Happy cooking! 🍽️✨
Print
Thai Mango Salad
- Total Time: 15 minutes
- Yield: 4 servings 1x
- Diet: Vegan
Description
A refreshing Thai Mango Salad bursting with vibrant flavors, perfect for summer lunches or as a side dish at gatherings.
Ingredients
- 2 ripe mangos
- 2 cups shredded green cabbage
- 1 cup grated carrots
- 1/2 cup red bell pepper, thinly sliced
- 1/4 cup chopped fresh cilantro
- 1/4 cup chopped green onions
- 1/4 cup roasted peanuts, roughly chopped
- 3 tablespoons fish sauce
- 2 tablespoons lime juice
- 1 tablespoon sugar
- 1 teaspoon chili flakes
Instructions
- Prepare the mangos by peeling and slicing the flesh away from the pit, then cut into strips or cubes.
- Chop the vegetables: finely shred the cabbage and grate the carrots.
- Combine all the chopped vegetables in a large mixing bowl.
- Make the dressing in a separate bowl by whisking together fish sauce, lime juice, sugar, and chili flakes.
- Toss the dressing with the salad mix until well combined.
- Serve the salad topped with chopped peanuts for added crunch.
Notes
Allow the salad to sit for about 10 minutes before serving to let the flavors meld. Serve with extra lime wedges for garnish.
- Prep Time: 15 minutes
- Cook Time: 0 minutes
- Category: Salad
- Method: Mixing
- Cuisine: Thai
Nutrition
- Serving Size: 1 serving
- Calories: 250
- Sugar: 12g
- Sodium: 300mg
- Fat: 9g
- Saturated Fat: 1g
- Unsaturated Fat: 8g
- Trans Fat: 0g
- Carbohydrates: 37g
- Fiber: 5g
- Protein: 5g
- Cholesterol: 0mg
Keywords: Thai salad, mango salad, summer recipes, vegan salad
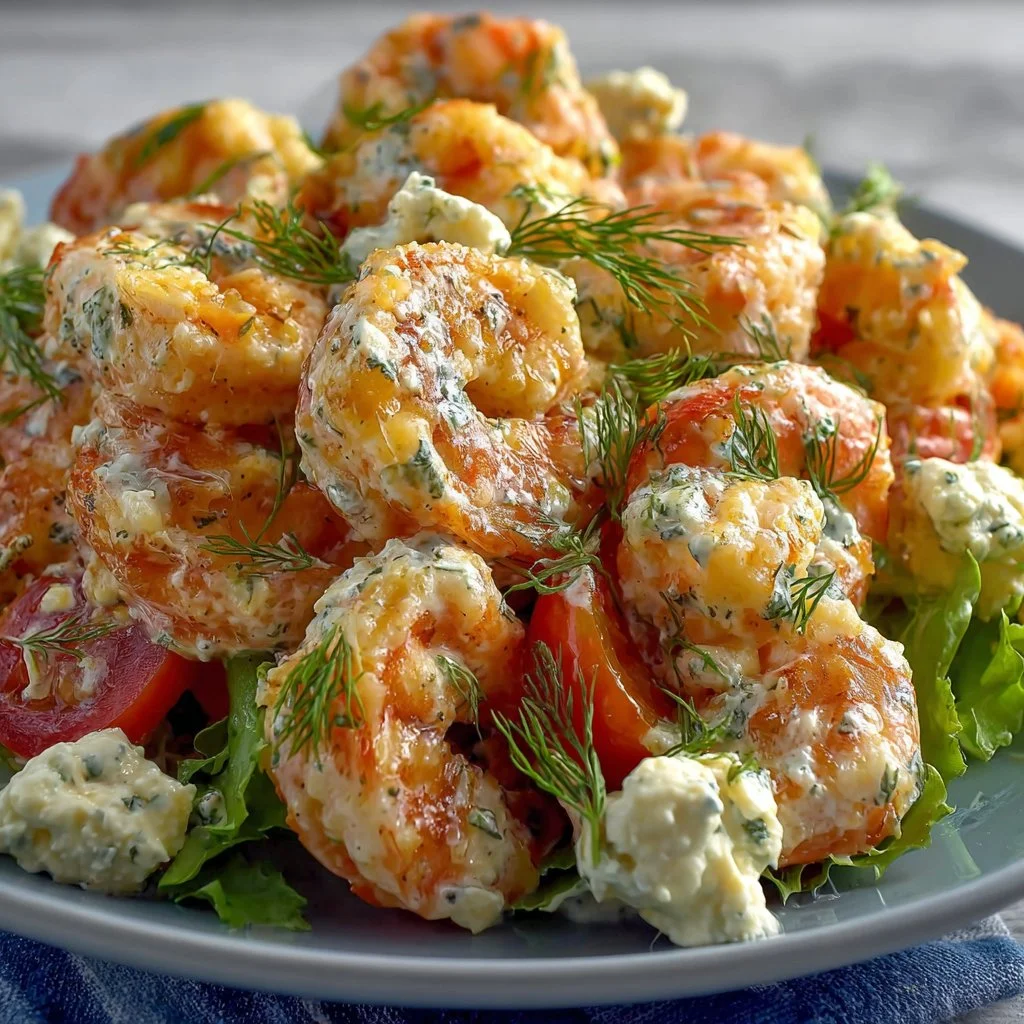
Shrimp Salad Recipe
The Ultimate Shrimp Salad Recipe: A Flavorful Dive into Summer Freshness
Welcome to my cozy kitchen, where the appliances hum a sweet tune and the aroma of fresh ingredients wafts through the air! I’m Olivia Bennett, and today we’re diving into one of my all-time favorite recipes: a vibrant, zesty Shrimp Salad that’s perfect for any occasion. Whether you’re gearing up for a beautiful summer gathering, prepping a quick lunch, or simply craving something deliciously fresh, this salad is here to bring a smile to your face and a little sunshine to your plate.
I remember the first time I had a shrimp salad that made my heart dance. I was at a seaside restaurant, the waves crashing in the background, and I could smell the salty sea breeze mingling with the inviting aromas of grilled seafood. When my shrimp salad arrived, it was beautifully plated — a colorful array of crisp greens, succulent shrimp, and a dressing that made my taste buds sing. As I took that first bite, it felt like summer itself exploded in my mouth! It was a dish rich in flavor and nostalgia, instantly transporting me back to lazy beach days and laughter-filled gatherings.
That experience sparked my love for shrimp salads, and I took the memory home with me. With a few tweaks and personal touches over the years, I’ve crafted a recipe that is sure to bring you the same joy. Are you ready? Let’s get cooking!
Ingredients
Here’s a list of simple yet high-quality ingredients you’ll need to whip up this delightful Shrimp Salad. Each ingredient adds its own flair, and I’ll include some handy tips for substitutions and insights along the way:
-
1 lb (450g) shrimp (peeled and deveined): Choose fresh or frozen shrimp; both work well! If you’re feeling adventurous, try swapping in grilled chicken or even tofu for a vegetarian version.
-
4 cups mixed greens (spinach, arugula, and kale): Use whatever greens you love! Mixed greens add a beautiful crunch. If you’re looking for a low-carb option, opt for a bed of zucchini noodles.
-
1 cup cherry tomatoes (halved): Sweet cherry tomatoes add a burst of flavor. You can substitute these with grape tomatoes or even roasted heirlooms for a bit more depth.
-
1 avocado (sliced): Creamy avocado brings richness to the salad. If you’re avoiding avocados, try a sprinkle of sunflower seeds for crunch or a dollop of hummus on top.
-
1/2 cucumber (diced): Crisp cucumber balances the tanginess of the dressing beautifully. For a twist, try pickled cucumbers for some zesty zing.
-
1/4 red onion (thinly sliced): A little sharpness from red onions enhances the overall taste. If you’re sensitive to onion flavors, green onions or chives make a great substitute.
-
1/4 cup fresh herbs (cilantro, parsley, or dill): Fresh herbs elevate the flavors—feel free to mix and match! Basil would pair beautifully if you’re going for an Italian vibe.
-
1/3 cup olive oil: A good-quality olive oil is essential for the dressing; it adds richness. You can switch to sesame oil for an Asian twist or use a lighter oil if that’s your preference.
-
Juice of 1 lemon: Fresh lemon juice brightens everything up! Lime or even orange juice can work wonders if you’re feeling experimental.
-
Salt and pepper to taste: Always season to perfection! You can experiment with flavored salts for an added kick.
-
Optional toppings: Try goat cheese, feta, or toasted nuts for extra flavor and texture. Remember, it’s all about what you love!
Step-by-Step Instructions
Let’s get down to the nitty-gritty of making this delicious Shrimp Salad. Follow these steps, and I promise you’ll impress yourself (and maybe even a few friends)!
-
Prep Your Shrimp: If using frozen shrimp, make sure to thaw them in advance by placing them in a bowl of cold water for 15-20 minutes. While you’re at it, let’s bring some flavor to those shrimp! In a medium bowl, toss the shrimp with a drizzle of olive oil, a pinch of salt, a pinch of pepper, and a sprinkle of your favorite herbs. Let them marinate while we prepare the rest!
-
Sauté the Shrimp: Heat a skillet over medium-high heat and add a splash of olive oil. Once the pan is hot, add the seasoned shrimp. Sauté for about 2-3 minutes on each side, or until they turn pink and opaque. Be careful not to overcook them; we want them tender and juicy! Once cooked, remove the shrimp from the heat and let them cool slightly.
-
Prepare Your Greens: In a large bowl, add your mixed greens, diced cucumber, halved cherry tomatoes, and sliced red onion. Give them a gentle toss to combine. This creates a colorful base for our salad!
-
Make the Dressing: In a small bowl, whisk together olive oil, lemon juice, salt, and pepper. Taste it, and adjust the flavors to your liking. If you like an extra zing, add a touch more lemon!
-
Combine It All: Now, add the sautéed shrimp to the bowl of greens. Pour the dressing over the top and gently toss everything together until it’s well coated. Don’t be afraid to get your hands in there for this one — it’s how the magic happens!
-
Plate Your Creation: To serve, layer the salad onto plates and top with sliced avocado and fresh herbs. If you’re feeling fancy, drizzle with a bit of balsamic glaze for a beautiful finish.
Serving Suggestions
This Shrimp Salad is as beautiful as it is tasty! For an elegant presentation, consider using a large platter to showcase the colorful ingredients. Add some grilled corn, or sprinkle your favorite cheese over the top for a gourmet touch. Serve with crusty bread or delightful pita chips for crunch, and don’t forget a chilled glass of white wine or sparkling water with a splash of lemon—it’s the perfect pairing!
Recipe Variations
Get creative with your Shrimp Salad by adapting it in unique ways! Here are a few ideas to inspire you:
-
Mediterranean Shrimp Salad: Toss in Kalamata olives, feta cheese, and a splash of red wine vinegar to create a Greek twist.
-
Tropical Shrimp Salad: Add diced mango, pineapple, or fresh coconut for a refreshing summer vibe.
-
Spicy Shrimp Salad: Mix in a little sriracha or chopped jalapeños to give it some heat!
-
Pasta Shrimp Salad: Mix in cooked pasta (like orzo or penne) for a heartier dish that works great as a meal prep option.
-
Asian-Inspired Shrimp Salad: Swap the herbs for cilantro and add sesame seeds and shredded carrots, drizzled with soy sauce or a ginger dressing.
Chef’s Notes
Over the years, this Shrimp Salad has evolved in my kitchen, inspired by the seasons and the fresh produce available at the farmers’ market. Sometimes, I even sneak in leftovers from last night’s dinner for an extra flavor pop! I recall a time when I forgot the lemon juice in a batch, and it turned out to be an unexpected success with a touch of lime instead. Remember, cooking is all about experimenting and having fun. Don’t be afraid to put your spin on it!
FAQs and Troubleshooting
1. Can I make this salad ahead of time?
Absolutely! Just keep the dressing separate until you’re ready to serve, as this will prevent the greens from wilting.
2. How do I prevent shrimp from becoming rubbery?
Cooking shrimp quickly over medium-high heat keeps them tender. As soon as they turn pink, remove them from the heat. A little undercooking is okay; they’ll continue to cook after you take them off the pan!
3. What’s the best way to store leftovers?
Place any leftovers in an airtight container in the fridge. The salad will keep for 1-2 days but best enjoyed fresh.
4. I don’t like shrimp; what alternative protein can I use?
Feel free to substitute grilled chicken or chickpeas for a lean protein twist! Both will integrate seamlessly into the salad and will be just as delicious.
Nutritional Info
For those mindful of nutrition, here’s a quick breakdown per serving (without added toppings):
- Calories: Approximately 330
- Protein: 25g
- Carbohydrates: 15g
- Fats: 18g
- Fiber: 5g
Whether it’s a cozy night in or a lively gathering with friends, this Shrimp Salad is bound to become a favorite in your recipe repertoire. So roll up your sleeves, throw on that apron, and let’s savor the good moments one bite at a time! Happy cooking!
Print
Ultimate Shrimp Salad
- Total Time: 25 minutes
- Yield: 4 servings 1x
- Diet: Gluten-Free
Description
A vibrant and zesty Shrimp Salad perfect for summer gatherings or a quick lunch.
Ingredients
- 1 lb (450g) shrimp (peeled and deveined)
- 4 cups mixed greens (spinach, arugula, kale)
- 1 cup cherry tomatoes (halved)
- 1 avocado (sliced)
- 1/2 cucumber (diced)
- 1/4 red onion (thinly sliced)
- 1/4 cup fresh herbs (cilantro, parsley, or dill)
- 1/3 cup olive oil
- Juice of 1 lemon
- Salt and pepper to taste
- Optional toppings: goat cheese, feta, or toasted nuts
Instructions
- Prep your shrimp: If using frozen shrimp, thaw them in a bowl of cold water for 15-20 minutes. Toss with olive oil, salt, pepper, and herbs.
- Sauté the shrimp in a skillet over medium-high heat for 2-3 minutes on each side until pink and opaque.
- Prepare your greens in a large bowl: combine mixed greens, diced cucumber, halved cherry tomatoes, and sliced red onion.
- Make the dressing by whisking together olive oil, lemon juice, salt, and pepper in a small bowl.
- Combine the sautéed shrimp with the greens and pour the dressing over. Toss gently.
- Plate your creation with sliced avocado and fresh herbs on top.
Notes
For an elegant presentation, serve on a large platter and pair with crusty bread or pita chips.
- Prep Time: 15 minutes
- Cook Time: 10 minutes
- Category: Salad
- Method: Sautéing
- Cuisine: American
Nutrition
- Serving Size: 1 serving
- Calories: 330
- Sugar: 3g
- Sodium: 350mg
- Fat: 18g
- Saturated Fat: 3g
- Unsaturated Fat: 5g
- Trans Fat: 0g
- Carbohydrates: 15g
- Fiber: 5g
- Protein: 25g
- Cholesterol: 180mg
Keywords: shrimp salad, summer salad, healthy salad, fresh ingredients
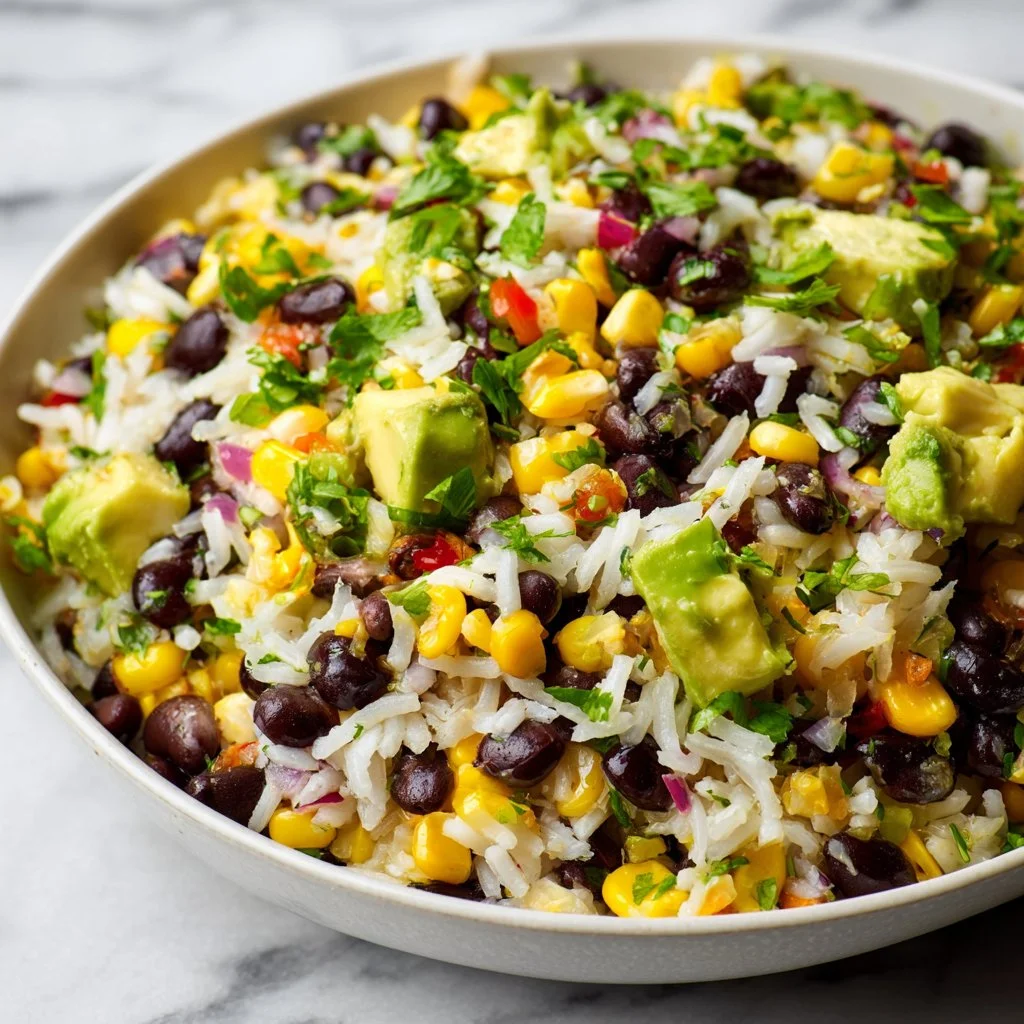
Black Bean Corn Avocado Salad with Rice
Black Bean Corn Avocado Salad with Rice: A Hearty, Flavor-Packed Celebration
Hello, lovely food enthusiasts! Welcome back to my cozy kitchen, where every meal is a chance to create memories, forge friendships, and spread joy. If you’re anything like me, you get giddy at the thought of fresh produce and vibrant flavors coming together in a delightful dish. Today, we’re diving into a recipe that encapsulates everything I love about cooking: the scrumptious Black Bean Corn Avocado Salad with Rice. It’s not just a salad; it’s a celebration of flavors, textures, and colors that will have your taste buds doing a happy dance!
This recipe is perfect for those warm, sunny days when you’re looking for something light yet filling, and it’s equally fantastic for your next gathering or meal prep for the week. With fresh ingredients like crunchy corn, creamy avocado, and hearty black beans, this salad isn’t just about sustaining yourself; it’s about savoring every delightful bite. And let’s not forget the hint of lime that brings it all together—it’s like a summery hug in a bowl!
But let’s take a step back for a moment. How did this salad become a staple in my kitchen? Picture this: A summer day full of laughter, the scent of the BBQ in the air, and friends gathering around the table, sharing stories. My best friend, Jamie, brought over her family’s BBQ spread, and this exact salad was the star of the show. I still remember biting into the rich avocado, pairing it perfectly with the sweetness of the corn and the robust flavors of black beans. It all blended together so well, and I was instantly hooked. That gathering sparked my desire to craft my version of this crowd-pleaser, and I can’t wait to share it with you!
So, grab your aprons, and let’s head into the kitchen to create a mouthwatering Black Bean Corn Avocado Salad with Rice that will leave your guests amazed and your heart full.
Personal Story
The first time I tried a version of this Black Bean Corn Avocado Salad was one of those perfect summer evenings that lingered in my memory. The sun was setting, casting warm golden hues across our backyard, and the air buzzed with laughter and music. My friend Jamie had whipped it up as a side dish for a BBQ, and it was an instant hit.
As I sat around the table with our friends, I could hardly keep my fork off Jamie’s salad, barely leaving enough for anyone else. There was something so magical about the combination of juicy corn kernels, creamy avocado, and the satisfying texture of black beans. As we bantered and reminisced, each bite was a reminder of the simple joys of good food and great company.
Eventually, I asked Jamie for the recipe, and she graciously shared her secrets and tips. With a few tweaks to make it my own, I began crafting this salad for every gathering, potluck, and family dinner. It became my go-to dish that always earned compliments and requests for seconds. Every time I make it, those fond memories come rushing back, coupled with the realization that food truly has the power to connect us.
Ingredients
Let’s gather our ingredients! Here’s what you’ll need for this delectable dish:
-
1 can (15 oz) black beans, drained and rinsed
- These little powerhouses are not just delicious; they’re also packed with protein and fiber. If you’re in a pinch, you could swap them for kidney beans, but I really recommend sticking with black beans for that perfect balance of flavor and texture.
-
1 cup corn (fresh, frozen, or canned)
- Fresh summer corn is the star of this salad, but frozen corn works just as well. If you’re using canned corn, make sure to drain it well. Sweet corn really elevates the dish, giving it that crunchy sweetness we all love.
-
1 cup cooked rice (white, brown, or quinoa)
- Cooking your rice with a bit of lime juice and salt can impart a beautiful flavor. If you want a gluten-free alternative, quinoa makes a fantastic substitute.
-
1 large ripe avocado, diced
- Avocado adds creaminess that complements the other ingredients perfectly. When choosing, look for one that gives a little when you Press gently. If you’re looking to make it lighter, feel free to adjust the amount or even use a diced cucumber for crunch.
-
1 medium red bell pepper, diced
- This adds a sweet crunch to the salad and beautiful color. You can substitute with a yellow or green bell pepper, or even switch to cherry tomatoes for a juicy bite.
-
1 small red onion, diced
- Red onions provide a zesty kick. If you find raw onions too strong, soak diced onion in cold water for a few minutes before adding it to the salad to mellow the flavor.
-
1/4 cup fresh cilantro, chopped
- Fresh herbs can elevate any dish! If cilantro isn’t your favorite, try substituting with parsley for a milder taste.
-
Juice of 2 limes
- Lime juice brings all the flavors together while adding a refreshing zest. Use fresh lime juice if you can for the best flavor—trust me, it makes a difference!
-
Salt and pepper, to taste
- Always a chef’s secret weapon! Adjust to your liking, but remember that seasoning enhances the natural taste of all ingredients.
Once you’ve gathered these wonderful components, we’re one step closer to creating a dish that’s sure to bring smiles all around the table!
Step-by-Step Instructions
Alright, my foodie friend, it’s time to get cooking! Here’s how to whip up your Black Bean Corn Avocado Salad with Rice in just a few simple steps:
Step 1: Prepare Your Rice
Cooking your rice is the first step. Rinse 1 cup of rice under running water to remove excess starch. This will lead to fluffier rice. Then, cook it according to the package instructions. For extra flavor, add 1/2 teaspoon of salt and the juice of half a lime to the water while it cooks. This little trick adds a nice zing to the rice that’s totally worth the extra effort!
Step 2: Combine the Base Ingredients
In a large mixing bowl, add your drained and rinsed black beans, corn, cooked rice, diced red bell pepper, and diced red onion. Gently mix everything together, ensuring not to mush the beans. You want those lovely textures intact for every bite!
Step 3: Prepare the Dressing
Now, let’s make our salad shine even brighter! In a separate bowl, combine the lime juice from the two limes, a generous pinch of salt, and pepper. If you like a little heat, this is an excellent moment to add a pinch of cayenne or chili powder. Whisk this together until well blended.
Step 4: Toss in Avocado and Cilantro
Chop your ripe avocado into bite-sized pieces and sprinkle with some lime juice to prevent browning. Add this to your salad mixture along with the chopped cilantro. Chef Hack: To make the mixing easier without damaging the avocado too much, toss the salad gently from the bottom up instead of stirring aggressively. This helps maintain those beautiful chunks of avocado!
Step 5: Final Toss and Taste
Pour the dressing over the salad mixture and gently fold everything together until every ingredient is nicely coated. Now’s the moment of truth—give it a taste! Adjust salt, pepper, and lime juice as needed. Remember, the dressing should be zesty, so don’t be afraid to add a little more lime juice if it needs a tangy boost.
Step 6: Chill Before Serving
For the best experience, let the salad chill in the refrigerator for at least 30 minutes. This allows the flavors to meld beautifully. It’s like a party in a bowl, and the guests (of flavors) are finally ready to mingle!
Serving Suggestions
To serve your Black Bean Corn Avocado Salad, think colorful and inviting! Present it in a large, beautiful serving bowl and garnish with an extra sprinkle of cilantro on top for a pop of color. Pair it with some tortilla chips for crunch, or serve it alongside grilled chicken or fish for a heartier meal. I also love offering lime wedges on the side for an added fresh squeeze just before serving.
Recipe Variations
-
Seasonal Swaps: In the fall, try incorporating roasted butternut squash for a cozy twist that adds sweetness and warmth!
-
Spicy Kick: Add diced jalapeños for a spicy kick that complements the sweetness of the corn.
-
Cheesy Delight: Toss in some crumbled feta cheese for a tangy creaminess that takes this salad over the top.
-
Veggie Power: Bulk it up with additional veggies like diced cucumber, cherry tomatoes, or shredded carrots for even more color and nutrients.
-
Grain-Free Option: Replace rice with cauliflower rice for a lighter, grain-free variation that’s just as delicious.
Chef’s Notes
This Black Bean Corn Avocado Salad is a recipe that has evolved beautifully over time. Each gathering brings new ideas and upgrades, and it never fails to impress guests. I once made this salad for a potluck, and I completely forgot it in the fridge at home. I panicked but ended up whipping up a quick alternative with whatever I had on hand. Surprisingly, that has sparked a new variation that has salad lovers coming back for more!
Cooking should always leave room for creativity. Feel free to adjust the recipe based on your preferences and available ingredients. Who knows? You might just create the next lovely, nostalgia-filled experience at your table!
FAQs and Troubleshooting
Q1: Why did my avocado turn brown in the salad?
Using fresh lime juice is key! The acidity helps prevent oxidation. If you add the avocado right before serving, it will stay fresher longer.
Q2: Can I make this salad ahead of time?
Absolutely! Preparing it a few hours in advance allows the flavors to meld beautifully. Just remember to add the avocado right before serving to keep it vibrant and green.
Q3: How can I store leftovers?
Store any leftover salad in an airtight container in the fridge for up to 2 days. The avocado may brown slightly, but the flavors will still be delicious.
Q4: Can I substitute the beans for another protein?
Certainly! If you’re looking for a different protein, roasted chickpeas or diced grilled chicken can work beautifully in this salad. You can even add a handful of nuts or seeds for extra crunch!
Nutritional Info
For a serving size of approximately 1 cup, here’s a rough breakdown:
- Calories: 250
- Protein: 10g
- Carbohydrates: 40g
- Fat: 9g
- Fiber: 10g
- Sodium: 200mg
(Nutritional information can vary based on the exact ingredients used.)
And there you have it! A vibrant, flavorful Black Bean Corn Avocado Salad with Rice that’s bound to become a staple in your kitchen. I hope you enjoyed making it as much as I do sharing it. Here’s to good food, cherished moments, and bringing people together—one delicious recipe at a time. Happy cooking!
Print
Black Bean Corn Avocado Salad with Rice
- Total Time: 35 minutes
- Yield: 4 servings 1x
- Diet: Vegetarian
Description
A vibrant and hearty salad packed with black beans, corn, creamy avocado, and rice, perfect for gatherings or meal prep.
Ingredients
- 1 can (15 oz) black beans, drained and rinsed
- 1 cup corn (fresh, frozen, or canned)
- 1 cup cooked rice (white, brown, or quinoa)
- 1 large ripe avocado, diced
- 1 medium red bell pepper, diced
- 1 small red onion, diced
- 1/4 cup fresh cilantro, chopped
- Juice of 2 limes
- Salt and pepper, to taste
Instructions
- Prepare your rice. Rinse 1 cup of rice under running water to remove excess starch. Then, cook it according to package instructions with a bit of salt and lime juice.
- Combine the drained and rinsed black beans, corn, cooked rice, diced red bell pepper, and diced red onion in a large mixing bowl.
- Prepare the dressing by mixing lime juice, salt, and pepper in a separate bowl.
- Toss in the diced avocado and chopped cilantro, mixing gently.
- Pour the dressing over the salad and fold together until coated.
- Chill the salad for at least 30 minutes before serving.
Notes
For a lighter version, you can substitute the avocado with diced cucumber. Adjust salt and lime juice based on taste.
- Prep Time: 15 minutes
- Cook Time: 20 minutes
- Category: Salad
- Method: Mixing
- Cuisine: Mexican
Nutrition
- Serving Size: 1 serving
- Calories: 250
- Sugar: 3g
- Sodium: 200mg
- Fat: 9g
- Saturated Fat: 1g
- Unsaturated Fat: 8g
- Trans Fat: 0g
- Carbohydrates: 40g
- Fiber: 10g
- Protein: 10g
- Cholesterol: 0mg
Keywords: salad, black beans, avocado, corn, healthy recipe, summer dish
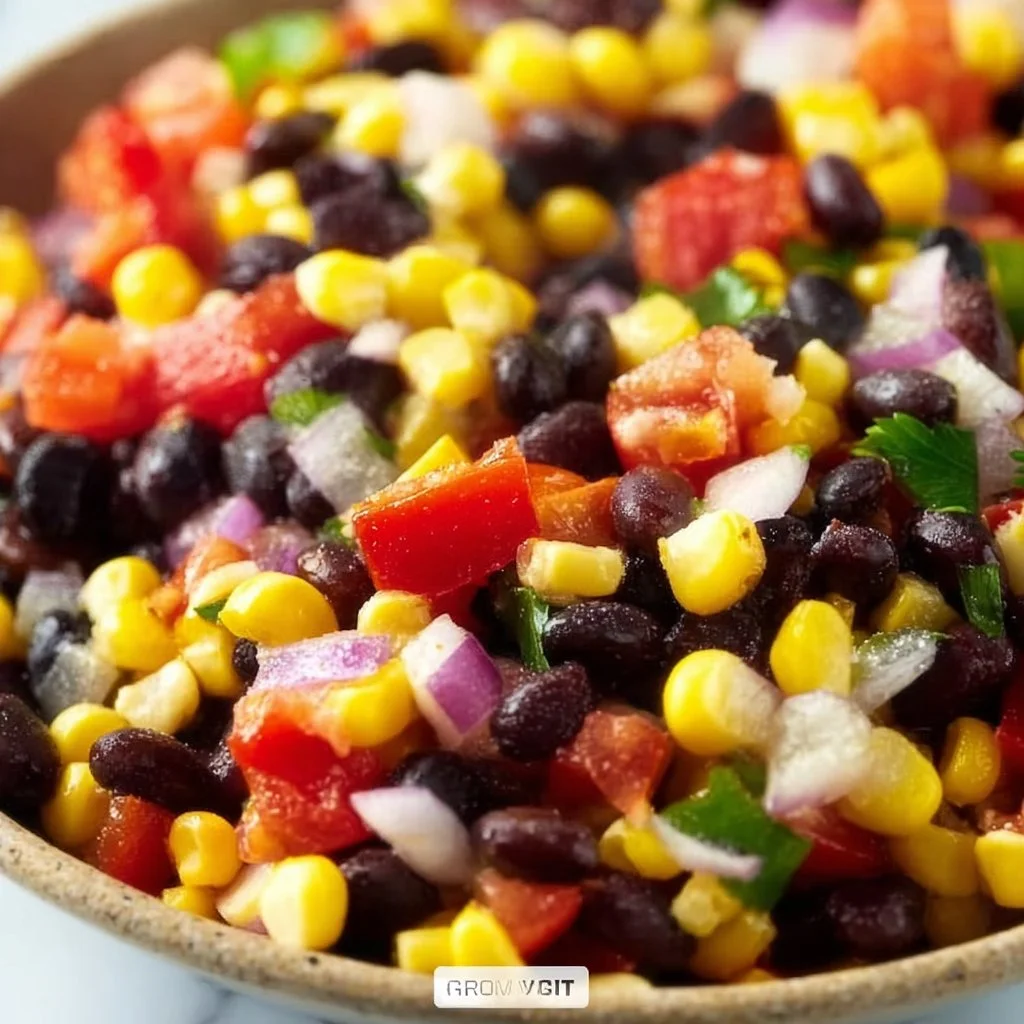
Southwest Corn and Black Bean Salad
Southwest Corn and Black Bean Salad: A Flavorful Fiesta in Every Bite!
Welcome back, dear foodies! I’m super excited to share something delicious with you today—a vibrant, hearty Southwest Corn and Black Bean Salad that will transport your taste buds straight to a festive summer fiesta! When I think of summer, fresh ingredients, and bright colors, this salad immediately pops into my mind. It’s not just a side dish; it’s a whole mood—a celebration of flavor, color, and community.
Imagine the first sunny day after a long winter, when the air is warm, and every ingredient seems to burst with flavor. That’s how I feel when I whip up this salad. You see, cooking for me is not just about feeding the body; it’s about nourishing the soul and creating memories in the kitchen. This salad, with its mix of sweet corn, hearty black beans, and a zesty lime dressing, is perfect for gatherings, picnics, or even a weekday lunch that feels like a treat!
Over the years, I’ve tweaked this recipe, adding my own special touches and flavor combos that make it truly sing. Plus, it’s as versatile as your creativity allows. You could serve it as a side, a main, or even as a filling for tacos! So grab your apron and let’s dive into this culinary adventure together! Believe me, by the end of this post, you’ll not only want to make this salad but you’ll also carry a sprinkle of kitchen magic back to your own kitchen!
Personal Story
Ah, memories of my childhood kitchen always bring a smile to my face! Growing up, we had a tradition in my family: every summer, we’d host a huge barbecue for friends and neighbors. It was a celebration of everything we loved about summer—the laughter, the sunshine, and of course, the food! One summer, my mom decided to try her hand at a Southwest-inspired spread, and among the smoky grilled meats and fiery salsas, she introduced this incredible corn and black bean salad.
The melding of flavors and vibrant colors captured everyone’s attention. I remember my dad taking the first bite and his eyes lighting up with delight, while friends gathered around the salad bowl, asking for seconds—and even thirds! It became a staple at our summer gatherings, a point of celebration and connection. As I grew older and developed my own culinary skills, I began to experiment with the recipe, adding my own twists while keeping that original spirit alive. Each bite is like a hug from my childhood, reminding me of the joy that good food can bring when shared with loved ones.
Now, as I pass this recipe along to you, I hope you create your own memories around this dish. After all, food is not just fuel; it’s the heart of every gathering, the laughter in every moment spent with loved ones.
Ingredients
Here’s what you’ll need to create your own Southwest Corn and Black Bean Salad:
-
Corn (Fresh or Frozen): 2 cups
- Tip: Fresh corn off the cob brings a juicy sweetness, but frozen corn works just as well if you’re short on time. Just make sure to thaw and drain it first!
-
Black Beans: 1 can (15 oz), rinsed and drained
- Chef Insight: Black beans are packed with protein and fiber, making them a hearty staple in this salad! If you want a different flavor, feel free to substitute with kidney beans or chickpeas.
-
Red Bell Pepper: 1, diced
- Substitution: You can swap this for yellow or orange bell pepper for a mellower sweetness or even jalapeño for some heat!
-
Red Onion: ½ small, finely chopped
- Quick Tip: Soaking the chopped onion in cold water for 10 minutes will take the bite out and make it milder.
-
Fresh Cilantro: ¼ cup, chopped
- Chef Hack: If cilantro’s not your thing, try fresh parsley or even chopped green onions for a bright flavor.
-
Cherry Tomatoes: 1 cup, halved
- Flavor Tip: You can use grape tomatoes or even swap them out for diced avocado for a creamier texture.
-
Lime Juice: 2 tablespoons (freshly squeezed)
- Chef Insight: Fresh lime juice is key to brightening up the flavors! Bottled juice just doesn’t have the same zest.
-
Olive Oil: 2 tablespoons
- Pro Tip: For a different flavor profile, use avocado oil or chili oil to add a touch of spice!
-
Chili Powder: ½ teaspoon
- Flavor Options: Want more heat? Increase the chili powder, or add a pinch of cayenne or smoked paprika!
-
Salt and Pepper: To taste
- Chef’s Note: Remember, seasoning at each stage is key! Start lightly and adjust as needed.
Step-by-Step Instructions
Let’s transform those fresh ingredients into something incredible! Follow these easy steps, and don’t hesitate to let your creativity shine.
Step 1: Prep Your Ingredients
Start by rinsing your black beans under cold water and draining them well. If you’re using fresh corn, remove it from the cob. For frozen corn, make sure it’s completely thawed and drained. Dice your bell pepper and red onion, and halve your cherry tomatoes. You should also chop the cilantro—set all your ingredients aside in separate bowls for easy access. This way, you’ll have a lovely mise en place, which, as a home cook, I can’t recommend enough. It makes cooking way more enjoyable!
Step 2: Mix the Veggies
In a large mixing bowl, combine your black beans, corn, diced bell pepper, chopped red onion, and halved cherry tomatoes. Give them a gentle toss—you want to keep the veggies whole and vibrant, not mushy! The colors will start to dance together, and that’s when the magic happens.
Step 3: Whip Up the Dressing
In a small bowl, whisk together the lime juice, olive oil, chili powder, and a pinch of salt and pepper. Taste it and adjust as needed! I always say, your dressing should pop with flavor like a party in your mouth. If you want to experiment, a dash of cumin or a sprinkle of sugar can elevate the dressing even more!
Step 4: Dress the Salad
Once you’re happy with your dressing, drizzle it over your mixed salad. Use a spatula or wooden spoon to gently combine everything, ensuring the dressing coats each ingredient beautifully. This is where the salad comes to life, soaking up all those flavors.
Step 5: Add Fresh Cilantro!
To finish off, fold in the chopped cilantro for that final touch of freshness. You can save a bit for garnish if you want to make it visually stunning on your table!
Step 6: Let It Chill
Always a good idea! Allow the salad to sit in the fridge for at least 30 minutes before serving. This will let those flavors meld together beautifully. You can totally make it ahead and let it hang out in the fridge for a few hours or even overnight!
Step 7: Serve and Enjoy!
When you’re ready to serve, give it a good stir (sometimes the dressing settles a bit), and ladle it into bowls or on a platter. You can garnish it with some additional cilantro, lime wedges, or even a sprinkle of feta cheese for a creamy touch!
Serving Suggestions
This salad is incredibly versatile! Plate it up in a vibrant, colorful bowl or serve it directly from the mixing bowl for a homey feel. For a complete meal, it pairs beautifully with grilled chicken or fish. Feeling extra adventurous? Use it as a filling for tacos, layered on top of nachos, or as a zesty topping for your favorite protein-packed salad!
Recipe Variations
Now, let’s spark some creativity! Here are a few fun twists you can explore:
- Spicy Kick: Add diced jalapeños or a splash of hot sauce to kick things up a notch.
- Taste of Summer: Mix in diced mango or pineapple for a sweet and tropical version.
- Creamy Delight: Stir in avocado or top it off with some creamy dressing or crumbled Feta cheese.
- Quinoa Boost: Add cooked quinoa for an extra protein punch!
- Herbal Flair: Try swapping cilantro with mint or basil for a fresh, unique flavor.
Chef’s Notes
This salad has come a long way in my kitchen. What started as my mom’s simple recipe has evolved into a vibrant canvas for flavors, textures, and seasonal ingredients. The best part? It’s forgiving and adapts to whatever you have on hand! I can’t tell you how many times I’ve added a random veggie or spice that turned out to be a new family favorite. And let me tell you, if you ever find yourself with leftovers (which is rare but happens sometimes!), it makes the perfect filling for a hearty wrap or burrito. Trust me, this is a dish that invites improvisation.
FAQs and Troubleshooting
Q1: My salad is too salty—what do I do?
If you find that your salad is a bit too salty after dressing it, try adding more corn, beans, or veggies to balance the flavor. A little more lime juice can help, too!
Q2: How long will the salad last in the fridge?
This salad can last about 2-3 days in the fridge, but it’s best enjoyed fresh! Make sure you store it in an airtight container to keep it crispy.
Q3: Can I make this salad ahead of time?
Absolutely! In fact, I recommend letting it chill in the fridge for at least 30 minutes before serving to let those flavors meld. You can prepare it the night before a gathering, too.
Q4: Can I freeze the salad?
I wouldn’t recommend freezing it, as the texture of the veggies (especially the tomatoes and peppers) will change once thawed. However, the dressing can be made ahead and stored in the fridge!
Nutritional Info
Though I don’t always focus on the numbers, here’s an approximate breakdown (per serving):
- Calories: 200
- Protein: 10 grams
- Carbohydrates: 30 grams
- Fiber: 8 grams
- Fat: 8 grams
(Note: Nutritional values can vary based on specific ingredients and portions used.)
And there you have it! A bright and flavorful Southwest Corn and Black Bean Salad that captures the essence of summer in every bite. I hope this recipe inspires you to gather around the table with your loved ones and create your own beautiful memories. Cooking is all about joy, connection, and a sprinkle of creativity—happy cooking, friends! 🎉
Print
Southwest Corn and Black Bean Salad
- Total Time: 45 minutes
- Yield: 4 servings 1x
- Diet: Vegetarian
Description
A vibrant and hearty salad featuring sweet corn, black beans, and a zesty lime dressing, perfect for summer gatherings.
Ingredients
- 2 cups Corn (Fresh or Frozen)
- 1 can (15 oz) Black Beans, rinsed and drained
- 1 Red Bell Pepper, diced
- ½ small Red Onion, finely chopped
- ¼ cup Fresh Cilantro, chopped
- 1 cup Cherry Tomatoes, halved
- 2 tablespoons Lime Juice (freshly squeezed)
- 2 tablespoons Olive Oil
- ½ teaspoon Chili Powder
- Salt and Pepper to taste
Instructions
- Prep Your Ingredients: Rinse black beans and dice other vegetables.
- Mix the Veggies: Combine beans, corn, bell pepper, onion, and tomatoes in a bowl.
- Whip Up the Dressing: Whisk lime juice, olive oil, chili powder, salt, and pepper.
- Dress the Salad: Drizzle dressing over salad and mix gently.
- Add Fresh Cilantro: Fold in chopped cilantro.
- Let It Chill: Refrigerate for at least 30 minutes before serving.
- Serve and Enjoy: Stir before serving and garnish with additional cilantro if desired.
Notes
This salad is versatile and can be served as a side dish or a filling for tacos. It can be made ahead of time for best flavor.
- Prep Time: 15 minutes
- Cook Time: 0 minutes
- Category: Salad
- Method: Mixing
- Cuisine: Mexican
Nutrition
- Serving Size: 1 serving
- Calories: 200
- Sugar: 3g
- Sodium: 300mg
- Fat: 8g
- Saturated Fat: 1g
- Unsaturated Fat: 7g
- Trans Fat: 0g
- Carbohydrates: 30g
- Fiber: 8g
- Protein: 10g
- Cholesterol: 0mg
Keywords: salad, corn, black beans, summer salad, healthy recipe
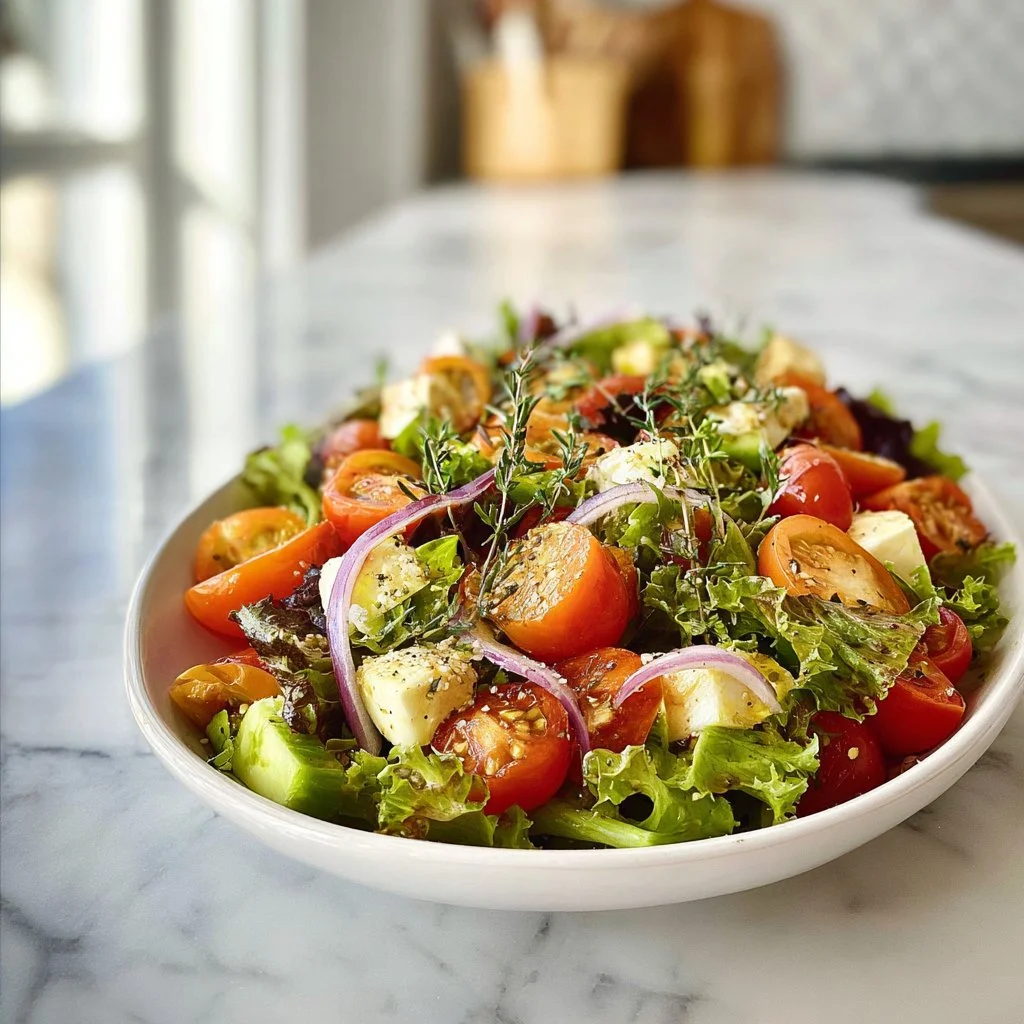
Best Simple Side Salad
# The Best Simple Side Salad: A Rainbow of Freshness on Your Plate

## Introduction

Welcome back to my cozy kitchen, my fellow food lovers! Today, we are diving into a dish that every home cook should have in their repertoire: the simple side salad. Now, you might wonder, “Olivia, why a salad?” Well, let me tell you—it’s not just any salad. This vibrant creation is packed with flavors and colors that dance together on your plate, bringing joy to your taste buds and nutrition to your body.

Salads often get a bad rap as being dull or just a boring side at dinner. But trust me, friends, when made right, a salad can be a showstopper! Picture fresh greens glistening with a homemade vinaigrette, crunchy vegetables adding their delightful crunch, and the finishing touch of creamy avocado or crumbly feta cheese. Yum!

The best part about this salad is its versatility. It’s a beautiful companion to grilled meats, a perfect partner to pasta dishes, or even a vibrant, standalone lunch. Whether you’re hosting a summer gathering or just looking to elevate a weeknight dinner, this simple side salad will impress and satisfy. And guess what? It’s so easy to toss together that you’ll wonder why you didn’t make it sooner!

So grab your cutting board and let’s get started on creating a fresh, colorful salad that boasts flavor and fills your home with aromatic memories. Just remember, this salad is a canvas, and you can paint it with your favorite ingredients. Let’s make salad magic together!

---

## Personal Story

Growing up, salads did not hold the same charm they do for me now. In fact, I remember sitting at the dining room table as a kid, pushing around those sad, wilted greens that Mom insisted we needed for dinner. What I didn’t realize, back then, was how delightful a well-made salad could be. My love affair with salads began during a summer family road trip. We stopped at a charming little café in a small town, and I ordered their house salad, which was stunning—colorful heirloom tomatoes, crisp cucumbers, tangy red onion, and the creamiest dressing. It was such a refreshing taste of summer!

That moment ignited a passion for salads in me, and I vowed to never again allow greens on my plate to be anything less than delightful. Now, every time I prepare a salad, it brings me back to that café, the laughter of my family, and the joy that comes from a fresh meal. Each creation is like a piece of nostalgia—simple yet fulfilling. I hope to help you connect to those delightful moments through the simple side salads we make together!

---

## Ingredients

Here’s what you need to create the best simple side salad. Don’t forget, you can always switch things up based on your preferences!

- **Mixed Greens (Spinach, Arugula, or Romaine)**
  Choose your favorite leafy greens as the base. Spinach offers a tender bite, arugula adds a peppery kick, and romaine gives crunch. If you’re looking for a lighter salad, opt for baby greens!

- **Cherry Tomatoes**
  Juicy and plump, cherry tomatoes add sweetness and color. Can’t find fresh ones? Substitute with grape tomatoes or even canned diced tomatoes, drained well, for an emergency fix.

- **Cucumber**
  This refreshing vegetable slices beautifully, providing a crisp texture. Try English cucumbers for fewer seeds, or pickling cucumbers if you want that extra crunch. No cucumbers? Try shredded carrots for a sweet crunch!

- **Red Onion**
  Just a few slices will give your salad a pop of color and flavor. Soaking them in cold water before adding them helps mellow the sharpness. If onions aren’t your jam, try thinly sliced radishes for a similar crunch without the bite.

- **Bell Peppers**
  Use any color you like—red, yellow, or green—each adds its own unique sweetness and vibrancy. If you’re looking for a twist, switch them out for roasted beets, which give a lovely earthy flavor.

- **Avocado**
  Creamy and rich, avocado enhances the salad with healthy fats. If you’re preparing the salad ahead of time, squeeze a little lemon juice on it to stop it from browning!

- **Feta Cheese**
  Crumbled feta provides a salty kick that brings the whole salad together. For a dairy-free version, use crumbled tofu seasoned with salt or nutritional yeast for a cheesy flavor!

- **Olive Oil and Lemon Juice**
  The dressing! A simple mix of olive oil and fresh lemon juice brings everything to life. You can also swap vinegar for lemon juice or use a splash of balsamic for a sweeter dressing.

---

## Step-by-Step Instructions

Now for the fun part: putting it all together! Follow these steps for a crowd-pleasing simple side salad.

1. **Prepare the Greens**
   Start by rinsing your chosen mixed greens in cold water. This not only removes any dirt but also keeps the leaves fresh and crisp. Shake off excess water (or use a salad spinner if you have one) and toss them into a large mixing bowl. *Chef’s Tip: Always dry your greens thoroughly; wet leaves can dilute your dressing!*

2. **Chop the Vegetables**
   Slice the cherry tomatoes in half, chop the cucumber into bite-sized pieces, and thinly slice the red onion—aim for the finest cuts possible for a pleasant crunch with every bite. *Pro Tip: If your cutting skills are a bit rusty, consider using a small melon baller for the cucumbers!*

3. **Add Color and Texture**
   Toss in the diced bell peppers, avocado, and any other colorful veggies you’d like to include. Feel free to experiment here—perhaps a grated carrot or some fresh corn for added sweetness. *Little Chef Hack: If your avocado is hard, toss it in a paper bag for a day— it’ll ripen beautifully!*

4. **Make the Dressing**
   In a small bowl, whisk together about ¼ cup of olive oil with the juice of one lemon (about 2 tablespoons). Add salt and pepper to taste. If you’re feeling adventurous, a teaspoon of Dijon mustard or honey can add a delightful twist! *Chef’s Insight: Always taste your dressing until it's just right for your palate!*

5. **Toss It Up**
   Drizzle the dressing over your beautiful bowl of veggies and toss gently to combine. Try to coat everything evenly—this ensures that every bite is just as delicious as the last. *Pro Tip: Use your hands! They’re the best tools for properly combining the ingredients without bruising your greens!*

6. **Plate It Up**
   Serve your colorful salad in a large bowl or divide it into individual plates. If you have extra cheese, sprinkle some more feta on top. For a finishing touch, a light drizzle of olive oil or balsamic glaze will take your salad to the next level! *Little Chef Hack: A squeeze of fresh lemon juice just before serving brightens the flavors even more!*

---

## Serving Suggestions

Now that your salad shines, consider pairing it with grilled chicken or fish for a complete meal. It can also stand on its own as a light lunch alongside a crusty piece of bread. For gatherings, serve it in a large bowl for a rustic touch, letting your guests help themselves.

---

## Recipe Variations

Here are some fun twists on this simple side salad to suit various tastes and dietary needs:

1. **Grilled Veggie Salad:** Toss some grilled zucchini, asparagus, or even corn into the mix for a smoky flavor.
2. **Fruit-Infused:** Add sliced strawberries, mandarin oranges, or pomegranate seeds for a sweet contrast to the savory ingredients.
3. **Protein-Packed:** Mix in some chickpeas or black beans to create a heartier side salad.
4. **Herb-Heavy:** Fresh herbs like basil, parsley, or dill can elevate the salad’s freshness and flavor.
5. **Nutty Crunch:** Sprinkle a handful of toasted nuts—such as pecans or walnuts—on top for extra texture and health benefits.

---

## Chef’s Notes

As I mentioned earlier, salads were not always my favorite; however, I’ve learned to love their versatility and creativity. This recipe has evolved over time as I’ve tried different ingredients and flavors based on what’s abundant in my garden or what’s fresh at the market.

Every season, I find excitement in experimenting with different textures and flavors. Sometimes, I’ll add leftover roasted veggies from dinner, or if I have a ripe peach, I’ll throw that in for sweetness! The beauty of salads is that they’re staged for creativity, so let your funky culinary spirit roam free!

---

## FAQs and Troubleshooting

**1. How do I keep my salad fresh for leftovers?**
Store any leftover salad in an airtight container in the refrigerator, but keep the dressing separate! This will prevent the greens from wilting and ensure they remain crisp for your next meal.

**2. Can I use pre-packaged salad mixes?**
Absolutely! Pre-packaged mixed greens can save time. However, check the expiration date and appearance to guarantee freshness. Feel free to add your personal touch by adding extra ingredients!

**3. Help! My salad is too salty! What can I do?**
If you find that you’ve added too much salt, a squeeze of fresh lemon or a dash of vinegar can help balance the flavors. Alternatively, you can add a little more of the greens or other veggies to dilute the saltiness.

**4. Can I make this salad ahead of time?**
Yes, you can! Just prep the ingredients in advance, but avoid dressing it until you’re ready to serve. This keeps everything fresh and crisp!

---

## Nutritional Info

While the specific nutritional information can vary based on the ingredients and quantities used, a serving of this simple side salad is generally low in calories and rich in vitamins A and C, fiber, and healthy fats from avocado and olive oil. An excellent addition to any meal!

---

There you have it, my friends—your guide to creating the best simple side salad. I hope you find as much joy in making this dish as I do, and I can't wait to hear about your culinary adventures in the kitchen! Happy cooking, and remember, every salad has the potential to be a star. 🌱🥗
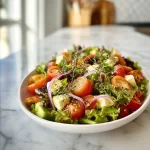
The Best Simple Side Salad
- Total Time: 15 minutes
- Yield: 4 servings
- Diet: Vegetarian
Description
A vibrant and fresh side salad packed with flavors and colors, perfect for any meal.
Ingredients
- Mixed Greens (Spinach, Arugula, or Romaine)
- Cherry Tomatoes
- Cucumber
- Red Onion
- Bell Peppers
- Avocado
- Feta Cheese
- Olive Oil and Lemon Juice
Instructions
- Prepare the greens by rinsing in cold water and shaking off excess water.
- Chop the vegetables: slice cherry tomatoes, chop cucumber, and slice red onion.
- Add diced bell peppers, avocado, and any other colorful veggies you choose.
- Make the dressing by whisking together olive oil and lemon juice.
- Toss the dressing over the salad and mix gently.
- Plate the salad and serve, adding extra cheese or a drizzle of olive oil if desired.
Notes
Store any leftovers in an airtight container and keep the dressing separate to prevent wilting.
- Prep Time: 15 minutes
- Cook Time: 0 minutes
- Category: Salad
- Method: No-cook
- Cuisine: American
Nutrition
- Serving Size: 1 serving
- Calories: 200
- Sugar: 4g
- Sodium: 300mg
- Fat: 15g
- Saturated Fat: 3g
- Unsaturated Fat: 10g
- Trans Fat: 0g
- Carbohydrates: 12g
- Fiber: 5g
- Protein: 4g
- Cholesterol: 10mg
Keywords: salad, side salad, fresh vegetables, healthy recipe
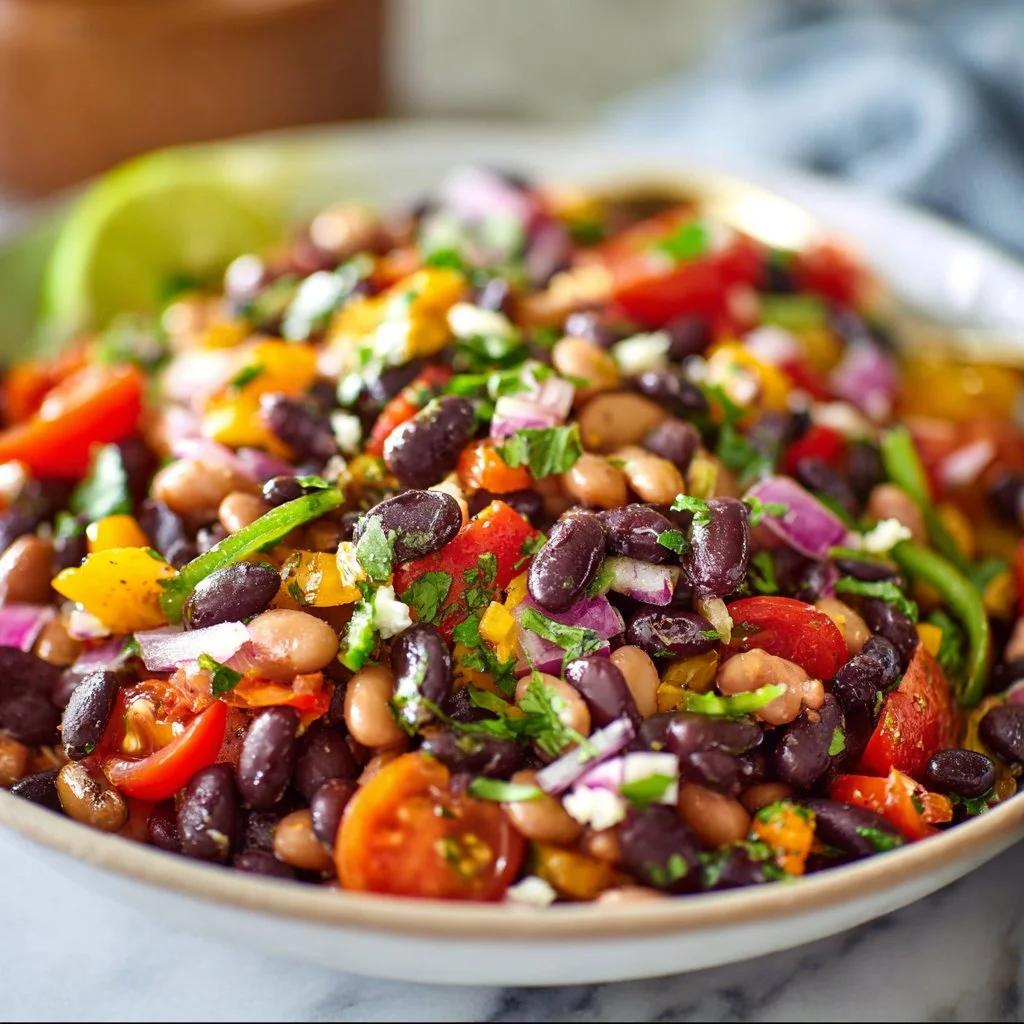
Southwest Dense Bean Salad
Southwest Dense Bean Salad
Welcome to my kitchen, food lovers! Today, I am beyond excited to dive into a dish that’s not only packed with bold flavors but also bursting with colorful ingredients that scream sunshine! I’m talking about my Southwest Dense Bean Salad. This salad is a celebration of the fantastic flavors of the Southwest, bringing together hearty beans, crisp veggies, and zesty spices that will make your taste buds dance with joy.
Picture this: it’s a warm summer day, the sun is shining bright, and you have friends gathering in your backyard. What’s the best way to impress and fill those hungry tummies? You guessed it! A vibrant, refreshing salad that’s as easy to throw together as it is delicious. Whether it’s for a barbecue, a potluck, or just a light lunch, this salad checks all the boxes — nutritious, satisfying, and oh-so-dreamy!
Not to mention, this recipe is super flexible! Don’t have a specific bean on hand? No problem! Want to jazz it up with extra herbs or a kick of heat? Go for it! By the end of this post, you’ll not only have the recipe nailed down but also the confidence to make it your own. So, grab your apron and let’s whip up this Southwest Dense Bean Salad together!
Personal Story
The inspiration for this salad takes me back to my childhood summers spent in my grandmother’s kitchen. Grandma had this magical ability to make every meal feel special, but her salads were truly the stars of the show. She was known for her fresh ingredients and distinct flair for flavors. One summer day, we decided to make a bean salad together, a recipe passed down from her mother.
I remember sitting on the kitchen counter, swinging my legs as I helped rinse the beans, giggling over the mess I was making. The best part was tasting along the way, adjusting the lime juice and tossing in chopped cilantro, creating something that was uniquely ours. As the colors blended, the aroma filled the kitchen, and those summer afternoons became cherished memories.
Now, every time I make my Southwest Dense Bean Salad, I think of those moments, infused with laughter, love, and a whole lot of flavor. It’s a reminder that food is not just about sustenance; it’s about connection, sharing, and creating memories with the people we cherish.
Ingredients
Here’s what you’ll need to make this Southwest Dense Bean Salad sing:
-
Mixed Beans (Black, Pinto, and Garbanzo) – About 3 cups total.
- Tip: Canned beans work great for convenience. Rinse and drain them to remove excess sodium. If you prefer dry beans, soak and cook them ahead of time!
-
Bell Peppers (1 red, 1 yellow) – Chopped.
- Substitution: Any color bell pepper will delight! For a spicier twist, try a jalapeño instead.
-
Red Onion (1 small) – Finely diced.
- Tip: If you find raw onion too pungent, soak the diced onion in cold water for 10 minutes. It softens the flavor and adds a nice crunch!
-
Corn (1 cup) – Fresh, frozen, or canned.
- Insight: Sweet corn adds a wonderful burst of sweetness. If using frozen, just thaw it before adding to the salad.
-
Cherry Tomatoes (1 cup) – Halved.
- Tip: Mix up the colors with gold and red tomatoes for extra visual appeal.
-
Avocado (1 large) – Diced.
- Substitution: For a creamy alternative, consider using chopped mango or cucumber.
-
Cilantro (1/2 cup) – Chopped.
- Chef’s Insight: Cilantro may not be everyone’s favorite; feel free to swap with parsley for a different herbaceous note!
-
Lime Juice (Juice of 2 limes).
- Tip: Fresh lime juice brightens the flavors. For extra zest, you can add some lime zest!
-
Olive Oil (3 tablespoons) – Extra virgin.
- Substitution: Avocado oil is another fabulous choice that adds a unique flavor.
-
Cumin (1 teaspoon) – Ground.
- Chef’s Insight: Cumin is a flavor powerhouse. Don’t skip it! For an exciting twist, try smoked paprika.
-
Salt & Pepper (to taste).
- Tip: Always taste as you go! Adjust seasoning to your personal preference.
Step-by-Step Instructions
Now that we have our vibrant ingredients ready, let’s get to the cooking (or tossing, in this case!). Follow these simple steps to create a fabulous Southwest Dense Bean Salad:
-
Prep Your Ingredients:
- Before diving into the mixing, give yourself a moment to chop and prepare all your vegetables. This makes everything easier and ensures you have prettier pieces. Pro tip: Dice your veggies in uniform sizes for a lovely presentation and even bites!
-
Mix the Beans:
- In a large mixing bowl, add your rinsed and drained mixed beans. Feel free to use any beans you have on hand — the more variety, the more fun (and nutrition)!
-
Add the Veggies:
- Toss in your chopped bell peppers, diced red onion, sweet corn, and halved cherry tomatoes. Examine the colors come together — it’s a work of art! Toss gently with a spatula or wooden spoon to combine the bean mixture with the colorful veggies.
-
Make the Dressing:
- In a small bowl, whisk together the lime juice, olive oil, cumin, salt, and pepper until well blended. This little dressing number brings everything together, so make sure it’s creamy and delicious! Adjust the seasonings to your liking — I usually add a pinch more cumin for extra warmth.
-
Combine It All:
- Drizzle the dressing over the salad and toss gently to coat all the ingredients with that zingy flavor! Add in the diced avocado and chopped cilantro, and fold gently to avoid smashing the avocado. This is where magic happens, and you’ll smell the goodness!
-
Taste Test:
- Here’s a crucial step — always taste your salad before serving. Does it need a little more lime juice or salt? Adjust until it’s just right. A sprinkle of extra lime always brightens things up, in my opinion!
-
Let It Marinate (Optional):
- If you have a little time, let the salad sit in the fridge for 30 minutes. This allows the flavors to blend beautifully. Perfect for making ahead of time!
Serving Suggestions
Now comes the fun part — serving! I love to scoop the Southwest Dense Bean Salad into vibrant bowls. For a fun twist, serve it with some crispy tortilla chips on the side for crunch and dipping. You can also bed it over a bed of greens for a more filling meal or use it as a filling for tacos. Garnish with a sprig of fresh cilantro and a lime wedge for a pop of color. Trust me; your friends are going to be in awe!
Recipe Variations
Here are a few creative twists you can try out:
-
Add Grains: Incorporate cooked quinoa or brown rice for an extra hearty salad that’s perfect for meal prepping.
-
Spice It Up: Add diced jalapeños or a sprinkle of chili powder for a kick of heat.
-
Cheese it Up: Crumbled feta or queso fresco can add a creamy, salty contrast.
-
Fruit Twist: For a refreshing touch, toss in diced mango or pineapple for a hint of sweetness that pairs beautifully with the savory beans.
-
Vegan Options: Keep this salad vegan-friendly by sticking with beans, veggies, and letting the flavors shine without any cheese.
Chef’s Notes
Over the years, this Southwest Dense Bean Salad has become a staple not only in my kitchen but also at gatherings with friends and family. I’ve seen it evolve based on what’s in season, sometimes featuring roasted corn or adding seasonal herbs like basil in the summertime. Last summer, I even threw in some grilled chicken for a protein punch, and it was a hit!
I often joke that my love for this salad mirrors my love for my messy apron — both are colorful, full of character, and always make me smile! So don’t worry about getting every detail perfect; the joy is in the cooking and sharing.
FAQs and Troubleshooting
-
What if my beans are too mushy?
- If your beans have gotten mushy, choose firmer beans next time, and make sure to watch the cooking time if you’re using dried beans.
-
Can I make this salad ahead of time?
- Absolutely! This salad keeps well in the fridge for 2-3 days. Just add the avocado right before serving for freshness!
-
How do I store leftovers?
- Keep any leftover salad in an airtight container in the refrigerator. It will taste even better the next day as the flavors meld!
-
Why does my salad taste bland?
- Always season to taste! Lime juice, spices, and salt make a big difference, so don’t skip these when preparing your dressing.
Nutritional Info
- Serving Size: 1 cup
- Calories: 220
- Protein: 12g
- Fat: 9g
- Carbohydrates: 30g
- Fiber: 10g
And there you have it, folks! A delightful, colorful, and satisfying Southwest Dense Bean Salad to excite your palate and bring friends and family together. I hope you enjoy making this dish as much as I do. Remember, cooking is all about having fun and expressing your creativity. Happy cooking, and I can’t wait to hear how yours turns out! 🌟
Print
Southwest Dense Bean Salad
- Total Time: 15 minutes
- Yield: 4 servings 1x
- Diet: Vegetarian
Description
A vibrant and refreshing salad packed with mixed beans, crisp veggies, and zesty flavors, perfect for summer gatherings.
Ingredients
- 3 cups Mixed Beans (Black, Pinto, Garbanzo) – rinsed and drained
- 2 Bell Peppers (1 red, 1 yellow) – chopped
- 1 small Red Onion – finely diced
- 1 cup Corn (fresh, frozen, or canned)
- 1 cup Cherry Tomatoes – halved
- 1 large Avocado – diced
- 1/2 cup Cilantro – chopped
- Juice of 2 Limes
- 3 tablespoons Olive Oil (extra virgin)
- 1 teaspoon Cumin (ground)
- Salt & Pepper – to taste
Instructions
- Prep your ingredients by chopping and preparing all vegetables.
- Mix the beans in a large mixing bowl.
- Add the chopped bell peppers, diced red onion, sweet corn, and halved cherry tomatoes, and toss gently.
- Make the dressing by whisking lime juice, olive oil, cumin, salt, and pepper in a small bowl.
- Combine the dressing over the salad and toss gently, then add diced avocado and cilantro.
- Taste test the salad and adjust seasonings.
- Let it marinate in the fridge for 30 minutes if time allows.
Notes
This salad can be made ahead of time; just add the avocado right before serving to keep it fresh.
- Prep Time: 15 minutes
- Cook Time: 0 minutes
- Category: Salad
- Method: Mixing
- Cuisine: Southwestern
Nutrition
- Serving Size: 1 serving
- Calories: 220
- Sugar: 4g
- Sodium: 180mg
- Fat: 9g
- Saturated Fat: 1g
- Unsaturated Fat: 6g
- Trans Fat: 0g
- Carbohydrates: 30g
- Fiber: 10g
- Protein: 12g
- Cholesterol: 0mg
Keywords: salad, southwestern, beans, vegetarian, summer dish
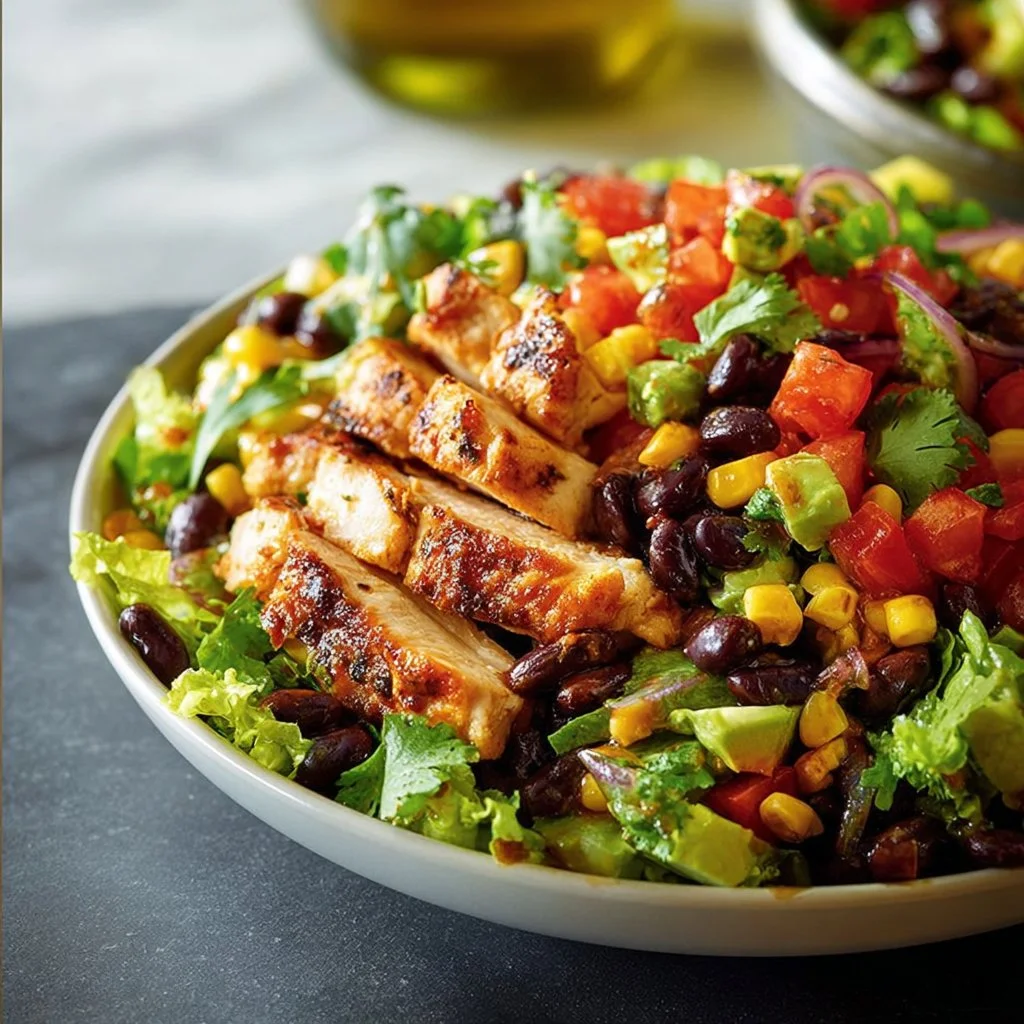
Black Bean & Corn Southwest Chicken Salad
Black Bean & Corn Southwest Chicken Salad: A Recipe for Heart and Soul
Welcome, fellow food lovers! If you’ve stumbled upon this cozy corner of the Internet, prepare your taste buds for a flavor-packed adventure. Today, I’m sharing one of my absolute favorite recipes: the Black Bean & Corn Southwest Chicken Salad. Picture a vibrant bowl brimming with fresh ingredients, bursting with flavor and color — it’s a feast for both the eyes and the palate!
I can’t stress enough how much joy cooking brings me, especially when it’s about creating dishes that invite friends and family to gather around the table. There’s something utterly magical about a salad that not only nourishes your body but also warms your heart. This Southwest Chicken Salad delivers just that! With its zesty dressing, tender chicken, crunchy veggies, and protein-packed black beans, it’s the perfect combo of health and satisfaction.
What I adore most about this recipe is its ability to transcend seasons. You can whip it up for a summer picnic, a cozy fall evening, or even as a refreshing lunch on a hectic weekday. Plus, everything can be prepped ahead of time, making it as practical as it is delicious. So grab your apron, roll up those sleeves, and let’s dive into this culinary journey together!
Personal Story
Ah, the memories of summer barbecues! Growing up, our family would enthusiastically gather in the backyard, the air filled with laughter, playful banter, and, of course, the mouthwatering aromas wafting from the grill. I remember my uncle, who was the ultimate grill master, marinating chicken with his secret spices and tossing fresh vegetables together to create colorful salads. One day, after noticing how quickly my cousins devoured his classic chicken salad, he decided to shake things up.
He added canned black beans and corn to the mix, along with a zesty dressing that brought everything to life. From that moment on, his black bean and corn chicken salad became a staple at our summer gatherings. Watching everyone dig in, chatting and enjoying each other’s company, inspired me to recreate that wonderful dish in my own kitchen. Years later, here I am, sharing my version of that cherished family recipe with all of you. And trust me, every bite will whisk you away to that backyard barbecue filled with love, laughter, and warmth!
Ingredients
Here’s what you’ll need to create your own Black Bean & Corn Southwest Chicken Salad:
-
2 cups cooked chicken, diced
Opt for grilled or rotisserie chicken for a flavorful and convenient option. If you’re looking for a substitute, grilled tofu or chickpeas work wonderfully for a vegetarian take! -
1 can (15 oz) black beans, drained and rinsed
Black beans add a hearty texture and protein boost to the salad. To add a twist, you can use pinto or kidney beans if you happen to have them on hand. -
1 cup corn kernels (frozen, canned, or fresh)
Sweet corn gives the salad a delightful crunch and natural sweetness. If fresh corn is in season, don’t hesitate to use it! Just grill the corn and cut it off the cob for an extra smoky flavor. -
1 red bell pepper, diced
The sweetness and vibrant color of red bell pepper brighten the salad up! If you prefer heat, go for a diced jalapeño instead. -
1/2 red onion, finely chopped
Red onion provides a sharp bite that balances perfectly with the other flavors. For a milder flavor, you can substitute with green onions or shallots. -
1 avocado, diced
Creamy avocado adds richness to the salad; plus, it’s packed with healthy fats! If avocados aren’t available, you can swap in sliced olives or feta cheese for a little tang. -
1/4 cup cilantro, chopped
Cilantro brings freshness and herbaceous notes to the salad. For a twist, try using parsley or even basil if you’re not a fan of cilantro. -
Juice of 2 limes
Lime juice not only adds zesty flavor but also brightens up the entire dish. If you don’t have limes, lemon juice can be a great substitute.
For the dressing:
-
1/4 cup olive oil
Extra virgin olive oil gives the dressing a luscious texture while enhancing flavors. If you’re after a different taste, avocado oil is a lovely alternative! -
1 tsp cumin
Cumin introduces warm, earthy flavors that highlight the Southwest vibe. You could also use smoked paprika for a slightly different depth. -
1 tsp garlic powder
Garlic powder adds a punch without the hassle of chopping fresh garlic. If you love fresh garlic, feel free to mince up one clove instead. -
Salt and pepper to taste
Always season it to your taste! A great tip is to start with a little, then adjust as needed.
Step-by-Step Instructions
Now that we have everything ready, let’s bring this salad together step by step!
Step 1: Prepare the Chicken
Start with your cooked chicken. If you’re using store-bought rotisserie chicken, grab your trusty fork and shred or chop the meat into bite-sized pieces. Using leftover grilled chicken is a fantastic way to save time and infuse more flavor into the salad. If you’re cooking raw chicken, grill it until golden and cook it to an internal temperature of 165°F (75°C). Let it cool down a bit, then chop it up.
Step 2: Rinse the Beans and Corn
Next up, grab a can of black beans. Drain and rinse them under cold water to remove excess sodium. This little step goes a long way! Follow that with your corn — if you’re using frozen corn, give it a little thaw in the microwave or under warm water. Fresh corn can be prepared by slicing it off the cob after grilling for 3-4 minutes.
Step 3: Chop the Veggies
Time to dice up your veggies! Grab your red bell pepper, red onion, and avocado. Aim for uniform sizes, so every forkful is laden with flavor. To avoid browning, if your avocado doesn’t get consumed immediately, a quick squeeze of lime juice will keep it fresh and green!
Step 4: Combine in a Large Bowl
Transfer the chicken, beans, corn, diced bell pepper, red onion, and avocado into a big mixing bowl. Now, for the magic— sprinkle in the chopped cilantro. Toss all the ingredients together gently to keep the avocado intact but ensure everything is well mingled.
Step 5: Make the Dressing
In a small bowl or jar, combine the olive oil, lime juice, cumin, garlic powder, salt, and pepper. Give it a good whisk or shake until it’s emulsified and deliciously fragrant. Drizzle this over your salad mixture. This step is so rewarding, as the dressing infuses its flavors into the salad, tantalizing your taste buds!
Step 6: Toss and Taste
Give everything a gentle toss to combine the dressing with all your colorful ingredients. Now for the fun part—taste it! Adjust the seasoning if needed, adding a bit more lime juice or salt to achieve your preferred flavor.
Serving Suggestions
When it comes to plating, I love serving this southwestern salad in a big, beautiful bowl that invites everyone to dig in. You can garnish with extra cilantro, lime wedges, or even a sprinkle of queso fresco if you’re feeling fancy! For a little crunch, serve it alongside tortilla chips or over a bed of nacho chips for a delightful twist. It’s also fantastic in a wrap or taco form if you’re craving something different!
Recipe Variations
Feeling adventurous? Here are some fun variations to tweak this salad to your tastes:
- Spicy Twist: Add diced jalapeños or a dash of hot sauce to the salad for a spicy kick!
- Grain Bowl: Swap out the chicken for quinoa or farro to create a hearty grain bowl.
- Vegan Delight: Omit the chicken and add tofu or tempeh for a delicious vegan option.
- Tropical Version: Introduce diced mango or pineapple for a sweet, tropical flair.
- Creamy Dressing: Swap the olive oil dressing with a creamy avocado dressing for an extra luxurious mouthfeel.
Chef’s Notes
This salad has come a long way since my uncle’s backyard barbecues! Over time, I’ve tweaked the recipe to embrace seasonal ingredients and personal preferences, which makes it even more special to me. The best part about this salad is its versatility; it’s practically begging to be personalized every time you make it.
To be honest, the first time I tried to make this dish, I accidentally mistook garlic powder for cocoa powder (what a mistake!). It’s safe to say that my family had a good laugh, and thankfully, they’re still brave enough to taste my experiments!
FAQs and Troubleshooting
1. Can I make this salad ahead of time?
Absolutely! You can prepare all the ingredients except for avocado and dressing one day in advance. Keep everything in airtight containers in the fridge. When ready to serve, mix it all up and add the dressing!
2. Why is my salad watery?
If you find your salad is getting watery, it could be from the tomatoes or beans releasing moisture. To prevent this, drain your beans well and pat them dry, and use tomatoes that aren’t overly ripe. Alternatively, add them right before serving.
3. How can I make it gluten-free?
All the ingredients listed are gluten-free, but always double-check your labels, especially for beans and corn. Enjoy this salad worry-free!
4. What should I do if my avocado is brown?
If your avocado has turned brown, you can give it a squeeze of lime juice and mix it into the salad. It may not look as pretty, but it’ll still taste great!
Nutritional Info (Optional)
Here’s a quick breakdown of the nutritional info for one serving (based on 6 servings):
- Calories: 355
- Protein: 28g
- Carbohydrates: 34g
- Dietary Fiber: 12g
- Sugars: 3g
- Fat: 16g
So there you have it — everything you need to know about creating a delicious Black Bean & Corn Southwest Chicken Salad that will bring smiles and happy bellies all around! It’s a dish that’s not just food, but a real celebration of flavor, love, and togetherness. Happy cooking, and may your kitchens be filled with joy and laughter!
Print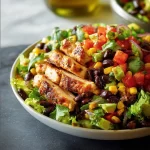
Black Bean & Corn Southwest Chicken Salad
- Total Time: 25 minutes
- Yield: 6 servings 1x
- Diet: Gluten-Free, Dairy-Free
Description
A vibrant and flavor-packed salad featuring tender chicken, black beans, corn, and a zesty dressing.
Ingredients
- 2 cups cooked chicken, diced
- 1 can (15 oz) black beans, drained and rinsed
- 1 cup corn kernels (frozen, canned, or fresh)
- 1 red bell pepper, diced
- 1/2 red onion, finely chopped
- 1 avocado, diced
- 1/4 cup cilantro, chopped
- Juice of 2 limes
- 1/4 cup olive oil
- 1 tsp cumin
- 1 tsp garlic powder
- Salt and pepper to taste
Instructions
- Prepare the chicken by shredding or chopping cooked chicken into bite-sized pieces.
- Rinse the black beans under cold water and drain.
- Chop the red bell pepper, red onion, and avocado into uniform sizes.
- Combine all ingredients in a large mixing bowl and sprinkle with cilantro.
- Make the dressing by whisking together olive oil, lime juice, cumin, garlic powder, salt, and pepper in a small bowl.
- Toss the salad with the dressing and adjust seasoning if needed.
Notes
This salad is versatile and can be personalized with additional ingredients or dressings.
- Prep Time: 15 minutes
- Cook Time: 10 minutes
- Category: Salad
- Method: Mixing
- Cuisine: Southwest
Nutrition
- Serving Size: 1 serving
- Calories: 355
- Sugar: 3g
- Sodium: 400mg
- Fat: 16g
- Saturated Fat: 2g
- Unsaturated Fat: 10g
- Trans Fat: 0g
- Carbohydrates: 34g
- Fiber: 12g
- Protein: 28g
- Cholesterol: 60mg
Keywords: salad, chicken salad, southwest salad, healthy recipes, black beans
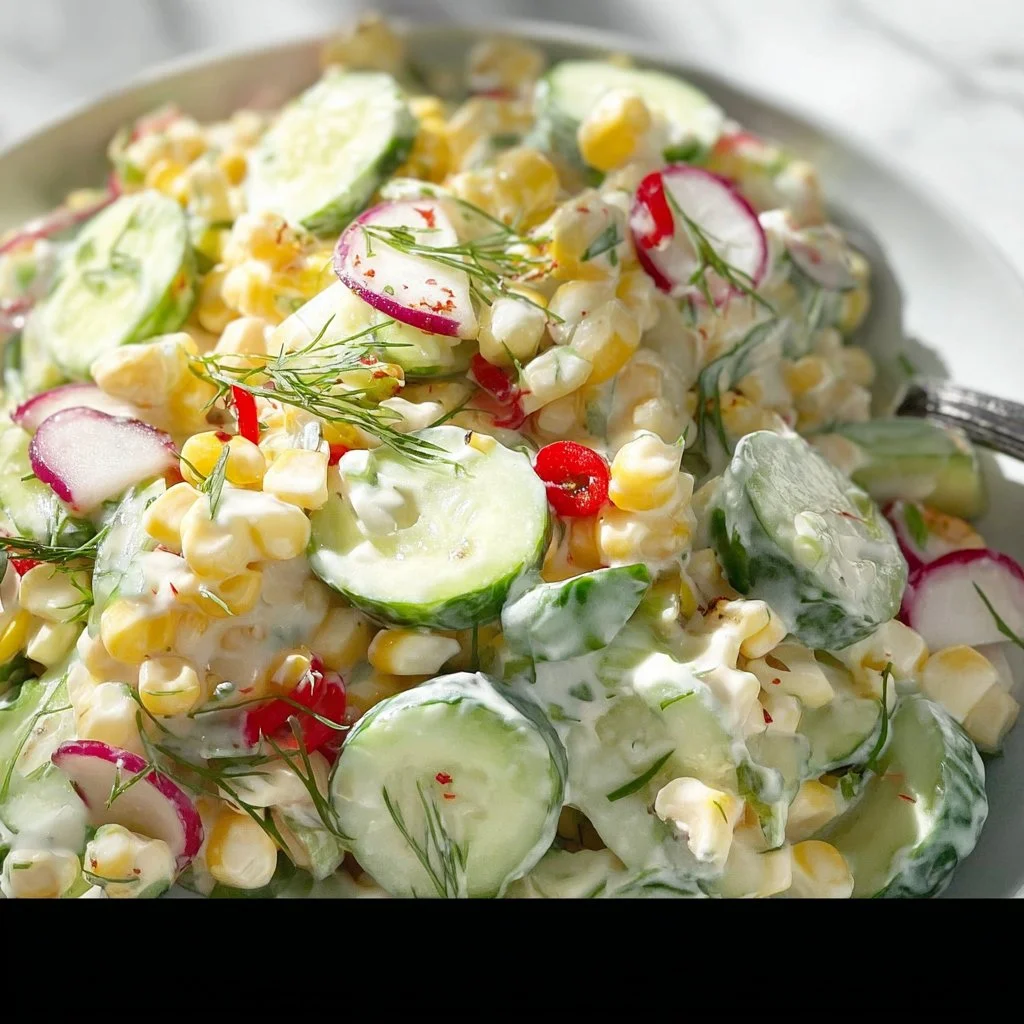
Creamy Corn Cucumber Salad
Creamy Corn Cucumber Salad: A Delightful Summer Dish
Introduction
Hello, all you wonderful food lovers! Welcome back to my cozy corner of the internet. Today, I’m thrilled to share a recipe that’s become a staple in my summer repertoire: Creamy Corn Cucumber Salad. With its crunchiness, creaminess, and a sprinkle of freshness, it’s truly a celebration of the season!
Is there anything better than the summer sun shining on your back while tossing together a vibrant dish? Just the thought of juicy corn and cool, crisp cucumbers mixing together brings a smile to my face. This salad captures the very essence of summer gatherings. It’s perfect for potlucks, spontaneous summer soirées, or a simple family dinner on the patio.
What I love most about this salad is how simple it is to throw together. The colorful ingredients not only please the eye but also offer a delightful textural contrast. They say we eat first with our eyes, and trust me, this dish will have everyone reaching for seconds (and thirds)!
Now, if you’ve ever felt like you needed a cooking degree to whip up something delicious, let me assure you: you don’t! The beauty of sharing meals is about creativity and love. Cooking brings people together, and I believe that anyone can create something magical in the kitchen, especially with a little guidance. So grab your apron, and let’s dive into this easy yet impressive Creamy Corn Cucumber Salad recipe!
Personal Story
Growing up, my family had a cherished tradition of gathering for summer picnics in our backyard. The scent of grilled burgers and the laughter of loved ones filled the air. Among all the scrumptious dishes, my aunt Claire would always bring her famous corn cucumber salad. It was fresh, crunchy, and its creamy dressing was the perfect complement—a symphony of flavors that danced on your palate.
One particular summer, I remember sitting on the grass with my cousins, each spoonful of that salad igniting bursts of joy as we swapped stories and made memories. Aunt Claire would always wince playfully as we dug in and fought over the last spoonful—her secret ingredient? A splash of her garden-fresh lemon juice. That day sparked my love for recipes that bring people together and set the stage for what would become my lifelong passion. Now, I share this recipe with friends, as it’s a delicious tribute to those cherished moments.
Ingredients
Here’s what you’ll need to bring this delightful salad to life:
-
Corn (fresh or canned):
- Using fresh corn? Grill or boil it for a sweet, crunchy texture. If canned, just make sure to rinse it thoroughly to wash away any excess salt!
-
Cucumbers:
- Opt for English cucumbers for their crispness and minimal seeds. If you prefer a stronger flavor, go for regular cucumbers, but be sure to peel them!
-
Greek Yogurt:
- This will form the creamy base of your salad, giving it a tangy kick and health benefits. If dairy-free, feel free to substitute with coconut yogurt or a cashew cream!
-
Mayonnaise:
- Adds an extra creamy element! You can use olive oil mayo for a lighter option.
-
Fresh Dill:
- A key herb that brightens up the dish. If you don’t have fresh dill, dried dill can work in a pinch (just use half the amount).
-
Lemon Juice:
- For that zesty freshness! You can substitute with lime juice for a slight twist.
-
Salt and Pepper:
- To taste. Use sea salt for a bit of crunch, and fresh cracked pepper for enhanced flavor.
Choosing the right ingredients can bring out the best in this salad, so trust your instincts and don’t hesitate to make it your own!
Step-by-Step Instructions
Ready to whip up this salad? Let’s break down those cooking steps, shall we?
-
Prepare the Corn:
- If you’re starting with fresh corn, bring a pot of water to a boil. Add the corn cobs and cook them for 5–7 minutes until tender. Let them cool before cutting the kernels off.
- Chef Tip: If you’re craving a smoky flavor, toss the corn cobs on a grill until charred and then slice off those kernels.
-
Chop the Cucumbers:
- Wash and slice your cucumbers. If you’re using regular cucumbers, I recommend peeling them since the skin can be a bit bitter.
- Chef Insight: For a more elegant presentation, create matchstick slices instead of regular bites—that way, each forkful looks fancy!
-
Mix the Dressing:
- In a large mixing bowl, combine 1 cup of Greek yogurt, 1/4 cup of mayonnaise, and the juice of one lemon. Stir until smooth and creamy.
- Little Hack: If you want to build deeper flavors, add in a teaspoon of Dijon mustard or a splash of apple cider vinegar for tartness.
-
Combine Ingredients:
- Add in the corn and cucumbers, gently folding them into the creamy dressing.
- Toss in a tablespoon of fresh dill, and sprinkle some salt and pepper over the top.
-
Chill and Serve:
- Let the salad chill in the refrigerator for at least 30 minutes. This allows the flavors to meld together beautifully.
- Chef Hack: If you’re in a hurry, you can skip the chilling step! Just make sure to serve it immediately for that fresh crunch.
Serving Suggestions
To serve this vibrant salad, scoop it into a beautiful serving bowl, or go rustic by using a wooden platter. Garnish with a few fresh dill sprigs on top for an extra touch of elegance and a pop of color. This Creamy Corn Cucumber Salad pairs beautifully with grilled meats or can stand alone as a light lunch. You can even serve it alongside crunchy pita chips or lettuce wraps for a refreshing snack.
Recipe Variations
- Add Protein: Toss in some shredded rotisserie chicken or chickpeas for a hearty meal.
- Spicy Kick: Mix in diced jalapeños or a sprinkle of cayenne pepper for a spicy twist.
- Vegan Option: Substitute Greek yogurt and mayonnaise with cashew cream and silken tofu to make this dish completely plant-based.
- Cheese Lover: Crumble some feta cheese or goat cheese on top for a creamy, tangy flavor.
- Seasonal Additions: In the fall, throw in some diced apples for a sweet crunch; in winter, roasted butternut squash!
Chef’s Notes
This recipe has evolved over time, but the heart of it remains the same: easy, colorful comfort. I can still hear the laughter from that backyard picnic as I make this salad, with everyone clamoring for just one more bite! It’s fun to experiment with different ingredients, or even dressing styles. One time, I substituted the dressing with a tahini-lemon sauce, and it gave the salad a unique, nutty flavor!
Every time I make this dish, it reminds me that food isn’t just about what’s on the plate; it’s about the stories we share and the joy we bring to those we love!
FAQs and Troubleshooting
-
Can I make this salad ahead of time?
- Yes! Just remember that the salad is best enjoyed fresh. To keep the cucumbers crunchy, add them right before serving.
-
What if my dressing is too thick?
- Don’t worry! If you find the dressing too thick, a splash of milk or water can help thin it out to your desired consistency.
-
How do I store leftovers?
- Store any leftovers in an airtight container in the refrigerator for up to 2 days. The salad may get a bit watery, so give it a good stir before serving again.
-
Can I use frozen corn?
- Absolutely! Just thaw it and pat it dry to remove excess moisture before mixing it with the other salad ingredients.
Nutritional Info (if applicable)
While I typically suggest enjoying food in moderation, here’s a quick glance at the nutritional components of this salad:
- Calories: 200 (per serving)
- Protein: 6g
- Carbs: 15g
- Fats: 12g
- Fiber: 3g
Feel free to adjust the recipe to suit your dietary needs or cravings.
So there you have it—a vibrant, flavorful Creamy Corn Cucumber Salad that’s perfect for any summer gathering. I hope this recipe inspires you to get cooking and create your kitchen magic. Don’t forget to drop a comment below; I’d love to hear about your own version or any memories you have attached to similar dishes. Until next time, happy cooking, and may your kitchen always be filled with love and laughter!
Print
Creamy Corn Cucumber Salad
- Total Time: 45 minutes
- Yield: 4 servings 1x
- Diet: Vegetarian
Description
A delightful summer salad featuring crunchy cucumbers and sweet corn in a creamy dressing.
Ingredients
- 2 cups Corn (fresh or canned, fresh cooked)
- 2 Cucumbers (preferably English, sliced)
- 1 cup Greek Yogurt (or coconut yogurt for dairy-free)
- 1/4 cup Mayonnaise (olive oil mayo for lighter option)
- 2 tablespoons Fresh Dill (or dried dill, half the amount)
- 2 tablespoons Lemon Juice (or lime juice)
- Salt and Pepper (to taste)
Instructions
- Prepare the Corn: Bring a pot of water to a boil, add corn cobs, and cook for 5–7 minutes until tender. Let cool and cut kernels off.
- Chop the Cucumbers: Wash and slice cucumbers. Peel if using regular cucumbers.
- Mix the Dressing: In a large bowl, combine Greek yogurt, mayonnaise, and lemon juice. Stir until smooth.
- Combine Ingredients: Add corn and cucumbers to the dressing, folding gently. Toss in dill, salt, and pepper.
- Chill and Serve: Let the salad chill in the refrigerator for at least 30 minutes before serving.
Notes
Best enjoyed fresh. Add cucumbers right before serving to maintain their crunch.
- Prep Time: 15 minutes
- Cook Time: 10 minutes
- Category: Salad
- Method: Mixing
- Cuisine: American
Nutrition
- Serving Size: 1 serving
- Calories: 200
- Sugar: 5g
- Sodium: 300mg
- Fat: 12g
- Saturated Fat: 2g
- Unsaturated Fat: 7g
- Trans Fat: 0g
- Carbohydrates: 15g
- Fiber: 3g
- Protein: 6g
- Cholesterol: 5mg
Keywords: salad, summer salad, corn, cucumber, creamy dressing




