
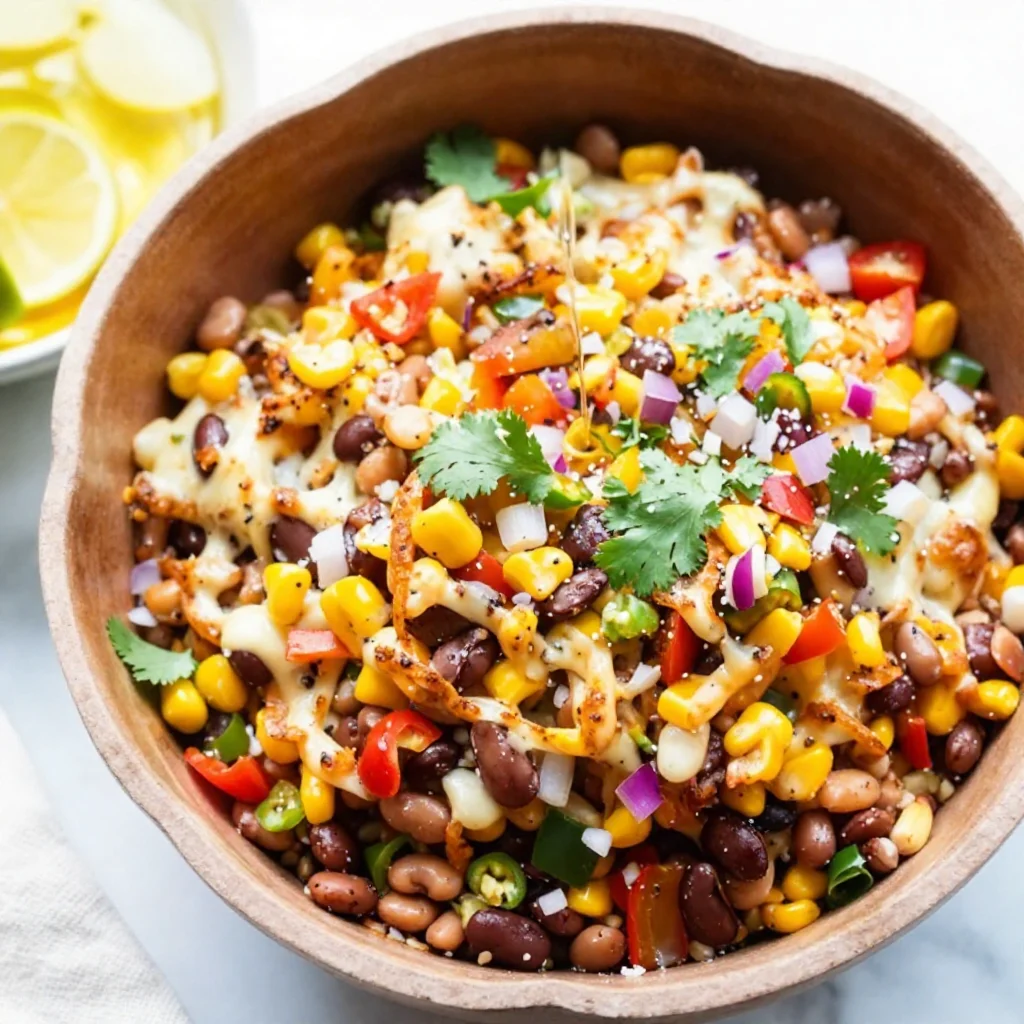
Cowboy Caviar
Cowboy Caviar: A Deliciously Fun Recipe to Impress Your Friends
Welcome to my kitchen! Today, we’re diving into a dish that’s as vibrant and exciting as a summer rodeo: Cowboy Caviar. If you haven’t tried this lively, flavor-packed dip, you’re in for a treat! Cowboy Caviar is not your ordinary bean dip; it’s a colorful medley of fresh ingredients that will make your taste buds dance with joy. Perfect for gatherings, picnics, or as a delightful snack while binge-watching your favorite show, this dish transforms everyday ingredients into something extraordinary.
You might be wondering—what is Cowboy Caviar? Picture this: black beans, corn, colorful peppers, tomatoes, and a zesty dressing that ties it all together. Whether served with tortilla chips or used as a salad topping, it’s a dish that embodies fun, flavor, and friendship. In my home, Cowboy Caviar is a staple. It’s my go-to recipe whenever friends swing by or when I need a vibrant addition to a potluck.
Join me as we journey through the simple steps of creating this crowd-pleaser. I promise it’ll be a delightful experience filled with laughter, great stories, and some culinary magic. Grab your ingredients, put on your apron (or not—I won’t judge!), and let’s get started!
A Nostalgic Memory: The First Time I Made Cowboy Caviar
I remember the first time I stumbled upon Cowboy Caviar like it was yesterday. It was a warm summer evening, and my best friend Sarah and I were trying to impress our college friends for a casual get-together. We wanted something that was easy to prepare but would make a big splash. After extensive Pinterest scrolling and a sprinkle of inspiration from a family cookbook, we landed on this luscious dip.
We spent the afternoon in my tiny kitchen, chopping vegetables, laughing, and devouring leftover tortilla chips while we worked. With each ingredient we added, the colors brightened, and the anticipation grew. When we finally tasted it, our eyes lit up! It was a burst of freshness, heat, and zest all in one bite. That evening was filled with laughter, great conversations, and of course, an empty bowl of Cowboy Caviar. Little did we know, this dish would become a tradition for many gatherings to come!
Ingredients
Here’s what you need to make your very own Cowboy Caviar:
-
1 can black beans: Rinsed and drained. These legumes pack a punch of protein and fiber. You can substitute with pinto or kidney beans if you prefer!
-
1 can corn: Kernel corn gives a lovely sweetness. You can use frozen corn—just thaw it first, or fresh corn off the cob for a juicy crunch.
-
1 cup cherry tomatoes: Halved. They’re sweet and juicy, perfect for this dip. You can swap them out for a cup of diced larger tomatoes, but cherry tomatoes add a fun pop of color!
-
1 bell pepper: Diced. Use your favorite color—red, yellow, or green! They all bring their own sweetness, and red provides a beautiful contrast in color.
-
1 small red onion: Finely chopped. For a milder flavor, you can substitute with green onions or shallots if you prefer less bite.
-
1 jalapeño: Seeds removed and finely chopped. It adds a glorious kick! If you’re sensitive to heat, feel free to skip it or substitute with a mild pepper.
-
½ cup fresh cilantro: Chopped. This herb brings brightness to the dish! If you’re not a fan, parsley works as a lovely alternative.
-
The Juice of 2 limes: Freshly squeezed. Lime juice adds a tangy flavor that pulls all the ingredients together. Bottled lime juice works, but fresh is always the way to go!
-
1 tablespoon olive oil: For a touch of richness. You can also use avocado oil or even skip it altogether if you’d like it lighter.
-
Salt and pepper: To taste. Seasoning can make or break your dish. Always start with a small pinch, and adjust to your preference!
Remember, this recipe is quite forgiving; you can modify it based on what you have in your pantry or what you enjoy!
Step-by-Step Instructions
Ready to bring all those vibrant ingredients together? Let’s get cookin’!
-
Prep Your Ingredients: Start by washing your vegetables. Rinse the black beans and corn under cold water. Halve the cherry tomatoes, chop the bell pepper, red onion, jalapeño, and cilantro. The more colorful your ingredients are, the better your Cowboy Caviar will look!
-
Mix the Base: In a large mixing bowl, combine the black beans, corn, cherry tomatoes, bell pepper, red onion, and jalapeño. Use a spatula and fold everything gently, preserving the shape of the tomatoes and beans.
-
Add the Flavor: Squeeze the juice of the limes over the mixture (don’t be shy; the lime juice is key here!). Drizzle on the olive oil and sprinkle with salt and pepper. The acidity from the lime will help meld all those great flavors.
-
Toss to Combine: Using that spatula again, toss everything together gently until combined. You want all the ingredients to bathe in the zesty dressing!
-
A Quick Taste Test: Here’s the best part! Take a small spoonful and taste. Does it need more lime? A pinch more salt? Adjust to your liking!
-
Chill (If You Can Wait): For the best flavor, let your Cowboy Caviar sit for at least 30 minutes to allow everything to marry. However, if you’re impatient like me, you can dive right in!
-
Serve and Enjoy: Scoop into a bowl and serve with your favorite tortilla chips. Enjoy the happy faces around the room as everyone dig in!
Serving Suggestions
Presentation can elevate your dish from good to spectacular! For a rustic vibe, serve the Cowboy Caviar in a colorful bowl and place it on a large wooden board with an assortment of tortilla chips around it. You could also garnish with extra cilantro or lime wedges for that extra pop of color. Not hosting? Portion it into individual cups for a fun grab-and-go snack!
Recipe Variations
Once you’ve mastered the classic Cowboy Caviar, feel free to shake things up:
- Mexican Street Corn Style: Add crumbled feta or cotija cheese and a sprinkle of chili powder.
- Guacamole Lover: Cube avocado and gently fold it in for a creamy texture—bonus flavor and nutrition!
- Sweet & Spicy: Mix in diced mango or pineapple for a tropical twist.
- Protein Boost: Throw in cooked, shredded chicken or shrimp for a heartier salad.
Chef’s Notes
So, here’s a little secret: Cowboy Caviar wasn’t always this vibrant in my kitchen. I originally made it with store-bought salsa! Over time, I discovered the joy of incorporating fresh ingredients and have adapted it into this lively and colorful dip. I once accidentally added too much jalapeño and ended up with a spicy disaster. But you know what? We laughed it off, made some tasty guacamole on the side to balance out the heat, and it turned into a great flavor combination after all. Cooking is about experimenting, learning, and most importantly, having fun!
FAQs and Troubleshooting
-
Can I make Cowboy Caviar ahead of time?
Absolutely! It gets better as it sits, so feel free to make it a few hours (or even a day) in advance. Just give it a good stir before serving. -
What if I don’t like black beans?
No problem! Use white beans, chickpeas, or even omit beans altogether for a lighter version. -
My dip is too spicy; how do I tone it down?
Mix in a bit of sour cream or yogurt for creaminess, or add more beans and corn to dilute the heat! -
Can I freeze it?
While you technically could, the texture of the beans and fresh veggies won’t fare well after freezing. It’s best enjoyed fresh!
Nutritional Info (Optional)
If you’re interested in the nutrition breakdown, here’s a quick overview (per serving):
- Calories: 120
- Protein: 8g
- Fat: 3g
- Carbs: 18g
- Fiber: 5g
Cowboy Caviar is not only delicious but also packed with vitamins and nutrients!
And there you have it! Cowboy Caviar—a dish that’s not only a feast for the eyes but also a wonderful celebration of flavors. I can’t wait for you to try it, share it with friends, and create your own memories in the kitchen. Remember, cooking should never be stressful but rather a joyous and flavorful adventure! Happy cooking, my friends!
Print
Cowboy Caviar
- Total Time: 45 minutes
- Yield: 4 servings 1x
- Diet: Vegetarian
Description
A colorful medley of black beans, corn, and peppers, served as a vibrant dip perfect for gatherings.
Ingredients
- 1 can black beans, rinsed and drained
- 1 can corn
- 1 cup cherry tomatoes, halved
- 1 bell pepper, diced
- 1 small red onion, finely chopped
- 1 jalapeño, seeds removed and finely chopped
- ½ cup fresh cilantro, chopped
- The juice of 2 limes, freshly squeezed
- 1 tablespoon olive oil
- Salt and pepper to taste
Instructions
- Prep your ingredients: Start by washing your vegetables. Rinse the black beans and corn under cold water. Halve the cherry tomatoes, chop the bell pepper, red onion, jalapeño, and cilantro.
- Mix the base: In a large mixing bowl, combine the black beans, corn, cherry tomatoes, bell pepper, red onion, and jalapeño. Use a spatula and fold everything gently.
- Add the flavor: Squeeze the juice of the limes over the mixture and drizzle on the olive oil. Sprinkle with salt and pepper.
- Toss to combine: Using a spatula, toss everything together gently until combined.
- Chill (if you can wait): For the best flavor, let your Cowboy Caviar sit for at least 30 minutes.
- Serve and enjoy: Scoop into a bowl and serve with tortilla chips.
Notes
Feel free to make it ahead of time, it gets better as it sits. Customize with your favorite ingredients!
- Prep Time: 15 minutes
- Cook Time: 0 minutes
- Category: Appetizer
- Method: Mixing
- Cuisine: Mexican
Nutrition
- Serving Size: 1 serving
- Calories: 120
- Sugar: 2g
- Sodium: 200mg
- Fat: 3g
- Saturated Fat: 0g
- Unsaturated Fat: 2g
- Trans Fat: 0g
- Carbohydrates: 18g
- Fiber: 5g
- Protein: 8g
- Cholesterol: 0mg
Keywords: Cowboy Caviar, dip recipe, vegetarian dip, appetizer, summer recipe
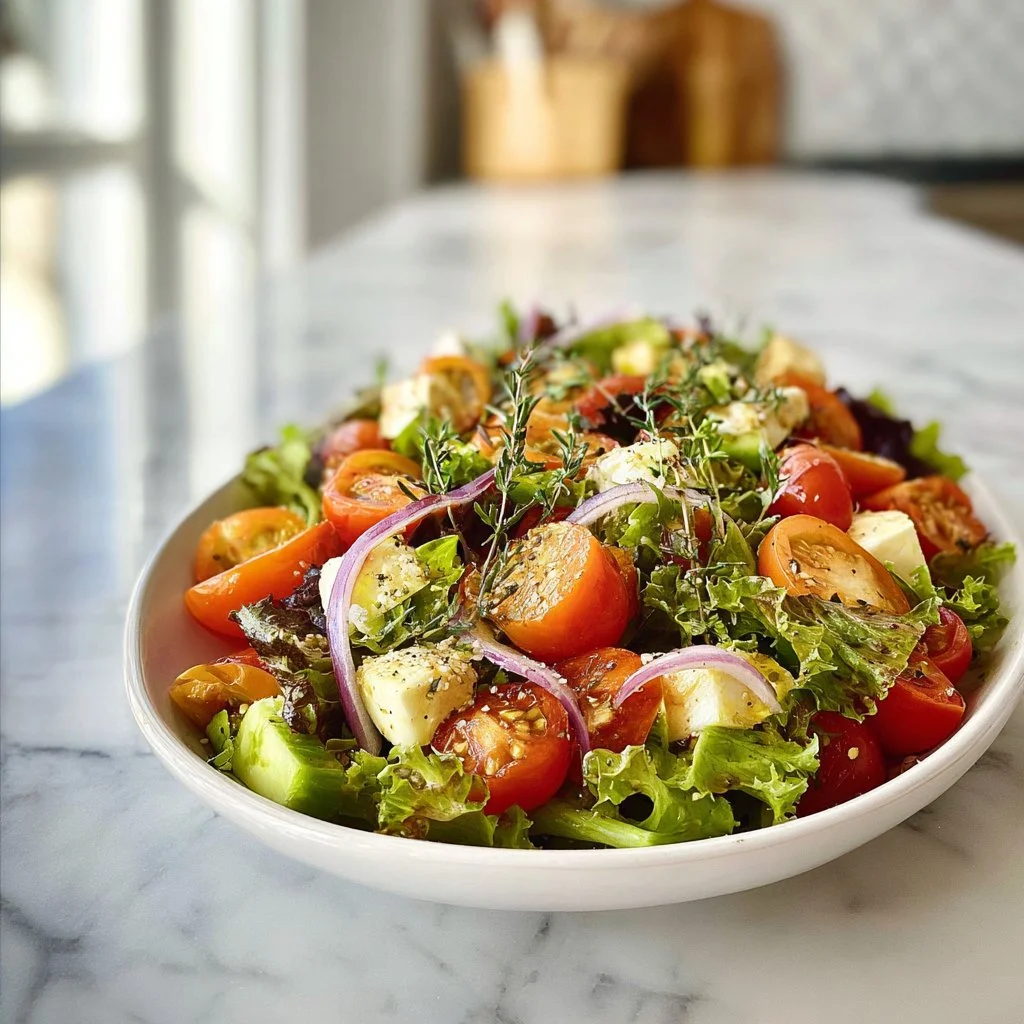
Best Simple Side Salad
# The Best Simple Side Salad: A Rainbow of Freshness on Your Plate

## Introduction

Welcome back to my cozy kitchen, my fellow food lovers! Today, we are diving into a dish that every home cook should have in their repertoire: the simple side salad. Now, you might wonder, “Olivia, why a salad?” Well, let me tell you—it’s not just any salad. This vibrant creation is packed with flavors and colors that dance together on your plate, bringing joy to your taste buds and nutrition to your body.

Salads often get a bad rap as being dull or just a boring side at dinner. But trust me, friends, when made right, a salad can be a showstopper! Picture fresh greens glistening with a homemade vinaigrette, crunchy vegetables adding their delightful crunch, and the finishing touch of creamy avocado or crumbly feta cheese. Yum!

The best part about this salad is its versatility. It’s a beautiful companion to grilled meats, a perfect partner to pasta dishes, or even a vibrant, standalone lunch. Whether you’re hosting a summer gathering or just looking to elevate a weeknight dinner, this simple side salad will impress and satisfy. And guess what? It’s so easy to toss together that you’ll wonder why you didn’t make it sooner!

So grab your cutting board and let’s get started on creating a fresh, colorful salad that boasts flavor and fills your home with aromatic memories. Just remember, this salad is a canvas, and you can paint it with your favorite ingredients. Let’s make salad magic together!

---

## Personal Story

Growing up, salads did not hold the same charm they do for me now. In fact, I remember sitting at the dining room table as a kid, pushing around those sad, wilted greens that Mom insisted we needed for dinner. What I didn’t realize, back then, was how delightful a well-made salad could be. My love affair with salads began during a summer family road trip. We stopped at a charming little café in a small town, and I ordered their house salad, which was stunning—colorful heirloom tomatoes, crisp cucumbers, tangy red onion, and the creamiest dressing. It was such a refreshing taste of summer!

That moment ignited a passion for salads in me, and I vowed to never again allow greens on my plate to be anything less than delightful. Now, every time I prepare a salad, it brings me back to that café, the laughter of my family, and the joy that comes from a fresh meal. Each creation is like a piece of nostalgia—simple yet fulfilling. I hope to help you connect to those delightful moments through the simple side salads we make together!

---

## Ingredients

Here’s what you need to create the best simple side salad. Don’t forget, you can always switch things up based on your preferences!

- **Mixed Greens (Spinach, Arugula, or Romaine)**
  Choose your favorite leafy greens as the base. Spinach offers a tender bite, arugula adds a peppery kick, and romaine gives crunch. If you’re looking for a lighter salad, opt for baby greens!

- **Cherry Tomatoes**
  Juicy and plump, cherry tomatoes add sweetness and color. Can’t find fresh ones? Substitute with grape tomatoes or even canned diced tomatoes, drained well, for an emergency fix.

- **Cucumber**
  This refreshing vegetable slices beautifully, providing a crisp texture. Try English cucumbers for fewer seeds, or pickling cucumbers if you want that extra crunch. No cucumbers? Try shredded carrots for a sweet crunch!

- **Red Onion**
  Just a few slices will give your salad a pop of color and flavor. Soaking them in cold water before adding them helps mellow the sharpness. If onions aren’t your jam, try thinly sliced radishes for a similar crunch without the bite.

- **Bell Peppers**
  Use any color you like—red, yellow, or green—each adds its own unique sweetness and vibrancy. If you’re looking for a twist, switch them out for roasted beets, which give a lovely earthy flavor.

- **Avocado**
  Creamy and rich, avocado enhances the salad with healthy fats. If you’re preparing the salad ahead of time, squeeze a little lemon juice on it to stop it from browning!

- **Feta Cheese**
  Crumbled feta provides a salty kick that brings the whole salad together. For a dairy-free version, use crumbled tofu seasoned with salt or nutritional yeast for a cheesy flavor!

- **Olive Oil and Lemon Juice**
  The dressing! A simple mix of olive oil and fresh lemon juice brings everything to life. You can also swap vinegar for lemon juice or use a splash of balsamic for a sweeter dressing.

---

## Step-by-Step Instructions

Now for the fun part: putting it all together! Follow these steps for a crowd-pleasing simple side salad.

1. **Prepare the Greens**
   Start by rinsing your chosen mixed greens in cold water. This not only removes any dirt but also keeps the leaves fresh and crisp. Shake off excess water (or use a salad spinner if you have one) and toss them into a large mixing bowl. *Chef’s Tip: Always dry your greens thoroughly; wet leaves can dilute your dressing!*

2. **Chop the Vegetables**
   Slice the cherry tomatoes in half, chop the cucumber into bite-sized pieces, and thinly slice the red onion—aim for the finest cuts possible for a pleasant crunch with every bite. *Pro Tip: If your cutting skills are a bit rusty, consider using a small melon baller for the cucumbers!*

3. **Add Color and Texture**
   Toss in the diced bell peppers, avocado, and any other colorful veggies you’d like to include. Feel free to experiment here—perhaps a grated carrot or some fresh corn for added sweetness. *Little Chef Hack: If your avocado is hard, toss it in a paper bag for a day— it’ll ripen beautifully!*

4. **Make the Dressing**
   In a small bowl, whisk together about ¼ cup of olive oil with the juice of one lemon (about 2 tablespoons). Add salt and pepper to taste. If you’re feeling adventurous, a teaspoon of Dijon mustard or honey can add a delightful twist! *Chef’s Insight: Always taste your dressing until it's just right for your palate!*

5. **Toss It Up**
   Drizzle the dressing over your beautiful bowl of veggies and toss gently to combine. Try to coat everything evenly—this ensures that every bite is just as delicious as the last. *Pro Tip: Use your hands! They’re the best tools for properly combining the ingredients without bruising your greens!*

6. **Plate It Up**
   Serve your colorful salad in a large bowl or divide it into individual plates. If you have extra cheese, sprinkle some more feta on top. For a finishing touch, a light drizzle of olive oil or balsamic glaze will take your salad to the next level! *Little Chef Hack: A squeeze of fresh lemon juice just before serving brightens the flavors even more!*

---

## Serving Suggestions

Now that your salad shines, consider pairing it with grilled chicken or fish for a complete meal. It can also stand on its own as a light lunch alongside a crusty piece of bread. For gatherings, serve it in a large bowl for a rustic touch, letting your guests help themselves.

---

## Recipe Variations

Here are some fun twists on this simple side salad to suit various tastes and dietary needs:

1. **Grilled Veggie Salad:** Toss some grilled zucchini, asparagus, or even corn into the mix for a smoky flavor.
2. **Fruit-Infused:** Add sliced strawberries, mandarin oranges, or pomegranate seeds for a sweet contrast to the savory ingredients.
3. **Protein-Packed:** Mix in some chickpeas or black beans to create a heartier side salad.
4. **Herb-Heavy:** Fresh herbs like basil, parsley, or dill can elevate the salad’s freshness and flavor.
5. **Nutty Crunch:** Sprinkle a handful of toasted nuts—such as pecans or walnuts—on top for extra texture and health benefits.

---

## Chef’s Notes

As I mentioned earlier, salads were not always my favorite; however, I’ve learned to love their versatility and creativity. This recipe has evolved over time as I’ve tried different ingredients and flavors based on what’s abundant in my garden or what’s fresh at the market.

Every season, I find excitement in experimenting with different textures and flavors. Sometimes, I’ll add leftover roasted veggies from dinner, or if I have a ripe peach, I’ll throw that in for sweetness! The beauty of salads is that they’re staged for creativity, so let your funky culinary spirit roam free!

---

## FAQs and Troubleshooting

**1. How do I keep my salad fresh for leftovers?**
Store any leftover salad in an airtight container in the refrigerator, but keep the dressing separate! This will prevent the greens from wilting and ensure they remain crisp for your next meal.

**2. Can I use pre-packaged salad mixes?**
Absolutely! Pre-packaged mixed greens can save time. However, check the expiration date and appearance to guarantee freshness. Feel free to add your personal touch by adding extra ingredients!

**3. Help! My salad is too salty! What can I do?**
If you find that you’ve added too much salt, a squeeze of fresh lemon or a dash of vinegar can help balance the flavors. Alternatively, you can add a little more of the greens or other veggies to dilute the saltiness.

**4. Can I make this salad ahead of time?**
Yes, you can! Just prep the ingredients in advance, but avoid dressing it until you’re ready to serve. This keeps everything fresh and crisp!

---

## Nutritional Info

While the specific nutritional information can vary based on the ingredients and quantities used, a serving of this simple side salad is generally low in calories and rich in vitamins A and C, fiber, and healthy fats from avocado and olive oil. An excellent addition to any meal!

---

There you have it, my friends—your guide to creating the best simple side salad. I hope you find as much joy in making this dish as I do, and I can't wait to hear about your culinary adventures in the kitchen! Happy cooking, and remember, every salad has the potential to be a star. 🌱🥗
The Best Simple Side Salad
- Total Time: 15 minutes
- Yield: 4 servings
- Diet: Vegetarian
Description
A vibrant and fresh side salad packed with flavors and colors, perfect for any meal.
Ingredients
- Mixed Greens (Spinach, Arugula, or Romaine)
- Cherry Tomatoes
- Cucumber
- Red Onion
- Bell Peppers
- Avocado
- Feta Cheese
- Olive Oil and Lemon Juice
Instructions
- Prepare the greens by rinsing in cold water and shaking off excess water.
- Chop the vegetables: slice cherry tomatoes, chop cucumber, and slice red onion.
- Add diced bell peppers, avocado, and any other colorful veggies you choose.
- Make the dressing by whisking together olive oil and lemon juice.
- Toss the dressing over the salad and mix gently.
- Plate the salad and serve, adding extra cheese or a drizzle of olive oil if desired.
Notes
Store any leftovers in an airtight container and keep the dressing separate to prevent wilting.
- Prep Time: 15 minutes
- Cook Time: 0 minutes
- Category: Salad
- Method: No-cook
- Cuisine: American
Nutrition
- Serving Size: 1 serving
- Calories: 200
- Sugar: 4g
- Sodium: 300mg
- Fat: 15g
- Saturated Fat: 3g
- Unsaturated Fat: 10g
- Trans Fat: 0g
- Carbohydrates: 12g
- Fiber: 5g
- Protein: 4g
- Cholesterol: 10mg
Keywords: salad, side salad, fresh vegetables, healthy recipe




