
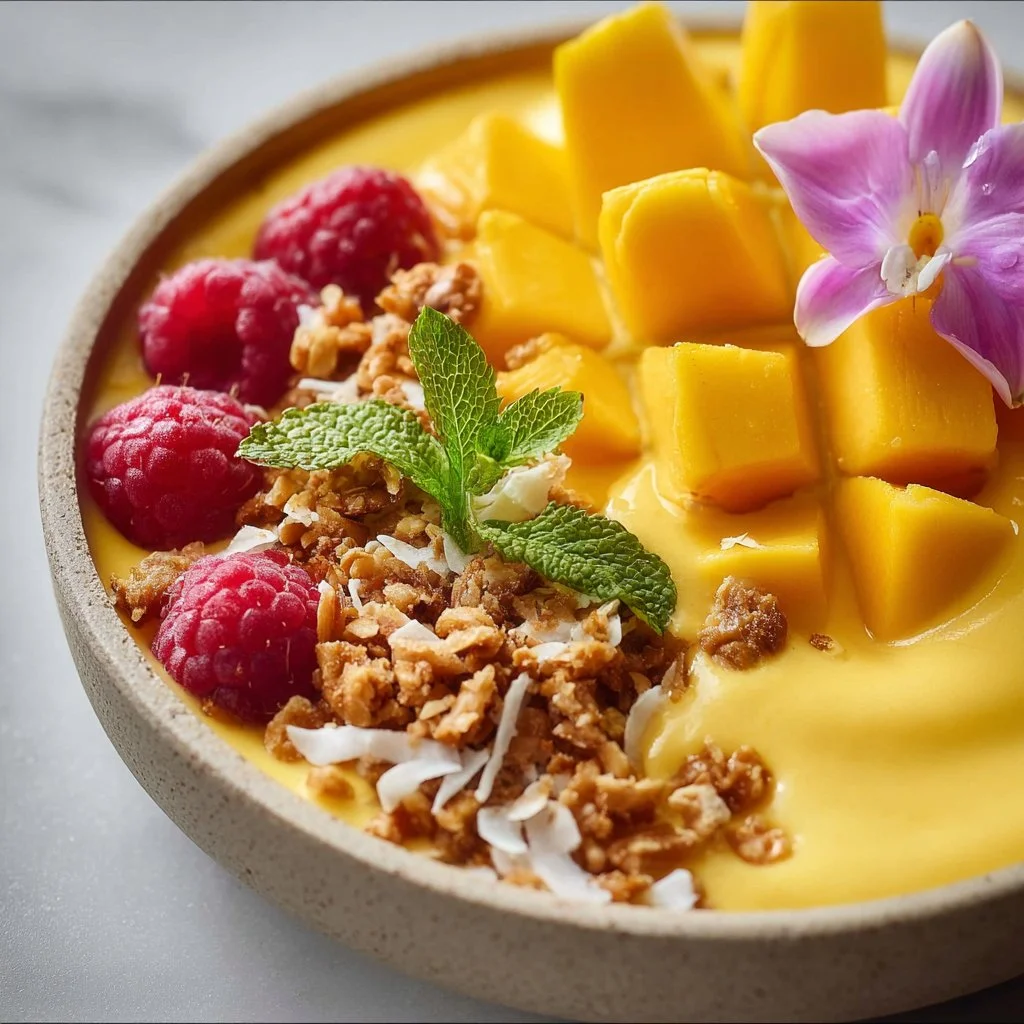
Iced Mango Lassi Smoothie Bowl
Refreshing Iced Mango Lassi Smoothie Bowl: A Taste of Summer in Every Spoonful
Welcome to my kitchen! I’m so excited to share one of my absolute favorite warm-weather treats with you today: the Iced Mango Lassi Smoothie Bowl. Picture this: it’s a sunny morning, the birds are chirping, and you want something nutritious but also cool and delicious to kick-start your day. This smoothie bowl is bursting with tropical flavors and is as easy to make as it is enjoyable to eat. With its creamy texture and vibrant color, it’s not just a breakfast option—it’s a cheerful, Instagram-worthy experience that will brighten your mood.
Now, what makes this smoothie bowl extra special is that it’s reminiscent of my travels to India. Balmy afternoons spent exploring colorful markets, discovering local eateries, and, of course, indulging in various delectable mango lassis—a refreshing Indian beverage made with yogurt, mango, and a hint of cardamom. The flavor combinations tantalize your taste buds, and it’s such a delight to whip up at home and share with friends and family. Before we dive in, grab your apron and get ready to blend, because this recipe will soon become a staple in your kitchen!
A Sweet Memory with Mango Lassi
Let me take you on a little trip down memory lane. I vividly recall the first time I tasted a real mango lassi at an open-air restaurant in Jaipur, India. The sun was shining, and the heat had a soft hum about it, making the cool lassi feel like a blessing. I watched as it was poured from a clay pot, the yogurty goodness twirling with bright, ripe mangoes. The first sip was like sunshine wrapped in a smooth velvety hug. The tanginess of yogurt paired perfectly with the sweetness of the mango. I remember asking for a second (or maybe a third) serving, and giggling with friends as we enjoyed the moment—nothing beats shared laughter over good food.
This Iced Mango Lassi Smoothie Bowl captures that essence of joy and nostalgia. It’s a celebration of the flavors that brought me happiness and inspired my love for cooking. It reminds me of the evocative connection food has not just to our taste buds but also to our hearts and memories. So, let’s recreate that blissful experience, shall we?
Ingredients
Here’s what you’ll need to make your own Iced Mango Lassi Smoothie Bowl. I’ve included some tips along the way to make substitutions easier:
- Mango: 1 cup of frozen mango chunks. If you can’t find frozen, fresh mango works too—just toss in some ice cubes to cool it down!
- Yogurt: ½ cup plain yogurt (Greek or regular). This is what gives your bowl that creamy consistency, but for a dairy-free option, feel free to use coconut yogurt!
- Milk: ½ cup of milk (dairy or plant-based). Coconut or almond milk will add to that tropical vibe!
- Honey or Maple Syrup: 1–2 tablespoons, depending on your sweetness preferences. For a sugar-free option, consider mashed banana or a drizzle of agave.
- Cardamom: ½ teaspoon ground cardamom. It adds a fragrant warmth, but if you don’t have this on hand, a pinch of cinnamon can also add an interesting twist!
- Lime Juice: 1 tablespoon fresh lime juice. A squeeze of lime brightens the flavors but can be left out if you’re not a fan of tartness.
- Toppings: assorted fruits, granola, shredded coconut, or nuts for that lovely crunch and extra flavor.
Step-by-Step Instructions
Now, let’s get blending! Follow these steps for a creamy and delicious Iced Mango Lassi Smoothie Bowl:
-
Gather Your Ingredients: Start by assembling everything on your kitchen counter. It’s much easier to work when you can see everything you need!
-
Blend the Base: In a high-speed blender, combine the frozen mango chunks, yogurt, milk, honey (or maple syrup), ground cardamom, and lime juice. Blend until smooth and creamy—about 30 seconds should do the trick. If you feel it’s too thick, add a splash more milk to loosen it up!
-
Taste Test: Once blended, take a tiny spoonful to see if it’s sweet and balanced for your palate. This is the fun part—tweaking it to your liking! Add a bit more honey or lime juice if needed, and blend again until it’s just right.
-
Prepare the Bowl: Once you’ve got your creamy mixture, pour it into a bowl. If you’re feeling fancy, use a spatula to create a soft swirl on the surface—your friends will be impressed!
-
Layer the Toppings: Here’s where you can really get creative! Start with a base layer of granola for crunch, then artfully arrange your favorite fruits on top. I love adding slices of fresh mango, berries, and a sprinkle of shredded coconut. Drizzle some honey on top for added sweetness or a touch of sliced almonds for an extra crunch. Let your creativity shine through!
-
Serve Immediately: This bowl is best enjoyed cold and fresh, so dig in right away while it’s still chilled and delightful. I promise you won’t want to share!
Serving Suggestions
Serve your Iced Mango Lassi Smoothie Bowl straight from the bowl, adorned with vibrant colors and textures, and place it on a cheerful table. Pair it with a refreshing herbal tea or a glass of sparkling water with mint, and you’ve got a beautiful summer morning spread!
Recipe Variations
Here are a few fun twists to make this recipe your own:
- Tropical Twist: Add pineapple or banana for a creamy texture and extra sweetness.
- Berry Bonus: Toss in a handful of mixed berries like strawberries or blueberries for a burst of color and antioxidants.
- Nutty Delight: Sprinkle with chia seeds or hemp seeds to amp up the nutrition and add a nice crunch.
- Spice It Up: Experiment with a dash of cinnamon or nutmeg instead of cardamom for a different flavor profile.
- Vegan Version: Swap yogurt with your favorite plant-based yogurt and use maple syrup; it’s deliciously creamy and dairy-free!
Chef’s Notes
As I’ve tested this recipe over the years, it has become a staple in my household, especially during warm months. The best part? Every person who tries it raves about it! I have a good friend who swears by adding a pinch of sea salt to balance out the sweetness, which I initially thought was odd, but she was right! Little tweaks like that can create flavor explosions. So don’t be shy; try adjusting ingredients to suit your taste preferences.
And let me tell you a funny story: one time, I decided to make this on a whimsically hot day but forgot to stock up on mango! A quick rummaging through my fridge led me to frozen peaches. Oh my, it turned into a peach lassi smoothie bowl that was equally delightful—so adaptable!
FAQs and Troubleshooting
-
What if my smoothie bowl is too thick?
If it’s thicker than you’d like, simply add a splash of milk and blend again until you reach your desired consistency. -
Can I use fresh mango instead of frozen?
Absolutely! Just be sure to add a handful of ice cubes when blending to keep it nice and chilled. -
Is there a non-dairy yogurt option?
Yes! Coconut yogurt or almond milk yogurt works perfectly and will still give that creamy texture we love. -
What if I don’t have cardamom?
No worries! Ground cinnamon or even a hint of vanilla extract can act as a great substitute, giving a different but equally delicious flavor.
Nutritional Info
This Iced Mango Lassi Smoothie Bowl is packed with vitamins and healthy fats, making it an excellent choice for breakfast or a refreshing snack. Each bowl will give you a mix of antioxidants, protein from yogurt, and healthy carbohydrates from fruits, leaving you energized and ready to tackle the day!
So, there you have it! I hope this Iced Mango Lassi Smoothie Bowl becomes a beloved part of your kitchen repertoire as it has in mine. Remember, cooking is meant to be fun, so don’t hesitate to experiment, make mistakes, and enjoy the process. Spread the love and let your culinary adventures unfold! HappyCooking! 🥭✨
Print
Iced Mango Lassi Smoothie Bowl
- Total Time: 10 minutes
- Yield: 1 serving 1x
- Diet: Vegetarian
Description
A refreshing smoothie bowl with tropical mango flavors, inspired by traditional Indian mango lassis.
Ingredients
- 1 cup frozen mango chunks
- ½ cup plain yogurt (Greek or regular)
- ½ cup milk (dairy or plant-based)
- 1–2 tablespoons honey or maple syrup
- ½ teaspoon ground cardamom
- 1 tablespoon fresh lime juice
- Assorted fruits, granola, shredded coconut, or nuts for toppings
Instructions
- Gather your ingredients: Start by assembling everything on your kitchen counter.
- Blend the base: In a high-speed blender, combine the frozen mango chunks, yogurt, milk, honey (or maple syrup), ground cardamom, and lime juice. Blend until smooth and creamy—about 30 seconds.
- Taste test: Once blended, take a tiny spoonful to see if it’s sweet and balanced for your palate. Adjust if needed and blend again.
- Prepare the bowl: Pour the creamy mixture into a bowl, creating a soft swirl on the surface.
- Layer the toppings: Start with a base layer of granola, then artfully arrange your favorite fruits on top.
- Serve immediately: Enjoy your bowl while it’s still chilled and delightful.
Notes
Serve with herbal tea or sparkling water for a complete refreshing experience.
- Prep Time: 10 minutes
- Cook Time: 0 minutes
- Category: Breakfast
- Method: Blending
- Cuisine: Indian
Nutrition
- Serving Size: 1 bowl
- Calories: 250
- Sugar: 18g
- Sodium: 70mg
- Fat: 5g
- Saturated Fat: 2g
- Unsaturated Fat: 3g
- Trans Fat: 0g
- Carbohydrates: 45g
- Fiber: 4g
- Protein: 8g
- Cholesterol: 10mg
Keywords: smoothie bowl, mango lassi, summer recipe, healthy breakfast
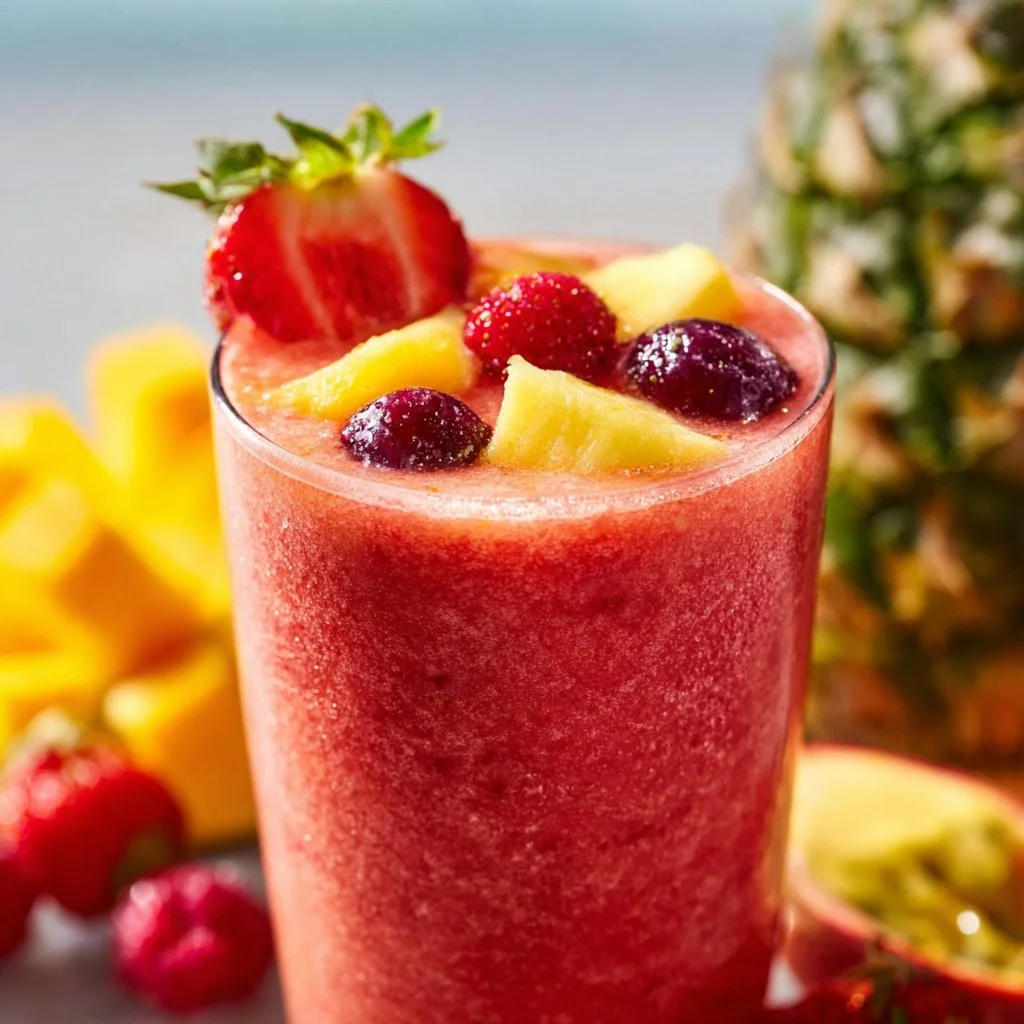
Jetty Punch Tropical Smoothie Recipe
Jetty Punch Tropical Smoothie Recipe
Welcome to my kitchen! I’m Olivia Bennett, and today, I’m thrilled to share with you one of my favorite creations: the Jetty Punch Tropical Smoothie. This vibrant, refreshing blend is not only ideal for hot summer days but also brings a taste of the tropics to your everyday routine. Imagine the sweet scent of ripe fruits and the satisfying creaminess of a well-crafted smoothie—it’s pure bliss in a glass.
There’s something undeniably cheerful about a smoothie, especially when it’s packed with colorful fruits and a hint of coconut. This recipe is like a mini-vacation in a cup, transporting you from your kitchen to a sun-kissed beach with every sip. Whether you’re prepping for a morning workout, enjoying a leisurely brunch, or just looking for a tasty afternoon treat, this smoothie is perfect for any occasion.
Plus, making it is as easy as pie—well, smoother than pie! So, grab your favorite blender, and let’s dive into this delicious world of fruity goodness. Not only will we whip up a stunning tropical smoothie, but I’ll also share some personal stories, tips for substitutions, and fun variations to make this recipe your own. So, put on an apron (or don’t, I won’t judge), and let’s get started!
Personal Story
Growing up, my family had a special tradition every summer. Every weekend, we would pack a picnic and head to our local beach. The excitement built on Friday nights as we prepared our favorite snacks and treats to bring along. Among those treats, my mom always made her fantastic tropical smoothie for us kids. She’d invite us into the kitchen, where the bright colors of the fruits danced across the counter, and we would all gather around, eager to help.
I vividly remember the laughter, the chatter, and the way my little brother would always sneak a taste of the banana before it made it to the blender. My mom would smile and roll her eyes, but she knew it was all part of the fun. Once the smoothies were blended, we’d fill mason jars and sip on the delicious concoctions while our toes sank into the warm sand.
That sweet, fruity flavor became synonymous with summer for me. Now, I’ve taken those childhood memories and crafted my own twist on that refreshing treat, creating the Jetty Punch Tropical Smoothie. Each sip not only captures the vibrant flavors of the tropics but also the warmth of those cherished summer days spent with my family.
Ingredients
To whip up this delightful Jetty Punch Tropical Smoothie, you’ll need the following ingredients:
-
1 cup frozen mango chunks
- Sweet and juicy, mangoes provide a tropical flaire. You can use fresh mango too—just peel, chop, and freeze!
-
1 cup frozen pineapple chunks
- Pineapple adds a zesty sweetness that pairs wonderfully with the mango. If fresh is preferred, simply cut and freeze beforehand.
-
1 ripe banana
- Bananas give the smoothie a creamy texture. If you’re not a banana fan, you can substitute it with half an avocado for silky smoothness.
-
1 cup coconut milk (or almond milk)
- Coconut milk enhances the tropical vibe. For a lighter option, use almond milk or another nut milk.
-
1 tablespoon honey or agave syrup (optional)
- Depending on your sweetness preference, honey adds a nice touch. For a vegan option, go with agave syrup.
-
1 tablespoon chia seeds (optional)
- For added fiber and omega-3s, toss in some chia seeds. They’ll thicken the smoothie too.
-
Fresh mint leaves for garnish (optional)
- Mint adds a refreshing final touch and looks beautiful in your glass.
With this ingredient list, you can experiment a bit! Each of these components plays a vital role in crafting a smoothie that’s both creamy and refreshing, so I encourage you to follow the basics at first, then let your creativity run wild.
Step-by-Step Instructions
Let’s get down to business! Making the Jetty Punch Tropical Smoothie is straightforward; just follow these simple steps:
-
Prepare Your Ingredients:
- Start by gathering and measuring out all your ingredients. If you’re using fresh fruits, be sure they’re prepped, peeled, and chopped. This makes your blending experience smoother (pun intended!).
-
Blending the Base:
- In your blender, add the frozen mango chunks, pineapple chunks, and banana. The order does not matter too much, but I find that putting the soft fruits (like the banana) at the bottom helps give a smoother blend.
-
Pour in the Liquid:
- Next, pour in the coconut milk (or your milk of choice). This is crucial for creating that luscious texture we all crave in a smoothie. If you prefer a thicker consistency, start with less liquid and add more as needed.
-
Add Sweetener:
- If you’d like an extra kick of sweetness, drizzle in honey or agave syrup. Remember, you can always taste and adjust later!
-
Toss in the Chia Seeds:
- If you’re including chia seeds for nutrition, this is the moment to add them! They’ll create a lovely thickness as they sit.
-
Blend It Up:
- Secure the lid on your blender and start at a low speed. Gradually increase to high speed and blend until everything is combined and creamy. If it seems too thick, add a splash more liquid and give it another whirl!
-
Taste Test:
- This is my favorite part! Grab a spoon and taste your smoothie. If you’d like it sweeter, add a touch more honey or agave.
-
Serve It Up:
- Once perfectly blended, pour the smoothie into tall glasses. Top with fresh mint leaves for that Instagram-worthy finish!
-
Savor the Moment:
- Take a moment to appreciate your handiwork before diving in. Squeeze a bit of fresh lime juice over the top for an added zing!
And there you have it! Your Jetty Punch Tropical Smoothie is ready to be enjoyed. It’ll make your taste buds dance and your heart sing.
Serving Suggestions
For a little extra flair, consider serving your smoothie in fun, chilled glasses. I love to use mason jars for a rustic touch, topped off with a colorful straw. Garnish with a sprig of fresh mint and a slice of pineapple on the rim for that beachy aesthetic. You can even add a few edible flowers on top for a pop of color! Pair it with a side of homemade granola or a yogurt parfait for a complete breakfast or snack experience.
Recipe Variations
The beauty of smoothies lies in their versatility! Here are a few creative twists to consider:
-
Berry Blast: Swap out the tropical fruits for a mix of frozen berries like strawberries, blueberries, and raspberries for a deeper, berry-flavored smoothie.
-
Green Twist: To get more greens in your diet, add a handful of spinach or kale. The fruits will still dominate the flavor, and you’ll sneak in those nutrients!
-
Protein Power: Add a scoop of your favorite protein powder for a post-workout meal. This will keep you feeling full and energized.
-
Nutty Touch: Blend in a tablespoon of almond or peanut butter for an extra creaminess and healthy fats.
-
Spiced Up: Add a dash of cinnamon or a sprinkle of nutmeg for a warm, cozy flavor that complements the tropical notes perfectly.
Feel free to mix and match these variations to find your ideal tropical smoothie!
Chef’s Notes
I’ve had so much fun evolving this recipe over the years! It’s funny how some of my most delightful kitchen experiments came about on those lazy Saturday mornings when I wanted to recreate those beach memories. Sometimes, I’d throw in whatever was leftover in the fridge, and often, those “leftovers” became new staples in our home!
My friends always ask for the recipe, yet I can never quite replicate the same flavor. That’s the magic of cooking, right? Each time you make a dish, you add your own spark of love and personality. So don’t stress if it’s not perfect the first time. Enjoy the process, embrace the mess, and savor every delicious sip.
FAQs and Troubleshooting
-
What if my smoothie is too thick?
- If your smoothie comes out thicker than you’d like, simply add a bit more coconut milk or water, then blend again in pulses until you reach your desired consistency.
-
Can I use fresh fruit instead of frozen?
- Absolutely! If using fresh fruit, you might want to add a handful of ice to keep the smoothie nice and chilled.
-
How can I prevent my smoothie from separating?
- To minimize separation, blend on a higher speed for a longer time, so everything emulsifies well. Serving it cold also helps.
-
What if I don’t have chia seeds?
- No worries! You can omit them or substitute them with ground flaxseed or a spoonful of rolled oats for added fiber.
Nutritional Info
Although I haven’t included exact nutritional stats here, I like to remind you that smoothies can be wholesome and nourishing. With the right mix of fruits and possibly some added protein or healthy fats, this Jetty Punch Tropical Smoothie is a delightful way to get a serving of vitamins, minerals, and hydration.
So grab your blender, pull on that cozy apron, and let’s make some memories in the kitchen with this refreshing Jetty Punch Tropical Smoothie. Trust me—every sip will remind you of sun-drenched beaches and the joy of sharing delicious food with those we love. Happy blending!
Print
Jetty Punch Tropical Smoothie
- Total Time: 10 minutes
- Yield: 2 servings 1x
- Diet: Vegan
Description
A vibrant and refreshing tropical smoothie packed with sweet fruits, perfect for hot summer days.
Ingredients
- 1 cup frozen mango chunks
- 1 cup frozen pineapple chunks
- 1 ripe banana
- 1 cup coconut milk (or almond milk)
- 1 tablespoon honey or agave syrup (optional)
- 1 tablespoon chia seeds (optional)
- Fresh mint leaves for garnish (optional)
Instructions
- Prepare your ingredients: Gather and measure out all your ingredients.
- Blend the base: In your blender, add the frozen mango chunks, pineapple chunks, and banana.
- Pour in the liquid: Add the coconut milk (or your milk of choice).
- Add sweetener: Drizzle in honey or agave syrup as desired.
- Toss in the chia seeds: Include chia seeds if using.
- Blend it up: Start at a low speed and gradually increase to high, blending until creamy.
- Taste test: Taste your smoothie and adjust sweetness if needed.
- Serve it up: Pour the smoothie into glasses and garnish with mint leaves.
- Savor the moment: Enjoy your delicious creation!
Notes
Feel free to experiment with different fruit combinations and variations.
- Prep Time: 10 minutes
- Cook Time: 0 minutes
- Category: Beverage
- Method: Blending
- Cuisine: Tropical
Nutrition
- Serving Size: 1 serving
- Calories: 250
- Sugar: 30g
- Sodium: 50mg
- Fat: 10g
- Saturated Fat: 8g
- Unsaturated Fat: 2g
- Trans Fat: 0g
- Carbohydrates: 40g
- Fiber: 5g
- Protein: 3g
- Cholesterol: 0mg
Keywords: smoothie, tropical, vegan, refreshing, summer, drink
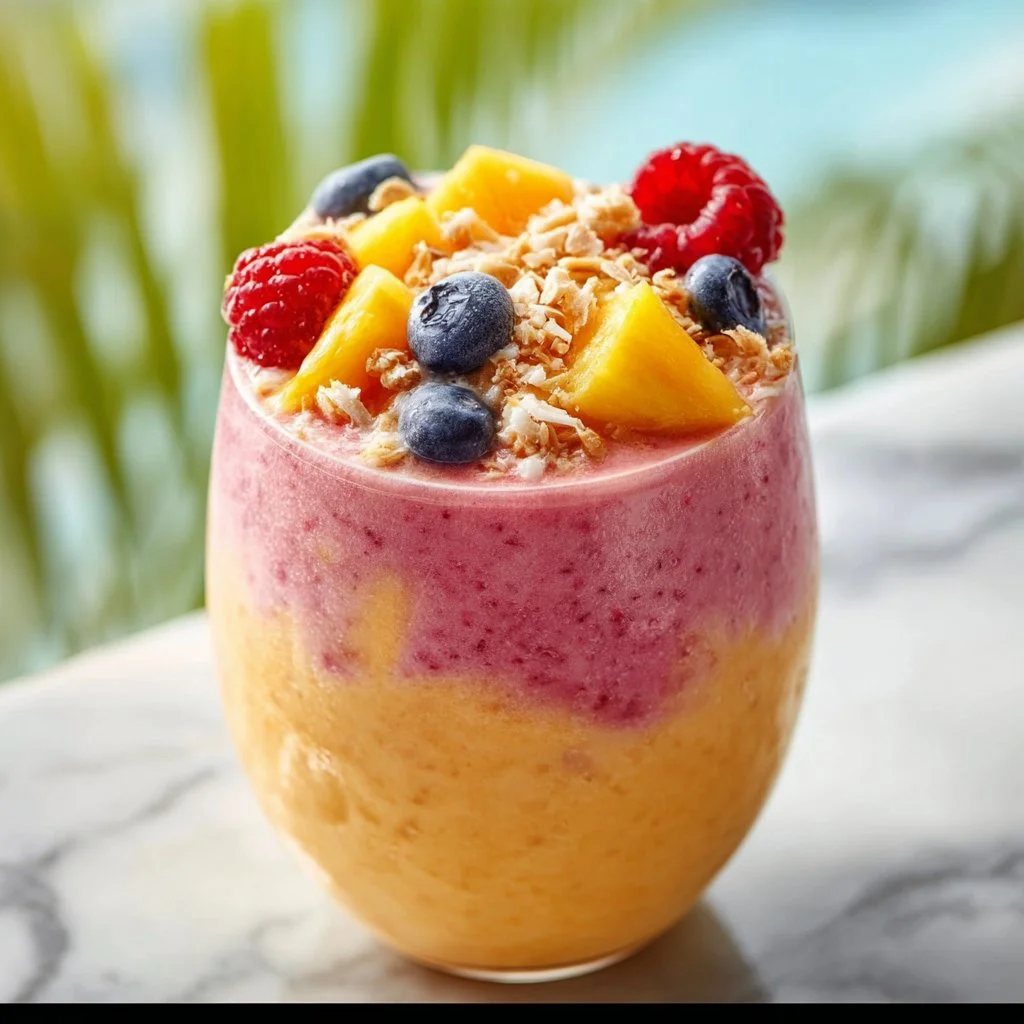
Jetty Punch Tropical Smoothie Recipe
Jetty Punch Tropical Smoothie Recipe: A Burst of Sunshine in Your Glass!
Welcome to my kitchen! I’m thrilled that you’ve decided to drop by today because I’m about to take you on a vibrant, tropical journey with my Jetty Punch Tropical Smoothie recipe. Picture this: the sun is shining, warm breezes are dancing through your hair, and you’re lounging in a hammock, drink in hand, ready to sip on something absolutely divine. That’s exactly what this smoothie brings — a slice of paradise, even if you’re just at home in your kitchen!
Smoothies have become a staple in my house over the years, mainly because they’re not only quick to whip up, but they also pack a punch when it comes to flavor and nutrition. The Jetty Punch Tropical Smoothie is my go-to whenever I need a tasty refreshment that makes me feel like I’m on a beach vacation, even if I’m really just chilling on my porch.
This smoothie is incredibly versatile. Whether you’re trying to impress guests at brunch, hunting for a post-workout energy booster, or just want to treat yourself mid-afternoon, this recipe has you covered. With a medley of tropical fruits and a splash of coconut that’ll whisk you away to an island getaway, you’ll understand why this smoothie often has a dedicated spot in my blender.
Let’s get blending, shall we? By the end of this post, you’ll have all the tools you need to make a delicious Jetty Punch Tropical Smoothie that’s sure to leave you feeling invigorated and oh-so-happy!
A Taste of Nostalgia
Jumping back in time, I remember the first time I sipped something remotely close to this smoothie. It was a scorching summer day during my college years, the sun blazing down as my friends and I huddled around a tiny shack on the shore that claimed to sell the best tropical smoothies in town. Each of us ordered a different flavor, but I vividly recall the moment I took my first sip of a mango-pineapple concoction. The explosion of sweetness and the cool, refreshing texture was a revelation! My heart danced with the waves, and twinkling laughter echoed in the air, mixing perfectly with the sounds of the ocean.
That day sparked something inside me. It ignited a passion for creating and recreating these vibrant flavors in my own kitchen. Fast forward to today, I’ve added my spin to the original, blending up a smoothie that both celebrates those delicious memories and gives everyone who tries it that same invigorating experience. Trust me, every sip of the Jetty Punch Tropical Smoothie wraps you in nostalgic sunshine—even in the middle of winter!
Ingredients
Here’s what you’ll need to make the Jetty Punch Tropical Smoothie, and I promise, it’s easy to find these ingredients:
-
1 ripe banana: Bananas add creaminess and natural sweetness. If bananas aren’t your thing, you can substitute with a small avocado for a creamy texture without the sweetness.
-
1 cup frozen pineapple chunks: Frozen fruits maintain their vibrant colors and nutrients. If fresh pineapple is available, you can chop it up, just remember to add ice to the blend for that cool smoothie effect.
-
1 cup frozen mango chunks: Mangoes provide that necessary tropical zing! Fresh mango works just as well, but you might want to add a bit of honey for sweetness.
-
½ cup coconut milk: Coconut milk lends a rich, creamy flavor. Substitute with almond milk for a lighter version, or even Greek yogurt for extra protein.
-
1 tablespoon honey (optional): Honey is a natural sweetener. Feel free to swap it out for maple syrup if you prefer!
-
1 tablespoon chia seeds: These tiny powerhouses are nutrient-dense and provide a great source of fiber. You can omit them completely if you’d prefer a smoother texture.
-
Juice of 1 lime: Fresh lime juice brightens the smoothie and enhances the flavors of the fruits. If limes are out of season, lemon juice is an excellent substitute.
Bonus Tip:
Always taste as you blend! Adjust sweetness, creaminess, or add more tropical flair as needed. Each fruit varies a bit in flavor.
Step-by-Step Instructions
Alright, let’s get down to the nitty-gritty of blending up this sunshine in a glass! Follow these steps to craft the perfect Jetty Punch Tropical Smoothie.
-
Gather Your Ingredients: Make sure all your ingredients are prepped and measured out. This smooth blending process makes it simple and efficient!
-
Add the Base Fruits: Start by tossing the banana, pineapple, and mango chunks into your blender. Blend these fruits first until they’re beautifully smooth. I find that starting with the fruits helps everything blend more evenly.
-
Pour in the Coconut Milk: Add in the coconut milk, which adds all that creamy goodness. If you’re feeling adventurous, add a splash of orange juice too for an extra layer of flavor! Blend again until combined.
-
Incorporate Sweetness: If you’re going for the honey, drizzle it in now! Blend it all together, but your smoothie may be working hard to get that honey mixed evenly, so give it a few extra seconds!
-
Add Chia Seeds and Lime Juice: Toss in the chia seeds and squeeze in the lime juice. Blend for about 10 seconds more. The chia seeds will expand a bit, adding texture but not overpowering the smoothie.
-
Taste Test: Grab a little sip with a spoon to see if it’s to your liking. If it’s missing something, feel free to adjust by adding more sweetness, coconut milk, or even a touch more lime!
-
Final Blend: Do a final mix until everything is silky smooth, and voila! Your Jazzed-up Jetty Punch Tropical Smoothie is ready to shine!
Chef’s Tip:
If you want a thicker smoothie, you can add a handful of baby spinach or kale. You won’t even taste them, and they’ll boost the nutritional value!
Serving Suggestions
To serve, pour the smoothie into your favorite glass or bowl. I love using oversized glasses because it makes enjoying the drink feel special! Top with an optional sprinkle of chia seeds, shredded coconut, or even slices of lingering fruit. Add a paper straw for pizzazz and serve it with a huge smile — trust me, it makes all the difference!
Recipe Variations
Let’s spice things up a bit! Here are some ideas for making this Jetty Punch Tropical Smoothie even more exciting:
-
Berry Blast: Swap out the mango and pineapple for your favorite mixed berries (strawberries, blueberries, raspberries) for a berry-flavored twist.
-
Green Smoothie: Add a handful of spinach or kale for an extra boost of vitamins that you won’t even taste!
-
Protein Power: Stir in your favorite protein powder for a post-workout smoothie!
-
Nutty Delight: Throw in a tablespoon of almond butter or peanut butter for a nutty flavor.
-
Dairy-Free: Use almond milk or oat milk instead of coconut milk for a different flavor standpoint while keeping it dairy-free.
Chef’s Notes
This Jetty Punch Tropical Smoothie has evolved over time, picking up new flavors and influences from my travels and kitchen experiments. One of my favorite stories comes from a camping trip where I accidentally forgot the blender and had to make do with a food processor. Let me tell you, the results were laughably chunky, but we all ended up having a good time throwing in random ingredients until we came up with our very own “campfire punch.”
Every time I make this smoothie now, I smile at the memories of improvisation and how food can bring us together. Cooking offers us the chance to mix creativity with flavors, and this smoothie embodies that spirit.
FAQs and Troubleshooting
-
Why is my smoothie too watery?
- If your smoothie turns out too watery, it could be the type of fruit or amount of liquid you used. Next time, try using less coconut milk or adding more frozen fruit to achieve that thick, creamy texture.
-
How can I make this smoothie sweeter?
- If it’s not sweet enough for your liking, just add a bit more honey or a pitted date, and blend again. Dates are a natural sweetener that packs a flavor punch!
-
Can I make this ahead of time?
- Absolutely! You can prep the fruits and store them in a freezer bag. When you’re ready, just blend with the other ingredients.
-
What’s the best way to store leftovers?
- Smoothie leftovers can be stored in the fridge for up to 24 hours. Just keep in mind that separation may occur, so give it a good shake or stir before drinking!
Nutritional Info
While the Jetty Punch Tropical Smoothie is a delightful treat, it also provides a healthy dose of vitamins and minerals from the fruits, particularly vitamin C and fiber. Pair it with a protein source for a balanced meal, and enjoy it post-workout or on those lazy summer afternoons!
Thank you for joining me today! I hope this recipe inspires you to blend up some joy in your kitchen. The Jetty Punch Tropical Smoothie is more than just a drink; it’s about capturing memories, savoring flavors, and creating connections. Happy blending, and don’t forget to enjoy every sip!
Print
Jetty Punch Tropical Smoothie
- Total Time: 10 minutes
- Yield: 2 servings 1x
- Diet: Vegan
Description
A vibrant, tropical smoothie that transports you to a beach paradise, packed with fruity flavors and perfect for any occasion.
Ingredients
- 1 ripe banana
- 1 cup frozen pineapple chunks
- 1 cup frozen mango chunks
- ½ cup coconut milk
- 1 tablespoon honey (optional)
- 1 tablespoon chia seeds
- Juice of 1 lime
Instructions
- Gather your ingredients: Make sure all your ingredients are prepped and measured out.
- Add the base fruits: Toss the banana, pineapple, and mango chunks into your blender and blend until smooth.
- Pour in the coconut milk: Add coconut milk and blend again until combined.
- Incorporate sweetness: Drizzle in honey if using, and blend for a few extra seconds.
- Add chia seeds and lime juice: Toss in the chia seeds and lime juice, and blend for about 10 seconds.
- Taste test: Check the flavor and adjust if needed.
- Final blend: Blend again until silky smooth, and your smoothie is ready!
Notes
For a thicker smoothie, add a handful of baby spinach or kale. Customize with your favorite fruits or protein powder.
- Prep Time: 10 minutes
- Cook Time: 0 minutes
- Category: Drink
- Method: Blending
- Cuisine: Tropical
Nutrition
- Serving Size: 1 serving
- Calories: 300
- Sugar: 30g
- Sodium: 40mg
- Fat: 10g
- Saturated Fat: 5g
- Unsaturated Fat: 3g
- Trans Fat: 0g
- Carbohydrates: 50g
- Fiber: 5g
- Protein: 3g
- Cholesterol: 0mg
Keywords: smoothie, tropical, healthy drink, refreshing, vegan
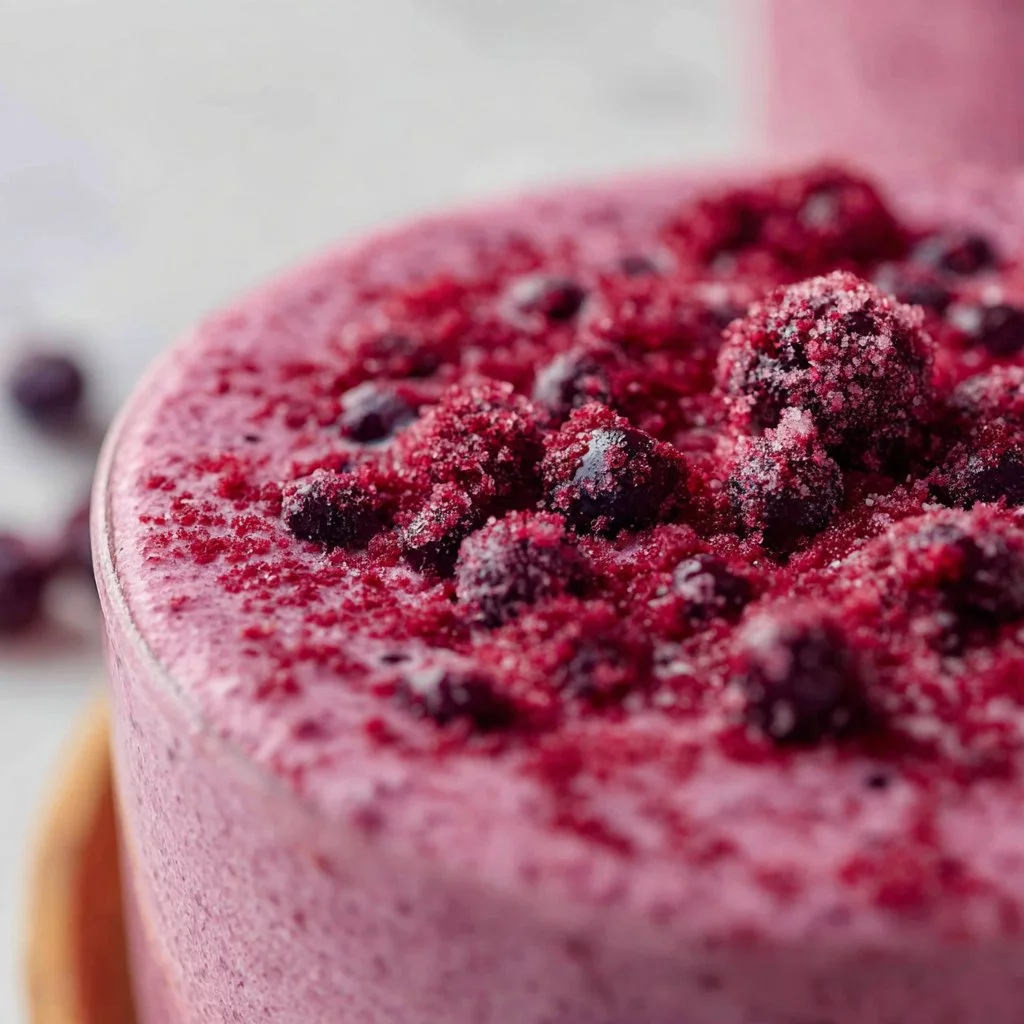
Blueberry Raspberry Smoothie
Refreshing Blueberry Raspberry Smoothie: A Delicious Journey
Welcome to my cozy kitchen! I’m thrilled you’re here, ready to whip up something delightful and nourishing. Today, we’ll be diving into the vibrant world of smoothies, specifically my much-loved Blueberry Raspberry Smoothie. A blend of plump blueberries and sweet, tangy raspberries, this smoothie is not just delicious but also a powerhouse of nutrients. Whether you’re seeking a refreshing breakfast, a post-workout treat, or a healthy afternoon snack, you’ll definitely want to keep this recipe close at hand.
Smoothies are one of those magical creations that can be tailored to everyone’s taste. You can throw in whatever fruits you have on hand, and each blending session feels like a new adventure. Plus, there’s something incredibly satisfying about seeing fresh berries glide effortlessly into a creamy, dreamy blend. It’s a treat for both the eyes and the taste buds!
The beauty of this Blueberry Raspberry Smoothie is not just in its flavor but also in its easy adaptability. It’s quick to make, bursting with color, and guaranteed to brighten your day. So grab your favorite blender, wear that messy apron, and let’s embark on this fruity journey together.
A Taste of Nostalgia
Let me take you back a few years to my grandmother’s kitchen. She was the queen of desserts, always experimenting with what she could mix and match. On summer days, our backyard would be abundant with berries, and we’d spend afternoons picking sun-warmed blueberries and raspberries, our hands stained purple from all the juicy goodness. One special afternoon, Grandma decided to create a smoothie-like delight with our freshly picked berries, a simple blend of yogurt, berries, and just a hint of honey.
The moment I took a sip, I was in heaven. The smooth, creamy texture combined with the tang of the berries transported me to pure bliss. I remember sitting on the back porch with my cousins, giggling over how our fingers looked more like paintings than hands. That memory stuck with me, and as I grew older, the combination of blueberry and raspberry became a nostalgic favorite. This Blueberry Raspberry Smoothie is my homage to that heartwarming summer day, reminding me of the joy of connecting over food, family, and a shared love for the fresh flavors of nature.
Ingredients
Here’s what you’ll need to create this delicious smoothie:
-
1 cup blueberries
- Fresh or frozen both work wonderfully. Blueberries are rich in antioxidants and vitamins. If you have raspberries, mix them in for a complex flavor!
-
1 cup raspberries
- Like blueberries, these bright gems add a beautiful tartness. If they’re out of season, opt for frozen.
-
1 banana
- A natural sweetener that creates creamy smoothness. Feel free to substitute with avocado for a rich texture without the sweetness.
-
1 cup spinach (optional)
- Sneak in some greens! Spinach won’t alter the flavor but will add a nutritional boost.
-
1 cup almond milk (or any milk of choice)
- Use any milk you prefer – cow’s milk, oat milk, or even coconut water for a tropical twist.
-
1 tablespoon honey or maple syrup (optional)
- Adjust the sweetness to taste. If you prefer, replace with agave syrup or skip it entirely if your berries are sweet.
-
1 teaspoon chia seeds (optional)
- These tiny seeds are packed with omega-3s and add texture. If you’re not a fan, feel free to leave them out.
Step-by-Step Instructions
-
Gather and Prep Your Ingredients
- Locate all your ingredients and give them a good rinse (especially the berries!). If you’re using frozen berries, no need to thaw them; they’ll help keep your smoothie cold and refreshing.
-
Add to Blender
- Start by placing the spinach in the bottom of your blender (if using). Then, layer in the berries, banana, and chia seeds. Adding the liquid last helps everything blend more smoothly.
-
Pour in the Milk
- Now, pour in the almond milk (or your milk of choice). If you want a thicker smoothie, add less milk; for a thinner consistency, adjust accordingly. You can always add more if it’s too thick!
-
Sweeten It Up
- If you have a sweet tooth, now’s the time to add honey or maple syrup. Remember, you can always taste before you blend to decide how sweet you want it.
-
Blend Away!
- Secure the blender lid and start blending on low, gradually increasing to high. Blend until everything is smooth and creamy, about 30 to 60 seconds. If needed, pause and scrape down the sides to ensure everything gets blended well.
-
Taste and Adjust
- Here comes the taste test. Sip a little to see if your smoothie needs more sweetness or a touch more milk. Don’t be shy; this is your creation!
-
Serve It Up
- Pour your delicious smoothie into a tall glass or a fancy mason jar. You can garnish with a few extra berries or a sprinkle of chia seeds on top for a decorative touch.
Serving Suggestions
For the ultimate smoothie experience, pair this Blueberry Raspberry Smoothie with a handful of granola for some added texture or a slice of whole-grain toast topped with almond butter. It’s a perfect way to boost your breakfast or a post-workout pick-me-up! And don’t forget a colorful straw; it makes sipping ever so satisfying!
Recipe Variations
- Tropical Twist: Add a half cup of pineapple or mango for a refreshing tropical twist.
- Nutty Delight: Toss in a scoop of nut butter (like almond or peanut) for an extra dose of protein and creaminess.
- Green Goddess: Add an avocado in place of the banana for a creamier texture without the sweetness.
- Berry Burst: Substitute strawberries for either berry for a new flavor profile.
- Protein-Packed: Add a scoop of protein powder—vanilla or berry-flavored works best—for a post-gym treat!
Chef’s Notes
This recipe has been through a few iterations in my kitchen. Initially, I crafted it as a breakfast option but found that it made a killer base for smoothie bowls as well! I once added some spirulina for a nutritional boost during a health kick, and while it turned my smoothie a wild green color, the flavor was still delightful. I love how adaptable this recipe is—it evolves with the seasons and what I have on hand. Feel free to experiment and make it your own!
FAQs and Troubleshooting
Q: What if my smoothie is too thick?
A: No worries! Just add a splash more of your milk or water and blend again. You can always adjust to your desired consistency.
Q: Can I use other fruits?
A: Absolutely! The beauty of smoothies is their versatility. Try swapping in peaches, strawberries, or even a handful of oats!
Q: How do I make this ahead of time?
A: You can prep your ingredients the night before, store them in the fridge or freezer, and blend in the morning. To avoid browning, squeeze a little lemon juice on any cut fruits!
Q: Can I store leftover smoothie?
A: Yes, but it’s best fresh! Store in an airtight container in the fridge for up to 24 hours. Give it a good shake before you drink it again.
Nutritional Info
(If applicable, consider including basic nutritional data such as calories, carbs, protein, and fats. Adjust based on personal needs or dietary specifics.)
And there you have it—a step-by-step guide to crafting the most delightful Blueberry Raspberry Smoothie! I hope you’ve enjoyed this journey through flavor and memory as much as I love sharing it with you. Go ahead, blend it up, and let that sweet, fruity goodness bring a smile to your face. Cheers to delicious moments in the kitchen, my fellow food enthusiasts! 🥤✨
Print
Blueberry Raspberry Smoothie
- Total Time: 10 minutes
- Yield: 2 servings 1x
- Diet: Vegetarian
Description
A refreshing and nutritious smoothie packed with blueberries, raspberries, and banana, perfect for breakfast or a healthy snack.
Ingredients
- 1 cup blueberries
- 1 cup raspberries
- 1 banana
- 1 cup spinach (optional)
- 1 cup almond milk (or any milk of choice)
- 1 tablespoon honey or maple syrup (optional)
- 1 teaspoon chia seeds (optional)
Instructions
- Gather and prep your ingredients.
- Add to the blender, starting with spinach at the bottom (if using).
- Pour in the almond milk.
- Sweeten it up with honey or maple syrup if desired.
- Blend until smooth and creamy, about 30 to 60 seconds.
- Taste and adjust sweetness or consistency as needed.
- Serve in a tall glass and garnish if desired.
Notes
Pair with granola or whole-grain toast for a satisfying meal. This recipe is highly adaptable; feel free to adjust ingredients based on your preference.
- Prep Time: 10 minutes
- Cook Time: 0 minutes
- Category: Breakfast
- Method: Blending
- Cuisine: American
Nutrition
- Serving Size: 1 serving
- Calories: 200
- Sugar: 20g
- Sodium: 150mg
- Fat: 6g
- Saturated Fat: 1g
- Unsaturated Fat: 5g
- Trans Fat: 0g
- Carbohydrates: 36g
- Fiber: 6g
- Protein: 4g
- Cholesterol: 0mg
Keywords: smoothie, blueberry, raspberry, healthy snack, breakfast
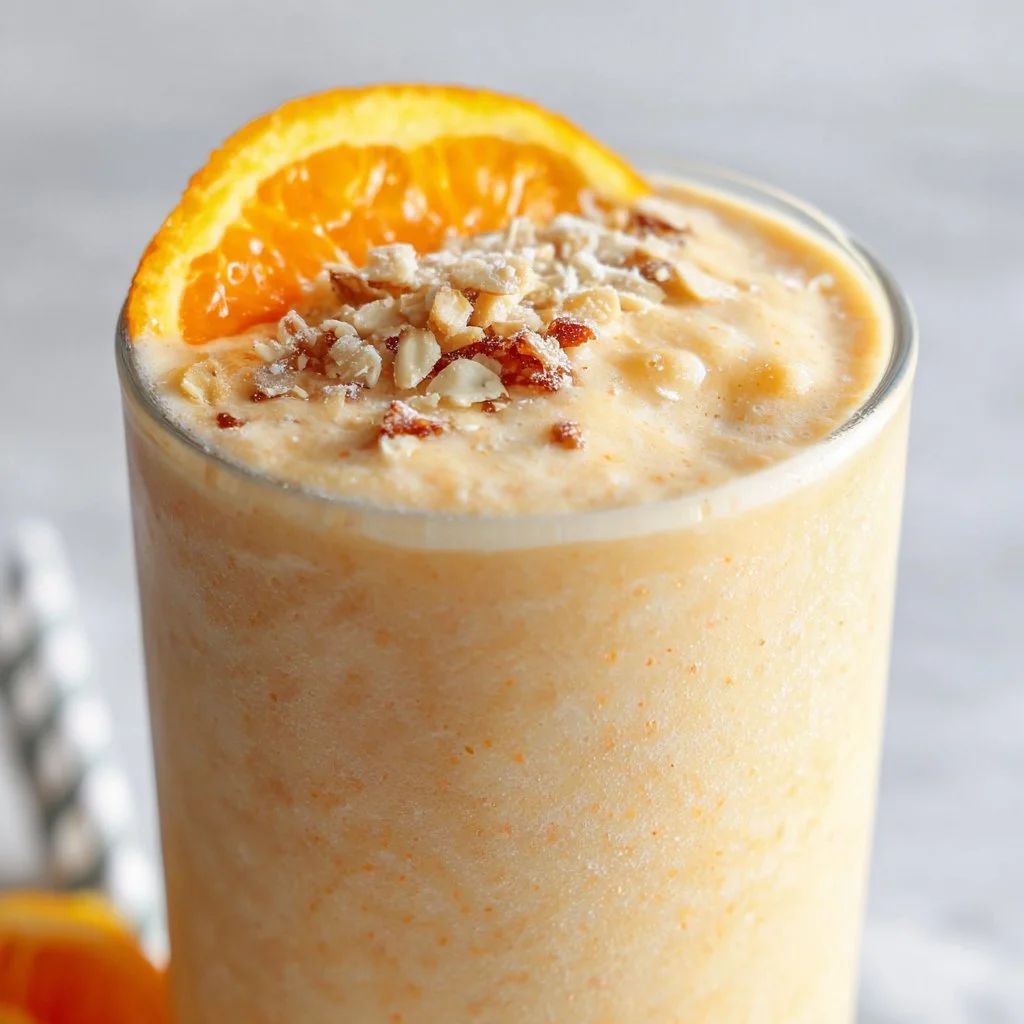
Orange Creamsicle Smoothie
Orange Creamsicle Smoothie: A Refreshing Delight
Welcome to my kitchen, fellow food lovers! Today, I’m thrilled to share one of my absolute favorite recipes: the Orange Creamsicle Smoothie. If you’ve ever indulged in those delightful ice cream treats of your childhood, you know just how nostalgic and delicious they are. Imagine capturing that sweet, creamy goodness in a refreshing smoothie — perfect for breakfast, a midday snack, or even a light dessert on a hot day!
This smoothie brings together the tangy brightness of fresh oranges, the creamy richness of yogurt, and a hint of vanilla that transports you right back to lazy summer afternoons. It’s a drink filled with sunshine, joy, and all those feels that come with a classic creamsicle on a stick. Plus, it’s so easy and quick to whip up! Trust me, whether you’re cooking for yourself or whipping something special for friends and family, this smoothie will delight everyone.
How did I come to love this treat? It takes me straight back to summers spent at my grandmother’s house, where she would whip up wonderful concoctions with whatever fruits were fresh and in season. Nothing was quite as magical as the creamy orange swirls of the popsicles we’d share after a day in the sun, sticky fingers and all. It was more than just a snack; it was a moment of connection, laughter, and childhood bliss. That’s the spirit I want to bring into your kitchen today!
So, grab your blender and let’s get started on this dreamy Orange Creamsicle Smoothie!
Personal Story
Thinking back to those sun-soaked days, one memory shines brightly: the time I tried to recreate my grandmother’s creamsicle pops with my little cousins. We stumbled through the kitchen, splashing orange juice everywhere, giggling uncontrollably as we debated whether to add more vanilla or a touch of honey. The kitchen was a delightful mess, but eventually, we managed to create something that tasted just like summer — sweet and perfectly refreshing!
I still remember the looks on their faces when we took our first sip of our homemade mixture. The smiles lit up the room, and I knew then that food isn’t just about nourishing the body; it’s about creating moments of joy and connection. That’s what I hope to inspire in you as we make this smoothie together.
Ingredients
Gathering the right ingredients is essential for this Orange Creamsicle Smoothie. Here’s what you need:
-
Fresh Oranges (2 large)
The star of our smoothie! Use juicy, sweet oranges for the best flavor. If oranges aren’t in season, feel free to swap with clementines or mandarins for a similar taste. -
Vanilla Yogurt (1 cup)
This adds the creamy texture and that dreamy vanilla flavor. You can use regular, Greek, or even dairy-free yogurt, depending on your preference. -
Milk (1/2 cup)
This helps blend everything together smoothly. Almond milk or coconut milk can also be used for a lighter, dairy-free option. -
Honey or Maple Syrup (1-2 tablespoons)
Sweeten to taste! Honey gives a lovely floral note, while maple syrup provides a rich, earthy sweetness. -
Ice Cubes (1 cup)
Essential for that refreshing chill. You can also freeze some orange juice in ice cube trays for an extra flavorful touch. -
Optional: Vanilla Extract (1 teaspoon)
If you want an extra pop of vanilla, add a splash! It enhances the creamy flavor and ties everything together beautifully.
Step-by-Step Instructions
Now that we have our ingredients ready, let’s get down to the fun part: blending everything together!
-
Prep Your Oranges
Start by peeling your fresh oranges. Make sure to remove any pith (the white part) as it can add bitterness to your smoothie. This step is crucial, especially if you’re using particularly ribbed oranges. You want sweet and juicy, not bitter! -
Blend the Base
In your blender, combine the peeled oranges, vanilla yogurt, and milk. Start with a low setting to mix them gently. You want to ensure all the yogurt is getting blended in smoothly without flying everywhere! A few seconds on low will do the trick. -
Add Sweetness
Now it’s time to add your honey (or maple syrup) — the sweet touch that really takes this smoothie to the next level. Remember, the amount you add will depend on how sweet your oranges are. If you’re unsure, start with one tablespoon, taste, then add more if needed. -
Ice, Ice Baby
Toss in the cup of ice cubes. If you’re using frozen orange juice cubes, this is where they’ll come in handy! Blend until your mixture is completely smooth and creamy. A minute should suffice, but take a peek to ensure it’s all well-blended. -
Final Touch
If you’re going for the optional vanilla extract, now’s the time to sprinkle it in! Give it one last spin in the blender to incorporate. Pour yourself a glass and get ready for a sip of pure nostalgia!
Serving Suggestions
When it comes to serving your Orange Creamsicle Smoothie, the options are endless! For a beautiful presentation, serve it in a tall glass or a fun Mason jar. Garnish with a slice of orange on the rim or a sprinkle of crushed graham crackers on top for that classic creamsicle vibe. You could even throw in a fun straw to complete the look!
This smoothie can be enjoyed right after blending, or you can chill it in the fridge for a bit if you’re prepping it ahead of time. Either way, it’s bound to be a hit at the breakfast table or during a cozy snack time!
Recipe Variations
Want to switch things up a bit? Here are some creative twists you can try:
-
Berry Blast: Add a handful of strawberries or blueberries for a fruity twist and beautiful color.
-
Tropical Vibe: Incorporate some pineapple or mango chunks for a tropical creamsicle experience.
-
Protein Boost: Stir in a scoop of your favorite protein powder for an added nutritional punch, perfect for breakfast!
-
Green Goodness: Sneak in a handful of spinach or kale. Trust me; you won’t even taste it but will gain all those extra nutrients.
-
Nutty Touch: Blend in a tablespoon of almond butter for a nutty flavor and extra creaminess.
Chef’s Notes
This Orange Creamsicle Smoothie has evolved over the years, and I love playing with the flavors based on what’s available. Sometimes I’ll add a tablespoon of chia seeds for a little extra texture and health benefits! As for kitchen stories, I can still hear my cousin’s laughter as we battled over the blender lid, ensuring nothing would escape. Kitchen disasters make for the best stories, don’t you think?
I’ve realized that this smoothie not only satisfies the taste buds but also brings people together. Whether it’s on a cozy winter morning or a bright sunny day, sharing this drink with loved ones is always a treat.
FAQs and Troubleshooting
1. Can I use frozen oranges?
Absolutely! Frozen oranges work just as well. They give your smoothie that extra chill factor while adding a slushy texture. Just make sure to adjust the amount of ice accordingly.
2. What if my smoothie is too thick?
No worries! Simply add a splash more milk to loosen it up, and blend again until you reach your desired thickness.
3. How long will this smoothie keep in the fridge?
This is best enjoyed fresh, but you can store it in the fridge for up to 24 hours. Just give it a good stir before consuming, as it may separate.
4. Can I make this smoothie vegan?
Of course! Just use a plant-based yogurt and milk alternative like almond, oat, or coconut milk. The honey can be swapped for maple syrup.
Nutritional Info
While the nutritional info can vary based on your choice of ingredients, a standard Orange Creamsicle Smoothie (with the ingredients listed) has approximately:
- Calories: 250
- Protein: 6g
- Fat: 4g
- Carbohydrates: 47g
- Fiber: 3g
- Sugars: 30g
Remember, this is just an estimate and might change based on substitutions and specific brands used.
There you have it, my dear friends! A delightful Orange Creamsicle Smoothie that’s not just a treat for your taste buds but a celebration of memories, joy, and love in the kitchen. As you blend up this refreshing delight, may it bring back sweet moments from your own childhood and inspire many more in your kitchen endeavors. So, pour yourself a glass, sit back, and enjoy every sip! Happy blending!
Print
Orange Creamsicle Smoothie
- Total Time: 10 minutes
- Yield: 2 servings
- Diet: Vegetarian
Description
A nostalgic and refreshing smoothie that combines the tangy brightness of fresh oranges with creamy yogurt and a hint of vanilla.
Ingredients
- Fresh Oranges (2 large)
- Vanilla Yogurt (1 cup)
- Milk (1/2 cup)
- Honey or Maple Syrup (1-2 tablespoons)
- Ice Cubes (1 cup)
- Optional: Vanilla Extract (1 teaspoon)
Instructions
- Prep your oranges by peeling them and removing any pith.
- Blend the peeled oranges, vanilla yogurt, and milk in a blender on low until mixed.
- Add honey or maple syrup, adjusting sweetness to taste.
- Toss in the ice cubes and blend until smooth.
- If using, add vanilla extract and blend one last time.
Notes
Serve in a tall glass or Mason jar garnished with an orange slice or crushed graham crackers for a fun presentation.
- Prep Time: 10 minutes
- Cook Time: 0 minutes
- Category: Drink
- Method: Blending
- Cuisine: American
Nutrition
- Serving Size: 1 serving
- Calories: 250
- Sugar: 30g
- Sodium: 100mg
- Fat: 4g
- Saturated Fat: 2g
- Unsaturated Fat: 2g
- Trans Fat: 0g
- Carbohydrates: 47g
- Fiber: 3g
- Protein: 6g
- Cholesterol: 10mg
Keywords: smoothie, orange, creamy, refreshing, breakfast, healthy
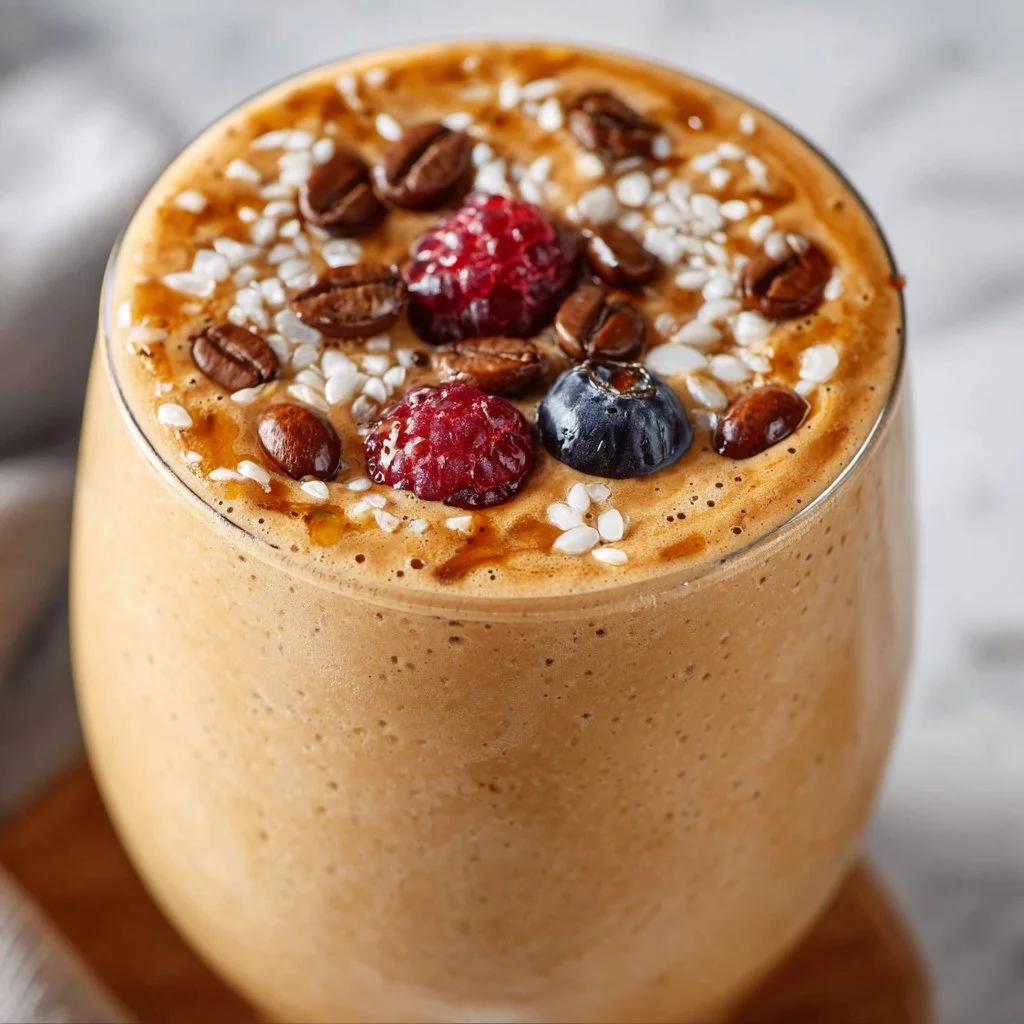
Creamy Coffee Smoothie
The Ultimate Creamy Coffee Smoothie: A Breakfast Game-Changer!
Welcome to my kitchen! I’m Olivia Bennett, your enthusiastic guide through the rich and aromatic world of flavors. If you’re like me, the day often begins with that delightful aroma of fresh coffee wafting through the air, and there’s just no better way to start the morning than with a creamy, dreamy coffee smoothie! Not only does it give you that much-needed caffeine kick, but it’s also a refreshing treat that can fuel your day.
Imagine this: you’re in your kitchen, sun streaming through the window, and the sound of the blender whirring away is harmonizing with your favorite playlist. You pour out a silky-smooth concoction, and as you take that first sip, the burst of flavor just dances in your mouth. Whether you’re heading to work, hitting the gym, or just taking a moment for yourself, this smoothie is the perfect blend of energy and indulgence.
In today’s recipe, we’ll combine the robust flavor of coffee with creamy layers of goodness, enhanced by the natural sweetness of bananas and the richness of yogurt or milk. This recipe is not just about the ingredients, but also about the joy of preparation and the satisfaction of creating something scrumptious from scratch.
So, if you’re ready to transform your morning routine from ordinary to extraordinary, let’s dive into the world of coffee smoothies together!
A Sip Down Memory Lane
Every time I whip up this creamy coffee smoothie, I’m transported back to lazy summer mornings at my grandmother’s house. She had a knack for infusing coffee with just the right amount of sweetness, and while her methods often involved secret family syrups and brews, I always seemed to marvel at how she made each cup feel special.
One summer, when I was around ten, she decided to make our typical coffee delight a little more exciting by blending it with vanilla ice cream. That’s right; it was love at first sip. We would sit on her porch, laughter mingling with the sounds of nature, both of us savoring our homemade concoctions. It wasn’t just the blend of flavors that made it memorable; it was the magic of being together, enjoying simple pleasures, and sharing stories.
This creamy coffee smoothie is an homage to those cherished moments. With a few tweaks here and there, I’ve turned that nostalgic idea into something I can enjoy any morning of the week. From the first sip to the last, it takes me back to my grandma’s porch, and I hope it brings that warmth to your morning as well!
Ingredients
Here’s what you’ll need to create your creamy coffee masterpiece:
-
Brewed Coffee (1 cup)
- Chef Insight: Start with your favorite kind of coffee. For a cold smoothie, use coffee that’s been chilled or consider making a pot the night before. If you’re pressed for time, instant coffee can work too; just mix it with a bit of hot water until dissolved before adding it to the blender!
-
Banana (1 ripe)
- Substitution Tip: A ripe banana adds natural sweetness and creaminess. If bananas aren’t your thing, try using a half-cup of avocado for a less sweet but equally creamy result.
-
Greek Yogurt (½ cup)
- Quick Insight: This adds protein and tanginess to your smoothie. Want it to be dairy-free? Swap it out for coconut yogurt or almond yogurt!
-
Milk (1 cup, any kind)
- Chef Insight: Whole milk provides richness, but you can use almond, soy, or oat milk for a lighter option or to keep things dairy-free.
-
Honey or Maple Syrup (1-2 tablespoons)
- Substitution Tip: Adjust the sweetness to your liking! If you’re watching your sugar intake, consider using stevia or leave it out altogether; the banana adds enough sweetness on its own.
-
Ice Cubes (1 cup)
- Quick Insight: Ice makes your smoothie refreshing and thick. If you want to skip the ice, freeze your sliced bananas ahead of time, making your smoothie just as cold.
-
Cinnamon or Cocoa Powder (optional, for garnish)
- Chef’s Note: Sprinkle some on top for an extra flavor twist. Cinnamon works beautifully with coffee, while cocoa gives it a delicious mocha feel—perfect for chocolate lovers!
Step-by-Step Instructions
Let’s blend this beautiful caffeine creation together!
-
Brew Your Coffee:
- Start by brewing your favorite coffee. If you’re using a standard drip maker, aim for a medium roast for a well-rounded flavor. If you love strong coffee, consider going for an espresso. Let it cool if you’re aiming for a cold smoothie!
-
Prepare Your Ingredients:
- While you’re waiting for your coffee to cool, gather all your ingredients on the counter. This makes mixing fun and keeps everything organized. I love to have my bananas and yogurt ready to go!
-
In the Blender:
- Add your cooled coffee, ripe banana, Greek yogurt, milk, and sweetener to the blender. Secure the lid tightly. Here’s a tip: if you’re nervous about spillage, you can cover the lid with a kitchen towel for extra protection!
-
Blend Away:
- Start blending at a slow speed. Gradually increase to high for about 30-60 seconds until you reach a creamy and smooth consistency. If it seems too thick, toss in a splash more milk. On the flip side, if it’s too liquidy, add more ice and blend again!
-
Check the Taste:
- Once blended, taste your smoothie and adjust as needed. Toss in a pinch more sweetener or a sprinkle of cinnamon if desired.
-
Chill for Extra Creaminess:
- For an ultra-creamy experience, let your smoothie sit for about 5 minutes. This helps all the flavors marry together beautifully!
-
Pour and Enjoy:
- Grab your favorite glass, pour your smoothie in, and if you’re feeling fancy, top it off with an extra sprinkle of cinnamon or cocoa powder.
Serving Suggestions
Serve your creamy coffee smoothie in a tall glass for a delightful presentation. Consider adding a reusable straw for sustainability—and it’s just more fun to sip! Pair it with a slice of whole-grain toast topped with avocado or your favorite nut butter for a complete breakfast. You could also grab a few crunchy granola clusters to sprinkle on top for an added texture that’s sure to elevate this smoothie experience!
Recipe Variations
-
Mocha Madness: Add in a tablespoon of cocoa powder to transform this into a mocha smoothie. It’s like dessert for breakfast!
-
Nutty Overload: Blend in a tablespoon of almond butter or peanut butter for extra protein and a nutty flavor.
-
Superfood Boost: Toss in a scoop of your favorite protein powder or some chia seeds for added nutrition.
-
Spicy Twist: A dash of nutmeg or cardamom gives a lovely warmth and spice, perfect for cozy mornings.
-
Frozen Fruit Fusion: Toss in some frozen blueberries or strawberries in place of the banana, creating a different flavor profile but keeping that creamy consistency!
Chef’s Notes
This recipe has been a favorite of mine for years, but I didn’t always make it this way. Just like in any kitchen, trial and error led to these delicious adaptations! I remember one early attempt where I misjudged the coffee strength and ended up with a smoothie that tasted like pure caffeine. Let’s just say I was buzzing for an hour! What I love most about this recipe is how customizable it is—I’ve experimented so much that it’s now a personal canvas of flavors that satisfies not just hunger but also nostalgia.
FAQs and Troubleshooting
1. Why is my smoothie grainy?
- This can happen if your banana or yogurt isn’t blended enough. Ensure your blender is high-speed or blend a bit longer. If you’re using frozen fruit, make sure it’s blended well to avoid chunks.
2. How do I make this dairy-free?
- Swap Greek yogurt with a dairy-free yogurt and use almond or coconut milk instead of cow’s milk. It’ll still be creamy and delicious!
3. Can I make it ahead of time?
- Absolutely! You can prep and blend your smoothie and store it in the fridge for up to 24 hours. Just give it a good shake or stir before enjoying.
4. My smoothie is too thick! What do I do?
- No problem! Just add a splash more milk or some brewed coffee, and blend again until you reach the desired consistency!
With this creamy coffee smoothie in your recipe arsenal, mornings just got a whole lot tastier. I hope this recipe not only becomes a beloved staple in your kitchen but also sparks warm memories and delightful mornings just like it does for me. Enjoy the process, embrace the flavors, and remember—every sip is a celebration of homemade joy! Happy blending!
Print
Ultimate Creamy Coffee Smoothie
- Total Time: 10 minutes
- Yield: 2 servings
- Diet: Vegetarian
Description
A creamy, dreamy coffee smoothie that gives you a refreshing caffeine kick, perfect for breakfast or any time you need a boost.
Ingredients
- Brewed Coffee (1 cup)
- Banana (1 ripe)
- Greek Yogurt (½ cup)
- Milk (1 cup, any kind)
- Honey or Maple Syrup (1-2 tablespoons)
- Ice Cubes (1 cup)
- Cinnamon or Cocoa Powder (optional, for garnish)
Instructions
- Brew your coffee: Start by brewing your favorite coffee, allowing it to cool if desired.
- Prepare your ingredients: Gather all ingredients on the counter for easy mixing.
- Add to the blender: Combine the cooled coffee, ripe banana, Greek yogurt, milk, and sweetener.
- Blend away: Blend on low, gradually increase to high for 30-60 seconds until smooth. Adjust liquid or ice as needed.
- Check the taste: Taste your smoothie and adjust with more sweetener or spices if desired.
- Chill for extra creaminess: Let it sit for 5 minutes to enhance flavors.
- Pour and enjoy: Serve in a tall glass, garnishing with cinnamon or cocoa if desired.
Notes
For a dairy-free option, substitute Greek yogurt with coconut or almond yogurt and use dairy-free milk. This recipe is highly customizable; try adding cocoa powder or nut butter for variations.
- Prep Time: 10 minutes
- Cook Time: 0 minutes
- Category: Breakfast
- Method: Blending
- Cuisine: American
Nutrition
- Serving Size: 1 serving
- Calories: 300
- Sugar: 18g
- Sodium: 130mg
- Fat: 7g
- Saturated Fat: 2g
- Unsaturated Fat: 5g
- Trans Fat: 0g
- Carbohydrates: 52g
- Fiber: 4g
- Protein: 10g
- Cholesterol: 5mg
Keywords: coffee smoothie, breakfast smoothie, creamy smoothie, quick breakfast, healthy smoothie
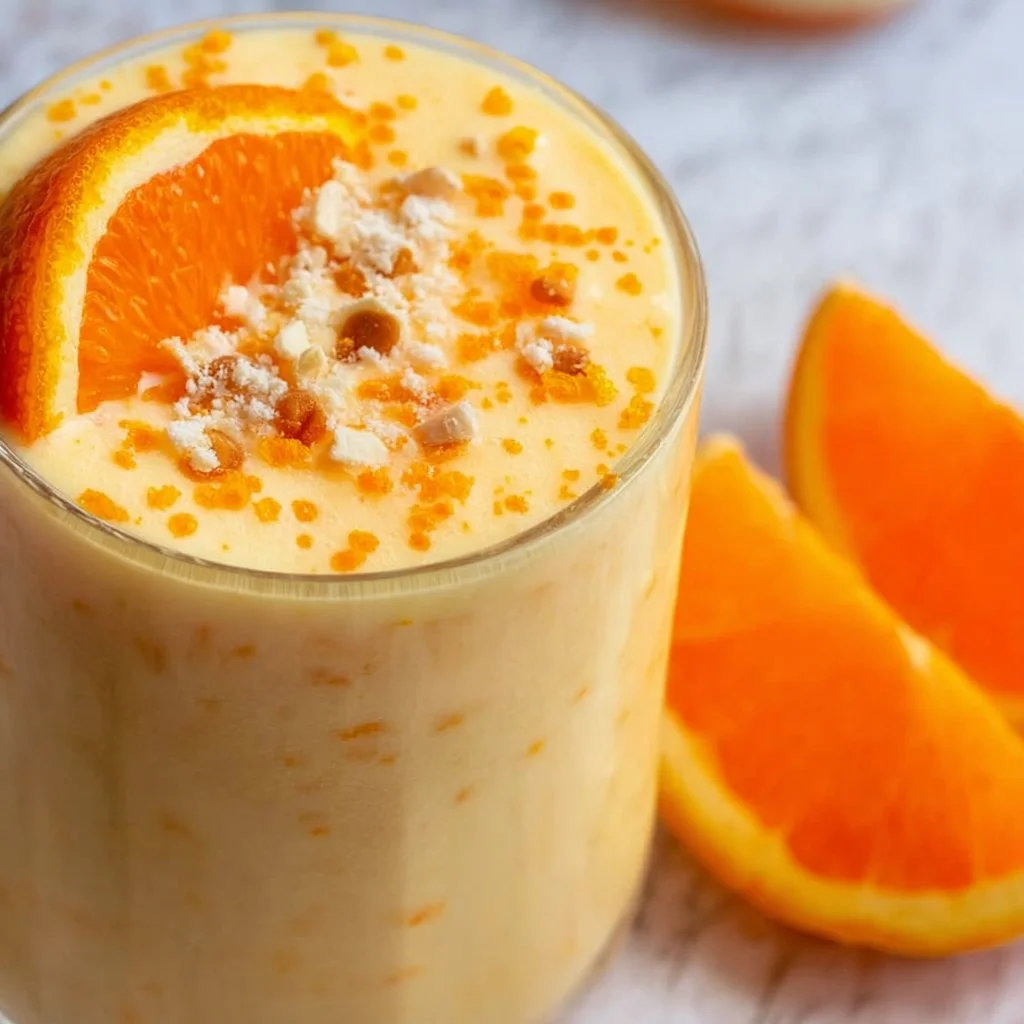
Orange Creamsicle Smoothie
The Ultimate Orange Creamsicle Smoothie Recipe
Welcome to my kitchen, sweet friends! Today, we’re diving into a refreshing, creamy treat that’ll make your taste buds dance with joy—the Orange Creamsicle Smoothie! Picture this: a sunny day, the warm breeze whipping through your hair, and that nostalgic flavor of orange cream swirling in your mouth. You know the one I’m talking about—the kind of deliciousness that whisks you back to carefree childhood days. So, grab your blender and let’s create a smoothie that brings those delightful memories to life!
A Little Personal Story
Whenever I blend up an Orange Creamsicle Smoothie, I think back to summer weekends at my grandmother’s house. She had this magical way of making everything feel extra special, even the simplest treats. There was one particular afternoon when we decided to whip up some homemade orange creamsicles. We squeezed fresh oranges and mixed in creamy goodness, pouring the mixture into molds. I can still hear her chuckling as we waited impatiently for them to freeze, our excitement bubbling over.
While we waited, she taught me how to appreciate the beauty in simple ingredients. We laughed, shared stories, and made a mess in the kitchen—cooking was more than just food to us; it was our connection. Those sweet summer days and creamy orange treats shaped my love for cooking, and I aim to capture that spirit in this smoothie. So let’s blend up something reminiscent of those treasured moments!
Ingredients
For this Orange Creamsicle Smoothie, you’ll need a handful of deliciously simple ingredients. Here’s what you’ll be gathering:
-
Fresh Oranges (2-3)
Fresh oranges are the star of this smoothie, infusing it with a vibrant citrus flavor. If you’re in a pinch, you can substitute with 100% orange juice, but fresh is always best! -
Greek Yogurt (1 cup)
Adding Greek yogurt gives the smoothie its creamy texture and a protein boost. For a dairy-free option, opt for coconut milk yogurt or almond yogurt! -
Honey or Maple Syrup (1-2 tablespoons)
A touch of sweetness is essential. Honey adds depth, but maple syrup works perfectly if you’re vegan or prefer a different flavor. -
Ice (1 cup)
Ice makes everything cooler! You’ll want it to chill and thicken your smoothie. For a creamier consistency, you can freeze leftover orange juice in ice cube trays. -
Vanilla Extract (1 teaspoon)
A splash of vanilla rounds out the flavors and intensifies the creamy profile. Feel free to experiment with almond extract for a unique twist! -
Coconut Milk (1/2 cup)
This adds a lovely creaminess. If you’re looking for a lighter option, swap it with almond milk or oat milk.
Step-by-Step Instructions
Let’s jump into making this dreamy Orange Creamsicle Smoothie:
-
Preparing the Oranges
Start by peeling your fresh oranges and removing the seeds. Cut them into segments for easier blending. Trust me, you want the full, vibrant orange flavor without any bitterness from the seeds. -
Adding the Ingredients
In your blender, toss in the orange segments along with the Greek yogurt, honey (or maple syrup), ice, vanilla extract, and coconut milk. I like to add the liquid ingredients first to help everything blend evenly, so feel free to follow this order for optimal results. -
Blending Time
Secure the lid on your blender and blend on high for about 30-60 seconds. You want everything to blend until smooth and creamy! If you find that it’s a bit too thick, you can always add a splash more coconut milk. If it’s too thin, just add a handful more of ice. -
Taste Test
Here comes the fun part! Give it a quick taste. Adjust the sweetness if necessary by adding a bit more honey or maple syrup. If you want an extra citrus punch, squeeze in some lemon juice—totally up to your flavor preferences! -
Serving It Up
Once you’re satisfied with the flavor and texture, pour the smoothie into your favorite glass. I love using tall, summery glasses that remind me of those childhood days. You could even add a slice of orange on the rim for a beautiful presentation!
Serving Suggestions
This Orange Creamsicle Smoothie is perfect on its own, but if you’re feeling extra fancy, consider serving it up with a sprinkle of shredded coconut on top or a dollop of whipped cream. It’s also fabulous as a refreshing breakfast or snack paired with some granola or whole-grain toast. Voila! You’ve got a delightful treat that brightens your day!
Recipe Variations
Let your creativity shine with these tasty twists on the classic Orange Creamsicle Smoothie:
- Tropical Twist: Add a handful of pineapple for a tropical flair! It’s a fun way to mix things up and get a burst of additional flavor.
- Berry Burst: Toss in some frozen strawberries or raspberries for a berry creamsicle version. The colors and tastes will be absolutely delightful!
- Green Goodness: Want to sneak in some greens? A handful of spinach or kale gives you added vitamins without sacrificing the flavor—promise!
- Nutty Creamsicle: Blend in a spoonful of almond butter or peanut butter. It adds a satisfying nutty flavor and extra creaminess while packing in healthy fats!
Chef’s Notes
This recipe has evolved for me over the years. I’ve experimented with different fruits, yogurts, and liquefied bases, and it’s been so much fun! One time, my blender decided to go rogue, and I ended up with a smoothie explosion all over my kitchen. Let’s just say I now wear an apron every time (even when I’m blending). The great thing about this smoothie is its flexibility—don’t hesitate to adapt it to match your palate or the season!
FAQs and Troubleshooting
Q1: Why is my smoothie too thick?
No worries! Just add a splash more coconut milk or water and give it another quick blend until you achieve your desired consistency.
Q2: Can I use frozen oranges?
Absolutely! Frozen oranges are perfect for a thicker, icier smoothie. Just be aware that they might make the blending a tad more challenging, so you may need to let them sit out for a few minutes to soften.
Q3: How can I make this smoothie dairy-free?
Easy peasy! Simply swap the Greek yogurt with a dairy-free yogurt, like almond or coconut, and make sure your milk alternative is dairy-free.
Q4: What’s the best way to store leftovers?
If you have any leftover smoothie (though that’s rare!), store it in an airtight container in the fridge. It should be good for about 24 hours, but give it a good shake or stir before enjoying again, as it may separate.
Nutritional Info
(Optional, but this can be a good addition if you want to share health benefits.)
- Calories: Approximately 250 per serving
- Protein: 8g (from Greek yogurt)
- Healthy fats: 5g (from coconut milk)
- Vitamin C: High (from fresh oranges)
In conclusion, making an Orange Creamsicle Smoothie is not just a delightful kitchen adventure; it’s an opportunity to create memories and bring a little sunshine to your day. Enjoy every drop of this creamy, citrus delight and let it remind you of cherished moments and that sweet, nostalgic taste we all love! Happy blending!
Print
Ultimate Orange Creamsicle Smoothie
- Total Time: 10 minutes
- Yield: 2 servings
- Diet: Vegetarian
Description
A refreshing, creamy Orange Creamsicle Smoothie that captures the nostalgic flavors of summer.
Ingredients
- Fresh Oranges (2-3)
- Greek Yogurt (1 cup)
- Honey or Maple Syrup (1-2 tablespoons)
- Ice (1 cup)
- Vanilla Extract (1 teaspoon)
- Coconut Milk (1/2 cup)
Instructions
- Start by peeling your fresh oranges and removing the seeds. Cut them into segments for easier blending.
- In your blender, toss in the orange segments along with the Greek yogurt, honey (or maple syrup), ice, vanilla extract, and coconut milk.
- Secure the lid on your blender and blend on high for about 30-60 seconds until smooth and creamy.
- Give it a quick taste and adjust the sweetness if necessary.
- Pour the smoothie into your favorite glass and add a slice of orange on the rim for presentation.
Notes
Feel free to experiment with different fruits and flavors. This smoothie can be adjusted to suit dietary preferences.
- Prep Time: 10 minutes
- Cook Time: 0 minutes
- Category: Beverage
- Method: Blending
- Cuisine: American
Nutrition
- Serving Size: 1 serving
- Calories: 250
- Sugar: 30g
- Sodium: 50mg
- Fat: 5g
- Saturated Fat: 4g
- Unsaturated Fat: 1g
- Trans Fat: 0g
- Carbohydrates: 40g
- Fiber: 3g
- Protein: 8g
- Cholesterol: 10mg
Keywords: smoothie, orange, creamsicle, beverage, healthy, refreshing
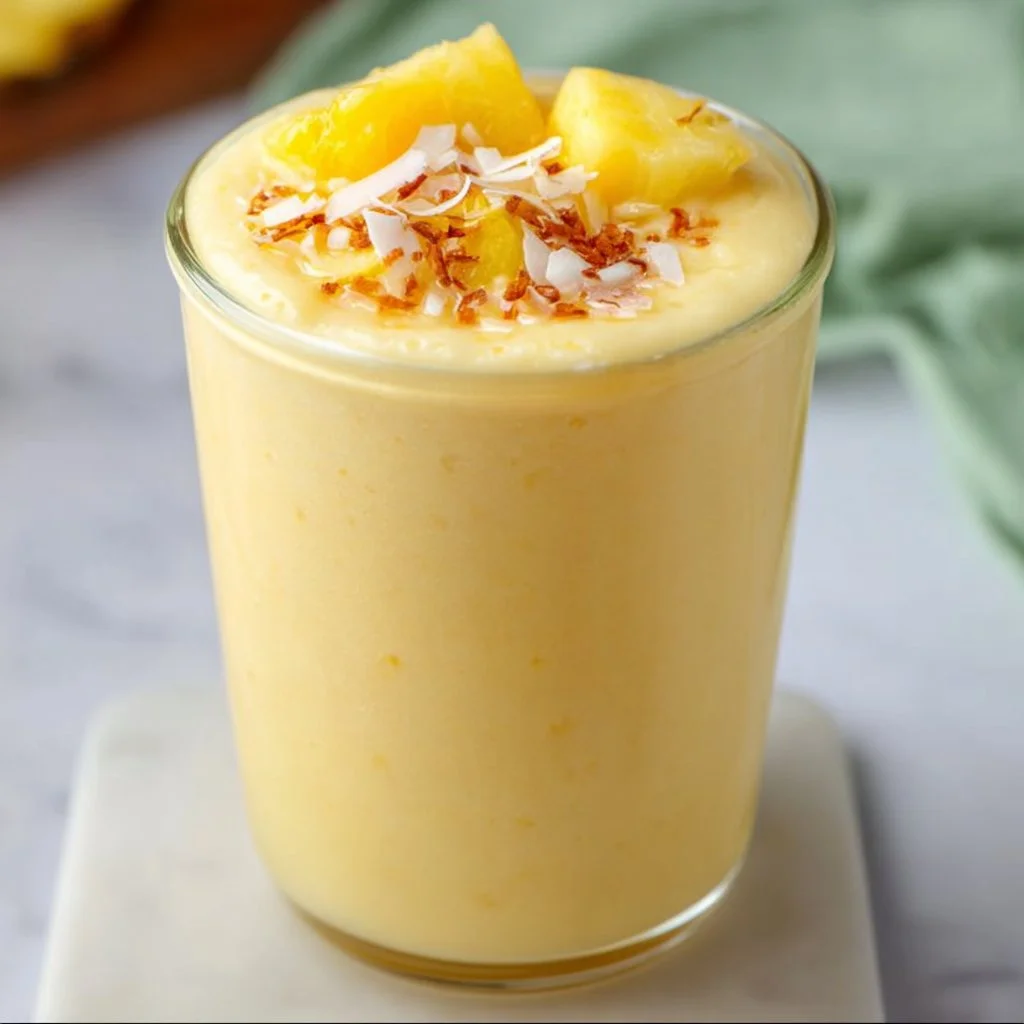
Pineapple Orange Smoothie
Pineapple Orange Smoothie: A Taste of Sunshine in a Glass
Welcome to my delightful little corner of the kitchen! If you’ve ever craved a drink that feels like a warm hug on a sunny day, then you’re in just the right place. Today, I’m excited to share with you one of my all-time favorite smoothie recipes—a refreshing Pineapple Orange Smoothie. Whether you’re kicking off your day or winding down in the evening, this vibrant blend is guaranteed to brighten your mood and tantalize your taste buds.
Imagine standing in your kitchen, fresh fruit surrounding you, and the sweet scent of citrus filling the air. There’s something magical about blending simple, wholesome ingredients into a drink that radiates joy. The best part? It’s ridiculously easy to whip up, and you don’t need any fancy kitchen gadgets to do it. Just grab your blender, and let’s dive in!
This smoothie is more than just a drink; it’s a celebration of flavors. The sweetness of pineapple dances with the tang of fresh oranges, creating a symphony that feels like summer, no matter the season. Plus, it’s loaded with nutrients, making it a perfect pick-me-up for any time of the day. So, let’s get started on creating this sunshine in a glass!
A Sweet Memory: Chasing Summer Vibes
As I think about my love for smoothies, I’m transported back to my childhood summers spent visiting my grandparents in Florida. Their backyard was a tropical paradise filled with palm trees, colorful flowers, and the sound of cicadas buzzing in the warm air. Every afternoon, we would sneak into the kitchen to whip up the most refreshing smoothies out of whatever fresh fruit we could find.
It was during those carefree days that I first tasted the incredible combination of pineapple and orange. My grandma would blend the fruit with a splash of coconut milk, and we’d sip on our creations while lounging by the pool. The colors would swirl together like a sunset, and every sip tasted just like summer. These are the moments that inspired me to experiment in the kitchen, celebrating flavors from nature.
That’s why this Pineapple Orange Smoothie holds a special place in my heart. It’s not just a drink; it’s a link to those cherished memories and a way to recreate that joy in my own kitchen. I can’t wait for you to experience this delicious blend!
Ingredients
Here’s what you’ll need to bring this smoothie to life:
-
1 cup fresh or frozen pineapple chunks
Pineapple isn’t just delicious; it’s packed with vitamins and minerals. If you can’t find fresh, frozen works just as well. You can also substitute it with mango or papaya for a different tropical twist. -
1 medium ripe banana
Bananas add a creamy texture and natural sweetness. If you’re looking for a low-sugar option, try using half an avocado or 1/4 cup of Greek yogurt instead. -
1 cup fresh orange juice
Freshly squeezed is best for flavor! However, if you’re short on time, go for a good quality store-bought option. Just make sure it’s 100% pure orange juice without added sugars. -
1/2 cup coconut milk (canned or carton)
Coconut milk gives our smoothie that tropical touch! For a lighter option, you can use almond milk or oat milk. -
1 tablespoon honey or maple syrup (optional)
Depending on your sweetness preference, you might want to add a drizzle of honey or maple syrup. You can totally skip it if the fruits are sweet enough! -
A handful of ice
Ice is essential for that frosty, refreshing vibe. If you’re using frozen fruit, you might need less ice.
Step-by-Step Instructions
-
Prepare your ingredients:
Start by gathering all your ingredients. The fresher, the better! If using fresh pineapple, chop it into manageable chunks. Peel the banana and squeeze the oranges to get that juice flowing. Trust me; the preparation makes everything feel organized and more fun! -
Add the fruits to the blender:
Toss the pineapple chunks, banana, and any additional fruits into the blender first. I recommend layering soft fruits like banana on top of the harder ones to ensure even blending. -
Pour in the orange juice:
Next, add your freshly squeezed orange juice. The vibrant color and zesty aroma should immediately ignite your senses—what a glorious start! -
Combine the coconut milk:
Time for the creamy element! Add the coconut milk to the blender. If you prefer a thicker smoothie, lean toward canned coconut milk; if lighter is your goal, choose the carton version. -
Sweeten it up (if desired):
Whether you prefer it on the sweeter side or more tangy, give it a taste at this stage. Add a little honey or maple syrup if you want, but remember to adjust to your personal taste! -
Add ice and blend:
Finally, throw in a handful of ice, put the lid on tightly, and blend until smooth! You’re looking for a lovely, thick consistency that you can easily sip through a straw. If it’s too thick, add a touch more coconut milk or juice; if too runny, throw in more ice or frozen fruit. -
Taste test:
Here’s the fun part! Taste your creation and adjust if necessary. Want more zing? A squeeze of lemon or lime can brighten it up. Need it sweeter? Add a little more honey. -
Blend one last time:
Blend everything until you achieve that sexy, velvety texture. You’ll know it’s ready when you have a beautifully vibrant mix that’s all one gorgeous color!
Serving Suggestions
Pour your refreshing Pineapple Orange Smoothie into a tall glass or stylish mason jar. You can garnish it with a slice of orange on the rim or a few pineapple chunks for that inviting look. If you’re feeling extra fancy, sprinkle a few chia seeds or shredded coconut on top for added texture and flavor. Serve with a colorful straw and enjoy immediately while it’s cold and vibrant!
Recipe Variations
Ready to mix things up? Here are a few creative twists you can try with your Pineapple Orange Smoothie:
-
Tropical Greens: Toss in a handful of spinach or kale for a nutritious boost without compromising flavor. The greens make it a tad more vibrant and loaded with nutrients.
-
Berry Bliss: Replace half of the pineapple with strawberries or blueberries for a berry twist that adds antioxidants and a stunning color contrast.
-
Creamy Avocado: Substitute the banana with half an avocado, giving you a super creamy and rich texture that’s also heart-healthy.
-
Protein Boost: Add a scoop of your favorite protein powder or Greek yogurt for an extra dose of goodness.
-
Spiced Up: A pinch of ground ginger or turmeric can add a subtle warmth and a trendy health kick.
Chef’s Notes
Ah, this smoothie is so near and dear to my heart! There’s nothing quite like that blissful moment when you take your first sip and are instantly transported to your happy place. Over the years, I’ve tweaked this recipe countless times to suit my cravings and what I have on hand. Sometimes, I even make it into a smoothie bowl by adding toppings like granola, fresh fruit, and nuts.
And here’s a funny kitchen story: Once, I accidentally used lime juice instead of orange juice because my zestful self didn’t pay proper attention. Let me tell you, the result was a very interesting concoction. But hey, we all have our moments! It turned out to be a fun discovery because I added a splash of coconut, and it was a whole new creation.
FAQs and Troubleshooting
-
Why is my smoothie too thick?
If you find your smoothie too thick, simply add a little extra coconut milk or orange juice until you reach your desired consistency. -
Can I freeze this smoothie?
Absolutely! You can freeze any leftovers. Just pour it into an airtight container, and when you’re ready to enjoy, let it thaw for about 30 minutes or blend it again with a little added liquid. -
How do I make it dairy-free?
All the ingredients in this recipe are already dairy-free, mainly if you’re using coconut milk or almond milk. Always ensure any supplemental ingredients like protein powder are also dairy-free. -
Can I add other fruits?
Of course! This smoothie is versatile. Feel free to switch things up with your favorite fruits or whatever is in season for a truly unique blend.
Nutritional Info (Optional)
While the exact nutritional values may fluctuate based on ingredient brands and quantities, here’s a general idea of what a serving provides (about 1-2 cups):
- Calories: 210-250
- Protein: 4-6g
- Fat: 5-10g (depends on coconut milk)
- Carbohydrates: 40-50g
- Sugars: 30-35g (natural sugars from fruits)
Remember, dear foodie friends, cooking is an adventure filled with creativity and joy. This Pineapple Orange Smoothie is not only delightful for your taste buds but also a beautiful reminder of joyful moments spent in the kitchen. I can’t wait for you to recreate this in your home! Cheers to lazy mornings and sunny sips! 🍹✨
Print
Pineapple Orange Smoothie
- Total Time: 10 minutes
- Yield: 2 servings 1x
- Diet: Vegan
Description
A refreshing Pineapple Orange Smoothie that feels like a warm hug on a sunny day. This vibrant blend is perfect for brightening your mood and tantalizing your taste buds.
Ingredients
- 1 cup fresh or frozen pineapple chunks
- 1 medium ripe banana
- 1 cup fresh orange juice
- 1/2 cup coconut milk (canned or carton)
- 1 tablespoon honey or maple syrup (optional)
- A handful of ice
Instructions
- Prepare your ingredients: Gather all your ingredients and chop the pineapple into chunks. Peel the banana and squeeze oranges for juice.
- Add the fruits to the blender: Toss in the pineapple, banana, and any additional fruits.
- Pour in the orange juice: Add the freshly squeezed orange juice to the blender.
- Combine the coconut milk: Add the coconut milk for creaminess.
- Sweeten it up (if desired): Taste your mixture and add honey or maple syrup if needed.
- Add ice and blend: Throw in ice, blend until smooth, adjusting thickness as needed.
- Taste test: Taste your smoothie and adjust flavors as needed.
- Blend one last time: Blend until achieving a velvety texture.
Notes
You can substitute the banana with avocado for a creamier texture. This smoothie can also be frozen for later enjoyment.
- Prep Time: 10 minutes
- Cook Time: 0 minutes
- Category: Beverage
- Method: Blending
- Cuisine: American
Nutrition
- Serving Size: 1 serving
- Calories: 250
- Sugar: 35g
- Sodium: 40mg
- Fat: 8g
- Saturated Fat: 6g
- Unsaturated Fat: 2g
- Trans Fat: 0g
- Carbohydrates: 50g
- Fiber: 5g
- Protein: 4g
- Cholesterol: 0mg
Keywords: smoothie, pineapple, orange, refreshing, vegan
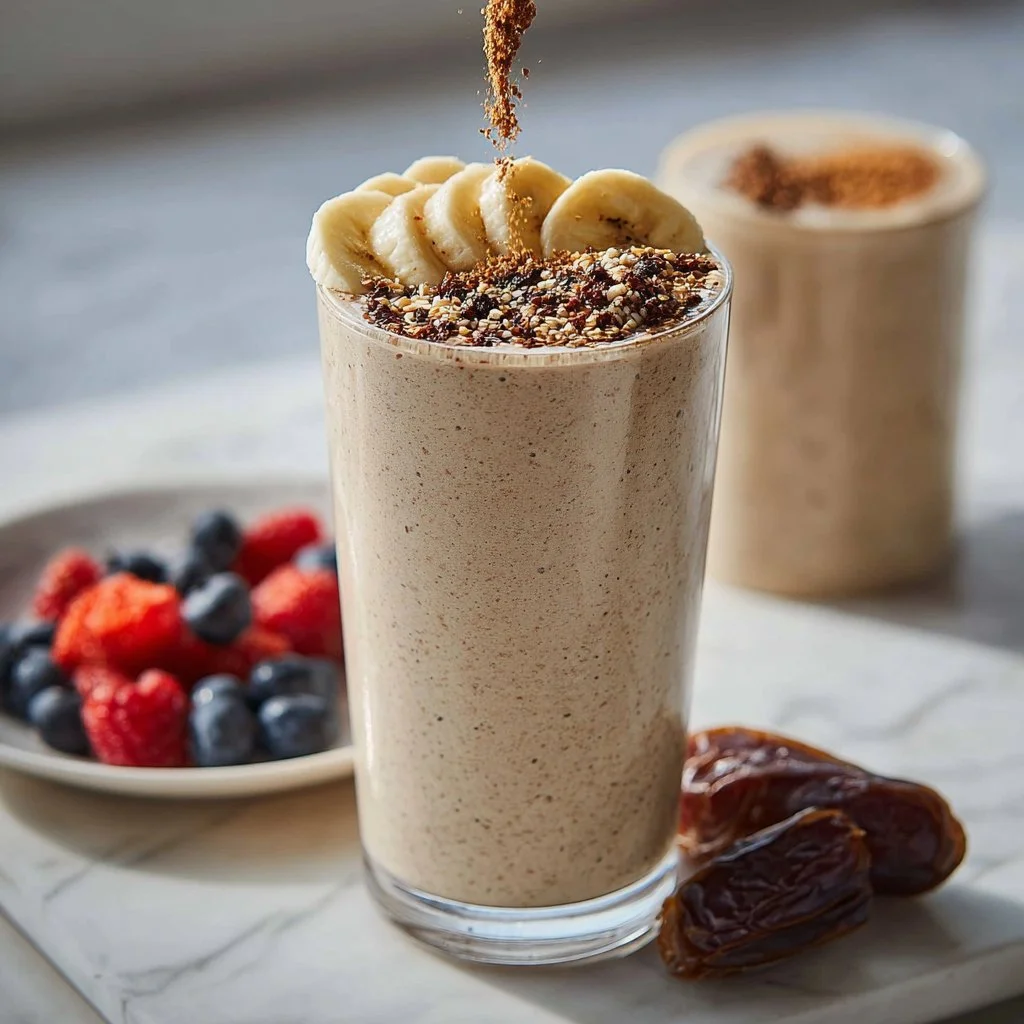
Morning Coffee Smoothie Recipe
Rise and Shine with My Morning Coffee Smoothie Recipe!
Welcome to a new day in my cozy kitchen! Today, I’m excited to share a delightful concoction that not only fuels your mornings but also brings a burst of flavor to your routine. Say hello to my Morning Coffee Smoothie — a delicious blend that’s perfect for energizing your day.
Now, we all know how the aroma of freshly brewed coffee can light up even the gloomiest of mornings. As a self-proclaimed coffee enthusiast, I’m here to tell you that this smoothie is more than just delicious; it’s a love letter to that warm, comforting cup of coffee we all crave. Imagine sipping on a creamy, frothy blend that captures all the cozy elements of your favorite cafe drink, but with a fruity twist. It’s the best of both worlds, all in one glass. And the bonus? It’s incredibly quick to whip up, so no need to sacrifice sleep for breakfast!
The beauty of this Morning Coffee Smoothie is that it’s customizable to your taste and dietary needs. Whether you prefer it vegan, want to pump up the protein, or simply crave a little extra sweetness, I’ve got you covered. Just picture it: you’re bustling about your morning routine, and in just under 10 minutes, you can have a refreshing smoothie ready to fuel your day. So grab your blender and let’s get blending!
A Sip of Nostalgia
One of my fondest memories as a child was waking up on weekends to the rich smell of brewing coffee mingling with the scent of freshly baked cinnamon rolls wafting through our kitchen. My mom, an inspired home cook, would often whip up something special for breakfast — a tradition that turned our simple weekend mornings into delightful brunch extravaganzas.
I remember sneaking into the kitchen before the sun fully had a chance to rise, tiptoeing past the crackling sounds of the coffee maker. My mom would usually catch me, chuckling as I leaned over the table to get a whiff of the goodies — a sweet reward for my early rising. Those moments taught me the importance of good food and great coffee, and how they can bring us together.
Fast forward to today, and I wanted to recreate that comforting feeling. I’ve blended my love for coffee with my passion for smoothies, creating this glorious Morning Coffee Smoothie. It’s a tribute to those cherished mornings spent with family, and I can’t wait for you to enjoy it as much as I do!
Ingredients
To whip up this rejuvenating Morning Coffee Smoothie, you’ll need the following ingredients:
-
Cold Brew Coffee: The star of the show! Use your favorite cold brew or make your own by steeping coarsely ground coffee in cold water for 12-24 hours. Substitute with brewed coffee, but remember to let it cool first!
-
Banana: This banana adds creaminess while providing natural sweetness and potassium. Feel free to substitute with frozen banana slices for a colder smoothie or use avocado for a creamy texture without the flavor.
-
Almond Milk (or milk of choice): I love almond milk for its subtle nutty flavor. You can, of course, use coconut milk for a tropical twist, oat milk for creaminess, or any other milk you prefer.
-
Greek Yogurt: Packed with protein and probiotics, adding Greek yogurt gives the smoothie a wonderful richness. For a dairy-free option, opt for coconut yogurt or blended silken tofu.
-
Honey or Maple Syrup: Just a drizzle adds sweetness. You can omit this if your banana is sweet enough, or use stevia for a low-calorie alternative.
-
Ice: This gives the smoothie that icy cold refreshment. If you use frozen bananas, you might skip this.
-
Optional Add-ins: A scoop of protein powder, a tablespoon of nut butter, a sprinkle of cinnamon, or even a handful of spinach for an extra nutrient boost!
Step-by-Step Instructions
Now, let’s get to making this delicious smoothie! Follow along with these steps and a sprinkle of love:
-
Get Your Ingredients Ready: Gather all the ingredients on your countertop. This makes blending a smooth process, plus it reduces any chances of missing an ingredient!
-
Brew Your Coffee: If you’re making cold brew, plan ahead by brewing it the night before. For this recipe, let’s say you’re using cold brew. Get your cold brew out from the fridge and let’s get pouring!
-
Blend the Core Ingredients:
- In your blender, combine 1 cup of cold brew coffee, 1 ripe banana, ½ cup of almond milk, and ½ cup of Greek yogurt. This combination creates a robust flavor profile that’s creamy and energizing.
-
Sweeten It: Add about 1 tablespoon of honey or maple syrup. Blend it together and taste! If you want it sweeter, feel free to add more until it’s just right for you.
-
Add Ice and Blend Again: Toss in about ½ cup of ice (or more if you like it extra cold) and then blend until smooth. It should be creamy and frosty, sipping on it should be a joyous experience!
-
Check the Texture: If your smoothie is too thick, add a splash more of almond milk and blend again. You want it to flow like a gentle river, not a mountain stream.
-
Pour and Enjoy: Pour your smoothie into your favorite glass (a cute mason jar is always a win!), and if you want a little extra flair, sprinkle a pinch of cinnamon on top.
Serving Suggestions
Presentation is key, right? Serve your Morning Coffee Smoothie in a chilled glass topped with a few coffee beans or a light dusting of cocoa powder for an extra touch of luxury. Pair it with a couple of almond butter toast slices or a granola bar on the side for a complete breakfast experience. Your family and friends will think you’re serving at a trendy café!
Recipe Variations
Getting creative in the kitchen is half the fun, so here are a few variations to try with your smoothie:
-
Mocha Bliss: Mix in a tablespoon of cocoa powder or a scoop of chocolate protein powder for a chocolatey mocha delight.
-
Nutty Banana: Add a tablespoon of your favorite nut butter (like almond or peanut butter) for added richness and a protein boost.
-
Green Dream: Toss in a handful of spinach or kale for a nutrient-packed green smoothie that still tastes incredible.
-
Tropical Delight: Swap the banana for mango and add a splash of coconut milk for a refreshing tropical twist.
-
Cinnamon Roll: Add a dash of cinnamon and top with crushed nuts for a breakfast that reminds you of sweet cinnamon rolls.
Chef’s Notes
As I experimented with this recipe, I remembered my first attempt, which accidentally turned into a coffee milkshake disaster! I remember thinking, “Why limit myself to breakfast when this could be a delightful afternoon treat as well?” The evolution of the Morning Coffee Smoothie allowed me to appreciate how versatile flavor combinations can be, especially when combining coffee with fruits.
The great thing about this recipe is that it adapts beautifully to seasonal ingredients. During the summer, throw in some fresh berries to keep it light, and in the winter, use spices like nutmeg or ginger for a cozy touch.
FAQs and Troubleshooting
-
Can I make this smoothie in advance?
- You can! Just blend the ingredients, pour it into an airtight container, and store it in the fridge. Give it a shake before enjoying, as it may separate slightly.
-
What if I don’t have Greek yogurt?
- No problem! You can use regular yogurt, non-dairy yogurt, or even blended silken tofu for a creamy texture.
-
Can I use regular brewed coffee instead of cold brew?
- Absolutely! Just let the brewed coffee cool to room temperature before adding it to your smoothie.
-
My smoothie is too thick! What can I do?
- Simply add a little bit more milk (almond or any of your choice) and blend again until you reach your desired consistency.
Nutritional Info
This delightful Morning Coffee Smoothie packs a punch in terms of nutrition! Each serving contains approximately:
- Calories: 250
- Protein: 12g
- Carbohydrates: 35g
- Fiber: 4g
- Sugars: 15g
These nutrients may vary based on specific ingredient choices, but it’s a nourishing start to your day!
And there you have it, my dear friends! A warm, inviting recipe that will kick-start your morning on a wonderfully delicious note. Go ahead, mix up this Morning Coffee Smoothie, and toast to energizing mornings filled with flavor and creativity. Happy blending!
Print
Morning Coffee Smoothie
- Total Time: 10 minutes
- Yield: 1 serving 1x
- Diet: Vegetarian
Description
A delightful smoothie that combines the rich flavor of cold brew coffee with creamy banana and Greek yogurt, perfect for energizing your mornings.
Ingredients
- 1 cup cold brew coffee
- 1 ripe banana
- ½ cup almond milk (or milk of choice)
- ½ cup Greek yogurt
- 1 tablespoon honey or maple syrup
- ½ cup ice
- Optional add-ins: protein powder, nut butter, cinnamon, spinach
Instructions
- Gather all the ingredients on your countertop.
- Brew your coffee if needed and prepare the cold brew.
- Blend the cold brew, banana, almond milk, and Greek yogurt together.
- Add honey or maple syrup, blend, and taste for sweetness.
- Incorporate ice and blend again until smooth.
- Check the texture and adjust with more almond milk if too thick.
- Pour into a glass and sprinkle with cinnamon if desired.
Notes
For variations, try adding cocoa powder for a mocha flavor or spinach for a nutrient boost. This smoothie can be made in advance and stored in the fridge.
- Prep Time: 10 minutes
- Cook Time: 0 minutes
- Category: Beverage
- Method: Blending
- Cuisine: American
Nutrition
- Serving Size: 1 serving
- Calories: 250
- Sugar: 15g
- Sodium: 100mg
- Fat: 4g
- Saturated Fat: 1g
- Unsaturated Fat: 3g
- Trans Fat: 0g
- Carbohydrates: 35g
- Fiber: 4g
- Protein: 12g
- Cholesterol: 5mg
Keywords: smoothie, coffee, breakfast, healthy, energizing
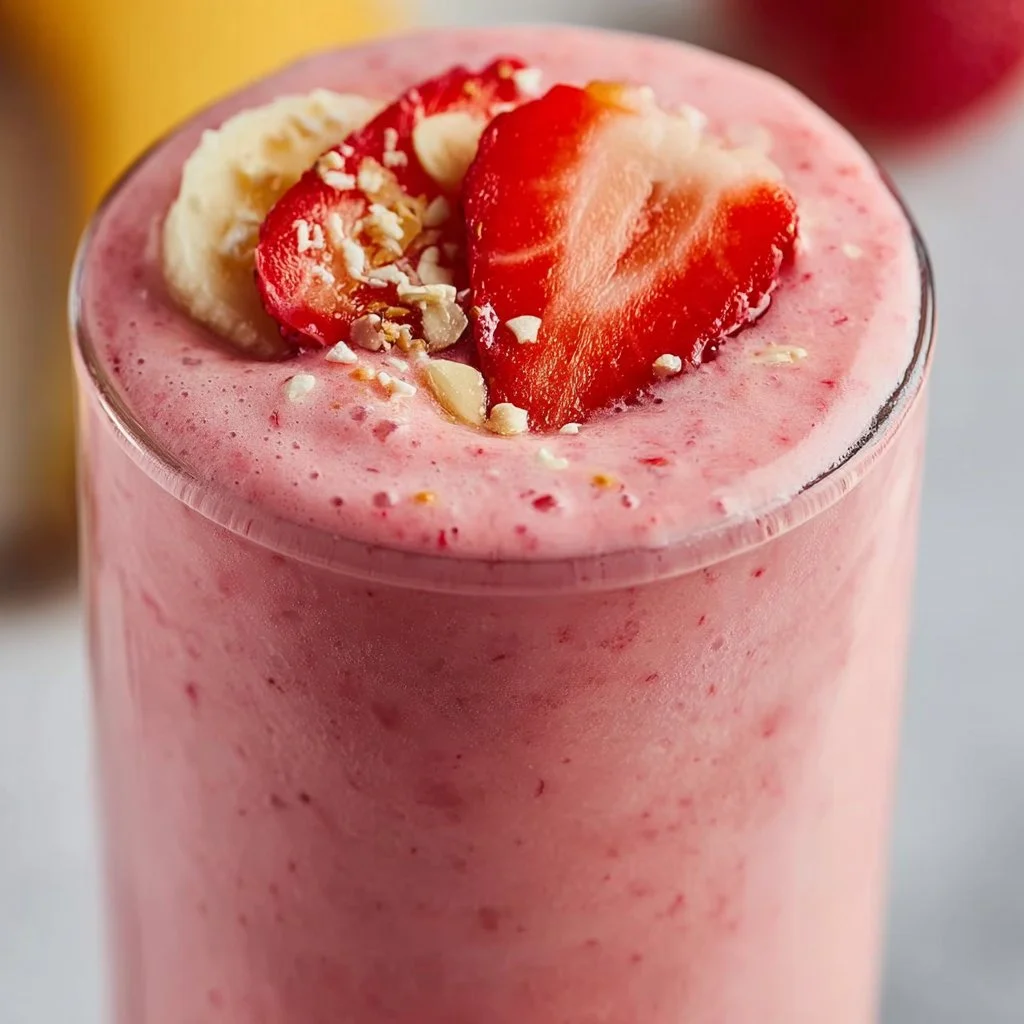
Strawberry Banana Smoothie 🍓
The Ultimate Strawberry Banana Smoothie Recipe 🍓
Welcome to my kitchen! I’m delighted you’re here to embark on this flavorful journey with me. As the sun rises and warms the day, there’s nothing quite like the refreshing, vibrant taste of a Strawberry Banana Smoothie to start your morning off right! This delightful blend of sweetness and nutrition not only tantalizes your taste buds but also fuels your body with essential vitamins and minerals. Perfect for breakfast or a mid-afternoon snack, it’s become a staple in my household, and I can’t wait to share all the juicy details with you.
A Delicious Blend of Memories
When I think about strawberry banana smoothies, I can’t help but chuckle at the hilarious memories from my early cooking adventures. I remember one summer afternoon when I decided I wanted to make smoothies from scratch for my family. Instead of pouring my ingredients into a blender, I got so excited that I too eagerly tossed everything in—frozen strawberries, ripe bananas, yogurt, and a splash of juice. The blender whirred to life, and instead of a smooth concoction, I ended up with an explosion of strawberry banana goodness all over the kitchen! My mother still giggles about it, recalling how I stood there, utterly shocked in a mess of fruit.
From that day on, the strawberry banana smoothie turned into our family favorite—an effortless recipe that combined simplicity, nutrition, and a touch of nostalgia. Fast forward to today, and I’ve perfected my method to avoid any chaotic kitchen explosions. So grab your blender, and let’s create something delightful together!
Ingredients
Here’s what you need to make this beautiful smoothie. Each ingredient plays a vital role in creating the perfect balance of flavor and nutrition!
-
Fresh Strawberries (1 cup)
- These juicy gems add natural sweetness and vibrant color! When selecting strawberries, look for ones that are deep red and slightly firm for the best flavor. If you’re short on fresh ones, frozen strawberries work wonders too.
-
Ripe Banana (1 medium)
- A ripe banana gives the smoothie a creamy texture and boosts the sweetness. Brown spots are your friend here! If you don’t have bananas, you can swap them with a half-cup of unsweetened applesauce.
-
Greek Yogurt (1/2 cup)
- This adds a lovely creamy texture and is packed with protein. If you’re looking for a dairy-free option, opt for coconut or almond yogurt; they’ll bring their unique flavors to the mix!
-
Milk (1 cup)
- Use any kind you like—cow’s, almond, oat, or coconut milk work perfectly. If you prefer a thicker smoothie, use less milk.
-
Honey or Maple Syrup (1-2 tablespoons, optional)
- A drizzle of sweetness never hurt anyone! Use honey for a classic touch or maple syrup for a more earthy flavor. Agave nectar is a great alternative if you’re keeping it vegan.
-
Chia Seeds (1 tablespoon)
- These little powerhouses add fiber and omega-3 fatty acids. If you don’t have chia seeds, you can skip them or substitute with flaxseeds.
Step-by-Step Instructions
Ready to whip up that luscious smoothie? Let’s get blending!
-
Gather Your Ingredients
- Set everything out on the counter. This is a great time to put on some upbeat music—it makes the whole process feel more fun! Don’t forget to wash your strawberries and slice off their green tops.
-
Slice the Banana
- Peel your ripe banana and slice it into thick chunks. They’ll blend much easier this way! Pro tip: If you want to make smoothies in advance, freeze banana slices ahead of time for a creamier texture.
-
Blend the Strawberries and Banana
- Into the blender, add the cut banana and halved strawberries. If you’re using frozen strawberries, there’s no need to thaw them; they’ll help chill the smoothie!
-
Add the Yogurt and Milk
- Add the Greek yogurt and pour in your milk of choice. This is where things get creamy! Start with one cup of milk—you can always adjust later to reach your desired consistency.
-
Sweeten It Up
- If you prefer a sweeter smoothie, add your honey or maple syrup. Remember, you can always taste and adjust!
-
Sprinkle in Chia Seeds
- Toss in the chia seeds for that extra oomph of nutrition. Blend for about 30 seconds to a minute until everything is smooth. Stop to scrape down the sides if necessary to ensure all fruit gets blended.
-
Adjust Consistency
- After blending, check the thickness. If it’s too thick, add a splash more milk and blend again.
-
Taste Test
- This is my favorite part! Grab a spoon, take a tiny taste, and if you need a bit more sweetness or tang, add either honey or maybe an extra dollop of yogurt. Blend for just a few more seconds.
-
Pour and Enjoy!
- Carefully pour the smoothie into glasses and savor the beautiful color. It’s visually inviting, and trust me, the aroma is totally invigorating!
Serving Suggestions
For an extra touch, garnish your smoothie with a sprinkle of seeds or a few slices of strawberry on top. It’s all about that presentation! Pair it with a few granola clusters or a slice of whole-grain toast for a well-rounded meal.
Recipe Variations
Let’s shake things up a little! Here are some creative twists to take your smoothie game to the next level:
- Tropical Vibes: Add a few chunks of mango or pineapple for a tropical twist.
- Nutty Banana: Toss in a tablespoon of almond butter for a creamy, nutty flavor.
- Green Power: Add a handful of fresh spinach or kale. You won’t even taste it, and it will pack in more nutrients!
- Berry Blast: Mix in 1/2 cup of blueberries or raspberries to diversify the flavor profile.
- Protein Boost: Add a scoop of protein powder for post-workout recovery.
Chef’s Notes
This strawberry banana smoothie is a staple in my kitchen, but it didn’t start that way. My first attempts were often too runny or too thick; I struggled to find the right balance of flavors. It took several kitchen mishaps and a minor explosion of strawberries (cue the laughter) to refine my technique. Now, it’s a comforting blend that brings a smile to my face, reminding me of those childhood afternoons. Cooking is all about learning, and this recipe perfectly embodies the joy of trying, failing, and succeeding!
FAQs and Troubleshooting
1. What if my smoothie is too thick?
No problem! Just add a splash more milk (or your milk alternative) and blend until you reach your desired consistency.
2. Can I make this ahead of time?
Absolutely! You can prepare the smoothie the night before. Store it in the fridge, but give it a good shake (or stir) before enjoying it.
3. My smoothie is too sweet. How can I fix it?
Balance it out by adding a splash of lemon juice or a handful of spinach, which will create a more refreshing taste without the extra sweetness.
4. How can I make this smoothie vegan?
Simply replace the Greek yogurt with a dairy-free alternative, and use maple syrup as your sweetener. You can also leave out any other non-vegan ingredients.
Nutritional Info
(Serving Size: 1 smoothie)
- Calories: 250
- Protein: 9g
- Fat: 3g
- Carbohydrates: 47g
- Fiber: 5g
And there you have it, my delightful Strawberry Banana Smoothie! It’s colorful, delicious, and guarantees a smile with every sip. Whether you’re starting your day or enjoying an afternoon break, this smoothie is bound to brighten your mood. Now, take a moment to let the flavors meld together in your kitchen and channel your inner chef. Until next time, happy blending!
Print
The Ultimate Strawberry Banana Smoothie
- Total Time: 10 minutes
- Yield: 1 serving 1x
- Diet: Vegetarian
Description
A refreshing and nutritious Strawberry Banana Smoothie perfect for breakfast or a snack.
Ingredients
- 1 cup Fresh Strawberries
- 1 medium Ripe Banana
- 1/2 cup Greek Yogurt
- 1 cup Milk (cow’s, almond, oat, or coconut)
- 1–2 tablespoons Honey or Maple Syrup (optional)
- 1 tablespoon Chia Seeds
Instructions
- Gather your ingredients.
- Slice the banana into thick chunks.
- Blend the strawberries and banana in the blender.
- Add the yogurt and milk.
- Sweeten it up with honey or maple syrup.
- Sprinkle in chia seeds and blend until smooth.
- Adjust consistency with more milk if needed.
- Taste test and adjust flavors.
- Pour and enjoy the smoothie!
Notes
For variations, try adding mango for a tropical twist or almond butter for nuttiness.
- Prep Time: 10 minutes
- Cook Time: 0 minutes
- Category: Beverage
- Method: Blending
- Cuisine: American
Nutrition
- Serving Size: 1 smoothie
- Calories: 250
- Sugar: 20g
- Sodium: 100mg
- Fat: 3g
- Saturated Fat: 1g
- Unsaturated Fat: 2g
- Trans Fat: 0g
- Carbohydrates: 47g
- Fiber: 5g
- Protein: 9g
- Cholesterol: 10mg
Keywords: strawberry banana smoothie, healthy smoothie, breakfast smoothie




