
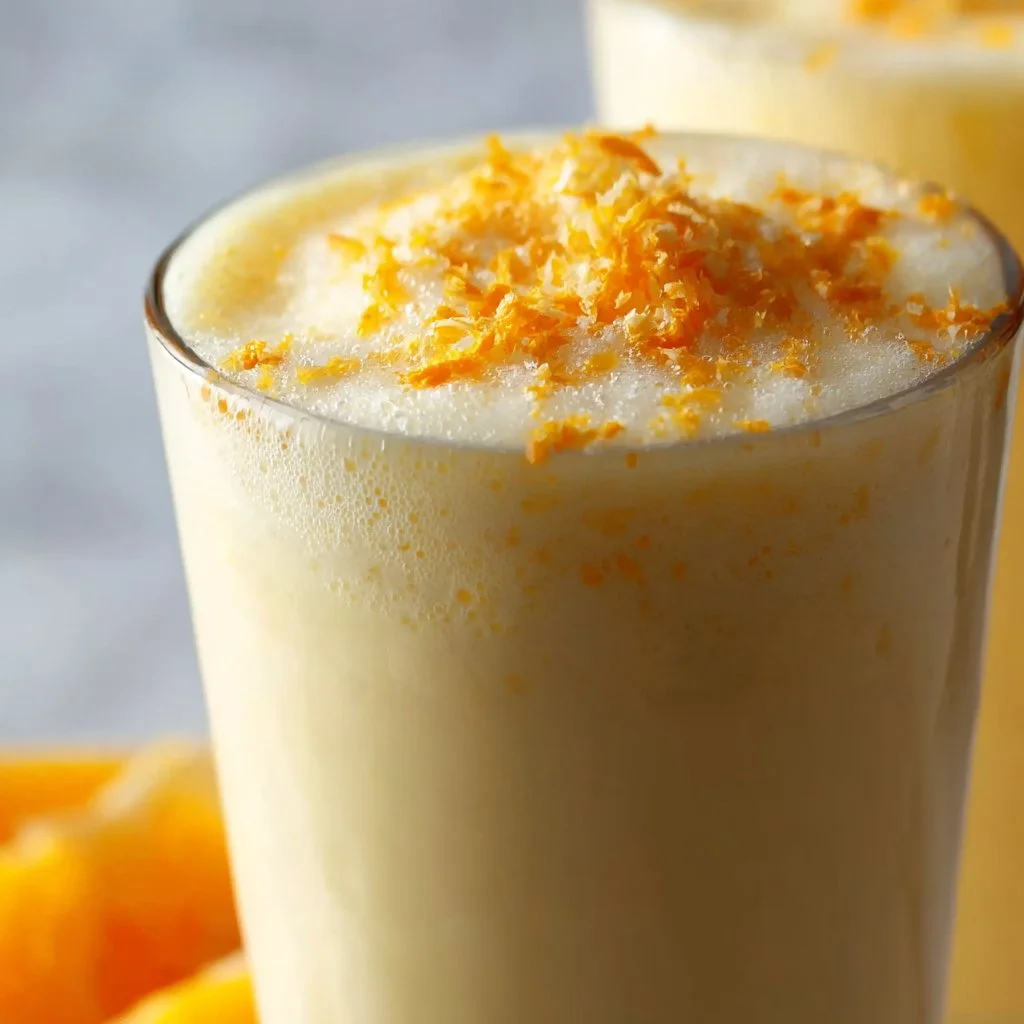
Sugar Free Orange Julius
Sugar-Free Orange Julius: A Refreshing Twist on a Classic
Welcome to my kitchen, dear food lover! Today, I’m beyond excited to share a recipe that’ll tickle your taste buds and bring a sunny burst of citrus to your day—my Sugar-Free Orange Julius. Before we dive into the recipe, let’s talk about why this drink deserves a special spot in your kitchen.
Picture this: it’s a warm summer day, and you’re lounging by the pool, feeling the sun on your skin. You hear the blender whirring, and a moment later, that classic Orange Julius makes an entrance—thick, frothy, and perfectly sweet. Sounds dreamy, doesn’t it? But let’s be honest—sometimes we want a refreshment that won’t wreak havoc on our health goals. This is where my sugar-free take on this iconic drink comes into play!
Making a sugar-free version allows me to savor that nostalgic sweetness without the guilty conscience! Not only does it taste incredible, but it’s also easy to whip up so you can enjoy it anytime. Everyone can gather around and indulge in this delicious treat knowing it’s made with wholesome ingredients. So, roll up those sleeves and let’s get blending!
A Sweet Memory: Discovering Orange Julius
Ah, let me take you on a little journey back to my childhood! Growing up, my family had this incredible tradition of weekend outings to the local mall. You know the kind—shopping, skating, and just soaking in the lively atmosphere. At the end of the day, my reward was always an Orange Julius from that bright yellow kiosk in the food court.
I vividly remember the first time I took a sip. It was love at first taste! That creamy, citrusy flavor was unlike anything I’d ever had. Then my mom would remind me to savor it slowly—as if that was even possible! As I grew older and learned more about nutrition, I realized that the sugary versions of my favorite treats didn’t quite align with my health goals. And so began my mission to recreate that magical Orange Julius with a twist—using natural sweeteners and wholesome ingredients.
And now, dear friend, I’m thrilled to share this revamped, guilt-free version that keeps all the nostalgia but leaves out the sugar!
Ingredients
Let’s gather our ingredients! Here’s what you’ll need for this vibrant beverage:
-
Fresh Oranges (about 4-5)
Nothing beats fresh! Oranges provide the bright citrus flavor we’re after. If you’re in a pinch, you can use store-bought orange juice, just ensure it’s 100% pure juice without added sugars! -
Vanilla Extract (1 tablespoon)
This adds a warm, rich note to the drink, perfectly harmonizing with the citrus. For a twist, try almond extract—it gives a lovely nutty aroma. -
Unsweetened Almond Milk (1.5 cups)
This keeps the drink creamy without adding sugar. You can swap it for coconut milk or oat milk for a different flavor profile! -
Ice (2 cups)
This is the secret to that signature frothy texture. Feel free to adjust the ice for a thicker or thinner drink, depending on your preference. -
Stevia or Monk Fruit Sweetener (to taste)
Opt for whatever you prefer! Both natural sweeteners give the perfect touch of sweetness without the carbs. Start with a little—taste and adjust as you go! -
Optional: Greek Yogurt (½ cup)
For an extra creamy texture and protein boost, this is a great addition! You can also use dairy-free yogurt for a vegan alternative.
Step-by-Step Instructions
Alright, let’s make some magic happen! Follow these easy steps for your Sugar-Free Orange Julius:
-
Prep the Oranges: Start by peeling the fresh oranges. Remove as much of the white pith as you can—it can be bitter. Then, break them into sections. If you have time, you could even juice them, but I find the sections work perfectly in the blender.
Chef Tip: If you want to make this ahead of time, zest a little bit of the orange peel to add to your drink later! It gives a fresh, aromatic kick.
-
Blend It Up: In your trusty blender, toss in the orange sections, vanilla extract, almond milk, and ice. If you’re adding Greek yogurt, go ahead and toss that in too!
Commentary: I absolutely love my high-speed blender for this; it gives a lovely, smooth consistency. If using a regular blender, ensure your ice is crushed a bit for easier blending.
-
Sweeten to Taste: Now, gradually add your choice of sweetener—start with a little and blend. Taste the mix and add more if needed.
-
Blend Again: Blend everything together until smooth and frothy! The goal here is a creamy texture with that signature frothiness.
-
Serve It Up: Once blended, pour this zesty delight into tall glasses. You might want to give it a little taste test first—yummm!
Chef Hack: Serve with colorful straws or garnish with a slice of orange on the rim for a festive touch.
Serving Suggestions
Here’s how I love to serve my Sugar-Free Orange Julius: pour it into tall, chilled glasses and add a playful paper straw or even sprinkle a bit of cinnamon on top for a warming twist! Feeling fancy? Top it off with a dollop of whipped coconut cream or yogurt for that deliciously creamy indulgence.
This drink is perfect for brunch gatherings or as a refreshing afternoon pick-me-up. Pair it with a light salad or some homemade scones, and you’ve got yourself a delightful meal!
Recipe Variations
While the classic is always a win, why not get creative? Here are some delightful twists to try with your Sugar-Free Orange Julius:
- Berry Burst: Toss in a cup of frozen mixed berries before blending for a fruity explosion.
- Mango Madness: Swap half of the oranges with fresh mango for a tropical delight.
- Minty Fresh: Add a few fresh mint leaves while blending for an invigorating twist.
- Protein Power: Add a scoop of vanilla protein powder for a filling, nutritious boost.
Chef’s Notes
Over the years, I’ve played around with this recipe, learning what works best and what doesn’t. I’ve seen it evolve into a favorite amongst friends and family. One funny moment stands out; once, I accidentally added too much orange zest and ended up with a drink that tasted like a citrus explosion! Lesson learned—balance is key!
Cooking is all about experimentation, and I love how this particular recipe has allowed me to modify it while maintaining that nostalgic flavor. I can’t wait for you to try it and hopefully create your own memory around this delicious drink!
FAQs and Troubleshooting
Q: My Orange Julius turned out too runny. What did I do wrong?
A: If your drink is too thin, it might be that you used too much almond milk or not enough ice. Just add a bit more ice and blend until you achieve the desired consistency.
Q: Can I make this ahead of time?
A: While it’s best fresh for that frothy texture, you can prepare the ingredients in advance. Just blend them right before serving for the best results!
Q: Is this recipe vegan?
A: Yes! As long as you use dairy-free yogurt and almond milk, it’s entirely plant-based and suitable for vegan diets.
Q: How long does it last in the fridge?
A: It’s best consumed fresh, but you can store it in the refrigerator for up to 24 hours. Just give it a good stir or shake before enjoying!
Nutritional Info (Approximate per Serving)
- Calories: 120
- Protein: 5g
- Fat: 2g
- Carbs: 16g
- Sugar: 1g (natural sugars from oranges)
- Fiber: 2g
Alright, my lovely foodies! Now you have everything you need to whip up your very own Sugar-Free Orange Julius. I hope this drink brings back memories of sunny days while also aligning with your health goals. Happy cooking, and don’t forget to share the love—this recipe is meant to be enjoyed and shared! 🌞
Print
Sugar-Free Orange Julius
- Total Time: 10 minutes
- Yield: 4 servings
- Diet: Vegan
Description
A refreshing, sugar-free twist on the classic Orange Julius, perfect for hot summer days.
Ingredients
- Fresh Oranges (about 4-5)
- Vanilla Extract (1 tablespoon)
- Unsweetened Almond Milk (1.5 cups)
- Ice (2 cups)
- Stevia or Monk Fruit Sweetener (to taste)
- Optional: Greek Yogurt (½ cup)
Instructions
- Prep the Oranges: Start by peeling the fresh oranges. Remove as much of the white pith as you can, break them into sections.
- Blend It Up: In your trusty blender, toss in the orange sections, vanilla extract, almond milk, and ice. If you’re adding Greek yogurt, go ahead and toss that in too!
- Sweeten to Taste: Gradually add your choice of sweetener—start with a little and blend.
- Blend Again: Blend everything together until smooth and frothy.
- Serve It Up: Pour this zesty delight into tall glasses and enjoy!
Notes
Add a splash of cinnamon on top or a dollop of whipped coconut cream for indulgence.
- Prep Time: 10 minutes
- Cook Time: 0 minutes
- Category: Beverage
- Method: Blending
- Cuisine: American
Nutrition
- Serving Size: 1 serving
- Calories: 120
- Sugar: 1g
- Sodium: 50mg
- Fat: 2g
- Saturated Fat: 0g
- Unsaturated Fat: 2g
- Trans Fat: 0g
- Carbohydrates: 16g
- Fiber: 2g
- Protein: 5g
- Cholesterol: 0mg
Keywords: sugar-free, orange, drink, healthy, refreshing, summer
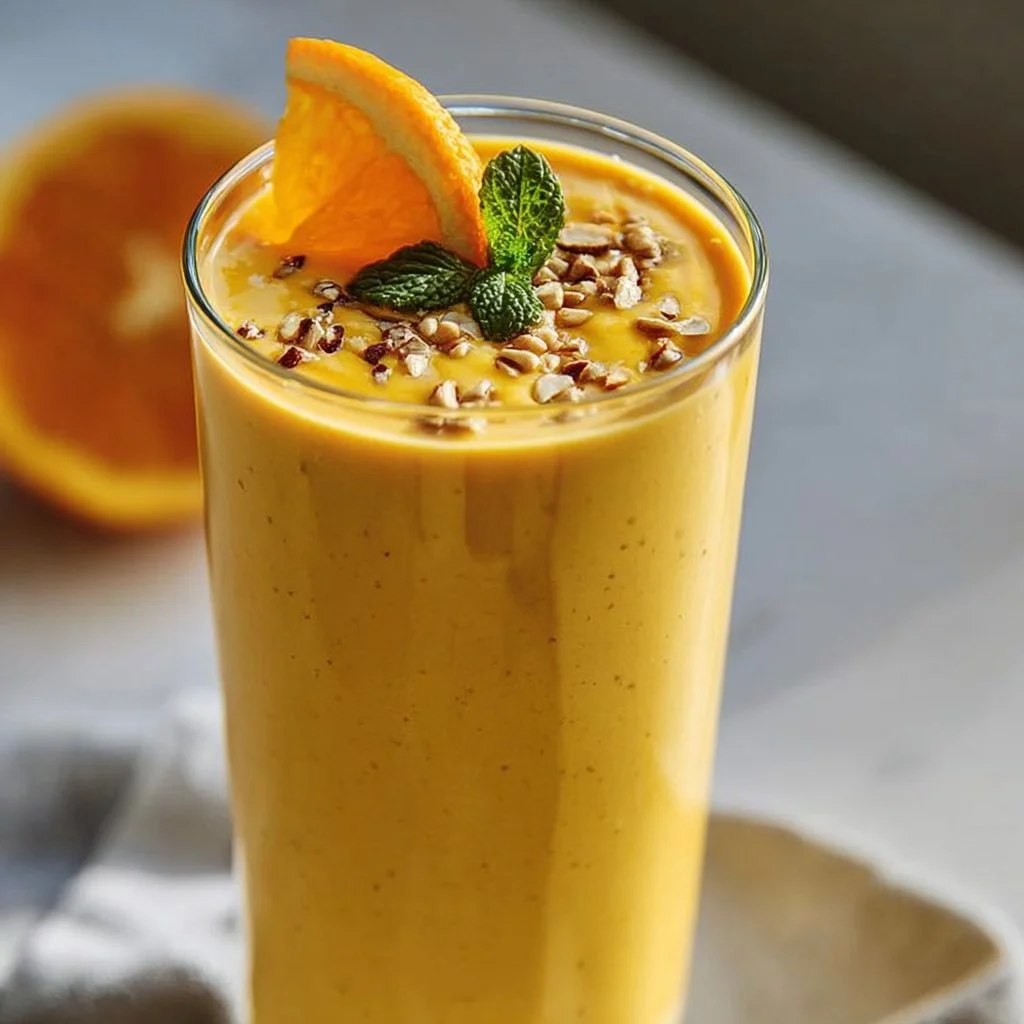
Mango Orange Smoothie
The Bright and Sunny Mango Orange Smoothie Recipe
Welcome to my kitchen! I’m so glad you’re here to join me in a little culinary adventure. Today, we’re diving into a cheerful and refreshing treat that is sure to brighten your day— the Mango Orange Smoothie. Imagine waking up every morning with the sun streaming through the window and the sweet aroma of ripe mangoes and juicy oranges filling the air. This smoothie encapsulates all that goodness and makes for a perfect breakfast, a mid-afternoon pick-me-up, or even a post-workout refreshment.
Smoothies hold a special place in my heart. They are the quick, vibrant canvas where you can throw just about anything, and it somehow ends up turning into delicious magic. This particular recipe stems from my childhood, when sitting on the back porch sipping fruit smoothies with my family was a summer staple. The memories of laughter, blushing sunburns, and sticky fingers from fresh fruit are a big inspiration for me in the kitchen.
Whether you’re lounging by the pool or simply need a burst of sunshine in your day, this Mango Orange Smoothie is a delightful treat that’ll have you coming back for seconds. Let’s get together and whip up this refreshing drink that’s not just a feast for the taste buds but also a feast for the spirit!
A Taste of Nostalgia
One summer afternoon, I remember lounging in our family backyard, surrounded by a riot of blooming flowers and the scents of fresh fruit. My mom had decided to whip up a smoothie, blending together mangoes and oranges, her two favorite fruits. The bright yellow and orange colors swirled together in the blender, and I was captivated. She poured the smoothie into tall glasses, and we all gathered around the picnic table, eager for our taste of summer.
As we sipped on our homemade concoction, the tangy, sweet flavors danced on our tongues, and the world felt a little brighter. With each sip, we shared stories, laughter, and dreams for future adventures—it was a moment of pure bliss. It’s amazing how food can transport you back in time, isn’t it? This recipe for Mango Orange Smoothie reminds me of those sun-drenched afternoons, and I hope it brings a bit of that lightness and joy to your kitchen too!
Ingredients
Let’s gather our ingredients, shall we? Here’s what you’ll need for your Mango Orange Smoothie, along with a few tips and substitutions:
-
1 ripe mango: Choose a mango that yields slightly to pressure when gently squeezed. If mangoes aren’t in season, try frozen mango chunks; they work just as well!
-
2 oranges: Freshly squeezed orange juice is irreplaceable for this recipe. If you’re in a pinch, store-bought orange juice can suffice, though it might lack the freshness.
-
1 banana: A frozen banana adds creaminess and natural sweetness to your smoothie. If you’re not a banana fan, you can use a small ripe avocado for a creamy texture without the banana flavor.
-
1 cup Greek yogurt: This adds a rich, creamy texture and a protein boost. If you’re dairy-free, opt for coconut or almond yogurt.
-
½ cup coconut water: This is a great hydration booster with a hint of sweetness. If you don’t have coconut water, use plain water or almond milk instead.
-
1 tablespoon honey or maple syrup (optional): A little sweetness can help enhance the flavors. Feel free to adjust this based on your sweetness preference!
-
A handful of spinach or kale (optional): For an added nutrient kick, toss in some greens. You won’t even taste them, but your body will thank you!
Step-by-Step Instructions
Now, let’s get blending! Here’s how to create your delicious Mango Orange Smoothie:
-
Prepare Your Fruits: Start by peeling and chopping your ripe mango, and set it aside. Cut your oranges in half and juice them, ensuring you remove any seeds. The juice adds such freshness, and it’s worth the extra minute!
-
Add Ingredients to the Blender: In your blender, combine the mango chunks, freshly squeezed orange juice, banana, Greek yogurt, and coconut water. It’s like a tropical paradise just waiting to happen. Pro tip: Weigh down the heavier ingredients at the bottom for better blending!
-
Blend Until Smooth: Secure the lid on your blender and blend on high for about 30-60 seconds, or until you achieve a smooth and creamy consistency. If it’s too thick, add more coconut water a splash at a time until you reach your desired thickness.
-
Taste and Adjust: Here’s where the magic happens! Taste your smoothie. If you want it sweeter, add honey or maple syrup, and blend again. If you included greens, you might find that the sweetness balances out beautifully!
-
Serve Immediately: Pour your vibrant creation into chilled glasses. The color alone is enough to make you smile. If you’d like, add some ice cubes during blending for an extra cold treat.
Serving Suggestions
For that extra wow factor, consider garnishing your smoothie with a colorful fruit slice on the rim of your glass. You could even sprinkle on a few chia seeds or granola for a lovely crunch. Serve it with a vibrant straw for a fun touch, and don’t forget to have a small plate of fresh fruit on the table for your guests to nibble on as they sip!
Recipe Variations
Feeling adventurous? Here are a few fun twists you can try to customize your Mango Orange Smoothie:
-
Tropical Mango-Pineapple: Add in a cup of fresh or frozen pineapple chunks for an even more tropical vibe.
-
Creamy Coconut: Substitute Greek yogurt with coconut cream, and top with toasted coconut flakes for a richer flavor.
-
Protein-Packed: Add a scoop of your favorite protein powder for an extra boost post-workout.
-
Berry Fusion: Toss in a handful of fresh or frozen berries to create a beautiful color and flavor contrast.
-
Spicy Kick: If you’re feeling daring, add a pinch of cayenne or ginger for a spicy twist that wakes up your palate!
Chef’s Notes
As with any recipe, this Mango Orange Smoothie has evolved over time in my kitchen. Initially, I kept it simple with just mango and orange, but as I started experimenting, I discovered the beauty of adding banana and yogurt for creaminess. Funny enough, one day when I couldn’t find a banana, I replaced it with an avocado, and it turned out to be a delightful surprise!
Every time I make this smoothie, I’m reminded that cooking is all about experimenting, and there are no hard and fast rules—just delicious creations waiting to be uncovered. Get a little messy, have fun, and don’t be afraid to make this recipe your own!
FAQs and Troubleshooting
1. My smoothie is too thick! What do I do?
No worries! Just add more coconut water or water, a little at a time, and blend until you achieve the right consistency.
2. Can I prepare this smoothie ahead of time?
While smoothies are best enjoyed fresh, you can prepare ingredients the night before and blend them in the morning. If you need to store it, keep it in an airtight container in the fridge, but consume within a few hours.
3. My smoothie tastes too sour! How can I fix it?
If you find your smoothie to be too tart, try adding a bit more honey or maple syrup to sweeten it. A small pinch of salt can balance out the flavors too!
4. What else can I add to my smoothie for extra nutrition?
Consider adding flax seeds, chia seeds, or protein powder for an extra nutrition boost. You can also try nut butters for a creamy texture and added flavor!
Nutritional Info
The Mango Orange Smoothie provides a lovely balance of carbohydrates, protein, and healthy fats. Each serving is packed with vitamins, minerals, antioxidants, and a decent amount of fiber, making it not only tasty but also nourishing!
- Calories: Approximately 250-300 (depending on the ingredients)
- Protein: 9g
- Carbohydrates: 60g
- Fats: 5g (healthy fats if you add avocado or nut butter)
- Fiber: 5g
Well, there you have it! A sunny, beautiful recipe for a Mango Orange Smoothie bursting with flavors and memories. I can’t wait for you to try this out in your kitchen—so grab your blender, gather those ingredients, and let’s make some delicious memories together! Happy cooking!
Print
Mango Orange Smoothie
- Total Time: 10 minutes
- Yield: 2 servings 1x
- Diet: Vegetarian
Description
A bright and refreshing Mango Orange Smoothie that combines sweet mangoes and tangy oranges for the perfect breakfast or snack.
Ingredients
- 1 ripe mango
- 2 oranges
- 1 banana
- 1 cup Greek yogurt
- ½ cup coconut water
- 1 tablespoon honey or maple syrup (optional)
- A handful of spinach or kale (optional)
Instructions
- Prepare your fruits: Start by peeling and chopping your ripe mango, and set it aside. Cut your oranges in half and juice them, ensuring you remove any seeds.
- Add ingredients to the blender: In your blender, combine the mango chunks, freshly squeezed orange juice, banana, Greek yogurt, and coconut water.
- Blend until smooth: Secure the lid on your blender and blend on high for about 30-60 seconds, or until you achieve a smooth and creamy consistency.
- Taste and adjust: If you want it sweeter, add honey or maple syrup, and blend again.
- Serve immediately: Pour your vibrant creation into chilled glasses.
Notes
Serve garnished with a colorful fruit slice or sprinkle of chia seeds for added texture.
- Prep Time: 10 minutes
- Cook Time: 0 minutes
- Category: Beverage
- Method: Blending
- Cuisine: American
Nutrition
- Serving Size: 1 serving
- Calories: 275
- Sugar: 38g
- Sodium: 90mg
- Fat: 5g
- Saturated Fat: 1g
- Unsaturated Fat: 4g
- Trans Fat: 0g
- Carbohydrates: 60g
- Fiber: 5g
- Protein: 10g
- Cholesterol: 5mg
Keywords: smoothie, mango, orange, healthy, breakfast, refreshing
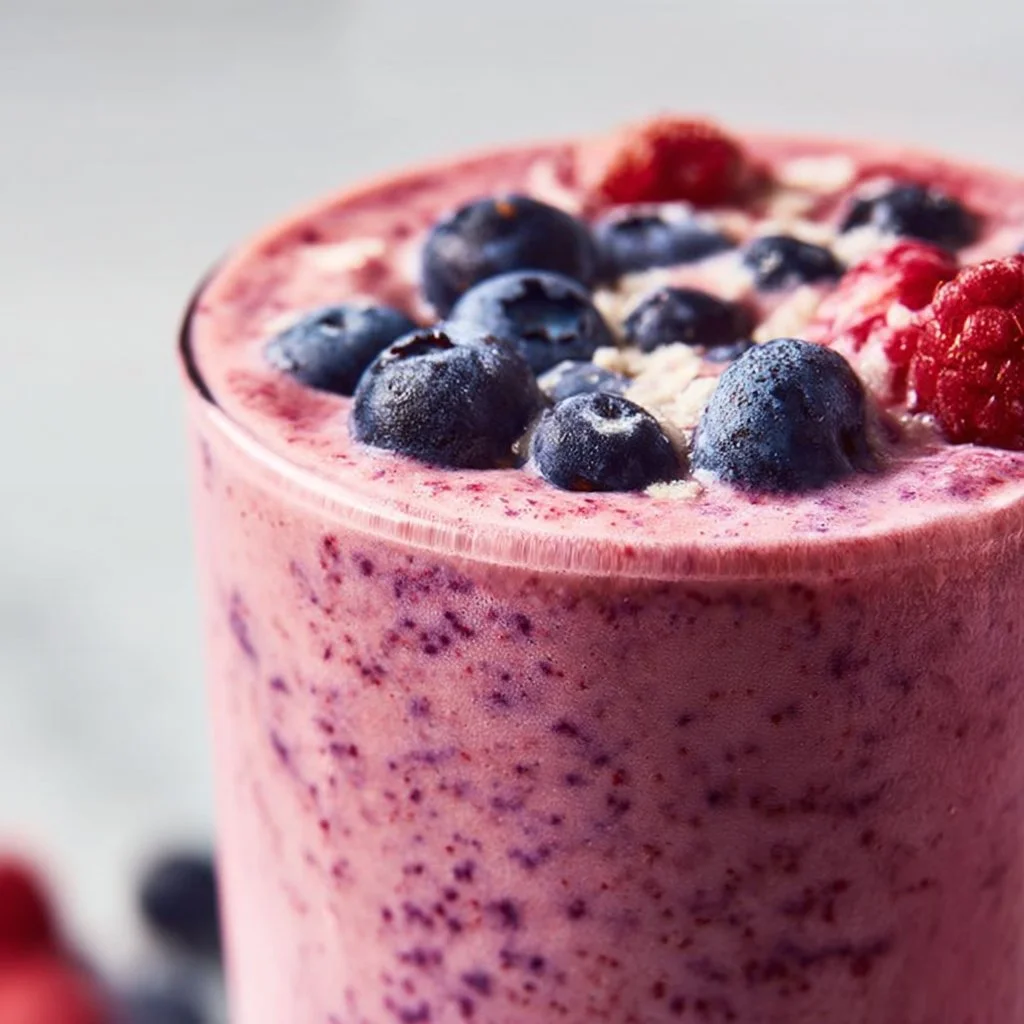
Blueberry Raspberry Smoothie
The Ultimate Blueberry Raspberry Smoothie Recipe: A Healthy Treat for Any Time of Day
Welcome to my kitchen! I’m so excited to share a recipe that’s as vibrant and refreshing as a sun-kissed summer morning: the Blueberry Raspberry Smoothie. This delicious blend not only tantalizes your taste buds but also packs a powerful punch of nutrients. Whether you’re looking for a quick breakfast that fuels your day or a refreshing snack after a workout, this smoothie has got you covered!
Smoothies have always held a special place in my heart. They evoke memories of hot summer afternoons spent at my grandmother’s house, where we’d pick fresh berries from her garden. The vibrant colors of the ripe blueberries and plump raspberries were just begging to be turned into something delicious. My grandmother, with her infectious laugh and warm demeanor, would blend those juicy gems into smoothies, and we’d sip them on her porch, watching the world go by.
Every time I make this smoothie, I’m transported back to those sunny afternoons, basking in the joy of delicious flavors and cherished moments. And that’s the beauty of cooking! It has the ability to evoke memories and create new ones, all while nurturing our bodies and souls. So grab your blender and get ready, because we’re about to dive into a whirlpool of fruity goodness!
Ingredients
Here’s what you’ll need for this delightful Blueberry Raspberry Smoothie:
-
1 cup fresh blueberries
Blueberries are packed with antioxidants, vitamins, and fiber. If fresh ones aren’t available, feel free to use frozen, which can enhance the smoothie’s creaminess! -
1 cup fresh raspberries
Raspberries add a tartness that balances the sweetness of blueberries. They’re also high in vitamin C. Again, frozen works just as well here and can give your smoothie a frosty texture. -
1 banana
Bananas add natural sweetness and creaminess to your smoothie. If you’re looking for a lower-sugar option, try swapping for half an avocado that will give it a wonderfully creamy texture without the sweetness. -
1 cup spinach (optional)
Adding spinach is a great way to sneak in some greens! It’s rich in iron and vitamins. If you’re not a fan, you can leave it out without missing a beat. -
1 cup almond milk (or any milk of choice)
Almond milk makes the smoothie dairy-free and nutty. You can substitute with cow’s milk, soy milk, or coconut water for a different flavor profile. -
1 tablespoon honey or maple syrup (optional)
For a bit of extra sweetness, add honey or maple syrup. If you like it less sweet, you can omit this or use a sugar-free sweetener. -
Ice cubes (optional)
If you prefer your smoothie cold and refreshing, add a handful of ice cubes. This is especially great for those hot summer days!
Step-by-Step Instructions
-
Prepare the Ingredients
Start by washing your fresh blueberries and raspberries. If you’re using frozen fruit, no need to thaw them—you’ll get a delightful icy texture! Next, peel the banana and chop it into smaller pieces to make blending easier. Toss everything into your blender; this is when the magic begins! -
Blend the Fruits
Add your fresh fruits (or frozen if you’re going that route) to the blender. If you’re using spinach for a nutrition boost, add that now too! Pour in the almond milk (or your milk of choice) over the fruits. This liquid will help everything blend smoothly. For a thicker smoothie, use less milk; for a thinner one, add more. -
Add Sweetener & Blend
If you like a little extra sweetness, drizzle in the honey or maple syrup. Then, pop the lid on your blender, and let it spin on high until everything is blended into a creamy consistency. Don’t worry if it looks a bit funky at first—just give it a good shake or stir and blend again. -
Check Texture and Taste
Once blended, take a quick taste. Is it sweet enough for your liking? If not, you can add more honey or maple syrup as desired. If it’s too thick, add a splash more milk, and blend again for a few seconds. -
Serving Up
Now come the fun part: serving! Pour your smoothie into a tall glass or bowl. You can top it with extra berries, sliced banana, or even a sprinkle of granola for some crunch. Or just dive in with a straw and enjoy the ride.
Serving Suggestions
When it comes to serving, presentation counts! Try pouring your Blueberry Raspberry Smoothie into a chilled glass. For a picturesque touch, garnish it with an extra raspberry or blueberry on top or even a sprig of fresh mint. If you’re feeling extra indulgent, a dollop of yogurt can add a lovely creamy element. Serve it up to guests for brunch or savor it solo on a quiet morning.
Recipe Variations
- Creamy Avocado Delight: Swap the banana for half an avocado for a creamier texture and a boost of healthy fats.
- Protein Boost: Add a scoop of your favorite protein powder or Greek yogurt for an extra dose of protein.
- Tropical Twist: Throw in some frozen mango or pineapple for a tropical vibe!
- Nutty Flavor: Add a tablespoon of almond or peanut butter for extra creaminess and a nutty flavor kick.
- Green Smoothie: Use kale instead of spinach for a different nutrient profile and a heartier texture.
Chef’s Notes
Ah, the Blueberry Raspberry Smoothie—a true kitchen staple! Over time, I’ve played with this recipe so much that it has undergone quite the evolution. I used to stick solely to the basics, but I began experimenting with various ingredients, each addition telling its own little story. When I toss that spinach into the blender, I chuckle at how my younger self would have rejected the very idea of greens in a smoothie! Cooking, much like life, is all about growth and creative exploration.
There’s something incredibly gratifying about serving this to friends and family who claim they “don’t do smoothies.” Watching their expression shift from skepticism to delight as they take that first sip is priceless. And it reminds me that sometimes, the best surprises come from trying something new.
FAQs and Troubleshooting
-
What can I do if my smoothie is too thick?
If your smoothie is thicker than you’d like, simply add more milk, a little at a time, blending after each addition until you reach your desired consistency. -
Can I use frozen fruit?
Absolutely! Frozen blueberries and raspberries work beautifully and will give your smoothie a thicker, frostier texture. Just remember—no need to thaw! -
Is this smoothie kid-friendly?
Yes! Kids usually love the bright color and sweet flavor of this smoothie. It’s an excellent way to sneak in some fruits (and veggies) without them even noticing! -
How can I make my smoothie more filling?
You can add oats, Greek yogurt, or protein powder. This way, you’ll have a filling smoothie that can stand in for a meal!
And there you have it—a delightful Blueberry Raspberry Smoothie that’s easy to make and full of fruity goodness. I hope this recipe brings you as much joy as it does me and that it sparks memories and new adventures in your kitchen. So grab your blender, and let’s get blending! Cheers to delicious moments and happy cooking!
Print
Blueberry Raspberry Smoothie
- Total Time: 10 minutes
- Yield: 2 servings 1x
- Diet: Vegetarian
Description
A vibrant and refreshing smoothie packed with antioxidants and flavor, perfect for breakfast or a post-workout snack.
Ingredients
- 1 cup fresh blueberries
- 1 cup fresh raspberries
- 1 banana
- 1 cup spinach (optional)
- 1 cup almond milk (or any milk of choice)
- 1 tablespoon honey or maple syrup (optional)
- Ice cubes (optional)
Instructions
- Prepare the Ingredients: Wash the blueberries and raspberries, peel the banana and chop it, then toss everything into your blender.
- Blend the Fruits: Add fresh or frozen fruits to the blender along with spinach and almond milk. Adjust milk for desired thickness.
- Add Sweetener & Blend: Drizzle in honey or maple syrup, then blend until creamy.
- Check Texture and Taste: Taste the blend and adjust sweetness or thickness as needed.
- Serving Up: Pour into glasses and garnish with extra berries or granola if desired.
Notes
Experiment with different variations like adding avocado or protein powder to enhance the smoothie.
- Prep Time: 10 minutes
- Cook Time: 0 minutes
- Category: Beverage
- Method: Blending
- Cuisine: American
Nutrition
- Serving Size: 1 serving
- Calories: 250
- Sugar: 20g
- Sodium: 150mg
- Fat: 6g
- Saturated Fat: 0.5g
- Unsaturated Fat: 5.5g
- Trans Fat: 0g
- Carbohydrates: 40g
- Fiber: 5g
- Protein: 5g
- Cholesterol: 0mg
Keywords: smoothie, blueberry, raspberry, healthy drink, breakfast
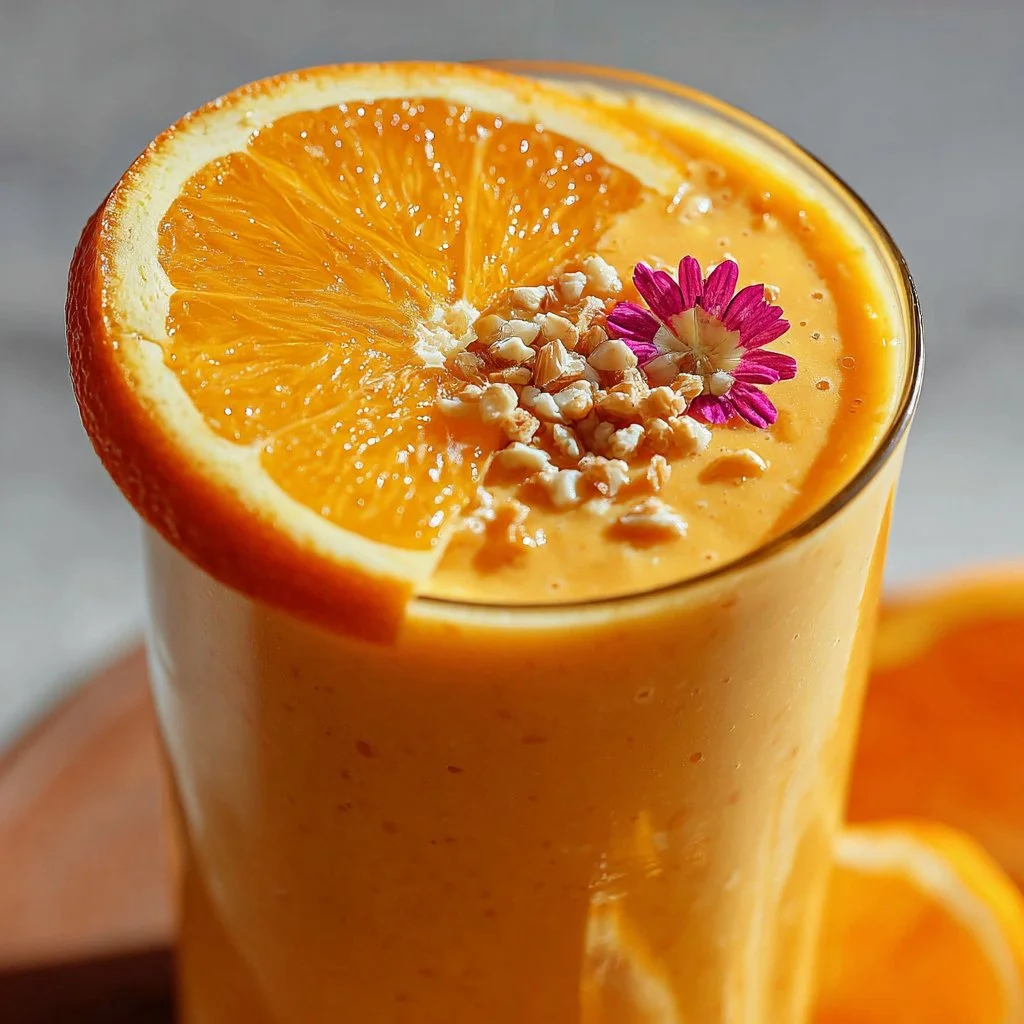
Zesty Orange Smoothie Recipe
Zesty Orange Smoothie Recipe: Refreshing, Energizing, and Oh-so-Yummy!
Welcome to my kitchen, dear friends! Today, we’re diving into a delightful, healthy treat that’s perfect for any time of the day: the Zesty Orange Smoothie! It’s a vibrant concoction that brings a burst of sunshine into your glass and a pep in your step. Whether you’re looking for a refreshing breakfast, a nutritious snack, or a post-workout pick-me-up, this smoothie has got your back. Let’s blend some happiness together!
Picture this: It’s a bright Saturday morning, and the sun is streaming through your kitchen window. You can smell the sweetness of fresh oranges from the local market you visited just yesterday. You’re feeling adventurous and decide to whip up a smoothie that captures all that citrusy goodness. As you toss in a few ingredients, the blender whirs to life, and soon enough, you’re pouring a beautiful, creamy drink into your favorite glass.
Making a zesty orange smoothie isn’t just about following a recipe; it’s about creating a little slice of joy that fills your day with energy and flavor. It’s also a wonderful way to sneak in some extra fruits and veggies without even noticing! You’ll find that this recipe is not only easy to make but it’s also quite versatile, allowing you to customize it according to your taste and dietary needs. Ready to get started? Let’s go on this flavorful journey together!
A Personal Story: The Love for Citrus
I can’t talk about my love for smoothies without sharing a sweet memory that’s close to my heart. I remember the first time I took a trip to Florida with my family when I was a kid. One sunny afternoon, we visited an orange grove, and there, amidst the blooming citrus trees, I picked my very first orange. The excitement was palpable; it was just so vibrant and bursting with color!
Once we returned home, I had the brilliant idea to make my first-ever smoothie using those fresh oranges. My little hands got busy peeling and blending, and though it was a chaotic mess of juice splattering everywhere, it turned out to be the best smoothie I’d ever tasted! The sweetness of the oranges, combined with the creaminess of yogurt I had in the fridge, created pure bliss in a glass.
That moment ignited my passion for cooking and especially for experimenting with fruit smoothies. Who would’ve thought that a simple day at the grove would kickstart a lifelong love affair with all things delicious? So, when I say that this Zesty Orange Smoothie is more than just a recipe, I mean it! It’s all about memories, love, and a splash of joy – in every sip!
Ingredients
Let’s break down what you’ll need to create this refreshing zesty orange smoothie. Here’s your shopping list, along with some helpful insights for each ingredient:
-
Oranges (2 large, peeled): The stars of the show! Choose juicy, sweet oranges. Valencia or navel oranges work wonderfully. If you don’t have fresh oranges, you can use 100% orange juice, but fresh is best!
-
Banana (1, frozen): This adds natural sweetness and creaminess to the smoothie. Freeze your bananas beforehand for a thicker texture. If you’re not a banana fan, you can substitute with half an avocado for creaminess or a scoop of Greek yogurt.
-
Greek Yogurt (½ cup): Pushes the protein content up and gives the smoothie a velvety finish. You can swap this out for dairy-free yogurt if you’re keeping it plant-based.
-
Spinach or Kale (1 cup, optional): Sneak in a serving of greens without sacrificing flavor! Spinach is milder, while kale has a bit more bite. If you’re not a fan of greens, feel free to leave this out.
-
Honey or Maple Syrup (1-2 tablespoons): Only if you need a bit more sweetness. Adjust based on your taste. If you’re avoiding sugar, you can skip this altogether!
-
Coconut Water or Almond Milk (1 cup): This adds hydration and a subtle flavor. Coconut water is naturally hydrating, while almond milk gives a nutty undertone. If you need it to be thicker, use less liquid.
-
Ice Cubes (optional, about ½ cup): For that icy cold refreshment. Toss in a handful if you’re enjoying the smoothie on a warm day and want a frosty treat.
Step-by-Step Instructions
Let’s make our Zesty Orange Smoothie come to life! Grab your blender, and let’s get started.
-
Prepare the Oranges: Start by peeling your oranges and separating them into segments. You can remove any seeds as you do this. The citrus scent is intoxicating! Make sure to give them a little squeeze over the blender to catch any juice – trust me, every drop of zesty goodness counts.
-
Add the Frozen Banana: Toss in your frozen banana. If you forgot to freeze one, you can use a fresh banana, but your smoothie will be less thick and cool. Don’t worry! It’ll still be delicious.
-
Mix in the Yogurt: Scoop in that creamy Greek yogurt. It’s going to make your smoothie rich and satisfying. It’s like giving your smoothie a hug!
-
Toss in the Greens (if using): If you’re adding spinach or kale, now’s the time! Start with spinach for a milder taste. Blend these greens in well; the goal is to make them virtually disappear!
-
Sweeten It Up: Drizzle in your honey or maple syrup. If you’re a sweet-tooth like me, taste it first. Adjust the sweetness as you like; sometimes, the bananas are sweet enough!
-
Add Your Liquid: Pour in the coconut water or almond milk. This helps everything blend smoothly and gets the right consistency. If you’re feeling adventurous, try adding a splash of vanilla extract at this stage for another layer of flavor!
-
Throw in Some Ice Cubes: If it’s a hot day or you just want a frosty treat, add those ice cubes. Now, secure the lid on your blender and blend on high until you reach a super smooth consistency. You might need to stop it once or twice to scrape down the sides.
-
Taste Test: This is the best part! Before serving, give it a quick taste. Adjust the flavors if needed. Want a bit more zing? A squeeze of lime can amp things up beautifully.
-
Pour and Enjoy: Once you’re satisfied, pour the vibrant smoothie into your favorite glass. You can even top it with a slice of orange as a fancy touch!
Serving Suggestions
To serve your Zesty Orange Smoothie, I love to garnish it with a small slice of orange or a sprinkle of chia seeds for added texture. If you’re feeling fancy, throw in a colorful straw and maybe even a mint leaf as a final touch. This simple garnishing elevates your smoothie from delicious to utterly Instagram-worthy!
Recipe Variations
Now, let’s talk about how you can jazz up your Zesty Orange Smoothie to suit your unique taste preferences:
-
Tropical Twist: Add a small handful of pineapple chunks for a tropical flair! The sweetness from the pineapple complements the orange beautifully.
-
Nutty Delight: Throw in a tablespoon of almond butter or peanut butter for added protein and a nutty flavor. This turns your smoothie into a filling meal!
-
Berry Blast: Add a handful of mixed berries (like strawberries or blueberries) for a berry-infused orange experience. This adds antioxidants and a gorgeous color contrast.
-
Spiced Up: Add a dash of ginger or turmeric for an extra health kick. Both bring unique flavors and tons of health benefits!
-
Choco-Orange Bliss: For a decadent treat, mix in a tablespoon of cocoa powder. The rich chocolate flavors meld wonderfully with the citrus, creating a sweet dessert-style smoothie!
Chef’s Notes
Here’s a little chef insight from my journey of perfecting the Zesty Orange Smoothie: When I first tried making it, I overcomplicated it with too many ingredients, and the flavors got lost. Remember, simplicity is key! You won’t need more than a handful of fresh ingredients to create something magical.
Also, my countertop blender has seen better days (one too many smoothie disasters, I’ll admit!), but it does the job for this recipe. If you have a high-speed blender, feel free to use it for an ultra-smooth finish!
FAQs and Troubleshooting
1. Why is my smoothie too thick?
If your smoothie is thicker than you’d like, simply add a bit more liquid (coconut water or almond milk) and blend again until you reach your desired consistency.
2. Can I make this ahead of time?
Absolutely! You can store your smoothie in an airtight container for up to 24 hours in the fridge. Just give it a good shake or stir before drinking.
3. How do I store leftover smoothie?
If you have leftovers after your smoothie feast, consider pouring it into an ice cube tray. These smoothie cubes can be a quick addition to your next smoothie, or blend them with yogurt for a popsicle treat!
4. My smoothie tastes too sour, how can I fix it?
If your smoothie ends up too sour for your liking, add a bit more banana or honey to balance the tartness. A pinch of lemon can also enhance the overall flavor without making it too sour.
Nutritional Info (Optional)
While I encourage you not to obsess over numbers, here’s a rough nutritional breakdown for one serving of this Zesty Orange Smoothie:
- Calories: ~250-300 (depending on ingredients)
- Protein: ~10g
- Carbohydrates: ~50g
- Healthy Fats: ~3g
- Fiber: ~5g
Ultimately, remember that this smoothie is not just about nutrition but about pleasure! Celebrate the flavors and enjoy every sip.
And there you have it—my Zesty Orange Smoothie recipe! It’s easy, refreshing, and full of bright flavors. I hope you take this recipe to your kitchen and create a little sunshine for yourself. Happy blending!
Print
Zesty Orange Smoothie
- Total Time: 10 minutes
- Yield: 1 serving 1x
- Diet: Vegetarian
Description
A refreshing and energizing smoothie packed with the bright flavors of fresh oranges and creamy yogurt.
Ingredients
- 2 large oranges, peeled
- 1 frozen banana
- ½ cup Greek yogurt
- 1 cup spinach or kale (optional)
- 1–2 tablespoons honey or maple syrup (optional)
- 1 cup coconut water or almond milk
- ½ cup ice cubes (optional)
Instructions
- Prepare the oranges by peeling and separating into segments.
- Add the frozen banana to the blender.
- Mix in the Greek yogurt.
- Toss in the greens if using.
- Sweeten it up with honey or maple syrup if desired.
- Add the coconut water or almond milk.
- Throw in the ice cubes if using.
- Taste and adjust flavors as needed.
- Pour the smoothie into a glass and enjoy!
Notes
For a tropical twist, add pineapple or for a berry blast, toss in mixed berries. Adjust sweetness as per your taste.
- Prep Time: 10 minutes
- Cook Time: 0 minutes
- Category: Beverage
- Method: Blending
- Cuisine: American
Nutrition
- Serving Size: 1 serving
- Calories: 275
- Sugar: 35g
- Sodium: 60mg
- Fat: 3g
- Saturated Fat: 1g
- Unsaturated Fat: 2g
- Trans Fat: 0g
- Carbohydrates: 60g
- Fiber: 6g
- Protein: 10g
- Cholesterol: 5mg
Keywords: smoothie, orange smoothie, healthy drink, breakfast smoothie, refreshing beverage
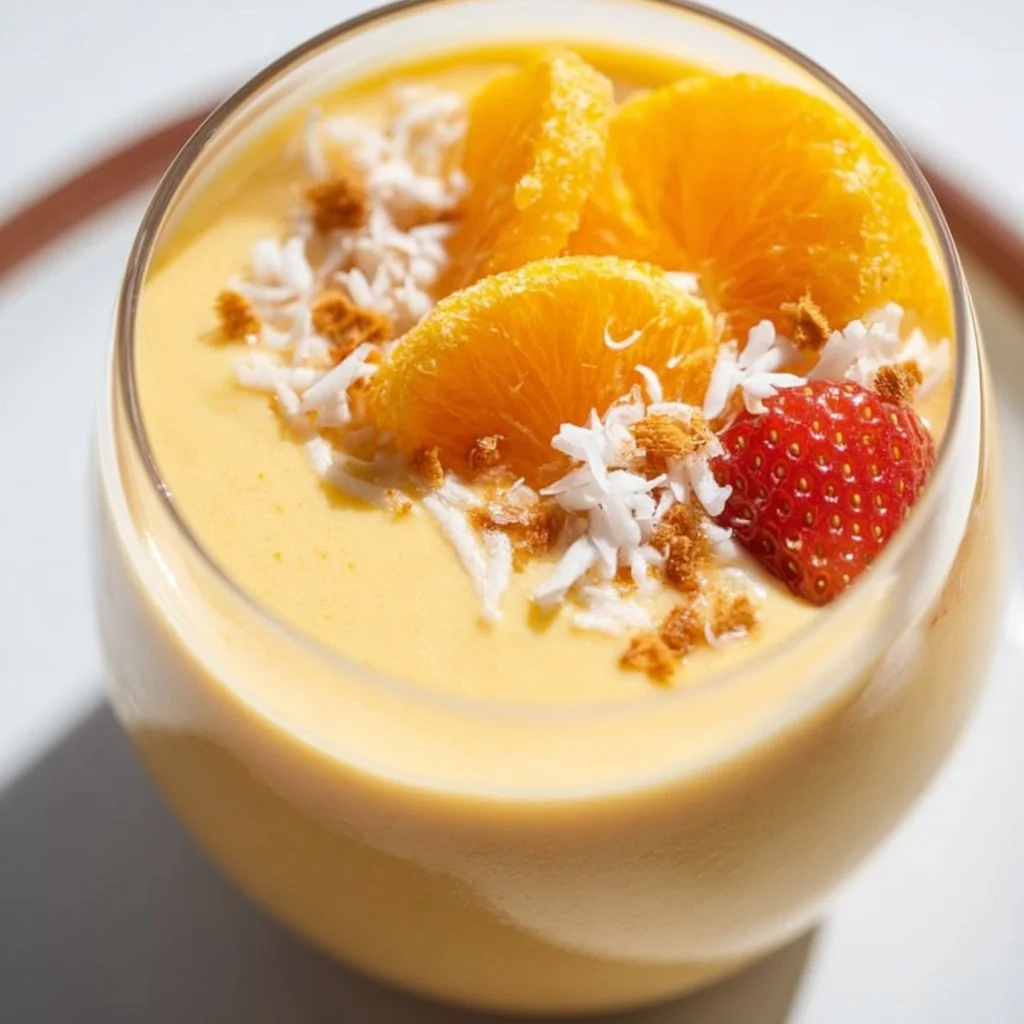
Tropical Orange Cream Smoothie
Tropical Orange Cream Smoothie: A Taste of Paradise
Welcome to my kitchen! Today, I’m so excited to share with you a recipe that will whisk you away to a sunny paradise: the Tropical Orange Cream Smoothie. This delightful drink is not just a treat for your taste buds; it’s also a deliciously refreshing way to kickstart your day, power through your afternoon slump, or even celebrate a warm evening with friends. Seriously, folks, this smoothie is like sunshine in a glass!
You know how sometimes a flavor takes you back to a certain moment in time? For me, the first sip of this smoothie transports me to lazy summer mornings at my grandmother’s house. Picture this: a warm Hawaiian breeze dancing through the kitchen as I sat at the breakfast table, eagerly awaiting the marvelous concoctions my grandma would whip up. She always had a knack for blending flavors that not only tantalized our palates but also warmed our hearts.
As a kid, I wasn’t too keen on fruits, but she’d always sneak in vibrant oranges and creamy yogurt, claiming they would give me “super strength.” Of course, I believed her! The simplicity of those ingredients, mixed to perfection, created an unforgettable taste that I still cherish today. So, let’s roll up our sleeves, grab our blenders, and embark on this culinary journey together. I promise, this Tropical Orange Cream Smoothie will become a staple in your kitchen, just like it is in mine!
Ingredients
Here’s what you’ll need to bring this smoothie to life:
-
Fresh Oranges (2): The star of the show! Oranges not only provide that refreshing citrus zing but are also packed with vitamin C. If you’re short on fresh oranges, feel free to substitute with store-bought orange juice (just make sure it’s 100% juice with no added sugar).
-
Banana (1): A frozen banana adds creaminess and natural sweetness to your smoothie. If bananas aren’t your thing, you can swap them out for a cup of frozen mango for a different kind of tropical goodness.
-
Greek Yogurt (½ cup): This adds a rich creaminess and a protein boost. If you’re looking for a dairy-free option, coconut yogurt delivers a lovely tropical flair while maintaining that creamy texture.
-
Coconut Milk (1 cup): For that extra splash of island vibes, coconut milk is a must. If you prefer a lighter version, unsweetened almond milk or oat milk works just as well.
-
Honey or Maple Syrup (1-2 tablespoons): Depending on your desired level of sweetness, use honey for a floral note or maple syrup for that rich, earthy flavor. If you’re keeping things low-carb or vegan, consider a sugar substitute like stevia.
-
Ice Cubes (1 cup): These make your smoothie refreshingly cool. If you want an even thicker texture, use frozen fruits instead of ice cubes.
Step-by-Step Instructions
Alright, folks, let’s get this show on the road! Making this Tropical Orange Cream Smoothie is as easy as pie—er, I mean, smoothie! Follow these simple steps, and you’ll have a burst of sunshine ready to sip in no time.
-
Prep Your Ingredients: Start by peeling your oranges and breaking them apart into segments. This helps them blend better and ensures you get all that juicy goodness. The banana, if you’re using a fresh one, should be sliced. If it’s frozen, just toss it in whole!
-
Blend It Up: In your trusty blender, throw in the orange segments, banana, Greek yogurt, and coconut milk. Blend on high until everything is smooth and creamy. If you like a little more texture, pulse the blender a few extra times rather than blending continuously. That way, you’ll have small bits of fruit that add a pleasant mouthfeel.
-
Sweeten If Necessary: Depending on the sweetness of your fruit, you may want to toss in your honey or maple syrup at this point. Blend again for about 10 seconds to mix it in. Taste your smoothie before pouring; if it’s not sweet enough for your liking, add another bit!
-
Ice, Ice, Baby: Now, add in those ice cubes (or frozen fruit if you went that route). Blend until your smoothie reaches the consistency you enjoy. If you prefer a thinner smoothie, you can add more coconut milk a little at a time while blending. It’s all about personal preference!
-
Serve in Style: Grab your favorite tall glasses, and pour the smoothie in. For an extra touch of tropical flair, consider garnishing with a slice of orange, a sprinkle of shredded coconut, or even a few mint leaves for that pop of color and freshness!
Serving Suggestions
When it comes to serving your Tropical Orange Cream Smoothie, presentation is key! I love using mason jars or tall glasses for a rustic vibe. You could even add a colorful paper straw to bring a splash of fun into every sip. Pair it with a side of crunchy granola bars, tropical fruit salad, or even a slice of banana bread for a complete breakfast or afternoon snack. Trust me, your friends and family will be impressed!
Recipe Variations
One of the best things about smoothies is how versatile they are! Check out these fun variations to switch things up:
-
Berry Bliss: Add a half-cup of mixed berries (strawberries, blueberries, or raspberries) to your base for an antioxidant boost. The berries will create a beautiful color swirl!
-
Mango Madness: Swap the banana for a ripe mango for a sweeter, more tropical smoothie experience. This combo will truly feel like a beach vacation!
-
Minty Fresh: Toss in a few fresh mint leaves during blending for a refreshing twist. This adds a bright, aromatic flavor that’s perfect for summer.
-
Green Groove: Sneak in a handful of spinach! You won’t even taste it, and it’ll give you an extra nutritional punch without altering the delicious flavor!
-
Nutty Delight: Add a tablespoon of almond butter or a handful of nuts for an extra dose of healthy fats and protein. It also gives the smoothie a delightful nutty flavor!
Chef’s Notes
Let me tell you how this recipe has evolved over the years! I first stumbled upon the idea of a smoothie when I wanted a quick breakfast option that the whole family would enjoy. Armed with a blender and a few ripe fruits, I was determined to create something delicious and nutritious. After several attempts and a few flourishes, this Tropical Orange Cream Smoothie emerged as a favorite in my household.
One of my fondest memories involves my niece, who at the time was a picky eater. I knew I had to find a way to get some nutrition into her diet, and within a week of me introducing this smoothie, I caught her making it for herself! Watching her sip on something she made herself and love it made my heart so happy. It’s a reminder of how food can be a bridge to connection and joy.
FAQs and Troubleshooting
-
What if my smoothie is too thick?
- No worries! Just add a little more coconut milk (or any milk of your choice) to the blender and pulse until it reaches your desired consistency.
-
Can I make this smoothie ahead of time?
- Absolutely! You can prep your ingredients the night before and store them in the fridge or freezer. Just blend in the morning for a quick breakfast!
-
What do I do if my blender isn’t powerful enough?
- Start by blending the liquids and softer ingredients first, then add in the fruits. Adding them gradually will give your blender a better chance to chop through them.
-
Can I store leftover smoothie?
- While smoothies are best enjoyed fresh, you can store leftovers in the fridge for a day. Just remember to give it a good shake or stir before drinking, as it might separate.
Nutritional Info
For those of you who are curious, here’s a rough breakdown of what you can expect:
- Calories: Approximately 250-300 per serving (depending on ingredients used)
- Protein: 8-10g (mainly from Greek yogurt)
- Fat: 5-15g (depending on the use of coconut milk)
- Carbohydrates: 40-50g (primarily from fruits)
This Tropical Orange Cream Smoothie not only tastes great but is also filled with nutrients that can jumpstart your day! So grab your blender, and let’s make some magic happen in your kitchen today! Cheers to deliciousness!
Print
Tropical Orange Cream Smoothie
- Total Time: 10 minutes
- Yield: 2 servings 1x
- Diet: Vegetarian
Description
A refreshing smoothie that combines fresh oranges, banana, Greek yogurt, and coconut milk for a taste of paradise.
Ingredients
- 2 Fresh Oranges
- 1 Banana
- ½ cup Greek Yogurt
- 1 cup Coconut Milk
- 1–2 tablespoons Honey or Maple Syrup
- 1 cup Ice Cubes
Instructions
- Prep your ingredients: Start by peeling your oranges and breaking them apart into segments.
- Blend it up: In your trusty blender, throw in the orange segments, banana, Greek yogurt, and coconut milk. Blend on high until everything is smooth and creamy.
- Sweeten if necessary: Depending on the sweetness of your fruit, you may want to toss in honey or maple syrup. Blend again for about 10 seconds.
- Ice, ice, baby: Now, add in those ice cubes and blend until your smoothie reaches the desired consistency.
- Serve in style: Pour the smoothie into tall glasses and garnish with a slice of orange or other toppings if desired.
Notes
For a thinner smoothie, add more coconut milk gradually while blending. Great for breakfast or as a refreshing snack.
- Prep Time: 10 minutes
- Cook Time: 0 minutes
- Category: Beverage
- Method: Blending
- Cuisine: Tropical
Nutrition
- Serving Size: 1 serving
- Calories: 300
- Sugar: 25g
- Sodium: 60mg
- Fat: 12g
- Saturated Fat: 10g
- Unsaturated Fat: 2g
- Trans Fat: 0g
- Carbohydrates: 45g
- Fiber: 4g
- Protein: 10g
- Cholesterol: 5mg
Keywords: smoothie, tropical, orange, refreshing, healthy
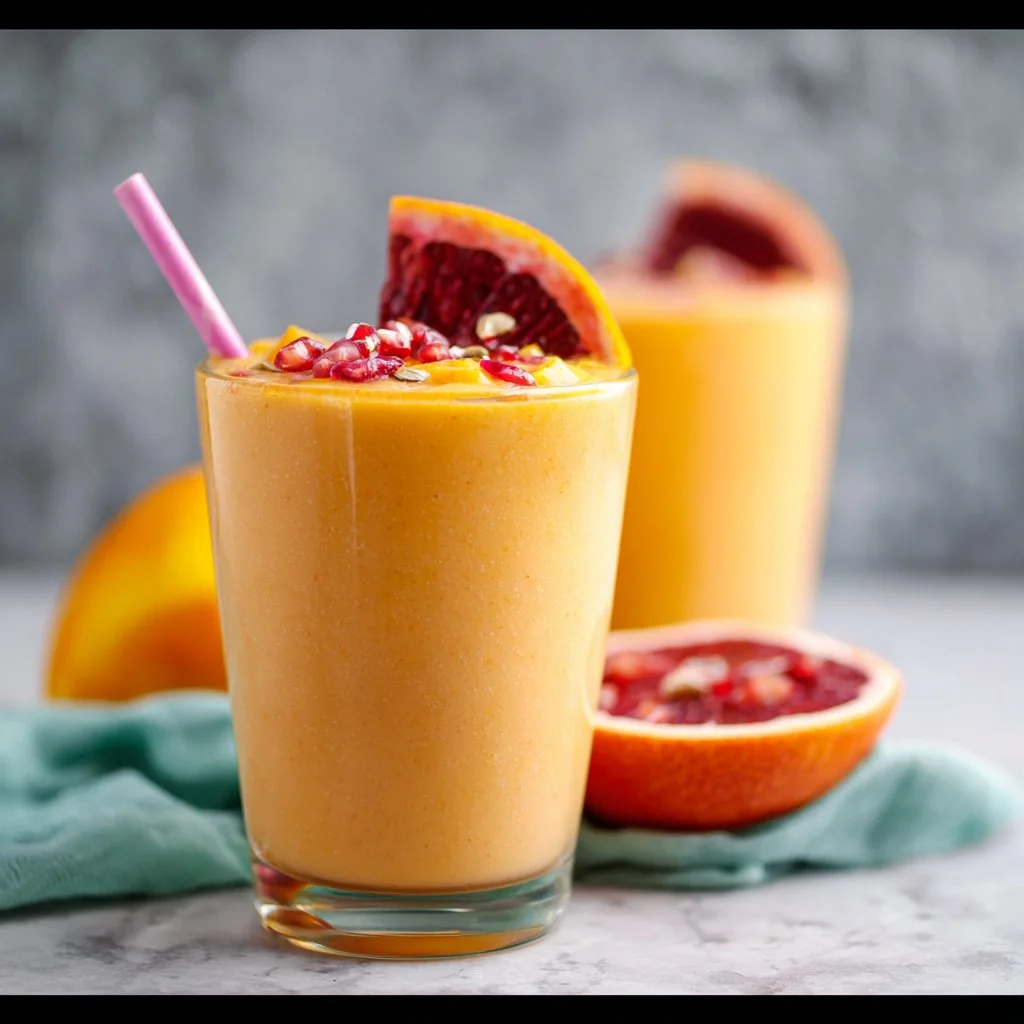
Blood Orange Mango Smoothie
Blood Orange Mango Smoothie: A Tropical Kiss for Your Taste Buds!
Welcome to my cozy kitchen, where the aroma of freshly blended fruits fills the air and every sip takes me on a mini-vacation. If you’re anything like me, there’s just something irresistibly delightful about a smoothie that can transport you to sun-soaked beaches, even if you’re just whipping it up in your home kitchen! Today, I’m thrilled to share one of my all-time favorite smoothies: the Blood Orange Mango Smoothie. Prepare for a burst of flavor that feels like a warm hug in a glass!
What Makes This Smoothie Special?
You might be wondering why I am so enthusiastic about this particular smoothie. Well, blood oranges are not just a feast for the eyes with their stunning crimson flesh; they bring a unique blend of tanginess and sweetness that elevates any drink. And when paired with the lusciousness of mango, it becomes a refreshing treat that’s as nutritious as it is delicious. Packed with vitamins and antioxidants, this smoothie isn’t just a tasty beverage—it’s a nourishing power-house!
Whether you’re gearing up for a busy day or looking to unwind, this smoothie is versatile enough to fit any occasion. Trust me, it’s going to become your new go-to drink, and I can’t wait for you to try it!
Personal Story: A Citrus Celebration
Let me take you back to a sun-drenched afternoon a few years ago at my parents’ house. I was scrolling through the internet for something refreshing to beat the summer heat when I stumbled across an article about blood oranges. At that moment, the memories came flooding back of my mother whipping up her famous blood orange salad at family gatherings.
The vibrant color and zesty flavor always left a lasting impression, and I could practically hear my little brother complaining about “fruity stuff” while reaching for dessert. But once he took a bite of that salad, his eyes lit up with surprise—I remember him saying something like, “Wait, this is actually amazing!” His enthusiastic response sparked a renewed love for blood oranges in our home. That summer, we experimented with various dishes, and it didn’t take long for this Blood Orange Mango Smoothie to become a family favorite.
To this day, whenever I blend this smoothie, it brings back those sun-kissed moments of laughter and fun, reminding me that cooking is about more than just food; it’s about connections and stories shared around the table.
Ingredients: What You’ll Need
Gathering the right ingredients can make all the difference when crafting this smoothie. Here’s what you need:
-
2 ripe blood oranges
These beauties are the star of the show! Known for their sweet and tangy taste, they’re rich in vitamin C and great for your skin. If you can’t find blood oranges, regular navel oranges will work in a pinch—just adjust the sweetness to your liking with a bit of honey or agave! -
1 ripe mango
Mango adds a creamy texture and natural sweetness. Choose a firm, fragrant mango that yields slightly when pressed. Don’t have mango? Try swapping in pineapple for a tropical twist! -
1/2 cup Greek yogurt
Yogurt adds a nice creaminess and a protein boost! If you’re dairy-free, go for plant-based yogurt made from almond or coconut milk. You could also use silken tofu for a vegan option! -
1/2 cup coconut water or milk
This hydrates and balances out the acidity of the blood orange. Coconut water is light and refreshing, while coconut milk will give you a richer consistency. Feel free to use any milk alternative based on your dietary preferences! -
1 tablespoon honey or maple syrup (optional)
While blood oranges and mango are pretty sweet, you can adjust the sweetness to your taste. If you need a sweetener, honey or maple syrup is a natural way to go! -
A handful of ice
Ice helps make the smoothie cold and frosty. You can also freeze your mango chunks ahead of time for an extra refreshingly icy drink.
Step-by-Step Instructions: How to Blend Your Perfect Smoothie
Now that you have your ingredients, let’s dive into the magic of making this delectable smoothie! Follow these steps, and you’ll be sipping away in no time.
-
Prep Your Fruits
Start by peeling the blood oranges, making sure to remove any seeds. Segment them if you like, or just chop them into large chunks. For the mango, peel it carefully and cut around the pit, taking out as much fruit as you can. The goal is to get about 1 cup of mango chunks.Chef Tip: Use a sharp knife for better control, and don’t hesitate to ask someone else for help if you’re a bit clumsy with the mangoes—those pits can be tricky!
-
Toss Everything in the Blender
In your blender, toss in the blood orange chunks, mango, Greek yogurt, and coconut water or milk. If you’re using honey or maple syrup, add that now too.Little Hack: Layer soft ingredients first to make blending easier, and don’t forget to measure the yogurt to keep that creamy texture consistent across batches!
-
Add the Ice
Once your ingredients are all in, add a handful of ice to your blender. This is essential for that frosty, refreshing experience! -
Blend, Baby, Blend!
Secure the lid and start blending on low. Gradually increase to high speed until everything is completely smooth. You might need to stop once or twice to scrape down the sides, ensuring everything gets blended evenly.Pro Tip: If the smoothie seems too thick, add a little more coconut water until you reach your desired consistency. It’s better to add a little at a time!
-
Taste and Adjust
This is the fun part! Give it a taste and see if it’s to your liking. Add more honey or syrup if it needs sweetness or throw in a bit more coconut water if it’s too thick. Blend it again to mix. -
Serve Chilled
Once you’re happy with the flavor and texture, pour the smoothie into attractive glasses. You can garnish them with extra blood orange slices, a sprig of mint, or even a sprinkle of chia seeds for added flair.Serving Hack: For the ultimate Instagrammable moment, serve your smoothie in mason jars or colorful cups, and don’t forget to snap a photo before diving in!
Serving Suggestions: How to Enjoy Your Smoothie
This Blood Orange Mango Smoothie is perfectly refreshing as a standalone beverage, but you can also pair it with various snacks for a lovely brunch or afternoon treat. Serve it alongside whole-grain toast topped with avocado, or whip up a batch of almond butter energy balls for a delightful afternoon pick-me-up. The vibrant colors of the smoothie can brighten up any table, making it a feast for the eyes as well!
Recipe Variations: Get Creative!
While this Blood Orange Mango Smoothie is delightful as is, the best part about smoothies is their versatility! Here are a few creative twists you can try:
- Spicy Kick: Add a pinch of cayenne pepper or a slice of fresh ginger to heat things up.
- Berry Bliss: Throw in a handful of blueberries or strawberries for an antioxidant boost.
- Green Power: Add a handful of spinach or kale for a nutrient-packed green version without sacrificing flavor!
- Protein Boost: Mix in a scoop of your favorite protein powder for an energizing post-workout snack.
- Nutty Deliciousness: A tablespoon of almond butter can add a creamy texture and healthy fats.
Chef’s Notes: A Journey of Flavor
As with any recipe, this Blood Orange Mango Smoothie has evolved over time. I started making it with just oranges and mango, but after experimenting with different ingredients, I realized the magic of yogurt and coconut water added that dreamy creaminess and hydration that makes it a refreshing drink, not just a snack.
I’ve had friends tell me they added greens, and it opened a whole new world of flavor and nutrition for them. It’s amazing how simple tweaks can turn a tried-and-true favorite into something creatively new and intricate. The kitchen is a playground for flavor, and I encourage you each time you blend to make it your own!
FAQs and Troubleshooting: Smoothie Shenanigans
-
Why is my smoothie too thick?
If your smoothie ends up thicker than you’d like, just add a splash more coconut water or milk and blend again until it reaches your desired consistency. -
Can I prepare it in advance?
Absolutely! If you prep your ingredients ahead of time, you can store them in the freezer as smoothie packs. Just blend them up when you’re ready to enjoy! -
Are there any tips for choosing ripe mangoes or blood oranges?
For mangoes, look for ones that give slightly when you press them gently, and they should smell fragrant. Blood oranges are ripe when they’re slightly firm, with a deep orange color—these are usually the sweetest! -
How do I make it more filling?
You can add oats or a scoop of nut butter for a filling breakfast option. Both add great texture and nutrients while keeping you satisfied longer!
Nutritional Info (Optional)
If you’d like to track your nutrition, here’s a rough estimate for one serving (about 1.5 cups) of this Blood Orange Mango Smoothie:
- Calories: 250
- Protein: 8g
- Carbohydrates: 44g
- Fat: 6g
- Fiber: 5g
Enjoy the burst of flavors and the memories tied to this delectable Blood Orange Mango Smoothie. Here’s to many joyful moments shared over delicious food, just like we do in my kitchen! Cheers to your next culinary adventure!
Print
Blood Orange Mango Smoothie
- Total Time: 10 minutes
- Yield: 2 servings 1x
- Diet: Vegan
Description
A refreshing Blood Orange Mango Smoothie that transports you to sun-soaked beaches with every sip.
Ingredients
- 2 ripe blood oranges
- 1 ripe mango
- 1/2 cup Greek yogurt
- 1/2 cup coconut water or milk
- 1 tablespoon honey or maple syrup (optional)
- A handful of ice
Instructions
- Prep your fruits by peeling and chopping the blood oranges and mango into chunks.
- Toss everything in the blender: blood orange chunks, mango, Greek yogurt, and coconut water or milk.
- Add the ice to your blender.
- Blend, starting on low and gradually increasing to high speed until smooth.
- Taste the smoothie and adjust sweetness or thickness as needed.
- Serve chilled in attractive glasses, garnished as desired.
Notes
For a tropical twist, substitute mango with pineapple or add a pinch of cayenne for a spicy kick.
- Prep Time: 10 minutes
- Cook Time: 0 minutes
- Category: Drink
- Method: Blending
- Cuisine: Tropical
Nutrition
- Serving Size: 1 serving
- Calories: 250
- Sugar: 30g
- Sodium: 50mg
- Fat: 6g
- Saturated Fat: 2g
- Unsaturated Fat: 4g
- Trans Fat: 0g
- Carbohydrates: 44g
- Fiber: 5g
- Protein: 8g
- Cholesterol: 5mg
Keywords: smoothie, blood orange, mango, healthy drink, refreshing beverage
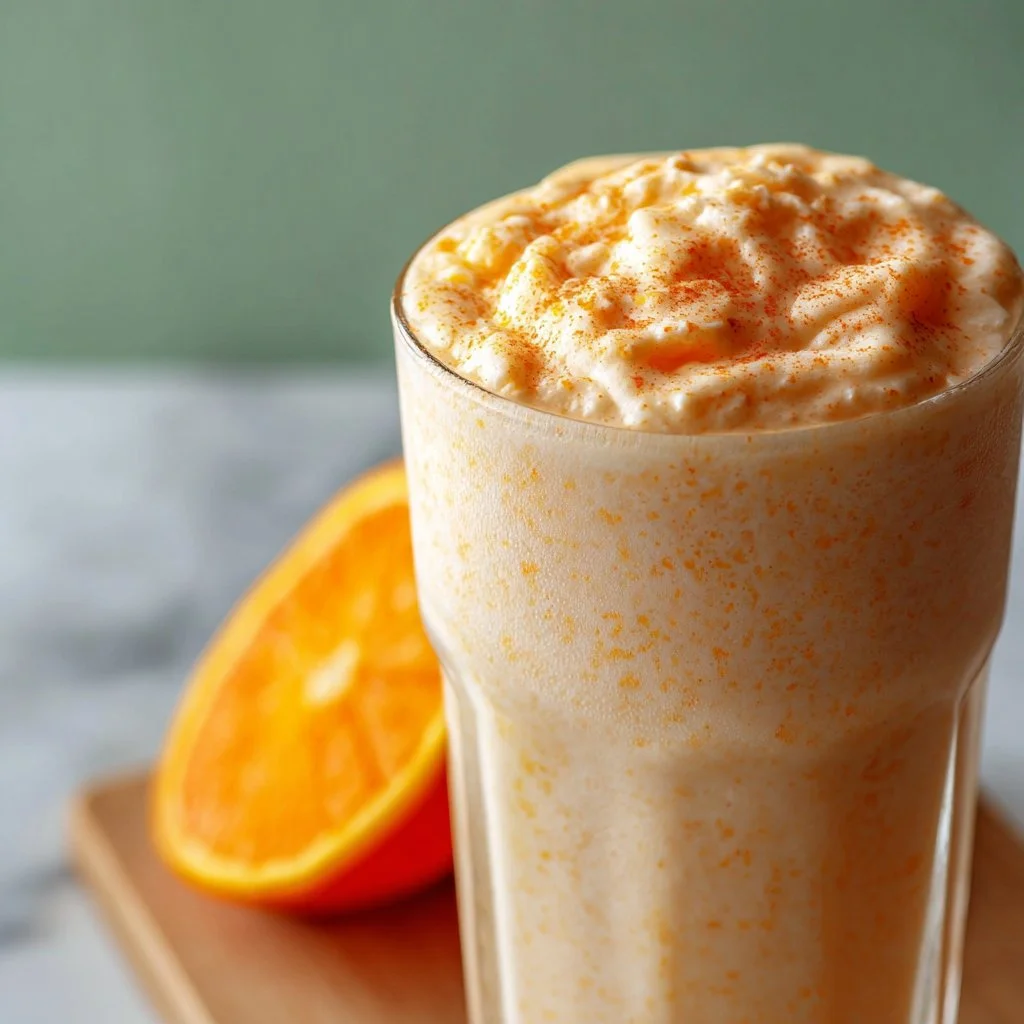
Orange Dreamsicle Protein Shake Recipe
Refreshing Orange Dreamsicle Protein Shake Recipe
Welcome to my kitchen! I’m thrilled you’re here because today we’re whipping up something deliciously delightful: an Orange Dreamsicle Protein Shake. If you’re someone who finds joy in a creamy, dreamy shake that’s both nutritious and satisfying, then you’re in for a treat. This recipe is like a blast from childhood wrapped in a healthy, energizing package—a combination that’s as irresistible as it is nourishing.
Imagine a sunny morning where you take your first sip and are transported to a summer’s day, long ago, where the ice cream truck was a beacon of happiness. This shake reminds me of those carefree moments, where the aroma of freshly zested oranges mingled with the sweetness of vanilla ice cream. As an adult, I still cherish those flavors, and now I get to enjoy them guilt-free! Preparing this shake is not just about making a meal; it’s about celebrating the simple joys of cooking and savoring the little things in life.
Now, the beauty of this Orange Dreamsicle Protein Shake lies not only in its dreamy flavor profile but also in its simplicity. It’s packed with protein to fuel your body and invigorate your spirit. Whether you enjoy it as a post-workout treat or a tasty breakfast substitute, I promise this shake will leave you refreshed and revitalized. So grab your blender and let’s get started on this vibrant culinary adventure!
A Walk Down Memory Lane
I must share a little story that makes this recipe even more special to me. Growing up, my family had a tradition—a summer afternoon sweet treat that always brought us together. Mom would whip up homemade orange popsicles, using fresh oranges from our backyard. I remember those hot days, running around the yard, only to be beckoned by the sugary scent of citrus. The moment those popsicles came out of the molds was pure magic. We’d gather outside, sticky fingers and laughter, indulging in that frozen delight.
Fast forward to my adult years, where I started my journey into cooking and nutrition. I found myself reminiscing about those sunny days, and just like that, the Orange Dreamsicle Protein Shake was born! I wanted to capture the essence of those joy-filled moments in a drink that could be enjoyed any time of the year. Now, whenever I blend this shake at home, it takes me back to those carefree summer afternoons and reminds me of the importance of enjoying simple pleasures.
Ingredients
To create your Orange Dreamsicle Protein Shake, gather the following ingredients:
-
1 large orange (peeled and segmented)
Fresh oranges not only provide a burst of sweet citrus flavor but are also loaded with vitamin C. If you’re in a pinch, you can use frozen orange segments for convenience. -
1 scoop vanilla protein powder
This gives the shake its creamy texture and helps to keep you full. Choose your favorite brand or a plant-based alternative for an extra boost! -
1 cup almond milk (or any milk of choice)
Almond milk is light and nutty, pairing beautifully with the orange flavor. Feel free to substitute with coconut milk or oat milk if you prefer a creamier consistency. -
1/2 banana (fresh or frozen)
Bananas add natural sweetness and a silky texture. If you’re avoiding bananas, try using a bit of avocado for creaminess or even a date! -
1 tablespoon Greek yogurt (optional)
This is optional but adds extra creaminess and a protein boost. For a dairy-free option, use coconut yogurt! -
1 teaspoon vanilla extract
The beloved flavor enhancer that ties everything together. You can enhance it even further with a splash of almond extract for a deeper flavor profile. -
Ice cubes (to taste)
The cooling agent! Adjust the amount based on your desired consistency.
With this lineup, you’re ready to start blending. The balance of flavors in your shake will take you right back to those nostalgic summer days while keeping your nutrition on track.
Step-by-Step Instructions
Now that you have all your ingredients, let’s dive into the creation of your Orange Dreamsicle Protein Shake! Follow these steps closely, and don’t be afraid to put your personal touch on it.
-
Prepare Your Ingredients
Start by peeling your orange and segmenting it. This makes it easier to blend! If you’re using frozen fruit, pop them out of the freezer in advance to allow them to soften slightly. -
Blend the Base
In your blender, add the orange segments first. They’re juicy and will help blend the other ingredients more smoothly. Then toss in the 1/2 banana, vanilla protein powder, and Greek yogurt if you’re using it. Layering this way allows the blender to mix everything seamlessly. -
Add Your Liquids
Pour in 1 cup of almond milk and add the teaspoon of vanilla extract. The liquid will help with the blending process, creating an easy, creamy consistency. Remember, you can always adjust the amount of liquid depending on how thick or thin you prefer your shake. -
Ice, Ice Baby!
Add a handful of ice cubes. I recommend starting with a few and increasing based on how chilled and thick you want your shake. Blend all of this goodness together until it reaches a smooth consistency. -
Taste and Adjust
This is the fun part! Give your shake a taste. Do you want more sweetness? Add a drizzle of honey or maple syrup. If you want more creaminess, a bit more yogurt or banana will do the trick. If it’s too thick, add a splash more almond milk and blend again. -
Pour & Serve
Once everything is blended to perfection, pour your shake into a glass. You can garnish it with an orange slice, a sprinkle of cinnamon, or even a few toasted coconut flakes for added texture.
Serving Suggestions
To serve your Orange Dreamsicle Protein Shake, consider using a tall, clear glass to showcase its vibrant color. You could also add a straw for a fun presentation! If you’re feeling extra fancy, rim the glass with a little sugar or crushed nuts. For an indulgent brunch treat, pair your shake with a light breakfast like avocado toast or overnight oats.
Recipe Variations
Here are a few creative twists to make your shake even more exciting:
- Tropical Dreamsicle: Swap out the orange for mango to create a tropical flavor explosion!
- Green Dreamsicle: Add a handful of spinach or kale for an extra nutrient boost without altering the taste too much.
- Chocolate Orange Delight: Add a scoop of chocolate protein powder instead of vanilla for a deliciously rich shake.
- Nutty Dreamsicle: Incorporate a tablespoon of almond butter for a nutty twist while adding healthy fats.
- Citrus Burst: Combine both orange and lemon for an extra zing!
Chef’s Notes
I love how this recipe has evolved over time! Initially, it was just about recreating that nostalgic orange flavor from my childhood. Still, as I got into nutrition, I found ways to make it not only enjoyable but also a powerhouse of protein. I remember one summer trying to impress my friends with this shake, and they were all blown away—who would’ve thought a healthy shake could taste so good? I can’t help but smile when I see people fall in love with this recipe. Remember, the kitchen is a place for creativity, so feel free to experiment and make it your own!
FAQs and Troubleshooting
Q: Can I make this shake ahead of time?
A: Absolutely! You can prepare the ingredients and store them in the fridge for a day. Just give it a quick blend before serving since the ingredients might settle. If you’re storing it longer, consider freezing the shake in portions and blending again when you’re ready to enjoy!
Q: My shake is too thick; how can I fix it?
A: If you find your shake is too thick, simply add a bit more almond milk (or whichever liquid you’re using). Blend again until you reach your desired consistency.
Q: Can I use other fruits?
A: Yes! Feel free to swap out the orange and banana for other fruits like berries or stone fruits. Just keep in mind that this may change the flavor profile slightly.
Q: Is this shake suitable for meal prep?
A: Yes, but it’s best if consumed fresh. If you have leftover shake, store it in an airtight container in the fridge, but it’s really at its best when enjoyed immediately after blending.
Nutritional Info
While the exact nutritional breakdown will vary based on your ingredient choices, here’s a rough estimate for the Orange Dreamsicle Protein Shake based on the ingredients listed:
- Calories: ~250-300 per serving
- Protein: ~20-25g
- Carbohydrates: ~30-35g
- Fats: ~5-7g
Now you’re all set to indulge in this delightful Orange Dreamsicle Protein Shake! I hope it brings a smile to your face just like it does for me. Get blending, and don’t forget to share your creations with your friends and family. Happy cooking!
Print
Refreshing Orange Dreamsicle Protein Shake
- Total Time: 10 minutes
- Yield: 1 serving 1x
- Diet: Vegetarian
Description
A creamy and nutritious shake that captures the delightful flavors of orange and vanilla, perfect for a post-workout treat or delicious breakfast.
Ingredients
- 1 large orange (peeled and segmented)
- 1 scoop vanilla protein powder
- 1 cup almond milk (or any milk of choice)
- 1/2 banana (fresh or frozen)
- 1 tablespoon Greek yogurt (optional)
- 1 teaspoon vanilla extract
- Ice cubes (to taste)
Instructions
- Prepare your ingredients by peeling and segmenting the orange.
- Blend the orange segments, banana, vanilla protein powder, and Greek yogurt (if using) in your blender.
- Add the almond milk and vanilla extract to the blender.
- Add your desired amount of ice cubes.
- Taste the shake and adjust sweetness or creaminess as preferred.
- Pour into a glass and serve with optional garnishes.
Notes
Feel free to customize the shake with different fruits or add-ins for added nutrition and flavor!
- Prep Time: 10 minutes
- Cook Time: 0 minutes
- Category: Beverage
- Method: Blending
- Cuisine: American
Nutrition
- Serving Size: 1 serving
- Calories: 300
- Sugar: 20g
- Sodium: 150mg
- Fat: 7g
- Saturated Fat: 1g
- Unsaturated Fat: 6g
- Trans Fat: 0g
- Carbohydrates: 35g
- Fiber: 4g
- Protein: 25g
- Cholesterol: 5mg
Keywords: orange, dreamsicle, protein shake, healthy shake, smoothie, breakfast
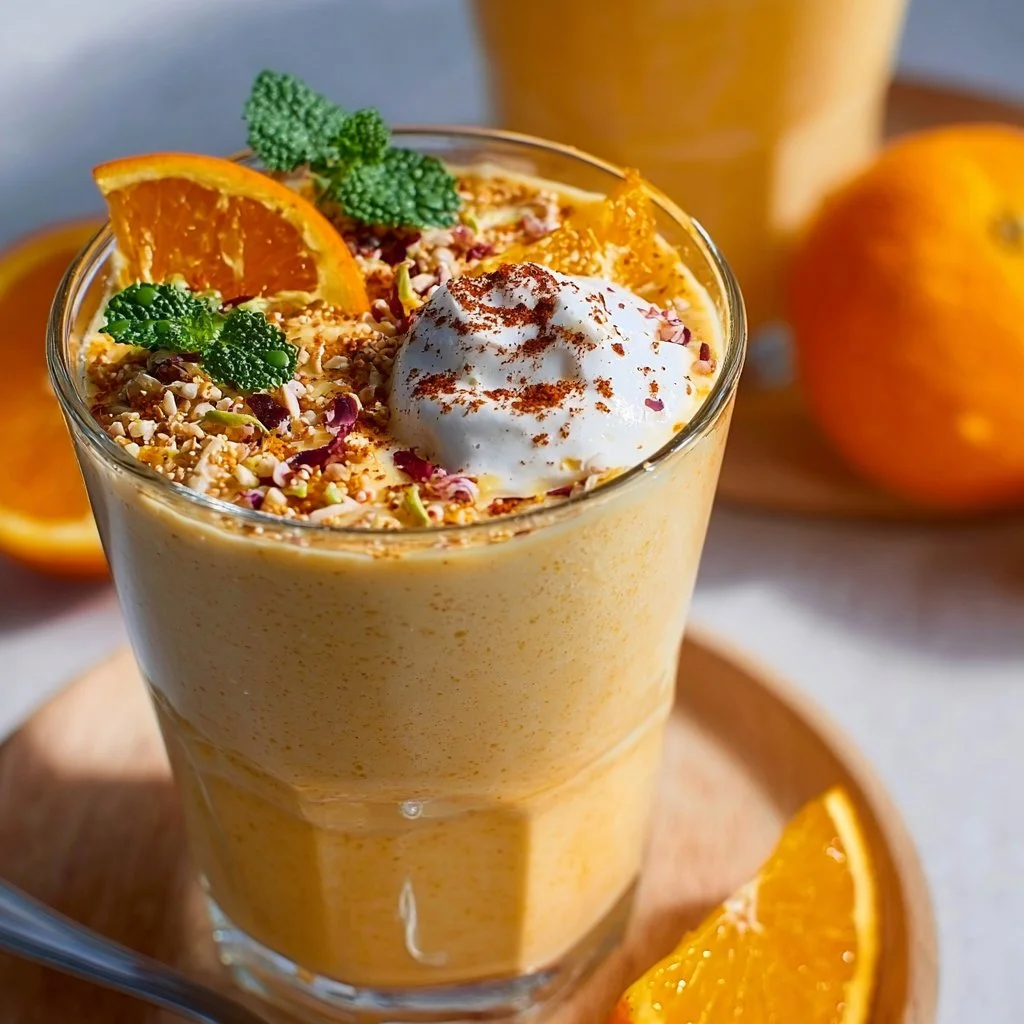
Orange Creamsicle Protein Smoothie
Whip Up a Refreshing Orange Creamsicle Protein Smoothie
Welcome to my kitchen! If you can’t resist the delightful taste of a cool orange creamsicle and you’re a fan of smoothies, then you’re in for a treat today. I’m Olivia Bennett, your friendly kitchen companion, and today, we’re diving into a deliciously refreshing Orange Creamsicle Protein Smoothie that’ll make your taste buds dance and your mornings a whole lot brighter!
Picture this: it’s a warm sunny morning, the sun is streaming through your kitchen window, and you have a busy day ahead. The perfect way to kickstart your energy? A creamy smoothie that transports you straight to a nostalgic summer afternoon, where the only thing on your mind is enjoying the day with friends and family. That’s precisely the magic of the Orange Creamsicle Protein Smoothie! It’s vibrant, packed with nutrients, and a joy to sip while dreaming of lazy beach days or picnics in the park.
In this blog post, I’ll guide you through every step of making this delightful smoothie, share personal stories that make cooking so special, and sprinkle in some tips to elevate your kitchen game. You won’t just be following a recipe; you’ll be creating a moment—filled with flavor, nostalgia, and plenty of smiles. Let’s get started on this delightful journey that’ll not only fuel your day but will also spark joy in your kitchen!
A Slice of Nostalgia
As a child, summers were synonymous with joy and adventure—and what better way to embrace that spirit than with an icy orange creamsicle? I can still remember those trips to the local ice cream shop, where my cheeks would hurt from smiling as I clutched that cold, creamy treat in my hands. The sweet and tangy flavor combined with that familiar creamy texture was an experience like no other, and it seemed to perfectly capture the essence of summer.
One summer, my parents decided to host a backyard BBQ, and to keep the kids cool, they served up homemade orange creamsicles. I can’t tell you how much fun we had! We laughed, played games, and, of course, indulged in the frozen treat while chasing the ice cream truck down the street. That carefree joy inspired me to create my own version of this nostalgic treat—a smoothie that’s not only healthy but also bursts with the same flavors that made my childhood summer so magical.
With this Orange Creamsicle Protein Smoothie, I hope to capture that essence and share it with you! Just imagine sipping on this creamy goodness while reminiscing about your own summer memories or making new ones with your loved ones. Now, let’s gather our ingredients!
Ingredients
Here’s what you’ll need to whip up this fantastic smoothie:
-
1 medium orange, peeled and segmented
- The star of our smoothie! Oranges bring that sweet and tangy flavor reminiscent of creamsicles. You can substitute with tangerines for a similar taste or Mandarin oranges for a touch of sweetness.
-
1 banana
- Bananas add creaminess and natural sweetness to our smoothie. If you’re looking for a lower-sugar option, you can use half an avocado instead; it’ll lend a silky texture without the sweetness.
-
1 scoop vanilla protein powder
- This is our power-packed ingredient that keeps you full longer and helps with muscle recovery. You can replace it with plant-based protein if you prefer, or leave it out altogether for a lighter smoothie.
-
1 cup almond milk (or any milk of your choice)
- Almond milk is my go-to for smoothies—it’s creamy and dairy-free. Feel free to substitute with cow’s milk, oat milk, or coconut milk for a tropical twist!
-
1/2 cup Greek yogurt
- This not only makes the smoothie creamy but also adds a protein boost. For a dairy-free alternative, simply use a plant-based yogurt; coconut yogurt works wonderfully!
-
1 tablespoon honey or maple syrup (optional)
- Only if you like it a bit sweeter! Adjust to your taste, or skip altogether if the fruit provides enough sweetness.
-
1/2 teaspoon vanilla extract
- This elevates the flavor, giving you that dreamy creamsicle taste. If you want to try something different, a splash of almond extract can offer a lovely twist!
Step-by-Step Instructions
Now that we have our ingredients rounded up, it’s time to get blending! Here’s your step-by-step guide to creating the most fabulous Orange Creamsicle Protein Smoothie.
-
Prepare Your Ingredients
- Start by peeling the orange and segmenting it. This makes it easier to blend and ensures no pesky seeds find their way into your smoothie. Slice your banana, too—this helps it blend more smoothly!
-
First Up: The Base
- Grab your blender and pour in the almond milk. This should be your first ingredient to help the blending process go smoothly. If you’re using a high-powered blender, you might be able to skip this, but for most standard blenders, it’s essential for a creamy consistency.
-
Add the Good Stuff
- Next, toss in the banana and orange segments. Give them a little push into the almond milk to help them start blending. The fruits will add the delightful flavors we’re aiming for.
-
Protein Power!
- Scoop in your vanilla protein powder and Greek yogurt. Blend on low first, gradually increasing the speed. This helps combine the heavier ingredients more gently without splattering everywhere.
-
Vanilla Vibes
- Add in the vanilla extract (or almond extract, if you’re feeling adventurous). Blend until everything is smooth and creamy. You may need to stop and scrape down the sides if things get a bit stubborn. If it’s too thick, you can always add a splash more of your almond milk.
-
Taste Test
- Here’s my cheeky secret: take a taste! Are you happy with the sweetness? If you like it sweeter, stir in honey or maple syrup at this point, and blend again until combined.
-
Serve and Enjoy!
- Once it’s beautifully blended to your liking, pour it into a tall glass. You want to see all that luscious color—it’s practically begging to be sipped!
Serving Suggestions
When it comes to serving, presentation is key! Pour your Orange Creamsicle Protein Smoothie into a chilled glass to keep it cold longer. For an extra touch, consider garnishing it with a slice of orange on the rim or a sprinkle of granola on top for a crunchy contrast. You can even throw in a colorful straw or an adorable drink umbrella for a bit of fun!
Recipe Variations
Looking to switch things up? Here are a few creative variations you can try out:
-
Tropical Twist: Add some diced pineapple to create a tropical version of this smoothie. Pineapple brings a burst of juiciness that pairs beautifully with the orange.
-
Berry Citrus Fusion: Swap the banana for a handful of strawberries or blueberries for a delicious berry and citrus combination.
-
Green Power: Toss in a handful of spinach or kale for a nutrient boost without sacrificing flavor. The sweetness of the fruits will mask the greens perfectly!
-
Nutty Delight: Blend in a tablespoon of almond butter or peanut butter for a nutty twist that adds a savory depth and more protein.
-
Coconut Creamsicle: Substitute coconut milk for almond milk and add a bit of shredded coconut for a rich, tropical flair.
Chef’s Notes
I’ve been making different variations of this smoothie for years, and it’s always a hit! It’s a fantastic way to use up ripe bananas or oranges. One time, I experimented by adding some turmeric for an additional health boost—surprisingly, the flavor was still delightful, and it even gave the smoothie a vibrant yellow hue! It’s always fun to challenge yourself and invent new combinations in the kitchen—who knows what gems you’ll discover?
One of the things I’ve learned is to embrace the mess. Sometimes, I’ve had my blender overflow because I got a little too excited with my ingredients. But hey, a messy kitchen is a happy kitchen, right? Plus, it’s another reason to dance around as you clean up!
FAQs and Troubleshooting
Q1: Why isn’t my smoothie creamy?
If your smoothie comes out too thin, try adding more yogurt or protein powder. An extra banana can also help thicken it up.
Q2: Can I make this ahead of time?
Certainly! You can prep the ingredients the night before, store them in the fridge, and blend in the morning. If you blend it up in advance, consider storing it in the freezer; just give it a good stir before enjoying.
Q3: I don’t have almond milk—what can I use instead?
No worries at all! You can substitute it with regular milk, oat milk, coconut milk, or even water if you’re looking to keep things light.
Q4: My smoothie is too sweet for my liking. How can I fix it?
If you find it too sweet, add a splash of lemon juice or some Greek yogurt to balance the flavors. Both help to cut through the sweetness and brighten the overall taste.
Nutritional Info
While specific nutrition may vary depending on your ingredient choices, here’s an approximate breakdown per serving (without added sweeteners):
- Calories: 350
- Protein: 25g
- Carbohydrates: 50g
- Sugars: 30g
- Fat: 7g
Now, armed with this delightful recipe, it’s time for you to create your own magic! Enjoy sipping on this creamy Orange Creamsicle Protein Smoothie as a refreshing breakfast, post-workout boost, or a healthy snack. Don’t forget to share your smoothie adventures and tag me! Happy cooking, friends! 🍊💕
Print
Orange Creamsicle Protein Smoothie
- Total Time: 10 minutes
- Yield: 1 serving 1x
- Diet: Vegetarian
Description
A creamy and refreshing smoothie that captures the nostalgic flavor of orange creamsicles, packed with nutrients to kickstart your day.
Ingredients
- 1 medium orange, peeled and segmented
- 1 banana
- 1 scoop vanilla protein powder
- 1 cup almond milk (or any milk of your choice)
- 1/2 cup Greek yogurt
- 1 tablespoon honey or maple syrup (optional)
- 1/2 teaspoon vanilla extract
Instructions
- Prepare your ingredients by peeling and segmenting the orange, and slicing the banana.
- Grab your blender and pour in the almond milk as the base.
- Add the banana and orange segments to the blender.
- Scoop in your vanilla protein powder and Greek yogurt.
- Add in the vanilla extract and blend until smooth.
- Taste and adjust the sweetness by adding honey or maple syrup, then blend again.
- Pour the smoothie into a tall glass and enjoy!
Notes
For a fun presentation, serve in a chilled glass and garnish with a slice of orange or granola.
- Prep Time: 10 minutes
- Cook Time: 0 minutes
- Category: Beverage
- Method: Blending
- Cuisine: American
Nutrition
- Serving Size: 1 serving
- Calories: 350
- Sugar: 30g
- Sodium: 100mg
- Fat: 7g
- Saturated Fat: 1g
- Unsaturated Fat: 6g
- Trans Fat: 0g
- Carbohydrates: 50g
- Fiber: 3g
- Protein: 25g
- Cholesterol: 10mg
Keywords: smoothie, protein smoothie, orange creamsicle, healthy breakfast, refreshing drink
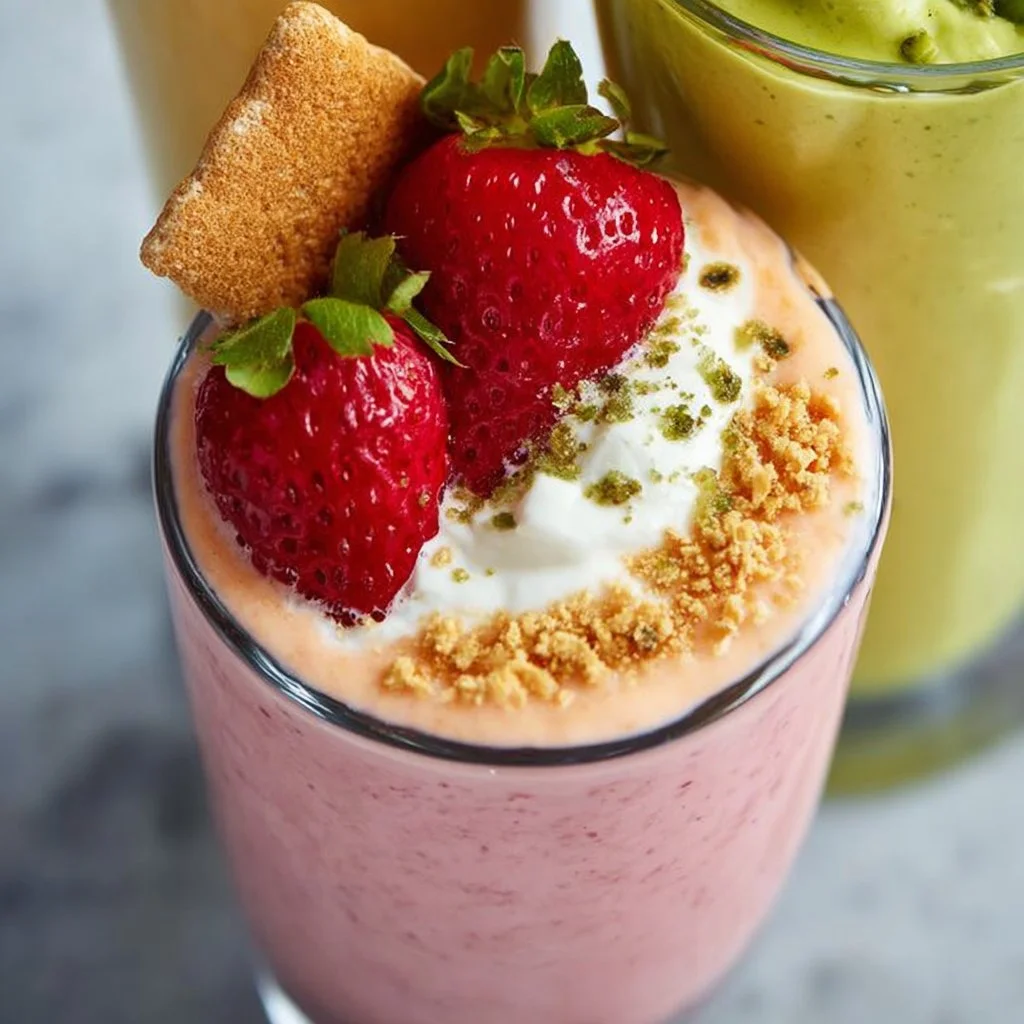
Refreshing and Delicious Spring and Summer Protein Smoothies {3 Recipes}
Refreshing and Delicious Spring and Summer Protein Smoothies: 3 Recipes to Energize Your Days
Welcome to another delightful culinary adventure in my kitchen! As the seasons shift and the weather warms up, there’s nothing quite like sipping on a refreshing protein smoothie that not only fuels your day but also tantalizes your taste buds. Whether you’re heading out to enjoy a sunny afternoon or just want a quick breakfast option, these smoothies are your go-to for vibrant flavors and nourishment.
Smoothies have become a staple in my kitchen, and for good reason! They are versatile, packed with nutrients, and can be whipped up in minutes. When spring blooms and summer starts to sizzle, I find myself reaching for the freshest fruits and greens, crafting smoothies that celebrate the season. Biting into a ripe peach or sipping a cool mango smoothie instantly transports me to sun-drenched days when time seems to drift away. Plus, the best part? You don’t need to be a kitchen whiz to make them! Just throw some ingredients into your blender, press a button, and voilà—you’ve got a delicious, health-boosting drink!
In today’s post, I’ll share three of my favorite protein-packed smoothie recipes that are both refreshing and delicious. We’ll explore a tropical mango delight, a luscious berry blend, and a green powerhouse smoothie that’s sure to become a staple in your routine. So grab your blender, and let’s get mixing!
Personal Story
Every summer as a kid, one of my fondest memories was visiting my grandparents’ house. My Grandma Alice would take me into her kitchen, where her trusty blender always sat proudly on the counter. Whether it was hot or cool, we would whip up a batch of smoothies together—always experimenting with whatever fruits were in season. I remember the way her face would light up when we’d unlock the magical combination of sweet strawberries, tart yogurt, and a splash of orange juice.
One particularly sunny afternoon, we made a batch of peach smoothies that were so creamy and perfectly sweet; I can still taste the sunshine in each sip! We packed them in jars and headed outside to enjoy them on the porch, the sweet aroma of freshly baked cookies wafting through the air. Those simple moments and delightful flavors have stayed with me and shaped my love for smoothies. It’s that same joy I hope to inspire in each of you through these recipes!
Ingredients
Here’s what you’ll need for each of the refreshing smoothies, along with some tips for making the most of your ingredient choices:
1. Tropical Mango Protein Smoothie
- 1 ripe mango: The star of the show! Choose a mango that gives slightly to pressure for sweetness. If fresh mangos aren’t available, try frozen mango chunks for a chillier version.
- 1 banana: Creamy and sweet! It’s rich in potassium and can be substituted with ripe avocado for a unique twist.
- 1 cup coconut milk: For a tropical vibe! Use almond milk or regular milk if coconut isn’t your thing—ingredients that add vitamins but retain creaminess.
- 1 scoop vanilla protein powder: Perfect for boosting your protein intake! Any protein powder will do; try pea protein for a vegan option.
2. Berry Blast Protein Smoothie
- 1 cup mixed berries (strawberries, blueberries, raspberries): Burst of flavor and antioxidants! Use a mix, or just choose your favorites. Fresh, frozen, or even dried berries work.
- 1 cup spinach: A nutritional powerhouse! Adding spinach increases your vitamin intake and it blends right in. If you’re not a fan of greens, sneak in kale instead.
- 1/2 cup Greek yogurt: This adds creaminess and a protein boost! For a dairy-free option, try coconut yogurt or a banana to add creaminess.
- 1-2 tablespoons honey or agave syrup (optional): Great for sweetness! Adjust to preference depending on your berry mix’s tanginess.
3. Green Powerhouse Smoothie
- 1 cup kale or spinach: Leafy greens are nutrient-dense! Spinach is milder in flavor, making it perfect for smoothies. Substituting with romaine lettuce gives a different twist.
- 1/2 avocado: Adds creaminess while being heart-healthy! Swap with a handful of soaked cashews if you’re avoiding avocados.
- 1 pear: Provides natural sweetness! If pears are out of season, apples or peaches work just as well.
- 1 cup almond milk or coconut water: This hydrates and binds the ingredients together. Feel free to use regular milk or just plain water if you need a lighter option.
Let’s gather these ingredients, and then we’ll dive into the blissful smoothie-making process!
Step-by-Step Instructions
Whipping up these smoothies is simple and fun! Here’s how to make each one:
Tropical Mango Protein Smoothie
- Prepare Your Ingredients: Peel and pit the mango, then chop it into chunks. Peel the banana. Simple prep saves time!
- Blend It Up: In your blender, toss in the mango, banana, coconut milk, and protein powder. Blend until smooth and creamy. Tip: If it’s too thick, gradually add more coconut milk until you reach your desired consistency.
- Taste Test: After blending, give it a little taste. Adjust sweetness with honey if desired! Smoothies should be a delightful balance of flavors.
- Serve: Pour into a tall glass and garnish with a slice of fresh mango and a sprinkle of shredded coconut to make it look extra tropical!
Berry Blast Protein Smoothie
- Prep Your Greens: If using fresh spinach, make sure it’s washed and includes no gritty bits. Fresh is always best!
- Layer the Blend: Place mixed berries, spinach, Greek yogurt, and honey in the blender. Start with small amounts of honey; you can always add more if needed!
- Let It Whirl: Blend until you achieve a smooth consistency—around 30-60 seconds. Hack: If your smoothie gets stuck, pause and use a spatula to stir it gently. Just blend again to incorporate everything.
- Taste and Serve: Pour your smoothie into a bowl or glass. Top with extra berries, a dollop of yogurt, and a drizzle of honey for that extra touch!
Green Powerhouse Smoothie
- Green Goodness Prep: Wash your leafy greens thoroughly. Chop the pear and avocado for easier blending.
- Combine in Blender: Add the greens, pear, avocado, and almond milk into the blender. There’s freshness in every bite!
- Blend It Up: Like the others, this will go in for 30-60 seconds. You want it to be creamy and thoroughly combined. Tip: If you’re feeling fancy, sprinkle some chia seeds for added nutrition!
- Pour and Enjoy: Pour your smoothie into your favorite glass or bowl. Garnish with slices of pear or a sprinkle of hemp seeds to get those nutrients in style!
Serving Suggestions
Presentation matters, even for smoothies! Use clear glasses to showcase the beautiful colors or serve them in mason jars for that rustic feel. Add a colorful straw or rim the glass with shredded coconut or crushed nuts to enhance the look. You can also accompany these smoothies with a side of whole-grain toast or a handful of nuts for a balanced and wholesome breakfast outside.
Recipe Variations
Feel free to get creative with these base recipes! Here are a few twists you might enjoy:
- Tropical Mango Variant: Add a handful of spinach for an added nutrient kick without compromising flavor.
- Berry Blast Remix: Swap out berries for stone fruits when in season—peaches and nectarines blend beautifully!
- Green Smoothie Upgrade: Toss in a tablespoon of nut butter for added richness and protein!
- Vegan Options: Replace dairy ingredients with their non-dairy counterparts, like coconut yogurt and almond milk.
Chef’s Notes
Smoothies are such an adaptable canvas—you’ll often find me throwing in whatever I have on hand. A handful of nuts, a spoonful of nut butter, or a scoop of oats can elevate your smoothie game even higher! My early trials in the kitchen were filled with hilarious blending mishaps, including a smoothie explosion from overstuffing the blender—I’ll never forget the kitchen floor that day!
Always feel free to experiment and trust your taste buds. While it’s essential to follow a recipe, creativity is the secret ingredient that makes your smoothies uniquely yours.
FAQs and Troubleshooting
-
What if my smoothie is too thick?
- Don’t worry! Just add a bit more liquid—water, juice, or milk—and blend again until smooth.
-
How can I make my smoothies sweeter without added sugar?
- Try using ripe fruits like bananas or dates. These natural sweeteners provide a lovely flavor without being overwhelming!
-
Can I prep smoothies ahead of time?
- Absolutely! Blend up your smoothies and store them in an airtight container in the fridge for up to 24 hours. Just give them a shake before drinking!
-
Are there ways to make smoothies more filling?
- Yes! Add ingredients like oats, nut butter, or protein powder to enhance satiety and keep you fuller for longer.
Nutritional Info
Serving Size: 1 Smoothie
Tropical Mango Protein Smoothie
- Calories: Approx. 300
- Protein: 20g
- Fat: 5g
- Carbohydrates: 50g
Berry Blast Protein Smoothie
- Calories: Approx. 250
- Protein: 18g
- Fat: 3g
- Carbohydrates: 35g
Green Powerhouse Smoothie
- Calories: Approx. 270
- Protein: 15g
- Fat: 10g
- Carbohydrates: 30g
Now, it’s time to bring those blender blades to life! I invite you to try out these delightful smoothies, bask in their refreshing goodness, and create joyful moments just like I did with my family. Cheers to a season full of vibrant flavors and nourishing experiences! Enjoy!
Print
Refreshing Spring and Summer Protein Smoothies
- Total Time: 10 minutes
- Yield: 3 servings 1x
- Diet: Vegan
Description
Three refreshing and energizing protein smoothie recipes perfect for spring and summer.
Ingredients
- 1 ripe mango
- 1 banana
- 1 cup coconut milk
- 1 scoop vanilla protein powder
- 1 cup mixed berries (strawberries, blueberries, raspberries)
- 1 cup spinach
- 1/2 cup Greek yogurt
- 1–2 tablespoons honey or agave syrup (optional)
- 1 cup kale or spinach
- 1/2 avocado
- 1 pear
- 1 cup almond milk or coconut water
Instructions
- Prepare Your Ingredients: Peel and pit the mango, then chop it into chunks. Peel the banana.
- Blend It Up: In your blender, toss in the mango, banana, coconut milk, and protein powder. Blend until smooth and creamy.
- Taste Test: Adjust sweetness with honey if desired.
- Serve: Pour into a tall glass and garnish with a slice of fresh mango.
Notes
Smoothies can be customized with various fruits and add-ins.
- Prep Time: 10 minutes
- Cook Time: 0 minutes
- Category: Beverage
- Method: Blending
- Cuisine: American
Nutrition
- Serving Size: 1 serving
- Calories: 300
- Sugar: 30g
- Sodium: 50mg
- Fat: 5g
- Saturated Fat: 4g
- Unsaturated Fat: 1g
- Trans Fat: 0g
- Carbohydrates: 50g
- Fiber: 5g
- Protein: 20g
- Cholesterol: 0mg
Keywords: smoothie, protein shake, healthy recipes, summer drinks, quick breakfast
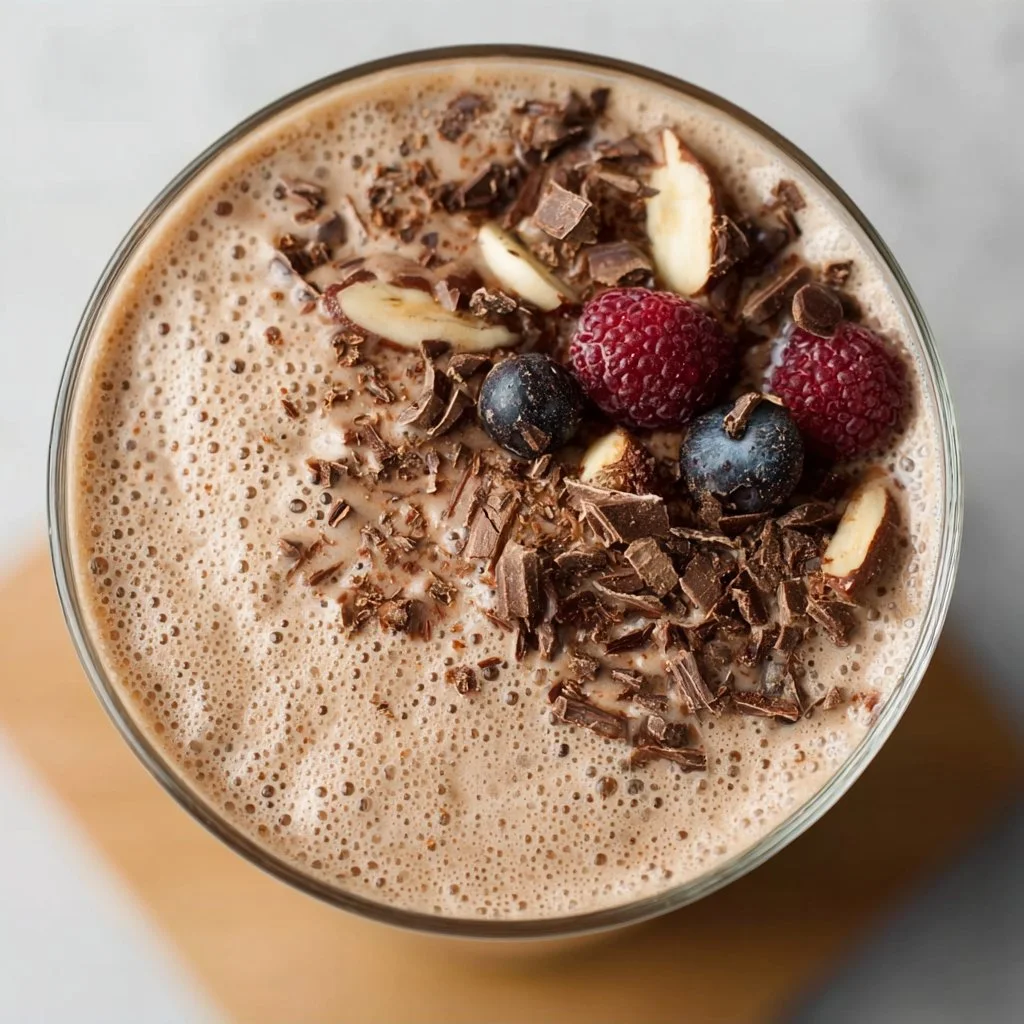
The 5-Minute Coffee Smoothie That Keeps Me Full All Morning
The 5-Minute Coffee Smoothie That Keeps Me Full All Morning
Welcome to my kitchen! Let’s talk about mornings. For many of us, they can be a whirlwind! Between brushing your teeth, getting dressed, and remembering to pack your lunch, breakfast sometimes falls to the bottom of the priority list. However, there’s one thing that truly deserves to be at the top: coffee. Oh, the love I have for my morning brew! If you’re a fellow coffee lover like me and want to find a way to sip your favorite caffeine while also fueling your day, you’re in the right spot!
Introducing my 5-Minute Coffee Smoothie — the perfect blend of energy, nutrition, and flavor that not only satisfies your coffee cravings but also keeps you full all morning! This smoothie is not just a drink; it’s a way to embrace those cozy mornings even when you’re rushing out the door.
Picture this: You open your pantry and pull out some delicious ingredients, toss them in a blender, and in just 5 minutes, you have a creamy, dreamy, coffee smoothie that powers you through your busy morning. Whether you’re dashing to a meeting, tackling a busy day at home, or simply enjoying a moment of peace with your favorite mug (or smoothie cup), this recipe will make waking up feel a little easier and a lot more delicious.
The best part? This smoothie is packed with protein, fiber, and healthy fats—everything you need to fuel your morning adventures. And who could resist that? So, grab your blender, and let’s bring this delightful, caffeinated creation to life!
A Toast to Mornings: My Coffee Smoothie Journey
Growing up in a household where coffee was king, I vividly remember the comforting aroma wafting through the kitchen each morning. My mom had this special way of making her morning coffee. She’d grind fresh beans, letting the rich scent envelop the house like a warm hug. I’d sit at the kitchen table, sleepily sipping my cocoa, listening to her tales of the day’s adventures ahead. Little did I know, those quiet mornings would imprint my love for coffee deep within me.
Fast forward to my college years — a time of late nights and early mornings. I needed a way to stay alert while also pleasing my taste buds. That’s when I had the lightbulb moment of turning my beloved coffee into a breakfast powerhouse. I began experimenting with different ingredients, and after many trials (and a few messy mishaps), my go-to coffee smoothie was born. It became my lifesaver — a perfect blend of energy and nutrition, allowing me to conquer those busy mornings while never compromising on flavor.
This smoothie isn’t just my recipe; it’s a tribute to those cherished memories and the morning rituals that have shaped my love for coffee. It’s a reminder that each morning is a fresh start, filled with delicious possibilities!
Ingredients for Your Smoothie Masterpiece
Here’s what you’ll need to whip up your own 5-Minute Coffee Smoothie:
-
1 cup brewed coffee (cooled): Trust me, the coffee is the star here! Use your favorite blend and avoid the bitter brew. If you need a caffeine kick without the brewing process, try instant coffee granules mixed with hot water.
-
1 banana (frozen is best): Bananas add creaminess and natural sweetness. If you don’t have frozen bananas, you can use fresh ones, but your smoothie might be less thick. Consider soaking dates in warm water as a sweetener substitute instead!
-
1/2 cup Greek yogurt: This thick and tangy delight packs in protein and creates a creamy texture. For dairy-free options, try coconut yogurt or almond yogurt.
-
1 tablespoon nut butter (peanut or almond): Nut butter provides healthy fats and creates a delightful richness. If nut allergies are a concern, sunflower seed butter works splendidly too!
-
1 tablespoon honey or maple syrup (optional): Sweeten to taste. If you’re following a low-sugar diet, you can skip this entirely or replace it with a sugar substitute like stevia.
-
1 cup spinach (optional): Trust me on this one! You won’t taste it, but your body will thank you for the extra nutrients. Don’t have spinach? Kale or Swiss chard can do the trick as well.
-
Ice cubes (optional): If you prefer your smoothie cold and thick, toss in a few ice cubes. You can blend to your liking – it’s all about what feels good to you!
Gather these delicious ingredients, and let’s get blending!
Step-by-Step Instructions
Ready to craft this morning masterpiece? Let’s dive into those details to make smooth sailing in your kitchen!
-
Prep Your Ingredients: Make sure your coffee is brewed and cooled (room temperature is ideal). If you’re using fresh bananas, slice them into chunks.
-
Add Coffee First: Start by pouring the cooled coffee into your blender. Why coffee first? It helps to give a liquid base to your other ingredients, ensuring an even blend.
-
Toss in the Banana: Next, add the banana. If it’s frozen, that’s perfect! It’ll add thickness to your smoothie and create a creamy texture that we all love.
-
Spoon in Greek Yogurt: Now, it’s time for that lovely, protein-packed Greek yogurt. The creaminess it adds is unbeatable. If you’re feeling particularly indulgent, a dash more won’t hurt!
-
Scoop the Nut Butter: Next, add the nut butter of your choice. Place a heaping tablespoon into the blender and watch it swirl into the fabulous mix.
-
Sweeten Things Up: If using, drizzle in the honey or maple syrup. Remember to adjust the sweetness to your taste—there’s no wrong way to make it your own!
-
Throw in Spinach (if using): This is where the magic happens! Add the spinach and blend for a few seconds until it’s fully incorporated. Need a sneak peek? Lift that blender lid for a check!
-
Blend Away!: It’s time to blend! Start on low speed to mix all the ingredients, then crank it up until smooth and creamy. If the mixture is too thick, add a splash of water or more coffee until you reach your desired consistency.
-
Tumble in Ice (optional): If you want it extra chilly, toss in a few ice cubes and blend again until nice and frosty.
-
Taste Test: At this point, give your smoothie a little taste! Adjust sweetness or thickness as necessary —this is your creation, after all!
-
Pour and Enjoy: Finally, pour your smoothie into a tall glass or a travel cup (if you’re on the go) and enjoy the deliciousness that you just made!
Chef Tip: If you really want to elevate your smoothie presentation, try garnishing with a sprinkle of cinnamon or a dollop of nut butter on top!
Serving Suggestions
This coffee smoothie is incredibly versatile, meaning it can match any mood or moment! Serve it in your favorite glass, and don’t forget a cute straw for that café vibe. Pair it with a handful of nuts, a slice of banana bread, or even some homemade granola for a more substantial breakfast! You could also add a sprinkle of cacao nibs or chia seeds on top for some added crunch. The possibilities are endless!
Recipe Variations
Feeling adventurous? Here are a few creative twists you can try with your coffee smoothie:
-
Mocha Delight: Add a tablespoon of cacao powder for a chocolatey twist that satisfies your sweet tooth while adding rich chocolate flavor.
-
Spice It Up: Try a pinch of cinnamon or nutmeg for a warm, spiced flavor that will bring coziness to your morning.
-
Protein Power-Up: Incorporate a scoop of your favorite protein powder to keep you fuller longer, especially after a workout.
-
Vegan-Friendly: Swap out Greek yogurt for a dairy-free alternative and use maple syrup instead of honey for a fully plant-based version.
-
Seasonal Smoothie: In fall, add a splash of pumpkin puree to celebrate the season, or blend in fresh berries during summer for a refreshing twist!
Chef’s Notes
After crafting this recipe, I’ve seen it evolve over the years as I try to capture seasonal flavors and keep it fresh. When I first started, it was purely coffee and banana; over time, I learned that a little nut butter goes a long way in making it creamier.
One of my funniest kitchen moments happened when I decided to experiment adding too much cinnamon—it turned into a delicious coffee donut flavor, but my blender was covered in a dust cloud of spice! Let’s just say, that cleanup was…interesting!
FAQs and Troubleshooting
1. My smoothie turned out too thick; how can I fix it?
No worries! Just blend in a splash of cold water or more coffee until you reach your desired consistency.
2. Can I make this smoothie in advance?
Absolutely! Just prep all the ingredients and store them in the fridge or freezer separately. When you’re ready, blend it for a quick breakfast!
3. My smoothie is too bitter. What can I do?
Try adding a sweetener like honey or maple syrup, or even some frozen fruits like mango or berries for natural sweetness.
4. Can I use decaf coffee?
Definitely! If you’re looking for a caffeine-free alternative, decaf coffee works perfectly fine, allowing you to enjoy the flavor without the buzz!
Nutritional Info
- Calories: Approx. 350 per serving
- Protein: 14g
- Carbs: 48g
- Fats: 12g
- Fiber: 7g
- Sugars: 15g (varies depending on added sweeteners)
And there you have it! The 5-Minute Coffee Smoothie that keeps you full all morning is not only quick and easy to whip up, but it also brings that delightful coffee flavor and nutritious benefits you crave. So why not give yourself that little morning boost? Happy blending, and may your mornings be filled with cozy coffee vibes!
Print
5-Minute Coffee Smoothie That Keeps You Full All Morning
- Total Time: 5 minutes
- Yield: 1 serving 1x
- Diet: Vegetarian
Description
A quick and nutritious coffee smoothie that keeps you full all morning while satisfying your coffee cravings.
Ingredients
- 1 cup brewed coffee (cooled)
- 1 banana (frozen is best)
- 1/2 cup Greek yogurt
- 1 tablespoon nut butter (peanut or almond)
- 1 tablespoon honey or maple syrup (optional)
- 1 cup spinach (optional)
- Ice cubes (optional)
Instructions
- Prep your ingredients: Make sure your coffee is brewed and cooled.
- Add coffee first: Pour the cooled coffee into your blender.
- Toss in the banana: Add the frozen banana for thickness.
- Spoon in Greek yogurt: Add protein-packed Greek yogurt.
- Scoop the nut butter: Include your choice of nut butter.
- Sweeten things up: Drizzle honey or maple syrup if desired.
- Throw in spinach (if using): Blend until fully incorporated.
- Blend away: Mix on low, then increase speed until smooth.
- Tumble in ice (optional): Blend again if you prefer it chilled.
- Taste test: Adjust sweetness or thickness as desired.
- Pour and enjoy: Serve in a tall glass or travel cup.
Notes
For a richer flavor, try adding a sprinkle of cinnamon on top before serving.
- Prep Time: 5 minutes
- Cook Time: 0 minutes
- Category: Breakfast
- Method: Blending
- Cuisine: American
Nutrition
- Serving Size: 1 serving
- Calories: 350
- Sugar: 15g
- Sodium: 100mg
- Fat: 12g
- Saturated Fat: 2g
- Unsaturated Fat: 10g
- Trans Fat: 0g
- Carbohydrates: 48g
- Fiber: 7g
- Protein: 14g
- Cholesterol: 10mg
Keywords: coffee smoothie, breakfast smoothie, quick breakfast, healthy smoothie




